Aspose.CADをAngularで使用する方法
Contents
[
Hide
]前提条件
- Angular CLI
- Visual Code
- Node.js
dgn画像をpngに変換し、ブラウザに表示する
この例では、描画を変換し、画像として保存するシンプルな変換プログラムを作成します。
Angularプロジェクトの作成
- すでにAngularワークスペースディレクトリにいないことを確認します。
- 新しいものを開始し、そのプログラムの名前を指定するか、Visual CodeやWebStormなどの他のプログラムを使用してプロジェクトを作成します:
ng new angular-example - npmパッケージからAspose.CADをインストールします。
npm install aspose-cad - angular.jsonファイルを開き、スクリプトフィールドにエントリを追加します。このスクリプトはプロジェクトと共に読み込まれ、ファイル処理を開始するために必要です。
"scripts": [ "node_modules/aspose-cad/dotnet.js" ] - app.component.htmlで、描画を読み込み表示するためのinputタイプファイルおよびimgタグを作成します。
<span style="background-color: red"> <input type="file" class="file-upload" (change)="onFileSelected($event)" /> <img alt="" id="image" [src]="imageUrl" /> </span> - app.component.tsで、ヘルパープロセスの開始、処理、および画像の保存のプロセスを説明します。
import {Component} from '@angular/core'; import {DomSanitizer} from '@angular/platform-browser'; import {Image} from "aspose-cad/commonjs/Core/Image"; import {PngOptions} from "aspose-cad/commonjs/Options/PngOptions"; //dotnetプロセスを起動する必要があります declare let dotnet: any; @Component({ selector: 'app-root', templateUrl: './app.component.html', styleUrls: ['./app.component.css'] }) export class AppComponent { title = 'angular-example'; imageUrl: any; imgFile: Uint8Array | null | undefined; constructor(private sanitizer: DomSanitizer) { } // @ts-ignore async ngOnInit() { console.log("aspose-cad WASMの読み込み中..."); await dotnet.boot().then((ex: any) => { console.log("aspose-cad WASMが読み込まれました"); }); } // @ts-ignore async onFileSelected(event) { const file: File = event.target.files[0]; file.arrayBuffer().then(async buff => { let x = new Uint8Array(buff); this.imgFile = await Image.Load(x); //画像を読み込む console.log(this.imgFile); var exportedFile = await Image.Save(this.imgFile, new PngOptions()); //画像をpngとして保存 var urlCreator = window.URL || window.webkitURL; var blob = new Blob([exportedFile], { type: 'application/octet-stream' }); //変換された画像のsrcを作成 this.imageUrl = this.sanitizer.bypassSecurityTrustUrl(urlCreator.createObjectURL(blob)); //png画像をダウンロード let url = window.URL.createObjectURL(blob); let a = document.createElement('a'); document.body.appendChild(a); a.setAttribute('style', 'display: none'); a.href = url; a.download = "file.png"; a.click(); window.URL.revokeObjectURL(url); a.remove(); }); } } - アプリケーションを開始します。
npm start
//または
ng serve
ng serveコマンド:
- アプリケーションをビルドします。
- 開発サーバーを開始します。
- ソースファイルを監視します。
- 変更を加えるとアプリケーションを再ビルドします。
–openフラグはhttp://localhost:4200をブラウザで開きます。
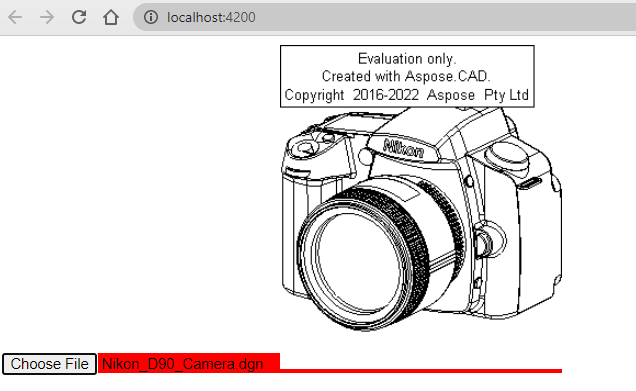
実行例
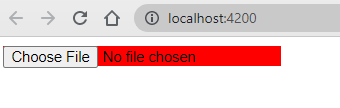
- ファイルを選択します。
- 任意のDXF、DWG、DGN、DWF、DWFX、IFC、STL、DWT、IGES、PLT、CF2、OBJ、HPGL、IGS、PCL、FBX、PDF、SVGファイルを選択します。
- 応答が成功すると、ファイルが画面に表示され、ダウンロードを提案します。