วิธีการใช้ Aspose.CAD ใน React
Contents
[
Hide
]ข้อกำหนดเบื้องต้น
- Visual Code
- Node.js
แปลงภาพ dgn เป็น png และแสดงในเบราว์เซอร์
ในตัวอย่างนี้ คุณจะสร้างโปรแกรมการแปลงที่ง่ายซึ่งจะทำการแปลงภาพวาดและบันทึกเป็นภาพ
การสร้างโปรเจกต์ React
- ตรวจสอบให้แน่ใจว่าคุณไม่ได้อยู่ในไดเรกทอรีพื้นที่ทำงานของ React แล้ว
- เริ่มใหม่และจากนั้นชื่อโปรแกรมหรือใช้โปรแกรมอื่นเพื่อสร้างโปรเจกต์เช่น Visual Code หรือ WebStorm:
npx create-react-app react-example - ติดตั้ง Aspose.CAD จากแพ็คเกจ npm
npm install aspose-cad - สร้างแท็ก input type file และ img เพื่อโหลดและแสดงภาพวาด
<span style="background-color: red"> <input id="file" type="file"/> <img alt="converted" id="image" /> </span> - ใน App.tsx เราจะอธิบายกระบวนการเริ่มต้นกระบวนการช่วย ประมวลผลและบันทึกภาพ
import React from 'react'; import './App.css'; import {boot} from "aspose-cad/dotnet"; import {Image, PngOptions} from "aspose-cad"; function App() { return ( <div className="App"> <header className="App-header"> <input id="file" type="file"/> <img alt="converted" id="image" /> </header> </div> ); } window.onload = async function () { console.log("กำลังโหลด WASM..."); await boot(); console.log("โหลด WASM เสร็จสมบูรณ์"); // @ts-ignore document.querySelector('input').addEventListener('change', function() { var reader = new FileReader(); reader.onload = function() { var arrayBuffer = this.result; // @ts-ignore var array = new Uint8Array(arrayBuffer); // โหลด var file = Image.load(array); // บันทึก var exportedFilePromise = Image.save(array, new PngOptions()); exportedFilePromise.then((exportedFile: BlobPart) => { console.log(exportedFile); var urlCreator = window.URL || window.webkitURL; var blob = new Blob([exportedFile], { type: 'application/octet-stream' }); var imageUrl = urlCreator.createObjectURL(blob); // @ts-ignore document.querySelector("#image").src = imageUrl; }); } // @ts-ignore reader.readAsArrayBuffer(this.files[0]); }, false); }; export default App; - เริ่มแอปพลิเคชัน
npm start
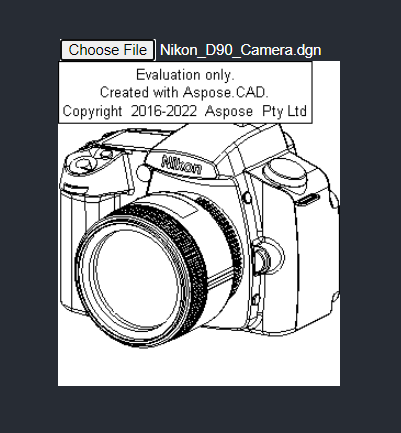
ตัวอย่างการดำเนินการ
- เลือกไฟล์.

- เลือกรูปแบบไฟล์ DXF, DWG, DGN, DWF, DWFX, IFC, STL, DWT, IGES, PLT, CF2, OBJ, HPGL, IGS, PCL, FBX, PDF, SVG ใดก็ได้
- หากคำตอบสำเร็จ ไฟล์จะปรากฏบนหน้าจอและจะมีการเสนอให้ดาวน์โหลด.