フォントライブラリを使用したテキストレンダリング| .NET
概要
テキストを画像にレンダリングする機能を作成したい場合は、こちらの記事では、Aspose.font APIソリューションを使用してフォントライブラリでサポートされているフォームのフォントでそれを行う方法を教えます。ライブラリを使用すると、テキストを簡単に画像に変換したり、任意の画像にテキストを追加できます。
レンダリングテキスト
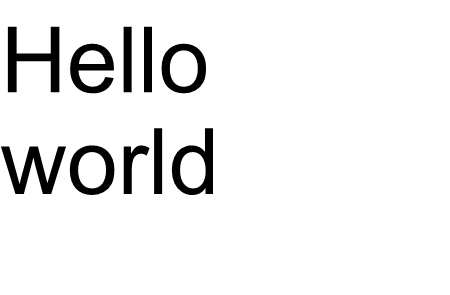
画像にテキストを挿入するには、 drawtext renderingutilsクラスのメソッドを使用する必要があります。以下のコードは、「Arial.png」という名前の画像にarialフォントに記述されたテキスト「Hello World」を追加する方法を示しています。
1 var datadir = @"c:\temp\";
2 var filename = datadir + "arial.ttf"; //フルパスを備えたフォントファイル名
3 var outfile = datadir + "arial.png";
4 var fontdefinition = new fontdefinition(fonttype.ttf、new fontfiledefinition( "ttf"、new FilesystemstreamSource(filename)));
5 var ttffont = font.open(fontdefinition)as ttffont;
6
7 var stream = Aspose.Font.Renderers.RenderingUtils.DrawText(ttfFont, "Hello world", 18);
8
9 var bitmap = new Bitmap(stream);
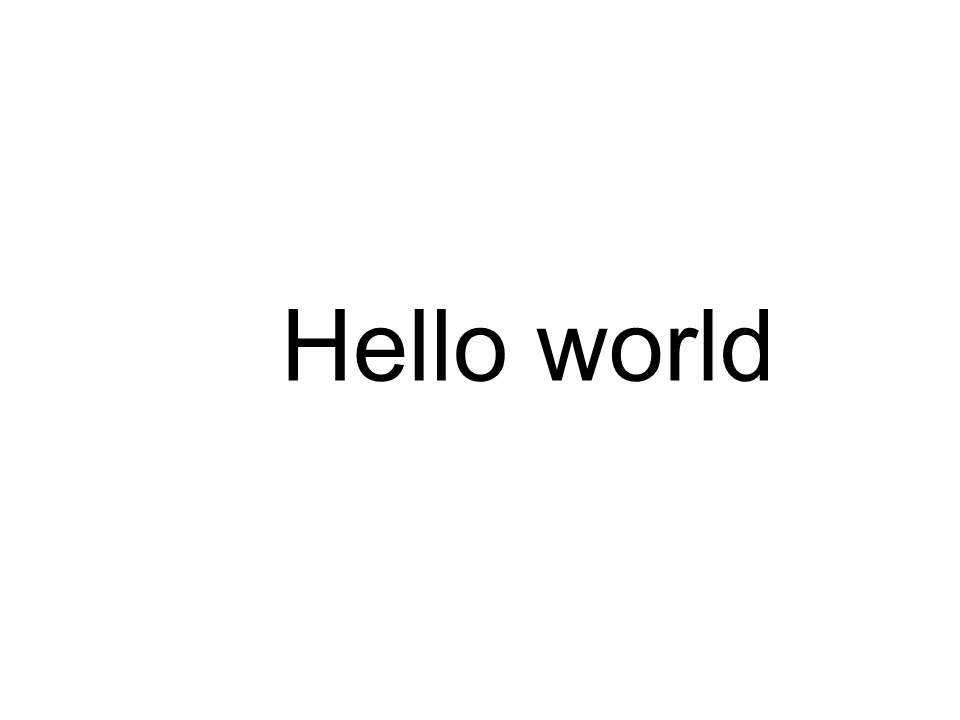
10 bitmap.Save(outFile);実装結果:

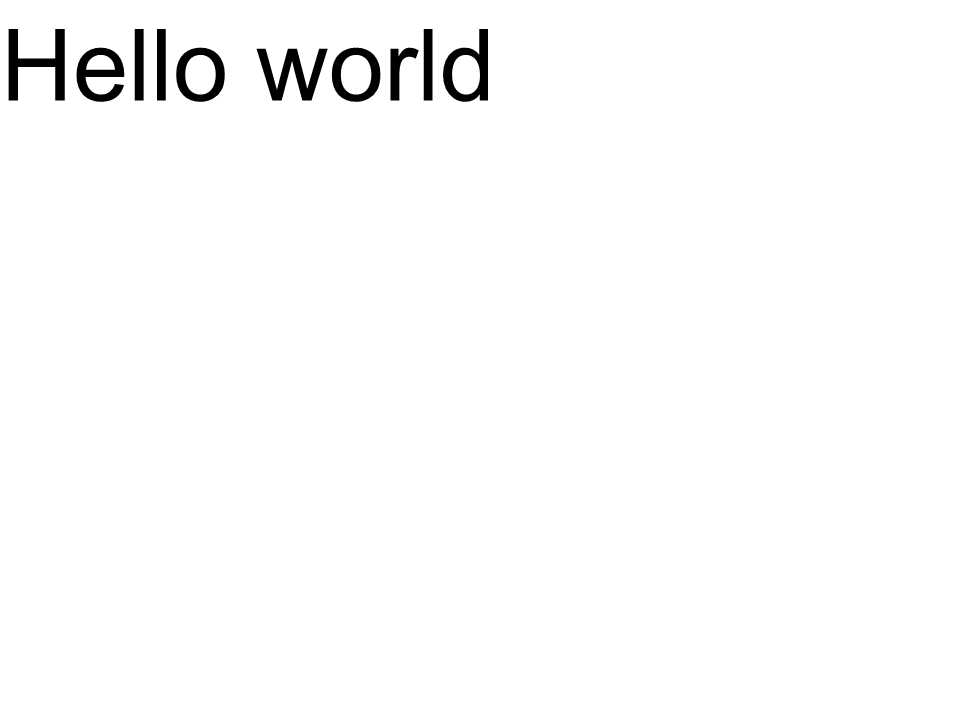
drawTextメソッドを使用すると、線間隔を設定し、自動ワードごとのテキストラップを実行できます。
以下のコードの例では、線間隔 linespacingtype.pixelsを指定し、10に設定し、画像の最大幅を450に設定しました。
指定された範囲(この場合は450)で正しく表示できないすべてのテキストは、新しいラインにラップされます。
切り取られたコードは、次の行にラッピングしてアリアルフォントで「Hello World」テキストをレンダリングする方法を示しています。
 1    var datadir = @"c:\temp\";
 2    var filename = datadir + "arial.ttf"; //フルパスを備えたフォントファイル名
 3    var outfile = datadir + "arial.png";
 4    var fontdefinition = new fontdefinition(fonttype.ttf、new fontfiledefinition( "ttf"、new FilesystemstreamSource(filename)));
 5    var ttffont = font.open(fontdefinition)as ttffont;
 6    var linespacingtype = linespacingtype.pixels;
 7
 8    var stream = DrawText(ttfFont, "Hello world", 22, lineSpacingType, 10, 450);
 9
10    var bitmap = new Bitmap(stream);
11
12    bitmap.Save(outFile);
実装結果:
この例では、テキストを1行のコードだけで画像に変える方法を見ました。
drawText()メソッドの関数ファミリーは、標準テキストまたはマルチラインテキスト出力をカバーしています。ただし、場合によっては、テキストのカスタマイズされた出力が必要になる場合があります。たとえば、テキストを斜めに圧縮、伸ばし、回転させる場合、または他のものでテキストを回転させる場合です。この場合、ニーズに応じて出力をカスタマイズする必要があります。
カスタムテキストレンダリング
次の例は、テキストを画像に変換するより高度な(カスタム)方法を示しています。
Aspose.Font内で
glyphsを描画するには、
glyphoutlinererderクラスのrenderglyph() `メソッドの1つを使用します。これらのオーバーロードされたメソッドはすべて、
iglyphrendererインターフェイスで宣言されています。
パラメーターとして、これらのメソッドにフォント、グリフィドまたはグリフインデックス、およびグリフ出力座標への参照を渡す必要があります。最後のパラメーターを転送するには、Aspose.Font
transformationMatrixで表される特別なマトリックスが使用されます。
以下に、
transformationMatrixタイプのオブジェクトを使用する方法を示して、GLYPH出力座標をrenderglyph() `ファミリーの方法に渡します。
したがって、グリフを描くには、 glyphoutlinerenderタイプのオブジェクトを作成する必要があります。しかし、そのようなオブジェクトはそれ自体でグリフを描くことはできません。 iglyphoutlinePainterインターフェイスによって説明される外部機能が必要です。 glyphoutlinererderオブジェクトを使用するには、 iglyphoutlinepainterの実装を備えている必要があります。 以下に、このインターフェイスの簡単な実装を見ることができます。 グラフィック描画目標に System.Drawing.Drawing.Drawing.GraphicsPathタイプのオブジェクトを必要とするGlyphoutLinePainterクラスを作成しましょう。
実装を以下に示します。
 1    Public Class GlyphoutlinePainter:IglyphoutlinePainter
 2    {
 3        プライベートグラフィックパス_path;
 4        Private Pointf _CurrentPoint;
 5
 6        public GlyphOutlinePainter(GraphicsPath path)
 7        {
 8            _path = path;
 9        }
10
11        public void MoveTo(MoveTo moveTo)
12        {
13            _path.CloseFigure();
14            _currentPoint.X = (float)moveTo.X;
15            _currentPoint.Y = (float)moveTo.Y;
16        }
17
18        public void LineTo(LineTo lineTo)
19        {
20            float x = (float)lineTo.X;
21            float y = (float)lineTo.Y;
22            _path.AddLine(_currentPoint.X, _currentPoint.Y, x, y);
23            _currentPoint.X = x;
24            _currentPoint.Y = y;
25        }
26
27        public void CurveTo(CurveTo curveTo)
28        {
29            float x3 = (float)curveTo.X3;
30            float y3 = (float)curveTo.Y3;
31
32            _path.AddBezier(
33                _currentPoint.X,
34                _currentPoint.Y,
35                (float)curveTo.X1,
36                (float)curveTo.Y1,
37                (float)curveTo.X2,
38                (float)curveTo.Y2,
39                x3,
40                y3);
41
42            _currentPoint.X = x3;
43            _currentPoint.Y = y3;
44        }
45
46        public void ClosePath()
47        {
48            _path.CloseFigure();
49        }
50 }iglyphoutlinePainter実装の後、そのタイプのオブジェクトを使用して、
glyphoutlinerendererにそれらを渡し、renderglyph() `familyの対応する過負荷の方法を呼び出すことで個々のグリフをレンダリングできます。
一連のテキストをレンダリングするには、各文字にglyphidを取得し、
glyphoutlinerendererタイプのrenderglyph()のメソッドの1つを呼び出し、対応するGlyphの座標を渡す必要があります。
Aspose.fontライブラリを使用してテキストの行を出力する例を見てみましょう。パラメーター - *customdrawText *(文字列テキスト、double fontsize、brush backgroundbrush、brush textbrush、string outfile)を受け入れる customdrawtext()メソッドの形式で構築されます。
指定されたテキストを
system.drawing.bitmapオブジェクトに描画する customdrawtext()メソッドを作成し、discに結果のビットマップを保存します。
これには、次の手順が含まれます。
- テキスト文字列のすべてのシンボルを反復します。
- すべての処理されたシンボルのGLYPH識別子を取得します-GID。
- 現在のグリフを描画するためにレンダリングサブシステムで必要な * glyphoutlinepainter *タイプのオブジェクトを作成します。
- aspose.font.renderers.glyphoutlinererderタイプのオブジェクトを作成し、 glyphoutlinererderの[glyphoutlinerenderer]のコンストラクターにglyphoutlinepainterタイプを渡します。この glyphoutlinererderオブジェクトは、指定されたグリフをレンダリングすることを目的としています。
- *glyphoutlinerenderer.renderglyph()*メソッドを使用して、現在処理されているグリフをレンダリングします。 Aspose.fonts.matrixオブジェクトは、Glyph座標を指定するために使用されます。 レンダリングするグリフは、 gidパラメーターによって指定されます。
この戦略の補助ステップ
- 「Y」軸のグリフ座標は、このコードスニペットの一定です。
- 「x」軸のグリフ座標は、すべての処理されたグリフに対して計算されます。
- 「x」と「y」座標の両方が、 glyphoutlinererderが使用するaspose.fonts.matrixオブジェクトに渡され、グリフを描画します。
- 正義と以前に処理されたグリフ間の距離は、すべての反復ステップで計算されます。すべてのGlyph ‘x’座標に影響します。
- glyphoutlinerendererタイプのオブジェクトは、glyphoutlinepainterの助けを借りてグリフを描画します。ビットマップに直接ははなく、 graphicspathオブジェクトがglyphoutlinepainterのコンストラクターに渡されたため、 system.graphicsのオブジェクトを使用します。
- *fontwidthtoimagewith()*メソッドは、ビットマップ座標系のグリフ幅を計算します。
*customdrawtext()*メソッドの実装を以下に示します。
 1    public static void customdrawtext(string text、ifont font、double fontsize、brush backgroundbrush、brush textbrush、string outfile)
 2    {
 3        //テキスト行のすべてのシンボルのGLYPH識別子を取得します
 4        glyphid [] gids = new glyphid [text.length];
 5
 6        for (int i = 0; i < text.Length; i++)
 7            gids[i] = font.Encoding.DecodeToGid(text[i]);
 8
 9        // Set common drawing settings
10        double dpi = 300;
11        double resolutionCorrection = dpi / 72; // 72 is font's internal dpi
12
13        // Prepare output bitmap
14        Bitmap outBitmap = new Bitmap(960, 720);
15
16
17        outBitmap.SetResolution((float)dpi, (float)dpi);
18
19        Graphics outGraphics = Graphics.FromImage(outBitmap);
20        outGraphics.FillRectangle(backgroundBrush, 0, 0, outBitmap.Width, outBitmap.Height);
21        outGraphics.SmoothingMode = SmoothingMode.HighQuality;
22
23        //Declare coordinate variables and a previous gid
24        GlyphId previousGid = null;
25        double glyphXCoordinate = 0;
26        double glyphYCoordinate = fontSize * resolutionCorrection;
27
28        // The loop paints every glyph in gids
29        foreach (GlyphId gid in gids)
30        {
31            // if the font contains the gid
32            if (gid != null)
33            {
34                Glyph glyph = font.GlyphAccessor.GetGlyphById(gid);
35                if (glyph == null)
36                    continue;
37
38                // The path that accepts drawing instructions
39                GraphicsPath path = new GraphicsPath();
40
41                // Create IGlyphOutlinePainter implementation
42                GlyphOutlinePainter outlinePainter = new GlyphOutlinePainter(path);
43
44                // Create the renderer
45                Aspose.Font.Renderers.IGlyphRenderer renderer = new Aspose.Font.Renderers.GlyphOutlineRenderer(outlinePainter);
46
47                // Get common glyph properties
48                double kerning = 0;
49
50                // Get kerning value
51
52                if (previousGid != null)
53                {
54                    kerning = (font.Metrics.GetKerningValue(previousGid, gid) / glyph.SourceResolution) * fontSize * resolutionCorrection;
55                    kerning += FontWidthToImageWith(font.Metrics.GetGlyphWidth(previousGid), glyph.SourceResolution, fontSize);
56                }
57
58                // Glyph positioning - increase glyph X coordinate according to kerning distance
59                glyphXCoordinate += kerning;
60
61                // Glyph placement matrix
62                TransformationMatrix glyphMatrix = new TransformationMatrix(
63                        new double[]
64                                { fontSize * resolutionCorrection,
65                            0,
66                            0,
67                        // negative because of the bitmap coordinate system begins from the top
68                            - fontSize*resolutionCorrection,
69                            glyphXCoordinate,
70                            glyphYCoordinate
71                                });
72
73                // Render the current glyph
74                renderer.RenderGlyph(font, gid, glyphMatrix);
75
76                // Fill the path
77                path.FillMode = FillMode.Winding;
78
79                outGraphics.FillPath(textBrush, path);
80            }
81
82            //Set current gid as previous to get correct kerning for next glyph
83            previousGid = gid;
84        }
85
86        //Save the results
87        outBitmap.Save(outFile);
88    }
フォント幅を画像幅に変換するユーティリティ方法
1    静的double fontwidthtoimagewith(double width、int fontsourceresulution、double fontsize、double dpi = 300)
2    {
3        Double ResolutionCorrection = DPI / 72; // 72はFontの内部DPIです
4
5        return (width / fontSourceResulution) * fontSize * resolutionCorrection;
6    }
次のコードスニペットは、「CustomDrawText() `メソッドを使用して「Hello World」を「Hello World」レンダリング方法を示しています。
1var datadir = @"c:\temp\";
2 var filename1 = datadir + "arial.ttf"; //フルパスを備えたフォントファイル名
3 var filename2 = datadir + "calibrii.ttf"; //フルパスを備えたフォントファイル名
4
5 var fontDefinition1 = new FontDefinition(FontType.TTF, new FontFileDefinition("ttf", new FileSystemStreamSource(fileName1)));
6 var ttfFont1 = Font.Open(fontDefinition1) as TtfFont;
7
8 var fontDefinition2 = new FontDefinition(FontType.TTF, new FontFileDefinition("ttf", new FileSystemStreamSource(fileName2)));
9 var ttfFont2 = Font.Open(fontDefinition2) as TtfFont;
10
11 GlyphOutlinePainter.CustomDrawText("Hello world", ttfFont1, 24, Brushes.White, Brushes.Black, dataDir + "Hello_Arial_out.png");
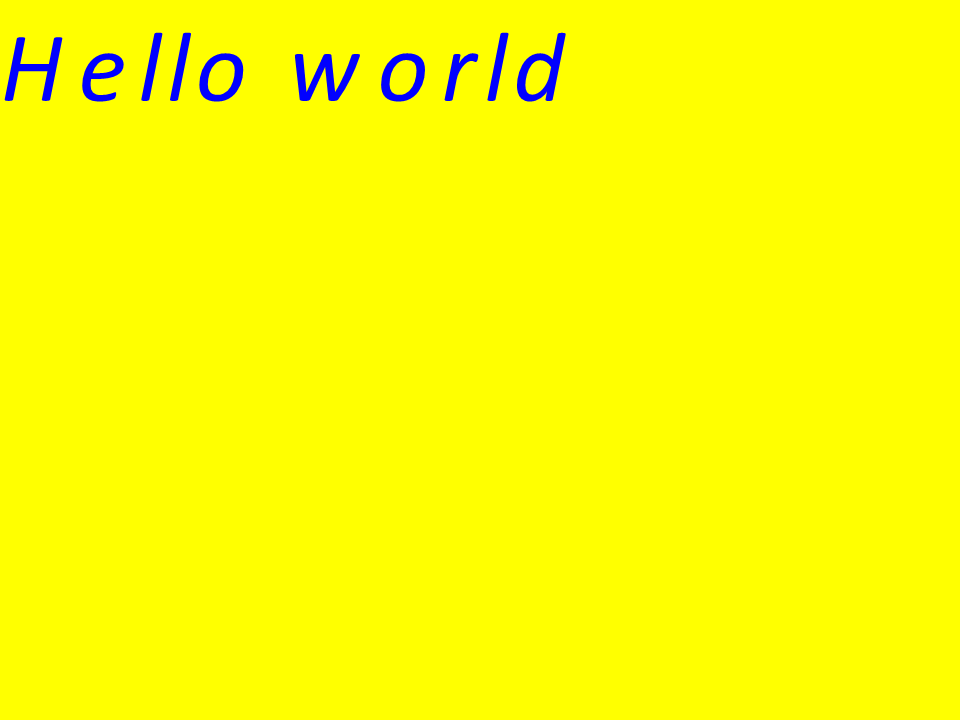
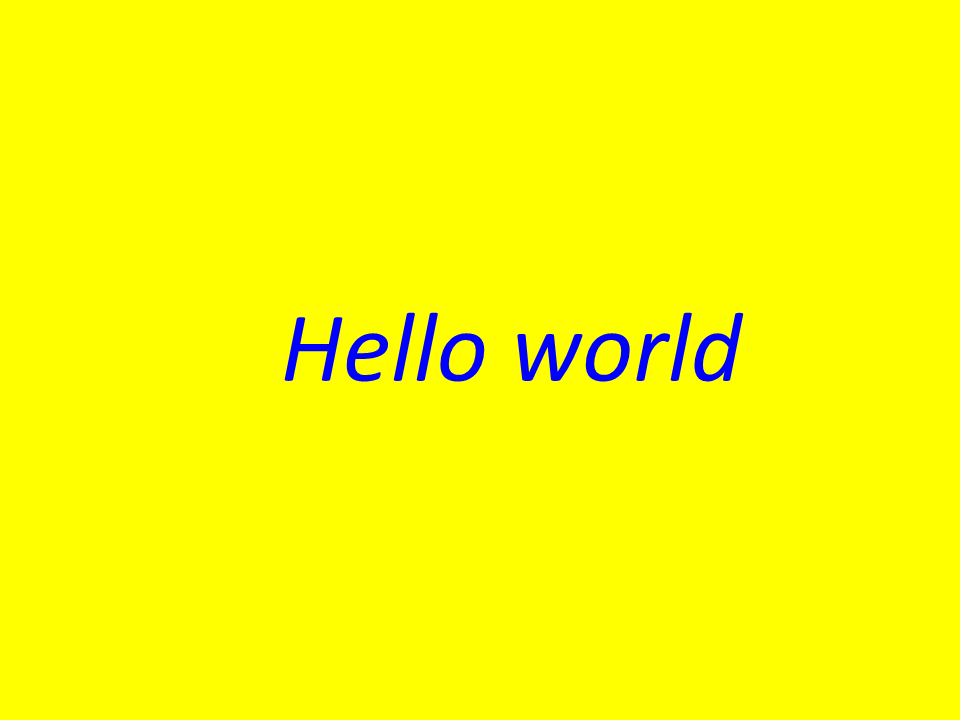
12 GlyphOutlinePainter.CustomDrawText("Hello world", ttfFont2, 24, Brushes.Yellow, Brushes.Blue, dataDir + "Hello_Calibri_out.png");コードを実装すると、次の結果が得られます。
実装結果:
 Arial
Arial
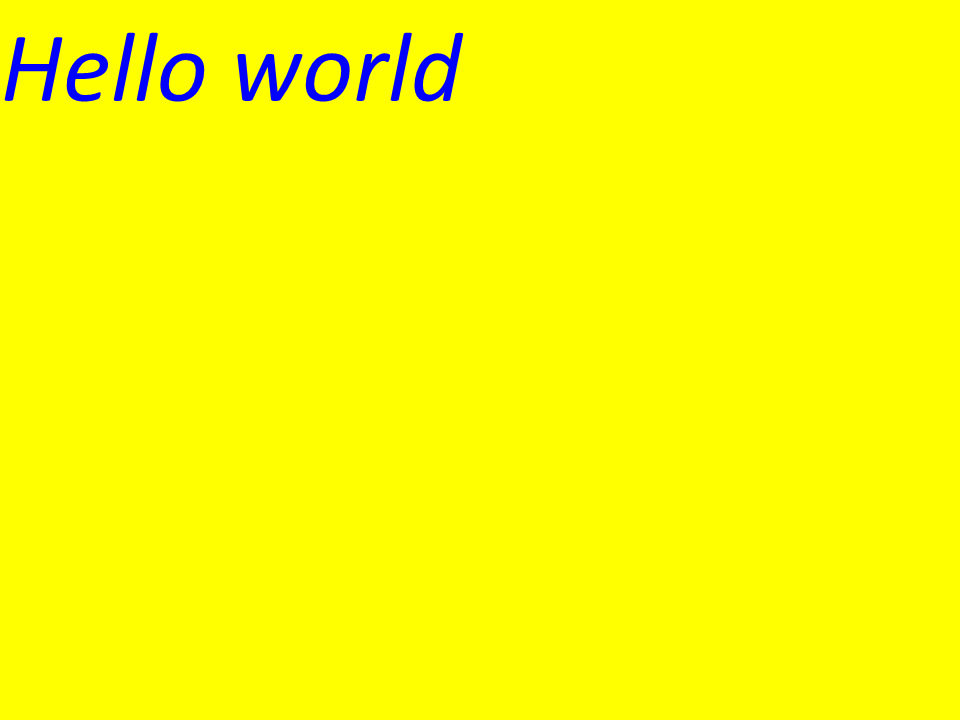 Calibri
カーニング
kerning 変数の値を使用すると、グリフ間の距離を変更できます。次に、次の方法でコードを書き直しましょう。
1
2    // GLYPHの位置決め-Kerning距離に応じてGlyph X座標を増やす
3    Kerning *= 1.25;
4    glyphxcoordinate += kerning;
次の結果が得られます:
実装結果:
 Arial kerning
 Calibri kerning
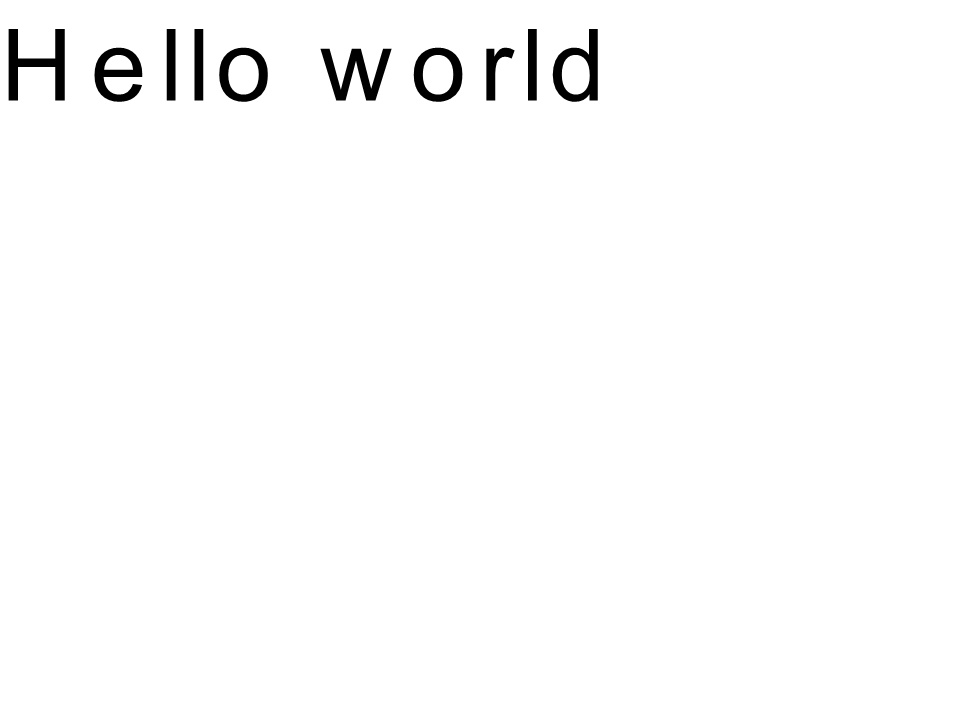
座標によるテキストのレンダリング
変数 glyphxcoordinateおよび glyphycoodinateは、テキスト出力の座標を担当します。次のようにコードを変更することにより:
1    //座標変数と以前のGIDを宣言します
2    glyphid fortergid = null;
3    double glyphxcoordinate = 300;
4    二重glyphycoordinate = 300;
次の結果が得られます:
実装結果:
 Arial x=300 y=300
 Calibri x=300 y=300
画像にテキストを追加する方法
既存の画像にテキストを表示することもできます。このために、次のようにコードを書き換えます。
 1
 2    public static void customdrawtext(string text、ifont font、double fontsize、brush backgroundbrush、brush textbrush、string outfile、bitmap bitmap、double kerningcoeffience = 1、double coordinatex = 0、double coordinety = 0)
 3    {
 4        //テキスト行のすべてのシンボルのGLYPH識別子を取得します
 5        glyphid [] gids = new glyphid [text.length];
 6
 7        for (int i = 0; i < text.Length; i++)
 8            gids[i] = font.Encoding.DecodeToGid(text[i]);
 9
10        // Set common drawing settings
11        double dpi = 300;
12        double resolutionCorrection = dpi / 72; // 72 is font's internal dpi
13
14        // Prepare the output bitmap
15        Bitmap outBitmap = bitmap;
16
17        outBitmap.SetResolution((float)dpi, (float)dpi);
18
19        Graphics outGraphics = Graphics.FromImage(outBitmap);
20        outGraphics.FillRectangle(backgroundBrush, 0, 0, outBitmap.Width, outBitmap.Height);
21        outGraphics.SmoothingMode = SmoothingMode.HighQuality;
22
23        //Declare coordinate variables and the previous gid
24        GlyphId previousGid = null;
25        double glyphXCoordinate = coordinateX;
26        double glyphYCoordinate = coordinateY;
27
28        glyphYCoordinate += fontSize * resolutionCorrection;
29
30        //The loop paints every glyph in gids
31        foreach (GlyphId gid in gids)
32        {
33            // if the font contains the gid
34            if (gid != null)
35            {
36                Glyph glyph = font.GlyphAccessor.GetGlyphById(gid);
37                if (glyph == null)
38                    continue;
39
40                // The path that accepts drawing instructions
41                GraphicsPath path = new GraphicsPath();
42
43                // Create the IGlyphOutlinePainter implementation
44                GlyphOutlinePainter outlinePainter = new GlyphOutlinePainter(path);
45
46                // Create the renderer
47                Aspose.Font.Renderers.IGlyphRenderer renderer = new Aspose.Font.Renderers.GlyphOutlineRenderer(outlinePainter);
48
49                // Get common glyph properties
50                double kerning = 0;
51
52                // Get the kerning value
53
54                if (previousGid != null)
55                {
56                    kerning = (font.Metrics.GetKerningValue(previousGid, gid) / glyph.SourceResolution) * fontSize * resolutionCorrection;
57                    kerning += FontWidthToImageWith(font.Metrics.GetGlyphWidth(previousGid), glyph.SourceResolution, fontSize);
58                }
59
60                // Glyph positioning - increase the glyph X coordinate according to the kerning distance
61                glyphXCoordinate += kerning * kerningCoefficient;
62
63                // Glyph placement matrix
64                TransformationMatrix glyphMatrix = new TransformationMatrix(
65                        new double[]
66                                { fontSize * resolutionCorrection,
67                            0,
68                            0,
69                        // negative because of the bitmap coordinate system begins from the top
70                            - fontSize*resolutionCorrection,
71                            glyphXCoordinate,
72                            glyphYCoordinate
73                                });
74
75                // Render the current glyph
76                renderer.RenderGlyph(font, gid, glyphMatrix);
77
78                // Fill the path
79                path.FillMode = FillMode.Winding;
80
81                outGraphics.FillPath(textBrush, path);
82            }
83
84            //Set the current gid as previous to get the correct kerning for the next glyph
85            previousGid = gid;
86        }
87
88        //Save the results
89        outBitmap.Save(outFile);
90    }
メソッドの呼び出し方を変更しましょう。
 1    var datadir = @"c:\temp\";
 2    var filename1 = datadir + "arial.ttf"; //フルパスを備えたフォントファイル名
 3
 4    var fontDefinition1 = new FontDefinition(FontType.TTF, new FontFileDefinition("ttf", new FileSystemStreamSource(fileName1)));
 5    var ttfFont1 = Font.Open(fontDefinition1) as TtfFont;
 6
 7    var bitmap = new Bitmap(960, 720);
 8
 9    GlyphOutlinePainter.CustomDrawText("Hello world", ttfFont1, 17, Brushes.White, Brushes.Black, dataDir + "Hello_Arial_out.png", bitmap);
10
11    var inputImagePath = dataDir + "Hello_Arial_out.png";
12    var bitmapAddText = new Bitmap(inputImagePath);
13
14    GlyphOutlinePainter.CustomDrawText("Hello world", ttfFont1, 17, Brushes.Transparent, Brushes.Gray, dataDir + "Hello_Arial_Shadow_out.png", bitmapAddText, 1, -3);
15
16    GlyphOutlinePainter.CustomDrawText("<= Shadow effect", ttfFont1, 17, Brushes.Transparent, Brushes.Brown, dataDir + "Hello_Arial_Shadow_out.png", bitmapAddText, 1, 400);
実装結果:
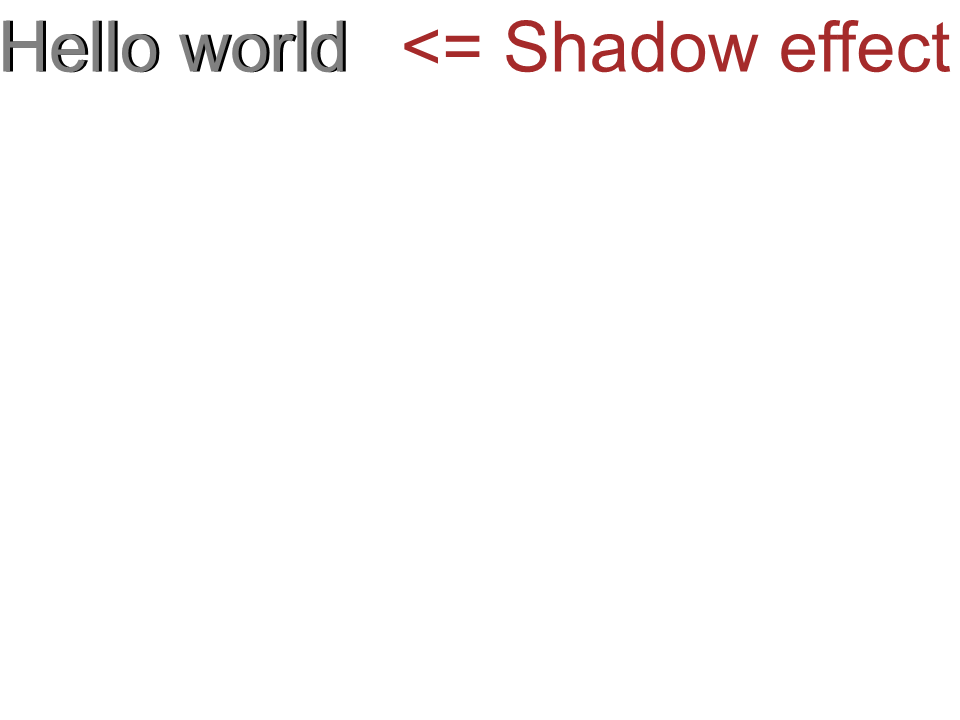 Arial shadow effect
テキストを上から下に出力します
上から下にテキストを表示するには、 CustomDrawText()メソッドに次の変更を加えましょう。
 1    public static void customdrawtext(string text、ifont font、double fontsize、brush backgroundbrush、brush textbrush、string outfile、bitmap bitmap、double kerningcoeffience = 1、double coordinatex = 0、double coordiney = 0、bool topdown = false)
 2    {
 3        //テキスト行のすべてのシンボルのGLYPH識別子を取得します
 4        glyphid [] gids = new glyphid [text.length];
 5
 6        for (int i = 0; i < text.Length; i++)
 7            gids[i] = font.Encoding.DecodeToGid(text[i]);
 8
 9        // Set common drawing settings
10        double dpi = 300;
11        double resolutionCorrection = dpi / 72; // 72 is font's internal dpi
12
13        // Prepare the output bitmap
14        Bitmap outBitmap = bitmap;
15
16        outBitmap.SetResolution((float)dpi, (float)dpi);
17
18        Graphics outGraphics = Graphics.FromImage(outBitmap);
19        outGraphics.FillRectangle(backgroundBrush, 0, 0, outBitmap.Width, outBitmap.Height);
20        outGraphics.SmoothingMode = SmoothingMode.HighQuality;
21
22        //Declare coordinate variables and the previous gid
23        GlyphId previousGid = null;
24        double glyphXCoordinate = coordinateX;
25        double glyphYCoordinate = coordinateY;
26
27        glyphYCoordinate += fontSize * resolutionCorrection;
28
29        //The loop paints every glyph in gids
30        foreach (GlyphId gid in gids)
31        {
32            // if the font contains the gid
33            if (gid != null)
34            {
35                Glyph glyph = font.GlyphAccessor.GetGlyphById(gid);
36                if (glyph == null)
37                    continue;
38
39                // The path that accepts drawing instructions
40                GraphicsPath path = new GraphicsPath();
41
42                // Create IGlyphOutlinePainter implementation
43                GlyphOutlinePainter outlinePainter = new GlyphOutlinePainter(path);
44
45                // Create the renderer
46                Aspose.Font.Renderers.IGlyphRenderer renderer = new Aspose.Font.Renderers.GlyphOutlineRenderer(outlinePainter);
47
48                // Get common glyph properties
49                double kerning = 0;
50
51                // Get kerning value
52                if (previousGid != null && !topDown)
53                {
54                    kerning = (font.Metrics.GetKerningValue(previousGid, gid) / glyph.SourceResolution) * fontSize * resolutionCorrection;
55                    kerning += FontWidthToImageWith(font.Metrics.GetGlyphWidth(previousGid), glyph.SourceResolution, fontSize);
56                }
57
58                if (topDown)
59                {
60                    glyphYCoordinate += fontSize * resolutionCorrection;
61                }
62                else
63                {
64                    // Glyph positioning - increase the glyph X coordinate according to kerning distance
65                    glyphXCoordinate += kerning * kerningCoefficient;
66                }
67
68                // Glyph placement matrix
69                TransformationMatrix glyphMatrix = new TransformationMatrix(
70                        new double[]
71                                { fontSize * resolutionCorrection,
72                            0,
73                            0,
74                        // negative because the bitmap coordinate system begins from the top
75                            - fontSize*resolutionCorrection,
76                            glyphXCoordinate,
77                            glyphYCoordinate
78                                });
79
80                // Render the current glyph
81                renderer.RenderGlyph(font, gid, glyphMatrix);
82
83                // Fill the path
84                path.FillMode = FillMode.Winding;
85
86                outGraphics.FillPath(textBrush, path);
87            }
88
89            //Set the current gid as previous to get correct kerning for the next glyph
90            previousGid = gid;
91        }
92
93        //Save the results
94        outBitmap.Save(outFile);
95    }
メソッドコールのコードには次の外観があります。
1    var datadir = @"c:\temp\";
2    var filename1 = datadir + "arial.ttf"; //フルパスを備えたフォントファイル名
3    var fontdefinition1 = new fontdefinition(fonttype.ttf、new fontfileDefinition( "TTF"、new FilesystemStymStreamSource(filename1)));
4    var ttffont1 = font.open(fontdefinition1)as ttffont;
5    var bitmap = new Bitmap(960、720);
6
7    GlyphOutlinePainter.CustomDrawText("Top down", ttfFont1, 18, Brushes.White, Brushes.Black, dataDir + "Hello_Arial_TopDown.png", bitmap, 1, 400, 00, true);
実装結果:
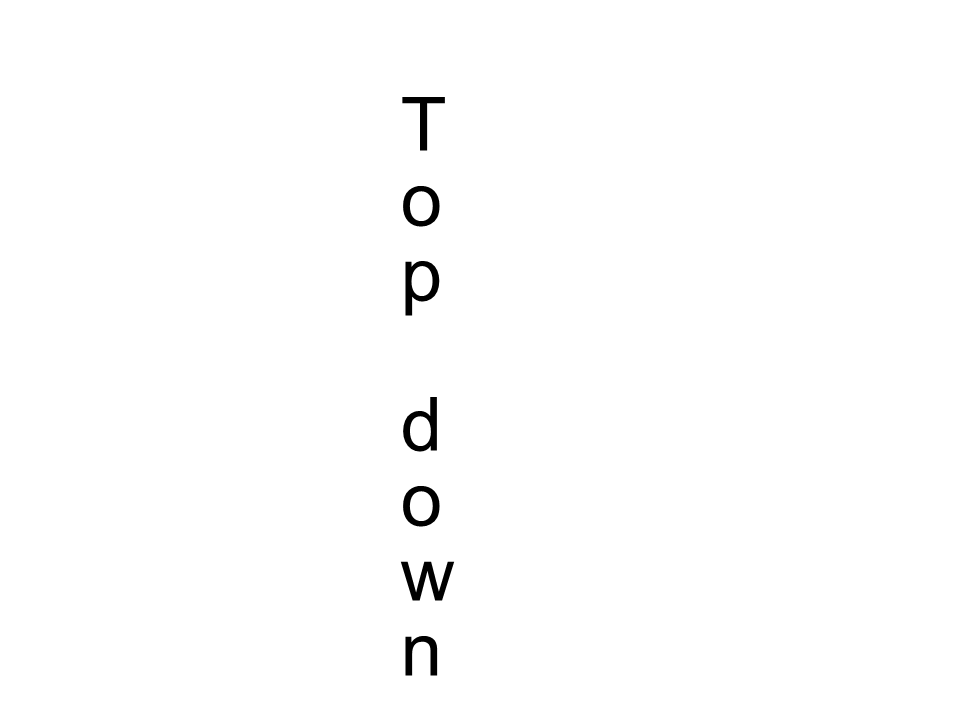 Arial top to down
追加情報
1    ダブルDPI; //インチあたりのドット
2    Double ResolutionCorrection = DPI / 72; // 72はFontの内部DPIです
3    //変数を調整します
4    二重glyphxcoodinate; // x
5    二重glyphycoordinate; // y;
6    //カーニング - 2文字の間の水平間隔
7    double kerning = 0;