Arbeiten mit Formen in PS-Datei | Python
Formen zum PS-Dokument hinzufügen
Rechteck zu PS hinzufügen
Um mit Aspose.Page für Python über die .NET-Bibliothek ein Rechteck in PsDocument einzufügen, führen Sie die folgenden Schritte aus:
- Erstellen Sie einen Ausgabestream für die resultierende PS-Datei.
- Erstellen Sie ein PsSaveOptions-Objekt mit den Standardoptionen.
- Erstellen Sie ein einseitiges PsDocument mit einem bereits erstellten Ausgabestream und Speicheroptionen.
- Erstellen Sie aus dem Rechteck ein Rechteck aspose.pydrawing.GraphicsPath.
- Stellen Sie einen Paint auf den aktuellen Grafikstatus von PsDocument ein.
- Füllen Sie das Rechteck.
- Schließen Sie die Seite.
- Speichern Sie das Dokument.
Um ein Rechteck zu zeichnen (umreißen), sind die ersten 4 und die letzten 2 Schritte gleich, aber der 5. und 6. Schritt sind:
- Stellen Sie den Strich auf den aktuellen Grafikstatus des PsDocument ein.
- Zeichnen Sie den Umriss des Rechtecks.
 1# The path to the documents directory.
 2data_dir = Util.get_data_dir_working_with_shapes()
 3
 4# Create an output stream for the PostScript document
 5with open(data_dir + "AddRectangle_outPS.ps", "wb") as out_ps_stream:
 6    # Create save options with A4 size
 7    options = PsSaveOptions()
 8
 9    # Create a new 1-paged PS Document
10    document = PsDocument(out_ps_stream, options, False)
11
12    # Create a graphics path from the first rectangle
13    path = aspose.pydrawing.drawing2d.GraphicsPath()
14    path.add_rectangle(aspose.pydrawing.RectangleF(250, 100, 150, 100))
15    # Set the paint
16    document.set_paint(aspose.pydrawing.SolidBrush(aspose.pydrawing.Color.orange))
17    # Fill the rectangle
18    document.fill(path)
19
20    # Create a graphics path from the second rectangle
21    path = aspose.pydrawing.drawing2d.GraphicsPath()
22    path.add_rectangle(aspose.pydrawing.RectangleF(250, 300, 150, 100))
23    # Set stroke
24    document.set_stroke(GraphicsFactory.create_pen_by_brush_and_width(aspose.pydrawing.SolidBrush(aspose.pydrawing.Color.red), 3))
25    # Stroke (outline) the rectangle
26    document.draw(path)
27
28    # Close the current page
29    document.close_page()
30
31    # Save the document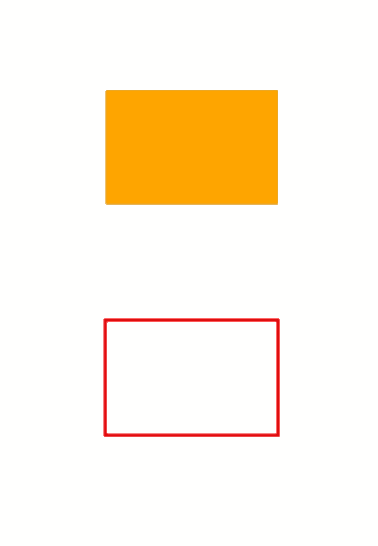
32 document.save()Das Ergebnis der Ausführung dieses Codes ist
Ellipse zu PS hinzufügen
Um eine Ellipse zu PsDocument hinzuzufügen, sind ebenfalls 8 Schritte erforderlich:
- Erstellen Sie einen Ausgabestream für die resultierende PS-Datei.
- Erstellen Sie ein PsSaveOptions-Objekt mit den Standardoptionen.
- Erstellen Sie ein einseitiges PsDocument mit einem bereits erstellten Ausgabestream und Speicheroptionen.
- Erstellen Sie aus dem Rechteck eine Ellipse aspose.pydrawing.drawing2d.GraphicsPath.
- Stellen Sie die Farbe auf den aktuellen Grafikstatus von PsDocument ein.
- Füllen Sie den Ellipsenpfad.
- Schließen Sie die Seite.
- Speichern Sie das Dokument.
Um eine Ellipse zu zeichnen (umreißen), sind die ersten 4 und die letzten 2 Schritte gleich, aber der 5. und 6. Schritt sind:
- Setzen Sie den Strich auf den aktuellen Grafikstatus von PsDocument.
- Konturieren Sie die Ellipse.
1# The path to the documents directory.
2data_dir = Util.get_data_dir_working_with_shapes()
3
4# Create an output stream for PostScript document
5with open(data_dir + "AddEllipse_outPS.ps", "wb") as out_ps_stream:
6 # Create save options with the A4 size
7 options = PsSaveOptions()
8
9 # Create a new 1-paged PS Document
10 document = PsDocument(out_ps_stream, options, False)
11
12 # Create a graphics path from the first ellipse
13 path = aspose.pydrawing.drawing2d.GraphicsPath()
14 path.add_ellipse(aspose.pydrawing.RectangleF(250, 100, 150, 100))
15 # Set the paint
16 document.set_paint(aspose.pydrawing.SolidBrush(aspose.pydrawing.Color.orange))
17 # Fill the ellipse
18 document.fill(path)
19
20 # Create a graphics path from the second ellipse
21 path = aspose.pydrawing.drawing2d.GraphicsPath()
22 path.add_ellipse(aspose.pydrawing.RectangleF(250, 300, 150, 100))
23 # Set the stroke
24 document.set_stroke(GraphicsFactory.create_pen_by_brush_and_width(aspose.pydrawing.SolidBrush(aspose.pydrawing.Color.red), 3))
25 # Stroke (outline) the ellipse
26 document.draw(path)
27
28 # Close the current page
29 document.close_page()
30
31 # Save the document
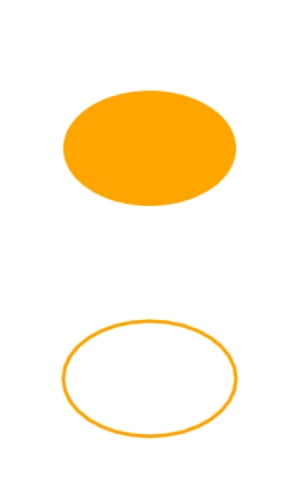
32 document.save()Das Ergebnis der Ausführung dieses Codes ist
Wie wir sehen können, kann jede Form, sowohl geschlossen als auch nicht geschlossen, von PsDocument gefüllt oder gezeichnet werden. Es kann auch abgeschnitten werden, dies wird jedoch in einem anderen Artikel beschrieben.
Sie können Beispiele und Datendateien herunterladen von GitHub.