
Travailler avec la transparence dans un fichier XPS | Python
La transparence est couramment utilisée pour créer des effets visuels tels que le mélange, la décoloration ou la superposition d’une image ou d’un élément graphique sur une autre. Cela peut être réalisé grâce à diverses techniques, notamment en ajustant l’opacité ou le canal alpha d’un objet, en utilisant des modes de fusion ou en appliquant des masques ou des superpositions. Il s’agit d’un outil précieux en matière de conception, d’illustration et de composition numérique, permettant la création de compositions visuelles superposées et complexes.
Ajouter un objet transparent au document XPS
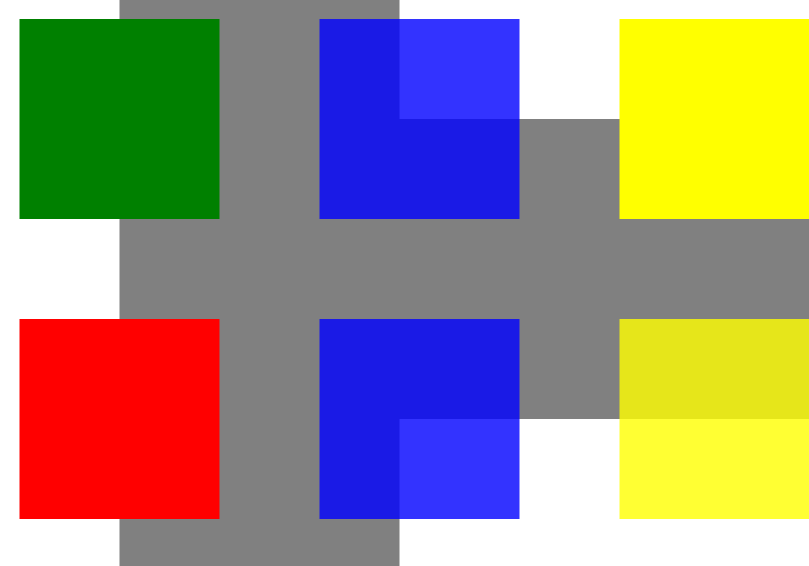
Aspose.Page pour Python via .NET fournit la classe XpsPath, vous permettant d’ajouter des objets transparents à un document XPS. Pour ce faire, vous devez spécifier un PathGeometry et l’ajouter au XpsPath. L’extrait de code suivant illustre la fonctionnalité complète permettant d’ajouter un objet transparent à un document XPS :
 1from aspose.page.xps import *
 2from aspose.page.xps.xpsmodel import *
 3import aspose.pydrawing
 4from util import Util
 5# The path to the documents directory.
 6        data_dir = Util.get_data_dir_working_with_transparency()
 7        # Create new XPS Document
 8        doc = XpsDocument()
 9
10        # Just to demonstrate transparency
11        doc.add_path(doc.create_path_geometry("M120,0 H400 v1000 H120")).fill = doc.create_solid_color_brush(aspose.pydrawing.Color.gray)
12        doc.add_path(doc.create_path_geometry("M300,120 h600 V420 h-600")).fill = doc.create_solid_color_brush(aspose.pydrawing.Color.gray)
13
14        # Create the path with the closed rectangle geometry
15        path1: XpsPath = doc.create_path(doc.create_path_geometry("M20,20 h200 v200 h-200 z"))
16        # Set a blue solid brush to fill the path1
17        path1.fill = doc.create_solid_color_brush(aspose.pydrawing.Color.blue)
18        # Add it to the current page
19        path2: XpsPath = doc.add_path(path1)
20
21        # path1 and path2 are the same as soon as path1 hasn't been placed inside any other element
22        # (which means that path1 had no parent element).
23        # Because of that rectangle's color on the page effectively turns to green
24        path2.fill = doc.create_solid_color_brush(aspose.pydrawing.Color.green)
25
26        # Now add path2 once again. Now path2 has parent. So path3 won't be the same as path2.
27        # Thus a new rectangle is painted on the page ...
28        path3: XpsPath = doc.add_path(path2)
29        # ... and we shift it 300 units lower ...
30        path3.render_transform = doc.create_matrix(1, 0, 0, 1, 0, 300)
31        # ... and set red solid brush to fill it
32        path3.fill = doc.create_solid_color_brush(aspose.pydrawing.Color.red)
33
34        # Create a new path4 with path2's geometry ...
35        path4: XpsPath = doc.add_path(path2.data)
36        # ... shift it 300 units to the right ...
37        path4.render_transform = doc.create_matrix(1, 0, 0, 1, 300, 0)
38        # ... and set a blue solid fill
39        path4.fill = doc.create_solid_color_brush(aspose.pydrawing.Color.blue)
40
41        # Add path4 once again.
42        path5: XpsPath = doc.add_path(path4)
43        # path4 and path5 are not the same again ...
44        # (move path5 300 units lower)
45        path5.render_transform = path5.render_transform.clone() # to disconnect RenderTransform value from path4 (see next comment about Fill property)
46        path5.render_transform.translate(0, 300)
47        # ... but if we set the opacity of Fill property, it will take effect on both path5 and path4
48        # because brush is a complex property value which remains the same for path5 and path4
49        path5.fill.opacity = 0.8
50
51        # Create a new path6 with path2's geometry ...
52        path6: XpsPath = doc.add_path(path2.data)
53        # ... shift it 600 units to the right ...
54        path6.render_transform = doc.create_matrix(1, 0, 0, 1, 600, 0)
55        # ... and set a yellow solid fill
56        path6.fill = doc.create_solid_color_brush(aspose.pydrawing.Color.yellow)
57
58        # Now add path6's clone ...
59        path7: XpsPath = doc.add_path(path6.clone())
60        # (move path5 300 units lower)
61        path7.render_transform = path7.render_transform.clone()
62        path7.render_transform.translate(0, 300)
63        # ... and set the opacity for path7
64        path7.fill.opacity = 0.8
65        # Now opacity effects independantly as soon as property values are cloned along with the element
66
67        # The following code block is equivalent to the previous one.
68        # Add path6 itself. path6 and path7 are not the same. Although their Fill property values are the same
69        #XpsPath path7 = doc.add_path(path6);
70        #path7.RenderTransform = path7.RenderTransform.Clone();
71        #path7.RenderTransform.Translate(0, 300);
72        # To "disconnect" path7's Fill property from path6's Fill property reassign it to its clone (or path6's Fill clone)
73        #path7.Fill = ((XpsSolidColorBrush)path7.Fill).Clone();
74        #path7.Fill.Opacity = 0.8f;
75
76        # Save the resultant XPS document
77 doc.save(data_dir + "WorkingWithTransparency_out.xps")Le résultat
Définir le masque d’opacité
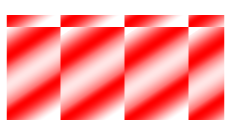
La solution fournit la propriété set_opacity_mask() utilisée pour appliquer un masque d’opacité à un document XPS. Pour y parvenir, vous devez créer un PathGeometry et l’ajouter au XpsPath. Une image peut être utilisée comme masque d’opacité, où le composant Alpha de chaque pixel détermine le niveau de transparence appliqué au remplissage sous-jacent. Le document XPS résultant affichera des bandes de dégradé obliques superposées au fichier image source. L’extrait de code suivant illustre la fonctionnalité complète de définition d’un masque d’opacité :
 1from aspose.page.xps import *
 2from aspose.page.xps.xpsmodel import *
 3import aspose.pydrawing
 4from util import Util
 5# The path to the documents directory.
 6data_dir = Util.get_data_dir_working_with_transparency()
 7# Create a new XPS Document
 8doc = XpsDocument()
 9#Add Canvas to the XpsDocument instance
10canvas = doc.add_canvas()
11# A rectangle with opacity masked by ImageBrush
12path = canvas.add_path(doc.create_path_geometry("M 10,180 L 228,180 228,285 10,285"))
13path.fill = doc.create_solid_color_brush(doc.create_color(1.0, 0.0, 0.0))
14imageBrush: XpsImageBrush = doc.create_image_brush(data_dir + "R08SY_NN.tif", aspose.pydrawing.RectangleF(0, 0, 128, 192),
15        aspose.pydrawing.RectangleF(0, 0, 64, 96))
16path.opacity_mask = imageBrush
17imageBrush.tile_mode = XpsTileMode.TILE
18# Save the resultant XPS document
19doc.save(data_dir + "OpacityMask_out.xps")Le résultat
Vous pouvez télécharger des exemples et des fichiers de données à partir de GitHub.