PSファイル内の図形の操作 | Java
Contents
[
Hide
Show
]PSドキュメントに図形を追加する
PSに四角形を追加する
Aspose.Page for Javaライブラリを使用して PsDocumentに四角形を追加するには、次の手順に従います。
- 出力されたPSファイル用の出力ストリームを作成します。
- デフォルトのオプションで PsSaveOptionsオブジェクトを作成します。
- 既に作成済みの出力ストリームと保存オプションを使用して、1ページのPsDocumentを作成します。
- 四角形(java.awt.geom.Rectangle2Dオブジェクト)を作成します。
- PsDocumentの現在のグラフィック状態にペイントを設定します。
- 四角形を塗りつぶします。
- ページを閉じます。
- ドキュメントを保存します。
四角形のストローク(アウトライン)を描く場合、最初の4つの手順と最後の2つの手順は同じですが、5番目と6番目の手順は以下のようになります。
ストロークをPsDocumentの現在のグラフィック状態に設定します。
四角形のストローク(アウトライン)を描きます。
 1// Add Rectangle to PS document.
 2
 3String outputFileName = "AddRectangle_outPS.ps";
 4
 5//Create save options with A4 size
 6PsSaveOptions options = new PsSaveOptions();
 7
 8// Create new 1-paged PS Document
 9PsDocument document = new PsDocument(getOutputDir() + outputFileName, options, false);
10
11//Create graphics path from the first rectangle
12GeneralPath path = new GeneralPath();
13path.append(new Rectangle2D.Float(250, 100, 150, 100), false);
14//Set paint
15document.setPaint(Color.ORANGE);
16//Fill the rectangle
17document.fill(path);
18
19//Create graphics path from the second rectangle
20path = new GeneralPath();
21path.append(new Rectangle2D.Float(250, 300, 150, 100), false);
22//Set stroke
23document.setStroke(new java.awt.BasicStroke(3));
24//Stroke (outline) the rectangle
25document.draw(path);
26
27//Close current page
28document.closePage();
29
30//Save the document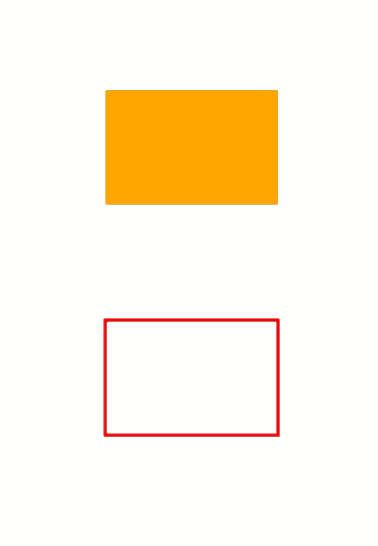
31document.save();.NET の PS ドキュメント内の図形の操作を参照してください。
このコードを実行した結果は次のように表示されます。
PS に楕円を追加する
PsDocument に楕円を追加するには、以下の 8 つの手順が必要です。
- 出力先の PS ファイルの出力ストリームを作成します。
- デフォルトのオプションで PsSaveOptions オブジェクトを作成します。
- 既に作成済みの出力ストリームと保存オプションを使用して、1 ページの PsDocument を作成します。
- 楕円 (java.awt.geom.Ellipse2D オブジェクト) を作成します。
- PsDocument の現在のグラフィック状態にペイントを設定します。
- 楕円のパスを塗りつぶします。
- ページを閉じます。
- ドキュメントを保存します。
楕円の輪郭線を描く場合、最初の4つのステップと最後の2つのステップは同じですが、5番目と6番目のステップは以下のようになります。
- ストロークをPsDocumentの現在のグラフィック状態に設定します。
- 楕円の輪郭線を描きます。
 1// Add ellipse to PS document.
 2
 3String outputFileName = "AddEllipse_outPS.ps";
 4
 5//Create save options with A4 size
 6PsSaveOptions options = new PsSaveOptions();
 7
 8// Create new 1-paged PS Document
 9PsDocument document = new PsDocument(getOutputDir() + outputFileName, options, false);
10
11//Create graphics path from the first ellipse
12GeneralPath path = new GeneralPath();
13path.append(new java.awt.geom.Ellipse2D.Float(250, 100, 150, 100), false);
14//Set paint
15document.setPaint(Color.ORANGE);
16//Fill the ellipse
17document.fill(path);
18
19//Create graphics path from the second ellipse
20path = new GeneralPath();
21path.append(new java.awt.geom.Ellipse2D.Float(250, 300, 150, 100), false);
22//Set stroke
23document.setStroke(new java.awt.BasicStroke(3));
24//Stroke (outline) the ellipse
25document.draw(path);
26
27//Close current page
28document.closePage();
29
30//Save the document
31document.save();このコードを実行した結果は次のように表示されます。

ご覧のとおり、 PsDocument を使用すると、閉じた図形も閉じていない図形も、塗りつぶしたり描画したりできます。 切り取りも可能ですが、これについては別の記事で説明します。
サンプルとデータファイルは以下からダウンロードできます。 GitHub.