PostScript でのクリップ操作 | .NET
PS ドキュメントにクリップを追加
PS ドキュメント内のクリップとは、PS ビューアーまたはエディターに表示される現在のグラフィック ステートのコンテンツを囲むパスです。境界からはみ出したコンテンツは切り取られます。
.NET では、クリッピング パスは 3 つの方法で割り当てることができます。
- 任意の閉じた図形を含む System.Drawing.Drawing2D.GraphicsPath を使用する。
- テキストのアウトラインを使用する。
- 1 bpp (ビット/ピクセル) の 2 色画像をステンシル マスクとして使用する。
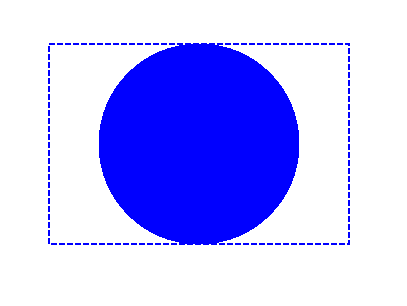
現在、Aspose.Page for .NET ライブラリでは、1 番目と 2 番目のクリッピング方法を提供しています。以下の例では、四角形から円 System.Drawing.Drawing2D.GraphicsPath をクリッピング パスとして取得し、同じグラフィック ステートで青色に塗りつぶされた四角形を切り取っています。
この例では、Aspose.Page for .NET ライブラリを使用して新しい PsDocument にクリップを追加するために、次の手順を実行します。
- 結果の PS ファイルの出力ストリームを作成します。
- デフォルトのオプションで PsSaveOptions オブジェクトを作成します。
- 既に作成済みの出力ストリームと保存オプションを使用して、1 ページの PsDocument を作成します。
- 新しいグラフィックス状態を作成します。
- 四角形から円 System.Drawing.Drawing2D.GraphicsPath を作成します。
- このパスにクリップを設定します。
- PsDocument の現在のグラフィックス状態にペイントを設定します。
- 現在のペイントで四角形のパスを塗りつぶします。
- 現在のグラフィック状態から上位レベルへ移動します。
- 塗りつぶされた四角形の位置に移動します。
- 塗りつぶされた四角形の上にある同じ四角形の境界を破線で囲み、切り取られた塗りつぶされた四角形の境界を表示します。
- ページを閉じます。
- ドキュメントを保存します。
 1// Demonstrates clipping by shape and clipping by text in PS document.
 2
 3string outputFileName = "ApplyClipByShape_outPS.ps";
 4
 5//Create save options with A4 size
 6PsSaveOptions options = new PsSaveOptions();
 7
 8// Create new 1-paged PS Document
 9PsDocument document = new PsDocument(OutputDir + outputFileName, options, false);
10
11//Create graphics path from the rectangle
12GraphicsPath rectanglePath = new GraphicsPath();
13rectanglePath.AddRectangle(new RectangleF(0, 0, 300, 200));
14
15////////////////////////////////////// Clipping by shape //////////////////////////////////////////////////////////////////////
16
17//Save graphics state in order to return back to this state after transformation
18document.WriteGraphicsSave();
19
20//Displace current graphics state on 100 points to the right and 100 points to the bottom.
21document.Translate(100, 100);
22
23//Create graphics path from the circle
24GraphicsPath circlePath = new GraphicsPath();
25circlePath.AddEllipse(new RectangleF(50, 0, 200, 200));
26
27//Add clipping by circle to the current graphics state
28document.Clip(circlePath);
29
30//Set paint in the current graphics state
31document.SetPaint(new SolidBrush(Color.Blue));
32
33//Fill the rectangle in the current graphics state (with clipping)
34document.Fill(rectanglePath);
35
36//Restore graphics state to the previus (upper) level
37document.WriteGraphicsRestore();
38
39//Displace upper level graphics state on 100 points to the right and 100 points to the bottom.
40document.Translate(100, 100);
41
42Pen pen = new Pen(new SolidBrush(Color.Blue), 2);
43pen.DashStyle = DashStyle.Dash;
44
45document.SetStroke(pen);
46
47//Draw the rectangle in the current graphics state (has no clipping) above clipped rectangle
48document.Draw(rectanglePath);
49
50//Close current page
51document.ClosePage();
52
53//Save the document
54document.Save();Linux、macOS、その他Windows以外のOSでは、 Aspose.Page.Drawing NuGetパッケージをご利用いただけます。このパッケージは、System.Drawingシステムライブラリではなく、Aspose.Drawingバックエンドを使用します。
そのため、System.Drawing名前空間ではなく、Aspose.Page.Drawing名前空間をインポートしてください。上記のコードスニペットでは、System.Drawing.Rectangleの代わりにAspose.Page.Drawing.Rectangleが、System.Drawing.Drawing2D.GraphicsPathの代わりにAspose.Page.Drawing.Drawing2D.GraphicsPathが使用されるなど、必要な置換はすべてGitHubのコード例に記載されています。
Java の PS ドキュメント内のクリップの操作を参照してください。
このコードを実行した結果は次のように表示されます。
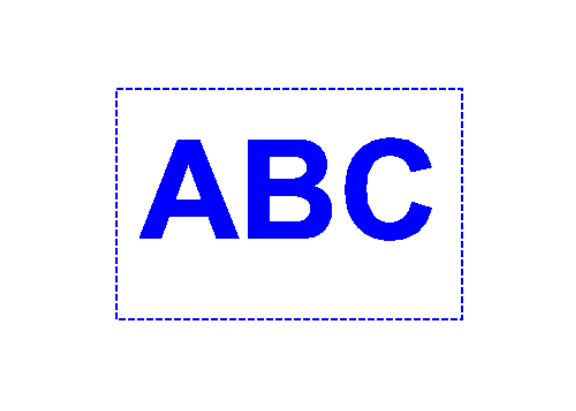
次の例では、テキストのアウトラインで青く塗りつぶされた四角形をクリッピングするフォントを取得します。
この例では、Aspose.Page for .NET ライブラリを使用して、新しい PsDocument にテキストによるクリッピングを追加するために、以下の手順を実行します。
- 生成された PS ファイルの出力ストリームを作成します。
- デフォルトのオプションで PsSaveOptions オブジェクトを作成します。
- 既に作成済みの出力ストリームと保存オプションを使用して、1 ページの PsDocument を作成します。
- 新しいグラフィックス状態を作成します。
- フォントを作成します。
- テキストとフォントでクリップを設定します。
- PsDocument の現在のグラフィック状態にペイントを設定します。
- 現在のペイントで四角形のパスを塗りつぶします。
- 現在のグラフィック状態から上位レベルへ移動します。
- 塗りつぶされた四角形の位置に移動します。
- 塗りつぶされた四角形の上にある同じ四角形の境界を破線で囲み、切り取られた塗りつぶされた四角形の境界を示します。
- ページを閉じます。
- ドキュメントを保存します。
 1// Demonstrates clipping by text in PS document.
 2
 3string outputFileName = "ApplyClipByText_outPS.ps";
 4
 5//Create save options with A4 size
 6PsSaveOptions options = new PsSaveOptions();
 7
 8// Create new 1-paged PS Document
 9PsDocument document = new PsDocument(OutputDir + outputFileName, options, false);
10
11//Create graphics path from the rectangle
12GraphicsPath rectanglePath = new GraphicsPath();
13rectanglePath.AddRectangle(new RectangleF(0, 0, 300, 200));
14
15//Save graphics state in order to return back to this state after transformation
16document.WriteGraphicsSave();
17
18//Displace current graphics state on 100 points to the right and 100 points to the bottom.
19document.Translate(100, 100);
20
21Pen pen = new Pen(new SolidBrush(Color.Blue), 2);
22pen.DashStyle = DashStyle.Dash;
23int fontSize = 120;
24System.Drawing.Font font = new System.Drawing.Font("Arial", fontSize, FontStyle.Bold);
25
26//Clip rectangle by text's outline
27document.ClipText("ABC", font, 20, fontSize + 10);
28
29//Set paint in the current graphics state
30document.SetPaint(new SolidBrush(Color.Blue));
31
32document.Fill(rectanglePath);
33
34document.WriteGraphicsRestore();
35
36document.Translate(100, 100);
37
38document.SetStroke(pen);
39//Draw the rectangle in the current graphics state (has no clipping) above clipped rectangle
40document.Draw(rectanglePath);
41
42//Close current page
43document.ClosePage();
44
45//Save the document
46document.Save();Linux、macOS、その他Windows以外のOSでは、 Aspose.Page.Drawing NuGetパッケージをご利用いただけます。このパッケージは、System.Drawingシステムライブラリではなく、Aspose.Drawingバックエンドを使用します。
そのため、System.Drawing名前空間ではなく、Aspose.Page.Drawing名前空間をインポートしてください。上記のコードスニペットでは、System.Drawing.Rectangleの代わりにAspose.Page.Drawing.Rectangleが使用され、System.Drawing.Drawing2D.GraphicsPathの代わりにAspose.Page.Drawing.Drawing2D.GraphicsPathが使用されます。GitHubのコード例には、必要な置換がすべて含まれています。
Java の PS ドキュメント内のクリップの操作方法をご覧ください。
このコードを実行した結果は次のように表示されます。
サンプルとデータ ファイルは GitHub からダウンロードできます。