PSファイル内のクリップの操作 | Python
Contents
[
Hide
Show
]PS ドキュメントにクリップを追加
PS ドキュメントにおいて、クリップとはパスによって定義される境界のことで、PS ビューアまたはエディターの現在のグラフィック状態におけるコンテンツの表示範囲を制限します。この境界を越えるコンテンツは切り捨てられます。
Python では、クリッピングパスは次の 3 つの方法で割り当てることができます。
- aspose.pydrawing.GraphicsPath に実装され、閉じた図形を格納できる任意のクラスを使用する。
- テキストのアウトラインを使用する。
- 1 bpp (ビット/ピクセル) の 2 色画像をステンシルマスクとして使用する。
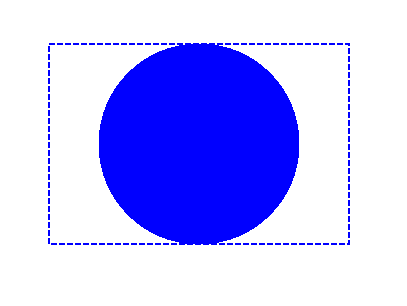
現在、Aspose.Page for Python via .NET ライブラリは、1 番目と 2 番目のクリッピング方法をサポートしています。以下の例では、円形をクリッピングパスとして作成し、同じグラフィック状態にある青色で塗りつぶされた四角形をクリッピングするために使用しています。
以下の例では、円形をクリッピングパスとして取得し、同じグラフィック状態にある青色で塗りつぶされた四角形を切り取っています。
この例では、.NET ライブラリを介して Aspose.Page for Python を使用して新しい PsDocument にクリップを追加します。
- 生成された PS ファイルの出力ストリームを作成します。
- デフォルトのオプションを使用して PsSaveOptions オブジェクトを作成します。
- 既に作成済みの出力ストリームと保存オプションを使用して、1 ページの PsDocument を作成します。
- 新しいグラフィックス状態を作成します。
- 円 (aspose.pydrawing.GraphicsPath オブジェクト) の図形を作成します。
- このパスを使用してクリップを設定します。
- PsDocument の現在のグラフィックス状態にペイントを設定します。
- 現在のペイントで四角形のパスを塗りつぶします。
- 現在のグラフィック状態から上位レベルへ移動します。
- 塗りつぶされた四角形の位置に移動します。
- 塗りつぶされた四角形の上にある同じ四角形の境界を破線で囲み、切り取られた塗りつぶされた四角形の境界を表示します。
- ページを閉じます。
- ドキュメントを保存します。
 1# Create an output stream for PostScript document
 2with open(data_dir + "Clipping_outPS.ps", "wb") as out_ps_stream:
 3    # Create the save options with default values
 4    options = PsSaveOptions()
 5
 6    # Create new 1-paged PS Document
 7    document = PsDocument(out_ps_stream, options, False)
 8
 9    # Create a graphics path from the rectangle
10    rectange_path = aspose.pydrawing.drawing2d.GraphicsPath()
11    rectange_path.add_rectangle(aspose.pydrawing.RectangleF(0, 0, 300, 200))
12
13    ##################################### Clipping by the shape //////////////////////////////////////////////////////////////////////
14
15    # Save the graphics state in order to return back to this state after the transformation
16    document.write_graphics_save()
17
18    # Displace the current graphics state on 100 points to the right and 100 points to the bottom.
19    document.translate(100, 100)
20
21    # Create a graphics path from the circle
22    circle_path = aspose.pydrawing.drawing2d.GraphicsPath()
23    circle_path.add_ellipse(aspose.pydrawing.RectangleF(50, 0, 200, 200))
24
25    # Add clipping by circle to the current graphics state
26    document.clip(circle_path)
27
28    # Set the paint in the current graphics state
29    document.set_paint(aspose.pydrawing.SolidBrush(aspose.pydrawing.Color.blue))
30
31    # Fill the rectangle in the current graphics state (with clipping)
32    document.fill(rectange_path)
33
34    # Restore the graphics state to the previus (upper) level
35    document.write_graphics_restore()
36
37    # Displace the upper level graphics state on 100 points to the right and 100 points to the bottom.
38    document.translate(100, 100)
39
40    pen = aspose.pydrawing.Pen(aspose.pydrawing.SolidBrush(aspose.pydrawing.Color.blue))
41    pen.width = float(2)
42    pen.dash_style = aspose.pydrawing.drawing2d.DashStyle.DASH
43
44    document.set_stroke(pen)
45
46    # Draw the rectangle in the current graphics state (has no clipping) above clipped rectangle
47    document.draw(rectange_path)
48
49    ########################################################################################################################
50
51    # Close the current page
52    document.close_page()
53
54    # Save the document
55 document.save()このコードを実行した結果は
サンプルとデータ ファイルは GitHub からダウンロードできます。