
XPSファイル内のテキスト操作 | Python
Contents
[
Hide
Show
]ここでは、Python を使用して XPS ファイル内のテキストを操作する方法を説明するコードを紹介します。
XPS ドキュメントへのテキストの追加
Aspose.Page for Python via .NET は XpsGlyphs クラス を提供しており、これを使用して XPS ドキュメントにテキストを挿入できます。これを行うには、API が提供するブラシを指定する必要があります。以下の例では、XpsSolidColorBrush を使用し、XpsDocument クラスのオブジェクトを保存します。次のコード スニペットは、XPS ドキュメントにテキストを追加する機能のすべてを示しています。
 1from aspose.page.xps import *
 2import aspose.pydrawing
 3from util import Util
 4# The path to the documents directory.
 5data_dir = Util.get_data_dir_working_with_text()
 6# Create a new XPS Document
 7doc = XpsDocument()
 8# Create a brush
 9text_fill = doc.create_solid_color_brush(aspose.pydrawing.Color.black)
10# Add a glyph to the document
11glyphs = doc.add_glyphs("Arial", 12, aspose.pydrawing.FontStyle.REGULAR, 300, 450, "Hello World!")
12glyphs.fill = text_fill
13# Save the resultant XPS document
14doc.save(data_dir + "AddText_out.xps")結果

エンコーディング文字列を使用したテキストの追加
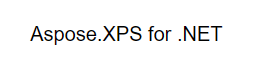
Aspose.Page for Python ソリューションは XpsGlyphs クラス を提供しており、これを使用すると、エンコーディング文字列を使用して XPS ドキュメントにテキストを追加できます。XpsGlyphs クラスの set_bidi_level() プロパティを使用してブラシを指定できます。次のコード スニペットは、エンコーディング文字列を使用してテキストを追加する機能のすべてを示しています。
 1from aspose.page.xps import *
 2import aspose.pydrawing
 3from util import Util
 4# The path to the documents directory.
 5data_dir = Util.get_data_dir_working_with_text()
 6# Create a new XPS Document
 7doc = XpsDocument()
 8# Add Text
 9text_fill = doc.create_solid_color_brush(aspose.pydrawing.Color.black)
10glyphs = doc.add_glyphs("Arial", 20, aspose.pydrawing.FontStyle.REGULAR, 400, 200, "TEN. rof SPX.esopsA")
11glyphs.bidi_level = 1
12glyphs.fill = text_fill
13# Save the resultant XPS document
14doc.save(data_dir + "AddTextRTL_out.xps")結果
サンプルとデータ ファイルは GitHub からダウンロードできます。