Trabalhar com Transparência em Ficheiro XPS | Java
Adicionar Objecto Transparente dentro de Documento XPS
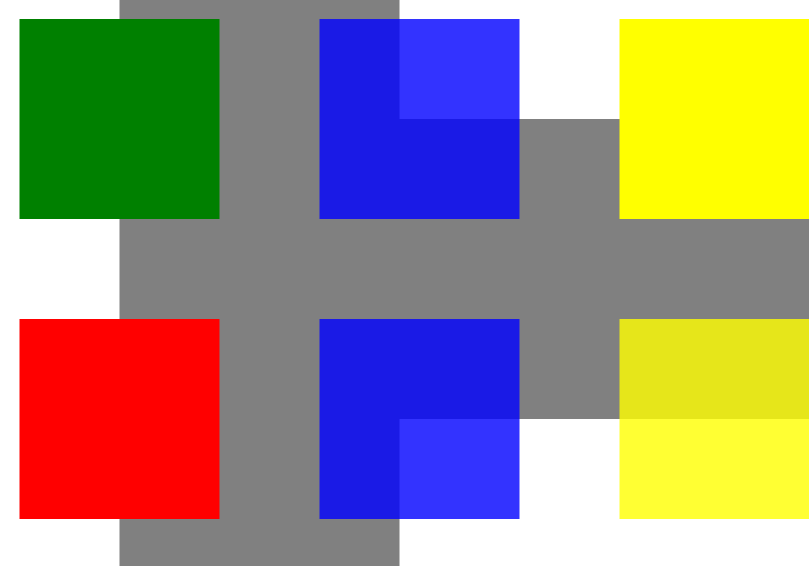
O Aspose.Page para Java oferece a classe XpsPath, com a qual pode adicionar um objeto transparente num documento XPS. É necessário especificar PathGeometry e adicioná-lo a XpsPath. O seguinte trecho de código mostra a funcionalidade completa para adicionar um objeto transparente num documento XPS:
 1// Demonstrates transparency in shapes in XPS document.
 2
 3// Create new XPS Document
 4XpsDocument doc = new XpsDocument();
 5
 6String outputFileName = "AddTransparentObject_outXPS.xps";
 7
 8// Just to demonstrate transparency - draw background rectangles
 9doc.addPath(doc.createPathGeometry("M120,0 H400 v1000 H120")).setFill(doc.createSolidColorBrush(doc.createColor(128,128,128)));
10doc.addPath(doc.createPathGeometry("M300,120 h600 V420 h-600")).setFill(doc.createSolidColorBrush(doc.createColor(128,128,128)));
11
12// Create path with closed rectangle geometry
13XpsPath path1 = doc.createPath(doc.createPathGeometry("M20,20 h200 v200 h-200 z"));
14// Set blue solid brush to fill path1
15path1.setFill(doc.createSolidColorBrush(doc.createColor(0, 0, 255)));
16// Add it to the current page
17XpsPath path2 = doc.add(path1);
18
19// path1 and path2 are the same as long as path1 has no parent. Setting fill on path2 affects shared brush
20path2.setFill(doc.createSolidColorBrush(doc.createColor(0, 128, 0)));
21
22// Now add path2 once again. Now path2 has parent. So path3 won't be the same as path2.
23XpsPath path3 = doc.add(path2);
24// shift it 300 units lower
25path3.setRenderTransform(doc.createMatrix(1f, 0f, 0f, 1f, 0f, 300f));
26// set red solid brush to fill it
27path3.setFill(doc.createSolidColorBrush(doc.createColor(255, 0, 0)));
28
29// Create new path4 with path2's geometry ...
30XpsPath path4 = doc.addPath(path2.getData());
31// shift it 300 units to the right ...
32path4.setRenderTransform(doc.createMatrix(1f, 0f, 0f, 1f, 300f, 0f));
33// and set blue solid fill
34path4.setFill(doc.createSolidColorBrush(doc.createColor(0, 0, 255)));
35
36// Add path4 once again.
37XpsPath path5 = doc.add(path4);
38// move path5 300 units lower and disconnect render transform from path4
39path5.setRenderTransform(path5.getRenderTransform().deepClone());
40path5.getRenderTransform().translate(0f, 300f);
41// set the opacity of Fill property - this will affect both path5 and path4 if brush instance is shared
42path5.getFill().setOpacity(0.8f);
43
44// Create new path6 with path2's geometry ...
45XpsPath path6 = doc.addPath(path2.getData());
46// shift it 600 units to the right ...
47path6.setRenderTransform(doc.createMatrix(1f, 0f, 0f, 1f, 600f, 0f));
48// and set yellow solid fill
49path6.setFill(doc.createSolidColorBrush(doc.createColor(255, 255, 0)));
50
51// Now add path6's clone ...
52XpsPath path7 = doc.add(path6.deepClone());
53// move it 300 units lower
54path7.setRenderTransform(path7.getRenderTransform().deepClone());
55path7.getRenderTransform().translate(0f, 300f);
56// set opacity for path7
57path7.getFill().setOpacity(0.8f);
58
59// Save resultant XPS document
60doc.save(getOutputDir() + outputFileName);O resultado
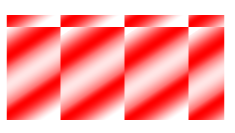
Definir Máscara de Opacidade
A solução oferece a propriedade setOpacityMask(), com a qual pode definir a máscara de opacidade nos documentos XPS. É necessário criar PathGeometry e adicioná-la a XpsPath. Uma imagem pode ser utilizada como máscara de opacidade e o componente Alfa de cada pixel é utilizado para aplicar sobre o preenchimento subjacente. O documento XPS gerado irá exibir riscas de gradiente inclinadas presentes sobre o ficheiro de imagem de origem. O seguinte excerto de código mostra a funcionalidade completa para definir a máscara de opacidade:
 1// Apply opacity mask for texture pattern in XPS document.
 2
 3// Create new XPS Document
 4XpsDocument doc = new XpsDocument();
 5
 6String outputFileName = "OpacityMask_out.xps";
 7
 8//Add Canvas to XpsDocument instance
 9XpsCanvas canvas = doc.addCanvas();
10// Rectangle with opacity masked by ImageBrush
11XpsPath path = canvas.addPath(doc.createPathGeometry("M 10,180 L 228,180 228,285 10,285"));
12path.setFill(doc.createSolidColorBrush(doc.createColor(255, 0, 0)));
13path.setOpacityMask((XpsImageBrush)doc.createImageBrush(getDataDir() + "R08SY_NN.tif", new Rectangle2D.Float(0f, 0f, 128f, 192f),
14        new Rectangle2D.Float(0f, 0f, 64f, 96f)));
15((XpsImageBrush)path.getOpacityMask()).setTileMode(XpsTileMode.Tile);
16// Save resultant XPS document
17doc.save(getOutputDir() + outputFileName);O resultado
Pode descarregar exemplos e ficheiros de dados do GitHub.