Trabalhar com Clips em PostScript | .NET
Adicionar Clip em Documento PS
Um clipe num documento PS é um caminho que delimita o conteúdo do estado gráfico atual que será apresentado no visualizador ou editor PS. O conteúdo que ficar para além dos limites será recortado.
Um caminho de recorte em .NET pode ser atribuído de três formas:
- por System.Drawing.Drawing2D.GraphicsPath, que pode conter quaisquer formas fechadas;
- por contorno de texto;
- por imagem bicolor de 1 bpp (bits por pixel) como máscara de stencil;
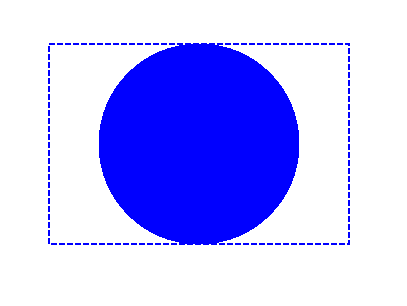
Neste momento, a biblioteca Aspose.Page para .NET oferece a primeira e a segunda forma de recorte. No exemplo abaixo, obtemos um círculo System.Drawing.Drawing2D.GraphicsPath de um retângulo como caminho de recorte e recortamos um retângulo preenchido a azul no mesmo estado gráfico.
Para adicionar um clip ao novo PsDocument com a biblioteca Aspose.Page para .NET, neste exemplo, seguimos os seguintes passos:
- Crie um fluxo de saída para o ficheiro PS resultante.
- Crie o objeto PsSaveOptions com as opções padrão.
- Crie um PsDocument de 1 página com um fluxo de saída já criado e opções de guardar.
- Crie um novo estado gráfico.
- Crie um círculo System.Drawing.Drawing2D.GraphicsPath a partir do retângulo.
- Defina um clipe com este percurso.
- Defina uma pintura para o estado gráfico atual do PsDocument.
- Preencha o percurso do retângulo com a tinta atual.
- Saia do estado gráfico atual para o nível superior.
- Transfira para o local do retângulo preenchido.
- Trace com uma linha tracejada os limites do mesmo retângulo acima do preenchido para mostrar os limites do retângulo preenchido recortado.
- Feche a página.
- Guarde o documento.
 1// Demonstrates clipping by shape and clipping by text in PS document.
 2
 3string outputFileName = "ApplyClipByShape_outPS.ps";
 4
 5//Create save options with A4 size
 6PsSaveOptions options = new PsSaveOptions();
 7
 8// Create new 1-paged PS Document
 9PsDocument document = new PsDocument(OutputDir + outputFileName, options, false);
10
11//Create graphics path from the rectangle
12GraphicsPath rectanglePath = new GraphicsPath();
13rectanglePath.AddRectangle(new RectangleF(0, 0, 300, 200));
14
15////////////////////////////////////// Clipping by shape //////////////////////////////////////////////////////////////////////
16
17//Save graphics state in order to return back to this state after transformation
18document.WriteGraphicsSave();
19
20//Displace current graphics state on 100 points to the right and 100 points to the bottom.
21document.Translate(100, 100);
22
23//Create graphics path from the circle
24GraphicsPath circlePath = new GraphicsPath();
25circlePath.AddEllipse(new RectangleF(50, 0, 200, 200));
26
27//Add clipping by circle to the current graphics state
28document.Clip(circlePath);
29
30//Set paint in the current graphics state
31document.SetPaint(new SolidBrush(Color.Blue));
32
33//Fill the rectangle in the current graphics state (with clipping)
34document.Fill(rectanglePath);
35
36//Restore graphics state to the previus (upper) level
37document.WriteGraphicsRestore();
38
39//Displace upper level graphics state on 100 points to the right and 100 points to the bottom.
40document.Translate(100, 100);
41
42Pen pen = new Pen(new SolidBrush(Color.Blue), 2);
43pen.DashStyle = DashStyle.Dash;
44
45document.SetStroke(pen);
46
47//Draw the rectangle in the current graphics state (has no clipping) above clipped rectangle
48document.Draw(rectanglePath);
49
50//Close current page
51document.ClosePage();
52
53//Save the document
54document.Save();Para Linux, MacOS e outros sistemas operativos não Windows, oferecemos a utilização do nosso pacote NuGet Aspose.Page.Drawing. Utiliza o backend Aspose.Drawing em vez da biblioteca de sistema System.Drawing.
Assim, importe o namespace Aspose.Page.Drawing em vez do namespace System.Drawing. No trecho de código acima, será utilizado Aspose.Page.Drawing.Rectangle em vez de System.Drawing.Rectangle, Aspose.Page.Drawing.Drawing2D.GraphicsPath em vez de System.Drawing.Drawing2D.GraphicsPath e assim por diante. Os nossos exemplos de código no GitHub contêm todas as substituições necessárias.
Veja como trabalhar com recortes em documentos PS em Java.
O resultado da execução deste código é apresentado como
No próximo exemplo, obtemos um tipo de letra que recorta um retângulo preenchido a azul com o contorno do texto.
Para adicionar um recorte por texto ao novo PsDocument com a biblioteca Aspose.Page para .NET, neste exemplo, seguimos os seguintes passos:
- Criar um fluxo de saída para o ficheiro PS resultante.
- Crie um objeto PsSaveOptions com as opções padrão.
- Crie um PsDocument de 1 página com um fluxo de saída já criado e opções de guardar.
- Crie um novo estado gráfico.
- Crie uma fonte.
- Defina um recorte com texto e a fonte.
- Defina uma pintura para o estado gráfico atual do PsDocument.
- Preencha o percurso do retângulo com a pintura atual.
- Saia do estado gráfico atual para o nível superior.
- Translação para o local do retângulo preenchido.
- Trace com uma linha tracejada os limites do mesmo retângulo acima do preenchido para mostrar os limites do retângulo preenchido recortado.
- Feche a página.
- Guarde o documento.
 1// Demonstrates clipping by text in PS document.
 2
 3string outputFileName = "ApplyClipByText_outPS.ps";
 4
 5//Create save options with A4 size
 6PsSaveOptions options = new PsSaveOptions();
 7
 8// Create new 1-paged PS Document
 9PsDocument document = new PsDocument(OutputDir + outputFileName, options, false);
10
11//Create graphics path from the rectangle
12GraphicsPath rectanglePath = new GraphicsPath();
13rectanglePath.AddRectangle(new RectangleF(0, 0, 300, 200));
14
15//Save graphics state in order to return back to this state after transformation
16document.WriteGraphicsSave();
17
18//Displace current graphics state on 100 points to the right and 100 points to the bottom.
19document.Translate(100, 100);
20
21Pen pen = new Pen(new SolidBrush(Color.Blue), 2);
22pen.DashStyle = DashStyle.Dash;
23int fontSize = 120;
24System.Drawing.Font font = new System.Drawing.Font("Arial", fontSize, FontStyle.Bold);
25
26//Clip rectangle by text's outline
27document.ClipText("ABC", font, 20, fontSize + 10);
28
29//Set paint in the current graphics state
30document.SetPaint(new SolidBrush(Color.Blue));
31
32document.Fill(rectanglePath);
33
34document.WriteGraphicsRestore();
35
36document.Translate(100, 100);
37
38document.SetStroke(pen);
39//Draw the rectangle in the current graphics state (has no clipping) above clipped rectangle
40document.Draw(rectanglePath);
41
42//Close current page
43document.ClosePage();
44
45//Save the document
46document.Save();Para Linux, MacOS e outros sistemas operativos não Windows, oferecemos a utilização do nosso pacote NuGet Aspose.Page.Drawing. Utiliza o backend Aspose.Drawing em vez da biblioteca de sistema System.Drawing.
Assim, importe o namespace Aspose.Page.Drawing em vez do System.Drawing. No excerto de código acima, será utilizado Aspose.Page.Drawing.Rectangle em vez de System.Drawing.Rectangle, Aspose.Page.Drawing.Drawing2D.GraphicsPath será utilizado em vez de System.Drawing.Drawing2D.GraphicsPath e assim por diante. Os nossos exemplos de código no GitHub contêm todas as substituições necessárias.
Veja como trabalhar com clips em documentos PS em Java.
O resultado da execução deste código é apresentado como

Pode descarregar exemplos e ficheiros de dados do GitHub.