Working with Images in XPS file | Python
Here you will find the code that explains to you how to work with images in XPS files using Python.
Add Images inside XPS Documents
Aspose.Page for Python via .NET provides the XpsPath Class, allowing you to incorporate images into XPS documents. To achieve this, you must create a Matrix and an ImageBrush, and then save the XpsDocument. The following code snippet demonstrates the complete functionality for adding an image to an XPS document:
 1from aspose.page.xps import *
 2import aspose.pydrawing
 3from util import Util
 4###############################################
 5###### Class and Method declaration here ######
 6###############################################
 7
 8# The path to the documents directory.
 9data_dir = Util.get_data_dir_working_with_images()
10# Create a new XPS Document
11doc = XpsDocument()
12# Add an Image
13path = doc.add_path(doc.create_path_geometry("M 30,20 l 258.24,0 0,56.64 -258.24,0 Z"))
14# Creating a matrix is optional, it can be used for the proper positioning
15path.render_transform = doc.create_matrix(0.7, 0, 0, 0.7, 0, 20)
16# Create an Image Brush
17path.fill = doc.create_image_brush(data_dir + "QL_logo_color.tif", aspose.pydrawing.RectangleF(0, 0, 258.24, 56.64),
18aspose.pydrawing.RectangleF(50, 20, 193.68, 42.48))
19# Save the resultant XPS document
20doc.save(data_dir + "AddImage_outXPS.xps")The result of running this code is next

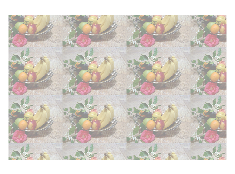
Add Tiled Images
Aspose.Page for Python via .NET provides the XpsPath Class, enabling you to incorporate images into XPS documents. To achieve this, you must create a Matrix and an ImageBrush, then set the tile mode to set_tile_mode(XpsTileMode.Tile), and finally save the XpsDocument. The following code snippet demonstrates the complete functionality for adding a tiled image to an XPS document:
 1from aspose.page.xps import *
 2from aspose.page.xps.xpsmodel import *
 3import aspose.pydrawing
 4from util import Util
 5###############################################
 6###### Class and Method declaration here ######
 7###############################################
 8
 9# The path to the documents directory.
10data_dir = Util.get_data_dir_working_with_images()
11# Create a new XPS Document
12doc = XpsDocument()
13# Tile an image
14# ImageBrush filled rectangle in the right top bellow
15path = doc.add_path(doc.create_path_geometry("M 10,160 L 228,160 228,305 10,305"))
16imageBrush: XpsImageBrush = doc.create_image_brush(data_dir + "R08LN_NN.jpg", aspose.pydrawing.RectangleF(0, 0, 128, 96),
17    aspose.pydrawing.RectangleF(0, 0, 64, 48))
18path.fill = imageBrush
19imageBrush.tile_mode = XpsTileMode.TILE
20path.fill.opacity = 0.5
21# Save the resultant XPS document
22doc.save(data_dir + "AddTiledImage_outXPS.xps")The result of running this code is next
You can download examples and data files from GitHub.