Работа с прозрачностью | API-решение для C++
Установить маску непрозрачности
Установить объект маски непрозрачности
В документе XPS можно установить маску непрозрачности. Aspose.Page для C++ можно использовать для создания/чтения документа XPS и установки маски непрозрачности для таких документов. API использует изображение в качестве маски непрозрачности, где альфа-компонент каждого пикселя применяется к базовой заливке. В результирующем документе XPS будут показаны наклонные градиентные полосы, присутствующие в исходном файле изображения. Чтобы установить маску непрозрачности в документе XPS, можно использовать следующие шаги.
- Создайте новый объект класса XpsDocument.
- Добавьте холст к объекту документа, используя класс XpsCanvas.
- Создайте класс объекта XpsPath с необходимыми параметрами.
- Установите маску непрозрачности на пути.
- Создайте объект класса XpsImageBrush.
- Сохраните документ на диск, используя метод Save.
 1For complete examples and data files, please go to https://github.com/aspose-page/Aspose.Page-for-C
 2// Create new XPS Document
 3System::SharedPtr<XpsDocument> doc = System::MakeObject<XpsDocument>();
 4//Add Canvas to XpsDocument instance
 5System::SharedPtr<XpsCanvas> canvas = doc->AddCanvas();
 6// Rectangle with opacity masked by ImageBrush
 7System::SharedPtr<XpsPath> path = canvas->AddPath(doc->CreatePathGeometry(u"M 10,180 L 228,180 228,285 10,285"));
 8path->set_Fill(doc->CreateSolidColorBrush(doc->CreateColor(1.0f, 0.0f, 0.0f)));
 9path->set_OpacityMask(doc->CreateImageBrush(dataDir() + u"R08SY_NN.tif", System::Drawing::RectangleF(0.f, 0.f, 128.f, 192.f), System::Drawing::RectangleF(0.f, 0.f, 64.f, 96.f)));
10(System::DynamicCast<Aspose::Page::Xps::XpsModel::XpsImageBrush>(path->get_OpacityMask()))->set_TileMode(Aspose::Page::Xps::XpsModel::XpsTileMode::Tile);
11// Save resultant XPS document
12doc->Save(outDir() + u"OpacityMask_out.xps");Добавить прозрачный объект в документ XPS
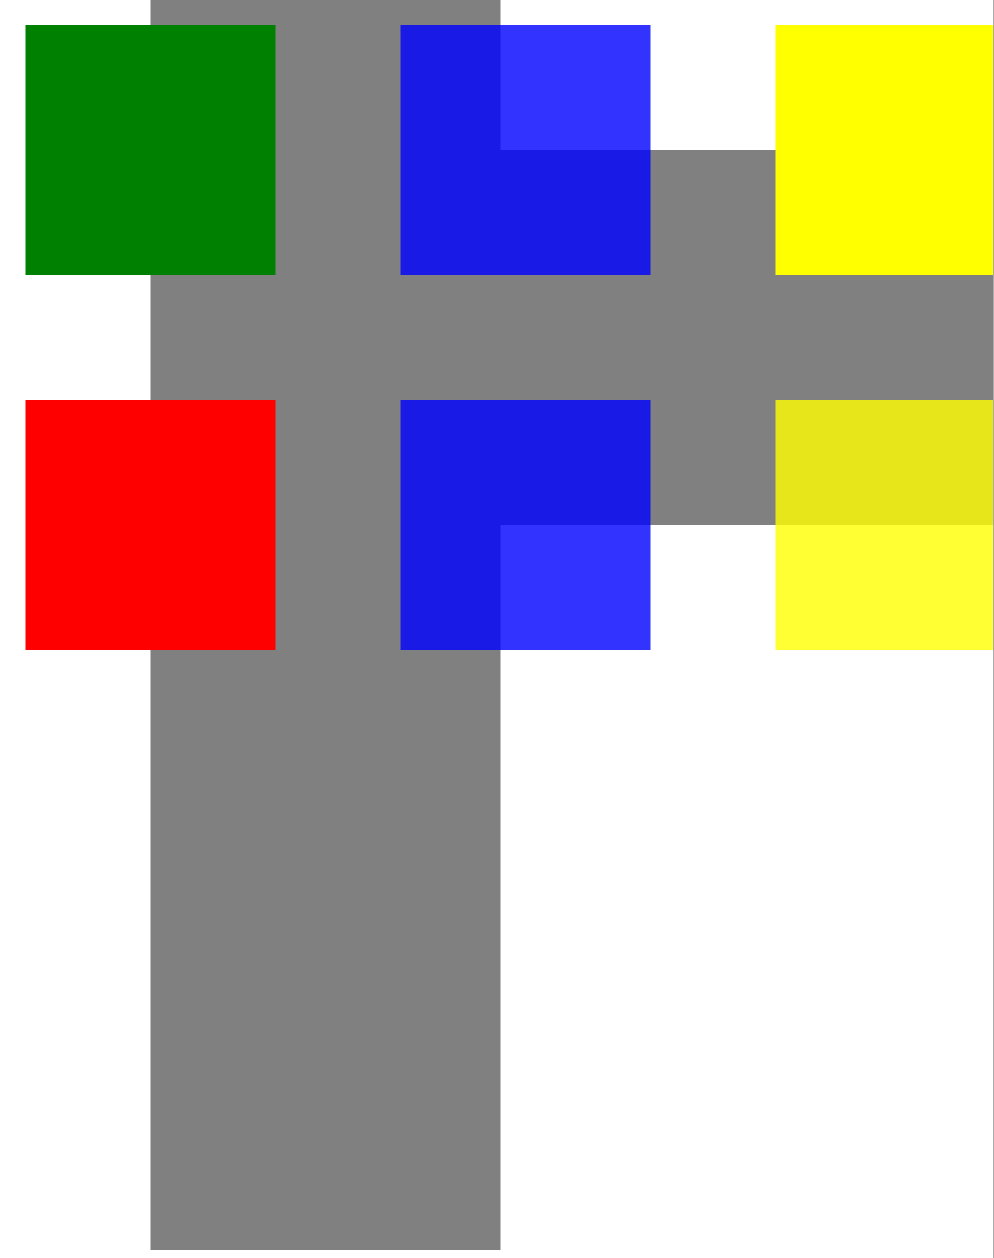
Добавить прозрачный объект
Aspose.Page для C++ позволяет добавлять прозрачные объекты в документ XPS в ваших приложениях. Класс XpsPath используется для достижения этой цели с помощью простого кода. Чтобы добавить прозрачный объект в документ XPS, можно использовать следующие шаги.
- Создайте новый объект, используя класс XpsDocument.
- Создайте объект XpsPath с необходимыми параметрами.
- Установите информацию о преобразовании рендеринга для пути.
- Используйте метод set_Opacity, чтобы указать значение непрозрачности.
- Сохраните документ XPS, используя метод Save.
 1For complete examples and data files, please go to https://github.com/aspose-page/Aspose.Page-for-C
 2// Create new XPS Document
 3auto doc = System::MakeObject<XpsDocument>();
 4
 5// Just to demonstrate transparency
 6doc->AddPath(doc->CreatePathGeometry(u"M120,0 H400 v1000 H120"))->set_Fill(doc->CreateSolidColorBrush(System::Drawing::Color::get_Gray()));
 7doc->AddPath(doc->CreatePathGeometry(u"M300,120 h600 V420 h-600"))->set_Fill(doc->CreateSolidColorBrush(System::Drawing::Color::get_Gray()));
 8
 9// Create path with closed rectangle geometry
10System::SharedPtr<XpsPath> path1 = doc->CreatePath(doc->CreatePathGeometry(u"M20,20 h200 v200 h-200 z"));
11// Set blue solid brush to fill path1
12path1->set_Fill(doc->CreateSolidColorBrush(System::Drawing::Color::get_Blue()));
13// Add it to the current page
14System::SharedPtr<XpsPath> path2 = doc->Add(path1);
15
16// path1 and path2 are the same as soon as path1 hasn't been placed inside any other element
17// (which means that path1 had no parent element).
18// Because of that rectangle's color on the page effectively turns to green
19path2->set_Fill(doc->CreateSolidColorBrush(System::Drawing::Color::get_Green()));
20
21// Now add path2 once again. Now path2 has parent. So path3 won't be the same as path2.
22// Thus a new rectangle is painted on the page ...
23System::SharedPtr<XpsPath> path3 = doc->Add(path2);
24// ... and we shift it 300 units lower ...
25path3->set_RenderTransform(doc->CreateMatrix(1.0f, 0.0f, 0.0f, 1.0f, 0.0f, 300.0f));
26// ... and set red solid brush to fill it
27path3->set_Fill(doc->CreateSolidColorBrush(System::Drawing::Color::get_Red()));
28
29// Create new path4 with path2's geometry ...
30System::SharedPtr<XpsPath> path4 = doc->AddPath(path2->get_Data());
31// ... shift it 300 units to the right ...
32path4->set_RenderTransform(doc->CreateMatrix(1.0f, 0.0f, 0.0f, 1.0f, 300.0f, 0.0f));
33// ... and set blue solid fill
34path4->set_Fill(doc->CreateSolidColorBrush(System::Drawing::Color::get_Blue()));
35
36// Add path4 once again.
37System::SharedPtr<XpsPath> path5 = doc->Add(path4);
38// path4 and path5 are not the same again ...
39// (move path5 300 units lower)
40path5->set_RenderTransform(path5->get_RenderTransform()->Clone());
41// to disconnect RenderTransform value from path4 (see next comment about Fill property)
42path5->get_RenderTransform()->Translate(0.0f, 300.0f);
43// ... but if we set the opacity of Fill property, it will take effect on both path5 and path4
44// because brush is a complex property value which remains the same for path5 and path4
45path5->get_Fill()->set_Opacity(0.8f);
46
47// Create new path6 with path2's geometry ...
48System::SharedPtr<XpsPath> path6 = doc->AddPath(path2->get_Data());
49// ... shift it 600 units to the right ...
50path6->set_RenderTransform(doc->CreateMatrix(1.0f, 0.0f, 0.0f, 1.0f, 600.0f, 0.0f));
51// ... and set yellow solid fill
52path6->set_Fill(doc->CreateSolidColorBrush(System::Drawing::Color::get_Yellow()));
53
54// Now add path6's clone ...
55System::SharedPtr<XpsPath> path7 = doc->Add(path6->Clone());
56// (move path5 300 units lower)
57path7->set_RenderTransform(path7->get_RenderTransform()->Clone());
58path7->get_RenderTransform()->Translate(0.0f, 300.0f);
59// ... and set opacity for path7
60path7->get_Fill()->set_Opacity(0.8f);
61// Now opacity effects independantly as soon as property values are cloned along with the element
62
63// The following code block is equivalent to the previous one.
64// Add path6 itself. path6 and path7 are not the same. Although their Fill property values are the same
65//XpsPath path7 = doc.Add(path6);
66//path7.RenderTransform = path7.RenderTransform.Clone();
67//path7.RenderTransform.Translate(0, 300);
68// To "disconnect" path7's Fill property from path6's Fill property reassign it to its clone (or path6's Fill clone)
69//path7.Fill = ((XpsSolidColorBrush)path7.Fill).Clone();
70//path7.Fill.Opacity = 0.8f;
71
72// Save resultant XPS document
73doc->Save(outDir() + u"WorkingWithTransparency_out.xps");Результат такой