使用 XPS 图形实用程序 | Java
如何在 XPS 中轻松创建基本形状
XPS 规范定义了可用于组成任何复杂形状的图形基元元素。Aspose.Page for Java 提供了封装这些元素的类。然而,即使是创建相对简单的形状,例如扇形或圆弧,或者内接或外接于圆的正 N 边形,也可能有些繁琐。即使绘制圆形或椭圆形也并非易事。因此,Aspose.Page 还提供了一组实用方法,以帮助节省执行这些任务的时间。
在下面的示例中,我们使用了所有可用的形状实用方法。需要注意的是,每个实用方法都会返回一个 XpsPathGeometry 对象,然后可以使用该对象创建 XPS 路径。对于这些路径,您可以指定外观属性 - 画笔、描边图案、不透明度等。
 1// Using shape utilities for adding shapes to XPS document.
 2
 3String outputFileName = "UseShapeUtilsXPS_out.xps";
 4
 5// Create new XPS Document
 6XpsDocument doc = new XpsDocument();
 7try {
 8    // Set first page's size.
 9    doc.getPage().setWidth(650f);
10    doc.getPage().setHeight(240f);
11
12    // Draw a circle with center (120, 120) and radius 100.
13    XpsPath path = doc.createPath(doc.getUtils().createCircle(new java.awt.geom.Point2D.Float(120f, 120f), 100f));
14    path.setFill(doc.createSolidColorBrush(doc.createColor(0, 255, 0)));
15    doc.add(path);
16
17    // Inscribe a regular pentagon in the circle.
18    path = doc.createPath(doc.getUtils().createRegularInscribedNGon(5, new java.awt.geom.Point2D.Float(120f, 120f), 100f));
19    path.setFill(doc.createSolidColorBrush(doc.createColor(255, 0, 0)));
20    doc.add(path);
21
22    // Circumscribe a regular hexagon around the circle.
23    path = doc.createPath(doc.getUtils().createRegularCircumscribedNGon(6, new java.awt.geom.Point2D.Float(120f, 120f), 100f));
24    path.setStroke(doc.createSolidColorBrush(doc.createColor(255, 0, 255)));
25    path.setStrokeThickness(3f);
26    doc.add(path);
27
28    // Draw a sector of the circle centered at (340, 120), starting at -45 degrees and ending at +45 degrees.
29    path = doc.createPath(doc.getUtils().createPieSlice(new java.awt.geom.Point2D.Float(340f, 120f), 100f, -45f, 45f));
30    path.setStroke(doc.createSolidColorBrush(doc.createColor(255, 0, 0)));
31    path.setStrokeThickness(5f);
32    doc.add(path);
33
34    // Draw a segment of the circle centered at (340, 120), starting at -45 degrees and ending at +45 degrees.
35    path = doc.createPath(doc.getUtils().createCircularSegment(new java.awt.geom.Point2D.Float(340f, 120f), 100f, -45f, 45f));
36    path.setFill(doc.createSolidColorBrush(doc.createColor(0, 0, 0)));
37    doc.add(path);
38
39    // Draw a rectangle with the top left vertex (530, 20), width 100 units and height 200 units.
40    path = doc.createPath(doc.getUtils().createRectangle(new Rectangle2D.Float(530f, 20f, 100f, 200f)));
41    path.setStroke(doc.createSolidColorBrush(doc.createColor(255, 0, 0)));
42    doc.add(path);
43
44    // Draw an ellipse with center (580, 120) and radii 50 and 100.
45    path = doc.createPath(doc.getUtils().createEllipse(new java.awt.geom.Point2D.Float(580f, 120f), 50f, 100f));
46    path.setFill(doc.createSolidColorBrush(doc.createColor(255, 255, 0)));
47    doc.add(path);
48
49    doc.save(getOutputDir() + outputFileName);
50} finally {
51    // nothing to dispose explicitly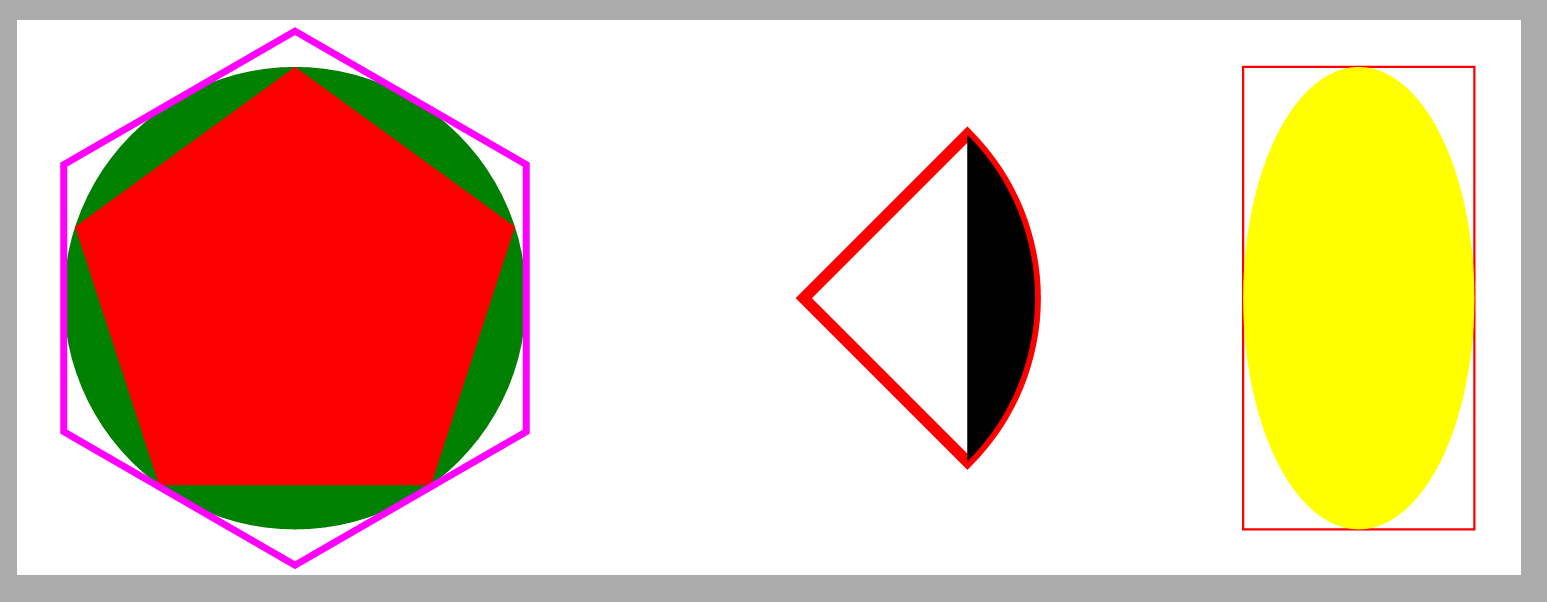
52}我们首先创建一个新的 XPS 文档,然后调整第一页的大小。我们添加到页面上的第一个形状是一个由其圆心和半径指定的实心绿色圆圈。接下来,我们绘制一个内接于该圆圈的未填充红色正五边形。然后是一个外接于该圆圈的正六边形,用洋红色描边。
在右侧,我们在 -45 度到 +45 度之间绘制一个红色扇形(或“饼形切片”),然后在扇形上方绘制一个具有相同参数的黑色圆段。
绘图的最后一部分包括一个红色矩形(由其左上角和尺寸指定)和一个内接于矩形的黄色椭圆(由其圆心和半径指定)。在本例中,我们“手动”处理了刻字。
以下是已保存 XPS 文件中的预期输出:
如何轻松将图像放置在 XPS 页面上
使用 XPS 规范定义的图元时,将图像放置在页面上涉及两个步骤:
- 添加一个矩形路径(图像框)以填充图像;
- 将图像画笔应用于图像框,您需要指定视图框和视口。通常,您需要知道图像的分辨率和像素大小才能准确提供这些参数。
幸运的是,Aspose.Page API for Java 中的 XPS 图形实用程序中有一个便捷的方法可以为您处理大部分工作。它还提供常见的适配模式。让我们看以下示例:
 1// Using image utilities for adding images to XPS document.
 2
 3String outputFileName = "UseImageUtilsXPS_out.xps";
 4
 5// Create new XPS Document
 6XpsDocument doc = new XpsDocument();
 7try {
 8    // Set first page's size.
 9    doc.getPage().setWidth(540f);
10    doc.getPage().setHeight(220f);
11
12    // Draw the image box.
13    java.awt.geom.Rectangle2D.Float imageBox = new java.awt.geom.Rectangle2D.Float(10f, 10f, 200f, 200f);
14    XpsPath path = doc.addPath(doc.getUtils().createRectangle(imageBox));
15    path.setStroke(doc.createSolidColorBrush(doc.createColor(0, 0, 0)));
16    // Add an image to fit width.
17    path = doc.getUtils().createImage(getDataDir() + "R08LN_NN.jpg", imageBox, com.aspose.xps.ImageMode.FitToWidth);
18    // Prevent tiling.
19    ((XpsImageBrush)path.getFill()).setTileMode(com.aspose.xps.XpsTileMode.None);
20    doc.add(path);
21
22    // Add other images using utils
23    doc.add(doc.getUtils().createImage(getDataDir() + "R08LN_NN.jpg", new Rectangle2D.Float(220f, 10f, 200f, 100f), com.aspose.xps.ImageMode.FitToHeight));
24    doc.add(doc.getUtils().createImage(getDataDir() + "R08LN_NN.jpg", new Rectangle2D.Float(430f, 10f, 100f, 200f), com.aspose.xps.ImageMode.FitToBox));
25
26    // Save resultant XPS document
27    doc.save(getOutputDir() + outputFileName);
28} finally {
29    // nothing to dispose explicitly here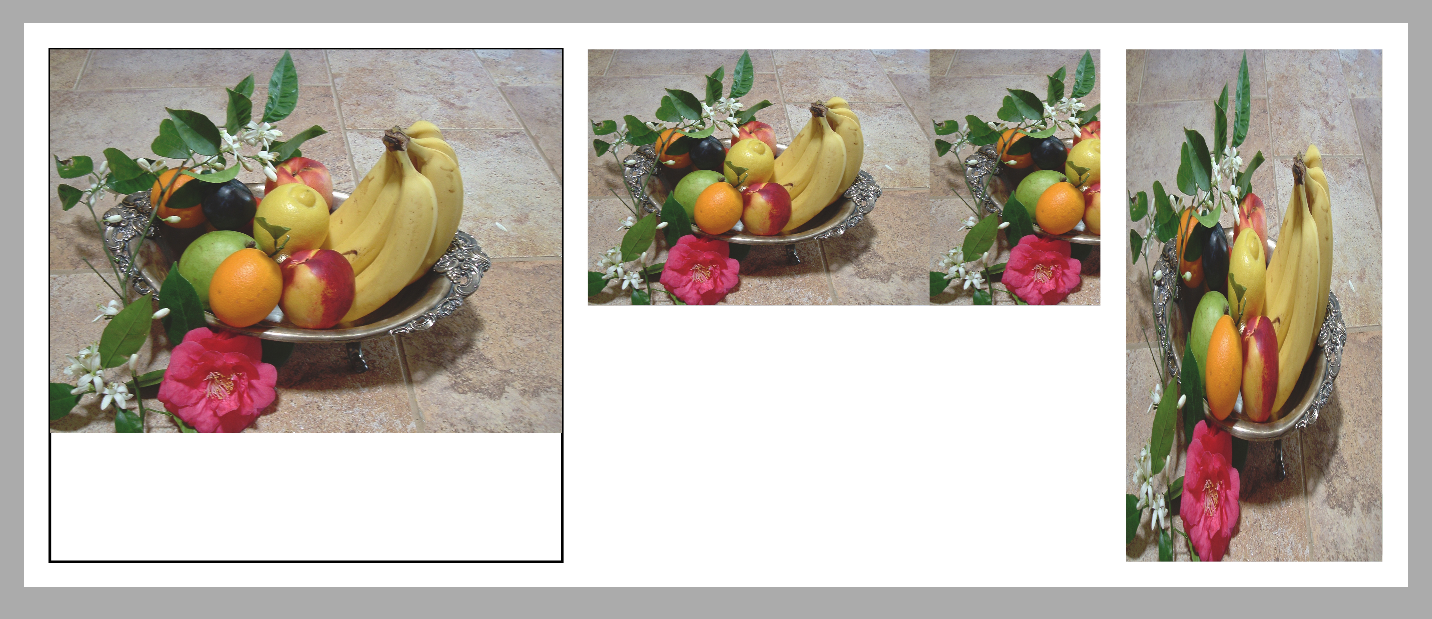
30}再次,我们新建一个 XPS 文档并调整第一页的大小。值得一提的是,默认情况下,用作画笔的图像会以与 XpsTileMode.Tile 模式相同的方式平铺在图像框上。不过,在示例的第一部分,我们将展示如何避免这种平铺。
因此,我们首先希望图像显示在坐标 (10, 10) 处,并适应矩形框的宽度(宽 200 个单位,高 200 个单位)。为了更好地呈现结果,我们首先绘制矩形框本身。然后,我们继续创建图像(本质上是一条填充路径)。最后,获取路径的填充并将其转换为
XpsImageBrush 后,我们将 TileMode 属性设置为 XpsTileMode.None。
在右侧,我们将同一张图片放置在与图片框高度相符的位置。注意平铺效果。
最后,我们再次将同一张图片放置在右侧,并调整其高度和宽度以适应图片框,这会导致图像略微失真。
保存的 XPS 文件中的效果如下: