# Aspose.Slides for Python via .NET > Complete English documentation. Each page retains its canonical source URL. # Aspose.Slides for Python via .NET > Start here: install Aspose.Slides for Python via .NET, create a first presentation, and find the guides for common tasks, the API reference and support. Source: https://docs.aspose.com/slides/python-net/ Updated: 2026-10-27 Aspose.Slides for Python via .NET Aspose.Slides for Python via .NET is a Python library for creating, reading, editing and converting PowerPoint and OpenDocument presentations, without Microsoft PowerPoint or Microsoft Office. It loads and saves PPT, PPTX, PPS, POT and ODP, including macro-enabled and template variants, and exports to PDF, XPS, HTML, SVG, TIFF, Markdown and images.

Explore features and support — browse the library features and open their guides.

------

Get Started


GETTING STARTED

EVALUATE

Build with Slides


COMMON TASKS

SLIDES WORKFLOWS

EXAMPLES

Reference & Support


REFERENCE

SUPPORT

------ ## **Your first presentation** Install the package from PyPI: ```bash pip install aspose.slides ``` The package includes the .NET runtime it uses, so you do not need to install .NET. On Linux, also install the libgdiplus and ICU libraries, and with the system Python of Debian or Ubuntu, run the command in a virtual environment. macOS has further prerequisites, and we have not verified the installation there. See [Installation](https://docs.aspose.com/slides/python-net/installation/) for the commands, the macOS prerequisites, and the supported Python versions. Save this code as *hello.py*: ```py import aspose.slides as slides # Instantiate the Presentation class that represents a presentation file. with slides.Presentation() as presentation: # Get the first slide. slide = presentation.slides[0] # Add an auto-shape of type CLOUD. auto_shape = slide.shapes.add_auto_shape(slides.ShapeType.CLOUD, 20, 20, 200, 80) auto_shape.text_frame.text = "Hello, Aspose!" # Save the presentation as a PPTX file. presentation.save("new_presentation.pptx", slides.export.SaveFormat.PPTX) ``` Run it with `python hello.py`. The script saves *new_presentation.pptx* in the current folder, with one slide holding a cloud shape that reads "Hello, Aspose!". Without a license, the saved file carries an evaluation watermark — see [Licensing](https://docs.aspose.com/slides/python-net/licensing/). For more ways to create and fill a presentation, see [Create Presentations](https://docs.aspose.com/slides/python-net/create-presentation/). ## Related articles - [API Reference](https://docs.aspose.com/slides/python-net/api-reference/) - [Product Overview](https://docs.aspose.com/slides/python-net/product-overview/) - [Features Overview](https://docs.aspose.com/slides/python-net/features-overview/) # Customize 3D Charts in Presentations with Python > Create 3D charts in PowerPoint presentations with Aspose.Slides for Python via .NET. Adjust rotation, height proportions, chart depth, and spacing between series with Python examples. Source: https://docs.aspose.com/slides/python-net/3d-chart/ Updated: 2026-11-09 ## **Overview** Aspose.Slides for Python via .NET lets you customize the view of a 3D chart through the [Chart.rotation_3d](https://reference.aspose.com/slides/python-net/aspose.slides.charts/chart/rotation_3d/) property. This article demonstrates how to adjust rotation, height proportions, depth, right-angle axes, and spacing between series, then save the presentation in PPTX format. ## **Set the Rotation and Depth of a 3D Chart** The example below creates a [Presentation](https://reference.aspose.com/slides/python-net/aspose.slides/presentation/) and uses [ShapeCollection.add_chart](https://reference.aspose.com/slides/python-net/aspose.slides/shapecollection/add_chart/) to add a stacked 3D column chart to its first slide. It replaces the default series and categories with two series containing three values each. Worksheet index `0` identifies the chart's first data worksheet; row `0` holds series names, and column `0` holds category labels. The [rotation_x](https://reference.aspose.com/slides/python-net/aspose.slides.charts/rotation3d/rotation_x/) and [rotation_y](https://reference.aspose.com/slides/python-net/aspose.slides.charts/rotation3d/rotation_y/) properties set the chart's rotation to 40 and 270 degrees, respectively. [depth_percents](https://reference.aspose.com/slides/python-net/aspose.slides.charts/rotation3d/depth_percents/) sets its depth to 150% of its width, while [right_angle_axes](https://reference.aspose.com/slides/python-net/aspose.slides.charts/rotation3d/right_angle_axes/) enables right-angle axes instead of perspective. The resulting presentation contains the populated chart with these 3D view settings. ```python import aspose.slides as slides import aspose.slides.charts as charts with slides.Presentation() as presentation: slide = presentation.slides[0] chart = slide.shapes.add_chart(charts.ChartType.STACKED_COLUMN_3D, 0, 0, 500, 500) chart.chart_data.series.clear() chart.chart_data.categories.clear() workbook = chart.chart_data.chart_data_workbook worksheet_index = 0 values = [[20, 50, 30], [30, 10, 60]] for category_index in range(3): category_cell = workbook.get_cell(worksheet_index, category_index + 1, 0, f"Category {category_index + 1}") chart.chart_data.categories.add(category_cell) for series_index in range(2): series_cell = workbook.get_cell(worksheet_index, 0, series_index + 1, f"Series {series_index + 1}") series = chart.chart_data.series.add(series_cell, chart.type) for category_index in range(3): value_cell = workbook.get_cell(worksheet_index, category_index + 1, series_index + 1, values[series_index][category_index]) series.data_points.add_data_point_for_bar_series(value_cell) chart.rotation_3d.right_angle_axes = True chart.rotation_3d.rotation_x = 40 chart.rotation_3d.rotation_y = 270 chart.rotation_3d.depth_percents = 150 presentation.save("Rotation3D_out.pptx", slides.export.SaveFormat.PPTX) ``` ## **Adjust the Height Proportions of a 3D Chart** Use [Rotation3D.height_percents](https://reference.aspose.com/slides/python-net/aspose.slides.charts/rotation3d/height_percents/) to set the height of a 3D chart as a percentage of its width. This changes the proportions of the 3D scene without resizing the chart object on the slide. The following example creates a [COLUMN_3D](https://reference.aspose.com/slides/python-net/aspose.slides.charts/charttype/) chart with the default data: three series and four categories. It saves three presentations with height proportions of 50%, 100%, and 200%. The chart's position, width, and height remain fixed. The data, rotation, depth, series spacing, and formatting are identical in all three files; only the height percentage changes. ```python import aspose.slides as slides import aspose.slides.charts as charts with slides.Presentation() as presentation: slide = presentation.slides[0] chart = slide.shapes.add_chart(charts.ChartType.COLUMN_3D, 40, 30, 620, 460) chart.rotation_3d.rotation_x = 20 chart.rotation_3d.rotation_y = 30 chart.rotation_3d.right_angle_axes = True chart.rotation_3d.depth_percents = 100 chart.chart_data.series[0].parent_series_group.gap_depth = 150 for height_percent in (50, 100, 200): chart.rotation_3d.height_percents = height_percent presentation.save(f"chart_height_{height_percent}.pptx", slides.export.SaveFormat.PPTX) ``` The following images were exported from the generated presentations using Microsoft PowerPoint. A smaller percentage produces a flatter scene, while a larger percentage produces a taller scene within the same chart object. PowerPoint may also adjust axis tick intervals and label placement to fit the scene. | Height: 50% | Height: 100% | Height: 200% | | --- | --- | --- | | ![3D column chart with height set to 50 percent of its width](https://docs.aspose.com/slides/python-net/3d-chart/height_percent_50.png) | ![3D column chart with height set to 100 percent of its width](https://docs.aspose.com/slides/python-net/3d-chart/height_percent_100.png) | ![3D column chart with height set to 200 percent of its width](https://docs.aspose.com/slides/python-net/3d-chart/height_percent_200.png) | These properties control different aspects of the chart: | Property | Effect | | --- | --- | | [Rotation3D.height_percents](https://reference.aspose.com/slides/python-net/aspose.slides.charts/rotation3d/height_percents/) | Height of the 3D scene as a percentage of its width. | | [Chart.height](https://reference.aspose.com/slides/python-net/aspose.slides/shape/height/) | Height of the chart object on the slide, in points. | | [Rotation3D.depth_percents](https://reference.aspose.com/slides/python-net/aspose.slides.charts/rotation3d/depth_percents/) | Depth of the 3D scene as a percentage of its width. | | [ChartSeriesGroup.gap_depth](https://reference.aspose.com/slides/python-net/aspose.slides.charts/chartseriesgroup/gap_depth/) | Spacing between series along the depth axis, as a percentage of the marker width. | The height setting affects 3D column and bar charts, including cylinder, cone, and pyramid variants, as well as 3D line, area, pie, and surface charts. The comparison above uses the verified `COLUMN_3D` type. The setting does not change the appearance of a 2D `CLUSTERED_COLUMN` chart or a `BUBBLE_WITH_3D` chart; these names are members of the [ChartType](https://reference.aspose.com/slides/python-net/aspose.slides.charts/charttype/) enumeration. For other chart appearance settings, see [Chart Formatting](https://docs.aspose.com/slides/python-net/chart-formatting/). ## **Adjust the Gap Between Series** Use [ChartSeriesGroup.gap_depth](https://reference.aspose.com/slides/python-net/aspose.slides.charts/chartseriesgroup/gap_depth/) to control the distance between data series along the depth axis of a 3D chart, expressed as a percentage of the marker width. Use values from **0 to 500**, inclusive: `0` removes the gap, while larger values increase the spacing. With a fixed chart depth, increasing the gap makes the markers thinner along the depth axis. Access the group through [ChartSeries.parent_series_group](https://reference.aspose.com/slides/python-net/aspose.slides.charts/chartseries/parent_series_group/). The setting applies to every series in that group, not just the series used to access it. [ChartSeries.gap_depth](https://reference.aspose.com/slides/python-net/aspose.slides.charts/chartseries/gap_depth/) is read-only and reflects the parent group's setting. This setting affects 3D column and bar charts, including their cylinder, cone, and pyramid variants, as well as 3D line and area charts. The appearance depends on whether the series are arranged in depth, clustered, or stacked. For a clear comparison of gaps between separate series, use `ChartType.COLUMN_3D` from the [ChartType](https://reference.aspose.com/slides/python-net/aspose.slides.charts/charttype/) enumeration. These properties control different aspects of the chart: | Property | Effect | | --- | --- | | [ChartSeriesGroup.gap_depth](https://reference.aspose.com/slides/python-net/aspose.slides.charts/chartseriesgroup/gap_depth/) | Spacing between series along the depth axis, as a percentage of the marker width. | | [ChartSeriesGroup.gap_width](https://reference.aspose.com/slides/python-net/aspose.slides.charts/chartseriesgroup/gap_width/) | Spacing between adjacent bar or column clusters, as a percentage of the bar or column width. | | [Rotation3D.depth_percents](https://reference.aspose.com/slides/python-net/aspose.slides.charts/rotation3d/depth_percents/) | Overall chart depth, as a percentage of the chart width. | The following self-contained example uses the default chart data, which contains three series and four categories. It saves two presentations with identical data, rotation, gap width, and chart depth; only the gap depth changes. ```python import aspose.slides as slides import aspose.slides.charts as charts with slides.Presentation() as presentation: slide = presentation.slides[0] chart = slide.shapes.add_chart(charts.ChartType.COLUMN_3D, 40, 30, 620, 230) chart.rotation_3d.rotation_x = 20 chart.rotation_3d.rotation_y = 30 chart.rotation_3d.depth_percents = 100 series = chart.chart_data.series[0] group = series.parent_series_group group.gap_width = 150 for gap_depth in (0, 500): group.gap_depth = gap_depth file_name = f"series_gap_depth_{gap_depth}.pptx" presentation.save(file_name, slides.export.SaveFormat.PPTX) ``` The following images were exported from the generated presentations using Microsoft PowerPoint. | Gap depth: 0% | Gap depth: 500% | | --- | --- | | ![3D column chart with no gap between series along the depth axis](https://docs.aspose.com/slides/python-net/3d-chart/gap_depth_0.png) | ![3D column chart with a 500 percent gap between series along the depth axis](https://docs.aspose.com/slides/python-net/3d-chart/gap_depth_500.png) | ## **FAQ** **Which chart types support 3D mode in Aspose.Slides?** Aspose.Slides supports 3D variants of column charts, including Column 3D, Clustered Column 3D, Stacked Column 3D, and 100% Stacked Column 3D, along with related 3D types exposed through the [ChartType](https://reference.aspose.com/slides/python-net/aspose.slides.charts/charttype/) enumeration. For an exact, up-to-date list, check the [ChartType](https://reference.aspose.com/slides/python-net/aspose.slides.charts/charttype/) members in the API reference of your installed version. **Can I get a raster image of a 3D chart for a report or the web?** Yes. You can export a chart to an image with [Shape.get_image](https://reference.aspose.com/slides/python-net/aspose.slides/shape/get_image/) or [render the entire slide](https://docs.aspose.com/slides/python-net/convert-powerpoint-to-png/) to formats like PNG or JPEG. This is useful when you need a raster preview or want to embed the chart into documents, dashboards, or web pages without requiring PowerPoint. **How performant is building and rendering large 3D charts?** Performance depends on data volume and visual complexity. For best results, keep 3D effects minimal, avoid heavy textures on walls and plot areas, limit the number of data points per series when possible, and render to an appropriately sized output (resolution and dimensions) to match the target display or print needs. # Create 3D Effects in Presentations Using Python > Apply and render 3D effects for PowerPoint shapes and text in Python with Aspose.Slides. Configure camera, lighting, material, extrusion, fills, and 3D text. Source: https://docs.aspose.com/slides/python-net/3d-presentation/ Updated: 2026-09-25 ## **Overview** Aspose.Slides for Python via .NET can create, edit, preserve, and render PowerPoint-style 3D formatting for shapes and text. This article covers 3D effects such as rotation, extrusion, bevels, lighting, material, gradient or picture fills, and 3D text. This article is about 3D formatting effects on PowerPoint shapes and text. It is not about inserting or editing standalone 3D model files. When you export a slide to an image, PDF, or HTML, Aspose.Slides renders those 3D effects into the exported 2D output. ## **3D Formatting Concepts** Use the [Shape.three_d_format](https://reference.aspose.com/slides/python-net/aspose.slides/shape/three_d_format/) property to apply 3D formatting to a shape. The property exposes [ThreeDFormat](https://reference.aspose.com/slides/python-net/aspose.slides/threedformat/), which controls the 3D scene for that shape. For text, use the [TextFrameFormat.three_d_format](https://reference.aspose.com/slides/python-net/aspose.slides/textframeformat/three_d_format/) property. This applies 3D formatting to the text frame instead of the shape body. The most important properties are: | Property | What it controls | When to use it | |---|---|---| | [camera](https://reference.aspose.com/slides/python-net/aspose.slides/threedformat/camera/) | Viewpoint, preset camera type, rotation, zoom, and perspective. | Rotate the object in 3D space or match a PowerPoint 3D rotation preset. | | [light_rig](https://reference.aspose.com/slides/python-net/aspose.slides/threedformat/light_rig/) | Light preset, direction, and light rotation. | Change how highlights and shadows appear on the 3D surface. | | [material](https://reference.aspose.com/slides/python-net/aspose.slides/threedformat/material/) | Surface material, such as flat, matte, plastic, or metal. | Make the same geometry look flatter, softer, glossy, or metallic. | | [extrusion_height](https://reference.aspose.com/slides/python-net/aspose.slides/threedformat/extrusion_height/) | How far the shape extends backward from its front face. | Turn a flat shape into a visibly thick 3D object. | | [extrusion_color](https://reference.aspose.com/slides/python-net/aspose.slides/threedformat/extrusion_color/) | Color of the extruded sides. | Make depth visible or coordinate the side color with the front fill. | | [depth](https://reference.aspose.com/slides/python-net/aspose.slides/threedformat/depth/) | Additional 3D depth used by PowerPoint 3D formatting. | Fine-tune depth for shapes or text, especially together with bevel and material settings. | | [bevel_top](https://reference.aspose.com/slides/python-net/aspose.slides/threedformat/bevel_top/) and [bevel_bottom](https://reference.aspose.com/slides/python-net/aspose.slides/threedformat/bevel_bottom/) | Raised or rounded edges on the front and back faces. | Add a softened or molded edge instead of a sharp flat face. | | [contour_color](https://reference.aspose.com/slides/python-net/aspose.slides/threedformat/contour_color/) and [contour_width](https://reference.aspose.com/slides/python-net/aspose.slides/threedformat/contour_width/) | Outline around the 3D object. | Emphasize the object boundary in rendered output. | ## **Create a 3D Shape** A shape usually needs four kinds of settings before it looks convincingly 3D: - Camera settings, because the default front view may hide the extrusion. - Light settings, because lighting makes the faces and sides readable. - Material settings, because the surface affects how light is rendered. - Extrusion or depth settings, because a flat shape needs thickness. The following example creates a rectangle, adds text to its front face, and applies 3D formatting. The camera rotation values are in degrees, and the extrusion height is 100 points. The example renders the slide to a PNG image at twice its default dimensions and saves the presentation as PPTX. ```py import aspose.pydrawing as drawing import aspose.slides as slides image_scale = 2 with slides.Presentation() as presentation: slide = presentation.slides[0] shape = slide.shapes.add_auto_shape(slides.ShapeType.RECTANGLE, 200, 150, 200, 200) shape.text_frame.text = "3D" shape.text_frame.paragraphs[0].paragraph_format.default_portion_format.font_height = 64 shape.fill_format.fill_type = slides.FillType.SOLID shape.fill_format.solid_fill_color.color = drawing.Color.cornflower_blue shape.three_d_format.camera.camera_type = slides.CameraPresetType.ORTHOGRAPHIC_FRONT shape.three_d_format.camera.set_rotation(20, 30, 40) shape.three_d_format.light_rig.light_type = slides.LightRigPresetType.FLAT shape.three_d_format.light_rig.direction = slides.LightingDirection.TOP shape.three_d_format.material = slides.MaterialPresetType.FLAT shape.three_d_format.extrusion_height = 100 shape.three_d_format.extrusion_color.color = drawing.Color.blue with slide.get_image(image_scale, image_scale) as thumbnail: thumbnail.save("shape_3d.png") presentation.save("shape_3d.pptx", slides.export.SaveFormat.PPTX) ``` The rendered slide image shows the rectangle as a thick 3D block: ![Rendered blue 3D rectangle with white 3D text on the front face](https://docs.aspose.com/slides/python-net/3d-presentation/img_01_01.png) ## **Rotate a Shape with the Camera** In PowerPoint, 3D rotation is configured from the 3-D Rotation pane. The X, Y, and Z rotation values correspond to the rotation you set through the camera API. ![PowerPoint 3-D Rotation pane with X, Y, and Z rotation values highlighted](https://docs.aspose.com/slides/python-net/3d-presentation/img_02_01.png) In Aspose.Slides, access the camera through [ThreeDFormat.camera](https://reference.aspose.com/slides/python-net/aspose.slides/threedformat/camera/). This example creates a rectangle, selects an orthographic front view, and sets its X, Y, and Z rotations to 20, 30, and 40 degrees, respectively. It configures the shape in memory without saving a file: ```py import aspose.slides as slides with slides.Presentation() as presentation: slide = presentation.slides[0] shape = slide.shapes.add_auto_shape(slides.ShapeType.RECTANGLE, 200, 150, 200, 200) shape.three_d_format.camera.camera_type = slides.CameraPresetType.ORTHOGRAPHIC_FRONT shape.three_d_format.camera.set_rotation(20, 30, 40) ``` Use the camera when you need to change how the viewer sees the object. It does not change the 2D shape geometry on the slide. It changes the 3D viewpoint used by PowerPoint and by Aspose.Slides when rendering. ## **Add Extrusion and Depth** Extrusion makes a shape look thick by extending it behind the front face. In PowerPoint, the depth control sets this visible thickness, and the color control sets the color of the side faces. ![PowerPoint depth controls mapped to extrusion color and extrusion height properties](https://docs.aspose.com/slides/python-net/3d-presentation/img_02_02.png) Set [ThreeDFormat.extrusion_height](https://reference.aspose.com/slides/python-net/aspose.slides/threedformat/extrusion_height/) for the thickness and [ThreeDFormat.extrusion_color](https://reference.aspose.com/slides/python-net/aspose.slides/threedformat/extrusion_color/) for the side color. This example gives a rectangle a 100-point extrusion with purple sides and rotates the camera to reveal its thickness. It configures the shape in memory without saving a file: ```py import aspose.pydrawing as drawing import aspose.slides as slides with slides.Presentation() as presentation: slide = presentation.slides[0] shape = slide.shapes.add_auto_shape(slides.ShapeType.RECTANGLE, 200, 150, 200, 200) shape.three_d_format.camera.camera_type = slides.CameraPresetType.ORTHOGRAPHIC_FRONT shape.three_d_format.camera.set_rotation(20, 30, 40) shape.three_d_format.light_rig.light_type = slides.LightRigPresetType.FLAT shape.three_d_format.light_rig.direction = slides.LightingDirection.TOP shape.three_d_format.material = slides.MaterialPresetType.FLAT shape.three_d_format.extrusion_height = 100 shape.three_d_format.extrusion_color.color = drawing.Color.purple ``` The [ThreeDFormat.depth](https://reference.aspose.com/slides/python-net/aspose.slides/threedformat/depth/) property sets the depth of a 3D shape. The [extrusion_height](https://reference.aspose.com/slides/python-net/aspose.slides/threedformat/extrusion_height/) property controls the height of the extrusion effect, as shown in this example. ## **Use Gradient or Picture Fills with 3D Effects** 3D formatting is independent of the shape fill. You can apply a solid color, gradient, pattern, or picture fill to the front face and still use the same camera, light, material, and extrusion settings. This example applies a blue-to-orange gradient to the front face and a dark orange color to the 150-point extrusion. The gradient stops at 0 and 100 mark the start and end of the gradient. The camera rotation values are in degrees. The slide is rendered to a PNG image at twice its default dimensions: ```py import aspose.pydrawing as drawing import aspose.slides as slides image_scale = 2 with slides.Presentation() as presentation: slide = presentation.slides[0] shape = slide.shapes.add_auto_shape(slides.ShapeType.RECTANGLE, 200, 150, 250, 250) shape.text_frame.text = "3D Gradient" shape.text_frame.paragraphs[0].paragraph_format.default_portion_format.font_height = 64 shape.fill_format.fill_type = slides.FillType.GRADIENT shape.fill_format.gradient_format.gradient_stops.add(0, drawing.Color.blue) shape.fill_format.gradient_format.gradient_stops.add(100, drawing.Color.orange) shape.three_d_format.camera.camera_type = slides.CameraPresetType.ORTHOGRAPHIC_FRONT shape.three_d_format.camera.set_rotation(10, 20, 30) shape.three_d_format.light_rig.light_type = slides.LightRigPresetType.FLAT shape.three_d_format.light_rig.direction = slides.LightingDirection.TOP shape.three_d_format.material = slides.MaterialPresetType.FLAT shape.three_d_format.extrusion_height = 150 shape.three_d_format.extrusion_color.color = drawing.Color.dark_orange with slide.get_image(image_scale, image_scale) as thumbnail: thumbnail.save("gradient_3d.png") ``` The rendered output keeps the gradient on the front face and renders the extrusion separately: ![Rendered 3D rectangle with a blue-to-orange gradient fill and orange extrusion](https://docs.aspose.com/slides/python-net/3d-presentation/img_02_03.png) To use a picture fill instead, add the image to the presentation and assign it to the shape fill. This example requires an existing file named "image.jpg" in the working directory. It stretches the picture to fill the rectangle, applies a 150-point extrusion, and sets the camera rotation in degrees. It configures the shape in memory without saving or rendering a file: ```py import aspose.pydrawing as drawing import aspose.slides as slides with open("image.jpg", "rb") as image_file: image_data = image_file.read() with slides.Presentation() as presentation: slide = presentation.slides[0] shape = slide.shapes.add_auto_shape(slides.ShapeType.RECTANGLE, 200, 150, 250, 250) image = presentation.images.add_image(image_data) shape.fill_format.fill_type = slides.FillType.PICTURE shape.fill_format.picture_fill_format.picture.image = image shape.fill_format.picture_fill_format.picture_fill_mode = slides.PictureFillMode.STRETCH shape.three_d_format.camera.camera_type = slides.CameraPresetType.ORTHOGRAPHIC_FRONT shape.three_d_format.camera.set_rotation(10, 20, 30) shape.three_d_format.light_rig.light_type = slides.LightRigPresetType.FLAT shape.three_d_format.light_rig.direction = slides.LightingDirection.TOP shape.three_d_format.material = slides.MaterialPresetType.FLAT shape.three_d_format.extrusion_height = 150 shape.three_d_format.extrusion_color.color = drawing.Color.dark_orange ``` The picture is rendered on the front face, while the extrusion is rendered as the 3D side surface: ![Rendered 3D rectangle with a photo fill on the front face and orange extrusion](https://docs.aspose.com/slides/python-net/3d-presentation/img_02_04.png) ## **Apply 3D Formatting to Text** Shape 3D formatting affects the shape body. Text 3D formatting affects the text frame. This is useful for WordArt-like effects where the letters themselves need extrusion, material, lighting, and camera settings. The following example creates text with an orange-and-white grid pattern, applies an upward arch, and configures 3D settings through [TextFrameFormat.three_d_format](https://reference.aspose.com/slides/python-net/aspose.slides/textframeformat/three_d_format/). The extrusion height and depth are in points, and the light rotation is in degrees. The shape fill and outline are hidden so that only the text is visible. The example renders a PNG image at twice the default slide dimensions and saves the presentation as PPTX: ```py import aspose.pydrawing as drawing import aspose.slides as slides image_scale = 2 with slides.Presentation() as presentation: slide = presentation.slides[0] shape = slide.shapes.add_auto_shape(slides.ShapeType.RECTANGLE, 200, 150, 250, 250) shape.fill_format.fill_type = slides.FillType.NO_FILL shape.line_format.fill_format.fill_type = slides.FillType.NO_FILL shape.text_frame.text = "3D Text" portion = shape.text_frame.paragraphs[0].portions[0] portion.portion_format.fill_format.fill_type = slides.FillType.PATTERN portion.portion_format.fill_format.pattern_format.fore_color.color = drawing.Color.dark_orange portion.portion_format.fill_format.pattern_format.back_color.color = drawing.Color.white portion.portion_format.fill_format.pattern_format.pattern_style = slides.PatternStyle.LARGE_GRID shape.text_frame.paragraphs[0].paragraph_format.default_portion_format.font_height = 128 text_frame_format = shape.text_frame.text_frame_format text_frame_format.transform = slides.TextShapeType.ARCH_UP text_frame_format.three_d_format.extrusion_height = 3.5 text_frame_format.three_d_format.depth = 3 text_frame_format.three_d_format.material = slides.MaterialPresetType.PLASTIC text_frame_format.three_d_format.light_rig.direction = slides.LightingDirection.TOP text_frame_format.three_d_format.light_rig.light_type = slides.LightRigPresetType.BALANCED text_frame_format.three_d_format.light_rig.set_rotation(0, 0, 40) text_frame_format.three_d_format.camera.camera_type = slides.CameraPresetType.PERSPECTIVE_CONTRASTING_RIGHT_FACING with slide.get_image(image_scale, image_scale) as thumbnail: thumbnail.save("text_3d.png") presentation.save("text_3d.pptx", slides.export.SaveFormat.PPTX) ``` The text is rendered as curved, extruded 3D lettering: ![Rendered 3D text with an arched WordArt transform, orange pattern fill, and dark extrusion](https://docs.aspose.com/slides/python-net/3d-presentation/img_02_05.png) ## **Keep Text Flat on a 3D Shape** To keep text readable while preserving a shape's 3D appearance, set [TextFrameFormat.keep_text_flat](https://reference.aspose.com/slides/python-net/aspose.slides/textframeformat/keep_text_flat/) through [TextFrame.text_frame_format](https://reference.aspose.com/slides/python-net/aspose.slides/textframe/text_frame_format/). When the value is `True`, the text stays out of the 3D scene. When it is `False`, the text participates in the scene and follows its 3D orientation. This setting does not remove the shape's 3D formatting: its camera, lighting, material, and extrusion remain configured through [Shape.three_d_format](https://reference.aspose.com/slides/python-net/aspose.slides/shape/three_d_format/). It is also different from ordinary rotation. [Shape.rotation](https://reference.aspose.com/slides/python-net/aspose.slides/shape/rotation/) rotates the shape in the slide plane, while [TextFrameFormat.rotation_angle](https://reference.aspose.com/slides/python-net/aspose.slides/textframeformat/rotation_angle/) controls the text's custom rotation within its bounding box. Keeping text out of the 3D scene does not reset either of those angles. The following self-contained example creates a blue rectangle with text and clones it beside the original. Both shapes have the same 3D formatting; only the text setting differs: `False` on the left and `True` on the right. The camera angles are in degrees, and the extrusion height is 40 points. The example saves the presentation as PPTX and renders the comparison slide to PNG at twice its default dimensions. ```py import aspose.pydrawing as drawing import aspose.slides as slides with slides.Presentation() as presentation: slide = presentation.slides[0] shape = slide.shapes.add_auto_shape(slides.ShapeType.RECTANGLE, 70, 160, 240, 140) shape.text_frame.text = "Readable text" shape.text_frame.paragraphs[0].paragraph_format.default_portion_format.font_height = 28 shape.text_frame.paragraphs[0].paragraph_format.alignment = slides.TextAlignment.CENTER shape.text_frame.text_frame_format.anchoring_type = slides.TextAnchorType.CENTER shape.fill_format.fill_type = slides.FillType.SOLID shape.fill_format.solid_fill_color.color = drawing.Color.cornflower_blue shape.three_d_format.camera.camera_type = slides.CameraPresetType.ORTHOGRAPHIC_FRONT shape.three_d_format.camera.set_rotation(30, 30, 0) shape.three_d_format.light_rig.light_type = slides.LightRigPresetType.FLAT shape.three_d_format.light_rig.direction = slides.LightingDirection.TOP shape.three_d_format.material = slides.MaterialPresetType.FLAT shape.three_d_format.extrusion_height = 40 shape.three_d_format.extrusion_color.color = drawing.Color.royal_blue shape.text_frame.text_frame_format.keep_text_flat = False flat_text_shape = slide.shapes.add_clone(shape, 400, 160) flat_text_shape.text_frame.text_frame_format.keep_text_flat = True presentation.save("keep_text_flat.pptx", slides.export.SaveFormat.PPTX) with slide.get_image(2, 2) as image: image.save("keep_text_flat.png") ``` On the left, the text follows the 3D orientation. On the right, it stays flat and easier to read. Both rectangles retain the same visible extrusion and 3D orientation. ![Side-by-side 3D rectangles: keep_text_flat is False on the left and True on the right](https://docs.aspose.com/slides/python-net/3d-presentation/keep_text_flat.png) ## **Export and Rendering Behavior** Aspose.Slides preserves 3D formatting when saving to PowerPoint formats such as PPTX. When rendering or exporting to fixed-layout formats, the 3D scene is rasterized or drawn into the output as a 2D result. This applies when you render slides to [PNG](https://docs.aspose.com/slides/python-net/convert-powerpoint-to-png/), export to [PDF](https://docs.aspose.com/slides/python-net/convert-powerpoint-to-pdf/), export to [HTML](https://docs.aspose.com/slides/python-net/convert-powerpoint-to-html/), or generate frames for [video conversion](https://docs.aspose.com/slides/python-net/convert-powerpoint-to-video/). Keep these points in mind: - Exported images and PDFs are not interactive. The object cannot be rotated by the viewer after export. - The final appearance depends on the combination of camera, light rig, material, extrusion, fill, and slide scaling. - If you need to inspect inherited or theme-based formatting values, read the [effective shape properties](https://docs.aspose.com/slides/python-net/shape-effective-properties/). - Some output formats cannot store editable PowerPoint 3D formatting. In those formats, the visual result is rendered rather than preserved as editable 3D settings. ## **FAQ** **Can Aspose.Slides create interactive 3D presentations?** Aspose.Slides creates and renders PowerPoint 3D effects for shapes and text. It does not make exported images, PDFs, or HTML pages interactive 3D scenes that a viewer can rotate. In PPTX, the 3D formatting remains editable in PowerPoint where the format supports it. **What is the difference between a 3D model and a 3D effect?** A 3D model is a separate 3D object inserted into a presentation. A 3D effect is formatting applied to a regular PowerPoint shape or text, such as rotation, extrusion, bevel, lighting, and material. This article covers 3D effects. **Which settings are required for a visible 3D shape?** At minimum, set a camera rotation and either extrusion or depth. In practice, also set a light rig and material so the rendered faces have clear highlights and shadows. **Can I apply 3D effects to both shapes and text?** Yes. Use [Shape.three_d_format](https://reference.aspose.com/slides/python-net/aspose.slides/shape/three_d_format/) for the shape body and [TextFrameFormat.three_d_format](https://reference.aspose.com/slides/python-net/aspose.slides/textframeformat/three_d_format/) for text. **Will 3D effects appear when exporting to images, PDF, HTML, or video frames?** Yes. Aspose.Slides renders 3D effects when producing slide images, PDF output, HTML output, and frames used for video conversion. The exported output contains the rendered appearance, not an editable 3D object. **Can I read the final 3D values after inheritance and theme settings are applied?** Yes. Use the effective formatting APIs described in [Shape Effective Properties](https://docs.aspose.com/slides/python-net/shape-effective-properties/) to read final camera, light rig, bevel, and related 3D values. # Access Slides in Presentations with Python > Learn how to access and manage slides in PowerPoint and OpenDocument presentations with Aspose.Slides for Python via .NET. Boost productivity with code examples. Source: https://docs.aspose.com/slides/python-net/access-slide-in-presentation/ Updated: 2026-08-02 ## **Overview** This article explains how to access specific slides in a PowerPoint presentation using Aspose.Slides for Python. It shows how to open a presentation, reference slides by index or by unique ID, and read basic slide information needed for navigation within the file. With these techniques, you can reliably locate the exact slide you want to inspect or process. ## **Access a Slide by Index** Slides in a presentation are indexed by position starting at 0. The first slide has index 0, the second slide has index 1, and so on. The [Presentation](https://reference.aspose.com/slides/python-net/aspose.slides/presentation/) class (which represents a presentation file) exposes slides through a [SlideCollection](https://reference.aspose.com/slides/python-net/aspose.slides/slidecollection/) of [Slide](https://reference.aspose.com/slides/python-net/aspose.slides/slide/) objects. The following Python code shows how to access a slide by its index: ```python import aspose.slides as slides # Create a Presentation that represents a presentation file. with slides.Presentation("sample.pptx") as presentation: # Get a slide by its index. slide = presentation.slides[0] ``` ## **Access a Slide by ID** Each slide in a presentation has a unique ID associated with it. You can use the [get_slide_by_id](https://reference.aspose.com/slides/python-net/aspose.slides/presentation/get_slide_by_id/) method (exposed by the [Presentation](https://reference.aspose.com/slides/python-net/aspose.slides/presentation/) class) to target that ID. The following Python code shows how to provide a valid slide ID and access that slide through the [get_slide_by_id](https://reference.aspose.com/slides/python-net/aspose.slides/presentation/get_slide_by_id/) method: ```python import aspose.slides as slides # Create a Presentation that represents a presentation file. with slides.Presentation("sample.pptx") as presentation: # Get a slide ID. id = presentation.slides[0].slide_id # Access the slide by its ID. slide = presentation.get_slide_by_id(id) ``` ## **Change a Slide's Position** Aspose.Slides allows you to change a slide’s position. For example, you can make the first slide become the second. 1. Create an instance of the [Presentation](https://reference.aspose.com/slides/python-net/aspose.slides/presentation/) class. 1. Get a reference to the slide whose position you want to change by its index. 1. Set a new position for the slide through the [slide_number](https://reference.aspose.com/slides/python-net/aspose.slides/slide/slide_number/) property. 1. Save the modified presentation. The following Python code moves the slide in position 1 to position 2: ```python import aspose.slides as slides # Instantiate a Presentation object that represents a presentation file. with slides.Presentation("sample.pptx") as presentation: # Get the slide whose position will be changed. slide = presentation.slides[0] # Set the new position for the slide. slide.slide_number = 2 # Save the modified presentation. presentation.save("slide_number.pptx", slides.export.SaveFormat.PPTX) ``` The first slide becomes the second; the second slide becomes the first. When you change a slide’s position, other slides are adjusted automatically. ## **Set the Slide Number** Using the [first_slide_number](https://reference.aspose.com/slides/python-net/aspose.slides/presentation/first_slide_number/) property (exposed by the [Presentation](https://reference.aspose.com/slides/python-net/aspose.slides/presentation/) class), you can specify a new number for the first slide in a presentation. This operation causes other slide numbers to be recalculated. 1. Create an instance of the [Presentation](https://reference.aspose.com/slides/python-net/aspose.slides/presentation/) class. 1. Set the slide number. 1. Save the modified presentation. The following Python code demonstrates an operation where the first slide number is set to 10: ```python import aspose.slides as slides # Instantiate a Presentation object that represents a presentation file. with slides.Presentation("sample.pptx") as presentation: # Set the slide number. presentation.first_slide_number = 10 # Save the modified presentation. presentation.save("first_slide_number.pptx", slides.export.SaveFormat.PPTX) ``` If you prefer to skip the first slide, you can start numbering from the second slide (and hide the number on the first slide) like this: ```python import aspose.slides as slides with slides.Presentation() as presentation: layout_slide = presentation.layout_slides.get_by_type(slides.SlideLayoutType.BLANK) presentation.slides.add_empty_slide(layout_slide) presentation.slides.add_empty_slide(layout_slide) presentation.slides.add_empty_slide(layout_slide) # Set the number for the first slide in the presentation. presentation.first_slide_number = 0 # Show slide numbers for all slides. presentation.header_footer_manager.set_all_slide_numbers_visibility(True) # Hide the slide number on the first slide. presentation.slides[0].header_footer_manager.set_slide_number_visibility(False) # Save the modified presentation. presentation.save("first_slide_number.pptx", slides.export.SaveFormat.PPTX) ``` ## **FAQ** ### Does the slide number a user sees match the collection’s zero-based index? The number shown on a slide can start from an arbitrary value (e.g., 10) and does not have to match the index; the relationship is controlled by the presentation’s [first slide number](https://reference.aspose.com/slides/python-net/aspose.slides/presentation/first_slide_number/) setting. ### Do hidden slides affect indexing? Yes. A hidden slide remains in the collection and is counted in indexing; "hidden" refers to display, not its position in the collection. ### Does a slide’s index change when other slides are added or removed? Yes. Indexes always reflect the current order in slides and are recalculated upon insert, delete, and move operations. # Manage ActiveX Controls in Presentations with Python > Learn how Aspose.Slides for Python via .NET leverages ActiveX to automate and enhance PowerPoint presentations, giving developers powerful control over slides. Source: https://docs.aspose.com/slides/python-net/activex/ Updated: 2026-08-05 ## **Introduction** ActiveX controls are used in presentations. Aspose.Slides for Python via .NET lets you manage ActiveX controls, but managing them is bit trickier and different from normal presentation shapes. From Aspose.Slides for Python via .NET 6.9.0, the component supports managing ActiveX controls. At the moment, you can access already added ActiveX control in your presentation and modify or delete it by using its various properties. Remember, ActiveX controls are not shapes and are not part of the presentation's IShapeCollection but the separate IControlCollection. This article shows how to work with them. ## **Modify ActiveX Controls** To manage a simple ActiveX control like a text box and simple command button on a slide: 1. Create an instance of the Presentation class and load the presentation with ActiveX controls in it. 1. Obtain a slide reference by its index. 1. Access the ActiveX controls in the slide by accessing the IControlCollection. 1. Access the TextBox1 ActiveX control using the ControlEx object. 1. Change the different properties of the TextBox1 ActiveX control including text, font, font height and frame position. 1. Access the second access control called CommandButton1. 1. Change the button caption, font and position. 1. Shift the position of the ActiveX controls frames. 1. Write the modified presentation to a PPTX file. The code snippet below updates the ActiveX controls on the presentation slides to the slide as shown below. ```py import aspose.slides as slides import aspose.pydrawing as draw import io import aspose.pydrawing as drawing # Accessing the presentation with ActiveX controls with slides.Presentation("ActiveX.pptm") as presentation: # Accessing the first slide in presentation slide = presentation.slides[0] # changing TextBox text control = slide.controls[0] if control.name == "TextBox1" and control.properties != None: newText = "Changed text" control.properties.remove("Value") control.properties.add("Value", newText) # changing substitute image. Powerpoint will replace this image during activeX activation, so sometime it's OK to leave image unchanged. bmp = draw.Bitmap(control.frame.width, control.frame.height) with draw.Graphics.from_image(bmp) as graphics: with draw.SolidBrush(draw.Color.from_known_color(draw.KnownColor.WINDOW)) as brush: graphics.fill_rectangle(brush, 0, 0, bmp.width, bmp.height) # font = draw.Font(control.properties["FontName"], 14) font = draw.Font("Arial", 14) with draw.SolidBrush(draw.Color.from_known_color(draw.KnownColor.WINDOW_TEXT)) as brush: graphics.draw_string(newText, font, brush, 10, 4) with draw.Pen(draw.Color.from_known_color(draw.KnownColor.CONTROL_DARK), 1) as pen: graphics.draw_lines(pen, [ draw.PointF(0, bmp.height - 1), draw.PointF(0, 0), draw.PointF(bmp.width - 1, 0) ]) with draw.Pen(draw.Color.from_known_color(draw.KnownColor.CONTROL_DARK_DARK), 1) as pen: graphics.draw_lines(pen, [ draw.PointF(1, bmp.height - 2), draw.PointF(1, 1), draw.PointF(bmp.width - 2, 1) ]) with draw.Pen(draw.Color.from_known_color(draw.KnownColor.CONTROL_LIGHT), 1) as pen: graphics.draw_lines(pen, [ draw.PointF(1, bmp.height - 1), draw.PointF(bmp.width - 1, bmp.height - 1), draw.PointF(bmp.width - 1, 1)]) with draw.Pen(draw.Color.from_known_color(draw.KnownColor.CONTROL_LIGHT_LIGHT), 1) as pen: graphics.draw_lines(pen, [ draw.PointF(0, bmp.height), draw.PointF(bmp.width, bmp.height), draw.PointF(bmp.width, 0) ]) bmp_bytes = io.BytesIO() bmp.save(bmp_bytes, drawing.imaging.ImageFormat.png) control.substitute_picture_format.picture.image = presentation.images.add_image(bmp_bytes) # changing Button caption control = slide.controls[1] if control.name == "CommandButton1" and control.properties != None: newCaption = "MessageBox" control.properties.remove("Caption") control.properties.add("Caption", newCaption) # changing substitute bmp = draw.Bitmap(control.frame.width, control.frame.height) with draw.Graphics.from_image(bmp) as graphics: with draw.SolidBrush(draw.Color.from_known_color(draw.KnownColor.CONTROL)) as brush: graphics.fill_rectangle(brush, 0, 0, bmp.width, bmp.height) #font = draw.Font(control.properties["FontName"], 14) font = draw.Font("Arial", 14) with draw.SolidBrush(draw.Color.from_known_color(draw.KnownColor.WINDOW_TEXT)) as brush: textSize = graphics.measure_string(newCaption, font, 65535) graphics.draw_string(newCaption, font, brush, (bmp.width - textSize.width) / 2, (bmp.height - textSize.height) / 2) with draw.Pen(draw.Color.from_known_color(draw.KnownColor.CONTROL_LIGHT_LIGHT), 1) as pen: graphics.draw_lines(pen, [ draw.PointF(0, bmp.height - 1), draw.PointF(0, 0), draw.PointF(bmp.width - 1, 0) ]) with draw.Pen(draw.Color.from_known_color(draw.KnownColor.CONTROL_LIGHT), 1) as pen: graphics.draw_lines(pen, [ draw.PointF(1, bmp.height - 2), draw.PointF(1, 1), draw.PointF(bmp.width - 2, 1) ]) with draw.Pen(draw.Color.from_known_color(draw.KnownColor.CONTROL_DARK), 1) as pen: graphics.draw_lines(pen, [ draw.PointF(1, bmp.height - 1), draw.PointF(bmp.width - 1, bmp.height - 1), draw.PointF(bmp.width - 1, 1) ]) with draw.Pen(draw.Color.from_known_color(draw.KnownColor.CONTROL_DARK_DARK), 1) as pen: graphics.draw_lines(pen, [ draw.PointF(0, bmp.height), draw.PointF(bmp.width, bmp.height), draw.PointF(bmp.width, 0) ]) bmp_bytes = io.BytesIO() bmp.save(bmp_bytes, drawing.imaging.ImageFormat.png) control.substitute_picture_format.picture.image = presentation.images.add_image(bmp_bytes) # Moving ActiveX frames 100 points down for ctl in slide.controls: frame = ctl.frame ctl.frame = slides.ShapeFrame( frame.x, frame.y + 100, frame.width, frame.height, frame.flip_h, frame.flip_v, frame.rotation) # Save the presentation with Edited ActiveX Controls presentation.save("withActiveX-edited_out.pptm", slides.export.SaveFormat.PPTM) # Now removing controls slide.controls.clear() # Saving the presentation with cleared ActiveX controls presentation.save("withActiveX.cleared_out.pptm", slides.export.SaveFormat.PPTM) ``` ## **Add ActiveX Media Player Control** To add ActiveX Media Player control, please perform following steps: 1. Create an instance of the Presentation class and load the sample presentation with Media Player ActiveX controls in it. 1. Create an instance of target Presentation class and generate empty presentation instance. 1. Clone the slide with Media Player ActiveX control in template presentation to target Presentation. 1. Access the cloned slide in target Presentation. 1. Access the ActiveX controls in the slide by accessing the IControlCollection. 1. Access the Media Player ActiveX control and set the video path by using its properties. 1. Save the presentation to a PPTX file. ```py import aspose.slides as slides # Instantiate Presentation class that represents PPTX file with slides.Presentation("template.pptx") as presentation: # Create empty presentation instance with slides.Presentation() as newPresentation: # Remove default slide newPresentation.slides.remove_at(0) # Clone slide with Media Player ActiveX Control newPresentation.slides.insert_clone(0, presentation.slides[0]) # Access the Media Player ActiveX control and set the video path prop = newPresentation.slides[0].controls[0].properties prop.remove("URL") prop.add("URL", "Wildlife.mp4") # Save the Presentation newPresentation.save("LinkingVideoActiveXControl_out.pptx", slides.export.SaveFormat.PPTX) ``` ## **FAQ** ### Does Aspose.Slides preserve ActiveX controls when reading and re-saving if they cannot be executed in the Python runtime? Yes. Aspose.Slides treats them as part of the presentation and can read/modify their properties and frames; executing the controls themselves is not required to preserve them. ### How do ActiveX controls differ from OLE objects in a presentation? ActiveX controls are interactive managed controls (buttons, text boxes, media player), whereas [OLE](https://docs.aspose.com/slides/python-net/manage-ole/) refers to embedded application objects (for example, an Excel worksheet). They are stored and handled differently and have different property models. ### Do ActiveX events and VBA macros work if the file has been modified by Aspose.Slides? Aspose.Slides preserves the existing markup and metadata; however, events and macros run only inside PowerPoint on Windows when security allows it. The library does not execute VBA. ## Related articles - [ActiveX](https://docs.aspose.com/slides/python-net/examples/elements/activex/) # Add Slides to Presentations with Python > Easily add slides to your PowerPoint and OpenDocument presentations using Aspose.Slides for Python via .NET—seamless, efficient slide insertion in seconds. Source: https://docs.aspose.com/slides/python-net/add-slide-to-presentation/ Updated: 2026-08-05 ## **Overview** Before adding slides to a presentation, it helps to understand how PowerPoint organizes them. Each presentation contains a master slide, optional layout slides, and one or more normal slides. Every slide has a unique ID, and normal slides are ordered by a zero-based index. This article shows how to use Aspose.Slides for Python to create slides and choose appropriate layouts. ## **Add Slides to Presentations** Aspose.Slides allows you to append new slides based on existing layout slides. The example below iterates through each layout in the presentation, adds a slide that uses that layout, and then saves the file. 1. Create an instance of the [Presentation](https://reference.aspose.com/slides/python-net/aspose.slides/presentation/) class. 1. Access the [SlideCollection](https://reference.aspose.com/slides/python-net/aspose.slides/slidecollection/). 1. For each item in `presentation.layout_slides`, call `add_empty_slide` to append a slide that uses that layout. 1. Optionally modify the newly added slides. 1. Save the presentation as a PPTX file. ```py import aspose.slides as slides # Instantiate the Presentation class. with slides.Presentation() as presentation: # Access the slide collection. slide_collection = presentation.slides for layout_slide in presentation.layout_slides: # Add an empty slide to the slide collection. slide_collection.add_empty_slide(layout_slide) # Do some work on the newly added slides. # Save the presentation to disk. presentation.save("empty_slides.pptx", slides.export.SaveFormat.PPTX) ``` ## **FAQ** ### Can I insert a new slide at a specific position, not just at the end? Yes. The library supports slide collections and [insert](https://reference.aspose.com/slides/python-net/aspose.slides/slidecollection/insert_empty_slide/)/[clone](https://reference.aspose.com/slides/python-net/aspose.slides/slidecollection/insert_clone/) operations, so you can add a slide at the required index rather than only at the end. ### Are the theme/styles preserved when adding a slide based on a layout? Yes. A layout inherits formatting from its master, and the new slide inherits from the selected layout and its associated master. ### Which slide is present in a new "empty" presentation before adding slides? A newly created presentation already contains one blank slide with index zero. This is important to consider when calculating insertion indices. ### How do I choose the "right" layout for a new slide if the master has many options? Generally choose the [LayoutSlide](https://reference.aspose.com/slides/python-net/aspose.slides/layoutslide/) that matches the required structure ([Title and Content, Two Content, etc.](https://reference.aspose.com/slides/python-net/aspose.slides/slidelayouttype/)). If such a layout is missing, you can [add it to the master](https://docs.aspose.com/slides/python-net/slide-layout/) and then use it. # AI Features in Aspose.Slides > Explore AI features in Aspose.Slides for Python to generate, analyze, and enhance presentations in Python, with guides for PowerPoint and OpenDocument formats. Source: https://docs.aspose.com/slides/python-net/ai/ Updated: 2025-09-15 --- lastmod: 2025-09-15T09:30:49+06:00 title: AI Features in Aspose.Slides linktitle: AI type: docs weight: 40 url: /python-net/ai/ keywords: - AI features - AI presentation translator - AI presentation generator - AI slide translator - AI slide generator - multilingual presentation - multilingual slide - PowerPoint - OpenDocument - presentation - Python - Aspose.Slides description: "Explore AI features in Aspose.Slides for Python to generate, analyze, and enhance presentations in Python, with guides for PowerPoint and OpenDocument formats." --- ## Related articles - [AI-Powered Multilingual Slide Generator](https://docs.aspose.com/slides/python-net/ai/generator/) - [Customize Presentation Charts in Python](https://docs.aspose.com/slides/python-net/chart-types/) - [AI-Powered Presentation Translator](https://docs.aspose.com/slides/python-net/ai/translator/) # AI-Powered Multilingual Slide Generator > Generate multilingual slides from text with Aspose.Slides for Python. Apply your template and export polished decks to PowerPoint and OpenDocument. Learn more. Source: https://docs.aspose.com/slides/python-net/ai/generator/ Updated: 2026-08-05 ## **Introduction** Aspose.Slides introduces a new AI-powered feature, the Presentation Generator, which enables developers to automatically create well-structured PowerPoint presentations from simple text inputs such as topic descriptions, summaries, quotations, or bullet points. Users can adjust the level of content detail and optionally apply a custom presentation template to define the visual design. Currently, the AI Presentation Generator structures content using text blocks, bullet lists, and tables. Image generation is not yet supported; however, images can be easily added afterward using Aspose.Slides tools or manually. The output is a complete PowerPoint presentation that can be used as-is or exported to any format supported by the Aspose.Slides API. While the generator produces high-quality results, minor post-editing may be required to meet specific requirements. ## **How it Works** Aspose.Slides does not include built-in AI models; instead, it integrates with external AI services over the internet. This integration is handled by the [SlidesAIAgent](https://reference.aspose.com/slides/python-net/aspose.slides.ai/slidesaiagent/) class, which uses an implementation of the [IAIWebClient](https://reference.aspose.com/slides/python-net/aspose.slides.ai/iaiwebclient/) class to communicate with the AI model. You can use the built-in [OpenAIWebClient](https://reference.aspose.com/slides/python-net/aspose.slides.ai/openaiwebclient/), which connects to OpenAI’s API, or provide a custom implementation of [IAIWebClient](https://reference.aspose.com/slides/python-net/aspose.slides.ai/iaiwebclient/) to work with another AI provider or language model. Aspose.Slides manages all communication with the AI service and processes the AI’s responses to generate slides. Note that the OpenAI API is a paid service, so an account and API key are required when using the built-in [OpenAIWebClient](https://reference.aspose.com/slides/python-net/aspose.slides.ai/openaiwebclient/). ## **Let's Code** ### **Example 1** This example demonstrates how to generate a presentation on the topic Aspose.Slides using the built-in [OpenAIWebClient](https://reference.aspose.com/slides/python-net/aspose.slides.ai/openaiwebclient/). ```py import aspose.slides as slides # Create an instance of OpenAIWebClient, the built-in implementation of the OpenAI web client. with slides.ai.OpenAIWebClient("gpt-4o-mini", "apiKey", "") as ai_web_client: # Create an instance of SlidesAIAgent, which provides access to AI-powered features. ai_agent = slides.ai.SlidesAIAgent(ai_web_client) # Define the instruction for generating the presentation. instruction = "Generate a presentation about Aspose.Slides for .NET, highlighting its capabilities and advantages over competitors." # Generate a presentation with a medium amount of content based on the instruction. with ai_agent.generate_presentation(instruction, slides.ai.PresentationContentAmountType.MEDIUM) as presentation: # Save the generated presentation to the local disk as a PowerPoint (.pptx) file. presentation.save("Aspose.Slides.NET.pptx", slides.export.SaveFormat.PPTX) ``` ### **Example 2** The following example demonstrates the overloads of the [generate_presentation](https://reference.aspose.com/slides/python-net/aspose.slides.ai/slidesaiagent/generate_presentation/#str-asposeslidesaipresentationcontentamounttype-asposeslidesipresentation) method. In this case, the user’s `master presentation` is used. ```py import aspose.slides as slides # Pass the model, the API key and the organization ID to the OpenAIWebClient constructor. with slides.ai.OpenAIWebClient("gpt-4o-mini", "apiKey", "organizationId") as ai_web_client: # Create an instance of SlidesAIAgent. ai_agent = slides.ai.SlidesAIAgent(ai_web_client) # Define the instruction for generating the presentation. instruction = "Generate a presentation about Aspose.Slides for .NET, highlighting its capabilities and advantages over competitors." # Load a master presentation from the local disk to use as the design template. with slides.Presentation("masterPresentation.pptx") as masterPresentation: # Generate a detailed presentation using the instruction and master template. with ai_agent.generate_presentation(instruction, slides.ai.PresentationContentAmountType.DETAILED, masterPresentation) as presentation: # Save the generated presentation as a PDF. presentation.save("Aspose.Slides.NET.pdf", slides.export.SaveFormat.PDF) ``` ## **Key Benefits** The new AI Presentation Generator in Aspose.Slides provides a fast and flexible way to produce structured slide decks from simple text prompts. With support for custom templates, it can be seamlessly integrated into a wide range of applications. Typical use cases include creating marketing presentations, educational materials, client reports, and internal slide decks. Although image generation is not yet supported, the tool already offers a strong foundation for automating presentation creation, with further enhancements expected in the future. ## Related articles - [AI-Powered Presentation Translator](https://docs.aspose.com/slides/python-net/ai/translator/) - [AI Features in Aspose.Slides](https://docs.aspose.com/slides/python-net/ai/) # AI-Powered Presentation Translator > Translate PowerPoint slides with AI using Aspose.Slides for Python. Localize PPT, PPTX and ODP while preserving layout—fast and developer-friendly. Try it. Source: https://docs.aspose.com/slides/python-net/ai/translator/ Updated: 2026-09-15 ## **Introduction** Aspose.Slides is a powerful API for programmatically managing PowerPoint presentations. In addition to creating, editing, and converting slides, it offers AI-driven features - such as the [Presentation Translation API](https://reference.aspose.com/slides/python-net/aspose.slides.ai/) for multilingual slide content. ## **How it Works** Aspose.Slides does not include built-in AI capabilities but integrates with external AI models over the internet. This functionality is exposed via the [SlidesAIAgent](https://reference.aspose.com/slides/python-net/aspose.slides.ai/slidesaiagent/) class, which uses [IAIWebClient](https://reference.aspose.com/slides/python-net/aspose.slides.ai/iaiwebclient/) subclasses to communicate with AI services. You can use the built-in [OpenAIWebClient](https://reference.aspose.com/slides/python-net/aspose.slides.ai/openaiwebclient/) to connect to OpenAI’s API or implement your own [IAIWebClient](https://reference.aspose.com/slides/python-net/aspose.slides.ai/iaiwebclient/) to use a different AI provider or language model. Aspose.Slides handles the communication, parses the AI responses, and intelligently inserts translated content while preserving the original slide layout and formatting. Note that the OpenAI API is a paid service, so you will need to create an account and supply your API key when using the built-in [OpenAIWebClient](https://reference.aspose.com/slides/python-net/aspose.slides.ai/openaiwebclient/). ## **Example** In this example, we translate a PowerPoint presentation into Japanese using the built-in [OpenAIWebClient](https://reference.aspose.com/slides/python-net/aspose.slides.ai/openaiwebclient/) with a specified OpenAI [model](https://platform.openai.com/docs/models). ```py import aspose.slides as slides # Load a presentation to translate. with slides.Presentation("sample.pptx") as presentation: # Create an AI client with OpenAIWebClient, specifying your model and API key. with slides.ai.OpenAIWebClient("gpt-4o-mini", "apiKey", "") as ai_web_client: # Initialize SlidesAIAgent with the AI client. ai_agent = slides.ai.SlidesAIAgent(ai_web_client) # Translate the presentation to Japanese. ai_agent.translate(presentation, "japanese") # Save the translated presentation as a PDF. presentation.save("sample_jp.pdf", slides.export.SaveFormat.PDF) ``` ### **Azure OpenAI Example** Since version **26.7.0**, Aspose.Slides for Python via .NET supports OpenAI-compatible providers, including Azure OpenAI. You can configure the translator to use your in-house Azure deployment with the [OpenAICompatibleWebClient](https://reference.aspose.com/slides/python-net/aspose.slides.ai/openaicompatiblewebclient/). ```py import aspose.slides as slides model = "your-azure-deployment-name" api_key = "your-azure-api-key" base_url = "https://your-resource.openai.azure.com/openai/v1/" with slides.ai.OpenAICompatibleWebClient(model, api_key, base_url) as ai_web_client: ai_agent = slides.ai.SlidesAIAgent(ai_web_client) with slides.Presentation("Presentation.pptx") as presentation: ai_agent.translate(presentation, "spanish") presentation.save("Translated.pptx", slides.export.SaveFormat.PPTX) ``` This snippet demonstrates translating a presentation using your Azure OpenAI endpoint. Replace the placeholder values with your deployment name, API key, and endpoint URL. ## **Key Benefits** The Aspose.Slides [Presentation Translation API](https://reference.aspose.com/slides/python-net/aspose.slides.ai/) offers an AI-powered solution for delivering multilingual PowerPoint presentations. By automating translation while preserving layout and design, it saves time and minimizes errors compared to manual workflows. Whether you're a developer, educator, or business professional, this API enables you to create engaging, localized presentations for global audiences - expanding your reach and improving communication. ## Related articles - [AI-Powered Multilingual Slide Generator](https://docs.aspose.com/slides/python-net/ai/generator/) - [AI Features in Aspose.Slides](https://docs.aspose.com/slides/python-net/ai/) # Animate PowerPoint Charts in Python > Create stunning animated charts in Python with Aspose.Slides. Boost presentations with dynamic visuals in PPT, PPTX and ODP files—get started now. Source: https://docs.aspose.com/slides/python-net/animated-charts/ Updated: 2026-11-08 ## **Introduction** Aspose.Slides for Python via .NET supports animating the chart elements. **Series**, **Categories**, **Series Elements**, **Categories Elements** can be animated with [ISequence.add_effect](https://reference.aspose.com/slides/python-net/aspose.slides.animation/isequence/) method and two enums [EffectChartMajorGroupingType](https://reference.aspose.com/slides/python-net/aspose.slides.animation/effectchartmajorgroupingtype/) and [EffectChartMinorGroupingType](https://reference.aspose.com/slides/python-net/aspose.slides.animation/effectchartminorgroupingtype/). [![Two-series, two-category grids compare grouping by series, category, element within series, and element within category.](https://docs.aspose.com/slides/python-net/animated-charts/visual-chart-animation-grouping-51704783a7c6.svg)](https://docs.aspose.com/slides/python-net/animated-charts/visual-chart-animation-grouping-51704783a7c6.svg) *Schematic comparison using two series and two categories. Numbers identify illustrative reveal steps, not data values: grouping selects which marks animate together. Actual order and triggers depend on the effects added to the sequence.* ## **Chart Series Animation** If you want to animate a chart series, write the code according to the steps listed below: 1. Load a presentation. 1. Get reference of the chart object. 1. Animate the series. 1. Write the presentation file to disk. In the example given below, we animated chart series. ```py import aspose.slides.animation as anim; import aspose.slides as slides # Instantiate Presentation class that represents a presentation file with slides.Presentation("ExistingChart.pptx") as presentation: # Get reference of the chart object slide = presentation.slides[0] shapes = slide.shapes chart = shapes[0] # Animate the series slide.timeline.main_sequence.add_effect(chart, anim.EffectType.FADE, anim.EffectSubtype.NONE, anim.EffectTriggerType.AFTER_PREVIOUS) slide.timeline.main_sequence.add_effect(chart, anim.EffectChartMajorGroupingType.BY_SERIES, 0, anim.EffectType.APPEAR, anim.EffectSubtype.NONE, anim.EffectTriggerType.AFTER_PREVIOUS) slide.timeline.main_sequence.add_effect(chart, anim.EffectChartMajorGroupingType.BY_SERIES, 1, anim.EffectType.APPEAR, anim.EffectSubtype.NONE, anim.EffectTriggerType.AFTER_PREVIOUS) slide.timeline.main_sequence.add_effect(chart, anim.EffectChartMajorGroupingType.BY_SERIES, 2, anim.EffectType.APPEAR, anim.EffectSubtype.NONE, anim.EffectTriggerType.AFTER_PREVIOUS) slide.timeline.main_sequence.add_effect(chart, anim.EffectChartMajorGroupingType.BY_SERIES, 3, anim.EffectType.APPEAR, anim.EffectSubtype.NONE, anim.EffectTriggerType.AFTER_PREVIOUS) # Write the modified presentation to disk presentation.save("AnimatingSeries_out.pptx", slides.export.SaveFormat.PPTX) ``` ## **Chart Category Animation** If you want to animate a chart category, write the code according to the steps listed below: 1. Load a presentation. 1. Get reference of the chart object. 1. Animate the Category. 1. Write the presentation file to disk. In the example given below, we animated chart category. ```py import aspose.slides.animation as anim; import aspose.slides as slides with slides.Presentation("ExistingChart.pptx") as presentation: # Get reference of the chart object slide = presentation.slides[0] shapes = slide.shapes chart = shapes[0] # Animate the categories slide.timeline.main_sequence.add_effect(chart, anim.EffectType.FADE, anim.EffectSubtype.NONE, anim.EffectTriggerType.AFTER_PREVIOUS) slide.timeline.main_sequence.add_effect(chart, anim.EffectChartMajorGroupingType.BY_CATEGORY, 0, anim.EffectType.APPEAR, anim.EffectSubtype.NONE, anim.EffectTriggerType.AFTER_PREVIOUS) slide.timeline.main_sequence.add_effect(chart, anim.EffectChartMajorGroupingType.BY_CATEGORY, 1, anim.EffectType.APPEAR, anim.EffectSubtype.NONE, anim.EffectTriggerType.AFTER_PREVIOUS) slide.timeline.main_sequence.add_effect(chart, anim.EffectChartMajorGroupingType.BY_CATEGORY, 2, anim.EffectType.APPEAR, anim.EffectSubtype.NONE, anim.EffectTriggerType.AFTER_PREVIOUS) slide.timeline.main_sequence.add_effect(chart, anim.EffectChartMajorGroupingType.BY_CATEGORY, 3, anim.EffectType.APPEAR, anim.EffectSubtype.NONE, anim.EffectTriggerType.AFTER_PREVIOUS) # Write the presentation file to disk presentation.save("AnimatingCategories_out.pptx", slides.export.SaveFormat.PPTX) ``` ## **Animation in Series Element** If you want to animate series elements, write the code according to the steps listed below: 1. Load a presentation. 1. Get reference of the chart object. 1. Animate series elements. 1. Write the presentation file to disk. In the example given below, we have animated series' elements. ```py import aspose.slides.animation as anim; import aspose.slides as slides # Load a presentation with slides.Presentation("ExistingChart.pptx") as presentation: # Get reference of the chart object slide = presentation.slides[0] shapes = slide.shapes chart = shapes[0] # Animate series elements slide.timeline.main_sequence.add_effect(chart, anim.EffectType.FADE, anim.EffectSubtype.NONE, anim.EffectTriggerType.AFTER_PREVIOUS) slide.timeline.main_sequence.add_effect(chart, anim.EffectChartMinorGroupingType.BY_ELEMENT_IN_SERIES, 0, 0, anim.EffectType.APPEAR, anim.EffectSubtype.NONE, anim.EffectTriggerType.AFTER_PREVIOUS) slide.timeline.main_sequence.add_effect(chart, anim.EffectChartMinorGroupingType.BY_ELEMENT_IN_SERIES, 0, 1, anim.EffectType.APPEAR, anim.EffectSubtype.NONE, anim.EffectTriggerType.AFTER_PREVIOUS) slide.timeline.main_sequence.add_effect(chart, anim.EffectChartMinorGroupingType.BY_ELEMENT_IN_SERIES, 0, 2, anim.EffectType.APPEAR, anim.EffectSubtype.NONE, anim.EffectTriggerType.AFTER_PREVIOUS) slide.timeline.main_sequence.add_effect(chart, anim.EffectChartMinorGroupingType.BY_ELEMENT_IN_SERIES, 0, 3, anim.EffectType.APPEAR, anim.EffectSubtype.NONE, anim.EffectTriggerType.AFTER_PREVIOUS) slide.timeline.main_sequence.add_effect(chart, anim.EffectChartMinorGroupingType.BY_ELEMENT_IN_SERIES, 1, 0, anim.EffectType.APPEAR, anim.EffectSubtype.NONE, anim.EffectTriggerType.AFTER_PREVIOUS) slide.timeline.main_sequence.add_effect(chart, anim.EffectChartMinorGroupingType.BY_ELEMENT_IN_SERIES, 1, 1, anim.EffectType.APPEAR, anim.EffectSubtype.NONE, anim.EffectTriggerType.AFTER_PREVIOUS) slide.timeline.main_sequence.add_effect(chart, anim.EffectChartMinorGroupingType.BY_ELEMENT_IN_SERIES, 1, 2, anim.EffectType.APPEAR, anim.EffectSubtype.NONE, anim.EffectTriggerType.AFTER_PREVIOUS) slide.timeline.main_sequence.add_effect(chart, anim.EffectChartMinorGroupingType.BY_ELEMENT_IN_SERIES, 1, 3, anim.EffectType.APPEAR, anim.EffectSubtype.NONE, anim.EffectTriggerType.AFTER_PREVIOUS) slide.timeline.main_sequence.add_effect(chart, anim.EffectChartMinorGroupingType.BY_ELEMENT_IN_SERIES, 2, 0, anim.EffectType.APPEAR, anim.EffectSubtype.NONE, anim.EffectTriggerType.AFTER_PREVIOUS) slide.timeline.main_sequence.add_effect(chart, anim.EffectChartMinorGroupingType.BY_ELEMENT_IN_SERIES, 2, 1, anim.EffectType.APPEAR, anim.EffectSubtype.NONE, anim.EffectTriggerType.AFTER_PREVIOUS) slide.timeline.main_sequence.add_effect(chart, anim.EffectChartMinorGroupingType.BY_ELEMENT_IN_SERIES, 2, 2, anim.EffectType.APPEAR, anim.EffectSubtype.NONE, anim.EffectTriggerType.AFTER_PREVIOUS) slide.timeline.main_sequence.add_effect(chart, anim.EffectChartMinorGroupingType.BY_ELEMENT_IN_SERIES, 2, 3, anim.EffectType.APPEAR, anim.EffectSubtype.NONE, anim.EffectTriggerType.AFTER_PREVIOUS) # Write the presentation file to disk presentation.save("AnimatingSeriesElements_out.pptx", slides.export.SaveFormat.PPTX) ``` ## **Animation in Category Element** If you want to animate categories elements, write the code according to the steps listed below: 1. Load a presentation. 1. Get reference of the chart object. 1. Animate categories elements. 1. Write the presentation file to disk. In the example given below, we have animated categories elements. ```py import aspose.slides.animation as anim; import aspose.slides as slides with slides.Presentation("ExistingChart.pptx") as presentation: # Get reference of the chart object slide = presentation.slides[0] shapes = slide.shapes chart = shapes[0] # Animate categories' elements slide.timeline.main_sequence.add_effect(chart, anim.EffectType.FADE, anim.EffectSubtype.NONE, anim.EffectTriggerType.AFTER_PREVIOUS) slide.timeline.main_sequence.add_effect(chart, anim.EffectChartMinorGroupingType.BY_ELEMENT_IN_CATEGORY, 0, 0, anim.EffectType.APPEAR, anim.EffectSubtype.NONE, anim.EffectTriggerType.AFTER_PREVIOUS) slide.timeline.main_sequence.add_effect(chart, anim.EffectChartMinorGroupingType.BY_ELEMENT_IN_CATEGORY, 0, 1, anim.EffectType.APPEAR, anim.EffectSubtype.NONE, anim.EffectTriggerType.AFTER_PREVIOUS) slide.timeline.main_sequence.add_effect(chart, anim.EffectChartMinorGroupingType.BY_ELEMENT_IN_CATEGORY, 0, 2, anim.EffectType.APPEAR, anim.EffectSubtype.NONE, anim.EffectTriggerType.AFTER_PREVIOUS) slide.timeline.main_sequence.add_effect(chart, anim.EffectChartMinorGroupingType.BY_ELEMENT_IN_CATEGORY, 0, 3, anim.EffectType.APPEAR, anim.EffectSubtype.NONE, anim.EffectTriggerType.AFTER_PREVIOUS) slide.timeline.main_sequence.add_effect(chart, anim.EffectChartMinorGroupingType.BY_ELEMENT_IN_CATEGORY, 1, 0, anim.EffectType.APPEAR, anim.EffectSubtype.NONE, anim.EffectTriggerType.AFTER_PREVIOUS) slide.timeline.main_sequence.add_effect(chart, anim.EffectChartMinorGroupingType.BY_ELEMENT_IN_CATEGORY, 1, 1, anim.EffectType.APPEAR, anim.EffectSubtype.NONE, anim.EffectTriggerType.AFTER_PREVIOUS) slide.timeline.main_sequence.add_effect(chart, anim.EffectChartMinorGroupingType.BY_ELEMENT_IN_CATEGORY, 1, 2, anim.EffectType.APPEAR, anim.EffectSubtype.NONE, anim.EffectTriggerType.AFTER_PREVIOUS) slide.timeline.main_sequence.add_effect(chart, anim.EffectChartMinorGroupingType.BY_ELEMENT_IN_CATEGORY, 1, 3, anim.EffectType.APPEAR, anim.EffectSubtype.NONE, anim.EffectTriggerType.AFTER_PREVIOUS) slide.timeline.main_sequence.add_effect(chart, anim.EffectChartMinorGroupingType.BY_ELEMENT_IN_CATEGORY, 2, 0, anim.EffectType.APPEAR, anim.EffectSubtype.NONE, anim.EffectTriggerType.AFTER_PREVIOUS) slide.timeline.main_sequence.add_effect(chart, anim.EffectChartMinorGroupingType.BY_ELEMENT_IN_CATEGORY, 2, 1, anim.EffectType.APPEAR, anim.EffectSubtype.NONE, anim.EffectTriggerType.AFTER_PREVIOUS) slide.timeline.main_sequence.add_effect(chart, anim.EffectChartMinorGroupingType.BY_ELEMENT_IN_CATEGORY, 2, 2, anim.EffectType.APPEAR, anim.EffectSubtype.NONE, anim.EffectTriggerType.AFTER_PREVIOUS) slide.timeline.main_sequence.add_effect(chart, anim.EffectChartMinorGroupingType.BY_ELEMENT_IN_CATEGORY, 2, 3, anim.EffectType.APPEAR, anim.EffectSubtype.NONE, anim.EffectTriggerType.AFTER_PREVIOUS) # Write the presentation file to disk presentation.save("AnimatingCategoriesElements_out.pptx", slides.export.SaveFormat.PPTX) ``` ## **FAQ** ### Are different effect types (e.g., entrance, emphasis, exit) supported for charts like for regular shapes? Yes. A chart is treated as a shape, so it supports the standard animation effect types, including entrance, emphasis, and exit, with full control via the slide's timeline and animation sequences. ### Can I combine chart animation with slide transitions? Yes. [Transitions](https://docs.aspose.com/slides/python-net/slide-transition/) apply to the slide, while animation effects apply to objects on the slide. You can use both together in the same presentation and control them independently. ### Are chart animations preserved when saving to PPTX? Yes. When you [save to PPTX](https://docs.aspose.com/slides/python-net/save-presentation/), all animation effects and their ordering are preserved because they are part of the presentation's native animation model. ### Can I read existing chart animations from a presentation and modify them? Yes. The [API](https://reference.aspose.com/slides/python-net/aspose.slides.animation/) provides access to the slide timeline, sequences, and effects, allowing you to inspect existing chart animations and adjust them without recreating everything from scratch. ### Can I produce a video that includes chart animations using Aspose.Slides for Python via .NET? Yes. You can [export a presentation to video](https://docs.aspose.com/slides/python-net/convert-powerpoint-to-video/) while preserving animations, configuring timings and other export settings so the resulting clip reflects the animated playback. ## Related articles - [Animate PowerPoint Text in Python](https://docs.aspose.com/slides/python-net/animated-text/) - [Enhance PowerPoint Presentations with Animations in Python](https://docs.aspose.com/slides/python-net/powerpoint-animation/) # Animate PowerPoint Text in Python > Create dynamic animated text in PowerPoint and OpenDocument presentations using Aspose.Slides for Python via .NET, with easy-to-follow, optimized code examples. Source: https://docs.aspose.com/slides/python-net/animated-text/ Updated: 2026-08-02 ## **Overview** This article shows how to animate text in PowerPoint presentations using Aspose.Slides for Python. You'll learn to add effects to individual paragraphs, adjust triggers, and read back existing animation sequences. By the end, you'll be able to create reusable text-animation workflows that export to standard PPTX and play correctly in PowerPoint. ## **Add Paragraph Animation Effects** The [add_effect](https://reference.aspose.com/slides/python-net/aspose.slides.animation/sequence/add_effect/) method of the [Sequence](https://reference.aspose.com/slides/python-net/aspose.slides.animation/sequence/) class lets you apply an animation effect to a single paragraph. The sample code below demonstrates how to do this: ```py import aspose.slides as slides with slides.Presentation("Presentation.pptx") as presentation: slide = presentation.slides[0] # Select the paragraph to add the effect. auto_shape = slide.shapes[0] paragraph = auto_shape.text_frame.paragraphs[0] # Add a Fly animation effect to the selected paragraph. effect = slide.timeline.main_sequence.add_effect(paragraph, slides.animation.EffectType.FLY, slides.animation.EffectSubtype.LEFT, slides.animation.EffectTriggerType.ON_CLICK) presentation.save("ParagraphAnimationEffect.pptx", slides.export.SaveFormat.PPTX) ``` ## **Get Paragraph Animation Effects** You may want to determine which animation effects are applied to a paragraph—for example, if you plan to copy those effects to another paragraph or shape. Aspose.Slides for Python lets you retrieve all animation effects applied to the paragraphs in a text frame (shape). The sample code below shows how to get a paragraph’s animation effects: ```py import aspose.slides as slides with slides.Presentation("ParagraphAnimationEffect.pptx") as presentation: slide = presentation.slides[0] sequence = slide.timeline.main_sequence auto_shape = slide.shapes[0] for paragraph in auto_shape.text_frame.paragraphs: effects = sequence.get_effects_by_paragraph(paragraph) if len(effects) > 0: print(f"Paragraph \"{paragraph.text}\" has the first animation effect of type {str(effects[0].type)}.") ``` ## **FAQ** ### How do text animations differ from slide transitions, and can they be combined? Text animations control object behavior over time on a slide, while [transitions](https://docs.aspose.com/slides/python-net/slide-transition/) control how slides change. They’re independent and can be used together; playback order is governed by the animation timeline and the transition settings. ### Are text animations preserved when exporting to PDF or images? No. PDF and raster images are static, so you’ll see a single state of the slide without motion. To keep movement, use [video](https://docs.aspose.com/slides/python-net/convert-powerpoint-to-video/) or [HTML](https://docs.aspose.com/slides/python-net/export-to-html5/) export. ### Do text animations work in layouts and the slide master? Effects applied to layout/master objects are inherited by slides, but their timing and interaction with slide-level animations depend on the final sequence on the slide. ## Related articles - [Animation](https://docs.aspose.com/slides/python-net/examples/elements/animation/) - [Animate PowerPoint Charts in Python](https://docs.aspose.com/slides/python-net/animated-charts/) - [Enhance PowerPoint Presentations with Animations in Python](https://docs.aspose.com/slides/python-net/powerpoint-animation/) # API Limitations > Know Aspose.Slides for Python limits: exports set fixed Application/Producer metadata in PPT, PPTX, ODP, and PDF—helping you plan integrations without surprises. Source: https://docs.aspose.com/slides/python-net/api-limitations/ Updated: 2026-05-08 ## **Overview** When presentations are created or exported with Aspose.Slides, certain technical metadata is written to the output file. This article explains the limitations related to the `Application`, `Creator`, and `Producer` metadata fields in PPTX and PDF files. ## **Application and Producer** When you create or export presentations with Aspose.Slides for Python via .NET, some technical metadata is written into the file. Two fields often raise questions: **Application** identifies the program that created or last saved a **PPTX** presentation. In Aspose.Slides for Python via .NET, this value is fixed and shows the library vendor rather than your app name, even if you set [DocumentProperties.name_of_application](https://reference.aspose.com/slides/python-net/aspose.slides/documentproperties/name_of_application/). **Producer** identifies the rendering engine that generated the final file during export. In **PDF** exports, metadata uses **Creator** and **Producer** fields. With Aspose.Slides for Python via .NET, both of these are fixed and reflect the library and its version. **What’s restricted** You cannot override these fields through the API for the formats above. For **PPTX**, the Application property is written as "Aspose.Slides for Python via .NET". For **PDF**, the Creator and Producer properties are written as "Aspose.Slides for Python via .NET x.x.x". This behavior is by design and applies regardless of how you load or save the file, and regardless of values assigned to [DocumentProperties.name_of_application](https://reference.aspose.com/slides/python-net/aspose.slides/documentproperties/name_of_application/). # API Reference > Create, edit, and convert presentations in Python—no PowerPoint needed. Aspose.Slides for Python via .NET supports PPT, PPTX, and ODP with fast SVG/PDF export. Source: https://docs.aspose.com/slides/python-net/api-reference/ Updated: 2026-08-13 Aspose.Slides for Python via .NET is a class library that enables Python applications to read and write presentation documents without using Microsoft PowerPoint® or other software. Aspose.Slides for Python via .NET allows you to manage text, shapes, tables, and animations; add audio and video to slides; preview slides; and export slides to SVG, PDF format, and more. Latest API Reference can be found at [Aspose.Slides for Python via .NET API Reference](https://reference.aspose.com/slides/python-net/). ## Related articles - [Aspose.Slides for Python via .NET](https://docs.aspose.com/slides/python-net/) # Restrict Presentation Edits with Shape Locks in Python > Learn how to lock and unlock shapes in PPTX presentations with Aspose.Slides for Python via .NET to restrict selection, movement, resizing, and grouping. Source: https://docs.aspose.com/slides/python-net/applying-protection-to-presentation/ Updated: 2026-10-20 ## **Background** A common use for Aspose.Slides for Python via .NET is to create, update, and save PowerPoint (PPTX) presentations as part of an automated workflow. When users receive these presentations, restricting changes to shapes can help preserve the intended layout and content. This article explains how shapes are organized on slides and how to apply and remove shape locks in a PPTX presentation. These locks let you restrict specific editing operations on individual shapes. ## **Composition of a Slide** A presentation slide is composed of components such as autoshapes, tables, OLE objects, grouped shapes, picture frames, video frames, connectors, and other elements used to build a presentation. In Aspose.Slides for Python via .NET, each element on a slide is represented by an object that inherits from the [Shape](https://reference.aspose.com/slides/python-net/aspose.slides/shape/) class. Different shape types expose different locking options. The [BaseShapeLock](https://reference.aspose.com/slides/python-net/aspose.slides/baseshapelock/) class is the base class for shape locks. Aspose.Slides for Python via .NET provides the following lock classes: - [AutoShapeLock](https://reference.aspose.com/slides/python-net/aspose.slides/autoshapelock/) locks autoshapes. - [ConnectorLock](https://reference.aspose.com/slides/python-net/aspose.slides/connectorlock/) locks connector shapes. - [GraphicalObjectLock](https://reference.aspose.com/slides/python-net/aspose.slides/graphicalobjectlock/) locks graphical objects. - [GroupShapeLock](https://reference.aspose.com/slides/python-net/aspose.slides/groupshapelock/) locks group shapes. - [PictureFrameLock](https://reference.aspose.com/slides/python-net/aspose.slides/pictureframelock/) locks picture frames. To apply locks across a [Presentation](https://reference.aspose.com/slides/python-net/aspose.slides/presentation/), iterate through its slides and set the appropriate locks on each supported shape. ## **Apply and Remove Protection** Shape locks restrict operations such as selecting, moving, and resizing shapes. They do not make the entire presentation uneditable. ### **Apply Protection to PPTX Shapes** Aspose.Slides for Python via .NET provides the [Shape](https://reference.aspose.com/slides/python-net/aspose.slides/shape/) class to work with shapes on a slide. The example sets [select_locked](https://reference.aspose.com/slides/python-net/aspose.slides/autoshapelock/select_locked/), [position_locked](https://reference.aspose.com/slides/python-net/aspose.slides/autoshapelock/position_locked/), and [size_locked](https://reference.aspose.com/slides/python-net/aspose.slides/autoshapelock/size_locked/) to `True` for autoshapes, with equivalent locks for group shapes, connectors, and picture frames. Connectors use [position_move](https://reference.aspose.com/slides/python-net/aspose.slides/connectorlock/position_move/) for movement; groups also use [grouping_locked](https://reference.aspose.com/slides/python-net/aspose.slides/groupshapelock/grouping_locked/) to restrict grouping. The example loads an existing PPTX presentation, checks the shapes in each slide's shape collection, and saves a copy with these restrictions applied. Shapes outside the four handled types are left unchanged. The loop does not traverse the child shapes inside a group. ```python import aspose.slides as slides with slides.Presentation("Sample.pptx") as presentation: for slide in presentation.slides: for shape in slide.shapes: if isinstance(shape, slides.AutoShape): shape.shape_lock.position_locked = True shape.shape_lock.select_locked = True shape.shape_lock.size_locked = True elif isinstance(shape, slides.GroupShape): shape.shape_lock.grouping_locked = True shape.shape_lock.position_locked = True shape.shape_lock.select_locked = True shape.shape_lock.size_locked = True elif isinstance(shape, slides.Connector): shape.shape_lock.position_move = True shape.shape_lock.select_locked = True shape.shape_lock.size_locked = True elif isinstance(shape, slides.PictureFrame): shape.shape_lock.position_locked = True shape.shape_lock.select_locked = True shape.shape_lock.size_locked = True presentation.save("ProtectedSample.pptx", slides.export.SaveFormat.PPTX) ``` ### **Remove Protection** To remove a shape lock, set its value to `False`. The following example loads a presentation with shape locks and clears the selection, movement, and resizing restrictions through [AutoShapeLock](https://reference.aspose.com/slides/python-net/aspose.slides/autoshapelock/), [GroupShapeLock](https://reference.aspose.com/slides/python-net/aspose.slides/groupshapelock/), [ConnectorLock](https://reference.aspose.com/slides/python-net/aspose.slides/connectorlock/), and [PictureFrameLock](https://reference.aspose.com/slides/python-net/aspose.slides/pictureframelock/). It also clears [GroupShapeLock.grouping_locked](https://reference.aspose.com/slides/python-net/aspose.slides/groupshapelock/grouping_locked/) and saves a copy of the presentation. Other lock settings are left unchanged. ```python import aspose.slides as slides with slides.Presentation("ProtectedSample.pptx") as presentation: for slide in presentation.slides: for shape in slide.shapes: if isinstance(shape, slides.AutoShape): shape.shape_lock.position_locked = False shape.shape_lock.select_locked = False shape.shape_lock.size_locked = False elif isinstance(shape, slides.GroupShape): shape.shape_lock.grouping_locked = False shape.shape_lock.position_locked = False shape.shape_lock.select_locked = False shape.shape_lock.size_locked = False elif isinstance(shape, slides.Connector): shape.shape_lock.position_move = False shape.shape_lock.select_locked = False shape.shape_lock.size_locked = False elif isinstance(shape, slides.PictureFrame): shape.shape_lock.position_locked = False shape.shape_lock.select_locked = False shape.shape_lock.size_locked = False presentation.save("RemovedProtectionSample.pptx", slides.export.SaveFormat.PPTX) ``` ### **Conclusion** Aspose.Slides for Python via .NET lets you restrict specific editing operations on individual shapes or apply the same restrictions across slides. Choose the locks supported by each shape type, and set their values to `False` when you need to remove those restrictions. ## **FAQ** **Can I combine shape locks and password protection in the same presentation?** Yes. Shape locks restrict specific editing operations, while [password protection](https://docs.aspose.com/slides/python-net/password-protected-presentation/) can restrict opening or modifying the presentation. You can use both in the same file. **Can I restrict editing on specific slides without affecting others?** Yes. Apply locks only to shapes on the selected slides. This does not change the lock settings on other slides. **How can I apply locks to individual shapes inside a group?** Iterate through the group's [shapes](https://reference.aspose.com/slides/python-net/aspose.slides/groupshape/shapes/) collection and apply the appropriate locks to each child shape. Repeat this for any nested groups. The examples above process only the slide's shape collection, so they do not set locks on individual group members. # Manage Audio in Presentations Using Python > Easily add, extract & manage audio frames in PPT, PPTX and ODP with Aspose.Slides for Python via .NET. Explore code examples & boost your presentations today. Source: https://docs.aspose.com/slides/python-net/audio-frame/ Updated: 2026-08-05 ## **Overview** This article explains how to work with audio frames in Aspose.Slides. It shows how to add embedded audio to slides, customize the audio frame thumbnail, configure playback options such as volume, looping, hiding, trimming, and fade durations, and extract audio used in slide show transitions. ## **Create Audio Frames** Aspose.Slides for Python via .NET allows you to add audio files to slides. The audio files are embedded in slides as audio frames. 1. Create an instance of the [Presentation](https://reference.aspose.com/slides/python-net/aspose.slides/presentation/) class. 2. Get a slide's reference through its index. 3. Load the audio file stream you want to embed in the slide. 4. Add the embedded audio frame (containing the audio file) to the slide. 5. Set [PlayMode](https://reference.aspose.com/slides/python-net/aspose.slides/audioplaymodepreset) and `Volume` exposed by the [IAudioFrame](https://reference.aspose.com/slides/python-net/aspose.slides/audioframe/) object. 6. Save the modified presentation. This Python code shows you how to add an embedded audio frame to a slide: ```python import aspose.slides as slides # InstantiateS a presentation class that represents a presentation file with slides.Presentation() as pres: # Gets the first slide sld = pres.slides[0] # Loads the wav sound file to stream with open("sampleaudio.wav", "rb") as in_file: # Adds the Audio Frame audio_frame = sld.shapes.add_audio_frame_embedded(50, 150, 100, 100, in_file) # Sets the Play Mode and Volume of the Audio audio_frame.play_mode = slides.AudioPlayModePreset.AUTO audio_frame.volume = slides.AudioVolumeMode.LOUD # Writes the PowerPoint file to disk pres.save("AudioFrameEmbed_out.pptx", slides.export.SaveFormat.PPTX) ``` ## **Change Audio Frame Thumbnail** When you add an audio file to a presentation, the audio appears as a frame with a standard default image (see the image in the section below). You change the audio frame's thumbnail (set your preferred image). This Python code shows you how to change an audio frame's thumbnail or preview image: ```python import aspose.slides as slides with slides.Presentation() as presentation: slide = presentation.slides[0] # Adds an audio frame to the slide with a specified position and size. with open("sample2.mp3", "rb") as audio_fs: audioFrame = slide.shapes.add_audio_frame_embedded(150, 100, 50, 50, audio_fs) # Adds an image to presentation resources. with open("eagle.jpeg", "rb") as image_fs: data = image_fs.read() audioImage = presentation.images.add_image(data) # Sets the image for the audio frame. audioFrame.picture_format.picture.image = audioImage #Saves the modified presentation to disk presentation.save("example_out.pptx", slides.export.SaveFormat.PPTX) ``` ## **Change Audio Play Options** Aspose.Slides for Python via .NET allows you to change options that control an audio's playback or properties. For example, you can adjust an audio's volume, set the audio to play looped, or even hide the audio icon. The **Audio Options** pane in Microsoft PowerPoint: ![example1_image](https://docs.aspose.com/slides/python-net/audio-frame/audio_frame_0.png) PowerPoint **Audio Options** that correspond to Aspose.Slides [AudioFrame](https://reference.aspose.com/slides/python-net/aspose.slides/audioframe/) properties: - **Start** drop-down list matches the [AudioFrame.play_mode](https://reference.aspose.com/slides/python-net/aspose.slides/audioframe/play_mode/) property - **Volume** matches the [AudioFrame.volume](https://reference.aspose.com/slides/python-net/aspose.slides/audioframe/volume/) property - **Play Across Slides** matches the [AudioFrame.play_across_slides](https://reference.aspose.com/slides/python-net/aspose.slides/audioframe/play_across_slides/) property - **Loop until Stopped** matches the [AudioFrame.play_loop_mode](https://reference.aspose.com/slides/python-net/aspose.slides/audioframe/play_loop_mode/) property - **Hide During Show** matches the [AudioFrame.hide_at_showing](https://reference.aspose.com/slides/python-net/aspose.slides/audioframe/hide_at_showing/) property - **Rewind after Playing** matches the [AudioFrame.rewind_audio](https://reference.aspose.com/slides/python-net/aspose.slides/audioframe/rewind_audio/) property PowerPoint **Editing** options that correspond to Aspose.Slides [AudioFrame](https://reference.aspose.com/slides/python-net/aspose.slides/audioframe/) properties: - **Fade In** matches the [AudioFrame.fade_in_duration](https://reference.aspose.com/slides/python-net/aspose.slides/audioframe/fade_in_duration/) property - **Fade Out** matches the [AudioFrame.fade_out_duration](https://reference.aspose.com/slides/python-net/aspose.slides/audioframe/fade_out_duration/) property - **Trim Audio Start Time** matches the [AudioFrame.trim_from_start](https://reference.aspose.com/slides/python-net/aspose.slides/audioframe/trim_from_start/) property - **Trim Audio End Time** value equals the audio duration minus the value of [AudioFrame.trim_from_end](https://reference.aspose.com/slides/python-net/aspose.slides/audioframe/trim_from_end/) property The PowerPoint **Volume controll** on the audio control panel corresponds to the [AudioFrame.volume_value](https://reference.aspose.com/slides/python-net/aspose.slides/audioframe/volume_value/) property. It lets you change the audio volume as a percentage. This is how you change the Audio Play options: 1. [Сreate](https://docs.aspose.com/slides/python-net/audio-frame/#create-audio-frame) or get the Audio Frame. 2. Set new values for the Audio Frame properties you want to adjust. 3. Save the modified PowerPoint file. This Python code demonstrates an operation in which an audio's options are adjusted: ```python import aspose.slides as slides with slides.Presentation("AudioFrameEmbed_out.pptx") as pres: # Gets the AudioFrame shape audioFrame = pres.slides[0].shapes[0] # Sets the Play mode to play on click audioFrame.play_mode = slides.AudioPlayModePreset.ON_CLICK # Sets the Volume to Low audioFrame.volume = slides.AudioVolumeMode.LOW # Sets the audio to play across slides audioFrame.play_across_slides = True # Disables loop for the audio audioFrame.play_loop_mode = False # Hides the AudioFrame during the slide show audioFrame.hide_at_showing = True # Rewinds the audio to start after playing audioFrame.rewind_audio = True # Saves the PowerPoint file to disk pres.save("AudioFrameEmbed_changed.pptx", slides.export.SaveFormat.PPTX) ``` This Python example shows how to add a new audio frame with embedded audio, trim it, and set the fade durations: ```py import aspose.slides as slides with slides.Presentation() as pres: slide = pres.slides[0] with open("sampleaudio.mp3", "rb") as audio_stream: audio_data = audio_stream.read() audio = pres.audios.add_audio(audio_data) audio_frame = slide.shapes.add_audio_frame_embedded(50, 50, 100, 100, audio) # Sets the trimming start offset to 1.5 seconds audio_frame.trim_from_start = 1500.0 # Sets the trimming end offset to 2 seconds audio_frame.trim_from_end = 2000.0 # Sets the fade-in duration to 200 ms audio_frame.fade_in_duration = 200.0 # Sets the fade-out duration to 500 ms audio_frame.fade_out_duration = 500.0 pres.save("AudioFrameTrimFade_out.pptx", slides.export.SaveFormat.PPTX) ``` The following code sample shows how to retrieve an audio frame with embedded audio and set its volume to 85%: ```py import aspose.slides as slides with slides.Presentation("AudioFrameEmbed_out.pptx") as pres: # Gets an audio frame shape audio_frame = pres.slides[0].shapes[0] # Sets the audio volume to 85% audio_frame.volume_value = 85.0 pres.save("AudioFrameValue_out.pptx", slides.export.SaveFormat.PPTX) ``` ## **Manage Audio Captions** Aspose.Slides allows you to add closed captions to an audio frame through the [caption_tracks](https://reference.aspose.com/slides/python-net/aspose.slides/audioframe/caption_tracks/) property. This property returns an [CaptionsCollection](https://reference.aspose.com/slides/python-net/aspose.slides/captionscollection/), which lets you add WebVTT caption tracks, iterate through existing tracks, and remove them when necessary. **Add Audio Captions** Use the [caption_tracks](https://reference.aspose.com/slides/python-net/aspose.slides/audioframe/caption_tracks/) property to attach one or more caption tracks to an audio frame. In the following example, an audio file is added to a slide, and then a new caption track is loaded from a `.vtt` file. ```py import aspose.slides as slides with slides.Presentation() as presentation: with open("audio.mp3", "rb") as audio_stream: audio = presentation.audios.add_audio(audio_stream.read()) slide = presentation.slides[0] audio_frame = slide.shapes.add_audio_frame_embedded(10, 10, 50, 50, audio) # Add a new caption track from a WebVTT file. audio_frame.caption_tracks.add("New track", "track.vtt") presentation.save("audio_with_captions.pptx", slides.export.SaveFormat.PPTX) ``` **Extract Audio Captions** You can iterate through the caption tracks associated with an audio frame and save them as `.vtt` files. Each caption track exposes its binary data and unique identifier, which can be used when exporting captions. ```py import aspose.slides as slides with slides.Presentation("audio_with_captions.pptx") as presentation: slide = presentation.slides[0] for shape in slide.shapes: if isinstance(shape, slides.AudioFrame): audio_frame = shape for caption_track in audio_frame.caption_tracks: # Save the caption track as a .vtt file. with open(f"{caption_track.caption_id}.vtt", "wb") as track_stream: track_stream.write(caption_track.binary_data) ``` **Remove Audio Captions** To remove captions from an audio frame, use the methods provided by [CaptionsCollection](https://reference.aspose.com/slides/python-net/aspose.slides/captionscollection/), such as [clear](https://reference.aspose.com/slides/python-net/aspose.slides/captionscollection/clear/), [remove](https://reference.aspose.com/slides/python-net/aspose.slides/captionscollection/remove/), or [remove_at](https://reference.aspose.com/slides/python-net/aspose.slides/captionscollection/remove_at/). The following example removes all caption tracks from an audio frame. ```py import aspose.slides as slides with slides.Presentation("audio_with_captions.pptx") as presentation: slide = presentation.slides[0] audio_frame = slide.shapes[0] # type: slides.AudioFrame # Remove all caption tracks from the audio frame. audio_frame.caption_tracks.clear() presentation.save("audio_without_captions.pptx", slides.export.SaveFormat.PPTX) ``` ## **Extract Audio** Aspose.Slides for Python via .NET allows you to extract the sound used in slide show transitions. For example, you can extract the sound used in a specific slide. 1. Create an instance of the [Presentation](https://reference.aspose.com/slides/python-net/aspose.slides/presentation/) class and load the presentation containing the audio. 2. Get the relevant slide's reference through its index. 3. Access the slideshow transitions for the slide. 4. Extract the sound in byte data. This Python code shows you how to extract the audio used in a slide. Note that `slide_show_transition.sound` is `None` unless the slide's transition actually has a sound attached, so `AudioSlide.pptx` here is a presentation whose first slide carries a transition sound—an audio frame placed on a slide is a different object and is read through [AudioFrame.embedded_audio](https://reference.aspose.com/slides/python-net/aspose.slides/audioframe/embedded_audio/) instead: ```python import aspose.slides as slides with slides.Presentation("AudioSlide.pptx") as pres: # Accesses the desired slide slide = pres.slides[0] # Gets the slideshow transition effects for the slide transition = slide.slide_show_transition #Extracts the sound in byte array audio = transition.sound.binary_data print("Length: " + str(len(audio))) ``` ## **FAQ** ### Can I reuse the same audio asset across multiple slides without inflating the file size? Yes. Add the audio once to the presentation’s shared [audio collection](https://reference.aspose.com/slides/python-net/aspose.slides/presentation/audios/) and create additional audio frames that reference that existing asset. This avoids duplicating media data and keeps the presentation size under control. ### Can I replace the sound in an existing audio frame without recreating the shape? Yes. For a linked sound, update the [link path](https://reference.aspose.com/slides/python-net/aspose.slides/audioframe/link_path_long/) to point to the new file. For an embedded sound, swap the [embedded audio](https://reference.aspose.com/slides/python-net/aspose.slides/audioframe/embedded_audio/) object with another one from the presentation’s [audio collection](https://reference.aspose.com/slides/python-net/aspose.slides/presentation/audios/). The frame’s formatting and most playback settings remain intact. ### Does trimming change the underlying audio data stored in the presentation? No. Trimming adjusts only the playback boundaries. The original audio bytes remain untouched and accessible through the embedded audio or the presentation’s audio collection. ## Related articles - [Audio](https://docs.aspose.com/slides/python-net/examples/elements/audio/) - [Add Videos to Presentations in Python](https://docs.aspose.com/slides/python-net/video-frame/) # Automating PowerPoint Generation in Python: Create Dynamic Presentations Easily > Automate slide creation on cloud platforms with Aspose.Slides for Python—generate, edit, and convert PowerPoint and OpenDocument files fast and reliably. Source: https://docs.aspose.com/slides/python-net/automating-powerpoint-generation-on-cloud-platforms/ Updated: 2026-08-05 ## **Introduction** Creating PowerPoint presentations manually can be a time-consuming and repetitive task—especially when the content is based on dynamic data that frequently changes. Whether it's generating weekly business reports, assembling educational material, or producing client-ready sales decks, automation can save countless hours and ensure consistency across teams. For Python developers, automating the creation of PowerPoint presentations opens up powerful possibilities. You can integrate slide generation into web portals, desktop tools, backend services, or cloud platforms to dynamically convert data into professional, branded presentations—on-demand. In this article, we’ll explore the common use cases for automated PowerPoint generation in Python apps (including deployments on cloud platforms) and why it's becoming an essential feature in modern solutions. From pulling real-time business data to converting text or images into slides, the goal is to transform raw content into structured, visual formats your audience can instantly understand. ## **Common Use Cases for PowerPoint Automation in Python** Automating PowerPoint generation is especially useful in scenarios where presentation content needs to be dynamically assembled, personalized, or frequently updated. Some of the most common real-world use cases include: - **Business Reports & Dashboards** Generate sales summaries, KPIs, or financial performance reports by pulling live data from databases or APIs. - **Personalized Sales & Marketing Decks** Automatically create client-specific pitch decks using CRM or form data, ensuring quick turnaround and brand consistency. - **Educational Content** Convert learning material, quizzes, or course summaries into structured slide decks for e-learning platforms. - **Data & AI-Powered Insights** Use natural language processing or analytics engines to transform raw data or long-form text into summarized presentations. - **Media-Based Slides** Assemble presentations from uploaded images, annotated screenshots, or video keyframes with supporting descriptions. - **Document Conversion** Automatically convert Word documents, PDFs, or form inputs into visual presentations with minimal manual effort. - **Developer and Technical Tools** Create tech demos, documentation overviews, or changelogs in slide format directly from code or markdown content. By automating these workflows, organizations can scale their content creation, maintain consistency, and free up time for more strategic work. ## **Let's Code** For this example, we’ve chosen **[Aspose.Slides for Python](https://products.aspose.com/slides/python-net/)** to demonstrate PowerPoint automation due to its comprehensive feature set and ease of use when working with presentations programmatically. Unlike lower-level libraries, which require developers to work directly with the Open XML structure (often resulting in verbose and less readable code), Aspose.Slides provides a higher-level API. It abstracts away the complexity, allowing developers to focus on presentation logic—such as layout, formatting, and data binding—without needing to understand the PowerPoint file format in detail. Although Aspose.Slides is a commercial library, it offers a [free trial](https://releases.aspose.com/slides/python-net/) version that is fully capable of running the examples provided in this article. For the purpose of demonstrating ideas, testing features, or building a proof of concept like the one we’re covering here, the trial is more than sufficient. This makes it a convenient option for experimenting with automated PowerPoint generation without needing to commit to a license upfront. Ok, let’s walk through building a sample presentation using real-world content. ### **Create a Title Slide** We'll begin by creating a new presentation and adding a title slide with a main heading and subtitle. ```py import aspose.slides as slides import aspose.slides.charts as charts import aspose.pydrawing as draw with slides.Presentation() as presentation: slide_0 = presentation.slides[0] slide_0.layout_slide = presentation.layout_slides.get_by_type(slides.SlideLayoutType.TITLE) title_shape = slide_0.shapes[0] subtitle_shape = slide_0.shapes[1] title_shape.text_frame.text = "Quarterly Business Review – Q1 2025" subtitle_shape.text_frame.text = "Prepared for Executive Team" ``` ![The title slide](https://docs.aspose.com/slides/python-net/automating-powerpoint-generation-on-cloud-platforms/slide_0.png) ### **Add a Slide with a Column Chart** Next, we’ll create a slide showing regional sales performance as a column chart. ```py import aspose.slides.charts as charts import aspose.slides as slides with slides.Presentation() as presentation: layout_slide_1 = presentation.layout_slides.get_by_type(slides.SlideLayoutType.BLANK) slide_1 = presentation.slides.add_empty_slide(layout_slide_1) chart = slide_1.shapes.add_chart(charts.ChartType.CLUSTERED_COLUMN, 100, 100, 500, 350, False) chart.legend.position = charts.LegendPositionType.BOTTOM chart.has_title = True chart.chart_title.add_text_frame_for_overriding("Data from January – March 2025") chart.chart_title.overlay = False workbook = chart.chart_data.chart_data_workbook worksheet_index = 0 chart.chart_data.categories.add(workbook.get_cell(worksheet_index, 1, 0, "North America")) chart.chart_data.categories.add(workbook.get_cell(worksheet_index, 2, 0, "Europe")) chart.chart_data.categories.add(workbook.get_cell(worksheet_index, 3, 0, "Asia Pacific")) chart.chart_data.categories.add(workbook.get_cell(worksheet_index, 4, 0, "Latin America")) chart.chart_data.categories.add(workbook.get_cell(worksheet_index, 5, 0, "Middle East")) series = chart.chart_data.series.add(workbook.get_cell(worksheet_index, 0, 1, "Sales ($K)"), chart.type) series.data_points.add_data_point_for_bar_series(workbook.get_cell(worksheet_index, 1, 1, 480)) series.data_points.add_data_point_for_bar_series(workbook.get_cell(worksheet_index, 2, 1, 365)) series.data_points.add_data_point_for_bar_series(workbook.get_cell(worksheet_index, 3, 1, 290)) series.data_points.add_data_point_for_bar_series(workbook.get_cell(worksheet_index, 4, 1, 150)) series.data_points.add_data_point_for_bar_series(workbook.get_cell(worksheet_index, 5, 1, 120)) ``` ![The slide with the chart](https://docs.aspose.com/slides/python-net/automating-powerpoint-generation-on-cloud-platforms/slide_1.png) ### **Add a Slide with a Table** We’ll now add a slide that presents key performance metrics in table format. ```py import aspose.slides as slides with slides.Presentation() as presentation: layout_slide_2 = presentation.layout_slides.get_by_type(slides.SlideLayoutType.BLANK) slide_2 = presentation.slides.add_empty_slide(layout_slide_2) column_widths = [200, 100] row_heights = [40, 40, 40, 40, 40] table = slide_2.shapes.add_table(200, 200, column_widths, row_heights) table.columns[0][0].text_frame.text = "Metric" table.columns[1][0].text_frame.text = "Value" table.columns[0][1].text_frame.text = "Total Revenue" table.columns[1][1].text_frame.text = "$1.4M" table.columns[0][2].text_frame.text = "Gross Margin" table.columns[1][2].text_frame.text = "54%" table.columns[0][3].text_frame.text = "New Customers" table.columns[1][3].text_frame.text = "340" table.columns[0][4].text_frame.text = "Customer Retention" table.columns[1][4].text_frame.text = "87%" ``` ![The slide with the table](https://docs.aspose.com/slides/python-net/automating-powerpoint-generation-on-cloud-platforms/slide_2.png) ### **Add a Summary Slide with Bullet Points** Lastly, we’ll include a summary and action plan using a simple bullet list. ```py import aspose.pydrawing as draw import aspose.slides as slides def create_bullet_paragraph(text): paragraph = slides.Paragraph() paragraph.paragraph_format.bullet.type = slides.BulletType.SYMBOL paragraph.paragraph_format.indent = 15 paragraph.paragraph_format.default_portion_format.fill_format.fill_type = slides.FillType.SOLID paragraph.paragraph_format.default_portion_format.fill_format.solid_fill_color.color = draw.Color.black paragraph.text = text return paragraph ``` ```py import aspose.pydrawing as draw import aspose.slides as slides def create_bullet_paragraph(text): paragraph = slides.Paragraph() paragraph.paragraph_format.bullet.type = slides.BulletType.SYMBOL paragraph.paragraph_format.indent = 15 paragraph.paragraph_format.default_portion_format.fill_format.fill_type = slides.FillType.SOLID paragraph.paragraph_format.default_portion_format.fill_format.solid_fill_color.color = draw.Color.black paragraph.text = text return paragraph with slides.Presentation() as presentation: layout_slide_3 = presentation.layout_slides.get_by_type(slides.SlideLayoutType.BLANK) slide_3 = presentation.slides.add_empty_slide(layout_slide_3) bullet_list = slide_3.shapes.add_auto_shape(slides.ShapeType.RECTANGLE, 100, 50, 600, 200) bullet_list.fill_format.fill_type = slides.FillType.NO_FILL bullet_list.line_format.fill_format.fill_type = slides.FillType.NO_FILL bullet_list.text_frame.paragraphs.clear() bullet_list.text_frame.paragraphs.add(create_bullet_paragraph("Strong performance in North America; growth opportunity in Asia Pacific")) bullet_list.text_frame.paragraphs.add(create_bullet_paragraph("Improve marketing outreach in underperforming regions")) bullet_list.text_frame.paragraphs.add(create_bullet_paragraph("Prepare new campaign strategy for Q2")) bullet_list.text_frame.paragraphs.add(create_bullet_paragraph("Schedule follow-up review in early July")) ``` ![The slide with the text](https://docs.aspose.com/slides/python-net/automating-powerpoint-generation-on-cloud-platforms/slide_3.png) ### **Save the Presentation** Finally, we save the presentation to disk: ```py import aspose.slides as slides with slides.Presentation() as presentation: presentation.save("presentation.pptx", slides.export.SaveFormat.PPTX) ``` ## **Conclusion** Automating PowerPoint generation in Python applications offers clear benefits in saving time and reducing manual effort. By integrating dynamic content such as charts, tables, and text, developers can quickly produce consistent, professional presentations—ideal for business reports, client meetings, or educational content. In this article, we've demonstrated how to automate the creation of a presentation from scratch, including adding a title slide, charts, and tables. This approach can be applied across various use cases where automated, data-driven presentations are needed. By leveraging the right tools, Python developers can efficiently automate PowerPoint creation, enhancing productivity and ensuring consistency across presentations. # Customize Bubble Charts in Presentations with Python > Create and customize powerful bubble charts in PowerPoint and OpenDocument with Aspose.Slides for Python via .NET to enhance your data visualization easily. Source: https://docs.aspose.com/slides/python-net/bubble-chart/ Updated: 2026-11-08 ## **Overview** This article shows how to work with bubble charts in Aspose.Slides. It covers two specific customization options: scaling bubble sizes through the `bubble_size_scale` property and controlling how bubble size values are represented through the `bubble_size_representation` property. The examples demonstrate how to create a bubble chart, adjust its size scaling, and switch the bubble size representation to use width. The article also includes a short FAQ section that clarifies support for the “Bubble with 3-D” chart type, notes that practical chart limits depend on performance and the target PowerPoint version, and explains that export preserves the chart’s appearance through the Aspose.Slides rendering engine. ## **Bubble Chart Size Scaling** Aspose.Slides for Python via .NET provides support for Bubble chart size scaling. In Aspose.Slides for Python via .NET **ChartSeries.bubble_size_scale** and **ChartSeriesGroup.bubble_size_scale** properties have been added. Below sample example is given.  ```py import aspose.slides.charts as charts import aspose.slides as slides with slides.Presentation() as pres: chart = pres.slides[0].shapes.add_chart(charts.ChartType.BUBBLE, 100, 100, 400, 300) chart.chart_data.series_groups[0].bubble_size_scale = 150 pres.save("Result.pptx", slides.export.SaveFormat.PPTX) ``` ## **Represent Data as Bubble Chart Sizes** Property **bubble_size_representation** has been added to ChartSeries, ChartSeriesGroup classes. **bubble_size_representation** specifies how the bubble size values are represented in the bubble chart. Possible values are: **BubbleSizeRepresentationType.AREA** and **BubbleSizeRepresentationType.WIDTH**. Accordingly, **BubbleSizeRepresentationType** enum has been added to specify the possible ways to represent data as bubble chart sizes. Sample code is given below. ```py import aspose.slides.charts as charts import aspose.slides as slides with slides.Presentation() as pres: chart = pres.slides[0].shapes.add_chart(charts.ChartType.BUBBLE, 50, 50, 600, 400, True) chart.chart_data.series_groups[0].bubble_size_representation = charts.BubbleSizeRepresentationType.WIDTH pres.save("Presentation_BubbleSizeRepresentation.pptx", slides.export.SaveFormat.PPTX) ``` [![Two plots use identical X and Y coordinates and size values 1, 4 and 9. In Area mode their circle areas follow 1 to 4 to 9. In Width mode their diameters follow that ratio.](https://docs.aspose.com/slides/python-net/bubble-chart/visual-bubble-chart-bf890435c020.svg)](https://docs.aspose.com/slides/python-net/bubble-chart/visual-bubble-chart-bf890435c020.svg) *Illustrative comparison at the same scale. Area uses the circle’s area, while Width uses its diameter.* ## **FAQ** ### Is a "bubble chart with 3-D effect" supported, and how does it differ from a regular one? Yes. There is a separate chart type, "Bubble with 3-D." It applies 3-D styling to the bubbles but does not add an additional axis; the data remain X-Y-S (size). The type is available in the [chart type](https://reference.aspose.com/slides/python-net/aspose.slides.charts/charttype/) enumeration. ### Is there a limit on the number of series and points in a bubble chart? There is no hard limit at the API level; constraints are determined by performance and the target PowerPoint version. It is recommended to keep the number of points reasonable for readability and rendering speed. ### How will export affect the appearance of a bubble chart (PDF, images)? Export to supported formats preserves the chart’s appearance; rendering is performed by the Aspose.Slides engine. For raster/vector formats, general chart-graphics rendering rules apply (resolution, anti-aliasing), so choose sufficient DPI for printing. # Manage Callouts in Presentation Charts with Python > Create and style callouts in Aspose.Slides for Python .NET with concise code examples, compatible with PPT, PPTX and ODP to automate presentation workflows. Source: https://docs.aspose.com/slides/python-net/callout/ Updated: 2026-08-05 ## **Overview** This article explains how to work with callouts for chart data labels in Aspose.Slides. It shows how to use the `show_label_as_data_callout` property to display labels as callouts, how to configure callout-related label settings for a doughnut chart, and notes that callouts and their appearance are preserved when presentations are exported to PDF, HTML5, SVG, and raster image formats. ## **Using Callouts** New property **show_label_as_data_callout** has been added to **DataLabelFormat** class, which determines either specified chart's data label will be displayed as data callout or as data label. In the example given below, we have set the Callouts. ```py import aspose.slides as slides with slides.Presentation() as presentation: chart = presentation.slides[0].shapes.add_chart(slides.charts.ChartType.PIE, 50, 50, 500, 400) chart.chart_data.series[0].labels.default_data_label_format.show_value = True chart.chart_data.series[0].labels.default_data_label_format.show_label_as_data_callout = True chart.chart_data.series[0].labels[2].data_label_format.show_label_as_data_callout = False presentation.save("DisplayChartLabels_out.pptx", slides.export.SaveFormat.PPTX) ``` ## **Set Callout for Doughnut Chart** Aspose.Slides for Python via .NET provides support for setting series data label callout shape for a Doughnut chart. Below sample example is given.  ```py import aspose.slides.charts as charts import aspose.slides as slides import aspose.pydrawing as draw with slides.Presentation() as pres: slide = pres.slides[0] chart = slide.shapes.add_chart(charts.ChartType.DOUGHNUT, 10, 10, 500, 500, False) workBook = chart.chart_data.chart_data_workbook chart.chart_data.series.clear() chart.chart_data.categories.clear() chart.has_legend = False seriesIndex = 0 while seriesIndex < 15: series = chart.chart_data.series.add(workBook.get_cell(0, 0, seriesIndex + 1, "SERIES " + str(seriesIndex)), chart.type) series.explosion = 0 series.parent_series_group.doughnut_hole_size = 20 series.parent_series_group.first_slice_angle = 351 seriesIndex += 1 categoryIndex = 0 while categoryIndex < 15: chart.chart_data.categories.add(workBook.get_cell(0, categoryIndex + 1, 0, "CATEGORY " + str(categoryIndex))) i = 0 while i < len(chart.chart_data.series): iCS = chart.chart_data.series[i] dataPoint = iCS.data_points.add_data_point_for_doughnut_series(workBook.get_cell(0, categoryIndex + 1, i + 1, 1)) dataPoint.format.fill.fill_type = slides.FillType.SOLID dataPoint.format.line.fill_format.fill_type = slides.FillType.SOLID dataPoint.format.line.fill_format.solid_fill_color.color = draw.Color.white dataPoint.format.line.width = 1 dataPoint.format.line.style = slides.LineStyle.SINGLE dataPoint.format.line.dash_style = slides.LineDashStyle.SOLID if i == len(chart.chart_data.series) - 1: lbl = dataPoint.label lbl.text_format.text_block_format.autofit_type = slides.TextAutofitType.SHAPE lbl.data_label_format.text_format.portion_format.font_bold = slides.NullableBool.TRUE lbl.data_label_format.text_format.portion_format.latin_font = slides.FontData("DINPro-Bold") lbl.data_label_format.text_format.portion_format.font_height = 12 lbl.data_label_format.text_format.portion_format.fill_format.fill_type = slides.FillType.SOLID lbl.data_label_format.text_format.portion_format.fill_format.solid_fill_color.color = draw.Color.light_gray lbl.data_label_format.format.line.fill_format.solid_fill_color.color = draw.Color.white lbl.data_label_format.show_value = False lbl.data_label_format.show_category_name = True lbl.data_label_format.show_series_name = False lbl.data_label_format.show_leader_lines = True lbl.data_label_format.show_label_as_data_callout = False chart.validate_chart_layout() lbl.as_i_layoutable.x += 0.5 lbl.as_i_layoutable.y += 0.5 i += 1 categoryIndex +=1 pres.save("chart.pptx", slides.export.SaveFormat.PPTX) ``` ## **FAQ** ### Are callouts preserved when converting a presentation to PDF, HTML5, SVG, or images? Yes. Callouts are part of the chart rendering, so when you export to [PDF](https://docs.aspose.com/slides/python-net/convert-powerpoint-to-pdf/), [HTML5](https://docs.aspose.com/slides/python-net/export-to-html5/), [SVG](https://docs.aspose.com/slides/python-net/render-a-slide-as-an-svg-image/), or [raster images](https://docs.aspose.com/slides/python-net/convert-powerpoint-to-png/), they are preserved together with the slide’s formatting. ### Do custom fonts work in callouts, and can their appearance be preserved on export? Yes. Aspose.Slides supports [embedding fonts](https://docs.aspose.com/slides/python-net/embedded-font/) into the presentation and controls font embedding during exports such as [PDF](https://docs.aspose.com/slides/python-net/convert-powerpoint-to-pdf/), ensuring the callouts look the same across different systems. # Customize Chart Axes in Presentations with Python > Discover how to use Aspose.Slides for Python via .NET to customize chart axes in PowerPoint and OpenDocument presentations for reports and visualizations. Source: https://docs.aspose.com/slides/python-net/chart-axis/ Updated: 2026-10-30 ## **Overview** This article explains how to customize chart axes with Aspose.Slides for Python via .NET. It covers calculated axis values, switching chart rows and columns, axis visibility, category label and tick-mark intervals, date categories and formatting, title rotation, axis positioning, display units, and logarithmic scaling. ## **Get the Max Values on the Vertical Axis on Charts** Create a [Presentation](https://reference.aspose.com/slides/python-net/aspose.slides/presentation/) and add an area chart with default data. Call [validate_chart_layout](https://reference.aspose.com/slides/python-net/aspose.slides.charts/chart/validate_chart_layout/) before reading calculated axis values so that the chart layout is up to date. Read [actual_max_value](https://reference.aspose.com/slides/python-net/aspose.slides.charts/axis/actual_max_value/) and [actual_min_value](https://reference.aspose.com/slides/python-net/aspose.slides.charts/axis/actual_min_value/) for the axis limits, and [actual_major_unit](https://reference.aspose.com/slides/python-net/aspose.slides.charts/axis/actual_major_unit/) and [actual_minor_unit](https://reference.aspose.com/slides/python-net/aspose.slides.charts/axis/actual_minor_unit/) for the tick intervals. [actual_major_unit_scale](https://reference.aspose.com/slides/python-net/aspose.slides.charts/axis/actual_major_unit_scale/) and [actual_minor_unit_scale](https://reference.aspose.com/slides/python-net/aspose.slides.charts/axis/actual_minor_unit_scale/) provide time-unit scales, which are relevant to date axes. The example stores these values in local variables and saves the chart. ```python import aspose.slides as slides import aspose.slides.charts as charts with slides.Presentation() as presentation: slide = presentation.slides[0] chart = slide.shapes.add_chart(charts.ChartType.AREA, 100, 100, 500, 350) chart.validate_chart_layout() max_value = chart.axes.vertical_axis.actual_max_value min_value = chart.axes.vertical_axis.actual_min_value major_unit = chart.axes.vertical_axis.actual_major_unit minor_unit = chart.axes.vertical_axis.actual_minor_unit major_unit_scale = chart.axes.vertical_axis.actual_major_unit_scale minor_unit_scale = chart.axes.vertical_axis.actual_minor_unit_scale presentation.save("AxisValues_out.pptx", slides.export.SaveFormat.PPTX) ``` ## **Swap the Data between Axes** Use [switch_row_column](https://reference.aspose.com/slides/python-net/aspose.slides.charts/chartdata/switch_row_column/) to exchange the roles of series and categories in chart data. Each former category becomes a series, and each former series becomes a category. This changes how the data is grouped; it does not exchange the horizontal and vertical axes. The example uses [set_range](https://reference.aspose.com/slides/python-net/aspose.slides.charts/chartdata/set_range/) to bind the default data to `Sheet1!A1:D5`, including the header row and category column, before switching rows and columns. It saves a chart with four series and three categories. ```python import aspose.slides as slides import aspose.slides.charts as charts with slides.Presentation() as presentation: slide = presentation.slides[0] chart = slide.shapes.add_chart(charts.ChartType.CLUSTERED_COLUMN, 100, 100, 400, 300) chart.chart_data.set_range("Sheet1!A1:D5") chart.chart_data.switch_row_column() presentation.save("SwitchChartRowColumns_out.pptx", slides.export.SaveFormat.PPTX) ``` ## **Reverse the Plotting Order of an Axis** Use [is_plot_order_reversed](https://reference.aspose.com/slides/python-net/aspose.slides.charts/axis/is_plot_order_reversed/) to reverse a category or value axis. For example, a horizontal bar chart can show project stages from top to bottom in the same order as the worksheet: Planning, Development, Testing. Reversing an axis changes the plotting direction; it does not sort or rearrange the workbook data. By comparison, [switch_row_column](https://reference.aspose.com/slides/python-net/aspose.slides.charts/chartdata/switch_row_column/) exchanges the roles of series and categories. The following example creates a horizontal bar chart with three stages and one series. It saves a presentation with three slides: normal order, reversed categories, and reversed values. Each copy uses the same dataset, and only one axis is reversed on each copy. ```python import aspose.slides as slides import aspose.slides.charts as charts with slides.Presentation() as presentation: slide = presentation.slides[0] chart = slide.shapes.add_chart(charts.ChartType.CLUSTERED_BAR, 50, 40, 620, 320) chart.has_legend = False chart.chart_data.categories.clear() chart.chart_data.series.clear() workbook = chart.chart_data.chart_data_workbook workbook.clear(0) series = chart.chart_data.series.add(charts.ChartType.CLUSTERED_BAR) stages = ["Planning", "Development", "Testing"] values = [10, 30, 20] for i, stage in enumerate(stages): category_cell = workbook.get_cell(0, i + 1, 0, stage) chart.chart_data.categories.add(category_cell) value_cell = workbook.get_cell(0, i + 1, 1, values[i]) series.data_points.add_data_point_for_bar_series(value_cell) # Slide 2: display the first category at the top. category_slide = presentation.slides.add_clone(slide) category_chart = category_slide.shapes[0] category_chart.axes.vertical_axis.is_plot_order_reversed = True # Keep the horizontal value axis at the bottom. category_chart.axes.vertical_axis.cross_type = charts.CrossesType.MAXIMUM # Slide 3: reverse only the horizontal numeric scale. value_slide = presentation.slides.add_clone(slide) value_chart = value_slide.shapes[0] value_chart.axes.horizontal_axis.is_plot_order_reversed = True presentation.save("ReversedAxes.pptx", slides.export.SaveFormat.PPTX) ``` Reversing an axis can also move the perpendicular axis to the opposite side of the plot. [cross_type](https://reference.aspose.com/slides/python-net/aspose.slides.charts/axis/cross_type/) controls where the other axis crosses the axis being configured. In slide 2, setting it to `MAXIMUM` on the reversed category axis keeps the horizontal value axis at the bottom. For a specific crossing point, use [cross_at](https://reference.aspose.com/slides/python-net/aspose.slides.charts/axis/cross_at/). Check the crossing settings when changing direction, especially if the chart already has a custom crossing point. Set `is_plot_order_reversed` back to `False` to restore the normal plotting direction; crossing settings are separate. | Normal order (slide 1) | Reversed categories (slide 2) | Reversed values (slide 3) | | --- | --- | --- | | ![Horizontal bar chart with normal category and value axis order](https://docs.aspose.com/slides/python-net/chart-axis/axis-order-normal.png) | ![Horizontal bar chart with categories displayed from top to bottom](https://docs.aspose.com/slides/python-net/chart-axis/axis-order-categories-reversed.png) | ![Horizontal bar chart with a reversed value axis and zero on the right](https://docs.aspose.com/slides/python-net/chart-axis/axis-order-values-reversed.png) | | Categories run from bottom to top; values increase from left to right. | Planning, Development, and Testing run from top to bottom. Values and workbook row order are unchanged. | Categories retain their normal order; values increase from right to left. The category axis crosses at zero on the right. | ## **Disable the Vertical Axis for Line Charts** Set [is_visible](https://reference.aspose.com/slides/python-net/aspose.slides.charts/axis/is_visible/) to `False` on the vertical axis to hide it. The example creates a line chart with default data and saves it with the vertical axis hidden. ```python import aspose.slides as slides import aspose.slides.charts as charts with slides.Presentation() as presentation: slide = presentation.slides[0] chart = slide.shapes.add_chart(charts.ChartType.LINE, 100, 100, 400, 300) chart.axes.vertical_axis.is_visible = False presentation.save("HiddenVerticalAxis.pptx", slides.export.SaveFormat.PPTX) ``` ## **Disable the Horizontal Axis for Line Charts** Set [is_visible](https://reference.aspose.com/slides/python-net/aspose.slides.charts/axis/is_visible/) to `False` on the horizontal axis to hide it. The example creates a line chart with default data and saves it with the horizontal axis hidden. ```python import aspose.slides as slides import aspose.slides.charts as charts with slides.Presentation() as presentation: slide = presentation.slides[0] chart = slide.shapes.add_chart(charts.ChartType.LINE, 100, 100, 400, 300) chart.axes.horizontal_axis.is_visible = False presentation.save("HiddenHorizontalAxis.pptx", slides.export.SaveFormat.PPTX) ``` ## **Change a Category Axis** Set [category_axis_type](https://reference.aspose.com/slides/python-net/aspose.slides.charts/axis/category_axis_type/) to choose a date or text category axis. This example requires `ExistingChart.pptx`, with a chart as the first shape on the first slide and category cells containing numeric Excel date values. It changes the horizontal axis to a date axis. Setting [is_automatic_major_unit](https://reference.aspose.com/slides/python-net/aspose.slides.charts/axis/is_automatic_major_unit/) to `False`, [major_unit](https://reference.aspose.com/slides/python-net/aspose.slides.charts/axis/major_unit/) to `1`, and [major_unit_scale](https://reference.aspose.com/slides/python-net/aspose.slides.charts/axis/major_unit_scale/) to months places major ticks at one-month intervals. ```python import aspose.slides as slides import aspose.slides.charts as charts with slides.Presentation("ExistingChart.pptx") as presentation: slide = presentation.slides[0] chart = slide.shapes[0] chart.axes.horizontal_axis.category_axis_type = charts.CategoryAxisType.DATE chart.axes.horizontal_axis.is_automatic_major_unit = False chart.axes.horizontal_axis.major_unit = 1 chart.axes.horizontal_axis.major_unit_scale = charts.TimeUnitType.MONTHS presentation.save("ChangeChartCategoryAxis_out.pptx", slides.export.SaveFormat.PPTX) ``` ### **Determine the Category Axis Type from Data** Call [set_category_axis_type_automatically](https://reference.aspose.com/slides/python-net/aspose.slides.charts/axis/set_category_axis_type_automatically/) after populating the categories, then read [category_axis_type](https://reference.aspose.com/slides/python-net/aspose.slides.charts/axis/category_axis_type/) to inspect the selection. This is useful when the same chart receives either text labels or numeric date values. The method determines the type when called; it does not enable a persistent mode that reevaluates later data changes. Call it again after replacing the categories. The following example creates a chart with text categories and prints `TEXT`. It then replaces the category cell values with dates and calls the method again, which prints `DATE`. Dates are stored as numeric OLE Automation values, calculated here as the number of days since December 30, 1899, rather than date strings. [custom_number_format](https://reference.aspose.com/slides/python-net/aspose.slides.charts/chartdatacell/custom_number_format/) controls how those values are displayed; it does not convert text into numeric dates. For more on category cells, see [Chart Workbook](https://docs.aspose.com/slides/python-net/chart-workbook/). Use automatic determination when the input is known to contain text categories or numeric dates, as in this example. For ordinary numeric labels, mixed categories, or empty data, explicitly set [category_axis_type](https://reference.aspose.com/slides/python-net/aspose.slides.charts/axis/category_axis_type/) to match the intended meaning. Numeric values alone do not establish that the categories represent dates. ```python from datetime import date import aspose.slides as slides import aspose.slides.charts as charts with slides.Presentation() as presentation: slide = presentation.slides[0] chart = slide.shapes.add_chart(charts.ChartType.CLUSTERED_COLUMN, 30, 40, 660, 320) chart.chart_data.categories.clear() chart.chart_data.series.clear() workbook = chart.chart_data.chart_data_workbook workbook.clear(0) series_name = workbook.get_cell(0, 0, 1, "Sales") series = chart.chart_data.series.add(series_name, chart.type) labels = ["First", "Second", "Third"] for i, label in enumerate(labels): category_cell = workbook.get_cell(0, i + 1, 0, label) chart.chart_data.categories.add(category_cell) value_cell = workbook.get_cell(0, i + 1, 1, (i + 1) * 10) series.data_points.add_data_point_for_bar_series(value_cell) axis = chart.axes.horizontal_axis axis.set_category_axis_type_automatically() print(axis.category_axis_type.name) # TEXT dates = [date(2026, 1, 1), date(2026, 1, 2), date(2026, 2, 1)] for i, category_date in enumerate(dates): category_cell = workbook.get_cell(0, i + 1, 0) category_cell.value = float((category_date - date(1899, 12, 30)).days) category_cell.custom_number_format = "yyyy-mm-dd" axis.set_category_axis_type_automatically() print(axis.category_axis_type.name) # DATE presentation.save("AutomaticCategoryAxis.pptx", slides.export.SaveFormat.PPTX) ``` ## **Control Category Axis Label Intervals** When a chart has many categories, reduce the number of visible axis labels without removing categories or data points. Set [is_automatic_tick_label_spacing](https://reference.aspose.com/slides/python-net/aspose.slides.charts/axis/is_automatic_tick_label_spacing/) to `False`, then set [tick_label_spacing](https://reference.aspose.com/slides/python-net/aspose.slides.charts/axis/tick_label_spacing/) to the desired category interval. For text categories in their normal order, counting starts at the first category: | Interval | Labels displayed in the example | | --- | --- | | `1` | Category 1, Category 2, Category 3, ... Category 24 | | `2` | Category 1, Category 3, Category 5, ... Category 23 | | `3` | Category 1, Category 4, Category 7, ... Category 22 | An interval of `3` displays every third label, leaving two labels hidden between displayed labels. It does not remove the corresponding columns. Automatic spacing chooses an interval based on the available space; it does not necessarily display every label. Tick marks have separate controls. Set [is_automatic_tick_marks_spacing](https://reference.aspose.com/slides/python-net/aspose.slides.charts/axis/is_automatic_tick_marks_spacing/) to `False` and use [tick_marks_spacing](https://reference.aspose.com/slides/python-net/aspose.slides.charts/axis/tick_marks_spacing/) to set their interval. For example, `1` keeps a tick mark at every category interval while labels appear only every third category. Set [major_tick_mark](https://reference.aspose.com/slides/python-net/aspose.slides.charts/axis/major_tick_mark/) to a visible style so you can see the result. Setting either automatic-spacing property back to `True` lets the chart choose that interval again. The following self-contained example creates 24 categories and one series, then saves three slides in `CategoryAxisIntervals.pptx`: automatic spacing, manual label spacing with independent tick marks, and restored automatic spacing. The two copies retain the original chart data. No input presentation is required. Horizontal label text makes the difference in density easy to see. ```python import aspose.slides as slides import aspose.slides.charts as charts with slides.Presentation() as presentation: slide = presentation.slides[0] chart = slide.shapes.add_chart(charts.ChartType.CLUSTERED_COLUMN, 30, 40, 660, 320) chart.has_legend = False chart.chart_data.categories.clear() chart.chart_data.series.clear() workbook = chart.chart_data.chart_data_workbook workbook.clear(0) series = chart.chart_data.series.add(charts.ChartType.CLUSTERED_COLUMN) for i in range(24): category_cell = workbook.get_cell(0, i + 1, 0, f"Category {i + 1}") chart.chart_data.categories.add(category_cell) value_cell = workbook.get_cell(0, i + 1, 1, 10 + i % 6 * 5) series.data_points.add_data_point_for_bar_series(value_cell) axis = chart.axes.horizontal_axis axis.category_axis_type = charts.CategoryAxisType.TEXT axis.text_format.text_block_format.rotation_angle = 0 axis.text_format.portion_format.font_height = 12 axis.major_tick_mark = charts.TickMarkType.OUTSIDE axis.is_automatic_tick_label_spacing = True axis.is_automatic_tick_marks_spacing = True # Slide 2: show every third label, but keep a tick mark for every category. manual_slide = presentation.slides.add_clone(slide) manual_chart = manual_slide.shapes[0] manual_axis = manual_chart.axes.horizontal_axis manual_axis.is_automatic_tick_label_spacing = False manual_axis.tick_label_spacing = 3 manual_axis.is_automatic_tick_marks_spacing = False manual_axis.tick_marks_spacing = 1 # Slide 3: let the chart choose both intervals again. restored_slide = presentation.slides.add_clone(manual_slide) restored_chart = restored_slide.shapes[0] restored_chart.axes.horizontal_axis.is_automatic_tick_label_spacing = True restored_chart.axes.horizontal_axis.is_automatic_tick_marks_spacing = True presentation.save("CategoryAxisIntervals.pptx", slides.export.SaveFormat.PPTX) ``` **Automatic spacing (slide 1):** In this rendering, every second category label is displayed and wraps onto two lines. The automatic result can vary with chart size, fonts, and the renderer. ![Automatic category label spacing with all 24 columns visible](https://docs.aspose.com/slides/python-net/chart-axis/category-axis-automatic.png) **Manual spacing (slide 2):** Every third label is displayed on one line, while tick marks remain at every category interval. All 24 columns, including those without labels, remain visible with the same values. Slide 3 restores the automatic appearance shown above. ![Manual category label interval of three with all 24 columns visible](https://docs.aspose.com/slides/python-net/chart-axis/category-axis-manual.png) ### **Choose the Correct Axis and Interval** Use this category-count interval for a text category axis, such as the category axis of a column, line, area, or bar chart. In a column chart, it is the horizontal axis. In a horizontal bar chart, the category axis is vertical, so apply these settings to [vertical_axis](https://reference.aspose.com/slides/python-net/aspose.slides.charts/axesmanager/vertical_axis/). Tick-mark spacing also applies to a series axis in charts that have one. Do not use category label spacing to set the numeric scale of a value axis. On a value axis, [major_unit](https://reference.aspose.com/slides/python-net/aspose.slides.charts/axis/major_unit/) specifies a difference in values: for example, a major unit of `10` produces ticks at 0, 10, 20, and so on when the axis starts at zero. A category label interval of `3` instead counts category positions, regardless of their data values. Scatter and bubble charts use value axes rather than a text category axis. For a date axis, use time-based major units and scales as described in [Change a Category Axis](https://docs.aspose.com/slides/python-net/chart-axis/#change-a-category-axis). ## **Set the Date Format for Category Axis Values** The example replaces the default chart data with four annual values. Dates are stored as OLE Automation serial numbers in the first worksheet (index `0`). Set [category_axis_type](https://reference.aspose.com/slides/python-net/aspose.slides.charts/axis/category_axis_type/) to a date axis, disable [is_number_format_linked_to_source](https://reference.aspose.com/slides/python-net/aspose.slides.charts/axis/is_number_format_linked_to_source/), and assign `yyyy` to [number_format](https://reference.aspose.com/slides/python-net/aspose.slides.charts/axis/number_format/) so the category labels display four-digit years independently of the cell formatting. ```python from datetime import date import aspose.slides as slides import aspose.slides.charts as charts with slides.Presentation() as presentation: slide = presentation.slides[0] chart = slide.shapes.add_chart(charts.ChartType.LINE, 50, 50, 450, 300) chart.chart_data.categories.clear() chart.chart_data.series.clear() workbook = chart.chart_data.chart_data_workbook workbook.clear(0) series = chart.chart_data.series.add(charts.ChartType.LINE) for i in range(4): category_date = date(2015 + i, 1, 1) serial_date = (category_date - date(1899, 12, 30)).days category_cell = workbook.get_cell(0, i + 1, 0, serial_date) chart.chart_data.categories.add(category_cell) value_cell = workbook.get_cell(0, i + 1, 1, i + 1) series.data_points.add_data_point_for_line_series(value_cell) chart.axes.horizontal_axis.category_axis_type = charts.CategoryAxisType.DATE chart.axes.horizontal_axis.is_number_format_linked_to_source = False chart.axes.horizontal_axis.number_format = "yyyy" presentation.save("DateAxisFormat.pptx", slides.export.SaveFormat.PPTX) ``` ## **Set a Rotation Angle for a Chart Axis Title** Enable [has_title](https://reference.aspose.com/slides/python-net/aspose.slides.charts/axis/has_title/) on the vertical axis, provide title text, and set [rotation_angle](https://reference.aspose.com/slides/python-net/aspose.slides/textframeformat/rotation_angle/) to rotate the title. The angle is measured in degrees; this example saves a column chart with its value-axis title rotated by 90 degrees. ```python import aspose.slides as slides import aspose.slides.charts as charts with slides.Presentation() as presentation: slide = presentation.slides[0] chart = slide.shapes.add_chart(charts.ChartType.CLUSTERED_COLUMN, 50, 50, 450, 300) chart.axes.vertical_axis.has_title = True chart.axes.vertical_axis.title.add_text_frame_for_overriding("Value") chart.axes.vertical_axis.title.text_format.text_block_format.rotation_angle = 90 presentation.save("RotatedAxisTitle.pptx", slides.export.SaveFormat.PPTX) ``` ## **Set the Axis Position on a Category or Value Axis** Use [axis_between_categories](https://reference.aspose.com/slides/python-net/aspose.slides.charts/axis/axis_between_categories/) to control whether the value axis crosses the category axis between categories or at category tick marks. This property applies to category axes. The example sets it to `True` on the horizontal category axis of a column chart and saves the result. ```python import aspose.slides as slides import aspose.slides.charts as charts with slides.Presentation() as presentation: slide = presentation.slides[0] chart = slide.shapes.add_chart(charts.ChartType.CLUSTERED_COLUMN, 50, 50, 450, 300) chart.axes.horizontal_axis.axis_between_categories = True presentation.save("AxisBetweenCategories.pptx", slides.export.SaveFormat.PPTX) ``` ## **Set the Display Unit on a Chart Value Axis** Set [display_unit](https://reference.aspose.com/slides/python-net/aspose.slides.charts/axis/display_unit/) to scale the labels on a value axis without changing the underlying data. With [DisplayUnitType](https://reference.aspose.com/slides/python-net/aspose.slides.charts/displayunittype/) set to `MILLIONS`, a value of 60,000,000 is displayed as 60. The example creates a column chart and applies the millions display unit to its vertical axis. ```python import aspose.slides as slides import aspose.slides.charts as charts with slides.Presentation() as presentation: slide = presentation.slides[0] chart = slide.shapes.add_chart(charts.ChartType.CLUSTERED_COLUMN, 50, 50, 450, 300) chart.axes.vertical_axis.display_unit = charts.DisplayUnitType.MILLIONS presentation.save("Result.pptx", slides.export.SaveFormat.PPTX) ``` ## **Configure a Logarithmic Value Axis** A logarithmic value axis is useful when positive values span several orders of magnitude. For example, a service might receive 10, 100, 1,000, 10,000, and 100,000 requests over five periods. On a linear scale, the smaller values appear close together near zero. A logarithmic scale makes their relative growth easier to compare: equal distances represent equal ratios rather than equal differences. Set [is_logarithmic](https://reference.aspose.com/slides/python-net/aspose.slides.charts/axis/is_logarithmic/) to `True` on the value axis and use [log_base](https://reference.aspose.com/slides/python-net/aspose.slides.charts/axis/log_base/) to choose the base. This changes how the existing values are displayed; it does not change the data or add a logarithmic trend line. A trend line represents a fitted relationship in the data and is a separate feature. ### **Choose the Value Axis and Base** For a line or column chart, the value axis is [vertical_axis](https://reference.aspose.com/slides/python-net/aspose.slides.charts/axesmanager/vertical_axis/). For a horizontal bar chart, it is [horizontal_axis](https://reference.aspose.com/slides/python-net/aspose.slides.charts/axesmanager/horizontal_axis/). Scatter and bubble charts have two value axes, so choose the horizontal axis for X values, the vertical axis for Y values, or both. Do not apply logarithmic scaling to a category axis. The default logarithmic base is `10`. For PPTX charts, use a base from `2` through `1000`, inclusive; fractional bases such as `2.5` are also supported. With base `10`, successive powers such as 10, 100, 1,000, and 10,000 are equally spaced. ### **Compare Linear and Logarithmic Scaling** The following self-contained example creates a line chart with the five request counts on the first slide, then clones that slide and enables a base-10 logarithmic value axis on the second. Both slides retain the same data. ```python import aspose.slides as slides import aspose.slides.charts as charts with slides.Presentation() as presentation: slide = presentation.slides[0] chart = slide.shapes.add_chart(charts.ChartType.LINE, 30, 40, 660, 200) chart.has_legend = False chart.chart_data.categories.clear() chart.chart_data.series.clear() workbook = chart.chart_data.chart_data_workbook workbook.clear(0) series = chart.chart_data.series.add(charts.ChartType.LINE) values = [10, 100, 1000, 10000, 100000] for i, value in enumerate(values): category_cell = workbook.get_cell(0, i + 1, 0, f"Period {i + 1}") chart.chart_data.categories.add(category_cell) value_cell = workbook.get_cell(0, i + 1, 1, value) series.data_points.add_data_point_for_line_series(value_cell) # Keep the first slide linear and change only the copy's value-axis scale. logarithmic_slide = presentation.slides.add_clone(slide) logarithmic_chart = logarithmic_slide.shapes[0] value_axis = logarithmic_chart.axes.vertical_axis value_axis.is_logarithmic = True value_axis.log_base = 10 presentation.save("LogarithmicAxis.pptx", slides.export.SaveFormat.PPTX) ``` **Linear scale (slide 1):** Equal vertical distances represent equal differences in request counts. The largest value dominates the chart, making the smaller values difficult to distinguish. ![Line chart in PowerPoint showing five request counts on a linear value axis](https://docs.aspose.com/slides/python-net/chart-axis/value-axis-linear.png) **Logarithmic scale (slide 2):** Equal vertical distances represent equal ratios. Each period has ten times as many requests as the previous one, so the points form a straight rising line on the base-10 scale. The axis labels still show the original request counts. ![The same five request counts in PowerPoint on a base-10 logarithmic value axis](https://docs.aspose.com/slides/python-net/chart-axis/value-axis-logarithmic.png) ### **Handle Zero and Negative Values** A logarithmic scale can display only strictly positive values. Check the data before enabling it. If zero or negative values are meaningful, keep a linear scale or show them separately. If excluding those values is appropriate for the analysis, explain the omission. Do not silently replace them with small positive numbers, as this changes the meaning of the data. Any manually configured minimum or maximum for a logarithmic axis must also be positive. ## **FAQ** **How do I set the value at which one axis crosses the other (axis crossing)?** Use [cross_type](https://reference.aspose.com/slides/python-net/aspose.slides.charts/axis/cross_type/) to select the crossing behavior. To specify a numeric crossing value, set [cross_at](https://reference.aspose.com/slides/python-net/aspose.slides.charts/axis/cross_at/). These settings let you move the axis crossing to a suitable baseline. **How can I position tick labels relative to the axis?** Set [tick_label_position](https://reference.aspose.com/slides/python-net/aspose.slides.charts/axis/tick_label_position/) using [TickLabelPositionType](https://reference.aspose.com/slides/python-net/aspose.slides.charts/ticklabelpositiontype/): `LOW`, `HIGH`, `NEXT_TO`, or `NONE`. To control the tick marks themselves, use [major_tick_mark](https://reference.aspose.com/slides/python-net/aspose.slides.charts/axis/major_tick_mark/) or [minor_tick_mark](https://reference.aspose.com/slides/python-net/aspose.slides.charts/axis/minor_tick_mark/); these are separate from label positioning. ## Related articles - [Format Charts in Presentations Using Python](https://docs.aspose.com/slides/python-net/chart-formatting/) # Optimize Chart Calculations for Presentations in Python > Understand chart calculations, data updates, and precision control in Aspose.Slides for Python via .NET for PPT, PPTX and ODP, with practical code examples. Source: https://docs.aspose.com/slides/python-net/chart-calculations/ Updated: 2026-08-05 ## **Overview** Aspose.Slides provides APIs for working with chart calculations and layout data in presentations. This article shows how to retrieve the actual values of chart elements, including the real position and size of elements that implement `ActualLayout` and the actual values of chart axes. It also explains that these values are populated after chart layout validation. In addition, the article demonstrates how to get the actual position of parent chart elements and how to hide chart components such as the title, axes, legend, and grid lines. Together, these examples help you inspect chart layout information and control the visibility of chart elements in PowerPoint presentations programmatically. ## **Calculate Actual Values of Chart Elements** Aspose.Slides for Python via .NET provides a simple API for getting these properties. This will help you to Calculates actual values of chart elements. The actual values include position of elements that inherit [IActualLayout](https://reference.aspose.com/slides/python-net/aspose.slides.charts/iactuallayout/) class (IActualLayout.ActualX, IActualLayout.ActualY, IActualLayout.ActualWidth, IActualLayout.ActualHeight) and actual axes values (IAxis.ActualMaxValue, IAxis.ActualMinValue, IAxis.ActualMajorUnit, IAxis.ActualMinorUnit, IAxis.ActualMajorUnitScale, IAxis.ActualMinorUnitScale). ```py import aspose.slides.charts as charts import aspose.slides as slides with slides.Presentation("pres.pptx") as pres: chart = pres.slides[0].shapes.add_chart(charts.ChartType.CLUSTERED_COLUMN, 100, 100, 500, 350) chart.validate_chart_layout() maxValue = chart.axes.vertical_axis.actual_max_value minValue = chart.axes.vertical_axis.actual_min_value majorUnit = chart.axes.horizontal_axis.actual_major_unit minorUnit = chart.axes.horizontal_axis.actual_minor_unit ``` ## **Calculate Actual Position of Parent Chart Elements** Aspose.Slides for Python via .NET provides a simple API for getting these properties. Properties of IActualLayout provide information about actual position of parent chart element. It is necessary to call method IChart.ValidateChartLayout() previously to fill properties with actual values. ```py import aspose.slides.charts as charts import aspose.slides as slides with slides.Presentation("pres.pptx") as pres: chart = pres.slides[0].shapes.add_chart(charts.ChartType.CLUSTERED_COLUMN, 100, 100, 500, 350) chart.validate_chart_layout() x = chart.plot_area.actual_x y = chart.plot_area.actual_y w = chart.plot_area.actual_width h = chart.plot_area.actual_height ``` ## **Hide Information from Chart** This topic helps you to understand how to hide information from chart. Using Aspose.Slides for Python via .NET you can hide **Title, Vertical Axis, Horizontal Axis** and **Grid Lines** from chart. Below code example shows how to use these properties. ```py import aspose.slides.charts as charts import aspose.slides as slides import aspose.pydrawing as draw with slides.Presentation() as pres: slide = pres.slides[0] chart = slide.shapes.add_chart(charts.ChartType.LINE_WITH_MARKERS, 140, 118, 320, 370) # Hiding chart Title chart.has_title = False # Hiding Values axis chart.axes.vertical_axis.is_visible = False # Category Axis visibility chart.axes.horizontal_axis.is_visible = False # Hiding Legend chart.has_legend = False # Hiding MajorGridLines of both axes chart.axes.horizontal_axis.major_grid_lines_format.line.fill_format.fill_type = slides.FillType.NO_FILL chart.axes.vertical_axis.major_grid_lines_format.line.fill_format.fill_type = slides.FillType.NO_FILL #for i in range(len(chart.chart_data.series)): # chart.chart_data.series.remove_at(i) series = chart.chart_data.series[0] series.marker.symbol = charts.MarkerStyleType.CIRCLE series.labels.default_data_label_format.show_value = True series.labels.default_data_label_format.position = charts.LegendDataLabelPosition.TOP series.marker.size = 15 # Setting series line color series.format.line.fill_format.fill_type = slides.FillType.SOLID series.format.line.fill_format.solid_fill_color.color = draw.Color.purple series.format.line.dash_style = slides.LineDashStyle.SOLID pres.save("HideInformationFromChart.pptx", slides.export.SaveFormat.PPTX) ``` ## **FAQ** ### Do external Excel workbooks work as a data source, and how does that affect recalculation? Yes. A chart can reference an external workbook: when you connect or refresh the external source, formulas and values are taken from that workbook, and the chart reflects the updates during open/edit operations. The API lets you [specify the external workbook](https://reference.aspose.com/slides/python-net/aspose.slides.charts/chartdata/set_external_workbook/) path and manage the linked data. ### Can I compute and display trendlines without implementing regression myself? Yes. [Trendlines](https://docs.aspose.com/slides/python-net/trend-line/) (linear, exponential, and others) are added and updated by Aspose.Slides; their parameters are recalculated from the series data automatically, so you don’t need to implement your own calculations. ### If a presentation has multiple charts with external links, can I control which workbook each chart uses for computed values? Yes. Each chart can point to its own [external workbook](https://reference.aspose.com/slides/python-net/aspose.slides.charts/chartdata/set_external_workbook/), or you can create/replace an external workbook per chart independently of the others. # Manage Chart Data Labels in Presentations with Python > Learn to add and format chart data labels in PowerPoint presentations using Aspose.Slides for Python via .NET for more engaging slides. Source: https://docs.aspose.com/slides/python-net/chart-data-label/ Updated: 2026-11-06 ## **Introduction** Data labels display information about chart series and individual data points, helping readers identify values and understand the chart. This article explains how to format values, display percentages, read label text, control labels beyond the axis maximum, adjust category axis label spacing, and position pie chart labels. ## **Count Visible Data Labels** Use [count_of_visible_data_labels](https://reference.aspose.com/slides/python-net/aspose.slides.charts/datalabelcollection/count_of_visible_data_labels/) to check how many data labels are enabled for display before publishing a presentation. Unlike `len(labels)`, which returns the total number of labels in the collection, it takes the series defaults and individual label settings into account. This example creates a column chart with one series and three data points. It accesses the series' [labels](https://reference.aspose.com/slides/python-net/aspose.slides.charts/chartseries/labels/) collection and prints the visible count as the settings change: **0, 3, 2, 3**. The total count remains **3**. ```python import aspose.slides as slides import aspose.slides.charts as charts with slides.Presentation() as presentation: slide = presentation.slides[0] chart = slide.shapes.add_chart(charts.ChartType.CLUSTERED_COLUMN, 50, 50, 500, 300) chart.chart_data.series.clear() chart.chart_data.categories.clear() workbook = chart.chart_data.chart_data_workbook series_cell = workbook.get_cell(0, 0, 1, "Values") series = chart.chart_data.series.add(series_cell, chart.type) for i in range(3): category_cell = workbook.get_cell(0, i + 1, 0, f"Category {i + 1}") chart.chart_data.categories.add(category_cell) value_cell = workbook.get_cell(0, i + 1, 1, (i + 1) * 10) series.data_points.add_data_point_for_bar_series(value_cell) labels = series.labels print(f"Total: {len(labels)}; visible: {labels.count_of_visible_data_labels}") # Total: 3; visible: 0 labels.default_data_label_format.show_value = True print(f"Visible: {labels.count_of_visible_data_labels}") # Visible: 3 labels[1].data_label_format.show_value = False print(f"Visible: {labels.count_of_visible_data_labels}") # Visible: 2 labels[1].data_label_format.show_legend_key = True print(f"Visible: {labels.count_of_visible_data_labels}") # Visible: 3 ``` The series' [default_data_label_format](https://reference.aspose.com/slides/python-net/aspose.slides.charts/datalabelcollection/default_data_label_format/) supplies the default settings. Enabling [show_value](https://reference.aspose.com/slides/python-net/aspose.slides.charts/datalabelformat/show_value/) there displays values for all three labels. Setting it to `False` through one label's [data_label_format](https://reference.aspose.com/slides/python-net/aspose.slides.charts/datalabel/data_label_format/) overrides that setting for the selected label. Enabling [show_legend_key](https://reference.aspose.com/slides/python-net/aspose.slides.charts/datalabelformat/show_legend_key/) makes that label count as visible again, even though its value remains hidden. The visible count reflects visibility settings. It does not measure whether labels overlap, are clipped, or are readable in the rendered chart. ## **Set Data Precision in Chart Data Labels** Use [number_format_of_values](https://reference.aspose.com/slides/python-net/aspose.slides.charts/chartseries/number_format_of_values/) to format series values. This example creates a line chart with default data, displays its data table, and enables value labels for the first series. The format `#,##0.00` displays a thousands separator and two decimal places without changing the underlying values. ```python import aspose.slides as slides import aspose.slides.charts as charts with slides.Presentation() as presentation: slide = presentation.slides[0] chart = slide.shapes.add_chart(charts.ChartType.LINE, 50, 50, 450, 300) chart.has_data_table = True series = chart.chart_data.series[0] series.number_format_of_values = "#,##0.00" series.labels.default_data_label_format.show_value = True presentation.save("PrecisionOfDatalabels_out.pptx", slides.export.SaveFormat.PPTX) ``` To format the numeric cells in a chart's embedded workbook, see [Set Custom Number Formats for Workbook Cells](https://docs.aspose.com/slides/python-net/chart-workbook/#set-custom-number-formats-for-workbook-cells). That example also shows value labels following their source cell formats while preserving the stored numeric values. ## **Display Percentage as Labels** For a stacked column chart, calculate each value as a percentage of its category total and assign the text to [text_frame_for_overriding](https://reference.aspose.com/slides/python-net/aspose.slides.charts/datalabel/text_frame_for_overriding/). This example uses the default chart data and displays percentages with two decimal places in an 8-point font. Categories with a total of zero are skipped to avoid division by zero. Recalculate the custom label text if the chart data changes. ```python import aspose.slides as slides import aspose.slides.charts as charts with slides.Presentation() as presentation: slide = presentation.slides[0] chart = slide.shapes.add_chart(charts.ChartType.STACKED_COLUMN, 20, 20, 400, 400) category_totals = [0.0] * len(chart.chart_data.categories) for k in range(len(chart.chart_data.categories)): for series in chart.chart_data.series: point_value = float(series.data_points[k].value.data) category_totals[k] += point_value for series in chart.chart_data.series: series.labels.default_data_label_format.show_legend_key = False for j in range(len(series.data_points)): label = series.data_points[j].label if category_totals[j] == 0: continue point_value = float(series.data_points[j].value.data) data_point_percent = point_value / category_totals[j] * 100 portion = slides.Portion() portion.text = f"{data_point_percent:.2f} %" portion.portion_format.font_height = 8 label.text_frame_for_overriding.text = "" paragraph = label.text_frame_for_overriding.paragraphs[0] paragraph.portions.add(portion) label.data_label_format.show_value = True label.data_label_format.show_series_name = False label.data_label_format.show_percentage = False label.data_label_format.show_legend_key = False label.data_label_format.show_category_name = False label.data_label_format.show_bubble_size = False presentation.save("DisplayPercentageAsLabels_out.pptx", slides.export.SaveFormat.PPTX) ``` ## **Set Percentage Sign with Chart Data Labels** When values are stored as fractions, use [number_format](https://reference.aspose.com/slides/python-net/aspose.slides.charts/datalabelformat/number_format/) to display percentages. Set [is_number_format_linked_to_source](https://reference.aspose.com/slides/python-net/aspose.slides.charts/datalabelformat/is_number_format_linked_to_source/) to `False` to apply the label format independently of the source cells. This example creates a 100% stacked column chart with red and blue series across four categories. Each pair of values adds up to 1. The label format `0.0%` displays 0.30 as 30.0%, while the vertical axis uses two decimal places. Both series use white, 10-point label text. ```python import aspose.slides as slides import aspose.slides.charts as charts import aspose.pydrawing as drawing with slides.Presentation() as presentation: slide = presentation.slides[0] chart = slide.shapes.add_chart(charts.ChartType.PERCENTS_STACKED_COLUMN, 20, 20, 500, 400) chart.axes.vertical_axis.is_number_format_linked_to_source = False chart.axes.vertical_axis.number_format = "0.00%" chart.chart_data.series.clear() chart.chart_data.categories.clear() workbook = chart.chart_data.chart_data_workbook worksheet_index = 0 for i in range(4): category_cell = workbook.get_cell(worksheet_index, i + 1, 0, f"Category {i + 1}") chart.chart_data.categories.add(category_cell) series_names = ["Reds", "Blues"] series_colors = [drawing.Color.red, drawing.Color.blue] values = [[0.30, 0.50, 0.80, 0.65], [0.70, 0.50, 0.20, 0.35]] for i in range(len(series_names)): series_cell = workbook.get_cell(worksheet_index, 0, i + 1, series_names[i]) series = chart.chart_data.series.add(series_cell, chart.type) for j in range(4): value_cell = workbook.get_cell(worksheet_index, j + 1, i + 1, values[i][j]) series.data_points.add_data_point_for_bar_series(value_cell) series.format.fill.fill_type = slides.FillType.SOLID series.format.fill.solid_fill_color.color = series_colors[i] label_format = series.labels.default_data_label_format label_format.show_value = True label_format.is_number_format_linked_to_source = False label_format.number_format = "0.0%" label_format.text_format.portion_format.font_height = 10 label_format.text_format.portion_format.fill_format.fill_type = slides.FillType.SOLID label_format.text_format.portion_format.fill_format.solid_fill_color.color = drawing.Color.white presentation.save("SetDataLabelsPercentageSign_out.pptx", slides.export.SaveFormat.PPTX) ``` ## **Read the Actual Text of Data Labels** Use [get_actual_label_text](https://reference.aspose.com/slides/python-net/aspose.slides.charts/datalabel/get_actual_label_text/) to retrieve the text produced by a data label's settings. This is useful when extracting labels for reports, searching presentation content, or validating generated charts. In the example below, the default [data label format](https://reference.aspose.com/slides/python-net/aspose.slides.charts/datalabelformat/) combines each category name, series name, and value. One point formats its value as a percentage, and another uses custom text from [text_frame_for_overriding](https://reference.aspose.com/slides/python-net/aspose.slides.charts/datalabel/text_frame_for_overriding/). ```python import aspose.slides as slides import aspose.slides.charts as charts with slides.Presentation() as presentation: slide = presentation.slides[0] chart = slide.shapes.add_chart(charts.ChartType.CLUSTERED_COLUMN, 20, 20, 500, 300) chart.chart_data.series.clear() chart.chart_data.categories.clear() workbook = chart.chart_data.chart_data_workbook for i, category_name in enumerate(["Q1", "Q2"]): category_cell = workbook.get_cell(0, i + 1, 0, category_name) chart.chart_data.categories.add(category_cell) north_cell = workbook.get_cell(0, 0, 1, "North") north = chart.chart_data.series.add(north_cell, chart.type) for i, value in enumerate([0.25, 0.75]): value_cell = workbook.get_cell(0, i + 1, 1, value) north.data_points.add_data_point_for_bar_series(value_cell) south_cell = workbook.get_cell(0, 0, 2, "South") south = chart.chart_data.series.add(south_cell, chart.type) for i, value in enumerate([0.40, 0.60]): value_cell = workbook.get_cell(0, i + 1, 2, value) south.data_points.add_data_point_for_bar_series(value_cell) for series in chart.chart_data.series: label_format = series.labels.default_data_label_format label_format.show_category_name = True label_format.show_series_name = True label_format.show_value = True north.labels[1].data_label_format.is_number_format_linked_to_source = False north.labels[1].data_label_format.number_format = "0%" south.labels[0].text_frame_for_overriding.text = "Reviewed" for series in chart.chart_data.series: for point in series.data_points: label = point.label if not label.is_visible: continue label_text = label.get_actual_label_text() print(f"Value: {point.value.data}; label: {label_text}") ``` The number stored in a data point remains `0.75`, even when its label shows `75%` along with the category and series names. Custom text replaces the generated label text. [get_actual_label_text](https://reference.aspose.com/slides/python-net/aspose.slides.charts/datalabel/get_actual_label_text/) returns the resulting label string in either case. Check [is_visible](https://reference.aspose.com/slides/python-net/aspose.slides.charts/datalabel/is_visible/) separately, as shown above, when you want to extract only visible labels. ## **Control Data Labels Beyond the Axis Maximum** When you limit an axis range manually, some data points may exceed its maximum. Use [show_data_labels_over_maximum](https://reference.aspose.com/slides/python-net/aspose.slides.charts/chart/show_data_labels_over_maximum/) to control whether their data labels are shown. This setting changes label visibility; it does not change the axis range or the underlying data values. The example below creates a 2D clustered column chart with values of 60 and 120. It sets [is_automatic_max_value](https://reference.aspose.com/slides/python-net/aspose.slides.charts/axis/is_automatic_max_value/) to `False` and [max_value](https://reference.aspose.com/slides/python-net/aspose.slides.charts/axis/max_value/) to 100 on the vertical axis. The first slide allows labels beyond the maximum; a copy of that slide disables them. Both slides are saved in `DataLabelsOverMaximum.pptx`. Enable value labels with [show_value](https://reference.aspose.com/slides/python-net/aspose.slides.charts/datalabelformat/show_value/). The chart-level setting does not enable value display by itself or override an individual label's disabled value display. This example enables values for the entire series and uses [position](https://reference.aspose.com/slides/python-net/aspose.slides.charts/datalabelformat/position/) to place labels at the outside end of each column. ```python import aspose.slides as slides import aspose.slides.charts as charts with slides.Presentation() as presentation: slide = presentation.slides[0] chart = slide.shapes.add_chart(charts.ChartType.CLUSTERED_COLUMN, 50, 50, 600, 400) chart.has_legend = False chart.chart_data.series.clear() chart.chart_data.categories.clear() workbook = chart.chart_data.chart_data_workbook first_category = workbook.get_cell(0, 1, 0, "Within range") second_category = workbook.get_cell(0, 2, 0, "Above maximum") chart.chart_data.categories.add(first_category) chart.chart_data.categories.add(second_category) series_name = workbook.get_cell(0, 0, 1, "Values") series = chart.chart_data.series.add(series_name, chart.type) first_value = workbook.get_cell(0, 1, 1, 60) second_value = workbook.get_cell(0, 2, 1, 120) series.data_points.add_data_point_for_bar_series(first_value) series.data_points.add_data_point_for_bar_series(second_value) series.labels.default_data_label_format.show_value = True series.labels.default_data_label_format.position = charts.LegendDataLabelPosition.OUTSIDE_END chart.axes.vertical_axis.is_automatic_max_value = False chart.axes.vertical_axis.max_value = 100 chart.show_data_labels_over_maximum = True second_slide = presentation.slides.add_clone(slide) second_chart = second_slide.shapes[0] second_chart.show_data_labels_over_maximum = False presentation.save("DataLabelsOverMaximum.pptx", slides.export.SaveFormat.PPTX) ``` The following images show the saved slides rendered by Microsoft PowerPoint. With `True`, the label **120** is visible at the upper boundary; with `False`, it is hidden. The label **60** remains visible, the axis maximum stays at **100**, and the second data point remains **120** in both cases. | show_data_labels_over_maximum = True | show_data_labels_over_maximum = False | | --- | --- | | ![PowerPoint chart showing the value label 120 with an axis maximum of 100](https://docs.aspose.com/slides/python-net/chart-data-label/data-labels-over-maximum-true.png) | ![PowerPoint chart hiding the value label 120 with an axis maximum of 100](https://docs.aspose.com/slides/python-net/chart-data-label/data-labels-over-maximum-false.png) | This example uses a 2D column chart with a value axis. Charts without a value axis, such as pie and doughnut charts, do not have an axis maximum to limit in this way. ## **Set Label Distance from an Axis** Use [label_offset](https://reference.aspose.com/slides/python-net/aspose.slides.charts/axis/label_offset/) to control the distance between category axis labels and the axis. The value is a percentage of the maximum font size of the axis labels. This example creates a clustered column chart and sets the horizontal axis label offset to 500. This setting affects category axis labels rather than labels attached to individual data points. ```python import aspose.slides as slides import aspose.slides.charts as charts with slides.Presentation() as presentation: slide = presentation.slides[0] chart = slide.shapes.add_chart(charts.ChartType.CLUSTERED_COLUMN, 20, 20, 500, 300) chart.axes.horizontal_axis.label_offset = 500 presentation.save("SetCategoryAxisLabelDistance_out.pptx", slides.export.SaveFormat.PPTX) ``` ## **Adjust Label Location** On a pie chart, adjust data label positions to improve spacing and make room for leader lines. This example displays the value of the first data point, places its label outside the slice, and adjusts its [x](https://reference.aspose.com/slides/python-net/aspose.slides.charts/datalabel/x/) and [y](https://reference.aspose.com/slides/python-net/aspose.slides.charts/datalabel/y/) offsets. These offsets are relative to the chart width and height, respectively. ```python import aspose.slides as slides import aspose.slides.charts as charts with slides.Presentation() as presentation: slide = presentation.slides[0] chart = slide.shapes.add_chart(charts.ChartType.PIE, 50, 50, 200, 200) series = chart.chart_data.series label = series[0].labels[0] label.data_label_format.show_value = True label.data_label_format.position = charts.LegendDataLabelPosition.OUTSIDE_END label.x = 0.71 label.y = 0.04 presentation.save("presentation.pptx", slides.export.SaveFormat.PPTX) ``` ![Pie chart with an adjusted data label position](https://docs.aspose.com/slides/python-net/chart-data-label/pie-chart-adjusted-label.png) ## **Format Leader Lines** When pie chart labels sit outside their slices, leader lines help readers match each value to the correct slice. A contrasting color and a slightly thicker line can make these connections easier to follow, while transparency and a dashed style keep the lines visually unobtrusive. Use [leader_lines_format](https://reference.aspose.com/slides/python-net/aspose.slides.charts/datalabelcollection/leader_lines_format/) to format leader lines at the series' data label collection level. The settings in `series.labels.leader_lines_format.line` apply to the collection, rather than to an individual label. This example creates a pie chart with default data, displays values outside the slices, and enables [show_leader_lines](https://reference.aspose.com/slides/python-net/aspose.slides.charts/datalabelformat/show_leader_lines/). It moves two labels farther from their slices using [x](https://reference.aspose.com/slides/python-net/aspose.slides.charts/datalabel/x/) and [y](https://reference.aspose.com/slides/python-net/aspose.slides.charts/datalabel/y/) offsets, expressed as fractions of the chart width and height. No input presentation is required. The line's [fill_format](https://reference.aspose.com/slides/python-net/aspose.slides/lineformat/fill_format/) sets a solid blue color with an alpha value of 191 out of 255, giving approximately 25% transparency. [width](https://reference.aspose.com/slides/python-net/aspose.slides/lineformat/width/) sets the thickness to 2 points, and [dash_style](https://reference.aspose.com/slides/python-net/aspose.slides/lineformat/dash_style/) makes the line dashed. ```python import aspose.slides as slides import aspose.slides.charts as charts import aspose.pydrawing as drawing with slides.Presentation() as presentation: slide = presentation.slides[0] chart = slide.shapes.add_chart(charts.ChartType.PIE, 80, 50, 560, 400) chart.has_legend = False series = chart.chart_data.series[0] label_format = series.labels.default_data_label_format label_format.show_value = True label_format.position = charts.LegendDataLabelPosition.OUTSIDE_END label_format.show_leader_lines = True # Move two labels farther away from their slices. series.labels[0].x = 0.10 series.labels[0].y = -0.05 series.labels[1].x = -0.10 series.labels[1].y = 0.05 line = series.labels.leader_lines_format.line line.fill_format.fill_type = slides.FillType.SOLID line.fill_format.solid_fill_color.color = drawing.Color.from_argb(191, 30, 90, 160) line.width = 2 line.dash_style = slides.LineDashStyle.DASH presentation.save("FormattedLeaderLines.pptx", slides.export.SaveFormat.PPTX) ``` Enabling leader lines does not guarantee that a line will appear for every label. Visibility depends on label placement and the chart's layout behavior. In this example, the two displaced labels have visible leader lines; the labels that remain close to their slices do not need them. The following image shows the saved `FormattedLeaderLines.pptx` rendered with Aspose.Slides: ![Pie chart with blue, semitransparent dashed leader lines connecting two outside labels to their slices](https://docs.aspose.com/slides/python-net/chart-data-label/formatted-leader-lines.png) ## **Add Multiple Rows of Data Labels Above a Column Chart** This example creates a column chart with two rows of data labels above the plot area. Series A displays the visible columns, while Series B and Series C provide the additional labels. Their columns are hidden by removing the fill and outline. The [overlap](https://reference.aspose.com/slides/python-net/aspose.slides.charts/chartseriesgroup/overlap/) property aligns all three series with the same category centers. The [plot_area](https://reference.aspose.com/slides/python-net/aspose.slides.charts/chart/plot_area/) settings reserve space for the label rows. After [validate_chart_layout](https://reference.aspose.com/slides/python-net/aspose.slides.charts/chart/validate_chart_layout/) calculates the default positions, [x](https://reference.aspose.com/slides/python-net/aspose.slides.charts/datalabel/x/) and [y](https://reference.aspose.com/slides/python-net/aspose.slides.charts/datalabel/y/) preserve the horizontal alignment and apply vertical offsets to arrange the labels in two rows. The numbers remain data labels linked to the series values; only the row headings are separate text shapes. ```python import aspose.slides as slides import aspose.slides.charts as charts import aspose.pydrawing as drawing with slides.Presentation() as presentation: slide = presentation.slides[0] chart = slide.shapes.add_chart(charts.ChartType.CLUSTERED_COLUMN, 40, 40, 640, 200) chart.has_title = False chart.has_legend = False chart.text_format.portion_format.font_height = 12 chart.chart_data.series.clear() chart.chart_data.categories.clear() workbook = chart.chart_data.chart_data_workbook workbook.clear(0) categories = ["North", "South", "East", "West"] series_names = ["Series A", "Series B", "Series C"] series_values = [ [35, 42, 28, 47], [22, 31, 19, 26], [12, 16, 14, 18] ] for category_index, category_name in enumerate(categories): category_cell = workbook.get_cell(0, category_index + 1, 0, category_name) chart.chart_data.categories.add(category_cell) for series_index, series_name in enumerate(series_names): series_cell = workbook.get_cell(0, 0, series_index + 1, series_name) series = chart.chart_data.series.add(series_cell, charts.ChartType.CLUSTERED_COLUMN) for category_index in range(len(categories)): value_cell = workbook.get_cell(0, category_index + 1, series_index + 1, series_values[series_index][category_index]) series.data_points.add_data_point_for_bar_series(value_cell) if series_index > 0: # Hide the columns of B and C, but keep their data labels. series.format.fill.fill_type = slides.FillType.NO_FILL series.format.line.fill_format.fill_type = slides.FillType.NO_FILL label_format = series.labels.default_data_label_format label_format.show_value = True label_format.text_format.portion_format.font_height = 12 label_fill = label_format.text_format.portion_format.fill_format label_fill.fill_type = slides.FillType.SOLID label_fill.solid_fill_color.color = drawing.Color.black label_format.position = charts.LegendDataLabelPosition.INSIDE_BASE # Align all three series with the same category centers. chart.chart_data.series[0].parent_series_group.overlap = 100 # Use fewer gridlines for this compact example. chart.axes.vertical_axis.is_automatic_major_unit = False chart.axes.vertical_axis.major_unit = 10 # Reserve space above the plot for two rows of data labels. chart.plot_area.layout_target_type = charts.LayoutTargetType.INNER chart.plot_area.x = 0.15 chart.plot_area.y = 0.32 chart.plot_area.width = 0.80 chart.plot_area.height = 0.48 chart.validate_chart_layout() for series_index in range(1, len(series_names)): series = chart.chart_data.series[series_index] row_top = 0.15 if series_index == 1 else 0.03 for category_index in range(len(categories)): data_label = series.data_points[category_index].label # Keep the default horizontal position. Y is an offset from # the default label position, expressed as a chart-height fraction. data_label.x = 0 data_label.y = row_top - data_label.actual_y / chart.height # Only the row heading is a separate text shape. row_heading = slide.shapes.add_auto_shape(slides.ShapeType.RECTANGLE, chart.x, chart.y + row_top * chart.height, 85, 18) row_heading.fill_format.fill_type = slides.FillType.NO_FILL row_heading.line_format.fill_format.fill_type = slides.FillType.NO_FILL row_heading.add_text_frame(series_names[series_index]) row_heading.text_frame.text_frame_format.margin_top = 0 row_heading.text_frame.text_frame_format.margin_bottom = 0 heading_format = row_heading.text_frame.paragraphs[0].portions[0].portion_format heading_format.font_height = 12 heading_format.fill_format.fill_type = slides.FillType.SOLID heading_format.fill_format.solid_fill_color.color = drawing.Color.black presentation.save("multiple-rows-of-labels.pptx", slides.export.SaveFormat.PPTX) ``` ![Column chart with two rows of data labels above the plot area](https://docs.aspose.com/slides/python-net/chart-data-label/multiple-rows-of-labels.png) ## **FAQ** **How can I prevent data labels from overlapping on dense charts?** Combine automatic label placement, leader lines, and reduced font size; if necessary, hide some fields (for example, the category) or show labels only for extreme values or key points. **How can I disable labels only for zero, negative, or empty values?** Filter data points before enabling labels and turn off display for values of 0, negative values, or missing values according to a defined rule. **How can I ensure a consistent label style when exporting to PDF/images?** Explicitly set the font family and size and verify that the font is available in the rendering environment to avoid fallback. # Manage Chart Data Markers in Presentations with Python > Learn how to customize chart data markers in Aspose.Slides, boosting presentation impact across PPT, PPTX and ODP formats with clear code examples. Source: https://docs.aspose.com/slides/python-net/chart-data-marker/ Updated: 2026-08-05 ## **Overview** This article explains how to work with chart data markers in Aspose.Slides. It shows how to create a chart, access a series and its data points, apply picture fills to markers at the data-point level, adjust marker size, and save the updated presentation. It also notes that standard marker shapes are available through the `MarkerStyleType` enumeration and that marker appearance is preserved when exporting charts to raster formats or SVG. ## **Set Chart Marker Options** The markers can be set on chart data points inside particular series. In order to set chart marker options. Please follow the steps below: - Instantiate [Presentation](https://reference.aspose.com/slides/python-net/aspose.slides/presentation/) class. - Creating the default chart. - Set the picture. - Take first chart series. - Add new data point. - Write presentation to disk. In the example given below, we have set the chart marker options on data points level. ```py import aspose.slides.charts as charts import aspose.slides as slides # Create an instance of Presentation class with slides.Presentation() as presentation: slide = presentation.slides[0] # Creating the default chart chart = slide.shapes.add_chart(charts.ChartType.LINE_WITH_MARKERS, 0, 0, 400, 400) # Getting the default chart data worksheet index defaultWorksheetIndex = 0 # Getting the chart data worksheet fact = chart.chart_data.chart_data_workbook # Delete demo series chart.chart_data.series.clear() # Add new series chart.chart_data.series.add(fact.get_cell(defaultWorksheetIndex, 1, 1, "Series 1"), chart.type) # Set the picture with slides.Images.from_file("aspose-logo.jpg") as image1: imgx1 = presentation.images.add_image(image1) # Set the picture with slides.Images.from_file("Tulips.jpg") as image2: imgx2 = presentation.images.add_image(image2) # Take first chart series series = chart.chart_data.series[0] # Add new point (1:3) there. point = series.data_points.add_data_point_for_line_series(fact.get_cell(defaultWorksheetIndex, 1, 1, 4.5)) point.marker.format.fill.fill_type = slides.FillType.PICTURE point.marker.format.fill.picture_fill_format.picture.image = imgx1 point = series.data_points.add_data_point_for_line_series(fact.get_cell(defaultWorksheetIndex, 2, 1, 2.5)) point.marker.format.fill.fill_type = slides.FillType.PICTURE point.marker.format.fill.picture_fill_format.picture.image = imgx2 point = series.data_points.add_data_point_for_line_series(fact.get_cell(defaultWorksheetIndex, 3, 1, 3.5)) point.marker.format.fill.fill_type = slides.FillType.PICTURE point.marker.format.fill.picture_fill_format.picture.image = imgx1 point = series.data_points.add_data_point_for_line_series(fact.get_cell(defaultWorksheetIndex, 4, 1, 4.5)) point.marker.format.fill.fill_type = slides.FillType.PICTURE point.marker.format.fill.picture_fill_format.picture.image = imgx2 # Changing the chart series marker series.marker.size = 15 # Write presentation to disk presentation.save("MarkOptions_out.pptx", slides.export.SaveFormat.PPTX) ``` ## **FAQ** ### Which marker shapes are available out of the box? Standard shapes are available (circle, square, diamond, triangle, etc.); the list is defined by the [MarkerStyleType](https://reference.aspose.com/slides/python-net/aspose.slides.charts/markerstyletype/) enumeration. If you need a non-standard shape, use a marker with a picture fill to emulate custom visuals. ### Are markers preserved when exporting a chart to an image or SVG? Yes. When rendering charts to [raster formats](https://docs.aspose.com/slides/python-net/convert-powerpoint-to-png/) or saving [shapes as SVG](https://docs.aspose.com/slides/python-net/render-a-slide-as-an-svg-image/), markers retain their appearance and settings, including size, fill, and outline. # Customize Chart Data Tables in Presentations in Python > Customize chart data table fonts, borders, and legend keys in PowerPoint presentations using Aspose.Slides for Python via .NET. Source: https://docs.aspose.com/slides/python-net/chart-data-table/ Updated: 2026-09-24 ## **Overview** Aspose.Slides for Python via .NET lets you display a chart's data table and customize its text formatting, borders, and legend keys. This article explains how to enable the table, format its text, control each type of border, and show or hide legend keys. The examples save the configured charts in PPTX files. ## **Set Font Properties** To display a chart's data table, set [has_data_table](https://reference.aspose.com/slides/python-net/aspose.slides.charts/chart/has_data_table/) to `True`. Use [chart_data_table](https://reference.aspose.com/slides/python-net/aspose.slides.charts/chart/chart_data_table/) to access the table and configure its text formatting. 1. Load the presentation using the [Presentation](https://reference.aspose.com/slides/python-net/aspose.slides/presentation/) class. 1. Add a clustered column chart to the first slide. 1. Enable the chart's data table. 1. Enable bold text with [font_bold](https://reference.aspose.com/slides/python-net/aspose.slides/baseportionformat/font_bold/) and set [font_height](https://reference.aspose.com/slides/python-net/aspose.slides/baseportionformat/font_height/) to `20` for 20-point text. 1. Save the modified presentation. The following example requires `test.pptx` in the working directory with at least one slide. It adds a chart with default data at position (50, 50), with a width of 600 points and a height of 400 points. The saved `output.pptx` contains the chart with its data table enabled and the specified font settings applied. ```py import aspose.slides as slides import aspose.slides.charts as charts with slides.Presentation("test.pptx") as presentation: slide = presentation.slides[0] chart = slide.shapes.add_chart(charts.ChartType.CLUSTERED_COLUMN, 50, 50, 600, 400) chart.has_data_table = True portion_format = chart.chart_data_table.text_format.portion_format portion_format.font_bold = slides.NullableBool.TRUE portion_format.font_height = 20 presentation.save("output.pptx", slides.export.SaveFormat.PPTX) ``` ## **Customize Data Table Borders** Enable the table with [Chart.has_data_table](https://reference.aspose.com/slides/python-net/aspose.slides.charts/chart/has_data_table/) and access it through [Chart.chart_data_table](https://reference.aspose.com/slides/python-net/aspose.slides.charts/chart/chart_data_table/). You can control three types of borders independently: - [has_border_horizontal](https://reference.aspose.com/slides/python-net/aspose.slides.charts/datatable/has_border_horizontal/) controls horizontal cell borders. - [has_border_vertical](https://reference.aspose.com/slides/python-net/aspose.slides.charts/datatable/has_border_vertical/) controls vertical cell borders. - [has_border_outline](https://reference.aspose.com/slides/python-net/aspose.slides.charts/datatable/has_border_outline/) controls the outer border of the table. Set each property to `True` to display its borders or `False` to hide them. The following example creates a clustered column chart with default data, displays horizontal borders and the outer border, and hides vertical borders. It requires no input file. The chart's position and size are specified in points. ```py import aspose.slides as slides import aspose.slides.charts as charts with slides.Presentation() as presentation: slide = presentation.slides[0] chart = slide.shapes.add_chart(charts.ChartType.CLUSTERED_COLUMN, 50, 50, 600, 400) chart.has_data_table = True data_table = chart.chart_data_table data_table.has_border_horizontal = True data_table.has_border_vertical = False data_table.has_border_outline = True presentation.save("data-table-borders.pptx", slides.export.SaveFormat.PPTX) ``` The comparison below uses the same chart data and legend key setting in all four cases. Starting with all borders enabled, each remaining variant disables just one border property. The lower-left variant matches the border settings in the example. ![Chart data tables with all borders enabled, no horizontal borders, no vertical borders, and no outer border](https://docs.aspose.com/slides/python-net/chart-data-table/data-table-borders.png) ## **Show or Hide Legend Keys** Legend keys are small colored markers beside the series names in the data table. They help readers match each table row to a chart series. Set [show_legend_key](https://reference.aspose.com/slides/python-net/aspose.slides.charts/datatable/show_legend_key/) to `True` to show these markers or `False` to hide them. The chart's separate legend is controlled by [Chart.has_legend](https://reference.aspose.com/slides/python-net/aspose.slides.charts/chart/has_legend/). These settings are independent: hiding the separate legend does not hide the keys inside the data table, and hiding the table's keys does not hide the separate legend. The following example creates a chart with default data, enables its data table, and shows legend keys inside it while hiding the separate legend. All table borders are explicitly enabled. No input presentation is required. To hide only the table's keys, change `data_table.show_legend_key` to `False`. ```py import aspose.slides as slides import aspose.slides.charts as charts with slides.Presentation() as presentation: slide = presentation.slides[0] chart = slide.shapes.add_chart(charts.ChartType.CLUSTERED_COLUMN, 50, 50, 600, 400) chart.has_data_table = True chart.has_legend = False data_table = chart.chart_data_table data_table.has_border_horizontal = True data_table.has_border_vertical = True data_table.has_border_outline = True data_table.show_legend_key = True presentation.save("data-table-legend-keys.pptx", slides.export.SaveFormat.PPTX) ``` The comparison below shows the same table with legend keys enabled and disabled. All borders remain enabled, and the separate chart legend is hidden in both cases. ![Chart data tables with legend keys shown on the left and hidden on the right](https://docs.aspose.com/slides/python-net/chart-data-table/data-table-legend-keys.png) ## **FAQ** **Can I show legend keys in a chart's data table?** Yes. Set [show_legend_key](https://reference.aspose.com/slides/python-net/aspose.slides.charts/datatable/show_legend_key/) to `True` to display legend keys or to `False` to hide them. **Will the data table be preserved when exporting the presentation to PDF, HTML, or images?** Yes. Aspose.Slides renders the chart and its displayed data table as part of the slide when exporting to [PDF](https://docs.aspose.com/slides/python-net/convert-powerpoint-to-pdf/), [HTML](https://docs.aspose.com/slides/python-net/convert-powerpoint-to-html/), or [images](https://docs.aspose.com/slides/python-net/convert-powerpoint-to-png/). **Can I work with data tables in charts loaded from a template?** Yes. For a chart loaded from an existing presentation or template, use [has_data_table](https://reference.aspose.com/slides/python-net/aspose.slides.charts/chart/has_data_table/) to check or change whether its data table is displayed. **How can I find charts that have a data table enabled?** Iterate through the shapes on each slide, identify the charts, and check their [has_data_table](https://reference.aspose.com/slides/python-net/aspose.slides.charts/chart/has_data_table/) property. A value of `True` indicates that the data table is enabled. # Customize Presentation Chart Entities in Python > Understand chart entities in Aspose.Slides for Python via .NET and learn to manage series, categories, data points and axes in PowerPoint PPT and PPTX. Source: https://docs.aspose.com/slides/python-net/chart-entities/ Updated: 2025-12-02 --- lastmod: 2025-12-02T13:32:50+06:00 title: Customize Presentation Chart Entities in Python linktitle: Chart Entities type: docs weight: 30 url: /python-net/chart-entities/ keywords: - callout - axis - data label - data marker - data table - legend - plot area - data series - error bar - trend line - PowerPoint - presentation - Python - Aspose.Slides description: "Understand chart entities in Aspose.Slides for Python via .NET and learn to manage series, categories, data points and axes in PowerPoint PPT and PPTX." --- ## Related articles - [Create and Customize PowerPoint Charts in Python](https://docs.aspose.com/slides/python-net/powerpoint-charts/) - [Chart](https://docs.aspose.com/slides/python-net/examples/elements/chart/) - [Customize Error Bars in Presentation Charts with Python](https://docs.aspose.com/slides/python-net/error-bar/) # Format Charts in Presentations Using Python > Learn chart formatting in Aspose.Slides for Python via .NET and elevate your PowerPoint presentation with custom axes, fonts, number formats, and rounded chart borders. Source: https://docs.aspose.com/slides/python-net/chart-formatting/ Updated: 2026-11-09 ## **Overview** This article explains how to format charts in PowerPoint presentations by using Aspose.Slides. It shows how to customize key chart elements such as axes, grid lines, titles, legends, the plot area, and wall fills to improve the appearance and readability of chart data. It also demonstrates how to set font properties for chart text, apply preset numeric formats to chart data, and enable rounded corners for the chart area. Together, these examples show how to control both the visual style and data presentation of charts in a presentation. For separate fills and outlines on rising and falling intervals, see the [stock chart example](https://docs.aspose.com/slides/python-net/create-chart/#create-stock-charts). ## **Format Chart Entities** Use [Chart](https://reference.aspose.com/slides/python-net/aspose.slides.charts/chart/) to format chart titles, axes, grid lines, legends, and the plot area. This example creates a line chart with markers and default data, then applies separate text and line styles to its value and category axes. Font sizes and line widths are specified in points; category labels are rotated by 45 degrees. The value axis uses [number_format](https://reference.aspose.com/slides/python-net/aspose.slides.charts/axis/number_format/) independently of the source cells. Its scale runs from -2 to 15, with major intervals of 2 and minor intervals of 0.5. The example also combines percentage formatting with [display_unit](https://reference.aspose.com/slides/python-net/aspose.slides.charts/axis/display_unit/) set to thousands, so adapt these settings to the meaning and magnitude of your data. The legend stays outside the plot area because [overlay](https://reference.aspose.com/slides/python-net/aspose.slides.charts/legend/overlay/) is disabled. Back-wall and floor fills are configured through [back_wall](https://reference.aspose.com/slides/python-net/aspose.slides.charts/chart/back_wall/) and [floor](https://reference.aspose.com/slides/python-net/aspose.slides.charts/chart/floor/), but these surfaces are only visible in 3D charts. ```python import aspose.slides.charts as charts import aspose.slides as slides with slides.Presentation() as presentation: slide = presentation.slides[0] chart = slide.shapes.add_chart(charts.ChartType.LINE_WITH_MARKERS, 50, 50, 500, 400) chart.has_title = True chart.chart_title.add_text_frame_for_overriding("") chart_title = chart.chart_title.text_frame_for_overriding.paragraphs[0].portions[0] chart_title.text = "Sample Chart" chart_title.portion_format.fill_format.fill_type = slides.FillType.SOLID chart_title.portion_format.fill_format.solid_fill_color.color = slides.Color.gray chart_title.portion_format.font_height = 20 chart_title.portion_format.font_bold = slides.NullableBool.TRUE chart_title.portion_format.font_italic = slides.NullableBool.TRUE chart.axes.vertical_axis.major_grid_lines_format.line.fill_format.fill_type = slides.FillType.SOLID chart.axes.vertical_axis.major_grid_lines_format.line.fill_format.solid_fill_color.color = slides.Color.blue chart.axes.vertical_axis.major_grid_lines_format.line.width = 5 chart.axes.vertical_axis.major_grid_lines_format.line.dash_style = slides.LineDashStyle.DASH_DOT chart.axes.vertical_axis.minor_grid_lines_format.line.fill_format.fill_type = slides.FillType.SOLID chart.axes.vertical_axis.minor_grid_lines_format.line.fill_format.solid_fill_color.color = slides.Color.red chart.axes.vertical_axis.minor_grid_lines_format.line.width = 3 chart.axes.vertical_axis.is_number_format_linked_to_source = False chart.axes.vertical_axis.display_unit = charts.DisplayUnitType.THOUSANDS chart.axes.vertical_axis.number_format = "0.0%" chart.axes.vertical_axis.is_automatic_major_unit = False chart.axes.vertical_axis.is_automatic_max_value = False chart.axes.vertical_axis.is_automatic_minor_unit = False chart.axes.vertical_axis.is_automatic_min_value = False chart.axes.vertical_axis.max_value = 15 chart.axes.vertical_axis.min_value = -2 chart.axes.vertical_axis.minor_unit = 0.5 chart.axes.vertical_axis.major_unit = 2.0 vertical_axis_portion_format = chart.axes.vertical_axis.text_format.portion_format vertical_axis_portion_format.font_bold = slides.NullableBool.TRUE vertical_axis_portion_format.font_height = 16 vertical_axis_portion_format.font_italic = slides.NullableBool.TRUE vertical_axis_portion_format.fill_format.fill_type = slides.FillType.SOLID vertical_axis_portion_format.fill_format.solid_fill_color.color = slides.Color.dark_green vertical_axis_portion_format.latin_font = slides.FontData("Times New Roman") chart.axes.vertical_axis.has_title = True chart.axes.vertical_axis.title.add_text_frame_for_overriding("") vertical_axis_title = chart.axes.vertical_axis.title.text_frame_for_overriding.paragraphs[0].portions[0] vertical_axis_title.text = "Primary Axis" vertical_axis_title.portion_format.fill_format.fill_type = slides.FillType.SOLID vertical_axis_title.portion_format.fill_format.solid_fill_color.color = slides.Color.gray vertical_axis_title.portion_format.font_height = 20 vertical_axis_title.portion_format.font_bold = slides.NullableBool.TRUE vertical_axis_title.portion_format.font_italic = slides.NullableBool.TRUE chart.axes.horizontal_axis.major_grid_lines_format.line.fill_format.fill_type = slides.FillType.SOLID chart.axes.horizontal_axis.major_grid_lines_format.line.fill_format.solid_fill_color.color = slides.Color.green chart.axes.horizontal_axis.major_grid_lines_format.line.width = 5 chart.axes.horizontal_axis.minor_grid_lines_format.line.fill_format.fill_type = slides.FillType.SOLID chart.axes.horizontal_axis.minor_grid_lines_format.line.fill_format.solid_fill_color.color = slides.Color.yellow chart.axes.horizontal_axis.minor_grid_lines_format.line.width = 3 horizontal_axis_portion_format = chart.axes.horizontal_axis.text_format.portion_format horizontal_axis_portion_format.font_bold = slides.NullableBool.TRUE horizontal_axis_portion_format.font_height = 16 horizontal_axis_portion_format.font_italic = slides.NullableBool.TRUE horizontal_axis_portion_format.fill_format.fill_type = slides.FillType.SOLID horizontal_axis_portion_format.fill_format.solid_fill_color.color = slides.Color.blue horizontal_axis_portion_format.latin_font = slides.FontData("Arial") chart.axes.horizontal_axis.has_title = True chart.axes.horizontal_axis.title.add_text_frame_for_overriding("") horizontal_axis_title = chart.axes.horizontal_axis.title.text_frame_for_overriding.paragraphs[0].portions[0] horizontal_axis_title.text = "Sample Category" horizontal_axis_title.portion_format.fill_format.fill_type = slides.FillType.SOLID horizontal_axis_title.portion_format.fill_format.solid_fill_color.color = slides.Color.gray horizontal_axis_title.portion_format.font_height = 20 horizontal_axis_title.portion_format.font_bold = slides.NullableBool.TRUE horizontal_axis_title.portion_format.font_italic = slides.NullableBool.TRUE chart.axes.horizontal_axis.tick_label_position = charts.TickLabelPositionType.LOW chart.axes.horizontal_axis.tick_label_rotation_angle = 45 legend_portion_format = chart.legend.text_format.portion_format legend_portion_format.font_bold = slides.NullableBool.TRUE legend_portion_format.font_height = 16 legend_portion_format.font_italic = slides.NullableBool.TRUE legend_portion_format.fill_format.fill_type = slides.FillType.SOLID legend_portion_format.fill_format.solid_fill_color.color = slides.Color.dark_red chart.legend.overlay = False chart.back_wall.thickness = 1 chart.back_wall.format.fill.fill_type = slides.FillType.SOLID chart.back_wall.format.fill.solid_fill_color.color = slides.Color.orange chart.floor.format.fill.fill_type = slides.FillType.SOLID chart.floor.format.fill.solid_fill_color.color = slides.Color.red chart.plot_area.format.fill.fill_type = slides.FillType.SOLID chart.plot_area.format.fill.solid_fill_color.color = slides.Color.light_cyan presentation.save("FormattedChart.pptx", slides.export.SaveFormat.PPTX) ``` ## **Set Font Properties for a Chart** Set the default font size for chart text through [Chart.text_format](https://reference.aspose.com/slides/python-net/aspose.slides.charts/chart/text_format/). The example creates a clustered column chart with a 20-point font and enables value labels for the first series through [show_value](https://reference.aspose.com/slides/python-net/aspose.slides.charts/datalabelformat/show_value/). Text elements with their own explicit font settings can override the chart default. ```python import aspose.slides.charts as charts import aspose.slides as slides with slides.Presentation() as presentation: slide = presentation.slides[0] chart = slide.shapes.add_chart(charts.ChartType.CLUSTERED_COLUMN, 100, 100, 500, 400) chart.text_format.portion_format.font_height = 20 chart.chart_data.series[0].labels.default_data_label_format.show_value = True presentation.save("ChartFontProperties.pptx", slides.export.SaveFormat.PPTX) ``` ## **Set the Numeric Format** Use [ChartDataCell.preset_number_format](https://reference.aspose.com/slides/python-net/aspose.slides.charts/chartdatacell/preset_number_format/) to apply a built-in number format to chart workbook cells. This example creates a clustered column chart with default, cell-backed data and applies format index 10 (`0.00%`) to each series value cell. This changes how the values are displayed in the workbook without changing the underlying numbers; for example, 0.25 is displayed as 25.00%. Axis and data-label formats can be configured separately. ```python import aspose.slides.charts as charts import aspose.slides as slides with slides.Presentation() as presentation: slide = presentation.slides[0] chart = slide.shapes.add_chart(charts.ChartType.CLUSTERED_COLUMN, 50, 50, 500, 400) for series in chart.chart_data.series: for data_point in series.data_points: data_point.value.as_cell.preset_number_format = 10 # 0.00% presentation.save("PresetNumberFormat.pptx", slides.export.SaveFormat.PPTX) ``` The following table lists built-in number format indices with representative Excel formats for the English (United States) locale. The exact format strings and their display can vary by application and locale, particularly for currency and dates. Some Excel formats also differ from the defaults in the OOXML standard, as described in [Microsoft's number format implementation notes](https://learn.microsoft.com/en-us/openspecs/office_standards/ms-oi29500/17d11129-219b-4e2c-88db-45844d21e528). | Index | Format | | --- | --- | | 0 | `General` | | 1 | `0` | | 2 | `0.00` | | 3 | `#,##0` | | 4 | `#,##0.00` | | 5 | `"$"#,##0_);("$"#,##0)` | | 6 | `"$"#,##0_);[Red]("$"#,##0)` | | 7 | `"$"#,##0.00_);("$"#,##0.00)` | | 8 | `"$"#,##0.00_);[Red]("$"#,##0.00)` | | 9 | `0%` | | 10 | `0.00%` | | 11 | `0.00E+00` | | 12 | `# ?/?` | | 13 | `# ??/??` | | 14 | `m/d/yyyy` | | 15 | `d-mmm-yy` | | 16 | `d-mmm` | | 17 | `mmm-yy` | | 18 | `h:mm AM/PM` | | 19 | `h:mm:ss AM/PM` | | 20 | `h:mm` | | 21 | `h:mm:ss` | | 22 | `m/d/yyyy h:mm` | | 37 | `#,##0_);(#,##0)` | | 38 | `#,##0_);[Red](#,##0)` | | 39 | `#,##0.00_);(#,##0.00)` | | 40 | `#,##0.00_);[Red](#,##0.00)` | | 41 | `_(* #,##0_);_(* (#,##0);_(* "-"_);_(@_)` | | 42 | `_("$"* #,##0_);_("$"* (#,##0);_("$"* "-"_);_(@_)` | | 43 | `_(* #,##0.00_);_(* (#,##0.00);_(* "-"??_);_(@_)` | | 44 | `_("$"* #,##0.00_);_("$"* (#,##0.00);_("$"* "-"??_);_(@_)` | | 45 | `mm:ss` | | 46 | `[h]:mm:ss` | | 47 | `mm:ss.0` | | 48 | `##0.0E+0` | | 49 | `@` | ## **Set Chart Area Rounded Borders** Enable [Chart.has_rounded_corners](https://reference.aspose.com/slides/python-net/aspose.slides.charts/chart/has_rounded_corners/) to round the corners of the chart area. The example creates a clustered column chart and uses [line_format](https://reference.aspose.com/slides/python-net/aspose.slides/shape/line_format/) to give its outline a solid gray color and a single-line style before saving the presentation. ```python import aspose.slides.charts as charts import aspose.slides as slides with slides.Presentation() as presentation: slide = presentation.slides[0] chart = slide.shapes.add_chart(charts.ChartType.CLUSTERED_COLUMN, 20, 100, 600, 400) chart.line_format.fill_format.fill_type = slides.FillType.SOLID chart.line_format.fill_format.solid_fill_color.color = slides.Color.gray chart.line_format.style = slides.LineStyle.SINGLE chart.has_rounded_corners = True presentation.save("RoundedBorders.pptx", slides.export.SaveFormat.PPTX) ``` ## **Edit Existing Chart Annotations** A chart can contain custom shapes, such as a text annotation explaining the status of a report. Access these shapes through [Chart.user_shapes](https://reference.aspose.com/slides/python-net/aspose.slides.charts/chart/user_shapes/). Its [shapes](https://reference.aspose.com/slides/python-net/aspose.slides/groupshape/shapes/) collection contains the chart-owned shapes. An ordinary text box placed over a chart belongs to the slide, even if it looks like part of the chart. Iterating through [Slide.shapes](https://reference.aspose.com/slides/python-net/aspose.slides/baseslide/shapes/) finds the chart and ordinary slide shapes, but does not enumerate the individual shapes inside the chart. Chart titles and data labels are separate chart elements, not custom annotations in this collection. Download [chart-annotations.pptx](https://docs.aspose.com/slides/python-net/chart-formatting/chart-annotations.pptx) and place it in the application's working directory. Its first slide contains a chart with an ungrouped annotation reading "Preliminary results", a chart-owned line, and an ordinary slide text box reading "Slide overlay". The example finds the first chart on that slide and changes the annotation to "Final results" when the report is ready to publish. It checks for an empty collection and only edits an [AutoShape](https://reference.aspose.com/slides/python-net/aspose.slides/autoshape/) with a [text_frame](https://reference.aspose.com/slides/python-net/aspose.slides/autoshape/text_frame/) that is not `None` and contains the expected text. ```python import aspose.slides as slides import aspose.slides.charts as charts with slides.Presentation("chart-annotations.pptx") as presentation: slide = presentation.slides[0] chart = next((shape for shape in slide.shapes if isinstance(shape, charts.Chart)), None) if chart is None or len(chart.user_shapes.shapes) == 0: print("No chart or chart-owned shapes found.") else: updated = False for shape in chart.user_shapes.shapes: if isinstance(shape, slides.AutoShape) and shape.text_frame is not None: if shape.text_frame.text == "Preliminary results": shape.text_frame.text = "Final results" updated = True break if updated: presentation.save("chart-annotations-updated.pptx", slides.export.SaveFormat.PPTX) else: print("No matching text annotation found.") ``` The line and the slide text box remain unchanged. The following images show the input and the saved, reopened result: | Before editing | After editing | | --- | --- | | ![Chart annotation reading Preliminary results](https://docs.aspose.com/slides/python-net/chart-formatting/chart-annotations-before.png) | ![Chart annotation reading Final results](https://docs.aspose.com/slides/python-net/chart-formatting/chart-annotations-after.png) | The example inspects only the top-level chart-owned shapes. If an annotation is inside a [GroupShape](https://reference.aspose.com/slides/python-net/aspose.slides/groupshape/), inspect that group's [shapes](https://reference.aspose.com/slides/python-net/aspose.slides/groupshape/shapes/) collection as well. Repeat this recursively for nested groups, applying the same text checks to their child shapes. A group itself is a container; do not treat it as a text box. ## **FAQ** **Can I set semi-transparent fills for columns/areas while keeping the border opaque?** Yes. Fill transparency and the outline are configured separately. This is useful for improving the readability of the grid and data in dense visualizations. **How can I deal with data labels when they overlap?** Reduce the font size, disable nonessential label components (for example, categories), adjust the label position, show labels only for selected points if necessary, or switch the format to "value + legend". **Can I apply gradient or pattern fills to series?** Yes. Series support solid, gradient, and pattern fills. In practice, use gradients sparingly and avoid combinations that reduce contrast with the grid and text. ## Related articles - [Customize Chart Axes in Presentations with Python](https://docs.aspose.com/slides/python-net/chart-axis/) # Customize Chart Legends in Presentations with Python > Customize chart legends with Aspose.Slides for Python via .NET to optimize PowerPoint presentations with tailored legend formatting. Source: https://docs.aspose.com/slides/python-net/chart-legend/ Updated: 2026-09-30 ## **Overview** Aspose.Slides for Python via .NET provides options for customizing chart legends in PowerPoint presentations. This article shows how to position and size a legend, set the font size for the whole legend, format an individual legend entry, and hide or restore selected entries. The FAQ covers related behaviors, including reserving space for the legend, displaying multiline labels, and inheriting formatting from the presentation theme. ## **Legend Positioning** Use the legend's [x](https://reference.aspose.com/slides/python-net/aspose.slides.charts/legend/x/), [y](https://reference.aspose.com/slides/python-net/aspose.slides.charts/legend/y/), [width](https://reference.aspose.com/slides/python-net/aspose.slides.charts/legend/width/), and [height](https://reference.aspose.com/slides/python-net/aspose.slides.charts/legend/height/) properties to specify its position and size as fractions of the chart's dimensions. This example creates a presentation and adds a clustered column chart with default data to the first slide. Dividing the desired legend offsets and dimensions by the chart's width and height converts them to relative values: the legend is offset by 50 points from the chart's top-left corner and sized to 100 by 100 points. ```python import aspose.slides as slides import aspose.slides.charts as charts with slides.Presentation() as presentation: slide = presentation.slides[0] chart = slide.shapes.add_chart(charts.ChartType.CLUSTERED_COLUMN, 50, 50, 500, 500) # Express the legend's position and size relative to the chart. chart.legend.x = 50 / chart.width chart.legend.y = 50 / chart.height chart.legend.width = 100 / chart.width chart.legend.height = 100 / chart.height presentation.save("legend_position.pptx", slides.export.SaveFormat.PPTX) ``` ## **Set the Font Size of a Legend** Use the legend's [text_format](https://reference.aspose.com/slides/python-net/aspose.slides.charts/legend/text_format/) to access its text formatting and set [font_height](https://reference.aspose.com/slides/python-net/aspose.slides/baseportionformat/font_height/) in points. This example creates a chart with default data and sets the legend text to 20 points. It also disables automatic bounds for the vertical axis and sets its range to -5 through 10. ```python import aspose.slides as slides import aspose.slides.charts as charts with slides.Presentation() as presentation: slide = presentation.slides[0] chart = slide.shapes.add_chart(charts.ChartType.CLUSTERED_COLUMN, 50, 50, 600, 400) chart.legend.text_format.portion_format.font_height = 20 chart.axes.vertical_axis.is_automatic_min_value = False chart.axes.vertical_axis.min_value = -5 chart.axes.vertical_axis.is_automatic_max_value = False chart.axes.vertical_axis.max_value = 10 presentation.save("legend_font_size.pptx", slides.export.SaveFormat.PPTX) ``` ## **Set the Font Size of an Individual Legend Entry** Use the legend's [entries](https://reference.aspose.com/slides/python-net/aspose.slides.charts/legend/entries/) collection to access formatting for a specific entry. Entry indices are zero-based, so index `1` refers to the second entry. This example creates a clustered column chart whose default data includes at least two series. It formats the second legend entry with bold, italic, and 20-point blue text. ```python import aspose.slides as slides import aspose.slides.charts as charts import aspose.pydrawing as draw with slides.Presentation() as presentation: slide = presentation.slides[0] chart = slide.shapes.add_chart(charts.ChartType.CLUSTERED_COLUMN, 50, 50, 600, 400) text_format = chart.legend.entries[1].text_format text_format.portion_format.font_bold = slides.NullableBool.TRUE text_format.portion_format.font_height = 20 text_format.portion_format.font_italic = slides.NullableBool.TRUE text_format.portion_format.fill_format.fill_type = slides.FillType.SOLID text_format.portion_format.fill_format.solid_fill_color.color = draw.Color.blue presentation.save("legend_entry_format.pptx", slides.export.SaveFormat.PPTX) ``` ## **Hide Individual Legend Entries** To exclude an auxiliary series from the legend while keeping its data visible, set [ILegendEntryProperties.hide](https://reference.aspose.com/slides/python-net/aspose.slides.charts/ilegendentryproperties/hide/) to `True` through [IChartSeries.related_legend_entry](https://reference.aspose.com/slides/python-net/aspose.slides.charts/ichartseries/related_legend_entry/). This hides only the selected legend entry; it does not remove the series or its data points. Setting [IChart.has_legend](https://reference.aspose.com/slides/python-net/aspose.slides.charts/ichart/has_legend/) to `False`, in contrast, hides the entire legend. The example below creates a clustered column chart with multiple series using default data. It hides the second series' legend entry (index `1`) and saves the presentation. It then restores the entry by setting [hide](https://reference.aspose.com/slides/python-net/aspose.slides.charts/ilegendentryproperties/hide/) to `False` and saves a second copy. The columns remain visible in both files. ```python import aspose.slides as slides import aspose.slides.charts as charts with slides.Presentation() as presentation: slide = presentation.slides[0] chart = slide.shapes.add_chart(charts.ChartType.CLUSTERED_COLUMN, 50, 50, 600, 400) chart.has_legend = True legend_entry = chart.chart_data.series[1].related_legend_entry legend_entry.hide = True presentation.save("hidden_legend_entry.pptx", slides.export.SaveFormat.PPTX) # Restore the same entry without changing the chart data. legend_entry.hide = False presentation.save("restored_legend_entry.pptx", slides.export.SaveFormat.PPTX) ``` The comparison below shows the same chart with all entries visible and with the second entry hidden. The second series' columns remain unchanged. ![Comparison of a chart with all legend entries visible and with Series 2 hidden from the legend; all columns remain visible.](https://docs.aspose.com/slides/python-net/chart-legend/hide-legend-entry.png) In column, bar, and line charts, legend entries identify series. For pie charts, they identify individual data points (slices), so use [IChartDataPoint.related_legend_entry](https://reference.aspose.com/slides/python-net/aspose.slides.charts/ichartdatapoint/related_legend_entry/) on the selected slice instead. The API documents this data-point property for the `PIE`, `PIE3D`, `EXPLODED_PIE`, `EXPLODED_PIE3D`, `PIE_OF_PIE`, and `BAR_OF_PIE` chart types. Do not assume it applies to doughnut charts, which are not included in that list. ## **FAQ** **Can I make the chart allocate space for the legend instead of overlaying it?** Yes. Set [overlay](https://reference.aspose.com/slides/python-net/aspose.slides.charts/legend/overlay/) to `False` to reserve space for the legend instead of allowing it to overlap the plot area. **Can I make multiline legend labels?** Yes. Long labels can wrap when the available width is insufficient. You can also use newline characters in series names to request line breaks. **How do I make the legend follow the presentation theme's color scheme?** Leave the legend's colors, fills, and fonts unset so that it can inherit theme formatting. Explicit formatting overrides the corresponding theme settings. # Customize Plot Areas of Presentation Charts in Python > Discover how to customize chart plot areas in PowerPoint and OpenDocument presentations with Aspose.Slides for Python via .NET. Improve your slide visuals effortlessly. Source: https://docs.aspose.com/slides/python-net/chart-plot-area/ Updated: 2026-11-08 ## **Overview** This article shows how to work with a chart’s plot area in Aspose.Slides. It explains how to get the actual position and size of the plot area by validating the chart layout and then reading its X, Y, width, and height values. It also demonstrates how to configure the plot area’s layout mode when the layout is set manually, using `LayoutTargetType` to define whether the plot area is calculated by its inner region or by its outer region together with axes and axis labels. ## **Get Width, Height of Chart Plot Area** Aspose.Slides for Python via .NET provides a simple API for reading the actual position and size of a chart plot area.  1. Create an instance of the [Presentation](https://reference.aspose.com/slides/python-net/aspose.slides/presentation/) class. 1. Access first slide. 1. Add chart with default data. 1. Call the chart's `validate_chart_layout()` method before reading the actual values. 1. Gets actual X location (left) of the chart element relative to the left top corner of the chart. 1. Gets actual top of the chart element relative to the left top corner of the chart. 1. Gets actual width of the chart element. 1. Gets actual height of the chart element. ```py import aspose.slides.charts as charts import aspose.slides as slides with slides.Presentation() as pres: chart = pres.slides[0].shapes.add_chart(charts.ChartType.CLUSTERED_COLUMN, 100, 100, 500, 350) chart.validate_chart_layout() x = chart.plot_area.actual_x y = chart.plot_area.actual_y w = chart.plot_area.actual_width h = chart.plot_area.actual_height # Save presentation with chart pres.save("Chart_out.pptx", slides.export.SaveFormat.PPTX) ``` ## **Set Layout Mode of Chart Plot Area** Aspose.Slides for Python via .NET provides a simple API to set the layout mode of the chart plot area. Property **LayoutTargetType** has been added to **ChartPlotArea** and **IChartPlotArea** classes. If the layout of the plot area defined manually this property specifies whether to layout the plot area by its inside (not including axis and axis labels) or outside (including axis and axis labels). There are two possible values which are defined in **LayoutTargetType** enum. - **LayoutTargetType.INNER** - specifies that the plot area size shall determine the size of the plot area, not including the tick marks and axis labels. - **LayoutTargetType.OUTER** - specifies that the plot area size shall determine the size of the plot area, the tick marks, and the axis labels. [![The same chart frame and manual rectangle are used in both renders. In Inner mode the target follows the grid, leaving ticks and labels outside. In Outer mode they take up room inside the target.](https://docs.aspose.com/slides/python-net/chart-plot-area/visual-chart-plot-area-2345b90e2bdf.svg)](https://docs.aspose.com/slides/python-net/chart-plot-area/visual-chart-plot-area-2345b90e2bdf.svg) *The dashed outline marks the same manual rectangle in both renders. Inner leaves room for ticks and labels outside it. Outer fits them inside it.* Sample code is given below. ```py import aspose.slides.charts as charts import aspose.slides as slides with slides.Presentation() as presentation: slide = presentation.slides[0] chart = slide.shapes.add_chart(charts.ChartType.CLUSTERED_COLUMN, 20, 100, 600, 400) chart.plot_area.as_i_layoutable.x = 0.2 chart.plot_area.as_i_layoutable.y = 0.2 chart.plot_area.as_i_layoutable.width = 0.7 chart.plot_area.as_i_layoutable.height = 0.7 chart.plot_area.layout_target_type = charts.LayoutTargetType.INNER presentation.save("SetLayoutMode_inner.pptx", slides.export.SaveFormat.PPTX) ``` ## **FAQ** ### In what units are actual_x, actual_y, actual_width, and actual_height returned? In points; 1 inch = 72 points. These are Aspose.Slides coordinate units. ### How does the Plot Area differ from the Chart Area in terms of content? The Plot Area is the data drawing region (series, gridlines, trendlines, etc.); the Chart Area includes the surrounding elements (title, legend, etc.). In 3D charts, the Plot Area also includes the walls/floor and the axes. ### How are the Plot Area’s X, Y, Width, and Height interpreted when layout is manual? They are fractions (0–1) of the chart’s overall size; in this mode, auto-positioning is disabled and the fractions you set are used. ### Why did the Plot Area position change after adding/moving the legend? The legend sits in the chart area outside the Plot Area but affects layout and available space, so the Plot Area may shift when auto-positioning is in effect. (This is standard behavior for PowerPoint charts.) # Manage Chart Data Series in Presentations in Python > Learn how to manage chart series, data points, workbook cells, formatting, overlap, gap width, and negative values in presentations with Python. Source: https://docs.aspose.com/slides/python-net/chart-series/ Updated: 2026-10-26 ## **Overview** A chart can store its plotted values in workbook cells or directly as numeric literals. A [ChartSeries](https://reference.aspose.com/slides/python-net/aspose.slides.charts/chartseries/) represents one set of related values, and each [ChartDataPoint](https://reference.aspose.com/slides/python-net/aspose.slides.charts/chartdatapoint/) represents a point in that series. [ChartCategory](https://reference.aspose.com/slides/python-net/aspose.slides.charts/chartcategory/) objects provide the labels or grouping values shared by the series. In charts created with default data, series names, categories, and point values use [ChartDataCell](https://reference.aspose.com/slides/python-net/aspose.slides.charts/chartdatacell/) objects from the chart workbook. For a typical category chart, the default workbook uses row 0 for series names, column 0 for category names, and the remaining cells for series values. Worksheet, row, and column indexes passed to [ChartDataWorkbook.get_cell](https://reference.aspose.com/slides/python-net/aspose.slides.charts/chartdataworkbook/get_cell/) are zero-based. This layout is useful when you create a chart with default data, but do not assume that every existing chart uses it. For a loaded presentation, inspect the cells referenced by the series, categories, and data points before changing workbook values. Chart settings have three different scopes: - Series-level settings, such as [ChartSeries.format](https://reference.aspose.com/slides/python-net/aspose.slides.charts/chartseries/format/), provide the default appearance for all points in one series. - Data-point settings, such as [ChartDataPoint.format](https://reference.aspose.com/slides/python-net/aspose.slides.charts/chartdatapoint/format/), override the series appearance for one point. - Group settings apply to compatible series that belong to the same [ChartSeriesGroup](https://reference.aspose.com/slides/python-net/aspose.slides.charts/chartseriesgroup/). Access the group through [ChartSeries.parent_series_group](https://reference.aspose.com/slides/python-net/aspose.slides.charts/chartseries/parent_series_group/) when you need to set options such as overlap or gap width. When no explicit point or series fill is set, the chart style and theme determine the automatic appearance. When both series and point formatting are present, the point formatting takes precedence for that point. ![chart-series-powerpoint](https://docs.aspose.com/slides/python-net/chart-series/chart-series-powerpoint.png) ## **Set Series Values Using Numeric Literals** Use numeric literals when series values come from application data or calculations and do not need worksheet cell references. Set [data_source_type_for_values](https://reference.aspose.com/slides/python-net/aspose.slides.charts/chartdatapointcollection/data_source_type_for_values/) to [DataSourceType.DOUBLE_LITERALS](https://reference.aspose.com/slides/python-net/aspose.slides.charts/datasourcetype/) before assigning each point's [value](https://reference.aspose.com/slides/python-net/aspose.slides.charts/chartdatapoint/value/) through [as_literal_double](https://reference.aspose.com/slides/python-net/aspose.slides.charts/doublechartvalue/as_literal_double/). The collection setting controls the source type of all point values in that series. Each point's [value.data_source_type](https://reference.aspose.com/slides/python-net/aspose.slides.charts/basechartvalue/data_source_type/) reports the selected type; change it through the collection setting. With `WORKSHEET`, use [as_cell](https://reference.aspose.com/slides/python-net/aspose.slides.charts/doublechartvalue/as_cell/) to access the referenced cell. With `DOUBLE_LITERALS`, use `as_literal_double` to read or write the number directly. The following example creates a column chart with default series and categories, then assigns calculated values of 10, 20, and so on to the existing points of its first series. It saves the presentation, reopens it, and prints the stored values. ```py import aspose.slides as slides import aspose.slides.charts as charts with slides.Presentation() as presentation: slide = presentation.slides[0] chart = slide.shapes.add_chart(charts.ChartType.CLUSTERED_COLUMN, 20, 20, 500, 300) series = chart.chart_data.series[0] series.data_points.data_source_type_for_values = charts.DataSourceType.DOUBLE_LITERALS for i in range(len(series.data_points)): series.data_points[i].value.as_literal_double = (i + 1) * 10 presentation.save("numeric_literals.pptx", slides.export.SaveFormat.PPTX) with slides.Presentation("numeric_literals.pptx") as reopened_presentation: reopened_slide = reopened_presentation.slides[0] reopened_chart = reopened_slide.shapes[0] reopened_series = reopened_chart.chart_data.series[0] for point in reopened_series.data_points: print(point.value.as_literal_double) ``` The point value source type is separate from [ChartData.data_source_type](https://reference.aspose.com/slides/python-net/aspose.slides.charts/chartdata/data_source_type/), which identifies the chart's internal or external workbook configuration. Using numeric literals does not, by itself, remove the embedded workbook. In this example, the workbook remains available for category labels, series names, and the other series. See [Chart Workbook](https://docs.aspose.com/slides/python-net/chart-workbook/) for workbook management. For scatter and bubble charts, set [data_source_type_for_x_values](https://reference.aspose.com/slides/python-net/aspose.slides.charts/chartdatapointcollection/data_source_type_for_x_values/) and [data_source_type_for_y_values](https://reference.aspose.com/slides/python-net/aspose.slides.charts/chartdatapointcollection/data_source_type_for_y_values/) to choose the sources for [x_value](https://reference.aspose.com/slides/python-net/aspose.slides.charts/chartdatapoint/x_value/) and [y_value](https://reference.aspose.com/slides/python-net/aspose.slides.charts/chartdatapoint/y_value/). Bubble charts also use [data_source_type_for_bubble_sizes](https://reference.aspose.com/slides/python-net/aspose.slides.charts/chartdatapointcollection/data_source_type_for_bubble_sizes/) for [bubble_size](https://reference.aspose.com/slides/python-net/aspose.slides.charts/chartdatapoint/bubble_size/). Set each applicable source to `DOUBLE_LITERALS` before assigning numbers through that value's `as_literal_double` property. ## **Set the Chart Series Overlap** [ChartSeries.overlap](https://reference.aspose.com/slides/python-net/aspose.slides.charts/chartseries/overlap/) reports how much bars or columns overlap in a 2D chart, from -100 through 100 percent. It is a read-only projection of the setting on the parent series group. Set [ChartSeriesGroup.overlap](https://reference.aspose.com/slides/python-net/aspose.slides.charts/chartseriesgroup/overlap/) to update every compatible series in that group. This option applies to chart types that display grouped bars or columns; it does not affect unrelated series groups in a combination chart. The following example sets the overlap for the group that contains the first series: ```py import aspose.slides as slides import aspose.slides.charts as charts first_slide_index = 0 first_series_index = 0 overlap_percent = 30 with slides.Presentation() as presentation: slide = presentation.slides[first_slide_index] # The new chart contains sample series, categories, and values. chart = slide.shapes.add_chart(charts.ChartType.CLUSTERED_COLUMN, 20, 20, 500, 200) series = chart.chart_data.series[first_series_index] series.parent_series_group.overlap = overlap_percent presentation.save("series_overlap.pptx", slides.export.SaveFormat.PPTX) ``` The result: ![The series overlap](https://docs.aspose.com/slides/python-net/chart-series/series_overlap.png) ## **Change the Series Fill Color** Use [ChartSeries.format](https://reference.aspose.com/slides/python-net/aspose.slides.charts/chartseries/format/) to set the default fill for an entire series. If a point already has an explicit fill, its [ChartDataPoint.format](https://reference.aspose.com/slides/python-net/aspose.slides.charts/chartdatapoint/format/) setting overrides the series fill for that point. The following example applies a solid blue fill to the first series: ```py import aspose.pydrawing as drawing import aspose.slides as slides import aspose.slides.charts as charts first_slide_index = 0 first_series_index = 0 with slides.Presentation() as presentation: slide = presentation.slides[first_slide_index] chart = slide.shapes.add_chart(charts.ChartType.CLUSTERED_COLUMN, 20, 20, 500, 200) series = chart.chart_data.series[first_series_index] series.format.fill.fill_type = slides.FillType.SOLID series.format.fill.solid_fill_color.color = drawing.Color.blue presentation.save("series_color.pptx", slides.export.SaveFormat.PPTX) ``` The result: ![The color of the series](https://docs.aspose.com/slides/python-net/chart-series/series_color.png) ## **Change the Series Name** A series name is stored in the chart data workbook and is normally displayed in the legend. In the default workbook created for a clustered column chart, cell B1 is at row 0, column 1 and contains the name of the first series. The named constants in the following example make that structure explicit: ```py import aspose.slides as slides import aspose.slides.charts as charts first_slide_index = 0 worksheet_index = 0 series_name_row_index = 0 first_series_column_index = 1 with slides.Presentation() as presentation: slide = presentation.slides[first_slide_index] chart = slide.shapes.add_chart(charts.ChartType.CLUSTERED_COLUMN, 20, 20, 500, 200) workbook = chart.chart_data.chart_data_workbook series_name_cell = workbook.get_cell(worksheet_index, series_name_row_index, first_series_column_index) series_name_cell.value = "Revenue" presentation.save("series_name.pptx", slides.export.SaveFormat.PPTX) ``` You can also update the cell already referenced by [ChartSeries.name](https://reference.aspose.com/slides/python-net/aspose.slides.charts/chartseries/name/). This approach avoids assuming a particular row and column in an existing chart: ```py import aspose.slides as slides import aspose.slides.charts as charts first_slide_index = 0 first_series_index = 0 first_name_cell_index = 0 with slides.Presentation() as presentation: slide = presentation.slides[first_slide_index] chart = slide.shapes.add_chart(charts.ChartType.CLUSTERED_COLUMN, 20, 20, 500, 200) series = chart.chart_data.series[first_series_index] series_name_cell = series.name.as_cells[first_name_cell_index] series_name_cell.value = "Revenue" presentation.save("series_name.pptx", slides.export.SaveFormat.PPTX) ``` The result: ![The series name](https://docs.aspose.com/slides/python-net/chart-series/series_name.png) ### **Create a Series with a Name from Multiple Cells** A composite series name is useful when a product name and a reporting period are stored in separate workbook cells. For example, you can combine `Product A` in B1 and `2026` in C1 into a single series name while keeping both parts linked to their source cells. Use [ChartDataWorkbook.get_cell_collection](https://reference.aspose.com/slides/python-net/aspose.slides.charts/chartdataworkbook/get_cell_collection/) to retrieve the name range, then pass that collection to [ChartSeriesCollection.add](https://reference.aspose.com/slides/python-net/aspose.slides.charts/chartseriescollection/add/). The `skip_hidden_cells` argument controls whether hidden cells are included: `True` excludes them, while `False` includes them. This example uses `False` to include every cell in the name range. The following example creates a presentation with one series and two data points. Cells B1:C1 supply only the series name; A2:A3 supply the category labels, and B2:B3 supply the numeric values. ```py import aspose.slides as slides import aspose.slides.charts as charts with slides.Presentation() as presentation: slide = presentation.slides[0] chart = slide.shapes.add_chart(charts.ChartType.CLUSTERED_COLUMN, 50, 50, 620, 180) chart.chart_data.series.clear() chart.chart_data.categories.clear() chart.has_legend = True workbook = chart.chart_data.chart_data_workbook workbook.clear(0) # These two cells supply the series name. workbook.get_cell(0, 0, 1, "Product A") workbook.get_cell(0, 0, 2, "2026") name_cells = workbook.get_cell_collection("Sheet1!$B$1:$C$1", False) series = chart.chart_data.series.add(name_cells, charts.ChartType.CLUSTERED_COLUMN) # Separate cells supply the categories and numeric data points. north_category = workbook.get_cell(0, 1, 0, "North") south_category = workbook.get_cell(0, 2, 0, "South") chart.chart_data.categories.add(north_category) chart.chart_data.categories.add(south_category) north_value = workbook.get_cell(0, 1, 1, 120) south_value = workbook.get_cell(0, 2, 1, 150) series.data_points.add_data_point_for_bar_series(north_value) series.data_points.add_data_point_for_bar_series(south_value) presentation.save("composite_series_name.pptx", slides.export.SaveFormat.PPTX) ``` The resulting series name is `Product A 2026`, with a space between the two cell values. The legend displays this as one entry for both columns. The image below was rendered from the saved presentation: ![Column chart with North and South values and the composite series name Product A 2026 in the legend](https://docs.aspose.com/slides/python-net/chart-series/composite_series_name.png) ## **Get the Automatic Series Fill Color** [ChartSeries.get_automatic_series_color](https://reference.aspose.com/slides/python-net/aspose.slides.charts/chartseries/get_automatic_series_color/) returns the color calculated from the series index and the chart style. This is the color used when the series fill has not been explicitly defined. Calling the method reads the calculated color; it does not assign a new fill. The following example prints the automatic color of each default series: ```py import aspose.slides as slides import aspose.slides.charts as charts first_slide_index = 0 with slides.Presentation() as presentation: slide = presentation.slides[first_slide_index] chart = slide.shapes.add_chart(charts.ChartType.CLUSTERED_COLUMN, 20, 20, 500, 200) series_count = len(chart.chart_data.series) for series_index in range(series_count): series = chart.chart_data.series[series_index] automatic_color = series.get_automatic_series_color() print(f"Series {series_index}: {automatic_color.name}") ``` Example output for the default chart style: ```text Series 0: ff4f81bd Series 1: ffc0504d Series 2: ff9bbb59 ``` The exact colors depend on the chart style and theme. ## **Set Invert Fill Color for a Chart Series** For bar, column, and bubble series, [ChartSeries.invert_if_negative](https://reference.aspose.com/slides/python-net/aspose.slides.charts/chartseries/invert_if_negative/) can display negative values with a different fill. Set the regular series fill to solid, enable inversion, and assign the negative-value color through [ChartSeries.inverted_solid_fill_color](https://reference.aspose.com/slides/python-net/aspose.slides.charts/chartseries/inverted_solid_fill_color/). Negative numbers remain unchanged in the workbook; only their display color changes. The following example replaces the default chart data with one series. Worksheet row 0 contains the series name, column 0 contains category names, and column 1 contains the values: ```py import aspose.pydrawing as drawing import aspose.slides as slides import aspose.slides.charts as charts first_slide_index = 0 worksheet_index = 0 header_row_index = 0 category_column_index = 0 first_series_column_index = 1 first_data_row_index = 1 category_names = ["Category 1", "Category 2", "Category 3"] series_values = [-20, 50, -30] with slides.Presentation() as presentation: slide = presentation.slides[first_slide_index] chart = slide.shapes.add_chart(charts.ChartType.CLUSTERED_COLUMN, 20, 20, 500, 200) chart_data = chart.chart_data workbook = chart_data.chart_data_workbook chart_data.series.clear() chart_data.categories.clear() series_name_cell = workbook.get_cell(worksheet_index, header_row_index, first_series_column_index, "Series 1") series = chart_data.series.add(series_name_cell, chart.type) category_count = len(category_names) for category_index in range(category_count): data_row_index = first_data_row_index + category_index category_name = category_names[category_index] series_value = series_values[category_index] category_cell = workbook.get_cell(worksheet_index, data_row_index, category_column_index, category_name) chart_data.categories.add(category_cell) value_cell = workbook.get_cell(worksheet_index, data_row_index, first_series_column_index, series_value) series.data_points.add_data_point_for_bar_series(value_cell) automatic_series_color = series.get_automatic_series_color() series.format.fill.fill_type = slides.FillType.SOLID series.format.fill.solid_fill_color.color = automatic_series_color series.invert_if_negative = True series.inverted_solid_fill_color.color = drawing.Color.red presentation.save("inverted_solid_fill_color.pptx", slides.export.SaveFormat.PPTX) ``` The result: ![The inverted solid fill color](https://docs.aspose.com/slides/python-net/chart-series/inverted_solid_fill_color.png) You can enable inversion for one point through [ChartDataPoint.invert_if_negative](https://reference.aspose.com/slides/python-net/aspose.slides.charts/chartdatapoint/invert_if_negative/). In the following example, inversion is disabled for the series and enabled only for the selected point. The point is also assigned a negative value so that the effect is visible: ```py import aspose.pydrawing as drawing import aspose.slides as slides import aspose.slides.charts as charts first_slide_index = 0 first_series_index = 0 target_data_point_index = 2 negative_value = -30 with slides.Presentation() as presentation: slide = presentation.slides[first_slide_index] chart = slide.shapes.add_chart(charts.ChartType.CLUSTERED_COLUMN, 20, 20, 500, 200) series = chart.chart_data.series[first_series_index] automatic_series_color = series.get_automatic_series_color() series.format.fill.fill_type = slides.FillType.SOLID series.format.fill.solid_fill_color.color = automatic_series_color series.inverted_solid_fill_color.color = drawing.Color.red series.invert_if_negative = False data_point = series.data_points[target_data_point_index] data_point.value.as_cell.value = negative_value data_point.invert_if_negative = True presentation.save("data_point_invert_color_if_negative.pptx", slides.export.SaveFormat.PPTX) ``` ## **Clear a Specific Data Point Value** To make one point empty without removing the other points, set its backing workbook cell to `None`. For a column chart, the plotted value is available through [ChartDataPoint.value](https://reference.aspose.com/slides/python-net/aspose.slides.charts/chartdatapoint/value/). The data point stays at the same category position, but the chart treats its value as blank according to the chart's blank-value settings. The following example clears only the second point in the first series: ```py import aspose.slides as slides import aspose.slides.charts as charts first_slide_index = 0 first_series_index = 0 target_data_point_index = 1 with slides.Presentation() as presentation: slide = presentation.slides[first_slide_index] chart = slide.shapes.add_chart(charts.ChartType.CLUSTERED_COLUMN, 20, 20, 500, 200) series = chart.chart_data.series[first_series_index] data_point = series.data_points[target_data_point_index] data_point.value.as_cell.value = None presentation.save("clear_data_point_value.pptx", slides.export.SaveFormat.PPTX) ``` Scatter charts use separate X and Y cells, and bubble charts also use a size cell. Clear only the cell that represents the value you intend to remove. Do not call [ChartDataPointCollection.clear](https://reference.aspose.com/slides/python-net/aspose.slides.charts/chartdatapointcollection/clear/) when you want to keep the other points, because that method removes every data point from the collection. ## **Control the Display of Empty Cells** Hidden cells that contain values are a separate case from empty cells. To include or exclude data from hidden worksheet rows and columns, see [Include Data from Hidden Rows and Columns](https://docs.aspose.com/slides/python-net/chart-workbook/#include-data-from-hidden-rows-and-columns). An empty workbook cell represents missing data; a cell containing `0` represents a known numeric value. Set [ChartDataCell.value](https://reference.aspose.com/slides/python-net/aspose.slides.charts/chartdatacell/value/) to `None` to make a cell empty. A numeric zero remains a zero regardless of the blank-cell setting. Use [Chart.display_blanks_as](https://reference.aspose.com/slides/python-net/aspose.slides.charts/chart/display_blanks_as/) to choose how the chart displays empty cells. This setting applies to the whole chart. It changes how blanks are plotted, without filling the empty workbook cell with zero or an interpolated value. The following self-contained example creates a line chart with one series, clears the value for Day 3, and saves the same chart with each mode. No input file is required. The [ChartDataWorkbook](https://reference.aspose.com/slides/python-net/aspose.slides.charts/chartdataworkbook/) uses worksheet 0, column 0 for category labels, and column 1 for values; row 0 holds the series name. The final data is `10, 20, empty, 30, 40`. ```py import aspose.slides as slides import aspose.slides.charts as charts with slides.Presentation() as presentation: slide = presentation.slides[0] chart = slide.shapes.add_chart(charts.ChartType.LINE_WITH_MARKERS, 40, 40, 640, 400) chart_data = chart.chart_data workbook = chart_data.chart_data_workbook chart_data.series.clear() chart_data.categories.clear() series_name_cell = workbook.get_cell(0, 0, 1, "Measurements") series = chart_data.series.add(series_name_cell, chart.type) values = [10, 20, 25, 30, 40] for i, value in enumerate(values): category_cell = workbook.get_cell(0, i + 1, 0, f"Day {i + 1}") chart_data.categories.add(category_cell) value_cell = workbook.get_cell(0, i + 1, 1, value) series.data_points.add_data_point_for_line_series(value_cell) # Leave Day 3 genuinely empty, while retaining its category and data point. workbook.get_cell(0, 3, 1).value = None modes = [("Gap", charts.DisplayBlanksAsType.GAP), ("Zero", charts.DisplayBlanksAsType.ZERO), ("Span", charts.DisplayBlanksAsType.SPAN)] for mode_name, mode in modes: chart.display_blanks_as = mode presentation.save(f"empty_cells_{mode_name}.pptx", slides.export.SaveFormat.PPTX) ``` Each output file stores the mode assigned before saving: `empty_cells_Gap.pptx`, `empty_cells_Zero.pptx`, and `empty_cells_Span.pptx`. To save only one version, assign the desired mode and save the presentation once instead of iterating over the modes. The comparison below shows the same data in all three files. Day 3 is empty in the workbook in every case: ![Line charts with identical data: Gap breaks the line at Day 3, Zero drops the line to zero, and Span connects Day 2 to Day 4.](https://docs.aspose.com/slides/python-net/chart-series/display_blanks_as.png) The visible effect depends on the chart type. A line chart makes all three modes easy to compare. Bar and column charts have no line to connect across a missing category, so `SPAN` cannot produce the connecting segment shown above; a missing column and a zero-height column can also look alike. Similarly, a scatter chart with markers only has no connecting line. Do not expect three distinct results for every chart type; check the output for the type you use. ## **Set the Series Gap Width** Gap width is the space between adjacent bar or column clusters, expressed as a percentage of the bar or column width. Like overlap, it belongs to the parent series group rather than to one series. Set [ChartSeriesGroup.gap_width](https://reference.aspose.com/slides/python-net/aspose.slides.charts/chartseriesgroup/gap_width/) once for the group. A larger value creates more space between clusters; a smaller value makes them denser. The following example changes the gap width and saves only the final presentation: ```py import aspose.slides as slides import aspose.slides.charts as charts first_slide_index = 0 first_series_index = 0 gap_width_percent = 30 with slides.Presentation() as presentation: slide = presentation.slides[first_slide_index] chart = slide.shapes.add_chart(charts.ChartType.STACKED_COLUMN, 20, 20, 500, 200) series = chart.chart_data.series[first_series_index] series.parent_series_group.gap_width = gap_width_percent presentation.save("gap_width_30.pptx", slides.export.SaveFormat.PPTX) ``` The result: ![The gap width](https://docs.aspose.com/slides/python-net/chart-series/gap_width.png) ## **Show or Hide Series Lines** Series lines visually connect related parts of a chart. Use [ChartSeriesGroup.has_series_lines](https://reference.aspose.com/slides/python-net/aspose.slides.charts/chartseriesgroup/has_series_lines/) to show or hide them in supported stacked bar and OfPie charts. In two-dimensional stacked bar and column charts, they connect corresponding stack boundaries across categories. In Pie of Pie and Bar of Pie charts, they connect the main plot to the secondary plot. This setting is not a general-purpose connector for other chart types. Access the group through [ChartSeries.parent_series_group](https://reference.aspose.com/slides/python-net/aspose.slides.charts/chartseries/parent_series_group/). The setting applies to every series in that group. [ChartSeries.has_series_lines](https://reference.aspose.com/slides/python-net/aspose.slides.charts/chartseries/has_series_lines/) is read-only and reflects the parent group's setting; change the group property to update it. The following example creates one [ChartType.PIE_OF_PIE](https://reference.aspose.com/slides/python-net/aspose.slides.charts/charttype/) chart with default data. It saves the same chart with series lines enabled and then disabled, producing two presentations for comparison. ```py import aspose.slides as slides import aspose.slides.charts as charts with slides.Presentation() as presentation: slide = presentation.slides[0] chart = slide.shapes.add_chart(charts.ChartType.PIE_OF_PIE, 50, 50, 600, 400) series = chart.chart_data.series[0] series_group = series.parent_series_group series_group.has_series_lines = True presentation.save("series_lines_enabled.pptx", slides.export.SaveFormat.PPTX) series_group.has_series_lines = False presentation.save("series_lines_disabled.pptx", slides.export.SaveFormat.PPTX) ``` | Series lines enabled | Series lines disabled | | --- | --- | | ![Pie of Pie chart with series lines enabled](https://docs.aspose.com/slides/python-net/chart-series/series_lines_enabled.png) | ![Pie of Pie chart with series lines disabled](https://docs.aspose.com/slides/python-net/chart-series/series_lines_disabled.png) | | The two lines connect the main pie to the secondary pie. | Both pies remain visible, but the connecting lines are hidden. | Series lines differ from data label leader lines, which connect labels to their data points; gridlines, which mark intervals along chart axes; and the lines in a line chart, which represent data values. This setting does not control those elements. ## **FAQ** **Which chart types support data series?** All chart types represented by the [ChartType](https://reference.aspose.com/slides/python-net/aspose.slides.charts/charttype/) enumeration use chart data, but their series do not all have the same value structure or settings. For example, category charts use categories and values, scatter charts use X and Y values, and bubble charts add bubble sizes. Use the data-point creation method that matches the series type. Options such as overlap and gap width apply only to compatible bar or column groups. **What is a chart series group?** A [ChartSeriesGroup](https://reference.aspose.com/slides/python-net/aspose.slides.charts/chartseriesgroup/) contains compatible series that share group-level plotting settings. A combination chart can contain more than one group, so changing the group reached through one series does not necessarily change every series in the chart. **Does a newly created chart contain default data?** Yes. By default, [ShapeCollection.add_chart](https://reference.aspose.com/slides/python-net/aspose.slides/shapecollection/add_chart/) creates sample series, categories, and values. You can edit those cells or clear both the series and category collections before adding a completely custom data set. An overload can also create a chart without default data. **How are chart objects connected to workbook cells?** Series names, category labels, and data-point values reference cells in a [ChartDataWorkbook](https://reference.aspose.com/slides/python-net/aspose.slides.charts/chartdataworkbook/). Changing a referenced cell updates the corresponding chart element. When you build custom data, keep category rows and series-value rows aligned so that each point is plotted under the intended category. **How do I clear one point instead of the whole series?** Set the relevant value cell to `None` to retain the point's category position as an empty point. Use [ChartDataPointCollection.clear](https://reference.aspose.com/slides/python-net/aspose.slides.charts/chartdatapointcollection/clear/) only when you intend to remove all points from that series. If you also remove categories, update every series so their values remain aligned with the category collection. **How are empty points displayed?** The result depends on the chart type and [Chart.display_blanks_as](https://reference.aspose.com/slides/python-net/aspose.slides.charts/chart/display_blanks_as/). Supported charts can display blanks as gaps, as zero values, or by connecting neighboring points. Choose the setting that matches the meaning of missing data in your presentation. See [Control the Display of Empty Cells](https://docs.aspose.com/slides/python-net/chart-series/#control-the-display-of-empty-cells) for a complete example and visual comparison. **How are negative values formatted?** For supported bar, column, and bubble series, enable [ChartSeries.invert_if_negative](https://reference.aspose.com/slides/python-net/aspose.slides.charts/chartseries/invert_if_negative/) and set [ChartSeries.inverted_solid_fill_color](https://reference.aspose.com/slides/python-net/aspose.slides.charts/chartseries/inverted_solid_fill_color/). You can override the behavior for an individual point with [ChartDataPoint.invert_if_negative](https://reference.aspose.com/slides/python-net/aspose.slides.charts/chartdatapoint/invert_if_negative/). These properties affect formatting, not the stored numeric values. **Which formatting wins when both a series and a point are formatted?** Explicit data-point formatting takes precedence for that point. Other points continue to use the explicit series format or, when the series format is not defined, the automatic chart style and theme. Group properties such as overlap and gap width control layout and are not point-level formatting overrides. **Is there a limit to how many series a chart can contain?** Aspose.Slides does not impose a separate fixed series-count limit. In practice, presentation file constraints, available memory, rendering time, and chart readability determine a useful limit. **What should I change when columns are too close together or too far apart?** Set [ChartSeriesGroup.gap_width](https://reference.aspose.com/slides/python-net/aspose.slides.charts/chartseriesgroup/gap_width/) on the appropriate parent series group. Increase the value to widen the space between clusters, or decrease it to bring the clusters closer together. # Customize Presentation Charts in Python > Explore every chart type you can create or edit with Aspose.Slides for Python via .NET – fast, code-first guides for PowerPoint and OpenDocument presentations. Source: https://docs.aspose.com/slides/python-net/chart-types/ Updated: 2025-06-19 --- lastmod: 2025-06-19T21:51:03+04:00 title: Customize Presentation Charts in Python linktitle: Chart Types type: docs weight: 20 url: /python-net/chart-types/ keywords: - customize chart - manage chart - chart type - PowerPoint chart - OpenDocument chart - presentation chart - PPT chart - PPTX chart - ODP chart - Python - Aspose.Slides description: "Explore every chart type you can create or edit with Aspose.Slides for Python via .NET – fast, code-first guides for PowerPoint and OpenDocument presentations." --- ## Related articles - [Create and Customize PowerPoint Charts in Python](https://docs.aspose.com/slides/python-net/powerpoint-charts/) - [Manage Media Files](https://docs.aspose.com/slides/python-net/manage-media-files/) - [Manage Shapes in Presentations with Python](https://docs.aspose.com/slides/python-net/shape-types/) # Manage Chart Workbooks in Presentations with Python > Discover Aspose.Slides for Python via .NET: effortlessly manage chart workbooks in PowerPoint and OpenDocument formats to streamline your presentation data. Source: https://docs.aspose.com/slides/python-net/chart-workbook/ Updated: 2026-10-22 ## **Overview** This article explains how to work with chart workbooks in Aspose.Slides. It shows how to read and write chart data through workbook streams, use workbook cells as chart data labels, access worksheet collections, and specify the data source type for chart values. It also covers working with external workbooks as chart data sources. The examples demonstrate how to create and assign an external workbook, retrieve the path of an external workbook linked to a chart, and edit chart data when the workbook is available. For workbook cells that represent missing data, see [Control the Display of Empty Cells](https://docs.aspose.com/slides/python-net/chart-series/) for the difference between an empty cell and zero, and a line-chart comparison of the available display modes. ## **Include Data from Hidden Rows and Columns** Use [Chart.plot_visible_cells_only](https://reference.aspose.com/slides/python-net/aspose.slides.charts/chart/plot_visible_cells_only/) to control whether a chart plots data from hidden worksheet rows and columns. Set it to `True` to plot only visible cells, or `False` to include both visible and hidden cells. This setting controls chart plotting; it does not hide or unhide worksheet rows or columns. The [sample presentation](https://docs.aspose.com/slides/python-net/chart-workbook/hidden-source-data.pptx) contains a column chart as the first shape on its first slide. The embedded worksheet, `Sheet1`, contains the following source range, `A1:C4`. Row 3 and column C are hidden, but their cells still contain values. | Worksheet row | A: Month | B: Retail | C: Wholesale (hidden column) | | --- | --- | --- | --- | | 2 | January | 10 | 30 | | 3 (hidden row) | February | 40 | 60 | | 4 | March | 20 | 50 | Access source cells through [ChartData.chart_data_workbook](https://reference.aspose.com/slides/python-net/aspose.slides.charts/chartdata/chart_data_workbook/) and read [ChartDataCell.is_hidden](https://reference.aspose.com/slides/python-net/aspose.slides.charts/chartdatacell/is_hidden/) to inspect their hidden status. This property is read-only. In this file, B2 is visible, B3 belongs to the hidden row, and C2 belongs to the hidden column; the example prints `False`, `True`, and `True`, respectively. For this example, refresh the chart data after changing the plotting setting: retain the embedded workbook with [read_workbook_stream](https://reference.aspose.com/slides/python-net/aspose.slides.charts/chartdata/read_workbook_stream/) and reload it with [write_workbook_stream](https://reference.aspose.com/slides/python-net/aspose.slides.charts/chartdata/write_workbook_stream/). When including all cells, also use [set_range](https://reference.aspose.com/slides/python-net/aspose.slides.charts/chartdata/set_range/) to restore the complete range, including the hidden February category. Simply changing the flag is insufficient to refresh this sample's cached chart data and category labels. ```python import aspose.slides as slides import aspose.slides.charts as charts with slides.Presentation("hidden-source-data.pptx") as presentation: slide = presentation.slides[0] if len(slide.shapes) > 0 and isinstance(slide.shapes[0], charts.Chart): chart = slide.shapes[0] workbook = chart.chart_data.chart_data_workbook print(f"B2 hidden: {workbook.get_cell(0, 'B2').is_hidden}") print(f"B3 hidden: {workbook.get_cell(0, 'B3').is_hidden}") print(f"C2 hidden: {workbook.get_cell(0, 'C2').is_hidden}") workbook_stream = chart.chart_data.read_workbook_stream() for visible_only in [True, False]: chart.plot_visible_cells_only = visible_only # Refresh the chart data from the embedded workbook. workbook_stream.seek(0) chart.chart_data.write_workbook_stream(workbook_stream) if not visible_only: # Restore the complete source range, including hidden categories. chart.chart_data.set_range("Sheet1!$A$1:$C$4") presentation.save(f"hidden_cells_{visible_only}.pptx", slides.export.SaveFormat.PPTX) else: print("The first shape is not a chart.") ``` The example saves two versions of the presentation: one with only the visible Retail values (10 and 20), and another with all six values. The images below were rendered from the saved presentations after reopening them; both files preserve their assigned plotting setting. Row 3 and column C remain hidden in both embedded workbooks. | Only visible cells (`True`) | All cells (`False`) | | --- | --- | | ![Only visible cells: Retail values 10 and 20 for January and March.](https://docs.aspose.com/slides/python-net/chart-workbook/hidden_cells_True.png) | ![All cells: Retail and Wholesale values for January, February, and March.](https://docs.aspose.com/slides/python-net/chart-workbook/hidden_cells_False.png) | A hidden cell containing a value is different from an empty cell. [Chart.display_blanks_as](https://reference.aspose.com/slides/python-net/aspose.slides.charts/chart/display_blanks_as/) controls how missing values are displayed; it does not include or exclude hidden source data. See [Control the Display of Empty Cells](https://docs.aspose.com/slides/python-net/chart-series/#control-the-display-of-empty-cells) for an example. ## **Retrieve a Chart's Data Range** Before updating workbook data in an existing presentation, inspect the source ranges to identify which worksheet cells each chart uses. The [ChartData.get_range](https://reference.aspose.com/slides/python-net/aspose.slides.charts/chartdata/get_range/) method returns the current data range as a worksheet-qualified formula, such as `Sheet1!$A$1:$D$5`. Here, `Sheet1` is the worksheet name, `!` separates it from the cell range, and `$A$1:$D$5` identifies cells A1 through D5, inclusive. The dollar signs indicate absolute row and column references. The method reads the current range without changing the chart or its workbook. If the chart does not use a workbook as its data source, it raises an exception. For more information, see the [ChartData API Reference](https://reference.aspose.com/slides/python-net/aspose.slides.charts/chartdata/). This example opens a presentation and checks the shapes directly on each slide for charts. It prints each chart's name and source range. If the range cannot be retrieved, it prints a diagnostic message and continues to the next chart. ```python import aspose.slides as slides import aspose.slides.charts as charts with slides.Presentation("presentation.pptx") as presentation: for slide in presentation.slides: for shape in slide.shapes: if isinstance(shape, charts.Chart): try: data_range = shape.chart_data.get_range() print(f"{shape.name}: {data_range}") except RuntimeError as error: print(f"{shape.name}: Unable to retrieve the chart data range. {error}") ``` ## **Read and Write Chart Data from a Workbook** Aspose.Slides for Python via .NET provides the [read_workbook_stream](https://reference.aspose.com/slides/python-net/aspose.slides.charts/chartdata/read_workbook_stream/) and [write_workbook_stream](https://reference.aspose.com/slides/python-net/aspose.slides.charts/chartdata/write_workbook_stream/) methods that allow you to read and write chart data workbooks (containing chart data edited with Aspose.Cells). **Note** that the chart data has to be organized in the same manner or must have a structure similar to the source. This example uses a presentation with a chart as the first shape on its first slide. It reads the embedded workbook into a stream, clears the existing series and categories, and writes the same workbook back. The changes remain in memory; the example does not save the presentation. ```python import aspose.slides as slides import aspose.slides.charts as charts with slides.Presentation("chart.pptx") as presentation: slide = presentation.slides[0] if len(slide.shapes) > 0 and isinstance(slide.shapes[0], charts.Chart): chart = slide.shapes[0] chart_data = chart.chart_data workbook_stream = chart_data.read_workbook_stream() chart_data.series.clear() chart_data.categories.clear() workbook_stream.seek(0) chart_data.write_workbook_stream(workbook_stream) else: print("The first shape is not a chart.") ``` ### **Validate Chart Layout After Workbook Modification** When you replace an embedded workbook with a modified one, the chart retains its original series and category collections. This mismatch can cause [Chart.validate_chart_layout](https://reference.aspose.com/slides/python-net/aspose.slides.charts/chart/validate_chart_layout/) to fail with an index-out-of-range error. Clear the existing series and categories before writing the updated workbook back to the chart. This example uses a chart that is the first shape on the first slide. The comment marks where workbook editing would occur; the runnable example writes the original workbook back and validates the layout in memory. ```python import aspose.slides as slides import aspose.slides.charts as charts with slides.Presentation("chart.pptx") as presentation: slide = presentation.slides[0] if len(slide.shapes) > 0 and isinstance(slide.shapes[0], charts.Chart): chart = slide.shapes[0] chart_data = chart.chart_data workbook_stream = chart_data.read_workbook_stream() # Modify the workbook stream here, for example, using Aspose.Cells. chart_data.series.clear() chart_data.categories.clear() workbook_stream.seek(0) chart_data.write_workbook_stream(workbook_stream) chart.validate_chart_layout() else: print("The first shape is not a chart.") ``` Clearing the collections removes stale data references before the workbook is written back. Rebuild any required series and category mappings for the updated workbook before using the chart. ## **Set Custom Number Formats for Workbook Cells** Use [ChartDataCell.custom_number_format](https://reference.aspose.com/slides/python-net/aspose.slides.charts/chartdatacell/custom_number_format/) to control how numeric values appear in a chart's embedded workbook. For example, a report may need a conversion rate displayed as a percentage with four decimal places and a coefficient displayed with five decimal places. Keep both values numeric so they remain available for calculations and chart plotting. A number format changes the display, not the stored value. The format `0.0000%` displays `0.125` as `12.5000%`; it does not replace the stored number with `12.5`. Similarly, `0.00000` displays `0.1234567` as `0.12346` without rounding the stored value. If the custom format is an empty string (`""`), [preset_number_format](https://reference.aspose.com/slides/python-net/aspose.slides.charts/chartdatacell/preset_number_format/) is used instead. The following example creates a column chart and accesses its cells through [ChartData.chart_data_workbook](https://reference.aspose.com/slides/python-net/aspose.slides.charts/chartdata/chart_data_workbook/). On worksheet 0, B2 contains the conversion rate and C2 contains the coefficient. Both cells supply chart values. The example also enables value labels linked to the source formats. ```python import aspose.slides as slides import aspose.slides.charts as charts with slides.Presentation() as presentation: presentation.slide_size.set_size(720, 270, slides.SlideSizeScaleType.DO_NOT_SCALE) slide = presentation.slides[0] chart = slide.shapes.add_chart(charts.ChartType.CLUSTERED_COLUMN, 50, 20, 620, 210) chart.has_title = False chart.axes.vertical_axis.is_number_format_linked_to_source = False chart.axes.vertical_axis.number_format = "0.00" chart.axes.vertical_axis.is_automatic_min_value = False chart.axes.vertical_axis.min_value = 0 chart.chart_data.series.clear() chart.chart_data.categories.clear() workbook = chart.chart_data.chart_data_workbook workbook.clear(0) category_cell = workbook.get_cell(0, "A2", "Sample") chart.chart_data.categories.add(category_cell) percentage_cell = workbook.get_cell(0, "B2", 0.125) percentage_cell.custom_number_format = "0.0000%" percentage_name = workbook.get_cell(0, "B1", "Conversion rate") percentage_series = chart.chart_data.series.add(percentage_name, chart.type) percentage_series.data_points.add_data_point_for_bar_series(percentage_cell) precision_cell = workbook.get_cell(0, "C2", 0.1234567) precision_cell.custom_number_format = "0.00000" precision_name = workbook.get_cell(0, "C1", "Coefficient") precision_series = chart.chart_data.series.add(precision_name, chart.type) precision_series.data_points.add_data_point_for_bar_series(precision_cell) for series in chart.chart_data.series: label_format = series.data_points[0].label.data_label_format label_format.show_value = True label_format.is_number_format_linked_to_source = True presentation.save("CustomCellFormats.pptx", slides.export.SaveFormat.PPTX) ``` Workbook cell formats are separate from formats set directly on chart axes or data labels. In this example, each label displays its source cell's value because [show_value](https://reference.aspose.com/slides/python-net/aspose.slides.charts/datalabelformat/show_value/) is enabled, and follows the source number format because [is_number_format_linked_to_source](https://reference.aspose.com/slides/python-net/aspose.slides.charts/datalabelformat/is_number_format_linked_to_source/) is `True`. After saving and reopening the presentation, the labels display `12.5000%` and `0.12346`, as shown below. The vertical axis uses its own [number_format](https://reference.aspose.com/slides/python-net/aspose.slides.charts/axis/number_format/) of `0.00`, with [is_number_format_linked_to_source](https://reference.aspose.com/slides/python-net/aspose.slides.charts/axis/is_number_format_linked_to_source/) set to `False`. To format a data label independently, set its source-link flag to `False` and assign its [number_format](https://reference.aspose.com/slides/python-net/aspose.slides.charts/datalabelformat/number_format/). This does not change the workbook cell's format. For example, an independent label format of `0.00` displays the first value as `0.13`, while B2 still displays `12.5000%`. See [Chart Data Labels](https://docs.aspose.com/slides/python-net/chart-data-label/#set-percentage-sign-with-chart-data-labels) for direct label formatting. The image below was rendered from the saved presentation after reopening it: ![Column chart with source-linked labels showing 12.5000% and 0.12346 and an independently formatted numeric axis.](https://docs.aspose.com/slides/python-net/chart-workbook/custom-cell-formats.png) ## **Set a Workbook Cell as a Chart Data Label** You can use text from workbook cells as chart data labels. This example adds a bubble chart with default data to the first slide of an existing presentation. It uses cells A10:A12 on worksheet 0 for the first three labels in the first series, enables labels from cells, and saves the updated presentation. ```python import aspose.slides as slides import aspose.slides.charts as charts with slides.Presentation("chart2.pptx") as presentation: slide = presentation.slides[0] chart = slide.shapes.add_chart(charts.ChartType.BUBBLE, 50, 50, 600, 400, True) series = chart.chart_data.series[0] workbook = chart.chart_data.chart_data_workbook series.labels.default_data_label_format.show_label_value_from_cell = True series.labels[0].value_from_cell = workbook.get_cell(0, "A10", "Label 0 cell value") series.labels[1].value_from_cell = workbook.get_cell(0, "A11", "Label 1 cell value") series.labels[2].value_from_cell = workbook.get_cell(0, "A12", "Label 2 cell value") presentation.save("resultchart.pptx", slides.export.SaveFormat.PPTX) ``` ## **Manage Worksheets** The [ChartDataWorkbook.worksheets](https://reference.aspose.com/slides/python-net/aspose.slides.charts/chartdataworkbook/worksheets/) property provides access to the worksheets in a chart workbook. This example creates a pie chart with default data and prints each worksheet name to the console. ```python import aspose.slides as slides import aspose.slides.charts as charts with slides.Presentation() as presentation: slide = presentation.slides[0] chart = slide.shapes.add_chart(charts.ChartType.PIE, 50, 50, 400, 500) workbook = chart.chart_data.chart_data_workbook for worksheet in workbook.worksheets: print(worksheet.name) ``` ## **Specify the Data Source Type** Series point values can also be stored directly as numeric literals. See [Set Series Values Using Numeric Literals](https://docs.aspose.com/slides/python-net/chart-series/#set-series-values-using-numeric-literals) for a complete example that saves and reads them. The source type of point values is separate from the chart's internal or external workbook configuration; using numeric literals does not, by itself, remove the embedded workbook. This example creates a 3D column chart with default data and sets two series names using different data sources. The first name uses a string literal; the second uses cell C1 on worksheet 0. The [DataSourceType](https://reference.aspose.com/slides/python-net/aspose.slides.charts/datasourcetype/) enumeration selects the source for each name. The example saves the presentation with the updated series names. ```python import aspose.slides as slides import aspose.slides.charts as charts with slides.Presentation() as presentation: slide = presentation.slides[0] chart = slide.shapes.add_chart(charts.ChartType.COLUMN_3D, 50, 50, 600, 400, True) literal_name = chart.chart_data.series[0].name literal_name.data_source_type = charts.DataSourceType.STRING_LITERALS literal_name.data = "LiteralString" cell_name = chart.chart_data.series[1].name name_cell = chart.chart_data.chart_data_workbook.get_cell(0, "C1", "NewCell") cell_name.data_source_type = charts.DataSourceType.WORKSHEET cell_name.data = name_cell presentation.save("pres.pptx", slides.export.SaveFormat.PPTX) ``` ## **Detect Unsupported Embedded Workbook Formats** Aspose.Slides does not support the Excel binary workbook (.xlsb) format that can be embedded in some charts. You can use the [embedded_workbook_type](https://reference.aspose.com/slides/python-net/aspose.slides.charts/chartdata/embedded_workbook_type/) property on [ChartData](https://reference.aspose.com/slides/python-net/aspose.slides.charts/chartdata/) together with the [WorkbookType](https://reference.aspose.com/slides/python-net/aspose.slides.charts/workbooktype/) enumeration to detect unsupported formats and skip those charts. This example inspects the shapes on the first slide of an existing presentation, skips non-chart shapes, and prints a diagnostic message for each chart with an embedded .xlsb workbook. ```python import aspose.slides as slides import aspose.slides.charts as charts with slides.Presentation("sample.pptx") as presentation: slide = presentation.slides[0] for shape in slide.shapes: if not isinstance(shape, charts.Chart): continue chart_data = shape.chart_data is_internal_workbook = chart_data.data_source_type == charts.ChartDataSourceType.INTERNAL_WORKBOOK is_binary_macro = chart_data.embedded_workbook_type == charts.WorkbookType.WORKBOOK_BINARY_MACRO if is_internal_workbook and is_binary_macro: print("Skipping a chart with an unsupported .xlsb workbook.") continue # Read or modify supported chart workbook data here. ``` ## **External Workbook** Aspose.Slides supports using external workbooks as a data source for charts. ### **Create an External Workbook** Use [read_workbook_stream](https://reference.aspose.com/slides/python-net/aspose.slides.charts/chartdata/read_workbook_stream/) and [set_external_workbook](https://reference.aspose.com/slides/python-net/aspose.slides.charts/chartdata/set_external_workbook/) to export an embedded chart workbook to a file and link the chart to that external workbook. This example creates a pie chart with default data and exports its workbook. It closes the output stream before assigning the external workbook as the chart data source, then saves the linked presentation. ```python from pathlib import Path import aspose.slides as slides import aspose.slides.charts as charts with slides.Presentation() as presentation: slide = presentation.slides[0] chart = slide.shapes.add_chart(charts.ChartType.PIE, 50, 50, 400, 600) workbook_path = str(Path("externalWorkbook1.xlsx").resolve()) workbook_stream = chart.chart_data.read_workbook_stream() workbook_data = workbook_stream.read() with open(workbook_path, "wb") as file_stream: file_stream.write(workbook_data) chart.chart_data.set_external_workbook(workbook_path) presentation.save("externalWorkbook.pptx", slides.export.SaveFormat.PPTX) ``` ### **Set an External Workbook** Using the [set_external_workbook](https://reference.aspose.com/slides/python-net/aspose.slides.charts/chartdata/set_external_workbook/) method, you can assign an external workbook to a chart as its data source. This method can also be used to update a path to the external workbook (if the latter has been moved). While you cannot edit the data in workbooks stored in remote locations or resources, you can still use such workbooks as an external data source. If the relative path for an external workbook is provided, it gets converted to a full path automatically. This example uses an external workbook whose worksheet named `Sheet1` contains a series name in B1, category names in A2:A4, and numeric values in B2:B4. The example creates a pie chart, links the workbook, and uses [set_range](https://reference.aspose.com/slides/python-net/aspose.slides.charts/chartdata/set_range/) to map A1:B4 to one series and three categories. It saves the presentation with the linked chart. ```python from pathlib import Path import aspose.slides as slides import aspose.slides.charts as charts with slides.Presentation() as presentation: slide = presentation.slides[0] chart = slide.shapes.add_chart(charts.ChartType.PIE, 50, 50, 400, 600, True) chart_data = chart.chart_data workbook_path = str(Path("externalWorkbook.xlsx").resolve()) chart_data.set_external_workbook(workbook_path) chart_data.set_range("Sheet1!$A$1:$B$4") presentation.save("Presentation_with_externalWorkbook.pptx", slides.export.SaveFormat.PPTX) ``` The `update_chart_data` parameter of [set_external_workbook](https://reference.aspose.com/slides/python-net/aspose.slides.charts/chartdata/set_external_workbook/) controls whether the workbook is loaded. * When `update_chart_data` is `False`, only the workbook path is updated. The chart data is not loaded or updated from the target workbook, so the workbook can be unavailable. * When `update_chart_data` is `True`, the chart data is updated from the target workbook. The following example assigns a placeholder URL with `update_chart_data` set to `False`. It retains the pie chart's default data and saves the presentation without loading the unavailable workbook. ```python import aspose.slides as slides import aspose.slides.charts as charts with slides.Presentation() as presentation: slide = presentation.slides[0] chart = slide.shapes.add_chart(charts.ChartType.PIE, 50, 50, 400, 600, True) chart.chart_data.set_external_workbook("https://example.com/unavailable-workbook.xlsx", False) presentation.save("SetExternalWorkbookWithUpdateChartData.pptx", slides.export.SaveFormat.PPTX) ``` ### **Get the External Data Source Workbook Path of a Chart** To identify the workbook linked to a chart, check whether the chart uses an external data source and retrieve its workbook path. This example inspects the first shape on the first slide of a presentation with a linked external workbook. If it is a chart linked to an external workbook, the example prints [external_workbook_path](https://reference.aspose.com/slides/python-net/aspose.slides.charts/chartdata/external_workbook_path/) to the console. It then saves a copy of the presentation. ```python import aspose.slides as slides import aspose.slides.charts as charts with slides.Presentation("externalWorkbook.pptx") as presentation: slide = presentation.slides[0] if len(slide.shapes) > 0 and isinstance(slide.shapes[0], charts.Chart): chart = slide.shapes[0] chart_data = chart.chart_data if chart_data.data_source_type == charts.ChartDataSourceType.EXTERNAL_WORKBOOK: print(chart_data.external_workbook_path) else: print("The chart does not use an external workbook.") else: print("The first shape is not a chart.") presentation.save("Result.pptx", slides.export.SaveFormat.PPTX) ``` ### **Edit Chart Data** You can edit the data in external workbooks the same way you make changes to the contents of internal workbooks. When an external workbook cannot be loaded, an exception is thrown. This example uses a chart that is the first shape on the first slide and is linked to an accessible external workbook. It sets the cell-backed value of the first data point in the first series to 100 and saves the updated presentation. Editing cell values can update the linked external XLSX file, so use a copy if you need to preserve the original workbook. ```python import aspose.slides as slides import aspose.slides.charts as charts with slides.Presentation("presentation.pptx") as presentation: slide = presentation.slides[0] if len(slide.shapes) > 0 and isinstance(slide.shapes[0], charts.Chart): chart = slide.shapes[0] series = chart.chart_data.series if len(series) > 0 and len(series[0].data_points) > 0: value_cell = series[0].data_points[0].value.as_cell if value_cell is not None: value_cell.value = 100 presentation.save("presentation_out.pptx", slides.export.SaveFormat.PPTX) else: print("The first data point is not linked to a workbook cell.") else: print("The chart has no data points to edit.") else: print("The first shape is not a chart.") ``` ### **Recover a Workbook from the Chart Cache** If a chart uses an external workbook that is missing or unavailable, Aspose.Slides can reconstruct the chart workbook from the data cached in the presentation. Create [LoadOptions](https://reference.aspose.com/slides/python-net/aspose.slides/loadoptions/), configure its [spreadsheet_options](https://reference.aspose.com/slides/python-net/aspose.slides/loadoptions/spreadsheet_options/), and set [SpreadsheetOptions.recover_workbook_from_chart_cache](https://reference.aspose.com/slides/python-net/aspose.slides/spreadsheetoptions/recover_workbook_from_chart_cache/) to `True` before opening the presentation. The following Python example recovers workbook data for a chart that is the first shape on the first slide and references an unavailable external workbook. It accesses the recovered data through [Chart.chart_data](https://reference.aspose.com/slides/python-net/aspose.slides.charts/chart/chart_data/) and [ChartData.chart_data_workbook](https://reference.aspose.com/slides/python-net/aspose.slides.charts/chartdata/chart_data_workbook/): ```python import aspose.slides as slides import aspose.slides.charts as charts load_options = slides.LoadOptions() load_options.spreadsheet_options.recover_workbook_from_chart_cache = True with slides.Presentation("presentation.pptx", load_options) as presentation: slide = presentation.slides[0] if len(slide.shapes) > 0 and isinstance(slide.shapes[0], charts.Chart): chart = slide.shapes[0] recovered_workbook = chart.chart_data.chart_data_workbook # Read or modify the recovered workbook data here. else: print("The first shape is not a chart.") ``` If the external workbook is unavailable and recovery is disabled, Aspose.Slides raises an exception. Enable recovery only when using the cached chart data is an acceptable fallback, because the cache may not contain changes made to the external workbook after the presentation was last updated. ## **FAQ** **Can I determine whether a specific chart is linked to an external or an embedded workbook?** Yes. A chart has a [data source type](https://reference.aspose.com/slides/python-net/aspose.slides.charts/chartdata/data_source_type/) and a [path to an external workbook](https://reference.aspose.com/slides/python-net/aspose.slides.charts/chartdata/external_workbook_path/); if the source is an external workbook, you can read the full path to make sure an external file is being used. **Are relative paths to external workbooks supported, and how are they stored?** Yes. If you specify a relative path, it is automatically converted to an absolute path. The presentation stores the absolute path in the PPTX file, so moving the workbook may require updating the link. **Can I use workbooks located on network resources/shares?** Yes, such workbooks can be used as an external data source. However, editing remote workbooks directly from Aspose.Slides is not supported—they can only be used as a source. **Does Aspose.Slides overwrite the external XLSX when saving the presentation?** The presentation stores a [link to the external file](https://reference.aspose.com/slides/python-net/aspose.slides.charts/chartdata/external_workbook_path/). Editing cell-backed chart data can also update the linked local XLSX file. Use a copy of the workbook if the original must remain unchanged. **What should I do if the external file is password-protected?** Aspose.Slides does not accept a password when linking. A common approach is to remove protection in advance or prepare a decrypted copy (for example, using [Aspose.Cells](https://reference.aspose.com/cells/python-net/)) and link to that copy. **Can multiple charts reference the same external workbook?** Yes. Each chart stores its own link. If they all point to the same file, updating that file will be reflected in each chart the next time the data is loaded. # Apply Chart Worksheet Formulas in Presentations with Python > Apply Excel-style formulas in Aspose.Slides for Python via .NET chart worksheets, recalculate values, and use the results in PowerPoint charts. Source: https://docs.aspose.com/slides/python-net/chart-worksheet-formulas/ Updated: 2026-08-21 ## **Overview** PowerPoint charts usually store their source data in an embedded worksheet. In Aspose.Slides for Python via .NET, you can access that worksheet through the chart data workbook, write input values, assign formulas to cells, calculate supported formulas, and use the calculated cells as chart data. This article explains the complete formula workflow: create a chart, populate its worksheet, assign A1-style or R1C1-style formulas, recalculate them, read the calculated values, connect those cells to a chart series, and save the presentation. It also describes the supported formula syntax, the built-in function subset, cached values, unsupported formulas, and spreadsheet-specific errors. ## **Chart Worksheets and Formulas** A chart worksheet contains the categories, series names, and values used by a chart. In PowerPoint, you can inspect the worksheet by opening the chart data editor: ![PowerPoint chart with its embedded worksheet open, showing category and series data](https://docs.aspose.com/slides/python-net/chart-worksheet-formulas/chart-worksheet-formulas_1.png) In Aspose.Slides, the worksheet is exposed through the [chart data workbook](https://reference.aspose.com/slides/python-net/aspose.slides.charts/ichartdataworkbook/). Use the [formula](https://reference.aspose.com/slides/python-net/aspose.slides.charts/ichartdatacell/formula/) property for A1-style formulas and the [r1c1_formula](https://reference.aspose.com/slides/python-net/aspose.slides.charts/ichartdatacell/r1c1_formula/) property for R1C1-style formulas. After changing input cells or formulas, call [calculate_formulas](https://reference.aspose.com/slides/python-net/aspose.slides.charts/chartdataworkbook/calculate_formulas/) to recalculate supported formulas and update the corresponding cell values. A calculated cell still exposes its result through the [value](https://reference.aspose.com/slides/python-net/aspose.slides.charts/ichartdatacell/value/) property. This is important when you need to inspect a formula result in code or use the cell as a chart data point. ## **Create a Chart and Calculate Worksheet Formulas** The following example demonstrates an end-to-end workflow. It creates a clustered column chart, clears the sample data, writes quarterly revenue and expense values, calculates profit with formulas, reads the results, uses the calculated cells as chart values, and saves the presentation. ```python import aspose.slides as slides import aspose.slides.charts as charts with slides.Presentation() as presentation: slide = presentation.slides[0] chart = slide.shapes.add_chart(charts.ChartType.CLUSTERED_COLUMN, 50, 50, 600, 350) workbook = chart.chart_data.chart_data_workbook worksheet_index = 0 chart.chart_data.series.clear() chart.chart_data.categories.clear() workbook.clear(worksheet_index) category1 = workbook.get_cell(worksheet_index, "A2", "Q1") category2 = workbook.get_cell(worksheet_index, "A3", "Q2") category3 = workbook.get_cell(worksheet_index, "A4", "Q3") workbook.get_cell(worksheet_index, "B1", "Revenue") workbook.get_cell(worksheet_index, "C1", "Expenses") workbook.get_cell(worksheet_index, "D1", "Profit") workbook.get_cell(worksheet_index, "B2").value = 120.0 workbook.get_cell(worksheet_index, "C2").value = 80.0 workbook.get_cell(worksheet_index, "B3").value = 150.0 workbook.get_cell(worksheet_index, "C3").value = 95.0 workbook.get_cell(worksheet_index, "B4").value = 135.0 workbook.get_cell(worksheet_index, "C4").value = 110.0 profit1 = workbook.get_cell(worksheet_index, "D2") profit2 = workbook.get_cell(worksheet_index, "D3") profit3 = workbook.get_cell(worksheet_index, "D4") profit1.formula = "B2-C2" profit2.formula = "B3-C3" profit3.formula = "B4-C4" workbook.calculate_formulas() q1_profit = profit1.value # 40 q2_profit = profit2.value # 55 q3_profit = profit3.value # 25 print(f"Q1 profit: {q1_profit}") print(f"Q2 profit: {q2_profit}") print(f"Q3 profit: {q3_profit}") chart.chart_data.categories.add(category1) chart.chart_data.categories.add(category2) chart.chart_data.categories.add(category3) profit_series = chart.chart_data.series.add(workbook.get_cell(worksheet_index, "D1"), chart.type) profit_series.data_points.add_data_point_for_bar_series(profit1) profit_series.data_points.add_data_point_for_bar_series(profit2) profit_series.data_points.add_data_point_for_bar_series(profit3) profit_series.labels.default_data_label_format.show_value = True presentation.save("chart-formulas.pptx", slides.export.SaveFormat.PPTX) ``` The chart data points reference `D2:D4`, so the chart uses the calculated profit values. There is no separate chart-refresh call in this workflow: recalculate the workbook first, then use or save the chart data that points to the calculated cells. ## **Use A1-Style Formulas** A1 notation identifies columns with letters and rows with numbers. Assign A1-style expressions through [IChartDataCell.formula](https://reference.aspose.com/slides/python-net/aspose.slides.charts/ichartdatacell/formula/). ```python import aspose.slides as slides import aspose.slides.charts as charts with slides.Presentation() as presentation: slide = presentation.slides[0] chart = slide.shapes.add_chart(charts.ChartType.CLUSTERED_COLUMN, 50, 50, 500, 300) workbook = chart.chart_data.chart_data_workbook workbook.get_cell(0, "C3").value = 10 workbook.get_cell(0, "F2").value = 2 workbook.get_cell(0, "G2").value = 3 workbook.get_cell(0, "H2").value = 4 cell = workbook.get_cell(0, "A2") cell.formula = "C3+SUM(F2:H2)" workbook.calculate_formulas() value = cell.value # 19 ``` Common A1 reference forms are: | Reference | Relative | Absolute | Mixed | |---|---|---|---| | Cell | `A2` | `$A$2` | `A$2`, `$A2` | | Row | `2:2` | `$2:$2` | — | | Column | `A:A` | `$A:$A` | — | | Range | `A2:C4` | `$A$2:$C$4` | `A$2:$C4`, `$A2:C$4` | Relative references can change when a formula is moved or copied by a spreadsheet application. Absolute references keep both coordinates fixed, while mixed references fix only a row or a column. ## **Use R1C1-Style Formulas** R1C1 notation identifies both rows and columns numerically. Relative references use offsets in square brackets. Assign this syntax through [IChartDataCell.r1c1_formula](https://reference.aspose.com/slides/python-net/aspose.slides.charts/ichartdatacell/r1c1_formula/). ```python import aspose.slides as slides import aspose.slides.charts as charts with slides.Presentation() as presentation: slide = presentation.slides[0] chart = slide.shapes.add_chart(charts.ChartType.CLUSTERED_COLUMN, 50, 50, 500, 300) workbook = chart.chart_data.chart_data_workbook workbook.get_cell(0, "B2").value = 12 workbook.get_cell(0, "C2").value = 5 cell = workbook.get_cell(0, "D2") cell.r1c1_formula = "RC[-2]-RC[-1]" workbook.calculate_formulas() value = cell.value # 7 ``` Common R1C1 reference forms are: | Reference | Relative | Absolute | Mixed | |---|---|---|---| | Cell | `R[2]C[3]` | `R2C3` | `R2C[3]`, `R[2]C3` | | Row | `R[2]` | `R2` | — | | Column | `C[3]` | `C3` | — | | Range | `R[2]C[3]:R[5]C[7]` | `R2C3:R5C7` | `R2C3:R[5]C[7]`, `R[2]C3:R5C[7]` | For example, in cell `D2`, `RC[-2]` means the cell in the same row two columns to the left (`B2`). ## **Formula Constants and Operators** The built-in formula evaluator supports logical values, numeric literals, strings, spreadsheet error values, arithmetic operators, and comparison operators. ### **Constants and Literals** | Type | Examples | Notes | |---|---|---| | Logical | `TRUE`, `FALSE` | Can be used directly in logical expressions such as `A2=TRUE`. | | Numeric | `1`, `0.5`, `.3`, `1E-2` | Common and scientific notation are supported. | | String | `"abc"`, `"2/3/2020 12:00"` | Text literals are enclosed in double quotation marks inside the formula. | | Error result | `#DIV/0!`, `#N/A`, `#REF!` | A valid formula can evaluate to a spreadsheet error value instead of a normal result. | This example uses several constant types: ```python import aspose.slides as slides import aspose.slides.charts as charts with slides.Presentation() as presentation: slide = presentation.slides[0] chart = slide.shapes.add_chart(charts.ChartType.CLUSTERED_COLUMN, 50, 50, 500, 300) workbook = chart.chart_data.chart_data_workbook workbook.get_cell(0, "A2").value = False workbook.get_cell(0, "B2").formula = "A2=TRUE" workbook.get_cell(0, "C2").formula = "1+0.5" workbook.get_cell(0, "D2").formula = ".3*1E-2" workbook.get_cell(0, "E2").formula = "\"abc\"" workbook.get_cell(0, "F2").formula = "2/0" workbook.calculate_formulas() logical_value = workbook.get_cell(0, "B2").value # False numeric_value = workbook.get_cell(0, "C2").value # 1.5 scientific_value = workbook.get_cell(0, "D2").value # 0.003 string_value = workbook.get_cell(0, "E2").value # abc error_value = workbook.get_cell(0, "F2").value # #DIV/0! ``` ### **Arithmetic Operators** | Operator | Meaning | Example | |---|---|---| | `+` | Addition or unary plus | `2+3` | | `-` | Subtraction or negation | `2-3`, `-3` | | `*` | Multiplication | `2*3` | | `/` | Division | `2/3` | | `%` | Percent | `30%` | | `^` | Exponentiation | `2^3` | Use parentheses to make evaluation order explicit, for example `(A2+B2)*C2`. ### **Comparison Operators** Comparison expressions return logical values. | Operator | Meaning | Example | |---|---|---| | `=` | Equal to | `A2=3` | | `<>` | Not equal to | `A2<>3` | | `>` | Greater than | `A2>3` | | `>=` | Greater than or equal to | `A2>=3` | | `<` | Less than | `A2<3` | | `<=` | Less than or equal to | `A2<=3` | ## **Supported Predefined Functions** Aspose.Slides includes a built-in formula evaluator for chart worksheets, but it is not a complete Excel calculation engine. The documented function set is limited to the functions below. Do not assume that an arbitrary Excel function can be recalculated by [calculate_formulas](https://reference.aspose.com/slides/python-net/aspose.slides.charts/chartdataworkbook/calculate_formulas/). | Function | Purpose or supported form | Example | |---|---|---| | `ABS` | Absolute value | `ABS(A2)` | | `AVERAGE` | Arithmetic mean | `AVERAGE(B2:B5)` | | `CEILING` | Round a number upward to a multiple | `CEILING(A2,5)` | | `CHOOSE` | Select a value by index | `CHOOSE(A2,"Low","High")` | | `CONCAT` | Join text values | `CONCAT(A2,B2)` | | `CONCATENATE` | Join text values | `CONCATENATE(A2," ",B2)` | | `DATE` | Create a date value using the 1900 date system | `DATE(2026,8,19)` | | `DAYS` | Return the number of days between dates | `DAYS(B2,A2)` | | `FIND` | Find one text value inside another | `FIND("-",A2)` | | `FINDB` | Byte-oriented text search | `FINDB("a",A2)` | | `IF` | Conditional result | `IF(A2>0,A2,0)` | | `INDEX` | Reference form | `INDEX(A2:C4,2,3)` | | `LOOKUP` | Vector form | `LOOKUP(A2,B2:B5,C2:C5)` | | `MATCH` | Vector form | `MATCH(A2,B2:B5,0)` | | `MAX` | Maximum value | `MAX(B2:B5)` | | `SUM` | Sum values | `SUM(B2:B5)` | | `VLOOKUP` | Vertical lookup | `VLOOKUP(A2,B2:D10,3,FALSE)` | The restrictions shown in the table are significant: `INDEX` is documented in reference form, while `LOOKUP` and `MATCH` are documented in their vector forms. `DATE` uses the 1900 date system. Features and functions not listed here should be treated as unsupported by the Aspose.Slides formula evaluator unless they are documented separately. ## **Calculate Formulas with a Preferred Culture** Some chart workbook functions interpret text according to culture-specific rules. This is especially important for functions intended for languages that use double-byte character sets (DBCS). To calculate such formulas correctly, create [LoadOptions](https://reference.aspose.com/slides/python-net/aspose.slides/loadoptions/), set [SpreadsheetOptions.preferred_culture](https://reference.aspose.com/slides/python-net/aspose.slides/spreadsheetoptions/) through [LoadOptions.spreadsheet_options](https://reference.aspose.com/slides/python-net/aspose.slides/loadoptions/spreadsheet_options/), and then load the presentation. The following example selects the Japanese culture, opens a presentation with the configured load options, and calls [ChartDataWorkbook.calculate_formulas](https://reference.aspose.com/slides/python-net/aspose.slides.charts/chartdataworkbook/calculate_formulas/) for every chart workbook: ```python import aspose.slides as slides import aspose.slides.charts as charts load_options = slides.LoadOptions() load_options.spreadsheet_options.preferred_culture = "ja-JP" with slides.Presentation("presentation.pptx", load_options) as presentation: for slide in presentation.slides: for shape in slide.shapes: if isinstance(shape, charts.Chart): shape.chart_data.chart_data_workbook.calculate_formulas() ``` The preferred culture is part of the presentation loading configuration, so specify it before creating the [Presentation](https://reference.aspose.com/slides/python-net/aspose.slides/presentation/) instance. Use the culture expected by the workbook formulas; for example, use `ja-JP` for formulas that should follow Japanese DBCS calculation rules. ## **Recalculation and Cached Values** Spreadsheet files commonly store both a formula and its last calculated value. Aspose.Slides can therefore read a cached value from [IChartDataCell.value](https://reference.aspose.com/slides/python-net/aspose.slides.charts/ichartdatacell/value/) when a presentation is loaded and the relevant chart data has not been changed. After changing input cells or formulas, do not rely on an old cached result. Call [ChartDataWorkbook.calculate_formulas](https://reference.aspose.com/slides/python-net/aspose.slides.charts/chartdataworkbook/calculate_formulas/) before reading calculated values or saving chart data that depends on them. For formulas outside the supported subset, Aspose.Slides may be unable to parse the formula or establish its dependencies. If the workbook has been modified, the previous cached value can no longer be considered reliable. In that situation, reading the value of a cell with unsupported data can raise [CellUnsupportedDataException](https://reference.aspose.com/slides/python-net/aspose.slides.spreadsheet/cellunsupporteddataexception/). If your chart depends on Excel functions that Aspose.Slides does not evaluate, calculate those formulas with a spreadsheet engine that supports them and write the resulting values back to the chart workbook. Do not replace unsupported formulas with guessed values. ## **Handle Formula Errors** There are two different kinds of problems to distinguish. A formula can be valid but produce a spreadsheet error result such as `#DIV/0!`, `#N/A`, `#NAME?`, `#NULL!`, `#NUM!`, `#REF!`, or `#VALUE!`. In this case, the error token is a cell result and can be returned through `value`. A formula can also fail at the parsing, reference, dependency, or supported-data level. Aspose.Slides provides spreadsheet-specific exceptions for these cases: [CellInvalidFormulaException](https://reference.aspose.com/slides/python-net/aspose.slides.spreadsheet/cellinvalidformulaexception/), [CellInvalidReferenceException](https://reference.aspose.com/slides/python-net/aspose.slides.spreadsheet/cellinvalidreferenceexception/), [CellCircularReferenceException](https://reference.aspose.com/slides/python-net/aspose.slides.spreadsheet/cellcircularreferenceexception/), and [CellUnsupportedDataException](https://reference.aspose.com/slides/python-net/aspose.slides.spreadsheet/cellunsupporteddataexception/). When formulas come from templates or user input, handle these exceptions around recalculation and value access: ```python import aspose.slides as slides import aspose.slides.charts as charts import aspose.slides.spreadsheet as spreadsheet with slides.Presentation() as presentation: slide = presentation.slides[0] chart = slide.shapes.add_chart(charts.ChartType.CLUSTERED_COLUMN, 50, 50, 500, 300) workbook = chart.chart_data.chart_data_workbook cell = workbook.get_cell(0, "A2") cell.formula = "SUM(B2:B5)" try: workbook.calculate_formulas() print(cell.value) except spreadsheet.CellInvalidFormulaException as ex: print(f"Invalid formula: {ex}") except spreadsheet.CellInvalidReferenceException as ex: print(f"Invalid cell reference: {ex}") except spreadsheet.CellCircularReferenceException as ex: print(f"Circular reference: {ex}") except spreadsheet.CellUnsupportedDataException as ex: print(f"Unsupported spreadsheet data: {ex}") ``` ## **Practical Limitations** The formula support in chart worksheets is intended for a defined subset of spreadsheet calculations, not for full Excel compatibility. Keep these constraints in mind when designing a reporting workflow: - Use only the documented constants, operators, references, and functions when you need Aspose.Slides to recalculate formulas. - Recalculate after changing cells that formula results depend on. - Treat cached values from loaded presentations as snapshots, not as a replacement for recalculation after edits. - Test formulas from existing templates before relying on their calculated values, especially when they use functions outside the documented list. - For formulas that require a full spreadsheet calculation engine, calculate them externally and then update the chart workbook with the resulting values. ## **FAQ** **What is the difference between `formula` and `r1c1_formula`?** [formula](https://reference.aspose.com/slides/python-net/aspose.slides.charts/ichartdatacell/formula/) stores an A1-style expression such as `B2-C2`. [r1c1_formula](https://reference.aspose.com/slides/python-net/aspose.slides.charts/ichartdatacell/r1c1_formula/) stores an R1C1-style expression such as `RC[-2]-RC[-1]`. Use the notation that best matches how you generate or copy formulas. **Do I need to read the cell itself or its value after calculation?** [ChartDataWorkbook.get_cell](https://reference.aspose.com/slides/python-net/aspose.slides.charts/chartdataworkbook/get_cell/) returns an `IChartDataCell`. To obtain the calculated result, read that cell's [value](https://reference.aspose.com/slides/python-net/aspose.slides.charts/ichartdatacell/value/) property after recalculation. **When should I call `calculate_formulas`?** Call [calculate_formulas](https://reference.aspose.com/slides/python-net/aspose.slides.charts/chartdataworkbook/calculate_formulas/) after changing input values or formulas and before you depend on the calculated results. This updates the values of formulas that the built-in evaluator supports. **Does Aspose.Slides support every Excel function?** No. The built-in evaluator supports a documented subset of functions. Functions outside that subset should not be assumed to recalculate correctly. If full Excel formula compatibility is required, perform the calculation with an appropriate spreadsheet engine and write the final values to the chart workbook. **What happens if a loaded presentation contains an unsupported formula?** If the chart data has not changed, the workbook may still contain a previously calculated cached value. After related data is modified, that cached value may no longer be valid. Accessing a cell whose formula cannot be handled can raise [CellUnsupportedDataException](https://reference.aspose.com/slides/python-net/aspose.slides.spreadsheet/cellunsupporteddataexception/). **Are formula error values the same as Python exceptions?** No. A result such as `#DIV/0!` is a spreadsheet value produced by a valid calculation. Exceptions such as [CellInvalidFormulaException](https://reference.aspose.com/slides/python-net/aspose.slides.spreadsheet/cellinvalidformulaexception/) or [CellCircularReferenceException](https://reference.aspose.com/slides/python-net/aspose.slides.spreadsheet/cellcircularreferenceexception/) indicate that the formula cannot be processed normally. **Does a chart update automatically when a formula cell changes?** A chart series can reference workbook cells. Recalculate the workbook first, then save or render the presentation. If the chart data points reference the calculated cells, the chart uses those updated cell values; no separate chart-refresh method is required for this workflow. **Can charts use an external Excel workbook?** Yes, chart data can be configured to use an external workbook through the chart data API. However, the formula calculation workflow described in this article concerns the chart data workbook and the formula subset evaluated by Aspose.Slides. Do not assume that [calculate_formulas](https://reference.aspose.com/slides/python-net/aspose.slides.charts/chartdataworkbook/calculate_formulas/) provides full recalculation of arbitrary formulas in an external XLSX file. **Can I use formulas that reference another worksheet or workbook?** Excel-style references may exist in chart workbooks, but formula evaluation is limited by the supported parser and function set. If a cross-sheet or external reference is essential, validate that exact formula with your target Aspose.Slides version. For workflows that require broad Excel reference compatibility, calculate the workbook externally and write the resolved values back to the chart data. **Should formula strings start with `=`?** The Aspose.Slides API examples assign expressions such as `B2-C2` or `SUM(B2:B5)` without a leading `=`. Using that form keeps generated formulas consistent with the documented API examples. # Clone PowerPoint Slides in Python > Quickly clone or duplicate PowerPoint slides with Aspose.Slides for Python via .NET. Follow our clear code examples and tips to automate PPT creation in seconds, boost productivity, and eliminate manual work. Source: https://docs.aspose.com/slides/python-net/clone-slides/ Updated: 2026-10-26 ## **Introduction** Cloning is the process of making an exact copy or replica of something. Aspose.Slides also allows you to copy (clone) any slide and then insert the cloned slide into the current presentation or any other open presentation. Slide cloning creates a new slide that developers can modify without affecting the original slide. There are several ways to clone a slide: - Clone at the end of a presentation. - Clone at another position within a presentation. - Clone at the end of another presentation. - Clone at another position in another presentation. - Clone at a specific position in another presentation. In Aspose.Slides for Python via .NET, the [slide collection](https://reference.aspose.com/slides/python-net/aspose.slides/slidecollection/) exposed by the [Presentation](https://reference.aspose.com/slides/python-net/aspose.slides/presentation/) object provides the `add_clone` and `insert_clone` methods to perform these types of slide cloning. ## **Installation** ```bash pip install aspose.slides ``` ## **Clone at the End Within the Same Presentation** If you want to clone a slide within the same presentation and append it to the end of the existing slides, use the `add_clone` method. Follow these steps: 1. Create an instance of the [Presentation](https://reference.aspose.com/slides/python-net/aspose.slides/presentation/) class. 1. Get the slide collection from the [Presentation](https://reference.aspose.com/slides/python-net/aspose.slides/presentation/) object. 1. Call the `add_clone` method on the [SlideCollection](https://reference.aspose.com/slides/python-net/aspose.slides/slidecollection/), passing the slide to be cloned. 1. Save the modified presentation. In the example below, the first slide (index 0) is cloned and appended to the end of the presentation. ```py import aspose.slides as slides # Instantiate the Presentation class to represent the presentation file. with slides.Presentation("CloneWithinSamePresentationToEnd.pptx") as presentation: # Clone the desired slide to the end of the slide collection in the same presentation. presentation.slides.add_clone(presentation.slides[0]) # Save the modified presentation to disk. presentation.save("Aspose_CloneWithinSamePresentationToEnd_out.pptx", slides.export.SaveFormat.PPTX) ``` ## **Clone to a Specific Position Within the Same Presentation** If you want to clone a slide within the same presentation and place it at a different position, use the `insert_clone` method: 1. Create an instance of the [Presentation](https://reference.aspose.com/slides/python-net/aspose.slides/presentation/) class. 1. Get the slide collection from the [Presentation](https://reference.aspose.com/slides/python-net/aspose.slides/presentation/) object. 1. Call the `insert_clone` method on the [SlideCollection](https://reference.aspose.com/slides/python-net/aspose.slides/slidecollection/), passing the slide to be cloned and the target index for its new position. 1. Save the modified presentation. In the example below, the slide at index 1 (position 2) is cloned to index 2 (position 3) within the same presentation. ```py import aspose.slides as slides # Instantiate the Presentation class to represent the presentation file. with slides.Presentation("CloneWithInSamePresentation.pptx") as presentation: # Clone the desired slide to the specified position (index) within the same presentation. presentation.slides.insert_clone(2, presentation.slides[1]) # Save the modified presentation to disk. presentation.save("Aspose_CloneWithInSamePresentation_out.pptx", slides.export.SaveFormat.PPTX) ``` ## **Clone at the End of Another Presentation** If you need to clone a slide from one presentation and append it to the end of another presentation: 1. Create an instance of the [Presentation](https://reference.aspose.com/slides/python-net/aspose.slides/presentation/) class for the source presentation (the one that contains the slide to clone). 1. Create an instance of the [Presentation](https://reference.aspose.com/slides/python-net/aspose.slides/presentation/) class for the destination presentation (where the slide will be added). 1. Get the slide collection from the destination presentation. 1. Call `add_clone` on the destination [SlideCollection](https://reference.aspose.com/slides/python-net/aspose.slides/slidecollection/), passing the slide from the source presentation. 1. Save the modified destination presentation. In the example below, the slide at index 0 in the source presentation is cloned to the end of the destination presentation. ```py import aspose.slides as slides # Instantiate the Presentation class to represent the source presentation file. with slides.Presentation("CloneAtEndOfAnother.pptx") as source_presentation: # Instantiate the Presentation class for the destination PPTX (where the slide will be cloned). with slides.Presentation() as target_presentation: # Clone the desired slide from the source presentation to the end of the slide collection in the destination presentation. target_presentation.slides.add_clone(source_presentation.slides[0]) # Save the destination presentation to disk. target_presentation.save("Aspose2_out.pptx", slides.export.SaveFormat.PPTX) ``` ## **Clone to a Specific Position in Another Presentation** If you need to clone a slide from one presentation and insert it into another presentation at a specific position: 1. Create an instance of the [Presentation](https://reference.aspose.com/slides/python-net/aspose.slides/presentation/) class for the source presentation (the one containing the slide to clone). 1. Create an instance of the [Presentation](https://reference.aspose.com/slides/python-net/aspose.slides/presentation/) class for the destination presentation (where the slide will be added). 1. Get the slide collection from the destination presentation. 1. Call the `insert_clone` method on the destination [SlideCollection](https://reference.aspose.com/slides/python-net/aspose.slides/slidecollection/), passing the slide from the source presentation and the desired target index. 1. Save the modified destination presentation. In the example below, the slide at index 0 in the source presentation is cloned to index 2 (position 3) in the destination presentation. ```py import aspose.slides as slides # Instantiate the Presentation class to represent the source presentation file. with slides.Presentation("CloneAtEndOfAnother.pptx") as source_presentation: # Instantiate the Presentation class for the destination PPTX (where the slide is to be cloned). with slides.Presentation("Aspose2_out.pptx") as target_presentation: # Insert a clone of the first slide from the source at index 2 in the destination presentation. target_presentation.slides.insert_clone(2, source_presentation.slides[0]) # Save the destination presentation to disk. target_presentation.save("Aspose3_out.pptx", slides.export.SaveFormat.PPTX) ``` ## **Clone a Slide with Its Master Slide into Another Presentation** If you need to clone a slide **with its master** from one presentation and use it in another, first clone the required master slide from the source presentation into the destination presentation. Then use that destination master when cloning the slide. The method `add_clone(Slide, MasterSlide)` expects a **master slide from the destination presentation**, not from the source. To clone a slide with its master, follow these steps: 1. Create an instance of the [Presentation](https://reference.aspose.com/slides/python-net/aspose.slides/presentation/) class for the source presentation (the one containing the slide to clone). 1. Create an instance of the [Presentation](https://reference.aspose.com/slides/python-net/aspose.slides/presentation/) class for the destination presentation. 1. Access the source slide to be cloned and its master slide. 1. Get the [MasterSlideCollection](https://reference.aspose.com/slides/python-net/aspose.slides/masterslidecollection/) from the destination presentation’s master collection. 1. Call `add_clone` on the destination [MasterSlideCollection](https://reference.aspose.com/slides/python-net/aspose.slides/masterslidecollection/), passing the source master to clone it into the destination. 1. Get the [SlideCollection](https://reference.aspose.com/slides/python-net/aspose.slides/slidecollection/) from the destination presentation’s slide collection. 1. Call `add_clone` on the destination [SlideCollection](https://reference.aspose.com/slides/python-net/aspose.slides/slidecollection/), passing the source slide and the cloned destination master. 1. Save the modified destination presentation. In the example below, the slide at index 0 in the source presentation is cloned to the end of the destination presentation using the master cloned from the source. ```py import aspose.slides as slides # Instantiate the Presentation class to represent the source presentation file. with slides.Presentation("CloneToAnotherPresentationWithMaster.pptx") as source_presentation: # Instantiate the Presentation class for the destination presentation where the slide will be cloned. with slides.Presentation() as target_presentation: # Get the first slide from the source presentation. source_slide = source_presentation.slides[0] # Get the master slide used by the first slide. source_master = source_slide.layout_slide.master_slide # Clone the master slide into the destination presentation's master collection. cloned_master = target_presentation.masters.add_clone(source_master) # Clone the slide from the source presentation to the end of the destination presentation using the cloned master. target_presentation.slides.add_clone(source_slide, cloned_master, True) # Save the destination presentation to disk. target_presentation.save("CloneToAnotherPresentationWithMaster_out.pptx", slides.export.SaveFormat.PPTX) ``` ## **Clone at the End in a Specified Section** With Aspose.Slides for Python via .NET, you can clone a slide from one section of a presentation and insert it into another section within the same presentation. To do this, use the `add_clone(Slide, Section)` method of the [SlideCollection](https://reference.aspose.com/slides/python-net/aspose.slides/slidecollection/) class. The following Python example shows how to clone a slide and insert the clone into a specified section: ```py import aspose.slides as slides # Create a new blank presentation. with slides.Presentation() as presentation: # Add an empty slide based on the layout of the first slide. slide = presentation.slides.add_empty_slide(presentation.slides[0].layout_slide) # Add an ellipse shape to the new slide; this slide will be cloned later. slide.shapes.add_auto_shape(slides.ShapeType.ELLIPSE, 150, 150, 100, 100) # Add another empty slide based on the layout of the first slide. slide2 = presentation.slides.add_empty_slide(presentation.slides[0].layout_slide) # Create a section named "Section2" that starts at slide2. section = presentation.sections.add_section("Section2", slide2) # Clone the previously created slide into the "Section2" section. presentation.slides.add_clone(slide, section) # Save the presentation as a PPTX file. presentation.save("presentation.pptx", slides.export.SaveFormat.PPTX) ``` ## **Ensure Matching Slide Size** When cloning slides into another presentation, make sure the destination presentation has the same slide size as the source. If the slide sizes differ, Aspose.Slides does not automatically rescale the cloned shapes—their original coordinates and dimensions are preserved, which may cause the content to appear misaligned or extend beyond the slide boundaries. You can set the destination presentation's slide size to match the source before cloning the master and slide: ```py source_size = source_presentation.slide_size.size target_presentation.slide_size.set_size( source_size.width, source_size.height, slides.SlideSizeScaleType.DO_NOT_SCALE) ``` Do this before cloning the master and the slide. ## **FAQ** **Do speaker notes and reviewer comments get cloned?** Yes. The notes page and review comments are included in the clone. If you don’t want them, [remove them](https://docs.aspose.com/slides/python-net/presentation-notes/) after insertion. **How are charts and their data sources handled?** The chart object, formatting, and embedded data are copied. If the chart was linked to an external source (e.g., an OLE-embedded workbook), that linkage is preserved as an [OLE object](https://docs.aspose.com/slides/python-net/manage-ole/). After moving between files, verify data availability and refresh behavior. **Can I control the insertion position and sections for the clone?** Yes. You can insert the clone at a specific slide index and place it into a chosen [section](https://docs.aspose.com/slides/python-net/slide-section/). If the target section doesn’t exist, create it first and then move the slide into it. Related feature: [Clone slides between presentations](https://docs.aspose.com/slides/features/clone-slides/). ## Related articles - [Efficiently Merge Presentations with Python](https://docs.aspose.com/slides/python-net/merge-presentation/) # Compare Presentation Slides in Python > Compare PowerPoint and OpenDocument presentations programmatically with Aspose.Slides for Python via .NET. Identify slide differences in code quickly. Source: https://docs.aspose.com/slides/python-net/compare-slides/ Updated: 2026-08-05 ## **Overview** Aspose.Slides allows you to compare slides, layout slides, and master slides using the `equals` method provided by the `BaseSlide` class. This method returns `True` when the compared slides are identical in their structure and static content. ## **Compare Two Slides** The `equals` method has been added to the [BaseSlide](https://reference.aspose.com/slides/python-net/aspose.slides/baseslide/) class. It returns true for the slides/layout and slides/master slides which identical by its structure and static content. Two slides are equal if all shapes, styles, texts, animation and other settings. etc. The comparison doesn't take into account unique identifier values, e.g. SlideId and dynamic content, e.g. current date value in Date Placeholder. ```py import aspose.slides as slides with slides.Presentation("AccessSlides.pptx") as p1: with slides.Presentation("HelloWorld.pptx") as p2: for i in range(len(p1.masters)): for j in range(len(p2.masters)): if p1.masters[i].equals(p2.masters[j]): print("Presentation1 MasterSlide#{0} is equal to Presentation2 MasterSlide#{1}".format(i,j)) ``` ## **FAQ** ### Does the fact that a slide is hidden affect the comparison of the slides themselves? [Hidden status](https://reference.aspose.com/slides/python-net/aspose.slides/slide/hidden/) is a presentation/playback-level property, not visual content. The equality of two specific slides is determined by their structure and static content; the mere fact that a slide is hidden does not make the slides different. ### Are hyperlinks and their parameters taken into account? Yes. Links are part of a slide’s static content. If the URL or the hyperlink action differs, this is usually treated as a difference in static content. ### If a chart refers to an external Excel file, will the contents of that file be taken into account? No. The comparison is performed based on the slides themselves. External data sources are generally not read at comparison time; only what is present in the slide’s structure and static state is considered. # Compatibility with PyInstaller and cx_Freeze > Package Aspose.Slides for Python via .NET with PyInstaller. Follow this guide to bundle, configure, and troubleshoot your app into a standalone executable. Source: https://docs.aspose.com/slides/python-net/compatibility-with-pyinstaller/ Updated: 2026-08-02 ## **Introduction** Aspose.Slides for Python via .NET extensions are standard Python C extensions, so they can be frozen as program dependencies with tools like PyInstaller and cx_Freeze (or similar). This allows you to create executable files from your Python scripts. Such tools are called “freezers” because they bundle your code and its dependencies into a single distributable file that runs on other machines without requiring a Python installation or additional libraries. This approach simplifies distributing your Python applications. Freezing an Aspose.Slides for Python via .NET extension as a dependency is illustrated below with a simple program that uses Aspose.Slides. ## **PyInstaller** Generally, nothing special is required when packaging a program that depends on an Aspose.Slides for Python via .NET extension. When a program imports the extension in a way visible to PyInstaller, the extension will be bundled with the program. Because Aspose.Slides for Python via .NET includes PyInstaller hooks, its dependencies are automatically detected and copied into the bundle. slide_app.py: ```python import aspose.slides as slides with slides.Presentation() as presentation: slide = presentation.slides[0] slide.shapes.add_auto_shape(slides.ShapeType.LINE, 50.0, 150.0, 300.0, 0.0) presentation.save("NewPresentation.pptx", slides.export.SaveFormat.PPTX) ``` ```bash $ pyinstaller slide_app.py ``` However, PyInstaller may occasionally miss hidden imports—modules that are imported dynamically or indirectly by your code. To include a hidden import, use PyInstaller’s options. The extension’s dependencies are specified in the PyInstaller hooks that ship with Aspose.Slides for Python via .NET. slide_app.spec: ``` a = Analysis( ['slide_app.py'], ... hiddenimports=['aspose.slides'] ) ``` ```bash $ pyinstaller slide_app.spec ``` ## **cx_Freeze** To freeze a program with cx_Freeze, configure it to include the root package of the Aspose.Slides for Python via .NET extension you are using. This ensures the extension and all dependent modules are copied into the build alongside your application. ### **Using the cxfreeze Script** ```bash $ cxfreeze slide_app.py --packages=aspose ``` ### **Using the Setup Script** setup.py: ``` executables = [Executable('slide_app.py')] options = { 'build_exe': { 'packages': ['aspose'], } } setup(... options=options, executables=executables) ``` ```bash $ python setup.py build_exe ``` ## **FAQ** ### Do I need Microsoft PowerPoint or .NET installed on the user’s machine? No, PowerPoint is not required. Aspose.Slides is a self-contained engine; the Python package ships everything needed as an extension for CPython. The user does not need to install .NET separately. ### How should I properly attach the license to a frozen application? You can store the license XML next to the executable or embed it as a resource and load it from an accessible path before the first API call. Important: do not modify the XML content (not even line breaks). ### What should I do if fonts render differently after the build compared to development? Make sure the fonts you use are available in the target environment (bundled or system-installed) and that their paths are correctly resolved at runtime; font behavior is especially sensitive on Linux. # Manage Connectors in Presentations with Python > Learn how to add, attach, reroute, adjust, and inspect straight, bent, and curved PowerPoint connectors with Aspose.Slides for Python via .NET. Source: https://docs.aspose.com/slides/python-net/connector/ Updated: 2026-08-27 ## **Overview** A connector is a line that can remain attached to two shapes when either shape moves. Its ends attach to connection sites, represented by green dots in PowerPoint. Some bent and curved connectors also expose adjustment points, represented by orange dots, that control the position of individual connector segments. Aspose.Slides represents connectors through the [IConnector](https://reference.aspose.com/slides/python-net/aspose.slides/iconnector/) interface. You can create them, attach their ends to shapes, choose connection sites, reroute them, and modify the geometry of connectors that have adjustment points. ## **Connector Types** The [ShapeType](https://reference.aspose.com/slides/python-net/aspose.slides/shapetype/) enumeration includes straight, bent, and curved connector presets. The following table shows the available connector geometries and the number of adjustment points defined by each preset. | Connector | Image | Number of adjustment points | |---|---|---| | `ShapeType.LINE` | ![shapetype-lineconnector](https://docs.aspose.com/slides/python-net/connector/shapetype-lineconnector.png) | 0 | | `ShapeType.STRAIGHT_CONNECTOR1` | ![shapetype-straightconnector1](https://docs.aspose.com/slides/python-net/connector/shapetype-straightconnector1.png) | 0 | | `ShapeType.BENT_CONNECTOR2` | ![shapetype-bent-connector2](https://docs.aspose.com/slides/python-net/connector/shapetype-bent-connector2.png) | 0 | | `ShapeType.BENT_CONNECTOR3` | ![shapetype-bentconnector3](https://docs.aspose.com/slides/python-net/connector/shapetype-bentconnector3.png) | 1 | | `ShapeType.BENT_CONNECTOR4` | ![shapetype-bentconnector4](https://docs.aspose.com/slides/python-net/connector/shapetype-bentconnector4.png) | 2 | | `ShapeType.BENT_CONNECTOR5` | ![shapetype-bentconnector5](https://docs.aspose.com/slides/python-net/connector/shapetype-bentconnector5.png) | 3 | | `ShapeType.CURVED_CONNECTOR2` | ![shapetype-curvedconnector2](https://docs.aspose.com/slides/python-net/connector/shapetype-curvedconnector2.png) | 0 | | `ShapeType.CURVED_CONNECTOR3` | ![shapetype-curvedconnector3](https://docs.aspose.com/slides/python-net/connector/shapetype-curvedconnector3.png) | 1 | | `ShapeType.CURVED_CONNECTOR4` | ![shapetype-curvedconnector4](https://docs.aspose.com/slides/python-net/connector/shapetype-curvedconnector4.png) | 2 | | `ShapeType.CURVED_CONNECTOR5` | ![shapetype.curvedconnector5](https://docs.aspose.com/slides/python-net/connector/shapetype.curvedconnector5.png) | 3 | The number and meaning of adjustment points are part of the selected connector preset. Do not assume that two different connector types expose the same collection layout. ## **Connect Two Shapes** Use [IShapeCollection.add_connector](https://reference.aspose.com/slides/python-net/aspose.slides/ishapecollection/add_connector/) to add a connector, and assign its [start_shape_connected_to](https://reference.aspose.com/slides/python-net/aspose.slides/iconnector/start_shape_connected_to/) and [end_shape_connected_to](https://reference.aspose.com/slides/python-net/aspose.slides/iconnector/end_shape_connected_to/) properties. After both ends are attached, [IConnector.reroute](https://reference.aspose.com/slides/python-net/aspose.slides/iconnector/reroute/) selects a short route between the shapes. The following example connects an ellipse and a rectangle with a bent connector: ```python import aspose.slides as slides with slides.Presentation() as presentation: slide = presentation.slides[0] ellipse = slide.shapes.add_auto_shape(slides.ShapeType.ELLIPSE, 40, 80, 120, 80) rectangle = slide.shapes.add_auto_shape(slides.ShapeType.RECTANGLE, 320, 240, 140, 80) connector = slide.shapes.add_connector(slides.ShapeType.BENT_CONNECTOR2, 0, 0, 10, 10) connector.start_shape_connected_to = ellipse connector.end_shape_connected_to = rectangle connector.reroute() presentation.save("connected-shapes.pptx", slides.export.SaveFormat.PPTX) ``` Calling `reroute` can change the [start_shape_connection_site_index](https://reference.aspose.com/slides/python-net/aspose.slides/iconnector/start_shape_connection_site_index/) and [end_shape_connection_site_index](https://reference.aspose.com/slides/python-net/aspose.slides/iconnector/end_shape_connection_site_index/) values. Assign specific connection sites after rerouting if those sites must remain fixed. ## **Choose a Connection Site** Each connectable shape reports its number of sites through [connection_site_count](https://reference.aspose.com/slides/python-net/aspose.slides/igeometryshape/connection_site_count/). Validate a preferred zero-based site index before assigning it to a connector end; site counts vary by shape geometry. This example attaches the connector to a particular site on the ellipse when that site exists: ```python import aspose.slides as slides with slides.Presentation() as presentation: slide = presentation.slides[0] ellipse = slide.shapes.add_auto_shape(slides.ShapeType.ELLIPSE, 40, 80, 120, 80) rectangle = slide.shapes.add_auto_shape(slides.ShapeType.RECTANGLE, 320, 240, 140, 80) connector = slide.shapes.add_connector(slides.ShapeType.BENT_CONNECTOR3, 0, 0, 10, 10) connector.start_shape_connected_to = ellipse connector.end_shape_connected_to = rectangle preferred_site_index = 2 if preferred_site_index < ellipse.connection_site_count: connector.start_shape_connection_site_index = preferred_site_index else: print(f"The ellipse has only {ellipse.connection_site_count} connection sites.") presentation.save("specific-connection-site.pptx", slides.export.SaveFormat.PPTX) ``` ## **Adjust a Connector Point** Connectors with adjustment points expose them through [IGeometryShape.adjustments](https://reference.aspose.com/slides/python-net/aspose.slides/igeometryshape/adjustments/). Inspect every [IAdjustValue](https://reference.aspose.com/slides/python-net/aspose.slides/iadjustvalue/) and check its [type](https://reference.aspose.com/slides/python-net/aspose.slides/iadjustvalue/type/) before changing its [raw_value](https://reference.aspose.com/slides/python-net/aspose.slides/iadjustvalue/raw_value/). For general shape manipulation, see [Shape Manipulation](https://docs.aspose.com/slides/python-net/shape-manipulations/). The number, order, meaning, and valid value range of connector adjustments depend on the connector preset. The `type` property is read-only, while the adjustment value is writable. The read-only [name](https://reference.aspose.com/slides/python-net/aspose.slides/iadjustvalue/name/) property provides additional identification when a connector contains more than one adjustment of the same semantic type. ### **Route Around an Obstacle** In the following layout, a `ShapeType.BENT_CONNECTOR5` connector between two shapes passes through a third shape: ![connector-obstruction](https://docs.aspose.com/slides/python-net/connector/connector-obstruction.png) This code creates the obstructed connector: ```python import aspose.slides as slides import aspose.pydrawing as draw with slides.Presentation() as presentation: slide = presentation.slides[0] slide.shapes.add_auto_shape(slides.ShapeType.RECTANGLE, 300, 150, 150, 75) source_shape = slide.shapes.add_auto_shape(slides.ShapeType.RECTANGLE, 500, 400, 100, 50) target_shape = slide.shapes.add_auto_shape(slides.ShapeType.RECTANGLE, 100, 100, 70, 30) connector = slide.shapes.add_connector(slides.ShapeType.BENT_CONNECTOR5, 20, 20, 400, 300) connector.line_format.end_arrowhead_style = slides.LineArrowheadStyle.TRIANGLE connector.line_format.fill_format.fill_type = slides.FillType.SOLID connector.line_format.fill_format.solid_fill_color.color = draw.Color.black connector.start_shape_connected_to = source_shape connector.end_shape_connected_to = target_shape connector.start_shape_connection_site_index = 2 presentation.save("connector-obstruction.pptx", slides.export.SaveFormat.PPTX) ``` Moving the vertical bend changes the route so that the connector bypasses the obstacle: ![connector-obstruction-fixed](https://docs.aspose.com/slides/python-net/connector/connector-obstruction-fixed.png) Instead of assuming that collection index `1` always represents the vertical bend, this example searches for `ShapeAdjustmentType.CONNECTOR_BEND_POSITION_Y` and changes it only when the expected semantic type is present: ```python import aspose.slides as slides import aspose.pydrawing as draw with slides.Presentation() as presentation: slide = presentation.slides[0] slide.shapes.add_auto_shape(slides.ShapeType.RECTANGLE, 300, 150, 150, 75) source_shape = slide.shapes.add_auto_shape(slides.ShapeType.RECTANGLE, 500, 400, 100, 50) target_shape = slide.shapes.add_auto_shape(slides.ShapeType.RECTANGLE, 100, 100, 70, 30) connector = slide.shapes.add_connector(slides.ShapeType.BENT_CONNECTOR5, 20, 20, 400, 300) connector.line_format.end_arrowhead_style = slides.LineArrowheadStyle.TRIANGLE connector.line_format.fill_format.fill_type = slides.FillType.SOLID connector.line_format.fill_format.solid_fill_color.color = draw.Color.black connector.start_shape_connected_to = source_shape connector.end_shape_connected_to = target_shape connector.start_shape_connection_site_index = 2 vertical_bend = None for adjustment_index in range(len(connector.adjustments)): adjustment = connector.adjustments[adjustment_index] print(f"{adjustment.name}: {adjustment.type}, raw value = {adjustment.raw_value}") if adjustment.type == slides.ShapeAdjustmentType.CONNECTOR_BEND_POSITION_Y: vertical_bend = adjustment break if vertical_bend is None: print("The connector does not expose a vertical bend adjustment.") else: vertical_bend.raw_value = 60000 presentation.save("connector-obstruction-fixed.pptx", slides.export.SaveFormat.PPTX) ``` A `ShapeType.BENT_CONNECTOR5` has two `ShapeAdjustmentType.CONNECTOR_BEND_POSITION_X` adjustments and one `ShapeAdjustmentType.CONNECTOR_BEND_POSITION_Y` adjustment. If the type you need occurs more than once, inspect `name` and the known geometry of that preset before selecting one. If an adjustment reports [ShapeAdjustmentType.CUSTOM](https://reference.aspose.com/slides/python-net/aspose.slides/shapeadjustmenttype/), treat its meaning and range as preset-specific and do not change it until that contract is known. ## **Relate Adjustment Values to Connector Geometry** For bent connectors, adjustment values can be used to estimate the positions of individual segments. These calculations are specific to the connector preset: - `ShapeType.BENT_CONNECTOR4` normally exposes one `ShapeAdjustmentType.CONNECTOR_BEND_POSITION_X` and one `ShapeAdjustmentType.CONNECTOR_BEND_POSITION_Y` adjustment. - For these bend positions, `raw_value / 100000` produces the fraction of the connector frame width or height used by the examples below. - A connector frame can be rotated or flipped, so frame coordinates must be transformed before they are compared with slide coordinates. The following examples use `type` to identify the adjustments first. They do not treat collection indexes as portable identifiers. ### **Unrotated Connector** The initial layout contains two text shapes connected by a `ShapeType.BENT_CONNECTOR4`: ![connector-shape-complex](https://docs.aspose.com/slides/python-net/connector/connector-shape-complex.png) This example inspects the connector and obtains its horizontal and vertical bend adjustments: ```python import aspose.slides as slides import aspose.pydrawing as draw with slides.Presentation() as presentation: slide = presentation.slides[0] source_shape = slide.shapes.add_auto_shape(slides.ShapeType.RECTANGLE, 100, 100, 60, 25) source_shape.text_frame.text = "From" target_shape = slide.shapes.add_auto_shape(slides.ShapeType.RECTANGLE, 500, 100, 60, 25) target_shape.text_frame.text = "To" connector = slide.shapes.add_connector(slides.ShapeType.BENT_CONNECTOR4, 20, 20, 400, 300) connector.line_format.end_arrowhead_style = slides.LineArrowheadStyle.TRIANGLE connector.line_format.fill_format.fill_type = slides.FillType.SOLID connector.line_format.fill_format.solid_fill_color.color = draw.Color.crimson connector.line_format.width = 3 connector.start_shape_connected_to = source_shape connector.start_shape_connection_site_index = 3 connector.end_shape_connected_to = target_shape connector.end_shape_connection_site_index = 2 for adjustment_index in range(len(connector.adjustments)): adjustment = connector.adjustments[adjustment_index] print(f"{adjustment.name}: {adjustment.type}, raw value = {adjustment.raw_value}") ``` To change both bends, locate each expected type and modify the values only after both have been found: ```python import aspose.slides as slides with slides.Presentation() as presentation: slide = presentation.slides[0] source_shape = slide.shapes.add_auto_shape(slides.ShapeType.RECTANGLE, 100, 100, 60, 25) target_shape = slide.shapes.add_auto_shape(slides.ShapeType.RECTANGLE, 500, 100, 60, 25) connector = slide.shapes.add_connector(slides.ShapeType.BENT_CONNECTOR4, 20, 20, 400, 300) connector.start_shape_connected_to = source_shape connector.start_shape_connection_site_index = 3 connector.end_shape_connected_to = target_shape connector.end_shape_connection_site_index = 2 horizontal_bend = None vertical_bend = None for adjustment_index in range(len(connector.adjustments)): adjustment = connector.adjustments[adjustment_index] if adjustment.type == slides.ShapeAdjustmentType.CONNECTOR_BEND_POSITION_X: horizontal_bend = adjustment elif adjustment.type == slides.ShapeAdjustmentType.CONNECTOR_BEND_POSITION_Y: vertical_bend = adjustment if horizontal_bend is None or vertical_bend is None: print("The connector does not expose the expected bend adjustments.") else: horizontal_bend.raw_value += 20000 vertical_bend.raw_value += 200000 presentation.save("connector-adjusted.pptx", slides.export.SaveFormat.PPTX) ``` The result is a connector whose horizontal and vertical segments have moved: ![connector-adjusted-1](https://docs.aspose.com/slides/python-net/connector/connector-adjusted-1.png) Once the semantic types are known, their values can be converted into connector-frame coordinates. This example draws a thin rectangle over the vertical segment controlled by the two bend adjustments: ```python import aspose.slides as slides with slides.Presentation() as presentation: slide = presentation.slides[0] source_shape = slide.shapes.add_auto_shape(slides.ShapeType.RECTANGLE, 100, 100, 60, 25) target_shape = slide.shapes.add_auto_shape(slides.ShapeType.RECTANGLE, 500, 100, 60, 25) connector = slide.shapes.add_connector(slides.ShapeType.BENT_CONNECTOR4, 20, 20, 400, 300) connector.start_shape_connected_to = source_shape connector.start_shape_connection_site_index = 3 connector.end_shape_connected_to = target_shape connector.end_shape_connection_site_index = 2 horizontal_bend = None vertical_bend = None for adjustment_index in range(len(connector.adjustments)): adjustment = connector.adjustments[adjustment_index] if adjustment.type == slides.ShapeAdjustmentType.CONNECTOR_BEND_POSITION_X: horizontal_bend = adjustment elif adjustment.type == slides.ShapeAdjustmentType.CONNECTOR_BEND_POSITION_Y: vertical_bend = adjustment if horizontal_bend is None or vertical_bend is None: print("The connector does not expose the expected bend adjustments.") else: x = connector.x + connector.width * horizontal_bend.raw_value / 100000 y = connector.y height = connector.height * vertical_bend.raw_value / 100000 slide.shapes.add_auto_shape(slides.ShapeType.RECTANGLE, x, y, 1, height) presentation.save("connector-segment-guide.pptx", slides.export.SaveFormat.PPTX) ``` The guide shape marks the calculated segment: ![connector-adjusted-2](https://docs.aspose.com/slides/python-net/connector/connector-adjusted-2.png) ### **Rotated or Flipped Connector** When the same connector geometry is oriented vertically, its [frame](https://reference.aspose.com/slides/python-net/aspose.slides/iconnector/frame/), [flip_h](https://reference.aspose.com/slides/python-net/aspose.slides/ishapeframe/flip_h/), and [flip_v](https://reference.aspose.com/slides/python-net/aspose.slides/ishapeframe/flip_v/) values affect the conversion from connector-frame coordinates to slide coordinates. This example creates and adjusts the vertically oriented connector: ```python import aspose.slides as slides import aspose.pydrawing as draw with slides.Presentation() as presentation: slide = presentation.slides[0] source_shape = slide.shapes.add_auto_shape(slides.ShapeType.RECTANGLE, 100, 100, 60, 25) source_shape.text_frame.text = "From" target_shape = slide.shapes.add_auto_shape(slides.ShapeType.RECTANGLE, 100, 400, 60, 25) target_shape.text_frame.text = "To 1" connector = slide.shapes.add_connector(slides.ShapeType.BENT_CONNECTOR4, 20, 20, 400, 300) connector.line_format.end_arrowhead_style = slides.LineArrowheadStyle.TRIANGLE connector.line_format.fill_format.fill_type = slides.FillType.SOLID connector.line_format.fill_format.solid_fill_color.color = draw.Color.medium_aquamarine connector.line_format.width = 3 connector.start_shape_connected_to = source_shape connector.start_shape_connection_site_index = 2 connector.end_shape_connected_to = target_shape connector.end_shape_connection_site_index = 3 for adjustment_index in range(len(connector.adjustments)): adjustment = connector.adjustments[adjustment_index] if adjustment.type == slides.ShapeAdjustmentType.CONNECTOR_BEND_POSITION_X: adjustment.raw_value += 20000 elif adjustment.type == slides.ShapeAdjustmentType.CONNECTOR_BEND_POSITION_Y: adjustment.raw_value += 200000 presentation.save("vertical-connector-adjusted.pptx", slides.export.SaveFormat.PPTX) ``` The adjusted connector appears vertically between the shapes: ![connector-adjusted-3](https://docs.aspose.com/slides/python-net/connector/connector-adjusted-3.png) For an arbitrary rotation angle `alpha`, rotate a connector-frame point `(x, y)` around the frame center `(x0, y0)`: `X = (x - x0) * cos(alpha) - (y - y0) * sin(alpha) + x0` `Y = (x - x0) * sin(alpha) + (y - y0) * cos(alpha) + y0` The following code handles the 90-degree orientation used in this example and draws a red guide over the corresponding connector segment: ```python import aspose.slides as slides import aspose.pydrawing as draw with slides.Presentation() as presentation: slide = presentation.slides[0] source_shape = slide.shapes.add_auto_shape(slides.ShapeType.RECTANGLE, 100, 100, 60, 25) target_shape = slide.shapes.add_auto_shape(slides.ShapeType.RECTANGLE, 100, 400, 60, 25) connector = slide.shapes.add_connector(slides.ShapeType.BENT_CONNECTOR4, 20, 20, 400, 300) connector.start_shape_connected_to = source_shape connector.start_shape_connection_site_index = 2 connector.end_shape_connected_to = target_shape connector.end_shape_connection_site_index = 3 horizontal_bend = None vertical_bend = None for adjustment_index in range(len(connector.adjustments)): adjustment = connector.adjustments[adjustment_index] if adjustment.type == slides.ShapeAdjustmentType.CONNECTOR_BEND_POSITION_X: horizontal_bend = adjustment elif adjustment.type == slides.ShapeAdjustmentType.CONNECTOR_BEND_POSITION_Y: vertical_bend = adjustment if horizontal_bend is None or vertical_bend is None: print("The connector does not expose the expected bend adjustments.") else: horizontal_bend.raw_value += 20000 vertical_bend.raw_value += 200000 x = connector.x y = connector.y if connector.frame.flip_h == slides.NullableBool.TRUE: x += connector.width if connector.frame.flip_v == slides.NullableBool.TRUE: y += connector.height x += connector.width * horizontal_bend.raw_value / 100000 rotated_x = connector.frame.center_x - y + connector.frame.center_y rotated_y = x - connector.frame.center_x + connector.frame.center_y segment_width = connector.height * vertical_bend.raw_value / 100000 guide = slide.shapes.add_auto_shape(slides.ShapeType.RECTANGLE, rotated_x, rotated_y, segment_width, 1) guide.line_format.fill_format.fill_type = slides.FillType.SOLID guide.line_format.fill_format.solid_fill_color.color = draw.Color.red presentation.save("rotated-connector-segment-guide.pptx", slides.export.SaveFormat.PPTX) ``` The red guide marks the calculated segment after the coordinate transformation: ![connector-adjusted-4](https://docs.aspose.com/slides/python-net/connector/connector-adjusted-4.png) These formulas describe the presets used in the examples, not a universal connector model. Validate the adjustment types, frame orientation, and value ranges before applying the same calculation to a different preset. ## **Find a Connector Direction Angle** The direction of a straight connector can be calculated from its width and height, with horizontal and vertical flips applied. The following example reports the clockwise angle from the positive horizontal axis in slide coordinates: ```python import math import aspose.slides as slides with slides.Presentation() as presentation: slide = presentation.slides[0] connector = slide.shapes.add_connector(slides.ShapeType.STRAIGHT_CONNECTOR1, 100, 100, 200, 100) flip_h = connector.frame.flip_h == slides.NullableBool.TRUE flip_v = connector.frame.flip_v == slides.NullableBool.TRUE delta_x = connector.width * (-1 if flip_h else 1) delta_y = connector.height * (-1 if flip_v else 1) angle = math.atan2(delta_y, delta_x) * 180.0 / math.pi if angle < 0: angle += 360 print(f"Connector direction: {angle:.2f} degrees") ``` ## **FAQ** **How can I tell whether a connector can attach to a shape?** Check the shape's [connection_site_count](https://reference.aspose.com/slides/python-net/aspose.slides/igeometryshape/connection_site_count/). A positive count means the shape exposes connection sites. Validate the selected site index before assigning it to either connector end. **Can I identify a connector adjustment by its collection index?** An index is meaningful only for a known connector preset and collection layout. Check [IAdjustValue.type](https://reference.aspose.com/slides/python-net/aspose.slides/iadjustvalue/type/) before modifying a value, and use [IAdjustValue.name](https://reference.aspose.com/slides/python-net/aspose.slides/iadjustvalue/name/) as additional information when the same semantic type occurs more than once. **What happens when a connected shape is deleted?** The corresponding connector end becomes detached. The connector remains on the slide and can be deleted, positioned as a free line, or attached to another shape. **Are connector bindings preserved when a slide is copied?** Bindings are generally preserved when the connected shapes are copied with the slide. If a connector is copied without one of its target shapes, the affected end must be attached again. ## Related articles - [Connector](https://docs.aspose.com/slides/python-net/examples/elements/connector/) # Convert ODP to PPTX in Python > Convert ODP to PPTX with Aspose.Slides for Python via .NET. Clean code examples, batch tips, and high-quality results—no PowerPoint needed. Source: https://docs.aspose.com/slides/python-net/convert-odp-to-pptx/ Updated: 2026-08-02 ## **Overview** This article explains how to convert an ODP presentation to PPTX format using Aspose.Slides. ## **Export ODP to PPTX** Aspose.Slides for Python via .NET offers Presentation class that represents a presentation file. [**Presentation**](https://reference.aspose.com/slides/python-net/aspose.slides/presentation/) class can now also access ODP through Presentation constructor when the object is instantiated. The following example shows how to convert a ODP Presentation into PPTX Presentation. ```py # Import Aspose.Slides for Python via .NET module import aspose.slides as slides # Open the ODP file pres = slides.Presentation("AccessOpenDoc.odp") # Saving the ODP presentation to PPTX format pres.save("AccessOpenDoc_out.pptx", slides.export.SaveFormat.PPTX) ``` ## **Live Example** You can visit [**Aspose.Slides Conversion**](https://products.aspose.app/slides/conversion/) web app, which is built with **Aspose.Slides API.** The app demonstrates how ODP to PPTX conversion can be implemented with Aspose.Slides API. ## **FAQ** ### Do I need to install Microsoft PowerPoint or LibreOffice to convert ODP to PPTX? No. Aspose.Slides works standalone and does not require third-party applications to read or write ODP/PPTX. ### Are master slides, layouts, and themes preserved during conversion? Yes. The library uses a full presentation object model and retains structure, including master slides and layouts, so the design remains correct after conversion. ### Can I convert password-protected ODP files? Yes. Aspose.Slides supports detecting protection, opening and working with [protected presentations](https://docs.aspose.com/slides/python-net/password-protected-presentation/) (including ODP) when you provide the password, as well as configuring encryption and access to document properties. ### Is Aspose.Slides suitable for cloud or REST-based conversion services? Yes. You can use the local library in your own backend or [Aspose.Slides Cloud](https://products.aspose.cloud/slides/family/) (REST API); both options support ODP → PPTX conversion. ## Related articles - [Convert PPT to PPTX in Python](https://docs.aspose.com/slides/python-net/convert-ppt-to-pptx/) # Convert OpenDocument Presentations in Python > Convert OpenDocument ODP to PDF, PPT, PPTX, XPS, HTML, TIFF, or SWF in Python with Aspose.Slides: code examples, high fidelity, batch conversion, and customization. Source: https://docs.aspose.com/slides/python-net/convert-openoffice-odp/ Updated: 2026-08-02 ## **Introduction** [**Aspose.Slides API**](https://products.aspose.com/slides/python-net/) allows you to convert OpenDocument (ODP) presentations to many formats (HTML, PDF, TIFF, SWF, XPS, etc.). The API used to convert ODP files to other document formats is the same as the one used for PowerPoint (PPT and PPTX) conversion operations. For example, if you need to convert an ODP presentation to PDF, you can do it as follows: ```py import aspose.slides as slides with slides.Presentation("pres.odp") as presentation: presentation.save("pres.pdf", slides.export.SaveFormat.PDF) ``` ## **FAQ** ### Can I convert ODP to PPTX without installing LibreOffice or OpenOffice? Yes. Aspose.Slides is a fully standalone library that handles both PowerPoint and OpenOffice formats without requiring any external applications. ### Does Aspose.Slides open and save password-protected ODP/OTP files? Yes. It can [load encrypted presentations](https://docs.aspose.com/slides/python-net/password-protected-presentation/) when you provide the password and can also save presentations with encryption and protection settings. ### Can I extract embedded media files (audio/video) from an ODP before converting it? Yes. Aspose.Slides lets you access and extract embedded [audio](https://docs.aspose.com/slides/python-net/audio-frame/) and [video](https://docs.aspose.com/slides/python-net/video-frame/) from presentations, which is helpful for pre-conversion processing or separate reuse. ### Can I save the converted ODP as Strict Office Open XML? Yes. When saving to PPTX you can enable Strict OOXML via the [save options](https://reference.aspose.com/slides/python-net/aspose.slides.export/pptxoptions/) to meet stricter compliance requirements. ## Related articles - [Convert Presentations to Multiple Formats in Python](https://docs.aspose.com/slides/python-net/convert-presentation/) - [Supported File Formats](https://docs.aspose.com/slides/python-net/supported-file-formats/) # Convert Presentations in Handout Mode with Python > Convert presentations to handouts in Python. Set slides per page, keep notes, export to PDF or images with Aspose.Slides, with sample code. Try it free. Source: https://docs.aspose.com/slides/python-net/convert-powerpoint-in-handout-mode/ Updated: 2026-11-08 ## **Introduction** Aspose.Slides provides the ability to convert presentations into various formats, including creating handouts for printing in Handout mode. This mode allows you to configure how multiple slides appear on a single page, making it useful for conferences, seminars, and other events. You can enable this mode by setting the `slides_layout_options` property in the [PdfOptions](https://reference.aspose.com/slides/python-net/aspose.slides.export/pdfoptions/), [RenderingOptions](https://reference.aspose.com/slides/python-net/aspose.slides.export/renderingoptions/), [HtmlOptions](https://reference.aspose.com/slides/python-net/aspose.slides.export/htmloptions/), and [TiffOptions](https://reference.aspose.com/slides/python-net/aspose.slides.export/tiffoptions/) classes. To set the handout page dimensions and orientation before export, see [Notes Page Size](https://docs.aspose.com/slides/python-net/notes-size/). ## **Handout Mode Export** To configure Handout mode, use the [HandoutLayoutingOptions](https://reference.aspose.com/slides/python-net/aspose.slides.export/handoutlayoutingoptions/) object, which determines how many slides are placed on a single page and other display parameters. Below is a code example showing how to convert a presentation to PDF in Handout mode. ```py import aspose.slides as slides # Load a presentation. with slides.Presentation("sample.pptx") as presentation: # Set the export options. slides_layout_options = slides.export.HandoutLayoutingOptions() slides_layout_options.handout = slides.export.HandoutType.HANDOUTS_4_HORIZONTAL # 4 slides on one page horizontally slides_layout_options.print_slide_numbers = True # print slide numbers slides_layout_options.print_frame_slide = True # print a frame around slides slides_layout_options.print_comments = False # no comments pdf_options = slides.export.PdfOptions() pdf_options.slides_layout_options = slides_layout_options # Export the presentation to PDF with the chosen layout. presentation.save("output.pdf", slides.export.SaveFormat.PDF, pdf_options) ``` Keep in mind that the `slides_layout_options` property is available only for certain output formats, such as PDF, HTML, TIFF, and when rendering as images. [![Four separately exported PDF pages are followed by one four-thumbnail handout. Slide 1 and Slide 2 are across the top, and Slide 3 and Slide 4 are across the bottom.](https://docs.aspose.com/slides/python-net/convert-powerpoint-in-handout-mode/visual-convert-powerpoint-in-handout-mode-2d311e39d758.svg)](https://docs.aspose.com/slides/python-net/convert-powerpoint-in-handout-mode/visual-convert-powerpoint-in-handout-mode-2d311e39d758.svg) *The same four numbered slides exported as one slide per PDF page and as a horizontal handout. The handout includes printed slide numbers and frames.* ## **FAQ** **What is the maximum number of slide thumbnails per page in Handout mode?** Aspose.Slides supports [presets](https://reference.aspose.com/slides/python-net/aspose.slides.export/handouttype/) up to 9 thumbnails per page with horizontal or vertical ordering: 1, 2, 3, 4 (horizontal/vertical), 6 (horizontal/vertical), and 9 (horizontal/vertical). **Can I define a custom grid, such as 5 or 8 slides per page?** No. The number and ordering of thumbnails are controlled strictly by the [HandoutType](https://reference.aspose.com/slides/python-net/aspose.slides.export/handouttype/) enumeration; arbitrary layouts are not supported. **Can I include hidden slides in the Handout output?** Yes. Enable the `show_hidden_slides` option in the export settings for the target format, such as [PdfOptions](https://reference.aspose.com/slides/python-net/aspose.slides.export/pdfoptions/), [HtmlOptions](https://reference.aspose.com/slides/python-net/aspose.slides.export/htmloptions/), or [TiffOptions](https://reference.aspose.com/slides/python-net/aspose.slides.export/tiffoptions/). # Convert Presentations to Animated GIFs in Python > Easily convert PowerPoint presentations (PPT, PPTX) and OpenDocument files (ODP) to animated GIFs with Aspose.Slides for Python. Fast, high-quality results. Source: https://docs.aspose.com/slides/python-net/convert-powerpoint-to-animated-gif/ Updated: 2026-08-13 ## **Overview** Aspose.Slides allows you to convert PowerPoint presentations to animated GIF files with just a few lines of code. This is useful when you need to share slide content in a lightweight, widely supported animated format that can be embedded in web pages, messengers, or documentation. This article explains how to export a presentation to GIF using default settings and how to customize the output by configuring options such as frame size, slide delay, and transition frame rate through [GifOptions](https://reference.aspose.com/slides/python-net/aspose.slides.export/gifoptions/). ## **Convert Presentations to Animated GIF Using Default Settings** This sample code in Python shows you how to convert a presentation to animated GIF using standard settings: ```py import aspose.slides as slides with slides.Presentation("pres.pptx") as pres: pres.save("pres.gif", slides.export.SaveFormat.GIF) ``` The animated GIF will be created with default parameters. If you prefer to customize the parameters for the GIF, you can use the [GifOptions](https://reference.aspose.com/slides/python-net/aspose.slides.export/gifoptions/) class. See the sample code below. ## **Convert Presentations to Animated GIF Using Custom Settings** This sample code shows you how to convert a presentation to animated GIF using custom settings in Python: ```py import aspose.slides as slides import aspose.pydrawing as drawing with slides.Presentation("pres.pptx") as pres: options = slides.export.GifOptions() options.frame_size = drawing.Size(960, 720) # the size of the resulted GIF options.default_delay = 2000 # how long each slide will be showed until it will be changed to the next one options.transition_fps = 35 # increase FPS to better transition animation quality pres.save("pres.gif", slides.export.SaveFormat.GIF, options) ``` You may want to check out a FREE [Text to GIF](https://products.aspose.app/slides/text-to-gif) converter developed by Aspose. ## **FAQ** ### What if the fonts used in the presentation aren’t installed on the system? Install the missing fonts or [configure fallback fonts](https://docs.aspose.com/slides/python-net/powerpoint-fonts/). Aspose.Slides will substitute, but the appearance may differ. For branding, always ensure the required typefaces are explicitly available. ### Can I overlay a watermark on the GIF frames? Yes. [Add a semi-transparent object/logo](https://docs.aspose.com/slides/python-net/watermark/) to the master slide or to individual slides before export — the watermark will appear on every frame. # Convert PowerPoint Presentations to HTML in Python > Convert PowerPoint presentations to HTML in Python. Use Aspose.Slides to export PPT and PPTX files, selected slides, notes, fonts, images, SVG, and media. Source: https://docs.aspose.com/slides/python-net/convert-powerpoint-to-html/ Updated: 2026-08-05 ## **Overview** Aspose.Slides for Python via .NET can save PowerPoint presentations as HTML without Microsoft PowerPoint. The basic conversion is a single [Presentation](https://reference.aspose.com/slides/python-net/aspose.slides/presentation/) load and a `save` call with [SaveFormat](https://reference.aspose.com/slides/python-net/aspose.slides.export/saveformat/). Use [HtmlOptions](https://reference.aspose.com/slides/python-net/aspose.slides.export/htmloptions/) when you need to control the exported layout, fonts, images, notes, comments, SVG output, or linked resources. This guide focuses on practical HTML export scenarios: - Export a whole presentation or selected slides. - Generate fixed-layout, responsive, or SVG-based HTML. - Include speaker notes and comments. - Control image quality and cropped image data. - Embed fonts or save font files separately. - Choose how external resources and media files are written and referenced. By default, HTML export produces a self-contained HTML document where most resources are embedded. This is convenient for sharing one file, but it can increase output size. For web publishing, consider external resources, lower image DPI, and only embedding fonts that are not reliably available in the target environment. ## **Convert a Presentation to HTML** To export a presentation to HTML, load it with [Presentation](https://reference.aspose.com/slides/python-net/aspose.slides/presentation/) and save it with [SaveFormat](https://reference.aspose.com/slides/python-net/aspose.slides.export/saveformat/). ```python import aspose.slides as slides with slides.Presentation("presentation.pptx") as presentation: presentation.save("presentation.html", slides.export.SaveFormat.HTML) ``` This example writes one HTML file. The `with` statement disposes the presentation object and releases file handles and rendering resources after export. ## **Use HtmlOptions** [HtmlOptions](https://reference.aspose.com/slides/python-net/aspose.slides.export/htmloptions/) is the main configuration class for HTML export. Common settings include: - `slides_layout_options`: adds notes, comments, handouts, or other layout information. - `html_formatter`: changes the HTML document structure or delegates formatting to a controller. - `slide_image_format`: changes how slides are represented, for example as SVG. - `pictures_compression`: controls image DPI and output size. - `delete_pictures_cropped_areas`: keeps or removes cropped image data. - `svg_responsive_layout`: makes exported SVG content adapt to its container. - `show_hidden_slides`: includes hidden slides when required. The following sections show the most common options separately so you can combine only the ones your workflow needs. ## **Convert Selected Slides to HTML** The `save` overload that accepts slide numbers uses 1-based slide positions. The loop below saves every slide to a separate HTML file. ```python import aspose.slides as slides with slides.Presentation("presentation.pptx") as presentation: slide_count = len(presentation.slides) for slide_index in range(slide_count): slide_number = slide_index + 1 slide_numbers = [slide_number] html_file_name = "slide-{}.html".format(slide_number) presentation.save(html_file_name, slide_numbers, slides.export.SaveFormat.HTML) ``` Use this pattern when a website or application needs one HTML page per slide. If each slide should have the same layout, create one [HtmlOptions](https://reference.aspose.com/slides/python-net/aspose.slides.export/htmloptions/) instance and pass it to each `save` call. ## **Create Responsive HTML** [ResponsiveHtmlController](https://reference.aspose.com/slides/python-net/aspose.slides.export/responsivehtmlcontroller/) provides responsive HTML output through [HtmlFormatter](https://reference.aspose.com/slides/python-net/aspose.slides.export/htmlformatter/). Use it when the exported page should adapt better to browser width. ```python import aspose.slides as slides with slides.Presentation("presentation.pptx") as presentation: controller = slides.export.ResponsiveHtmlController() formatter = slides.export.HtmlFormatter.create_custom_formatter(controller) html_options = slides.export.HtmlOptions() html_options.html_formatter = formatter presentation.save("presentation-responsive.html", slides.export.SaveFormat.HTML, html_options) ``` For SVG-based responsive layout, set `svg_responsive_layout` on [HtmlOptions](https://reference.aspose.com/slides/python-net/aspose.slides.export/htmloptions/). This is useful when the slide content is exported as scalable SVG markup. ```python import aspose.slides as slides with slides.Presentation("presentation.pptx") as presentation: html_options = slides.export.HtmlOptions() html_options.svg_responsive_layout = True presentation.save("presentation-svg-responsive.html", slides.export.SaveFormat.HTML, html_options) ``` ## **Include Speaker Notes and Comments** Use [NotesCommentsLayoutingOptions](https://reference.aspose.com/slides/python-net/aspose.slides.export/notescommentslayoutingoptions/) through `html_options.slides_layout_options` to include speaker notes or comments. Notes and comments are hidden by default unless you choose their positions. Suppose the source presentation contains speaker notes: ![Slide with speaker notes in PowerPoint](https://docs.aspose.com/slides/python-net/convert-powerpoint-to-html/slide_with_notes.png) The following code exports the slide content with speaker notes below the slide. ```python import aspose.slides as slides with slides.Presentation("presentation.pptx") as presentation: layout_options = slides.export.NotesCommentsLayoutingOptions() layout_options.notes_position = slides.export.NotesPositions.BOTTOM_FULL html_options = slides.export.HtmlOptions() html_options.slides_layout_options = layout_options presentation.save("presentation-with-notes.html", slides.export.SaveFormat.HTML, html_options) ``` The exported HTML includes the notes area: ![HTML output with the slide and speaker notes](https://docs.aspose.com/slides/python-net/convert-powerpoint-to-html/HTML_with_notes.png) To export comments, set `comments_position`, for example to `CommentsPositions.RIGHT` or `CommentsPositions.BOTTOM`. If you need only comments, omit `notes_position`. If you need both notes and comments, set both properties. ## **Control Image Quality and Cropped Areas** HTML export can compress slide images to reduce output size. Set `pictures_compression` to a value from [PicturesCompression](https://reference.aspose.com/slides/python-net/aspose.slides.export/picturescompression/) when you need higher image quality. ```python import aspose.slides as slides with slides.Presentation("presentation.pptx") as presentation: html_options = slides.export.HtmlOptions() html_options.pictures_compression = slides.export.PicturesCompression.DPI150 presentation.save("presentation-dpi-150.html", slides.export.SaveFormat.HTML, html_options) ``` By default, cropped areas of images may be removed from the exported output. Keep cropped data only when users must be able to recover or inspect those hidden image parts. Keeping it can increase the HTML size. ```python import aspose.slides as slides with slides.Presentation("presentation.pptx") as presentation: html_options = slides.export.HtmlOptions() html_options.delete_pictures_cropped_areas = False presentation.save("presentation-with-cropped-areas.html", slides.export.SaveFormat.HTML, html_options) ``` ## **Add CSS** For simple styling, pass a CSS string to [HtmlFormatter](https://reference.aspose.com/slides/python-net/aspose.slides.export/htmlformatter/). This changes the surrounding HTML document while Aspose.Slides continues to render the slide content. ```python import aspose.slides as slides with slides.Presentation("presentation.pptx") as presentation: css_rules = "body { margin: 0; background: #f7f7f7; } .slide { margin: 24px auto; }" formatter = slides.export.HtmlFormatter.create_document_formatter(css_rules, True) html_options = slides.export.HtmlOptions() html_options.html_formatter = formatter presentation.save("presentation-styled.html", slides.export.SaveFormat.HTML, html_options) ``` For a custom document header, a linked CSS file, or custom markup around slides and shapes, use a custom formatting controller and pass it to [HtmlFormatter](https://reference.aspose.com/slides/python-net/aspose.slides.export/htmlformatter/) with `create_custom_formatter`. ## **Embed Fonts** If the target environment may not have the presentation fonts installed, embed fonts in the HTML with [EmbedAllFontsHtmlController](https://reference.aspose.com/slides/python-net/aspose.slides.export/embedallfontshtmlcontroller/). Embedding improves visual fidelity but increases output size. ```python import aspose.slides as slides with slides.Presentation("presentation.pptx") as presentation: font_names_to_exclude = ["Arial"] font_controller = slides.export.EmbedAllFontsHtmlController(font_names_to_exclude) formatter = slides.export.HtmlFormatter.create_custom_formatter(font_controller) html_options = slides.export.HtmlOptions() html_options.html_formatter = formatter presentation.save("presentation-embedded-fonts.html", slides.export.SaveFormat.HTML, html_options) ``` Exclude a font only when you are confident that the target browsers or systems already provide it. For brand fonts or less common fonts, embedding is usually safer. ## **Link Font Files Instead of Embedding Them** To reduce the HTML file size, you can write font data to separate WOFF files and add `@font-face` rules to the HTML. This requires a controller that customizes how font data is written during export. In Python via .NET, implement that controller in a small .NET helper assembly, load it in Python, and pass the helper object to [HtmlFormatter](https://reference.aspose.com/slides/python-net/aspose.slides.export/htmlformatter/) with `create_custom_formatter`. When you externalize fonts, choose two paths deliberately: - The file system output directory where generated WOFF files will be written. - The URL path that will appear in the HTML document and that the browser will use to load those font files. Keep the HTML file and generated font files together until deployment paths are final. If the files are deployed to another location, make the URL prefix match the deployed URL path. ## **Save Resources Externally** Self-contained HTML is easy to move around, but embedded Base64 resources can make the file large. If your application needs external image, font, audio, or video files, use a custom link/embed controller and pass it to the [HtmlOptions](https://reference.aspose.com/slides/python-net/aspose.slides.export/htmloptions/) constructor. When you externalize resources, choose two paths deliberately: - The file system output path, where your application writes generated images, fonts, audio, or video. - The URL path, which is what the browser uses from the HTML document to load those files. For a full image-linking discussion, see [Export Presentations to HTML with Externally Linked Images](https://docs.aspose.com/slides/python-net/exporting-presentations-to-html-with-externally-linked-images/). ## **Export Media Files** [VideoPlayerHtmlController](https://reference.aspose.com/slides/python-net/aspose.slides.export/videoplayerhtmlcontroller/) exports video and audio files and writes HTML that can play them in a browser. Its constructor takes: - `path`: the directory where generated media files will be written. - `file_name`: the HTML file name being generated. - `base_uri`: an absolute URI that describes where the generated files will be published. The exported HTML links each generated media file by its plain file name (for example, ``), and the browser resolves that name against the location of the HTML document. Point `path` at the directory that contains the generated HTML file so the links resolve. `base_uri` must be an absolute URI: build a `file:///` URI from the output directory for local preview, or use the absolute URL of the published directory for a deployed application. ```python import os from pathlib import Path import aspose.slides as slides output_directory = os.path.join(os.getcwd(), "html-output") os.makedirs(output_directory, exist_ok=True) html_file_name = "presentation.html" media_base_uri = Path(output_directory).as_uri() + "/" with slides.Presentation() as presentation: with open("intro.mp4", "rb") as video_stream: video = presentation.videos.add_video( video_stream, slides.LoadingStreamBehavior.READ_STREAM_AND_RELEASE) slide = presentation.slides[0] slide.shapes.add_video_frame(20, 20, 480, 270, video) controller = slides.export.VideoPlayerHtmlController( output_directory, html_file_name, media_base_uri) formatter = slides.export.HtmlFormatter.create_custom_formatter(controller) svg_options = slides.export.SVGOptions(controller) slide_image_format = slides.export.SlideImageFormat.svg(svg_options) html_options = slides.export.HtmlOptions(controller) html_options.html_formatter = formatter html_options.slide_image_format = slide_image_format html_file_path = os.path.join(output_directory, html_file_name) presentation.save(html_file_path, slides.export.SaveFormat.HTML, html_options) ``` Use output directories that are unique per export job, especially in server applications. Shared output paths can cause files from different conversions to overwrite each other. ## **Performance and Resource Management** HTML conversion is a rendering operation, so processing time and memory use depend on slide count, image resolution, fonts, effects, charts, and embedded media. Higher `pictures_compression` DPI values, embedded fonts, SVG output, and retained cropped image areas can improve fidelity but usually increase output size. For batch conversion: - Dispose every [Presentation](https://reference.aspose.com/slides/python-net/aspose.slides/presentation/) instance promptly. - Use separate output directories for separate jobs. - Avoid embedding common fonts unless fidelity requires it. - Lower image DPI when the HTML is for preview or thumbnails. - Keep the source presentation, generated HTML, and external resources together until deployment paths are final. ## **FAQ** ### Are hyperlinks preserved in HTML output? Yes. Presentation hyperlinks are exported to HTML and remain clickable when the target URL is valid. ### Can I convert presentations to HTML in parallel? Yes, but do not share one [Presentation](https://reference.aspose.com/slides/python-net/aspose.slides/presentation/) instance across threads. Process different files with separate presentation instances, separate streams, and separate output directories. See the [multithreading guidance](https://docs.aspose.com/slides/python-net/multithreading/) for details. ### Is a Presentation object thread-safe? No. A single [Presentation](https://reference.aspose.com/slides/python-net/aspose.slides/presentation/) instance should be loaded, modified, saved, and disposed on one thread. For parallel work, create an independent instance per thread or process. ### Why is the generated HTML file large? The default export can embed resources directly in the HTML. Embedded fonts, high-DPI images, media, SVG content, and retained cropped image areas also increase size. Use external resources, exclude common fonts from embedding, and lower `pictures_compression` when smaller output is more important than maximum fidelity. ### Why does a PowerPoint font size such as 24 pt appear as 17.999819 pt in HTML? This can happen because PowerPoint and HTML use different DPI models. PowerPoint stores text sizes in typographic points based on 72 DPI, while HTML layout is based on CSS pixels in a 96 DPI model. When Aspose.Slides exports a presentation to HTML, the font size is translated between these systems, and the conversion may introduce small rounding differences. These values do not indicate a real visual font-size change. They are only a mathematical side effect of converting text metrics between PowerPoint and HTML. ### How should I choose base_uri for media export? Pass `base_uri` as an absolute URI; the constructor rejects relative values. For local preview, you can derive it from the output directory with `Path(output_directory).as_uri() + "/"`. For deployment, use the absolute URL of the published directory. Because the exported HTML references generated media by plain file name, `path` must be the directory that holds the HTML file, and `base_uri` should describe that same location from the browser's point of view. ### Can I include hidden slides? Yes. Set `show_hidden_slides = True` on [HtmlOptions](https://reference.aspose.com/slides/python-net/aspose.slides.export/htmloptions/) when hidden slides must be exported. ## Related articles - [Export Presentations to HTML with Externally Linked Images in Python](https://docs.aspose.com/slides/python-net/exporting-presentations-to-html-with-externally-linked-images/) # Convert PPT, PPTX, and ODP to JPG in Python > Learn how to transform your slides from PowerPoint and OpenDocument presentations into high-quality JPEG images with just a few lines of code in Python. Optimize presentations for web use, sharing, and archiving. Read the full guide now! Source: https://docs.aspose.com/slides/python-net/convert-powerpoint-to-jpg/ Updated: 2026-08-13 ## **Introduction** Converting PowerPoint and OpenDocument presentations to JPG images helps with sharing slides, optimizing performance, and embedding content into websites or applications. Aspose.Slides for Python allows you to transform PPTX, PPT, and ODP files into high-quality JPEG images. This guide explains different methods for conversion. With these features, it's easy to implement your own presentation viewer and create a thumbnail for every slide. This may be useful if you want to protect presentation slides from copying or demonstrate the presentation in read-only mode. Aspose.Slides allows you to convert the whole presentation or a specific slide into image formats. ## **Convert Presentation Slides to JPG Images** Here are the steps to convert a PPT, PPTX, or ODP file to JPG: 1. Create an instance of the [Presentation](https://reference.aspose.com/slides/python-net/aspose.slides/presentation/) class. 1. Get the slide object of the [Slide](https://reference.aspose.com/slides/python-net/aspose.slides/slide/) type from the [Presentation.slides](https://reference.aspose.com/slides/python-net/aspose.slides/presentation/slides/) collection. 1. Create an image of the slide using the [Slide.get_image(scale_x, scale_y)](https://reference.aspose.com/slides/python-net/aspose.slides/slide/get_image/#float-float) method. 1. Call the [IImage.save(filename, format)](https://reference.aspose.com/slides/python-net/aspose.slides/iimage/save/#str-imageformat) method on the image object. Pass the output file name and image format as arguments. **Note:** PPT, PPTX, or ODP to JPG conversion differs from conversion to other formats in the Aspose.Slides Python API. For other formats, you typically use the [Presentation.save(fname, format, options)](https://reference.aspose.com/slides/python-net/aspose.slides/presentation/save/#str-asposeslidesexportsaveformat-asposeslidesexportisaveoptions) method. However, for JPG conversion, you need to use the [IImage.save(filename, format)](https://reference.aspose.com/slides/python-net/aspose.slides/iimage/save/#str-imageformat) method. ```py import aspose.slides as slides scale_x = 1 scale_y = scale_x with slides.Presentation("PowerPoint_Presentation.ppt") as presentation: for slide in presentation.slides: with slide.get_image(scale_x, scale_y) as thumbnail: # Save the image to disk in JPEG format. file_name = f"Slide_{slide.slide_number}.jpg" thumbnail.save(file_name, slides.ImageFormat.JPEG) ``` ## **Convert Slides to JPG with Customized Dimensions** To change the dimensions of the resulting JPG images, you can set the image size by passing it into the [Slide.get_image(image_size)](https://reference.aspose.com/slides/python-net/aspose.slides/slide/get_image/#asposepydrawingsize) method. This allows you to generate images with specific width and height values, ensuring that the output meets your requirements for resolution and aspect ratio. This flexibility is particularly useful when generating images for web applications, reports, or documentation, where precise image dimensions are required. ```py import aspose.slides as slides import aspose.pydrawing as pydrawing image_size = pydrawing.Size(1200, 800) with slides.Presentation("PowerPoint_Presentation.pptx") as presentation: for slide in presentation.slides: # Create a slide image of the specified size. with slide.get_image(image_size) as thumbnail: # Save the image to disk in JPEG format. file_name = f"Slide_{slide.slide_number}.jpg" thumbnail.save(file_name, slides.ImageFormat.JPEG) ``` ## **Render Comments when Saving Slides as Images** Aspose.Slides for Python provides a feature that allows you to render comments on a presentation's slides when converting them into JPG images. This functionality is particularly useful for preserving annotations, feedback, or discussions added by collaborators in PowerPoint presentations. By enabling this option, you ensure that comments are visible in the generated images, making it easier to review and share feedback without needing to open the original presentation file. Let's say we have a presentation file, "sample.pptx," with a slide that contains comments: ![The slide with comments](https://docs.aspose.com/slides/python-net/convert-powerpoint-to-jpg/slide_with_comments.png) The following Python code converts the slide to a JPG image while preserving the comments: ```py import aspose.slides as slides import aspose.pydrawing as pydrawing scale_x = 1 scale_y = scale_x with slides.Presentation("sample.pptx") as presentation: # Set options for the slide comments. comments_options = slides.export.NotesCommentsLayoutingOptions() comments_options.comments_position = slides.export.CommentsPositions.RIGHT comments_options.comments_area_width = 200 comments_options.comments_area_color = pydrawing.Color.dark_orange options = slides.export.RenderingOptions() options.slides_layout_options = comments_options # Convert the first slide to an image. with presentation.slides[0].get_image(options, scale_x, scale_y) as thumbnail: thumbnail.save("Slide_1.jpg", slides.ImageFormat.JPEG) ``` The result: ![The JPG image with comments](https://docs.aspose.com/slides/python-net/convert-powerpoint-to-jpg/image_with_comments.png) ## **See also** See other options for converting PPT, PPTX, or ODP to images, such as: - [Convert PowerPoint to GIF](https://docs.aspose.com/slides/python-net/convert-powerpoint-to-animated-gif/) - [Convert PowerPoint to PNG](https://docs.aspose.com/slides/python-net/convert-powerpoint-to-png/) - [Convert PowerPoint to TIFF](https://docs.aspose.com/slides/python-net/convert-powerpoint-to-tiff/) - [Convert PowerPoint to SVG](https://docs.aspose.com/slides/python-net/render-a-slide-as-an-svg-image/) To see how Aspose.Slides converts PowerPoint to JPG images, try these free online converters: PowerPoint [PPTX to JPG](https://products.aspose.app/slides/conversion/pptx-to-jpg) and [PPT to JPG](https://products.aspose.app/slides/conversion/ppt-to-jpg). ![Free Online PPTX to JPG Converter](https://docs.aspose.com/slides/python-net/convert-powerpoint-to-jpg/ppt-to-jpg.png) Aspose provides a [FREE Collage web app](https://products.aspose.app/slides/collage). Using this online service, you can merge [JPG to JPG](https://products.aspose.app/slides/collage/jpg) or PNG to PNG images, create [photo grids](https://products.aspose.app/slides/collage/photo-grid), and so on. Using the same principles described in this article, you can convert images from one format to another. For more information, see these pages: convert [image to JPG](https://products.aspose.com/slides/python-net/conversion/image-to-jpg/); convert [JPG to image](https://products.aspose.com/slides/python-net/conversion/jpg-to-image/); convert [JPG to PNG](https://products.aspose.com/slides/python-net/conversion/jpg-to-png/), convert [PNG to JPG](https://products.aspose.com/slides/python-net/conversion/png-to-jpg/); convert [PNG to SVG](https://products.aspose.com/slides/python-net/conversion/png-to-svg/), convert [SVG to PNG](https://products.aspose.com/slides/python-net/conversion/svg-to-png/). ## **FAQ** ### Does this method support batch conversion? Yes, Aspose.Slides allows batch conversion of multiple slides to JPG in a single operation. ### Does the conversion support SmartArt, charts, and other complex objects? Yes, Aspose.Slides renders all content, including SmartArt, charts, tables, shapes, and more. However, the rendering accuracy may vary slightly compared to PowerPoint, especially when using custom or missing fonts. ### Are there any limitations on the number of slides that can be processed? Aspose.Slides itself does not impose any strict limits on the number of slides you can process. However, you may encounter out-of-memory error when working with large presentations or high-resolution images. ## Related articles - [Convert PowerPoint Slides to PNG in Python](https://docs.aspose.com/slides/python-net/convert-powerpoint-to-png/) # Convert PowerPoint Presentations to Markdown in Python > Convert PPT and PPTX presentations to Markdown in Python and control where exported images are saved and how the generated Markdown references them. Source: https://docs.aspose.com/slides/python-net/convert-powerpoint-to-markdown/ Updated: 2026-10-01 ## **Overview** Aspose.Slides for Python via .NET can convert PPT and PPTX presentations to Markdown for documentation, static-site, content-migration, and version-control workflows. You can choose a Markdown flavor, control how slide content is rendered, and decide where exported images are stored and how the generated Markdown references them. By default, Markdown export uses text-only output. To export visual content, set the [MarkdownSaveOptions.export_type](https://reference.aspose.com/slides/python-net/aspose.slides.export/markdownsaveoptions/export_type/) property to the `SEQUENTIAL` or `VISUAL` value from the [MarkdownExportType](https://reference.aspose.com/slides/python-net/aspose.slides.export/markdownexporttype/) enumeration. `SEQUENTIAL` renders slide items separately and in order, whereas `VISUAL` keeps grouped items together to preserve their visual relationship. The `TEXT_ONLY` value does not emit image resources. ## **Convert a Presentation to Markdown** Load the source file with the [Presentation](https://reference.aspose.com/slides/python-net/aspose.slides/presentation/) class, and then call the [Presentation.save](https://reference.aspose.com/slides/python-net/aspose.slides/ipresentation/save/) method with the `MD` value from the [SaveFormat](https://reference.aspose.com/slides/python-net/aspose.slides.export/saveformat/) enumeration. ```python import aspose.slides as slides with slides.Presentation("presentation.pptx") as presentation: presentation.save("presentation.md", slides.export.SaveFormat.MD) ``` ## **Select a Markdown Flavor** The [MarkdownSaveOptions.flavor](https://reference.aspose.com/slides/python-net/aspose.slides.export/markdownsaveoptions/flavor/) property controls the Markdown specification used for the output. The [Flavor](https://reference.aspose.com/slides/python-net/aspose.slides.export/flavor/) enumeration includes CommonMark, GitHub Flavored Markdown, and other supported variants. The following example exports a presentation as CommonMark: ```python import aspose.slides as slides options = slides.export.MarkdownSaveOptions() options.flavor = slides.export.Flavor.COMMON_MARK with slides.Presentation("presentation.pptx") as presentation: presentation.save("presentation.md", slides.export.SaveFormat.MD, options) ``` ## **Control Repeated Spaces** When preparing slide text for documentation, text processing, or publication, use [MarkdownSaveOptions.handle_repeated_spaces](https://reference.aspose.com/slides/python-net/aspose.slides.export/markdownsaveoptions/handle_repeated_spaces/) to control consecutive regular spaces. Single spaces remain regular spaces in all three modes. The following self-contained example creates text with one, two, and three consecutive spaces and exports the same slide using each mode. ```python import aspose.slides as slides with slides.Presentation() as presentation: slide = presentation.slides[0] shape = slide.shapes.add_auto_shape(slides.ShapeType.RECTANGLE, 20, 20, 600, 100) shape.text_frame.text = "One space; two spaces; three spaces." modes = [ slides.export.HandleRepeatedSpaces.NONE, slides.export.HandleRepeatedSpaces.ALTERNATE_SPACES_TO_NBSP, slides.export.HandleRepeatedSpaces.MULTIPLE_SPACES_TO_NBSP ] for mode in modes: options = slides.export.MarkdownSaveOptions() options.flavor = slides.export.Flavor.COMMON_MARK options.handle_repeated_spaces = mode presentation.save(f"spaces-{mode.name}.md", slides.export.SaveFormat.MD, options) ``` The exported text lines are shown below. These excerpts omit the slide separator and the two trailing spaces added by the exporter. `NONE`: ```markdown One space; two spaces; three spaces. ``` `ALTERNATE_SPACES_TO_NBSP`: ```markdown One space; two  spaces; three   spaces. ``` `MULTIPLE_SPACES_TO_NBSP`: ```markdown One space; two  spaces; three   spaces. ``` In a typical HTML-based Markdown viewer, consecutive regular spaces collapse visually even though they remain in the source. Both replacement modes preserve the visible spacing in this example; their source differs for the three-space sequence. Choose `NONE` when downstream tools need ordinary space characters without HTML entities. Choose a replacement mode when visible spacing matters more. A text-processing pipeline consuming that output may need to decode ` ` and normalize the resulting nonbreaking spaces. Nonbreaking spaces also affect where a viewer can wrap text. ## **Remove Empty Lines** The [MarkdownSaveOptions.remove_empty_lines](https://reference.aspose.com/slides/python-net/aspose.slides.export/markdownsaveoptions/remove_empty_lines/) property controls whether empty or whitespace-only lines are removed during export. Its default value is `False`. This controls vertical separation, independently of how repeated spaces within text are represented. The following example creates two text paragraphs separated by an empty paragraph and a paragraph containing three regular spaces. It exports both settings. The `\r` characters create paragraph boundaries in the text frame; `HandleRepeatedSpaces.NONE` makes the treatment of ordinary spaces easier to inspect. ```python import aspose.slides as slides with slides.Presentation() as presentation: slide = presentation.slides[0] shape = slide.shapes.add_auto_shape(slides.ShapeType.RECTANGLE, 20, 20, 600, 300) # Include an empty paragraph and a paragraph containing three regular spaces. shape.text_frame.text = "First paragraph.\r\r \rSecond paragraph." options = slides.export.MarkdownSaveOptions() options.flavor = slides.export.Flavor.COMMON_MARK options.handle_repeated_spaces = slides.export.HandleRepeatedSpaces.NONE options.remove_empty_lines = False presentation.save("empty-lines-kept.md", slides.export.SaveFormat.MD, options) options.remove_empty_lines = True presentation.save("empty-lines-removed.md", slides.export.SaveFormat.MD, options) ``` With `False`, the generated Markdown is: ```markdown --- First paragraph.   Second paragraph. ``` With `True`, it becomes: ```markdown --- First paragraph. Second paragraph. ``` With `remove_empty_lines = False`, the exported Markdown preserves the empty and whitespace-only paragraphs. The ` ` line represents an empty paragraph. With `remove_empty_lines = True`, these blank paragraphs are removed. The two text paragraphs become a single Markdown paragraph with a line break between them. This line break is preserved by two trailing spaces after `First paragraph.`—Markdown syntax for a hard line break. The slide separator (`---`) remains in both outputs. Keep `remove_empty_lines = False` when you need to preserve paragraph separation. If your presentation contains lists or code blocks, check the exported result in your target Markdown viewer, since blank lines can affect how that content is interpreted. ## **Export Images Using the Default Local-Saving Behavior** The [MarkdownSaveOptions](https://reference.aspose.com/slides/python-net/aspose.slides.export/markdownsaveoptions/) class provides two properties for locally saved images: - [base_path](https://reference.aspose.com/slides/python-net/aspose.slides.export/markdownsaveoptions/base_path/) specifies the base directory for the Markdown document and its resources. - [images_save_folder_name](https://reference.aspose.com/slides/python-net/aspose.slides.export/markdownsaveoptions/images_save_folder_name/) specifies the image subdirectory. Its default value is `Images`. The following example renders visual content, writes images to `output/assets`, and creates relative image references in the Markdown document: ```python import os import aspose.slides as slides output_directory = "output" os.makedirs(output_directory, exist_ok=True) options = slides.export.MarkdownSaveOptions() options.export_type = slides.export.MarkdownExportType.VISUAL options.base_path = output_directory options.images_save_folder_name = "assets" markdown_path = os.path.join(output_directory, "presentation.md") with slides.Presentation("presentation.pptx") as presentation: presentation.save(markdown_path, slides.export.SaveFormat.MD, options) ``` Aspose.Slides creates the image subdirectory when the export produces image resources, but the application must create `base_path` before saving the Markdown file. ## **Prepare Markdown and Images for Publication** Aspose.Slides for Python via .NET does not expose the .NET image-saving callbacks for replacing each generated image link during export. Instead, export the Markdown document and its image folder to a publication directory, and then publish that directory without changing its relative structure. The following example prepares `cdn-origin/presentations/quarterly-report` as a mounted or synchronized publication directory. The sample itself performs no network upload: the generated links become valid after the directory is published at the intended site or CDN location. ```python import os import aspose.slides as slides publication_directory = os.path.join( "cdn-origin", "presentations", "quarterly-report") os.makedirs(publication_directory, exist_ok=True) options = slides.export.MarkdownSaveOptions() options.export_type = slides.export.MarkdownExportType.VISUAL options.base_path = publication_directory options.images_save_folder_name = "assets" markdown_path = os.path.join(publication_directory, "presentation.md") with slides.Presentation("presentation.pptx") as presentation: presentation.save(markdown_path, slides.export.SaveFormat.MD, options) ``` Publish `presentation.md` together with the `assets` directory. The Markdown document uses relative image references, so both items must keep the same relationship at the destination. If a publishing system requires absolute external URLs, rewrite the generated links as a separate post-processing step after all image files have been published. ## **FAQ** **Can Python callbacks customize individual image files and links during Markdown export?** No. Aspose.Slides for Python via .NET does not expose the .NET `ImageSaving` and `SvgImageSaving` callbacks. Configure the local output with [MarkdownSaveOptions.base_path](https://reference.aspose.com/slides/python-net/aspose.slides.export/markdownsaveoptions/base_path/) and [MarkdownSaveOptions.images_save_folder_name](https://reference.aspose.com/slides/python-net/aspose.slides.export/markdownsaveoptions/images_save_folder_name/), then publish or post-process the generated resources. **Where are exported images saved?** The image location is controlled by [MarkdownSaveOptions.base_path](https://reference.aspose.com/slides/python-net/aspose.slides.export/markdownsaveoptions/base_path/) and [MarkdownSaveOptions.images_save_folder_name](https://reference.aspose.com/slides/python-net/aspose.slides.export/markdownsaveoptions/images_save_folder_name/). The Markdown document references those images with relative paths. **Which path separator should image links use?** Use forward slashes in Markdown links and URLs. Use `os.path.join` only for file-system paths, and normalize any link created during post-processing separately. **Are hyperlinks preserved during Markdown export?** Yes. Text [hyperlinks](https://docs.aspose.com/slides/python-net/manage-hyperlinks/) are preserved as standard Markdown links. Slide [transitions](https://docs.aspose.com/slides/python-net/slide-transition/) and [animations](https://docs.aspose.com/slides/python-net/powerpoint-animation/) are not converted. **Can presentations be converted to Markdown in parallel?** You can process different presentation files in parallel, but do not share the same [Presentation](https://reference.aspose.com/slides/python-net/aspose.slides/presentation/) instance between threads. Follow the [multithreading guidelines](https://docs.aspose.com/slides/python-net/multithreading/) and use a separate instance for each file. # Convert Presentations to PDF with Notes in Python > Convert formats PPT, PPTX and ODP to PDF with notes using Aspose.Slides for Python. Preserve layouts and speaker notes for professional presentations. Source: https://docs.aspose.com/slides/python-net/convert-powerpoint-to-pdf-with-notes/ Updated: 2026-11-08 ## **Overview** In this article, you will learn how to convert PowerPoint presentations to PDF format with speaker notes using Aspose.Slides. This guide will cover the necessary steps and provide code examples to help you achieve this task efficiently. By the end of this article, you will be able to: - Implement the conversion process to transform PowerPoint slides into PDF documents while preserving the speaker notes. - Customize the output PDF to ensure that the speaker notes are included and formatted according to your requirements. To set the notes page dimensions and orientation before export, see [Notes Page Size](https://docs.aspose.com/slides/python-net/notes-size/). ## **Convert PowerPoint to PDF with Notes** The `save` method in the [Presentation](https://reference.aspose.com/slides/python-net/aspose.slides/presentation/) class can be used to convert a PPT or PPTX presentation to a PDF with speaker notes. With Aspose.Slides, you simply load the presentation, configure the layout options using the [NotesCommentsLayoutingOptions](https://reference.aspose.com/slides/python-net/aspose.slides.export/notescommentslayoutingoptions/) class to include speaker notes, and then save the file as a PDF. The following code snippet demonstrates how to convert a sample presentation to a PDF in Notes Slide view. ```py import aspose.slides as slides with slides.Presentation("sample.pptx") as presentation: # Configure PDF options for rendering speaker notes. notes_options = slides.export.NotesCommentsLayoutingOptions() notes_options.notes_position = slides.export.NotesPositions.BOTTOM_FULL pdf_options = slides.export.PdfOptions() pdf_options.slides_layout_options = notes_options # Save the presentation to PDF with speaker notes. presentation.save("output.pdf", slides.export.SaveFormat.PDF, pdf_options) ``` You may want to check out the Aspose [Online PowerPoint to PDF Converter](https://products.aspose.app/slides/conversion). [![Actual BottomFull PDF page with the slide above a line reading Speaker note marker, shown again in an enlargement.](https://docs.aspose.com/slides/python-net/convert-powerpoint-to-pdf-with-notes/visual-notes-export-f0ed0501bd93.svg)](https://docs.aspose.com/slides/python-net/convert-powerpoint-to-pdf-with-notes/visual-notes-export-f0ed0501bd93.svg) *This BottomFull PDF places the speaker note below the slide.* ## Related articles - [Convert PowerPoint Presentations to TIFF with Notes in Python](https://docs.aspose.com/slides/python-net/convert-powerpoint-to-tiff-with-notes/) - [Note](https://docs.aspose.com/slides/python-net/examples/elements/note/) # Convert PPT & PPTX to PDF in Python | Advanced Options > Step‑by‑step guide to converting PPT, PPTX, and ODP to high‑quality, WCAG‑compliant PDFs in Python with Aspose.Slides—includes password protection, slide selection, and image‑quality control. Source: https://docs.aspose.com/slides/python-net/convert-powerpoint-to-pdf/ Updated: 2026-10-26 ## **Overview** Converting PowerPoint presentations (PPT, PPTX, ODP) into PDF format in Python offers several advantages, including ensuring compatibility across different devices and preserving the layout and formatting of your presentation. This guide demonstrates how to convert presentations to PDF documents, utilize various options to control image quality, include hidden slides, password protect PDF documents, detect font substitutions, select specific slides for conversion, and apply compliance standards to output documents. ## **PowerPoint to PDF Conversions** Using Aspose.Slides, you can convert presentations in these formats to PDF: * **PPT** * **PPTX** * **ODP** To convert a presentation to PDF in Python, you simply have to pass the file name as an argument to the [Presentation](https://reference.aspose.com/slides/python-net/aspose.slides/presentation/) class and then save the presentation as a PDF using a [save](https://reference.aspose.com/slides/python-net/aspose.slides/presentation/save/) method. The [Presentation](https://reference.aspose.com/slides/python-net/aspose.slides/presentation/) class exposes the [save](https://reference.aspose.com/slides/python-net/aspose.slides/presentation/save/) method that is typically used to convert a presentation to PDF. Aspose.Slides for Python inserts its API information and version number into output documents. For example, when it converts a presentation to PDF, Aspose.Slides for Python populates the Application field with the '*Aspose.Slides*' value and the PDF Producer field with a value in '*Aspose.Slides v XX.XX*' form. **Note** that you cannot instruct Aspose.Slides for Python to change or remove this information from output documents. Aspose.Slides allows you to convert: * Entire presentations to PDF * Specific slides in a presentation to PDF Aspose.Slides exports presentations to PDF, ensuring the contents of the resulting PDFs closely match the original presentations. Elements and attributes are rendered accurately in the conversion, including: * Images * Text boxes and shapes * Text formatting * Paragraph formatting * Hyperlinks * Headers and footers * Bullets * Tables ## **Convert PowerPoint to PDF** The standard PowerPoint-to-PDF conversion process uses default options. In this case, Aspose.Slides tries to convert the provided presentation to PDF using optimal settings at the maximum quality levels. The following example loads a presentation and saves all visible slides to PDF using the default export settings. ```python import aspose.slides as slides with slides.Presentation("PowerPoint.ppt") as presentation: presentation.save("PPT-to-PDF.pdf", slides.export.SaveFormat.PDF) ``` Aspose provides a free online [**PowerPoint to PDF converter**](https://products.aspose.app/slides/conversion/ppt-to-pdf) that demonstrates the presentation to PDF conversion process. For a live implementation of the procedure described here, you can do a test with the converter. ## **Convert PowerPoint to PDF with Options** Aspose.Slides provides custom options—properties under the [PdfOptions](https://reference.aspose.com/slides/python-net/aspose.slides.export/pdfoptions/) class—that allow you to customize the PDF (resulting from the conversion process), lock the PDF with a password, or even specify how the conversion process should go. ### **Convert PowerPoint to PDF with Custom Options** Using custom conversion options, you can set your preferred quality setting for raster images, specify how metafiles should be handled, set a compression level for text, set DPI for images, etc. The following example exports a presentation to PDF 1.5 with JPEG quality set to 90, image resolution set to 300 DPI, metafiles saved as PNG, and Flate text compression. ```python import aspose.slides as slides pdf_options = slides.export.PdfOptions() pdf_options.jpeg_quality = 90 pdf_options.sufficient_resolution = 300 pdf_options.save_metafiles_as_png = True pdf_options.text_compression = slides.export.PdfTextCompression.FLATE pdf_options.compliance = slides.export.PdfCompliance.PDF15 with slides.Presentation("PowerPoint.pptx") as presentation: presentation.save("PowerPoint-to-PDF.pdf", slides.export.SaveFormat.PDF, pdf_options) ``` ### **Automatically Select Image Compression** When a presentation contains many photographs or screenshots, reducing the size of the exported PDF can make it easier to email or download. Set [PdfOptions.best_images_compression_ratio](https://reference.aspose.com/slides/python-net/aspose.slides.export/pdfoptions/best_images_compression_ratio/) to `True` to automatically select the most appropriate compression algorithm for each image during PDF export. The following example loads an existing presentation, enables automatic image compression selection, and saves it as a PDF document. All other PDF export settings retain their default values. ```python import aspose.slides as slides pdf_options = slides.export.PdfOptions() pdf_options.best_images_compression_ratio = True with slides.Presentation("image-heavy.pptx") as presentation: presentation.save("image-heavy.pdf", slides.export.SaveFormat.PDF, pdf_options) ``` This option selects a compression algorithm for each image. Lowering [jpeg_quality](https://reference.aspose.com/slides/python-net/aspose.slides.export/pdfoptions/jpeg_quality/) instead reduces JPEG image quality, while lowering [sufficient_resolution](https://reference.aspose.com/slides/python-net/aspose.slides.export/pdfoptions/sufficient_resolution/) allows images to be downsampled to a lower resolution, which can reduce detail. Enabling automatic compression selection does not itself lower either of these settings. Selecting image compression algorithms requires additional processing time and memory. The size reduction depends on the presentation's images and export settings; a fixed reduction is not guaranteed for every presentation. ### **Preserve Embedded OLE Files as PDF Attachments** If a presentation contains an embedded Excel workbook, you may want PDF recipients to access the workbook's data as well as view the slides. Set [PdfOptions.include_ole_data](https://reference.aspose.com/slides/python-net/aspose.slides.export/pdfoptions/include_ole_data/) to `True` to preserve embedded OLE files as attachments in the resulting PDF. The default value is `False`: the OLE object's preview image or icon is rendered on the PDF page, but its embedded file is not included as an attachment. Setting the option to `True` additionally includes the file data. The preview remains a visual representation; the attachment lets recipients open or save the embedded file separately. The OLE object does not become an interactive Excel worksheet on the PDF page. The following example loads a presentation that already contains an embedded Excel workbook and exports it to PDF with the workbook attached. ```python import aspose.slides as slides pdf_options = slides.export.PdfOptions() pdf_options.include_ole_data = True with slides.Presentation("presentation.pptx") as presentation: presentation.save("presentation.pdf", slides.export.SaveFormat.PDF, pdf_options) ``` To check the result: 1. Open the exported PDF in a viewer that supports file attachments, such as Adobe Acrobat Reader. 2. Open the viewer's **Attachments** panel and locate the embedded workbook. 3. Save the attachment and open it in Excel to inspect its data, or open it directly if the viewer permits it. The preview on the PDF page is separate from the attachment. The PDF/A standards impose restrictions on attachments: PDF/A-1 prohibits embedded files, PDF/A-2 permits only PDF/A attachments, and PDF/A-3 permits other file types, including Excel workbooks. These are requirements of the standards, not restrictions specific to Aspose.Slides. This example uses the default PDF compliance setting and does not demonstrate PDF/A export. ### **Convert PowerPoint to PDF with Hidden Slides** If a presentation contains hidden slides, you can use a custom option—the [show_hidden_slides](https://reference.aspose.com/slides/python-net/aspose.slides.export/pdfoptions/show_hidden_slides/) property from the [PdfOptions](https://reference.aspose.com/slides/python-net/aspose.slides.export/pdfoptions/) class—to instruct Aspose.Slides to include the hidden slides as pages in the resulting PDF. The following example exports a presentation to PDF, including any hidden slides. ```python import aspose.slides as slides pdf_options = slides.export.PdfOptions() pdf_options.show_hidden_slides = True with slides.Presentation("PowerPoint.pptx") as presentation: presentation.save("PowerPoint-to-PDF.pdf", slides.export.SaveFormat.PDF, pdf_options) ``` ### **Convert PowerPoint to a Password-Protected PDF** The following example exports a presentation to a PDF that requires the password `password` to open. The access permissions allow printing, including high-quality printing. ```python import aspose.slides as slides pdf_options = slides.export.PdfOptions() pdf_options.password = "password" pdf_options.access_permissions = slides.export.PdfAccessPermissions.PRINT_DOCUMENT | slides.export.PdfAccessPermissions.HIGH_QUALITY_PRINT with slides.Presentation("PowerPoint.pptx") as presentation: presentation.save("PPTX-to-PDF.pdf", slides.export.SaveFormat.PDF, pdf_options) ``` ### **Handle Fonts Without a Dedicated Bold Typeface** A presentation can apply bold formatting to text even when its font has no dedicated bold typeface. The text can still appear bold through synthetic bolding, which artificially thickens the regular glyphs. When that text looks too heavy or otherwise differs from the intended appearance in PDF, try setting [PdfOptions.rasterize_unsupported_font_styles](https://reference.aspose.com/slides/python-net/aspose.slides.export/pdfoptions/rasterize_unsupported_font_styles/) to `True`. This option renders the affected text as a bitmap during PDF export and can improve its appearance for certain fonts. Its default value is `False`. The sample presentation contains two text boxes: one with regular text and one with bold formatting applied to the same font, which has no dedicated bold typeface. The following example loads the presentation, enables rasterization of unsupported font styles, and exports it to PDF: ```python import aspose.slides as slides pdf_options = slides.export.PdfOptions() pdf_options.rasterize_unsupported_font_styles = True with slides.Presentation("unsupported-bold.pptx") as presentation: presentation.save("rasterized.pdf", slides.export.SaveFormat.PDF, pdf_options) ``` The following previews show the disabled output and the enabled output. In this example, the bold text has heavier strokes with the option disabled. With the option enabled, its strokes are lighter; the regular text is unchanged. Compare the results before choosing the setting for your presentation. | Option disabled (`False`, the default) | Option enabled (`True`) | |---|---| | ![PDF with unsupported font style rasterization disabled](https://docs.aspose.com/slides/python-net/convert-powerpoint-to-pdf/unsupported-bold-disabled.png) | ![PDF with unsupported font style rasterization enabled](https://docs.aspose.com/slides/python-net/convert-powerpoint-to-pdf/unsupported-bold-enabled.png) | In this example, enabling the option turns only the bold text into a bitmap: it cannot be selected, copied, or searched as text without OCR, and its edges appear softer at 800% zoom. The regular text remains searchable. With the option disabled, both strings remain text. This option rasterizes text formatted as bold when its font has no dedicated bold typeface. [Font substitution](https://docs.aspose.com/slides/python-net/font-substitution/) instead selects another font when the original is unavailable. ## **Convert Selected Slides in PowerPoint to PDF** The following example exports slides 1 and 3 from a presentation to PDF. Slide numbers in this array are one-based, and the input presentation must contain at least three slides. ```python import aspose.slides as slides with slides.Presentation("PowerPoint.pptx") as presentation: slide_numbers = [1, 3] presentation.save("PPTX-to-PDF.pdf", slide_numbers, slides.export.SaveFormat.PDF) ``` ## **Convert PowerPoint to PDF with Custom Slide Size** The following example copies the first slide from a presentation into a new presentation with a slide size of 612 × 792 points (8.5 × 11 inches). It scales the slide content to fit and exports the single slide to PDF. ```python import aspose.slides as slides slide_width = 612 slide_height = 792 with slides.Presentation("SelectedSlides.pptx") as presentation: with slides.Presentation() as resized_presentation: resized_presentation.slide_size.set_size(slide_width, slide_height, slides.SlideSizeScaleType.ENSURE_FIT) slide = presentation.slides[0] resized_presentation.slides.insert_clone(0, slide) # Remove the blank slide that the new presentation was created with. resized_presentation.slides.remove_at(1) resized_presentation.save("PDF_with_custom_slide_size.pdf", slides.export.SaveFormat.PDF) ``` ## **Convert PowerPoint to PDF in Notes Slide View** The following example exports a presentation to PDF, placing each slide's speaker notes below the slide. Use a presentation containing speaker notes to see the result. ```python import aspose.slides as slides pdf_options = slides.export.PdfOptions() pdf_options.slides_layout_options = slides.export.NotesCommentsLayoutingOptions() pdf_options.slides_layout_options.notes_position = slides.export.NotesPositions.BOTTOM_FULL with slides.Presentation("NotesFile.pptx") as presentation: presentation.save("Pdf_Notes_out.pdf", slides.export.SaveFormat.PDF, pdf_options) ``` ## **Accessibility and Compliance Standards for PDF** Aspose.Slides allows you to use a conversion procedure that complies with [Web Content Accessibility Guidelines (**WCAG**)](https://www.w3.org/TR/WCAG-TECHS/pdf.html). You can export a PowerPoint document to PDF using any of these compliance standards: **PDF/A1a**, **PDF/A1b**, and **PDF/UA**. This Python code demonstrates a PowerPoint to PDF conversion operation in which multiple PDFs based on different compliance standards are obtained: ```python import aspose.slides as slides pres = slides.Presentation("pres.pptx") options = slides.export.PdfOptions() options.compliance = slides.export.PdfCompliance.PDF_A1A pres.save("pres-a1a-compliance.pdf", slides.export.SaveFormat.PDF, options) options.compliance = slides.export.PdfCompliance.PDF_A1B pres.save("pres-a1b-compliance.pdf", slides.export.SaveFormat.PDF, options) options.compliance = slides.export.PdfCompliance.PDF_UA pres.save("pres-ua-compliance.pdf", slides.export.SaveFormat.PDF, options) ``` Aspose.Slides support for PDF conversion operations allows you to convert PDF to the most popular file formats. You can do [PDF to HTML](https://products.aspose.com/slides/python-net/conversion/pdf-to-html/), [PDF to image](https://products.aspose.com/slides/python-net/conversion/pdf-to-image/), [PDF to JPG](https://products.aspose.com/slides/python-net/conversion/pdf-to-jpg/), and [PDF to PNG](https://products.aspose.com/slides/python-net/conversion/pdf-to-png/) conversions. Other PDF conversion operations to specialized formats—[PDF to SVG](https://products.aspose.com/slides/python-net/conversion/pdf-to-svg/), [PDF to TIFF](https://products.aspose.com/slides/python-net/conversion/pdf-to-tiff/), and [PDF to XML](https://products.aspose.com/slides/python-net/conversion/pdf-to-xml/)—are also supported. > **Note:** When exporting to PDF/UA, Aspose.Slides treats complex graphics such as SmartArt, charts, and formulas as a single figure. Individual path elements are not preserved as separate content and may be marked as artifacts; alternative text is provided only for the whole figure. ## **FAQ** **Can Aspose.Slides for Python remove the application information from the PDF?** No, Aspose.Slides for Python automatically includes API information and the version number in the output PDF. This information cannot be modified or removed. **How do I include only specific slides in the PDF conversion?** You can specify the slide indices you want to convert by passing an array of slide positions to the [save](https://reference.aspose.com/slides/python-net/aspose.slides/presentation/save/) method. **Is it possible to password-protect the PDF during conversion?** Yes, you can set a password and define access permissions using the [PdfOptions](https://reference.aspose.com/slides/python-net/aspose.slides.export/pdfoptions/) class before saving the presentation as a PDF. **Does Aspose.Slides support converting PDF to other formats?** Yes, Aspose.Slides supports converting PDFs to formats like HTML, image formats (JPG, PNG), SVG, TIFF, and XML. **How can I ensure my PDF complies with accessibility standards?** Set the [compliance](https://reference.aspose.com/slides/python-net/aspose.slides.export/pdfoptions/compliance/) property in [PdfOptions](https://reference.aspose.com/slides/python-net/aspose.slides.export/pdfoptions/) to standards like `PDF_A1A`, `PDF_A1B`, or `PDF_UA` to ensure compliance with accessibility guidelines. **Can I include hidden slides in the PDF output?** Yes, by setting the [show_hidden_slides](https://reference.aspose.com/slides/python-net/aspose.slides.export/pdfoptions/show_hidden_slides/) property in [PdfOptions](https://reference.aspose.com/slides/python-net/aspose.slides.export/pdfoptions/) to `True`, hidden slides will be included in the PDF. **How do I adjust image quality and resolution during conversion?** Use the [jpeg_quality](https://reference.aspose.com/slides/python-net/aspose.slides.export/pdfoptions/jpeg_quality/) and [sufficient_resolution](https://reference.aspose.com/slides/python-net/aspose.slides.export/pdfoptions/sufficient_resolution/) properties in [PdfOptions](https://reference.aspose.com/slides/python-net/aspose.slides.export/pdfoptions/) to control image quality and resolution in the resulting PDF. **Does Aspose.Slides handle font substitutions automatically?** Aspose.Slides detects font substitutions during conversion, and you can handle them using the `warning_callback` property in `SaveOptions` (currently limited). ## **Additional Resources** - [Aspose.Slides for Python via .NET Documentation](https://docs.aspose.com/slides/python-net/) - [Aspose.Slides API Reference](https://reference.aspose.com/slides/python-net/) - [Aspose Free Online Converters](https://products.aspose.app/slides/conversion) Related feature: [Export presentations to PDF](https://docs.aspose.com/slides/features/pdf-export/). # Convert PowerPoint Slides to PNG in Python > Convert PowerPoint and OpenDocument presentations to high-quality PNG images quickly with Aspose.Slides for Python via .NET, ensuring precise, automated results. Source: https://docs.aspose.com/slides/python-net/convert-powerpoint-to-png/ Updated: 2026-10-14 ## **Overview** This article explains how to convert presentation slides to PNG images using Aspose.Slides for Python via .NET. You can load presentations in formats such as PPT, PPTX, and ODP, render each slide, and save it as a separate PNG image. The examples below demonstrate rendering at the default scale, increasing the scale, specifying the output dimensions in pixels, and choosing a gradient rendering style. ## **Convert PowerPoint to PNG** Load a presentation with the [Presentation](https://reference.aspose.com/slides/python-net/aspose.slides/presentation/) class and access its slides through the [slides](https://reference.aspose.com/slides/python-net/aspose.slides/presentation/slides/) collection. The example renders every slide with [Slide.get_image](https://reference.aspose.com/slides/python-net/aspose.slides/slide/get_image/) without parameters to create a thumbnail. It then calls [IImage.save](https://reference.aspose.com/slides/python-net/aspose.slides/iimage/save/) with [ImageFormat.PNG](https://reference.aspose.com/slides/python-net/aspose.slides/imageformat/) to save each rendered slide as a PNG image. ```python import aspose.slides as slides with slides.Presentation("presentation.pptx") as presentation: for index, slide in enumerate(presentation.slides): with slide.get_image() as image: image.save(f"slide_{index}.png", slides.ImageFormat.PNG) ``` The parameterless [Slide.get_image](https://reference.aspose.com/slides/python-net/aspose.slides/slide/get_image/) overload renders at a scale of 0.2. For example, a slide measuring 720 × 540 points produces a 144 × 108 pixel thumbnail. To control the output dimensions, use the overloads with scale factors or an explicit image size shown below. ## **Convert PowerPoint to PNG With Custom Dimensions** Pass horizontal and vertical scale factors to [Slide.get_image](https://reference.aspose.com/slides/python-net/aspose.slides/slide/get_image/) to control the rendered dimensions. In this example, both factors are 2, so a slide measuring 720 × 540 points produces a 1440 × 1080 pixel image. Equal scale factors preserve the slide's aspect ratio. Each image is saved in PNG format with [IImage.save](https://reference.aspose.com/slides/python-net/aspose.slides/iimage/save/). ```python import aspose.slides as slides scale_x = 2.0 scale_y = scale_x with slides.Presentation("presentation.pptx") as presentation: for index, slide in enumerate(presentation.slides): with slide.get_image(scale_x, scale_y) as image: image.save(f"slide_{index}.png", slides.ImageFormat.PNG) ``` ## **Convert PowerPoint to PNG With Custom Size** To specify output dimensions in pixels, pass a size to [Slide.get_image](https://reference.aspose.com/slides/python-net/aspose.slides/slide/get_image/) instead of scale factors. This example renders every slide at 960 × 720 pixels and saves the result with [IImage.save](https://reference.aspose.com/slides/python-net/aspose.slides/iimage/save/). Choose dimensions that match the slide's aspect ratio to avoid stretching the image. ```python import aspose.slides as slides image_size = slides.Size(960, 720) with slides.Presentation("presentation.pptx") as presentation: for index, slide in enumerate(presentation.slides): with slide.get_image(image_size) as image: image.save(f"slide_{index}.png", slides.ImageFormat.PNG) ``` ## **Choose a Gradient Rendering Style** Suppose a slide contains gradient fills, but the transitions in the exported PNG look lighter or otherwise different from what you see in PowerPoint. You can use the [gradient_style](https://reference.aspose.com/slides/python-net/aspose.slides.export/saveoptions/gradient_style/) property of [RenderingOptions](https://reference.aspose.com/slides/python-net/aspose.slides.export/renderingoptions/) to choose how the gradients are rendered. Download [gradient-styles.pptx](https://docs.aspose.com/slides/python-net/convert-powerpoint-to-png/gradient-styles.pptx) and place it in the application's working directory. Its first slide contains two linear gradients: cyan to orange at the top and blue to yellow at the bottom. Each gradient has two stops, at 0% and 100%. The following example loads this presentation and renders the same first slide in both modes with [Slide.get_image](https://reference.aspose.com/slides/python-net/aspose.slides/slide/get_image/). ```python import aspose.slides as slides with slides.Presentation("gradient-styles.pptx") as presentation: slide = presentation.slides[0] gradient_styles = [slides.GradientStyle.DEFAULT, slides.GradientStyle.POWER_POINT_UI] for style in gradient_styles: options = slides.export.RenderingOptions() options.gradient_style = style with slide.get_image(options, 1.0, 1.0) as image: image.save(f"gradient-{style.name}.png", slides.ImageFormat.PNG) ``` The images below show the output from the same slide, with both gradients in each image: | Default | PowerPointUI | | --- | --- | | ![Cyan-to-orange and blue-to-yellow gradients rendered with Default](https://docs.aspose.com/slides/python-net/convert-powerpoint-to-png/gradient-Default.png) | ![The same gradients rendered with PowerPointUI](https://docs.aspose.com/slides/python-net/convert-powerpoint-to-png/gradient-PowerPointUI.png) | In this example, `DEFAULT` produces lighter intermediate colors, while `POWER_POINT_UI` produces darker intermediate colors. The difference depends on the colors and stops in the gradient. Choose `DEFAULT` when the standard Aspose.Slides output suits your needs. Try `POWER_POINT_UI` when your priority is matching the appearance in PowerPoint. Compare both outputs with your intended result; neither mode is universally preferable. ## **FAQ** **How can I export a specific shape, such as a chart or picture, instead of the entire slide?** Aspose.Slides supports [generating thumbnails for individual shapes](https://docs.aspose.com/slides/python-net/create-shape-thumbnails/), allowing you to render a shape as a PNG image. **Is parallel conversion supported on a server?** Yes. Use a separate presentation instance for each thread or process; [do not share a single instance across threads](https://docs.aspose.com/slides/python-net/multithreading/). **What are the evaluation limitations when exporting to PNG?** Evaluation mode adds a watermark to output images and applies [other restrictions](https://docs.aspose.com/slides/python-net/licensing/) until a license is applied. ## Related articles - [Convert PPT, PPTX, and ODP to JPG in Python](https://docs.aspose.com/slides/python-net/convert-powerpoint-to-jpg/) # Convert PowerPoint Presentations to SWF Flash in Python > Convert PowerPoint (PPT/PPTX) to SWF Flash in Python with Aspose.Slides. Step‑by‑step code samples, fast quality output, no PowerPoint automation. Source: https://docs.aspose.com/slides/python-net/convert-powerpoint-to-swf-flash/ Updated: 2026-08-05 ## **Overview** This article explains how to convert PowerPoint presentations to SWF by using Aspose.Slides. It shows how to save a presentation as an SWF file with the [Presentation.save](https://reference.aspose.com/slides/python-net/aspose.slides/presentation/save/) method and how to configure the export with [SwfOptions](https://reference.aspose.com/slides/python-net/aspose.slides.export/swfoptions/), including viewer settings and notes or comments layout. ## **Convert Presentations to Flash** The [save](https://reference.aspose.com/slides/python-net/aspose.slides/presentation/save/) method exposed by [Presentation](https://reference.aspose.com/slides/python-net/aspose.slides/presentation/) class can be used to convert the whole presentation into SWF document.  You can also include comments in generated SWF by using [SWFOptions](https://reference.aspose.com/slides/python-net/aspose.slides.export/swfoptions/) class and [NotesCommentsLayoutingOptions](https://reference.aspose.com/slides/python-net/aspose.slides.export/notescommentslayoutingoptions/) class. The following example shows how to convert a presentation into SWF document by using options provided by SWFOptions class. ```py import aspose.slides as slides # Instantiate a Presentation object that represents a presentation file with slides.Presentation("pres.pptx") as presentation: swfOptions = slides.export.SwfOptions() swfOptions.viewer_included = False # Saving the presentation presentation.save("SaveAsSwf_out.swf", slides.export.SaveFormat.SWF, swfOptions) # Saving the presentation with the notes pages notesOptions = slides.export.NotesCommentsLayoutingOptions() notesOptions.notes_position = slides.export.NotesPositions.BOTTOM_FULL swfOptions.slides_layout_options = notesOptions presentation.save("SaveNotes_out.swf", slides.export.SaveFormat.SWF, swfOptions) ``` ## **FAQ** ### Can I include hidden slides in the SWF? Yes. Enable the [show_hidden_slides](https://reference.aspose.com/slides/python-net/aspose.slides.export/swfoptions/show_hidden_slides/) option in [SwfOptions](https://reference.aspose.com/slides/python-net/aspose.slides.export/swfoptions/). By default, hidden slides are not exported. ### How can I control compression and the final SWF size? Use the [compressed](https://reference.aspose.com/slides/python-net/aspose.slides.export/swfoptions/compressed/) flag (enabled by default) and adjust [jpeg_quality](https://reference.aspose.com/slides/python-net/aspose.slides.export/swfoptions/jpeg_quality/) to balance file size and image fidelity. ### What is 'viewer_included' for, and when should I disable it? [viewer_included](https://reference.aspose.com/slides/python-net/aspose.slides.export/swfoptions/viewer_included/) adds an embedded player UI (navigation controls, panels, search). Disable it if you plan to use your own player or need a bare SWF frame without UI. ### What happens if a source font is missing on the export machine? Aspose.Slides will substitute the font you specify via [default_regular_font](https://reference.aspose.com/slides/python-net/aspose.slides.export/swfoptions/default_regular_font/) in [SwfOptions](https://reference.aspose.com/slides/python-net/aspose.slides.export/swfoptions/) to avoid an unintended fallback. ## Related articles - [Extract Flash Objects from Presentations in Python](https://docs.aspose.com/slides/python-net/flash/) # Convert PowerPoint Presentations to TIFF with Notes in Python > Convert PowerPoint presentations to TIFF with notes using Aspose.Slides for Python via .NET. Learn how to export slides with speaker notes efficiently. Source: https://docs.aspose.com/slides/python-net/convert-powerpoint-to-tiff-with-notes/ Updated: 2026-08-13 ## **Introduction** Aspose.Slides for Python via .NET provides a simple solution for converting PowerPoint and OpenDocument presentations (PPT, PPTX, and ODP) with notes to the TIFF format. This format is widely used for high-quality image storage, printing, and document archiving. With Aspose.Slides, you can not only export entire presentations with speaker notes but also generate slide thumbnails in the Notes Slide view. The conversion process is simple and efficient, utilizing the `save` method of the [Presentation](https://reference.aspose.com/slides/python-net/aspose.slides/presentation/) class to transform the entire presentation into a series of TIFF images while preserving the notes and layout. ## **Convert a Presentation to TIFF with Notes** Saving a PowerPoint or OpenDocument presentation to TIFF with notes using Aspose.Slides for Python via .NET involves the following steps: 1. Instantiate the [Presentation](https://reference.aspose.com/slides/python-net/aspose.slides/presentation/) class: Load a PowerPoint or OpenDocument file. 1. Configure the output layout options: Use the [NotesCommentsLayoutingOptions](https://reference.aspose.com/slides/python-net/aspose.slides.export/notescommentslayoutingoptions/) class to specify how notes and comments should be displayed. 1. Save the presentation to TIFF: Pass the configured options to the [save](https://reference.aspose.com/slides/python-net/aspose.slides/presentation/save/#str-asposeslidesexportsaveformat-asposeslidesexportisaveoptions) method. Let's say we have a "speaker_notes.pptx" file with the following slide: ![The presentation slide with speaker notes](https://docs.aspose.com/slides/python-net/convert-powerpoint-to-tiff-with-notes/slide_with_notes.png) The code snippet below demonstrates how to convert the presentation to a TIFF image in Notes Slide view using the [slides_layout_options](https://reference.aspose.com/slides/python-net/aspose.slides.export/tiffoptions/slides_layout_options/) property. ```py import aspose.slides as slides # Instantiate the Presentation class that represents a presentation file. with slides.Presentation("speaker_notes.pptx") as presentation: notes_options = slides.export.NotesCommentsLayoutingOptions() notes_options.notes_position = slides.export.NotesPositions.BOTTOM_FULL # Display the notes below the slide. # Configure the TIFF options with Notes layouting. tiff_options = slides.export.TiffOptions() tiff_options.dpi_x = 300 tiff_options.dpi_y = 300 tiff_options.slides_layout_options = notes_options # Save the presentation to TIFF with the speaker notes. presentation.save("TIFF_with_notes.tiff", slides.export.SaveFormat.TIFF, tiff_options) ``` The result: ![The TIFF image with speaker notes](https://docs.aspose.com/slides/python-net/convert-powerpoint-to-tiff-with-notes/TIFF_with_notes.png) Check out Aspose [Free PowerPoint to Poster Converter](https://products.aspose.app/slides/conversion/convert-ppt-to-poster-online). ## **FAQ** ### Can I control the position of the notes area in the resulting TIFF? Yes. Use the [notes layout settings](https://reference.aspose.com/slides/python-net/aspose.slides.export/tiffoptions/slides_layout_options/) to choose among options like `NONE`, `BOTTOM_TRUNCATED`, or `BOTTOM_FULL`, which respectively hide notes, fit them into a single page, or allow them to flow onto additional pages. ### How can I reduce the size of a TIFF file with notes without visible loss of quality? Pick an [efficient compression](https://reference.aspose.com/slides/python-net/aspose.slides.export/tiffoptions/compression_type/) (e.g., `LZW` or `RLE`), set a reasonable DPI, and, if acceptable, use a lower [pixel format](https://reference.aspose.com/slides/python-net/aspose.slides.export/tiffoptions/pixel_format/) (such as 8 bpp or 1 bpp for monochrome). Slightly reducing the [image dimensions](https://reference.aspose.com/slides/python-net/aspose.slides.export/tiffoptions/image_size/) can also help without noticeably hurting readability. ### Does the font in the notes affect the result if the original fonts are missing from the system? Yes. Missing fonts trigger [substitution](https://docs.aspose.com/slides/python-net/font-selection-sequence/), which can change text metrics and appearance. To avoid this, [supply the required fonts](https://docs.aspose.com/slides/python-net/custom-font/) or set a default [fallback font](https://docs.aspose.com/slides/python-net/fallback-font/) so the intended typefaces are used. ## Related articles - [Convert Presentations to PDF with Notes in Python](https://docs.aspose.com/slides/python-net/convert-powerpoint-to-pdf-with-notes/) - [Convert PowerPoint Slides to Images in Python](https://docs.aspose.com/slides/python-net/convert-slide/) - [Convert PowerPoint Presentations to TIFF in Python](https://docs.aspose.com/slides/python-net/convert-powerpoint-to-tiff/) # Convert PowerPoint Presentations to TIFF in Python > Learn how to easily convert PowerPoint (PPT, PPTX) and OpenDocument (ODP) presentations to high-quality TIFF images using Aspose.Slides for Python via .NET. Step-by-step guide with code examples included. Source: https://docs.aspose.com/slides/python-net/convert-powerpoint-to-tiff/ Updated: 2026-08-21 ## **Introduction** TIFF (**Tagged Image File Format**) is a widely-used, lossless raster image format known for its exceptional quality and detailed preservation of graphics. Designers, photographers, and desktop publishers often choose TIFF to maintain layers, color accuracy, and original settings in their images. Using Aspose.Slides, you can effortlessly convert your PowerPoint slides (PPT, PPTX) and OpenDocument slides (ODP) directly into high-quality TIFF images, ensuring your presentations retain maximum visual fidelity. ## **Convert a Presentation to TIFF** Using the [save](https://reference.aspose.com/slides/python-net/aspose.slides/presentation/#methods) method provided by the [Presentation](https://reference.aspose.com/slides/python-net/aspose.slides/presentation/) class, you can quickly convert an entire PowerPoint presentation to TIFF. The resulting TIFF images correspond to the default slide size. This Python code demonstrates how to convert a PowerPoint presentation to TIFF: ```py import aspose.slides as slides # Instantiate the Presentation class that represents a presentation file (PPT, PPTX, ODP, etc.). with slides.Presentation("presentation.pptx") as presentation: # Save the presentation as TIFF. presentation.save("output.tiff", slides.export.SaveFormat.TIFF) ``` ## **Convert a Presentation to Black-and-White TIFF** The property [bw_conversion_mode](https://reference.aspose.com/slides/python-net/aspose.slides.export/tiffoptions/bw_conversion_mode/) in the [TiffOptions](https://reference.aspose.com/slides/python-net/aspose.slides.export/tiffoptions/) class allows you to specify the algorithm used when converting a colored slide or image to a black-and-white TIFF. Note that this setting applies only when the [compression_type](https://reference.aspose.com/slides/python-net/aspose.slides.export/tiffoptions/compression_type/) property is set to `CCITT4` or `CCITT3`. [TiffOptions.bw_conversion_mode](https://reference.aspose.com/slides/python-net/aspose.slides.export/tiffoptions/bw_conversion_mode/) is an export-level setting that selects a pixel-conversion algorithm for the complete TIFF image. To define how an individual shape should appear when black-and-white display mode is active, use [Shape.black_white_mode](https://reference.aspose.com/slides/python-net/aspose.slides/shape/black_white_mode/). See [Control Black-and-White Rendering for Shapes](https://docs.aspose.com/python-net/shape-formatting/#control-black-and-white-rendering-for-shapes) for examples. Let's say we have a "sample.pptx" file with the following slide: ![A presentation slide](https://docs.aspose.com/slides/python-net/convert-powerpoint-to-tiff/slide_black_and_white.png) This Python code demonstrates how to convert the colored slide to a black-and-white TIFF: ```py import aspose.slides as slides tiff_options = slides.export.TiffOptions() tiff_options.compression_type = slides.export.TiffCompressionTypes.CCITT4 tiff_options.bw_conversion_mode = slides.export.BlackWhiteConversionMode.DITHERING with slides.Presentation("sample.pptx") as presentation: presentation.save("output.tiff", slides.export.SaveFormat.TIFF, tiff_options) ``` The result: ![Black-and-White TIFF](https://docs.aspose.com/slides/python-net/convert-powerpoint-to-tiff/TIFF_black_and_white.png) ## **Convert a Presentation to TIFF with Custom Size** If you require a TIFF image with specific dimensions, you can set your desired values using properties available in [TiffOptions](https://reference.aspose.com/slides/python-net/aspose.slides.export/tiffoptions/). For instance, the [image_size](https://reference.aspose.com/slides/python-net/aspose.slides.export/tiffoptions/image_size/) property allows you to define the size of the resulting image. This Python code demonstrates how to convert a PowerPoint presentation to TIFF images with a custom size: ```py import aspose.slides as slides import aspose.pydrawing as drawing # Instantiate the Presentation class that represents a presentation file (PPT, PPTX, ODP, etc.). with slides.Presentation("sample.pptx") as presentation: tiff_options = slides.export.TiffOptions() # Set the compression type. tiff_options.compression_type = slides.export.TiffCompressionTypes.DEFAULT """ Compression types: Default - Specifies the default compression scheme (LZW). None - Specifies no compression. CCITT3 CCITT4 LZW RLE """ # Set the image DPI. tiff_options.dpi_x = 200 tiff_options.dpi_y = 200 # Set the image size. tiff_options.image_size = drawing.Size(1728, 1078) notes_options = slides.export.NotesCommentsLayoutingOptions() notes_options.notes_position = slides.export.NotesPositions.BOTTOM_FULL tiff_options.slides_layout_options = notes_options # Save the presentation as TIFF with the specified size. presentation.save("custom_size.tiff", slides.export.SaveFormat.TIFF, tiff_options) ``` ## **Convert a Presentation to TIFF with Custom Image Pixel Format** Using the [pixel_format](https://reference.aspose.com/slides/python-net/aspose.slides.export/tiffoptions/pixel_format/) property from the [TiffOptions](https://reference.aspose.com/slides/python-net/aspose.slides.export/tiffoptions/) class, you can specify your preferred pixel format for the resulting TIFF image. This Python code demonstrates how to convert a PowerPoint presentation to a TIFF image with a custom pixel format: ```py import aspose.slides as slides # Instantiate the Presentation class that represents a presentation file (PPT, PPTX, ODP, etc.). with slides.Presentation("Presentation.pptx") as presentation: tiff_options = slides.export.TiffOptions() tiff_options.pixel_format = slides.export.ImagePixelFormat.FORMAT_8BPP_INDEXED """ ImagePixelFormat contains the following values (as stated in the documentation): FORMAT_1BPP_INDEXED - 1 bit per pixel, indexed. FORMAT_4BPP_INDEXED - 4 bits per pixel, indexed. FORMAT_8BPP_INDEXED - 8 bits per pixel, indexed. FORMAT_24BPP_RGB - 24 bits per pixel, RGB. FORMAT_32BPP_ARGB - 32 bits per pixel, ARGB. """ # Save the presentation as TIFF with the specified pixel format. presentation.save("Custom_Image_Pixel_Format.tiff", slides.export.SaveFormat.TIFF, tiff_options) ``` Check out Aspose's [FREE PowerPoint to Poster converter](https://products.aspose.app/slides/conversion/convert-ppt-to-poster-online). ## **FAQ** **Can I convert an individual slide instead of entire PowerPoint presentation to TIFF?** Yes. Aspose.Slides allows you to convert individual slides from PowerPoint and OpenDocument presentations into TIFF images separately. **Is there any limit to the number of slides when converting a presentation to TIFF?** No, Aspose.Slides does not impose any restrictions on the number of slides. You can convert presentations of any size into TIFF format. **Are PowerPoint animations and transition effects preserved when converting slides to TIFF?** No, TIFF is a static image format. Therefore, animations and transition effects are not preserved; only static snapshots of slides are exported. ## Related articles - [Convert PowerPoint Slides to Images in Python](https://docs.aspose.com/slides/python-net/convert-slide/) - [Convert PowerPoint Presentations to TIFF with Notes in Python](https://docs.aspose.com/slides/python-net/convert-powerpoint-to-tiff-with-notes/) # Convert PowerPoint Presentations to Video in Python > Learn how to convert PowerPoint and OpenDocument presentations to video using Python. Discover sample code and automation techniques to streamline your workflow. Source: https://docs.aspose.com/slides/python-net/convert-powerpoint-to-video/ Updated: 2026-11-08 ## **Introduction** By converting your PowerPoint or OpenDocument presentation to video, you gain: **Increased accessibility:** All devices, regardless of platform, are equipped with video players by default, making it easier for users to open or play videos compared to traditional presentation applications. **Wider reach:** Videos enable you to reach a larger audience and present information in a more engaging format. Surveys and statistics indicate that people prefer to watch and consume video content over other forms, making your message more impactful. Check out our [**PowerPoint to Video Online Converter**](https://products.aspose.app/slides/video) because it offers a live and effective implementation of the process described here. In [Aspose.Slides for Python 24.4](https://releases.aspose.com/slides/python-net/release-notes/2024/aspose-slides-for-python-net-24-4-release-notes/), we implemented support for converting presentations to video. * Use Aspose.Slides for Python to generate frames from the presentation slides at a specified frame rate (FPS). * Then, use a third-party utility like ffmpeg to compile these frames into a video. ## **Convert a PowerPoint Presentation to Video** 1. Use the pip install command to add Aspose.Slides for Python to your project: `pip install aspose-slides==24.4.0` 2. Download ffmpeg from [here](https://ffmpeg.org/download.html) or install it via the package manager. 3. Make sure that ffmpeg is in the `PATH`. Otherwise, launch ffmpeg using the full path to the binary (e.g., `C:\ffmpeg\ffmpeg.exe` on Windows or `/opt/ffmpeg/ffmpeg` on Linux). 4. Run the PowerPoint-to-video conversion code. This Python code demonstrates how to convert a presentation (containing a shape and two animation effects) into a video: ```python import aspose.slides as slides import subprocess with slides.Presentation() as presentation: slide = presentation.slides[0] smile_shape = slide.shapes.add_auto_shape(slides.ShapeType.SMILEY_FACE, 110, 20, 500, 500) effect_in = slide.timeline.main_sequence.add_effect( smile_shape, slides.animation.EffectType.FLY, slides.animation.EffectSubtype.TOP_LEFT, slides.animation.EffectTriggerType.AFTER_PREVIOUS) effect_out = slide.timeline.main_sequence.add_effect( smile_shape, slides.animation.EffectType.FLY, slides.animation.EffectSubtype.BOTTOM_RIGHT, slides.animation.EffectTriggerType.AFTER_PREVIOUS) effect_in.timing.duration = 2 effect_out.preset_class_type = slides.animation.EffectPresetClassType.EXIT fps = 33 with slides.export.PresentationEnumerableFramesGenerator(presentation, fps) as frames_stream: for frame_args in frames_stream.enumerate_frames(presentation.slides): frame = "frame_{:04d}.png".format(frame_args.frames_generator.frame_index) frame_args.get_frame().save(frame) cmd_line = ["ffmpeg", "-r", str(fps), "-i", "frame_%04d.png", "-y", "-s", "720x540", "-pix_fmt", "yuv420p", "smile.webm"] subprocess.call(cmd_line) ``` [![Presentation animation data is rendered to numbered PNGs, then a separate encoder writes the selected video format with coordinated frame rates.](https://docs.aspose.com/slides/python-net/convert-powerpoint-to-video/visual-convert-powerpoint-to-video-f34cee01f867.svg)](https://docs.aspose.com/slides/python-net/convert-powerpoint-to-video/visual-convert-powerpoint-to-video-f34cee01f867.svg) *The animation workflow produces frames; a separate encoder writes the video file. Coordinate its image-sequence input and output rates with rendering to preserve intended pacing. Frame APIs and output formats vary by platform.* ## **Video Effects** When converting a PowerPoint presentation to video using Aspose.Slides for Python, you can apply various video effects to enhance the visual quality of the output. These effects allow you to control the appearance of slides in the final video by adding smooth transitions, animations, and other visual elements. This section explains the available video effect options and shows how to apply them. See [PowerPoint Animation](https://docs.aspose.com/slides/python-net/powerpoint-animation/), [Shape Animation](https://docs.aspose.com/slides/python-net/shape-animation/), and [Shape Effect](https://docs.aspose.com/slides/python-net/shape-effect/). Animations and transitions make slideshows more engaging and interesting — and they do the same for videos. Let's add another slide and transition to the code for the previous presentation: ```python import aspose.pydrawing as drawing import aspose.slides as slides with slides.Presentation() as presentation: # Add a smile shape and animate it. # ... # Add a new slide and an animated transition. new_slide = presentation.slides.add_empty_slide(presentation.slides[0].layout_slide) new_slide.background.type = slides.BackgroundType.OWN_BACKGROUND new_slide.background.fill_format.fill_type = slides.FillType.SOLID new_slide.background.fill_format.solid_fill_color.color = drawing.Color.indigo new_slide.slide_show_transition.type = slides.slideshow.TransitionType.PUSH ``` Aspose.Slides for Python also supports text animations. In this example, we animate paragraphs on objects so that they appear one after the other, with a one-second delay between them: ```python import aspose.slides as slides import subprocess with slides.Presentation() as presentation: slide = presentation.slides[0] # Add text and animations. auto_shape = slide.shapes.add_auto_shape(slides.ShapeType.RECTANGLE, 210, 120, 300, 300) para1 = slides.Paragraph() para1.portions.add(slides.Portion("Aspose.Slides for Python")) para2 = slides.Paragraph() para2.portions.add(slides.Portion("Convert a PowerPoint presentation with text to video")) para3 = slides.Paragraph() para3.portions.add(slides.Portion("paragraph by paragraph")) auto_shape.text_frame.paragraphs.add(para1) auto_shape.text_frame.paragraphs.add(para2) auto_shape.text_frame.paragraphs.add(para3) auto_shape.text_frame.paragraphs.add(slides.Paragraph()) effect = slide.timeline.main_sequence.add_effect( para1, slides.animation.EffectType.APPEAR, slides.animation.EffectSubtype.NONE, slides.animation.EffectTriggerType.AFTER_PREVIOUS) effect2 = slide.timeline.main_sequence.add_effect( para2, slides.animation.EffectType.APPEAR, slides.animation.EffectSubtype.NONE, slides.animation.EffectTriggerType.AFTER_PREVIOUS) effect3 = slide.timeline.main_sequence.add_effect( para3, slides.animation.EffectType.APPEAR, slides.animation.EffectSubtype.NONE, slides.animation.EffectTriggerType.AFTER_PREVIOUS) effect4 = slide.timeline.main_sequence.add_effect( para3, slides.animation.EffectType.APPEAR, slides.animation.EffectSubtype.NONE, slides.animation.EffectTriggerType.AFTER_PREVIOUS) effect.timing.trigger_delay_time = 1 effect2.timing.trigger_delay_time = 1 effect3.timing.trigger_delay_time = 1 effect4.timing.trigger_delay_time = 1 # Convert frames to video. fps = 33 with slides.export.PresentationEnumerableFramesGenerator(presentation, fps) as frames_stream: for frame_args in frames_stream.enumerate_frames(presentation.slides): frame = "frame_{:04d}.png".format(frame_args.frames_generator.frame_index) frame_args.get_frame().save(frame) cmd_line = ["ffmpeg", "-r", str(fps), "-i", "frame_%04d.png", "-y", "-s", "720x540", "-pix_fmt", "yuv420p", "text_animation.webm"] subprocess.call(cmd_line) ``` ## **Video Conversion Classes** To enable PowerPoint to video conversion tasks, Aspose.Slides for Python provides the [PresentationEnumerableFramesGenerator](https://reference.aspose.com/slides/python-net/aspose.slides.export/presentationenumerableframesgenerator/). `PresentationEnumerableFramesGenerator` allows you to set the frame size for the video (which will be created later) and the FPS (frames per second) value through its constructor. If you pass an instance of a presentation, its `Presentation.SlideSize` will be used. To make all animations in a presentation play at once, use the `PresentationEnumerableFramesGenerator.enumerate_frames` method. This method takes a collection of slides and sequentially returns [EnumerableFrameArgs](https://reference.aspose.com/slides/python-net/aspose.slides.export/enumerableframeargs/). Then, use `EnumerableFrameArgs.get_frame()` to obtain each video frame. ```python import aspose.slides as slides with slides.Presentation("animated.pptx") as presentation: fps = 33 with slides.export.PresentationEnumerableFramesGenerator(presentation, fps) as frames_stream: for frame_args in frames_stream.enumerate_frames(presentation.slides): frame_args.get_frame().save(f"frame_{frame_args.frames_generator.frame_index:04d}.png") ``` Then the generated frames can be compiled into a video. For more details, see the [Convert PowerPoint to Video](https://docs.aspose.com/slides/python-net/convert-powerpoint-to-video/#convert-powerpoint-to-video) section. ## **Supported Animations and Effects** When converting a PowerPoint presentation to video using Aspose.Slides for Python, it's important to understand which animations and effects are supported in the output. Aspose.Slides supports a wide range of common entrance, exit, and emphasis effects such as fade, fly in, zoom, and spin. However, some advanced or custom animations may not be fully preserved or may appear differently in the final video. This section outlines the supported animations and effects. **Entrance**: | Animation Type | Aspose.Slides | PowerPoint | |---|---|---| | **Appear** | ![not supported](https://docs.aspose.com/slides/python-net/convert-powerpoint-to-video/x.png) | ![supported](https://docs.aspose.com/slides/python-net/convert-powerpoint-to-video/v.png) | | **Fade** | ![supported](https://docs.aspose.com/slides/python-net/convert-powerpoint-to-video/v.png) | ![supported](https://docs.aspose.com/slides/python-net/convert-powerpoint-to-video/v.png) | | **Fly In** | ![supported](https://docs.aspose.com/slides/python-net/convert-powerpoint-to-video/v.png) | ![supported](https://docs.aspose.com/slides/python-net/convert-powerpoint-to-video/v.png) | | **Float In** | ![supported](https://docs.aspose.com/slides/python-net/convert-powerpoint-to-video/v.png) | ![supported](https://docs.aspose.com/slides/python-net/convert-powerpoint-to-video/v.png) | | **Split** | ![supported](https://docs.aspose.com/slides/python-net/convert-powerpoint-to-video/v.png) | ![supported](https://docs.aspose.com/slides/python-net/convert-powerpoint-to-video/v.png) | | **Wipe** | ![supported](https://docs.aspose.com/slides/python-net/convert-powerpoint-to-video/v.png) | ![supported](https://docs.aspose.com/slides/python-net/convert-powerpoint-to-video/v.png) | | **Shape** | ![supported](https://docs.aspose.com/slides/python-net/convert-powerpoint-to-video/v.png) | ![supported](https://docs.aspose.com/slides/python-net/convert-powerpoint-to-video/v.png) | | **Wheel** | ![supported](https://docs.aspose.com/slides/python-net/convert-powerpoint-to-video/v.png) | ![supported](https://docs.aspose.com/slides/python-net/convert-powerpoint-to-video/v.png) | | **Random Bars** | ![supported](https://docs.aspose.com/slides/python-net/convert-powerpoint-to-video/v.png) | ![supported](https://docs.aspose.com/slides/python-net/convert-powerpoint-to-video/v.png) | | **Grow & Turn** | ![not supported](https://docs.aspose.com/slides/python-net/convert-powerpoint-to-video/x.png) | ![supported](https://docs.aspose.com/slides/python-net/convert-powerpoint-to-video/v.png) | | **Zoom** | ![supported](https://docs.aspose.com/slides/python-net/convert-powerpoint-to-video/v.png) | ![supported](https://docs.aspose.com/slides/python-net/convert-powerpoint-to-video/v.png) | | **Swivel** | ![supported](https://docs.aspose.com/slides/python-net/convert-powerpoint-to-video/v.png) | ![supported](https://docs.aspose.com/slides/python-net/convert-powerpoint-to-video/v.png) | | **Bounce** | ![supported](https://docs.aspose.com/slides/python-net/convert-powerpoint-to-video/v.png) | ![supported](https://docs.aspose.com/slides/python-net/convert-powerpoint-to-video/v.png) | **Emphasis**: | Animation Type | Aspose.Slides | PowerPoint | |---|---|---| | **Pulse** | ![not supported](https://docs.aspose.com/slides/python-net/convert-powerpoint-to-video/x.png) | ![supported](https://docs.aspose.com/slides/python-net/convert-powerpoint-to-video/v.png) | | **Color Pulse** | ![not supported](https://docs.aspose.com/slides/python-net/convert-powerpoint-to-video/x.png) | ![supported](https://docs.aspose.com/slides/python-net/convert-powerpoint-to-video/v.png) | | **Teeter** | ![supported](https://docs.aspose.com/slides/python-net/convert-powerpoint-to-video/v.png) | ![supported](https://docs.aspose.com/slides/python-net/convert-powerpoint-to-video/v.png) | | **Spin** | ![supported](https://docs.aspose.com/slides/python-net/convert-powerpoint-to-video/v.png) | ![supported](https://docs.aspose.com/slides/python-net/convert-powerpoint-to-video/v.png) | | **Grow/Shrink** | ![not supported](https://docs.aspose.com/slides/python-net/convert-powerpoint-to-video/x.png) | ![supported](https://docs.aspose.com/slides/python-net/convert-powerpoint-to-video/v.png) | | **Desaturate** | ![not supported](https://docs.aspose.com/slides/python-net/convert-powerpoint-to-video/x.png) | ![supported](https://docs.aspose.com/slides/python-net/convert-powerpoint-to-video/v.png) | | **Darken** | ![not supported](https://docs.aspose.com/slides/python-net/convert-powerpoint-to-video/x.png) | ![supported](https://docs.aspose.com/slides/python-net/convert-powerpoint-to-video/v.png) | | **Lighten** | ![not supported](https://docs.aspose.com/slides/python-net/convert-powerpoint-to-video/x.png) | ![supported](https://docs.aspose.com/slides/python-net/convert-powerpoint-to-video/v.png) | | **Transparency** | ![not supported](https://docs.aspose.com/slides/python-net/convert-powerpoint-to-video/x.png) | ![supported](https://docs.aspose.com/slides/python-net/convert-powerpoint-to-video/v.png) | | **Object Color** | ![not supported](https://docs.aspose.com/slides/python-net/convert-powerpoint-to-video/x.png) | ![supported](https://docs.aspose.com/slides/python-net/convert-powerpoint-to-video/v.png) | | **Complementary Color** | ![not supported](https://docs.aspose.com/slides/python-net/convert-powerpoint-to-video/x.png) | ![supported](https://docs.aspose.com/slides/python-net/convert-powerpoint-to-video/v.png) | | **Line Color** | ![not supported](https://docs.aspose.com/slides/python-net/convert-powerpoint-to-video/x.png) | ![supported](https://docs.aspose.com/slides/python-net/convert-powerpoint-to-video/v.png) | | **Fill Color** | ![not supported](https://docs.aspose.com/slides/python-net/convert-powerpoint-to-video/x.png) | ![supported](https://docs.aspose.com/slides/python-net/convert-powerpoint-to-video/v.png) | **Exit**: | Animation Type | Aspose.Slides | PowerPoint | |---|---|---| | **Disappear** | ![not supported](https://docs.aspose.com/slides/python-net/convert-powerpoint-to-video/x.png) | ![supported](https://docs.aspose.com/slides/python-net/convert-powerpoint-to-video/v.png) | | **Fade** | ![supported](https://docs.aspose.com/slides/python-net/convert-powerpoint-to-video/v.png) | ![supported](https://docs.aspose.com/slides/python-net/convert-powerpoint-to-video/v.png) | | **Fly Out** | ![supported](https://docs.aspose.com/slides/python-net/convert-powerpoint-to-video/v.png) | ![supported](https://docs.aspose.com/slides/python-net/convert-powerpoint-to-video/v.png) | | **Float Out** | ![supported](https://docs.aspose.com/slides/python-net/convert-powerpoint-to-video/v.png) | ![supported](https://docs.aspose.com/slides/python-net/convert-powerpoint-to-video/v.png) | | **Split** | ![supported](https://docs.aspose.com/slides/python-net/convert-powerpoint-to-video/v.png) | ![supported](https://docs.aspose.com/slides/python-net/convert-powerpoint-to-video/v.png) | | **Wipe** | ![supported](https://docs.aspose.com/slides/python-net/convert-powerpoint-to-video/v.png) | ![supported](https://docs.aspose.com/slides/python-net/convert-powerpoint-to-video/v.png) | | **Shape** | ![supported](https://docs.aspose.com/slides/python-net/convert-powerpoint-to-video/v.png) | ![supported](https://docs.aspose.com/slides/python-net/convert-powerpoint-to-video/v.png) | | **Random Bars** | ![supported](https://docs.aspose.com/slides/python-net/convert-powerpoint-to-video/v.png) | ![supported](https://docs.aspose.com/slides/python-net/convert-powerpoint-to-video/v.png) | | **Shrink & Turn** | ![not supported](https://docs.aspose.com/slides/python-net/convert-powerpoint-to-video/x.png) | ![supported](https://docs.aspose.com/slides/python-net/convert-powerpoint-to-video/v.png) | | **Zoom** | ![supported](https://docs.aspose.com/slides/python-net/convert-powerpoint-to-video/v.png) | ![supported](https://docs.aspose.com/slides/python-net/convert-powerpoint-to-video/v.png) | | **Swivel** | ![supported](https://docs.aspose.com/slides/python-net/convert-powerpoint-to-video/v.png) | ![supported](https://docs.aspose.com/slides/python-net/convert-powerpoint-to-video/v.png) | | **Bounce** | ![supported](https://docs.aspose.com/slides/python-net/convert-powerpoint-to-video/v.png) | ![supported](https://docs.aspose.com/slides/python-net/convert-powerpoint-to-video/v.png) | **Motion Paths:** | Animation Type | Aspose.Slides | PowerPoint | |---|---|---| | **Lines** | ![supported](https://docs.aspose.com/slides/python-net/convert-powerpoint-to-video/v.png) | ![supported](https://docs.aspose.com/slides/python-net/convert-powerpoint-to-video/v.png) | | **Arcs** | ![supported](https://docs.aspose.com/slides/python-net/convert-powerpoint-to-video/v.png) | ![supported](https://docs.aspose.com/slides/python-net/convert-powerpoint-to-video/v.png) | | **Turns** | ![supported](https://docs.aspose.com/slides/python-net/convert-powerpoint-to-video/v.png) | ![supported](https://docs.aspose.com/slides/python-net/convert-powerpoint-to-video/v.png) | | **Shapes** | ![supported](https://docs.aspose.com/slides/python-net/convert-powerpoint-to-video/v.png) | ![supported](https://docs.aspose.com/slides/python-net/convert-powerpoint-to-video/v.png) | | **Loops** | ![supported](https://docs.aspose.com/slides/python-net/convert-powerpoint-to-video/v.png) | ![supported](https://docs.aspose.com/slides/python-net/convert-powerpoint-to-video/v.png) | | **Custom Path** | ![supported](https://docs.aspose.com/slides/python-net/convert-powerpoint-to-video/v.png) | ![supported](https://docs.aspose.com/slides/python-net/convert-powerpoint-to-video/v.png) | ## **Supported Slide Transition Effects** Slide transition effects play an important role in creating smooth and visually appealing changes between slides in a video. Aspose.Slides for Python supports a variety of commonly used transition effects to help preserve the flow and style of your original presentation. This section highlights which transition effects are supported during the conversion process. **Subtle**: | Animation Type | Aspose.Slides | PowerPoint | |---|---|---| | **Morph** | ![not supported](https://docs.aspose.com/slides/python-net/convert-powerpoint-to-video/x.png) | ![supported](https://docs.aspose.com/slides/python-net/convert-powerpoint-to-video/v.png) | | **Fade** | ![supported](https://docs.aspose.com/slides/python-net/convert-powerpoint-to-video/v.png) | ![supported](https://docs.aspose.com/slides/python-net/convert-powerpoint-to-video/v.png) | | **Push** | ![supported](https://docs.aspose.com/slides/python-net/convert-powerpoint-to-video/v.png) | ![supported](https://docs.aspose.com/slides/python-net/convert-powerpoint-to-video/v.png) | | **Pull** | ![supported](https://docs.aspose.com/slides/python-net/convert-powerpoint-to-video/v.png) | ![supported](https://docs.aspose.com/slides/python-net/convert-powerpoint-to-video/v.png) | | **Wipe** | ![supported](https://docs.aspose.com/slides/python-net/convert-powerpoint-to-video/v.png) | ![supported](https://docs.aspose.com/slides/python-net/convert-powerpoint-to-video/v.png) | | **Split** | ![supported](https://docs.aspose.com/slides/python-net/convert-powerpoint-to-video/v.png) | ![supported](https://docs.aspose.com/slides/python-net/convert-powerpoint-to-video/v.png) | | **Reveal** | ![not supported](https://docs.aspose.com/slides/python-net/convert-powerpoint-to-video/x.png) | ![supported](https://docs.aspose.com/slides/python-net/convert-powerpoint-to-video/v.png) | | **Random Bars** | ![supported](https://docs.aspose.com/slides/python-net/convert-powerpoint-to-video/v.png) | ![supported](https://docs.aspose.com/slides/python-net/convert-powerpoint-to-video/v.png) | | **Shape** | ![not supported](https://docs.aspose.com/slides/python-net/convert-powerpoint-to-video/x.png) | ![supported](https://docs.aspose.com/slides/python-net/convert-powerpoint-to-video/v.png) | | **Uncover** | ![not supported](https://docs.aspose.com/slides/python-net/convert-powerpoint-to-video/x.png) | ![supported](https://docs.aspose.com/slides/python-net/convert-powerpoint-to-video/v.png) | | **Cover** | ![supported](https://docs.aspose.com/slides/python-net/convert-powerpoint-to-video/v.png) | ![supported](https://docs.aspose.com/slides/python-net/convert-powerpoint-to-video/v.png) | | **Flash** | ![supported](https://docs.aspose.com/slides/python-net/convert-powerpoint-to-video/v.png) | ![supported](https://docs.aspose.com/slides/python-net/convert-powerpoint-to-video/v.png) | | **Strips** | ![supported](https://docs.aspose.com/slides/python-net/convert-powerpoint-to-video/v.png) | ![supported](https://docs.aspose.com/slides/python-net/convert-powerpoint-to-video/v.png) | **Exciting**: | Animation Type | Aspose.Slides | PowerPoint | |---|---|---| | **Fall Over** | ![not supported](https://docs.aspose.com/slides/python-net/convert-powerpoint-to-video/x.png) | ![supported](https://docs.aspose.com/slides/python-net/convert-powerpoint-to-video/v.png) | | **Drape** | ![not supported](https://docs.aspose.com/slides/python-net/convert-powerpoint-to-video/x.png) | ![supported](https://docs.aspose.com/slides/python-net/convert-powerpoint-to-video/v.png) | | **Curtains** | ![not supported](https://docs.aspose.com/slides/python-net/convert-powerpoint-to-video/x.png) | ![supported](https://docs.aspose.com/slides/python-net/convert-powerpoint-to-video/v.png) | | **Wind** | ![not supported](https://docs.aspose.com/slides/python-net/convert-powerpoint-to-video/x.png) | ![supported](https://docs.aspose.com/slides/python-net/convert-powerpoint-to-video/v.png) | | **Prestige** | ![not supported](https://docs.aspose.com/slides/python-net/convert-powerpoint-to-video/x.png) | ![supported](https://docs.aspose.com/slides/python-net/convert-powerpoint-to-video/v.png) | | **Fracture** | ![not supported](https://docs.aspose.com/slides/python-net/convert-powerpoint-to-video/x.png) | ![supported](https://docs.aspose.com/slides/python-net/convert-powerpoint-to-video/v.png) | | **Crush** | ![not supported](https://docs.aspose.com/slides/python-net/convert-powerpoint-to-video/x.png) | ![supported](https://docs.aspose.com/slides/python-net/convert-powerpoint-to-video/v.png) | | **Peel Off** | ![not supported](https://docs.aspose.com/slides/python-net/convert-powerpoint-to-video/x.png) | ![supported](https://docs.aspose.com/slides/python-net/convert-powerpoint-to-video/v.png) | | **Page Curl** | ![not supported](https://docs.aspose.com/slides/python-net/convert-powerpoint-to-video/x.png) | ![supported](https://docs.aspose.com/slides/python-net/convert-powerpoint-to-video/v.png) | | **Airplane** | ![not supported](https://docs.aspose.com/slides/python-net/convert-powerpoint-to-video/x.png) | ![supported](https://docs.aspose.com/slides/python-net/convert-powerpoint-to-video/v.png) | | **Origami** | ![not supported](https://docs.aspose.com/slides/python-net/convert-powerpoint-to-video/x.png) | ![supported](https://docs.aspose.com/slides/python-net/convert-powerpoint-to-video/v.png) | | **Dissolve** | ![supported](https://docs.aspose.com/slides/python-net/convert-powerpoint-to-video/v.png) | ![supported](https://docs.aspose.com/slides/python-net/convert-powerpoint-to-video/v.png) | | **Checkerboard** | ![not supported](https://docs.aspose.com/slides/python-net/convert-powerpoint-to-video/x.png) | ![supported](https://docs.aspose.com/slides/python-net/convert-powerpoint-to-video/v.png) | | **Blinds** | ![not supported](https://docs.aspose.com/slides/python-net/convert-powerpoint-to-video/x.png) | ![supported](https://docs.aspose.com/slides/python-net/convert-powerpoint-to-video/v.png) | | **Clock** | ![supported](https://docs.aspose.com/slides/python-net/convert-powerpoint-to-video/v.png) | ![supported](https://docs.aspose.com/slides/python-net/convert-powerpoint-to-video/v.png) | | **Ripple** | ![not supported](https://docs.aspose.com/slides/python-net/convert-powerpoint-to-video/x.png) | ![supported](https://docs.aspose.com/slides/python-net/convert-powerpoint-to-video/v.png) | | **Honeycomb** | ![not supported](https://docs.aspose.com/slides/python-net/convert-powerpoint-to-video/x.png) | ![supported](https://docs.aspose.com/slides/python-net/convert-powerpoint-to-video/v.png) | | **Glitter** | ![not supported](https://docs.aspose.com/slides/python-net/convert-powerpoint-to-video/x.png) | ![supported](https://docs.aspose.com/slides/python-net/convert-powerpoint-to-video/v.png) | | **Vortex** | ![not supported](https://docs.aspose.com/slides/python-net/convert-powerpoint-to-video/x.png) | ![supported](https://docs.aspose.com/slides/python-net/convert-powerpoint-to-video/v.png) | | **Shred** | ![not supported](https://docs.aspose.com/slides/python-net/convert-powerpoint-to-video/x.png) | ![supported](https://docs.aspose.com/slides/python-net/convert-powerpoint-to-video/v.png) | | **Switch** | ![not supported](https://docs.aspose.com/slides/python-net/convert-powerpoint-to-video/x.png) | ![supported](https://docs.aspose.com/slides/python-net/convert-powerpoint-to-video/v.png) | | **Flip** | ![not supported](https://docs.aspose.com/slides/python-net/convert-powerpoint-to-video/x.png) | ![supported](https://docs.aspose.com/slides/python-net/convert-powerpoint-to-video/v.png) | | **Gallery** | ![not supported](https://docs.aspose.com/slides/python-net/convert-powerpoint-to-video/x.png) | ![supported](https://docs.aspose.com/slides/python-net/convert-powerpoint-to-video/v.png) | | **Cube** | ![not supported](https://docs.aspose.com/slides/python-net/convert-powerpoint-to-video/x.png) | ![supported](https://docs.aspose.com/slides/python-net/convert-powerpoint-to-video/v.png) | | **Doors** | ![not supported](https://docs.aspose.com/slides/python-net/convert-powerpoint-to-video/x.png) | ![supported](https://docs.aspose.com/slides/python-net/convert-powerpoint-to-video/v.png) | | **Box** | ![not supported](https://docs.aspose.com/slides/python-net/convert-powerpoint-to-video/x.png) | ![supported](https://docs.aspose.com/slides/python-net/convert-powerpoint-to-video/v.png) | | **Comb** | ![not supported](https://docs.aspose.com/slides/python-net/convert-powerpoint-to-video/x.png) | ![supported](https://docs.aspose.com/slides/python-net/convert-powerpoint-to-video/v.png) | | **Zoom** | ![supported](https://docs.aspose.com/slides/python-net/convert-powerpoint-to-video/v.png) | ![supported](https://docs.aspose.com/slides/python-net/convert-powerpoint-to-video/v.png) | | **Random** | ![not supported](https://docs.aspose.com/slides/python-net/convert-powerpoint-to-video/x.png) | ![supported](https://docs.aspose.com/slides/python-net/convert-powerpoint-to-video/v.png) | **Dynamic Content**: | Animation Type | Aspose.Slides | PowerPoint | |---|---|---| | **Pan** | ![not supported](https://docs.aspose.com/slides/python-net/convert-powerpoint-to-video/x.png) | ![supported](https://docs.aspose.com/slides/python-net/convert-powerpoint-to-video/v.png) | | **Ferris Wheel** | ![supported](https://docs.aspose.com/slides/python-net/convert-powerpoint-to-video/v.png) | ![supported](https://docs.aspose.com/slides/python-net/convert-powerpoint-to-video/v.png) | | **Conveyor** | ![not supported](https://docs.aspose.com/slides/python-net/convert-powerpoint-to-video/x.png) | ![supported](https://docs.aspose.com/slides/python-net/convert-powerpoint-to-video/v.png) | | **Rotate** | ![not supported](https://docs.aspose.com/slides/python-net/convert-powerpoint-to-video/x.png) | ![supported](https://docs.aspose.com/slides/python-net/convert-powerpoint-to-video/v.png) | | **Orbit** | ![not supported](https://docs.aspose.com/slides/python-net/convert-powerpoint-to-video/x.png) | ![supported](https://docs.aspose.com/slides/python-net/convert-powerpoint-to-video/v.png) | | **Fly Through** | ![supported](https://docs.aspose.com/slides/python-net/convert-powerpoint-to-video/v.png) | ![supported](https://docs.aspose.com/slides/python-net/convert-powerpoint-to-video/v.png) | ## **FAQ** ### Is it possible to convert presentations that are password protected? Yes, Aspose.Slides for Python allows working with password-protected presentations. When processing such files, you need to provide the correct password so that the library can access the content of the presentation. ### Does Aspose.Slides for Python support usage in cloud solutions? Yes, Aspose.Slides for Python can be integrated into cloud applications and services. The library is designed to work in server environments, ensuring high performance and scalability for batch processing of files. ### Are there any size limitations for presentations during conversion? Aspose.Slides for Python is capable of handling presentations of virtually any size. However, when working with very large files, additional system resources may be required, and it is sometimes recommended to optimize the presentation to improve performance. # Convert PowerPoint Presentations to Word Documents in Python > Learn how to effortlessly convert PowerPoint and OpenDocument presentations to Word documents using Aspose.Slides for Python via .NET. Our step-by-step guide with sample Python code provides the solution for developers looking to streamline their document workflows. Source: https://docs.aspose.com/slides/python-net/convert-powerpoint-to-word/ Updated: 2026-08-13 ## **Overview** This article provides a solution for developers on converting PowerPoint and OpenDocument presentations to Word documents using Aspose.Slides for Python via .NET and Aspose.Words for Python via .NET. The step-by-step guide walks you through every stage of the conversion process. ## **Convert a Presentation to a Word Document** Follow the instructions below to convert a PowerPoint or OpenDocument presentation to a Word document: 1. Instantiate the [Presentation](https://reference.aspose.com/slides/python-net/aspose.slides/presentation/) class and load a presentation file. 2. Instantiate the [Document](https://reference.aspose.com/words/python-net/aspose.words/document/) and [DocumentBuilder](https://reference.aspose.com/words/python-net/aspose.words/documentbuilder/) classes to generate a Word document. 3. Set the page size for the Word document to match that of the presentation using the [DocumentBuilder.page_setup](https://reference.aspose.com/words/python-net/aspose.words/documentbuilder/page_setup/) property. 4. Set margins in the Word document using the [DocumentBuilder.page_setup](https://reference.aspose.com/words/python-net/aspose.words/documentbuilder/page_setup/) property. 5. Go through all the presentation slides using the [Presentation.slides](https://reference.aspose.com/slides/python-net/aspose.slides/presentation/slides/) property. - Generate a slide image using the `get_image` method from the [Slide](https://reference.aspose.com/slides/python-net/aspose.slides/slide/) class and save it to a memory stream. - Add the slide image to the Word document using the `insert_image` method from the [DocumentBuilder](https://reference.aspose.com/words/python-net/aspose.words/documentbuilder/) class. 6. Save the Word document to a file. Let's say we have a presentation "sample.pptx" that looks like this: ![PowerPoint presentation](https://docs.aspose.com/slides/python-net/convert-powerpoint-to-word/PowerPoint.png) The following Python code example demonstrates how to convert the PowerPoint presentation to a Word document: ```py import aspose.slides as slides import aspose.words as words from io import BytesIO # Load a presentation file. with slides.Presentation("sample.pptx") as presentation: # Create Document and DocumentBuilder objects. document = words.Document() builder = words.DocumentBuilder(document) # Set the page size in the Word document. slide_size = presentation.slide_size.size builder.page_setup.page_width = slide_size.width builder.page_setup.page_height = slide_size.height # Set margins in the Word document. builder.page_setup.left_margin = 0 builder.page_setup.right_margin = 0 builder.page_setup.top_margin = 0 builder.page_setup.bottom_margin = 0 scale_x = 2 scale_y = 2 # Go through all the presentation slides. for index, slide in enumerate(presentation.slides): # Start every slide except the first one on a new page. if index > 0: builder.insert_break(words.BreakType.PAGE_BREAK) # Generate a slide image and save it to a memory stream. with slide.get_image(scale_x, scale_y) as image: image_stream = BytesIO() image.save(image_stream, slides.ImageFormat.PNG) # Add the slide image to the Word document. image_stream.seek(0) image_width = builder.page_setup.page_width image_height = builder.page_setup.page_height builder.insert_image(image_stream.read(), image_width, image_height) # Save the Word document to a file. document.save("output.docx") ``` The result: ![Word document](https://docs.aspose.com/slides/python-net/convert-powerpoint-to-word/Word.png) Try our [**Online PPT to Word Converter**](https://products.aspose.app/slides/conversion/ppt-to-word) to see what you could gain from converting PowerPoint and OpenDocument presentations to Word documents. ## **FAQ** ### What components need to be installed to convert PowerPoint and OpenDocument presentations to Word documents? You only need to add the respective packages for [Aspose.Slides for Python via .NET](https://pypi.org/project/Aspose.Slides/) and [Aspose.Words for Python .NET](https://pypi.org/project/aspose-words/) to your Python project. Both packages operate as standalone APIs, and there is no requirement for Microsoft Office to be installed. ### Are all PowerPoint and OpenDocument presentation formats supported? Aspose.Slides for Python .NET [supports all presentation formats](https://docs.aspose.com/slides/python-net/supported-file-formats/), including PPT, PPTX, ODP, and other common file types. This ensures that you can work with presentations created in various versions of Microsoft PowerPoint. # Convert PowerPoint Presentations to XML in Python > Convert PowerPoint and OpenDocument presentations to PowerPoint XML files or streams in Python with Aspose.Slides. Source: https://docs.aspose.com/slides/python-net/convert-powerpoint-to-xml/ Updated: 2026-09-01 ## **Overview** Aspose.Slides for Python via .NET can convert PowerPoint presentations to the PowerPoint XML Presentation format. XML output is useful when you need a text-based representation for inspecting presentation structure, troubleshooting generated documents, comparing output in automated tests, or integrating with a workflow that consumes XML instead of a presentation package. Use the [Presentation.save](https://reference.aspose.com/slides/python-net/aspose.slides/presentation/save/) method with the `XML` value from the [SaveFormat](https://reference.aspose.com/slides/python-net/aspose.slides.export/saveformat/) enumeration. You can write the result directly to a file or to a stream. `SaveFormat.XML` creates a PowerPoint XML Presentation. It does not extract the individual Office Open XML parts stored inside a PPTX package. If you need the exact PPTX package parts, such as `ppt/presentation.xml` or individual slide XML files, inspect the PPTX package itself. ## **Convert a Presentation to an XML File** Load a source presentation with the [Presentation](https://reference.aspose.com/slides/python-net/aspose.slides/presentation/) class, and then pass the output path and `SaveFormat.XML` to [Presentation.save](https://reference.aspose.com/slides/python-net/aspose.slides/presentation/save/). The source can be any presentation format supported for loading, such as PPT, PPTX, or ODP. The following example converts a PPTX presentation to an XML file: ```py import aspose.slides as slides with slides.Presentation("presentation.pptx") as presentation: presentation.save("presentation.xml", slides.export.SaveFormat.XML) ``` ## **Write the XML Output to a Stream** Use the stream overload of [Presentation.save](https://reference.aspose.com/slides/python-net/aspose.slides/presentation/save/) when the XML must remain in memory or be passed to another component, such as a web service, storage provider, or XML processing pipeline. The following example writes the result to a [BytesIO](https://docs.python.org/3/library/io.html#io.BytesIO) stream and rewinds it for subsequent reading: ```py from io import BytesIO import aspose.slides as slides with slides.Presentation("presentation.pptx") as presentation: xml_stream = BytesIO() presentation.save(xml_stream, slides.export.SaveFormat.XML) xml_stream.seek(0) # Pass xml_stream to the next component in the workflow. ``` ## **Compare XML with Presentation and Export Formats** Choose the output format according to how the result will be used: | Format | Output | Typical use | | --- | --- | --- | | PowerPoint XML (`.xml`) | A PowerPoint XML Presentation | Inspecting structure, troubleshooting, comparing generated output, and XML-based integration | | PPT (`.ppt`) | A legacy binary presentation file | Compatibility with older PowerPoint workflows | | PPTX (`.pptx`) | An Office Open XML package containing multiple parts | Regular PowerPoint editing and presentation exchange | | PDF or TIFF | Fixed-layout pages or a multi-page image | Viewing, printing, and archiving | | PNG, JPEG, or SVG | A rendered representation of an individual slide | Thumbnails, previews, and image assets | | HTML or HTML5 | Web-oriented presentation output | Browser viewing and web publishing | Unlike PPT and PPTX, XML output is primarily intended for inspection and data-oriented workflows. Unlike PDF, TIFF, HTML, and slide image formats, it represents presentation data rather than rendering slides as pages or visual assets. The [supported file formats](https://docs.aspose.com/slides/python-net/supported-file-formats/) table lists PowerPoint XML Presentation as a save-only format, so do not use it when a workflow must load the exported file back into Aspose.Slides for continued editing. ## **FAQ** **Is `SaveFormat.XML` the same as saving a PPTX file?** No. PPTX is a package containing multiple Office Open XML parts, whereas `SaveFormat.XML` creates a PowerPoint XML Presentation file. **Can I save the XML output without creating a file on disk?** Yes. Pass a writable stream to [Presentation.save](https://reference.aspose.com/slides/python-net/aspose.slides/presentation/save/). For example, use a [BytesIO](https://docs.python.org/3/library/io.html#io.BytesIO) stream for in-memory processing. **Can Aspose.Slides load the exported XML file again?** No. PowerPoint XML Presentation is currently supported for saving but not for loading. Use PPTX or another supported presentation format when round-trip editing is required. **Does XML conversion render each slide as a page or image?** No. XML conversion writes structured presentation data. Use PDF or TIFF for page-oriented output, or PNG, JPEG, and SVG for individual slide images. # Convert PowerPoint Presentations to XPS in Python > Convert PowerPoint PPT/PPTX to high-quality, platform-independent XPS in Python using Aspose.Slides. Get step-by-step guide and sample code. Source: https://docs.aspose.com/slides/python-net/convert-powerpoint-to-xps/ Updated: 2026-08-13 ## **Overview** Aspose.Slides allows you to convert PowerPoint presentations to XPS by saving a PPT or PPTX file in the XPS format. This article explains when the XPS format may be useful and shows how to perform the conversion with Aspose.Slides using either default settings or custom [XpsOptions](https://reference.aspose.com/slides/python-net/aspose.slides.export/xpsoptions/) settings. ## **About XPS** Microsoft developed [XPS](https://docs.fileformat.com/page-description-language/xps/) as an alternative to [PDF](https://docs.fileformat.com/pdf/). It allows you to print content by outputting a file very similar to a PDF. The XPS format is based on XML. The layout or structure of an XPS file remains the same on all operating systems and printers. ## When to Use Microsoft XPS Format To see how Aspose.Slides converts PPT or PPTX presentation to the XPS format, you can check out [this free online converter app](https://products.aspose.app/slides/conversion). If you want to cut down on storage costs, you can convert your Microsoft PowerPoint presentation to the XPS format. This way, you will find it easier to save, share, and print your documents. Microsoft continues to implement strong support for XPS in Windows (even in Windows 10), so you may want to consider saving files to this format. If you are dealing with Windows 8.1, Windows 8, Windows 7, and Windows Vista, then XPS might actually be your best option for certain operations. - **Windows 8** uses the OXPS (Open XPS) format for XPS files. OXPS is a standardized version of the original XPS format. Windows 8 provides better support for XPS files than it does for PDF files. - **XPS:** Built-in XPS viewer/reader and printing to XPS feature available. - **PDF**: PDF reader available but no printing to PDF feature. - **Windows 7 and Windows Vista** use the original XPS format. These operating systems also provide better support for XPS files than they do for PDFs. - **XPS**: Built-in XPS viewer and printing to XPS feature available. - **PDF**: No PDF reader. No printing to PDF feature. |

**Input PPT(X):

**![todo:image_alt_text](https://docs.aspose.com/slides/python-net/convert-powerpoint-to-xps/convert-powerpoint-ppt-and-pptx-to-microsoft-xps-document_1.png)**

|

**Output XPS:

**![todo:image_alt_text](https://docs.aspose.com/slides/python-net/convert-powerpoint-to-xps/convert-powerpoint-ppt-and-pptx-to-microsoft-xps-document_2.png)**

| | :- | :- | Microsoft eventually implemented support for printing operations in PDF through the Print to PDF feature in Windows 10. Previously, users were expected to print documents through the XPS format. ## XPS Conversion with Aspose.Slides In [**Aspose.Slides**](https://products.aspose.com/slides/python-net/) for Python via .NET, you can use the [**save**](https://reference.aspose.com/slides/python-net/aspose.slides/presentation/) method exposed by the [Presentation](https://reference.aspose.com/slides/python-net/aspose.slides/presentation/) class to convert the entire presentation into an XPS document. When converting a presentation to XPS, you have to save the presentation using either of these settings: - Default settings (without [**XPSOptions**](https://reference.aspose.com/slides/python-net/aspose.slides.export/xpsoptions/)) - Custom settings (with [**XPSOptions**](https://reference.aspose.com/slides/python-net/aspose.slides.export/xpsoptions/)) ### **Converting Presentations to XPS Using Default Settings** This sample code in Python shows you how to convert a presentation to an XPS document using standard settings: ```py import aspose.slides as slides # Instantiate a Presentation object that represents a presentation file pres = slides.Presentation("Convert_XPS.pptx") # Saving the presentation to XPS document pres.save("XPS_Output_Without_XPSOption_out.xps", slides.export.SaveFormat.XPS) ``` ### **Converting Presentations to XPS Using Custom Settings** This sample code shows you how to convert a presentation to an XPS document using custom settings in Python: ```py import aspose.slides as slides # Instantiate a Presentation object that represents a presentation file pres = slides.Presentation("Convert_XPS_Options.pptx") # Instantiate the XpsOptions class options = slides.export.XpsOptions() # Save MetaFiles as PNG options.save_metafiles_as_png = True # Save the presentation to XPS document pres.save("XPS_With_Options_out.xps", slides.export.SaveFormat.XPS, options) ``` ## **FAQ** ### Can I save to XPS into a stream instead of a file? Yes—Aspose.Slides lets you export directly to a stream, which is ideal for web APIs, server-side pipelines, or any scenario where you want to send the XPS without touching the file system. ### Are hidden slides carried over to XPS, and can I exclude them? By default, only regular (visible) slides are rendered. You can [include or exclude hidden slides](https://reference.aspose.com/slides/python-net/aspose.slides.export/xpsoptions/show_hidden_slides/) through [export settings](https://reference.aspose.com/slides/python-net/aspose.slides.export/xpsoptions/) before saving to XPS, ensuring the output contains exactly the pages you intend. # Convert PowerPoint Presentations with Python | HTML, PNG, PDF, Word, TIFF > Convert PowerPoint presentations to other formats using Aspose.Slides for Python via .NET. Fast, accurate, and seamless PPT and PPTX conversion. Source: https://docs.aspose.com/slides/python-net/convert-powerpoint/ Updated: 2025-06-19 --- lastmod: 2025-06-19T21:51:03+04:00 title: Convert PowerPoint Presentations with Python | HTML, PNG, PDF, Word, TIFF linktitle: Convert PowerPoint type: docs weight: 20 url: /python-net/convert-powerpoint/ keywords: - convert PowerPoint - convert presentation - convert slide - convert PPT - convert PPTX - export PowerPoint - export presentation - export slide - export PPT - export PPTX - Python - Aspose.Slides description: "Convert PowerPoint presentations to other formats using Aspose.Slides for Python via .NET. Fast, accurate, and seamless PPT and PPTX conversion." --- ## Related articles - [Convert PPTX to PPT in Python](https://docs.aspose.com/slides/python-net/convert-pptx-to-ppt/) - [Import Presentations with Python](https://docs.aspose.com/slides/python-net/import-presentation/) # Convert PPT to PPTX in Python > Convert legacy PPT files to PPTX in Python with Aspose.Slides. Includes examples for single-file and batch conversion, error handling, and fidelity notes. Source: https://docs.aspose.com/slides/python-net/convert-ppt-to-pptx/ Updated: 2026-08-25 ## **Overview** PPT is the legacy binary PowerPoint format, while PPTX is the newer Open XML format. Aspose.Slides for Python via .NET can load a PPT file and save it as PPTX without Microsoft PowerPoint. This article shows how to convert one file or a directory of files and explains what to verify after conversion. ## **Convert a PPT File to PPTX** Load the source file with the [Presentation](https://reference.aspose.com/slides/python-net/aspose.slides/presentation/) class, then call [Presentation.save](https://reference.aspose.com/slides/python-net/aspose.slides/presentation/save/) with [SaveFormat.PPTX](https://reference.aspose.com/slides/python-net/aspose.slides.export/saveformat/). The `with` statement disposes the presentation and releases its resources when the block ends. ```python import aspose.slides as slides # Load the legacy PPT presentation. with slides.Presentation("presentation.ppt") as presentation: # Save the presentation in PPTX format. presentation.save("presentation.pptx", slides.export.SaveFormat.PPTX) ``` The file extension does not select the output format by itself; the [SaveFormat.PPTX](https://reference.aspose.com/slides/python-net/aspose.slides.export/saveformat/) argument does. Keep the input and output paths different if you need to retain the original PPT file. ## **Convert Multiple PPT Files** The following example converts every `.ppt` file in one directory. Each file is processed independently, so one failed conversion does not stop the rest of the batch. ```python from pathlib import Path import aspose.slides as slides input_directory = Path("input") output_directory = Path("output") output_directory.mkdir(parents=True, exist_ok=True) for input_path in input_directory.glob("*.ppt"): output_path = output_directory / f"{input_path.stem}.pptx" try: with slides.Presentation(str(input_path)) as presentation: presentation.save(str(output_path), slides.export.SaveFormat.PPTX) print(f"Converted: {input_path}") except Exception as exception: print(f"Failed: {input_path} ({exception})") ``` For production workloads, log the complete exception, decide whether an existing output file may be overwritten, and write failed file names to a retry or review queue. Corrupt files, password-protected files opened without the required password, inaccessible paths, and unsupported content can all cause a conversion to fail. See [Password-Protected Presentations](https://docs.aspose.com/slides/python-net/password-protected-presentation/) for loading encrypted files. ## **Fidelity and Legacy Features** Conversion normally preserves slides, masters, layouts, text, shapes, images, tables, and charts. However, PPT and PPTX do not represent every feature in exactly the same way. A legacy feature that has no PPTX equivalent, or is not supported by the library, may be normalized, omitted, or displayed differently. Check the converted file when it contains animations, transitions, embedded or linked OLE objects, ActiveX controls, embedded media, uncommon fonts, or VBA macros. A plain PPTX file is not a macro-enabled format, so use an appropriate macro-enabled workflow when VBA must remain available. Also verify that required fonts and external resources are present in the environment where the converted presentation will be opened or rendered. For important documents, reopen the generated PPTX programmatically and inspect key slide counts and content, then compare its appearance and slide-show behavior in the intended viewer. Do not treat a successful [Presentation.save](https://reference.aspose.com/slides/python-net/aspose.slides/presentation/save/) call as proof that every legacy feature has an exact PPTX representation. ## **When to Use PPTX** Use PPTX when the presentation will be edited in current PowerPoint versions, exchanged with systems that work with Open XML packages, or stored in a format that is easier to inspect and recover than legacy binary PPT. Keep the original PPT as an archival or rollback copy until the converted presentation has passed your fidelity checks. If you need PDF, HTML, images, XPS, or another output type instead, use the format-specific guidance in [Convert Presentations to Multiple Formats](https://docs.aspose.com/slides/python-net/convert-presentation/) rather than assuming that all targets preserve editable PowerPoint features. ## **Online Converter** For an occasional file or a quick comparison, you can use the [online PPT to PPTX converter](https://products.aspose.app/slides/conversion/ppt-to-pptx). For repeatable conversions, batch processing, or application-level error handling, use the Python API. ## **Related Articles** - [PPT vs PPTX](https://docs.aspose.com/slides/python-net/ppt-vs-pptx/) - [Save Presentations in Python](https://docs.aspose.com/slides/python-net/save-presentation/) - [Supported File Formats](https://docs.aspose.com/slides/python-net/supported-file-formats/) - [Open Presentations in Python](https://docs.aspose.com/slides/python-net/open-presentation/) ## **FAQ** **Can I convert PPT to PPTX without Microsoft PowerPoint installed?** Yes. Aspose.Slides for Python via .NET loads and saves presentation files without requiring Microsoft PowerPoint. **Will PPT-to-PPTX conversion preserve all content exactly?** It preserves common presentation content, but exact fidelity is not guaranteed for every legacy or unsupported feature. Review the generated file when it contains macros, OLE or ActiveX objects, media, specialized animations, or uncommon fonts. **Can I convert a password-protected PPT file?** Yes, if you supply the correct password when loading the file. A missing or incorrect password causes the load operation to fail. **Should I delete the PPT file after conversion?** Keep the original until you have verified the PPTX in the viewers and workflows that matter to you. This provides a rollback copy if a legacy feature converts differently. ## Related articles - [Convert ODP to PPTX in Python](https://docs.aspose.com/slides/python-net/convert-odp-to-pptx/) - [Convert Presentations to Multiple Formats in Python](https://docs.aspose.com/slides/python-net/convert-presentation/) # Convert PPTX to PPT in Python > Easily convert PPTX to PPT with Aspose.Slides for Python via .NET—ensure seamless compatibility with PowerPoint formats while preserving your presentation’s layout and quality. Source: https://docs.aspose.com/slides/python-net/convert-pptx-to-ppt/ Updated: 2026-08-02 ## **Overview** Aspose.Slides for Python lets you convert modern PPTX presentations to the legacy PPT format entirely in code. Open a PPTX and export it as PPT while maintaining the presentation’s content and layout, making the result compatible with older versions of PowerPoint. The same workflow can produce other outputs—such as PDF, XPS, ODP, HTML, or images—so it fits smoothly into scripts, CI pipelines, and batch processing. ## **Convert PPTX to PPT** To convert a PPTX to PPT, simply pass the file name and save format to the [save](https://reference.aspose.com/slides/python-net/aspose.slides/presentation/save/) method of the [Presentation](https://reference.aspose.com/slides/python-net/aspose.slides/presentation/) class. The Python example below converts a presentation from PPTX to PPT using the default options. ```py import aspose.slides as slides # Instantiate the Presentation class that represents a PPTX file. presentation = slides.Presentation("presentation.pptx") # Save the presentation as a PPT file. presentation.save("presentation.ppt", slides.export.SaveFormat.PPT) ``` ## **FAQ** ### Do all PPTX effects and features survive when saving to the legacy PPT (97–2003) format? Not always. The PPT format lacks some newer capabilities (e.g., certain effects, objects, and behaviors), so features may be simplified or rasterized during conversion. ### Can I convert only selected slides to PPT instead of the entire presentation? Direct saving targets the whole presentation. To convert specific slides, create a new presentation with just those slides and save it as PPT; alternatively, use a service/API that supports per-slide conversion parameters. ### Are password-protected presentations supported? Yes. You can detect whether a file is protected, open it with a password, and also [configure protection/encryption settings](https://docs.aspose.com/slides/python-net/password-protected-presentation/) for the saved PPT. **See also:** - [Convert PPT & PPTX to PDF in Python | Advanced Options](https://docs.aspose.com/slides/python-net/convert-powerpoint-to-pdf/) - [Convert PowerPoint Presentations to XPS in Python](https://docs.aspose.com/slides/python-net/convert-powerpoint-to-xps/) - [Convert PowerPoint Presentations to HTML in Python](https://docs.aspose.com/slides/python-net/convert-powerpoint-to-html/) - [Convert PowerPoint Slides to PNG in Python](https://docs.aspose.com/slides/python-net/convert-powerpoint-to-png/) ## Related articles - [Convert PowerPoint Presentations with Python | HTML, PNG, PDF, Word, TIFF](https://docs.aspose.com/slides/python-net/convert-powerpoint/) # Convert Presentations to Multiple Formats in Python > Convert PowerPoint and OpenDocument presentations to PPTX, PDF, HTML, images, XPS, TIFF, and more with Aspose.Slides for Python via .NET. Source: https://docs.aspose.com/slides/python-net/convert-presentation/ Updated: 2026-09-01 ## **Overview** Aspose.Slides for Python via .NET can load PowerPoint and OpenDocument presentations and save or render them to many other formats without Microsoft PowerPoint, OpenOffice, or LibreOffice. You can convert legacy PPT files to modern PPTX, export presentations to fixed-layout documents such as PDF and XPS, publish slides as HTML, or render slides as image files for previews, thumbnails, and archives. Most document conversions use the same general workflow: load the source file, choose the required output format, and apply format-specific options when needed. For image formats, each slide is rendered separately and then saved as a raster or vector image. The dedicated articles linked below provide the implementation details for each case. ## **Choose a Conversion Scenario** Use the articles below for complete Python examples and format-specific options. | Scenario | Use it when you need to | Article | | --- | --- | --- | | PPT/PPTX/ODP to PPTX | Modernize legacy PPT files, normalize existing PPTX files, or convert OpenDocument presentations to PowerPoint PPTX. | [Convert PPT to PPTX](https://docs.aspose.com/slides/python-net/convert-ppt-to-pptx/), [Convert ODP to PPTX](https://docs.aspose.com/slides/python-net/convert-odp-to-pptx/), [Save Presentations](https://docs.aspose.com/slides/python-net/save-presentation/) | | PPTX to PPT | Save a modern PowerPoint presentation to the older binary PPT format for compatibility with older workflows. | [Convert PPTX to PPT](https://docs.aspose.com/slides/python-net/convert-pptx-to-ppt/) | | PPT/PPTX/ODP to PDF | Create portable, searchable, fixed-layout documents for sharing, printing, or archiving. | [Convert PowerPoint to PDF](https://docs.aspose.com/slides/python-net/convert-powerpoint-to-pdf/) | | PPT/PPTX/ODP to PDF with notes | Export speaker notes together with slide content. | [Convert PowerPoint to PDF with Notes](https://docs.aspose.com/slides/python-net/convert-powerpoint-to-pdf-with-notes/) | | PPT/PPTX/ODP to HTML | Publish presentations as HTML pages and control images, fonts, notes, and responsive layout options. | [Convert PowerPoint to HTML](https://docs.aspose.com/slides/python-net/convert-powerpoint-to-html/) | | PPT/PPTX/ODP to HTML5 | Export slides to HTML5 for browser-based viewing with preserved formatting and interactivity. | [Convert Presentations to HTML5](https://docs.aspose.com/slides/python-net/export-to-html5/) | | PPT/PPTX/ODP to PNG | Render each slide to a PNG image for previews, thumbnails, or web output. | [Convert PowerPoint to PNG](https://docs.aspose.com/slides/python-net/convert-powerpoint-to-png/) | | PPT/PPTX/ODP to JPG | Render slides to JPG images and control image dimensions and quality. | [Convert PowerPoint to JPG](https://docs.aspose.com/slides/python-net/convert-powerpoint-to-jpg/) | | Slide to SVG | Export individual slides as scalable vector graphics. | [Render Slide as SVG](https://docs.aspose.com/slides/python-net/render-a-slide-as-an-svg-image/) | | PPT/PPTX/ODP to XPS | Generate fixed-layout XPS documents. | [Convert PowerPoint to XPS](https://docs.aspose.com/slides/python-net/convert-powerpoint-to-xps/) | | PPT/PPTX/ODP to TIFF | Save a presentation as a multi-page TIFF file for printing, scanning, fax, or archival workflows. | [Convert PowerPoint to TIFF](https://docs.aspose.com/slides/python-net/convert-powerpoint-to-tiff/) | | PPT/PPTX/ODP to TIFF with notes | Save slides with speaker notes to TIFF. | [Convert PowerPoint to TIFF with Notes](https://docs.aspose.com/slides/python-net/convert-powerpoint-to-tiff-with-notes/) | | PPT/PPTX/ODP to Word | Convert slides to a Word document when you need document-style output. | [Convert PowerPoint to Word](https://docs.aspose.com/slides/python-net/convert-powerpoint-to-word/) | | PPT/PPTX/ODP to Markdown | Extract presentation content into Markdown for documentation and text-based workflows. | [Convert PowerPoint to Markdown](https://docs.aspose.com/slides/python-net/convert-powerpoint-to-markdown/) | | PPT/PPTX/ODP to XML | Create a text-based PowerPoint XML Presentation for inspection, comparison, troubleshooting, or XML-based workflows. | [Convert PowerPoint to XML](https://docs.aspose.com/slides/python-net/convert-powerpoint-to-xml/) | | PPT/PPTX/ODP to animated GIF | Create an animated GIF from slides. | [Convert PowerPoint to Animated GIF](https://docs.aspose.com/slides/python-net/convert-powerpoint-to-animated-gif/) | | PPT/PPTX/ODP to video | Build a video export workflow from presentation slides. | [Convert PowerPoint to Video](https://docs.aspose.com/slides/python-net/convert-powerpoint-to-video/) | | Presentation to XAML | Export slides to XAML for Python or .NET UI scenarios. | [Export Presentations to XAML](https://docs.aspose.com/slides/python-net/export-to-xaml/) | For a broader list of input and output formats, see [Supported File Formats](https://docs.aspose.com/slides/python-net/supported-file-formats/). ## **PowerPoint and OpenDocument Conversion** Aspose.Slides for Python via .NET supports conversion from commonly used presentation formats such as PPT, PPTX, PPS, PPSX, POT, POTX, and ODP. The same conversion API is used for PowerPoint and OpenDocument files, so a workflow that saves a PPTX file to PDF can usually be applied to an ODP file by changing only the input file. When converting ODP files, remember that PowerPoint and OpenDocument applications do not support every layout and formatting feature in exactly the same way. If an ODP file was created in LibreOffice or OpenOffice Impress, review the output and use the options described in [Convert OpenDocument Presentations](https://docs.aspose.com/slides/python-net/convert-openoffice-odp/) when you need format-specific guidance. ## **PPT to PPTX Conversion** PPT is the older binary PowerPoint format, while PPTX is the modern Office Open XML format. Aspose.Slides for Python via .NET supports high-fidelity PPT to PPTX conversion while preserving complex presentation structures such as masters, layouts, slides, charts, grouped shapes, placeholders, text frames, textures, and picture fills. For details, see [Convert PPT to PPTX](https://docs.aspose.com/slides/python-net/convert-ppt-to-pptx/) and [PPT vs PPTX](https://docs.aspose.com/slides/python-net/ppt-vs-pptx/). ## **Fixed-Layout Export** PDF, XPS, and TIFF are useful when the output should look the same across devices and should not be edited as a presentation. The dedicated PDF, XPS, and TIFF articles explain how to control compliance, hidden slides, notes, image quality, compression, pixel format, and output size. ## **HTML and Image Export** HTML and HTML5 export are useful for browser viewing, web publishing, and lightweight sharing. Image export is useful when each slide must become a separate preview, thumbnail, or raster asset. Use the PNG, JPG, and SVG articles for format-specific rendering guidance. ## **FAQ** **Do I need Microsoft PowerPoint to convert presentations?** No. Aspose.Slides for Python via .NET is a standalone library and does not require Microsoft PowerPoint or Office automation. **Can I batch convert many presentations?** Yes. Load each presentation, save it to the required format, and dispose of the presentation object after processing. For parallel processing, use separate presentation instances and follow the [multithreading](https://docs.aspose.com/slides/python-net/multithreading/) guidance. **Can I export only selected slides?** Yes. Several export methods allow you to pass slide indexes or render individual slides, depending on the output format. See the dedicated article for the target format. **Can I include hidden slides when exporting to PDF or XPS?** Yes. Use the hidden-slide export settings described in the [PDF](https://docs.aspose.com/slides/python-net/convert-powerpoint-to-pdf/) and [XPS](https://docs.aspose.com/slides/python-net/convert-powerpoint-to-xps/) conversion articles. **Can I create PDF/A output?** Yes. PDF compliance settings are available for PDF export. See [Convert PowerPoint to PDF](https://docs.aspose.com/slides/python-net/convert-powerpoint-to-pdf/) for details. **How are fonts handled during conversion?** Aspose.Slides can use embedded fonts, font fallback, and font substitution settings. See [Embedded Font](https://docs.aspose.com/slides/python-net/embedded-font/), [Fallback Font](https://docs.aspose.com/slides/python-net/fallback-font/), and [Font Substitution](https://docs.aspose.com/slides/python-net/font-substitution/). ## Related articles - [Convert OpenDocument Presentations in Python](https://docs.aspose.com/slides/python-net/convert-openoffice-odp/) - [Supported File Formats](https://docs.aspose.com/slides/python-net/supported-file-formats/) - [Convert PPT to PPTX in Python](https://docs.aspose.com/slides/python-net/convert-ppt-to-pptx/) # Convert Presentation Slides to Images in Python > Convert slides from PPT, PPTX, and ODP presentations to PNG, JPEG, GIF, TIFF, EMF, and other image formats in Python with Aspose.Slides. Source: https://docs.aspose.com/slides/python-net/convert-slide/ Updated: 2026-10-26 ## **Introduction** Aspose.Slides for Python via .NET can render individual slides from PowerPoint and OpenDocument presentations as PNG, JPEG, GIF, TIFF, and other image formats. To convert a slide into an image, follow these steps: 1. Load the presentation with the [Presentation](https://reference.aspose.com/slides/python-net/aspose.slides/presentation/) class. 2. Select the slide that you want to render. 3. If necessary, configure rendering with the [RenderingOptions](https://reference.aspose.com/slides/python-net/aspose.slides.export/renderingoptions/) or [TiffOptions](https://reference.aspose.com/slides/python-net/aspose.slides.export/tiffoptions/) class. 4. Call the [Slide.get_image](https://reference.aspose.com/slides/python-net/aspose.slides/slide/get_image/) method. It returns an [IImage](https://reference.aspose.com/slides/python-net/aspose.slides/iimage/) object. 5. Call the [IImage.save](https://reference.aspose.com/slides/python-net/aspose.slides/iimage/save/) method and specify the output format with an [ImageFormat](https://reference.aspose.com/slides/python-net/aspose.slides/imageformat/) value. ## **Convert a Slide to a PNG Image** The simplest conversion uses the default rendering settings. The resulting [IImage](https://reference.aspose.com/slides/python-net/aspose.slides/iimage/) object can be processed in memory or saved to a file. The following Python example renders the first slide and saves it as a PNG image: ```py import aspose.slides as slides with slides.Presentation("Presentation.pptx") as presentation: slide = presentation.slides[0] with slide.get_image() as image: image.save("Slide_0.png", slides.ImageFormat.PNG) ``` ## **Convert Slides to Images with Custom Sizes** Use the [Slide.get_image](https://reference.aspose.com/slides/python-net/aspose.slides/slide/get_image/) overload that accepts a Size value to render a slide with exact pixel dimensions. The following example creates a 1820 × 1040 JPEG image: ```py import aspose.pydrawing as draw import aspose.slides as slides image_size = draw.Size(1820, 1040) with slides.Presentation("Presentation.pptx") as presentation: slide = presentation.slides[0] with slide.get_image(image_size) as image: image.save("Slide_0.jpg", slides.ImageFormat.JPEG) ``` ## **Convert Slides with Notes and Comments to Images** By default, slide images do not include notes or comments. Assign a [NotesCommentsLayoutingOptions](https://reference.aspose.com/slides/python-net/aspose.slides.export/notescommentslayoutingoptions/) object to the [RenderingOptions.slides_layout_options](https://reference.aspose.com/slides/python-net/aspose.slides.export/renderingoptions/slides_layout_options/) property to control where notes and comments appear. The following example places truncated notes below the slide and comments to its right: ```py import aspose.pydrawing as draw import aspose.slides as slides scale_x = 2 scale_y = scale_x layout_options = slides.export.NotesCommentsLayoutingOptions() layout_options.notes_position = slides.export.NotesPositions.BOTTOM_TRUNCATED layout_options.comments_position = slides.export.CommentsPositions.RIGHT layout_options.comments_area_width = 500 layout_options.comments_area_color = draw.Color.antique_white rendering_options = slides.export.RenderingOptions() rendering_options.slides_layout_options = layout_options with slides.Presentation("Presentation_with_notes_and_comments.pptx") as presentation: slide = presentation.slides[0] with slide.get_image(rendering_options, scale_x, scale_y) as image: image.save("Image_with_notes_and_comments_0.gif", slides.ImageFormat.GIF) ``` For slide-to-image conversion, do not set the [NotesCommentsLayoutingOptions.notes_position](https://reference.aspose.com/slides/python-net/aspose.slides.export/notescommentslayoutingoptions/notes_position/) property to [NotesPositions.BOTTOM_FULL](https://reference.aspose.com/slides/python-net/aspose.slides.export/notespositions/). Notes can contain more text than the fixed image size can accommodate. Use [NotesPositions.BOTTOM_TRUNCATED](https://reference.aspose.com/slides/python-net/aspose.slides.export/notespositions/) instead. ## **Convert Slides to Images Using TIFF Options** The [TiffOptions](https://reference.aspose.com/slides/python-net/aspose.slides.export/tiffoptions/) class lets you control the size, resolution, and other properties of the rendered TIFF image. The following example renders the first slide as a 2160 × 2880 TIFF image at 300 DPI: ```py import aspose.pydrawing as draw import aspose.slides as slides tiff_options = slides.export.TiffOptions() tiff_options.image_size = draw.Size(2160, 2880) tiff_options.dpi_x = 300 tiff_options.dpi_y = 300 with slides.Presentation("sample.pptx") as presentation: slide = presentation.slides[0] with slide.get_image(tiff_options) as image: image.save("output.tiff", slides.ImageFormat.TIFF) ``` ## **Convert All Slides to Images** Iterate through the slide collection to convert the entire presentation into a series of images. Hidden slides are included unless you explicitly skip them. The following example renders every slide as a JPEG image with horizontal and vertical scale factors of 2: ```py import aspose.slides as slides scale_x = 2 scale_y = scale_x with slides.Presentation("Presentation.pptx") as presentation: for index, slide in enumerate(presentation.slides): with slide.get_image(scale_x, scale_y) as image: image.save("Slide_{}.jpg".format(index), slides.ImageFormat.JPEG) ``` ## **Create Enhanced Metafile Output** Enhanced Metafile (EMF) is useful when vector-based graphics must be exchanged with Microsoft Office or other Windows applications that support Windows metafiles. Unlike a pixel-based image, an EMF can retain vector drawing operations that scale without the same loss of sharpness. However, EMF is primarily a compatibility format for applications with Windows metafile support, not a universal interchange format. In addition, complex slide content, such as bitmap images and some effects, may be stored as rasterized elements inside the vector metafile container. ### **Export a Slide to EMF** The [Slide.write_as_emf](https://reference.aspose.com/slides/python-net/aspose.slides/slide/write_as_emf/) method writes a [Slide](https://reference.aspose.com/slides/python-net/aspose.slides/slide/) to a target stream in EMF format. The following example loads a presentation, selects the first slide, and writes it to an EMF file stream: ```py import aspose.slides as slides with slides.Presentation("Presentation.pptx") as presentation: slide = presentation.slides[0] with open("Slide_0.emf", "wb") as emf_stream: slide.write_as_emf(emf_stream) ``` The caller owns the stream passed to [Slide.write_as_emf](https://reference.aspose.com/slides/python-net/aspose.slides/slide/write_as_emf/) and must close it. Aspose.Slides writes at the stream's current position and leaves the stream open. ### **Convert an SVG Image to EMF and Add It to a Presentation** Use [SvgImage.write_as_emf](https://reference.aspose.com/slides/python-net/aspose.slides/svgimage/write_as_emf/) to convert SVG content to EMF. The resulting bytes can be added to the presentation through [ImageCollection.add_image](https://reference.aspose.com/slides/python-net/aspose.slides/imagecollection/add_image/) and placed on a slide with [ShapeCollection.add_picture_frame](https://reference.aspose.com/slides/python-net/aspose.slides/shapecollection/add_picture_frame/). The following example creates an [SvgImage](https://reference.aspose.com/slides/python-net/aspose.slides/svgimage/) from SVG markup, converts it to an in-memory EMF, inserts the metafile on the first slide, and saves the presentation: ```py import io import aspose.slides as slides svg_content = '' svg_image = slides.SvgImage(svg_content) with slides.Presentation() as presentation: slide = presentation.slides[0] with io.BytesIO() as emf_stream: svg_image.write_as_emf(emf_stream) emf_data = emf_stream.getvalue() image = presentation.images.add_image(emf_data) slide.shapes.add_picture_frame(slides.ShapeType.RECTANGLE, 20, 20, 200, 100, image) presentation.save("Presentation_with_emf.pptx", slides.export.SaveFormat.PPTX) ``` [SvgImage.write_as_emf](https://reference.aspose.com/slides/python-net/aspose.slides/svgimage/write_as_emf/) does not take ownership of the destination stream. After writing, the stream position is at the end of the generated data. Call `getvalue` to obtain the complete buffer regardless of the current stream position, as shown above. Keep the stream open until the data has been read, and close it afterward. EMF generation is available on the operating systems supported by Aspose.Slides for Python via .NET, but rendering can differ across platforms when fonts or native graphics dependencies are unavailable. Install the fonts used by the source content or configure suitable substitutions, follow the [platform requirements](https://docs.aspose.com/slides/python-net/system-requirements/) for Aspose.Slides, and validate the result in the target EMF-consuming application. Linux and macOS applications often have limited or inconsistent support for displaying and editing Windows metafiles. ## **Color Emoji Rendering** To render color emojis correctly when converting presentation slides to images, the emoji fonts used in the presentation must be installed and available on the system performing the conversion. For example, if the presentation uses **Segoe UI Emoji** and this font is missing, emojis may appear in monochrome in the output images. ## **FAQ** **Does Aspose.Slides support rendering slides with animations?** No. The [Slide.get_image](https://reference.aspose.com/slides/python-net/aspose.slides/slide/get_image/) method renders a static image of the slide and does not export animations. **Can hidden slides be exported as images?** Yes. Hidden slides can be rendered like regular slides. Include them in the processing loop, as shown in the example above. **Are shadows and other effects preserved in slide images?** Yes. Aspose.Slides renders shadows, transparency, and other supported graphical effects in slide images. Related feature: [Render slides as images](https://docs.aspose.com/slides/features/slide-images/). ## Related articles - [Convert PowerPoint Presentations to TIFF in Python](https://docs.aspose.com/slides/python-net/convert-powerpoint-to-tiff/) - [Convert PowerPoint Presentations to TIFF with Notes in Python](https://docs.aspose.com/slides/python-net/convert-powerpoint-to-tiff-with-notes/) # Create or Update PowerPoint Presentation Charts in Python > Create and customize charts in PowerPoint presentations using Aspose.Slides for Python via .NET. Add, format, and edit charts with practical code examples in Python. Source: https://docs.aspose.com/slides/python-net/create-chart/ Updated: 2026-11-18 ## **Overview** This article provides a comprehensive guide on how to create and customize charts using Aspose.Slides for Python via .NET. You will learn how to programmatically add a chart to a slide, populate it with data, and apply various formatting options to match your specific design requirements. Throughout the article, detailed code examples illustrate each step, from initializing the presentation and chart object to configuring series, axes, and legends. By following this guide, you'll gain a solid understanding of how to integrate dynamic chart generation into your Python applications, streamlining the process of creating data-driven presentations. ## **Create a Chart** Charts help people quickly visualize data and gain insights that may not be immediately obvious from a table or spreadsheet. **Why Create Charts?** Using charts, you can: * aggregate, condense, or summarize large amounts of data on a single slide in a presentation; * expose patterns and trends in data; * deduce the direction and momentum of data over time or with respect to a specific unit of measurement; * spot outliers, aberrations, deviations, errors, and nonsensical data; * communicate or present complex data. In PowerPoint, you can create charts through the *Insert* function, which provides templates for designing many types of charts. Using Aspose.Slides, you can create both regular charts (based on popular chart types) and custom charts. Use the [ChartType](https://reference.aspose.com/slides/python-net/aspose.slides.charts/charttype/) enumeration under the [aspose.slides.charts](https://reference.aspose.com/slides/python-net/aspose.slides.charts/) module. The values in this enumeration correspond to different chart types. ### **Create Clustered Column Charts** This example uses [add_chart](https://reference.aspose.com/slides/python-net/aspose.slides/shapecollection/add_chart/) to create a clustered column chart that compares two series across three categories. The series use red and green fills, and individual labels demonstrate category names, series names, and values. Worksheet index 0 refers to the first sheet in the embedded chart workbook. ```python import aspose.pydrawing as draw import aspose.slides as slides import aspose.slides.charts as charts with slides.Presentation() as presentation: slide = presentation.slides[0] chart = slide.shapes.add_chart(charts.ChartType.CLUSTERED_COLUMN, 20, 20, 500, 300) chart.chart_title.add_text_frame_for_overriding("Sample Title") chart.chart_title.text_frame_for_overriding.text_frame_format.center_text = slides.NullableBool.TRUE chart.chart_title.height = 20 chart.has_title = True workbook = chart.chart_data.chart_data_workbook worksheet_index = 0 chart.chart_data.series.clear() chart.chart_data.categories.clear() series_name_cell = workbook.get_cell(worksheet_index, 0, 1, "Series 1") chart.chart_data.series.add(series_name_cell, chart.type) series_name_cell = workbook.get_cell(worksheet_index, 0, 2, "Series 2") chart.chart_data.series.add(series_name_cell, chart.type) category_cell = workbook.get_cell(worksheet_index, 1, 0, "Category 1") chart.chart_data.categories.add(category_cell) category_cell = workbook.get_cell(worksheet_index, 2, 0, "Category 2") chart.chart_data.categories.add(category_cell) category_cell = workbook.get_cell(worksheet_index, 3, 0, "Category 3") chart.chart_data.categories.add(category_cell) series = chart.chart_data.series[0] value_cell = workbook.get_cell(worksheet_index, 1, 1, 20) series.data_points.add_data_point_for_bar_series(value_cell) value_cell = workbook.get_cell(worksheet_index, 2, 1, 50) series.data_points.add_data_point_for_bar_series(value_cell) value_cell = workbook.get_cell(worksheet_index, 3, 1, 30) series.data_points.add_data_point_for_bar_series(value_cell) series.format.fill.fill_type = slides.FillType.SOLID series.format.fill.solid_fill_color.color = draw.Color.red series = chart.chart_data.series[1] value_cell = workbook.get_cell(worksheet_index, 1, 2, 30) series.data_points.add_data_point_for_bar_series(value_cell) value_cell = workbook.get_cell(worksheet_index, 2, 2, 10) series.data_points.add_data_point_for_bar_series(value_cell) value_cell = workbook.get_cell(worksheet_index, 3, 2, 60) series.data_points.add_data_point_for_bar_series(value_cell) series.format.fill.fill_type = slides.FillType.SOLID series.format.fill.solid_fill_color.color = draw.Color.green label = series.data_points[0].label label.data_label_format.show_category_name = True label = series.data_points[1].label label.data_label_format.show_series_name = True label = series.data_points[2].label label.data_label_format.show_value = True label.data_label_format.show_series_name = True label.data_label_format.separator = "/" presentation.save("AsposeChart.pptx", slides.export.SaveFormat.PPTX) ``` The result: ![The Clustered Column chart](https://docs.aspose.com/slides/python-net/create-chart/clustered_column_chart.png) ### **Create Scatter Charts** Scatter charts (also known as scatter plots or x-y graphs) are often used to check for patterns or demonstrate correlations between two variables. Use a scatter chart when: * You have paired numerical data. * You have two variables that pair well together. * You want to determine whether the two variables are related. * You have an independent variable that has multiple values for a dependent variable. This example plots two sets of x-y values. The first series uses straight lines with star markers, while the second uses smooth lines with circle markers; both use a [size](https://reference.aspose.com/slides/python-net/aspose.slides.charts/marker/size/) of 10. The [symbol](https://reference.aspose.com/slides/python-net/aspose.slides.charts/marker/symbol/) property controls the marker shape. ```python import aspose.slides as slides import aspose.slides.charts as charts with slides.Presentation() as presentation: slide = presentation.slides[0] chart = slide.shapes.add_chart(charts.ChartType.SCATTER_WITH_SMOOTH_LINES, 20, 20, 500, 300) workbook = chart.chart_data.chart_data_workbook worksheet_index = 0 chart.chart_data.series.clear() series_name_cell = workbook.get_cell(worksheet_index, 1, 1, "Series 1") chart.chart_data.series.add(series_name_cell, chart.type) series_name_cell = workbook.get_cell(worksheet_index, 1, 3, "Series 2") chart.chart_data.series.add(series_name_cell, chart.type) series = chart.chart_data.series[0] x_value_cell = workbook.get_cell(worksheet_index, 2, 1, 1) y_value_cell = workbook.get_cell(worksheet_index, 2, 2, 3) series.data_points.add_data_point_for_scatter_series(x_value_cell, y_value_cell) x_value_cell = workbook.get_cell(worksheet_index, 3, 1, 2) y_value_cell = workbook.get_cell(worksheet_index, 3, 2, 10) series.data_points.add_data_point_for_scatter_series(x_value_cell, y_value_cell) series.type = charts.ChartType.SCATTER_WITH_STRAIGHT_LINES_AND_MARKERS series.marker.size = 10 series.marker.symbol = charts.MarkerStyleType.STAR series = chart.chart_data.series[1] x_value_cell = workbook.get_cell(worksheet_index, 2, 3, 5) y_value_cell = workbook.get_cell(worksheet_index, 2, 4, 2) series.data_points.add_data_point_for_scatter_series(x_value_cell, y_value_cell) x_value_cell = workbook.get_cell(worksheet_index, 3, 3, 3) y_value_cell = workbook.get_cell(worksheet_index, 3, 4, 1) series.data_points.add_data_point_for_scatter_series(x_value_cell, y_value_cell) x_value_cell = workbook.get_cell(worksheet_index, 4, 3, 2) y_value_cell = workbook.get_cell(worksheet_index, 4, 4, 2) series.data_points.add_data_point_for_scatter_series(x_value_cell, y_value_cell) x_value_cell = workbook.get_cell(worksheet_index, 5, 3, 5) y_value_cell = workbook.get_cell(worksheet_index, 5, 4, 1) series.data_points.add_data_point_for_scatter_series(x_value_cell, y_value_cell) series.marker.size = 10 series.marker.symbol = charts.MarkerStyleType.CIRCLE presentation.save("AsposeChart.pptx", slides.export.SaveFormat.PPTX) ``` The result: ![The Scatter chart](https://docs.aspose.com/slides/python-net/create-chart/scatter_chart.png) ### **Create Pie Charts** Pie charts are best used to show the part-to-whole relationship in data, especially when the data contains categorical labels with numeric values. However, if your data contains many parts or labels, you might want to consider using a bar chart instead. This example creates a pie chart with three quarterly values. Each slice has a custom fill and border, and the labels display different combinations of values, percentages, and series information. The [first_slice_angle](https://reference.aspose.com/slides/python-net/aspose.slides.charts/chartseriesgroup/first_slice_angle/) property sets the first slice to start at 180 degrees. ```python import aspose.pydrawing as draw import aspose.slides as slides import aspose.slides.charts as charts with slides.Presentation() as presentation: slide = presentation.slides[0] chart = slide.shapes.add_chart(charts.ChartType.PIE, 20, 20, 500, 300) chart.chart_title.add_text_frame_for_overriding("Sample Title") chart.chart_title.text_frame_for_overriding.text_frame_format.center_text = slides.NullableBool.TRUE chart.chart_title.height = 20 chart.has_title = True chart.chart_data.series[0].labels.default_data_label_format.show_value = True workbook = chart.chart_data.chart_data_workbook worksheet_index = 0 chart.chart_data.series.clear() chart.chart_data.categories.clear() category_cell = workbook.get_cell(0, 1, 0, "1st Qtr") chart.chart_data.categories.add(category_cell) category_cell = workbook.get_cell(0, 2, 0, "2nd Qtr") chart.chart_data.categories.add(category_cell) category_cell = workbook.get_cell(0, 3, 0, "3rd Qtr") chart.chart_data.categories.add(category_cell) series_name_cell = workbook.get_cell(0, 0, 1, "Series 1") series = chart.chart_data.series.add(series_name_cell, chart.type) value_cell = workbook.get_cell(worksheet_index, 1, 1, 20) series.data_points.add_data_point_for_pie_series(value_cell) value_cell = workbook.get_cell(worksheet_index, 2, 1, 50) series.data_points.add_data_point_for_pie_series(value_cell) value_cell = workbook.get_cell(worksheet_index, 3, 1, 30) series.data_points.add_data_point_for_pie_series(value_cell) chart.chart_data.series_groups[0].is_color_varied = True first_slice = series.data_points[0] first_slice.format.fill.fill_type = slides.FillType.SOLID first_slice.format.fill.solid_fill_color.color = draw.Color.cyan first_slice.format.line.fill_format.fill_type = slides.FillType.SOLID first_slice.format.line.fill_format.solid_fill_color.color = draw.Color.gray first_slice.format.line.width = 3.0 first_slice.format.line.style = slides.LineStyle.THIN_THICK first_slice.format.line.dash_style = slides.LineDashStyle.LARGE_DASH second_slice = series.data_points[1] second_slice.format.fill.fill_type = slides.FillType.SOLID second_slice.format.fill.solid_fill_color.color = draw.Color.brown second_slice.format.line.fill_format.fill_type = slides.FillType.SOLID second_slice.format.line.fill_format.solid_fill_color.color = draw.Color.blue second_slice.format.line.width = 3.0 second_slice.format.line.style = slides.LineStyle.SINGLE second_slice.format.line.dash_style = slides.LineDashStyle.LARGE_DASH_DOT third_slice = series.data_points[2] third_slice.format.fill.fill_type = slides.FillType.SOLID third_slice.format.fill.solid_fill_color.color = draw.Color.coral third_slice.format.line.fill_format.fill_type = slides.FillType.SOLID third_slice.format.line.fill_format.solid_fill_color.color = draw.Color.red third_slice.format.line.width = 2.0 third_slice.format.line.style = slides.LineStyle.THIN_THIN third_slice.format.line.dash_style = slides.LineDashStyle.LARGE_DASH_DOT_DOT first_label = series.data_points[0].label first_label.data_label_format.show_value = True second_label = series.data_points[1].label second_label.data_label_format.show_value = True second_label.data_label_format.show_legend_key = True second_label.data_label_format.show_percentage = True third_label = series.data_points[2].label third_label.data_label_format.show_series_name = True third_label.data_label_format.show_percentage = True series.labels.default_data_label_format.show_leader_lines = True chart.chart_data.series_groups[0].first_slice_angle = 180 presentation.save("PieChart.pptx", slides.export.SaveFormat.PPTX) ``` The result: ![The Pie chart](https://docs.aspose.com/slides/python-net/create-chart/pie_chart.png) To improve the readability of labels outside the pie, see [Format Leader Lines](https://docs.aspose.com/slides/python-net/chart-data-label/#format-leader-lines) for an example that positions labels and customizes the lines' color, width, transparency, and dash style. ### **Create Line Charts** Line charts (also known as line graphs) are best used in situations where you want to demonstrate changes in value over time. Using a line chart, you can compare a large amount of data at once, track changes and trends over time, highlight anomalies in data series, and more. This example uses [add_chart](https://reference.aspose.com/slides/python-net/aspose.slides/shapecollection/add_chart/) to create a line chart with the default series and categories, then saves the presentation as PPTX. ```python import aspose.slides as slides import aspose.slides.charts as charts with slides.Presentation() as presentation: slide = presentation.slides[0] line_chart = slide.shapes.add_chart(charts.ChartType.LINE, 20, 20, 500, 300) presentation.save("lineChart.pptx", slides.export.SaveFormat.PPTX) ``` By default, points on a line chart are joined by straight continuous lines. If you want the points to be joined by dashes instead, set [dash_style](https://reference.aspose.com/slides/python-net/aspose.slides/lineformat/dash_style/) to a value from [LineDashStyle](https://reference.aspose.com/slides/python-net/aspose.slides/linedashstyle/): ```python import aspose.slides as slides import aspose.slides.charts as charts with slides.Presentation() as presentation: slide = presentation.slides[0] line_chart = slide.shapes.add_chart(charts.ChartType.LINE, 20, 20, 500, 300) for series in line_chart.chart_data.series: series.format.line.dash_style = slides.LineDashStyle.DASH ``` The result: ![The Line chart](https://docs.aspose.com/slides/python-net/create-chart/line_chart.png) ### **Create Tree Map Charts** Tree map charts are best used for sales data when you want to show the relative size of data categories and quickly draw attention to items that are large contributors within each category. This example creates a tree map with eight leaves grouped into four stems and two branches. The [set_grouping_item](https://reference.aspose.com/slides/python-net/aspose.slides.charts/chartcategorylevelsmanager/set_grouping_item/) method assigns stems at grouping level 1 and branches at level 2. Values determine the relative rectangle sizes, while category labels and overlapping parent labels identify the hierarchy. ```python import aspose.slides as slides import aspose.slides.charts as charts with slides.Presentation() as presentation: slide = presentation.slides[0] chart = slide.shapes.add_chart(charts.ChartType.TREEMAP, 20, 20, 500, 300) chart.chart_data.categories.clear() chart.chart_data.series.clear() workbook = chart.chart_data.chart_data_workbook workbook.clear(0) # Branch 1 category_cell = workbook.get_cell(0, "C1", "Leaf1") leaf = chart.chart_data.categories.add(category_cell) leaf.grouping_levels.set_grouping_item(1, "Stem1") leaf.grouping_levels.set_grouping_item(2, "Branch1") category_cell = workbook.get_cell(0, "C2", "Leaf2") chart.chart_data.categories.add(category_cell) category_cell = workbook.get_cell(0, "C3", "Leaf3") leaf = chart.chart_data.categories.add(category_cell) leaf.grouping_levels.set_grouping_item(1, "Stem2") category_cell = workbook.get_cell(0, "C4", "Leaf4") chart.chart_data.categories.add(category_cell) # Branch 2 category_cell = workbook.get_cell(0, "C5", "Leaf5") leaf = chart.chart_data.categories.add(category_cell) leaf.grouping_levels.set_grouping_item(1, "Stem3") leaf.grouping_levels.set_grouping_item(2, "Branch2") category_cell = workbook.get_cell(0, "C6", "Leaf6") chart.chart_data.categories.add(category_cell) category_cell = workbook.get_cell(0, "C7", "Leaf7") leaf = chart.chart_data.categories.add(category_cell) leaf.grouping_levels.set_grouping_item(1, "Stem4") category_cell = workbook.get_cell(0, "C8", "Leaf8") chart.chart_data.categories.add(category_cell) series = chart.chart_data.series.add(charts.ChartType.TREEMAP) series.labels.default_data_label_format.show_category_name = True value_cell = workbook.get_cell(0, "D1", 4) series.data_points.add_data_point_for_treemap_series(value_cell) value_cell = workbook.get_cell(0, "D2", 5) series.data_points.add_data_point_for_treemap_series(value_cell) value_cell = workbook.get_cell(0, "D3", 3) series.data_points.add_data_point_for_treemap_series(value_cell) value_cell = workbook.get_cell(0, "D4", 6) series.data_points.add_data_point_for_treemap_series(value_cell) value_cell = workbook.get_cell(0, "D5", 9) series.data_points.add_data_point_for_treemap_series(value_cell) value_cell = workbook.get_cell(0, "D6", 9) series.data_points.add_data_point_for_treemap_series(value_cell) value_cell = workbook.get_cell(0, "D7", 4) series.data_points.add_data_point_for_treemap_series(value_cell) value_cell = workbook.get_cell(0, "D8", 3) series.data_points.add_data_point_for_treemap_series(value_cell) series.parent_label_layout = charts.ParentLabelLayoutType.OVERLAPPING presentation.save("Treemap.pptx", slides.export.SaveFormat.PPTX) ``` The result: ![The Treemap chart](https://docs.aspose.com/slides/python-net/create-chart/treemap_chart.png) ### **Create Waterfall Charts** A waterfall chart shows how positive and negative changes contribute to a final value. For example, a profit breakdown can start with revenue, subtract costs, and add other income. Change columns float between the previous and new running values, while total columns extend from zero to the accumulated value. The following example uses amounts in thousands of US dollars: | Category | Workbook value | Column type | | --- | ---: | --- | | Revenue | 1000 | Increase | | Cost of sales | -400 | Decrease | | Gross profit | 600 | Intermediate total | | Operating expenses | -200 | Decrease | | Other income | 50 | Increase | | Net profit | 450 | Final total | To mark a point as an intermediate or final total, set its [set_as_total](https://reference.aspose.com/slides/python-net/aspose.slides.charts/chartdatapoint/set_as_total/) property to `True`. Supply the actual accumulated amount in that point's workbook cell: `600` for gross profit (`1000 - 400`) and `450` for net profit (`600 - 200 + 50`). The property marks the column as a total; it does not calculate or populate the cell value. Do not use zero as a placeholder or supply another change for a total point. A total column displays the accumulated value without adding it again to the running value. This complete C# example creates a chart using the `Waterfall` member of [ChartType](https://reference.aspose.com/slides/python-net/aspose.slides.charts/charttype/), clears the default data, and fills the embedded workbook. Worksheet index `0` selects the first worksheet; column A contains category names and column B contains values. Each value cell is added with [add_data_point_for_waterfall_series](https://reference.aspose.com/slides/python-net/aspose.slides.charts/chartdatapointcollection/add_data_point_for_waterfall_series/). The zero-based point indices `2` and `5` identify the intermediate and final totals. Enabling [show_value](https://reference.aspose.com/slides/python-net/aspose.slides.charts/datalabelformat/show_value/) displays the amounts on the columns. No input presentation or workbook is required. ```python import aspose.slides as slides import aspose.slides.charts as charts with slides.Presentation() as presentation: slide = presentation.slides[0] chart = slide.shapes.add_chart(charts.ChartType.WATERFALL, 20, 20, 680, 200) chart.has_title = True chart.chart_title.add_text_frame_for_overriding("Profit breakdown (USD thousands)") chart.chart_title.overlay = False chart.has_legend = False chart.chart_data.series.clear() chart.chart_data.categories.clear() workbook = chart.chart_data.chart_data_workbook worksheet_index = 0 workbook.clear(worksheet_index) series_name_cell = workbook.get_cell(worksheet_index, 0, 1, "Profit") series = chart.chart_data.series.add(series_name_cell, charts.ChartType.WATERFALL) categories = ["Revenue", "Cost of sales", "Gross profit", "Operating expenses", "Other income", "Net profit"] values = [1000, -400, 600, -200, 50, 450] for i in range(len(categories)): category_cell = workbook.get_cell(worksheet_index, i + 1, 0, categories[i]) chart.chart_data.categories.add(category_cell) value_cell = workbook.get_cell(worksheet_index, i + 1, 1, values[i]) series.data_points.add_data_point_for_waterfall_series(value_cell) # The third and sixth points represent totals, not additional changes. series.data_points[2].set_as_total = True series.data_points[5].set_as_total = True series.show_connector_lines = True series.labels.default_data_label_format.show_value = True presentation.save("WaterfallChart.pptx", slides.export.SaveFormat.PPTX) ``` Set the series-level [show_connector_lines](https://reference.aspose.com/slides/python-net/aspose.slides.charts/chartseries/show_connector_lines/) property to `True` to show lines linking consecutive columns and make the running value easier to follow. To hide these lines, replace the assignment in the example with `series.show_connector_lines = False` before saving. This changes only the line visibility, not the data or totals. The saved presentation shows gross profit of 600 and net profit of 450, with both totals drawn from zero: ![Waterfall chart showing revenue, costs, gross profit of 600, and net profit of 450, with value labels and connector lines](https://docs.aspose.com/slides/python-net/create-chart/waterfall_chart.png) ### **Create Stock Charts** Stock charts are used to display financial data such as open, high, low, and close prices, helping analyze market trends and volatility. They offer essential insights into stock performance, aiding investors and analysts in making informed decisions. This example creates an open-high-low-close chart with four series in that order and three categories. The [has_up_down_bars](https://reference.aspose.com/slides/python-net/aspose.slides.charts/updownbarsmanager/has_up_down_bars/) property enables up/down bars, and [hi_low_lines_format](https://reference.aspose.com/slides/python-net/aspose.slides.charts/chartseriesgroup/hi_low_lines_format/) controls the high-low lines that show the price ranges, while the individual series lines and minor horizontal gridlines are hidden. The [up_down_bars](https://reference.aspose.com/slides/python-net/aspose.slides.charts/chartseriesgroup/up_down_bars/) manager exposes separate [up_bars_format](https://reference.aspose.com/slides/python-net/aspose.slides.charts/updownbarsmanager/up_bars_format/) and [down_bars_format](https://reference.aspose.com/slides/python-net/aspose.slides.charts/updownbarsmanager/down_bars_format/) objects. Use each object's [fill](https://reference.aspose.com/slides/python-net/aspose.slides.charts/format/fill/) and [line](https://reference.aspose.com/slides/python-net/aspose.slides.charts/format/line/) properties to set its fill and outline independently. This example uses green bars with dark-green outlines for rising intervals and orange-red bars with dark-red outlines for falling intervals. Provide numeric values for all four series at each category, with High and Low enclosing Open and Close. The bars compare Close with Open **within the same category**, not with the previous category: A falls from 72 to 25, while B rises from 25 to 38 and C rises from 38 to 50. Equal Open and Close values produce no visible filled interval. Up/down bars span Open–Close; high-low lines span Low–High. These bars belong to the series group and are not ordinary bar-chart series. This formatting also works with [LINE and LINE_WITH_MARKERS](https://reference.aspose.com/slides/python-net/aspose.slides.charts/charttype/) charts containing at least two series in the same group and corresponding numeric values for each category. For these non-stacked line charts, up/down bars compare the first and last series: a higher last value produces an up bar, and a lower last value produces a down bar. Reversing those series reverses the classification. The example below uses [OPEN_HIGH_LOW_CLOSE](https://reference.aspose.com/slides/python-net/aspose.slides.charts/charttype/); do not assume that other stock, stacked-line, or 3D variants use the same data arrangement or interval interpretation. ```python import aspose.pydrawing as draw import aspose.slides as slides import aspose.slides.charts as charts with slides.Presentation() as presentation: slide = presentation.slides[0] chart = slide.shapes.add_chart(charts.ChartType.OPEN_HIGH_LOW_CLOSE, 20, 20, 500, 150, False) workbook = chart.chart_data.chart_data_workbook category_cell = workbook.get_cell(0, 1, 0, "A") chart.chart_data.categories.add(category_cell) category_cell = workbook.get_cell(0, 2, 0, "B") chart.chart_data.categories.add(category_cell) category_cell = workbook.get_cell(0, 3, 0, "C") chart.chart_data.categories.add(category_cell) series_name_cell = workbook.get_cell(0, 0, 1, "Open") chart.chart_data.series.add(series_name_cell, charts.ChartType.OPEN_HIGH_LOW_CLOSE) series_name_cell = workbook.get_cell(0, 0, 2, "High") chart.chart_data.series.add(series_name_cell, charts.ChartType.OPEN_HIGH_LOW_CLOSE) series_name_cell = workbook.get_cell(0, 0, 3, "Low") chart.chart_data.series.add(series_name_cell, charts.ChartType.OPEN_HIGH_LOW_CLOSE) series_name_cell = workbook.get_cell(0, 0, 4, "Close") chart.chart_data.series.add(series_name_cell, charts.ChartType.OPEN_HIGH_LOW_CLOSE) series = chart.chart_data.series[0] value_cell = workbook.get_cell(0, 1, 1, 72) series.data_points.add_data_point_for_stock_series(value_cell) value_cell = workbook.get_cell(0, 2, 1, 25) series.data_points.add_data_point_for_stock_series(value_cell) value_cell = workbook.get_cell(0, 3, 1, 38) series.data_points.add_data_point_for_stock_series(value_cell) series = chart.chart_data.series[1] value_cell = workbook.get_cell(0, 1, 2, 172) series.data_points.add_data_point_for_stock_series(value_cell) value_cell = workbook.get_cell(0, 2, 2, 57) series.data_points.add_data_point_for_stock_series(value_cell) value_cell = workbook.get_cell(0, 3, 2, 57) series.data_points.add_data_point_for_stock_series(value_cell) series = chart.chart_data.series[2] value_cell = workbook.get_cell(0, 1, 3, 12) series.data_points.add_data_point_for_stock_series(value_cell) value_cell = workbook.get_cell(0, 2, 3, 12) series.data_points.add_data_point_for_stock_series(value_cell) value_cell = workbook.get_cell(0, 3, 3, 13) series.data_points.add_data_point_for_stock_series(value_cell) series = chart.chart_data.series[3] value_cell = workbook.get_cell(0, 1, 4, 25) series.data_points.add_data_point_for_stock_series(value_cell) value_cell = workbook.get_cell(0, 2, 4, 38) series.data_points.add_data_point_for_stock_series(value_cell) value_cell = workbook.get_cell(0, 3, 4, 50) series.data_points.add_data_point_for_stock_series(value_cell) up_down_bars = chart.chart_data.series_groups[0].up_down_bars up_down_bars.has_up_down_bars = True up_down_bars.up_bars_format.fill.fill_type = slides.FillType.SOLID up_down_bars.up_bars_format.fill.solid_fill_color.color = draw.Color.lime_green up_down_bars.up_bars_format.line.fill_format.fill_type = slides.FillType.SOLID up_down_bars.up_bars_format.line.fill_format.solid_fill_color.color = draw.Color.dark_green up_down_bars.up_bars_format.line.width = 2 up_down_bars.down_bars_format.fill.fill_type = slides.FillType.SOLID up_down_bars.down_bars_format.fill.solid_fill_color.color = draw.Color.orange_red up_down_bars.down_bars_format.line.fill_format.fill_type = slides.FillType.SOLID up_down_bars.down_bars_format.line.fill_format.solid_fill_color.color = draw.Color.dark_red up_down_bars.down_bars_format.line.width = 2 chart.chart_data.series_groups[0].hi_low_lines_format.line.fill_format.fill_type = slides.FillType.SOLID for stock_series in chart.chart_data.series: stock_series.format.line.fill_format.fill_type = slides.FillType.NO_FILL chart.axes.vertical_axis.minor_grid_lines_format.line.fill_format.fill_type = slides.FillType.NO_FILL presentation.save("Stock-chart.pptx", slides.export.SaveFormat.PPTX) ``` The result, exported from PowerPoint: ![Stock chart with an orange-red falling interval for A and green rising intervals for B and C](https://docs.aspose.com/slides/python-net/create-chart/stock_chart.png) ### **Create Box and Whisker Charts** Box and whisker charts are used to display the distribution of data by summarizing key statistical measures, such as the median, quartiles, and potential outliers. They are particularly useful in exploratory data analysis and statistical studies to quickly understand data variability and identify any anomalies. This example creates a box and whisker chart from six values. The [quartile_method](https://reference.aspose.com/slides/python-net/aspose.slides.charts/chartseries/quartile_method/) property selects the exclusive quartile calculation. The example also enables mean lines, mean markers, inner points, and outlier points. ```python import aspose.slides as slides import aspose.slides.charts as charts with slides.Presentation() as presentation: slide = presentation.slides[0] chart = slide.shapes.add_chart(charts.ChartType.BOX_AND_WHISKER, 20, 20, 500, 300) chart.chart_data.categories.clear() chart.chart_data.series.clear() workbook = chart.chart_data.chart_data_workbook workbook.clear(0) category_cell = workbook.get_cell(0, "A1", "Category 1") chart.chart_data.categories.add(category_cell) category_cell = workbook.get_cell(0, "A2", "Category 2") chart.chart_data.categories.add(category_cell) category_cell = workbook.get_cell(0, "A3", "Category 3") chart.chart_data.categories.add(category_cell) category_cell = workbook.get_cell(0, "A4", "Category 4") chart.chart_data.categories.add(category_cell) category_cell = workbook.get_cell(0, "A5", "Category 5") chart.chart_data.categories.add(category_cell) category_cell = workbook.get_cell(0, "A6", "Category 6") chart.chart_data.categories.add(category_cell) series = chart.chart_data.series.add(charts.ChartType.BOX_AND_WHISKER) series.quartile_method = charts.QuartileMethodType.EXCLUSIVE series.show_mean_line = True series.show_mean_markers = True series.show_inner_points = True series.show_outlier_points = True value_cell = workbook.get_cell(0, "B1", 15) series.data_points.add_data_point_for_box_and_whisker_series(value_cell) value_cell = workbook.get_cell(0, "B2", 41) series.data_points.add_data_point_for_box_and_whisker_series(value_cell) value_cell = workbook.get_cell(0, "B3", 16) series.data_points.add_data_point_for_box_and_whisker_series(value_cell) value_cell = workbook.get_cell(0, "B4", 10) series.data_points.add_data_point_for_box_and_whisker_series(value_cell) value_cell = workbook.get_cell(0, "B5", 23) series.data_points.add_data_point_for_box_and_whisker_series(value_cell) value_cell = workbook.get_cell(0, "B6", 16) series.data_points.add_data_point_for_box_and_whisker_series(value_cell) presentation.save("BoxAndWhisker.pptx", slides.export.SaveFormat.PPTX) ``` ### **Create Funnel Charts** Funnel charts are used to visualize processes that involve sequential stages, where the volume of data decreases as it progresses from one step to the next. They are especially helpful for analyzing conversion rates, identifying bottlenecks, and tracking the efficiency of sales or marketing processes. This example uses [add_chart](https://reference.aspose.com/slides/python-net/aspose.slides/shapecollection/add_chart/) to add a funnel chart to the first slide of an existing presentation. It replaces the default data with six categories and values ranging from 50 to 500, then saves the updated presentation. The input presentation must contain at least one slide. ```python import aspose.slides as slides import aspose.slides.charts as charts with slides.Presentation("test.pptx") as presentation: slide = presentation.slides[0] chart = slide.shapes.add_chart(charts.ChartType.FUNNEL, 50, 50, 500, 400) chart.chart_data.categories.clear() chart.chart_data.series.clear() workbook = chart.chart_data.chart_data_workbook workbook.clear(0) category_cell = workbook.get_cell(0, "A1", "Category 1") chart.chart_data.categories.add(category_cell) category_cell = workbook.get_cell(0, "A2", "Category 2") chart.chart_data.categories.add(category_cell) category_cell = workbook.get_cell(0, "A3", "Category 3") chart.chart_data.categories.add(category_cell) category_cell = workbook.get_cell(0, "A4", "Category 4") chart.chart_data.categories.add(category_cell) category_cell = workbook.get_cell(0, "A5", "Category 5") chart.chart_data.categories.add(category_cell) category_cell = workbook.get_cell(0, "A6", "Category 6") chart.chart_data.categories.add(category_cell) series = chart.chart_data.series.add(charts.ChartType.FUNNEL) value_cell = workbook.get_cell(0, "B1", 50) series.data_points.add_data_point_for_funnel_series(value_cell) value_cell = workbook.get_cell(0, "B2", 100) series.data_points.add_data_point_for_funnel_series(value_cell) value_cell = workbook.get_cell(0, "B3", 200) series.data_points.add_data_point_for_funnel_series(value_cell) value_cell = workbook.get_cell(0, "B4", 300) series.data_points.add_data_point_for_funnel_series(value_cell) value_cell = workbook.get_cell(0, "B5", 400) series.data_points.add_data_point_for_funnel_series(value_cell) value_cell = workbook.get_cell(0, "B6", 500) series.data_points.add_data_point_for_funnel_series(value_cell) presentation.save("Funnel.pptx", slides.export.SaveFormat.PPTX) ``` The result: ![The Funnel chart](https://docs.aspose.com/slides/python-net/create-chart/funnel_chart.png) ### **Create Sunburst Charts** Sunburst charts are used to visualize hierarchical data, displaying levels as concentric rings. They help illustrate part-to-whole relationships and are ideal for representing nested categories and subcategories in a clear, compact format. This example creates a sunburst chart with eight leaves grouped into four stems and two branches. The [set_grouping_item](https://reference.aspose.com/slides/python-net/aspose.slides.charts/chartcategorylevelsmanager/set_grouping_item/) method assigns stems at grouping level 1 and branches at level 2. Category labels identify the segments, and the values determine their relative sizes. ```python import aspose.slides as slides import aspose.slides.charts as charts with slides.Presentation() as presentation: slide = presentation.slides[0] chart = slide.shapes.add_chart(charts.ChartType.SUNBURST, 20, 20, 500, 300) chart.chart_data.categories.clear() chart.chart_data.series.clear() workbook = chart.chart_data.chart_data_workbook workbook.clear(0) # Branch 1 category_cell = workbook.get_cell(0, "C1", "Leaf1") leaf = chart.chart_data.categories.add(category_cell) leaf.grouping_levels.set_grouping_item(1, "Stem1") leaf.grouping_levels.set_grouping_item(2, "Branch1") category_cell = workbook.get_cell(0, "C2", "Leaf2") chart.chart_data.categories.add(category_cell) category_cell = workbook.get_cell(0, "C3", "Leaf3") leaf = chart.chart_data.categories.add(category_cell) leaf.grouping_levels.set_grouping_item(1, "Stem2") category_cell = workbook.get_cell(0, "C4", "Leaf4") chart.chart_data.categories.add(category_cell) # Branch 2 category_cell = workbook.get_cell(0, "C5", "Leaf5") leaf = chart.chart_data.categories.add(category_cell) leaf.grouping_levels.set_grouping_item(1, "Stem3") leaf.grouping_levels.set_grouping_item(2, "Branch2") category_cell = workbook.get_cell(0, "C6", "Leaf6") chart.chart_data.categories.add(category_cell) category_cell = workbook.get_cell(0, "C7", "Leaf7") leaf = chart.chart_data.categories.add(category_cell) leaf.grouping_levels.set_grouping_item(1, "Stem4") category_cell = workbook.get_cell(0, "C8", "Leaf8") chart.chart_data.categories.add(category_cell) series = chart.chart_data.series.add(charts.ChartType.SUNBURST) series.labels.default_data_label_format.show_category_name = True value_cell = workbook.get_cell(0, "D1", 4) series.data_points.add_data_point_for_sunburst_series(value_cell) value_cell = workbook.get_cell(0, "D2", 5) series.data_points.add_data_point_for_sunburst_series(value_cell) value_cell = workbook.get_cell(0, "D3", 3) series.data_points.add_data_point_for_sunburst_series(value_cell) value_cell = workbook.get_cell(0, "D4", 6) series.data_points.add_data_point_for_sunburst_series(value_cell) value_cell = workbook.get_cell(0, "D5", 9) series.data_points.add_data_point_for_sunburst_series(value_cell) value_cell = workbook.get_cell(0, "D6", 9) series.data_points.add_data_point_for_sunburst_series(value_cell) value_cell = workbook.get_cell(0, "D7", 4) series.data_points.add_data_point_for_sunburst_series(value_cell) value_cell = workbook.get_cell(0, "D8", 3) series.data_points.add_data_point_for_sunburst_series(value_cell) presentation.save("Sunburst.pptx", slides.export.SaveFormat.PPTX) ``` The result: ![The Sunburst chart](https://docs.aspose.com/slides/python-net/create-chart/sunburst_chart.png) ### **Create Histogram Charts** Histogram charts show how numerical values are distributed across intervals (bins). For monthly reports on order processing times, use the same bin width and thresholds to keep intervals consistent and make distributions easier to compare. Set the horizontal axis [aggregation_type](https://reference.aspose.com/slides/python-net/aspose.slides.charts/axis/aggregation_type/) to a mode from [AxisAggregationType](https://reference.aspose.com/slides/python-net/aspose.slides.charts/axisaggregationtype/). [bin_width](https://reference.aspose.com/slides/python-net/aspose.slides.charts/axis/bin_width/) applies only to `BY_BIN_WIDTH`; [number_of_bins](https://reference.aspose.com/slides/python-net/aspose.slides.charts/axis/number_of_bins/) applies only to `BY_NUMBER_OF_BINS`. Use `AUTOMATIC` to let the chart choose the bins. #### **Use a Fixed Bin Width** This example groups processing times into 10-minute intervals, with separate bins for times at or below 10 minutes and above 40 minutes. Enable these bins with [is_underflow_bin](https://reference.aspose.com/slides/python-net/aspose.slides.charts/axis/is_underflow_bin/) and [is_overflow_bin](https://reference.aspose.com/slides/python-net/aspose.slides.charts/axis/is_overflow_bin/). When supplying explicit [underflow_bin](https://reference.aspose.com/slides/python-net/aspose.slides.charts/axis/underflow_bin/) and [overflow_bin](https://reference.aspose.com/slides/python-net/aspose.slides.charts/axis/overflow_bin/) thresholds, set [is_automatic_underflow_bin](https://reference.aspose.com/slides/python-net/aspose.slides.charts/axis/is_automatic_underflow_bin/) and [is_automatic_overflow_bin](https://reference.aspose.com/slides/python-net/aspose.slides.charts/axis/is_automatic_overflow_bin/) to `False`. ```python import aspose.slides as slides import aspose.slides.charts as charts with slides.Presentation() as presentation: slide = presentation.slides[0] chart = slide.shapes.add_chart(charts.ChartType.HISTOGRAM, 20, 20, 680, 200) chart.has_legend = False chart.has_title = False chart.chart_data.categories.clear() chart.chart_data.series.clear() workbook = chart.chart_data.chart_data_workbook workbook.clear(0) series = chart.chart_data.series.add(charts.ChartType.HISTOGRAM) values = [5, 10, 10, 11, 15, 20, 20, 21, 25, 30, 30, 31, 35, 40, 40, 41, 50] for i, value in enumerate(values): value_cell = workbook.get_cell(0, i, 0, value) series.data_points.add_data_point_for_histogram_series(value_cell) axis = chart.axes.horizontal_axis axis.aggregation_type = charts.AxisAggregationType.BY_BIN_WIDTH axis.bin_width = 10 axis.is_underflow_bin = True axis.is_automatic_underflow_bin = False axis.underflow_bin = 10 axis.is_overflow_bin = True axis.is_automatic_overflow_bin = False axis.overflow_bin = 40 presentation.save("Histogram-bin-width.pptx", slides.export.SaveFormat.PPTX) ``` The presentation displayed in PowerPoint shows bin counts of **3, 4, 4, 4, and 2**. The underflow bin includes `5, 10, 10`, so its threshold is inclusive. The overflow bin includes only `41, 50`, so its threshold is exclusive; both values equal to `40` remain in the preceding interval. The interior bins contain values greater than their lower boundary and less than or equal to their upper boundary. ![Histogram with 10-minute bins and explicit underflow and overflow thresholds](https://docs.aspose.com/slides/python-net/create-chart/histogram_bin_width.png) #### **Specify the Number of Bins** For a fixed level of detail instead of fixed intervals, request five bins for the same data. This example leaves underflow and overflow bins disabled. The chart determines the width from the data range, so boundaries can change between reports. ```python import aspose.slides as slides import aspose.slides.charts as charts with slides.Presentation() as presentation: slide = presentation.slides[0] chart = slide.shapes.add_chart(charts.ChartType.HISTOGRAM, 20, 20, 680, 200) chart.has_legend = False chart.has_title = False chart.chart_data.categories.clear() chart.chart_data.series.clear() workbook = chart.chart_data.chart_data_workbook workbook.clear(0) series = chart.chart_data.series.add(charts.ChartType.HISTOGRAM) values = [5, 10, 10, 11, 15, 20, 20, 21, 25, 30, 30, 31, 35, 40, 40, 41, 50] for i, value in enumerate(values): value_cell = workbook.get_cell(0, i, 0, value) series.data_points.add_data_point_for_histogram_series(value_cell) axis = chart.axes.horizontal_axis axis.aggregation_type = charts.AxisAggregationType.BY_NUMBER_OF_BINS axis.number_of_bins = 5 presentation.save("Histogram-bin-count.pptx", slides.export.SaveFormat.PPTX) ``` The five bins have counts of **4, 4, 4, 4, and 1**. Compare this distribution with the fixed-width result above: the input values are identical, but the boundaries differ. ![Histogram with five bins calculated from the same data](https://docs.aspose.com/slides/python-net/create-chart/histogram_bin_count.png) ### **Create Radar Charts** Radar charts are used to display multivariate data in a two-dimensional format, allowing for easy comparison of several variables simultaneously. They are particularly useful for identifying patterns, strengths, and weaknesses across multiple performance metrics or attributes. This example uses [add_chart](https://reference.aspose.com/slides/python-net/aspose.slides/shapecollection/add_chart/) to create a radar chart with the default series and categories, then saves the presentation as PPTX. ```python import aspose.slides as slides import aspose.slides.charts as charts with slides.Presentation() as presentation: slide = presentation.slides[0] slide.shapes.add_chart(charts.ChartType.RADAR, 20, 20, 500, 300) presentation.save("Radar-chart.pptx", slides.export.SaveFormat.PPTX) ``` The result: ![The Radar chart](https://docs.aspose.com/slides/python-net/create-chart/radar_chart.png) ### **Create Multi-Category Charts** Multi-category charts are used to display data that involves more than one categorical grouping, allowing you to compare values across multiple dimensions simultaneously. They are particularly helpful when you need to analyze trends and relationships within complex, multi-layered datasets. This example creates a clustered column chart with eight categories arranged in four pairs. The [set_grouping_item](https://reference.aspose.com/slides/python-net/aspose.slides.charts/chartcategorylevelsmanager/set_grouping_item/) method gives each pair a shared label at grouping level 1, producing a category axis with both individual and group labels. ```python import aspose.slides as slides import aspose.slides.charts as charts with slides.Presentation() as presentation: slide = presentation.slides[0] chart = slide.shapes.add_chart(charts.ChartType.CLUSTERED_COLUMN, 20, 20, 500, 300) chart.chart_data.series.clear() chart.chart_data.categories.clear() workbook = chart.chart_data.chart_data_workbook workbook.clear(0) worksheet_index = 0 category_cell = workbook.get_cell(0, "c2", "A") category = chart.chart_data.categories.add(category_cell) category.grouping_levels.set_grouping_item(1, "Group1") category_cell = workbook.get_cell(0, "c3", "B") category = chart.chart_data.categories.add(category_cell) category_cell = workbook.get_cell(0, "c4", "C") category = chart.chart_data.categories.add(category_cell) category.grouping_levels.set_grouping_item(1, "Group2") category_cell = workbook.get_cell(0, "c5", "D") category = chart.chart_data.categories.add(category_cell) category_cell = workbook.get_cell(0, "c6", "E") category = chart.chart_data.categories.add(category_cell) category.grouping_levels.set_grouping_item(1, "Group3") category_cell = workbook.get_cell(0, "c7", "F") category = chart.chart_data.categories.add(category_cell) category_cell = workbook.get_cell(0, "c8", "G") category = chart.chart_data.categories.add(category_cell) category.grouping_levels.set_grouping_item(1, "Group4") category_cell = workbook.get_cell(0, "c9", "H") category = chart.chart_data.categories.add(category_cell) series_name_cell = workbook.get_cell(0, "D1", "Series 1") series = chart.chart_data.series.add(series_name_cell, charts.ChartType.CLUSTERED_COLUMN) value_cell = workbook.get_cell(worksheet_index, "D2", 10) series.data_points.add_data_point_for_bar_series(value_cell) value_cell = workbook.get_cell(worksheet_index, "D3", 20) series.data_points.add_data_point_for_bar_series(value_cell) value_cell = workbook.get_cell(worksheet_index, "D4", 30) series.data_points.add_data_point_for_bar_series(value_cell) value_cell = workbook.get_cell(worksheet_index, "D5", 40) series.data_points.add_data_point_for_bar_series(value_cell) value_cell = workbook.get_cell(worksheet_index, "D6", 50) series.data_points.add_data_point_for_bar_series(value_cell) value_cell = workbook.get_cell(worksheet_index, "D7", 60) series.data_points.add_data_point_for_bar_series(value_cell) value_cell = workbook.get_cell(worksheet_index, "D8", 70) series.data_points.add_data_point_for_bar_series(value_cell) value_cell = workbook.get_cell(worksheet_index, "D9", 80) series.data_points.add_data_point_for_bar_series(value_cell) presentation.save("AsposeChart.pptx", slides.export.SaveFormat.PPTX) ``` The result: ![The multi category chart](https://docs.aspose.com/slides/python-net/create-chart/multi_category_chart.png) #### **Remove a Quarter Label** Download [quarters.pptx](https://docs.aspose.com/slides/python-net/create-chart/quarters.pptx) and place it in the working directory. Its chart shows nine months and a single sales series with values from 10 through 18. The category axis has three quarter labels: Q1 spans Jan–Mar, Q2 spans Apr–Jun, and Q3 spans Jul–Sep. April is the fourth category and the one on which Q2 was explicitly set. Call [delete_grouping_item](https://reference.aspose.com/slides/python-net/aspose.slides.charts/chartcategorylevelsmanager/delete_grouping_item/) on April's [grouping_levels](https://reference.aspose.com/slides/python-net/aspose.slides.charts/chartcategory/grouping_levels/) collection. The level is relative to April: level 1 is its quarter, and level 0 is the month itself. The method cannot remove the leaf category at level 0. ```python import aspose.slides as slides with slides.Presentation("quarters.pptx") as presentation: chart = presentation.slides[0].shapes[0] april = chart.chart_data.categories[3] april.grouping_levels.delete_grouping_item(1) presentation.save("quarters-updated.pptx", slides.export.SaveFormat.PPTX) with slides.Presentation("quarters-updated.pptx") as reopened: data = reopened.slides[0].shapes[0].chart_data print(", ".join(str(month.as_cell.value) for month in data.categories)) print(", ".join(str(point.value.data) for point in data.series[0].data_points)) ``` The reopened chart prints the original months (`Jan, Feb, Mar, Apr, May, Jun, Jul, Aug, Sep`) and sales values (`10, 11, 12, 13, 14, 15, 16, 17, 18`) in the same order. Open `quarters-updated.pptx` in PowerPoint to compare the axis labels. The Q2 label and the group boundary before April disappear, so Q1 spans January through June. Q3 still begins in July. ![Quarter labels before and after removal. On the left, Q2 spans April through June. On the right, Q1 spans January through June.](https://docs.aspose.com/slides/python-net/create-chart/quarter-label-comparison.png) ### **Create Map Charts** Map charts are used to visualize geographical data by mapping information to specific locations such as countries, states, or cities. They are particularly useful for analyzing regional trends, demographic data, and spatial distributions in a clear, visually engaging manner. This example uses [add_chart](https://reference.aspose.com/slides/python-net/aspose.slides/shapecollection/add_chart/) to create a map chart with the default geographical data and saves it for viewing in PowerPoint. ```python import aspose.slides as slides import aspose.slides.charts as charts with slides.Presentation() as presentation: slide = presentation.slides[0] chart = slide.shapes.add_chart(charts.ChartType.MAP, 20, 20, 500, 300) presentation.save("mapChart.pptx", slides.export.SaveFormat.PPTX) ``` The result: ![The Map chart](https://docs.aspose.com/slides/python-net/create-chart/map_chart.png) The picture above shows the saved presentation opened in PowerPoint. Aspose.Slides writes the map chart and its data correctly, but it does not draw map charts itself: when a slide holding one is rendered to an image or converted to PDF or SVG, the chart area comes out blank. Other shapes on the same slide are unaffected. ### **Create Combination Charts** A combination chart (or combo chart) combines two or more chart types in a single graph. This chart lets you highlight, compare, or examine differences between two or more data sets, helping you identify relationships between them. ![The combination chart](https://docs.aspose.com/slides/python-net/create-chart/combination_chart.png) This example combines two clustered column series with a line series across four categories. The columns use the primary vertical axis, while [plot_on_second_axis](https://reference.aspose.com/slides/python-net/aspose.slides.charts/chartseries/plot_on_second_axis/) places the line on a secondary vertical axis on the right. The helper functions configure the title, legend, axis labels, and gridlines. ```python import aspose.pydrawing as draw import aspose.slides as slides import aspose.slides.charts as charts def create_combo_chart(): with slides.Presentation() as presentation: chart = create_chart_with_first_series(presentation.slides[0]) add_second_series_to_chart(chart) add_third_series_to_chart(chart) set_primary_axes_format(chart) set_secondary_axes_format(chart) presentation.save("combo-chart.pptx", slides.export.SaveFormat.PPTX) def create_chart_with_first_series(slide): chart = slide.shapes.add_chart(charts.ChartType.CLUSTERED_COLUMN, 50, 50, 600, 400) chart.has_title = True chart.chart_title.add_text_frame_for_overriding("Chart Title") chart.chart_title.overlay = False portion_format = chart.chart_title.text_frame_for_overriding.paragraphs[0].paragraph_format.default_portion_format portion_format.font_bold = slides.NullableBool.FALSE portion_format.font_height = 18 chart.legend.position = charts.LegendPositionType.BOTTOM chart.legend.text_format.portion_format.font_height = 12 chart.chart_data.series.clear() chart.chart_data.categories.clear() workbook = chart.chart_data.chart_data_workbook worksheet_index = 0 category_cell = workbook.get_cell(worksheet_index, 1, 0, "Category 1") chart.chart_data.categories.add(category_cell) category_cell = workbook.get_cell(worksheet_index, 2, 0, "Category 2") chart.chart_data.categories.add(category_cell) category_cell = workbook.get_cell(worksheet_index, 3, 0, "Category 3") chart.chart_data.categories.add(category_cell) category_cell = workbook.get_cell(worksheet_index, 4, 0, "Category 4") chart.chart_data.categories.add(category_cell) series_name_cell = workbook.get_cell(worksheet_index, 0, 1, "Series 1") series = chart.chart_data.series.add(series_name_cell, chart.type) series.parent_series_group.overlap = -25 series.parent_series_group.gap_width = 220 value_cell = workbook.get_cell(worksheet_index, 1, 1, 4.3) series.data_points.add_data_point_for_bar_series(value_cell) value_cell = workbook.get_cell(worksheet_index, 2, 1, 2.5) series.data_points.add_data_point_for_bar_series(value_cell) value_cell = workbook.get_cell(worksheet_index, 3, 1, 3.5) series.data_points.add_data_point_for_bar_series(value_cell) value_cell = workbook.get_cell(worksheet_index, 4, 1, 4.5) series.data_points.add_data_point_for_bar_series(value_cell) return chart def add_second_series_to_chart(chart): workbook = chart.chart_data.chart_data_workbook worksheet_index = 0 series_name_cell = workbook.get_cell(worksheet_index, 0, 2, "Series 2") series = chart.chart_data.series.add(series_name_cell, charts.ChartType.CLUSTERED_COLUMN) series.parent_series_group.overlap = -25 series.parent_series_group.gap_width = 220 value_cell = workbook.get_cell(worksheet_index, 1, 2, 2.4) series.data_points.add_data_point_for_bar_series(value_cell) value_cell = workbook.get_cell(worksheet_index, 2, 2, 4.4) series.data_points.add_data_point_for_bar_series(value_cell) value_cell = workbook.get_cell(worksheet_index, 3, 2, 1.8) series.data_points.add_data_point_for_bar_series(value_cell) value_cell = workbook.get_cell(worksheet_index, 4, 2, 2.8) series.data_points.add_data_point_for_bar_series(value_cell) def add_third_series_to_chart(chart): workbook = chart.chart_data.chart_data_workbook worksheet_index = 0 series_name_cell = workbook.get_cell(worksheet_index, 0, 3, "Series 3") series = chart.chart_data.series.add(series_name_cell, charts.ChartType.LINE) value_cell = workbook.get_cell(worksheet_index, 1, 3, 2.0) series.data_points.add_data_point_for_line_series(value_cell) value_cell = workbook.get_cell(worksheet_index, 2, 3, 2.0) series.data_points.add_data_point_for_line_series(value_cell) value_cell = workbook.get_cell(worksheet_index, 3, 3, 3.0) series.data_points.add_data_point_for_line_series(value_cell) value_cell = workbook.get_cell(worksheet_index, 4, 3, 5.0) series.data_points.add_data_point_for_line_series(value_cell) series.plot_on_second_axis = True def set_primary_axes_format(chart): horizontal_axis = chart.axes.horizontal_axis horizontal_axis.text_format.portion_format.font_height = 12 horizontal_axis.format.line.fill_format.fill_type = slides.FillType.NO_FILL set_axis_title(horizontal_axis, "X Axis") vertical_axis = chart.axes.vertical_axis vertical_axis.text_format.portion_format.font_height = 12 vertical_axis.format.line.fill_format.fill_type = slides.FillType.NO_FILL set_axis_title(vertical_axis, "Y Axis 1") major_grid_lines_format = vertical_axis.major_grid_lines_format.line.fill_format major_grid_lines_format.fill_type = slides.FillType.SOLID major_grid_lines_format.solid_fill_color.color = draw.Color.from_argb(217, 217, 217) def set_secondary_axes_format(chart): secondary_horizontal_axis = chart.axes.secondary_horizontal_axis secondary_horizontal_axis.position = charts.AxisPositionType.BOTTOM secondary_horizontal_axis.cross_type = charts.CrossesType.MAXIMUM secondary_horizontal_axis.is_visible = False secondary_horizontal_axis.major_grid_lines_format.line.fill_format.fill_type = slides.FillType.NO_FILL secondary_horizontal_axis.minor_grid_lines_format.line.fill_format.fill_type = slides.FillType.NO_FILL secondary_vertical_axis = chart.axes.secondary_vertical_axis secondary_vertical_axis.position = charts.AxisPositionType.RIGHT secondary_vertical_axis.text_format.portion_format.font_height = 12 secondary_vertical_axis.format.line.fill_format.fill_type = slides.FillType.NO_FILL secondary_vertical_axis.major_grid_lines_format.line.fill_format.fill_type = slides.FillType.NO_FILL secondary_vertical_axis.minor_grid_lines_format.line.fill_format.fill_type = slides.FillType.NO_FILL set_axis_title(secondary_vertical_axis, "Y Axis 2") def set_axis_title(axis, axis_title): axis.has_title = True axis.title.overlay = False title_portion_format = axis.title.add_text_frame_for_overriding(axis_title).paragraphs[0].paragraph_format.default_portion_format title_portion_format.font_bold = slides.NullableBool.FALSE title_portion_format.font_height = 12 create_combo_chart() ``` ## **Update Charts** Aspose.Slides for Python via .NET enables you to update PowerPoint charts by modifying chart data, formatting, and styling. This functionality simplifies the process of keeping presentations up-to-date with dynamic content and ensures that charts accurately reflect current data and visual standards. This example updates the chart named "My chart" on the first slide of an existing presentation. It requires two column series with three data points each, with category labels in column A and series names in the first row of the first worksheet. The example uses [get_cell](https://reference.aspose.com/slides/python-net/aspose.slides.charts/chartdataworkbook/get_cell/) to change workbook cells, updates series values, adds a third series, and changes the chart to clustered cylinders through [type](https://reference.aspose.com/slides/python-net/aspose.slides.charts/chart/type/). ```python import aspose.slides as slides import aspose.slides.charts as charts chart_name = "My chart" with slides.Presentation("ExistingChart.pptx") as presentation: slide = presentation.slides[0] for shape in slide.shapes: if isinstance(shape, charts.Chart) and shape.name == chart_name: chart = shape worksheet_index = 0 workbook = chart.chart_data.chart_data_workbook workbook.get_cell(worksheet_index, 1, 0, "Modified Category 1") workbook.get_cell(worksheet_index, 2, 0, "Modified Category 2") series = chart.chart_data.series[0] workbook.get_cell(worksheet_index, 0, 1, "New_Series 1") series.data_points[0].value.data = 90 series.data_points[1].value.data = 123 series.data_points[2].value.data = 44 series = chart.chart_data.series[1] workbook.get_cell(worksheet_index, 0, 2, "New_Series 2") series.data_points[0].value.data = 23 series.data_points[1].value.data = 67 series.data_points[2].value.data = 99 series_name_cell = workbook.get_cell(worksheet_index, 0, 3, "Series 3") series = chart.chart_data.series.add(series_name_cell, chart.type) value_cell = workbook.get_cell(worksheet_index, 1, 3, 20) series.data_points.add_data_point_for_bar_series(value_cell) value_cell = workbook.get_cell(worksheet_index, 2, 3, 50) series.data_points.add_data_point_for_bar_series(value_cell) value_cell = workbook.get_cell(worksheet_index, 3, 3, 30) series.data_points.add_data_point_for_bar_series(value_cell) chart.type = charts.ChartType.CLUSTERED_CYLINDER presentation.save("AsposeChartModified.pptx", slides.export.SaveFormat.PPTX) ``` ## **Set Data Range for a Chart** To inspect the range already used by an existing chart, see [Retrieve a Chart's Data Range](https://docs.aspose.com/slides/python-net/chart-workbook/#retrieve-a-charts-data-range). Aspose.Slides for Python via .NET provides the flexibility to define a specific data range from a worksheet as the source for your chart's data. This means you can directly map a portion of your worksheet to the chart, allowing you to control which cells contribute to the chart's series and categories. As a result, you can easily update and synchronize your charts with the latest data changes in your worksheet, ensuring that your PowerPoint presentations reflect current and accurate information. This example uses [set_range](https://reference.aspose.com/slides/python-net/aspose.slides.charts/chartdata/set_range/) to set the data source of the chart named "My chart" on the first slide of an existing presentation to `Sheet1!A1:B4`. The chart workbook must contain that worksheet and a populated range with a series heading in the first row, category labels in column A, and three values in column B. ```python import aspose.slides as slides import aspose.slides.charts as charts chart_name = "My chart" with slides.Presentation("ExistingChart.pptx") as presentation: slide = presentation.slides[0] for shape in slide.shapes: if isinstance(shape, charts.Chart) and shape.name == chart_name: chart = shape chart.chart_data.set_range("Sheet1!A1:B4") presentation.save("SetDataRange.pptx", slides.export.SaveFormat.PPTX) ``` ## **Use Default Markers in Charts** When you use default markers in charts, each chart series gets a different default marker symbol automatically. This example uses [add_chart](https://reference.aspose.com/slides/python-net/aspose.slides/shapecollection/add_chart/) to create a chart with two line series and a legend. The [marker](https://reference.aspose.com/slides/python-net/aspose.slides.charts/chartseries/marker/) settings retain the automatically assigned marker symbols. The first series includes a negative value and a missing value, represented by `None`, while the second has a value for every category. ```python import aspose.slides as slides import aspose.slides.charts as charts with slides.Presentation() as presentation: slide = presentation.slides[0] chart = slide.shapes.add_chart(charts.ChartType.LINE_WITH_MARKERS, 10, 10, 400, 400) chart.chart_data.series.clear() chart.chart_data.categories.clear() workbook = chart.chart_data.chart_data_workbook series_name_cell = workbook.get_cell(0, 0, 1, "Series 1") series = chart.chart_data.series.add(series_name_cell, chart.type) category_cell = workbook.get_cell(0, 1, 0, "C1") chart.chart_data.categories.add(category_cell) value_cell = workbook.get_cell(0, 1, 1, 24) series.data_points.add_data_point_for_line_series(value_cell) category_cell = workbook.get_cell(0, 2, 0, "C2") chart.chart_data.categories.add(category_cell) value_cell = workbook.get_cell(0, 2, 1, 23) series.data_points.add_data_point_for_line_series(value_cell) category_cell = workbook.get_cell(0, 3, 0, "C3") chart.chart_data.categories.add(category_cell) value_cell = workbook.get_cell(0, 3, 1, -10) series.data_points.add_data_point_for_line_series(value_cell) category_cell = workbook.get_cell(0, 4, 0, "C4") chart.chart_data.categories.add(category_cell) value_cell = workbook.get_cell(0, 4, 1, None) series.data_points.add_data_point_for_line_series(value_cell) series_name_cell = workbook.get_cell(0, 0, 2, "Series 2") second_series = chart.chart_data.series.add(series_name_cell, chart.type) value_cell = workbook.get_cell(0, 1, 2, 30) second_series.data_points.add_data_point_for_line_series(value_cell) value_cell = workbook.get_cell(0, 2, 2, 10) second_series.data_points.add_data_point_for_line_series(value_cell) value_cell = workbook.get_cell(0, 3, 2, 60) second_series.data_points.add_data_point_for_line_series(value_cell) value_cell = workbook.get_cell(0, 4, 2, 40) second_series.data_points.add_data_point_for_line_series(value_cell) chart.has_legend = True chart.legend.overlay = False presentation.save("DefaultMarkersInChart.pptx", slides.export.SaveFormat.PPTX) ``` ## **FAQ** **What chart types are supported by Aspose.Slides for Python via .NET?** Aspose.Slides for Python via .NET supports a wide range of chart types, including bar, line, pie, area, scatter, histogram, radar, and many more. This flexibility allows you to choose the most appropriate chart type for your data visualization needs. **How do I add a new chart to a slide?** To add a chart, you first create an instance of the [Presentation](https://reference.aspose.com/slides/python-net/aspose.slides/presentation/) class, retrieve the desired slide using its index, and then call the method to add a chart, specifying the chart type and initial data. This process integrates the chart directly into your presentation. **How can I update the data displayed in a chart?** You can update a chart's data by accessing its data workbook ([ChartDataWorkbook](https://reference.aspose.com/slides/python-net/aspose.slides.charts/chartdataworkbook/)), clearing any default series and categories, and then adding your custom data. This allows you to programmatically refresh the chart to reflect the latest data. **Is it possible to customize the appearance of the chart?** Yes, Aspose.Slides for Python via .NET provides extensive customization options. You can modify colors, fonts, labels, legends, and other formatting elements to tailor the chart's appearance to your specific design requirements. Related feature: [Create editable charts](https://docs.aspose.com/slides/features/create-charts/). # Specify Fallback Fonts for Presentations in Python > Master Aspose.Slides for Python via .NET to set fallback fonts in PPT, PPTX and ODP files, safeguarding consistent text display on any device or OS. Source: https://docs.aspose.com/slides/python-net/create-fallback-font/ Updated: 2026-08-13 ## **Overview** Aspose.Slides allows you to specify fallback fonts for presentation rendering and export operations. Fallback fonts are used when the primary font does not contain glyphs for particular characters. Fallback behavior is configured through fallback rules. Each rule associates a Unicode range with one or more fonts that may contain the required glyphs. You can define rules for different character ranges, add or remove fallback fonts from existing rules, and organize multiple rules in a fallback font rules collection. Fallback rules are runtime rendering settings. They do not modify the presentation file itself and are not stored inside the PPTX file. ## **Specify Fallback Fonts** Aspose.Slides supports [FontFallBackRule](https://reference.aspose.com/slides/python-net/aspose.slides/FontFallBackRule/) class to specify the rules to apply a fallback font. [FontFallBackRule](https://reference.aspose.com/slides/python-net/aspose.slides/FontFallBackRule/) class represents an association between the specified Unicode range, used for searching missed glyphs, and a list of fonts that may contain proper glyphs: ```py import aspose.slides as slides startUnicodeIndex = 0x0B80 endUnicodeIndex = 0x0BFF firstRule = slides.FontFallBackRule(startUnicodeIndex, endUnicodeIndex, "Vijaya") secondRule = slides.FontFallBackRule(0x3040, 0x309F, "MS Mincho, MS Gothic") #Using multiple ways you can add fonts list: fontNames = ["Segoe UI Emoji, Segoe UI Symbol", "Arial" ] thirdRule = slides.FontFallBackRule(0x1F300, 0x1F64F, fontNames) ``` It is also possible to [remove](https://reference.aspose.com/slides/python-net/aspose.slides/fontfallbackrule/remove/) fallback font or [add_fall_back_fonts](https://reference.aspose.com/slides/python-net/aspose.slides/fontfallbackrule/add_fall_back_fonts/) into existing [FontFallBackRule](https://reference.aspose.com/slides/python-net/aspose.slides/FontFallBackRule/) object. [FontFallBackRulesCollection](https://reference.aspose.com/slides/python-net/aspose.slides/fontfallbackrulescollection/) can be used to organize a list of [FontFallBackRule](https://reference.aspose.com/slides/python-net/aspose.slides/FontFallBackRule/) objects, when there is a need to specify fallback font replacement rules for multiple Unicode ranges. - [Create Fallback Fonts Collection](https://docs.aspose.com/slides/python-net/create-fallback-fonts-collection/) ## **FAQ** ### What is the difference between a fallback font, font substitution, and font embedding? A fallback font is used only for characters missing in the primary font. [Font substitution](https://docs.aspose.com/slides/python-net/font-substitution/) replaces the entire specified font with another font. [Font embedding](https://docs.aspose.com/slides/python-net/embedded-font/) packages the fonts inside the output file so recipients can view the text as intended. ### Are fallback fonts applied during exports like PDF, PNG, or SVG, or only on-screen rendering? Yes. Fallback affects all [rendering and export operations](https://docs.aspose.com/slides/python-net/convert-presentation/) where characters must be drawn but are absent in the source font. ### Does configuring fallback change the presentation file itself, and will the setting persist for future openings? No. Fallback rules are runtime rendering settings in your code; they are not stored inside the .pptx and won’t appear in PowerPoint. ### Does the operating system (Windows/Linux/macOS) and the set of font directories affect fallback selection? Yes. The engine resolves fonts from available system folders and any [additional paths](https://docs.aspose.com/slides/python-net/custom-font/) you provide. If a font isn’t physically available, a rule referencing it cannot take effect. ### Does fallback work for WordArt, SmartArt, and charts? Yes. When these objects contain text, the same glyph-substitution mechanism applies to render missing characters. ## Related articles - [Manage Fallback Fonts for Presentations in Python](https://docs.aspose.com/slides/python-net/fallback-font/) - [Configure Fallback Font Collections in Python](https://docs.aspose.com/slides/python-net/create-fallback-fonts-collection/) - [Render Presentations with Fallback Fonts in Python](https://docs.aspose.com/slides/python-net/render-presentation-with-fallback-font/) # Configure Fallback Font Collections in Python > Set up a fallback fonts collection in Aspose.Slides for Python via .NET to keep text consistent and crisp in PowerPoint and OpenDocument presentations. Source: https://docs.aspose.com/slides/python-net/create-fallback-fonts-collection/ Updated: 2026-08-13 ## **Overview** Aspose.Slides allows you to configure a collection of fallback font rules for a presentation. Each fallback rule is represented by the `FontFallBackRule` class and can be added to a `FontFallBackRulesCollection`. After creating the collection, you can assign it to the `font_fall_back_rules_collection` property of the presentation’s `fonts_manager`. The `fonts_manager` controls fonts across the presentation, and each `Presentation` instance has its own `FontsManager`. Once the `FontsManager` is initialized with the fallback font collection, the specified fallback fonts are applied during presentation rendering. ## **Apply Fallback Rules** Instances of [FontFallBackRule](https://reference.aspose.com/slides/python-net/aspose.slides/FontFallBackRule/) class can be organized into [FontFallBackRulesCollection](https://reference.aspose.com/slides/python-net/aspose.slides/fontfallbackrulescollection/). It is possible to add or remove rules from the collection. Then this collection may be assigned to [font_fall_back_rules_collection](https://reference.aspose.com/slides/python-net/aspose.slides/fontsmanager/font_fall_back_rules_collection/) property of the [FontsManager](https://reference.aspose.com/slides/python-net/aspose.slides/fontsmanager/) class. FontsManager controls fonts across the presentation. Each [Presentation](https://reference.aspose.com/slides/python-net/aspose.slides/presentation/) has a [fonts_manager](https://reference.aspose.com/slides/python-net/aspose.slides/presentation/fonts_manager/) property with its own instance of the FontsManager class. Here is an examples how to create fallback fonts rules collection and assign in into the FontsManager of a certain presentation:   ```py import aspose.slides as slides with slides.Presentation() as presentation: userRulesList = slides.FontFallBackRulesCollection() userRulesList.add(slides.FontFallBackRule(0x0B80, 0x0BFF, "Vijaya")) userRulesList.add(slides.FontFallBackRule(0x3040, 0x309F, "MS Mincho, MS Gothic")) presentation.fonts_manager.font_fall_back_rules_collection = userRulesList ``` After FontsManager is initialised with fallback fonts collection, the fallback fonts are applied during presentation rendering. Read more how to [Render Presentation with Fallback Font](https://docs.aspose.com/slides/python-net/render-presentation-with-fallback-font/). ## **FAQ** ### Will my fallback rules be embedded into the PPTX file and visible in PowerPoint after saving? No. Fallback rules are runtime rendering settings; they are not serialized into PPTX and will not appear in PowerPoint's UI. ### Does fallback apply to text inside SmartArt, WordArt, charts, and tables? Yes. The same glyph-substitution mechanism is used for any text in these objects. ### Does Aspose distribute any fonts with the library? No. You add and use fonts on your side and under your own responsibility. ### Can replacement/substitution for missing fonts and fallback for missing glyphs be used together? Yes. They are independent stages of the same font-resolution pipeline: first the engine resolves font availability ([replacement](https://docs.aspose.com/slides/python-net/font-replacement/)/[substitution](https://docs.aspose.com/slides/python-net/font-substitution/)), then fallback fills gaps for missing glyphs in available fonts. ## Related articles - [Render Presentations with Fallback Fonts in Python](https://docs.aspose.com/slides/python-net/render-presentation-with-fallback-font/) - [Manage Fallback Fonts for Presentations in Python](https://docs.aspose.com/slides/python-net/fallback-font/) - [Specify Fallback Fonts for Presentations in Python](https://docs.aspose.com/slides/python-net/create-fallback-font/) # Create Presentations in Python > Create PowerPoint presentations in Python with Aspose.Slides—produce PPT, PPTX, and ODP files, benefit from OpenDocument support, and save them programmatically for reliable results. Source: https://docs.aspose.com/slides/python-net/create-presentation/ Updated: 2026-09-27 ## **Overview** This article shows how to create a presentation with Aspose.Slides for Python via .NET, add a shape with text to its first slide, and save the result as a PPTX file. The same API also saves presentations as PPT and ODP, so you can target both PowerPoint and OpenDocument formats from one code base, without Microsoft Office. A short FAQ at the end covers common questions about formats, templates, slide sizing, units, memory usage, threading, licensing, digital signatures, and VBA support. Before you begin, install the package from PyPI with `pip install aspose.slides`. See [Installation](https://docs.aspose.com/slides/python-net/installation/) for the libraries that Linux and macOS also need, and for the virtual environment that the system Python of Debian and Ubuntu requires. ## **Create a Presentation** To create a presentation and put a shape with text on its first slide, follow these steps: 1. Create an instance of the [Presentation](https://reference.aspose.com/slides/python-net/aspose.slides/presentation/) class. A new presentation already contains one empty slide. 1. Get that slide from the [slides](https://reference.aspose.com/slides/python-net/aspose.slides/presentation/slides/) collection by its index, 0. 1. Add a cloud-shaped [AutoShape](https://reference.aspose.com/slides/python-net/aspose.slides/autoshape/) with the [add_auto_shape](https://reference.aspose.com/slides/python-net/aspose.slides/shapecollection/add_auto_shape/) method of the slide's [shapes](https://reference.aspose.com/slides/python-net/aspose.slides/slide/shapes/) collection, and set its [text](https://reference.aspose.com/slides/python-net/aspose.slides/textframe/text/). 1. Save the presentation as a PPTX file with the [save](https://reference.aspose.com/slides/python-net/aspose.slides/presentation/save/) method. ```py import aspose.slides as slides # Instantiate the Presentation class that represents a presentation file. with slides.Presentation() as presentation: # Get the first slide. slide = presentation.slides[0] # Add an auto-shape of type CLOUD. auto_shape = slide.shapes.add_auto_shape(slides.ShapeType.CLOUD, 20, 20, 200, 80) auto_shape.text_frame.text = "Hello, Aspose!" # Save the presentation as a PPTX file. presentation.save("new_presentation.pptx", slides.export.SaveFormat.PPTX) ``` The cloud's top-left corner is 20 points from the left edge and 20 points from the top edge of the slide, and the cloud is 200 points wide and 80 points high. The `with` statement releases the presentation's resources when the block ends. The script saves *new_presentation.pptx* in the current folder, with one slide that holds the cloud and its text. Without a license, Aspose.Slides also adds an evaluation watermark to every slide it saves; see [Licensing](https://docs.aspose.com/slides/python-net/licensing/). The result: ![The new presentation](https://docs.aspose.com/slides/python-net/create-presentation/new_presentation.png) ## **FAQ** ### What formats can I save a new presentation to? You can save to [PPTX, PPT, and ODP](https://docs.aspose.com/slides/python-net/save-presentation/), and export to [PDF](https://docs.aspose.com/slides/python-net/convert-powerpoint-to-pdf/), [XPS](https://docs.aspose.com/slides/python-net/convert-powerpoint-to-xps/), [HTML](https://docs.aspose.com/slides/python-net/convert-powerpoint-to-html/), [SVG](https://docs.aspose.com/slides/python-net/render-a-slide-as-an-svg-image/), and [images](https://docs.aspose.com/slides/python-net/convert-powerpoint-to-png/), among others. ### Can I start from a template (POTX/POTM) and save as a regular PPTX? Yes. Load the template and save to the desired format; POTX/POTM/PPTM and similar formats [are supported](https://docs.aspose.com/slides/python-net/supported-file-formats/). ### How do I control slide size/aspect ratio when creating a presentation? Set the [slide size](https://docs.aspose.com/slides/python-net/slide-size/) (including presets like 4:3 and 16:9 or custom dimensions) and choose how content should scale. ### In what units are sizes and coordinates measured? In points: 1 inch equals 72 units. ### How do I handle very large presentations (with many media files) to reduce memory usage? Use [BLOB management strategies](https://docs.aspose.com/slides/python-net/manage-blob/), limit in-memory storage by leveraging temporary files, and prefer file-based workflows over purely in-memory streams. ### Can I create/save presentations in parallel? You cannot operate on the same [Presentation](https://reference.aspose.com/slides/python-net/aspose.slides/presentation/) instance from [multiple threads](https://docs.aspose.com/slides/python-net/multithreading/). Run separate, isolated instances per thread or process. ### How do I remove the trial watermark and limitations? [Apply a license](https://docs.aspose.com/slides/python-net/licensing/) once per process. The license XML must remain unmodified, and the license setup should be synchronized if multiple threads are involved. ### Can I digitally sign the PPTX I create? Yes. [Digital signatures](https://docs.aspose.com/slides/python-net/digital-signature-in-powerpoint/) (adding and verifying) are supported for presentations. ### Are macros (VBA) supported in created presentations? Yes. You can [create/edit VBA projects](https://docs.aspose.com/slides/python-net/presentation-via-vba/) and save macro-enabled files such as PPTM/PPSM. # Create Thumbnails of Presentation Shapes in Python > Generate high-quality shape thumbnails from PowerPoint and OpenDocument slides with Aspose.Slides for Python via .NET – easily create and export presentation thumbnails. Source: https://docs.aspose.com/slides/python-net/create-shape-thumbnails/ Updated: 2026-11-08 ## **Introduction** Aspose.Slides for Python via .NET is used to create presentation files in which each page is a slide. You can view these slides in Microsoft PowerPoint by opening the presentation file. However, developers may sometimes need to view images of shapes separately in an image viewer. In such cases, Aspose.Slides can generate thumbnail images for slide shapes. This article explains how to use this feature. ## **Generate Shape Thumbnails from Slides** When you need a preview of a specific object rather than the entire slide, you can render a thumbnail for an individual shape. Aspose.Slides lets you export any shape to an image, making it easy to create lightweight previews, icons, or assets for downstream processing. To generate a thumbnail from any shape: 1. Create an instance of the [Presentation](https://reference.aspose.com/slides/python-net/aspose.slides/presentation/) class. 1. Get a reference to a slide by its ID or index. 1. Get a reference to a shape on that slide. 1. Render the shape’s thumbnail image. 1. Save the thumbnail image in the desired format. The example below generates a shape thumbnail. ```py import aspose.slides as slides # Instantiate the Presentation class to open the presentation file. with slides.Presentation("hello_world.pptx") as presentation: slide = presentation.slides[0] shape = slide.shapes[0] # Create a image with the default scale. with shape.get_image() as thumbnail: # Save the image to disk in PNG format. thumbnail.save("shape_thumbnail.png", slides.ImageFormat.PNG) ``` ## **Generate Thumbnails with a Custom Scaling Factor** This section shows how to generate shape thumbnails with a user-defined scaling factor in Aspose.Slides. By controlling the scale, you can fine-tune thumbnail size to suit previews, exports, or high-DPI displays. To generate a thumbnail for any shape on a slide: 1. Create an instance of the [Presentation](https://reference.aspose.com/slides/python-net/aspose.slides/presentation/) class. 1. Get a slide by its ID or index. 1. Get the target shape on that slide. 1. Render the thumbnail image of the shape with the specified scale. 1. Save the thumbnail image in the desired format. The example below generates a thumbnail with a user-defined scaling factor. ```py import aspose.slides as slides scale_x = 2.0 scale_y = scale_x # Instantiate the Presentation class to open the presentation file. with slides.Presentation("hello_world.pptx") as presentation: slide = presentation.slides[0] shape = slide.shapes[0] # Create an image with the defined scale. with shape.get_image(slides.ShapeThumbnailBounds.SHAPE, scale_x, scale_y) as thumbnail: # Save the image to disk in PNG format. thumbnail.save("scaling_factor.png", slides.ImageFormat.PNG) ``` ## **Generate Thumbnails Using a Shape’s Appearance Bounds** This section shows how to generate a thumbnail within a shape’s appearance bounds. It accounts for all shape effects. The generated thumbnail is restricted by the slide bounds. To generate a thumbnail of any slide shape within the bounds of its appearance: 1. Create an instance of the [Presentation](https://reference.aspose.com/slides/python-net/aspose.slides/presentation/) class. 1. Get a slide by its ID or index. 1. Get the target shape on that slide. 1. Render the thumbnail image of the shape with the specified bounds. 1. Save the thumbnail image in the desired image format. The example below creates a thumbnail with user-defined bounds. ```py import aspose.slides as slides image_bounds = slides.ShapeThumbnailBounds.APPEARANCE # Instantiate the Presentation class to open the presentation file. with slides.Presentation("hello_world.pptx") as presentation: slide = presentation.slides[0] shape = slide.shapes[0] # Create an appearance-bounds shape image. with shape.get_image(image_bounds, 1.0, 1.0) as thumbnail: # Save the image to disk in PNG format. thumbnail.save("apperance_bounds.png", slides.ImageFormat.PNG) ``` [![A rectangle’s shadow extends beyond the slide’s right edge. Shape and Appearance thumbnails show different crops of the rectangle and shadow.](https://docs.aspose.com/slides/python-net/create-shape-thumbnails/visual-shape-thumbnail-bounds-2f4141e8a2fe.svg)](https://docs.aspose.com/slides/python-net/create-shape-thumbnails/visual-shape-thumbnail-bounds-2f4141e8a2fe.svg) *The shadow extends past the slide’s right edge. The Appearance thumbnail is clipped at that edge.* ## **Get the Actual Visual Bounds of a Shape** The frame properties of a [Shape](https://reference.aspose.com/slides/python-net/aspose.slides/shape/)—`Shape.x`, `Shape.y`, `Shape.width`, and `Shape.height`—describe the rectangle stored in the presentation model. The content that is actually rendered can extend beyond that frame or occupy a different axis-aligned rectangle. Rotation, outlines, arrowheads, text layout and overflow, generated SmartArt geometry, and other rendering effects can all change the occupied area. Use [Shape.get_visual_bounds](https://reference.aspose.com/slides/python-net/aspose.slides/shape/get_visual_bounds/) to calculate that occupied area without creating an image. The method returns a floating-point rectangle in slide coordinates. The returned rectangle is not clipped to the slide, so its coordinates can be negative when content extends beyond the slide origin. The following example gets and compares the frame and visual bounds: ```py import aspose.pydrawing as drawing import aspose.slides as slides with slides.Presentation("example.pptx") as presentation: slide = presentation.slides[0] shape = slide.shapes[0] visual_bounds = shape.get_visual_bounds() frame_values = (shape.x, shape.y, shape.width, shape.height) visual_values = (visual_bounds.x, visual_bounds.y, visual_bounds.width, visual_bounds.height) print(f"Frame bounds (x, y, width, height): {frame_values}") print(f"Visual bounds (x, y, width, height): {visual_values}") ``` The same rectangle can be used to align nearby shapes to its `left`, `right`, `top`, or `bottom` edge; reserve enough space in a generated layout; or detect content outside a permitted region. Visual bounds are especially useful for SmartArt, text boxes, arrows, pictures, rotated shapes, and group shapes, where the stored frame may not represent the full rendered result. Use [Shape.get_visual_bounds](https://reference.aspose.com/slides/python-net/aspose.slides/shape/get_visual_bounds/) when you need coordinates for layout or validation and do not need a bitmap. Use [Shape.get_image](https://reference.aspose.com/slides/python-net/aspose.slides/shape/get_image/) when you need to render the shape. With [ShapeThumbnailBounds](https://reference.aspose.com/slides/python-net/aspose.slides/shapethumbnailbounds/), `ShapeThumbnailBounds.SHAPE` sizes the image from the shape bounds, including outline settings, while `ShapeThumbnailBounds.APPEARANCE` sizes it from the shape's appearance and restricts the result to the slide bounds. In contrast, `Shape.get_visual_bounds` returns only the calculated rectangle and does not clip it to the slide. ## **FAQ** **What image formats can be used when saving shape thumbnails?** [PNG, JPEG, BMP, GIF, TIFF](https://reference.aspose.com/slides/python-net/aspose.slides/imageformat/), and others. Shapes can also be [exported as vector SVG](https://reference.aspose.com/slides/python-net/aspose.slides/shape/write_as_svg/) by saving the shape’s content as SVG. **What is the difference between SHAPE and APPEARANCE bounds when rendering a thumbnail?** `SHAPE` uses the shape’s geometry; `APPEARANCE` takes [visual effects](https://docs.aspose.com/slides/python-net/shape-effect/) (shadows, glows, etc.) into account. **What happens if a shape is marked as hidden? Will it still render as a thumbnail?** A hidden shape remains part of the model and can be rendered; the hidden flag affects slideshow display but does not prevent generating the shape’s image. **Are group shapes, charts, SmartArt, and other complex objects supported?** Yes. Any object represented as [Shape](https://reference.aspose.com/slides/python-net/aspose.slides/shape/) (including [GroupShape](https://reference.aspose.com/slides/python-net/aspose.slides/groupshape/), [Chart](https://reference.aspose.com/slides/python-net/aspose.slides.charts/chart/), and [SmartArt](https://reference.aspose.com/slides/python-net/aspose.slides.smartart/smartart/)) can be saved as a thumbnail or as SVG. **Do system-installed fonts affect the quality of thumbnails for text shapes?** Yes. You should [provide the required fonts](https://docs.aspose.com/slides/python-net/custom-font/) (or [configure font substitutions](https://docs.aspose.com/slides/python-net/font-substitution/)) to avoid unwanted fallbacks and text reflow. # Create Excel Charts and Embed Them in Presentations as OLE Objects > Create an Excel chart with Aspose.Cells for Python via .NET and embed the workbook in a PowerPoint presentation with Aspose.Slides, including a chart preview. Source: https://docs.aspose.com/slides/python-net/creating-excel-chart-and-embedding-it-in-presentation-as-ole-object/ Updated: 2026-10-20 ## **Overview** This article shows how to create an Excel column chart with Aspose.Cells for Python via .NET and embed its workbook in a PowerPoint presentation with Aspose.Slides for Python via .NET. The embedded workbook contains both the source data and the chart. A separate PNG preview displays the chart on the slide before the OLE object is activated. The result is an embedded Excel object, not a native PowerPoint chart. Editing the workbook through OLE requires a desktop application that supports OLE activation and a compatible Excel installation. ## **Prerequisites** Install the `aspose-cells-python` and `aspose-slides` packages in your Python environment. Microsoft Office is not required to generate the presentation with these libraries. No input files are required: the example creates the data and chart in memory, then writes `OutputChart.pptx` to the current working directory. Apply licenses for both products when running outside evaluation mode. ## **How the Embedding Works** 1. Create a workbook with a data worksheet and a chart sheet. 1. Make the chart sheet active so that the workbook opens on the chart. 1. Set the workbook's OLE display range and render the chart to PNG. 1. Save the workbook as XLSX in memory and embed those bytes in a slide. 1. Assign the PNG as the OLE object's preview and save the presentation as PPTX. The workbook display range and the frame on the slide have different roles. [set_ole_size](https://reference.aspose.com/cells/python-net/aspose.cells/worksheetcollection/set_ole_size/) takes zero-based start/end row and column indices. [ChartCollection.add](https://reference.aspose.com/cells/python-net/aspose.cells.charts/chartcollection/add/) instead takes the top row, left column, bottom row, and right column. The example uses row index 55 and column index 25 as the lower-right boundaries; these values are layout choices, not the number of data rows or columns. The slide frame uses points. The example fits it within the slide and centers it while preserving the PNG's aspect ratio, rather than stretching the preview to fill the slide. ## **Create and Embed the Chart** The following complete example populates `DataSheet` with four rows and five columns of values. Each row becomes a chart series. `ChartSheet` is selected as the active sheet before the workbook is saved. The workbook is explicitly saved as XLSX, matching the `xlsx` extension passed to [OleEmbeddedDataInfo](https://reference.aspose.com/slides/python-net/aspose.slides.dom.ole/oleembeddeddatainfo/). The PNG is loaded directly from its stream without an intermediate bitmap conversion. Assigning it through [substitute_picture_format](https://reference.aspose.com/slides/python-net/aspose.slides/ioleobjectframe/substitute_picture_format/) replaces the default OLE placeholder. ```python import io import aspose.cells as cells import aspose.cells.charts as charts import aspose.cells.drawing as drawing import aspose.slides as slides workbook = cells.Workbook() data_sheet = workbook.worksheets[0] data_sheet.name = "DataSheet" values = [ [67, 44, 46, 43, 24], [86, 64, 97, 29, 40], [68, 89, 78, 69, 38], [91, 48, 60, 26, 25], ] for row, row_values in enumerate(values): for column, value in enumerate(row_values): data_sheet.cells.get(row, column).put_value(value) chart_sheet_index = workbook.worksheets.add(cells.SheetType.CHART) chart_sheet = workbook.worksheets[chart_sheet_index] chart_sheet.name = "ChartSheet" last_chart_row = 55 last_chart_column = 25 chart_index = chart_sheet.charts.add(charts.ChartType.COLUMN, 0, 0, last_chart_row, last_chart_column) chart = chart_sheet.charts[chart_index] for row in range(1, len(values) + 1): chart.n_series.add(f"DataSheet!A{row}:E{row}", False) workbook.worksheets.active_sheet_index = chart_sheet_index workbook.worksheets.set_ole_size(0, last_chart_row, 0, last_chart_column) # Render the chart preview and serialize the editable workbook separately. with io.BytesIO() as chart_image_stream, io.BytesIO() as workbook_stream: chart.to_image(chart_image_stream, drawing.ImageType.PNG) chart_image_stream.seek(0) workbook.save(workbook_stream, cells.SaveFormat.XLSX) workbook_bytes = workbook_stream.getvalue() with slides.Images.from_stream(chart_image_stream) as chart_image: with slides.Presentation() as presentation: slide = presentation.slides[0] slide_size = presentation.slide_size.size # Fit the preview within the slide without changing its aspect ratio. scale = min(slide_size.width / chart_image.width, slide_size.height / chart_image.height) frame_width = chart_image.width * scale frame_height = chart_image.height * scale frame_x = (slide_size.width - frame_width) / 2 frame_y = (slide_size.height - frame_height) / 2 embedded_data = slides.dom.ole.OleEmbeddedDataInfo(workbook_bytes, "xlsx") ole_frame = slide.shapes.add_ole_object_frame(frame_x, frame_y, frame_width, frame_height, embedded_data) preview_image = presentation.images.add_image(chart_image) ole_frame.substitute_picture_format.picture.image = preview_image presentation.save("OutputChart.pptx", slides.export.SaveFormat.PPTX) ``` ## **Expected Result** `OutputChart.pptx` contains one slide with an embedded Excel workbook and a chart preview. The workbook contains the original data and a column chart with four series. The preview is centered on the slide and retains its proportions. ![Excel column chart displayed as the preview of an embedded workbook](https://docs.aspose.com/slides/python-net/creating-excel-chart-and-embedding-it-in-presentation-as-ole-object/excel-chart-ole-preview.png) In a compatible desktop PowerPoint environment with Excel available, double-click the object to activate and edit the embedded workbook. Activation and editing depend on the host application's OLE support and security settings. ## **FAQ** **Why is a preview image needed?** The embedded workbook and its slide preview are separate content. Supply a chart image so the slide shows the chart instead of the default "EMBEDDED OLE OBJECT" placeholder. See [Object Preview Issue when Adding OleObjectFrame](https://docs.aspose.com/slides/python-net/object-preview-issue-when-adding-oleobjectframe/). **Does the preview update automatically when I change the workbook in code?** Treat the preview as a snapshot. When updating workbook data programmatically, regenerate the chart image and replace the preview as well as the embedded workbook data. **Can I use XLS instead of XLSX?** Yes. Save the workbook in XLS format and use `xls` as the embedded data extension. The extension must match the actual workbook format; changing the extension alone does not convert the data. **Why might the object change size after activation?** The host application can update the OLE object's presentation when it activates the workbook. The workbook's OLE display range and the slide frame dimensions both matter. See [Resize OLE Objects Automatically in PowerPoint Presentations](https://docs.aspose.com/slides/python-net/working-solution-for-worksheet-resizing/). ## **Related Sections** - [Resize OLE Objects Automatically in PowerPoint Presentations](https://docs.aspose.com/slides/python-net/working-solution-for-worksheet-resizing/) - [Object Preview Issue when Adding OleObjectFrame](https://docs.aspose.com/slides/python-net/object-preview-issue-when-adding-oleobjectframe/) - [Manage OLE Objects](https://docs.aspose.com/slides/python-net/manage-ole/) # Create and Modify Custom Animation Behaviors in Python > Create, inspect, and modify custom animation behaviors and editable motion paths in PowerPoint presentations with Aspose.Slides for Python via .NET. Source: https://docs.aspose.com/slides/python-net/custom-animation/ Updated: 2026-11-08 ## **Overview** Custom animation behaviors let you control individual operations within an animation effect, such as changing a color, rotating a shape, or following an editable motion path. This guide shows how to create and combine behaviors, configure their timing, inspect and modify existing animations, and verify that their properties survive saving and reopening a presentation. For predefined effects and click triggers, see [Shape Animation](https://docs.aspose.com/slides/python-net/shape-animation/). ## **Understand the Animation Model** An animation is organized as **Timeline → Sequence → Effect → Behaviors**: - The slide's [timeline](https://reference.aspose.com/slides/python-net/aspose.slides/baseslide/timeline/) contains its main sequence and interactive sequences. - A [Sequence](https://reference.aspose.com/slides/python-net/aspose.slides.animation/sequence/) contains effects, potentially targeting different shapes. - An [Effect](https://reference.aspose.com/slides/python-net/aspose.slides.animation/effect/) identifies a target shape, preset, subtype, and effect timing. - [Effect.behaviors](https://reference.aspose.com/slides/python-net/aspose.slides.animation/effect/behaviors/) contains the operations that implement the effect: changing color, moving, rotating, setting a property, and so on. ## **Create Individual Behaviors** Call [Sequence.add_effect](https://reference.aspose.com/slides/python-net/aspose.slides.animation/sequence/add_effect/) to create an effect and access its [behaviors](https://reference.aspose.com/slides/python-net/aspose.slides.animation/effect/behaviors/) collection. A preset can populate this collection automatically. Keep its operations when extending the preset, or use [clear](https://reference.aspose.com/slides/python-net/aspose.slides.animation/behaviorcollection/clear/) when deliberately replacing them. [BehaviorFactory](https://reference.aspose.com/slides/python-net/aspose.slides.animation/behaviorfactory/) creates the eight behavior types illustrated below. Motion is covered in [Build a Motion Path](https://docs.aspose.com/slides/python-net/custom-animation/#build-a-motion-path). Each creation example is a complete program; later editing examples state which output file they use. ### **Rotation** Use [create_rotation_effect](https://reference.aspose.com/slides/python-net/aspose.slides.animation/behaviorfactory/create_rotation_effect/) to create a rotation. [by](https://reference.aspose.com/slides/python-net/aspose.slides.animation/rotationeffect/by/) specifies a relative angle in degrees; [from_address](https://reference.aspose.com/slides/python-net/aspose.slides.animation/rotationeffect/from_address/) and [to](https://reference.aspose.com/slides/python-net/aspose.slides.animation/rotationeffect/to/) specify endpoints. The example starts with a Spin effect, replaces its preset operations with one rotation behavior, and gives that operation a two-second duration. A relative angle of 90 degrees expresses a quarter-turn from the shape's starting orientation, so no explicit starting angle is needed. ```python import aspose.slides as slides with slides.Presentation() as presentation: slide = presentation.slides[0] shape = slide.shapes.add_auto_shape(slides.ShapeType.RECTANGLE, 100, 100, 160, 80) effect = slide.timeline.main_sequence.add_effect(shape, slides.animation.EffectType.SPIN, slides.animation.EffectSubtype.NONE, slides.animation.EffectTriggerType.ON_CLICK) effect.behaviors.clear() factory = slides.animation.BehaviorFactory() rotation = factory.create_rotation_effect() rotation.by = 90 rotation.timing.duration = 2 effect.behaviors.add(rotation) presentation.save("rotation.pptx", slides.export.SaveFormat.PPTX) ``` `rotation.pptx` contains one shape and one rotation behavior. The collection, timing, and rotation-editing examples below use this file. ### **Scale** Use [create_scale_effect](https://reference.aspose.com/slides/python-net/aspose.slides.animation/behaviorfactory/create_scale_effect/) with X/Y percentages: [from_address](https://reference.aspose.com/slides/python-net/aspose.slides.animation/scaleeffect/from_address/) and [to](https://reference.aspose.com/slides/python-net/aspose.slides.animation/scaleeffect/to/) describe the starting and ending size, while [by](https://reference.aspose.com/slides/python-net/aspose.slides.animation/scaleeffect/by/) describes a relative change. Here, 100 means the original size. The example grows both dimensions from 100% to 125% over two seconds. Using equal horizontal and vertical percentages keeps the shape's proportions; different percentages would stretch one dimension more than the other. ```python import aspose.pydrawing as draw import aspose.slides as slides with slides.Presentation() as presentation: slide = presentation.slides[0] shape = slide.shapes.add_auto_shape(slides.ShapeType.RECTANGLE, 100, 100, 160, 80) effect = slide.timeline.main_sequence.add_effect(shape, slides.animation.EffectType.GROW_SHRINK, slides.animation.EffectSubtype.NONE, slides.animation.EffectTriggerType.ON_CLICK) effect.behaviors.clear() factory = slides.animation.BehaviorFactory() scale = factory.create_scale_effect() scale.from_address = draw.PointF(100, 100) scale.to = draw.PointF(125, 125) scale.timing.duration = 2 effect.behaviors.add(scale) presentation.save("scale.pptx", slides.export.SaveFormat.PPTX) ``` ### **Color** Use [create_color_effect](https://reference.aspose.com/slides/python-net/aspose.slides.animation/behaviorfactory/create_color_effect/) to change the fill from blue to orange. [from_address](https://reference.aspose.com/slides/python-net/aspose.slides.animation/coloreffect/from_address/) and [to](https://reference.aspose.com/slides/python-net/aspose.slides.animation/coloreffect/to/) are colors; [by](https://reference.aspose.com/slides/python-net/aspose.slides.animation/coloreffect/by/) is a color offset. [Behavior.properties](https://reference.aspose.com/slides/python-net/aspose.slides.animation/behavior/properties/) identifies the attribute being animated. The shape's solid fill is initialized to blue, matching the animation's starting color. Selecting the fill-color attribute tells the behavior which part of the shape to change; the color endpoints alone do not identify that attribute. The saved effect describes a two-second transition to orange. ```python import aspose.pydrawing as draw import aspose.slides as slides with slides.Presentation() as presentation: slide = presentation.slides[0] shape = slide.shapes.add_auto_shape(slides.ShapeType.RECTANGLE, 100, 100, 160, 80) shape.fill_format.fill_type = slides.FillType.SOLID shape.fill_format.solid_fill_color.color = draw.Color.blue effect = slide.timeline.main_sequence.add_effect(shape, slides.animation.EffectType.CHANGE_FILL_COLOR, slides.animation.EffectSubtype.NONE, slides.animation.EffectTriggerType.ON_CLICK) effect.behaviors.clear() factory = slides.animation.BehaviorFactory() color = factory.create_color_effect() color.properties.add(slides.animation.BehaviorProperty.fill_color.value) color.from_address.color = draw.Color.blue color.to.color = draw.Color.orange color.timing.duration = 2 effect.behaviors.add(color) presentation.save("color.pptx", slides.export.SaveFormat.PPTX) ``` ### **Filter** Use [create_filter_effect](https://reference.aspose.com/slides/python-net/aspose.slides.animation/behaviorfactory/create_filter_effect/) to select a wipe. [type](https://reference.aspose.com/slides/python-net/aspose.slides.animation/filtereffect/type/), [subtype](https://reference.aspose.com/slides/python-net/aspose.slides.animation/filtereffect/subtype/), and [reveal](https://reference.aspose.com/slides/python-net/aspose.slides.animation/filtereffect/reveal/) specify the filter, direction, and whether to reveal or hide the shape. This example configures a two-second wipe that reveals the shape using the right-direction subtype. The filter settings belong to the behavior inside the effect, so they are configured after the preset's original operations have been removed. ```python import aspose.slides as slides with slides.Presentation() as presentation: slide = presentation.slides[0] shape = slide.shapes.add_auto_shape(slides.ShapeType.RECTANGLE, 100, 100, 160, 80) effect = slide.timeline.main_sequence.add_effect(shape, slides.animation.EffectType.WIPE, slides.animation.EffectSubtype.NONE, slides.animation.EffectTriggerType.ON_CLICK) effect.behaviors.clear() factory = slides.animation.BehaviorFactory() filter_behavior = factory.create_filter_effect() filter_behavior.type = slides.animation.FilterEffectType.WIPE filter_behavior.subtype = slides.animation.FilterEffectSubtype.RIGHT filter_behavior.reveal = slides.animation.FilterEffectRevealType.IN filter_behavior.timing.duration = 2 effect.behaviors.add(filter_behavior) presentation.save("filter.pptx", slides.export.SaveFormat.PPTX) ``` ### **Property** Use [create_property_effect](https://reference.aspose.com/slides/python-net/aspose.slides.animation/behaviorfactory/create_property_effect/) to animate opacity. [from_address](https://reference.aspose.com/slides/python-net/aspose.slides.animation/propertyeffect/from_address/), [to](https://reference.aspose.com/slides/python-net/aspose.slides.animation/propertyeffect/to/), and [by](https://reference.aspose.com/slides/python-net/aspose.slides.animation/propertyeffect/by/) are strings interpreted using [value_type](https://reference.aspose.com/slides/python-net/aspose.slides.animation/propertyeffect/value_type/) and [calc_mode](https://reference.aspose.com/slides/python-net/aspose.slides.animation/propertyeffect/calc_mode/). Choose endpoints or a relative offset rather than setting all three indiscriminately. Here, the selected attribute is opacity, and the numeric strings represent a change from 25% opacity to full opacity. Linear interpolation describes a gradual change between those values. When adapting this example to another attribute, choose a value type and endpoint values appropriate to that attribute. ```python import aspose.slides as slides with slides.Presentation() as presentation: slide = presentation.slides[0] shape = slide.shapes.add_auto_shape(slides.ShapeType.RECTANGLE, 100, 100, 160, 80) effect = slide.timeline.main_sequence.add_effect(shape, slides.animation.EffectType.FADE, slides.animation.EffectSubtype.NONE, slides.animation.EffectTriggerType.ON_CLICK) effect.behaviors.clear() factory = slides.animation.BehaviorFactory() property_behavior = factory.create_property_effect() property_behavior.properties.add(slides.animation.BehaviorProperty.style_opacity.value) property_behavior.value_type = slides.animation.PropertyValueType.NUMBER property_behavior.calc_mode = slides.animation.PropertyCalcModeType.LINEAR property_behavior.from_address = "0.25" property_behavior.to = "1" property_behavior.timing.duration = 2 effect.behaviors.add(property_behavior) presentation.save("property.pptx", slides.export.SaveFormat.PPTX) ``` ### **Set** Use [create_set_effect](https://reference.aspose.com/slides/python-net/aspose.slides.animation/behaviorfactory/create_set_effect/) to assign visibility through [to](https://reference.aspose.com/slides/python-net/aspose.slides.animation/seteffect/to/). A set behavior does not interpolate between endpoints. The example selects the visibility attribute and assigns the string `visible` when the behavior runs. The rectangle is already visible in this minimal presentation, so the assignment may not produce an obvious visual change on its own. Such an operation is useful as part of a larger effect that also controls when the shape becomes hidden or visible. ```python import aspose.slides as slides with slides.Presentation() as presentation: slide = presentation.slides[0] shape = slide.shapes.add_auto_shape(slides.ShapeType.RECTANGLE, 100, 100, 160, 80) effect = slide.timeline.main_sequence.add_effect(shape, slides.animation.EffectType.APPEAR, slides.animation.EffectSubtype.NONE, slides.animation.EffectTriggerType.ON_CLICK) effect.behaviors.clear() factory = slides.animation.BehaviorFactory() set_behavior = factory.create_set_effect() set_behavior.properties.add(slides.animation.BehaviorProperty.style_visibility.value) set_behavior.to = "visible" effect.behaviors.add(set_behavior) presentation.save("set.pptx", slides.export.SaveFormat.PPTX) ``` ### **Command** Use [create_command_effect](https://reference.aspose.com/slides/python-net/aspose.slides.animation/behaviorfactory/create_command_effect/) and configure [type](https://reference.aspose.com/slides/python-net/aspose.slides.animation/commandeffect/type/), [command_string](https://reference.aspose.com/slides/python-net/aspose.slides.animation/commandeffect/command_string/), and [shape_target](https://reference.aspose.com/slides/python-net/aspose.slides.animation/commandeffect/shape_target/). Place a WAV recording named `sample.wav` in the working directory. This example embeds it with [add_audio_frame_embedded](https://reference.aspose.com/slides/python-net/aspose.slides/shapecollection/add_audio_frame_embedded/) and attaches a play command to the audio frame. The audio frame is both the effect's target and the command's target. This connects the play request to the embedded recording; a command string by itself does not identify which media object to control. The effect is configured to start on a click during the slideshow. ```python import aspose.slides as slides with slides.Presentation() as presentation: slide = presentation.slides[0] with open("sample.wav", "rb") as audio_stream: audio_frame = slide.shapes.add_audio_frame_embedded(100, 100, 40, 40, audio_stream) effect = slide.timeline.main_sequence.add_effect(audio_frame, slides.animation.EffectType.MEDIA_PLAY, slides.animation.EffectSubtype.NONE, slides.animation.EffectTriggerType.ON_CLICK) effect.behaviors.clear() factory = slides.animation.BehaviorFactory() command = factory.create_command_effect() command.type = slides.animation.CommandEffectType.CALL command.command_string = "play" command.shape_target = audio_frame effect.behaviors.add(command) presentation.save("command.pptx", slides.export.SaveFormat.PPTX) ``` Saving stores the command in `command.pptx`; it does not play the recording. Playback requires a slideshow player that supports the command and its media target. ## **Manage the Behavior Collection** [BehaviorCollection](https://reference.aspose.com/slides/python-net/aspose.slides.animation/behaviorcollection/) supports [add](https://reference.aspose.com/slides/python-net/aspose.slides.animation/behaviorcollection/add/), [insert](https://reference.aspose.com/slides/python-net/aspose.slides.animation/behaviorcollection/insert/), [remove](https://reference.aspose.com/slides/python-net/aspose.slides.animation/behaviorcollection/remove/), and [remove_at](https://reference.aspose.com/slides/python-net/aspose.slides.animation/behaviorcollection/remove_at/). This example opens `rotation.pptx`, adds scaling, moves it before rotation, and removes the rotation. Removing and reinserting the same object changes its stored position without making a copy. The sequence of edits changes the collection from rotation–scale to scale–rotation, then to scale only. Indices refer to the current collection, so the removal uses the rotation's new index after reordering. The final enumeration confirms which behavior will be saved. ```python import aspose.pydrawing as draw import aspose.slides as slides with slides.Presentation("rotation.pptx") as presentation: effect = presentation.slides[0].timeline.main_sequence[0] behaviors = effect.behaviors factory = slides.animation.BehaviorFactory() scale = factory.create_scale_effect() scale.to = draw.PointF(125, 125) scale.timing.duration = 2 behaviors.add(scale) behaviors.remove(scale) behaviors.insert(0, scale) behaviors.remove_at(1) for behavior in behaviors: print(type(behavior).__name__) presentation.save("collection-edited.pptx", slides.export.SaveFormat.PPTX) ``` The output is `ScaleEffect`: only scaling remains. Collection order does not, by itself, schedule behaviors one after another. Clear the collection only when replacing all its operations. ## **Configure Behavior Timing** [Behavior.timing](https://reference.aspose.com/slides/python-net/aspose.slides.animation/behavior/timing/) exposes [Timing](https://reference.aspose.com/slides/python-net/aspose.slides.animation/timing/), independently of [Effect.timing](https://reference.aspose.com/slides/python-net/aspose.slides.animation/effect/timing/). Effect timing schedules the enclosing effect; behavior timing describes an operation inside it. ### **Set Duration, Delay, Repetition, and Acceleration** Open `rotation.pptx` and set [duration](https://reference.aspose.com/slides/python-net/aspose.slides.animation/timing/duration/) and [trigger_delay_time](https://reference.aspose.com/slides/python-net/aspose.slides.animation/timing/trigger_delay_time/) in seconds, then configure [repeat_count](https://reference.aspose.com/slides/python-net/aspose.slides.animation/timing/repeat_count/). [accelerate](https://reference.aspose.com/slides/python-net/aspose.slides.animation/timing/accelerate/) and [decelerate](https://reference.aspose.com/slides/python-net/aspose.slides.animation/timing/decelerate/) are fractions of the duration; keep their sum at most 1. The input file is the one created in the rotation example, where the first behavior is known to be a rotation. This example changes only that behavior's timing; its 90-degree angle remains intact. Keeping the angle and timing separate makes it easier to adjust the pace without rebuilding the animation. ```python import aspose.slides as slides with slides.Presentation("rotation.pptx") as presentation: effect = presentation.slides[0].timeline.main_sequence[0] rotation = effect.behaviors[0] rotation.timing.duration = 2 rotation.timing.trigger_delay_time = 0.5 rotation.timing.repeat_count = 3 rotation.timing.accelerate = 0.2 rotation.timing.decelerate = 0.2 presentation.save("timing.pptx", slides.export.SaveFormat.PPTX) ``` The behavior uses a two-second duration, a half-second delay, and a repeat count of 3. The first and last 20% of its duration are used for acceleration and deceleration. Other repeat policies include [repeat_duration](https://reference.aspose.com/slides/python-net/aspose.slides.animation/timing/repeat_duration/), [repeat_until_end_slide](https://reference.aspose.com/slides/python-net/aspose.slides.animation/timing/repeat_until_end_slide/), and [repeat_until_next_click](https://reference.aspose.com/slides/python-net/aspose.slides.animation/timing/repeat_until_next_click/); choose a policy rather than enabling them all together. [auto_reverse](https://reference.aspose.com/slides/python-net/aspose.slides.animation/timing/auto_reverse/) plays the animation backwards after the forward pass. Acceleration and deceleration apply to continuous changes, not discrete assignments or commands. ## **Build a Motion Path** Use [create_motion_effect](https://reference.aspose.com/slides/python-net/aspose.slides.animation/behaviorfactory/create_motion_effect/) to create motion. Its [from_address](https://reference.aspose.com/slides/python-net/aspose.slides.animation/motioneffect/from_address/), [to](https://reference.aspose.com/slides/python-net/aspose.slides.animation/motioneffect/to/), and [by](https://reference.aspose.com/slides/python-net/aspose.slides.animation/motioneffect/by/) describe percentage-based coordinates or offsets. For an editable route, create a [MotionPath](https://reference.aspose.com/slides/python-net/aspose.slides.animation/motionpath/) and assign it to [MotionEffect.path](https://reference.aspose.com/slides/python-net/aspose.slides.animation/motioneffect/path/). [MotionPath](https://reference.aspose.com/slides/python-net/aspose.slides.animation/motionpath/) stores the path commands. [MotionCommandPathType](https://reference.aspose.com/slides/python-net/aspose.slides.animation/motioncommandpathtype/) selects the operation: | Command | Points | Meaning | | --- | --- | --- | | MOVE_TO | One | Set the starting position. | | LINE_TO | One | Move along a straight segment to its endpoint. | | CURVE_TO | Three | Follow a cubic curve defined by two control points and an endpoint. | | CLOSE_LOOP | None | Return to the starting position. | | END | None | Finish the path. | [MotionPathPointsType](https://reference.aspose.com/slides/python-net/aspose.slides.animation/motionpathpointstype/) describes point-editing characteristics, such as corner or smooth points. It does not replace the command type. Use a curve point type for the curve example below, and a corner point type for the straight segments. Path coordinates are normalized to slide dimensions: an X displacement of 0.25 represents one quarter of the slide width, not 0.25 points. Positive Y runs downward. Absolute commands specify positions in the path coordinate system; relative commands specify offsets from the current position. This is separate from [origin](https://reference.aspose.com/slides/python-net/aspose.slides.animation/motioneffect/origin/), which selects the path's reference frame, and [path_edit_mode](https://reference.aspose.com/slides/python-net/aspose.slides.animation/motioneffect/path_edit_mode/), which controls how the path moves when the shape is moved. ### **Create a Straight Path** Create a motion behavior with a starting point, one straight segment, and an end command. [MotionPath.add](https://reference.aspose.com/slides/python-net/aspose.slides.animation/motionpath/add/) takes the command type, its points, the point type, and a relative-coordinate flag. The starting command establishes (0, 0), and the line ends at (0.25, 0), giving the route a horizontal displacement of one quarter of the slide width. The ending command has no coordinate points. Once the path is assigned, adding the motion behavior to the effect connects that route to the rectangle. ```python import aspose.pydrawing as draw import aspose.slides as slides with slides.Presentation() as presentation: slide = presentation.slides[0] shape = slide.shapes.add_auto_shape(slides.ShapeType.RECTANGLE, 100, 100, 160, 80) effect = slide.timeline.main_sequence.add_effect(shape, slides.animation.EffectType.PATH_RIGHT, slides.animation.EffectSubtype.NONE, slides.animation.EffectTriggerType.ON_CLICK) effect.behaviors.clear() factory = slides.animation.BehaviorFactory() motion = factory.create_motion_effect() motion.origin = slides.animation.MotionOriginType.LAYOUT motion.timing.duration = 2 path = slides.animation.MotionPath() path.add(slides.animation.MotionCommandPathType.MOVE_TO, [draw.PointF(0, 0)], slides.animation.MotionPathPointsType.AUTO, False) path.add(slides.animation.MotionCommandPathType.LINE_TO, [draw.PointF(0.25, 0)], slides.animation.MotionPathPointsType.CORNER, False) path.add(slides.animation.MotionCommandPathType.END, [], slides.animation.MotionPathPointsType.NONE, False) motion.path = path effect.behaviors.add(motion) presentation.save("motion.pptx", slides.export.SaveFormat.PPTX) ``` `motion.pptx` contains one motion behavior with three path commands. The following file-editing examples use this known structure. ### **Compare Absolute and Relative Coordinates** These two path objects describe the same route. The absolute command ends at (0.3, 0.1); the relative command adds (0.1, 0.1) to the current position, (0.2, 0). Both paths start at the same position. For the relative line, add its X and Y offsets to the current position to obtain the endpoint; for the absolute line, read the endpoint directly. Switching the flag without converting the coordinates would describe a different route. ```python import aspose.pydrawing as draw import aspose.slides as slides absolute_path = slides.animation.MotionPath() absolute_path.add(slides.animation.MotionCommandPathType.MOVE_TO, [draw.PointF(0.2, 0)], slides.animation.MotionPathPointsType.AUTO, False) absolute_path.add(slides.animation.MotionCommandPathType.LINE_TO, [draw.PointF(0.3, 0.1)], slides.animation.MotionPathPointsType.CORNER, False) relative_path = slides.animation.MotionPath() relative_path.add(slides.animation.MotionCommandPathType.MOVE_TO, [draw.PointF(0.2, 0)], slides.animation.MotionPathPointsType.AUTO, False) relative_path.add(slides.animation.MotionCommandPathType.LINE_TO, [draw.PointF(0.1, 0.1)], slides.animation.MotionPathPointsType.CORNER, True) ``` Assign either path to a motion behavior to use it in a presentation. The final Boolean argument selects relative coordinates for that command. [![Equivalent routes start at .2,0 and end at .3,.1, using either an absolute endpoint or a relative .1,.1 offset.](https://docs.aspose.com/slides/python-net/custom-animation/visual-custom-animation-2b5c03cbaedf.svg)](https://docs.aspose.com/slides/python-net/custom-animation/visual-custom-animation-2b5c03cbaedf.svg) *Both path commands end at (0.3, 0.1). The absolute command specifies that endpoint; the relative command adds (0.1, 0.1) to the current position (0.2, 0). The diagrams show path-coordinate arithmetic, not measured slide pixels.* ### **Replace a Line with a Curve** Open `motion.pptx` and replace its line command with a cubic curve. Supply the two control points first, followed by the endpoint. The starting position is supplied by the preceding command. The first two points shape the curve, while the third is its destination; they are not three successive destinations. Updating the command type, point-editing type, and point array together keeps the segment consistent with its new geometry. ```python import aspose.pydrawing as draw import aspose.slides as slides with slides.Presentation("motion.pptx") as presentation: effect = presentation.slides[0].timeline.main_sequence[0] motion = effect.behaviors[0] path = motion.path path[1].command_type = slides.animation.MotionCommandPathType.CURVE_TO path[1].points_type = slides.animation.MotionPathPointsType.CURVE_SMOOTH path[1].points = [draw.PointF(0.1, 0), draw.PointF(0.2, 0.1), draw.PointF(0.3, 0.1)] presentation.save("curve.pptx", slides.export.SaveFormat.PPTX) ``` The path in `curve.pptx` still has three commands; its middle command now defines a curve. ## **Inspect and Edit a Saved Path** Each [MotionCmdPath](https://reference.aspose.com/slides/python-net/aspose.slides.animation/motioncmdpath/) exposes [points](https://reference.aspose.com/slides/python-net/aspose.slides.animation/motioncmdpath/points/), [command_type](https://reference.aspose.com/slides/python-net/aspose.slides.animation/motioncmdpath/command_type/), [points_type](https://reference.aspose.com/slides/python-net/aspose.slides.animation/motioncmdpath/points_type/), and [is_relative](https://reference.aspose.com/slides/python-net/aspose.slides.animation/motioncmdpath/is_relative/). The following examples use the known three-command path in `motion.pptx`. For arbitrary input, locate the intended effect and check command types and point counts before editing by index. ### **Read Commands and Coordinates** Read the path without changing it. End and close-loop commands need no points, so allow for a `None` point array. The output pairs each command with its relative-coordinate flag before listing its points. This lets you distinguish an endpoint from an offset before modifying the path. A curve would list three points, whereas the straight line in this file lists only one. ```python import aspose.slides as slides with slides.Presentation("motion.pptx") as presentation: effect = presentation.slides[0].timeline.main_sequence[0] motion = effect.behaviors[0] for segment in motion.path: print(f"{segment.command_type}, relative: {segment.is_relative}") if segment.points is not None: for point in segment.points: print(f"X={point.x}, Y={point.y}") ``` The listing contains a starting point, an absolute line ending at (0.25, 0), and an end command. ### **Change an Endpoint** Open `motion.pptx` and replace the line's point array to move its endpoint. In the input file, index 0 is the starting command and index 1 is the line. Replacing the line's single point changes its destination without changing its command type, timing, or position in the collection. Because the command uses absolute coordinates, the new pair specifies a position rather than an added offset. ```python import aspose.pydrawing as draw import aspose.slides as slides with slides.Presentation("motion.pptx") as presentation: effect = presentation.slides[0].timeline.main_sequence[0] motion = effect.behaviors[0] motion.path[1].points = [draw.PointF(0.4, 0.1)] presentation.save("motion-endpoint.pptx", slides.export.SaveFormat.PPTX) ``` The line in `motion-endpoint.pptx` ends at (0.4, 0.1); the original file is unchanged. ### **Replace a Segment** Use [insert](https://reference.aspose.com/slides/python-net/aspose.slides.animation/motionpath/insert/) and [remove_at](https://reference.aspose.com/slides/python-net/aspose.slides.animation/motionpath/remove_at/) to replace the line in `motion.pptx`. Inserting shifts the old line to index 2. This demonstrates replacing a command object rather than editing its existing coordinates. After insertion, the collection temporarily contains the starting command, the new line, the old line, and the end command. Removing index 2 discards the old line and leaves the new route in place. ```python import aspose.pydrawing as draw import aspose.slides as slides with slides.Presentation("motion.pptx") as presentation: effect = presentation.slides[0].timeline.main_sequence[0] motion = effect.behaviors[0] path = motion.path path.insert(1, slides.animation.MotionCommandPathType.LINE_TO, [draw.PointF(0.2, 0.1)], slides.animation.MotionPathPointsType.CORNER, False) path.remove_at(2) presentation.save("motion-edited.pptx", slides.export.SaveFormat.PPTX) ``` The saved path still has three commands, with the new line ending at (0.2, 0.1) and the end command last. ## **Modify and Verify an Existing Behavior** When the behavior's index is unknown, select it by type. This example opens `rotation.pptx`, finds its [RotationEffect](https://reference.aspose.com/slides/python-net/aspose.slides.animation/rotationeffect/), changes the angle, and checks the saved value after reopening. The type check allows the loop to skip behaviors that are not rotations. The second load reads the saved file into a separate presentation object, so the comparison checks persisted data rather than the value still held in memory. This example still assumes the known effect is first in the main sequence; selecting a behavior by type does not locate the correct effect in an arbitrary presentation. ```python import aspose.slides as slides with slides.Presentation("rotation.pptx") as presentation: effect = presentation.slides[0].timeline.main_sequence[0] for behavior in effect.behaviors: if isinstance(behavior, slides.animation.RotationEffect): behavior.by = 180 presentation.save("rotation-edited.pptx", slides.export.SaveFormat.PPTX) with slides.Presentation("rotation-edited.pptx") as reopened: saved_effect = reopened.slides[0].timeline.main_sequence[0] for behavior in saved_effect.behaviors: if isinstance(behavior, slides.animation.RotationEffect): print(f"Rotation preserved: {abs(behavior.by - 180) < 0.001}") ``` The output is `Rotation preserved: True`. Apply the same type-checking pattern to other behaviors. For a complete preservation check, compare the target shape, effect, behavior types and order, timing, and path commands. Use a numeric tolerance for floating-point values. For a presentation with an unknown animation layout, see [Read Shape Animations](https://docs.aspose.com/slides/python-net/shape-animation/#read-shape-animations) for traversal of main and interactive sequences. ## **Behavior Order, Presets, and Playback** The order in [BehaviorCollection](https://reference.aspose.com/slides/python-net/aspose.slides.animation/behaviorcollection/) is the stored order of an effect's operations. It is not a playlist in which every behavior automatically waits for the preceding one. Timing and the enclosing effect determine scheduling. Behaviors can overlap, and operations on the same property may interact through [additive](https://reference.aspose.com/slides/python-net/aspose.slides.animation/behavior/additive/) and [accumulate](https://reference.aspose.com/slides/python-net/aspose.slides.animation/behavior/accumulate/). Do not use collection reordering alone to schedule “move, then rotate”; use explicit timing or separate effects as described in [Shape Animation](https://docs.aspose.com/slides/python-net/shape-animation/). The effect's [type](https://reference.aspose.com/slides/python-net/aspose.slides.animation/effect/type/) and [subtype](https://reference.aspose.com/slides/python-net/aspose.slides.animation/effect/subtype/) describe its preset. They are not a complete description of an edited behavior tree. Choose the preset and subtype before customizing behaviors: changing the preset can rebuild the collection and discard your custom operations. For example, changing a customized Spin effect to Fade can replace its rotation behavior with set and filter behaviors. Inspect the collection again after changing a preset or subtype. Clearing preset behaviors can also remove visibility or initialization operations that the preset needs. The examples deliberately use visible shapes and replace the behaviors; they do not reconstruct every preset's implementation. ## **Format Compatibility** A preserved behavior tree does not guarantee identical playback in every viewer or export renderer. Check the saved data and the rendered output separately. | Format or output | What to verify | | --- | --- | | PPTX | Use as the primary format for these examples. Reopen it to verify the editable behavior tree, then check playback in the intended PowerPoint version. | | PPT | Legacy binary representation can differ from PPTX. Test a separate save-and-reopen cycle and playback; do not infer support for every custom combination from successful PPTX output. | | PDF, PNG, JPEG, and other static slide images | Contain a static slide representation, not a playable behavior timeline or a guaranteed final animation frame. | | [HTML5](https://docs.aspose.com/slides/python-net/export-to-html5/) | Can play supported animations when shape animation is enabled in the export options. Test custom combinations in the browser. | | [Animated GIF](https://docs.aspose.com/slides/python-net/convert-powerpoint-to-animated-gif/) | Stores rendered frames, not editable behaviors or click-triggered interaction. Check the actual rendered motion. | | [Video](https://docs.aspose.com/slides/python-net/convert-powerpoint-to-video/) | Render animation frames and encode them as video. Support is limited to the renderer's [supported animations and effects](https://docs.aspose.com/slides/python-net/convert-powerpoint-to-video/#supported-animations-and-effects); commands and interactive events do not become an editable timeline. | ## **FAQ** **Why does my effect contain behaviors before I add any?** Creating a predefined effect can create its underlying operations. Inspect them before deciding whether to extend the preset or replace its behaviors. **Does moving a behavior to the beginning make it play first?** Not necessarily. Collection order is not a substitute for timing. Check delays, durations, and interactions between operations on the same property. **Why does an end command have no points?** It marks the end of the path and needs no coordinates. Check for a `None` point array when inspecting a path read from a file. **Is a successful round trip sufficient to confirm playback?** No. Reopening confirms preservation of the properties you checked. Test the slideshow player or animated export separately to confirm its visual behavior. # Customize PowerPoint Fonts in Python > Embed custom fonts in PowerPoint slides with Aspose.Slides for Python via .NET to keep your presentations sharp and consistent across any device. Source: https://docs.aspose.com/slides/python-net/custom-font/ Updated: 2026-08-25 ## **Overview** Aspose.Slides for Python lets you provide custom fonts at runtime so presentations render correctly even when the required fonts aren’t installed on the host system. During export to PDF or images, you can supply font folders or in-memory font data to preserve text layout, glyph metrics, and typography. This makes server-side rendering predictable across different environments, removes OS-level font dependencies, and prevents unwanted fallbacks or reflow. The article shows how to register font sources. A presentation theme can reference different font families for individual writing systems. These mappings store font names but do not install or load the font files. See [Script-Specific Theme Fonts](https://docs.aspose.com/slides/python-net/script-specific-font-mappings/) to manage the mappings, and use the loading options below to make the referenced fonts available for consistent rendering. Aspose.Slides lets you load the following fonts using the `load_external_font` and `load_external_fonts` methods of the [FontsLoader](https://reference.aspose.com/slides/python-net/aspose.slides/fontsloader/) class: - TrueType (.ttf) and TrueType Collection (.ttc) fonts. See [TrueType](https://en.wikipedia.org/wiki/TrueType). - OpenType (.otf) fonts. See [OpenType](https://en.wikipedia.org/wiki/OpenType). ## **Load Custom Fonts** Aspose.Slides allows you to load fonts used in a presentation without installing them on the system. This affects export output—such as PDF, images, and other supported formats—so the resulting documents look consistent across environments. Fonts are loaded from custom directories. 1. Specify one or more folders that contain the font files. 2. Call the static [FontsLoader.load_external_fonts](https://reference.aspose.com/slides/python-net/aspose.slides/fontsloader/load_external_fonts/) method to load fonts from those folders. 3. Load and render/export the presentation. 4. Call [FontsLoader.clear_cache](https://reference.aspose.com/slides/python-net/aspose.slides/fontsloader/clear_cache/) to clear the font cache. The following code example demonstrates the font loading process: ```py import aspose.slides as slides # Define folders that contain custom font files. font_folders = ["fonts", "external_fonts"] # Load custom fonts from the specified folders. slides.FontsLoader.load_external_fonts(font_folders) with slides.Presentation("sample.pptx") as presentation: # Render/export the presentation (e.g., to PDF, images, or other formats) using the loaded fonts. presentation.save("output.pdf", slides.export.SaveFormat.PDF) # Clear the font cache after the work is finished. slides.FontsLoader.clear_cache() ``` [FontsLoader.load_external_fonts](https://reference.aspose.com/slides/python-net/aspose.slides/fontsloader/load_external_fonts/) adds additional folders to the font search paths, but it does not change the font initialization order. Fonts are initialized in this order: 1. The default operating system font path. 1. The paths loaded via [FontsLoader](https://reference.aspose.com/slides/python-net/aspose.slides/fontsloader/). ## **Get the Custom Fonts Folder** Aspose.Slides provides the `get_font_folders` method to retrieve font folders. It returns both the folders added through `load_external_fonts` and the system font folders. This Python code shows how to use `get_font_folders`: ```python import aspose.slides as slides # This call returns the folders checked for font files. # These include folders added via the load_external_fonts method and the system font folders. font_folders = slides.FontsLoader.get_font_folders() ``` ## **Specify Custom Fonts for a Presentation** Aspose.Slides provides the `document_level_font_sources` property, which lets you specify external fonts to use with a presentation. The following Python example shows how to use `document_level_font_sources`: ```python import aspose.slides as slides with open("CustomFont1.ttf", "br") as font1_stream: font1_data = font1_stream.read() with open("CustomFont2.ttf", "br") as font2_stream: font2_data = font2_stream.read() load_options = slides.LoadOptions() load_options.document_level_font_sources.font_folders = ["assets\\fonts", "global\\fonts"] load_options.document_level_font_sources.memory_fonts = [font1_data, font2_data] with slides.Presentation("Fonts.pptx", load_options) as presentation: # ... # Work with the presentation. # CustomFont1, CustomFont2, and fonts from the assets\fonts and global\fonts folders (and their subfolders) are available to the presentation. # ... print(len(presentation.slides)) ``` ## **Load External Fonts from Binary Data** Aspose.Slides provides the `load_external_font` method to load external fonts from binary data. The following Python example demonstrates loading a font from a byte array: ```python import aspose.slides as slides def read_all_bytes(file_path): with open(file_path, "rb") as file_stream: file_data = file_stream.read() return file_data # Load external fonts from byte arrays. slides.FontsLoader.load_external_font(read_all_bytes("ARIALN.TTF")) slides.FontsLoader.load_external_font(read_all_bytes("ARIALNBI.TTF")) slides.FontsLoader.load_external_font(read_all_bytes("ARIALNI.TTF")) try: with slides.Presentation() as presentation: # External fonts are available for the lifetime of this presentation instance. print("processing") finally: slides.FontsLoader.clear_cache() ``` ## **FAQ** ### Do custom fonts affect export to all formats (PDF, PNG, SVG, HTML)? Yes. Connected fonts are used by the renderer across all export formats. ### Are custom fonts automatically embedded into the resulting PPTX? No. Registering a font for rendering is not the same as embedding it into a PPTX. If you need the font carried inside the presentation file, you must use the explicit [embedding features](https://docs.aspose.com/slides/python-net/embedded-font/). ### Can I control fallback behavior when a custom font lacks certain glyphs? Yes. Configure [font substitution](https://docs.aspose.com/slides/python-net/font-substitution/), [replacement rules](https://docs.aspose.com/slides/python-net/font-replacement/), and [fallback sets](https://docs.aspose.com/slides/python-net/fallback-font/) to define exactly which font is used when the requested glyph is missing. ### Can I use fonts in Linux/Docker containers without installing them system-wide? Yes. Point to your own font folders or load fonts from byte arrays. This removes any dependency on system font directories in the container image. ### What about licensing—can I embed any custom font without restrictions? You are responsible for font licensing compliance. Terms vary; some licenses prohibit embedding or commercial use. Always review the font’s EULA before distributing outputs. ## Related articles - [Font Selection Sequence in Aspose.Slides for Python](https://docs.aspose.com/slides/python-net/font-selection-sequence/) # Customize Presentation Shapes in Python > Create and customize shapes in PowerPoint presentations with Aspose.Slides for Python via .NET: geometry paths, curved corners, composite shapes. Source: https://docs.aspose.com/slides/python-net/custom-shape/ Updated: 2026-10-22 ## **Overview** This article explains how to customize presentation shapes in Aspose.Slides by editing shape geometry through edit points and geometry paths. It shows how to work with [GeometryPath](https://reference.aspose.com/slides/python-net/aspose.slides/geometrypath/) to modify existing shapes, perform basic path editing operations, add or remove points, and apply updated geometry back to a shape. It also demonstrates how to create custom and composite shapes, build shapes with curved corners, determine whether a shape geometry is closed, and extract shape elements for contour analysis. ## **Change a Shape Using Edit Points** In PowerPoint, you can use **Edit Points** to modify a square: * Move a corner inward or outward. * Adjust the curvature at a point. * Add new points. Editing points lets you modify a shape’s outline or use an existing shape as the basis for a new one. ## **Shape Editing Tips** ![overview_image](https://docs.aspose.com/slides/python-net/custom-shape/custom_shape_0.png) When editing PowerPoint shapes, keep these concepts in mind: * A shape (or its path) can either be closed or open. * A shape’s path consists of anchor points connected by segments. * A segment can be straight or curved. Anchor points and control handles determine its shape. * Anchor points exist as corner points, straight points, or smooth points: * At a corner point, adjoining segments can meet at an angle. * At a smooth point, the two control handles are aligned and equally distant from the anchor point. * At a straight point, the two control handles are aligned but can be different distances from the anchor point. * Moving anchor points or adjusting their handles changes the shape’s outline. To edit PowerPoint shapes through edit points, **Aspose.Slides** provides the [GeometryPath](https://reference.aspose.com/slides/python-net/aspose.slides/geometrypath/) class. * A [GeometryPath](https://reference.aspose.com/slides/python-net/aspose.slides/geometrypath/) instance represents a geometry path of the [GeometryShape](https://reference.aspose.com/slides/python-net/aspose.slides/geometryshape/) object. * To retrieve the [GeometryPath](https://reference.aspose.com/slides/python-net/aspose.slides/geometrypath/) from the [GeometryShape](https://reference.aspose.com/slides/python-net/aspose.slides/geometryshape/) instance, you can use the [GeometryShape.get_geometry_paths](https://reference.aspose.com/slides/python-net/aspose.slides/geometryshape/get_geometry_paths/) method. * To set the [GeometryPath](https://reference.aspose.com/slides/python-net/aspose.slides/geometrypath/) for a shape, you can use these methods: [GeometryShape.set_geometry_path](https://reference.aspose.com/slides/python-net/aspose.slides/geometryshape/set_geometry_path/) for shapes with a single path and [GeometryShape.set_geometry_paths](https://reference.aspose.com/slides/python-net/aspose.slides/geometryshape/set_geometry_paths/) for shapes with multiple paths. * To add segments, you can use the methods under [GeometryPath](https://reference.aspose.com/slides/python-net/aspose.slides/geometrypath/). * Using the [GeometryPath.stroke](https://reference.aspose.com/slides/python-net/aspose.slides/geometrypath/stroke/) and [GeometryPath.fill_mode](https://reference.aspose.com/slides/python-net/aspose.slides/geometrypath/fill_mode/) properties, you can set the appearance for a geometry path. * Using the [GeometryPath.path_data](https://reference.aspose.com/slides/python-net/aspose.slides/geometrypath/path_data/) property, you can retrieve the geometry path of a [GeometryShape](https://reference.aspose.com/slides/python-net/aspose.slides/geometryshape/) as an array of path segments. ## **Simple Editing Operations** Use the following methods to edit a geometry path. Overloads that accept an index insert a segment at that zero-based position in the path’s segment array. | Operation | Method | | --- | --- | | Append or insert a straight line. | [GeometryPath.line_to](https://reference.aspose.com/slides/python-net/aspose.slides/geometrypath/line_to/) | | Append or insert a cubic Bézier curve with two control points and an endpoint. | [GeometryPath.cubic_bezier_to](https://reference.aspose.com/slides/python-net/aspose.slides/geometrypath/cubic_bezier_to/) | | Append or insert a quadratic Bézier curve with one control point and an endpoint. | [GeometryPath.quadratic_bezier_to](https://reference.aspose.com/slides/python-net/aspose.slides/geometrypath/quadratic_bezier_to/) | | Append an elliptical arc with the specified dimensions and angles in degrees. | [GeometryPath.arc_to](https://reference.aspose.com/slides/python-net/aspose.slides/geometrypath/arc_to/) | | Close the current figure by connecting its endpoint to its starting point. | [GeometryPath.close_figure](https://reference.aspose.com/slides/python-net/aspose.slides/geometrypath/close_figure/) | | Set the starting point of a figure. | [GeometryPath.move_to](https://reference.aspose.com/slides/python-net/aspose.slides/geometrypath/move_to/) | | Remove a segment at a zero-based index. | [GeometryPath.remove_at](https://reference.aspose.com/slides/python-net/aspose.slides/geometrypath/remove_at/) | ## **Add Custom Points to a Shape** This example inserts two points into a rectangular shape using [GeometryPath.line_to](https://reference.aspose.com/slides/python-net/aspose.slides/geometrypath/line_to/) and applies the edited path with [GeometryShape.set_geometry_path](https://reference.aspose.com/slides/python-net/aspose.slides/geometryshape/set_geometry_path/). The coordinates are local to the shape: both new points are at its center, 100 points from the left and 50 points from the top. Segment indices 1 and 4 place them on the top and bottom edges, pulling those edges inward. ```python import aspose.slides as slides with slides.Presentation() as presentation: slide = presentation.slides[0] shape = slide.shapes.add_auto_shape(slides.ShapeType.RECTANGLE, 100, 100, 200, 100) geometry_path = shape.get_geometry_paths()[0] geometry_path.line_to(100, 50, 1) geometry_path.line_to(100, 50, 4) shape.set_geometry_path(geometry_path) ``` ![example1_image](https://docs.aspose.com/slides/python-net/custom-shape/custom_shape_1.png) ## **Remove Points from a Shape** This example changes a heart-shaped outline by removing the segment at zero-based index 2 with [GeometryPath.remove_at](https://reference.aspose.com/slides/python-net/aspose.slides/geometrypath/remove_at/). Applying the modified path with [GeometryShape.set_geometry_path](https://reference.aspose.com/slides/python-net/aspose.slides/geometryshape/set_geometry_path/) updates the shape’s contour. ```python import aspose.slides as slides with slides.Presentation() as presentation: slide = presentation.slides[0] shape = slide.shapes.add_auto_shape(slides.ShapeType.HEART, 100, 100, 300, 300) path = shape.get_geometry_paths()[0] path.remove_at(2) shape.set_geometry_path(path) ``` ![example2_image](https://docs.aspose.com/slides/python-net/custom-shape/custom_shape_2.png) ## **Create a Custom Shape** This example builds a five-pointed star with [GeometryPath](https://reference.aspose.com/slides/python-net/aspose.slides/geometrypath/). Alternating outer and inner radii of 100 and 50 points define the tips and indentations; a 72-degree step spaces the five tips evenly. The path is closed with [GeometryPath.close_figure](https://reference.aspose.com/slides/python-net/aspose.slides/geometrypath/close_figure/) and applied to a rectangular shape using [GeometryShape.set_geometry_path](https://reference.aspose.com/slides/python-net/aspose.slides/geometryshape/set_geometry_path/), replacing its outline. ```python import aspose.slides as slides import aspose.pydrawing as draw import math points = [] outer_radius = 100 inner_radius = 50 angle_step = 72 for angle in range(-90, 270, angle_step): radians = angle * (math.pi / 180) x = outer_radius * math.cos(radians) y = outer_radius * math.sin(radians) points.append(slides.PointF(x + outer_radius, y + outer_radius)) radians = math.pi * (angle + angle_step / 2) / 180.0 x = inner_radius * math.cos(radians) y = inner_radius * math.sin(radians) points.append(slides.PointF(x + outer_radius, y + outer_radius)) star_path = slides.GeometryPath() star_path.move_to(points[0]) for i in range(1, len(points)): star_path.line_to(points[i]) star_path.close_figure() with slides.Presentation() as presentation: slide = presentation.slides[0] shape = slide.shapes.add_auto_shape(slides.ShapeType.RECTANGLE, 100, 100, outer_radius * 2, outer_radius * 2) shape.set_geometry_path(star_path) ``` ![example3_image](https://docs.aspose.com/slides/python-net/custom-shape/custom_shape_3.png) ## **Create a Composite Custom Shape** This example defines two closed [GeometryPath](https://reference.aspose.com/slides/python-net/aspose.slides/geometrypath/) objects for the top and bottom thirds of a shape. Applying both paths with [GeometryShape.set_geometry_paths](https://reference.aspose.com/slides/python-net/aspose.slides/geometryshape/set_geometry_paths/) creates a single composite shape with a gap across its middle third. ```python import aspose.slides as slides with slides.Presentation() as presentation: slide = presentation.slides[0] shape = slide.shapes.add_auto_shape(slides.ShapeType.RECTANGLE, 100, 100, 200, 100) top_path = slides.GeometryPath() top_path.move_to(0, 0) top_path.line_to(shape.width, 0) top_path.line_to(shape.width, shape.height / 3) top_path.line_to(0, shape.height / 3) top_path.close_figure() bottom_path = slides.GeometryPath() bottom_path.move_to(0, shape.height / 3 * 2) bottom_path.line_to(shape.width, shape.height / 3 * 2) bottom_path.line_to(shape.width, shape.height) bottom_path.line_to(0, shape.height) bottom_path.close_figure() shape.set_geometry_paths([top_path, bottom_path]) ``` ![example4_image](https://docs.aspose.com/slides/python-net/custom-shape/custom_shape_4.png) ## **Create a Custom Shape with Curved Corners** This example combines straight segments with [GeometryPath.arc_to](https://reference.aspose.com/slides/python-net/aspose.slides/geometrypath/arc_to/) to create a shape with inward-curved corners. Each corner size sets the arc’s width and height in points, and the -90-degree sweep draws a counterclockwise quarter ellipse. The completed path is applied with [GeometryShape.set_geometry_path](https://reference.aspose.com/slides/python-net/aspose.slides/geometryshape/set_geometry_path/), and the presentation is saved in PPTX format. ```python import aspose.slides as slides import aspose.pydrawing as draw shape_x = 20 shape_y = 20 shape_width = 300 shape_height = 200 left_top_size = 50 right_top_size = 20 right_bottom_size = 40 left_bottom_size = 10 with slides.Presentation() as presentation: slide = presentation.slides[0] shape = slide.shapes.add_auto_shape(slides.ShapeType.CUSTOM, shape_x, shape_y, shape_width, shape_height) top_left = slides.PointF(left_top_size, 0) top_right = slides.PointF(shape_width - right_top_size, 0) right_bottom = slides.PointF(shape_width, shape_height - right_bottom_size) bottom_left = slides.PointF(left_bottom_size, shape_height) left_top = slides.PointF(0, left_top_size) geometry_path = slides.GeometryPath() geometry_path.move_to(top_left) geometry_path.line_to(top_right) geometry_path.arc_to(right_top_size, right_top_size, 180, -90) geometry_path.line_to(right_bottom) geometry_path.arc_to(right_bottom_size, right_bottom_size, -90, -90) geometry_path.line_to(bottom_left) geometry_path.arc_to(left_bottom_size, left_bottom_size, 0, -90) geometry_path.line_to(left_top) geometry_path.arc_to(left_top_size, left_top_size, 90, -90) geometry_path.close_figure() shape.set_geometry_path(geometry_path) presentation.save("output.pptx", slides.export.SaveFormat.PPTX) ``` ## **Find Out If a Shape Geometry Is Closed** The following helper checks whether every nonempty geometry path ends with a closing segment. It reads [GeometryPath.path_data](https://reference.aspose.com/slides/python-net/aspose.slides/geometrypath/path_data/) and compares the final segment’s [PathSegment.path_command](https://reference.aspose.com/slides/python-net/aspose.slides/pathsegment/path_command/) with [PathCommandType.CLOSE](https://reference.aspose.com/slides/python-net/aspose.slides/pathcommandtype/). It returns false when there are no nonempty paths. This checks the final command of each path; it does not inspect every subfigure within a path. The example prints `True` for a rectangle. ```python import aspose.slides as slides def is_geometry_closed(geometry_shape): has_nonempty_path = False for geometry_path in geometry_shape.get_geometry_paths(): segments = geometry_path.path_data if len(segments) == 0: continue has_nonempty_path = True last_segment = segments[len(segments) - 1] if last_segment.path_command != slides.PathCommandType.CLOSE: return False return has_nonempty_path with slides.Presentation() as presentation: slide = presentation.slides[0] shape = slide.shapes.add_auto_shape(slides.ShapeType.RECTANGLE, 100, 100, 200, 100) print(is_geometry_closed(shape)) ``` ## **Extract and Inspect Shape Elements** Use [GeometryShape.create_shape_elements](https://reference.aspose.com/slides/python-net/aspose.slides/geometryshape/create_shape_elements/) to inspect an existing shape as elements containing path points and point types. Each returned [ShapeElement](https://reference.aspose.com/slides/python-net/aspose.slides/shapeelement/) exposes its [path_points](https://reference.aspose.com/slides/python-net/aspose.slides/shapeelement/path_points/) and [path_types](https://reference.aspose.com/slides/python-net/aspose.slides/shapeelement/path_types/) arrays. This representation is useful for contour analysis or passing geometry to custom drawing tools. The example opens a presentation, finds the first geometry shape directly on the first slide, and prints its path segments. Use a presentation containing a shape with straight and curved segments to see both kinds of output. It does not search inside groups. ```python import aspose.slides as slides with slides.Presentation("input.pptx") as presentation: slide = presentation.slides[0] shape = next((item for item in slide.shapes if isinstance(item, slides.GeometryShape)), None) if shape is None: print("No geometry shape found on the first slide.") else: for element in shape.create_shape_elements(): points = element.path_points types = element.path_types print("Shape element:") i = 0 while i < len(points): point_type = types[i] & 0x07 # Keep the segment type, excluding flags. if point_type == 0: print(f"Start figure at {points[i]}") elif point_type == 1: print(f"Line to {points[i]}") elif point_type == 3: print(f"Cubic Bezier: controls {points[i]}, {points[i + 1]}; end {points[i + 2]}") i += 2 # Consume both control points and the endpoint. if (types[i] & 0x80) != 0: print("Close subpath back to its starting point.") i += 1 ``` The arrays correspond by index: `points[i]` is a point and `types[i]` describes its role. Type `0` starts a figure, and type `1` draws a line from the previous point to the current point. A cubic Bézier segment starts at the previous endpoint and uses three consecutive type-`3` entries: two control points followed by the new endpoint. The loop consumes these three entries together and checks the endpoint for closure. Point types also contain flags. Mask with `0x07` to identify the segment type, and test `0x80` separately to detect a closed subpath. For example, `129` (`0x81`) means a line endpoint that closes a subpath, and `131` (`0x83`) means a Bézier endpoint that closes one. Comparing the raw value only with `1` or `3` would miss these cases. Other flags, such as dash (`0x10`) and marker (`0x20`), do not change the base segment type. **Coordinates and transformations.** Points are measured in points (1/72 inch), with X increasing to the right and Y increasing downward. For an ungrouped shape, the extracted coordinates already include its [x](https://reference.aspose.com/slides/python-net/aspose.slides/shape/x/) and [y](https://reference.aspose.com/slides/python-net/aspose.slides/shape/y/) position and reflect its current width and height. For example, an unrotated rectangle at `(100, 200)` with size `120 × 80` has contour bounds `(100, 200)`–`(220, 280)`. Do not add the shape's position again. Subtract its X and Y to obtain coordinates relative to its unrotated frame. The extracted points do not apply the shape's [rotation](https://reference.aspose.com/slides/python-net/aspose.slides/shape/rotation/) or horizontal and vertical flips. To reproduce the displayed contour, apply those transformations around the shape's center. For grouped shapes, also account for the group coordinate mapping and transformations; do not assume that the extracted points are the final rendered slide coordinates or apply a translation or scale twice if it is already reflected in the child's frame. **Inspection versus editing.** Extracted arrays describe the contour; changing them does not update the original shape. Choose this approach when your analysis or drawing code needs point/type arrays. Use [get_geometry_paths](https://reference.aspose.com/slides/python-net/aspose.slides/geometryshape/get_geometry_paths/) when you need geometry commands in the shape's local coordinate system or want to edit its geometry. Apply edited paths through [set_geometry_path](https://reference.aspose.com/slides/python-net/aspose.slides/geometryshape/set_geometry_path/) or [set_geometry_paths](https://reference.aspose.com/slides/python-net/aspose.slides/geometryshape/set_geometry_paths/). ## **FAQ** **What will happen to the fill and outline after replacing the geometry?** The style remains with the shape; only the contour changes. The fill and outline are automatically applied to the new geometry. **How do I correctly rotate a custom shape along with its geometry?** Use the shape’s [rotation](https://reference.aspose.com/slides/python-net/aspose.slides/shape/rotation/) property; the geometry rotates with the shape because it’s bound to the shape’s own coordinate system. **Can I convert a custom shape to an image to "lock in" the result?** Yes. Export the required [slide](https://docs.aspose.com/slides/python-net/convert-powerpoint-to-png/) area or the [shape](https://docs.aspose.com/slides/python-net/create-shape-thumbnails/) itself to a raster format; this simplifies further work with complex geometries. # Customize Data Points in Treemap and Sunburst Charts in Python > Learn how to create hierarchical data and customize levels, labels, and colors in Treemap and Sunburst charts with Aspose.Slides for Python via .NET. Source: https://docs.aspose.com/slides/python-net/data-points-of-treemap-and-sunburst-chart/ Updated: 2026-08-05 ## **Overview** Treemap and Sunburst charts display the same kind of hierarchical data, but they use different layouts. A Treemap draws the hierarchy as nested rectangles whose areas represent leaf values. A Sunburst draws it as concentric rings: top-level groups are near the center, and leaf categories are on the outer ring. In Aspose.Slides for Python via .NET, each numeric value is a [ChartDataPoint](https://reference.aspose.com/slides/python-net/aspose.slides.charts/chartdatapoint/). Its [ChartDataPoint.data_point_levels](https://reference.aspose.com/slides/python-net/aspose.slides.charts/chartdatapoint/data_point_levels/) collection provides access to the leaf and its parent groups. This article explains that mapping and shows how to create and format both chart types from the same sample data. ![A Treemap chart with Consumer and Business branches](https://docs.aspose.com/slides/python-net/data-points-of-treemap-and-sunburst-chart/treemap-hierarchy.png) ![A Sunburst chart with the same Consumer and Business hierarchy](https://docs.aspose.com/slides/python-net/data-points-of-treemap-and-sunburst-chart/sunburst-hierarchy.png) ## **Understand Categories, Data Points, and Levels** The sample used below has three category levels and one numeric series: | Branch | Stem | Leaf | Revenue | | --- | --- | --- | ---: | | Consumer | Computers | Laptops | 12 | | Consumer | Computers | Desktops | 8 | | Consumer | Mobile | Phones | 15 | | Consumer | Mobile | Tablets | 6 | | Business | Services | Consulting | 10 | | Business | Services | Support | 7 | | Business | Software | Licenses | 11 | | Business | Software | Subscriptions | 14 | Each row creates one leaf category and one data point. The category grouping levels describe the path from that leaf to its parents. For the first row, the path is `Consumer > Computers > Laptops`. The indexes in [ChartDataPoint.data_point_levels](https://reference.aspose.com/slides/python-net/aspose.slides.charts/chartdatapoint/data_point_levels/) run from the leaf upward: | `data_point_levels` index | Logical level | Treemap representation | Sunburst representation | | ---: | --- | --- | --- | | `0` | Leaf | Value rectangle | Outer-ring segment | | `1` | Stem | Parent rectangle or header | Middle-ring segment | | `2` | Branch | Top-level rectangle or header | Inner-ring segment | This order is the same for both chart types even though their visual layouts differ. A parent segment is shared by several leaves. To format it, use the corresponding level of the first data point in that group. For example, the `Consumer` branch starts with the `Laptops` point, while the `Software` stem starts with the `Licenses` point. Keeping references to those points is clearer and safer than using unexplained expressions such as `data_points[0]` or `data_points[6]`. ## **Create and Customize Both Chart Types** The following complete example creates a Treemap on the first slide and a Sunburst on the second slide. It builds the hierarchy, displays the value for `Tablets`, applies fixed colors to selected levels, formats a branch label, and saves the presentation. ```py import aspose.pydrawing as drawing import aspose.slides as slides import aspose.slides.charts as charts def set_solid_fill(fill_format, color): fill_format.fill_type = slides.FillType.SOLID fill_format.solid_fill_color.color = color def add_hierarchy_chart(slide, chart_type): worksheet_index = 0 leaf_level_index = 0 stem_level_index = 1 branch_level_index = 2 chart = slide.shapes.add_chart(chart_type, 40, 40, 640, 440) chart.has_title = False chart.has_legend = False chart.chart_data.categories.clear() chart.chart_data.series.clear() workbook = chart.chart_data.chart_data_workbook workbook.clear(worksheet_index) def add_category(row_index, leaf_name): category_cell = workbook.get_cell(worksheet_index, row_index, 2, leaf_name) return chart.chart_data.categories.add(category_cell) # Add the leaf categories. A grouping item is set only when a new group begins; # the following categories remain in that group until another item is set. laptops_category = add_category(1, "Laptops") laptops_category.grouping_levels.set_grouping_item(stem_level_index, "Computers") laptops_category.grouping_levels.set_grouping_item(branch_level_index, "Consumer") add_category(2, "Desktops") phones_category = add_category(3, "Phones") phones_category.grouping_levels.set_grouping_item(stem_level_index, "Mobile") add_category(4, "Tablets") consulting_category = add_category(5, "Consulting") consulting_category.grouping_levels.set_grouping_item(stem_level_index, "Services") consulting_category.grouping_levels.set_grouping_item(branch_level_index, "Business") add_category(6, "Support") licenses_category = add_category(7, "Licenses") licenses_category.grouping_levels.set_grouping_item(stem_level_index, "Software") add_category(8, "Subscriptions") series_name_cell = workbook.get_cell(worksheet_index, 0, 3, "Revenue") series = chart.chart_data.series.add(series_name_cell, chart_type) series.labels.default_data_label_format.show_category_name = True def add_data_point(row_index, value): value_cell = workbook.get_cell(worksheet_index, row_index, 3, value) if chart_type == charts.ChartType.TREEMAP: return series.data_points.add_data_point_for_treemap_series(value_cell) return series.data_points.add_data_point_for_sunburst_series(value_cell) laptops_data_point = add_data_point(1, 12) add_data_point(2, 8) add_data_point(3, 15) tablets_data_point = add_data_point(4, 6) add_data_point(5, 10) add_data_point(6, 7) licenses_data_point = add_data_point(7, 11) add_data_point(8, 14) # Show the category and value on the Tablets leaf. tablets_label_format = tablets_data_point.data_point_levels[leaf_level_index].label.data_label_format tablets_label_format.show_category_name = True tablets_label_format.show_value = True tablets_label_format.separator = "\n" tablets_label_format.number_format = "$0" # Format the Consumer branch through the first leaf in that branch. consumer_branch_level = laptops_data_point.data_point_levels[branch_level_index] consumer_branch_fill = consumer_branch_level.format.fill consumer_branch_color = drawing.Color.from_argb(31, 78, 121) set_solid_fill(consumer_branch_fill, consumer_branch_color) consumer_label_format = consumer_branch_level.label.data_label_format consumer_label_format.show_category_name = True consumer_label_format.show_series_name = False consumer_label_text_fill = consumer_label_format.text_format.portion_format.fill_format set_solid_fill(consumer_label_text_fill, drawing.Color.white) # Format the Software stem through the first leaf in that stem. software_stem_level = licenses_data_point.data_point_levels[stem_level_index] software_stem_fill = software_stem_level.format.fill software_stem_color = drawing.Color.from_argb(112, 173, 71) set_solid_fill(software_stem_fill, software_stem_color) # parent_label_layout affects Treemap parent labels; Sunburst uses ring segments. if chart_type == charts.ChartType.TREEMAP: series.parent_label_layout = charts.ParentLabelLayoutType.OVERLAPPING with slides.Presentation() as presentation: treemap_slide = presentation.slides[0] add_hierarchy_chart(treemap_slide, charts.ChartType.TREEMAP) layout_slide = presentation.layout_slides[0] sunburst_slide = presentation.slides.add_empty_slide(layout_slide) add_hierarchy_chart(sunburst_slide, charts.ChartType.SUNBURST) presentation.save("hierarchical-charts.pptx", slides.export.SaveFormat.PPTX) ``` The category cells and value cells use the same worksheet row, so their collection positions remain aligned. When you work with an existing chart rather than creating one, inspect the category rows first and store named references to the data points and levels you intend to format. ## **Behavior and Practical Considerations** ### **Treemap and Sunburst Differences** - A Treemap uses area to communicate value and nested rectangles to communicate hierarchy. The [ChartSeries.parent_label_layout](https://reference.aspose.com/slides/python-net/aspose.slides.charts/chartseries/parent_label_layout/) property controls how parent labels appear in this chart type. - A Sunburst uses angle to communicate value and ring depth to communicate hierarchy. [ChartSeries.parent_label_layout](https://reference.aspose.com/slides/python-net/aspose.slides.charts/chartseries/parent_label_layout/) does not control its ring labels. - Both chart types use the same category grouping levels and the same leaf-to-parent order in `data_point_levels`, so the data-building and level-formatting code can be shared. - Parent values are calculated from their descendant leaves. Do not add separate numeric points for branches or stems. ### **Sorting and Segment Order** The chart layout engine determines the final placement of rectangles and ring segments. Arrange related category rows together before adding them, but do not rely on a specific rectangle position or start angle. If sequence carries meaning, include it in the labels or use a chart type with an explicit category axis. ### **Theme and Fixed Colors** Unformatted chart levels inherit colors from the presentation theme. The example uses explicit RGB fills for predictable output. If the chart should follow theme changes, use scheme colors instead of fixed RGB values and avoid overriding every level. Also check label contrast after changing a branch or stem fill. ### **Labels and Available Space** PowerPoint may hide or truncate labels when a segment is too small. Increasing the chart size, shortening category names, or showing fewer label fields usually produces a clearer result. A label can combine the category name, series name, and value through [DataLabelFormat](https://reference.aspose.com/slides/python-net/aspose.slides.charts/datalabelformat/), but enabling every field often makes hierarchical charts difficult to read. ### **Export and Rendering** Saving to PPTX keeps the chart editable. When Aspose.Slides renders the presentation to PDF or an image, the supported fills and label settings are rendered with the chart. Font substitution and small differences in available layout space can change line wrapping or label visibility, so install the required fonts and verify important export targets. ## **FAQ** **Why does changing a parent level affect several leaves?** A branch or stem is a shared visual segment. Its [ChartDataPointLevel](https://reference.aspose.com/slides/python-net/aspose.slides.charts/chartdatapointlevel/) can be reached through a descendant leaf, but the formatting belongs to the shared parent segment rather than only to that leaf. **Why is a data label missing?** First enable the required fields on the label's [DataLabelFormat](https://reference.aspose.com/slides/python-net/aspose.slides.charts/datalabelformat/) object. Then check whether the segment has enough space. Treemap parent-label layout, chart dimensions, label length, font size, and the number of enabled fields all affect whether a label can be displayed. **Can I set the exact order or coordinates of segments?** You can control the source-row order and keep each group contiguous, but you cannot assign exact Treemap rectangles or Sunburst angles. The chart layout engine calculates them from the hierarchy, values, and available space. **Why do colors change after the presentation theme changes?** Theme-based fills are designed to follow the presentation palette. Apply explicit RGB colors to the levels that must remain fixed, or keep scheme colors when adapting to a new theme is preferred. **Will custom formatting be preserved in PDF and image exports?** Yes, supported chart fills and label settings are included during rendering. For consistent results across systems, make the required fonts available and test the final export size because label fitting is layout-dependent. ## **See Also** - [Create Treemap charts](https://docs.aspose.com/slides/python-net/create-chart/#create-tree-map-charts) - [Create Sunburst charts](https://docs.aspose.com/slides/python-net/create-chart/#create-sunburst-charts) - [Export presentation charts](https://docs.aspose.com/slides/python-net/export-chart/) - [Manage presentation themes](https://docs.aspose.com/slides/python-net/presentation-theme/) # Customize Default Fonts in Presentations with Python > Set default fonts in Aspose.Slides for Python to ensure proper PowerPoint (PPT, PPTX) and OpenDocument (ODP) conversion to PDF, XPS and images. Source: https://docs.aspose.com/slides/python-net/default-font/ Updated: 2026-08-05 ## **Overview** Aspose.Slides allows you to specify default fonts that are used when a presentation is rendered. This is useful when generating slide thumbnails or exporting a presentation to formats such as PDF and XPS. Default fonts are configured through `LoadOptions` before the presentation is loaded. The `default_regular_font` property defines the default font for regular text, while `default_asian_font` defines the default font for Asian text. After these options are set, the presentation can be loaded and rendered using the specified fonts. ## **Using Default Fonts for Rendering Presentation** Aspose.Slides lets you set the default font fore rendering the presentation to PDF, XPS or thumbnails. This article shows how to define DefaultRegular Font and DefaultAsian Font for use as default fonts. Please follow the steps below to loading fonts from external directories by using Aspose.Slides for Python via .NET API: 1. Create an instance of LoadOptions. 1. Set the DefaultRegularFont to your desired font. In the following example, I have used Wingdings. 1. Set the DefaultAsianFont to your desired font. I have used Wingdings in following sample. 1. Load the presentation using Presentation and setting the load options. 1. Now, generate the slide thumbnail, PDF and XPS to verify the results. The implementation of the above is given below. ```py import aspose.slides as slides # Use load options to define the default regular and asian fonts loadOptions = slides.LoadOptions(slides.LoadFormat.AUTO) loadOptions.default_regular_font = "Wingdings" loadOptions.default_asian_font = "Wingdings" # Load the presentation with slides.Presentation("DefaultFonts.pptx", loadOptions) as pptx: # Generate slide thumbnail with pptx.slides[0].get_image(1, 1) as img: img.save("output_out.png", slides.ImageFormat.PNG) # Generate PDF pptx.save("output_out.pdf", slides.export.SaveFormat.PDF) # Generate XPS pptx.save("output_out.xps", slides.export.SaveFormat.XPS) ``` ## **FAQ** ### What exactly do default_regular_font and default_asian_font affect—only export, or also thumbnails, PDF, XPS, HTML, and SVG? They participate in the rendering pipeline for all supported outputs. This includes slide thumbnails, [PDF](https://docs.aspose.com/slides/python-net/convert-powerpoint-to-pdf/), [XPS](https://docs.aspose.com/slides/python-net/convert-powerpoint-to-xps/), [raster images](https://docs.aspose.com/slides/python-net/convert-powerpoint-to-png/), [HTML](https://docs.aspose.com/slides/python-net/convert-powerpoint-to-html/), and [SVG](https://docs.aspose.com/slides/python-net/render-a-slide-as-an-svg-image/), because Aspose.Slides uses the same layout and glyph resolution logic across these targets. ### Are default fonts applied when simply reading and saving a PPTX without any rendering? No. Default fonts matter when text must be measured and drawn. A straight open–save of a presentation does not change stored font runs or the file’s structure. Default fonts come into play during operations that render or reflow text. ### If I add my own font folders or supply fonts from memory, will they be considered when choosing default fonts? Yes. [Custom font sources](https://docs.aspose.com/slides/python-net/custom-font/) expand the catalog of available families and glyphs that the engine can use. Default fonts and any [fallback rules](https://docs.aspose.com/slides/python-net/fallback-font/) will resolve against those sources first, yielding more reliable coverage on servers and in containers. ### Will default fonts affect text metrics (kerning, advances) and therefore line breaks and wrapping? Yes. Changing the font changes glyph metrics and can alter line breaks, wrapping, and pagination during rendering. For layout stability, [embed the original fonts](https://docs.aspose.com/slides/python-net/embedded-font/) or select metrically compatible default and fallback families. ### Is there any point in setting default fonts if all fonts used in the presentation are embedded? Often it’s not necessary, because [embedded fonts](https://docs.aspose.com/slides/python-net/embedded-font/) already ensure consistent appearance. Default fonts still help as a safety net for characters not covered by the embedded subset or when a file mixes embedded and non-embedded text. # Determine the Original Presentation Format in Python > Read the original format of a loaded presentation in Python with Aspose.Slides for Python via .NET, compare detection APIs, and handle files, streams, and legacy formats. Source: https://docs.aspose.com/slides/python-net/detect-presentation-source-format/ Updated: 2026-09-22 ## **Overview** After loading a presentation, read the read-only [Presentation.source_format](https://reference.aspose.com/slides/python-net/aspose.slides/presentation/source_format/) property to determine its original format. Use it when subsequent processing depends on the format from which the current instance was loaded. The source format is distinct from the [SaveFormat](https://reference.aspose.com/slides/python-net/aspose.slides.export/saveformat/) selected for an output file. Saving to another format does not change the source format of the existing instance. ## **Read the Source Format of a File** This example requires an existing `sample.pptx` file. It loads the file and selects an application processing policy using [Presentation.source_format](https://reference.aspose.com/slides/python-net/aspose.slides/presentation/source_format/), rather than the filename. Change the input path to try other formats. The example prints the selected policy; replace the messages with your application logic. ```python import aspose.slides as slides with slides.Presentation("sample.pptx") as presentation: source_format = presentation.source_format if source_format in (slides.SourceFormat.PPT, slides.SourceFormat.PPS, slides.SourceFormat.POT): print("Use the legacy PowerPoint processing policy.") elif source_format == slides.SourceFormat.PPTX: print("Use the standard PPTX processing policy.") else: print(f"Use the general policy for {source_format.name}.") ``` ## **Recognize the Supported Values** The [SourceFormat](https://reference.aspose.com/slides/python-net/aspose.slides/sourceformat/) enumeration distinguishes the following presentation formats. The extensions below are conventional extensions, not a reconstruction of the original filename. | SourceFormat value | Extension | Format | | --- | --- | --- | | `PPT` | `.ppt` | PowerPoint 97–2003 presentation | | `PPTX` | `.pptx` | Office Open XML presentation | | `PPTM` | `.pptm` | Macro-enabled Office Open XML presentation | | `PPS` | `.pps` | PowerPoint 97–2003 slide show | | `PPSX` | `.ppsx` | Office Open XML slide show | | `PPSM` | `.ppsm` | Macro-enabled Office Open XML slide show | | `POT` | `.pot` | PowerPoint 97–2003 template | | `POTX` | `.potx` | Office Open XML template | | `POTM` | `.potm` | Macro-enabled Office Open XML template | | `ODP` | `.odp` | OpenDocument presentation | | `OTP` | `.otp` | OpenDocument presentation template | | `FODP` | `.fodp` | Flat XML ODF presentation | | `XML` | `.xml` | PowerPoint XML presentation | ## **Read the Source Format of a Stream** This example requires an existing `sample.pps` file. Reading its bytes into a memory stream models input received without a filename, such as a database value or an uploaded byte array. The [Presentation](https://reference.aspose.com/slides/python-net/aspose.slides/presentation/) constructor receives only the stream. ```python import io import aspose.slides as slides with open("sample.pps", "rb") as input_file: data = input_file.read() with io.BytesIO(data) as stream: with slides.Presentation(stream) as presentation: print(f"Source format: {presentation.source_format.name}") ``` PPT, PPS, and POT use the same underlying binary format. When loading by file path, the extension can help distinguish a slide show or template. Without a filename, legacy PPS and POT content may be reported as `SourceFormat.PPT`; the PPS example above reports `PPT`. If your application must preserve the distinction, keep the original filename or subtype metadata separately. An extension is a useful hint for these legacy subtypes, but should not be the only basis for identifying arbitrary presentation content. ## **Compare Detection Before and After Loading** Use [PresentationFactory.get_presentation_info](https://reference.aspose.com/slides/python-net/aspose.slides/presentationfactory/get_presentation_info/) and [PresentationInfo.load_format](https://reference.aspose.com/slides/python-net/aspose.slides/presentationinfo/load_format/) when you need to inspect a file before loading its complete presentation object model. Use [Presentation.source_format](https://reference.aspose.com/slides/python-net/aspose.slides/presentation/source_format/) when the instance already exists. This example requires `sample.pptx` and prints `PPTX` for both checks. In production, choose the API appropriate to your processing stage; an already loaded presentation does not need a second inspection solely to obtain its source format. ```python import aspose.slides as slides path = "sample.pptx" information = slides.PresentationFactory.instance.get_presentation_info(path) print(f"Before loading: {information.load_format.name}") with slides.Presentation(path) as presentation: print(f"After loading: {presentation.source_format.name}") ``` The results have different enumeration types: [LoadFormat](https://reference.aspose.com/slides/python-net/aspose.slides/loadformat/) and [SourceFormat](https://reference.aspose.com/slides/python-net/aspose.slides/sourceformat/). Do not compare them by casting their numeric values or assume that every format has identical detection results. In the save-and-reopen check described below, PowerPoint XML was reported as `LoadFormat.UNKNOWN` before loading and `SourceFormat.XML` after loading. ## **Keep Source and Output Formats Separate** This example requires `sample.pptx` and writes `converted.odp`. It prints `PPTX` both before and after saving the original instance. Only the new instance loaded from the ODP output reports `ODP`. ```python import aspose.slides as slides with slides.Presentation("sample.pptx") as presentation: print(f"Before saving: {presentation.source_format.name}") presentation.save("converted.odp", slides.export.SaveFormat.ODP) print(f"After saving: {presentation.source_format.name}") with slides.Presentation("converted.odp") as reopened: print(f"Reopened output: {reopened.source_format.name}") ``` A presentation created from scratch with `slides.Presentation()` reports `SourceFormat.PPTX`. It has no input file: this is the default value for a newly created instance, not evidence that a PPTX file was loaded. Track whether your application created or loaded the instance separately if that distinction matters. ## **Map a Source Format to an Extension** The following example requires `sample.pptx`. It maps every currently supported [SourceFormat](https://reference.aspose.com/slides/python-net/aspose.slides/sourceformat/) value to a conventional extension, without parsing the input filename. The fallback avoids silently assigning an extension to an unrecognized value. ```python import aspose.slides as slides extensions = { slides.SourceFormat.PPT: ".ppt", slides.SourceFormat.PPTX: ".pptx", slides.SourceFormat.PPTM: ".pptm", slides.SourceFormat.PPS: ".pps", slides.SourceFormat.PPSX: ".ppsx", slides.SourceFormat.PPSM: ".ppsm", slides.SourceFormat.POT: ".pot", slides.SourceFormat.POTX: ".potx", slides.SourceFormat.POTM: ".potm", slides.SourceFormat.ODP: ".odp", slides.SourceFormat.OTP: ".otp", slides.SourceFormat.FODP: ".fodp", slides.SourceFormat.XML: ".xml", } with slides.Presentation("sample.pptx") as presentation: extension = extensions.get(presentation.source_format) print(extension if extension is not None else "No extension mapping is available.") ``` This mapping does not convert a file or recover a legacy PPS/POT subtype lost during stream loading. For actual saving, select a [SaveFormat](https://reference.aspose.com/slides/python-net/aspose.slides.export/saveformat/) explicitly, or use the conversion shown in [Save Presentations in Their Original Format](https://docs.aspose.com/slides/python-net/save-presentation/#save-presentations-in-their-original-format). ## **Verify Formats by Saving and Reopening** This self-contained example creates a presentation and writes three files in the working directory, overwriting files with the same names. It reopens each output both by path and through a memory stream. For PPTX and ODP, both routes report the saved format. For PPS, loading by path reports `PPS`, while loading the same bytes without a filename reports `PPT`. ```python import io import aspose.slides as slides formats = [slides.export.SaveFormat.PPTX, slides.export.SaveFormat.ODP, slides.export.SaveFormat.PPS] with slides.Presentation() as presentation: for output_format in formats: path = f"roundtrip.{output_format.name.lower()}" presentation.save(path, output_format) with open(path, "rb") as input_file: data = input_file.read() with slides.Presentation(path) as from_file: with io.BytesIO(data) as stream: with slides.Presentation(stream) as from_stream: print(f"{output_format.name}: file={from_file.source_format.name}, stream={from_stream.source_format.name}") ``` The same check with all the formats listed above produced these results for generated presentations with matching extensions: | Saved format | SourceFormat from a file path | SourceFormat from a nameless stream | | --- | --- | --- | | PPT | `PPT` | `PPT` | | PPTX, PPTM | `PPTX`, `PPTM` respectively | Same as file path | | PPS | `PPS` | `PPT` | | PPSX, PPSM | `PPSX`, `PPSM` respectively | Same as file path | | POT | `POT` | `PPT` | | POTX, POTM | `POTX`, `POTM` respectively | Same as file path | | ODP, OTP | `ODP`, `OTP` respectively | Same as file path | | FODP | `FODP` | `FODP` | | PowerPoint XML | `XML` | `XML` | In these checks, the only source-format normalization was PPS/POT to `PPT` for nameless streams. The table describes format identification, not preservation of every presentation feature during conversion. ## **FAQ** **Does saving to ODP change the source format of a presentation loaded from PPTX?** No. The existing instance still reports `PPTX`. An instance loaded from the saved ODP file reports `ODP`. **Can a stream always distinguish a legacy presentation, slide show, and template?** No. PPT, PPS, and POT share the binary format. Keep filename or subtype metadata separately when that distinction is required. **Which API should I use if the presentation is already loaded?** Read [Presentation.source_format](https://reference.aspose.com/slides/python-net/aspose.slides/presentation/source_format/). Use [PresentationFactory.get_presentation_info](https://reference.aspose.com/slides/python-net/aspose.slides/presentationfactory/get_presentation_info/) for inspection before loading. # Developer Guide > Discover the Aspose.Slides for Python via .NET Developer Guide for step-by-step APIs to build, edit, and convert PPT, PPTX and ODP presentations with ease. Source: https://docs.aspose.com/slides/python-net/developer-guide/ Updated: 2025-08-10 --- lastmod: 2025-08-10T15:41:05+04:00 title: Developer Guide type: docs weight: 20 url: /python-net/developer-guide/ keywords: - developer guide - manage presentation - presentation design - professional presentation - create presentation - presentation viewer - presentation security - presentation properties - view properties - presentation comments - presentation notes - animation - 3D presentation - VBA project - image processing - PowerPoint - OpenDocument - presentation - Python - Aspose.Slides description: "Discover the Aspose.Slides for Python via .NET Developer Guide for step-by-step APIs to build, edit, and convert PPT, PPTX and ODP presentations with ease." --- ## Related articles - [Design Professional Presentations in Python](https://docs.aspose.com/slides/python-net/presentation-design/) # Add Digital Signatures to Presentations in Python > Learn how to sign existing PPTX presentations with PFX certificates and use Aspose.Slides for Python via .NET to validate or remove digital signatures. Source: https://docs.aspose.com/slides/python-net/digital-signature-in-powerpoint/ Updated: 2026-08-25 ## **Overview** A digital signature helps a recipient determine who signed a presentation and whether the signed content has changed. Three related security concepts are important here: - A **digital certificate** is an electronic credential that associates an identity with a public key. A trusted certificate authority (CA) can issue a certificate, or an organization can use a self-signed certificate for internal workflows. - A **digital signature** is created from the presentation content and the certificate holder's private key. The certificate's public key can then be used to verify the signature. A signature provides evidence of origin and integrity; it does not encrypt the presentation. - **Password protection** controls whether a user can open or modify a presentation. It is separate from digital signing and is described in [Password-Protected Presentations](https://docs.aspose.com/slides/python-net/password-protected-presentation/). PowerPoint provides the **Add a Digital Signature** command under **File > Info > Protect Presentation**. ![PowerPoint Protect Presentation menu with Add a Digital Signature highlighted](https://docs.aspose.com/slides/python-net/digital-signature-in-powerpoint/add-digital-signature-in-powerpoint.png) After a signed presentation is opened, PowerPoint can display a signature-status notification. ![PowerPoint notification stating that the presentation contains valid signatures](https://docs.aspose.com/slides/python-net/digital-signature-in-powerpoint/digital-signature-status-in-powerpoint.png) Aspose.Slides exposes signatures through [Presentation.digital_signatures](https://reference.aspose.com/slides/python-net/aspose.slides/presentation/digital_signatures/), a [DigitalSignatureCollection](https://reference.aspose.com/slides/python-net/aspose.slides/digitalsignaturecollection/) whose items are [DigitalSignature](https://reference.aspose.com/slides/python-net/aspose.slides/digitalsignature/) objects. A presentation can contain multiple signatures. ## **Understand PFX Certificates and Passwords** A PFX file, also known as a PKCS#12 file and commonly given a `.pfx` or `.p12` extension, can contain an X.509 certificate, its private key, and the certificate chain. The private key is what allows the holder to create a signature. A certificate without an accessible private key cannot be used to sign a presentation. The PFX password protects the certificate package and private key. It is **not** a password for opening or editing the presentation. Do not commit PFX files or their passwords to source control. In production, limit access to the certificate file and obtain its password from a secret store or another protected configuration source. The examples below use an environment variable only to avoid embedding the password in code. ## **Add a Digital Signature to a Presentation** To sign a real presentation workflow, load an existing PPTX file, create a [DigitalSignature](https://reference.aspose.com/slides/python-net/aspose.slides/digitalsignature/) from a PFX certificate and its password, add the signature to the presentation's collection, and save to a PPTX file. ```python import os import aspose.slides as slides certificate_password = os.environ.get("PFX_PASSWORD") if certificate_password is None: raise RuntimeError("Set the PFX_PASSWORD environment variable.") with slides.Presentation("InputPresentation.pptx") as presentation: signature = slides.DigitalSignature("signing-certificate.pfx", certificate_password) signature.comments = "Approved for release." presentation.digital_signatures.add(signature) presentation.save("InputPresentation-signed.pptx", slides.export.SaveFormat.PPTX) ``` Saving the result under a new name preserves the unsigned source file. The [DigitalSignature.comments](https://reference.aspose.com/slides/python-net/aspose.slides/digitalsignature/comments/) value describes the purpose of the signature; it is not a security control. ## **Validate Digital Signatures** When you load a signed PPTX file, inspect every item in [Presentation.digital_signatures](https://reference.aspose.com/slides/python-net/aspose.slides/presentation/digital_signatures/). The [DigitalSignature.is_valid](https://reference.aspose.com/slides/python-net/aspose.slides/digitalsignature/is_valid/) property indicates whether the embedded signature is valid for the current presentation content. ```python import hashlib import aspose.slides as slides with slides.Presentation("InputPresentation-signed.pptx") as presentation: signature_count = len(presentation.digital_signatures) if signature_count == 0: print("The presentation does not contain digital signatures.") else: all_signatures_are_valid = True for signature in presentation.digital_signatures: signature_status = "VALID" if signature.is_valid else "INVALID" certificate_fingerprint = hashlib.sha256(signature.certificate).hexdigest().upper() signing_time = signature.sign_time.strftime("%Y-%m-%d %H:%M:%S") print( f"Certificate SHA-256: {certificate_fingerprint}, " f"{signing_time} -- {signature_status}" ) all_signatures_are_valid = (all_signatures_are_valid and signature.is_valid) if all_signatures_are_valid: print("All embedded signatures are valid for the current presentation.") else: print("At least one embedded signature is invalid.") ``` An invalid result commonly means that the signed presentation content or signature data changed after signing, or that the file is damaged. Removing every signature produces an unsigned presentation, so checking only the validity of items is not enough: a security-sensitive workflow must also verify that the expected number of signatures and expected signer identities are present. The [DigitalSignature.certificate](https://reference.aspose.com/slides/python-net/aspose.slides/digitalsignature/certificate/) property provides the certificate data as a byte array. The example calculates its SHA-256 fingerprint so that an application can compare it with the fingerprint of an expected signer certificate. This validity result should not be treated as a complete certificate-trust decision. Depending on your security policy, your application may also need to build and validate the X.509 certificate chain, check certificate validity dates and revocation status, confirm the expected subject or thumbprint, verify key usage, and evaluate a trusted timestamp. The [DigitalSignature.sign_time](https://reference.aspose.com/slides/python-net/aspose.slides/digitalsignature/sign_time/) value by itself is not proof from a trusted timestamp authority. ## **Remove Digital Signatures** Removing signatures changes the presentation's security state. The following example loads a signed PPTX file, removes all signatures with [DigitalSignatureCollection.clear](https://reference.aspose.com/slides/python-net/aspose.slides/digitalsignaturecollection/clear/), and saves an unsigned copy. ```python import aspose.slides as slides with slides.Presentation("InputPresentation-signed.pptx") as presentation: presentation.digital_signatures.clear() presentation.save("InputPresentation-unsigned.pptx", slides.export.SaveFormat.PPTX) ``` To remove only one signature, call [DigitalSignatureCollection.remove_at](https://reference.aspose.com/slides/python-net/aspose.slides/digitalsignaturecollection/remove_at/) with its zero-based index. Save to a new file unless overwriting the signed original is an explicit part of your workflow. ## **Editing and Format Considerations** - A signature does not make a presentation read-only. Users and applications can still edit the file, but changes to signed content normally invalidate the existing signature. - Complete all intended edits before signing. If a presentation must be changed, save the revised presentation and sign that revision again. - Keep the final output in PPTX format. Converting a signed presentation to another format does not transfer the original PPTX signature as a valid signature for the converted file. - Treat the certificate's private key as sensitive. Anyone who obtains the private key and its password may be able to create signatures that appear to come from that certificate holder. - Retain the unsigned source or another controlled copy when your document-retention policy requires it. ## **FAQ** **Does a digital signature encrypt the presentation?** No. A digital signature provides evidence about origin and integrity, but presentation content remains readable unless separate encryption is applied. Use [password protection](https://docs.aspose.com/slides/python-net/password-protected-presentation/) when access to the content must be restricted. **Is the PFX password the same as a presentation password?** No. The PFX password unlocks the private key stored in the certificate package. It does not control who can open or edit the PPTX file. **Can I use a self-signed certificate?** Technically, a self-signed certificate can be used when it includes an accessible private key. Recipients will not automatically trust it, however, unless that certificate has been explicitly added to their trusted environment. Public or cross-organization workflows generally use a certificate issued by a trusted CA. **What makes a signature invalid?** Changing signed presentation content or the signature data after signing can invalidate the signature. File corruption can also cause validation to fail. If all signatures are removed, the presentation is unsigned rather than a file containing an invalid signature. **Does a valid signature mean that I should trust the signer?** Not by itself. Signature integrity and signer trust are separate decisions. A production validation policy should also check the certificate chain, validity period, revocation status, expected identity, key usage, and any trusted timestamp requirements. **What happens when the certificate expires?** Certificate expiration does not alter the presentation bytes, but it affects certificate-trust evaluation. Whether a signature remains acceptable depends on your policy and on whether a valid trusted timestamp proves that signing occurred while the certificate was valid. Do not rely on the displayed signing time alone as a trusted timestamp. **Can a signed presentation still be edited?** Yes. Signing does not lock the file. Editing signed content generally makes the existing signature invalid, so finish the presentation first and sign the final revision. **Can a presentation contain more than one signature?** Yes. Add each signature to [Presentation.digital_signatures](https://reference.aspose.com/slides/python-net/aspose.slides/presentation/digital_signatures/) before saving. During validation, inspect every signature and confirm that all required signers are present. **Which presentation formats support these operations?** Aspose.Slides supports the digital-signature operations described here only for PPTX. PPT and OpenDocument presentation formats are not supported by this API workflow. **Can I remove a signature without affecting the slides?** Yes. You can remove one signature or clear the entire collection and then save the presentation. The slide content remains available, but the saved file no longer carries the removed signature evidence. # Customize Doughnut Charts in Presentations with Python > Discover how to create and customize doughnut charts in Aspose.Slides for Python via .NET, supporting PowerPoint and OpenDocument formats for dynamic presentations. Source: https://docs.aspose.com/slides/python-net/doughnut-chart/ Updated: 2026-08-02 ## **Overview** This article shows how to work with a doughnut chart in Aspose.Slides by adding the chart to a slide, setting the size of its center hole, and saving the presentation. It focuses on the `doughnut_hole_size` setting and demonstrates the basic steps required to customize this chart type in code. It also includes a short FAQ covering related doughnut-chart scenarios, such as using multiple series to create multiple rings, working with exploded doughnut charts, and exporting a chart as a raster image or SVG. ## **Specify Center Gap in Doughnut Chart** In order to specify the size of the hole in a doughnut chart. Please follow the steps below: - Instantiate [Presentation](https://reference.aspose.com/slides/python-net/aspose.slides/presentation/) class. - Add doughnut chart on the slide. - Specify the size of the hole in a doughnut chart. - Write presentation to disk. In the example given below, we have set the size of the hole in a doughnut chart. ```py import aspose.slides.charts as charts import aspose.slides as slides # Create an instance of Presentation class with slides.Presentation() as presentation: chart = presentation.slides[0].shapes.add_chart(charts.ChartType.DOUGHNUT, 50, 50, 400, 400) chart.chart_data.series_groups[0].doughnut_hole_size = 90 # Write presentation to disk presentation.save("DoughnutHoleSize_out.pptx", slides.export.SaveFormat.PPTX) ``` ## **FAQ** ### Can I create a multi-level doughnut with multiple rings? Yes. Add multiple series to a single doughnut chart—each series becomes a separate ring. The ring order is determined by the order of the series in the collection. ### Is an "exploded" doughnut (separated slices) supported? Yes. There is an Exploded Doughnut [chart type](https://reference.aspose.com/slides/python-net/aspose.slides.charts/charttype/) and an explosion property on data points; you can separate individual slices. ### How can I get an image of a doughnut chart (PNG/SVG) for a report? A chart is a shape; you can render it to a [raster image](https://reference.aspose.com/slides/python-net/aspose.slides/shape/get_image/) or export the chart to an [SVG image](https://reference.aspose.com/slides/python-net/aspose.slides/shape/write_as_svg/). # Manage Drawing Guides in Presentations in Python > Add, access, and clear horizontal and vertical drawing guides in PowerPoint presentations using Aspose.Slides for Python via .NET. Source: https://docs.aspose.com/slides/python-net/drawing-guides/ Updated: 2026-11-08 ## **Overview** Drawing guides are adjustable horizontal and vertical lines that help users align shapes consistently while editing a presentation in PowerPoint. They are especially useful when an application generates a presentation that will later be refined manually: the application can save the same alignment aids that authors should follow when adding or moving content. Drawing guides are editing aids, not slide content. They do not appear in a slide show or rendered output. Aspose.Slides for Python via .NET exposes them through the [IDrawingGuidesCollection](https://reference.aspose.com/slides/python-net/aspose.slides/idrawingguidescollection/) interface. A guide is represented by [IDrawingGuide](https://reference.aspose.com/slides/python-net/aspose.slides/idrawingguide/) and has an orientation, a position, and a color. The position is measured in points from the top-left corner of the relevant slide or master. A vertical guide uses a horizontal coordinate, typically between zero and the slide width. A horizontal guide uses a vertical coordinate, typically between zero and the slide height. ## **Add Guides to the Slide View** Use [ICommonSlideViewProperties.drawing_guides](https://reference.aspose.com/slides/python-net/aspose.slides/icommonslideviewproperties/drawing_guides/) to manage guides displayed while editing normal slides. Call [IDrawingGuidesCollection.add](https://reference.aspose.com/slides/python-net/aspose.slides/idrawingguidescollection/add/) with an [Orientation](https://reference.aspose.com/slides/python-net/aspose.slides/orientation/) value and a position in points. The following example adds one vertical guide to the right of the slide center and one horizontal guide below it: ```py import aspose.slides as slides with slides.Presentation() as presentation: slide_size = presentation.slide_size.size guides = presentation.view_properties.slide_view_properties.drawing_guides guides.add(slides.Orientation.VERTICAL, slide_size.width / 2 + 12.5) guides.add(slides.Orientation.HORIZONTAL, slide_size.height / 2 + 12.5) presentation.save("drawing-guides.pptx", slides.export.SaveFormat.PPTX) ``` [![A 720 by 540 point slide has its origin at top-left; guides sit at x = 372.5 and y = 282.5, 12.5 points beyond each center.](https://docs.aspose.com/slides/python-net/drawing-guides/visual-drawing-guides-7a8220358e23.svg)](https://docs.aspose.com/slides/python-net/drawing-guides/visual-drawing-guides-7a8220358e23.svg) *Conceptual editing overlay with coordinates verified in the saved .NET 26.11 fixture. The example adds guides at width/2 + 12.5 and height/2 + 12.5 points. Existing center guides may also be present. Guide visibility depends on the editor; static slide rendering does not draw them.* ## **Access Drawing Guides** The [IDrawingGuidesCollection.count](https://reference.aspose.com/slides/python-net/aspose.slides/idrawingguidescollection/count/) property and indexer provide access to existing guides. The [IDrawingGuide.orientation](https://reference.aspose.com/slides/python-net/aspose.slides/idrawingguide/orientation/), [IDrawingGuide.position](https://reference.aspose.com/slides/python-net/aspose.slides/idrawingguide/position/), and [IDrawingGuide.color](https://reference.aspose.com/slides/python-net/aspose.slides/idrawingguide/color/) properties can be read or changed. The following example reads the slide-view guides from the presentation created above: ```py import aspose.slides as slides with slides.Presentation("drawing-guides.pptx") as presentation: guides = presentation.view_properties.slide_view_properties.drawing_guides for index in range(guides.count): guide = guides[index] print(f"Guide {index}: orientation = {guide.orientation}, position = {guide.position}, color = {guide.color}") ``` ## **Add Guides to Master and Layout Slides** A slide master and each of its layout slides can have their own drawing-guide collections. Use [IMasterSlide.drawing_guides](https://reference.aspose.com/slides/python-net/aspose.slides/imasterslide/drawing_guides/) for a master slide and [ILayoutSlide.drawing_guides](https://reference.aspose.com/slides/python-net/aspose.slides/ilayoutslide/drawing_guides/) for a layout slide. The following example adds a vertical guide to the first master slide and a horizontal guide to the first layout slide: ```py import aspose.slides as slides with slides.Presentation() as presentation: slide_size = presentation.slide_size.size master_guides = presentation.masters[0].drawing_guides layout_guides = presentation.layout_slides[0].drawing_guides master_guides.add(slides.Orientation.VERTICAL, slide_size.width / 2 - 20) layout_guides.add(slides.Orientation.HORIZONTAL, slide_size.height / 2 + 20) presentation.save("master-layout-drawing-guides.pptx", slides.export.SaveFormat.PPTX) ``` ## **Add Guides to Notes and Handout Masters** Notes masters and handout masters also support drawing guides. Use [IMasterNotesSlide.drawing_guides](https://reference.aspose.com/slides/python-net/aspose.slides/imasternotesslide/drawing_guides/) and [IMasterHandoutSlide.drawing_guides](https://reference.aspose.com/slides/python-net/aspose.slides/imasterhandoutslide/drawing_guides/) to access their collections. If a presentation does not contain one of these masters, [IMasterNotesSlideManager.set_default_master_notes_slide](https://reference.aspose.com/slides/python-net/aspose.slides/imasternotesslidemanager/set_default_master_notes_slide/) or [IMasterHandoutSlideManager.set_default_master_handout_slide](https://reference.aspose.com/slides/python-net/aspose.slides/imasterhandoutslidemanager/set_default_master_handout_slide/) creates the default master and returns it. The following example adds a horizontal guide to a notes master and a vertical guide to a handout master: ```py import aspose.slides as slides with slides.Presentation() as presentation: notes_size = presentation.notes_size.size notes_master = presentation.master_notes_slide_manager.set_default_master_notes_slide() handout_master = presentation.master_handout_slide_manager.set_default_master_handout_slide() notes_master.drawing_guides.add(slides.Orientation.HORIZONTAL, notes_size.height / 2 + 50) handout_master.drawing_guides.add(slides.Orientation.VERTICAL, notes_size.width / 2 - 50) presentation.save("notes-handout-drawing-guides.pptx", slides.export.SaveFormat.PPTX) ``` ## **Clear Drawing Guides** Call [IDrawingGuidesCollection.clear](https://reference.aspose.com/slides/python-net/aspose.slides/idrawingguidescollection/clear/) to remove every guide from a particular collection. Clearing one collection does not affect guides stored in another scope. The following example clears the slide-view guides and all guides on slide masters, layout slides, the notes master, and the handout master without creating missing masters: ```py import aspose.slides as slides with slides.Presentation("presentation-with-guides.pptx") as presentation: presentation.view_properties.slide_view_properties.drawing_guides.clear() for master_slide in presentation.masters: master_slide.drawing_guides.clear() for layout_slide in presentation.layout_slides: layout_slide.drawing_guides.clear() notes_master = presentation.master_notes_slide_manager.master_notes_slide if notes_master is not None: notes_master.drawing_guides.clear() handout_master = presentation.master_handout_slide_manager.master_handout_slide if handout_master is not None: handout_master.drawing_guides.clear() presentation.save("presentation-without-guides.pptx", slides.export.SaveFormat.PPTX) ``` ## **FAQ** **Do drawing guides appear in a slide show or exported images?** No. Drawing guides are alignment aids for editing and are not rendered as presentation content. **Can a drawing guide be added directly to an individual normal slide?** Normal-slide editing guides are stored in the presentation's slide-view properties. Separate guide collections are available for slide masters, layout slides, notes masters, and handout masters. **Which units are used for guide positions?** Positions are specified in points, where 72 points equal one inch. Vertical positions are measured from the left edge, and horizontal positions are measured from the top edge. **Does clearing drawing guides remove shapes or change slide content?** No. The `clear` method removes only the guides in the selected collection. Shapes and other slide content remain unchanged. # Edit PDF Documents in Python > Edit PDF documents in Python by importing them into Aspose.Slides, replacing text, and saving the modified presentation back to PDF. Source: https://docs.aspose.com/slides/python-net/edit-pdf/ Updated: 2026-09-21 ## **Overview** Aspose.Slides for Python via .NET lets you edit PDF content by importing its pages as slides, modifying the presentation, and exporting it back to PDF. This article shows a simple text replacement. The presentation stays in memory, so saving an intermediate PPTX file is optional. ## **Replace Text in a PDF** Use [add_from_pdf](https://reference.aspose.com/slides/python-net/aspose.slides/slidecollection/add_from_pdf/) to import the pages, [replace_text](https://reference.aspose.com/slides/python-net/aspose.slides/presentation/replace_text/) to update the text, and [save](https://reference.aspose.com/slides/python-net/aspose.slides/presentation/save/) to export the result. The following example expects `input.pdf` to contain the word "Draft" as editable text after import. It replaces that word with "Final" and writes `edited.pdf`. Clearing the initial slide before import prevents an extra blank page in the output. The search matches whole words with the same letter case; `None` means no result callback is needed. ```python import aspose.slides as slides with slides.Presentation() as presentation: presentation.slides.remove_at(0) presentation.slides.add_from_pdf("input.pdf") search_options = slides.TextSearchOptions() search_options.whole_words_only = True search_options.case_sensitive = True presentation.replace_text("Draft", "Final", search_options, None) presentation.save("edited.pdf", slides.export.SaveFormat.PDF) ``` For more options, see [Search and Replace Text](https://docs.aspose.com/slides/python-net/search-and-replace-text/) and [Convert PowerPoint to PDF](https://docs.aspose.com/slides/python-net/convert-powerpoint-to-pdf/). Text replacement works on imported text, not text inside scanned images. The conversion can affect layout and formatting, so review the output, especially when the replacement text is longer than the original. ## **FAQ** **Do I need to save a PPTX file before exporting the PDF?** No. You can edit and export the same presentation in memory. Save a PPTX copy only if you also want to continue editing it in PowerPoint; see [Save Presentations](https://docs.aspose.com/slides/python-net/save-presentation/). **Why might some text remain unchanged?** The example matches the whole word "Draft" with exact case. Text imported as an image or split across separate text frames will not necessarily match the search. Check the imported content and adjust the search for your document. # Add Ellipses to Presentations in Python > Learn how to create, format, and manipulate ellipse shapes in Aspose.Slides for Python via .NET across PPT, PPTX and ODP presentations—code examples included. Source: https://docs.aspose.com/slides/python-net/ellipse/ Updated: 2026-08-02 ## **Overview** This article shows how to add ellipse shapes to PowerPoint slides by using Aspose.Slides. It covers creating a simple ellipse, creating a formatted ellipse, and saving the updated presentation as a PPTX file. It also touches on related questions such as working with ellipse position and size, controlling stacking order, and applying animation effects. ## **Create Ellipse** In this topic, we will introduce developers about adding ellipse shapes to their slides using Aspose.Slides for Python via .NET . Aspose.Slides for Python via .NET provides an easier set of APIs to draw different kinds of shapes with just a few lines of code. To add a simple ellipse to a selected slide of the presentation, please follow the steps below: 1. Create an instance of [Presentation ](https://reference.aspose.com/slides/python-net/aspose.slides/presentation/)class 1. Obtain the reference of a slide by using its Index 1. Add an AutoShape of Ellipse type using AddAutoShape method exposed by IShapes object 1. Write the modified presentation as a PPTX file In the example given below, we have added an ellipse to the first slide. ```py import aspose.slides as slides # Instantiate Prseetation class that represents the PPTX with slides.Presentation() as pres: # Get the first slide sld = pres.slides[0] # Add autoshape of ellipse type sld.shapes.add_auto_shape(slides.ShapeType.ELLIPSE, 50, 150, 150, 50) #Write the PPTX file to disk pres.save("EllipseShp1_out.pptx", slides.export.SaveFormat.PPTX) ``` ## **Create Formatted Ellipse** To add a better formatted ellipse to a slide, please follow the steps below: 1. Create an instance of [Presentation ](https://reference.aspose.com/slides/python-net/aspose.slides/presentation/)class. 1. Obtain the reference of a slide by using its Index. 1. Add an AutoShape of Ellipse type using AddAutoShape method exposed by IShapes object. 1. Set the Fill Type of the Ellipse to Solid. 1. Set the Color of the Ellipse using SolidFillColor.Color property as exposed by FillFormat object associated with the IShape object. 1. Set the Color of the lines of the Ellipse. 1. Set the Width of the lines of the Ellipse. 1. Write the modified presentation as a PPTX file. In the example given below, we have added a formatted ellipse to the first slide of the presentation. ```py import aspose.slides as slides import aspose.pydrawing as draw # Instantiate Prseetation class that represents the PPTX with slides.Presentation() as pres: # Get the first slide sld = pres.slides[0] # Add autoshape of ellipse type shp = sld.shapes.add_auto_shape(slides.ShapeType.ELLIPSE, 50, 150, 150, 50) # Apply some formatting to ellipse shape shp.fill_format.fill_type = slides.FillType.SOLID shp.fill_format.solid_fill_color.color = draw.Color.chocolate # Apply some formatting to the line of Ellipse shp.line_format.fill_format.fill_type = slides.FillType.SOLID shp.line_format.fill_format.solid_fill_color.color = draw.Color.black shp.line_format.width = 5 #Write the PPTX file to disk pres.save("EllipseShp2_out.pptx", slides.export.SaveFormat.PPTX) ``` ## **FAQ** ### How do I set the exact position and size of an ellipse with respect to the slide's units? Coordinates and sizes are typically specified **in points**. For predictable results, base your calculations on the slide size and convert required millimeters or inches to points before assigning values. ### How can I place an ellipse above or below other objects (control stacking order)? Adjust the drawing order of the object by bringing it to front or sending it to back. This lets the ellipse overlap other objects or reveal those beneath it. ### How do I animate the appearance or emphasis of an ellipse? [Apply](https://docs.aspose.com/slides/python-net/shape-animation/) entrance, emphasis, or exit effects to the shape, and configure triggers and timing to orchestrate when and how the animation plays. ## Related articles - [Add Rectangles to Presentations in Python](https://docs.aspose.com/slides/python-net/rectangle/) - [Manage Shapes in Presentations with Python](https://docs.aspose.com/slides/python-net/shape-types/) # Embed Fonts in Presentations with Python > Manage embedded fonts in PowerPoint with Aspose.Slides for Python via .NET. Use Python to add, retrieve, remove, and compress fonts to preserve text appearance and reduce file size. Source: https://docs.aspose.com/slides/python-net/embedded-font/ Updated: 2026-09-03 ## **Introduction** Embedding fonts stores font data inside a PowerPoint presentation. When a viewer supports embedded fonts, it can display text using those fonts even if they are not installed on the target system. This helps preserve line breaks, text spacing, and slide layout. Aspose.Slides for Python via .NET lets you retrieve, add, and remove embedded fonts through the [fonts_manager](https://reference.aspose.com/slides/python-net/aspose.slides/presentation/fonts_manager/) property of a [Presentation](https://reference.aspose.com/slides/python-net/aspose.slides/presentation/) object. You can also reduce the size of embedded font data by removing characters that the presentation does not use. The examples below work with PPTX files. Before embedding a font, make sure its font data is available to Aspose.Slides and its license permits embedding. ## **Get and Remove Embedded Fonts** Use [get_embedded_fonts](https://reference.aspose.com/slides/python-net/aspose.slides/fontsmanager/get_embedded_fonts/) to list the fonts stored in a presentation. To remove one, pass a font from that list to [remove_embedded_font](https://reference.aspose.com/slides/python-net/aspose.slides/fontsmanager/remove_embedded_font/), then save the presentation. The following example lists the embedded fonts in `EmbeddedFonts.pptx` and removes Calibri if it is present: ```python import aspose.slides as slides with slides.Presentation("EmbeddedFonts.pptx") as presentation: fonts_manager = presentation.fonts_manager embedded_fonts = fonts_manager.get_embedded_fonts() for font in embedded_fonts: print(font.font_name) font_to_remove = next((font for font in embedded_fonts if font.font_name.casefold() == "calibri"), None) if font_to_remove is not None: fonts_manager.remove_embedded_font(font_to_remove) presentation.save("WithoutEmbeddedCalibri.pptx", slides.export.SaveFormat.PPTX) else: print("Calibri is not embedded. No output file was created.") ``` Removing an embedded font removes its stored font data; it does not change the font assigned to the text. If the font is installed on the target system, the text can still use it. Otherwise, rendering may require [font substitution](https://docs.aspose.com/slides/python-net/font-substitution/), which can affect the layout. ## **Inspect Font Data and Embedding Permissions** Use the [FontsManager](https://reference.aspose.com/slides/python-net/aspose.slides/fontsmanager/) class to inspect fonts before embedding them. Call [get_fonts](https://reference.aspose.com/slides/python-net/aspose.slides/fontsmanager/get_fonts/) to retrieve the fonts used in the presentation. For each font, pass a [FontData](https://reference.aspose.com/slides/python-net/aspose.slides/fontdata/) object and the required [FontStyleType](https://reference.aspose.com/slides/python-net/aspose.slides/fontstyletype/) value to [get_font_bytes](https://reference.aspose.com/slides/python-net/aspose.slides/fontsmanager/get_font_bytes/). The method returns the binary data for that font style, or `None` when the requested font or style is unavailable. Do not pass a `None` result to [get_font_embedding_level](https://reference.aspose.com/slides/python-net/aspose.slides/fontsmanager/get_font_embedding_level/), because that method requires a byte array. [EmbeddingLevel](https://reference.aspose.com/slides/python-net/aspose.slides/embeddinglevel/) is a flags enumeration that reports the embedding restrictions stored in the font: - `INSTALLABLE` permits embedding and permanent installation on another system, subject to the font license. - `RESTRICTED` prohibits embedding unless permission is obtained from the font's legal owner when it is the only usage-permission flag. - `PREVIEW_PRINT` permits temporary use for viewing and printing; a document containing the font must be read-only. - `EDITABLE` permits temporary use and allows the document to be edited and saved. - `NO_SUBSETTING` is an additional restriction that prohibits embedding only a subset of the glyphs. Embed all characters when this flag is present. - `BITMAP_ONLY` is an additional restriction that permits only bitmap strikes to be embedded, not outline data. If the font has no bitmap strikes, it cannot be embedded. The first four values describe usage permission, while `NO_SUBSETTING` and `BITMAP_ONLY` can be combined with them. Check the modifiers with bitwise operations. Because `INSTALLABLE` is zero, mask the usage-permission bits and compare the result with `INSTALLABLE`. Current fonts should set at most one usage-permission bit. For compatibility with older fonts that set more than one, the helper below selects the least restrictive permission: `EDITABLE`, then `PREVIEW_PRINT`, then `RESTRICTED`. The following example audits the regular, bold, italic, and bold-italic data available for every font returned by `get_fonts`. It skips unavailable styles, restricted fonts, bitmap-only fonts, fonts limited to preview and print because the output remains editable, and fonts that are already embedded. If any available style has `NO_SUBSETTING`, it embeds all characters for that font family. ```python import aspose.slides as slides def get_usage_permission(level): permission_mask = slides.EmbeddingLevel.RESTRICTED | slides.EmbeddingLevel.PREVIEW_PRINT | slides.EmbeddingLevel.EDITABLE permissions = level & permission_mask if permissions & slides.EmbeddingLevel.EDITABLE: return slides.EmbeddingLevel.EDITABLE if permissions & slides.EmbeddingLevel.PREVIEW_PRINT: return slides.EmbeddingLevel.PREVIEW_PRINT if permissions & slides.EmbeddingLevel.RESTRICTED: return slides.EmbeddingLevel.RESTRICTED return slides.EmbeddingLevel.INSTALLABLE with slides.Presentation("Fonts.pptx") as presentation: fonts_manager = presentation.fonts_manager font_styles = [slides.FontStyleType.REGULAR, slides.FontStyleType.BOLD, slides.FontStyleType.ITALIC, slides.FontStyleType.BOLD | slides.FontStyleType.ITALIC] embedded_font_names = {font.font_name.casefold() for font in fonts_manager.get_embedded_fonts()} embedding_plan = [] for font in fonts_manager.get_fonts(): if font.font_name.casefold() in embedded_font_names: print(f"{font.font_name}: already embedded.") continue has_available_data = False all_available_styles_can_be_embedded = True preview_print_only = False requires_full_font = False for font_style in font_styles: font_bytes = fonts_manager.get_font_bytes(font, font_style) if font_bytes is None: print(f"{font.font_name} ({font_style}): font data is unavailable.") continue has_available_data = True embedding_level = fonts_manager.get_font_embedding_level(font_bytes, font.font_name) usage_permission = get_usage_permission(embedding_level) no_subsetting = bool(embedding_level & slides.EmbeddingLevel.NO_SUBSETTING) bitmap_only = bool(embedding_level & slides.EmbeddingLevel.BITMAP_ONLY) requires_full_font |= no_subsetting preview_print_only |= usage_permission == slides.EmbeddingLevel.PREVIEW_PRINT all_available_styles_can_be_embedded &= usage_permission != slides.EmbeddingLevel.RESTRICTED and not bitmap_only print(f"{font.font_name} ({font_style}): {embedding_level}.") if not has_available_data: print(f"{font.font_name}: skipped because no requested style is available.") elif not all_available_styles_can_be_embedded: print(f"{font.font_name}: skipped because at least one available style does not permit outline embedding.") elif preview_print_only: print(f"{font.font_name}: skipped because this example produces an editable presentation.") else: rule = slides.export.EmbedFontCharacters.ALL if requires_full_font else slides.export.EmbedFontCharacters.ONLY_USED embedding_plan.append((font, rule)) for font, rule in embedding_plan: fonts_manager.add_embedded_font(font, rule) presentation.save("WithAuditedFonts.pptx", slides.export.SaveFormat.PPTX) ``` This inspection reports the restrictions encoded in each font file. It does not grant a license, prove that you obtained the font legally, or replace checking the font's license agreement before distributing an embedded copy. ## **Add Embedded Fonts** Use [add_embedded_font](https://reference.aspose.com/slides/python-net/aspose.slides/fontsmanager/add_embedded_font/) to embed a font. Its overloads accept either a [FontData](https://reference.aspose.com/slides/python-net/aspose.slides/fontdata/) object or a byte array containing the font data. The [EmbedFontCharacters](https://reference.aspose.com/slides/python-net/aspose.slides.export/embedfontcharacters/) enumeration controls which characters are included: - [ALL](https://reference.aspose.com/slides/python-net/aspose.slides.export/embedfontcharacters/) embeds all characters in the font. Use this option when recipients need to edit the presentation and enter new text. - [ONLY_USED](https://reference.aspose.com/slides/python-net/aspose.slides.export/embedfontcharacters/) embeds only the characters used in the presentation to reduce file size. Choose this option for a finished presentation that is primarily intended for viewing. The following example uses [get_fonts](https://reference.aspose.com/slides/python-net/aspose.slides/fontsmanager/get_fonts/) to retrieve the fonts used in `Fonts.pptx` and embeds those that are not already embedded. The fonts to add must be available on the machine running the code. Existing embedded fonts retain their current character sets. ```python import aspose.slides as slides with slides.Presentation("Fonts.pptx") as presentation: fonts_manager = presentation.fonts_manager all_fonts = fonts_manager.get_fonts() embedded_fonts = fonts_manager.get_embedded_fonts() embedded_names = {font.font_name.casefold() for font in embedded_fonts} for font in all_fonts: normalized_name = font.font_name.casefold() if normalized_name not in embedded_names: fonts_manager.add_embedded_font(font, slides.export.EmbedFontCharacters.ALL) embedded_names.add(normalized_name) presentation.save("WithEmbeddedFonts.pptx", slides.export.SaveFormat.PPTX) ``` ## **Compress Embedded Fonts** [compress_embedded_fonts](https://reference.aspose.com/slides/python-net/aspose.slides.lowcode/compress/compress_embedded_fonts/) reduces embedded font data by removing unused characters. It operates on fonts that are already embedded, so the size reduction depends on how much unused font data the presentation contains. The following example compresses the fonts in `EmbeddedFonts.pptx` and saves the result as a separate file: ```python import aspose.slides as slides with slides.Presentation("EmbeddedFonts.pptx") as presentation: slides.lowcode.Compress.compress_embedded_fonts(presentation) presentation.save("CompressedEmbeddedFonts.pptx", slides.export.SaveFormat.PPTX) ``` Keep the original file if recipients may need to add text later. Characters removed during compression are no longer available from the embedded font, even if you originally embedded all characters. ## **FAQ** **How can I check whether an embedded font will still be substituted during rendering?** Call [get_substitutions](https://reference.aspose.com/slides/python-net/aspose.slides/fontsmanager/get_substitutions/) in the environment where you render the presentation to see which fonts Aspose.Slides will replace. Also check [font substitution](https://docs.aspose.com/slides/python-net/font-substitution/) settings and [font fallback](https://docs.aspose.com/slides/python-net/fallback-font/) rules. Fallback handles missing characters, so embedding a font does not resolve characters that the font itself does not contain. **Should I embed common fonts such as Arial and Calibri?** Base the decision on the target environment. If the required fonts are available on every machine that opens or renders the presentation, embedding them may add unnecessary file size. If recipients or servers may lack those fonts, embedding them can help preserve the intended appearance, provided their licenses allow it. # Customize Error Bars in Presentation Charts with Python > Learn how to add and customize error bars in charts with Aspose.Slides for Python via .NET—optimize data visuals in PowerPoint and OpenDocument presentations. Source: https://docs.aspose.com/slides/python-net/error-bar/ Updated: 2026-08-05 ## **Overview** This article explains how to work with error bars in presentation charts by using Aspose.Slides. It shows how to add error bars to a chart series, configure X and Y error bar settings, and apply different value types such as fixed, percentage, and custom values. It also demonstrates how to assign custom error bar values for individual data points in a series by using the corresponding data point collection. In addition, the article includes brief notes about how error bars behave during export, their compatibility with markers and data labels, and where to find the related API reference classes and enums. ## **Add Error Bar** Aspose.Slides for Python via .NET provides a simple API for managing error bar values. The sample code below applies when the value type is the same for the whole series—for example **FIXED** or **PERCENTAGE**. In that case a single amount is set through the **value** property of the error bars format. For per-point amounts, see [Add Custom Error Bar Value](https://docs.aspose.com/slides/python-net/error-bar/#add-custom-error-bar-value) below. 1. Create an instance of the [Presentation](https://reference.aspose.com/slides/python-net/aspose.slides/presentation/) class. 1. Add a bubble chart on desired slide. 1. Access the first chart series and set the error bar X format. 1. Access the first chart series and set the error bar Y format. 1. Setting bars values and format. 1. Write the modified presentation to a PPTX file. ```py import aspose.slides.charts as charts import aspose.slides as slides # Creating empty presentation with slides.Presentation() as presentation: # Creating a bubble chart chart = presentation.slides[0].shapes.add_chart(charts.ChartType.BUBBLE, 50, 50, 400, 300, True) # Adding Error bars and setting its format errBarX = chart.chart_data.series[0].error_bars_x_format errBarY = chart.chart_data.series[0].error_bars_y_format errBarX.is_visible = True errBarY.is_visible = True errBarX.value_type = charts.ErrorBarValueType.FIXED errBarX.value = 0.1 errBarY.value_type = charts.ErrorBarValueType.PERCENTAGE errBarY.value = 5 errBarX.type = charts.ErrorBarType.PLUS errBarY.format.line.width = 2 errBarX.has_end_cap = True # Saving presentation presentation.save("ErrorBars_out.pptx", slides.export.SaveFormat.PPTX) ``` ## **Add Custom Error Bar Value** Aspose.Slides for Python via .NET provides a simple API for managing custom error bar values. The sample code applies when the **IErrorBarsFormat.ValueType** property is equal to **Custom**. To specify a value, use the **ErrorBarCustomValues** property of a specific data point in the **DataPoints** collection of series: 1. Create an instance of the [Presentation](https://reference.aspose.com/slides/python-net/aspose.slides/presentation/) class. 1. Add a bubble chart on desired slide. 1. Access the first chart series and set the error bar X format. 1. Access the first chart series and set the error bar Y format. 1. Access the chart series individual data points and setting the Error Bar values for individual series data point. 1. Setting bars values and format. 1. Write the modified presentation to a PPTX file. ```py import aspose.slides.charts as charts import aspose.slides as slides # Creating empty presentation with slides.Presentation() as presentation: # Creating a bubble chart chart = presentation.slides[0].shapes.add_chart(charts.ChartType.BUBBLE, 50, 50, 400, 300, True) # Adding custom Error bars and setting its format series = chart.chart_data.series[0] errBarX = series.error_bars_x_format errBarY = series.error_bars_y_format errBarX.is_visible = True errBarY.is_visible = True errBarX.value_type = charts.ErrorBarValueType.CUSTOM errBarY.value_type = charts.ErrorBarValueType.CUSTOM # Accessing chart series data point and setting error bars values for individual point points = series.data_points points.data_source_type_for_error_bars_custom_values.data_source_type_for_x_plus_values = charts.DataSourceType.DOUBLE_LITERALS points.data_source_type_for_error_bars_custom_values.data_source_type_for_x_minus_values = charts.DataSourceType.DOUBLE_LITERALS points.data_source_type_for_error_bars_custom_values.data_source_type_for_y_plus_values = charts.DataSourceType.DOUBLE_LITERALS points.data_source_type_for_error_bars_custom_values.data_source_type_for_y_minus_values = charts.DataSourceType.DOUBLE_LITERALS # Setting error bars for chart series points for i in range(len(points)): points[i].error_bars_custom_values.x_minus.as_literal_double = i + 1 points[i].error_bars_custom_values.x_plus.as_literal_double = i + 1 points[i].error_bars_custom_values.y_minus.as_literal_double = i + 1 points[i].error_bars_custom_values.y_plus.as_literal_double = i + 1 # Saving presentation presentation.save("ErrorBarsCustomValues_out.pptx", slides.export.SaveFormat.PPTX) ``` ## **FAQ** ### What happens to error bars when exporting a presentation to PDF or images? They are rendered as part of the chart and preserved during conversion along with the rest of the chart formatting, assuming a compatible version or renderer. ### Can error bars be combined with markers and data labels? Yes. Error bars are a separate element and are compatible with markers and data labels; if elements overlap, you may need to adjust formatting. ### Where can I find the list of properties and enums for working with error bars in the API? In the API reference: the [ErrorBarsFormat](https://reference.aspose.com/slides/python-net/aspose.slides.charts/errorbarsformat/) class and the related enums [ErrorBarType](https://reference.aspose.com/slides/python-net/aspose.slides.charts/errorbartype/) and [ErrorBarValueType](https://reference.aspose.com/slides/python-net/aspose.slides.charts/errorbarvaluetype/). ## Related articles - [Customize Presentation Chart Entities in Python](https://docs.aspose.com/slides/python-net/chart-entities/) # Evaluate Aspose.Slides > Evaluate Aspose.Slides for Python via .NET and explore API features for PowerPoint (PPT, PPTX) and OpenDocument (ODP) presentations—start your free trial. Source: https://docs.aspose.com/slides/python-net/evaluate-aspose-slides/ Updated: 2026-09-27 ## **Aspose.Slides Evaluation** You can download Aspose.Slides for evaluation. The evaluation package is the same as the purchased package; it becomes licensed after you add a few lines of code to apply the license. Without a license, Aspose.Slides provides its full functionality in evaluation mode, with two limitations: it adds an evaluation watermark text box to every slide of each presentation it saves, and text that your code reads from a presentation is truncated to its first few characters, followed by a notice about the evaluation limitation. Text that your code writes is saved in full. If you want to test Aspose.Slides without evaluation version limitations, you can request a **30 Day Temporary License**. Please refer to [How to get a Temporary License?](https://purchase.aspose.com/temporary-license) for more information. ## **FAQ** ### Can I test multiple presentations in parallel across different threads in evaluation mode? Yes. You can process different documents in parallel; you should not share the same presentation object [across threads](https://docs.aspose.com/slides/python-net/multithreading/). Evaluation mode does not affect this. ### Do I need to install Microsoft PowerPoint to evaluate the library on a server or in CI? No. Aspose.Slides is a standalone engine and does not require PowerPoint installed for either evaluation or production. ### Can I fully test conversion of PPT/PPTX to PDF and images in evaluation mode? Yes. The [converters](https://docs.aspose.com/slides/python-net/convert-presentation/) work; the output will include a watermark. ### Can I use a temporary license for load testing without a watermark? Yes. A 30-day temporary license removes evaluation-mode limitations and allows testing without a watermark. ## Related articles - [Licensing](https://docs.aspose.com/slides/python-net/licensing/) # Retrieve and Update Presentation Information in Python > Explore slides, structure and metadata in PowerPoint and OpenDocument presentations using Python for faster insights and smarter content audits. Source: https://docs.aspose.com/slides/python-net/examine-presentation/ Updated: 2026-09-22 ## **Overview** Aspose.Slides can identify a presentation's format and read its document metadata without creating a complete presentation object model. This is useful when you need to classify files, build an inventory, or inspect properties before deciding whether to load and process the presentation content. This article demonstrates lightweight inspection through [PresentationFactory](https://reference.aspose.com/slides/python-net/aspose.slides/presentationfactory/) and [PresentationInfo](https://reference.aspose.com/slides/python-net/aspose.slides/presentationinfo/), as well as targeted updates through [DocumentProperties](https://reference.aspose.com/slides/python-net/aspose.slides/documentproperties/). ## **Check a Presentation Format** If you already have a loaded presentation, see [Determine the Original Presentation Format](https://docs.aspose.com/slides/python-net/detect-presentation-source-format/) for detection after loading and the limitations of legacy PPT, PPS, and POT streams. Use [PresentationFactory.get_presentation_info](https://reference.aspose.com/slides/python-net/aspose.slides/presentationfactory/get_presentation_info/) to inspect a file without creating a [Presentation](https://reference.aspose.com/slides/python-net/aspose.slides/presentation/) instance. The [PresentationInfo.load_format](https://reference.aspose.com/slides/python-net/aspose.slides/presentationinfo/load_format/) property reports the detected format, such as PPTX, PPT, or ODP. ```python import aspose.slides as slides file_names = ["pres.pptx", "pres.ppt", "pres.odp"] for file_name in file_names: presentation_info = slides.PresentationFactory.instance.get_presentation_info(file_name) print(f"{file_name}: {presentation_info.load_format}") ``` ## **Build a Lightweight Presentation Inventory** When you process many presentation files, you may need a compact inventory for validation, indexing, or a document-management system. In this scenario, use [PresentationFactory.get_presentation_info](https://reference.aspose.com/slides/python-net/aspose.slides/presentationfactory/get_presentation_info/) to obtain a [PresentationInfo](https://reference.aspose.com/slides/python-net/aspose.slides/presentationinfo/) object, and then call [PresentationInfo.read_document_properties](https://reference.aspose.com/slides/python-net/aspose.slides/presentationinfo/read_document_properties/) to read the document metadata. This approach does not create a [Presentation](https://reference.aspose.com/slides/python-net/aspose.slides/presentation/) instance or require you to traverse the complete presentation object model. The extended properties exposed by [DocumentProperties](https://reference.aspose.com/slides/python-net/aspose.slides/documentproperties/) provide the following inventory values: | Property | Inventory value | | --- | --- | | [slides](https://reference.aspose.com/slides/python-net/aspose.slides/documentproperties/slides/) | Total number of slides. | | [hidden_slides](https://reference.aspose.com/slides/python-net/aspose.slides/documentproperties/hidden_slides/) | Number of hidden slides. | | [notes](https://reference.aspose.com/slides/python-net/aspose.slides/documentproperties/notes/) | Number of slides that contain notes. | | [paragraphs](https://reference.aspose.com/slides/python-net/aspose.slides/documentproperties/paragraphs/) | Total number of paragraphs, when available. | | [words](https://reference.aspose.com/slides/python-net/aspose.slides/documentproperties/words/) | Total number of words. | | [multimedia_clips](https://reference.aspose.com/slides/python-net/aspose.slides/documentproperties/multimedia_clips/) | Total number of audio and video clips. | The following example reads these values without creating a [Presentation](https://reference.aspose.com/slides/python-net/aspose.slides/presentation/) object and prints a compact inventory. It also combines [heading_pairs](https://reference.aspose.com/slides/python-net/aspose.slides/documentproperties/heading_pairs/) with [titles_of_parts](https://reference.aspose.com/slides/python-net/aspose.slides/documentproperties/titles_of_parts/) to display content groups such as fonts, themes, and slide titles. ```python import os import aspose.slides as slides file_path = "sample.pptx" presentation_info = slides.PresentationFactory.instance.get_presentation_info(file_path) document_properties = presentation_info.read_document_properties() print(f"File: {os.path.basename(file_path)}") print(f"Format: {presentation_info.load_format}") print(f"Title: {document_properties.title}") print(f"Author: {document_properties.author}") print("Statistics:") print(f" Slides: {document_properties.slides}") print(f" Hidden slides: {document_properties.hidden_slides}") print(f" Slides with notes: {document_properties.notes}") print(f" Paragraphs: {document_properties.paragraphs}") print(f" Words: {document_properties.words}") print(f" Multimedia clips: {document_properties.multimedia_clips}") heading_pairs = document_properties.heading_pairs or [] titles_of_parts = document_properties.titles_of_parts or [] part_index = 0 if not heading_pairs or not titles_of_parts: print("Content groups: not available") else: print("Content groups:") for heading_pair in heading_pairs: print(f" {heading_pair.name} ({heading_pair.count})") for _ in range(heading_pair.count): if part_index >= len(titles_of_parts): break print(f" - {titles_of_parts[part_index]}") part_index += 1 if part_index < len(titles_of_parts): print(" Other parts:") while part_index < len(titles_of_parts): print(f" - {titles_of_parts[part_index]}") part_index += 1 ``` Each [HeadingPair](https://reference.aspose.com/slides/python-net/aspose.slides/headingpair/) supplies a group name and the number of items in that group. [DocumentProperties.titles_of_parts](https://reference.aspose.com/slides/python-net/aspose.slides/documentproperties/titles_of_parts/) is a flat, ordered collection, so consume the number of consecutive titles specified by each heading pair. ### **Stored Metadata and Format Limitations** The inventory properties returned by [PresentationInfo.read_document_properties](https://reference.aspose.com/slides/python-net/aspose.slides/presentationinfo/read_document_properties/) reflect metadata available in the source document. Aspose.Slides does not load and traverse the presentation object model to recalculate these values for this call. Missing properties are represented by default values, and stored values may be stale if the application that last saved the file did not update its document properties. - **PPTX:** The format provides extended document properties for slide, note, hidden-slide, paragraph, word, and multimedia counts, as well as heading pairs and part titles. Availability depends on which properties were written by the document producer. - **PPT:** The binary format can store corresponding document-summary properties. If a property is absent or was not refreshed by the document producer, Aspose.Slides returns its stored or default value rather than calculating it from the slides. - **ODP:** OpenDocument metadata provides general document statistics, such as page, paragraph, and word counts, but these values do not map to every PowerPoint-specific extended property. Hidden-slide, notes-slide, multimedia, heading-pair, and part-title metadata may be unavailable, and the inventory properties may return default values. Do not treat a zero value or an empty collection as authoritative proof that the corresponding content is absent. Use the lightweight metadata approach for inventories and preliminary checks. Load the presentation and inspect its live object model when the result must reflect in-memory changes or when you need to verify the actual presentation content. ## **Update Presentation Properties** The properties returned by [PresentationInfo.read_document_properties](https://reference.aspose.com/slides/python-net/aspose.slides/presentationinfo/read_document_properties/) can also be changed without creating a [Presentation](https://reference.aspose.com/slides/python-net/aspose.slides/presentation/) instance. Apply the changes with [PresentationInfo.update_document_properties](https://reference.aspose.com/slides/python-net/aspose.slides/presentationinfo/update_document_properties/), and then write the bound presentation with [PresentationInfo.write_binded_presentation](https://reference.aspose.com/slides/python-net/aspose.slides/presentationinfo/write_binded_presentation/). The following image shows the original document properties. ![Original document properties of the PowerPoint presentation](https://docs.aspose.com/slides/python-net/examine-presentation/input_properties.png) The following example changes the title and last-saved time and writes the result to a new file: ```python import datetime import aspose.slides as slides source_file = "sample.pptx" output_file = "sample_with_updated_properties.pptx" presentation_info = slides.PresentationFactory.instance.get_presentation_info(source_file) document_properties = presentation_info.read_document_properties() document_properties.title = "Quarterly sales report" document_properties.last_saved_time = datetime.datetime.now(datetime.timezone.utc) presentation_info.update_document_properties(document_properties) with open(output_file, "wb") as output_stream: presentation_info.write_binded_presentation(output_stream) ``` The following image shows the updated document properties. ![Changed document properties of the PowerPoint presentation](https://docs.aspose.com/slides/python-net/examine-presentation/output_properties.png) ## **Useful Links** For related security checks and protection settings, see the following articles: - [Password-Protect Presentations](https://docs.aspose.com/slides/python-net/password-protected-presentation/) - [Write-Protect Presentations](https://docs.aspose.com/slides/python-net/write-protected-presentation/) ## **FAQ** **How can I check whether fonts are embedded and which ones they are?** Load the presentation and use [Presentation.fonts_manager](https://reference.aspose.com/slides/python-net/aspose.slides/presentation/fonts_manager/). Call [FontsManager.get_embedded_fonts](https://reference.aspose.com/slides/python-net/aspose.slides/fontsmanager/get_embedded_fonts/) to obtain the embedded fonts and [FontsManager.get_fonts](https://reference.aspose.com/slides/python-net/aspose.slides/fontsmanager/get_fonts/) to obtain the fonts used by the presentation. Compare the two results to find fonts that are required for rendering but are not embedded. **How can I quickly tell if the file has hidden slides and how many?** When stored document metadata is sufficient, read [DocumentProperties.hidden_slides](https://reference.aspose.com/slides/python-net/aspose.slides/documentproperties/hidden_slides/) through [PresentationFactory.get_presentation_info](https://reference.aspose.com/slides/python-net/aspose.slides/presentationfactory/get_presentation_info/) and [PresentationInfo.read_document_properties](https://reference.aspose.com/slides/python-net/aspose.slides/presentationinfo/read_document_properties/). This is suitable for a lightweight inventory. If the presentation has been modified in memory, the stored metadata may be missing or stale, or you need to verify live values, iterate through [Presentation.slides](https://reference.aspose.com/slides/python-net/aspose.slides/presentation/slides/) and inspect each slide's [Slide.hidden](https://reference.aspose.com/slides/python-net/aspose.slides/slide/hidden/) property instead. **Can I detect whether custom slide size and orientation are used, and whether they differ from the defaults?** Yes. Load the presentation and read [Presentation.slide_size](https://reference.aspose.com/slides/python-net/aspose.slides/presentation/slide_size/). Inspect [SlideSize.type](https://reference.aspose.com/slides/python-net/aspose.slides/slidesize/type/), [SlideSize.size](https://reference.aspose.com/slides/python-net/aspose.slides/slidesize/size/), and [SlideSize.orientation](https://reference.aspose.com/slides/python-net/aspose.slides/slidesize/orientation/) to compare the current settings with the expected preset and dimensions. **Is there a quick way to see if charts reference external data sources?** Yes. Locate each [Chart](https://reference.aspose.com/slides/python-net/aspose.slides.charts/chart/) and inspect [ChartData.data_source_type](https://reference.aspose.com/slides/python-net/aspose.slides.charts/chartdata/data_source_type/). For an external workbook, read [ChartData.external_workbook_path](https://reference.aspose.com/slides/python-net/aspose.slides.charts/chartdata/external_workbook_path/). The data source type and path identify an external reference, but verifying whether the target is available requires a separate resource check. **How can I assess 'heavy' slides that may slow rendering or PDF export?** There is no single complexity property. Traverse [Presentation.slides](https://reference.aspose.com/slides/python-net/aspose.slides/presentation/slides/) and each slide's [BaseSlide.shapes](https://reference.aspose.com/slides/python-net/aspose.slides/baseslide/shapes/) collection. Use shape counts and the presence of large images, effects, animations, or multimedia as screening signals, and measure a representative render or export before treating a slide as a confirmed performance bottleneck. # Examples > Browse Python examples for managing slides, shapes, media, charts, text, and more, and learn practical patterns for PowerPoint and OpenDocument. Source: https://docs.aspose.com/slides/python-net/examples/ Updated: 2026-02-06 --- lastmod: 2026-02-06T18:17:17+06:00 title: Examples type: docs weight: 40 url: /python-net/examples/ keywords: - code examples - PowerPoint - OpenDocument - presentation - Python - Aspose.Slides description: "Browse Python examples for managing slides, shapes, media, charts, text, and more, and learn practical patterns for PowerPoint and OpenDocument." --- ## Related articles - [Elements](https://docs.aspose.com/slides/python-net/examples/elements/) # Elements > Explore Python examples for every slide element with Aspose.Slides—shapes, text, images, media, charts, animation, and more—covering PowerPoint and OpenDocument. Source: https://docs.aspose.com/slides/python-net/examples/elements/ Updated: 2026-02-06 --- lastmod: 2026-02-06T18:17:17+06:00 title: Elements type: docs weight: 40 url: /python-net/examples/elements/ keywords: - elements - code examples - PowerPoint - OpenDocument - presentation - Python - Aspose.Slides description: "Explore Python examples for every slide element with Aspose.Slides—shapes, text, images, media, charts, animation, and more—covering PowerPoint and OpenDocument." --- ## Related articles - [Examples](https://docs.aspose.com/slides/python-net/examples/) # ActiveX > Learn how to find, edit, and remove ActiveX controls in Python with Aspose.Slides, including property updates for PowerPoint presentations. Source: https://docs.aspose.com/slides/python-net/examples/elements/activex/ Updated: 2026-08-05 Demonstrates how to add, access, remove, and configure ActiveX controls in a presentation using **Aspose.Slides for Python via .NET**. ## **Add an ActiveX Control** Insert a new ActiveX control. ```py import aspose.slides as slides def add_activex(): with slides.Presentation() as presentation: slide = presentation.slides[0] # Add a new ActiveX control (Windows Media Player). control = slide.controls.add_control(slides.ControlType.WINDOWS_MEDIA_PLAYER, 50, 50, 100, 50) presentation.save("activex.pptm", slides.export.SaveFormat.PPTM) ``` ## **Access an ActiveX Control** Read information from the first ActiveX control on the slide. ```py import aspose.slides as slides def access_activex(): with slides.Presentation("activex.pptm") as presentation: slide = presentation.slides[0] # Access the first ActiveX control. control = slide.controls[0] if slide.controls else None if control is not None: # Print control name. print(f"Control Name: {control.name}") ``` ## **Remove an ActiveX Control** Delete an existing ActiveX control from the slide. ```py import aspose.slides as slides def remove_activex(): with slides.Presentation("activex.pptm") as presentation: slide = presentation.slides[0] if len(slide.controls) > 0: # Remove the first ActiveX control. slide.controls.remove_at(0) presentation.save("activex_removed.pptm", slides.export.SaveFormat.PPTM) ``` ## **Set ActiveX Properties** Configure several properties of the Windows Media Player control. ```py import aspose.slides as slides def set_activex_properties(): with slides.Presentation("activex.pptm") as presentation: slide = presentation.slides[0] # Assuming the Control collection contains at least one Control. control = slide.controls[0] # A property must be removed before it can be set to a new value. control.properties.remove("autoStart") control.properties.add("autoStart", "false") control.properties.remove("uiMode") control.properties.add("uiMode", "none") presentation.save("activex_properties.pptm", slides.export.SaveFormat.PPTM) ``` ## Related articles - [Manage PowerPoint Shapes in Python](https://docs.aspose.com/slides/python-net/powerpoint-shapes/) - [Manage ActiveX Controls in Presentations with Python](https://docs.aspose.com/slides/python-net/activex/) # Animation > Master slide animations in Python with Aspose.Slides: add, edit, and remove effects, timings, and triggers to create dynamic presentations in PPT, PPTX and ODP. Source: https://docs.aspose.com/slides/python-net/examples/elements/animation/ Updated: 2026-08-05 Shows how to create simple animations and manage their sequence using **Aspose.Slides for Python via .NET**. ## **Add an Animation** Create a rectangle shape and apply a fade effect triggered on click. ```py import aspose.slides as slides def add_animation(): with slides.Presentation() as presentation: slide = presentation.slides[0] shape = slide.shapes.add_auto_shape(slides.ShapeType.RECTANGLE, 50, 50, 100, 100) # Add a fade in effect. slide.timeline.main_sequence.add_effect( shape, slides.animation.EffectType.FADE, slides.animation.EffectSubtype.NONE, slides.animation.EffectTriggerType.ON_CLICK) presentation.save("animation.pptx", slides.export.SaveFormat.PPTX) ``` ## **Access an Animation** Retrieve the first animation effect from the slide timeline. ```py import aspose.slides as slides def access_animation(): with slides.Presentation("animation.pptx") as presentation: slide = presentation.slides[0] # Access the first animation effect. effect = slide.timeline.main_sequence[0] ``` ## **Remove an Animation** Remove an animation effect from the sequence. ```py import aspose.slides as slides def remove_animation(): with slides.Presentation("animation.pptx") as presentation: slide = presentation.slides[0] # Assuming the main sequence contains at least one effect. effect = slide.timeline.main_sequence[0] # Remove the effect. slide.timeline.main_sequence.remove(effect) presentation.save("animation_removed.pptx", slides.export.SaveFormat.PPTX) ``` ## **Sequence Animations** Add multiple effects and demonstrate the order in which animations occur. ```py import aspose.slides as slides def sequence_animations(): with slides.Presentation() as presentation: slide = presentation.slides[0] shape1 = slide.shapes.add_auto_shape(slides.ShapeType.RECTANGLE, 50, 50, 100, 100) shape2 = slide.shapes.add_auto_shape(slides.ShapeType.ELLIPSE, 200, 50, 100, 100) sequence = slide.timeline.main_sequence sequence.add_effect( shape1, slides.animation.EffectType.FLY, slides.animation.EffectSubtype.BOTTOM, slides.animation.EffectTriggerType.ON_CLICK) sequence.add_effect( shape2, slides.animation.EffectType.FLY, slides.animation.EffectSubtype.BOTTOM, slides.animation.EffectTriggerType.ON_CLICK) presentation.save("animation_sequence.pptx", slides.export.SaveFormat.PPTX) ``` ## Related articles - [Animate PowerPoint Text in Python](https://docs.aspose.com/slides/python-net/animated-text/) - [Manage PowerPoint Shapes in Python](https://docs.aspose.com/slides/python-net/powerpoint-shapes/) - [Enhance PowerPoint Presentations with Animations in Python](https://docs.aspose.com/slides/python-net/powerpoint-animation/) # Audio > Work with audio in Python using Aspose.Slides: add, replace, extract, and trim sounds, set volume and playback for slides and shapes in PowerPoint and OpenDocument. Source: https://docs.aspose.com/slides/python-net/examples/elements/audio/ Updated: 2026-08-05 Illustrates how to embed audio frames and control playback with **Aspose.Slides for Python via .NET**. The following examples show basic audio operations. ## **Add an Audio Frame** The code example below adds an audio frame on a presentation slide. ```py import aspose.slides as slides def add_audio(): with slides.Presentation() as presentation: slide = presentation.slides[0] with open("audio.wav", "rb") as audio_stream: audio_frame = slide.shapes.add_audio_frame_embedded(50, 50, 100, 100, audio_stream) presentation.save("audio.pptx", slides.export.SaveFormat.PPTX) ``` ## **Access an Audio Frame** This code retrieves the first audio frame from the slide. ```py import aspose.slides as slides def access_audio(): with slides.Presentation("audio.pptx") as presentation: slide = presentation.slides[0] first_audio_frame = None for shape in slide.shapes: if isinstance(shape, slides.AudioFrame): first_audio_frame = shape break ``` ## **Remove an Audio Frame** Delete a previously added audio frame. ```py import aspose.slides as slides def remove_audio(): with slides.Presentation("audio.pptx") as presentation: slide = presentation.slides[0] # Assuming the first shape is an AudioFrame. audio_frame = slide.shapes[0] # Remove the audio frame. slide.shapes.remove(audio_frame) presentation.save("audio_removed.pptx", slides.export.SaveFormat.PPTX) ``` ## **Set Audio Playback** Configure the audio frame to play automatically when the slide appears. ```py import aspose.slides as slides def set_audio_playback(): with slides.Presentation("audio.pptx") as presentation: slide = presentation.slides[0] # Assuming the first shape is an AudioFrame. audio_frame = slide.shapes[0] # Play automatically when the slide appears. audio_frame.play_mode = slides.AudioPlayModePreset.AUTO presentation.save("audio_playback.pptx", slides.export.SaveFormat.PPTX) ``` ## Related articles - [Video](https://docs.aspose.com/slides/python-net/examples/elements/video/) - [Manage Audio in Presentations Using Python](https://docs.aspose.com/slides/python-net/audio-frame/) # Chart > Create and customize charts in Python with Aspose.Slides: add data, format series, axes and labels, change types, and export—works with PPT, PPTX and ODP. Source: https://docs.aspose.com/slides/python-net/examples/elements/chart/ Updated: 2026-08-05 Examples for adding, accessing, removing, and updating different chart types with **Aspose.Slides for Python via .NET**. The snippets below demonstrate basic chart operations. ## **Add a Chart** This method adds a simple area chart to the first slide. ```py import aspose.slides as slides def add_chart(): with slides.Presentation() as presentation: slide = presentation.slides[0] # Add a simple area chart to the first slide. chart = slide.shapes.add_chart(slides.charts.ChartType.AREA, 50, 50, 400, 300) presentation.save("chart.pptx", slides.export.SaveFormat.PPTX) ``` ## **Access a Chart** The following code retrieves a chart from the shape collection. ```py import aspose.slides as slides def access_chart(): with slides.Presentation("chart.pptx") as presentation: slide = presentation.slides[0] # Access the first chart on the slide. first_chart = None for shape in slide.shapes: if isinstance(shape, slides.charts.Chart): first_chart = shape break ``` ## **Remove a Chart** The following code removes a chart from a slide. ```py import aspose.slides as slides def remove_chart(): with slides.Presentation("chart.pptx") as presentation: slide = presentation.slides[0] # Assuming the first shape is a chart. chart = slide.shapes[0] # Remove the chart. slide.shapes.remove(chart) presentation.save("chart_removed.pptx", slides.export.SaveFormat.PPTX) ``` ## **Update Chart Data** You can change chart properties such as the title. ```py import aspose.slides as slides def update_chart_data(): with slides.Presentation("chart.pptx") as presentation: slide = presentation.slides[0] # Assuming the first shape is a chart. chart = slide.shapes[0] # Show the chart title and change its text. chart.has_title = True chart.chart_title.add_text_frame_for_overriding("Sales Report") presentation.save("chart_updated.pptx", slides.export.SaveFormat.PPTX) ``` ## Related articles - [Create and Customize PowerPoint Charts in Python](https://docs.aspose.com/slides/python-net/powerpoint-charts/) - [Customize Presentation Chart Entities in Python](https://docs.aspose.com/slides/python-net/chart-entities/) - [OleObject](https://docs.aspose.com/slides/python-net/examples/elements/ole-object/) # Comment > Manage slide comments in Python with Aspose.Slides: add, read, reply, edit, delete, and work with threaded comments for PowerPoint and OpenDocument. Source: https://docs.aspose.com/slides/python-net/examples/elements/comment/ Updated: 2026-08-05 Demonstrates adding, reading, removing, and replying to modern comments using **Aspose.Slides for Python via .NET**. ## **Add a Modern Comment** Create a comment authored by a user and save the presentation. ```py import datetime import aspose.pydrawing as drawing import aspose.slides as slides def add_modern_comment(): with slides.Presentation() as presentation: slide = presentation.slides[0] # Add a comment author. author = presentation.comment_authors.add_author("User", "U1") # Add a modern comment. author.comments.add_modern_comment( "This is a modern comment", slide, None, drawing.PointF(100, 100), datetime.date.today()) presentation.save("modern_comment.pptx", slides.export.SaveFormat.PPTX) ``` ## **Access a Modern Comment** Read a modern comment from an existing presentation. ```py import aspose.slides as slides def access_modern_comment(): with slides.Presentation("modern_comment.pptx") as presentation: author = presentation.comment_authors[0] # Access the first modern comment. comment = author.comments[0] print(f"Author: {author.name}, Comment: {comment.text}") ``` ## **Remove a Modern Comment** Remove a comment and save the updated file. ```py import aspose.slides as slides def remove_modern_comment(): with slides.Presentation("modern_comment.pptx") as presentation: author = presentation.comment_authors[0] comment = author.comments[0] # Remove the comment. comment.remove() presentation.save("modern_comment_removed.pptx", slides.export.SaveFormat.PPTX) ``` ## **Reply to a Modern Comment** Add replies to a parent modern comment. ```py import datetime import aspose.pydrawing as drawing import aspose.slides as slides def reply_to_modern_comment(): with slides.Presentation() as presentation: slide = presentation.slides[0] author = presentation.comment_authors.add_author("User", "U1") # Add parent comment. parent = author.comments.add_modern_comment( "Parent comment", slide, None, drawing.PointF(100, 100), datetime.date.today()) # Add first reply. reply1 = author.comments.add_modern_comment( "Reply 1", slide, None, drawing.PointF(110, 100), datetime.date.today()) # Add second reply. reply2 = author.comments.add_modern_comment( "Reply 2", slide, None, drawing.PointF(120, 100), datetime.date.today()) reply1.parent_comment = parent reply2.parent_comment = parent presentation.save("modern_comment_replies.pptx", slides.export.SaveFormat.PPTX) ``` ## Related articles - [Manage Presentation Comments in Python](https://docs.aspose.com/slides/python-net/presentation-comments/) # Connector > Draw and control connectors in Python with Aspose.Slides: add, route, reroute, set connection points, arrows and styles to link shapes in PPT, PPTX and ODP. Source: https://docs.aspose.com/slides/python-net/examples/elements/connector/ Updated: 2026-08-05 Shows how to connect shapes with connectors and change their targets using **Aspose.Slides for Python via .NET**. ## **Add a Connector** Insert a connector shape between two points on the slide. ```py import aspose.slides as slides def add_connector(): with slides.Presentation() as presentation: slide = presentation.slides[0] # Add a bent connector shape. connector = slide.shapes.add_connector(slides.ShapeType.BENT_CONNECTOR2, 0, 0, 100, 100) presentation.save("connector.pptx", slides.export.SaveFormat.PPTX) ``` ## **Access a Connector** Retrieve the first connector shape added to a slide. ```py import aspose.slides as slides def access_connector(): with slides.Presentation("connector.pptx") as presentation: slide = presentation.slides[0] # Access the first connector on the slide. first_connector = None for shape in slide.shapes: if isinstance(shape, slides.Connector): first_connector = shape break ``` ## **Remove a Connector** Delete a connector from the slide. ```py import aspose.slides as slides def remove_connector(): with slides.Presentation("connector.pptx") as presentation: slide = presentation.slides[0] # Assuming the first shape is a connector. connector = slide.shapes[0] # Remove the connector. slide.shapes.remove(connector) presentation.save("connector_removed.pptx", slides.export.SaveFormat.PPTX) ``` ## **Reconnect Shapes** Attach a connector to two shapes by assigning start and end targets. ```py import aspose.slides as slides def reconnect_shapes(): with slides.Presentation("connector.pptx") as presentation: slide = presentation.slides[0] # Add the first rectangle shape. shape1 = slide.shapes.add_auto_shape(slides.ShapeType.RECTANGLE, 0, 0, 50, 50) # Add the second rectangle shape. shape2 = slide.shapes.add_auto_shape(slides.ShapeType.RECTANGLE, 100, 100, 50, 50) # Add a bent connector shape. connector = slide.shapes.add_connector(slides.ShapeType.BENT_CONNECTOR2, 0, 0, 100, 100) # Connect the start of the connector to the first shape. connector.start_shape_connected_to = shape1 # Connect the end of the connector to the second shape. connector.end_shape_connected_to = shape2 presentation.save("shapes_reconnected.pptx", slides.export.SaveFormat.PPTX) ``` ## Related articles - [Manage Connectors in Presentations with Python](https://docs.aspose.com/slides/python-net/connector/) - [Manage Shapes in Presentations with Python](https://docs.aspose.com/slides/python-net/shape-types/) # GroupShape > Work with group shapes in Python using Aspose.Slides: create and ungroup, reorder child shapes, set transforms and bounds across PowerPoint and OpenDocument. Source: https://docs.aspose.com/slides/python-net/examples/elements/group-shape/ Updated: 2026-08-05 Examples for creating groups of shapes, accessing them, ungrouping, and removal using **Aspose.Slides for Python via .NET**. ## **Add a Group Shape** Create a group containing two basic shapes. ```py import aspose.slides as slides def add_group_shape(): with slides.Presentation() as presentation: slide = presentation.slides[0] # Add a group shape. group = slide.shapes.add_group_shape() group.shapes.add_auto_shape(slides.ShapeType.RECTANGLE, 0, 0, 50, 50) group.shapes.add_auto_shape(slides.ShapeType.ELLIPSE, 60, 0, 50, 50) presentation.save("group.pptx", slides.export.SaveFormat.PPTX) ``` ## **Access a Group Shape** Retrieve the first group shape from a slide. ```py import aspose.slides as slides def access_group_shape(): with slides.Presentation("group.pptx") as presentation: slide = presentation.slides[0] # Access the first group shape on the slide. first_group = None for shape in slide.shapes: if isinstance(shape, slides.GroupShape): first_group = shape break ``` ## **Remove a Group Shape** Delete a group shape from the slide. ```py import aspose.slides as slides def remove_group_shape(): with slides.Presentation("group.pptx") as presentation: slide = presentation.slides[0] # Assuming the first shape is a group shape. group = slide.shapes[0] # Remove the group shape. slide.shapes.remove(group) presentation.save("group_removed.pptx", slides.export.SaveFormat.PPTX) ``` ## **Ungroup Shapes** Move shapes out of a group container. ```py import aspose.slides as slides def ungroup_shapes(): with slides.Presentation("group.pptx") as presentation: slide = presentation.slides[0] # Assuming the first shape is a group shape. group = slide.shapes[0] # Move shapes out of the group. for shape in group.shapes: slide.shapes.add_clone(shape) slide.shapes.remove(group) presentation.save("shapes_ungrouped.pptx", slides.export.SaveFormat.PPTX) ``` ## Related articles - [Group Presentation Shapes with Python](https://docs.aspose.com/slides/python-net/group/) # HeaderFooter > Control headers and footers in Python with Aspose.Slides: add or edit date/time, slide numbers, and footer text, show or hide placeholders across PPT, PPTX and ODP. Source: https://docs.aspose.com/slides/python-net/examples/elements/header-footer/ Updated: 2026-08-05 Shows how to add footers and update date and time placeholders using **Aspose.Slides for Python via .NET**. ## **Add a Footer** Add text to the footer area of a slide and make it visible. ```py import aspose.slides as slides def add_footer(): with slides.Presentation() as presentation: slide = presentation.slides[0] # Make the footer placeholder visible first, then set its text. slide.header_footer_manager.set_footer_visibility(True) slide.header_footer_manager.set_footer_text("My footer") presentation.save("footer.pptx", slides.export.SaveFormat.PPTX) ``` ## **Update Date and Time** Modify the date and time placeholder on a slide. ```py import aspose.slides as slides def add_date_time(): with slides.Presentation() as presentation: slide = presentation.slides[0] # Make the date and time placeholder visible first, then set its text. slide.header_footer_manager.set_date_time_visibility(True) slide.header_footer_manager.set_date_time_text("01/01/2024") presentation.save("date_time.pptx", slides.export.SaveFormat.PPTX) ``` ## Related articles - [Manage Presentation Headers and Footers with Python](https://docs.aspose.com/slides/python-net/presentation-header-and-footer/) - [Manage Placeholders in Presentations with Python](https://docs.aspose.com/slides/python-net/manage-placeholder/) # Hyperlink > Add, edit, and remove hyperlinks in Python with Aspose.Slides: link text, shapes, slides, URLs and email; set targets and actions for PPT, PPTX and ODP. Source: https://docs.aspose.com/slides/python-net/examples/elements/hyperlink/ Updated: 2026-08-05 Demonstrates adding, accessing, removing, and updating hyperlinks on shapes using **Aspose.Slides for Python via .NET**. ## **Add a Hyperlink** Create a rectangle shape with a hyperlink pointing to an external website. ```py import aspose.slides as slides def add_hyperlink(): with slides.Presentation() as presentation: slide = presentation.slides[0] shape = slide.shapes.add_auto_shape(slides.ShapeType.RECTANGLE, 50, 50, 150, 50) shape.text_frame.text = "Aspose" text_portion = shape.text_frame.paragraphs[0].portions[0] text_portion.portion_format.hyperlink_click = slides.Hyperlink("https://www.aspose.com") presentation.save("hyperlink.pptx", slides.export.SaveFormat.PPTX) ``` ## **Access a Hyperlink** Read hyperlink information from a shape's text portion. ```py import aspose.slides as slides def access_hyperlink(): with slides.Presentation("hyperlink.pptx") as presentation: slide = presentation.slides[0] shape = slide.shapes[0] text_portion = shape.text_frame.paragraphs[0].portions[0] hyperlink = text_portion.portion_format.hyperlink_click ``` ## **Remove a Hyperlink** Clear the hyperlink from a shape's text. ```py import aspose.slides as slides def remove_hyperlink(): with slides.Presentation("hyperlink.pptx") as presentation: slide = presentation.slides[0] shape = slide.shapes[0] text_portion = shape.text_frame.paragraphs[0].portions[0] text_portion.portion_format.hyperlink_click = None presentation.save("hyperlink_removed.pptx", slides.export.SaveFormat.PPTX) ``` ## **Update a Hyperlink** Change the target of an existing hyperlink. Use `HyperlinkManager` to modify text that already contains a hyperlink, which mimics how PowerPoint updates hyperlinks safely. ```py import aspose.slides as slides def update_hyperlink(): with slides.Presentation("hyperlink.pptx") as presentation: slide = presentation.slides[0] shape = slide.shapes[0] # Changing a hyperlink inside existing text should be done via # HyperlinkManager rather than setting the property directly. # This mimics how PowerPoint safely updates hyperlinks. text_portion = shape.text_frame.paragraphs[0].portions[0] text_portion.portion_format.hyperlink_manager.set_external_hyperlink_click("https://new.example.com") presentation.save("hyperlink_updated.pptx", slides.export.SaveFormat.PPTX) ``` ## Related articles - [Manage Hyperlinks in Presentations with Python](https://docs.aspose.com/slides/python-net/manage-hyperlinks/) - [Manage Presentation Content in Python](https://docs.aspose.com/slides/python-net/presentation-content/) # Ink > Handle digital ink on slides in Python with Aspose.Slides: add pen strokes, edit paths, set color and width, and export results for PowerPoint and OpenDocument. Source: https://docs.aspose.com/slides/python-net/examples/elements/ink/ Updated: 2026-08-05 Provides examples of accessing existing ink shapes and removing them using **Aspose.Slides for Python via .NET**. > ❗ **Note:** Ink shapes represent user input from specialized devices. Aspose.Slides cannot create new ink strokes programmatically, but you can read and modify existing ink. ## **Access Ink** Get the first ink shape from a slide. ```py import aspose.slides as slides def access_ink(): with slides.Presentation("ink.pptx") as presentation: slide = presentation.slides[0] first_ink = None for shape in slide.shapes: if isinstance(shape, slides.ink.Ink): first_ink = shape break ``` ## **Remove Ink** Delete an ink shape from the slide. ```py import aspose.slides as slides def remove_ink(): with slides.Presentation("ink.pptx") as presentation: slide = presentation.slides[0] # Assuming the first shape is an Ink object. ink = slide.shapes[0] slide.shapes.remove(ink) presentation.save("ink_removed.pptx", slides.export.SaveFormat.PPTX) ``` ## Related articles - [Manage Presentation Content in Python](https://docs.aspose.com/slides/python-net/presentation-content/) - [Manage Presentation Ink Objects in Python](https://docs.aspose.com/slides/python-net/manage-ink/) # Layout Slide > Use Python to manage layout slides with Aspose.Slides: create, apply, clone, rename, and customize placeholders and themes in presentations for PPT, PPTX and ODP. Source: https://docs.aspose.com/slides/python-net/examples/elements/layout-slide/ Updated: 2026-08-05 This article demonstrates how to work with **Layout Slides** in Aspose.Slides for Python via .NET. A layout slide defines the design and formatting inherited by normal slides. You can add, access, clone, and remove layout slides, as well as clean up unused ones to reduce presentation size. ## **Add a Layout Slide** You can create a custom layout slide to define reusable formatting. ```py import aspose.slides as slides def add_layout_slide(): with slides.Presentation() as presentation: master_slide = presentation.masters[0] layout_type = slides.SlideLayoutType.CUSTOM layout_name = "Main layout" # Create a layout slide with the specified type and name. layout_slide = presentation.layout_slides.add(master_slide, layout_type, layout_name) presentation.save("layout_slide.pptx", slides.export.SaveFormat.PPTX) ``` > 💡 **Tip 1:** Layout slides act as templates for individual slides. You can define common elements once and reuse them across many slides. > 💡 **Tip 2:** When you add shapes or text to a layout slide, all slides based on that layout will display this shared content automatically. > The screenshot below shows two slides, each inheriting a text box from the same layout slide. ![Slides Inheriting Layout Content](https://docs.aspose.com/slides/python-net/examples/elements/layout-slide/layout-slide-result.png) ## **Access a Layout Slide** Layout slides can be accessed by index or by layout type (e.g., `BLANK`, `TITLE`, `SECTION_HEADER`, etc.). ```py import aspose.slides as slides def access_layout_slide(): with slides.Presentation("layout_slide.pptx") as presentation: # Access by index. first_layout_slide = presentation.layout_slides[0] # Access by layout type. blank_layout_slide = presentation.layout_slides.get_by_type(slides.SlideLayoutType.BLANK) ``` ## **Remove a Layout Slide** You can remove a specific layout slide if it's no longer needed. ```py import aspose.slides as slides def remove_layout_slide(): with slides.Presentation("layout_slide.pptx") as presentation: # Get a layout slide by type and remove it. layout_slide = presentation.layout_slides.get_by_type(slides.SlideLayoutType.CUSTOM) presentation.layout_slides.remove(layout_slide) presentation.save("layout_slide_removed.pptx", slides.export.SaveFormat.PPTX) ``` ## **Remove Unused Layout Slides** To reduce the presentation size, you may want to remove layout slides that are not used by any normal slides. ```py import aspose.slides as slides def remove_unused_layout_slides(): with slides.Presentation("layout_slide.pptx") as presentation: # Automatically removes all layout slides not referenced by any slide. presentation.layout_slides.remove_unused() presentation.save("layout_slides_removed.pptx", slides.export.SaveFormat.PPTX) ``` ## **Clone a Layout Slide** You can duplicate a layout slide using the `add_clone` method. ```py import aspose.slides as slides def clone_layout_slides(): with slides.Presentation("layout_slide.pptx") as presentation: # Get an existing layout slide by type. layout_slide = presentation.layout_slides.get_by_type(slides.SlideLayoutType.BLANK) # Clone the layout slide to the end of the layout slide collection. cloned_layout_slide = presentation.layout_slides.add_clone(layout_slide) presentation.save("layout_slide_cloned.pptx", slides.export.SaveFormat.PPTX) ``` > ✅ **Summary:** Layout slides are powerful tools for managing consistent formatting across slides. Aspose.Slides allows full control over creating, managing, and optimizing layout slides. ## Related articles - [Master Slide](https://docs.aspose.com/slides/python-net/examples/elements/master-slide/) - [Manage Presentation Slide Masters in Python](https://docs.aspose.com/slides/python-net/slide-master/) - [Section](https://docs.aspose.com/slides/python-net/examples/elements/section/) # Master Slide > Manage master slides in Python with Aspose.Slides: create, edit, clone, and format themes, backgrounds, placeholders to unify slides in PowerPoint and OpenDocument. Source: https://docs.aspose.com/slides/python-net/examples/elements/master-slide/ Updated: 2026-08-05 Master slides form the top level of the slide inheritance hierarchy in PowerPoint. A **master slide** defines common design elements such as backgrounds, logos, and text formatting. **Layout slides** inherit from master slides, and **normal slides** inherit from layout slides. This article demonstrates how to create, modify, and manage master slides using Aspose.Slides for Python via .NET. ## **Add a Master Slide** This example shows how to create a new master slide by cloning the default one. ```py import aspose.slides as slides def add_master_slide(): with slides.Presentation() as presentation: # Clone the default master slide. default_master_slide = presentation.masters[0] new_master = presentation.masters.add_clone(default_master_slide) presentation.save("master_slide.pptx", slides.export.SaveFormat.PPTX) ``` > 💡 **Tip 1:** Master slides provide a way to apply consistent branding or shared design elements across all slides. Any changes made to the master will automatically reflect on dependent layout and normal slides. > 💡 **Tip 2:** Any shapes or formatting added to a master slide are inherited by layout slides and, in turn, all normal slides using those layouts. > The image below illustrates how a text box added on a master slide is automatically rendered on the final slide. ![Master Inheritance Example](https://docs.aspose.com/slides/python-net/examples/elements/master-slide/master-slide-banner.png) ## **Access a Master Slide** You can access master slides using the `Presentation.masters` collection. Here’s how to retrieve and work with them: ```py import aspose.slides as slides def access_master_slide(): with slides.Presentation("master_slide.pptx") as presentation: # Access the first master slide. first_master_slide = presentation.masters[0] ``` ## **Remove a Master Slide** Master slides can be removed either by index or by reference. A master slide that is still used by a layout slide or a normal slide cannot be removed — only unused master slides can. In the presentation saved above, the cloned master at index 1 is the unused one. ```py import aspose.slides as slides def remove_master_slide(): with slides.Presentation("master_slide.pptx") as presentation: # Remove an unused master slide by index. presentation.masters.remove_at(1) # Or remove an unused master slide by reference. # unused_master_slide = presentation.masters[1] # presentation.masters.remove(unused_master_slide) presentation.save("master_slide_removed.pptx", slides.export.SaveFormat.PPTX) ``` ## **Remove Unused Master Slides** Some presentations contain master slides that are not in use. Removing these slides can help reduce file size. ```py import aspose.slides as slides def remove_unused_master_slides(): with slides.Presentation("master_slide.pptx") as presentation: # Remove all unused master slides (even those marked as Preserve). presentation.masters.remove_unused(True) presentation.save("master_slides_removed.pptx", slides.export.SaveFormat.PPTX) ``` > ⚙️ **Tip:** Use `remove_unused(True)` to clean up unused master slides and minimize the presentation size. ## Related articles - [Layout Slide](https://docs.aspose.com/slides/python-net/examples/elements/layout-slide/) - [Manage Presentation Slide Masters in Python](https://docs.aspose.com/slides/python-net/slide-master/) - [Slide](https://docs.aspose.com/slides/python-net/examples/elements/slide/) # MathText > Work with math text in Python using Aspose.Slides: create and edit equations, fractions, radicals, scripts, formatting, and render results for PPT and PPTX. Source: https://docs.aspose.com/slides/python-net/examples/elements/math-text/ Updated: 2026-08-05 Illustrates working with mathematical text shapes and formatting equations using **Aspose.Slides for Python via .NET**. ## **Add Math Text** Create a math shape containing a fraction and the Pythagorean formula. ```py import aspose.slides as slides def add_math_text(): with slides.Presentation() as presentation: slide = presentation.slides[0] # Add a Math shape to the slide. math_shape = slide.shapes.add_math_shape(0, 0, 720, 150) # Access the math paragraph. math_paragraph = math_shape.text_frame.paragraphs[0].portions[0].math_paragraph # Add a simple fraction: x / y. fraction = slides.mathtext.MathematicalText("x").divide("y") math_paragraph.add(slides.mathtext.MathBlock(fraction)) # Add equation: c² = a² + b². math_block = ( slides.mathtext.MathematicalText("c") .set_superscript("2") .join("=") .join(slides.mathtext.MathematicalText("a").set_superscript("2")) .join("+") .join(slides.mathtext.MathematicalText("b").set_superscript("2")) ) math_paragraph.add(math_block) presentation.save("math_text.pptx", slides.export.SaveFormat.PPTX) ``` ## **Access Math Text** Locate a shape that contains a math paragraph on the slide. ```py import aspose.slides as slides def access_math_text(): with slides.Presentation("math_text.pptx") as presentation: slide = presentation.slides[0] # Find the first shape that contains a math paragraph. math_shape = next( ( shape for shape in slide.shapes if isinstance(shape, slides.AutoShape) and shape.text_frame is not None and any( any(isinstance(portion, slides.mathtext.MathPortion) for portion in paragraph.portions) for paragraph in shape.text_frame.paragraphs ) ), None ) ``` ## **Remove Math Text** Delete a math shape from the slide. ```py import aspose.slides as slides def remove_math_text(): with slides.Presentation("math_text.pptx") as presentation: slide = presentation.slides[0] # Assuming the first shape is a shape with math text. math_shape = slide.shapes[0] slide.shapes.remove(math_shape) presentation.save("math_text_removed.pptx", slides.export.SaveFormat.PPTX) ``` ## **Format Math Text** Set font properties for a math portion. ```py import aspose.slides as slides def format_math_text(): with slides.Presentation("math_text.pptx") as presentation: slide = presentation.slides[0] # Assuming the first shape is a shape with math text. math_shape = slide.shapes[0] # Math runs take their size from the paragraph's default portion format. math_shape.text_frame.paragraphs[0].paragraph_format.default_portion_format.font_height = 20 presentation.save("math_text_formatted.pptx", slides.export.SaveFormat.PPTX) ``` ## Related articles - [Add Math Equations to PowerPoint Presentations in Python](https://docs.aspose.com/slides/python-net/powerpoint-math-equations/) # Note > Add, read, edit, and export speaker notes in Python with Aspose.Slides: format text, manage notes per slide, and control visibility in PowerPoint and OpenDocument. Source: https://docs.aspose.com/slides/python-net/examples/elements/note/ Updated: 2026-08-05 Shows how to add, read, remove, and update notes slides using **Aspose.Slides for Python via .NET**. ## **Add a Notes Slide** Create a notes slide and assign text to it. ```py import aspose.slides as slides def add_note(): with slides.Presentation() as presentation: slide = presentation.slides[0] notes_slide = slide.notes_slide_manager.add_notes_slide() notes_slide.notes_text_frame.text = "My note" presentation.save("note.pptx", slides.export.SaveFormat.PPTX) ``` ## **Access a Notes Slide** Read text from an existing notes slide. ```py import aspose.slides as slides def access_note(): with slides.Presentation("note.pptx") as presentation: slide = presentation.slides[0] notes_slide = slide.notes_slide_manager.notes_slide notes = notes_slide.notes_text_frame.text ``` ## **Remove a Notes Slide** Remove the notes slide associated with a slide. ```py import aspose.slides as slides def remove_note(): with slides.Presentation("note.pptx") as presentation: slide = presentation.slides[0] # Remove the notes slide. slide.notes_slide_manager.remove_notes_slide() presentation.save("note_removed.pptx", slides.export.SaveFormat.PPTX) ``` ## **Update Notes Text** Change the text of a notes slide. ```py import aspose.slides as slides def update_note_text(): with slides.Presentation("note.pptx") as presentation: slide = presentation.slides[0] # Update note text. slide.notes_slide_manager.notes_slide.notes_text_frame.text = "Updated" presentation.save("note_updated.pptx", slides.export.SaveFormat.PPTX) ``` ## Related articles - [Convert Presentations to PDF with Notes in Python](https://docs.aspose.com/slides/python-net/convert-powerpoint-to-pdf-with-notes/) # OleObject > Work with OLE objects in Python using Aspose.Slides: insert or update embedded files, set icons or links, extract content, control behavior for PPT, PPTX and ODP. Source: https://docs.aspose.com/slides/python-net/examples/elements/ole-object/ Updated: 2026-08-05 Demonstrates embedding a file as an OLE object and updating its data using **Aspose.Slides for Python via .NET**. ## **Add an OLE Object** Embed a PDF file into the presentation. ```py import aspose.slides as slides def add_ole_object(): with slides.Presentation() as presentation: slide = presentation.slides[0] # Load PDF data to embed. with open("doc.pdf", "rb") as file_stream: data_info = slides.dom.ole.OleEmbeddedDataInfo(file_stream.read(), "pdf") # Add an OLE object frame to the slide. ole_frame = slide.shapes.add_ole_object_frame(20, 20, 50, 50, data_info) presentation.save("ole_frame.pptx", slides.export.SaveFormat.PPTX) ``` ## **Access an OLE Object** Retrieve the first OLE object frame on a slide. ```py import aspose.slides as slides def access_ole_object(): with slides.Presentation("ole_frame.pptx") as presentation: slide = presentation.slides[0] # Get the first OLE object frame on the slide. first_ole = next(shape for shape in slide.shapes if isinstance(shape, slides.OleObjectFrame)) ``` ## **Remove an OLE Object** Delete an embedded OLE object from the slide. ```py import aspose.slides as slides def remove_ole_object(): with slides.Presentation("ole_frame.pptx") as presentation: slide = presentation.slides[0] # Assuming the first shape is an OleObjectFrame object. ole_frame = slide.shapes[0] slide.shapes.remove(ole_frame) presentation.save("ole_frame_removed.pptx", slides.export.SaveFormat.PPTX) ``` ## **Update OLE Object Data** Replace the data embedded in an existing OLE object. ```py import aspose.slides as slides def update_ole_object_data(): with slides.Presentation("ole_frame.pptx") as presentation: slide = presentation.slides[0] # Assuming the first shape is an OleObjectFrame object. ole_frame = slide.shapes[0] with open("Picture.png", "rb") as picture_stream: new_data = slides.dom.ole.OleEmbeddedDataInfo(picture_stream.read(), "png") # Update the OLE object with the new embedded data. ole_frame.set_embedded_data(new_data) presentation.save("ole_frame_updated.pptx", slides.export.SaveFormat.PPTX) ``` ## Related articles - [Manage OLE in Presentations Using Python](https://docs.aspose.com/slides/python-net/manage-ole/) - [Manage Presentation Content in Python](https://docs.aspose.com/slides/python-net/presentation-content/) - [Video](https://docs.aspose.com/slides/python-net/examples/elements/video/) # Picture > Work with pictures in Python using Aspose.Slides: insert, replace, crop, compress, adjust transparency and effects, fill shapes, and export for PPT, PPTX and ODP. Source: https://docs.aspose.com/slides/python-net/examples/elements/picture/ Updated: 2026-08-05 Shows how to insert and access pictures using **Aspose.Slides for Python via .NET**. The examples below load an image from a file, place it on a slide, and then retrieve it. ## **Add a Picture** This code loads an image from a file and inserts it as a picture frame on the first slide. ```py import aspose.slides as slides def add_picture(): with slides.Presentation() as presentation: slide = presentation.slides[0] # Load an image from a file. with open("image.png", "rb") as image_stream: # Add the image to the presentation resources. image = presentation.images.add_image(image_stream) # Insert a picture frame showing the image on the first slide. slide.shapes.add_picture_frame(slides.ShapeType.RECTANGLE, 50, 50, image.width, image.height, image) presentation.save("picture.pptx", slides.export.SaveFormat.PPTX) ``` ## **Access a Picture** This example accesses the first picture frame found on the slide. ```py import aspose.slides as slides def access_picture(): with slides.Presentation("picture.pptx") as presentation: slide = presentation.slides[0] # Access the first picture frame on the slide. picture_frame = next(shape for shape in slide.shapes if isinstance(shape, slides.PictureFrame)) ``` ## Related articles - [Video](https://docs.aspose.com/slides/python-net/examples/elements/video/) - [Add Picture Frames to Presentations with Python](https://docs.aspose.com/slides/python-net/picture-frame/) - [OleObject](https://docs.aspose.com/slides/python-net/examples/elements/ole-object/) # Section > Manage slide sections in Python with Aspose.Slides: create, rename, reorder easily, move slides between sections, and control visibility for PPT, PPTX and ODP. Source: https://docs.aspose.com/slides/python-net/examples/elements/section/ Updated: 2026-08-05 Examples for managing presentation sections—add, access, remove, and rename them programmatically using **Aspose.Slides for Python via .NET**. ## **Add a Section** Create a section that starts at a specific slide. ```py import aspose.slides as slides def add_section(): with slides.Presentation() as presentation: slide = presentation.slides[0] # Add a new section and specify the slide that marks the beginning of the section. presentation.sections.add_section("New Section", slide) presentation.save("section.pptx", slides.export.SaveFormat.PPTX) ``` ## **Access a Section** Get a section from a presentation. ```py import aspose.slides as slides def access_section(): with slides.Presentation("section.pptx") as presentation: # Access a section by index. section = presentation.sections[0] ``` ## **Remove a Section** Delete a previously added section. ```py import aspose.slides as slides def remove_section(): with slides.Presentation("section.pptx") as presentation: section = presentation.sections[0] # Remove the section. presentation.sections.remove_section(section) presentation.save("section_removed.pptx", slides.export.SaveFormat.PPTX) ``` ## **Rename a Section** Change the name of an existing section. ```py import aspose.slides as slides def rename_section(): with slides.Presentation("section.pptx") as presentation: section = presentation.sections[0] # Rename the section. section.name = "New Name" presentation.save("section_renamed.pptx", slides.export.SaveFormat.PPTX) ``` ## Related articles - [Manage Slide Sections in Presentations with Python](https://docs.aspose.com/slides/python-net/slide-section/) - [Layout Slide](https://docs.aspose.com/slides/python-net/examples/elements/layout-slide/) # SlideTransition > Control slide transitions in Python with Aspose.Slides: choose types, speed, sound, and timing to polish presentations in PPT, PPTX and ODP. Source: https://docs.aspose.com/slides/python-net/examples/elements/slide-transition/ Updated: 2026-08-05 Demonstrates applying slide transition effects and timings with **Aspose.Slides for Python via .NET**. ## **Add a Slide Transition** Apply a fade transition effect to the first slide. ```py import aspose.slides as slides def add_slide_transition(): with slides.Presentation() as presentation: slide = presentation.slides[0] # Apply a fade transition. slide.slide_show_transition.type = slides.slideshow.TransitionType.FADE presentation.save("slide_transition.pptx", slides.export.SaveFormat.PPTX) ``` ## **Access a Slide Transition** Read the transition type currently assigned to a slide. ```py import aspose.slides as slides def access_slide_transition(): with slides.Presentation("slide_transition.pptx") as presentation: slide = presentation.slides[0] # Access the transition type. transition_type = slide.slide_show_transition.type ``` ## **Remove a Slide Transition** Clear any transition effect by setting the type to `NONE`. ```py import aspose.slides as slides def remove_slide_transition(): with slides.Presentation("slide_transition.pptx") as presentation: slide = presentation.slides[0] # Remove transition by setting none. slide.slide_show_transition.type = slides.slideshow.TransitionType.NONE presentation.save("slide_transition_removed.pptx", slides.export.SaveFormat.PPTX) ``` ## **Set Transition Duration** Specify how long the slide is displayed before advancing automatically. `advance_after_time` is the display time of the slide, not the length of the transition animation, and setting it also turns on automatic advancing. ```py import aspose.slides as slides def set_transition_duration(): with slides.Presentation("slide_transition.pptx") as presentation: slide = presentation.slides[0] slide.slide_show_transition.advance_on_click = True slide.slide_show_transition.advance_after_time = 2000 # in milliseconds. presentation.save("transition_duration.pptx", slides.export.SaveFormat.PPTX) ``` ## Related articles - [Manage Slide Transitions in Presentations Using Python](https://docs.aspose.com/slides/python-net/slide-transition/) # Slide > Manage slides in Python with Aspose.Slides: create, clone, reorder, hide, set backgrounds and size, apply transitions, and export for PowerPoint and OpenDocument. Source: https://docs.aspose.com/slides/python-net/examples/elements/slide/ Updated: 2026-08-05 This article provides a series of examples that demonstrate how to work with slides using **Aspose.Slides for Python via .NET**. You’ll learn how to add, access, clone, reorder, and remove slides using the `Presentation` class. Each example below includes a brief explanation followed by a code snippet in Python. ## **Add a Slide** To add a new slide, you must first select a layout. In this example, we use the `Blank` layout and add an empty slide to the presentation. ```py import aspose.slides as slides def add_slide(): with slides.Presentation() as presentation: # Each slide is based on a layout, which itself is based on a master slide. # Use the Blank layout to create a new slide. blank_layout = presentation.layout_slides.get_by_type(slides.SlideLayoutType.BLANK) # Add a new empty slide using the selected layout. presentation.slides.add_empty_slide(blank_layout) presentation.save("slide.pptx", slides.export.SaveFormat.PPTX) ``` > 💡 **Tip:** Each slide layout is derived from a master slide, which defines the overall design and placeholder structure. The image below illustrates how master slides and their associated layouts are organized in PowerPoint. ![Master and Layout Relationship](https://docs.aspose.com/slides/python-net/examples/elements/slide/master-layout-slide.png) ## **Access Slides by Index** You can access slides using their index. This is useful for iterating through or modifying specific slides. ```py import aspose.slides as slides def access_slide(): with slides.Presentation("slide.pptx") as presentation: # Access a slide by index. first_slide = presentation.slides[0] ``` ## **Clone a Slide** This example demonstrates how to clone an existing slide. The cloned slide is automatically added to the end of the slide collection. ```py import aspose.slides as slides def clone_slide(): with slides.Presentation("slide.pptx") as presentation: slide = presentation.slides[0] # Clone the slide; it will be added at the end of the presentation. cloned_slide = presentation.slides.add_clone(slide) presentation.save("slide_cloned.pptx", slides.export.SaveFormat.PPTX) ``` ## **Reorder Slides** You can change the order of slides by moving one to a new index. In this case, we move a slide to the first position. ```py import aspose.slides as slides def reorder_slide(): with slides.Presentation("slide.pptx") as presentation: slide = presentation.slides[1] # Move the slide to the first position (others shift down). presentation.slides.reorder(0, slide) presentation.save("slide_reordered.pptx", slides.export.SaveFormat.PPTX) ``` ## **Remove a Slide** To remove a slide, simply reference it and call `remove`. This example removes the first slide. ```py import aspose.slides as slides def remove_slide(): with slides.Presentation("slide.pptx") as presentation: slide = presentation.slides[0] # Remove the slide. presentation.slides.remove(slide) presentation.save("slide_removed.pptx", slides.export.SaveFormat.PPTX) ``` ## Related articles - [Master Slide](https://docs.aspose.com/slides/python-net/examples/elements/master-slide/) # SmartArt > Build and edit SmartArt in Python with Aspose.Slides: add nodes, change layouts and styles, convert to shapes with precision, and export for PPT, PPTX and ODP. Source: https://docs.aspose.com/slides/python-net/examples/elements/smart-art/ Updated: 2026-08-05 Shows how to add SmartArt graphics, access them, remove them, and change layouts using **Aspose.Slides for Python via .NET**. ## **Add SmartArt** Insert a SmartArt graphic using one of the built-in layouts. ```py import aspose.slides as slides def add_smart_art(): with slides.Presentation() as presentation: slide = presentation.slides[0] smart_art = slide.shapes.add_smart_art(50, 50, 400, 300, slides.smartart.SmartArtLayoutType.BASIC_PROCESS) presentation.save("smart_art.pptx", slides.export.SaveFormat.PPTX) ``` ## **Access SmartArt** Retrieve the first SmartArt object on a slide. ```py import aspose.slides as slides def access_smart_art(): with slides.Presentation("smart_art.pptx") as presentation: slide = presentation.slides[0] # Access the first SmartArt shape. first_smart_art = next(shape for shape in slide.shapes if isinstance(shape, slides.smartart.SmartArt)) ``` ## **Remove SmartArt** Delete a SmartArt shape from the slide. ```py import aspose.slides as slides def remove_smart_art(): with slides.Presentation("smart_art.pptx") as presentation: slide = presentation.slides[0] # Assuming the first shape is a SmartArt object. smart_art = slide.shapes[0] slide.shapes.remove(smart_art) presentation.save("smart_art_removed.pptx", slides.export.SaveFormat.PPTX) ``` ## **Change SmartArt Layout** Update the layout type of an existing SmartArt graphic. ```py import aspose.slides as slides def change_smart_art_layout(): with slides.Presentation("smart_art.pptx") as presentation: slide = presentation.slides[0] # Assuming the first shape is a SmartArt object. smart_art = slide.shapes[0] # Change the SmartArt layout. smart_art.layout = slides.smartart.SmartArtLayoutType.VERTICAL_PICTURE_LIST presentation.save("smart_art_changed.pptx", slides.export.SaveFormat.PPTX) ``` ## Related articles - [Manage PowerPoint SmartArt in Python](https://docs.aspose.com/slides/python-net/powerpoint-smartart/) - [Manage SmartArt in PowerPoint Presentations Using Python](https://docs.aspose.com/slides/python-net/manage-smartart/) - [Manage SmartArt Graphics in Presentations Using Python](https://docs.aspose.com/slides/python-net/manage-smartart-shape/) # Table > Create and format tables in Python with Aspose.Slides: insert data, merge cells, style borders, align content, and import/export for PPT, PPTX and ODP. Source: https://docs.aspose.com/slides/python-net/examples/elements/table/ Updated: 2026-08-05 Examples for adding tables, accessing them, removing them, and merging cells using **Aspose.Slides for Python via .NET**. ## **Add a Table** Create a simple table with two rows and two columns. ```py import aspose.slides as slides def add_table(): with slides.Presentation() as presentation: slide = presentation.slides[0] # Define column widths and row heights. widths = [80, 80] heights = [30, 30] # Add a table shape to the slide. table = slide.shapes.add_table(50, 50, widths, heights) presentation.save("table.pptx", slides.export.SaveFormat.PPTX) ``` ## **Access a Table** Retrieve the first table shape on the slide. ```py import aspose.slides as slides def access_table(): with slides.Presentation("table.pptx") as presentation: slide = presentation.slides[0] # Access the first table on the slide. first_table = next(shape for shape in slide.shapes if isinstance(shape, slides.Table)) ``` ## **Remove a Table** Delete a table from a slide. ```py import aspose.slides as slides def remove_table(): with slides.Presentation("table.pptx") as presentation: slide = presentation.slides[0] # Assuming the first shape is a table. table = slide.shapes[0] # Remove the table from the slide. slide.shapes.remove(table) presentation.save("table_removed.pptx", slides.export.SaveFormat.PPTX) ``` ## **Merge Table Cells** Merge adjacent cells of a table into a single cell. ```py import aspose.slides as slides def merge_table_cells(): with slides.Presentation("table.pptx") as presentation: slide = presentation.slides[0] # Assuming the first shape is a table. table = slide.shapes[0] # Merge the two cells of the first row into one. table.merge_cells(table.rows[0][0], table.rows[0][1], False) presentation.save("cells_merged.pptx", slides.export.SaveFormat.PPTX) ``` ## Related articles - [Create and Customize PowerPoint Tables in Python](https://docs.aspose.com/slides/python-net/powerpoint-table/) - [Manage Table Cells in Presentations with Python](https://docs.aspose.com/slides/python-net/manage-cells/) - [Manage Presentation Tables with Python](https://docs.aspose.com/slides/python-net/manage-table/) # Text Box > Create and format text boxes in Python with Aspose.Slides: set fonts, alignment, wrapping, autofit, and links to polish slides for PowerPoint and OpenDocument. Source: https://docs.aspose.com/slides/python-net/examples/elements/text-box/ Updated: 2026-08-05 In Aspose.Slides, a **text box** is represented by an `AutoShape`. Nearly any shape can contain text, but a typical text box has no fill or border and displays only text. This guide explains how to add, access, and remove text boxes programmatically. ## **Add a Text Box** A text box is simply an `AutoShape` with no fill or border and some formatted text. Here's how to create one: ```py import aspose.pydrawing as drawing import aspose.slides as slides def add_text_box(): with slides.Presentation() as presentation: slide = presentation.slides[0] # Create a rectangle shape (defaults to filled with border and no text). text_box = slide.shapes.add_auto_shape(slides.ShapeType.RECTANGLE, 50, 75, 150, 100) # Remove fill and border to make it look like a typical text box. text_box.fill_format.fill_type = slides.FillType.NO_FILL text_box.line_format.fill_format.fill_type = slides.FillType.NO_FILL # Set text formatting. paragraph_format = text_box.text_frame.paragraphs[0].paragraph_format paragraph_format.default_portion_format.fill_format.fill_type = slides.FillType.SOLID paragraph_format.default_portion_format.fill_format.solid_fill_color.color = drawing.Color.black # Assign the actual text content. text_box.text_frame.text = "Some text..." presentation.save("text_box.pptx", slides.export.SaveFormat.PPTX) ``` > 💡 **Note:** Any `AutoShape` that contains a non-empty `TextFrame` can function as a text box. ## **Access Text Boxes by Content** To find all text boxes containing a specific keyword (e.g. "text"), iterate through the shapes and check their text: ```py import aspose.slides as slides def access_text_box(): with slides.Presentation("text_box.pptx") as presentation: slide = presentation.slides[0] for shape in slide.shapes: # Only AutoShapes can contain editable text. if isinstance(shape, slides.AutoShape): if "text" in shape.text_frame.text: # Do something with the matching text box. pass ``` ## **Remove Text Boxes by Content** This example finds and deletes all text boxes on the first slide that contain a specific keyword: ```py import aspose.slides as slides def remove_text_boxes(): with slides.Presentation("text_box.pptx") as presentation: slide = presentation.slides[0] # Find shapes to remove that are AutoShapes containing the word "text". shapes_to_remove = [ shape for shape in slide.shapes if isinstance(shape, slides.AutoShape) and "text" in shape.text_frame.text ] # Remove each matching shape from the slide. for shape in shapes_to_remove: slide.shapes.remove(shape) presentation.save("text_boxes_removed.pptx", slides.export.SaveFormat.PPTX) ``` > 💡 **Tip:** Always create a copy of the shape collection before modifying it during iteration to avoid collection modification errors. # VbaMacro > Work with VBA macros in Python using Aspose.Slides: add or edit projects and modules, sign or remove macros, and save presentations in PPT, PPTX and ODP. Source: https://docs.aspose.com/slides/python-net/examples/elements/vba-macro/ Updated: 2026-08-05 Illustrates how to add, access, and remove VBA macros using **Aspose.Slides for Python via .NET**. ## **Add a VBA Macro** Create a presentation with a VBA project and a simple macro module. ```py import aspose.slides as slides def add_vba_macro(): with slides.Presentation() as presentation: # Initialize a VBA project. presentation.vba_project = slides.vba.VbaProject() # Add an empty module named "Module". module = presentation.vba_project.modules.add_empty_module("Module") module.source_code = "Sub Test()\n MsgBox \"Hi\" \nEnd Sub" presentation.save("vba_macro.pptm", slides.export.SaveFormat.PPTM) ``` ## **Access a VBA Macro** Retrieve the first module from the VBA project. ```py import aspose.slides as slides def access_vba_macro(): with slides.Presentation("vba_macro.pptm") as presentation: first_module = presentation.vba_project.modules[0] ``` ## **Remove a VBA Macro** Delete a module from the VBA project. ```py import aspose.slides as slides def remove_vba_macro(): with slides.Presentation("vba_macro.pptm") as presentation: # Assuming the presentation contains a VBA project and at least one module. module = presentation.vba_project.modules[0] # Remove the module from the project. presentation.vba_project.modules.remove(module) presentation.save("vba_macro_removed.pptm", slides.export.SaveFormat.PPTM) ``` ## Related articles - [Manage VBA Projects in Presentations with Python](https://docs.aspose.com/slides/python-net/presentation-via-vba/) # Video > Work with video in Python using Aspose.Slides: insert, replace, trim, set poster frames and playback options, and export presentations for PPT, PPTX and ODP. Source: https://docs.aspose.com/slides/python-net/examples/elements/video/ Updated: 2026-08-05 Shows how to embed video frames and set playback options using **Aspose.Slides for Python via .NET**. ## **Add a Video Frame** Insert a video frame linked to a video file. ```py import aspose.slides as slides def add_video(): with slides.Presentation() as presentation: slide = presentation.slides[0] # Add a video frame. video_frame = slide.shapes.add_video_frame(50, 50, 320, 240, "video.mp4") presentation.save("video.pptx", slides.export.SaveFormat.PPTX) ``` ## **Access a Video Frame** Retrieve the first video frame added to a slide. ```py import aspose.slides as slides def access_video(): with slides.Presentation("video.pptx") as presentation: slide = presentation.slides[0] # Access the first video frame on the slide. first_video = next(shape for shape in slide.shapes if isinstance(shape, slides.VideoFrame)) ``` ## **Remove a Video Frame** Delete a video frame from the slide. ```py import aspose.slides as slides def remove_video(): with slides.Presentation("video.pptx") as presentation: slide = presentation.slides[0] # Assuming the first shape is a video frame. video_frame = slide.shapes[0] # Remove the video frame. slide.shapes.remove(video_frame) presentation.save("video_removed.pptx", slides.export.SaveFormat.PPTX) ``` ## **Set Video Playback** Configure the video to play automatically when the slide is displayed. ```py import aspose.slides as slides def set_video_playback(): with slides.Presentation("video.pptx") as presentation: slide = presentation.slides[0] # Assuming the first shape is a video frame. video_frame = slide.shapes[0] # Configure the video to play automatically. video_frame.play_mode = slides.VideoPlayModePreset.AUTO presentation.save("video_playback.pptx", slides.export.SaveFormat.PPTX) ``` ## Related articles - [Audio](https://docs.aspose.com/slides/python-net/examples/elements/audio/) - [Picture](https://docs.aspose.com/slides/python-net/examples/elements/picture/) - [OleObject](https://docs.aspose.com/slides/python-net/examples/elements/ole-object/) # Integrate Excel Data into PowerPoint Presentations > Read data from Excel workbooks in Aspose.Slides using the ExcelDataWorkbook API. Load sheets and cells and use values to generate data-driven PowerPoint presentations. Source: https://docs.aspose.com/slides/python-net/excel-integration/ Updated: 2026-08-12 ## **Introduction** PowerPoint presentations are a powerful way to display and communicate information. They are often used in conjunction with Excel workbooks, where Excel serves as an excellent source of structured data and PowerPoint excels at visualizing that data for an audience. There are many practical scenarios where combining Excel and PowerPoint is essential: mail merges, populating data tables, generating one slide per data record (batch slide generation), creating training materials, and consolidating multiple Excel reports into a single presentation, to name a few. Until now, implementing such features with the Aspose.Slides API required relying on third-party solutions like Aspose.Cells. While these tools are robust, they can be overly complex and costly for users who only need basic data integration functionality. ## **How It Works** To make working with Excel data easier and more streamlined, Aspose.Slides has introduced new classes for reading data from Excel workbooks and importing content into a presentation. This feature opens up powerful new possibilities for API users who want to leverage Excel as a data source within their presentation workflows. The new functionality is designed for general-purpose data access and is not integrated into the Presentation Document Object Model (DOM). That means *it does not allow editing or saving Excel files* — its sole purpose is to open workbooks and navigate through their content to retrieve cell data. At the core of this feature is the new [ExcelDataWorkbook](https://reference.aspose.com/slides/python-net/aspose.slides.excel/exceldataworkbook/) class. This class allows you to load an Excel workbook from a local file or a stream. Once loaded, it provides several overloads of the [get_cell](https://reference.aspose.com/slides/python-net/aspose.slides.excel/exceldataworkbook/get_cell/) method, which you can use to retrieve specific cells by their position (e.g., row and column indices or named ranges). Each call to [get_cell](https://reference.aspose.com/slides/python-net/aspose.slides.excel/exceldataworkbook/get_cell/) returns an instance of the [ExcelDataCell](https://reference.aspose.com/slides/python-net/aspose.slides.excel/exceldatacell/) class. This object represents a single cell in the Excel workbook and gives you access to its value in a simple and intuitive way. #### **Import an Excel Chart** The next step to extend functionality is the [ExcelWorkbookImporter](https://reference.aspose.com/slides/python-net/aspose.slides.importing/excelworkbookimporter/) class. This utility class provides functionality for importing content from an Excel workbook into a presentation. It contains several overloads of the [add_chart_from_workbook](https://reference.aspose.com/slides/python-net/aspose.slides.importing/excelworkbookimporter/add_chart_from_workbook/) method, which help you to retrieve the selected chart from the specified Excel workbook and add it to the end of the given shape collection at the specified coordinates. #### **Import an Excel Table** The [ExcelWorkbookImporter](https://reference.aspose.com/slides/python-net/aspose.slides.importing/excelworkbookimporter/) class also provides several overloads of the [ExcelWorkbookImporter.add_table_from_workbook](https://reference.aspose.com/slides/python-net/aspose.slides.importing/excelworkbookimporter/add_table_from_workbook/) method. These methods allow you to import a specified cell range from a specified worksheet and add it as a table to the end of the given shape collection at the specified coordinates. In short, it's a lightweight and straightforward API for reading Excel data — exactly what many developers need without the overhead of a full spreadsheet processing library. ## **Let's Code** ### **Mail Merge Scenario Example** In the following example, we'll implement a simple Mail Merge scenario by generating multiple presentations based on data stored in an Excel workbook. To get started, we need two things: 1. An Excel workbook containing the data ![Excel data example](https://docs.aspose.com/slides/python-net/excel-integration/example1_image0.png) 2. PowerPoint presentation template ![PowerPoint template example](https://docs.aspose.com/slides/python-net/excel-integration/example1_image1.png) ```py import aspose.slides as slides # Load the Excel workbook with employee data. workbook = slides.excel.ExcelDataWorkbook("TemplateData.xlsx") worksheet_index = 0 # Load the presentation template. with slides.Presentation("PresentationTemplate.pptx") as template_presentation: # Loop through Excel rows (excluding header at row 0). for row_index in range(1, 5): # Create a new presentation for each employee record. with slides.Presentation() as employee_presentation: # Remove the default blank slide. employee_presentation.slides.remove_at(0) # Clone the template slide into the new presentation. slide = employee_presentation.slides.add_clone(template_presentation.slides[0]) # Get paragraphs from the target shape (assumes shape index 1 is used). paragraphs = slide.shapes[1].text_frame.paragraphs # Replace the placeholders with data from Excel. employee_name = workbook.get_cell(worksheet_index, row_index, 0).value name_portion = paragraphs[0].portions[0] name_portion.text = name_portion.text.replace("{{EmployeeName}}", employee_name) department = workbook.get_cell(worksheet_index, row_index, 1).value department_portion = paragraphs[1].portions[0] department_portion.text = department_portion.text.replace("{{Department}}", department) # Numeric Excel cells are returned as floats, so convert the whole number back to an integer. years_of_service = str(int(workbook.get_cell(worksheet_index, row_index, 2).value)) years_portion = paragraphs[2].portions[0] years_portion.text = years_portion.text.replace("{{YearsOfService}}", years_of_service) # Save the personalized presentation to a separate file. employee_presentation.save(f"{employee_name} Report.pptx", slides.export.SaveFormat.PPTX) ``` ![Result](https://docs.aspose.com/slides/python-net/excel-integration/example1_image2.png) ### **Excel Table Example** In the second example, we simply copy data from an Excel table and display it on a PowerPoint slide in a more visually appealing format. In this example, we reuse the same Excel workbook from the first example, which contains a simple employee table. ```py import aspose.slides as slides # Load the Excel workbook containing the employee data. workbook = slides.excel.ExcelDataWorkbook("TemplateData.xlsx") worksheet_index = 0 # Create a new PowerPoint presentation. with slides.Presentation() as presentation: # Add a table shape to the first slide. table = presentation.slides[0].shapes.add_table( 50, 200, [200, 200, 200], [30, 30, 30, 30, 30] ) # Fill the PowerPoint table with data from the Excel workbook. for row_index in range(0, 5): for column_index in range(0, 3): value = workbook.get_cell(worksheet_index, row_index, column_index).value # Numeric Excel cells are returned as floats, so show whole numbers without a decimal part. cell_value = str(int(value)) if isinstance(value, float) and value.is_integer() else str(value) table.columns[column_index][row_index].text_frame.text = cell_value # Save the resulting presentation to a file. presentation.save("Table.pptx", slides.export.SaveFormat.PPTX) ``` ![Result](https://docs.aspose.com/slides/python-net/excel-integration/example2_image0.png) ### **Import an Excel Chart Example** In this example, we import a chart from the first worksheet of the Excel workbook used in the previous example. The chart will link to the external workbook in the resulting presentation. First, we add a Pie chart to the Excel workbook based on the employees table. ![Excel Chart example](https://docs.aspose.com/slides/python-net/excel-integration/example3_image0.png) ```py import aspose.slides as slides # Create a new PowerPoint presentation. with slides.Presentation() as presentation: # Get the shapes collection of the first slide. shapes = presentation.slides[0].shapes # Import the chart named "Chart 1" from the first sheet of the workbook and add it to the shapes collection. slides.importing.ExcelWorkbookImporter.add_chart_from_workbook( shapes, 10, 10, "TemplateData.xlsx", "Sheet1", "Chart 1", False) # Save the resulting presentation to a file. presentation.save("Chart.pptx", slides.export.SaveFormat.PPTX) ``` ![Result](https://docs.aspose.com/slides/python-net/excel-integration/example3_image1.png) ### **Import All Excel Charts Example** Let's imagine you have an Excel workbook full of charts and you need to import them all into a presentation. Each chart should be placed on a new slide. The following code iterates through all worksheets in the source Excel file, extracts the charts from each worksheet, and adds each chart to a separate slide using a blank slide layout. In the resulting presentation, only the chart data will be embedded, not the entire workbook. ```py import aspose.slides as slides # Load the Excel workbook containing the employee data. workbook = slides.excel.ExcelDataWorkbook("ExcelWithCharts.xlsx") # Create a new PowerPoint presentation. with slides.Presentation() as presentation: # Retrieve the blank slide layout. blank_layout = presentation.layout_slides.get_by_type(slides.SlideLayoutType.BLANK) # Get the names of all worksheets contained in the Excel workbook. worksheet_names = workbook.get_worksheet_names() for name in worksheet_names: # Retrieve a dictionary that maps chart indexes to chart names for the worksheet. worksheet_charts = workbook.get_charts_from_worksheet(name) for chart in worksheet_charts: # Add a new slide using the blank layout. slide = presentation.slides.add_empty_slide(blank_layout) # Import the specified chart from the Excel workbook into the slide's shapes collection. slides.importing.ExcelWorkbookImporter.add_chart_from_workbook( slide.shapes, 10, 10, workbook, name, chart.key, False) # Save the resulting presentation to a file. presentation.save("Charts.pptx", slides.export.SaveFormat.PPTX) ``` ### **Import an Excel Table Example** In this example, we import a formatted table from an Excel worksheet directly into a PowerPoint presentation. The source Excel worksheet contains a formatted table with employee data: ![Excel table example](https://docs.aspose.com/slides/python-net/excel-integration/example4_image0.png) ```py import aspose.slides as slides # Create a new PowerPoint presentation. with slides.Presentation() as presentation: # Get the shapes collection of the first slide. shapes = presentation.slides[0].shapes # Import the table from the first sheet of the workbook and add it to the shapes collection. slides.importing.ExcelWorkbookImporter.add_table_from_workbook( shapes, 10, 10, "TemplateData.xlsx", "Sheet1", "A1:C5") # Save the resulting presentation to a file. presentation.save("FormattedTable.pptx", slides.export.SaveFormat.PPTX) ``` ![Result](https://docs.aspose.com/slides/python-net/excel-integration/example4_image1.png) ## **Summary** This mechanism, available directly in Aspose.Slides, combines working with Excel data and presentations in one place. It allows you to create slides with visual charts and data presented as Excel tables - without any additional libraries or complex integrations. # Export Presentation Charts with Python > Learn how to export presentation charts with Aspose.Slides for Python via .NET, supporting PPT, PPTX and ODP formats, and streamline reporting into any workflow. Source: https://docs.aspose.com/slides/python-net/export-chart/ Updated: 2026-08-02 ## **Overview** Aspose.Slides allows you to export a chart from a presentation as an image. This article shows how to get an image from a chart and save it, which is useful when you need to reuse chart visuals outside a PowerPoint presentation. ## **Get Chart Image** Aspose.Slides for Python via .NET provides support for extracting image of specific chart. Below sample example is given.  ```py import aspose.slides.charts as charts import aspose.slides as slides with slides.Presentation("test.pptx") as presentation: slide = presentation.slides[0] chart = slide.shapes.add_chart(charts.ChartType.CLUSTERED_COLUMN, 50, 50, 600, 400) with chart.get_image() as image: image.save("image.png", slides.ImageFormat.PNG) ``` ## **FAQ** ### Can I export a chart as a vector (SVG) instead of a raster image? Yes. A chart is a shape, and its contents can be saved to SVG using the [shape-to-SVG saving method](https://reference.aspose.com/slides/python-net/aspose.slides.charts/chart/write_as_svg/). ### How can I set the exact size of the exported chart in pixels? Use the image-rendering overloads that let you specify size or scale—the library supports rendering objects with given dimensions/scale. ### What should I do if fonts in labels and the legend look wrong after export? [Load the required fonts](https://docs.aspose.com/slides/python-net/custom-font/) via [FontsLoader](https://reference.aspose.com/slides/python-net/aspose.slides/fontsloader/) so the chart rendering preserves metrics and text appearance. ### Does export honor the PowerPoint theme, styles, and effects? Yes. Aspose.Slides’ renderer follows the presentation’s formatting (themes, styles, fills, effects), so the chart’s appearance is preserved. ### Where can I find available rendering/export capabilities beyond chart images? See the export section of the [API](https://reference.aspose.com/slides/python-net/aspose.slides.export/)/[documentation](https://docs.aspose.com/slides/python-net/convert-powerpoint/) for output targets ([PDF](https://docs.aspose.com/slides/python-net/convert-powerpoint-to-pdf/), [SVG](https://docs.aspose.com/slides/python-net/render-a-slide-as-an-svg-image/), [XPS](https://docs.aspose.com/slides/python-net/convert-powerpoint-to-xps/), [HTML](https://docs.aspose.com/slides/python-net/convert-powerpoint-to-html/), etc.) and related rendering options. # Convert Presentations to HTML5 in Python > Export PowerPoint & OpenDocument presentations to responsive HTML5 with Aspose.Slides for Python via .NET. Preserve formatting, animations, and interactivity. Source: https://docs.aspose.com/slides/python-net/export-to-html5/ Updated: 2026-10-05 ## **Overview** This article explains how to convert PowerPoint presentations to HTML5 using Aspose.Slides for Python via .NET. It covers basic export, control of shape animations and slide transitions, and comment layout. It also compares HTML5 output with the SVG-based output of standard HTML export. ## **Export PowerPoint to HTML5** The following example loads a presentation from the working directory and saves it in HTML5 format. It uses the default export settings; the next example shows how to control animation playback explicitly. Replace the input path with the path to your presentation. ```python import aspose.slides as slides with slides.Presentation("pres.pptx") as presentation: presentation.save("pres.html", slides.export.SaveFormat.HTML5) ``` Besides the HTML document, the export writes supporting CSS and JavaScript files for slide styling, animations, effects, and navigation. Keep these files with the HTML document when moving or publishing the output. The generated page also loads jQuery and Anime.js from public CDNs; without them, slide navigation and animations do not run. To export without playing shape animations or slide transitions, set [animate_shapes](https://reference.aspose.com/slides/python-net/aspose.slides.export/html5options/animate_shapes/) and [animate_transitions](https://reference.aspose.com/slides/python-net/aspose.slides.export/html5options/animate_transitions/) to `False` in [Html5Options](https://reference.aspose.com/slides/python-net/aspose.slides.export/html5options/). These settings are independent, so you can enable one while disabling the other. The example exports the presentation with both types of animation disabled in the generated page. ```python import aspose.slides as slides html5_options = slides.export.Html5Options() html5_options.animate_shapes = False html5_options.animate_transitions = False with slides.Presentation("pres.pptx") as presentation: presentation.save("pres5.html", slides.export.SaveFormat.HTML5, html5_options) ``` ## **Export PowerPoint to HTML** The standard HTML export uses a different rendering approach: slide content is represented by SVG inside an HTML page. The following example converts a presentation to an HTML document using this rendering approach. ```python import aspose.slides as slides with slides.Presentation("pres.pptx") as presentation: presentation.save("pres.html", slides.export.SaveFormat.HTML) ``` The simplified markup below illustrates the structure of the generated page. The SVG element contains the rendered slide content; the placeholder text represents that content and is not literal export output. ```html
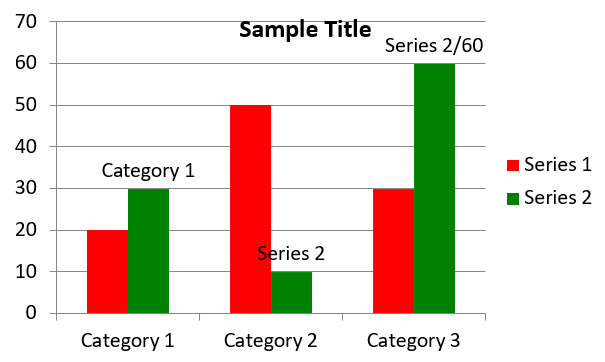
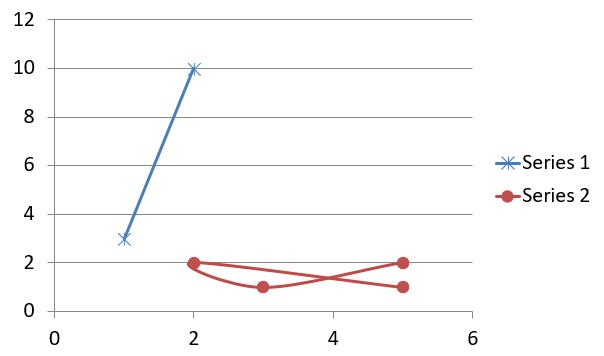
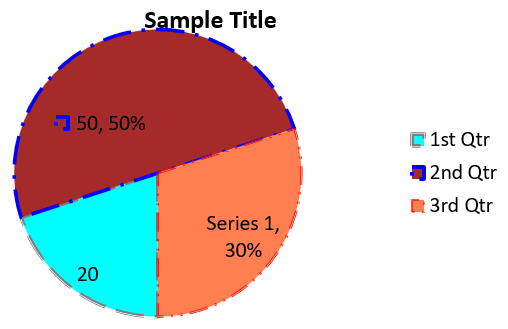
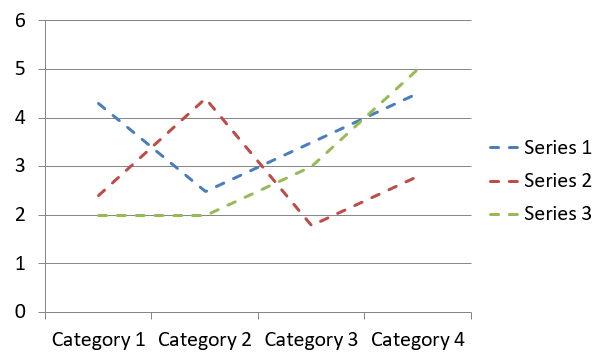
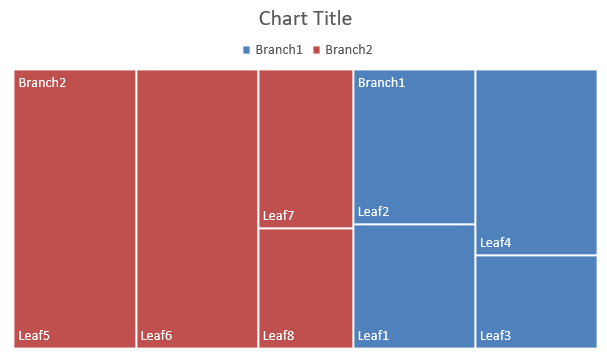
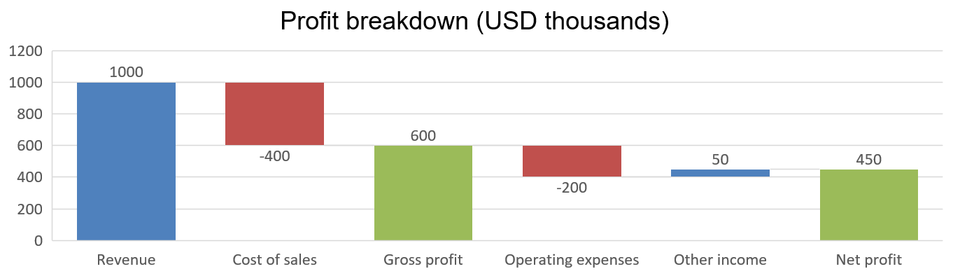
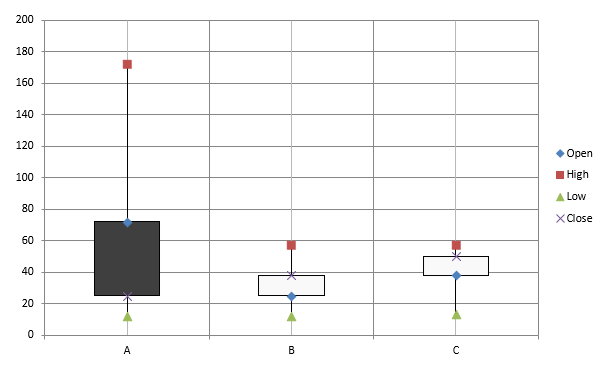
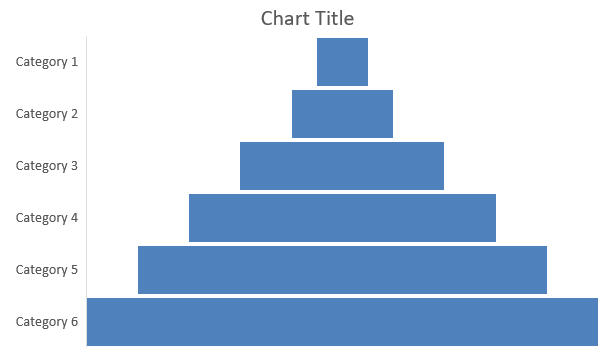
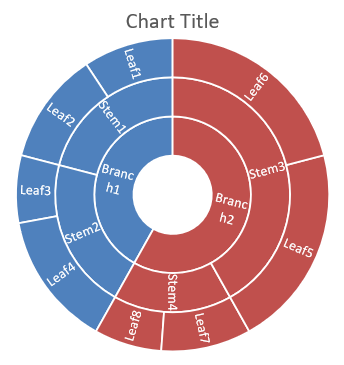
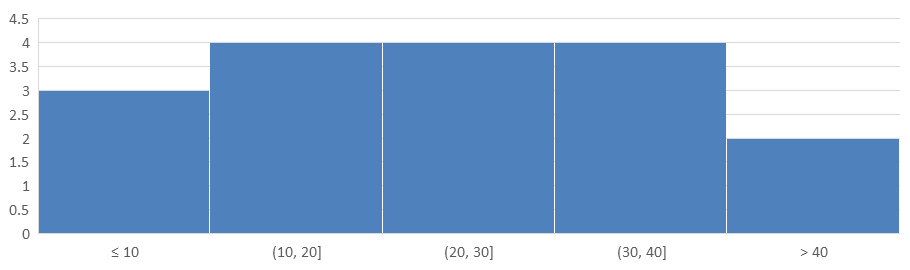
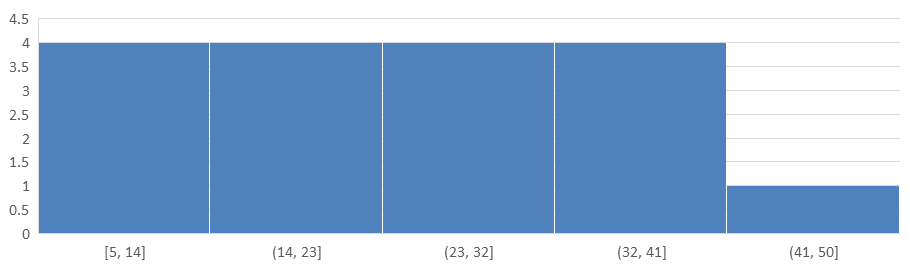
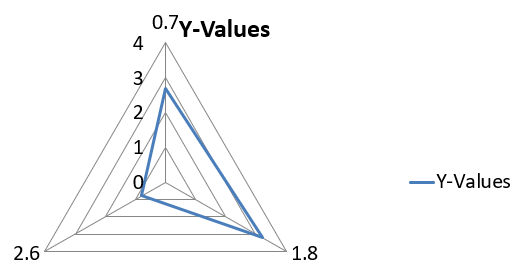
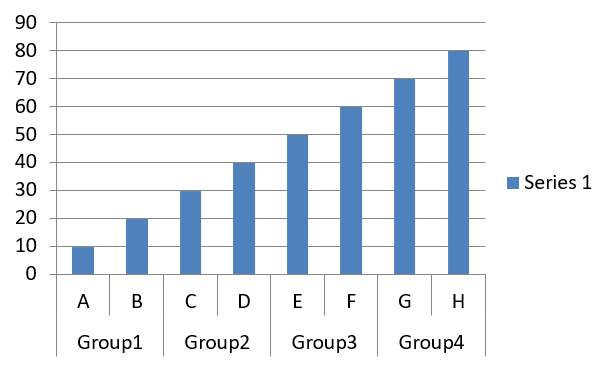

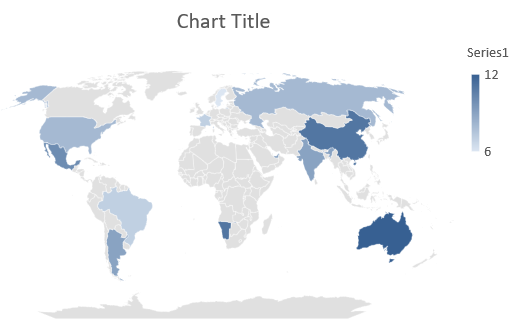
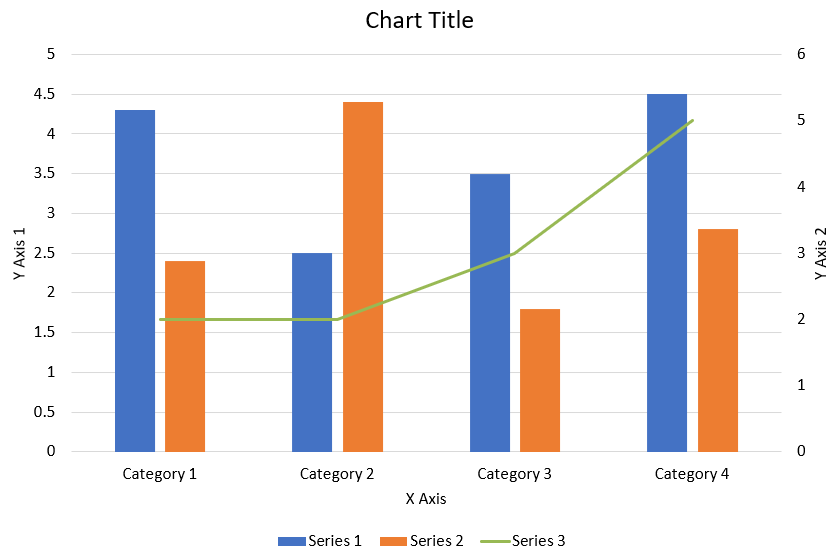
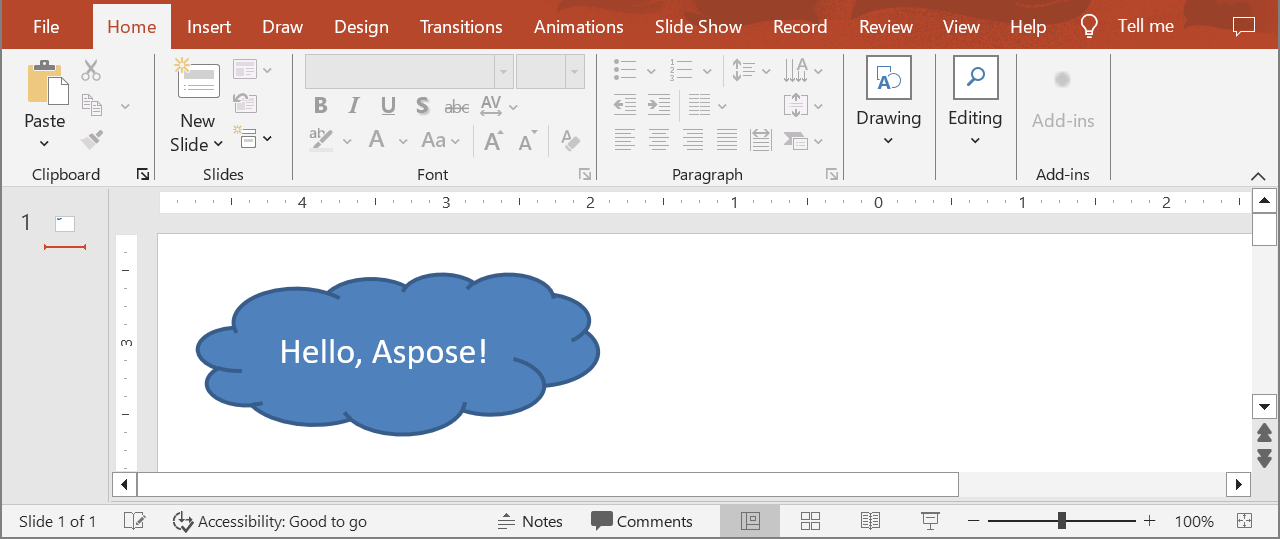
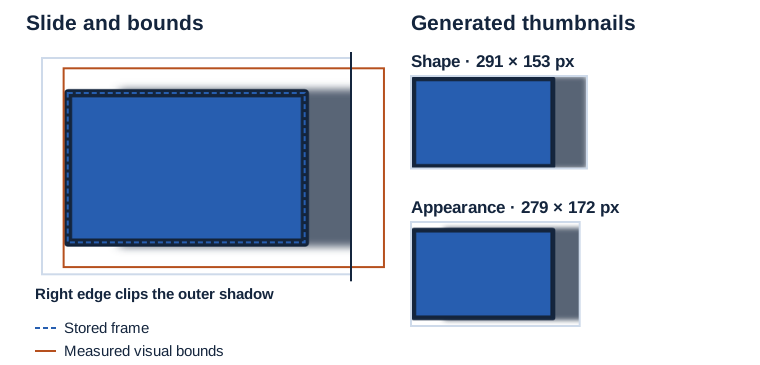
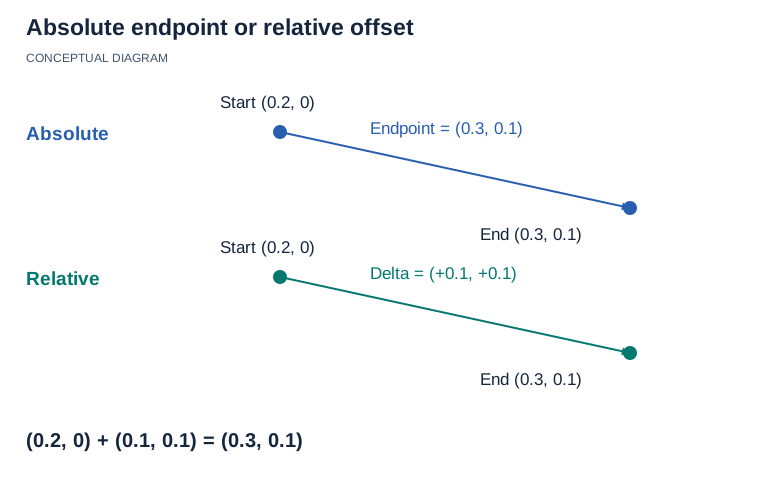
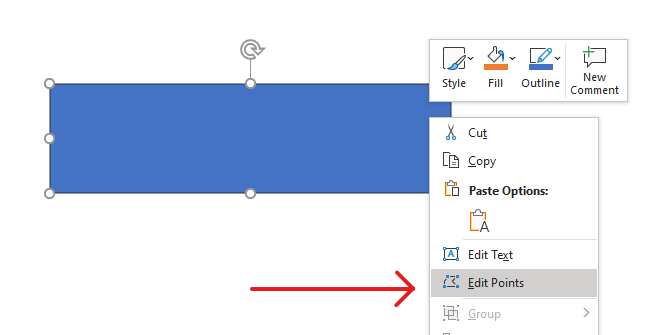



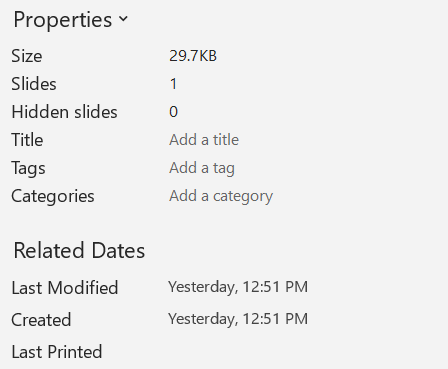
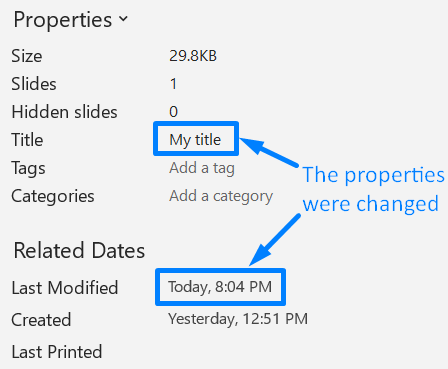
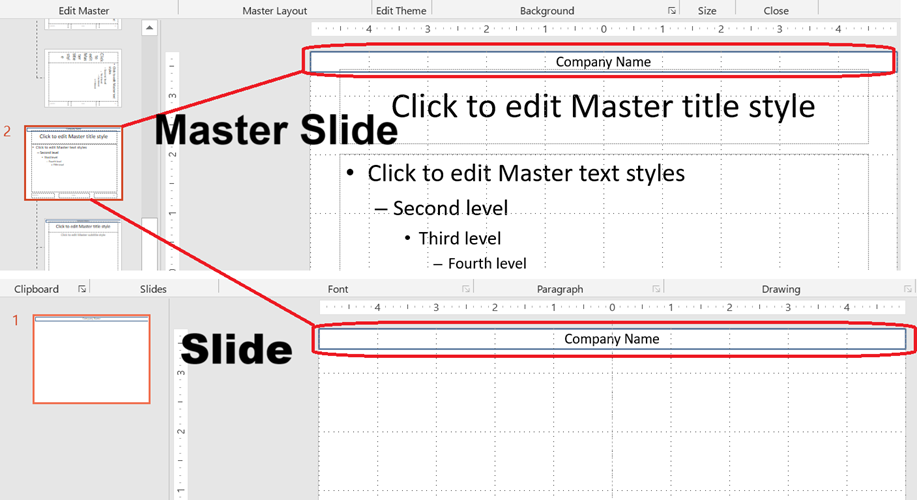
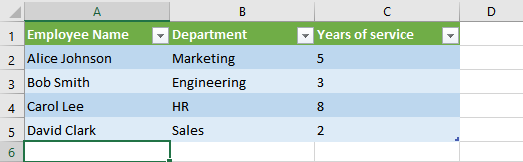
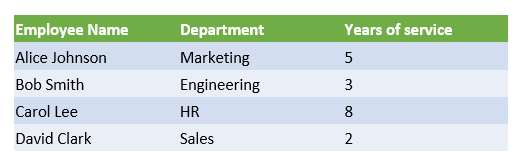
THE SLIDE CONTENT GOES HERE
``` The SVG-based export does not expose PowerPoint shapes as individual HTML elements. Use HTML5 export when you need the shape-animation and slide-transition options demonstrated in this article. ## **Export PowerPoint to HTML5 Slide View** HTML5 export produces a page for viewing and navigating the presentation slides in a browser. This example enables both [animate_shapes](https://reference.aspose.com/slides/python-net/aspose.slides.export/html5options/animate_shapes/) and [animate_transitions](https://reference.aspose.com/slides/python-net/aspose.slides.export/html5options/animate_transitions/) so that the exported slide view can play effects from the source presentation. Use a presentation that already contains shape animations and slide transitions to see the effect of these settings. Enabling them does not add new effects to slides that have none. After export, open the generated HTML5 document in a browser with its supporting files available. ```python import aspose.slides as slides html5_options = slides.export.Html5Options() html5_options.animate_shapes = True html5_options.animate_transitions = True with slides.Presentation("pres.pptx") as presentation: presentation.save("HTML5-slide-view.html", slides.export.SaveFormat.HTML5, html5_options) ``` ## **Convert a Presentation to an HTML5 Document with Comments** You can include existing slide comments in HTML5 output so that readers can see feedback alongside the slide content. The example in this section expects the source presentation to contain comments, as illustrated below. It exports those comments; it does not create new ones. ![Two comments on the presentation slide](https://docs.aspose.com/slides/python-net/export-to-html5/two_comments_pptx.png) Assign a [NotesCommentsLayoutingOptions](https://reference.aspose.com/slides/python-net/aspose.slides.export/notescommentslayoutingoptions/) object to the [slides_layout_options](https://reference.aspose.com/slides/python-net/aspose.slides.export/html5options/slides_layout_options/) property of [Html5Options](https://reference.aspose.com/slides/python-net/aspose.slides.export/html5options/). Set [comments_position](https://reference.aspose.com/slides/python-net/aspose.slides.export/notescommentslayoutingoptions/comments_position/) to `RIGHT` from the [CommentsPositions](https://reference.aspose.com/slides/python-net/aspose.slides.export/commentspositions/) enumeration to place the comments to the right of each slide. The following example exports the presentation to HTML5 with this comment layout. A presentation without comments will have no comment text to display. ```python import aspose.slides as slides layout_options = slides.export.NotesCommentsLayoutingOptions() layout_options.comments_position = slides.export.CommentsPositions.RIGHT html5_options = slides.export.Html5Options() html5_options.slides_layout_options = layout_options with slides.Presentation("sample.pptx") as presentation: presentation.save("output.html", slides.export.SaveFormat.HTML5, html5_options) ``` The image below shows the exported HTML5 document with the comments displayed beside the slide. ![The comments in the output HTML5 document](https://docs.aspose.com/slides/python-net/export-to-html5/two_comments_html5.png) ## **Exclude JavaScript Hyperlinks During Export** Suppose `hyperlinks.pptx` contains linked text with a `javascript:alert('Hello')` target and an ordinary `https://example.com/` link. To exclude the JavaScript hyperlink during export, set [Html5Options.skip_java_script_links](https://reference.aspose.com/slides/python-net/aspose.slides.export/html5options/skip_java_script_links/) to `True`. The default is `False`, so these links are not filtered unless you enable the option. The following example loads the presentation from the working directory and exports it using [Html5Options](https://reference.aspose.com/slides/python-net/aspose.slides.export/html5options/): ```python import aspose.slides as slides html5_options = slides.export.Html5Options() html5_options.skip_java_script_links = True with slides.Presentation("hyperlinks.pptx") as presentation: presentation.save("filtered-html5.html", slides.export.SaveFormat.HTML5, html5_options) ``` The exported file omits the JavaScript hyperlink while retaining its text and the ordinary HTTPS link. The source presentation is unchanged. This option filters JavaScript hyperlinks; it does not remove all scripts or other active content, nor does it guarantee CSP compliance. For example, HTML5 output still includes scripts for slide navigation and animations. ## **FAQ** **Can I control whether object animations and slide transitions will play in HTML5?** Yes, HTML5 export provides separate options to enable or disable [shape animations](https://reference.aspose.com/slides/python-net/aspose.slides.export/html5options/animate_shapes/) and [slide transitions](https://reference.aspose.com/slides/python-net/aspose.slides.export/html5options/animate_transitions/). **Are comments supported, and where can they be placed relative to the slide?** Yes, existing comments can be included in HTML5 output and positioned (for example, to the right of the slide) through [layout settings](https://reference.aspose.com/slides/python-net/aspose.slides.export/html5options/slides_layout_options/) for notes and comments. **Can I skip links that invoke JavaScript for security or CSP reasons?** Yes, the [skip_java_script_links](https://reference.aspose.com/slides/python-net/aspose.slides.export/html5options/skip_java_script_links/) setting allows you to skip hyperlinks with JavaScript calls during saving. The default is `False`. See [Exclude JavaScript Hyperlinks During Export](https://docs.aspose.com/slides/python-net/export-to-html5/#exclude-javascript-hyperlinks-during-export) for an HTML5 export example and the scope of the filter. This setting does not remove the JavaScript used by the HTML5 viewer for navigation and animations. # Export Presentations to XAML with Python > Convert PowerPoint and OpenDocument slides to XAML with Python using Aspose.Slides—quick, Office-free solution that keeps your layout intact. Source: https://docs.aspose.com/slides/python-net/export-to-xaml/ Updated: 2026-09-16 ## **Overview** This article explains how to export PowerPoint presentations to XAML using Aspose.Slides. It includes a brief introduction to XAML, shows how to save a presentation to XAML with default settings, and demonstrates how to customize the export through [XamlOptions](https://reference.aspose.com/slides/python-net/aspose.slides.export.xaml/xamloptions/), including exporting hidden slides. The article also answers a few common questions related to fallback fonts, XAML stack compatibility, and hidden slide export behavior. ## **About XAML** XAML is an XML-based markup language used to describe user interfaces in frameworks such as WPF (Windows Presentation Foundation), UWP (Universal Windows Platform), and Xamarin.Forms. You can work with XAML files in a visual designer or write and edit the markup directly. ## **Export Presentations to XAML With Default Options** The following Python example shows how to export a presentation to XAML with default settings: ```python import aspose.slides as slides with slides.Presentation("pres.pptx") as presentation: xaml_options = slides.export.xaml.XamlOptions() presentation.save(xaml_options) ``` By default, the exported slides are saved in a `pres` subfolder of the process's current working directory, as returned by [os.getcwd](https://docs.python.org/3/library/os.html#os.getcwd). The folder is created automatically, and any required images are saved there as well. The output folder name is taken from the source file name without its extension. For `pres.pptx`, the output files are named `pres/Slide_1.xaml`, `pres/Slide_2.xaml`, and so on. Even if you pass an absolute path to the input presentation, the output folder is created relative to the current working directory, rather than alongside the input file. ## **Export Presentations to XAML With Custom Options** Use the [XamlOptions](https://reference.aspose.com/slides/python-net/aspose.slides.export.xaml/xamloptions/) class to control how Aspose.Slides exports a presentation to XAML. To include hidden slides in the XAML output, set the [export_hidden_slides](https://reference.aspose.com/slides/python-net/aspose.slides.export.xaml/xamloptions/export_hidden_slides/) property to `True`, as shown in the following Python example: ```python import aspose.slides as slides with slides.Presentation("pres.pptx") as presentation: xaml_options = slides.export.xaml.XamlOptions() xaml_options.export_hidden_slides = True presentation.save(xaml_options) ``` ## **Capture All Generated XAML Artifacts** A XAML export can produce a XAML document for each exported slide plus separate images and supporting resources. Retain all these files when storing or transmitting an export. The examples below use the default file-system saver in a temporary directory, then collect the generated files. ### **Understand the Export Lifecycle** - Start the export with the XAML-specific [Presentation.save](https://reference.aspose.com/slides/python-net/aspose.slides/presentation/save/) overload that accepts XAML options. Read the generated files only after it returns successfully. - Preserve each artifact's relative path because XAML may reference resources using relative paths. - Read artifacts as bytes. Images and other binary resources must not be decoded as text. - Report overall success only after collection and any subsequent storage operation complete. Let storage errors reach the caller, and clean up partial output if persistence fails. [XamlOptions.export_hidden_slides](https://reference.aspose.com/slides/python-net/aspose.slides.export.xaml/xamloptions/export_hidden_slides/) defaults to `False`, which excludes hidden-slide XAML documents. Setting it to `True` includes them and any resources required for their export. Resource counts depend on the presentation; do not assume one file per slide. The examples temporarily change the process's current working directory, which affects all threads. Run each export in a dedicated worker process, or ensure that no other work in the process depends on the current directory during export. A unique temporary directory alone does not make concurrent exports in the same process safe. ### **Export to Memory and Inspect the Artifacts** This complete example loads `pres.pptx`, exports it to a temporary directory, collects every artifact in a dictionary of relative names and bytes, and prints its name, type, and byte count. It preserves the generated directory structure and removes the temporary files after collection. The input path is resolved before changing the working directory. ```python import os from pathlib import Path from tempfile import TemporaryDirectory import aspose.slides as slides def collect_xaml_artifacts(source_path, export_hidden_slides): source_path = Path(source_path).resolve() original_directory = Path.cwd() artifacts = {} with TemporaryDirectory(prefix="xaml-") as temporary_directory: try: os.chdir(temporary_directory) with slides.Presentation(str(source_path)) as presentation: options = slides.export.xaml.XamlOptions() options.export_hidden_slides = export_hidden_slides presentation.save(options) for artifact_path in Path(temporary_directory).rglob("*"): if artifact_path.is_file(): relative_path = artifact_path.relative_to(temporary_directory) artifacts[relative_path.as_posix()] = artifact_path.read_bytes() finally: os.chdir(original_directory) return artifacts artifacts = collect_xaml_artifacts("pres.pptx", True) inspect_xaml_text = False image_extensions = {".png", ".jpg", ".jpeg", ".gif", ".bmp", ".tif", ".tiff", ".svg"} for name, data in artifacts.items(): extension = Path(name).suffix.lower() if extension == ".xaml": kind = "slide XAML" elif extension in image_extensions: kind = "image" else: kind = "supporting resource" print(f"{name}: {len(data)} bytes ({kind})") # Decode only XAML, and only when textual inspection is needed. if extension == ".xaml" and inspect_xaml_text: print(data.decode("utf-8")) ``` Extension checks are useful for inspection; retain all artifacts, including unfamiliar resource types. Leave the bytes unchanged when storing or transmitting them. Decode only XAML that needs textual processing. This approach uses temporary disk space as well as memory for the collected export. ### **Package Collected Artifacts in a ZIP Archive** This independent example collects the export, validates its names, and writes the original bytes into a ZIP archive. A unique archive name separates export jobs. ZIP entries use forward slashes and retain relative directories. Unsafe names or names that collide after normalization reject the entire package before it is written. ```python from uuid import uuid4 from zipfile import ZIP_DEFLATED, ZipFile import os from pathlib import Path from tempfile import TemporaryDirectory import aspose.slides as slides def collect_xaml_artifacts(source_path, export_hidden_slides): source_path = Path(source_path).resolve() original_directory = Path.cwd() artifacts = {} with TemporaryDirectory(prefix="xaml-") as temporary_directory: try: os.chdir(temporary_directory) with slides.Presentation(str(source_path)) as presentation: options = slides.export.xaml.XamlOptions() options.export_hidden_slides = export_hidden_slides presentation.save(options) for artifact_path in Path(temporary_directory).rglob("*"): if artifact_path.is_file(): relative_path = artifact_path.relative_to(temporary_directory) artifacts[relative_path.as_posix()] = artifact_path.read_bytes() finally: os.chdir(original_directory) return artifacts def package_xaml(): artifacts = collect_xaml_artifacts("pres.pptx", False) entries = {} normalized_names = set() for name, data in artifacts.items(): entry_name = name.replace("\\", "/") segments = entry_name.split("/") unsafe_name = entry_name.startswith("/") or ":" in entry_name unsafe_name = unsafe_name or any(not segment.strip() or segment in {".", ".."} for segment in segments) normalized_name = entry_name.casefold() if unsafe_name or normalized_name in normalized_names: print(f"Export rejected: unsafe or duplicate artifact name: {name}") return normalized_names.add(normalized_name) entries[entry_name] = data archive_path = Path(f"xaml-{uuid4().hex}.zip") with ZipFile(archive_path, "x", compression=ZIP_DEFLATED) as archive: for name, data in entries.items(): archive.writestr(name, data) # The ZIP directory has been finalized before reporting success. print(f"Saved {len(entries)} artifacts to {archive_path}") package_xaml() ``` The example uses [ZipFile](https://docs.python.org/3/library/zipfile.html#zipfile.ZipFile) to write one local archive after collecting the temporary export. For remote storage, replace the archive-writing stage with uploads of the collected bytes. Use an export-job identifier plus the full relative artifact name as an object key, or store the job identifier, relative name, and binary data in a database row. Publish the job only after all uploads complete or the database transaction commits. Clean up partial output if persistence fails. For large presentations, process the temporary files one at a time after export instead of collecting all their bytes in a dictionary. This avoids an additional in-memory copy of the entire export, but does not eliminate the exporter's own memory requirements. ### **Preserve Resource Names and Verify References** - Normalize path separators when the destination requires it, but preserve relative directories. Do not keep only the final file name unless every generated name is known to be unique and resource references remain valid. - Apply destination-specific name validation. When writing loose files, reject absolute paths and traversal segments, resolve the destination, and verify that it stays beneath the intended export directory. Use an application-controlled directory without symbolic links that could redirect writes. - Use a separate storage namespace for each export job. Detect collisions after separator normalization and according to the destination's case-sensitivity rules. - Before publishing, parse each XAML document as XML and inspect its file-based resource references, such as image `Source` or `ImageSource` attributes. Resolve each relative URI against the containing XAML artifact's directory, normalize the resulting storage name, and confirm that the corresponding dictionary key, ZIP entry, or stored object exists. Treat external URIs and XAML markup expressions separately from relative file names. For example, if `pres/Slide_1.xaml` references `images/image1.png`, the stored resource must be available as `pres/images/image1.png`. Keeping just `image1.png` would break that relationship. For object storage, preserve the same layout beneath the job prefix and make those resource URLs accessible to the XAML consumer. Reopen the completed ZIP to verify entry names and resource bytes, and load representative slides in the target XAML environment to confirm that images resolve correctly. ## **FAQ** **How can I ensure predictable fonts if the original font is not available on the machine?** Set [default_regular_font](https://reference.aspose.com/slides/python-net/aspose.slides.export.xaml/xamloptions/default_regular_font/) in [XamlOptions](https://reference.aspose.com/slides/python-net/aspose.slides.export.xaml/xamloptions/) — it is used as a fallback font during export when the original is missing. This does not guarantee that the generated XAML references the fallback font or that the font is available on the target machine. Ensure that the fonts referenced by the XAML are available in the environment where it is displayed. **Is the exported XAML intended only for WPF, or can it be used in other XAML stacks as well?** Aspose.Slides exports WPF XAML through its public API. Compatibility with other XAML stacks, such as UWP and Xamarin.Forms, is not guaranteed. Test the generated markup in your target environment. **Are hidden slides supported, and how can I prevent them from being exported by default?** By default, hidden slides are not included. You can control this behavior via [export_hidden_slides](https://reference.aspose.com/slides/python-net/aspose.slides.export.xaml/xamloptions/export_hidden_slides/) in [XamlOptions](https://reference.aspose.com/slides/python-net/aspose.slides.export.xaml/xamloptions/) — keep it disabled if you do not need to export them. # Export Math Equations from Presentations in Python > Export math equations from PowerPoint presentations to LaTeX or MathML directly with Aspose.Slides for Python via .NET. Source: https://docs.aspose.com/slides/python-net/exporting-math-equations/ Updated: 2026-08-13 ## **Introduction** Aspose.Slides for Python via .NET allows you to export math equations from presentations. For example, you may need to extract equations from specific slides and reuse them in another program or platform. You can export equations directly to LaTeX or to MathML, a popular standard for mathematical content used on the web and in many applications. ## **Export Math Equations to LaTeX** Aspose.Slides can convert a PowerPoint math equation directly to LaTeX; an intermediate MathML file and an external converter are not required. A math equation is stored in a text frame as a [MathPortion](https://reference.aspose.com/slides/python-net/aspose.slides.mathtext/mathportion/). Use [MathPortion.math_paragraph](https://reference.aspose.com/slides/python-net/aspose.slides.mathtext/mathportion/math_paragraph/) to get a [MathParagraph](https://reference.aspose.com/slides/python-net/aspose.slides.mathtext/mathparagraph/), and then call [MathParagraph.to_latex](https://reference.aspose.com/slides/python-net/aspose.slides.mathtext/mathparagraph/to_latex/). The method returns a string that you can save, display, send to another application, or process further. The following example examines every text frame on every slide, finds all math portions, and writes each equation to a separate `.tex` file: ```py import aspose.slides as slides with slides.Presentation("equations.pptx") as presentation: for slide_number, slide in enumerate(presentation.slides, start=1): equation_number = 1 text_frames = slides.util.SlideUtil.get_all_text_boxes(slide) for text_frame in text_frames: for paragraph in text_frame.paragraphs: for portion in paragraph.portions: if not isinstance(portion, slides.mathtext.MathPortion): continue math_paragraph = portion.math_paragraph latex_path = f"slide_{slide_number}_equation_{equation_number}.tex" latex_text = math_paragraph.to_latex() with open(latex_path, "w", encoding="utf-8") as latex_file: latex_file.write(latex_text) equation_number += 1 ``` [SlideUtil.get_all_text_boxes](https://reference.aspose.com/slides/python-net/aspose.slides.util/slideutil/get_all_text_boxes/) returns all text frames found on a slide. The [MathPortion](https://reference.aspose.com/slides/python-net/aspose.slides.mathtext/mathportion/) type check separates genuine editable equations from ordinary text and images. LaTeX engines and document templates do not all support the same commands, packages, or Unicode characters. Test the returned string with the LaTeX engine used by your application. If a symbol or Office Math element has no suitable representation in that environment, replace it in the returned string with a project-specific command or skip the equation and record the issue for review. ## **Save Math Equations as MathML** Although humans can easily write LaTeX, MathML is typically generated automatically by applications. Because MathML is XML-based, programs can read and parse it reliably, so it is commonly used as an output and printing format across many fields. The following sample code shows how to export a math equation from a presentation to MathML: ```py import aspose.slides as slides import aspose.slides.mathtext as math with slides.Presentation() as presentation: slide = presentation.slides[0] auto_shape = slide.shapes.add_math_shape(0, 0, 500, 50) math_paragraph = auto_shape.text_frame.paragraphs[0].portions[0].math_paragraph math_paragraph.add( math.MathematicalText("a"). set_superscript("2"). join("+"). join(math.MathematicalText("b").set_superscript("2")). join("="). join(math.MathematicalText("c").set_superscript("2"))) with open("mathml.xml", "wb") as file_stream: math_paragraph.write_as_math_ml(file_stream) ``` ## **FAQ** **What exactly is exported to MathML—a paragraph or an individual formula block?** You can export either an entire math paragraph ([MathParagraph](https://reference.aspose.com/slides/python-net/aspose.slides.mathtext/mathparagraph/)) or an individual block ([MathBlock](https://reference.aspose.com/slides/python-net/aspose.slides.mathtext/mathblock/)) to MathML. Both types provide a method to write to MathML. **How can I tell that an object on a slide is a math formula rather than regular text or an image?** A formula lives in a [MathPortion](https://reference.aspose.com/slides/python-net/aspose.slides.mathtext/mathportion/) and has a [MathParagraph](https://reference.aspose.com/slides/python-net/aspose.slides.mathtext/mathparagraph/). Images and regular text portions without a [MathParagraph](https://reference.aspose.com/slides/python-net/aspose.slides.mathtext/mathparagraph/) are not exportable formulas. **Where does the MathML come from in a presentation—is it PowerPoint-specific or a standard?** The export targets standard MathML (XML). Aspose uses Presentation MathML—the presentation subset of the standard—which is widely used across applications and the web. **Is exporting formulas inside tables, SmartArt, groups, etc., supported?** Yes, if those objects contain text portions with a [MathParagraph](https://reference.aspose.com/slides/python-net/aspose.slides.mathtext/mathparagraph/) (i.e., genuine PowerPoint formulas), they are exported. If a formula is embedded as an image, it is not. **Does exporting to MathML modify the original presentation?** No. Writing MathML is a serialization of the formula’s content; it does not modify the presentation file. ## Related articles - [Add Math Equations to PowerPoint Presentations in Python](https://docs.aspose.com/slides/python-net/powerpoint-math-equations/) # Export Presentations to HTML with Externally Linked Images in Python > Export PowerPoint and OpenDocument presentations to HTML in Python using Aspose.Slides with images saved as external linked files. Source: https://docs.aspose.com/slides/python-net/exporting-presentations-to-html-with-externally-linked-images/ Updated: 2026-08-02 ## **Overview** By default, Aspose.Slides exports a presentation to a self-contained HTML file. Images and other resources are written directly into the HTML, usually as Base64 data. This is convenient when you need one portable file, but it is not always the best format for a website, a CMS, or a server-side conversion pipeline. Use externally linked images when you want to: - reduce the size of the HTML document; - cache images separately in a browser or CDN; - inspect, replace, compress, or post-process generated images after export; - keep the output structure closer to what a web application expects. For the general HTML conversion workflow, see [Convert PowerPoint Presentations to HTML](https://docs.aspose.com/slides/python-net/convert-powerpoint-to-html/). This article focuses on the image-linking part of the export. ## **How Linked Image Export Works** In .NET and Java, [ILinkEmbedController](https://reference.aspose.com/slides/python-net/aspose.slides.export/ilinkembedcontroller/) represents the callback interface used by the exporter to decide whether a resource should be embedded or linked. In Python via .NET, Python classes cannot currently implement this .NET callback interface directly, so the practical workflow is: 1. Export the presentation to HTML with [HtmlOptions](https://reference.aspose.com/slides/python-net/aspose.slides.export/htmloptions/). 1. Use [SlideImageFormat](https://reference.aspose.com/slides/python-net/aspose.slides.export/slideimageformat/) with [SVGOptions](https://reference.aspose.com/slides/python-net/aspose.slides.export/svgoptions/) so the slides are represented as SVG in the HTML. 1. Move Base64 image data from HTML `data:` URLs into separate files. 1. Replace the original `data:` URLs with relative links such as `assets/resource-1.jpg`. The file system path and the browser URL are separate concerns. For example, the sample below writes image files to `html-output/assets` on disk, while the HTML contains relative URLs such as `assets/resource-1.jpg`. A browser resolves those URLs relative to the HTML file that contains the link. ## **Export HTML with Linked Images** The following Python example creates an output directory, saves the HTML file there, stores extracted images in an `assets` subdirectory, and rewrites Base64 image URLs to relative links. The example extracts common Base64 image formats when Aspose.Slides provides a safe file extension. Data URLs that are not recognized remain embedded. ```python import base64 import os import re import aspose.slides as slides import aspose.slides.export as slides_export EXTENSIONS_BY_CONTENT_TYPE = { "image/jpeg": ".jpg", "image/png": ".png", "image/gif": ".gif", "image/bmp": ".bmp", "image/svg+xml": ".svg", "image/tiff": ".tiff", "image/x-emf": ".emf", "image/x-wmf": ".wmf", } DATA_URI_PATTERN = re.compile( r"data:(?P[-\w.+]+/[-\w.+]+);base64,(?P[A-Za-z0-9+/=\r\n]+)" ) def export_presentation_to_html_with_linked_images( input_file_path, output_directory, asset_directory_name="assets", ): asset_directory = os.path.join(output_directory, asset_directory_name) os.makedirs(output_directory, exist_ok=True) os.makedirs(asset_directory, exist_ok=True) html_options = slides_export.HtmlOptions() html_options.html_formatter = slides_export.HtmlFormatter.create_document_formatter("", False) html_options.slide_image_format = slides_export.SlideImageFormat.svg( slides_export.SVGOptions() ) html_file_path = os.path.join(output_directory, "presentation.html") with slides.Presentation(input_file_path) as presentation: presentation.save(html_file_path, slides_export.SaveFormat.HTML, html_options) externalize_base64_images(html_file_path, asset_directory, asset_directory_name) def externalize_base64_images(html_file_path, asset_directory, asset_directory_name): with open(html_file_path, "r", encoding="utf-8-sig") as html_file: html_content = html_file.read() saved_resource_names = {} resource_index = 1 def replace_data_uri(match): nonlocal resource_index data_uri = match.group(0) if data_uri in saved_resource_names: return saved_resource_names[data_uri] content_type = match.group("content_type").lower() extension = EXTENSIONS_BY_CONTENT_TYPE.get(content_type) if extension is None: return data_uri encoded_data = match.group("data") image_data = base64.b64decode(encoded_data) if len(image_data) == 0: return data_uri file_name = f"resource-{resource_index}{extension}" resource_index += 1 file_path = os.path.join(asset_directory, file_name) with open(file_path, "wb") as image_file: image_file.write(image_data) linked_url = f"{asset_directory_name}/{file_name}" saved_resource_names[data_uri] = linked_url return linked_url updated_html_content = DATA_URI_PATTERN.sub(replace_data_uri, html_content) with open(html_file_path, "w", encoding="utf-8", newline="\n") as html_file: html_file.write(updated_html_content) input_file_path = "presentation.pptx" output_directory = "html-output" export_presentation_to_html_with_linked_images(input_file_path, output_directory) ``` After the export, the output folder may have this structure: ```text html-output/ presentation.html assets/ resource-1.jpg resource-2.png ``` The exact files depend on the presentation content and export options. For example, raster images are commonly exported as JPEG or PNG. Aspose.Slides may choose a different image codec than the one used in the source presentation when that produces a smaller or more suitable file. Images with transparency are exported as PNG. ## **Choosing URLs for Deployment** The sample uses a relative URL prefix: `assets/`. If `presentation.html` is opened from `html-output/presentation.html`, the browser loads `html-output/assets/resource-1.jpg`. Use a different asset directory name or rewrite the generated links when the files are deployed elsewhere: - Use `assets/` when the asset directory is next to the HTML file. - Use `../assets/` when the asset directory is one level above the HTML file. - Use `https://cdn.example.com/presentations/job-123/assets/` when the files are uploaded to a CDN or static file server. In server applications, use a unique output directory or object-storage prefix for each conversion job to avoid overwriting files from another export. ## **When to Embed Instead** Embedded Base64 HTML is still useful when the output must be a single file, such as an email attachment, an offline preview, or a document that will be moved without a supporting asset folder. Linked images are a better fit when the HTML will be served by a web application, stored in a CMS, optimized by a build pipeline, or cached by browsers independently from the HTML. ## **FAQ** ### Can I externalize only images and keep other resources embedded? Yes. The sample extracts only `image/*` Base64 data URLs whose content types are listed in `EXTENSIONS_BY_CONTENT_TYPE`. Other data URLs remain embedded. ### Why does the exported image extension differ from the source presentation? Aspose.Slides may re-encode raster images during HTML export to improve size or browser compatibility. For example, an image from the source file may be written as JPEG or PNG depending on the rendered result. ### Do relative URLs work after I move the HTML file? Relative URLs work only when the same relative folder structure is preserved. If the HTML references `assets/resource-1.png`, the `assets` folder must stay next to the HTML file unless you generate a different URL prefix. ### Should server applications reuse the same output folder? No. Use a unique output directory or storage prefix for each conversion job. This avoids filename collisions and prevents one export from overwriting resources generated by another export. ## Related articles - [Convert PowerPoint Presentations to HTML in Python](https://docs.aspose.com/slides/python-net/convert-powerpoint-to-html/) # Advanced Text Extraction from Presentations in Python > Quickly extract text from PowerPoint and OpenDocument presentations using Aspose.Slides for Python via .NET. Follow our simple, step-by-step guide to save time. Source: https://docs.aspose.com/slides/python-net/extract-text-from-presentation/ Updated: 2026-08-05 ## **Overview** Extracting text from presentations is a common yet essential task for developers working with slide content. Whether you're dealing with Microsoft PowerPoint files in PPT or PPTX format, or OpenDocument presentations (ODP), accessing and retrieving textual data can be critical for analysis, automation, indexing, or content migration purposes. This article provides a comprehensive guide on how to efficiently extract text from various presentation formats, including PPT, PPTX, and ODP, using Aspose.Slides for Python via .NET. You'll learn how to systematically iterate through presentation elements to accurately retrieve the text content you need. ## **Extract Text from a Slide** Aspose.Slides for Python via .NET provides the [aspose.slides.util](https://reference.aspose.com/slides/python-net/aspose.slides.util/) namespace, which includes the [SlideUtil](https://reference.aspose.com/slides/python-net/aspose.slides.util/slideutil/) class. This class exposes several overloaded static methods for extracting all text from a presentation or slide. To extract text from a slide in a presentation, use the [get_all_text_boxes](https://reference.aspose.com/slides/python-net/aspose.slides.util/slideutil/get_all_text_boxes/) method. This method accepts an object of type [BaseSlide](https://reference.aspose.com/slides/python-net/aspose.slides/baseslide/) as a parameter. When executed, the method scans the entire slide for text and returns an array of objects of type [TextFrame](https://reference.aspose.com/slides/python-net/aspose.slides/textframe/), preserving any text formatting. The following code snippet extracts all the text from the first slide of the presentation: ```py import aspose.slides as slides slide_index = 0 with slides.Presentation("demo.pptx") as presentation: slide = presentation.slides[slide_index] text_frames = slides.util.SlideUtil.get_all_text_boxes(slide) for text_frame in text_frames: for paragraph in text_frame.paragraphs: for portion in paragraph.portions: portion_text = portion.text print(portion_text) portion_format = portion.portion_format font_height = portion_format.font_height print(font_height) latin_font = portion_format.latin_font if latin_font is not None: font_name = latin_font.font_name print(font_name) ``` ## **Extract Text from a Presentation** To scan text from the entire presentation, use the [get_all_text_frames](https://reference.aspose.com/slides/python-net/aspose.slides.util/slideutil/get_all_text_frames/) static method exposed by the [SlideUtil](https://reference.aspose.com/slides/python-net/aspose.slides.util/slideutil/) class. It accepts two parameters: 1. First, a [Presentation](https://reference.aspose.com/slides/python-net/aspose.slides/presentation/) object representing a PowerPoint or OpenDocument presentation from which text will be extracted. 1. Second, a `Boolean` value indicating whether the master slides should be included when scanning text from the presentation. The method returns an array of objects of type [TextFrame](https://reference.aspose.com/slides/python-net/aspose.slides/textframe/), including text formatting information. The code below scans the text and formatting details from a presentation, including the master slides. ```py import aspose.slides as slides with slides.Presentation("demo.pptx") as presentation: include_master_slides = True text_frames = slides.util.SlideUtil.get_all_text_frames(presentation, include_master_slides) for text_frame in text_frames: for paragraph in text_frame.paragraphs: for portion in paragraph.portions: portion_text = portion.text print(portion_text) portion_format = portion.portion_format font_height = portion_format.font_height print(font_height) latin_font = portion_format.latin_font if latin_font is not None: font_name = latin_font.font_name print(font_name) ``` ## **Categorized and Fast Text Extraction** The [PresentationFactory](https://reference.aspose.com/slides/python-net/aspose.slides/presentationfactory/) class also provides methods for extracting all text from presentations: ```py import io import aspose.slides as slides file_name = "presentation.pptx" stream = io.BytesIO() mode = slides.TextExtractionArrangingMode.UNARRANGED options = slides.LoadOptions() factory = slides.PresentationFactory.instance presentation_text = factory.get_presentation_text(file_name, mode) presentation_text = factory.get_presentation_text(stream, mode) presentation_text = factory.get_presentation_text(stream, mode, options) ``` The [TextExtractionArrangingMode](https://reference.aspose.com/slides/python-net/aspose.slides/textextractionarrangingmode/) enum argument indicates the mode for organizing the text extraction result and can be set to the following values: - `UNARRANGED` - The raw text without regard to its position on the slide. - `ARRANGED` - The text is arranged in the same order as on the slide. The `UNARRANGED` mode can be used when speed is critical; it's faster than the `ARRANGED` mode. [PresentationText](https://reference.aspose.com/slides/python-net/aspose.slides/presentationtext/) represents the raw text extracted from the presentation. Its `slides_text` property returns an array of slide text objects. Each object represents the text on the corresponding slide and has the following properties: - `text` - The text within the slide's shapes. - `master_text` - The text within the master slide's shapes associated with this slide. - `layout_text` - The text within the layout slide's shapes associated with this slide. - `notes_text` - The text within the notes slide's shapes associated with this slide. - `comments_text` - The text within comments associated with this slide. ```py import aspose.slides as slides presentation_path = "presentation.ppt" arranging_mode = slides.TextExtractionArrangingMode.UNARRANGED presentation_text = slides.PresentationFactory.instance.get_presentation_text(presentation_path, arranging_mode) first_slide_text = presentation_text.slides_text[0] print(first_slide_text.text) print(first_slide_text.layout_text) print(first_slide_text.master_text) print(first_slide_text.notes_text) print(first_slide_text.comments_text) ``` ## **FAQ** ### How fast does Aspose.Slides process large presentations during text extraction? Aspose.Slides is optimized for high performance and can process even [large presentations](https://docs.aspose.com/slides/python-net/open-presentation/), making it suitable for real-time or bulk processing scenarios. ### Can Aspose.Slides extract text from tables and charts within presentations? Yes. Aspose.Slides can extract text from many slide elements, including tables and chart-related objects, so you can access and analyze textual content in common presentation structures. ### Do I need a special Aspose.Slides license to extract text from presentations? You can extract text using the free trial version of Aspose.Slides, although it will have [certain limitations](https://docs.aspose.com/slides/python-net/licensing/), such as processing only a limited number of slides. For unrestricted use and to handle larger presentations, purchasing a full license is recommended. # Extract Images from Presentation Shapes in Python > Extract images from shapes in PowerPoint and OpenDocument presentations with Aspose.Slides for Python via .NET - quick, code-friendly solution. Source: https://docs.aspose.com/slides/python-net/extracting-images-from-presentation-shapes/ Updated: 2026-08-13 ## **Overview** Images in a presentation can appear in several shape types: as ordinary picture frames, as picture fills applied to shapes, as OLE object preview images, as video or audio frame thumbnails, as zoom images, or as images nested inside table, chart, and SmartArt shapes. Aspose.Slides stores those images in the presentation image collection, exposed through [ImageCollection](https://reference.aspose.com/slides/python-net/aspose.slides/imagecollection/) and [PPImage](https://reference.aspose.com/slides/python-net/aspose.slides/ppimage/) objects. If you only need to export every image resource embedded in a presentation, iterate through `presentation.images`. This article focuses on a different task: traversing shapes to find where images are used on slides, so the saved files can keep useful context such as the slide number, shape position, and source type (picture frame, fill image, media preview, OLE preview, or zoom image). Use the `binary_data` property of [PPImage](https://reference.aspose.com/slides/python-net/aspose.slides/ppimage/) to preserve the original encoded image data and file type. Use the `image` property with `save` when you want to normalize the output to a specific format such as PNG. ## **Shared Helper Methods** The helper methods below keep the examples short. `save_original_image` writes the original embedded bytes, chooses a safe extension from the MIME type, and skips duplicate image binaries by SHA-256 hash. ```py import hashlib import re from pathlib import Path import aspose.slides as slides import aspose.slides.charts as charts import aspose.slides.smartart as smartart def save_original_image(image, output_directory, file_name_base, saved_image_hashes): image_data = bytes(image.binary_data) image_hash = hashlib.sha256(image_data).hexdigest() if image_hash in saved_image_hashes: return False saved_image_hashes.add(image_hash) extension = get_extension_from_content_type(image.content_type) file_name = f"{file_name_base}.{extension}" output_path = Path(output_directory) / file_name output_path.write_bytes(image_data) return True def save_image_as_png(image, output_directory, file_name_base): file_name = f"{file_name_base}.png" output_path = Path(output_directory) / file_name image.image.save(str(output_path), slides.ImageFormat.PNG) def get_picture_fill_image(fill_format): if fill_format is None or fill_format.fill_type != slides.FillType.PICTURE: return None return fill_format.picture_fill_format.picture.image def enumerate_shapes(shapes, prefix, include_grouped_shapes): for shape_index, shape in enumerate(shapes, start=1): shape_name_part = f"{prefix}_shape_{shape_index}" yield shape, shape_name_part if include_grouped_shapes and isinstance(shape, slides.GroupShape): yield from enumerate_shapes( shape.shapes, shape_name_part, include_grouped_shapes) def get_extension_from_content_type(content_type): if not content_type: return "bin" media_type = content_type.split(";")[0].strip().lower() extensions = { "image/jpeg": "jpg", "image/png": "png", "image/gif": "gif", "image/bmp": "bmp", "image/tiff": "tiff", "image/x-emf": "emf", "image/emf": "emf", "image/x-wmf": "wmf", "image/wmf": "wmf", "image/svg+xml": "svg", } if media_type in extensions: return extensions[media_type] if media_type.startswith("image/"): extension = media_type[len("image/"):] return make_safe_file_name_part(extension) return "bin" def make_safe_file_name_part(value): return re.sub(r'[<>:"/\\|?*]', "_", value) ``` ## **Extract Images from Picture Frames** Use this approach for pictures inserted as standalone objects. A [PictureFrame](https://reference.aspose.com/slides/python-net/aspose.slides/pictureframe/) stores its picture in `picture_format.picture.image`, which returns a [PPImage](https://reference.aspose.com/slides/python-net/aspose.slides/ppimage/) object. ```py from pathlib import Path import aspose.slides as slides input_path = "sample.pptx" output_directory = Path.cwd() / "extracted-images" output_directory.mkdir(parents=True, exist_ok=True) saved_image_hashes = set() with slides.Presentation(input_path) as presentation: for slide in presentation.slides: slide_prefix = f"slide_{slide.slide_number}" for shape, name_part in enumerate_shapes( slide.shapes, slide_prefix, include_grouped_shapes=False): if type(shape) is slides.PictureFrame: image = shape.picture_format.picture.image save_original_image(image, output_directory, name_part, saved_image_hashes) ``` ## **Extract Images from Picture-Filled Shapes** Shapes can use a picture as their fill. Check the shape's fill type first: if it is not [FillType.PICTURE](https://reference.aspose.com/slides/python-net/aspose.slides/filltype/), there is no picture to extract from that fill. The example below handles [AutoShape](https://reference.aspose.com/slides/python-net/aspose.slides/autoshape/) objects and saves each image as PNG through the `image` property of [PPImage](https://reference.aspose.com/slides/python-net/aspose.slides/ppimage/). ```py from pathlib import Path import aspose.slides as slides input_path = "sample.pptx" output_directory = Path.cwd() / "shape-fill-images" output_directory.mkdir(parents=True, exist_ok=True) with slides.Presentation(input_path) as presentation: for slide in presentation.slides: slide_prefix = f"slide_{slide.slide_number}" for shape, name_part in enumerate_shapes( slide.shapes, slide_prefix, include_grouped_shapes=False): if isinstance(shape, slides.AutoShape): image = get_picture_fill_image(shape.fill_format) if image is not None: save_image_as_png(image, output_directory, name_part) ``` ## **Extract Preview Images from OLE Object Frames** An [OleObjectFrame](https://reference.aspose.com/slides/python-net/aspose.slides/oleobjectframe/) can have a substitute picture that PowerPoint uses as the object's preview on a slide. This image is available through `substitute_picture_format.picture.image`. Extracting this picture gives you the preview image, not the embedded OLE package contents. ```py from pathlib import Path import aspose.slides as slides input_path = "sample.pptx" output_directory = Path.cwd() / "ole-preview-images" output_directory.mkdir(parents=True, exist_ok=True) saved_image_hashes = set() with slides.Presentation(input_path) as presentation: for slide in presentation.slides: slide_prefix = f"slide_{slide.slide_number}" for shape, name_part in enumerate_shapes( slide.shapes, slide_prefix, include_grouped_shapes=False): if isinstance(shape, slides.OleObjectFrame): image = shape.substitute_picture_format.picture.image if image is not None: file_name_base = f"{name_part}_ole_preview" save_original_image(image, output_directory, file_name_base, saved_image_hashes) ``` ## **Extract Preview Images from Video Frames** A [VideoFrame](https://reference.aspose.com/slides/python-net/aspose.slides/videoframe/) can also store a preview image in `picture_format.picture.image`. This is the poster or thumbnail shown on the slide, not a frame decoded from the video stream. ```py from pathlib import Path import aspose.slides as slides input_path = "sample.pptx" output_directory = Path.cwd() / "video-preview-images" output_directory.mkdir(parents=True, exist_ok=True) saved_image_hashes = set() with slides.Presentation(input_path) as presentation: for slide in presentation.slides: slide_prefix = f"slide_{slide.slide_number}" for shape, name_part in enumerate_shapes( slide.shapes, slide_prefix, include_grouped_shapes=False): if isinstance(shape, slides.VideoFrame): image = shape.picture_format.picture.image if image is not None: file_name_base = f"{name_part}_video_preview" save_original_image(image, output_directory, file_name_base, saved_image_hashes) ``` ## **Extract Preview Images from Audio Frames** An [AudioFrame](https://reference.aspose.com/slides/python-net/aspose.slides/audioframe/) can store a thumbnail in `picture_format.picture.image`. This is the image shown for the audio object on the slide. ```py from pathlib import Path import aspose.slides as slides input_path = "sample.pptx" output_directory = Path.cwd() / "audio-preview-images" output_directory.mkdir(parents=True, exist_ok=True) saved_image_hashes = set() with slides.Presentation(input_path) as presentation: for slide in presentation.slides: slide_prefix = f"slide_{slide.slide_number}" for shape, name_part in enumerate_shapes( slide.shapes, slide_prefix, include_grouped_shapes=False): if isinstance(shape, slides.AudioFrame): image = shape.picture_format.picture.image if image is not None: file_name_base = f"{name_part}_audio_preview" save_original_image(image, output_directory, file_name_base, saved_image_hashes) ``` ## **Extract Images from Zoom Objects** [ZoomFrame](https://reference.aspose.com/slides/python-net/aspose.slides/zoomframe/) and [SectionZoomFrame](https://reference.aspose.com/slides/python-net/aspose.slides/sectionzoomframe/) shapes can use custom images. Read `zoom_image` from the zoom frame. ```py from pathlib import Path import aspose.slides as slides input_path = "sample.pptx" output_directory = Path.cwd() / "zoom-images" output_directory.mkdir(parents=True, exist_ok=True) saved_image_hashes = set() with slides.Presentation(input_path) as presentation: for slide in presentation.slides: slide_prefix = f"slide_{slide.slide_number}" for shape, name_part in enumerate_shapes( slide.shapes, slide_prefix, include_grouped_shapes=False): if isinstance(shape, slides.ZoomFrame) and shape.zoom_image is not None: file_name_base = f"{name_part}_zoom" save_original_image(shape.zoom_image, output_directory, file_name_base, saved_image_hashes) continue if isinstance(shape, slides.SectionZoomFrame) and shape.zoom_image is not None: file_name_base = f"{name_part}_section_zoom" save_original_image(shape.zoom_image, output_directory, file_name_base, saved_image_hashes) continue ``` ## **Extract Images from Summary Zoom Frames** A [SummaryZoomFrame](https://reference.aspose.com/slides/python-net/aspose.slides/summaryzoomframe/) is also a shape. Its section items can use custom images, exposed through each summary zoom section's `zoom_image` property. ```py from pathlib import Path import aspose.slides as slides input_path = "sample.pptx" output_directory = Path.cwd() / "summary-zoom-images" output_directory.mkdir(parents=True, exist_ok=True) saved_image_hashes = set() with slides.Presentation(input_path) as presentation: for slide in presentation.slides: slide_prefix = f"slide_{slide.slide_number}" for shape, name_part in enumerate_shapes( slide.shapes, slide_prefix, include_grouped_shapes=False): if isinstance(shape, slides.SummaryZoomFrame): section_count = len(shape.summary_zoom_collection) for section_index in range(section_count): section = shape.summary_zoom_collection[section_index] if section.zoom_image is not None: display_index = section_index + 1 file_name_base = f"{name_part}_summary_zoom_{display_index}" save_original_image(section.zoom_image, output_directory, file_name_base, saved_image_hashes) ``` ## **Extract Images from Table Shapes** A [Table](https://reference.aspose.com/slides/python-net/aspose.slides/table/) is a shape. Images in a table are usually stored as picture fills in table cells. ```py from pathlib import Path import aspose.slides as slides input_path = "sample.pptx" output_directory = Path.cwd() / "table-images" output_directory.mkdir(parents=True, exist_ok=True) saved_image_hashes = set() with slides.Presentation(input_path) as presentation: for slide in presentation.slides: slide_prefix = f"slide_{slide.slide_number}" for shape, name_part in enumerate_shapes( slide.shapes, slide_prefix, include_grouped_shapes=True): if isinstance(shape, slides.Table): row_count = len(shape.rows) column_count = len(shape.columns) for row_index in range(row_count): for column_index in range(column_count): cell = shape.rows[row_index][column_index] image = get_picture_fill_image(cell.cell_format.fill_format) if image is not None: file_name_base = f"{name_part}_cell_{row_index + 1}_{column_index + 1}" save_original_image(image, output_directory, file_name_base, saved_image_hashes) ``` ## **Extract Images from Chart Shapes** A [Chart](https://reference.aspose.com/slides/python-net/aspose.slides.charts/chart/) is a shape. The example below extracts an image from the chart area's picture fill. ```py from pathlib import Path import aspose.slides.charts as charts import aspose.slides as slides input_path = "sample.pptx" output_directory = Path.cwd() / "chart-images" output_directory.mkdir(parents=True, exist_ok=True) saved_image_hashes = set() with slides.Presentation(input_path) as presentation: for slide in presentation.slides: slide_prefix = f"slide_{slide.slide_number}" for shape, name_part in enumerate_shapes( slide.shapes, slide_prefix, include_grouped_shapes=True): if isinstance(shape, charts.Chart): fill_format = shape.fill_format image = get_picture_fill_image(fill_format) if image is not None: file_name_base = f"{name_part}_chart_area" save_original_image(image, output_directory, file_name_base, saved_image_hashes) ``` ## **Extract Images from SmartArt Shapes** A [SmartArt](https://reference.aspose.com/slides/python-net/aspose.slides.smartart/smartart/) object is a shape. Depending on the SmartArt layout, images may be stored in node bullet fills or in the fill formats of node shapes. ```py from pathlib import Path import aspose.slides as slides import aspose.slides.smartart as smartart input_path = "sample.pptx" output_directory = Path.cwd() / "smartart-images" output_directory.mkdir(parents=True, exist_ok=True) saved_image_hashes = set() with slides.Presentation(input_path) as presentation: for slide in presentation.slides: slide_prefix = f"slide_{slide.slide_number}" for shape, name_part in enumerate_shapes( slide.shapes, slide_prefix, include_grouped_shapes=True): if isinstance(shape, smartart.SmartArt): node_count = len(shape.all_nodes) for node_index in range(node_count): node = shape.all_nodes[node_index] bullet_image = get_picture_fill_image(node.bullet_fill_format) if bullet_image is not None: file_name_base = f"{name_part}_smartart_node_{node_index + 1}_bullet" save_original_image(bullet_image, output_directory, file_name_base, saved_image_hashes) node_shape_count = len(node.shapes) for node_shape_index in range(node_shape_count): node_shape = node.shapes[node_shape_index] image = get_picture_fill_image(node_shape.fill_format) if image is not None: file_name_base = f"{name_part}_smartart_node_{node_index + 1}_shape_{node_shape_index + 1}" save_original_image(image, output_directory, file_name_base, saved_image_hashes) ``` ## **Include Images Inside Grouped Shapes** Grouped shapes contain their own shape collections. The shared `enumerate_shapes` helper has an `include_grouped_shapes` option. Set it to `True` when you want to inspect shapes inside [GroupShape](https://reference.aspose.com/slides/python-net/aspose.slides/groupshape/) objects. The example below extracts images from picture frames, picture-filled shapes, OLE object previews, video frame thumbnails, and audio frame thumbnails. To include table, chart, SmartArt, and summary zoom images as well, reuse the specialized extraction logic from the previous sections while keeping the same recursive shape traversal. ```py from pathlib import Path import aspose.slides as slides input_path = "sample.pptx" output_directory = Path.cwd() / "all-shape-images" output_directory.mkdir(parents=True, exist_ok=True) saved_image_hashes = set() with slides.Presentation(input_path) as presentation: for slide in presentation.slides: slide_prefix = f"slide_{slide.slide_number}" for shape, name_part in enumerate_shapes( slide.shapes, slide_prefix, include_grouped_shapes=True): if isinstance(shape, slides.OleObjectFrame): image = shape.substitute_picture_format.picture.image if image is not None: file_name_base = f"{name_part}_ole_preview" save_original_image(image, output_directory, file_name_base, saved_image_hashes) continue if isinstance(shape, slides.VideoFrame): image = shape.picture_format.picture.image if image is not None: file_name_base = f"{name_part}_video_preview" save_original_image(image, output_directory, file_name_base, saved_image_hashes) continue if isinstance(shape, slides.AudioFrame): image = shape.picture_format.picture.image if image is not None: file_name_base = f"{name_part}_audio_preview" save_original_image(image, output_directory, file_name_base, saved_image_hashes) continue if type(shape) is slides.PictureFrame: image = shape.picture_format.picture.image save_original_image(image, output_directory, name_part, saved_image_hashes) continue if isinstance(shape, slides.AutoShape): image = get_picture_fill_image(shape.fill_format) if image is not None: save_original_image(image, output_directory, name_part, saved_image_hashes) ``` ## **Edge Cases and Practical Notes** - **Duplicate images:** Multiple shapes may reference the same image or separate images with identical bytes. Hash the `binary_data` property of [PPImage](https://reference.aspose.com/slides/python-net/aspose.slides/ppimage/) before writing files if you want one output file per unique image. - **Original data vs. converted output:** Saving the `binary_data` property of [PPImage](https://reference.aspose.com/slides/python-net/aspose.slides/ppimage/) preserves the embedded JPEG, PNG, GIF, SVG, EMF, or WMF data. Saving the `image` property through `save` is useful when you want a consistent output format. - **Unsupported fill types:** Solid, gradient, pattern, and no-fill shapes do not contain a picture fill. Check [FillType](https://reference.aspose.com/slides/python-net/aspose.slides/filltype/) before reading `picture_fill_format`. - **Grouped shapes:** The top-level slide shape collection does not flatten groups. Recursively inspect [GroupShape.shapes](https://reference.aspose.com/slides/python-net/aspose.slides/groupshape/shapes/) when grouped content matters. - **OLE object previews:** An [OleObjectFrame](https://reference.aspose.com/slides/python-net/aspose.slides/oleobjectframe/) may expose a preview image through `substitute_picture_format`, but that image is only the slide preview. It is not the embedded file inside the OLE object. - **Video frame thumbnails:** A [VideoFrame](https://reference.aspose.com/slides/python-net/aspose.slides/videoframe/) may expose a preview image through `picture_format`, but that image is only the poster shown on the slide. It is not extracted from the video stream. - **Audio frame thumbnails:** An [AudioFrame](https://reference.aspose.com/slides/python-net/aspose.slides/audioframe/) may expose an icon or thumbnail through `picture_format`; it is not the embedded audio data. - **Zoom images:** Slide zoom, section zoom, and summary zoom shapes may use custom [PPImage](https://reference.aspose.com/slides/python-net/aspose.slides/ppimage/) objects through `image`. - **Nested shape models:** Table, chart, and SmartArt objects implement [Shape](https://reference.aspose.com/slides/python-net/aspose.slides/shape/), but their images are often stored in nested table cell, chart element, or SmartArt node formatting objects. - **Cropped or transformed pictures:** Accessing [PPImage](https://reference.aspose.com/slides/python-net/aspose.slides/ppimage/) gives you the stored image resource. It does not render cropping, transparency, recoloring, rotation, or other visual effects applied by the shape. ## **FAQ** ### Can I extract the original image without cropping, effects, or shape transformations? Yes. Access the [PPImage](https://reference.aspose.com/slides/python-net/aspose.slides/ppimage/) object and write its `binary_data` property to disk. This preserves the original encoded image stored in the presentation, not the way the image is rendered on the slide. ### Can I export every extracted image as PNG? Yes. Use the `image` property of [PPImage](https://reference.aspose.com/slides/python-net/aspose.slides/ppimage/) to get an image object, and then call `save` with [ImageFormat.PNG](https://reference.aspose.com/slides/python-net/aspose.slides/imageformat/). This converts the output and may not preserve the original file type or vector data. ### How do I avoid saving the same image more than once? Use a hash of the `binary_data` property of [PPImage](https://reference.aspose.com/slides/python-net/aspose.slides/ppimage/) and keep the hashes in a set. If a new image has a hash that already exists, skip it or record another reference to the existing output file. ### Why do some shapes not produce an image? Picture frames, picture-filled shapes, OLE object frames, media frames, zoom frames, tables, charts, and SmartArt objects can reference images. Some shape types expose images through nested formatting objects, so a simple `picture_format` or shape `fill_format` check is not always enough. ### Can I extract the thumbnail shown for a video frame? Yes. Use [VideoFrame](https://reference.aspose.com/slides/python-net/aspose.slides/videoframe/) and read `picture_format.picture.image`. This extracts the poster image stored with the video frame, not a frame generated from the video file. ### How can I determine which shapes use a specific image from the presentation image collection? Aspose.Slides does not store reverse links from [PPImage](https://reference.aspose.com/slides/python-net/aspose.slides/ppimage/) to shapes. Build a mapping during traversal: whenever you find an image reference, record the slide number, shape path, and image hash or collection item. ### Can I extract images embedded inside OLE objects, such as attached documents? You can extract the OLE object's slide preview from the `substitute_picture_format` property of [OleObjectFrame](https://reference.aspose.com/slides/python-net/aspose.slides/oleobjectframe/). However, that preview is not the embedded document itself. To extract images from inside the embedded file, extract the OLE data and inspect it with tools for that file type. # Extracting Text from PPT, PPTX, ODP > Extract and process slide text from PPT, PPTX and ODP on major cloud platforms, using Python tools to power search, analytics, and automation. Source: https://docs.aspose.com/slides/python-net/extracting-text-from-ppt-pptx-odp-on-cloud-platforms/ Updated: 2025-12-02 --- lastmod: 2025-12-02T13:32:50+06:00 title: Extracting Text from PPT, PPTX, ODP type: docs weight: 40 url: /python-net/extracting-text-from-ppt-pptx-odp-on-cloud-platforms/ keywords: - cloud platforms - cloud integration - extract text - text extraction - PPT - PPTX - ODP - Open XML SDK - PowerPoint - OpenDocument - presentation - Python - Aspose.Slides description: "Extract and process slide text from PPT, PPTX and ODP on major cloud platforms, using Python tools to power search, analytics, and automation." --- ## Related articles - [Slides on Cloud Platforms](https://docs.aspose.com/slides/python-net/slides-on-cloud-platforms/) - [Slide Text Extraction: PPT, PPTX, ODP Essentials](https://docs.aspose.com/slides/python-net/slide-text-extraction-ppt-pptx-odp-essentials/) # Manage Fallback Fonts for Presentations in Python > See how Aspose.Slides for Python via .NET uses fallback fonts to keep text readable in PowerPoint and OpenDocument presentations when original fonts aren’t available. Source: https://docs.aspose.com/slides/python-net/fallback-font/ Updated: 2026-08-02 ## **Introduction** Fallback fonts are used when the font specified for text is available in the system but does not contain a required glyph. In this case, Aspose.Slides can use one of the specified fallback fonts to replace the missing glyph. ## **Fallback Font** Aspose.Slides allows to create fallback fonts, add them to fallback fonts collection, set fallback font collection for a certain presentation, remove fallback fonts from presentation, specify the rules to apply fallback fonts and others. To get familiar with these features, use the following links: - [Create Fallback Font](https://docs.aspose.com/slides/python-net/create-fallback-font) - [Create Fallback Fonts Collection](https://docs.aspose.com/slides/python-net/create-fallback-fonts-collection) - [Render Presentation with Fallback Font](https://docs.aspose.com/slides/python-net/render-presentation-with-fallback-font) ## **FAQ** ### How do fallback fonts differ from font substitution? Fallback is applied per character or per range of Unicode when the primary font lacks specific glyphs; it fills just the missing characters. [Substitution](https://docs.aspose.com/slides/python-net/font-substitution/) replaces a missing or unavailable font for an entire run or text portion with another font. They can be combined, but their scope and selection logic are different. ### Are fallback settings saved inside the presentation file? No. Fallback configuration lives at processing/rendering time in the library and is not serialized into the PPTX. The presentation does not store your fallback rules. ### Does fallback affect elements created by PowerPoint objects (SmartArt, charts, WordArt)? Yes. Text inside these objects goes through the same rendering pipeline, so the same fallback rules apply to it as to regular text. ## Related articles - [Specify Fallback Fonts for Presentations in Python](https://docs.aspose.com/slides/python-net/create-fallback-font/) - [Configure Fallback Font Collections in Python](https://docs.aspose.com/slides/python-net/create-fallback-fonts-collection/) - [Render Presentations with Fallback Fonts in Python](https://docs.aspose.com/slides/python-net/render-presentation-with-fallback-font/) # FAQ > Get answers to FAQ on Aspose.Slides for Python via .NET, covering PowerPoint and OpenDocument support, installation guidance, licensing, troubleshooting. Source: https://docs.aspose.com/slides/python-net/faq/ Updated: 2026-08-02 ## **Overview** This FAQ provides answers to common questions about Aspose.Slides. It covers supported file formats, handling exceptions when working with large presentations, changing slide sizes, previewing slides, retrieving text from presentations, formatting table borders, placing pictures, and resolving font-related issues when converting presentations to PDF or images. ## **Supported File Formats** ### Q: What file formats does Aspose.Slides for Python via .NET support? **A**: Aspose.Slides for Python via .NET supports the file formats described in [Supported File Formats](https://docs.aspose.com/slides/python-net/supported-file-formats/). ## **Exceptions** ### Q: I am getting an out of memory exception while loading a large PPT file with images. Is there a limitation in Aspose.Slides regarding file size? **A**: There is no specific formula for calculating the presentation size supported by Aspose.Slides. There should be enough space to accommodate the whole presentation structure and images in memory. Normally, images in the memory occupy more space than the hard disk, especially when images have additional effects. In general, Aspose.Slides for Python via .NET can easily handle presentation files of around 300 MB on a server with 4 GB RAM. ## **Working with Slides** ### Q: Can I change the size of the slides in a presentation? **A**: You can use the `slide_size` property exposed by the [Presentation](https://reference.aspose.com/slides/python-net/aspose.slides/presentation/) class to define the size of the slides in a presentation. ### Q: Is there a way to define slides of different size in a presentation? **A**: Since the size of slides is defined at presentation level in Microsoft PowerPoint documents, there is no way to do this. ### Q: Does Aspose.Slides for Python via .NET support previewing a slide before saving? **A**: You can render the presentation slides to images and can use these images for previewing the slides. ## **Working with Text** ### Q: Is it possible to retrieve all the text from a presentation? **A**: Aspose.Slides for Python via .NET provides the [SlideUtil](https://reference.aspose.com/slides/python-net/aspose.slides.util/slideutil/) class under the `aspose.slides.util` namespace that provides various methods for retrieving whole text from the presentations. ### Q: Why are paragraph sizes different on Windows and Linux operating systems? **A**: The calculation of paragraph sizes is based on the calculation of the text size representing the given paragraph. The text size calculation is based on the metrics of the font specified in the PowerPoint presentation. If the specified font is missing, it is replaced with the most similar font, but this font has metrics different from the original ones. As a result, the calculation of paragraph sizes in different systems will lead to different results depending on the set of installed fonts. To achieve the same result on different operating systems, you need to install the same fonts on the systems or load them at runtime as [external fonts](https://docs.aspose.com/slides/python-net/custom-font/). ## **Formatting and Images** ### Q: How can I set the color of a table border? **A**: You can change the color of all table borders or just the border around the entire table. For changing all borders, please use the `cell_format` property from the [Cell](https://reference.aspose.com/slides/python-net/aspose.slides/cell/) class. For the border of the entire table, you should iterate cells and change the color of the outer borders. ### Q: What measure does Aspose.Slides for Python via .NET use to place pictures? **A**: The coordinates and sizes of all shapes on the slides are measured in points (72 dpi). ## **Working with Fonts** ### Q: When converting PPT to PDF or images, why are the fonts different in the output documents? **A**: This issue might indicate that the fonts used in the presentation are missing from the operating system on which the code was executed. You should install the fonts on the operating system or load them as external fonts using the [FontsLoader](https://reference.aspose.com/slides/python-net/aspose.slides/fontsloader/) class as shown below: ```cs folders = [ "path_to_a_folder_with_fonts" ] aspose.slides.FontsLoader.load_external_fonts(folders) ``` # Features Overview > Discover Aspose.Slides for Python via .NET: a powerful API to create, edit, automate, and convert PowerPoint and OpenDocument presentations efficiently. Source: https://docs.aspose.com/slides/python-net/features-overview/ Updated: 2026-10-27 Browse the [features and support catalogue](https://docs.aspose.com/slides/features/) for short descriptions and links to the relevant guides. ## **Supported Platforms** The platforms Aspose.Slides for Python via .NET can be used on Windows x64 or x86 and wide range of Linux distributions with Python 3.5 or later installed. There are additional requirements to the target Linux platform: - GCC-6 runtime libraries (or later) - Dependencies of .NET Core Runtime. Installing .NET Core Runtime itself is NOT required - For Python 3.5-3.7: The `pymalloc` build of Python is needed. The `--with-pymalloc` Python build option is enabled by default. Typically, the `pymalloc` build of Python is marked with `m` suffix in the filename. - `libpython` shared Python library. The `--enable-shared` Python build option is disabled by default, some Python distributions do not contain the `libpython` shared library. For some linux platforms, the `libpython` shared library can be installed using the package manager, for example: `sudo apt-get install libpython3.7`. The common issue is that `libpython` library is installed in a different location than the standard system location for shared libraries. The issue can be fixed by using the Python build options to set alternate library paths when compiling Python, or fixed by creating a symbolic link to the `libpython` library file in the system standard location for shared libraries. Typically, the `libpython` shared library file name is `libpythonX.Ym.so.1.0` for Python 3.5-3.7, or libpythonX.Y.so.1.0 for Python 3.8 or later (for example: `libpython3.7m.so.1.0`, `libpython3.9.so.1.0`). If you need support for more platforms, look for the "twin brother" products Aspose.Slides for .NET or Aspose.Slides for Java. ## **File Formats and Conversions** Aspose.Slides for Python via .NET supports most PowerPoint document formats. It also lets you export them to the popular formats organizations widely use and exchange among themselves. Go through these details: |**Feature**|**Description**| | :- | :- | |[Microsoft PowerPoint (PPT)](https://docs.aspose.com/slides/python-net/ppt-vs-pptx/)|Aspose.Slides for Python via .NET provides the fastest processing for this presentation document format.| |[PPT to PPTX conversion](https://docs.aspose.com/slides/python-net/convert-ppt-to-pptx/)|Aspose.Slides for Python via .NET supports conversion of PPT to PPTX.| |[Portable Document Format (PDF)](https://docs.aspose.com/slides/python-net/convert-powerpoint-ppt-and-pptx-to-pdf/)|You can export all supported file formats to Adobe Portable Document Format (PDF) documents with a single method.| |[XML Parser Specification (XPS)](https://docs.aspose.com/slides/python-net/convert-powerpoint-to-xps/)|You can export all supported file formats to XML Parser Specification (XPS) documents with a single method.| |[Tagged Image File Format (TIFF)](https://docs.aspose.com/slides/python-net/convert-powerpoint-to-tiff/)|You can export all supported presentation file formats to Tagged Image File Format (TIFF).| |[PPTX To HTML Conversion](https://docs.aspose.com/slides/python-net/convert-powerpoint-to-html/)|Aspose.Slides for Python via .NET supports the conversion of PresentationEx to HTML format.| ## **Presentation Rendering** Aspose.Slides for Python via .NET supports high fidelity rendering of slides in the presentation documents to various graphics formats. Go through these details: |**Feature**|**Description**| | :- | :- | |.NET Supported Image Formats|With Aspose.Slides for Python via .NET, you get to render presentation slides and images on slides to all the .NET supported graphics formats such as TIFF, PNG, BMP, JPEG, GIF, and metafiles.| |SVG Format|Aspose.Slides for Python via .NET also provides built-in methods that allow you to export presentation slides to Scalable Vector Graphics (SVG) formats.| ## **Content Features** Aspose.Slides for Python via .NET allows you to access, modify, or create almost all the items or contents of presentation documents. Go through these details: |**Feature**|**Description**| | :- | :- | |Master Slides|The master Slides define the layout of the normal slides. Aspose.Slides for Python via .NET allows you to access and modify the Master Slides of presentation documents| |Normal Slides|With Aspose.Slides for Python via .NET, you can create new slides of different types; you also get to access and modify existing slides in the presentations| |Cloning / Copying Slides|There are built-in methods provided by Aspose.Slides for Python via .NET that allow you to clone or copy existing slides within a presentation. You also get to use copied and cloned slides from one presentation to another. Since a slide inherits its layout from the master slide, the built-in cloning methods automatically copy the master on cloning| |Managing Slides sections|Methods to organize slides in different sections inside a presentation| |Place Holders and Text Holders|You can access the place holders and text holders in a slide. Moreover, you can create a slide with text holders from scratch using the appropriate method| |Header and Footers|Aspose.Slides for Python via .NET facilitates the handling of headers/footers in slides| |Notes in Slides|With Aspose.Slides for Python via .NET, you can access and modify notes associated with a slide and also add new notes| |Finding a Shape|You can also find a particular shape from a slide using the alternative text associated with the shape| |Backgrounds|Aspose.Slides for Python via .NET allows you to work with backgrounds associated with a master or normal slide in a presentation| |Text Boxes|Text boxes can be created from scratch. You can access existing text boxes. You also get to modify their texts without losing the original text format| |Rectangle Shapes|You can create or modify rectangle shapes with Aspose.Slides for Python via .NET| |Poly Line Shapes|You can create or modify poly line shapes with Aspose.Slides for Python via .NET| |Ellipse Shapes|You can create or modify Ellipse shapes with Aspose.Slides for Python via .NET| |Group Shapes| Aspose.Slides for Python via .NET supports group shapes | |Auto Shapes|Aspose.Slides for Python via .NET supports auto shapes| |SmartArt|Aspose.Slides for Python via .NET provides support for SmartArt shapes in MS PowerPoint| |Charts|Aspose.Slides for Python via .NET provides support for MSO Charts in PowerPoint| |Shapes Serialization| Aspose.Slides for Python via .NET supports a large number of shapes. When Aspose.Slides for Python via .NET lacks support for a shape, you can use a serialization method through which you get to serialize that shape from an existing slide. This way, you get to use the shape further as per your requirements | |Picture Frames|You can manage pictures in picture frames with Aspose.Slides for Python via .NET| |Audio Frames|You can link or embed audio files in audio frames on slides with Aspose.Slides for Python via .NET| |Video Frames| You get to handle video files in video frames. Aspose.Slides for Python via .NET also provides support for linked and embedded videos | |OLE Frame|You get to manage OLE Objects in OLE frames with Aspose.Slides for Python via .NET| |Tables|Aspose.Slides for Python via .NET supports tables in slides| |ActiveX Controls|Support for ActiveX controls| |VBA Macros|Support for managing VBA macros inside presentations.| |Text Frame|You get to access the text with any shape through the text frame associated with that shape| |Text Scanning|You get to scan text in a presentation at the presentation or slide level through built-in scanning methods.| |Animations|You get to apply animations on shapes| |Slide Shows|Aspose.Slides for Python via .NET supports slide shows and slide transitions| ## **Formatting Features** With Aspose.Slides for Python via .NET, you can format texts and shapes on slides in presentations. Go through these details: |**Feature**|**Description**| | :- | :- | |Text Formatting|
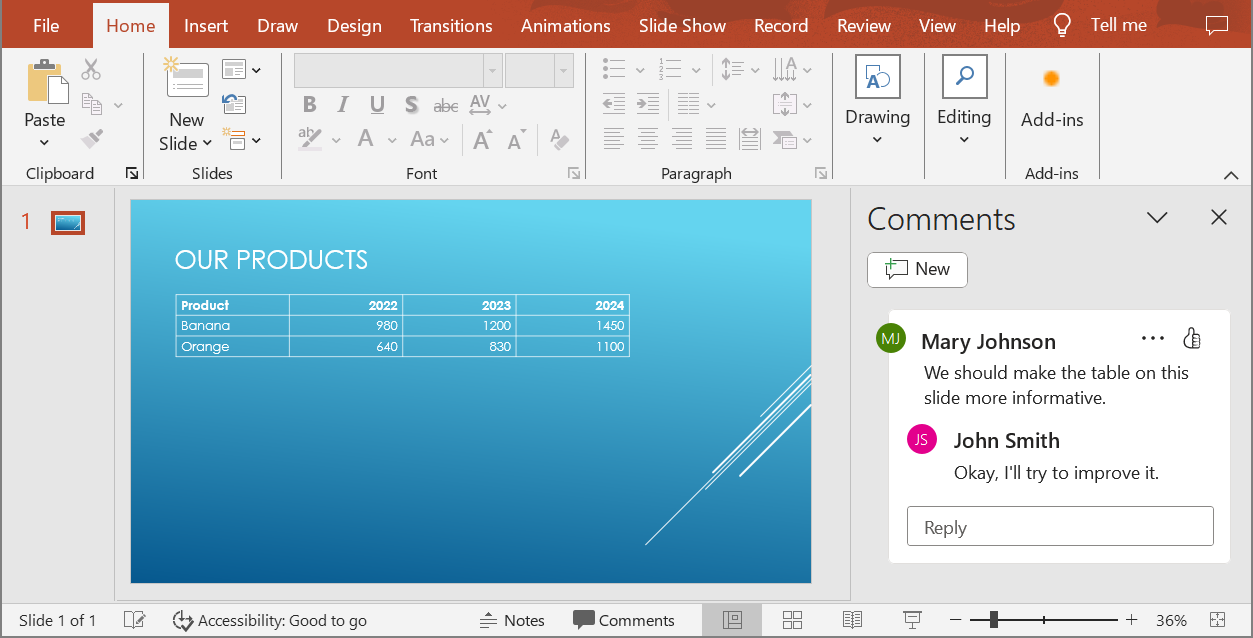
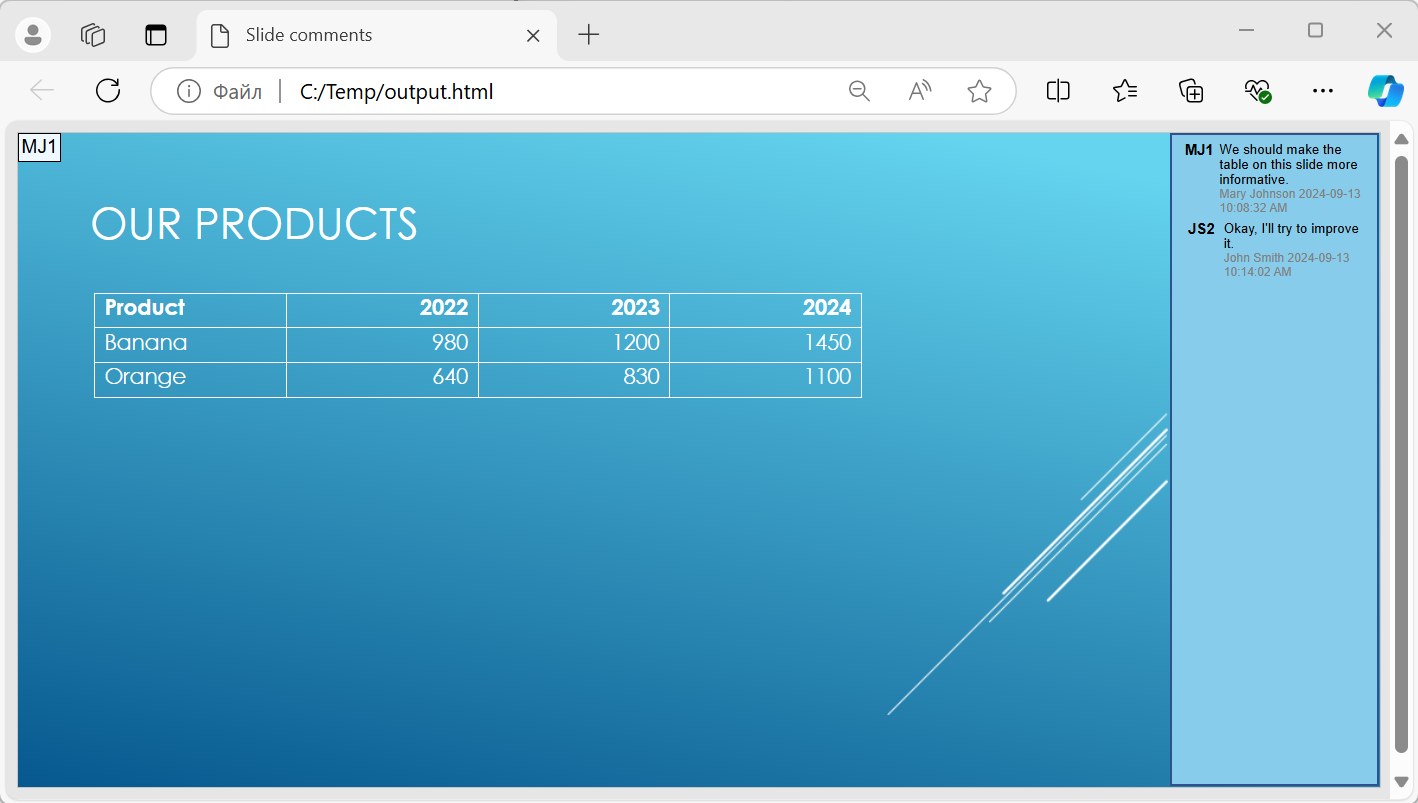
In Aspose.Slides for Python via .NET, you can manage texts through the text frames associated with the shapes. Hence, you get to format texts using the paragraphs and portions associated with the text frames. These text elements can be formatted through Aspose.Slides for Python via .NET.

- Font Type

- Font Size

- Font Color

- Font Shades

- Paragraph Alignment

- Paragraph Bulleting

- Paragraph Orientation

| |Shape Formatting|

In Aspose.Slides for Python via .NET, the basic element of a slide is a shape. You can format these shape elements with Aspose.Slides for Python via .NET:

- Position

- Size

- Line

- Fill (including Pattern, Gradient, Solid)

- Text

- Image

| ## **FAQ** ### Do I need to install Microsoft PowerPoint on the server/PC for the library to work? No. PowerPoint is not required; Aspose.Slides is a standalone engine for creating, editing, converting, and rendering presentations. ### How does multithreading work? Can processing be parallelized? It is safe to process different documents in different threads; the same [presentation](https://reference.aspose.com/slides/python-net/aspose.slides/presentation/) object must not be used by [multiple threads](https://docs.aspose.com/slides/python-net/multithreading/) at the same time. ### Are file passwords and encryption supported? Yes. [You can](https://docs.aspose.com/slides/python-net/password-protected-presentation/) open encrypted presentations, set or remove an open and write password, and check the protection status. ### Do I need to care about font packages in Linux containers? Yes. It is recommended to install common font packages and/or explicitly [specify font directories](https://docs.aspose.com/slides/python-net/custom-font/) in your application to avoid unexpected substitutions. ### Are there limitations in the evaluation version? In [evaluation mode](https://docs.aspose.com/slides/python-net/licensing/), a watermark is added to the output and certain limitations apply; a [30-day temporary license](https://purchase.aspose.com/temporary-license/) is available for full-feature testing. ### Is importing external formats into a presentation (PDF/HTML → PPTX) supported? Yes. You can add [PDF pages and HTML content](https://docs.aspose.com/slides/python-net/import-presentation/) to a presentation, turning them into slides. ## Related articles - [System Requirements](https://docs.aspose.com/slides/python-net/system-requirements/) - [Product Overview](https://docs.aspose.com/slides/python-net/product-overview/) - [Aspose.Slides for Python via .NET](https://docs.aspose.com/slides/python-net/) # Extract Flash Objects from Presentations in Python > Learn how to extract Flash objects from PowerPoint and OpenDocument slides in Python with Aspose.Slides, complete code samples and best practices. Source: https://docs.aspose.com/slides/python-net/flash/ Updated: 2026-08-02 ## **Overview** This article explains how to extract Flash objects from presentations by using Aspose.Slides. It shows how to find a Flash control by name in a slide’s controls collection and work with the embedded SWF object data. ## **Extract Flash Objects from Presentation** Aspose.Slides for Python via .NET provides a facility for extracting flash objects from presentation. You can access the flash control by name and extract it from presentation and including store SWF object data. ```py import aspose.slides as slides with slides.Presentation("withFlash.pptm") as pres: controls = pres.slides[0].controls for control in controls: if control.Name == "ShockwaveFlash1": flashControl = control ``` ## **FAQ** ### What presentation formats are supported when extracting Flash content? [Aspose.Slides supports](https://docs.aspose.com/slides/python-net/supported-file-formats/) the main PowerPoint formats such as PPT and PPTX, since it can load these containers and access their controls, including Flash-related ActiveX elements. ### Can I convert a presentation with Flash to HTML5 and preserve Flash interactivity? No. Aspose.Slides does not execute SWF content or convert its interactivity. While export to [HTML](https://docs.aspose.com/slides/python-net/convert-powerpoint-to-html/)/[HTML5](https://docs.aspose.com/slides/python-net/export-to-html5/) is supported, Flash will not play in modern browsers due to end of support. The recommended path is to replace Flash with alternatives such as video or HTML5 animations before export. ### From a security perspective, does Aspose.Slides execute SWF files while reading a presentation? No. Aspose.Slides treats Flash as binary data embedded in the file and does not execute SWF content during processing. ### How should I handle presentations that include Flash along with other embedded files via OLE? Aspose.Slides supports [extracting embedded OLE objects](https://docs.aspose.com/slides/python-net/manage-ole/), so you can process all related embedded content in one pass, handling Flash controls and other OLE-embedded documents together. ## Related articles - [Convert PowerPoint Presentations to SWF Flash in Python](https://docs.aspose.com/slides/python-net/convert-powerpoint-to-swf-flash/) - [Manage Media Files](https://docs.aspose.com/slides/python-net/manage-media-files/) # Streamline Font Replacement in Presentations Using Python > Seamlessly replace fonts in Aspose.Slides Python via .NET to ensure consistent typography in PowerPoint and OpenDocument presentations. Source: https://docs.aspose.com/slides/python-net/font-replacement/ Updated: 2026-08-05 ## **Overview** Aspose.Slides allows you to replace one font with another throughout a presentation. When a font is replaced, all instances of the original font are changed to the new font. To perform font replacement, load the presentation, define the source font and the replacement font, call the font replacement method, and save the modified presentation as a PPTX file. This approach is useful when you intentionally want to switch from one font family to another across the presentation. ## **Replace Fonts** If you change your mind about using a font, you can replace that font with another font. All instances of the old font will be replaced by the new font. Aspose.Slides allows you to replace a font this way: 1. Load the relevant presentation. 2. Load the font that will be replaced. 3. Load the new font. 4. Replace the font. 5. Write the modified presentation as a PPTX file. This Python code demonstrates font replacement: ```py import aspose.pydrawing as draw import aspose.slides as slides # Loads a presentation with slides.Presentation("Fonts.pptx") as presentation: # Loads the source font that will be replaced sourceFont = slides.FontData("Arial") # Loads the new font destFont = slides.FontData("Times New Roman") # Replaces the fonts presentation.fonts_manager.replace_font(sourceFont, destFont) # Saves the presentation presentation.save("UpdatedFont_out.pptx", slides.export.SaveFormat.PPTX) ``` To set rules that determine what happens in certain conditions (if a font cannot be accessed, for example), see [**Font Substitution**](https://docs.aspose.com/slides/python-net/font-substitution/). ## **FAQ** ### What is the difference between "font replacement", "font substitution", and "fallback fonts"? Replacement is an intentional switch from one family to another across the whole document. [Substitution](https://docs.aspose.com/slides/python-net/font-substitution/) is a rule like "if the font is unavailable, use X." [Fallback](https://docs.aspose.com/slides/python-net/fallback-font/) is applied surgically for individual missing glyphs when the base font is installed but does not contain the required characters. ### Does replacement apply to master slides, layouts, notes, and comments? Yes. Replacement affects all presentation objects that use the original font, including master slides and notes; comments are also part of the document and are taken into account by the font engine. ### Will the font change inside embedded OLE objects (for example, Excel)? No. [OLE content](https://docs.aspose.com/slides/python-net/manage-ole/) is controlled by its own application. Replacement in the presentation does not reformat the internal OLE data; it may be displayed as an image or as externally editable content. ### Can I replace a font only in part of the presentation (by slides or regions)? Targeted replacement is possible if you change the font at the level of the required objects/ranges rather than applying a global replacement to the entire document. The overall font selection logic during rendering remains the same. ### How can I determine in advance which fonts the presentation uses at all? Use the presentation’s [font manager](https://reference.aspose.com/slides/python-net/aspose.slides/fontsmanager/): it provides a list of the [families in use](https://reference.aspose.com/slides/python-net/aspose.slides/fontsmanager/get_fonts/) and information about [substitutions/"unknown" fonts](https://reference.aspose.com/slides/python-net/aspose.slides/fontsmanager/get_substitutions/), which helps plan the replacement. ### Does font replacement work when converting to PDF/images? Yes. During export, Aspose.Slides applies the same [font selection/substitution sequence](https://docs.aspose.com/slides/python-net/font-selection-sequence/), so a replacement performed in advance will be honored during conversion. ### Do I need to install the target font in the system, or can I attach a fonts folder? Installation is not required: the library allows [loading external fonts](https://docs.aspose.com/slides/python-net/custom-font/) from user folders for use during [rendering and export](https://docs.aspose.com/slides/python-net/convert-powerpoint/). ### Will replacement fix "tofu" (squares) instead of characters? Only if the target font actually contains the required glyphs. If not, [configure fallback](https://docs.aspose.com/slides/python-net/fallback-font/) to cover the missing characters. ## Related articles - [Font Selection Sequence in Aspose.Slides for Python](https://docs.aspose.com/slides/python-net/font-selection-sequence/) - [Configure Font Substitution in Presentations with Python](https://docs.aspose.com/slides/python-net/font-substitution/) - [Manage Fallback Fonts for Presentations in Python](https://docs.aspose.com/slides/python-net/fallback-font/) # Font Selection Sequence in Aspose.Slides for Python > Discover how Aspose.Slides for Python via .NET selects fonts, ensuring crisp, consistent presentation of PPT, PPTX and ODP files—improve your slides now. Source: https://docs.aspose.com/slides/python-net/font-selection-sequence/ Updated: 2026-11-08 ## **Overview** When a presentation is loaded, rendered, or converted to another format, Aspose.Slides checks whether the fonts used in the presentation are available in the operating system. If a required font is missing, Aspose.Slides selects a replacement font that is as close as possible to the one PowerPoint would use. Aspose.Slides first searches for the selected font in the operating system. If the font is found, it is used. If it is not found, a suitable replacement is applied. When font substitution rules are defined through `FontSubstRule`, those rules are also taken into account. You can also add fonts at application runtime, use embedded fonts from a presentation, or load external fonts for output documents such as PDF files. ## **Font Selection** Text can reference a theme font, such as `+mn-lt`, rather than an explicit family name. See [Resolve Theme Font References](https://docs.aspose.com/slides/python-net/presentation-theme/#resolve-theme-font-references) to obtain the family specified by the applicable theme. Resolving that reference is separate from checking font availability and applying rendering-time substitution or glyph fallback; it does not identify the font file ultimately used to render the text. Certain rules apply to fonts in a presentation when the presentation is loaded, rendered, or converted to another format. For example, when you try to convert a presentation (its slides) to images, the presentation's fonts are checked to verify that the chosen fonts are available in the operating system. If the fonts are confirmed to be missing, they are replaced — see [**Font Replacement**](https://docs.aspose.com/slides/python-net/font-replacement/) and [**Font Substitution**](https://docs.aspose.com/slides/python-net/font-substitution/). This is the process Aspose.Slides follows when dealing with fonts: 1. Aspose.Slides searches for fonts in the operating system to find the font that matches the presentation's chosen font. 2. If the chosen font is found, Aspose.Slides uses it. Otherwise, Aspose.Slides uses a replacement font that is as close as possible to what PowerPoint would use. 3. If font replacement rules have been set through [FontSubstRule](https://reference.aspose.com/slides/python-net/aspose.slides/fontsubstrule/), they are applied. Aspose.Slides allows you to add fonts at application runtime and then use those fonts. See [**Custom fonts**](https://docs.aspose.com/slides/python-net/custom-font/). When additional fonts are placed within a presentation, they are called [**Embedded fonts**](https://docs.aspose.com/slides/python-net/embedded-font/). Aspose.Slides allows you to add fonts that are applied to *only* output documents. For example, if a presentation you are looking to convert to PDF contains fonts missing from your system and embedded fonts, you can add or load the needed fonts as **external fonts**. We do not distribute any fonts, either paid or free. Our API allows you to load external fonts and embed them in documents, but you do so with fonts at your discretion and responsibility. [![A font selection schematic separates theme resolution, unavailable families and missing glyphs.](https://docs.aspose.com/slides/python-net/font-selection-sequence/visual-font-selection-sequence-503e4c9ad302.svg)](https://docs.aspose.com/slides/python-net/font-selection-sequence/visual-font-selection-sequence-503e4c9ad302.svg) *Resolve the theme token to a family first. An unavailable family can trigger substitution, while a missing character can trigger glyph fallback.* ## **FAQ** **How can I determine which fonts are actually used in a presentation before conversion?** Aspose.Slides lets you inspect the fonts used via the [font manager](https://reference.aspose.com/slides/python-net/aspose.slides/presentation/fonts_manager/), so you can decide whether to [embed](https://docs.aspose.com/slides/python-net/embedded-font/), [replace](https://docs.aspose.com/slides/python-net/font-replacement/), or add [external sources](https://docs.aspose.com/slides/python-net/custom-font/). This helps you prevent unwanted substitutions during rendering and export. **Can I add extra font directories without installing them on the operating system?** Yes. You can register [external font sources](https://docs.aspose.com/slides/python-net/custom-font/) such as folders or in-memory streams for rendering and export. This removes dependency on host system fonts and keeps layout predictable. **How do I prevent a silent fallback to an unsuitable font when a glyph is missing?** Define explicit [font replacement](https://docs.aspose.com/slides/python-net/font-replacement/) and font [fallback rules](https://docs.aspose.com/slides/python-net/fallback-font/) in advance. By analyzing used fonts and setting a controlled priority for substitutes, you ensure consistent typography and avoid unexpected results. ## Related articles - [Configure Font Substitution in Presentations with Python](https://docs.aspose.com/slides/python-net/font-substitution/) - [Streamline Font Replacement in Presentations Using Python](https://docs.aspose.com/slides/python-net/font-replacement/) - [Configure Fallback Font Collections in Python](https://docs.aspose.com/slides/python-net/create-fallback-fonts-collection/) # Configure Font Substitution in Presentations with Python > Configure font substitution rules and inspect substituted fonts in Aspose.Slides for Python via .NET when rendering or converting PowerPoint and OpenDocument presentations. Source: https://docs.aspose.com/slides/python-net/font-substitution/ Updated: 2026-10-08 ## **Overview** Font substitution allows Aspose.Slides to use an available font in place of a font that cannot be accessed when a presentation is rendered or converted. The substitution affects the rendered output; it does not change the font assigned to the presentation content. You can define the font to use when a particular font is unavailable, and you can inspect the substitutions that Aspose.Slides will make during rendering. This helps keep output consistent across environments with different installed fonts. If a font is available but has no dedicated bold typeface, see [Handle Fonts Without a Dedicated Bold Typeface](https://docs.aspose.com/slides/python-net/convert-powerpoint-to-pdf/#handle-fonts-without-a-dedicated-bold-typeface). That section explains how to rasterize the affected text during PDF export and the consequences for text selection, searching, and scaling. ## **Get Font Substitutions** Use the [FontsManager.get_substitutions](https://reference.aspose.com/slides/python-net/aspose.slides/fontsmanager/get_substitutions/) method to determine which fonts will be substituted when the presentation is rendered. The method returns [FontSubstitutionInfo](https://reference.aspose.com/slides/python-net/aspose.slides/fontsubstitutioninfo/) objects that identify the original and substituted font names. The following Python example lists all font substitutions for a presentation: ```python import aspose.slides as slides with slides.Presentation("Presentation.pptx") as presentation: for substitution in presentation.fonts_manager.get_substitutions(): print(f"{substitution.original_font_name} -> {substitution.substituted_font_name}") ``` ## **Get Font Substitutions for Selected Slides** Use [FontsManager.get_substitutions](https://reference.aspose.com/slides/python-net/aspose.slides/fontsmanager/get_substitutions/) with a list of slide indexes to inspect only the substitutions required to render specific slides. This is useful when you are rendering or exporting part of a presentation, checking a large presentation incrementally, locating slides that depend on unavailable fonts, preparing a minimal font package for a server or container, or diagnosing rendering differences without processing unrelated slides. The list contains one-based slide indexes: `1` identifies the first slide. By contrast, the [Presentation.slides](https://reference.aspose.com/slides/python-net/aspose.slides/presentation/slides/) collection is zero-based, so that same slide is accessed as `presentation.slides[0]`. Keep this difference in mind when building the list to avoid off-by-one errors. Call the method through the [Presentation.fonts_manager](https://reference.aspose.com/slides/python-net/aspose.slides/presentation/fonts_manager/) property. It returns only the substitutions determined while rendering the selected slides. Each result is a [FontSubstitutionInfo](https://reference.aspose.com/slides/python-net/aspose.slides/fontsubstitutioninfo/) object containing the original and substituted font names. The result reflects the current font environment, configured fallback rules, substitution rules stored in an [IFontSubstRuleCollection](https://reference.aspose.com/slides/python-net/aspose.slides/ifontsubstrulecollection/), and [externally loaded fonts](https://docs.aspose.com/slides/python-net/custom-font/). The same substitution can be required by more than one selected slide. Deduplicate the results when you create a font inventory or preflight report. The following example reports every returned substitution and then creates a sorted list of unique font mappings: ```python import aspose.slides as slides with slides.Presentation("Presentation.pptx") as presentation: selected_slides = [1, 3, 5] substitutions = list(presentation.fonts_manager.get_substitutions(selected_slides)) print("Substitutions for the selected slides:") for substitution in substitutions: print(f"{substitution.original_font_name} -> {substitution.substituted_font_name}") preflight_entries = [f"{substitution.original_font_name} -> {substitution.substituted_font_name}" for substitution in substitutions] unique_preflight_entries = {entry.casefold(): entry for entry in preflight_entries} sorted_preflight_entries = sorted(unique_preflight_entries.values(), key=str.casefold) print("Deduplicated font preflight report:") for entry in sorted_preflight_entries: print(entry) ``` The [FontsManager](https://reference.aspose.com/slides/python-net/aspose.slides/fontsmanager/) class provides both forms of the method. Choose one according to the scope of the rendering operation: | Method call | Use it when | |---|---| | [get_substitutions](https://reference.aspose.com/slides/python-net/aspose.slides/fontsmanager/get_substitutions/) with no arguments | You need substitutions for the entire presentation. | | [get_substitutions](https://reference.aspose.com/slides/python-net/aspose.slides/fontsmanager/get_substitutions/) with a list of slide indexes | You need substitutions for a selected range, incremental check, or partial export. | ## **Set Font Substitution Rules** To specify the font that Aspose.Slides should use when a source font is unavailable: 1. Load the presentation. 2. Create font definitions for the source and substitute fonts. 3. Create a [FontSubstRule](https://reference.aspose.com/slides/python-net/aspose.slides/fontsubstrule/) with the [WHEN_INACCESSIBLE](https://reference.aspose.com/slides/python-net/aspose.slides/fontsubstcondition/) condition. 4. Add the rule to a [FontSubstRuleCollection](https://reference.aspose.com/slides/python-net/aspose.slides/fontsubstrulecollection/). 5. Assign the collection to the [FontsManager.font_subst_rule_list](https://reference.aspose.com/slides/python-net/aspose.slides/fontsmanager/font_subst_rule_list/) property. 6. Render or convert the presentation. The following Python example substitutes `Arial` for `SomeRareFont` when `SomeRareFont` is unavailable, and then renders the first slide to verify the result. The substitute font must be available to Aspose.Slides. ```python import aspose.slides as slides with slides.Presentation("Fonts.pptx") as presentation: source_font = slides.FontData("SomeRareFont") substitute_font = slides.FontData("Arial") substitution_rule = slides.FontSubstRule(source_font, substitute_font, slides.FontSubstCondition.WHEN_INACCESSIBLE) substitution_rules = slides.FontSubstRuleCollection() substitution_rules.add(substitution_rule) presentation.fonts_manager.font_subst_rule_list = substitution_rules with presentation.slides[0].get_image(1, 1) as image: image.save("slide.jpg", slides.ImageFormat.JPEG) ``` For an unconditional change to the fonts used throughout a presentation, see [Font Replacement](https://docs.aspose.com/slides/python-net/font-replacement/). ## **Limitations for Math Equation Fonts** Font substitution rules are part of the standard font selection process used during rendering and conversion. They work for regular text when Aspose.Slides can replace an inaccessible font with the available font specified by a rule. Office Math equations have an additional requirement. If an equation uses **Cambria Math**, Aspose.Slides may need that exact font to calculate and render the equation layout. A rule that substitutes another math font, such as **STIX Two Math**, cannot replace **Cambria Math** for this purpose, and rendering may still report that **Cambria Math** is required. To render or convert such a presentation, make **Cambria Math** available to Aspose.Slides. Install it in the operating system or load it as an [external font](https://docs.aspose.com/slides/python-net/custom-font/). This limitation applies to equation layout. The substitution rules described above still apply to regular presentation text. ## **FAQ** **What is the difference between font replacement and font substitution?** [Font replacement](https://docs.aspose.com/slides/python-net/font-replacement/) intentionally changes one font to another throughout the presentation. Font substitution selects a font for rendered output when the configured condition is met, such as when the original font is unavailable. **When are substitution rules applied?** The rules participate in the [font selection sequence](https://docs.aspose.com/slides/python-net/font-selection-sequence/) during rendering and conversion. With `WHEN_INACCESSIBLE`, a rule is used only when Aspose.Slides cannot access the source font. **What happens when a font is missing and no substitution rule is configured?** Aspose.Slides selects the closest available font according to its font selection process. The result depends on the fonts available in the runtime environment. **Can I load external fonts to avoid substitution?** Yes. You can [load external fonts](https://docs.aspose.com/slides/python-net/custom-font/) so Aspose.Slides can use them during rendering and conversion. **Does Aspose distribute fonts with the library?** No. You are responsible for providing fonts and complying with their licenses. **Can substitution results differ between Windows, Linux, and macOS?** Yes. Installed fonts and font search locations differ by operating system, so a font available on one machine may require substitution on another. **How can I make font selection consistent in batch conversions?** Use the same font files and versions on every machine or container, [load required external fonts](https://docs.aspose.com/slides/python-net/custom-font/), and [embed fonts](https://docs.aspose.com/slides/python-net/embedded-font/) when licensing permits. You can also call [FontsManager.get_substitutions](https://reference.aspose.com/slides/python-net/aspose.slides/fontsmanager/get_substitutions/) before export to identify unexpected substitutions. ## Related articles - [Font Selection Sequence in Aspose.Slides for Python](https://docs.aspose.com/slides/python-net/font-selection-sequence/) - [Streamline Font Replacement in Presentations Using Python](https://docs.aspose.com/slides/python-net/font-replacement/) - [Configure Fallback Font Collections in Python](https://docs.aspose.com/slides/python-net/create-fallback-fonts-collection/) # Get the Entire Slide Background from a Presentation as an Image > Extract full slide backgrounds as images from PowerPoint and OpenDocument presentations using Aspose.Slides for Python via .NET, streamlining visual workflows. Source: https://docs.aspose.com/slides/python-net/get-the-entire-presentation-slide-background-as-an-image/ Updated: 2026-08-05 ## **Overview** In PowerPoint presentations, a slide background may be formed from multiple elements, including the slide background image, presentation theme, color scheme, and objects placed on the master slide or layout slide. This article shows how to extract the entire slide background as an image using Aspose.Slides. Since there is no single method for this task, the approach involves cloning the selected slide into a temporary presentation, removing the slide shapes, and then converting the resulting slide background to an image. ## **Get the Entire Slide Background** Aspose.Slides for Python does not provide a simple method to extract the entire presentation slide background as an image, but you can follow the steps below to do this: 1. Load the presentation using the [Presentation](https://reference.aspose.com/slides/python-net/aspose.slides/presentation/) class. 1. Get the slide size from the presentation. 1. Select a slide. 1. Create a temporary presentation. 1. Set the same slide size in the temporary presentation. 1. Clone the selected slide into the temporary presentation. 1. Delete the shapes from the cloned slide. 1. Convert the cloned slide to an image. The following code example extracts the entire presentation slide background as an image. ```py import aspose.slides as slides slide_index = 0 image_scale = 1 with slides.Presentation("sample.pptx") as presentation: slide_size = presentation.slide_size.size slide = presentation.slides[slide_index] with slides.Presentation() as temp_presentation: temp_presentation.slide_size.set_size( slide_size.width, slide_size.height, slides.SlideSizeScaleType.DO_NOT_SCALE) cloned_slide = temp_presentation.slides.add_clone(slide) cloned_slide.shapes.clear() with cloned_slide.get_image(image_scale, image_scale) as background: background.save("output.png", slides.ImageFormat.PNG) ``` ## **FAQ** ### Will complex gradients, textures, or picture fills from a master slide be preserved in the resulting background image? Yes. Aspose.Slides renders gradient, picture, and texture fills defined on the slide, layout, or master. If you need to isolate the look from inherited masters, [set an own background](https://docs.aspose.com/slides/python-net/presentation-background/) on the current slide before exporting. ### Can I add a watermark to the resulting background image before saving it? Yes. You can [add a watermark](https://docs.aspose.com/slides/python-net/watermark/) shape or image on a working [copy of the slide](https://docs.aspose.com/slides/python-net/clone-slides/) (placed behind other content) and then export. This lets you generate a background image with the watermark baked in. ### Can I get the background for a specific layout or master without tying it to an existing slide? Yes. Access the desired master or layout, apply it to a [temporary slide](https://docs.aspose.com/slides/python-net/clone-slides/) with the required size, and export that slide to obtain the background derived from that layout or master. ### Are there licensing limitations that affect image export? Rendering features are fully available with a [valid license](https://docs.aspose.com/slides/python-net/licensing/). In evaluation mode, output may include limitations such as a watermark. Activate the license once per process before running batch exports. ## Related articles - [Manage Presentation Backgrounds in Python](https://docs.aspose.com/slides/python-net/presentation-background/) # Getting Started > Get started with Aspose.Slides for Python via .NET: install, create, edit, and convert presentations with code—supporting PowerPoint and OpenDocument formats. Source: https://docs.aspose.com/slides/python-net/getting-started/ Updated: 2025-08-03 --- lastmod: 2025-08-03T12:20:36+04:00 title: Getting Started type: docs weight: 10 url: /python-net/getting-started/ keywords: - getting started - PowerPoint - OpenDocument - presentation - Python - Aspose.Slides description: "Get started with Aspose.Slides for Python via .NET: install, create, edit, and convert presentations with code—supporting PowerPoint and OpenDocument formats." --- # Group Presentation Shapes with Python > Learn to group and ungroup shapes in PowerPoint and OpenDocument decks using Aspose.Slides for Python—fast, step-by-step guide with free code. Source: https://docs.aspose.com/slides/python-net/group/ Updated: 2026-08-02 ## **Overview** This article explains how to work with group shapes in Aspose.Slides. It shows how to add a group shape to a slide, place shapes inside it, and save the updated presentation. It also demonstrates how to access shapes stored inside a group and read their `alternative_text` values. In addition, the article briefly covers related group-shape capabilities such as nested groups, z-order, and locking options. ## **Add Group Shapes** Aspose.Slides supports working with group shapes on a slide. This feature lets you build richer presentations by treating multiple shapes as a single object. You can add new group shapes, access existing ones, populate them with child shapes, and read or modify any of their properties. To add a group shape to a slide: 1. Create an instance of the [Presentation](https://reference.aspose.com/slides/python-net/aspose.slides/presentation/) class. 2. Get a reference to a slide by index. 3. Add a [GroupShape](https://reference.aspose.com/slides/python-net/aspose.slides/groupshape/) to the slide. 4. Add shapes to the new group shape. 5. Save the modified presentation as a PPTX file. The example below shows how to add a group shape to a slide. ```py import aspose.slides as slides # Instantiate the Presentation class. with slides.Presentation() as presentation: # Get the first slide. slide = presentation.slides[0] # Add a group shape to the slide. group_shape = slide.shapes.add_group_shape() # Add shapes inside the group shape. group_shape.shapes.add_auto_shape(slides.ShapeType.RECTANGLE, 300, 100, 100, 100) group_shape.shapes.add_auto_shape(slides.ShapeType.RECTANGLE, 500, 100, 100, 100) group_shape.shapes.add_auto_shape(slides.ShapeType.RECTANGLE, 300, 300, 100, 100) group_shape.shapes.add_auto_shape(slides.ShapeType.RECTANGLE, 500, 300, 100, 100) # Write the PPTX file to disk. presentation.save("group_shape.pptx", slides.export.SaveFormat.PPTX) ``` ## **Access the Alt Text Property** This section explains how to read the Alt Text of shapes contained within a group shape on a slide using Aspose.Slides. To access the Alt Text of the shapes: 1. Instantiate the [Presentation](https://reference.aspose.com/slides/python-net/aspose.slides/presentation/) class to represent a PPTX file. 2. Obtain a reference to the slide by its index. 3. Access the slide’s shapes collection. 4. Access the [GroupShape](https://reference.aspose.com/slides/python-net/aspose.slides/groupshape/). 5. Read the Alt Text property. The example below retrieves the Alt Text of shapes contained within group shapes. ```py import aspose.slides as slides # Instantiate the Presentation class to open the PPTX file. with slides.Presentation("group_shape.pptx") as presentation: # Get the first slide. slide = presentation.slides[0] for shape in slide.shapes: if isinstance(shape, slides.GroupShape): # Access the group shape. for child_shape in shape.shapes: # Access the Alt Text property. print(child_shape.alternative_text) ``` ## **FAQ** ### Is nested grouping (a group inside a group) supported? Yes. [GroupShape](https://reference.aspose.com/slides/python-net/aspose.slides/groupshape/) has a [parent_group](https://reference.aspose.com/slides/python-net/aspose.slides/groupshape/parent_group/) property, which directly indicates hierarchy support (a group can be a child of another group). ### How do I control the group’s z-order relative to other objects on the slide? Use the [GroupShape](https://reference.aspose.com/slides/python-net/aspose.slides/groupshape/)’s [z_order_position](https://reference.aspose.com/slides/python-net/aspose.slides/groupshape/z_order_position/) property to inspect its position in the display stack. ### Can I prevent moving/editing/ungrouping? Yes. The group’s lock section is exposed via [group_shape_lock](https://reference.aspose.com/slides/python-net/aspose.slides/groupshape/group_shape_lock/), which lets you restrict operations on the object. ## Related articles - [GroupShape](https://docs.aspose.com/slides/python-net/examples/elements/group-shape/) # How to Run Aspose.Slides in Docker > Run Aspose.Slides for Python via .NET in Docker: a working Dockerfile, the native libraries the package needs, font setup, and licensing inside a container. Source: https://docs.aspose.com/slides/python-net/how-to-run-aspose-slides-in-docker/ Updated: 2026-08-08 ## **Overview** Aspose.Slides for Python via .NET runs in Linux containers, but the package is a Python wrapper around a bundled .NET Core 3.1 runtime. That runtime needs three native libraries that slim Python images do not ship, and it is particular about their versions. This article gives a Dockerfile that works, explains why each dependency is there, and shows how to add fonts and a license. ## **A working Dockerfile** ```dockerfile FROM python:3.11-slim-bullseye RUN apt-get update && apt-get install -y --no-install-recommends \ libgdiplus \ libicu67 \ libfontconfig1 \ fonts-dejavu-core \ && rm -rf /var/lib/apt/lists/* RUN pip install --no-cache-dir aspose.slides WORKDIR /app COPY app.py . CMD ["python", "app.py"] ``` `app.py`: ```py import aspose.slides as slides with slides.Presentation() as presentation: slide = presentation.slides[0] shape = slide.shapes.add_auto_shape(slides.ShapeType.RECTANGLE, 100, 100, 400, 100) shape.text_frame.text = "Created inside a Docker container" presentation.save("output.pptx", slides.export.SaveFormat.PPTX) presentation.save("output.pdf", slides.export.SaveFormat.PDF) ``` Build and run: ```bash docker build -t aspose-slides-python . docker run --rm aspose-slides-python ``` ## **Why the base image is Debian 11** The `aspose.slides` wheel bundles a **.NET Core 3.1** runtime, and that runtime predates the library versions shipped by current Debian releases. On Debian 12 and 13 the container builds successfully and then fails at the first `Presentation()` call: ``` Process terminated. Couldn't find a valid ICU package installed on the system. ``` The message is misleading — ICU *is* installed on those images, but it is ICU 72 or 76, and .NET Core 3.1 only recognises older major versions. Debian 12 additionally ships OpenSSL 3, which produces a second failure: ``` No usable version of libssl was found ``` `python:3.11-slim-bullseye` is Debian 11, which provides both versions the bundled runtime expects: | Package | Version on Debian 11 | Why it is needed | |---|---|---| | `libgdiplus` | 6.0.4 | GDI+ implementation used for rendering shapes, text, and images | | `libicu67` | 67.1 | Globalization data. Newer majors are not recognised by .NET Core 3.1 | | `libssl1.1` | 1.1.1w | Cryptography. Preinstalled on Debian 11; absent from Debian 12+ | | `libfontconfig1` | — | Font discovery | `libssl1.1` is already present in the base image, so it does not need to be listed in `apt-get install`. If you must use a newer base image, set `DOTNET_SYSTEM_GLOBALIZATION_INVARIANT=1` to bypass the ICU requirement. This disables culture-specific formatting and does **not** solve the OpenSSL problem, so Debian 11 remains the simpler choice. ## **Fonts** Slim images contain no fonts at all. Without at least one font installed, text renders as blank boxes in PDF, image, and HTML output. `fonts-dejavu-core` is a small general-purpose starting point. To match a presentation's intended appearance, copy the fonts it uses into the image and point Aspose.Slides at them: ```dockerfile COPY fonts/ /usr/share/fonts/truetype/custom/ RUN fc-cache -f ``` ```py import aspose.slides as slides slides.FontsLoader.load_external_fonts(["/usr/share/fonts/truetype/custom/"]) ``` ## **Licensing inside a container** Do not build the license file into the image — anyone who pulls the image gets the license. Mount it at run time instead: ```bash docker run --rm -v /path/on/host:/license aspose-slides-python ``` ```py import aspose.slides as slides license = slides.License() license.set_license("/license/Aspose.Slides.Python.NET.lic") ``` Without a license the library runs in evaluation mode, which adds a watermark and limits the number of slides processed. See [Licensing](https://docs.aspose.com/slides/python-net/licensing/) for details. ## **Memory** Rendering to PDF or images is more memory-hungry than reading a file. Containers with tight memory limits can be terminated by the OOM killer partway through a conversion, which usually surfaces as the process disappearing without a Python traceback. If that happens, raise the container's memory limit before investigating the code. # Manage Image Transform Effects in Presentations with Python > Apply, chain, inspect, remove, and verify image transform effects for picture frames with Aspose.Slides for Python via .NET. Source: https://docs.aspose.com/slides/python-net/image-transform-effects/ Updated: 2026-11-17 ## **Overview** Aspose.Slides represents picture adjustments as an ordered collection of image transform operations. For a picture frame, start with the frame's [Picture](https://reference.aspose.com/slides/python-net/aspose.slides/picture/) and access its [image_transform](https://reference.aspose.com/slides/python-net/aspose.slides/picture/image_transform/) property. The returned [ImageTransformOperationCollection](https://reference.aspose.com/slides/python-net/aspose.slides.effects/imagetransformoperationcollection/) lets you append, enumerate, inspect, remove, and clear effects without rewriting the original image bytes. This article demonstrates a complete workflow for brightness and contrast, color transformations, blur, transparency, ordered effect chains, effective values, removal, and PPTX round-trip verification. ## **Understand Effect Ownership and Image Reuse** An image resource and the picture that displays it are different objects: - [PPImage](https://reference.aspose.com/slides/python-net/aspose.slides/ppimage/) stores or references the source image data owned by the presentation. - [Picture](https://reference.aspose.com/slides/python-net/aspose.slides/picture/) belongs to a picture fill and refers to an image resource while storing the image transform collection. - [PictureFrame](https://reference.aspose.com/slides/python-net/aspose.slides/pictureframe/) is the slide shape that owns the relevant picture fill, geometry, crop settings, and other frame-level formatting. Therefore, image transform operations do not modify the bytes in [PPImage](https://reference.aspose.com/slides/python-net/aspose.slides/ppimage/). When the same `PPImage` is passed to [ShapeCollection.add_picture_frame](https://reference.aspose.com/slides/python-net/aspose.slides/shapecollection/add_picture_frame/) more than once, each new picture frame receives its own `Picture` and its own transform collection. Applying grayscale to one frame does not make the other frames grayscale, even though all of them reuse the same embedded image resource. The same `Picture.image_transform` model is also used by other picture fills, such as a shape or slide background. The examples below focus on picture frames. ## **Use Valid Parameter Ranges and Units** The demonstrated methods use the following semantic ranges and units. Keep values in these ranges even if a particular library version does not reject every out-of-range value immediately; the target presentation format may normalize, omit, or reject invalid data during save or when PowerPoint opens the file. | Operation | Parameters | Valid range and unit | |---|---|---| | [add_brightness_contrast_effect](https://reference.aspose.com/slides/python-net/aspose.slides.effects/imagetransformoperationcollection/add_brightness_contrast_effect/) | `brightness`, `contrast` | `-100` through `100`, percent; `0` leaves the component unchanged. | | [add_gray_scale_effect](https://reference.aspose.com/slides/python-net/aspose.slides.effects/imagetransformoperationcollection/add_gray_scale_effect/) | None | No numeric parameters. Alpha is unchanged. | | [add_duotone_effect](https://reference.aspose.com/slides/python-net/aspose.slides.effects/imagetransformoperationcollection/add_duotone_effect/) | `color1`, `color2` | Two colors for dark and light pixels. RGB and alpha channels use `0` through `255`. | | [add_tint_effect](https://reference.aspose.com/slides/python-net/aspose.slides.effects/imagetransformoperationcollection/add_tint_effect/) | `hue`, `amount` | Hue is `0` inclusive through `360` exclusive, in degrees; amount is `-100` through `100`, percent. | | [add_hsl_effect](https://reference.aspose.com/slides/python-net/aspose.slides.effects/imagetransformoperationcollection/add_hsl_effect/) | `hue`, `saturation`, `luminance` | Hue is `0` inclusive through `360` exclusive, in degrees; saturation and luminance are `-100` through `100`, percent. | | [add_color_replace_effect](https://reference.aspose.com/slides/python-net/aspose.slides.effects/imagetransformoperationcollection/add_color_replace_effect/) | `color` | The replacement color uses channel values from `0` through `255`. Existing alpha values are unchanged. | | [add_blur_effect](https://reference.aspose.com/slides/python-net/aspose.slides.effects/imagetransformoperationcollection/add_blur_effect/) | `radius`, `grow` | Radius is nonnegative and is measured in points; `grow` is a Boolean that controls whether blurred content may extend outside the original bounds. | | [add_alpha_modulate_fixed_effect](https://reference.aspose.com/slides/python-net/aspose.slides.effects/imagetransformoperationcollection/add_alpha_modulate_fixed_effect/) | `amount` | Nonnegative percent. Use `0` through `100` for ordinary opacity scaling: `0` is fully transparent and `100` preserves the existing alpha. | | [add_alpha_replace_effect](https://reference.aspose.com/slides/python-net/aspose.slides.effects/imagetransformoperationcollection/add_alpha_replace_effect/) | `alpha` | `0` through `100`, percent opacity. | | [add_alpha_bi_level_effect](https://reference.aspose.com/slides/python-net/aspose.slides.effects/imagetransformoperationcollection/add_alpha_bi_level_effect/) | `threshold` | `0` through `100`, percent alpha threshold. Values below it become transparent; values at or above it become opaque. | For fixed alpha modulation, transparency and opacity are complementary. For example, 35% transparency corresponds to an alpha modulation amount of 65%. ## **Apply Brightness and Contrast** [ImageTransformOperationCollection.add_brightness_contrast_effect](https://reference.aspose.com/slides/python-net/aspose.slides.effects/imagetransformoperationcollection/add_brightness_contrast_effect/) returns a [BrightnessContrast](https://reference.aspose.com/slides/python-net/aspose.slides.effects/brightnesscontrast/) operation. Its scalar settings are supplied when the operation is created. [BrightnessContrast.get_effective](https://reference.aspose.com/slides/python-net/aspose.slides.effects/brightnesscontrast/get_effective/) returns calculated read-only values that can be inspected or logged. The following example increases brightness by 15% and contrast by 20%, then renders a preview without modifying the embedded image: ```python import aspose.slides as slides with slides.Presentation() as presentation: slide = presentation.slides[0] with slides.Images.from_file("photo.png") as source_image: image = presentation.images.add_image(source_image) picture_frame = slide.shapes.add_picture_frame(slides.ShapeType.RECTANGLE, 50, 50, 400, 260, image) image_transform = picture_frame.picture_format.picture.image_transform brightness_contrast = image_transform.add_brightness_contrast_effect(15, 20) effective_values = brightness_contrast.get_effective() print("Brightness: " + str(effective_values.brightness) + "%") print("Contrast: " + str(effective_values.contrast) + "%") with slide.get_image() as preview: preview.save("brightness-contrast-preview.png") ``` [BrightnessContrast](https://reference.aspose.com/slides/python-net/aspose.slides.effects/brightnesscontrast/) is an Office 2010 picture-effect extension and is less portable than the standard DrawingML luminance effect. When brightness and contrast must remain editable after a PPTX round trip, use [ImageTransformOperationCollection.add_luminance_effect](https://reference.aspose.com/slides/python-net/aspose.slides.effects/imagetransformoperationcollection/add_luminance_effect/) and verify the result after reopening the file. The format limitations section explains this distinction in more detail. ## **Apply Color Transformations** Color effects can be applied independently to different picture frames that reuse one image resource. The following example creates five frames and applies grayscale, duotone, tint, HSL adjustment, and color replacement. [Duotone](https://reference.aspose.com/slides/python-net/aspose.slides.effects/duotone/) contains two independently editable color parameters: `color1` maps dark pixels, while `color2` maps light pixels. This makes it a useful example of an effect whose settings are more complex than a single scalar value. ```python import aspose.pydrawing as draw import aspose.slides as slides with slides.Presentation() as presentation: slide = presentation.slides[0] with slides.Images.from_file("photo.png") as source_image: image = presentation.images.add_image(source_image) gray_frame = slide.shapes.add_picture_frame(slides.ShapeType.RECTANGLE, 20, 20, 180, 120, image) gray_frame.picture_format.picture.image_transform.add_gray_scale_effect() duotone_frame = slide.shapes.add_picture_frame(slides.ShapeType.RECTANGLE, 220, 20, 180, 120, image) duotone = duotone_frame.picture_format.picture.image_transform.add_duotone_effect() duotone.color1.color = draw.Color.navy duotone.color2.color = draw.Color.gold tint_frame = slide.shapes.add_picture_frame(slides.ShapeType.RECTANGLE, 420, 20, 180, 120, image) tint_frame.picture_format.picture.image_transform.add_tint_effect(210, 35) hsl_frame = slide.shapes.add_picture_frame(slides.ShapeType.RECTANGLE, 120, 170, 180, 120, image) hsl_frame.picture_format.picture.image_transform.add_hsl_effect(30, 20, -10) replacement_frame = slide.shapes.add_picture_frame(slides.ShapeType.RECTANGLE, 320, 170, 180, 120, image) color_replacement = replacement_frame.picture_format.picture.image_transform.add_color_replace_effect() color_replacement.color.color = draw.Color.cornflower_blue presentation.save("color-transformations.pptx", slides.export.SaveFormat.PPTX) ``` [add_color_replace_effect](https://reference.aspose.com/slides/python-net/aspose.slides.effects/imagetransformoperationcollection/add_color_replace_effect/) replaces every pixel's color with one fixed color while preserving alpha. It is different from [add_color_change_effect](https://reference.aspose.com/slides/python-net/aspose.slides.effects/imagetransformoperationcollection/add_color_change_effect/), which maps one source color to another and exposes both source and target color formats. ### **Apply a Luminance Threshold** A luminance threshold can make faint marks on a scanned page easier to distinguish from the background. [add_gray_scale_effect](https://reference.aspose.com/slides/python-net/aspose.slides.effects/imagetransformoperationcollection/add_gray_scale_effect/) preserves intermediate shades of gray. [add_bi_level_effect](https://reference.aspose.com/slides/python-net/aspose.slides.effects/imagetransformoperationcollection/add_bi_level_effect/) maps luminance to black or white, while [add_alpha_bi_level_effect](https://reference.aspose.com/slides/python-net/aspose.slides.effects/imagetransformoperationcollection/add_alpha_bi_level_effect/) applies a threshold to opacity. The luminance threshold ranges from 0% to 100%, inclusive. Pixels below the threshold become black. Pixels at or above it become white. Raising the threshold turns more shades black because more of them fall below the cutoff. Download [grayscale-swatches.png](https://docs.aspose.com/slides/python-net/image-transform-effects/grayscale-swatches.png) to the working directory. Each label gives the original gray level on a scale from 0 to 255. The example places the original beside two copies and saves each copy's threshold in the presentation. ```python import aspose.slides as slides with slides.Presentation() as presentation: presentation.slide_size.set_size(720, 150, slides.SlideSizeScaleType.DO_NOT_SCALE) shapes = presentation.slides[0].shapes with slides.Images.from_file("grayscale-swatches.png") as source_image: image = presentation.images.add_image(source_image) def add_frame(x, caption): label = shapes.add_auto_shape(slides.ShapeType.RECTANGLE, x, 12, 216, 36) label.text_frame.text = caption return shapes.add_picture_frame(slides.ShapeType.RECTANGLE, x, 60, 216, 72, image) add_frame(12, "Original") low_threshold = add_frame(252, "Threshold 20%") low_threshold.picture_format.picture.image_transform.add_bi_level_effect(20) high_threshold = add_frame(492, "Threshold 60%") high_threshold.picture_format.picture.image_transform.add_bi_level_effect(60) presentation.save("luminance-threshold.pptx", slides.export.SaveFormat.PPTX) ``` Open the output presentation in PowerPoint to compare the three frames. The swatch labeled 96 has about 38% luminance (96 out of 255). It turns white at the 20% threshold and black at the 60% threshold. ![Original grayscale swatches beside the black-and-white results at luminance thresholds of 20% and 60%](https://docs.aspose.com/slides/python-net/image-transform-effects/luminance-threshold.png) ## **Add Blur, Transparency, and Alpha Effects** [add_blur_effect](https://reference.aspose.com/slides/python-net/aspose.slides.effects/imagetransformoperationcollection/add_blur_effect/) affects all color channels, including alpha. Set `grow` to `True` when the blurred edge may extend beyond the original picture bounds. For uniform transparency, use [add_alpha_modulate_fixed_effect](https://reference.aspose.com/slides/python-net/aspose.slides.effects/imagetransformoperationcollection/add_alpha_modulate_fixed_effect/). It multiplies every existing alpha value, so partially transparent pixels remain proportionally different. [add_alpha_replace_effect](https://reference.aspose.com/slides/python-net/aspose.slides.effects/imagetransformoperationcollection/add_alpha_replace_effect/) instead assigns one alpha value to all pixels. [add_alpha_bi_level_effect](https://reference.aspose.com/slides/python-net/aspose.slides.effects/imagetransformoperationcollection/add_alpha_bi_level_effect/) converts alpha to two levels based on a threshold. ```python import aspose.slides as slides with slides.Presentation() as presentation: slide = presentation.slides[0] with slides.Images.from_file("photo.png") as source_image: image = presentation.images.add_image(source_image) blurred_frame = slide.shapes.add_picture_frame(slides.ShapeType.RECTANGLE, 20, 20, 200, 140, image) blur = blurred_frame.picture_format.picture.image_transform.add_blur_effect(4.5, True) blur.radius = 5 transparent_frame = slide.shapes.add_picture_frame(slides.ShapeType.RECTANGLE, 240, 20, 200, 140, image) alpha_modulate = transparent_frame.picture_format.picture.image_transform.add_alpha_modulate_fixed_effect(65) alpha_modulate.amount = 60 uniform_alpha_frame = slide.shapes.add_picture_frame(slides.ShapeType.RECTANGLE, 20, 180, 200, 140, image) uniform_alpha_frame.picture_format.picture.image_transform.add_alpha_replace_effect(55) binary_alpha_frame = slide.shapes.add_picture_frame(slides.ShapeType.RECTANGLE, 240, 180, 200, 140, image) alpha_bi_level = binary_alpha_frame.picture_format.picture.image_transform.add_alpha_bi_level_effect(50) alpha_bi_level.threshold = 45 binary_alpha_frame.picture_format.picture.image_transform.add_alpha_inverse_effect() presentation.save("blur-and-alpha-effects.pptx", slides.export.SaveFormat.PPTX) ``` Other parameter-free alpha operations include [add_alpha_ceiling_effect](https://reference.aspose.com/slides/python-net/aspose.slides.effects/imagetransformoperationcollection/add_alpha_ceiling_effect/), which makes every nonzero alpha fully opaque; [add_alpha_floor_effect](https://reference.aspose.com/slides/python-net/aspose.slides.effects/imagetransformoperationcollection/add_alpha_floor_effect/), which makes every alpha below 100% fully transparent; and [add_alpha_inverse_effect](https://reference.aspose.com/slides/python-net/aspose.slides.effects/imagetransformoperationcollection/add_alpha_inverse_effect/), which changes alpha to `100% - alpha`. ## **Build an Ordered Effect Chain** Every `add_..._effect` method appends a new operation to the end of the collection. The renderer uses the collection as an ordered pipeline: the output of operation 0 becomes the input of operation 1, and so on. Consequently, the same operations in a different order can produce a different image. For example, grayscale followed by tint first removes chromatic information and then recolors the luminance result. Tint followed by grayscale removes the tint again. Similarly, alpha replacement can override alpha values calculated by earlier operations, while alpha modulation preserves their relative differences. The following example builds a four-operation chain, saves it as PPTX, reopens the presentation, checks both the operation types and their order, and renders the reopened result: ```python import aspose.slides as slides with slides.Presentation() as presentation: slide = presentation.slides[0] with slides.Images.from_file("photo.png") as source_image: image = presentation.images.add_image(source_image) picture_frame = slide.shapes.add_picture_frame(slides.ShapeType.RECTANGLE, 50, 50, 400, 260, image) image_transform = picture_frame.picture_format.picture.image_transform image_transform.add_gray_scale_effect() image_transform.add_tint_effect(220, 25) image_transform.add_blur_effect(2.5, False) image_transform.add_alpha_modulate_fixed_effect(80) presentation.save("image-transform-chain.pptx", slides.export.SaveFormat.PPTX) with slides.Presentation("image-transform-chain.pptx") as reopened_presentation: reopened_shape = reopened_presentation.slides[0].shapes[0] if isinstance(reopened_shape, slides.PictureFrame): reopened_transform = reopened_shape.picture_format.picture.image_transform order_is_preserved = ( len(reopened_transform) == 4 and isinstance(reopened_transform[0], slides.effects.GrayScale) and isinstance(reopened_transform[1], slides.effects.Tint) and isinstance(reopened_transform[2], slides.effects.Blur) and isinstance(reopened_transform[3], slides.effects.AlphaModulateFixed) ) print("The effect chain was preserved." if order_is_preserved else "The effect chain changed during the round trip.") with reopened_presentation.slides[0].get_image() as rendered_slide: rendered_slide.save("reopened-effect-chain.png") else: print("The reopened shape is not a picture frame.") ``` The collection does not impose a compatibility matrix that restricts color, alpha, and blur operations to separate chains. They can be combined, but combinations are not always useful. A fixed color replacement removes RGB variation produced by earlier color effects; grayscale after duotone removes the two selected colors; and alpha ceiling, floor, replacement, or bi-level operations can discard alpha detail created earlier. Build the chain according to the desired pixel-processing sequence rather than treating its items as unordered formatting flags. [![The same image passes through grayscale then tint, and tint then grayscale. The two final grayscale images have different tones.](https://docs.aspose.com/slides/python-net/image-transform-effects/visual-image-transform-effects-49aa72211f3a.svg)](https://docs.aspose.com/slides/python-net/image-transform-effects/visual-image-transform-effects-49aa72211f3a.svg) *In this illustrative Aspose.Slides for .NET 26.11 render, a 220° tint at 25% leaves the grayscale image unchanged. Applying the same tint before grayscale produces different tones.* ## **Inspect Editable and Effective Values** An editable operation is the object stored in `Picture.image_transform`. Depending on the effect, it may expose writable members directly. For example, [Blur](https://reference.aspose.com/slides/python-net/aspose.slides.effects/blur/) exposes writable `radius` and `grow` properties, [AlphaModulateFixed](https://reference.aspose.com/slides/python-net/aspose.slides.effects/alphamodulatefixed/) exposes a writable `amount` property, and [AlphaBiLevel](https://reference.aspose.com/slides/python-net/aspose.slides.effects/alphabilevel/) exposes a writable `threshold` property. Color effects such as [Duotone](https://reference.aspose.com/slides/python-net/aspose.slides.effects/duotone/) expose mutable [ColorFormat](https://reference.aspose.com/slides/python-net/aspose.slides/colorformat/) objects. Some operations, including [BrightnessContrast](https://reference.aspose.com/slides/python-net/aspose.slides.effects/brightnesscontrast/), [HSL](https://reference.aspose.com/slides/python-net/aspose.slides.effects/hsl/), [Tint](https://reference.aspose.com/slides/python-net/aspose.slides.effects/tint/), and [AlphaReplace](https://reference.aspose.com/slides/python-net/aspose.slides.effects/alphareplace/), do not expose their creation scalars as writable properties. To change those settings, remove the operation and add a replacement at the required position. Effective data returned by `get_effective()` is calculated and read-only. It is useful for resolving theme-dependent colors and reading the normalized values that the renderer uses, but it is not another editing surface. The following example enumerates the chain and inspects effective values where the corresponding API provides them: ```python import aspose.slides as slides with slides.Presentation("image-transform-chain.pptx") as presentation: picture_frame = None for shape in presentation.slides[0].shapes: if isinstance(shape, slides.PictureFrame): picture_frame = shape break if picture_frame is not None: image_transform = picture_frame.picture_format.picture.image_transform for index, operation in enumerate(image_transform): print(str(index) + ": " + type(operation).__name__) if isinstance(operation, slides.effects.BrightnessContrast): effect_data = operation.get_effective() print(" Brightness: " + str(effect_data.brightness)) print(" Contrast: " + str(effect_data.contrast)) elif isinstance(operation, slides.effects.Luminance): effect_data = operation.get_effective() print(" Brightness: " + str(effect_data.brightness)) print(" Contrast: " + str(effect_data.contrast)) elif isinstance(operation, slides.effects.Duotone): effect_data = operation.get_effective() print(" Dark color: " + str(effect_data.color1)) print(" Light color: " + str(effect_data.color2)) elif isinstance(operation, slides.effects.ColorReplace): effect_data = operation.get_effective() print(" Replacement color: " + str(effect_data.color)) elif isinstance(operation, slides.effects.HSL): effect_data = operation.get_effective() print(" HSL: " + str(effect_data.hue) + ", " + str(effect_data.saturation) + ", " + str(effect_data.luminance)) elif isinstance(operation, slides.effects.Tint): effect_data = operation.get_effective() print(" Tint: " + str(effect_data.hue) + ", " + str(effect_data.amount)) elif isinstance(operation, slides.effects.Blur): effect_data = operation.get_effective() print(" Blur radius: " + str(effect_data.radius) + " pt") elif isinstance(operation, slides.effects.AlphaModulateFixed): effect_data = operation.get_effective() print(" Alpha amount: " + str(effect_data.amount) + "%") elif isinstance(operation, slides.effects.AlphaReplace): effect_data = operation.get_effective() print(" Replacement alpha: " + str(effect_data.alpha) + "%") elif isinstance(operation, slides.effects.AlphaBiLevel): effect_data = operation.get_effective() print(" Alpha threshold: " + str(effect_data.threshold) + "%") ``` Parameter-free effects such as grayscale, alpha ceiling, and alpha inverse still have an effective-data object, but there are no scalar settings to print. Their presence and position in the collection are the important information. ## **Remove or Clear Image Transforms** Use [ImageTransformOperationCollection.remove_at](https://reference.aspose.com/slides/python-net/aspose.slides.effects/imagetransformoperationcollection/remove_at/) to remove one operation by index. Because indexes shift after removal, search for the target first and remove it after enumeration. Use `clear()` to remove the entire chain. ```python import aspose.slides as slides with slides.Presentation("image-transform-chain.pptx") as presentation: picture_frame = None for shape in presentation.slides[0].shapes: if isinstance(shape, slides.PictureFrame): picture_frame = shape break if picture_frame is not None: image_transform = picture_frame.picture_format.picture.image_transform blur_index = None for index, operation in enumerate(image_transform): if isinstance(operation, slides.effects.Blur): blur_index = index break if blur_index is not None: image_transform.remove_at(blur_index) print("The blur operation was removed.") image_transform.clear() print("Remaining operations: " + str(len(image_transform))) presentation.save("image-transforms-cleared.pptx", slides.export.SaveFormat.PPTX) ``` Removing or clearing transforms changes only the picture formatting. It does not delete, recompress, or otherwise alter the reused [PPImage](https://reference.aspose.com/slides/python-net/aspose.slides/ppimage/) resource. ## **Consider Presentation Formats and Export Targets** Image transforms originate in DrawingML, so PPTX is the preferred editable format for effect chains. Even with PPTX, not every operation has identical portability: - Standard DrawingML operations such as luminance, grayscale, duotone, tint, HSL, blur, and common alpha operations have the best chance of surviving a PPTX round trip. Always reopen the generated file and inspect the collection when preservation is a requirement. - [BrightnessContrast](https://reference.aspose.com/slides/python-net/aspose.slides.effects/brightnesscontrast/) is an Office 2010 extension rather than the standard DrawingML luminance operation. It can be used for in-memory rendering, but it is not guaranteed to remain as an editable `BrightnessContrast` operation after saving and reopening PPTX. Prefer [add_luminance_effect](https://reference.aspose.com/slides/python-net/aspose.slides.effects/imagetransformoperationcollection/add_luminance_effect/) for persistent brightness and contrast adjustments. - The binary PPT format predates the full DrawingML effect model. Saving to PPT can omit unsupported operations, reduce a chain to a supported subset, or approximate the appearance. Do not use PPT as the verification format for a complex editable chain. - Rendering to PNG, JPEG, TIFF, PDF, SVG, HTML, or other visual output applies the supported chain to the rendered appearance. Those outputs do not contain an editable `ImageTransformOperationCollection`; raster formats flatten the result into pixels, and document or vector exports store their own rendering representation. - Effects do not make a linked image self-contained. Rendering a linked picture still depends on the linked resource being available when the presentation is loaded. Different presentation consumers may render edge cases differently, especially when several alpha or color-quantizing operations are combined. For critical output, test both the editable round trip and the final export format with the same Aspose.Slides version used in production. ## **FAQ** **Do image transform effects modify the embedded image data?** No. The operations belong to the `Picture` used by the picture fill. The underlying `PPImage` bytes remain unchanged. **Will two picture frames that reuse the same image share their effects?** No. Reusing a `PPImage` avoids duplicate image data, but each picture frame normally has a separate `Picture` and image transform collection. **Can color, blur, and alpha effects be combined?** Yes. The collection accepts them in one ordered chain. Consider what each operation does to the output of the previous one because replacement and threshold operations may discard earlier color or alpha detail. **Why are effective values read-only?** Effective data represents calculated values used for rendering, including resolved colors. Edit the operation stored in the transform collection where writable members exist; otherwise remove it and add a replacement with new creation parameters. **Which format should I use to preserve a transform chain?** Use PPTX and verify the file by reopening it. Legacy PPT cannot represent the full DrawingML effect model, and rendered export formats preserve appearance rather than editable transform operations. # Optimize Image Management in Presentations with Python > Learn how to add, reuse, link, replace, and manage raster and SVG images in PowerPoint and OpenDocument presentations with Aspose.Slides for Python via .NET. Source: https://docs.aspose.com/slides/python-net/image/ Updated: 2026-11-08 ## **Introduction** Aspose.Slides for Python via .NET provides several ways to work with images, and each one serves a different purpose. You can store an image in a presentation, display it in a picture frame, use it as a slide background, link to an external image, replace a shared image resource, or convert SVG content into editable shapes. This article focuses on image resources and how they are used across a presentation. For cropping, transparency, effects, stretching, and other formatting applied to an individual picture frame, see [Picture Frame](https://docs.aspose.com/slides/python-net/picture-frame/). ## **Understand the Image Model** The following API concepts are closely related but not interchangeable: - The [presentation image collection](https://reference.aspose.com/slides/python-net/aspose.slides/imagecollection/) stores image resources used by the presentation. Use [ImageCollection.add_image](https://reference.aspose.com/slides/python-net/aspose.slides/imagecollection/add_image/) to add image data and obtain an [IPPImage](https://reference.aspose.com/slides/python-net/aspose.slides/ippimage/) resource. - A [picture frame](https://reference.aspose.com/slides/python-net/aspose.slides/ipictureframe/) is a shape that displays an image on a slide, layout, or master. Use [ShapeCollection.add_picture_frame](https://reference.aspose.com/slides/python-net/aspose.slides/shapecollection/add_picture_frame/) to place an image resource on a slide. - A slide background uses an image as part of the slide fill rather than as a shape. It therefore does not behave like a picture frame. - [IPPImage.replace_image](https://reference.aspose.com/slides/python-net/aspose.slides/ippimage/replace_image/) replaces an image resource. If several presentation elements use that resource, they all use the replacement. - Converting an SVG to shapes creates editable slide shapes. After conversion, the content is no longer managed as one picture resource. A typical workflow is therefore: add image data to the image collection, receive an [IPPImage](https://reference.aspose.com/slides/python-net/aspose.slides/ippimage/), and then use that resource in one or more picture frames or fills. [![Two picture frames and a background share one embedded image. A separate SVG conversion creates editable shapes.](https://docs.aspose.com/slides/python-net/image/visual-image-9c661bc60854.svg)](https://docs.aspose.com/slides/python-net/image/visual-image-9c661bc60854.svg) *In this diagram, replacing the shared image updates both picture frames and the background. SVG conversion creates separate slide objects.* ## **Add an Embedded Image** To insert a local image, read the file, add its data to the image collection, and create a picture frame that uses the returned `IPPImage`. ```python import aspose.slides as slides with open("photo.png", "rb") as image_stream: image_data = image_stream.read() with slides.Presentation() as presentation: image = presentation.images.add_image(image_data) slide = presentation.slides[0] slide.shapes.add_picture_frame(slides.ShapeType.RECTANGLE, 20, 20, 320, 180, image) presentation.save("presentation.pptx", slides.export.SaveFormat.PPTX) ``` The image added this way is embedded in the presentation, so the resulting file does not depend on the original image file remaining available. ### **Add an Image from the Web** When an image is available through HTTP or HTTPS, download its bytes, add them to the presentation image collection, and use the returned image resource in the same way as a local image. ```python from urllib.request import urlopen import aspose.slides as slides image_url = "https://example.com/image.png" with urlopen(image_url) as response: image_data = response.read() with slides.Presentation() as presentation: image = presentation.images.add_image(image_data) slide = presentation.slides[0] slide.shapes.add_picture_frame(slides.ShapeType.RECTANGLE, 20, 20, 320, 180, image) presentation.save("presentation-from-web.pptx", slides.export.SaveFormat.PPTX) ``` In long-running applications, reuse an HTTP client or connection pool where appropriate rather than creating a new connection for every request. Also validate remote URLs, response sizes, and content types when the source is not trusted. ## **Reuse Images Across Slides** If the same image is needed more than once, add it to the presentation once and reuse the returned [IPPImage](https://reference.aspose.com/slides/python-net/aspose.slides/ippimage/) when creating additional picture frames. This avoids repeatedly loading the same source data and makes the relationship between the shared image resource and its uses explicit. For graphics that should appear automatically on many slides, such as a company logo, consider placing the picture frame on a [slide master](https://docs.aspose.com/slides/python-net/slide-master/) or layout instead of adding an equivalent shape to every slide. ## **Use an Image as a Slide Background** A background image is assigned to the slide fill; it is not added as a picture-frame shape. This is useful when the picture should cover the slide background and should not be manipulated as a normal slide object. ```python import aspose.slides as slides with open("background.jpg", "rb") as image_stream: image_data = image_stream.read() with slides.Presentation() as presentation: slide = presentation.slides[0] image = presentation.images.add_image(image_data) slide.background.type = slides.BackgroundType.OWN_BACKGROUND slide.background.fill_format.fill_type = slides.FillType.PICTURE slide.background.fill_format.picture_fill_format.picture_fill_mode = slides.PictureFillMode.STRETCH slide.background.fill_format.picture_fill_format.picture.image = image presentation.save("background-image.pptx", slides.export.SaveFormat.PPTX) ``` For additional background options, including master and layout backgrounds, see [Presentation Background](https://docs.aspose.com/slides/python-net/presentation-background/). ## **Embedded Images and Linked Images** Embedded and linked images have different portability and file-size tradeoffs: - **Embedded image:** the image data is stored inside the presentation. The presentation is self-contained, but the file size includes the image data. - **Linked image:** the presentation stores a path or URL to an external image. This can reduce the presentation size, but the external resource must remain accessible when the presentation is opened or rendered. A linked picture can be created by assigning the external path or URL through [ISlidesPicture.link_path_long](https://reference.aspose.com/slides/python-net/aspose.slides/islidespicture/link_path_long/) rather than embedding the image data. ```python import aspose.slides as slides with slides.Presentation() as presentation: slide = presentation.slides[0] picture_frame = slide.shapes.add_picture_frame(slides.ShapeType.RECTANGLE, 20, 20, 320, 180, None) picture_frame.picture_format.picture.link_path_long = "https://example.com/image.png" presentation.save("linked-image.pptx", slides.export.SaveFormat.PPTX) ``` Use linked images only when the deployment environment can reliably access the external resource. For presentations that must work offline or be moved between systems, embedded images are usually safer. ## **Work with SVG Images** SVG is a vector format, so it can be useful for icons, diagrams, and other graphics that should scale without the same loss of detail as raster images. Aspose.Slides supports SVG both as an image resource and as a source for editable slide shapes. ### **Add an SVG as an Image** Create an [SvgImage](https://reference.aspose.com/slides/python-net/aspose.slides/svgimage/), add it to the image collection, and place the resulting image resource in a picture frame. ```python import aspose.slides as slides with open("icon.svg", "r", encoding="utf-8") as svg_stream: svg_content = svg_stream.read() svg_image = slides.SvgImage(svg_content) with slides.Presentation() as presentation: image = presentation.images.add_image(svg_image) slide = presentation.slides[0] slide.shapes.add_picture_frame(slides.ShapeType.RECTANGLE, 20, 20, 200, 200, image) presentation.save("svg-image.pptx", slides.export.SaveFormat.PPTX) ``` ### **Convert SVG to Editable Shapes** Aspose.Slides can convert an SVG into a group of editable slide shapes, similar to the corresponding PowerPoint command. ![PowerPoint Popup Menu](https://docs.aspose.com/slides/python-net/image/img_01_01.png) Use the [ShapeCollection.add_group_shape](https://reference.aspose.com/slides/python-net/aspose.slides/shapecollection/add_group_shape/) overload that accepts an [ISvgImage](https://reference.aspose.com/slides/python-net/aspose.slides/isvgimage/) to perform the conversion. ```python import aspose.slides as slides with open("diagram.svg", "r", encoding="utf-8") as svg_stream: svg_content = svg_stream.read() svg_image = slides.SvgImage(svg_content) with slides.Presentation() as presentation: slide_size = presentation.slide_size.size slide = presentation.slides[0] slide.shapes.add_group_shape(svg_image, 0, 0, slide_size.width, slide_size.height) presentation.save("editable-svg-shapes.pptx", slides.export.SaveFormat.PPTX) ``` Use SVG-to-shapes conversion when individual vector elements need to be edited as PowerPoint shapes. If the SVG only needs to be displayed, keeping it as an image is simpler and avoids creating many separate shapes. ## **Replace an Existing Image Resource** Use [IPPImage.replace_image](https://reference.aspose.com/slides/python-net/aspose.slides/ippimage/replace_image/) when you want to replace an existing image resource. This is especially useful for shared graphics such as logos. ```python import aspose.slides as slides with open("new-logo.png", "rb") as image_stream: image_data = image_stream.read() with slides.Presentation("input.pptx") as presentation: image_to_replace = presentation.images[0] image_to_replace.replace_image(image_data) presentation.save("output.pptx", slides.export.SaveFormat.PPTX) ``` If multiple picture frames, backgrounds, masters, or layouts use the same image resource, replacing that resource updates all of those uses. If only one picture frame should change, assign a different image to that frame instead of replacing the shared resource. `replace_image` also provides overloads that accept an [IImage](https://reference.aspose.com/slides/python-net/aspose.slides/iimage/) or another [IPPImage](https://reference.aspose.com/slides/python-net/aspose.slides/ippimage/). ## **Practical Image Management Guidance** ### **Control Presentation Size** Large raster images can make a presentation unnecessarily large. Use source images with dimensions appropriate for their intended display size, reuse shared image resources where possible, and avoid embedding repeated copies of the same full-resolution graphic. For raster pictures that have already been placed in picture frames, [PictureFillFormat.compress_image](https://reference.aspose.com/slides/python-net/aspose.slides/picturefillformat/compress_image/) can reduce image data according to the selected resolution and crop settings. This is picture-frame processing rather than image-collection management, so see [Picture Frame](https://docs.aspose.com/slides/python-net/picture-frame/) for related formatting operations. ### **Choose Between Embedded and Linked Content** Embedding makes the presentation portable because all required image data travels with the file. Linking can reduce file size, but it introduces an external dependency. Use links only when that dependency is acceptable and stable. ### **Reuse Shared Branding** For repeated logos, watermarks, or decorative graphics, use one image resource and reuse it. If the graphic belongs to the presentation design rather than slide content, place it on a master or layout so it is inherited by the appropriate slides. ### **Keep SVG Resources Portable** A self-contained SVG is easier to move and render consistently than an SVG that depends on external files or network resources. When possible, embed required resources before importing the SVG. Convert SVG to shapes only when the individual vector elements need to be edited. ### **Use the Modern Cross-Platform Image API** For new Python via .NET code, use the Aspose.Slides [IImage](https://reference.aspose.com/slides/python-net/aspose.slides/iimage/) and [Images](https://reference.aspose.com/slides/python-net/aspose.slides/images/) APIs instead of the deprecated `aspose.pydrawing.Image` or `aspose.pydrawing.Bitmap` image APIs. See [Modern API](https://docs.aspose.com/slides/python-net/modern-api/) for migration guidance. WMF and EMF require special consideration. When these formats are passed through an [IImage](https://reference.aspose.com/slides/python-net/aspose.slides/iimage/), [ImageCollection.add_image](https://reference.aspose.com/slides/python-net/aspose.slides/imagecollection/add_image/) converts the metafile to a raster PNG representation before insertion. If preserving the metafile data is important, use a stream-based [ImageCollection.add_image](https://reference.aspose.com/slides/python-net/aspose.slides/imagecollection/add_image/) overload instead. Generating EMF content from spreadsheets or other products is a separate integration workflow and is outside the scope of this article. ## **FAQ** **What is the difference between the image collection and a picture frame?** The image collection stores reusable image resources. A picture frame is a slide shape that displays one of those resources and provides picture-specific formatting such as cropping and effects. **What is the best way to replace the same logo everywhere?** If the logo is already shared as one image resource, replace that resource with [IPPImage.replace_image](https://reference.aspose.com/slides/python-net/aspose.slides/ippimage/replace_image/). For presentation-wide branding, placing the logo on a master or layout can also reduce duplicated slide content. **Why does a linked image disappear on another computer?** A linked picture depends on its external file or URL. If that resource cannot be reached from the other computer, the linked image may be unavailable. Embed the image when the presentation must be self-contained. **Can an inserted SVG be edited as PowerPoint shapes?** Yes. Convert the SVG with [ShapeCollection.add_group_shape](https://reference.aspose.com/slides/python-net/aspose.slides/shapecollection/add_group_shape/); the resulting group contains editable slide shapes rather than one SVG picture. **How can I keep presentations with many images smaller?** Reuse shared image resources, avoid unnecessarily large raster sources, compress suitable raster pictures when appropriate, keep repeated branding on masters or layouts, and use linked images only when an external dependency is acceptable. ## Related articles - [Add Picture Frames to Presentations with Python](https://docs.aspose.com/slides/python-net/picture-frame/) # Import Presentations from PDF or HTML in Python > Learn how to import PDF and HTML content into PowerPoint presentations in Python with Aspose.Slides for Python via .NET and save the results as PPTX files. Source: https://docs.aspose.com/slides/python-net/import-presentation/ Updated: 2026-11-08 ## **Introduction** Aspose.Slides for Python via .NET can turn PDF pages or HTML content into PowerPoint slides without Microsoft PowerPoint. The [SlideCollection](https://reference.aspose.com/slides/python-net/aspose.slides/slidecollection/) class provides [add_from_pdf](https://reference.aspose.com/slides/python-net/aspose.slides/slidecollection/add_from_pdf/) and [add_from_html](https://reference.aspose.com/slides/python-net/aspose.slides/slidecollection/add_from_html/) for appending imported content to a presentation. For more control over HTML placement, [SlideCollection.insert_from_html](https://reference.aspose.com/slides/python-net/aspose.slides/slidecollection/insert_from_html/) can insert generated slides at a collection index or begin filling available space on an existing slide. Long HTML is paginated across additional slides automatically, the source can be supplied as a string or stream, and external assets can be loaded through [IExternalResourceResolver](https://reference.aspose.com/slides/python-net/aspose.slides.importing/iexternalresourceresolver/) with a base URI. The returned [ISlide](https://reference.aspose.com/slides/python-net/aspose.slides/islide/) array identifies the affected and newly created slides. ## **Import from PDF** To convert a PDF document to a PowerPoint presentation, import its content into the slide collection and save the result as a PPTX file. pdf-to-powerpoint 1. Create a new [Presentation](https://reference.aspose.com/slides/python-net/aspose.slides/presentation/) object. 2. Call [add_from_pdf](https://reference.aspose.com/slides/python-net/aspose.slides/slidecollection/add_from_pdf/) with the path to the PDF file. 3. Call [save](https://reference.aspose.com/slides/python-net/aspose.slides/presentation/save/) with [SaveFormat.PPTX](https://reference.aspose.com/slides/python-net/aspose.slides.export/saveformat/) to write the presentation to a PPTX file. The following Python example imports a PDF document and saves the generated slides as a PowerPoint presentation: ```python import aspose.slides as slides with slides.Presentation() as presentation: presentation.slides.add_from_pdf("document.pdf") presentation.save("presentation.pptx", slides.export.SaveFormat.PPTX) ``` The [add_from_pdf](https://reference.aspose.com/slides/python-net/aspose.slides/slidecollection/add_from_pdf/) method returns the slides it adds, which is useful when you need to process only the imported slides. Try the free [PDF to PowerPoint](https://products.aspose.app/slides/import/pdf-to-powerpoint) web app to see this conversion workflow in action. ## **Import from HTML** Aspose.Slides can also create slides from an HTML document. The source can be supplied as HTML text or a stream. The following steps use a file stream: 1. Create a new [Presentation](https://reference.aspose.com/slides/python-net/aspose.slides/presentation/) object. 2. Open the HTML file for reading and pass the stream to [add_from_html](https://reference.aspose.com/slides/python-net/aspose.slides/slidecollection/add_from_html/). 3. Call [save](https://reference.aspose.com/slides/python-net/aspose.slides/presentation/save/) with [SaveFormat.PPTX](https://reference.aspose.com/slides/python-net/aspose.slides.export/saveformat/) to write the result to a PPTX file. The following Python example imports an HTML document and saves the generated slides as a PowerPoint presentation: ```python import aspose.slides as slides with slides.Presentation() as presentation: with open("page.html", "rb") as html_stream: presentation.slides.add_from_html(html_stream) presentation.save("presentation.pptx", slides.export.SaveFormat.PPTX) ``` ## **Insert HTML Content** Use [SlideCollection.insert_from_html](https://reference.aspose.com/slides/python-net/aspose.slides/slidecollection/insert_from_html/) when HTML-generated slides must be placed at a specific position instead of appended. The index is zero-based and identifies the position at which the import starts. The method is also available through [ISlideCollection](https://reference.aspose.com/slides/python-net/aspose.slides/islidecollection/). The `use_slide_with_index_as_start` argument controls how the importer uses that position: - When it is `False`, the importer creates new slides at the specified index and shifts the slides that follow them. - When it is `True`, the importer starts placing content in the available space on the existing slide at that index. If the HTML does not fit, Aspose.Slides paginates it automatically and inserts additional slides immediately after the starting slide. [SlideCollection.insert_from_html](https://reference.aspose.com/slides/python-net/aspose.slides/slidecollection/insert_from_html/) returns an array of [ISlide](https://reference.aspose.com/slides/python-net/aspose.slides/islide/) objects. When insertion starts on new slides, every returned item is newly created. When an existing slide is used as the start, the array includes that affected slide followed by any new overflow slides. You can inspect this array instead of calculating the affected range from the presentation's slide count. ### **Insert HTML as New Slides** The following example supplies HTML as a string and inserts the generated slides at collection index `1`. Passing `False` leaves the existing slides unchanged except for shifting them to make room. ```python import aspose.slides as slides with slides.Presentation() as presentation: layout_slide = presentation.layout_slides[0] presentation.slides.add_empty_slide(layout_slide) presentation.slides.add_empty_slide(layout_slide) insert_index = 1 html = "
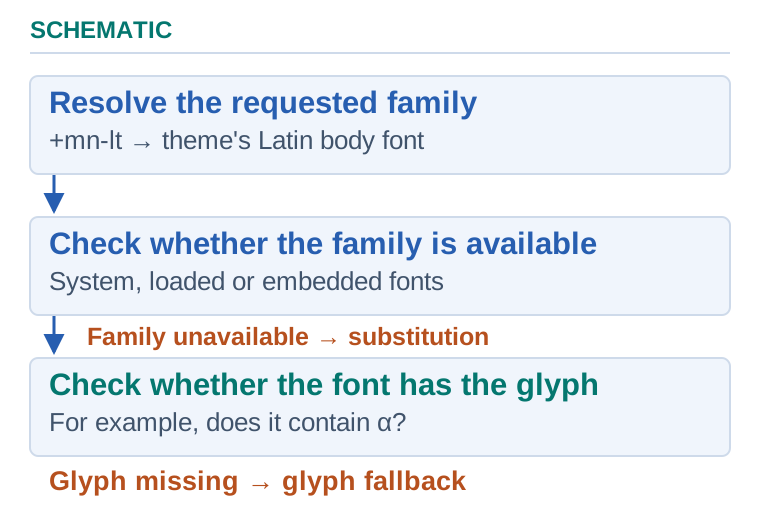

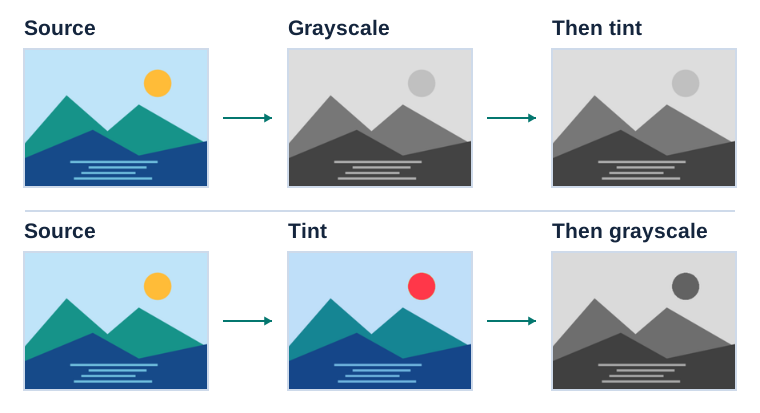
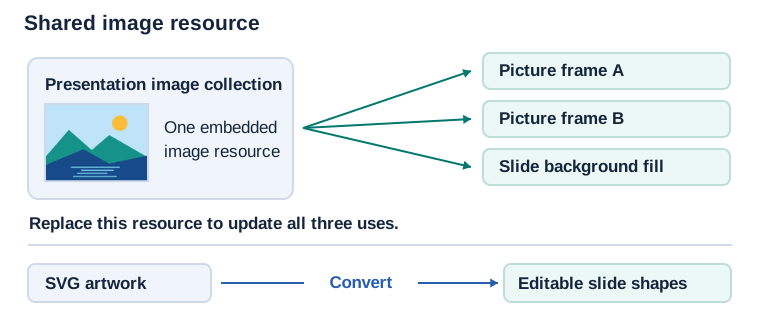
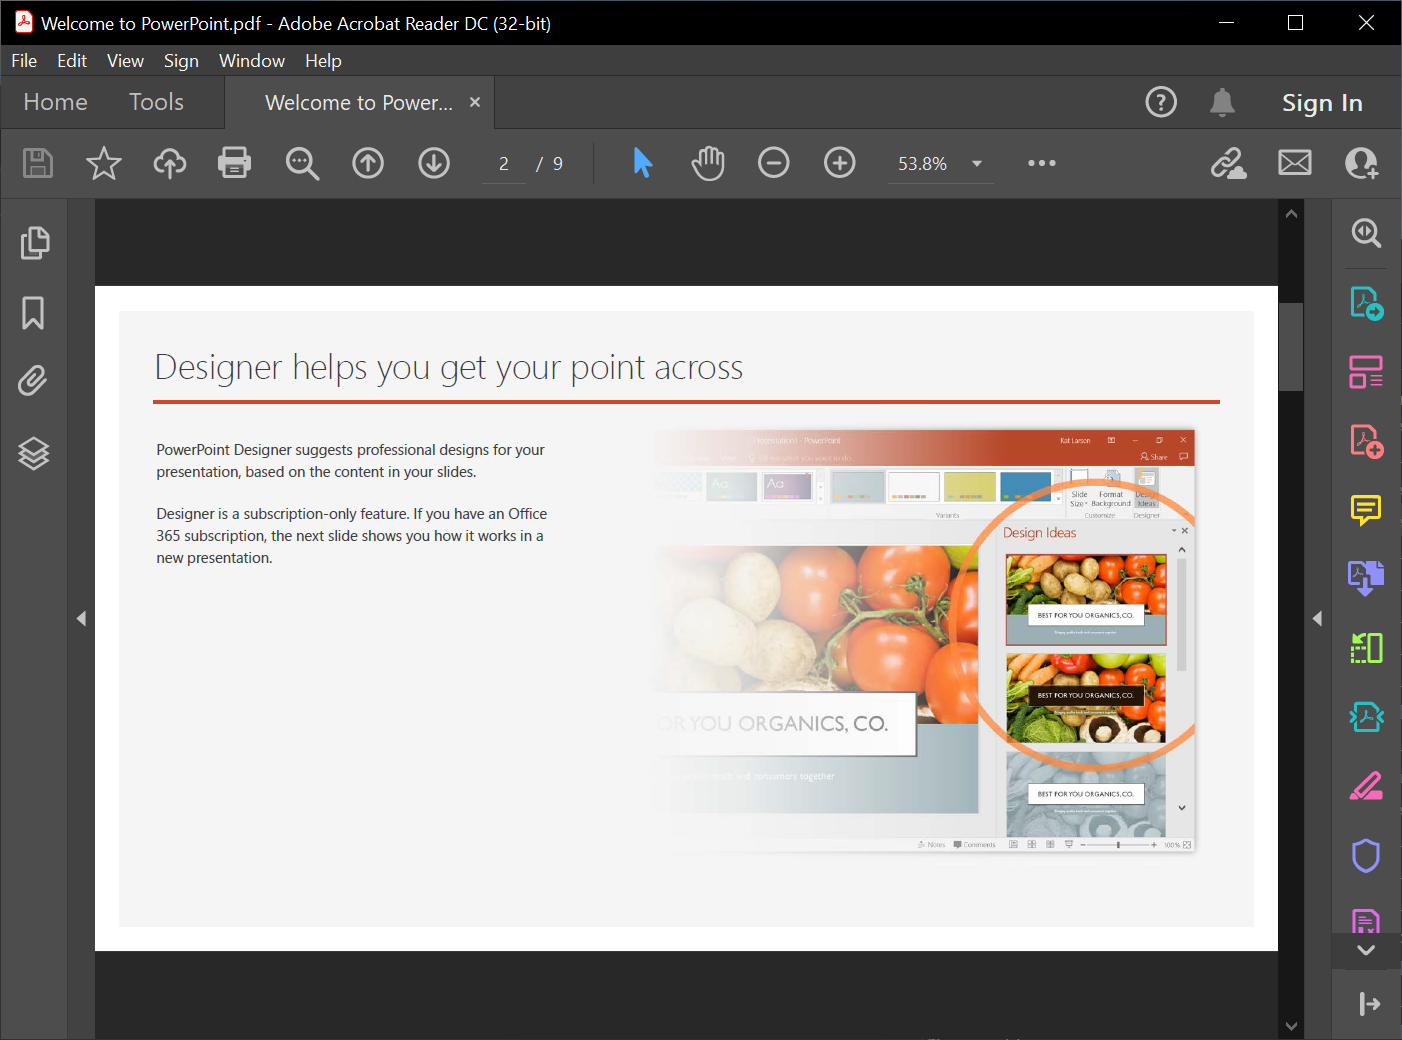
Quarterly update

This content is inserted before the slide that was at index 1.

" inserted_slides = presentation.slides.insert_from_html(insert_index, html, False) for slide in inserted_slides: print(f"Inserted slide index: {presentation.slides.index_of(slide)}") presentation.save("presentation-with-inserted-html.pptx", slides.export.SaveFormat.PPTX) ``` ### **Start on an Existing Slide** The next example supplies the HTML through a stream. It keeps a header shape on the existing template slide, starts importing below the occupied area, and lets the long body continue onto new slides. The HTML also contains a relative image URL. An [IExternalResourceResolver](https://reference.aspose.com/slides/python-net/aspose.slides.importing/iexternalresourceresolver/) obtains the resource, while the base URI tells the importer how to resolve `images/logo.png`. In this example, that file is expected at `html-assets/images/logo.png`. ```python from io import BytesIO from pathlib import Path import aspose.slides as slides with slides.Presentation() as presentation: template_slide = presentation.slides[0] header = template_slide.shapes.add_auto_shape(slides.ShapeType.RECTANGLE, 20, 20, 680, 60) header.text_frame.text = "Product roadmap" html_parts = ["

Roadmap details

"] for item_index in range(1, 61): html_parts.append(f"

Roadmap item {item_index}: detailed implementation notes.

") html_parts.append("") html = "".join(html_parts) html_stream = BytesIO(html.encode("utf-8")) resolver = slides.importing.ExternalResourceResolver() base_uri = Path("html-assets").resolve().as_uri() + "/" affected_slides = presentation.slides.insert_from_html(0, html_stream, resolver, base_uri, True) for slide in affected_slides: print(f"Affected slide index: {presentation.slides.index_of(slide)}") presentation.save("presentation-with-html-overflow.pptx", slides.export.SaveFormat.PPTX) ``` An unrestricted external resource resolver can read local or network resources referenced by the HTML. For untrusted input, implement [IExternalResourceResolver](https://reference.aspose.com/slides/python-net/aspose.slides.importing/iexternalresourceresolver/) with an allowlist for permitted schemes, directories, and hosts, and reject all other URIs. [![Crops show Overview, Product roadmap and Summary before import. Slide 2 keeps its Product roadmap header with imported logo and body below. The first continuation starts at item 7 and Summary remains after the imported slides.](https://docs.aspose.com/slides/python-net/import-presentation/visual-import-presentation-2c09b3d2f9f0.svg)](https://docs.aspose.com/slides/python-net/import-presentation/visual-import-presentation-2c09b3d2f9f0.svg) *Crops from one .NET import with an existing target between two neighboring slides. The header survives, the relative logo and body start below it, and overflow creates six continuation slides before Summary.* ## **FAQ** **Can Aspose.Slides detect tables when importing a PDF?** Yes. Create a [PdfImportOptions](https://reference.aspose.com/slides/python-net/aspose.slides.importing/pdfimportoptions/) object, set its [detect_tables](https://reference.aspose.com/slides/python-net/aspose.slides.importing/pdfimportoptions/detect_tables/) property to `True`, and pass the options to [add_from_pdf](https://reference.aspose.com/slides/python-net/aspose.slides/slidecollection/add_from_pdf/). The quality of table recognition depends on the structure and complexity of the source PDF. You can also use Aspose.Slides to convert HTML content to other formats: - [HTML to image](https://products.aspose.com/slides/python-net/conversion/html-to-image/) - [HTML to JPG](https://products.aspose.com/slides/python-net/conversion/html-to-jpg/) - [HTML to XML](https://products.aspose.com/slides/python-net/conversion/html-to-xml/) - [HTML to TIFF](https://products.aspose.com/slides/python-net/conversion/html-to-tiff/) ## Related articles - [Convert PowerPoint Presentations with Python | HTML, PNG, PDF, Word, TIFF](https://docs.aspose.com/slides/python-net/convert-powerpoint/) # Installation > Install Aspose.Slides for Python via .NET from PyPI with pip on Windows, Linux, and macOS, and install the native libraries that Linux and macOS need. Source: https://docs.aspose.com/slides/python-net/installation/ Updated: 2026-09-27 ## **Overview** This article explains how to install Aspose.Slides for Python via .NET on Windows, Linux, and macOS. The package is published on [PyPI](https://pypi.org/project/aspose.slides/) and installed with pip. It includes the .NET runtime it uses, so you do not need to install .NET. On Linux and macOS, that runtime needs native libraries that the operating system may not include; the sections below name them. Aspose.Slides for Python via .NET supports Python 3.5 to 3.14. PyPI provides packages for Windows (32-bit and 64-bit), Linux (x86_64 and ARM64), and macOS (Intel and Apple silicon). ## **Windows** On Windows, install the package with pip. No other libraries are required. ```bash pip install aspose.slides ``` ## **Linux** On Linux, the .NET runtime included in the package needs two libraries: - **libgdiplus**, an implementation of the Windows GDI+ graphics API. Without it, saving a presentation fails with the error `The type initializer for 'Gdip' threw an exception`. - **ICU** (International Components for Unicode). Without it, the Python process terminates at the first Aspose.Slides call with the message `Couldn't find a valid ICU package installed on the system`. On Debian and Ubuntu, install both with apt: ```bash sudo apt-get update && sudo apt-get install -y libgdiplus libicu76 ``` The name of the ICU package contains its version: `libicu76` is the package for Debian 13. On Debian 12, install `libicu72` instead, and on Ubuntu 24.04, `libicu74`. To find the name on your system, run: ```bash apt-cache search --names-only '^libicu[0-9]+$' ``` Then install the package into a virtual environment. On current Debian and Ubuntu releases, the system Python does not allow `pip install` outside a virtual environment and stops with the error `externally-managed-environment`. ```bash sudo apt-get install -y python3-venv python3 -m venv .venv . .venv/bin/activate pip install aspose.slides ``` Run your scripts with the same virtual environment activated. If you use a Python that your distribution does not manage, such as the one in the official `python` Docker images, you can also run `pip install aspose.slides` without a virtual environment. The fonts used in your presentations, or suitable substitutes, must be installed on the system for text to render correctly when you convert slides to PDF or images. ## **macOS** We have not verified the installation on macOS. On macOS, Aspose.Slides needs the following prerequisites: - **Python with shared libraries**, that is, Python built with the `--enable-shared` configure option. If you install Python with [pyenv](https://github.com/pyenv/pyenv#homebrew-in-macos), set the `PYTHON_CONFIGURE_OPTS` environment variable to `--enable-shared` when you install a Python version. - **The libpython library in a system library directory.** A Python installed with pyenv keeps its libpython library, such as *libpython3.9.dylib*, under *~/.pyenv/versions*; create a symbolic link to it in */usr/local/lib*. - **libgdiplus**, an implementation of the Windows GDI+ graphics API. Homebrew provides it as the `mono-libgdiplus` package. Then install the package with pip. ## **Check the Installation** To check the installation, save the first example in [Create Presentations](https://docs.aspose.com/slides/python-net/create-presentation/) as *hello.py* and run `python hello.py`. It saves *new_presentation.pptx* in the current folder. ## **Upgrade** To upgrade an existing installation to the latest version, run this command in the environment where you installed the package: ```bash pip install --upgrade aspose.slides ``` ## **FAQ** **Can I install Aspose.Slides in a virtual environment?** Yes. You can install it in any Python virtual environment with pip. The native libraries that Linux and macOS need are installed on the system, not in the virtual environment. **Can I use Aspose.Slides in Docker containers?** Yes. The image must include the same native libraries as a Linux system — libgdiplus and ICU — and the fonts your presentations use. **Is there a free version or trial limitation?** Yes. Without a license, Aspose.Slides runs in evaluation mode: it adds an evaluation watermark to every slide it saves and truncates text read from presentations. To remove these limitations, apply a valid [license](https://docs.aspose.com/slides/python-net/licensing/). ## Related features - [Use Slides from Python](https://docs.aspose.com/slides/features/python-api/) ## Related articles - [System Requirements](https://docs.aspose.com/slides/python-net/system-requirements/) # Known Issues > Stay informed about current limitations and workarounds in Aspose.Slides for Python to handle PowerPoint and OpenDocument presentations reliably. Source: https://docs.aspose.com/slides/python-net/known-issues/ Updated: 2025-12-02 --- lastmod: 2025-12-02T13:32:50+06:00 title: Known Issues type: docs weight: 330 url: /python-net/known-issues/ keywords: - known issue - Python - Aspose.Slides description: "Stay informed about current limitations and workarounds in Aspose.Slides for Python to handle PowerPoint and OpenDocument presentations reliably." --- # Licensing > Learn how to apply, manage, and troubleshoot licenses in Aspose.Slides for Python via .NET. Ensure uninterrupted access to full features with our step-by-step licensing guide. Source: https://docs.aspose.com/slides/python-net/licensing/ Updated: 2026-09-27 ## **Overview** Aspose.Slides can be used in evaluation mode or with a valid license. The evaluation version provides the same functionality as the licensed version, but it adds an evaluation watermark to every slide of each presentation it saves and truncates text that your code reads from presentations. ## **Evaluate Aspose.Slides** You can download an evaluation version of **Aspose.Slides for Python via .NET** from its [download page](https://pypi.org/project/Aspose.Slides/). The evaluation version provides the same features as the licensed product. The evaluation package is identical to the purchased package and becomes licensed after you add a few lines of code to apply the license. When you’re satisfied with your evaluation of **Aspose.Slides**, you can [purchase a license](https://purchase.aspose.com/pricing/slides/python-net/). We recommend reviewing the available subscription options. If you have questions, contact the Aspose sales team. Every Aspose license includes a one-year subscription with free upgrades to new versions and fixes released during that period. Both licensed and evaluation users receive free, unlimited technical support. **Limitations of the Evaluation Version** * The evaluation version (when no license is applied) provides full functionality, but it adds an evaluation watermark text box to every slide of each presentation it saves. * Text that your code reads from a presentation is truncated to its first few characters, followed by a notice about the evaluation limitation. Text that your code writes is saved in full. To test Aspose.Slides without limitations, you can request a **30-day Temporary License**. See the [How to Get a Temporary License](https://purchase.aspose.com/temporary-license) page for details. ## **Licensing in Aspose.Slides** * An evaluation version becomes licensed after you purchase a license and add a couple of lines of code to apply it. * The license is a plain-text XML file that contains details such as the product name, the number of developers it covers, the subscription expiry date, and so on. * The license file is digitally signed, so you must not modify it. Even adding a single line break will invalidate it. * Aspose.Slides for Python via .NET looks for the license at the path you pass to it. A relative path, or a file name without a path, is resolved against the current working directory, which is not necessarily the folder that contains your Python script. * To avoid the evaluation limitations, set the license before using Aspose.Slides. You only need to set it once per application or process. You may also want to review [Metered Licensing](https://docs.aspose.com/slides/python-net/metered-licensing/). ## **Applying a License** A license can be loaded from a **file** or a **stream**. Aspose.Slides provides the [License](https://reference.aspose.com/slides/python-net/aspose.slides/license/) class to handle licensing. New licenses can activate Aspose.Slides only with version 21.4 or later. Earlier versions use a different licensing system and will not recognize these licenses. ### **File** The simplest way to set a license is to pass the path of the license file to the [set_license](https://reference.aspose.com/slides/python-net/aspose.slides/license/set_license/) method. If you pass only the file name, as in the example below, Aspose.Slides looks for the file in the current working directory. The following Python code shows how to set the license file: ```py import aspose.slides as slides # Instantiates the License class. license = slides.License() # Sets the license file path. license.set_license("Aspose.Slides.lic") ``` If you place the license file in a different directory, when you call [License.set_license](https://reference.aspose.com/slides/python-net/aspose.slides/license/set_license/#str), the file name at the end of the explicit path must match your license file’s name. For example, you can rename the license file to *Aspose.Slides.lic.xml*. Then, in your code, pass the full path to that file (ending with Aspose.Slides.lic.xml) to the [License.set_license](https://reference.aspose.com/slides/python-net/aspose.slides/license/set_license/#str) method. ### **Stream** You can load a license from a stream. The following Python example shows how to apply a license from a stream: ```py import aspose.slides as slides # Instantiates the License class. license = slides.License() # Set the license from a stream. with open("Aspose.Slides.lic", "rb") as stream: license.set_license(stream) ``` ## **Validating a License** To verify that the license has been applied correctly, you can validate it. The following Python code demonstrates how to validate a license: ```py import aspose.slides as slides license = slides.License() license.set_license("Aspose.Slides.lic") if license.is_licensed(): print("License is good!") ``` ## **Thread Safety** The [License.set_license](https://reference.aspose.com/slides/python-net/aspose.slides/license/set_license/) method is not thread-safe. If you need to call it concurrently from multiple threads, use a synchronization primitive, such as `threading.Lock`, to avoid issues. ## **FAQ** ### Can I apply the license in a completely offline environment (no internet access)? Yes. License validation is performed locally using the license file; no internet connection is required. ### What happens after the one-year subscription expires? Will the library stop working? No. The license is perpetual: you can continue using versions released before your subscription end date; you just won’t be eligible to use newer releases without renewing. ## Related articles - [Evaluate Aspose.Slides](https://docs.aspose.com/slides/python-net/evaluate-aspose-slides/) # Create Line Shapes in Presentations with Python > Learn to manipulate line formatting in PowerPoint and OpenDocument presentations with Aspose.Slides for Python via .NET. Discover properties, methods, and examples. Source: https://docs.aspose.com/slides/python-net/line/ Updated: 2026-08-02 ## **Overview** Aspose.Slides for Python via .NET supports adding different kinds of shapes to the slides. In this topic, we will start working with shapes by adding lines to the slides. Using Aspose.Slides, developers can not only create simple lines , but some fancy lines can also be drawn on the slides. ## **Create Plain Lines** Use Aspose.Slides to add a plain line to a slide as a simple separator or connector. To add a plain line to a selected slide in a presentation, follow these steps: 1. Create an instance of the [Presentation](https://reference.aspose.com/slides/python-net/aspose.slides/presentation/) class. 1. Get a reference to the slide by index. 1. Add an [AutoShape](https://reference.aspose.com/slides/python-net/aspose.slides/autoshape/) of type `LINE` using the `add_auto_shape` method on the [ShapeCollection](https://reference.aspose.com/slides/python-net/aspose.slides/shapecollection/) object. 1. Save the presentation as a PPTX file. In the example below, a line is added to the first slide of the presentation. ```py import aspose.slides as slides # Instantiate the Presentation class. with slides.Presentation() as presentation: # Get the first slide. slide = presentation.slides[0] # Add an auto shape of type LINE. slide.shapes.add_auto_shape(slides.ShapeType.LINE, 50, 150, 300, 0) # Save the presentation as a PPTX file. presentation.save("line_shape.pptx", slides.export.SaveFormat.PPTX) ``` ## **Create Arrow-Shaped Lines** Aspose.Slides lets you configure line properties to make them more visually appealing. Below, we configure a few properties of a line to make it look like an arrow. Follow these steps: 1. Create an instance of the [Presentation](https://reference.aspose.com/slides/python-net/aspose.slides/presentation/) class. 1. Get a reference to a slide by index. 1. Add an [AutoShape](https://reference.aspose.com/slides/python-net/aspose.slides/autoshape/) of type `LINE` using the `add_auto_shape` method on the [ShapeCollection](https://reference.aspose.com/slides/python-net/aspose.slides/shapecollection/) object. 1. Set the [line style](https://reference.aspose.com/slides/python-net/aspose.slides/linestyle/). 1. Set the line width. 1. Set the line’s [dash style](https://reference.aspose.com/slides/python-net/aspose.slides/linedashstyle/). 1. Set the [arrowhead style](https://reference.aspose.com/slides/python-net/aspose.slides/linearrowheadstyle/) and length for the line’s start point. 1. Set the arrowhead style and length for the line’s end point. 1. Save the presentation as a PPTX file. ```py import aspose.slides as slides import aspose.pydrawing as draw # Instantiate the Presentation class that represents the PPTX file. with slides.Presentation() as presentation: # Get the first slide. slide = presentation.slides[0] # Add an auto shape of type LINE. shape = slide.shapes.add_auto_shape(slides.ShapeType.LINE, 50, 150, 300, 0) # Apply formatting to the line. shape.line_format.style = slides.LineStyle.THICK_BETWEEN_THIN shape.line_format.width = 10 shape.line_format.dash_style = slides.LineDashStyle.DASH_DOT shape.line_format.begin_arrowhead_length = slides.LineArrowheadLength.SHORT shape.line_format.begin_arrowhead_style = slides.LineArrowheadStyle.OVAL shape.line_format.end_arrowhead_length = slides.LineArrowheadLength.LONG shape.line_format.end_arrowhead_style = slides.LineArrowheadStyle.TRIANGLE shape.line_format.fill_format.fill_type = slides.FillType.SOLID shape.line_format.fill_format.solid_fill_color.color = draw.Color.maroon # Save the presentation as a PPTX file. presentation.save("line_shape_2.pptx", slides.export.SaveFormat.PPTX) ``` ## **FAQ** ### Can I convert a regular line into a connector so it "snaps" to shapes? No. A regular line (an [AutoShape](https://reference.aspose.com/slides/python-net/aspose.slides/autoshape/) of type [LINE](https://reference.aspose.com/slides/python-net/aspose.slides/shapetype/)) does not automatically become a connector. To make it snap to shapes, use the dedicated [Connector](https://reference.aspose.com/slides/python-net/aspose.slides/connector/) type and the [corresponding APIs](https://docs.aspose.com/slides/python-net/connector/) for connections. ### What should I do if a line’s properties are inherited from the theme and it’s hard to determine the final values? [Read the effective properties](https://docs.aspose.com/slides/python-net/shape-effective-properties/) through the [ILineFormatEffectiveData](https://reference.aspose.com/slides/python-net/aspose.slides/ilineformateffectivedata/)/[ILineFillFormatEffectiveData](https://reference.aspose.com/slides/python-net/aspose.slides/ilinefillformateffectivedata/) classes—these already account for inheritance and theme styles. ### Can I lock a line against editing (moving, resizing)? Yes. Shapes provide [lock objects](https://reference.aspose.com/slides/python-net/aspose.slides/autoshape/auto_shape_lock/) that let you [disallow editing operations](https://docs.aspose.com/slides/python-net/applying-protection-to-presentation/). # Low-Code Presentation Operations in Python > Use the Aspose.Slides low-code API in Python to convert and merge presentations, collect shapes, and reduce presentation size. Source: https://docs.aspose.com/slides/python-net/low-code-presentation-operations/ Updated: 2026-08-25 ## **Overview** The [aspose.slides.lowcode](https://reference.aspose.com/slides/python-net/aspose.slides.lowcode/) module provides helper classes for common presentation operations. These helpers wrap frequently used object-model workflows in focused methods, so you can convert or merge files, collect shapes, and remove unused content with less code. Low-code helpers are most useful when the operation applies to an entire file or presentation and the default workflow matches your requirements. Use the full [Aspose.Slides object model](https://reference.aspose.com/slides/python-net/aspose.slides/) when you need fine-grained control over individual slides, masters, layouts, shapes, export settings, or relationships between presentation elements. The following table summarizes the available helpers: | Helper | Use it for | | --- | --- | | [Convert](https://reference.aspose.com/slides/python-net/aspose.slides.lowcode/convert/) | Converting a presentation to another format with a direct file-to-file call. | | [Merger](https://reference.aspose.com/slides/python-net/aspose.slides.lowcode/merger/) | Combining complete presentation files of the same format. | | [Collect](https://reference.aspose.com/slides/python-net/aspose.slides.lowcode/collect/) | Retrieving shapes from the entire presentation for repeated processing or analysis. | | [Compress](https://reference.aspose.com/slides/python-net/aspose.slides.lowcode/compress/) | Removing unused masters and layouts and reducing embedded font data. | ## **Convert a Presentation** Use [Convert.auto_by_extension](https://reference.aspose.com/slides/python-net/aspose.slides.lowcode/convert/auto_by_extension/) when the output file extension is sufficient to select the export format. The method opens the source presentation, determines the required format from the output path, and writes the result. ```python import aspose.slides as slides slides.lowcode.Convert.auto_by_extension("input.pptx", "output.pdf") ``` The [Convert](https://reference.aspose.com/slides/python-net/aspose.slides.lowcode/convert/) class also provides dedicated methods for PDF, SVG, JPEG, PNG, and TIFF output. Use the full object model when you need to inspect or modify the presentation before export or configure an export option that is not exposed by the selected helper. See [Convert Presentation](https://docs.aspose.com/slides/python-net/convert-presentation/) for format-specific workflows and options. ## **Merge Presentations** Use [Merger.process](https://reference.aspose.com/slides/python-net/aspose.slides.lowcode/merger/process/) to combine complete presentation files with one call. The input presentations must have the same file format. ```python import aspose.slides as slides input_files = ["part-1.pptx", "part-2.pptx"] slides.lowcode.Merger.process(input_files, "merged.pptx") ``` The helper is appropriate when all slides should be appended to one result without selecting or remapping them individually. Use the full object model when you need to merge selected slides, apply a destination master or layout, preserve sections explicitly, or reconcile different slide sizes. See [Merge Presentations](https://docs.aspose.com/slides/python-net/merge-presentation/) for those scenarios. ## **Collect Shapes** Use [Collect.shapes](https://reference.aspose.com/slides/python-net/aspose.slides.lowcode/collect/shapes/) when you need a collection of all shapes in a presentation. This is useful when the same set will be filtered, counted, or processed more than once. ```python import aspose.slides as slides with slides.Presentation("input.pptx") as presentation: shapes = slides.lowcode.Collect.shapes(presentation) for shape in shapes: print(f"{shape.name}: {type(shape).__name__}") ``` Use direct collection loops when traversal order, early exit, filtering before processing, or detailed parent-child control is important. ## **Compress Presentation Content** The [Compress](https://reference.aspose.com/slides/python-net/aspose.slides.lowcode/compress/) class can remove unused structural elements and reduce embedded font data: - [Compress.remove_unused_layout_slides](https://reference.aspose.com/slides/python-net/aspose.slides.lowcode/compress/remove_unused_layout_slides/) removes layout slides that no normal slide references. - [Compress.remove_unused_master_slides](https://reference.aspose.com/slides/python-net/aspose.slides.lowcode/compress/remove_unused_master_slides/) removes master slides that are no longer used. - [Compress.compress_embedded_fonts](https://reference.aspose.com/slides/python-net/aspose.slides.lowcode/compress/compress_embedded_fonts/) removes unused characters from embedded fonts. ```python import aspose.slides as slides with slides.Presentation("input.pptx") as presentation: slides.lowcode.Compress.remove_unused_layout_slides(presentation) slides.lowcode.Compress.remove_unused_master_slides(presentation) slides.lowcode.Compress.compress_embedded_fonts(presentation) presentation.save("compressed.pptx", slides.export.SaveFormat.PPTX) ``` Remove unused layouts before unused masters so a master that becomes unreferenced after layout cleanup can also be removed. Save the optimized presentation to a new file if you may need the original masters, layouts, or complete embedded font data later. For more detail, see [Slide Master](https://docs.aspose.com/slides/python-net/slide-master/) and [Embedded Font](https://docs.aspose.com/slides/python-net/embedded-font/). ## **FAQ** **When should I use the low-code API instead of the full object model?** Use low-code helpers when a standard operation applies to a complete file or presentation and does not require detailed control over individual elements. Use the full object model when you need to select specific slides, control master and layout relationships, inspect intermediate state, or configure behavior that the helper does not expose. **Can Merger combine presentations in different file formats?** No. [Merger.process](https://reference.aspose.com/slides/python-net/aspose.slides.lowcode/merger/process/) requires input presentations in the same format. Convert the input files to a common format first, for example with [Convert.auto_by_extension](https://reference.aspose.com/slides/python-net/aspose.slides.lowcode/convert/auto_by_extension/), and then merge the converted files. **What does Collect.shapes include?** [Collect.shapes](https://reference.aspose.com/slides/python-net/aspose.slides.lowcode/collect/shapes/) retrieves shapes from the presentation so they can be retained, filtered, counted, or traversed multiple times. Use direct collection loops when you need precise control over which slide types or nested objects are visited. **Does Compress always make the presentation file smaller?** Not necessarily. The result depends on whether the presentation contains unused layouts, unused masters, or embedded fonts with unused characters. If none of those are present, the corresponding [Compress](https://reference.aspose.com/slides/python-net/aspose.slides.lowcode/compress/) operations may not reduce the file size. **Are changes made by Compress saved automatically?** No. These helpers operate on the loaded [Presentation](https://reference.aspose.com/slides/python-net/aspose.slides/presentation/) object in memory. After running [Compress](https://reference.aspose.com/slides/python-net/aspose.slides.lowcode/compress/), call [Presentation.save](https://reference.aspose.com/slides/python-net/aspose.slides/presentation/save/) to write the result. ## **Related Articles** - [Convert Presentation](https://docs.aspose.com/slides/python-net/convert-presentation/) - [Merge Presentations](https://docs.aspose.com/slides/python-net/merge-presentation/) - [Slide Master](https://docs.aspose.com/slides/python-net/slide-master/) - [Manage Text Box](https://docs.aspose.com/slides/python-net/manage-textbox/) - [Embedded Font](https://docs.aspose.com/slides/python-net/embedded-font/) # Enhance Your Presentations with AutoFit in Python > Learn how to manage AutoFit settings in Aspose.Slides for Python via .NET to optimize text display in your PowerPoint and OpenDocument presentations and improve content readability. Source: https://docs.aspose.com/slides/python-net/manage-autofit-settings/ Updated: 2026-08-02 ## **Introduction** By default, when you add a textbox, Microsoft PowerPoint uses the **Resize shape to fix text** setting for the textbox—it automatically resizes the textbox to ensure its text always fits into it. ![textbox-in-powerpoint](https://docs.aspose.com/slides/python-net/manage-autofit-settings/textbox-in-powerpoint.png) * When the text in the textbox becomes longer or bigger, PowerPoint automatically enlarges the textbox—increases its height—to allow it to hold more text. * When the text in the textbox becomes shorter or smaller, PowerPoint automatically reduces the textbox—decreases its height—to clear redundant space. In PowerPoint, these are the 4 important parameters or options that control the autofit behavior for a textbox: * **Do not Autofit** * **Shrink text on overflow** * **Resize shape to fit text** * **Wrap text in shape.** ![autofit-options-powerpoint](https://docs.aspose.com/slides/python-net/manage-autofit-settings/autofit-options-powerpoint.png) Aspose.Slides for Python via .NET provides similar options—some properties under the [TextFrameFormat](https://reference.aspose.com/slides/python-net/aspose.slides/textframeformat/) class—that allow you to control the autofit behavior for textboxes in presentations. ## **Resize Shapes to Fit Text** If you want the text in a box to always fit into that box after changes are made to the text, you have to use the **Resize shape to fix text** option. To specify this setting, set the [autofit_type](https://reference.aspose.com/slides/python-net/aspose.slides/textframeformat/) property from the [TextFrameFormat](https://reference.aspose.com/slides/python-net/aspose.slides/textframeformat/) class to `SHAPE`. ![alwaysfit-setting-powerpoint](https://docs.aspose.com/slides/python-net/manage-autofit-settings/alwaysfit-setting-powerpoint.png) This Python code shows you how to specify that a text must always fit into its box in a PowerPoint presentation: ```py import aspose.slides as slides import aspose.pydrawing as draw with slides.Presentation() as presentation: slide = presentation.slides[0] auto_shape = slide.shapes.add_auto_shape(slides.ShapeType.RECTANGLE, 30, 30, 350, 100) portion = slides.Portion("lorem ipsum...") portion.portion_format.fill_format.solid_fill_color.color = draw.Color.black portion.portion_format.fill_format.fill_type = slides.FillType.SOLID auto_shape.text_frame.paragraphs[0].portions.add(portion) text_frame_format = auto_shape.text_frame.text_frame_format text_frame_format.autofit_type = slides.TextAutofitType.SHAPE presentation.save("output.pptx", slides.export.SaveFormat.PPTX) ``` If the text becomes longer or bigger, the textbox will be automatically resized (increase in height) to ensure all the text fits into it. If the text becomes shorter, the reverse occurs. ## **Do Not Autofit** If you want a textbox or shape to retain its dimensions no matter the changes made to the text it contains, you have to use the **Do not Autofit** option. To specify this setting, set the [autofit_type](https://reference.aspose.com/slides/python-net/aspose.slides/textframeformat/) property from the [TextFrameFormat](https://reference.aspose.com/slides/python-net/aspose.slides/textframeformat/) class to `NONE`. ![donotautofit-setting-powerpoint](https://docs.aspose.com/slides/python-net/manage-autofit-settings/donotautofit-setting-powerpoint.png) This Python code shows you how to specify that a textbox must always retain its dimensions in a PowerPoint presentation: ```py import aspose.slides as slides import aspose.pydrawing as draw with slides.Presentation() as presentation: slide = presentation.slides[0] auto_shape = slide.shapes.add_auto_shape(slides.ShapeType.RECTANGLE, 30, 30, 350, 100) portion = slides.Portion("lorem ipsum...") portion.portion_format.fill_format.solid_fill_color.color = draw.Color.black portion.portion_format.fill_format.fill_type = slides.FillType.SOLID auto_shape.text_frame.paragraphs[0].portions.add(portion) text_frame_format = auto_shape.text_frame.text_frame_format text_frame_format.autofit_type = slides.TextAutofitType.NONE presentation.save("output.pptx", slides.export.SaveFormat.PPTX) ``` When the text becomes too long for its box, it spills out. ## **Shrink Text on Overflow** If a text becomes too long for its box, through the **Shrink text on overflow** option, you can specify that the text's size and spacing must be reduced to make it fit into its box. To specify this setting, set the [autofit_type](https://reference.aspose.com/slides/python-net/aspose.slides/textframeformat/) property from the [TextFrameFormat](https://reference.aspose.com/slides/python-net/aspose.slides/textframeformat/) class to `NORMAL`. ![shrinktextonoverflow-setting-powerpoint](https://docs.aspose.com/slides/python-net/manage-autofit-settings/shrinktextonoverflow-setting-powerpoint.png) This Python code shows you how to specify that a text must be shrunk on overflow in a PowerPoint presentation: ```py import aspose.slides as slides import aspose.pydrawing as draw with slides.Presentation() as presentation: slide = presentation.slides[0] auto_shape = slide.shapes.add_auto_shape(slides.ShapeType.RECTANGLE, 30, 30, 350, 100) portion = slides.Portion("lorem ipsum...") portion.portion_format.fill_format.solid_fill_color.color = draw.Color.black portion.portion_format.fill_format.fill_type = slides.FillType.SOLID auto_shape.text_frame.paragraphs[0].portions.add(portion) text_frame_format = auto_shape.text_frame.text_frame_format text_frame_format.autofit_type = slides.TextAutofitType.NORMAL presentation.save("output.pptx", slides.export.SaveFormat.PPTX) ``` When the **Shrink text on overflow** option is used, the setting gets applied only when the text becomes too long for its box. ## **Wrap Text** If you want the text in a shape to get wrapped inside that shape when the text goes beyond the shape's border (width only), you have to use the **Wrap text in shape** parameter. To specify this setting, you have to set the [wrap_text](https://reference.aspose.com/slides/python-net/aspose.slides/textframeformat/) property from the [TextFrameFormat](https://reference.aspose.com/slides/python-net/aspose.slides/textframeformat/) class to `NullableBool.TRUE`. This Python code shows you how to use the Wrap Text setting in a PowerPoint presentation: ```py import aspose.slides as slides import aspose.pydrawing as draw with slides.Presentation() as presentation: slide = presentation.slides[0] auto_shape = slide.shapes.add_auto_shape(slides.ShapeType.RECTANGLE, 30, 30, 350, 100) portion = slides.Portion("lorem ipsum...") portion.portion_format.fill_format.solid_fill_color.color = draw.Color.black portion.portion_format.fill_format.fill_type = slides.FillType.SOLID auto_shape.text_frame.paragraphs[0].portions.add(portion) text_frame_format = auto_shape.text_frame.text_frame_format text_frame_format.autofit_type = slides.TextAutofitType.NONE text_frame_format.wrap_text = slides.NullableBool.TRUE presentation.save("output.pptx", slides.export.SaveFormat.PPTX) ``` If you set the `wrap_text` property to `NullableBool.FALSE` for a shape, when the text inside the shape becomes longer than the shape's width, the text gets extended beyond the shape's borders along a single line. ## **FAQ** ### Do the text frame’s internal margins affect AutoFit? Yes. Padding (internal margins) reduces the usable area for text, so AutoFit will kick in earlier—shrinking the font or resizing the shape sooner. Check and adjust margins before tuning AutoFit. ### How does AutoFit interact with manual and soft line breaks? Forced breaks remain in place, and AutoFit adapts font size and spacing around them. Removing unnecessary breaks often reduces how aggressively AutoFit needs to shrink the text. ### Does changing the theme font or triggering font substitution affect AutoFit results? Yes. Substituting to a font with different glyph metrics changes text width/height, which can alter final font size and line wrapping. After any font change or substitution, re-check the slides. # Manage BLOBs in Presentations with Python for Efficient Memory Use > Manage BLOB data in Aspose.Slides for Python via .NET to streamline PowerPoint and OpenDocument file operations for efficient presentation handling. Source: https://docs.aspose.com/slides/python-net/manage-blob/ Updated: 2026-08-05 ## **Overview** Aspose.Slides provides BLOB-based handling for large binary data in presentations to help reduce memory consumption when working with large images, audio, video, and presentation files. This article shows how to use BLOB-based processing to add large media to a presentation, export large media from a presentation, and load large presentations more efficiently. It also explains how temporary files can be used during processing and how to change the folder used to store them. ## **About BLOB** **BLOB** (**Binary Large Object**) is usually a large item (photo, presentation, document, or media) saved in binary formats. Aspose.Slides for Python via .NET allows you to use BLOBs for objects in a way that reduces memory consumption when large files are involved. ## **Use BLOB to Reduce Memory Consumption** ### **Add Large File through BLOB to a Presentation** [Aspose.Slides](https://docs.aspose.com/slides/python-net/) for .NET allows you to add large files (in this case, a large video file) through a process involving BLOBs to reduce memory consumption. This Python shows you how to add a large video file through the BLOB process to a presentation: ```py import aspose.slides as slides pathToVeryLargeVideo = "veryLargeVideo.avi" # Creates a new presentation to which the video will be added with slides.Presentation() as pres: with open(pathToVeryLargeVideo, "br") as fileStream: # Let's add the video to the presentation - we chose the KeepLocked behavior because we do # not intend to access the "veryLargeVideo.avi" file. video = pres.videos.add_video(fileStream, slides.LoadingStreamBehavior.KEEP_LOCKED) pres.slides[0].shapes.add_video_frame(0, 0, 480, 270, video) # Saves the presentation. While a large presentation gets outputted, the memory consumption # stays low through the pres object's lifecycle pres.save("presentationWithLargeVideo.pptx", slides.export.SaveFormat.PPTX) ``` ### **Export Large File Through BLOB from Presentation** Aspose.Slides for Python via .NET allows you to export large files (in this case, an audio or video file) through a process involving BLOBs from presentations. For example, you may need to extract a large media file from a presentation but do not want the file to be loaded into your computer's memory. By exporting the file through the BLOB process, you get to keep memory consumption low. This code in Python demonstrates the described operation: ```py import aspose.slides as slides loadOptions = slides.LoadOptions() loadOptions.blob_management_options = slides.BlobManagementOptions() loadOptions.blob_management_options.presentation_locking_behavior = slides.PresentationLockingBehavior.KEEP_LOCKED loadOptions.blob_management_options.is_temporary_files_allowed = True with slides.Presentation("Video.pptx", loadOptions) as pres: # Let's save each video to a file. To prevent high memory usage, we need a buffer that will be used # to transfer the data from the presentation's video stream to a stream for a newly created video file. # byte[] buffer = new byte[8 * 1024]; bufferSize = 8 * 1024 # Iterates through the videos index = 0 # If necessary, you can apply the same steps for audio files. for video in pres.videos: # Opens the presentation video stream. Please, note that we intentionally avoided accessing properties # like video.BinaryData - because this property returns a byte array containing a full video, which then # causes bytes to be loaded into memory. We use video.GetStream, which will return Stream - and does NOT # require us to load the whole video into the memory. with video.get_stream() as presVideoStream: with open("video{index}.avi".format(index = index), "wb") as outputFileStream: buffer = presVideoStream.read(8 * 1024) bytesRead = len(buffer) while bytesRead > 0: outputFileStream.write(buffer) buffer = presVideoStream.read(8 * 1024) bytesRead = len(buffer) index += 1 ``` ### **Add Image as BLOB in Presentation** With methods from the [**ImageCollection**](https://reference.aspose.com/slides/python-net/aspose.slides/imagecollection/) class, you can add a large image as a stream to get it treated as a BLOB. This Python code shows you how to add a large image through the BLOB process: ```py import aspose.slides as slides # creates a new presentation to which the image will be added. with slides.Presentation() as pres: with open("img.jpeg", "br") as fileStream: img = pres.images.add_image(fileStream, slides.LoadingStreamBehavior.KEEP_LOCKED) pres.slides[0].shapes.add_picture_frame(slides.ShapeType.RECTANGLE, 0, 0, 300, 200, img) # The KeepLocked behavior reads the stream when the presentation is saved, # so the save must happen while the stream is still open. pres.save("presentationWithLargeImage.pptx", slides.export.SaveFormat.PPTX) ``` ## **Memory and Large Presentations** Typically, to load a large presentation, computers require a lot of temporary memory. All the presentation's content is loaded into the memory and the file (from which the presentation was loaded) stops being used. Consider a large PowerPoint presentation (large.pptx) that contains a 1.5 GB video file. The standard method for loading the presentation is described in this Python code: ```py import aspose.slides as slides with slides.Presentation("large.pptx") as pres: pres.save("large.pdf", slides.export.SaveFormat.PDF) ``` But this method consumes around 1.6 GB of temporary memory. ### **Load a Large Presentation as BLOB** Through the process involving a BLOB, you can load up a large presentation while using little memory. This Python code describes the implementation where the BLOB process is used to load up a large presentation file (large.pptx): ```py import aspose.slides as slides loadOptions = slides.LoadOptions() loadOptions.blob_management_options = slides.BlobManagementOptions() loadOptions.blob_management_options.presentation_locking_behavior = slides.PresentationLockingBehavior.KEEP_LOCKED loadOptions.blob_management_options.is_temporary_files_allowed = True with slides.Presentation("large.pptx", loadOptions) as pres: pres.save("large.pdf", slides.export.SaveFormat.PDF) ``` ### **Change the Folder for Temporary Files** When the BLOB process is used, your computer creates temporary files in the default folder for temporary files. If you want the temporary files to be kept in a different folder, you can change the settings for storage using `temp_files_root_path`: ```py import aspose.slides as slides loadOptions = slides.LoadOptions() loadOptions.blob_management_options = slides.BlobManagementOptions() loadOptions.blob_management_options.presentation_locking_behavior = slides.PresentationLockingBehavior.KEEP_LOCKED loadOptions.blob_management_options.is_temporary_files_allowed = True loadOptions.blob_management_options.temp_files_root_path = "temp" ``` When you use `temp_files_root_path`, Aspose.Slides does not automatically create a folder to store temporary files. You have to create the folder manually. ### **Dispose Presentation Objects to Release Memory** When processing large presentations, ensure that the [Presentation](https://reference.aspose.com/slides/python-net/aspose.slides/presentation/) instance is properly disposed so that the memory it occupied is released. The recommended way is to use the context manager (`with slides.Presentation(...) as presentation:`) as shown in the examples above; it automatically closes the presentation and frees unmanaged resources when the block exits. If you create a presentation without a `with` block, close it explicitly by calling `presentation.__exit__(None, None, None)` after you have finished using it, and remove any remaining references so that Python’s garbage collector can reclaim the memory. ```py import aspose.slides as slides presentation = slides.Presentation("large.pptx") # ...process the presentation... presentation.save("large.pdf", slides.export.SaveFormat.PDF) # Explicitly release resources. presentation.__exit__(None, None, None) ``` ## **FAQ** ### What data in an Aspose.Slides presentation is treated as BLOB and controlled by BLOB options? Large binary objects such as images, audio, and video are treated as BLOB. The whole presentation file also involves BLOB handling when it’s loaded or saved. These objects are governed by BLOB policies that let you manage memory usage and spill to temporary files when needed. ### Where do I configure BLOB handling rules during presentation loading? Use [LoadOptions](https://reference.aspose.com/slides/python-net/aspose.slides/loadoptions/) with [BlobManagementOptions](https://reference.aspose.com/slides/python-net/aspose.slides/blobmanagementoptions/). There you set the in-memory limit for BLOB, allow or disallow temporary files, choose the root path for temp files, and select source locking behavior. ### Do BLOB settings affect performance, and how do I balance speed vs memory? Yes. Keeping BLOB in memory maximizes speed but increases RAM consumption; lowering the memory limit shifts more work to temporary files, reducing RAM at the cost of additional I/O. Tune the [max_blobs_bytes_in_memory](https://reference.aspose.com/slides/python-net/aspose.slides/blobmanagementoptions/max_blobs_bytes_in_memory/) threshold to reach the right balance for your workload and environment. ### Do BLOB options help when opening extremely large presentations (e.g., gigabytes)? Yes. [BlobManagementOptions](https://reference.aspose.com/slides/python-net/aspose.slides/blobmanagementoptions/) are designed for such scenarios: enabling temporary files and using source locking can significantly reduce peak RAM use and stabilize processing for very large decks. ### Can I use BLOB policies when loading from streams instead of disk files? Yes. The same rules apply to streams: the presentation instance can own and lock the input stream (depending on the chosen locking mode), and temporary files are used when allowed, keeping memory usage predictable during processing. # Manage Table Cells in Presentations with Python > Manage PowerPoint table cells in Python: identify merged cells, remove borders, split cells, and set background colors and images with Aspose.Slides for Python via .NET. Source: https://docs.aspose.com/slides/python-net/manage-cells/ Updated: 2026-11-17 ## **Overview** Aspose.Slides allows you to access and modify table cells in PowerPoint presentations. This article explains how to identify merged table cells, remove cell borders, work with cell numbering after merging or splitting cells, change a cell’s background color, and add an image inside a table cell. The examples show how to create or open a presentation, get a table from a slide, update cell formatting through cell properties, and save the modified presentation as a PPTX file. Aspose.Slides uses zero-based indices. Coordinates in this article are written as `(column, row)`. ## **Identify a Merged Table Cell** The example opens an existing presentation and accesses the first shape on the first slide as a table. It assumes that the slide and shape exist and that the shape is a table. It then iterates through all rows and columns and uses [is_merged_cell](https://reference.aspose.com/slides/python-net/aspose.slides/cell/is_merged_cell/) to identify cells in merged regions. For each match, it prints the cell coordinates in `row;column` order, [row_span](https://reference.aspose.com/slides/python-net/aspose.slides/cell/row_span/), [col_span](https://reference.aspose.com/slides/python-net/aspose.slides/cell/col_span/), and the region's starting coordinates, [first_row_index](https://reference.aspose.com/slides/python-net/aspose.slides/cell/first_row_index/) and [first_column_index](https://reference.aspose.com/slides/python-net/aspose.slides/cell/first_column_index/). ```python import aspose.slides as slides with slides.Presentation("presentation_with_table.pptx") as presentation: slide = presentation.slides[0] table = slide.shapes[0] for row_index in range(len(table.rows)): for column_index in range(len(table.columns)): cell = table.rows[row_index][column_index] if cell.is_merged_cell: print(f"Cell {row_index};{column_index} belongs to a merged region with row_span={cell.row_span} and col_span={cell.col_span} starting at {cell.first_row_index};{cell.first_column_index}.") ``` ## **Remove Table Cell Borders** Create a [Presentation](https://reference.aspose.com/slides/python-net/aspose.slides/presentation/) and add a table to its first slide with [add_table](https://reference.aspose.com/slides/python-net/aspose.slides/shapecollection/add_table/). Column widths, row heights, and the table position are specified in points. The example sets all four cell borders to [FillType.NO_FILL](https://reference.aspose.com/slides/python-net/aspose.slides/filltype/), making them invisible. ```python import aspose.slides as slides with slides.Presentation() as presentation: slide = presentation.slides[0] column_widths = [50, 50, 50, 50] row_heights = [50, 30, 30, 30, 30] table = slide.shapes.add_table(100, 50, column_widths, row_heights) for row in table.rows: for cell in row: cell.cell_format.border_top.fill_format.fill_type = slides.FillType.NO_FILL cell.cell_format.border_bottom.fill_format.fill_type = slides.FillType.NO_FILL cell.cell_format.border_left.fill_format.fill_type = slides.FillType.NO_FILL cell.cell_format.border_right.fill_format.fill_type = slides.FillType.NO_FILL presentation.save("table.pptx", slides.export.SaveFormat.PPTX) ``` ## **Add Diagonal Cell Borders** Use [border_diagonal_down](https://reference.aspose.com/slides/python-net/aspose.slides/cellformat/border_diagonal_down/) to draw a line from the top-left corner to the bottom-right, and [border_diagonal_up](https://reference.aspose.com/slides/python-net/aspose.slides/cellformat/border_diagonal_up/) to draw a line from the bottom-left corner to the top-right. A diagonal can mark a corner header; both diagonals can form an X to mark a cell as not applicable. Each diagonal is a [LineFormat](https://reference.aspose.com/slides/python-net/aspose.slides/lineformat/). In its [fill_format](https://reference.aspose.com/slides/python-net/aspose.slides/lineformat/fill_format/), set [fill_type](https://reference.aspose.com/slides/python-net/aspose.slides/fillformat/fill_type/) to [FillType.SOLID](https://reference.aspose.com/slides/python-net/aspose.slides/filltype/) and choose a [solid_fill_color](https://reference.aspose.com/slides/python-net/aspose.slides/fillformat/solid_fill_color/). Set the line's [width](https://reference.aspose.com/slides/python-net/aspose.slides/lineformat/width/) in points. The example creates three cells in one row: a red downward diagonal, a blue upward diagonal, and both diagonals. It leaves the top, bottom, left, and right cell borders unchanged. ```python import aspose.slides as slides with slides.Presentation() as presentation: slide = presentation.slides[0] column_widths = [210, 210, 210] row_heights = [160] table = slide.shapes.add_table(45, 130, column_widths, row_heights) downward_border = table.rows[0][0].cell_format.border_diagonal_down downward_border.fill_format.fill_type = slides.FillType.SOLID downward_border.fill_format.solid_fill_color.color = slides.Color.red downward_border.width = 3 upward_border = table.rows[0][1].cell_format.border_diagonal_up upward_border.fill_format.fill_type = slides.FillType.SOLID upward_border.fill_format.solid_fill_color.color = slides.Color.blue upward_border.width = 5 cross_downward_border = table.rows[0][2].cell_format.border_diagonal_down cross_downward_border.fill_format.fill_type = slides.FillType.SOLID cross_downward_border.fill_format.solid_fill_color.color = slides.Color.red cross_downward_border.width = 3 cross_upward_border = table.rows[0][2].cell_format.border_diagonal_up cross_upward_border.fill_format.fill_type = slides.FillType.SOLID cross_upward_border.fill_format.solid_fill_color.color = slides.Color.blue cross_upward_border.width = 5 presentation.save("diagonal_cell_borders.pptx", slides.export.SaveFormat.PPTX) ``` A diagonal is a formatting property, not a cell split. Each cell retains a single [text_frame](https://reference.aspose.com/slides/python-net/aspose.slides/cell/text_frame/); the regions on either side of a diagonal cannot be edited independently. The saved table, rendered in Microsoft PowerPoint: ![Three table cells showing a red diagonal from top-left to bottom-right, a blue diagonal from bottom-left to top-right, and both diagonals forming an X.](https://docs.aspose.com/slides/python-net/manage-cells/diagonal-cell-borders.png) *Left to right: downward diagonal (red, 3 pt), upward diagonal (blue, 5 pt), and both diagonals.* ## **Merge Table Cells** Use [merge_cells](https://reference.aspose.com/slides/python-net/aspose.slides/table/merge_cells/) to combine a rectangular range of table cells into one cell. Specify the cells at the top-left and bottom-right corners of the range. The final argument controls whether the merge may include cells outside the specified range; `False` keeps the merge within that range. The example creates a 4-by-4 table with 70-point columns and rows, then merges the four central cells from `(1, 1)` through `(2, 2)`. The resulting cell spans two columns and two rows, while the table's underlying grid retains four columns and four rows. To access the merged cell's content or formatting, use its top-left position: `table.rows[1][1]` in this example. The other positions in the merged range remain part of the table grid, so the indices of cells outside the range do not change. ```python import aspose.slides as slides with slides.Presentation() as presentation: slide = presentation.slides[0] column_widths = [70, 70, 70, 70] row_heights = [70, 70, 70, 70] table = slide.shapes.add_table(100, 50, column_widths, row_heights) table.merge_cells(table.rows[1][1], table.rows[2][2], False) presentation.save("merged_cells.pptx", slides.export.SaveFormat.PPTX) ``` ## **Split Table Cells** Merging cells in the previous example preserves the table's grid. Splitting a cell can introduce a new grid column and change the column indices of cells to its right. Aspose.Slides follows PowerPoint's table grid model. This example creates a 4-by-4 table with 70-point columns and rows and calls [split_by_width](https://reference.aspose.com/slides/python-net/aspose.slides/cell/split_by_width/) on cell `(1, 1)`. Half of the cell's 70-point width is passed to create two equal-width cells. After this split, the two halves are accessed as `table.rows[1][1]` and `table.rows[1][2]`. The table grid now has five columns: cells originally in columns 2 and 3 move to columns 3 and 4, respectively. Row indices remain unchanged. Use these updated column indices when accessing cells after the split. ```python import aspose.slides as slides with slides.Presentation() as presentation: slide = presentation.slides[0] column_widths = [70, 70, 70, 70] row_heights = [70, 70, 70, 70] table = slide.shapes.add_table(100, 50, column_widths, row_heights) table.rows[1][1].split_by_width(table.rows[1][1].width / 2) presentation.save("split_cells.pptx", slides.export.SaveFormat.PPTX) ``` [![An unmerged 70-point cell splits into two 35-point cells, adding a fifth grid column and shifting the indices to its right.](https://docs.aspose.com/slides/python-net/manage-cells/visual-manage-cells-04c40789d81c.svg)](https://docs.aspose.com/slides/python-net/manage-cells/visual-manage-cells-04c40789d81c.svg) *The width split affects cell (1, 1), using zero-based (column, row) indices. Other rows keep a cell spanning both new column positions.* ### **Split Merged Cells by Row or Column Span** To prepare merged template cells for data population, use [split_by_row_span](https://reference.aspose.com/slides/python-net/aspose.slides/cell/split_by_row_span/) to split along an existing row boundary, or [split_by_col_span](https://reference.aspose.com/slides/python-net/aspose.slides/cell/split_by_col_span/) to split along a column boundary. The `index` argument counts rows in the upper part or columns in the left part of the split; it is relative to the merged region: - Row split: `0 < index <` [row_span](https://reference.aspose.com/slides/python-net/aspose.slides/cell/row_span/). - Column split: `0 < index <` [col_span](https://reference.aspose.com/slides/python-net/aspose.slides/cell/col_span/). The example expects a presentation to have a table as the first shape on the first slide, with `(1, 2)` and `(1, 3)` merged vertically. Starting from the lower position, it uses [first_column_index](https://reference.aspose.com/slides/python-net/aspose.slides/cell/first_column_index/) and [first_row_index](https://reference.aspose.com/slides/python-net/aspose.slides/cell/first_row_index/) to locate the origin and checks both spans. `split_by_row_span` with an index of 1 then separates rows 2 and 3 for product names. For a horizontal two-column merge, use `split_by_col_span` with an index of 1 instead. ```python import aspose.slides as slides with slides.Presentation("table_template.pptx") as presentation: slide = presentation.slides[0] table = slide.shapes[0] selected_cell = table.rows[3][1] first_column_index = selected_cell.first_column_index first_row_index = selected_cell.first_row_index merged_cell = table.rows[first_row_index][first_column_index] if merged_cell.is_merged_cell and merged_cell.row_span == 2 and merged_cell.col_span == 1: merged_cell.split_by_row_span(1) # Retrieve the resulting cells from the table after splitting. upper_cell = table.rows[first_row_index][first_column_index] lower_cell = table.rows[first_row_index + 1][first_column_index] print(f"Upper cell merged: {upper_cell.is_merged_cell}") print(f"Lower cell merged: {lower_cell.is_merged_cell}") upper_cell.text_frame.text = "Product A" lower_cell.text_frame.text = "Product B" presentation.save("split_template.pptx", slides.export.SaveFormat.PPTX) else: print("Select a merged region spanning exactly two rows and one column.") ``` The table grid and surrounding cell indices stay unchanged. Retrieve the resulting cells by their coordinates; here, both have spans of 1 and [is_merged_cell](https://reference.aspose.com/slides/python-net/aspose.slides/cell/is_merged_cell/) prints `False`. Larger regions can remain partly merged after one split. The original text and its formatting remain in the upper (or left) cell; the new cell is empty but inherits cell formatting such as fill, borders, and margins. Populate the cells after splitting and set any required text formatting explicitly. The saved presentation contains separate "Product A" and "Product B" cells with the template's cell formatting retained. See the [Cell API Reference](https://reference.aspose.com/slides/python-net/aspose.slides/cell/) for details. ### **Split a Cell at a Specific Height** [split_by_height](https://reference.aspose.com/slides/python-net/aspose.slides/cell/split_by_height/) takes the height of the upper part in points. [split_by_row_span](https://reference.aspose.com/slides/python-net/aspose.slides/cell/split_by_row_span/) takes the number of existing grid rows in the upper part. To center a 40-point cell vertically in the right column, subtract 40 from the cell’s actual height and divide the remaining space equally above and below it. ```python import aspose.slides as slides with slides.Presentation() as presentation: slide = presentation.slides[0] column_widths = [160, 160] row_heights = [140] table = slide.shapes.add_table(50, 50, column_widths, row_heights) table.rows[0][0].text_frame.text = "Left" height = table.rows[0][1].height margin = (height - 40) / 2 table.rows[0][1].split_by_height(margin) table.rows[1][1].split_by_height(40) table.rows[1][1].text_frame.text = "Middle" presentation.save("split_by_height.pptx", slides.export.SaveFormat.PPTX) ``` The first split adds a grid row, leaving the lower 90 points in `table.rows[1][1]`. The second split divides that cell into a 40-point middle cell and a 50-point bottom cell. The three cells in the right column are now 50, 40, and 50 points high from top to bottom. The left cell spans all three rows at its original height of 140 points. ![The left cell spans the full table height beside three cells with Middle in the center.](https://docs.aspose.com/slides/python-net/manage-cells/split-by-height.png) ## **Change the Table Cell Background Color** This example creates a table with 150-point columns and 50-point rows. It sets [fill_type](https://reference.aspose.com/slides/python-net/aspose.slides/fillformat/fill_type/) to solid and [solid_fill_color](https://reference.aspose.com/slides/python-net/aspose.slides/fillformat/solid_fill_color/) to red for cell `(2, 3)`, in the third column and fourth row. ```python import aspose.slides as slides with slides.Presentation() as presentation: slide = presentation.slides[0] column_widths = [150, 150, 150, 150] row_heights = [50, 50, 50, 50, 50] table = slide.shapes.add_table(50, 50, column_widths, row_heights) cell = table.rows[3][2] cell.cell_format.fill_format.fill_type = slides.FillType.SOLID cell.cell_format.fill_format.solid_fill_color.color = slides.Color.red presentation.save("cell_background_color.pptx", slides.export.SaveFormat.PPTX) ``` ## **Add an Image Inside a Table Cell** Place the input image in the working directory before running this example. It loads the image with [Images.from_file](https://reference.aspose.com/slides/python-net/aspose.slides/images/from_file/) and adds it to the presentation's image collection with [add_image](https://reference.aspose.com/slides/python-net/aspose.slides/imagecollection/add_image/). It then assigns the image to the picture fill of cell `(0, 0)`, the first cell in the table. [PictureFillMode.STRETCH](https://reference.aspose.com/slides/python-net/aspose.slides/picturefillmode/) stretches the image to fill the cell, which may change its aspect ratio. Column widths and row heights are in points. The loaded image is disposed automatically when its `with` block ends. ```python import aspose.slides as slides with slides.Presentation() as presentation: slide = presentation.slides[0] column_widths = [150, 150, 150, 150] row_heights = [100, 100, 100, 100, 90] table = slide.shapes.add_table(50, 50, column_widths, row_heights) with slides.Images.from_file("aspose_logo.jpg") as image: presentation_image = presentation.images.add_image(image) cell = table.rows[0][0] cell.cell_format.fill_format.fill_type = slides.FillType.PICTURE cell.cell_format.fill_format.picture_fill_format.picture_fill_mode = slides.PictureFillMode.STRETCH cell.cell_format.fill_format.picture_fill_format.picture.image = presentation_image presentation.save("table_cell_with_image.pptx", slides.export.SaveFormat.PPTX) ``` ## **FAQ** **Can I set different line thicknesses and styles for different sides of a single cell?** Yes. The [top](https://reference.aspose.com/slides/python-net/aspose.slides/cellformat/border_top/)/[bottom](https://reference.aspose.com/slides/python-net/aspose.slides/cellformat/border_bottom/)/[left](https://reference.aspose.com/slides/python-net/aspose.slides/cellformat/border_left/)/[right](https://reference.aspose.com/slides/python-net/aspose.slides/cellformat/border_right/) borders have separate properties, so the thickness and style of each side can differ. **What happens to the image if I change the column/row size after setting a picture as the cell’s background?** The behavior depends on the [fill mode](https://reference.aspose.com/slides/python-net/aspose.slides/picturefillmode/) (stretch/tile). With stretching, the image adjusts to the new cell; with tiling, the tiles are recalculated. **Can I assign a hyperlink to all the content of a cell?** [Hyperlinks](https://docs.aspose.com/slides/python-net/manage-hyperlinks/) are set at the text (portion) level inside the cell’s text frame or at the level of the entire table/shape. In practice, you assign the link to a portion or to all the text in the cell. **Can I set different fonts within a single cell?** Yes. A cell’s text frame supports [portions](https://reference.aspose.com/slides/python-net/aspose.slides/portion/) (runs) with independent formatting—font family, style, size, and color. ## Related articles - [Manage Presentation Tables with Python](https://docs.aspose.com/slides/python-net/manage-table/) - [Create and Customize PowerPoint Tables in Python](https://docs.aspose.com/slides/python-net/powerpoint-table/) - [Manage Rows and Columns in PowerPoint Tables Using Python](https://docs.aspose.com/slides/python-net/manage-rows-and-columns/) # Manage Presentation Hyperlinks in Python > Add, format, update, and remove hyperlinks in PowerPoint and OpenDocument presentations with Aspose.Slides for Python via .NET, using Python examples. Source: https://docs.aspose.com/slides/python-net/manage-hyperlinks/ Updated: 2026-11-02 ## **Introduction** A hyperlink connects presentation content to a website or a location within the presentation. In PowerPoint, hyperlinks commonly serve two purposes: * Open a website from text, a shape, or a media frame. * Navigate to another slide, for example, from a table of contents. Aspose.Slides for Python via .NET lets you add these links, control their appearance and sound, update their properties, and remove them. The examples below show how to work with hyperlinks on individual elements and how to access hyperlinks at the presentation, slide, or text-frame level. You can also edit presentations with the [free online Aspose PowerPoint editor](https://products.aspose.app/slides/editor). ## **Add URL Hyperlinks** You can assign a website URL to text, a shape, or a media frame. The element to which you assign the hyperlink determines the clickable area: a text portion links the selected text, while a shape or frame links the slide object. For presentations containing relative hyperlinks, see [Manage the Hyperlink Base](https://docs.aspose.com/slides/python-net/presentation-properties/#manage-the-hyperlink-base) to read, change, or clear the document-level base. ### **Add URL Hyperlinks to Text** To link text to a website, assign a [Hyperlink](https://reference.aspose.com/slides/python-net/aspose.slides/hyperlink/) to the text portion's [hyperlink_click](https://reference.aspose.com/slides/python-net/aspose.slides/portionformat/hyperlink_click/) property, as shown below. Only that portion of text becomes clickable. ```python import aspose.slides as slides with slides.Presentation() as presentation: text_shape = presentation.slides[0].shapes.add_auto_shape(slides.ShapeType.RECTANGLE, 100, 100, 600, 50, False) text_shape.add_text_frame("Aspose: File Format APIs") portion_format = text_shape.text_frame.paragraphs[0].portions[0].portion_format portion_format.hyperlink_click = slides.Hyperlink("https://www.aspose.com/") portion_format.hyperlink_click.tooltip = "Explore Aspose file format APIs" portion_format.font_height = 32 presentation.save("presentation-out.pptx", slides.export.SaveFormat.PPTX) ``` ### **Add URL Hyperlinks to Shapes and Media Frames** To make a shape or frame clickable, set its [hyperlink_click](https://reference.aspose.com/slides/python-net/aspose.slides/shape/hyperlink_click/) property. The hyperlink belongs to the object itself rather than to a text portion inside it. The same approach applies to picture, audio, and video frames: assign the hyperlink to the frame and set the link's [tooltip](https://reference.aspose.com/slides/python-net/aspose.slides/hyperlink/tooltip/) if needed. The following example makes a rectangle clickable: ```python import aspose.slides as slides with slides.Presentation() as presentation: shape = presentation.slides[0].shapes.add_auto_shape(slides.ShapeType.RECTANGLE, 100, 100, 600, 50) shape.hyperlink_click = slides.Hyperlink("https://www.aspose.com/") shape.hyperlink_click.tooltip = "Explore Aspose file format APIs" presentation.save("presentation-out.pptx", slides.export.SaveFormat.PPTX) ``` ## **Use Hyperlinks to Create a Table of Contents** Internal hyperlinks let readers jump from a table of contents to a specific slide. The following example uses [set_internal_hyperlink_click](https://reference.aspose.com/slides/python-net/aspose.slides/hyperlinkmanager/set_internal_hyperlink_click/) to link the “Page 2” text on the first slide to the second slide. ```python import aspose.pydrawing as draw import aspose.slides as slides with slides.Presentation() as presentation: first_slide = presentation.slides[0] second_slide = presentation.slides.add_empty_slide(first_slide.layout_slide) table_of_contents = first_slide.shapes.add_auto_shape(slides.ShapeType.RECTANGLE, 40, 40, 300, 100) table_of_contents.fill_format.fill_type = slides.FillType.NO_FILL table_of_contents.line_format.fill_format.fill_type = slides.FillType.NO_FILL table_of_contents.text_frame.paragraphs.clear() paragraph = slides.Paragraph() paragraph.paragraph_format.default_portion_format.fill_format.fill_type = slides.FillType.SOLID paragraph.paragraph_format.default_portion_format.fill_format.solid_fill_color.color = draw.Color.black paragraph.text = "Title of slide 2 .......... " link_portion = slides.Portion() link_portion.text = "Page 2" link_portion.portion_format.hyperlink_manager.set_internal_hyperlink_click(second_slide) paragraph.portions.add(link_portion) table_of_contents.text_frame.paragraphs.add(paragraph) presentation.save("link_to_slide.pptx", slides.export.SaveFormat.PPTX) ``` ## **Format Hyperlinks** ### **Color** The [color_source](https://reference.aspose.com/slides/python-net/aspose.slides/hyperlink/color_source/) property of [Hyperlink](https://reference.aspose.com/slides/python-net/aspose.slides/hyperlink/) determines whether a hyperlink uses the presentation's hyperlink color or the text portion's formatting. To apply a custom text color, select [HyperlinkColorSource.PORTION_FORMAT](https://reference.aspose.com/slides/python-net/aspose.slides/hyperlinkcolorsource/) and set the portion's fill color. This feature was introduced in PowerPoint 2019; older versions do not apply this setting. The following example adds two text hyperlinks to the same slide. The first uses a red text fill, while the second retains the default hyperlink color. ```python import aspose.pydrawing as draw import aspose.slides as slides with slides.Presentation() as presentation: colored_shape = presentation.slides[0].shapes.add_auto_shape(slides.ShapeType.RECTANGLE, 100, 100, 450, 50, False) colored_shape.add_text_frame("This hyperlink uses a custom color.") colored_portion_format = colored_shape.text_frame.paragraphs[0].portions[0].portion_format colored_portion_format.hyperlink_click = slides.Hyperlink("https://www.aspose.com/") colored_portion_format.hyperlink_click.color_source = slides.HyperlinkColorSource.PORTION_FORMAT colored_portion_format.fill_format.fill_type = slides.FillType.SOLID colored_portion_format.fill_format.solid_fill_color.color = draw.Color.red default_shape = presentation.slides[0].shapes.add_auto_shape(slides.ShapeType.RECTANGLE, 100, 200, 450, 50, False) default_shape.add_text_frame("This hyperlink uses the default color.") default_shape.text_frame.paragraphs[0].portions[0].portion_format.hyperlink_click = slides.Hyperlink("https://www.aspose.com/") presentation.save("presentation-out-hyperlink.pptx", slides.export.SaveFormat.PPTX) ``` ### **Sound** A hyperlink can play a sound when activated or stop a sound that is already playing. Use the following properties to configure these behaviors: - [Hyperlink.sound](https://reference.aspose.com/slides/python-net/aspose.slides/hyperlink/sound/) specifies the audio associated with the hyperlink. - [Hyperlink.stop_sound_on_click](https://reference.aspose.com/slides/python-net/aspose.slides/hyperlink/stop_sound_on_click/) controls whether activating the hyperlink stops the previous sound. #### **Add a Hyperlink Sound** The following example loads `sampleaudio.wav` and associates it with a button on the first slide. Clicking the button plays the sound and navigates to the next slide. A second shape on that slide stops the previous sound when clicked, without performing a navigation action. ```python import aspose.slides as slides with slides.Presentation() as presentation: with open("sampleaudio.wav", "rb") as audio_file: audio_data = audio_file.read() hyperlink_sound = presentation.audios.add_audio(audio_data) first_slide = presentation.slides[0] play_button = first_slide.shapes.add_auto_shape(slides.ShapeType.SOUND_BUTTON, 100, 100, 100, 50) play_button.hyperlink_click = slides.Hyperlink.next_slide if not play_button.hyperlink_click.stop_sound_on_click and play_button.hyperlink_click.sound is None: play_button.hyperlink_click.sound = hyperlink_sound second_slide = presentation.slides.add_empty_slide(first_slide.layout_slide) stop_button = second_slide.shapes.add_auto_shape(slides.ShapeType.RECTANGLE, 100, 100, 100, 50) stop_button.hyperlink_click = slides.Hyperlink.no_action stop_button.hyperlink_click.stop_sound_on_click = True presentation.save("hyperlink-sound.pptx", slides.export.SaveFormat.PPTX) ``` #### **Extract a Hyperlink Sound** The following example opens the presentation created above and reads the first shape's hyperlink audio into memory through [sound](https://reference.aspose.com/slides/python-net/aspose.slides/hyperlink/sound/) and [binary_data](https://reference.aspose.com/slides/python-net/aspose.slides/audio/binary_data/). ```python import aspose.slides as slides with slides.Presentation("hyperlink-sound.pptx") as presentation: if len(presentation.slides) > 0 and len(presentation.slides[0].shapes) > 0: hyperlink = presentation.slides[0].shapes[0].hyperlink_click sound = hyperlink.sound if hyperlink is not None else None if sound is not None: audio_data = sound.binary_data print(f"Extracted {len(audio_data)} bytes of hyperlink audio.") else: print("The first shape has no hyperlink sound.") else: print("The presentation has no first slide or shape to inspect.") ``` ### **Tooltip and Interaction Settings** You can update the following [Hyperlink](https://reference.aspose.com/slides/python-net/aspose.slides/hyperlink/) properties after assigning a hyperlink to text or a shape: - [tooltip](https://reference.aspose.com/slides/python-net/aspose.slides/hyperlink/tooltip/) sets the text that a viewer can display as a hint for the link. - [target_frame](https://reference.aspose.com/slides/python-net/aspose.slides/hyperlink/target_frame/) specifies the target frame within a parent HTML frameset, when applicable. - [history](https://reference.aspose.com/slides/python-net/aspose.slides/hyperlink/history/) controls whether activating the link adds its destination to the list of viewed hyperlinks. - [highlight_click](https://reference.aspose.com/slides/python-net/aspose.slides/hyperlink/highlight_click/) controls whether the hyperlink is highlighted when clicked. ## **Remove Hyperlinks from Presentations** Use [get_any_hyperlinks](https://reference.aspose.com/slides/python-net/aspose.slides/hyperlinkqueries/get_any_hyperlinks/) to collect hyperlink containers, including text-portion links, before changing them. The following example removes both activation types from the first slide. To remove only one type, call only [remove_hyperlink_click](https://reference.aspose.com/slides/python-net/aspose.slides/hyperlinkmanager/remove_hyperlink_click/) or [remove_hyperlink_mouse_over](https://reference.aspose.com/slides/python-net/aspose.slides/hyperlinkmanager/remove_hyperlink_mouse_over/); removing a click action does not remove its mouse-over counterpart. ```python import aspose.slides as slides with slides.Presentation("pres.pptx") as presentation: if len(presentation.slides) > 0: containers = list(presentation.slides[0].hyperlink_queries.get_any_hyperlinks()) for container in containers: container.hyperlink_manager.remove_hyperlink_click() container.hyperlink_manager.remove_hyperlink_mouse_over() presentation.save("pres-removed-hyperlinks.pptx", slides.export.SaveFormat.PPTX) else: print("The presentation has no slides to process.") ``` For unconditional removal, [remove_all_hyperlinks](https://reference.aspose.com/slides/python-net/aspose.slides/hyperlinkqueries/remove_all_hyperlinks/) removes both activation types in the selected scope in one call. For selective cleanup and coverage of masters, layouts, and notes, see [Report, Sanitize, and Verify Hyperlinks](https://docs.aspose.com/slides/python-net/manage-hyperlinks/#report-sanitize-and-verify-hyperlinks). ## **Build a Complete Hyperlink Inventory** Before distributing a presentation, inventory its interactive actions as well as its web links. [get_any_hyperlinks](https://reference.aspose.com/slides/python-net/aspose.slides/hyperlinkqueries/get_any_hyperlinks/) returns [IHyperlinkContainer](https://reference.aspose.com/slides/python-net/aspose.slides/ihyperlinkcontainer/) objects, not a flat list of URL strings. Inspect both [hyperlink_click](https://reference.aspose.com/slides/python-net/aspose.slides/ihyperlinkcontainer/hyperlink_click/) and [hyperlink_mouse_over](https://reference.aspose.com/slides/python-net/aspose.slides/ihyperlinkcontainer/hyperlink_mouse_over/) on each container. They are independent: the same container can expose both actions, so a complete report needs up to two rows per container. Scanning only shape-level hyperlinks can miss links attached to text portions. Query the appropriate scope instead, and retain the returned containers so that you can later update or remove their actions. ### **Query Presentation, Slide, and Text-Frame Scopes** The [HyperlinkQueries](https://reference.aspose.com/slides/python-net/aspose.slides/hyperlinkqueries/) class is available through [Presentation.hyperlink_queries](https://reference.aspose.com/slides/python-net/aspose.slides/presentation/hyperlink_queries/), [BaseSlide.hyperlink_queries](https://reference.aspose.com/slides/python-net/aspose.slides/baseslide/hyperlink_queries/), and [TextFrame.hyperlink_queries](https://reference.aspose.com/slides/python-net/aspose.slides/textframe/hyperlink_queries/). Each scope supports the same queries: - [get_hyperlink_clicks](https://reference.aspose.com/slides/python-net/aspose.slides/hyperlinkqueries/get_hyperlink_clicks/) returns containers with a click action. - [get_hyperlink_mouse_overs](https://reference.aspose.com/slides/python-net/aspose.slides/hyperlinkqueries/get_hyperlink_mouse_overs/) returns containers with a mouse-over action. - [get_any_hyperlinks](https://reference.aspose.com/slides/python-net/aspose.slides/hyperlinkqueries/get_any_hyperlinks/) returns containers with either or both actions. The following example creates `hyperlink-audit-input.pptx` with an external click link, a file mouse-over link, internal slide navigation, a text mouse-over link, and a macro action. It does not execute any of these actions. The same three queries work at every scope; the counts describe containers, not action totals. The text-frame scope excludes the enclosing shape's own links. ```python import aspose.slides as slides def print_counts(scope, queries): click_containers = queries.get_hyperlink_clicks() mouse_over_containers = queries.get_hyperlink_mouse_overs() all_containers = queries.get_any_hyperlinks() print(f"{scope}: click={len(click_containers)}, mouse-over={len(mouse_over_containers)}, any={len(all_containers)}") with slides.Presentation() as presentation: slide = presentation.slides[0] destination = presentation.slides.add_empty_slide(slide.layout_slide) shape = slide.shapes.add_auto_shape(slides.ShapeType.RECTANGLE, 20, 20, 400, 60) shape.text_frame.text = "Click the text to go to slide 2" shape.hyperlink_manager.set_external_hyperlink_click("https://example.com/") shape.hyperlink_click.tooltip = "Public website" shape.hyperlink_manager.set_external_hyperlink_mouse_over("file:///C:/private/report.xlsx") portion_format = shape.text_frame.paragraphs[0].portions[0].portion_format portion_format.hyperlink_manager.set_internal_hyperlink_click(destination) portion_format.hyperlink_manager.set_external_hyperlink_mouse_over("https://example.com/help") macro_button = slide.shapes.add_auto_shape(slides.ShapeType.RECTANGLE, 20, 120, 200, 60) macro_button.hyperlink_manager.set_macro_hyperlink_click("ReviewPresentation") print_counts("Presentation", presentation.hyperlink_queries) print_counts("Slide 1", slide.hyperlink_queries) print_counts("Text frame", shape.text_frame.hyperlink_queries) presentation.save("hyperlink-audit-input.pptx", slides.export.SaveFormat.PPTX) ``` For this example, presentation and slide queries each report three click containers, two mouse-over containers, and three containers with either action. The text-frame query reports one container in each category. ### **Classify Actions and Destinations** Use [Hyperlink.action_type](https://reference.aspose.com/slides/python-net/aspose.slides/hyperlink/action_type/) to interpret an action before interpreting its destination. The [HyperlinkActionType](https://reference.aspose.com/slides/python-net/aspose.slides/hyperlinkactiontype/) values cover more than web navigation: | Values | Meaning for an audit | | --- | --- | | `HYPERLINK` | External hyperlink; inspect the URL and its scheme. | | `JUMP_SPECIFIC_SLIDE` | Internal navigation to a particular slide. | | `JUMP_FIRST_SLIDE`, `JUMP_PREVIOUS_SLIDE`, `JUMP_NEXT_SLIDE`, `JUMP_LAST_SLIDE`, `JUMP_LAST_VIEWED_SLIDE` | Built-in slideshow navigation, resolved in slideshow context. | | `JUMP_END_SHOW`, `START_CUSTOM_SLIDE_SHOW` | End the current show or start a custom show. | | `START_MACRO` | Execute a macro. | | `START_PROGRAM` | Launch a program. | | `OPEN_FILE`, `OPEN_PRESENTATION` | Open a file or another presentation; review separately from web URLs. | | `START_STOP_MEDIA` | Start or stop media playback. | | `NO_ACTION`, `UNKNOWN` | No navigation action, or an unrecognized action requiring review. | Read external destinations from [external_url](https://reference.aspose.com/slides/python-net/aspose.slides/hyperlink/external_url/) and specific internal destinations from [target_slide](https://reference.aspose.com/slides/python-net/aspose.slides/hyperlink/target_slide/). Internal actions and built-in commands may have no external URL; an empty URL does not mean that the container has no action. Preserve [external_url_original](https://reference.aspose.com/slides/python-net/aspose.slides/hyperlink/external_url_original/) when it differs from the normalized URL, and include the [tooltip](https://reference.aspose.com/slides/python-net/aspose.slides/hyperlink/tooltip/) when available. ### **Report, Sanitize, and Verify Hyperlinks** The following Python example reads an existing presentation (use the file created above), writes `hyperlink-audit.json`, applies a policy, saves `hyperlink-sanitized.pptx`, and reopens it to check both activation types again. It collects containers before changing them and queries each slide scope once to avoid duplicate processing. Presentation queries cover ordinary slides; for a package-wide inventory, the example queries ordinary slides, masters, layouts, notes, and the notes and handout masters when present. The report records a one-based slide index and [slide_id](https://reference.aspose.com/slides/python-net/aspose.slides/baseslide/slide_id/) where available. The collector retains the owning slide and scope alongside each returned container. Masters, layouts, and notes have no ordinary slide index and are identified by their scope. Shape containers and text-portion formatting containers are labeled separately; other container types retain their runtime type name. Each container gets a report-local ID so its two actions can be correlated. This deliberately restrictive application policy allows only absolute HTTPS URLs and valid internal slide targets. It rejects macros, programs, file actions, other slideshow actions, unknown actions, and other URL schemes. These rejections are policy decisions, not an Aspose.Slides safety verdict. HTTPS alone does not establish trust: add host allowlists and other checks for your application. Both original and normalized external URLs are checked. The example audits metadata without following links or running actions. For remediation, the container's [hyperlink_manager](https://reference.aspose.com/slides/python-net/aspose.slides/ihyperlinkcontainer/hyperlink_manager/) supports [set_external_hyperlink_click](https://reference.aspose.com/slides/python-net/aspose.slides/hyperlinkmanager/set_external_hyperlink_click/), [remove_hyperlink_click](https://reference.aspose.com/slides/python-net/aspose.slides/hyperlinkmanager/remove_hyperlink_click/), and [remove_hyperlink_mouse_over](https://reference.aspose.com/slides/python-net/aspose.slides/hyperlinkmanager/remove_hyperlink_mouse_over/). Here, prohibited external click links are replaced with a fixed HTTPS landing page; other prohibited clicks and prohibited mouse-over actions are removed independently. Set `replace_external_clicks` to `False` to remove all policy violations instead. Choose an application-owned replacement page before deployment. The report's export flag uses a conservative PDF review policy: flag mouse-over actions and anything other than an external link or specific slide jump as potentially unsupported. It is a review hint, not a capability test or a guarantee that unflagged links will survive export. Supported [PDF](https://docs.aspose.com/slides/python-net/convert-powerpoint-to-pdf/) and [HTML](https://docs.aspose.com/slides/python-net/convert-powerpoint-to-html/) exports may preserve hyperlinks, depending on the action, export options, and viewer. Raster [images](https://docs.aspose.com/slides/python-net/convert-powerpoint-to-png/) and [video](https://docs.aspose.com/slides/python-net/convert-powerpoint-to-video/) cannot preserve interactive hyperlinks; flag every action when auditing for those outputs. ```python import json import sys from urllib.parse import urlsplit import aspose.slides as slides def is_https(value): if not value or any(character.isspace() for character in value): return False try: uri = urlsplit(value) return uri.scheme.lower() == "https" and bool(uri.hostname) except ValueError: return False def policy_violation(link): if link is None: return None if link.action_type == slides.HyperlinkActionType.JUMP_SPECIFIC_SLIDE: return "Missing target slide" if link.target_slide is None else None if link.action_type != slides.HyperlinkActionType.HYPERLINK: return "Action is not allowed" if not is_https(link.external_url): return "Normalized URL is not absolute HTTPS" original = link.external_url_original if original and not is_https(original): return "Original URL is not absolute HTTPS" return None def slide_index(presentation, slide): if slide is not None: for index, candidate in enumerate(presentation.slides, start=1): if candidate.slide_id == slide.slide_id: return index return None def collect_containers(presentation): # Query each slide scope once, retaining its owner with each container. scopes = [("Slide", slide) for slide in presentation.slides] scopes.extend(("Master", master) for master in presentation.masters) scopes.extend(("Layout", layout) for layout in presentation.layout_slides) scopes.extend(("Notes", slide.notes_slide_manager.notes_slide) for slide in presentation.slides) scopes.append(("Notes master", presentation.master_notes_slide_manager.master_notes_slide)) scopes.append(("Handout master", presentation.master_handout_slide_manager.master_handout_slide)) found = [] for scope, owner in scopes: if owner is not None: containers = list(owner.hyperlink_queries.get_any_hyperlinks()) found.extend((container, scope, owner) for container in containers) return found def add_row(rows, presentation, link, activation, container, container_id, scope, owner): if link is None: return target_slide = link.target_slide violation = policy_violation(link) if isinstance(container, slides.Shape): owner_type = "Shape" elif isinstance(container, slides.PortionFormat): owner_type = "Text portion" else: owner_type = type(container).__name__ ordinary_action = link.action_type in (slides.HyperlinkActionType.HYPERLINK, slides.HyperlinkActionType.JUMP_SPECIFIC_SLIDE) original_url = link.external_url_original if link.external_url_original != link.external_url else None rows.append({ "container_id": container_id, "slide_index": slide_index(presentation, owner) if scope == "Slide" else None, "slide_id": owner.slide_id, "scope": scope, "owner_type": owner_type, "activation": activation, "action_type": link.action_type.name, "external_url": link.external_url, "target_slide_index": slide_index(presentation, target_slide), "target_slide_id": target_slide.slide_id if target_slide is not None else None, "tooltip": link.tooltip, "original_external_url": original_url, "potentially_unsafe": violation is not None, "policy_violation": violation, "target_export": "PDF", "potentially_unsupported_by_export": activation == "mouse-over" or not ordinary_action, }) replace_external_clicks = True replacement_url = "https://example.com/blocked-link" with slides.Presentation("hyperlink-audit-input.pptx") as presentation: containers = collect_containers(presentation) rows = [] for container_id, (container, scope, owner) in enumerate(containers, start=1): add_row(rows, presentation, container.hyperlink_click, "click", container, container_id, scope, owner) add_row(rows, presentation, container.hyperlink_mouse_over, "mouse-over", container, container_id, scope, owner) with open("hyperlink-audit.json", "w", encoding="utf-8") as report_file: json.dump(rows, report_file, indent=2) for container, scope, owner in containers: click = container.hyperlink_click if policy_violation(click) is not None: if replace_external_clicks and click.action_type == slides.HyperlinkActionType.HYPERLINK: container.hyperlink_manager.set_external_hyperlink_click(replacement_url) else: container.hyperlink_manager.remove_hyperlink_click() if policy_violation(container.hyperlink_mouse_over) is not None: container.hyperlink_manager.remove_hyperlink_mouse_over() presentation.save("hyperlink-sanitized.pptx", slides.export.SaveFormat.PPTX) with slides.Presentation("hyperlink-sanitized.pptx") as reopened: remaining_containers = collect_containers(reopened) violations = 0 for container, scope, owner in remaining_containers: if policy_violation(container.hyperlink_click) is not None: violations += 1 if policy_violation(container.hyperlink_mouse_over) is not None: violations += 1 print(f"Audit rows: {len(rows)}; prohibited actions after reopening: {violations}") if violations != 0: print("Verification failed: do not distribute the saved presentation.") sys.exit(1) ``` With the input created above, the report contains five action rows. The file mouse-over link and macro click are removed, while the HTTPS links and internal slide navigation remain. The verification prints zero prohibited actions. An input containing a prohibited external click URL also exercises the replacement branch. A container with an allowed click and a prohibited mouse-over keeps its click action. This selective cleanup differs from [remove_all_hyperlinks](https://reference.aspose.com/slides/python-net/aspose.slides/hyperlinkqueries/remove_all_hyperlinks/), which removes both activation types throughout the selected scope regardless of policy. Verification here checks hyperlink actions only; it does not remove embedded VBA projects, OLE objects, or other active content, and it does not validate an exported PDF or HTML file. ## **FAQ** **How can I link to a section or its first slide?** Sections in PowerPoint group slides, but an internal hyperlink targets an individual slide. To create navigation to a section, link to the first slide in that section. **Can I attach a hyperlink to master slide elements so it works on all slides?** Yes. Master slide and layout elements support hyperlinks. Links on these elements are available during the slide show on slides that use the corresponding master or layout. **Will hyperlinks be preserved when exporting to PDF, HTML, images, or video?** Supported PDF and HTML exports may preserve hyperlinks; raster images and video cannot. See the export considerations in [Report, Sanitize, and Verify Hyperlinks](https://docs.aspose.com/slides/python-net/manage-hyperlinks/#report-sanitize-and-verify-hyperlinks). ## Related articles - [Hyperlink](https://docs.aspose.com/slides/python-net/examples/elements/hyperlink/) # Manage Presentation Ink Objects in Python > Manage PowerPoint ink objects, edit traces and brush properties, and control ink appearance during PDF, HTML, SVG, TIFF, and image export with Aspose.Slides for Python via .NET. Source: https://docs.aspose.com/slides/python-net/manage-ink/ Updated: 2026-08-10 ## **Introduction** PowerPoint provides an ink feature that allows you to draw freeform strokes. Ink can be used to highlight other objects, show connections and processes, and draw attention to specific items on a slide. The [aspose.slides.ink](https://reference.aspose.com/slides/python-net/aspose.slides.ink/) namespace contains the classes needed to work with ink objects. For example, the [Ink](https://reference.aspose.com/slides/python-net/aspose.slides.ink/ink/) class represents an ink object on a slide. ## **Differences between Regular Objects and Ink Objects** Objects on a PowerPoint slide are typically represented by shape objects. In its simplest form, a shape is a container that defines the area of the object itself (its frame) along with properties such as the container size, shape, and background. For more information, see [Shape Layout Format](https://docs.aspose.com/slides/python-net/shape-manipulations/#access-layout-formats-for-shape). However, when PowerPoint handles an ink object, it ignores all properties of the object frame (container) except its size. The size of the container area is determined by the standard [Ink.width](https://reference.aspose.com/slides/python-net/aspose.slides.ink/ink/width/) and [Ink.height](https://reference.aspose.com/slides/python-net/aspose.slides.ink/ink/height/) properties: ![ink_powerpoint1](https://docs.aspose.com/slides/python-net/manage-ink/ink_powerpoint1.png) ## **Ink Traces** An ink trace is a basic element used to record the trajectory of a pen as a user writes digital ink. A trace stores a sequence of connected points. The simplest form of encoding specifies the X and Y coordinates of each sample point. When all connected points are rendered, they produce an image like this: ![ink_powerpoint2](https://docs.aspose.com/slides/python-net/manage-ink/ink_powerpoint2.png) ## **Brush Properties for Drawing** A brush is used to draw lines that connect the points of an ink trace. Its [InkBrush.color](https://reference.aspose.com/slides/python-net/aspose.slides.ink/inkbrush/color/) and [InkBrush.size](https://reference.aspose.com/slides/python-net/aspose.slides.ink/inkbrush/size/) properties control its color and size. ### **Set Ink Brush Color** This Python code shows how to set the color of an ink brush: ```py import aspose.slides as slides import aspose.pydrawing as draw with slides.Presentation("pres.pptx") as presentation: ink = presentation.slides[0].shapes[0] brush = ink.traces[0].brush brush.color = draw.Color.red ``` ### **Set Ink Brush Size** This Python code shows how to set the size of an ink brush: ```py import aspose.slides as slides import aspose.pydrawing as draw with slides.Presentation("pres.pptx") as presentation: ink = presentation.slides[0].shapes[0] brush = ink.traces[0].brush brush.size = draw.SizeF(5.0, 10.0) ``` Generally, a brush's width and height do not match, so PowerPoint does not display the brush size (the corresponding data section is grayed out). When the brush width and height match, PowerPoint displays its size this way: ![ink_powerpoint3](https://docs.aspose.com/slides/python-net/manage-ink/ink_powerpoint3.png) For clarity, let's increase the height of the ink object and review the important dimensions: ![ink_powerpoint4](https://docs.aspose.com/slides/python-net/manage-ink/ink_powerpoint4.png) The container (frame) does not account for the size of the brushes—it always assumes that the line thickness is zero (see the previous image). Therefore, to determine the visible area of the entire ink object, the brush size of its traces must be taken into account. Here, the target object (the handwritten text trace) has been scaled to the size of the container (frame). When the size of the container changes, the brush size remains constant, and vice versa. ![ink_powerpoint5](https://docs.aspose.com/slides/python-net/manage-ink/ink_powerpoint5.png) PowerPoint uses similar behavior for text objects: ![ink_powerpoint6](https://docs.aspose.com/slides/python-net/manage-ink/ink_powerpoint6.png) ## **Control Ink Appearance During Export and Rendering** Aspose.Slides provides the [InkOptions](https://reference.aspose.com/slides/python-net/aspose.slides.export/inkoptions/) class to control how ink objects appear in exported or rendered output. You can use its properties to hide ink completely or change how ink brush mask operations are interpreted. Ink options are available through the export or rendering options for several output types: | Output | Ink options property | | --- | --- | | PDF | [`PdfOptions.ink_options`](https://reference.aspose.com/slides/python-net/aspose.slides.export/pdfoptions/ink_options/) | | HTML | [`HtmlOptions.ink_options`](https://reference.aspose.com/slides/python-net/aspose.slides.export/htmloptions/ink_options/) | | SVG | [`SVGOptions.ink_options`](https://reference.aspose.com/slides/python-net/aspose.slides.export/svgoptions/ink_options/) | | TIFF | [`TiffOptions.ink_options`](https://reference.aspose.com/slides/python-net/aspose.slides.export/tiffoptions/ink_options/) | | Slide image | [`RenderingOptions.ink_options`](https://reference.aspose.com/slides/python-net/aspose.slides.export/renderingoptions/ink_options/) | The same two settings are available through these properties: - [`InkOptions.hide_ink`](https://reference.aspose.com/slides/python-net/aspose.slides.export/inkoptions/hide_ink/) determines whether ink objects are included in the output. Its default value is `False`. - [`InkOptions.interpret_mask_op_as_opacity`](https://reference.aspose.com/slides/python-net/aspose.slides.export/inkoptions/interpret_mask_op_as_opacity/) determines whether a mask operation is interpreted as opacity when rendering an ink brush. Its default value is `True`; set it to `False` to use the ROP operation instead. ### **Hide Ink Objects in PDF Output** By default, ink objects remain visible during export. Set [InkOptions.hide_ink](https://reference.aspose.com/slides/python-net/aspose.slides.export/inkoptions/hide_ink/) to `True` when you need a clean output without handwritten annotations or other ink content. The following Python example exports a presentation to PDF while hiding all ink objects: ```py import aspose.slides as slides with slides.Presentation("presentation.pptx") as presentation: pdf_options = slides.export.PdfOptions() pdf_options.ink_options.hide_ink = True presentation.save("presentation_without_ink.pdf", slides.export.SaveFormat.PDF, pdf_options) ``` ### **Hide Ink Objects When Rendering a Slide as an Image** To hide ink objects when rendering slides as bitmap images, configure [RenderingOptions.ink_options](https://reference.aspose.com/slides/python-net/aspose.slides.export/renderingoptions/ink_options/) and pass the rendering options to the [Slide.get_image](https://reference.aspose.com/slides/python-net/aspose.slides/slide/get_image/) method. The following Python example renders the first slide as a PNG image without ink objects: ```py import aspose.slides as slides with slides.Presentation("presentation.pptx") as presentation: rendering_options = slides.export.RenderingOptions() rendering_options.ink_options.hide_ink = True with presentation.slides[0].get_image(rendering_options) as image: image.save("slide_without_ink.png", slides.ImageFormat.PNG) ``` ### **Control Ink Mask Rendering** The [InkOptions.interpret_mask_op_as_opacity](https://reference.aspose.com/slides/python-net/aspose.slides.export/inkoptions/interpret_mask_op_as_opacity/) property controls how mask operations are interpreted when rendering ink brushes. The default value is `True`, which uses opacity. Set the property to `False` to use the ROP operation instead. The following Python example exports a slide to SVG and uses ROP-based rendering for ink mask operations: ```py import aspose.slides as slides with slides.Presentation("presentation.pptx") as presentation: svg_options = slides.export.SVGOptions() svg_options.ink_options.interpret_mask_op_as_opacity = False with open("slide.svg", "wb") as svg_stream: presentation.slides[0].write_as_svg(svg_stream, svg_options) ``` The same setting can be applied through [TiffOptions.ink_options](https://reference.aspose.com/slides/python-net/aspose.slides.export/tiffoptions/ink_options/) when exporting a presentation or rendering a slide to TIFF. ### **Choose Whether to Hide or Preserve Ink** Set [InkOptions.hide_ink](https://reference.aspose.com/slides/python-net/aspose.slides.export/inkoptions/hide_ink/) to `True` when the exported file should be a clean version of an annotated presentation, for example, a final copy intended for distribution without review marks. Leave [InkOptions.hide_ink](https://reference.aspose.com/slides/python-net/aspose.slides.export/inkoptions/hide_ink/) at its default value of `False` when ink annotations are part of the intended content, such as review comments, handwritten notes, highlights, or drawings that should remain visible in the exported result. This allows applications to generate separate review and final outputs from the same presentation without modifying the source ink objects. ## **FAQ** **Can I change the color or size of an existing ink stroke?** Yes. Get the trace from [Ink.traces](https://reference.aspose.com/slides/python-net/aspose.slides.ink/ink/traces/), then change its [InkTrace.brush](https://reference.aspose.com/slides/python-net/aspose.slides.ink/inktrace/brush/). You can set the brush's [InkBrush.color](https://reference.aspose.com/slides/python-net/aspose.slides.ink/inkbrush/color/) and [InkBrush.size](https://reference.aspose.com/slides/python-net/aspose.slides.ink/inkbrush/size/) properties. **Does hiding ink change the source presentation?** No. [InkOptions.hide_ink](https://reference.aspose.com/slides/python-net/aspose.slides.export/inkoptions/hide_ink/) affects only the rendered or exported result; it does not remove or modify ink objects in the source presentation. **Which export formats support ink options?** You can configure ink options for PDF, HTML, SVG, TIFF, and bitmap slide images through the corresponding export or rendering options shown above. **Further reading** * To read about shapes in general, see the [PowerPoint Shapes](https://docs.aspose.com/slides/python-net/powerpoint-shapes/) section. * For more information on effective values, see [Shape Effective Properties](https://docs.aspose.com/slides/python-net/shape-effective-properties/#get-effective-font-height-value). * For details on PDF export, see [Convert PPT and PPTX to PDF](https://docs.aspose.com/slides/python-net/convert-powerpoint-to-pdf/). * For details on HTML export, see [Convert PowerPoint Presentations to HTML](https://docs.aspose.com/slides/python-net/convert-powerpoint-to-html/). * For details on SVG export, see [Render Presentation Slides as SVG Images](https://docs.aspose.com/slides/python-net/render-a-slide-as-an-svg-image/). * For details on TIFF export, see [Convert PowerPoint Presentations to TIFF](https://docs.aspose.com/slides/python-net/convert-powerpoint-to-tiff/). * For details on slide-to-image rendering, see [Convert Presentation Slides to Images](https://docs.aspose.com/slides/python-net/convert-slide/). ## Related articles - [Ink](https://docs.aspose.com/slides/python-net/examples/elements/ink/) # Manage Bulleted and Numbered Lists in Presentations in Python > Learn how to create and format bulleted, picture, multilevel, and numbered lists in PowerPoint and OpenDocument presentations using Aspose.Slides for Python via .NET. Source: https://docs.aspose.com/slides/python-net/manage-lists/ Updated: 2026-11-02 ## **Overview** Aspose.Slides for Python via .NET lets you create and format bulleted and numbered lists in PowerPoint and OpenDocument presentations. A list item is a paragraph whose bullet settings are controlled through its paragraph format. Use the [Paragraph.paragraph_format](https://reference.aspose.com/slides/python-net/aspose.slides/paragraph/paragraph_format/) property to access paragraph-level list settings. The main entry point is [ParagraphFormat.bullet](https://reference.aspose.com/slides/python-net/aspose.slides/paragraphformat/bullet/), which returns a [BulletFormat](https://reference.aspose.com/slides/python-net/aspose.slides/bulletformat/) object. With this object, you can set the bullet type, symbol, picture, color, size, numbering style, and starting number. This article shows how to: - create a bulleted list with a custom symbol - create a picture bullet - create a multilevel list by setting paragraph depth - create a numbered list - inspect and change list formatting in an existing presentation - read actual list markers and numbers alongside paragraph text ## **Create a Bulleted List** To create a bulleted list, add [Paragraph](https://reference.aspose.com/slides/python-net/aspose.slides/paragraph/) objects to a [TextFrame](https://reference.aspose.com/slides/python-net/aspose.slides/textframe/) and set [BulletFormat.type](https://reference.aspose.com/slides/python-net/aspose.slides/bulletformat/type/) to [BulletType.SYMBOL](https://reference.aspose.com/slides/python-net/aspose.slides/bullettype/). You can then set [BulletFormat.char](https://reference.aspose.com/slides/python-net/aspose.slides/bulletformat/char/), [BulletFormat.color](https://reference.aspose.com/slides/python-net/aspose.slides/bulletformat/color/), and [BulletFormat.height](https://reference.aspose.com/slides/python-net/aspose.slides/bulletformat/height/) to control the bullet appearance. The following Python code demonstrates how to create a bulleted list in a slide: ```py import aspose.slides as slides def create_paragraph(text): paragraph = slides.Paragraph() paragraph.paragraph_format.bullet.type = slides.BulletType.SYMBOL paragraph.paragraph_format.bullet.char = '*' paragraph.paragraph_format.indent = 15 paragraph.paragraph_format.bullet.is_bullet_hard_color = slides.NullableBool.TRUE paragraph.paragraph_format.bullet.color.color = slides.Color.indian_red paragraph.paragraph_format.bullet.height = 100 paragraph.text = text return paragraph with slides.Presentation() as presentation: slide = presentation.slides[0] auto_shape = slide.shapes.add_auto_shape(slides.ShapeType.RECTANGLE, 20, 20, 200, 50) text_frame = auto_shape.text_frame text_frame.paragraphs.clear() paragraph1 = create_paragraph("The first paragraph") text_frame.paragraphs.add(paragraph1) paragraph2 = create_paragraph("The second paragraph") text_frame.paragraphs.add(paragraph2) presentation.save("symbol_bullets.pptx", slides.export.SaveFormat.PPTX) ``` The result: ![The symbol bullets](https://docs.aspose.com/slides/python-net/manage-lists/symbol_bullets.png) ## **Create a Numbered List** Use numbered lists when the order of items matters. Set [BulletFormat.type](https://reference.aspose.com/slides/python-net/aspose.slides/bulletformat/type/) to [BulletType.NUMBERED](https://reference.aspose.com/slides/python-net/aspose.slides/bullettype/). You can also choose a numbering format with [BulletFormat.numbered_bullet_style](https://reference.aspose.com/slides/python-net/aspose.slides/bulletformat/numbered_bullet_style/) or set [BulletFormat.numbered_bullet_start_with](https://reference.aspose.com/slides/python-net/aspose.slides/bulletformat/numbered_bullet_start_with/) when the list should start from a value other than 1. The following Python code shows how to create a numbered list in a slide: ```py import aspose.slides as slides with slides.Presentation() as presentation: slide = presentation.slides[0] auto_shape = slide.shapes.add_auto_shape(slides.ShapeType.RECTANGLE, 20, 20, 90, 80) text_frame = auto_shape.text_frame text_frame.paragraphs.clear() paragraph1 = slides.Paragraph() paragraph1.paragraph_format.bullet.type = slides.BulletType.NUMBERED paragraph1.text = "Apple" text_frame.paragraphs.add(paragraph1) paragraph2 = slides.Paragraph() paragraph2.paragraph_format.bullet.type = slides.BulletType.NUMBERED paragraph2.text = "Orange" text_frame.paragraphs.add(paragraph2) paragraph3 = slides.Paragraph() paragraph3.paragraph_format.bullet.type = slides.BulletType.NUMBERED paragraph3.text = "Banana" text_frame.paragraphs.add(paragraph3) presentation.save("numbered_bullets.pptx", slides.export.SaveFormat.PPTX) ``` The result: ![The numbered bullets](https://docs.aspose.com/slides/python-net/manage-lists/numbered_bullets.png) ## **Create a Picture Bullet** Aspose.Slides allows you to replace a regular bullet symbol with an image. Picture bullets work best with simple images that remain readable at a small size, such as icons or small transparent PNG files. Ideally, if you plan to replace the regular bullet symbol with an image, it's best to choose a simple graphic with a transparent background. Such images work well as custom bullet symbols. Keep in mind that the image will be scaled down to a very small size. For that reason, we strongly recommend selecting an image that remains clear and visually effective when used as a bullet in a list. To create a picture bullet, add an image to [Presentation.images](https://reference.aspose.com/slides/python-net/aspose.slides/presentation/images/) and assign the returned image object to [BulletFormat.picture](https://reference.aspose.com/slides/python-net/aspose.slides/bulletformat/picture/). Set [BulletFormat.type](https://reference.aspose.com/slides/python-net/aspose.slides/bulletformat/type/) to [BulletType.PICTURE](https://reference.aspose.com/slides/python-net/aspose.slides/bullettype/) before assigning the image. Let's say we have an "image.png": ![A picture for the bullets](https://docs.aspose.com/slides/python-net/manage-lists/picture_for_bullets.png) The following Python code shows how to create picture bullets in a slide: ```py import aspose.slides as slides def create_paragraph(text, image): paragraph = slides.Paragraph() paragraph.paragraph_format.bullet.type = slides.BulletType.PICTURE paragraph.paragraph_format.bullet.picture.image = image paragraph.paragraph_format.indent = 15 paragraph.paragraph_format.bullet.height = 100 paragraph.text = text return paragraph with slides.Presentation() as presentation: slide = presentation.slides[0] auto_shape = slide.shapes.add_auto_shape(slides.ShapeType.RECTANGLE, 20, 20, 200, 50) text_frame = auto_shape.text_frame text_frame.paragraphs.clear() with open("image.png", "rb") as image_stream: bullet_image = presentation.images.add_image(image_stream) paragraph1 = create_paragraph("The first paragraph", bullet_image) text_frame.paragraphs.add(paragraph1) paragraph2 = create_paragraph("The second paragraph", bullet_image) text_frame.paragraphs.add(paragraph2) presentation.save("picture_bullets.pptx", slides.export.SaveFormat.PPTX) ``` The result: ![The picture bullets](https://docs.aspose.com/slides/python-net/manage-lists/picture_bullets.png) ## **Create a Multilevel List** Use [ParagraphFormat.depth](https://reference.aspose.com/slides/python-net/aspose.slides/paragraphformat/depth/) to place list items on different levels. Level 0 is the top level, level 1 is nested below it, and so on. Depth controls indentation only; set [ParagraphFormat.bullet](https://reference.aspose.com/slides/python-net/aspose.slides/paragraphformat/bullet/) on each paragraph when the levels should also carry bullets. The following Python code shows how to create a multilevel list: ```py import aspose.slides as slides with slides.Presentation() as presentation: slide = presentation.slides[0] auto_shape = slide.shapes.add_auto_shape(slides.ShapeType.RECTANGLE, 20, 20, 260, 110) text_frame = auto_shape.text_frame text_frame.paragraphs.clear() paragraph1 = slides.Paragraph() paragraph1.paragraph_format.depth = 0 paragraph1.text = "My text - Depth 0" text_frame.paragraphs.add(paragraph1) paragraph2 = slides.Paragraph() paragraph2.paragraph_format.depth = 1 paragraph2.text = "My text - Depth 1" text_frame.paragraphs.add(paragraph2) paragraph3 = slides.Paragraph() paragraph3.paragraph_format.depth = 2 paragraph3.text = "My text - Depth 2" text_frame.paragraphs.add(paragraph3) paragraph4 = slides.Paragraph() paragraph4.paragraph_format.depth = 3 paragraph4.text = "My text - Depth 3" text_frame.paragraphs.add(paragraph4) presentation.save("multilevel_bullets.pptx", slides.export.SaveFormat.PPTX) ``` The result: ![The multilevel list](https://docs.aspose.com/slides/python-net/manage-lists/multilevel_list.png) ## **Change an Existing List** To change list formatting in an existing presentation, access the target paragraph and update its [ParagraphFormat.bullet](https://reference.aspose.com/slides/python-net/aspose.slides/paragraphformat/bullet/) settings. The same properties used to create lists can be used to inspect or modify lists loaded from a PPT, PPTX, or ODP file. The following Python code changes the first paragraph in a text frame to use a numbered list style: ```py import aspose.slides as slides with slides.Presentation("input.pptx") as presentation: slide = presentation.slides[0] auto_shape = slide.shapes[0] paragraph = auto_shape.text_frame.paragraphs[0] paragraph.paragraph_format.bullet.type = slides.BulletType.NUMBERED paragraph.paragraph_format.bullet.numbered_bullet_style = slides.NumberedBulletStyle.BULLET_ROMAN_UC_PERIOD paragraph.paragraph_format.bullet.numbered_bullet_start_with = 1 paragraph.paragraph_format.margin_left = 30 paragraph.paragraph_format.indent = -20 presentation.save("updated_list.pptx", slides.export.SaveFormat.PPTX) ``` ## **Read Actual Bullet Values** When extracting presentation content, keep list markers alongside paragraph text. Call [ParagraphFormat.get_effective](https://reference.aspose.com/slides/python-net/aspose.slides/paragraphformat/get_effective/) and access [IParagraphFormatEffectiveData.bullet](https://reference.aspose.com/slides/python-net/aspose.slides/iparagraphformateffectivedata/bullet/) to obtain the effective bullet format. Check its [type](https://reference.aspose.com/slides/python-net/aspose.slides/ibulletformateffectivedata/type/) before reading [actual_bullet_value](https://reference.aspose.com/slides/python-net/aspose.slides/ibulletformateffectivedata/actual_bullet_value/). For numbered lists, distinguish these three values: - [numbered_bullet_style](https://reference.aspose.com/slides/python-net/aspose.slides/ibulletformateffectivedata/numbered_bullet_style/) determines the format, such as Arabic numbers followed by a period or lowercase letters followed by a period. - [numbered_bullet_start_with](https://reference.aspose.com/slides/python-net/aspose.slides/ibulletformateffectivedata/numbered_bullet_start_with/) specifies the starting number for a group of numbered paragraphs. - [actual_bullet_value](https://reference.aspose.com/slides/python-net/aspose.slides/ibulletformateffectivedata/actual_bullet_value/) returns the formatted marker for a particular paragraph. For example, the second item in a list starting at 5 returns `6.`. Preserve [depth](https://reference.aspose.com/slides/python-net/aspose.slides/paragraphformat/depth/) with each paragraph to retain its nesting level. The actual marker does not encode the full hierarchy: a nested item can return `c.` rather than a combined label such as `6.c.`. The following self-contained example creates lists, saves them to a presentation, and reloads the presentation to report each paragraph's text, depth, bullet type, and actual value. The small blue picture marker is created from inline SVG. ```py import aspose.slides as slides with slides.Presentation() as presentation: presentation.slide_size.set_size(720, 440, slides.SlideSizeScaleType.DO_NOT_SCALE) slide = presentation.slides[0] shape = slide.shapes.add_auto_shape(slides.ShapeType.RECTANGLE, 30, 20, 660, 400) shape.fill_format.fill_type = slides.FillType.NO_FILL shape.line_format.fill_format.fill_type = slides.FillType.NO_FILL text_frame = shape.text_frame text_frame.paragraphs.clear() # Create a picture marker without an external image file. svg = slides.SvgImage("") bullet_image = presentation.images.add_image(svg) def add_paragraph(text, depth, bullet_type, start=1, style=slides.NumberedBulletStyle.BULLET_ARABIC_PERIOD): paragraph = slides.Paragraph() paragraph.text = text paragraph_format = paragraph.paragraph_format paragraph_format.depth = depth paragraph_format.margin_left = 30 + depth * 40 paragraph_format.indent = -28 paragraph_format.space_after = 8 paragraph_format.default_portion_format.font_height = 22 paragraph_format.default_portion_format.fill_format.fill_type = slides.FillType.SOLID paragraph_format.default_portion_format.fill_format.solid_fill_color.color = slides.Color.black paragraph_format.bullet.type = bullet_type paragraph_format.bullet.is_bullet_hard_color = slides.NullableBool.TRUE paragraph_format.bullet.color.color = slides.Color.black if bullet_type == slides.BulletType.NUMBERED: paragraph_format.bullet.numbered_bullet_style = style paragraph_format.bullet.numbered_bullet_start_with = start elif bullet_type == slides.BulletType.SYMBOL: paragraph_format.bullet.char = "\u2022" elif bullet_type == slides.BulletType.PICTURE: paragraph_format.bullet.picture.image = bullet_image text_frame.paragraphs.add(paragraph) add_paragraph("First item", 0, slides.BulletType.NUMBERED, 5) add_paragraph("Second item", 0, slides.BulletType.NUMBERED, 5) add_paragraph("Nested item", 1, slides.BulletType.NUMBERED, 3, slides.NumberedBulletStyle.BULLET_ALPHA_LC_PERIOD) add_paragraph("Next nested item", 1, slides.BulletType.NUMBERED, 3, slides.NumberedBulletStyle.BULLET_ALPHA_LC_PERIOD) add_paragraph("Deep item", 2, slides.BulletType.NUMBERED, 4, slides.NumberedBulletStyle.BULLET_ROMAN_LC_PERIOD) add_paragraph("Back to top level", 0, slides.BulletType.NUMBERED, 5) add_paragraph("Symbol marker", 0, slides.BulletType.SYMBOL) add_paragraph("No bullet", 0, slides.BulletType.NONE) add_paragraph("Picture marker", 0, slides.BulletType.PICTURE) presentation.save("actual_bullet_values.pptx", slides.export.SaveFormat.PPTX) with slides.Presentation("actual_bullet_values.pptx") as loaded_presentation: loaded_shape = loaded_presentation.slides[0].shapes[0] bullet_type_names = {slides.BulletType.NUMBERED: "NUMBERED", slides.BulletType.SYMBOL: "SYMBOL", slides.BulletType.NONE: "NONE", slides.BulletType.PICTURE: "PICTURE"} print("Text | Depth | Type | Actual value") for paragraph in loaded_shape.text_frame.paragraphs: bullet = paragraph.paragraph_format.get_effective().bullet if bullet.type in (slides.BulletType.NUMBERED, slides.BulletType.SYMBOL): marker = bullet.actual_bullet_value elif bullet.type == slides.BulletType.NONE: marker = f"{bullet.actual_bullet_value} (no bullet)" elif bullet.type == slides.BulletType.PICTURE: marker = f"{bullet.actual_bullet_value} (image required)" else: marker = "unsupported bullet type" bullet_type_name = bullet_type_names.get(bullet.type, "UNKNOWN") print(f"{paragraph.text} | {paragraph.paragraph_format.depth} | {bullet_type_name} | {marker}") ``` The source lists are shown below. ![Lists starting at 5, nested letter and Roman-number items, a symbol marker, a paragraph without a bullet, and a blue picture marker](https://docs.aspose.com/slides/python-net/manage-lists/actual_bullet_values.png) The report matches the markers displayed in PowerPoint: ```text Text | Depth | Type | Actual value First item | 0 | NUMBERED | 5. Second item | 0 | NUMBERED | 6. Nested item | 1 | NUMBERED | c. Next nested item | 1 | NUMBERED | d. Deep item | 2 | NUMBERED | iv. Back to top level | 0 | NUMBERED | 7. Symbol marker | 0 | SYMBOL | • No bullet | 0 | NONE | None (no bullet) Picture marker | 0 | PICTURE | None (image required) ``` For [BulletType.NONE and BulletType.PICTURE](https://reference.aspose.com/slides/python-net/aspose.slides/bullettype/), [actual_bullet_value](https://reference.aspose.com/slides/python-net/aspose.slides/ibulletformateffectivedata/actual_bullet_value/) returns `None`, not an empty string. Handle these types separately: the former has no marker, while the latter requires extracting the bullet image separately. A picture bullet cannot be reproduced solely by extracting a text marker. ## **FAQ** **Can bulleted and numbered lists be exported to PDF or images?** Yes. Aspose.Slides preserves list formatting when the target format supports the corresponding text layout and bullet features. **Can I edit lists in existing presentations?** Yes. Load the presentation, access the target paragraph, inspect or update its [ParagraphFormat.bullet](https://reference.aspose.com/slides/python-net/aspose.slides/paragraphformat/bullet/) settings, and save the presentation. **Can lists contain non-Latin text?** Yes. List item text can contain Unicode characters, so you can create lists in multilingual presentations. Make sure the fonts used in the presentation support the characters you need. ## Related articles - [Manage PowerPoint Text Paragraphs in Python](https://docs.aspose.com/slides/python-net/manage-paragraph/) - [Manage Text in Presentations with Python](https://docs.aspose.com/slides/python-net/manage-text/) # Manage Media Files > Manage audio and video in Aspose.Slides for Python via .NET: add, extract, replace, and optimize media in PPT, PPTX and ODP files. Step-by-step guides and code. Source: https://docs.aspose.com/slides/python-net/manage-media-files/ Updated: 2025-08-10 --- lastmod: 2025-08-10T15:41:05+04:00 title: Manage Media Files linktitle: Media Files type: docs weight: 30 url: /python-net/manage-media-files/ keywords: - media file - manage media - embed audio - extract flash - manage image - add picture - add video - PowerPoint - OpenDocument - presentation - Python - Aspose.Slides description: "Manage audio and video in Aspose.Slides for Python via .NET: add, extract, replace, and optimize media in PPT, PPTX and ODP files. Step-by-step guides and code." --- ## Related articles - [Extract Flash Objects from Presentations in Python](https://docs.aspose.com/slides/python-net/flash/) - [Customize Presentation Charts in Python](https://docs.aspose.com/slides/python-net/chart-types/) # Manage OLE in Presentations Using Python > Optimize OLE object management in PowerPoint and OpenDocument files with Aspose.Slides for Python via .NET. Embed, update, and export OLE content seamlessly. Source: https://docs.aspose.com/slides/python-net/manage-ole/ Updated: 2026-11-08 ## **Introduction** **OLE (Object Linking & Embedding)** is a Microsoft technology that lets data and objects created in one application be linked or embedded in another. For example, a chart created in Microsoft Excel and placed on a PowerPoint slide is an OLE object. - An OLE object may appear as an icon. Double-clicking the icon opens the object in its associated application (e.g., Excel) or prompts you to choose an app to open or edit it. - An OLE object may display its contents (for example, a chart). In this case, PowerPoint activates the embedded object, loads the chart interface, and allows you to edit the chart’s data within PowerPoint. Aspose.Slides for Python lets you insert OLE objects into slides as OLE object frames ([OleObjectFrame](https://reference.aspose.com/slides/python-net/aspose.slides/oleobjectframe/)). ## **Add OLE Objects to Slides** If you’ve already created a chart in Microsoft Excel and want to embed it in a slide as an OLE object frame using Aspose.Slides for Python, follow these steps: 1. Create an instance of the [Presentation](https://reference.aspose.com/slides/python-net/aspose.slides/presentation/) class. 1. Get a reference to the slide by its index. 1. Read the Excel file into a byte array. 1. Add an [OleObjectFrame](https://reference.aspose.com/slides/python-net/aspose.slides/oleobjectframe/) to the slide, supplying the byte array and other OLE object details. 1. Save the modified presentation as a PPTX file. In the example below, a chart from an Excel file is embedded in a slide as an [OleObjectFrame](https://reference.aspose.com/slides/python-net/aspose.slides/oleobjectframe/). **Note:** The [OleEmbeddedDataInfo](https://reference.aspose.com/slides/python-net/aspose.slides.dom.ole/oleembeddeddatainfo/) constructor takes the embeddable object’s file extension as its second parameter. PowerPoint uses this extension to identify the file type and select the appropriate application to open the OLE object. ```py import aspose.slides as slides with slides.Presentation() as presentation: slide_size = presentation.slide_size.size slide = presentation.slides[0] # Prepare the data for the OLE object. with open("book.xlsx", "rb") as file_stream: file_data = file_stream.read() data_info = slides.dom.ole.OleEmbeddedDataInfo(file_data, "xlsx") # Add an OLE object frame to the slide. ole_frame = slide.shapes.add_ole_object_frame(0, 0, slide_size.width, slide_size.height, data_info) presentation.save("output.pptx", slides.export.SaveFormat.PPTX) ``` ### **Add Linked OLE Objects** Aspose.Slides for Python lets you add an [OleObjectFrame](https://reference.aspose.com/slides/python-net/aspose.slides/oleobjectframe/) that links to a file instead of embedding its data. The following Python example shows how to add an [OleObjectFrame](https://reference.aspose.com/slides/python-net/aspose.slides/oleobjectframe/) linked to an Excel file on a slide: ```py import aspose.slides as slides with slides.Presentation() as presentation: slide = presentation.slides[0] # Add an OLE object frame with a linked Excel file. slide.shapes.add_ole_object_frame(20, 20, 200, 150, "Excel.Sheet.12", "book.xlsx") presentation.save("output.pptx", slides.export.SaveFormat.PPTX) ``` [![OLE preview and workbook payload are distinct, and activation requires a supporting host.](https://docs.aspose.com/slides/python-net/manage-ole/visual-ole-preview-and-payload-f38773947dd8.svg)](https://docs.aspose.com/slides/python-net/manage-ole/visual-ole-preview-and-payload-f38773947dd8.svg) *An embedded object keeps workbook bytes in the PPTX; a linked object keeps a path to an external workbook. The slide preview, when present, is separate. Opening a linked workbook requires the file and a supporting OLE host.* ## **Access OLE Objects** If an OLE object is already embedded in a slide, you can access it as follows: 1. Load the presentation that contains the embedded OLE object by creating an instance of the Presentation class. 1. Get a reference to the slide by its index. 1. Access the OleObjectFrame shape. 1. Once you have the OLE object frame, perform any required operations on it. The example below accesses the OLE object frame—an embedded Excel chart—and retrieves its file data. In this example, we use a PPTX that has a single shape on the first slide. ```py import aspose.slides as slides with slides.Presentation("sample.pptx") as presentation: slide = presentation.slides[0] shape = slide.shapes[0] if isinstance(shape, slides.OleObjectFrame): ole_frame = shape # Get the embedded file data. file_data = ole_frame.embedded_data.embedded_file_data # Get the extension of the embedded file. file_extension = ole_frame.embedded_data.embedded_file_extension # ... ``` ### **Access Linked OLE Object Properties** Aspose.Slides lets you access the properties of a linked OLE object frame. The Python example below checks whether an OLE object is linked and, if it is, retrieves the path to the linked file: ```py import aspose.slides as slides with slides.Presentation("sample.ppt") as presentation: slide = presentation.slides[0] shape = slide.shapes[0] if isinstance(shape, slides.OleObjectFrame): ole_frame = shape # Check whether the OLE object is linked. if ole_frame.is_object_link: # Print the full path to the linked file. print("OLE object frame is linked to:", ole_frame.link_path_long) # Print the relative path to the linked file, if present. # Only .ppt presentations can contain a relative path. if ole_frame.link_path_relative: print("OLE object frame relative path:", ole_frame.link_path_relative) ``` ## **Change OLE Object Data** In this section, the code example below uses [Aspose.Cells for Python via .NET](https://docs.aspose.com/cells/python-net/). If an OLE object is already embedded in a slide, you can access it and modify its data as follows: 1. Load the presentation by creating an instance of the [Presentation](https://reference.aspose.com/slides/python-net/aspose.slides/presentation/) class. 1. Get the target slide by its index. 1. Access the [OleObjectFrame](https://reference.aspose.com/slides/python-net/aspose.slides/oleobjectframe/) shape. 1. Once you have the OLE object frame, perform the required operations on it. 1. Create a `Workbook` object and read the OLE data. 1. Open the desired `Worksheet` and edit the data. 1. Save the updated `Workbook` to a stream. 1. Replace the OLE object’s data using that stream. In the example below, an OLE object frame (an embedded Excel chart) is accessed and its file data is modified to update the chart. The sample uses a previously created PPTX that contains a single shape on the first slide. ```py import io import aspose.slides as slides import aspose.cells as cells with slides.Presentation("sample.pptx") as presentation: slide = presentation.slides[0] shape = slide.shapes[0] if isinstance(shape, slides.OleObjectFrame): ole_frame = shape with io.BytesIO(ole_frame.embedded_data.embedded_file_data) as ole_stream: # Read the OLE object data as a Workbook object. workbook = cells.Workbook(ole_stream) with io.BytesIO() as new_ole_stream: # Modify the workbook data. workbook.worksheets.get(0).cells.get(0, 4).put_value("E") workbook.worksheets.get(0).cells.get(1, 4).put_value(12) workbook.worksheets.get(0).cells.get(2, 4).put_value(14) workbook.worksheets.get(0).cells.get(3, 4).put_value(15) file_options = cells.OoxmlSaveOptions(cells.SaveFormat.XLSX) workbook.save(new_ole_stream, file_options) # Change the OLE frame object data. new_data = slides.dom.ole.OleEmbeddedDataInfo(new_ole_stream.getvalue(), ole_frame.embedded_data.embedded_file_extension) ole_frame.set_embedded_data(new_data) presentation.save("output.pptx", slides.export.SaveFormat.PPTX) ``` ## **Embed Files in Slides** In addition to Excel charts, Aspose.Slides for Python lets you embed other file types in slides. For example, you can insert HTML, PDF, and ZIP files as objects. When a user double-clicks an inserted object, it opens automatically in the associated application, or the user is prompted to choose an appropriate program. This Python code shows how to embed HTML and ZIP files in a slide: ```py import aspose.slides as slides with slides.Presentation() as presentation: slide = presentation.slides[0] with open("sample.html", "rb") as html_stream: html_data = html_stream.read() html_data_info = slides.dom.ole.OleEmbeddedDataInfo(html_data, "html") html_ole_frame = slide.shapes.add_ole_object_frame(150, 120, 50, 50, html_data_info) html_ole_frame.is_object_icon = True with open("sample.zip", "rb") as zip_stream: zip_data = zip_stream.read() zip_data_info = slides.dom.ole.OleEmbeddedDataInfo(zip_data, "zip") zip_ole_frame = slide.shapes.add_ole_object_frame(150, 220, 50, 50, zip_data_info) zip_ole_frame.is_object_icon = True presentation.save("output.pptx", slides.export.SaveFormat.PPTX) ``` ## **Set File Types for Embedded Objects** When working with presentations, you may need to replace old OLE objects with new ones or swap an unsupported OLE object for a supported one. Aspose.Slides for Python lets you set the file type of an embedded object, allowing you to update the OLE frame data or its file extension. This Python code shows how to set the embedded OLE object’s file type to `zip`: ```py import aspose.slides as slides with slides.Presentation("sample.pptx") as presentation: slide = presentation.slides[0] ole_frame = slide.shapes[0] file_extension = ole_frame.embedded_data.embedded_file_extension file_data = ole_frame.embedded_data.embedded_file_data print(f"Current embedded file extension is: {file_extension}") # Change the file type to ZIP. ole_frame.set_embedded_data(slides.dom.ole.OleEmbeddedDataInfo(file_data, "zip")) presentation.save("output.pptx", slides.export.SaveFormat.PPTX) ``` ## **Set Icon Images and Titles for Embedded Objects** After you embed an OLE object, an icon-based preview is added automatically. This preview is what users see before they access or open the OLE object. If you want to use a specific image and text in the preview, you can set the icon image and title using Aspose.Slides for Python. This Python code shows how to set the icon image and title for an embedded object: ```py import aspose.slides as slides with slides.Presentation("sample.pptx") as presentation: slide = presentation.slides[0] ole_frame = slide.shapes[0] # Add an image to the presentation resources. with slides.Images.from_file("image.png") as image: ole_image = presentation.images.add_image(image) # Set a title and the image for the OLE preview. ole_frame.substitute_picture_title = "My title" ole_frame.substitute_picture_format.picture.image = ole_image ole_frame.is_object_icon = True presentation.save("output.pptx", slides.export.SaveFormat.PPTX) ``` ## **Prevent OLE Object Frames from Being Resized and Repositioned** After you add a linked OLE object to a slide, PowerPoint may prompt you to update links when you open the presentation. Selecting Update Links can change the OLE object frame’s size and position because PowerPoint refreshes the preview with data from the linked object. To prevent PowerPoint from prompting you to update the object’s data, set the `update_automatic` property of the [OleObjectFrame](https://reference.aspose.com/slides/python-net/aspose.slides/oleobjectframe/) class to `False`: ```py import aspose.slides as slides with slides.Presentation("sample.pptx") as presentation: slide = presentation.slides[0] ole_frame = slide.shapes[0] ole_frame.update_automatic = False presentation.save("output.pptx", slides.export.SaveFormat.PPTX) ``` ## **Extract Embedded Files** Aspose.Slides for Python lets you extract files embedded in slides as OLE objects as follows: 1. Create an instance of the [Presentation](https://reference.aspose.com/slides/python-net/aspose.slides/presentation/) class that contains the OLE objects you want to extract. 1. Iterate through all shapes in the presentation and locate the OLEObjectFrame shapes. 1. Retrieve the embedded file data from each [OLEObjectFrame](https://reference.aspose.com/slides/python-net/aspose.slides/oleobjectframe/) and write it to disk. The following Python code shows how to extract files embedded in a slide as OLE objects: ```py import aspose.slides as slides with slides.Presentation("sample.pptx") as presentation: slide = presentation.slides[0] for index, shape in enumerate(slide.shapes): if isinstance(shape, slides.OleObjectFrame): ole_frame = shape file_data = ole_frame.embedded_data.embedded_file_data file_extension = ole_frame.embedded_data.embedded_file_extension file_path = f"OLE_object_{index}{file_extension}" with open(file_path, 'wb') as file_stream: file_stream.write(file_data) ``` ## **FAQ** **Will the OLE content be rendered when exporting slides to PDF/images?** What is visible on the slide is rendered—the icon/substitute image (preview). The "live" OLE content is not executed during rendering. If needed, set your own preview image to ensure the expected appearance in the exported PDF. To also preserve the embedded file as a PDF attachment, set [PdfOptions.include_ole_data](https://reference.aspose.com/slides/python-net/aspose.slides.export/pdfoptions/include_ole_data/) to `True`. This option is disabled by default. For an example and instructions for checking the attachment, see [Preserve Embedded OLE Files as PDF Attachments](https://docs.aspose.com/slides/python-net/convert-powerpoint-to-pdf/#preserve-embedded-ole-files-as-pdf-attachments). **How can I lock an OLE object on a slide so users cannot move/edit it in PowerPoint?** Lock the shape: Aspose.Slides provides [shape-level locks](https://docs.aspose.com/slides/python-net/applying-protection-to-presentation/). This is not encryption, but it effectively prevents accidental edits and movement. **Why does a linked Excel object "jump" or change size when I open the presentation?** PowerPoint may refresh the preview of the linked OLE. For a stable appearance, follow the [Working Solution for Worksheet Resizing](https://docs.aspose.com/slides/python-net/working-solution-for-worksheet-resizing/) practices—either fit the frame to the range, or scale the range to a fixed frame and set an appropriate substitute image. **Will relative paths for linked OLE objects be preserved in the PPTX format?** In PPTX, "relative path" information is not available—only the full path. Relative paths are found in the older PPT format. For portability, prefer reliable absolute paths/accessible URIs or embedding. ## Related articles - [OleObject](https://docs.aspose.com/slides/python-net/examples/elements/ole-object/) - [Object Preview Issue When Adding OleObjectFrame](https://docs.aspose.com/slides/python-net/object-preview-issue-when-adding-oleobjectframe/) # Manage PowerPoint Text Paragraphs in Python > Learn how to create and format paragraphs, portions, bullets, numbered lists, indents, HTML content, and paragraph images with Aspose.Slides for Python via .NET. Source: https://docs.aspose.com/slides/python-net/manage-paragraph/ Updated: 2026-11-11 ## **Overview** Aspose.Slides for Python via .NET represents text as a hierarchy of text frames, paragraphs, and portions: * [TextFrame](https://reference.aspose.com/slides/python-net/aspose.slides/textframe/) represents the text container in a shape and provides access to its paragraph collection. * [Paragraph](https://reference.aspose.com/slides/python-net/aspose.slides/paragraph/) represents one paragraph in a text frame and provides access to its portions and paragraph-level formatting. * [Portion](https://reference.aspose.com/slides/python-net/aspose.slides/portion/) represents a text run within a paragraph. Each portion can have its own text and character-level formatting. A paragraph can therefore contain text with different fonts, colors, sizes, and other formatting by using multiple portions. ## **Create and Format Paragraphs** Create paragraphs in a shape's text frame and use portions to format individual text runs. This section shows how to combine multiple portions within each paragraph and apply different colors, font sizes, and styles. ### **Create Paragraphs with Multiple Portions** The following Python example creates three paragraphs, each containing three text runs in its [Paragraph.portions](https://reference.aspose.com/slides/python-net/aspose.slides/paragraph/portions/) collection. It reuses the default paragraph and its empty portion, then adds the remaining paragraphs and portions. Formatting is applied through [Portion.portion_format](https://reference.aspose.com/slides/python-net/aspose.slides/portion/portion_format/): the first portion in each paragraph is red, bold, and 15 points; the second is blue, italic, and 18 points. The third portion retains its default formatting: ```python import aspose.pydrawing as draw import aspose.slides as slides with slides.Presentation() as presentation: slide = presentation.slides[0] shape = slide.shapes.add_auto_shape(slides.ShapeType.RECTANGLE, 50, 150, 300, 150) text_frame = shape.text_frame first_paragraph = text_frame.paragraphs[0] first_paragraph.portions.add(slides.Portion()) first_paragraph.portions.add(slides.Portion()) second_paragraph = slides.Paragraph() second_paragraph.portions.add(slides.Portion()) second_paragraph.portions.add(slides.Portion()) second_paragraph.portions.add(slides.Portion()) text_frame.paragraphs.add(second_paragraph) third_paragraph = slides.Paragraph() third_paragraph.portions.add(slides.Portion()) third_paragraph.portions.add(slides.Portion()) third_paragraph.portions.add(slides.Portion()) text_frame.paragraphs.add(third_paragraph) for paragraph_index in range(text_frame.paragraphs.count): paragraph = text_frame.paragraphs[paragraph_index] for portion_index in range(paragraph.portions.count): portion = paragraph.portions[portion_index] portion.text = f"Portion {paragraph_index + 1}.{portion_index + 1}" if portion_index == 0: portion.portion_format.fill_format.fill_type = slides.FillType.SOLID portion.portion_format.fill_format.solid_fill_color.color = draw.Color.red portion.portion_format.font_bold = slides.NullableBool.TRUE portion.portion_format.font_height = 15 elif portion_index == 1: portion.portion_format.fill_format.fill_type = slides.FillType.SOLID portion.portion_format.fill_format.solid_fill_color.color = draw.Color.blue portion.portion_format.font_italic = slides.NullableBool.TRUE portion.portion_format.font_height = 18 presentation.save("paragraphs_with_portions.pptx", slides.export.SaveFormat.PPTX) ``` ## **Create Bulleted and Numbered Lists** Organize paragraph text into lists with symbols, numbers, or custom images. The examples in this section cover bullet formatting, multilevel lists, and custom starting numbers. ### **Create a Bulleted or Numbered List** Bullets and numbering make related items easier to scan. In Aspose.Slides, list settings are defined through [BulletFormat](https://reference.aspose.com/slides/python-net/aspose.slides/bulletformat/). This Python example adds a symbol bullet and a numbered item to the same text frame. [BulletFormat.type](https://reference.aspose.com/slides/python-net/aspose.slides/bulletformat/type/) selects the bullet type, while [BulletFormat.char](https://reference.aspose.com/slides/python-net/aspose.slides/bulletformat/char/) supplies the symbol and [BulletFormat.numbered_bullet_style](https://reference.aspose.com/slides/python-net/aspose.slides/bulletformat/numbered_bullet_style/) selects the numbering style. Both items use black bullets with a height of 100 percent and a paragraph indent of 25 points: ```python import aspose.pydrawing as draw import aspose.slides as slides with slides.Presentation() as presentation: slide = presentation.slides[0] shape = slide.shapes.add_auto_shape(slides.ShapeType.RECTANGLE, 200, 200, 400, 200) text_frame = shape.text_frame text_frame.paragraphs.clear() symbol_paragraph = slides.Paragraph() symbol_paragraph.text = "Welcome to Aspose.Slides" symbol_paragraph.paragraph_format.bullet.type = slides.BulletType.SYMBOL symbol_paragraph.paragraph_format.bullet.char = chr(0x2022) symbol_paragraph.paragraph_format.indent = 25 symbol_paragraph.paragraph_format.bullet.color.color_type = slides.ColorType.RGB symbol_paragraph.paragraph_format.bullet.color.color = draw.Color.black symbol_paragraph.paragraph_format.bullet.is_bullet_hard_color = slides.NullableBool.TRUE symbol_paragraph.paragraph_format.bullet.height = 100 text_frame.paragraphs.add(symbol_paragraph) numbered_paragraph = slides.Paragraph() numbered_paragraph.text = "This is a numbered item" numbered_paragraph.paragraph_format.bullet.type = slides.BulletType.NUMBERED numbered_paragraph.paragraph_format.bullet.numbered_bullet_style = slides.NumberedBulletStyle.BULLET_CIRCLE_NUM_WD_BLACK_PLAIN numbered_paragraph.paragraph_format.indent = 25 numbered_paragraph.paragraph_format.bullet.color.color_type = slides.ColorType.RGB numbered_paragraph.paragraph_format.bullet.color.color = draw.Color.black numbered_paragraph.paragraph_format.bullet.is_bullet_hard_color = slides.NullableBool.TRUE numbered_paragraph.paragraph_format.bullet.height = 100 text_frame.paragraphs.add(numbered_paragraph) presentation.save("bulleted_and_numbered_list.pptx", slides.export.SaveFormat.PPTX) ``` ### **Use Picture Bullets** Picture bullets let you use a custom image instead of a symbol or number. The example requires `bullets.png` in the working directory. This Python example adds an image to the presentation's image collection as an [PPImage](https://reference.aspose.com/slides/python-net/aspose.slides/ppimage/) and uses it as a paragraph bullet. It sets [BulletFormat.type](https://reference.aspose.com/slides/python-net/aspose.slides/bulletformat/type/) to use a picture bullet and assigns the image through [BulletFormat.picture](https://reference.aspose.com/slides/python-net/aspose.slides/bulletformat/picture/). [BulletFormat.height](https://reference.aspose.com/slides/python-net/aspose.slides/bulletformat/height/) is set to 100 percent to size the bullet relative to the paragraph text: ```python import aspose.slides as slides with slides.Presentation() as presentation: slide = presentation.slides[0] with slides.Images.from_file("bullets.png") as bullet_image: presentation_image = presentation.images.add_image(bullet_image) shape = slide.shapes.add_auto_shape(slides.ShapeType.RECTANGLE, 200, 200, 400, 200) text_frame = shape.text_frame text_frame.paragraphs.clear() paragraph = slides.Paragraph() paragraph.text = "Welcome to Aspose.Slides" paragraph.paragraph_format.bullet.type = slides.BulletType.PICTURE paragraph.paragraph_format.bullet.picture.image = presentation_image paragraph.paragraph_format.bullet.height = 100 text_frame.paragraphs.add(paragraph) presentation.save("picture_bullet.pptx", slides.export.SaveFormat.PPTX) presentation.save("picture_bullet.ppt", slides.export.SaveFormat.PPT) ``` ### **Create a Multilevel List** Set [ParagraphFormat.depth](https://reference.aspose.com/slides/python-net/aspose.slides/paragraphformat/depth/) to place paragraphs at different levels of a list. The top level has a depth of `0`. This Python example assigns [ParagraphFormat.depth](https://reference.aspose.com/slides/python-net/aspose.slides/paragraphformat/depth/) values from 0 to 3 to four paragraphs, creating a hierarchy within one text frame. Each paragraph uses a symbol bullet, with [BulletFormat.char](https://reference.aspose.com/slides/python-net/aspose.slides/bulletformat/char/) alternating between a round bullet and a hyphen to distinguish adjacent levels: ```python import aspose.pydrawing as draw import aspose.slides as slides with slides.Presentation() as presentation: slide = presentation.slides[0] shape = slide.shapes.add_auto_shape(slides.ShapeType.RECTANGLE, 200, 200, 400, 200) text_frame = shape.text_frame text_frame.paragraphs.clear() first_paragraph = slides.Paragraph() first_paragraph.text = "Content" first_paragraph.paragraph_format.bullet.type = slides.BulletType.SYMBOL first_paragraph.paragraph_format.bullet.char = chr(0x2022) first_paragraph.paragraph_format.default_portion_format.fill_format.fill_type = slides.FillType.SOLID first_paragraph.paragraph_format.default_portion_format.fill_format.solid_fill_color.color = draw.Color.black first_paragraph.paragraph_format.depth = 0 second_paragraph = slides.Paragraph() second_paragraph.text = "Second level" second_paragraph.paragraph_format.bullet.type = slides.BulletType.SYMBOL second_paragraph.paragraph_format.bullet.char = "-" second_paragraph.paragraph_format.default_portion_format.fill_format.fill_type = slides.FillType.SOLID second_paragraph.paragraph_format.default_portion_format.fill_format.solid_fill_color.color = draw.Color.black second_paragraph.paragraph_format.depth = 1 third_paragraph = slides.Paragraph() third_paragraph.text = "Third level" third_paragraph.paragraph_format.bullet.type = slides.BulletType.SYMBOL third_paragraph.paragraph_format.bullet.char = chr(0x2022) third_paragraph.paragraph_format.default_portion_format.fill_format.fill_type = slides.FillType.SOLID third_paragraph.paragraph_format.default_portion_format.fill_format.solid_fill_color.color = draw.Color.black third_paragraph.paragraph_format.depth = 2 fourth_paragraph = slides.Paragraph() fourth_paragraph.text = "Fourth level" fourth_paragraph.paragraph_format.bullet.type = slides.BulletType.SYMBOL fourth_paragraph.paragraph_format.bullet.char = "-" fourth_paragraph.paragraph_format.default_portion_format.fill_format.fill_type = slides.FillType.SOLID fourth_paragraph.paragraph_format.default_portion_format.fill_format.solid_fill_color.color = draw.Color.black fourth_paragraph.paragraph_format.depth = 3 text_frame.paragraphs.add(first_paragraph) text_frame.paragraphs.add(second_paragraph) text_frame.paragraphs.add(third_paragraph) text_frame.paragraphs.add(fourth_paragraph) presentation.save("multilevel_list.pptx", slides.export.SaveFormat.PPTX) ``` ### **Start Numbered List Items at Custom Values** Use [BulletFormat.numbered_bullet_start_with](https://reference.aspose.com/slides/python-net/aspose.slides/bulletformat/numbered_bullet_start_with/) to set the initial number displayed for a numbered paragraph. This Python example sets [BulletFormat.type](https://reference.aspose.com/slides/python-net/aspose.slides/bulletformat/type/) to use numbering for three paragraphs and assigns [BulletFormat.numbered_bullet_start_with](https://reference.aspose.com/slides/python-net/aspose.slides/bulletformat/numbered_bullet_start_with/) values of 2, 3, and 7. The starting value is configured separately for each paragraph, allowing the displayed numbers to skip values: ```python import aspose.slides as slides with slides.Presentation() as presentation: slide = presentation.slides[0] shape = slide.shapes.add_auto_shape(slides.ShapeType.RECTANGLE, 200, 200, 400, 200) text_frame = shape.text_frame text_frame.paragraphs.clear() first_paragraph = slides.Paragraph() first_paragraph.text = "Start at 2" first_paragraph.paragraph_format.bullet.type = slides.BulletType.NUMBERED first_paragraph.paragraph_format.bullet.numbered_bullet_start_with = 2 text_frame.paragraphs.add(first_paragraph) second_paragraph = slides.Paragraph() second_paragraph.text = "Start at 3" second_paragraph.paragraph_format.bullet.type = slides.BulletType.NUMBERED second_paragraph.paragraph_format.bullet.numbered_bullet_start_with = 3 text_frame.paragraphs.add(second_paragraph) third_paragraph = slides.Paragraph() third_paragraph.text = "Start at 7" third_paragraph.paragraph_format.bullet.type = slides.BulletType.NUMBERED third_paragraph.paragraph_format.bullet.numbered_bullet_start_with = 7 text_frame.paragraphs.add(third_paragraph) presentation.save("custom_numbered_list.pptx", slides.export.SaveFormat.PPTX) ``` ## **Control Paragraph Layout and End Properties** Adjust paragraph margins and indents to control the position of the first line and wrapped lines. You can also format the paragraph end mark separately from the visible text portions. ### **Set a First-Line Indent** Use the [ParagraphFormat.indent](https://reference.aspose.com/slides/python-net/aspose.slides/paragraphformat/indent/) property to control the first-line indent of a paragraph. This property moves only the first line relative to the paragraph's left margin. A positive value shifts the first line to the right, while the remaining lines stay aligned to the paragraph body. Use [ParagraphFormat.margin_left](https://reference.aspose.com/slides/python-net/aspose.slides/paragraphformat/margin_left/) when you need to move the whole paragraph. Use [ParagraphFormat.indent](https://reference.aspose.com/slides/python-net/aspose.slides/paragraphformat/indent/) when you need to move only the first line. The following example gives three paragraphs the same [ParagraphFormat.margin_left](https://reference.aspose.com/slides/python-net/aspose.slides/paragraphformat/margin_left/) of 20 points and [ParagraphFormat.indent](https://reference.aspose.com/slides/python-net/aspose.slides/paragraphformat/indent/) values of 0, 20, and 40 points. The first lines start at progressively larger offsets, while wrapped lines retain the same left margin: ```python import aspose.pydrawing as draw import aspose.slides as slides with slides.Presentation() as presentation: slide = presentation.slides[0] shape = slide.shapes.add_auto_shape(slides.ShapeType.RECTANGLE, 50, 50, 420, 220) shape.fill_format.fill_type = slides.FillType.NO_FILL shape.line_format.fill_format.fill_type = slides.FillType.SOLID shape.line_format.fill_format.solid_fill_color.color = draw.Color.gray text_frame = shape.text_frame text_frame.text_frame_format.autofit_type = slides.TextAutofitType.SHAPE text_frame.paragraphs.clear() first_paragraph = slides.Paragraph() first_paragraph.text = "No first-line indent. Wrapped lines start at the same position as the first line." first_paragraph.paragraph_format.default_portion_format.fill_format.fill_type = slides.FillType.SOLID first_paragraph.paragraph_format.default_portion_format.fill_format.solid_fill_color.color = draw.Color.black first_paragraph.paragraph_format.margin_left = 20 first_paragraph.paragraph_format.indent = 0 second_paragraph = slides.Paragraph() second_paragraph.text = "First-line indent of 20 points. The first line moves to the right, while wrapped lines remain aligned to the paragraph body." second_paragraph.paragraph_format.default_portion_format.fill_format.fill_type = slides.FillType.SOLID second_paragraph.paragraph_format.default_portion_format.fill_format.solid_fill_color.color = draw.Color.black second_paragraph.paragraph_format.margin_left = 20 second_paragraph.paragraph_format.indent = 20 third_paragraph = slides.Paragraph() third_paragraph.text = "First-line indent of 40 points. This paragraph shows a larger first-line offset to make the effect easier to see." third_paragraph.paragraph_format.default_portion_format.fill_format.fill_type = slides.FillType.SOLID third_paragraph.paragraph_format.default_portion_format.fill_format.solid_fill_color.color = draw.Color.black third_paragraph.paragraph_format.margin_left = 20 third_paragraph.paragraph_format.indent = 40 text_frame.paragraphs.add(first_paragraph) text_frame.paragraphs.add(second_paragraph) text_frame.paragraphs.add(third_paragraph) presentation.save("paragraph_indent.pptx", slides.export.SaveFormat.PPTX) ``` The result: ![The first-line indent of the paragraphs](https://docs.aspose.com/slides/python-net/manage-paragraph/first_line_indent.png) ### **Set a Hanging Indent** A hanging indent is a paragraph layout in which the first line starts to the left of the remaining lines. In Aspose.Slides, you create this effect with the [ParagraphFormat.indent](https://reference.aspose.com/slides/python-net/aspose.slides/paragraphformat/indent/) property. Set `indent` to a negative value to move the first line to the left relative to the paragraph body. In practice, [ParagraphFormat.margin_left](https://reference.aspose.com/slides/python-net/aspose.slides/paragraphformat/margin_left/) defines the left position of the paragraph body, and [ParagraphFormat.indent](https://reference.aspose.com/slides/python-net/aspose.slides/paragraphformat/indent/) defines the position of the first line relative to that margin. To create a hanging indent, set a positive `margin_left` value and a negative `indent` value. This formatting is useful for bibliographies, references, glossary entries, and other paragraphs where wrapped lines must align under the paragraph body rather than under the first character of the first line. The following Python example pairs [ParagraphFormat.margin_left](https://reference.aspose.com/slides/python-net/aspose.slides/paragraphformat/margin_left/) values of 40 and 60 points with [ParagraphFormat.indent](https://reference.aspose.com/slides/python-net/aspose.slides/paragraphformat/indent/) values of -20 and -30 points. In each paragraph, the first line starts to the left of the wrapped lines; the second paragraph has a deeper hanging indent: ```python import aspose.pydrawing as draw import aspose.slides as slides with slides.Presentation() as presentation: slide = presentation.slides[0] shape = slide.shapes.add_auto_shape(slides.ShapeType.RECTANGLE, 50, 50, 420, 220) shape.fill_format.fill_type = slides.FillType.NO_FILL shape.line_format.fill_format.fill_type = slides.FillType.SOLID shape.line_format.fill_format.solid_fill_color.color = draw.Color.gray text_frame = shape.text_frame text_frame.text_frame_format.autofit_type = slides.TextAutofitType.SHAPE text_frame.paragraphs.clear() first_paragraph = slides.Paragraph() first_paragraph.text = "A hanging indent is created by combining a positive left margin with a negative indent. The first line starts to the left, while wrapped lines align with the paragraph body." first_paragraph.paragraph_format.default_portion_format.fill_format.fill_type = slides.FillType.SOLID first_paragraph.paragraph_format.default_portion_format.fill_format.solid_fill_color.color = draw.Color.black first_paragraph.paragraph_format.margin_left = 40 first_paragraph.paragraph_format.indent = -20 second_paragraph = slides.Paragraph() second_paragraph.text = "This second example uses a deeper hanging indent so the difference between the first line and the wrapped lines is easier to compare." second_paragraph.paragraph_format.default_portion_format.fill_format.fill_type = slides.FillType.SOLID second_paragraph.paragraph_format.default_portion_format.fill_format.solid_fill_color.color = draw.Color.black second_paragraph.paragraph_format.margin_left = 60 second_paragraph.paragraph_format.indent = -30 text_frame.paragraphs.add(first_paragraph) text_frame.paragraphs.add(second_paragraph) presentation.save("hanging_indent.pptx", slides.export.SaveFormat.PPTX) ``` The result: ![The hanging indent of the paragraphs](https://docs.aspose.com/slides/python-net/manage-paragraph/hanging_indent.png) ### **Set End Paragraph Run Properties** The [Paragraph.end_paragraph_portion_format](https://reference.aspose.com/slides/python-net/aspose.slides/paragraph/end_paragraph_portion_format/) property controls the formatting of the paragraph end mark. The example loads `Test.pptx`, which must contain at least one slide, and creates a [PortionFormat](https://reference.aspose.com/slides/python-net/aspose.slides/portionformat/) with [PortionFormat.font_height](https://reference.aspose.com/slides/python-net/aspose.slides/portionformat/font_height/) set to 48 points and [PortionFormat.latin_font](https://reference.aspose.com/slides/python-net/aspose.slides/portionformat/latin_font/) set to Times New Roman. It assigns this format to the second paragraph's end mark, leaving the visible text portions unchanged: ```python import aspose.slides as slides with slides.Presentation("Test.pptx") as presentation: slide = presentation.slides[0] shape = slide.shapes.add_auto_shape(slides.ShapeType.RECTANGLE, 10, 10, 200, 250) text_frame = shape.text_frame text_frame.paragraphs.clear() first_paragraph = slides.Paragraph() first_paragraph.portions.add(slides.Portion("Sample text")) second_paragraph = slides.Paragraph() second_paragraph.portions.add(slides.Portion("Sample text 2")) end_paragraph_format = slides.PortionFormat() end_paragraph_format.font_height = 48 end_paragraph_format.latin_font = slides.FontData("Times New Roman") second_paragraph.end_paragraph_portion_format = end_paragraph_format text_frame.paragraphs.add(first_paragraph) text_frame.paragraphs.add(second_paragraph) presentation.save("end_paragraph_format.pptx", slides.export.SaveFormat.PPTX) ``` ## **Count Rendered Lines** For paragraph rules that affect automatic wrapping and punctuation at line endings, see [Control Line Breaking](https://docs.aspose.com/slides/python-net/text-formatting/#control-line-breaking) and [Control Hanging Punctuation](https://docs.aspose.com/slides/python-net/text-formatting/#control-hanging-punctuation). Use [Paragraph.get_lines_count](https://reference.aspose.com/slides/python-net/aspose.slides/paragraph/get_lines_count/) to count the lines occupied by a paragraph after text layout, including automatic wrapping. This is useful when checking text length and layout in presentation templates. A paragraph is one item in [TextFrame.paragraphs](https://reference.aspose.com/slides/python-net/aspose.slides/textframe/paragraphs/), and it can occupy several rendered lines. An explicit line break within a paragraph forces a new line without creating another paragraph. Automatic wrapping creates lines based on the available width without inserting explicit line breaks into the text. Counting paragraphs or line-break characters therefore does not give the rendered line count. The following example creates a text shape, counts its lines, narrows the shape, and then replaces the text with a shorter string. The example enables [TextFrameFormat.wrap_text](https://reference.aspose.com/slides/python-net/aspose.slides/textframeformat/wrap_text/) and disables [TextFrameFormat.autofit_type](https://reference.aspose.com/slides/python-net/aspose.slides/textframeformat/autofit_type/) so that the shape width controls wrapping without automatically shrinking the text or resizing the shape. Each measurement uses [Paragraph.get_lines_count](https://reference.aspose.com/slides/python-net/aspose.slides/paragraph/get_lines_count/). Shape dimensions are in points. Finally, the example adds another paragraph and sums the line counts across the text frame. ```python import aspose.slides as slides with slides.Presentation() as presentation: slide = presentation.slides[0] shape = slide.shapes.add_auto_shape(slides.ShapeType.RECTANGLE, 50, 50, 400, 200) text_frame = shape.text_frame text_frame.text_frame_format.wrap_text = slides.NullableBool.TRUE text_frame.text_frame_format.autofit_type = slides.TextAutofitType.NONE paragraph = text_frame.paragraphs[0] paragraph.paragraph_format.default_portion_format.font_height = 20 paragraph.text = "This text demonstrates how automatic wrapping changes the number of rendered lines." print(f"Original width: {paragraph.get_lines_count()}") shape.width = 150 print(f"Narrower shape: {paragraph.get_lines_count()}") paragraph.text = "Short text." print(f"Shorter text: {paragraph.get_lines_count()}") second_paragraph = slides.Paragraph() second_paragraph.text = "Another paragraph." second_paragraph.paragraph_format.default_portion_format.font_height = 20 text_frame.paragraphs.add(second_paragraph) total_line_count = 0 for current_paragraph in text_frame.paragraphs: total_line_count += current_paragraph.get_lines_count() print(f"Total lines in the text frame: {total_line_count}") ``` With this text and these dimensions, narrowing the shape increases the line count, while replacing the text with the short string reduces it. Exact counts can vary with font availability and substitution, font size, margins, indentation, wrapping, and autofit settings. Use the fonts and layout settings intended for the target environment when checking a template. The line count alone does not determine whether text overflows its container. The available height, line heights, paragraph and line spacing, and autofit behavior also matter; even a single line can exceed the available width when wrapping is disabled. ## **Import and Export Paragraph Content** Use HTML to bring text into a presentation or export existing paragraphs for use outside it. This section also shows how to render individual paragraphs as images, including paragraphs in table cells. ### **Import HTML Text into Paragraphs** Use [ParagraphCollection.add_from_html](https://reference.aspose.com/slides/python-net/aspose.slides/paragraphcollection/add_from_html/) to convert HTML markup into paragraphs and portions in a text frame. This Python example reads HTML from `file.html` in the working directory and passes the markup to [ParagraphCollection.add_from_html](https://reference.aspose.com/slides/python-net/aspose.slides/paragraphcollection/add_from_html/). It clears the text frame's default paragraph so that the frame contains only the imported content. The rectangular shape leaves a 10-point margin on each side of the slide: ```python import aspose.slides as slides with slides.Presentation() as presentation: slide = presentation.slides[0] shape_width = presentation.slide_size.size.width - 20 shape_height = presentation.slide_size.size.height - 20 shape = slide.shapes.add_auto_shape(slides.ShapeType.RECTANGLE, 10, 10, shape_width, shape_height) shape.fill_format.fill_type = slides.FillType.NO_FILL shape.text_frame.paragraphs.clear() with open("file.html", "r", encoding="utf-8") as html_stream: html = html_stream.read() shape.text_frame.paragraphs.add_from_html(html) presentation.save("html_text.pptx", slides.export.SaveFormat.PPTX) ``` ### **Export Paragraph Text to HTML** Use [ParagraphCollection.export_to_html](https://reference.aspose.com/slides/python-net/aspose.slides/paragraphcollection/export_to_html/) to export a selected range of paragraphs as HTML. When reusing presentation text on a website, you may want to preserve local emphasis without carrying over the presentation's font, size, or text box styles. Set [TextToHtmlConversionOptions.text_inheritance_limit](https://reference.aspose.com/slides/python-net/aspose.slides.export/texttohtmlconversionoptions/text_inheritance_limit/) to control how far the exporter follows formatting inheritance. Download [the sample presentation](https://docs.aspose.com/slides/python-net/manage-paragraph/text-inheritance.pptx) and place it in the application's working directory. Its first slide contains one text shape with the text "Inherited text; explicit red 18pt". The input deliberately uses several formatting levels: - The presentation's default text style supplies Calibri and a size of 28 pt. - The text frame's first-level text style supplies blue text and italics. - The paragraph explicitly sets bold text. - The second portion, "explicit red 18pt", explicitly sets red text and a size of 18 pt. The following complete example exports the same paragraphs three times. It passes [TextToHtmlConversionOptions](https://reference.aspose.com/slides/python-net/aspose.slides.export/texttohtmlconversionoptions/) to the export method and writes each result as a separate UTF-8 HTML file: ```python import aspose.slides as slides with slides.Presentation("text-inheritance.pptx") as presentation: text_shape = presentation.slides[0].shapes[0] paragraphs = text_shape.text_frame.paragraphs modes = { "All": slides.export.TextInheritanceLimit.ALL, "TextBox": slides.export.TextInheritanceLimit.TEXT_BOX, "ParagraphOnly": slides.export.TextInheritanceLimit.PARAGRAPH_ONLY, } for name, mode in modes.items(): options = slides.export.TextToHtmlConversionOptions() options.text_inheritance_limit = mode html = paragraphs.export_to_html(0, paragraphs.count, options) with open(f"{name}.html", "w", encoding="utf-8") as html_stream: html_stream.write(html) ``` The generated HTML contains the following CSS for the first portion, "Inherited text; ". The table lists the relevant declarations; other generated properties are omitted for clarity. | Output | Relevant CSS for the first portion | Appearance | | --- | --- | --- | | `All.html` | `font-family:'Calibri'; font-size:28pt; color:#0000ff; font-style:italic; font-weight:bold` | Blue, bold, italic text at 28 pt in Calibri, if that font is available. | | `TextBox.html` | `color:#0000ff; font-style:italic; font-weight:bold` | Blue, bold, italic text; the surrounding page or browser supplies the font family and size. | | `ParagraphOnly.html` | `font-weight:bold` | Bold text; the surrounding page or browser supplies the font family, size, color, and italic style. | The second portion retains `color:#ff0000`, `font-size:18pt`, and `font-weight:bold` in all three outputs. It also retains italics with `ALL` and `TEXT_BOX`, but not with `PARAGRAPH_ONLY`. Restricting inheritance therefore does not remove formatting explicitly assigned to a paragraph or portion. Open the files in the same browser to compare them. In the two restricted modes, omitted CSS properties are resolved by the destination page's styles or browser defaults, so the resulting appearance depends on where the HTML is used. ### **Generate an HTML Clipboard Fragment** [ParagraphCollection.export_to_html](https://reference.aspose.com/slides/python-net/aspose.slides/paragraphcollection/export_to_html/) returns an HTML string. Set [TextToHtmlConversionOptions.add_clipboard_fragment_header](https://reference.aspose.com/slides/python-net/aspose.slides.export/texttohtmlconversionoptions/add_clipboard_fragment_header/) to `False` for ordinary HTML or `True` to include the Windows clipboard header. The header gives the UTF-8 byte offsets of the surrounding HTML (`StartHTML` and `EndHTML`) and the fragment to paste (`StartFragment` and `EndFragment`). This example exports two formatted paragraphs as ordinary HTML (`html`) and as an HTML clipboard fragment (`clipboard_html`). Writing the fragment to the system clipboard is a separate application step. If the clipboard API expects raw bytes, encode the fragment as UTF-8 without a BOM. ```python import aspose.slides as slides with slides.Presentation() as presentation: slide = presentation.slides[0] shape = slide.shapes.add_auto_shape(slides.ShapeType.RECTANGLE, 0, 0, 400, 100) paragraphs = shape.text_frame.paragraphs paragraphs.clear() paragraphs.add_from_html("
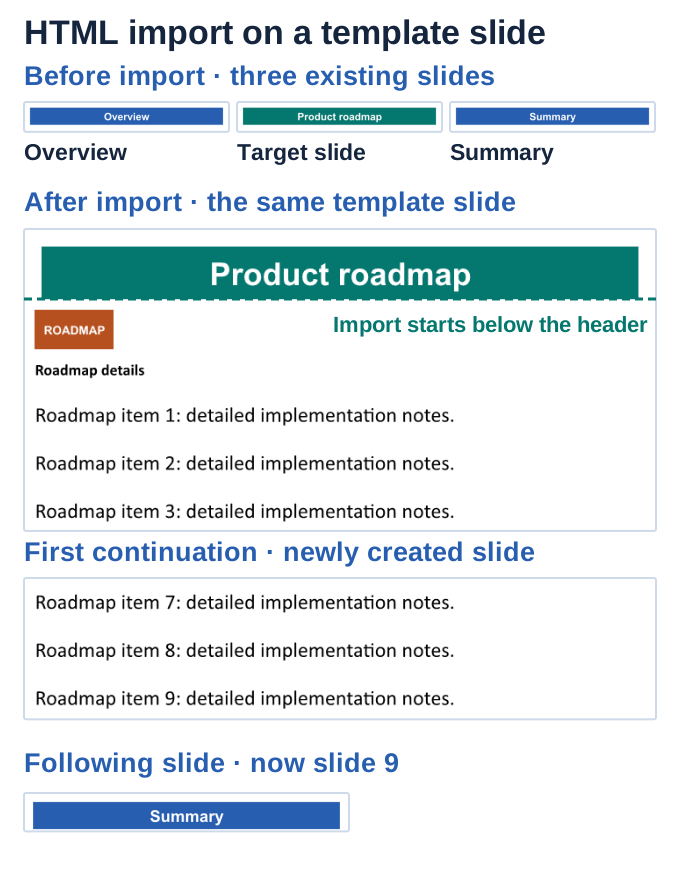
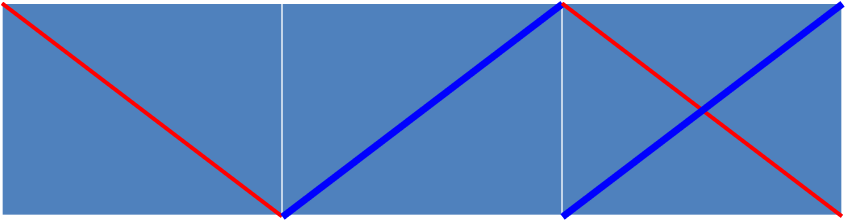
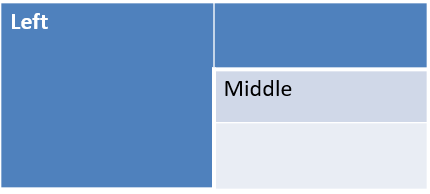
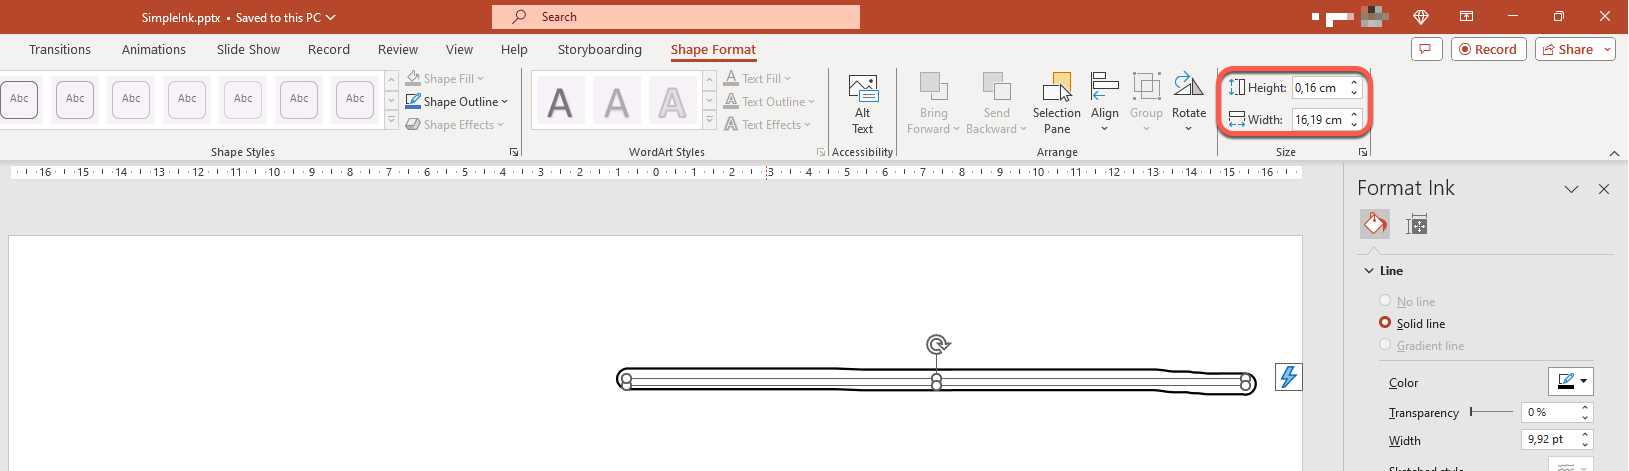
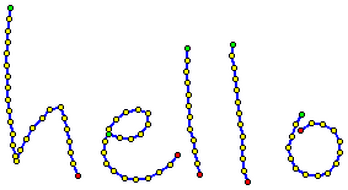
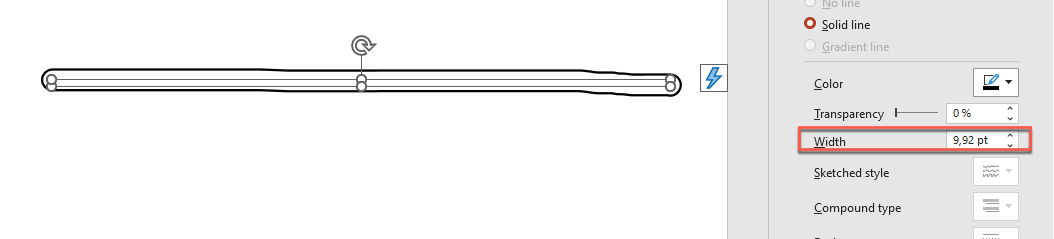
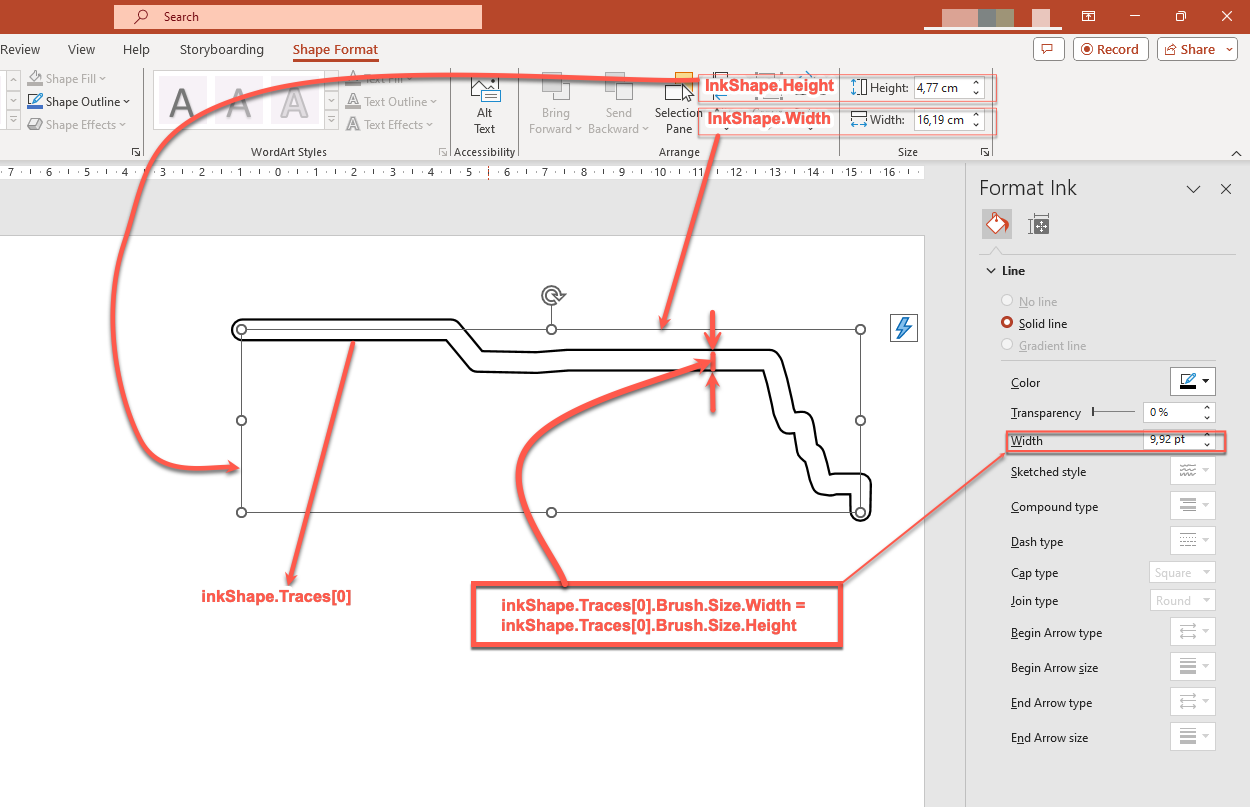
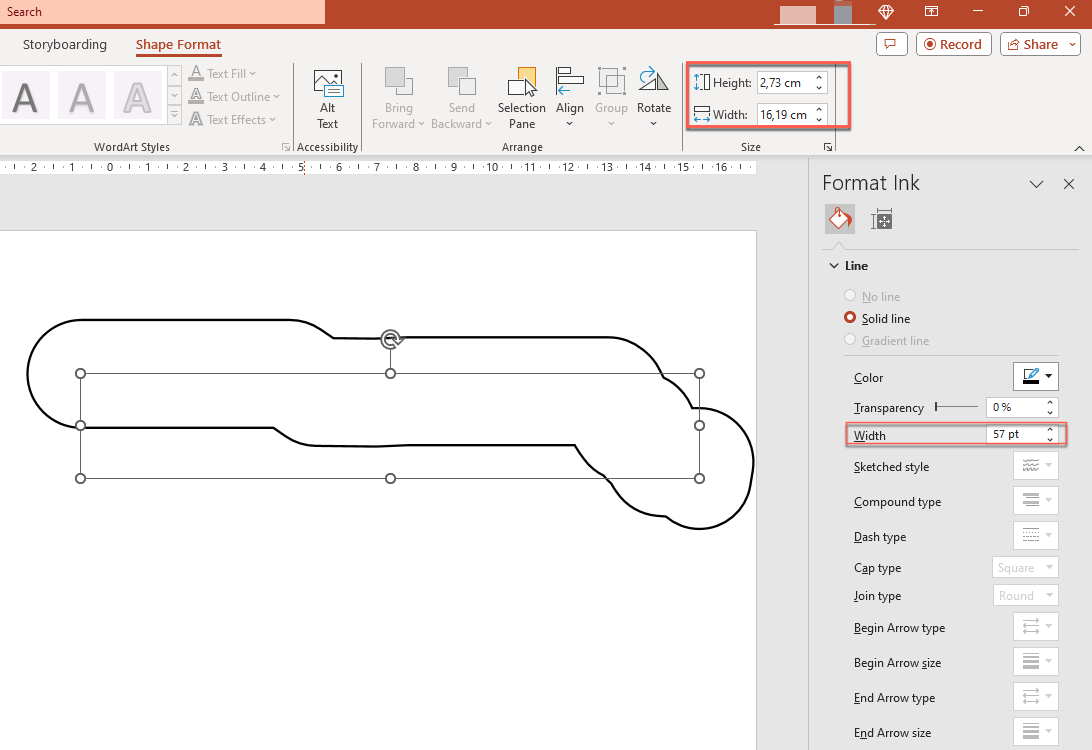
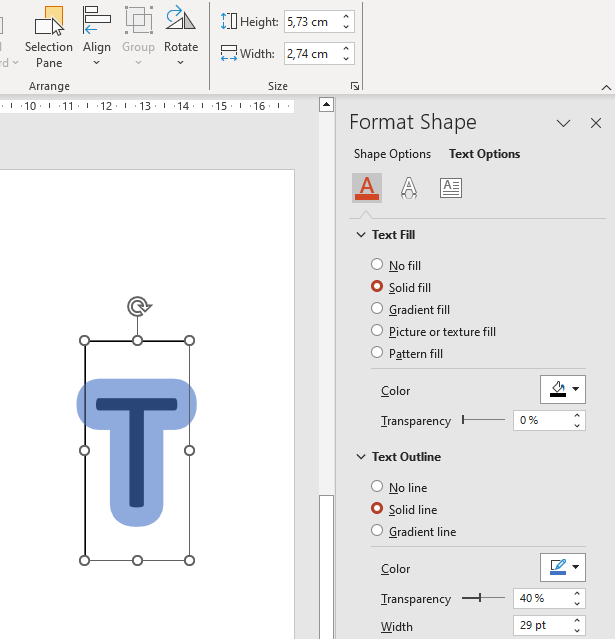

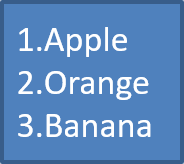


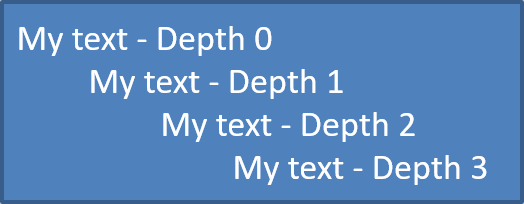
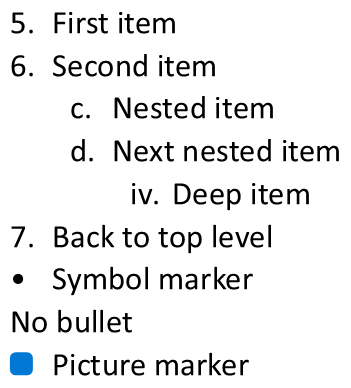
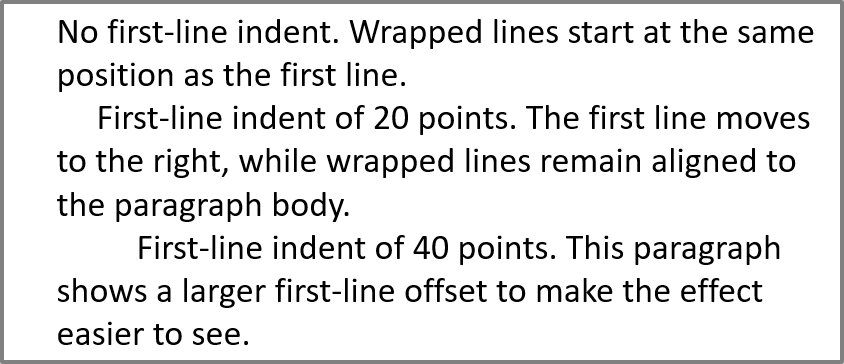
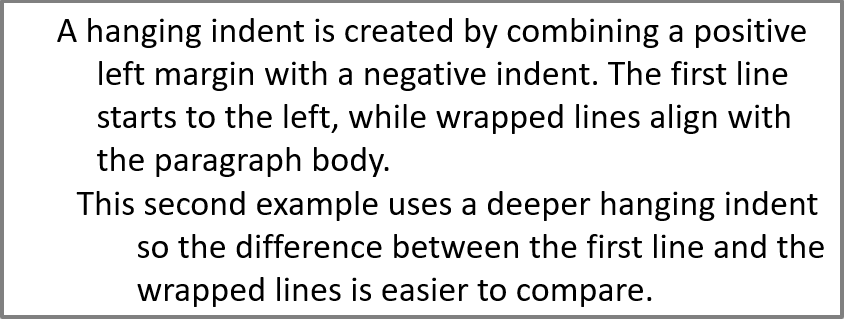
Status: Ready

Next steps

") options = slides.export.TextToHtmlConversionOptions() options.add_clipboard_fragment_header = False html = paragraphs.export_to_html(0, paragraphs.count, options) options.add_clipboard_fragment_header = True clipboard_html = paragraphs.export_to_html(0, paragraphs.count, options) ``` ### **Render a Paragraph as an Image** [Paragraph.get_image](https://reference.aspose.com/slides/python-net/aspose.slides/paragraph/get_image/) renders an individual paragraph directly and returns an [IImage](https://reference.aspose.com/slides/python-net/aspose.slides/iimage/). Save the result to a file or stream with [IImage.save](https://reference.aspose.com/slides/python-net/aspose.slides/iimage/save/). You do not need to render the containing shape or crop a bitmap manually. [Paragraph.get_image](https://reference.aspose.com/slides/python-net/aspose.slides/paragraph/get_image/) can return `None` if the paragraph cannot be found in its parent collection, has no valid rendering bounds, or cannot be rendered. Check the result before saving it and dispose of the returned image after use. #### **Render a Paragraph at the Default Scale** The example uses `sample.pptx`, a presentation with one slide whose first shape is a text box containing three paragraphs. ![The text box with three paragraphs](https://docs.aspose.com/slides/python-net/manage-paragraph/paragraph_to_image_input.png) The following example selects the second paragraph at index 1 and calls [Paragraph.get_image](https://reference.aspose.com/slides/python-net/aspose.slides/paragraph/get_image/) without scale parameters. It checks that the shape contains the required paragraph and that rendering returns an image before calling [IImage.save](https://reference.aspose.com/slides/python-net/aspose.slides/iimage/save/) to save it in PNG format. The context manager releases the image resources after use. ```python import aspose.slides as slides with slides.Presentation("sample.pptx") as presentation: shape = presentation.slides[0].shapes[0] if isinstance(shape, slides.AutoShape) and shape.text_frame is not None and shape.text_frame.paragraphs.count > 1: paragraph = shape.text_frame.paragraphs[1] paragraph_image = paragraph.get_image() if paragraph_image is not None: with paragraph_image: paragraph_image.save("paragraph.png", slides.ImageFormat.PNG) else: print("The paragraph could not be rendered.") else: print("The expected text shape or paragraph was not found.") ``` The result: ![The paragraph image](https://docs.aspose.com/slides/python-net/manage-paragraph/paragraph_to_image_output.png) #### **Render a Paragraph in a Table Cell with Scaling** Use the [Paragraph.get_image](https://reference.aspose.com/slides/python-net/aspose.slides/paragraph/get_image/) overload that accepts `scale_x` and `scale_y` parameters to set the horizontal and vertical scale factors. The following example creates a table, renders the paragraph in its first cell at twice its default width and height, and saves the result as a PNG image. ```python import aspose.slides as slides scale_x = 2 scale_y = 2 with slides.Presentation() as presentation: slide = presentation.slides[0] table = slide.shapes.add_table(50, 50, [300], [80]) paragraph = table.rows[0][0].text_frame.paragraphs[0] paragraph.text = "Text in a table cell" paragraph_image = paragraph.get_image(scale_x, scale_y) if paragraph_image is not None: with paragraph_image: paragraph_image.save("table_paragraph.png", slides.ImageFormat.PNG) else: print("The paragraph could not be rendered.") ``` A scale factor of `1` keeps that axis at its default pixel size. For example, `2` for both factors produces an image whose width and height are approximately twice the default dimensions, resulting in four times as many pixels. Larger factors generally produce sharper text for zooming or high-resolution output, but they also increase memory use and file size. Factors below `1` produce smaller images with less detail. Use equal factors to preserve the paragraph's aspect ratio; different horizontal and vertical factors stretch the output independently. Rendering a whole shape with [Shape.get_image](https://reference.aspose.com/slides/python-net/aspose.slides/shape/get_image/) remains useful when the output must include the shape's fill, border, or other visual context. For a paragraph-only image, use [Paragraph.get_image](https://reference.aspose.com/slides/python-net/aspose.slides/paragraph/get_image/). ## **FAQ** **Can I completely disable line wrapping inside a text frame?** Yes. Set [TextFrameFormat.wrap_text](https://reference.aspose.com/slides/python-net/aspose.slides/textframeformat/wrap_text/) to disable wrapping so lines do not break at the text frame's edges. **How can I get the exact on-slide bounds of a specific paragraph?** Use [Paragraph.get_rect](https://reference.aspose.com/slides/python-net/aspose.slides/paragraph/get_rect/) to retrieve the paragraph's bounding rectangle. [Portion.get_rect](https://reference.aspose.com/slides/python-net/aspose.slides/portion/get_rect/) provides the bounds of an individual portion. **Where is paragraph alignment (left, right, center, or justify) controlled?** [ParagraphFormat.alignment](https://reference.aspose.com/slides/python-net/aspose.slides/paragraphformat/alignment/) is a paragraph-level setting and applies to the whole paragraph regardless of individual portion formatting. To vertically align portions of different font sizes within each line, see [Align Fonts Within a Line](https://docs.aspose.com/slides/python-net/text-formatting/#align-fonts-within-a-line). **Can I set the proofing language for part of a paragraph?** Yes. Set [PortionFormat.language_id](https://reference.aspose.com/slides/python-net/aspose.slides/portionformat/language_id/) for individual portions, so one paragraph can contain text in multiple languages. ## Related articles - [Manage Bulleted and Numbered Lists in Presentations in Python](https://docs.aspose.com/slides/python-net/manage-lists/) # Manage Presentation Placeholders in Python > Learn how to inspect and edit text, picture, chart, and content placeholders and understand placeholder inheritance with Aspose.Slides for Python via .NET. Source: https://docs.aspose.com/slides/python-net/manage-placeholder/ Updated: 2026-11-08 ## **Overview** A placeholder is a shape that reserves a position for a particular kind of content in a presentation template. Common examples are title, body, picture, chart, and general-purpose content placeholders. Unlike an ordinary shape, a placeholder can inherit its position, size, formatting, and other settings from a layout slide or master slide. Aspose.Slides exposes placeholder information through the [Shape.placeholder](https://reference.aspose.com/slides/python-net/aspose.slides/shape/placeholder/) property. The property returns a [Placeholder](https://reference.aspose.com/slides/python-net/aspose.slides/placeholder/) object or `None` for a normal shape. Use [Placeholder.type](https://reference.aspose.com/slides/python-net/aspose.slides/placeholder/type/) to determine what the placeholder is intended to contain. The shape class still matters after you know the placeholder type: - An empty text, picture, chart, or content placeholder is commonly represented by an [AutoShape](https://reference.aspose.com/slides/python-net/aspose.slides/autoshape/). - A populated picture placeholder can be represented by a [PictureFrame](https://reference.aspose.com/slides/python-net/aspose.slides/pictureframe/). - A populated chart placeholder can be represented by a [Chart](https://reference.aspose.com/slides/python-net/aspose.slides.charts/chart/). - A content placeholder can contain several kinds of content. Check both [Placeholder.type](https://reference.aspose.com/slides/python-net/aspose.slides/placeholder/type/) and the runtime shape class instead of assuming that every placeholder is an [AutoShape](https://reference.aspose.com/slides/python-net/aspose.slides/autoshape/). [Placeholder.type](https://reference.aspose.com/slides/python-net/aspose.slides/placeholder/type/) describes a placeholder's role; it does not guarantee the shape's runtime class. Always use a type check before accessing text, picture, chart, table, or media-specific members. ## **Understand Placeholder Inheritance** Placeholders form a hierarchy: 1. A master slide defines reusable styles and, in some cases, master-level placeholders. 2. A layout slide defines the arrangement used by one or more normal slides and can inherit from the master. 3. A normal slide contains the placeholders for that slide and can inherit from its layout. Call [Shape.get_base_placeholder](https://reference.aspose.com/slides/python-net/aspose.slides/shape/get_base_placeholder/) to move one level up this hierarchy. A slide placeholder normally returns its layout placeholder; a layout placeholder can return its master placeholder. The method returns `None` when the shape has no base placeholder. The following example lists placeholders on the first slide and reports their base placeholders: ```python import aspose.slides as slides with slides.Presentation("template.pptx") as presentation: slide = presentation.slides[0] for shape in slide.shapes: if shape.placeholder is None: continue placeholder_type = shape.placeholder.type type_name = type(shape).__name__ print(f"Slide placeholder: {placeholder_type}; shape class: {type_name}") layout_placeholder = shape.get_base_placeholder() if layout_placeholder is not None: layout_placeholder_type = layout_placeholder.placeholder.type if layout_placeholder.placeholder is not None else None print(f" Layout placeholder: {layout_placeholder_type}") master_placeholder = layout_placeholder.get_base_placeholder() if master_placeholder is not None: master_placeholder_type = master_placeholder.placeholder.type if master_placeholder.placeholder is not None else None print(f" Master placeholder: {master_placeholder_type}") ``` Editing a placeholder on a normal slide creates or changes a local override for that slide. Editing the related layout or master can affect all slides that still inherit that setting. A local ordinary shape has no base placeholder and does not begin inheriting merely because it occupies the same coordinates. ## **Remove Placeholder Status** When adapting a template, use [Shape.remove_placeholder](https://reference.aspose.com/slides/python-net/aspose.slides/shape/remove_placeholder/) to keep an existing object as an ordinary shape. Its [placeholder](https://reference.aspose.com/slides/python-net/aspose.slides/shape/placeholder/) property becomes `None`, but the shape remains in the slide's collection. In contrast, [ShapeCollection.remove](https://reference.aspose.com/slides/python-net/aspose.slides/shapecollection/remove/) deletes the shape from that collection. The following example requires `template.pptx` with at least one slide and a nonempty text placeholder on the first slide. Use a placeholder with formatting inherited from its layout or master to see the effect of removing that relationship. The example checks that the same shape remains, calls the method again on the now ordinary shape, and saves the result. Removing placeholder status does not automatically preserve inherited appearance settings. The example below deliberately leaves those settings unchanged, so the output may look different. A shape whose position and size are entirely inherited can have zero coordinates and dimensions after the call and become invisible even though it remains in the collection. ```python import aspose.slides as slides with slides.Presentation("template.pptx") as presentation: slide = presentation.slides[0] found = False for index in range(len(slide.shapes)): shape = slide.shapes[index] if not isinstance(shape, slides.AutoShape) or shape.placeholder is None: continue if shape.text_frame is None or not shape.text_frame.text: continue shape_count = len(slide.shapes) shape.remove_placeholder() print(f"Placeholder removed: {shape.placeholder is None}") print(f"Same shape retained: {slide.shapes[index] == shape}") print(f"Shape count unchanged: {len(slide.shapes) == shape_count}") # Calling the method on an ordinary shape has no effect. shape.remove_placeholder() found = True break if found: presentation.save("placeholder-status-removed.pptx", slides.export.SaveFormat.PPTX) else: print("No nonempty text placeholder was found on the first slide.") ``` For a matching placeholder, all three checks print `True`. The text remains, but inherited position, size, rotation, font, paragraph alignment, text-frame margins, vertical anchoring, fill, and line settings can change when the placeholder relationship is removed. For example, inherited title formatting can fall back to ordinary text formatting. See [Slide Layout](https://docs.aspose.com/slides/python-net/slide-layout/) for more about layouts. To preserve the intended appearance, capture the resolved position, size, and rotation before the call, and copy the required effective formatting values into separate variables. Retrieve those values through [PortionFormat.get_effective](https://reference.aspose.com/slides/python-net/aspose.slides/portionformat/get_effective/), [ParagraphFormat.get_effective](https://reference.aspose.com/slides/python-net/aspose.slides/paragraphformat/get_effective/), [TextFrameFormat.get_effective](https://reference.aspose.com/slides/python-net/aspose.slides/textframeformat/get_effective/), [FillFormat.get_effective](https://reference.aspose.com/slides/python-net/aspose.slides/fillformat/get_effective/), and [LineFormat.get_effective](https://reference.aspose.com/slides/python-net/aspose.slides/lineformat/get_effective/). Do not rely on retaining only the effective-format objects, because their text-formatting values can change after the relationship is removed. Explicitly apply the captured values to the ordinary shape afterward, including the font family, size, style, color, paragraph settings, text-frame settings, fill, and line used by your template. Inherited shape geometry may also need to be assigned explicitly through [GeometryShape.shape_type](https://reference.aspose.com/slides/python-net/aspose.slides/geometryshape/shape_type/). For a rectangular text placeholder, this means assigning [ShapeType.RECTANGLE](https://reference.aspose.com/slides/python-net/aspose.slides/shapetype/); restoring only the fill and line may not restore the visible rectangle. Templates with additional effects or more complex formatting require those settings to be handled as well. [![An inherited Project update title becomes almost invisible after placeholder removal; stored text and shape count remain while its resolved frame becomes zero-sized.](https://docs.aspose.com/slides/python-net/manage-placeholder/visual-placeholder-inheritance-e07f1411f7f8.svg)](https://docs.aspose.com/slides/python-net/manage-placeholder/visual-placeholder-inheritance-e07f1411f7f8.svg) *Controlled .NET 26.11 fixture: removing placeholder status keeps the object and text but removes the base link; the inherited 648 × 90-point frame becomes zero-sized. This is not shape deletion. Capture resolved values before removal and explicitly reapply the geometry and formatting needed to preserve appearance.* ## **Change Text in a Placeholder** Title, centered-title, subtitle, body, and text placeholders normally support text. Check for [AutoShape](https://reference.aspose.com/slides/python-net/aspose.slides/autoshape/) before using its [text_frame](https://reference.aspose.com/slides/python-net/aspose.slides/autoshape/text_frame/) property. This example updates the first title placeholder on the first slide and saves the result: ```python import aspose.slides as slides with slides.Presentation("template.pptx") as presentation: slide = presentation.slides[0] title_shape = None for shape in slide.shapes: if not isinstance(shape, slides.AutoShape) or shape.placeholder is None: continue placeholder_type = shape.placeholder.type if placeholder_type in (slides.PlaceholderType.TITLE, slides.PlaceholderType.CENTERED_TITLE): title_shape = shape break if title_shape is None: raise RuntimeError("The first slide does not contain a title placeholder.") title_shape.text_frame.text = "Quarterly Business Review" presentation.save("title-placeholder-updated.pptx", slides.export.SaveFormat.PPTX) ``` This pattern avoids treating picture, chart, table, or media placeholders as [AutoShape](https://reference.aspose.com/slides/python-net/aspose.slides/autoshape/) objects. It also identifies the placeholder by purpose instead of relying on a fragile shape index. ## **Set Prompt Text on a Layout** Prompt text is the design-time instruction displayed in an empty placeholder, such as *Click to add title*. Set custom prompt text on the layout placeholder rather than trying to reach it through a normal slide's shape collection. Access the layout through [Slide.layout_slide](https://reference.aspose.com/slides/python-net/aspose.slides/slide/layout_slide/) and iterate over [LayoutSlide.shapes](https://reference.aspose.com/slides/python-net/aspose.slides/baseslide/shapes/). The following example changes the title and subtitle prompts on the layout used by the first slide: ```python import aspose.slides as slides with slides.Presentation("template.pptx") as presentation: layout_slide = presentation.slides[0].layout_slide for shape in layout_slide.shapes: if not isinstance(shape, slides.AutoShape) or shape.placeholder is None: continue placeholder_type = shape.placeholder.type if placeholder_type in (slides.PlaceholderType.TITLE, slides.PlaceholderType.CENTERED_TITLE): shape.text_frame.text = "Enter a concise slide title" elif placeholder_type == slides.PlaceholderType.SUBTITLE: shape.text_frame.text = "Enter a subtitle or reporting period" presentation.save("custom-placeholder-prompts.pptx", slides.export.SaveFormat.PPTX) ``` Prompt text is not normal slide content. It is intended for empty placeholders in editing applications such as PowerPoint. Once a user or program supplies real content, the prompt is no longer displayed. Changing a prompt also does not replace existing text on slides that use the layout. ## **Update a Picture Placeholder** There are two cases to handle: - If the picture placeholder is already populated and represented by a [PictureFrame](https://reference.aspose.com/slides/python-net/aspose.slides/pictureframe/), replace the image through [PictureFillFormat.picture](https://reference.aspose.com/slides/python-net/aspose.slides/picturefillformat/picture/) and [Picture.image](https://reference.aspose.com/slides/python-net/aspose.slides/picture/image/). - If it is still an empty placeholder, add a picture frame at the placeholder's coordinates with [ShapeCollection.add_picture_frame](https://reference.aspose.com/slides/python-net/aspose.slides/shapecollection/add_picture_frame/) and remove the empty placeholder. The next example supports both cases and saves the presentation: ```python import aspose.slides as slides with slides.Presentation("picture-template.pptx") as presentation: slide = presentation.slides[0] picture_placeholder = None for shape in slide.shapes: if shape.placeholder is not None and shape.placeholder.type == slides.PlaceholderType.PICTURE: picture_placeholder = shape break if picture_placeholder is None: raise RuntimeError("The first slide does not contain a picture placeholder.") with open("replacement.png", "rb") as image_stream: image_bytes = image_stream.read() image = presentation.images.add_image(image_bytes) if isinstance(picture_placeholder, slides.PictureFrame): picture_placeholder.picture_format.picture.image = image else: slide.shapes.add_picture_frame(slides.ShapeType.RECTANGLE, picture_placeholder.x, picture_placeholder.y, picture_placeholder.width, picture_placeholder.height, image) slide.shapes.remove(picture_placeholder) presentation.save("picture-placeholder-updated.pptx", slides.export.SaveFormat.PPTX) ``` The replacement created for an empty placeholder is a local picture frame, not a new placeholder, because [Shape.placeholder](https://reference.aspose.com/slides/python-net/aspose.slides/shape/placeholder/) is read-only. It keeps the reserved position but no longer inherits placeholder-specific behavior. If retaining the placeholder relationship is essential, prepare and populate the placeholder in PowerPoint first, then update the resulting [PictureFrame](https://reference.aspose.com/slides/python-net/aspose.slides/pictureframe/) with Aspose.Slides. For image transparency, cropping, and other picture-specific effects, see [Manage Picture Frames](https://docs.aspose.com/slides/python-net/picture-frame/). Those operations belong to the picture frame or picture fill, not to placeholder metadata. ## **Work with Chart and Content Placeholders** A populated chart placeholder can be represented by a [Chart](https://reference.aspose.com/slides/python-net/aspose.slides.charts/chart/). This example finds such a chart by both placeholder type and runtime class, changes its title, and saves the file: ```python import aspose.slides as slides import aspose.slides.charts as charts with slides.Presentation("chart-template.pptx") as presentation: slide = presentation.slides[0] placeholder_chart = None for shape in slide.shapes: if isinstance(shape, charts.Chart) and shape.placeholder is not None and shape.placeholder.type == slides.PlaceholderType.CHART: placeholder_chart = shape break if placeholder_chart is None: raise RuntimeError("The first slide does not contain a populated chart placeholder.") placeholder_chart.has_title = True placeholder_chart.chart_title.add_text_frame_for_overriding("Quarterly Revenue") presentation.save("chart-placeholder-updated.pptx", slides.export.SaveFormat.PPTX) ``` A general content placeholder usually has [PlaceholderType.OBJECT](https://reference.aspose.com/slides/python-net/aspose.slides/placeholdertype/). In PowerPoint it acts as a launcher for several content types, including charts, tables, diagrams, pictures, and media. After it has been populated, inspect the actual shape class to learn what it contains. Specialized layouts can also expose [PlaceholderType.CHART](https://reference.aspose.com/slides/python-net/aspose.slides/placeholdertype/), [PlaceholderType.TABLE](https://reference.aspose.com/slides/python-net/aspose.slides/placeholdertype/), [PlaceholderType.PICTURE](https://reference.aspose.com/slides/python-net/aspose.slides/placeholdertype/), [PlaceholderType.MEDIA](https://reference.aspose.com/slides/python-net/aspose.slides/placeholdertype/), or [PlaceholderType.DIAGRAM](https://reference.aspose.com/slides/python-net/aspose.slides/placeholdertype/). Aspose.Slides does not convert an empty [AutoShape](https://reference.aspose.com/slides/python-net/aspose.slides/autoshape/) placeholder into a [Chart](https://reference.aspose.com/slides/python-net/aspose.slides.charts/chart/) merely by changing [Placeholder.type](https://reference.aspose.com/slides/python-net/aspose.slides/placeholder/type/); the type is read-only. To fill an empty chart or content area programmatically, add the required object at the placeholder's coordinates and then remove the empty placeholder. The following example does that for a chart: ```python import aspose.slides as slides import aspose.slides.charts as charts with slides.Presentation("content-template.pptx") as presentation: slide = presentation.slides[0] target_placeholder = None for shape in slide.shapes: if shape.placeholder is None: continue if shape.placeholder.type in (slides.PlaceholderType.CHART, slides.PlaceholderType.OBJECT): target_placeholder = shape break if target_placeholder is None: raise RuntimeError("The first slide does not contain a chart or content placeholder.") chart = slide.shapes.add_chart(charts.ChartType.CLUSTERED_COLUMN, target_placeholder.x, target_placeholder.y, target_placeholder.width, target_placeholder.height) chart.has_title = True chart.chart_title.add_text_frame_for_overriding("Quarterly Revenue") slide.shapes.remove(target_placeholder) presentation.save("content-placeholder-replaced-with-chart.pptx", slides.export.SaveFormat.PPTX) ``` The added chart is an ordinary local chart. It occupies the placeholder's area but does not inherit from the layout placeholder. Use the dedicated [chart management articles](https://docs.aspose.com/slides/python-net/powerpoint-charts/) when you need to replace its categories, series, or workbook data. ## **Complete Example: Update Text or Image Content** The following end-to-end example opens a template, searches the first slide for either a title or picture placeholder, checks the placeholder and shape types, updates the appropriate content, and saves the output. The example deliberately avoids assuming a shape index or treating every placeholder as the same shape class. ```python import aspose.slides as slides with slides.Presentation("template.pptx") as presentation: slide = presentation.slides[0] updated = False for shape in slide.shapes: if shape.placeholder is None: continue placeholder_type = shape.placeholder.type if placeholder_type in (slides.PlaceholderType.TITLE, slides.PlaceholderType.CENTERED_TITLE) and isinstance(shape, slides.AutoShape): shape.text_frame.text = "Quarterly Business Review" updated = True break if placeholder_type == slides.PlaceholderType.PICTURE: with open("replacement.png", "rb") as image_stream: image_bytes = image_stream.read() image = presentation.images.add_image(image_bytes) if isinstance(shape, slides.PictureFrame): shape.picture_format.picture.image = image else: slide.shapes.add_picture_frame(slides.ShapeType.RECTANGLE, shape.x, shape.y, shape.width, shape.height, image) slide.shapes.remove(shape) updated = True break if not updated: raise RuntimeError("No supported title or picture placeholder was found on the first slide.") presentation.save("placeholder-content-updated.pptx", slides.export.SaveFormat.PPTX) ``` ## **FAQ** **What is a base placeholder?** A base placeholder is the corresponding shape on the layout or master from which another placeholder inherits. Use [Shape.get_base_placeholder](https://reference.aspose.com/slides/python-net/aspose.slides/shape/get_base_placeholder/) to retrieve it. An ordinary local shape returns `None` because it is not part of the placeholder hierarchy. **Can I change all slide titles by editing a layout placeholder?** You can change inherited formatting or prompt text through a layout, but existing title content is stored on the normal slides. To replace actual title text across a presentation, iterate over the slides and update each title placeholder. **How do I manage date, slide-number, header, and footer placeholders?** Use the header and footer managers at the appropriate slide, layout, master, notes, or handout scope. See [Manage Presentation Header and Footer](https://docs.aspose.com/slides/python-net/presentation-header-and-footer/) for complete examples. ## Related articles - [HeaderFooter](https://docs.aspose.com/slides/python-net/examples/elements/header-footer/) # Manage Presentations in Python > Manage PowerPoint PPT, PPTX and ODP presentations in Python with Aspose.Slides: create, load, edit, clone slides and control content programmatically. Source: https://docs.aspose.com/slides/python-net/manage-presentation/ Updated: 2025-12-02 --- lastmod: 2025-12-02T13:32:50+06:00 title: Manage Presentations in Python linktitle: Manage Presentation type: docs weight: 10 url: /python-net/manage-presentation/ keywords: - manage presentation - manage PPT - manage PPTX - manage ODP - create presentation - open presentation - examine presentation - merge presentations - convert presentation - save presentation - manage slide show - Python - Aspose.Slides description: "Manage PowerPoint PPT, PPTX and ODP presentations in Python with Aspose.Slides: create, load, edit, clone slides and control content programmatically." --- # Manage Rows and Columns in PowerPoint Tables Using Python > Manage table rows and columns in PowerPoint with Aspose.Slides for Python via .NET and speed up presentation editing and data updates. Source: https://docs.aspose.com/slides/python-net/manage-rows-and-columns/ Updated: 2026-11-16 ## **Introduction** Aspose.Slides for Python via .NET lets you manage table structure and formatting in PowerPoint presentations through the [Table](https://reference.aspose.com/slides/python-net/aspose.slides/table/) class. You can designate a header row, clone or remove rows and columns, and apply text formatting to an entire row or column. This article explains these operations with Python examples. It also shows how to retrieve a table's style preset so you can reuse it. Table row and column indices are zero-based. ## **Control Row Height** Use [Row.minimal_height](https://reference.aspose.com/slides/python-net/aspose.slides/row/minimal_height/) to set a row's minimum height in points. It is a lower bound, not a fixed height. [Row.height](https://reference.aspose.com/slides/python-net/aspose.slides/row/height/) returns the actual height and is read-only. Access the row through [Table.rows](https://reference.aspose.com/slides/python-net/aspose.slides/table/rows/). The example loads [row-height-input.pptx](https://docs.aspose.com/slides/python-net/manage-rows-and-columns/row-height-input.pptx), which has a table as the first shape on the first slide. Its first row starts at 70 points. The cells use 18-point Arial text, wrapping, and 6-point top and bottom margins; the longer text in the second column wraps onto multiple lines. The example increases the minimum to 100 points, then decreases it to 20 points, prints the actual height after each change, and saves both results. ```python import aspose.slides as slides with slides.Presentation("row-height-input.pptx") as presentation: table = presentation.slides[0].shapes[0] row = table.rows[0] row.minimal_height = 100 print(f"Increased: minimum = {row.minimal_height:.1f}, actual = {row.height:.1f} pt") presentation.save("row-height-increased.pptx", slides.export.SaveFormat.PPTX) row.minimal_height = 20 print(f"Decreased: minimum = {row.minimal_height:.1f}, actual = {row.height:.1f} pt") presentation.save("row-height-decreased.pptx", slides.export.SaveFormat.PPTX) ``` With the supplied presentation, increasing the minimum adds space to the row. Decreasing it removes that extra space, but the actual height remains greater than 20 points because the text and cell margins need more room. Reducing the minimum alone cannot force the row below the space required by its content. Several factors affect the actual height: - **Text and font size:** longer text, explicit line breaks, or a larger font can require more vertical space. - **Wrapping and column width:** with wrapping enabled, a narrower [Column.width](https://reference.aspose.com/slides/python-net/aspose.slides/column/width/) can produce more lines. A wider column can reduce the space required vertically. - **Cell margins:** [Cell.margin_top](https://reference.aspose.com/slides/python-net/aspose.slides/cell/margin_top/) and [Cell.margin_bottom](https://reference.aspose.com/slides/python-net/aspose.slides/cell/margin_bottom/) add vertical space. [Cell.margin_left](https://reference.aspose.com/slides/python-net/aspose.slides/cell/margin_left/) and [Cell.margin_right](https://reference.aspose.com/slides/python-net/aspose.slides/cell/margin_right/) reduce the width available for text and can cause additional wrapping. For this table without merged cells, the cell that needs the most vertical space determines the content-driven lower limit for the entire row. To make the row shorter, you may also need to shorten the text, reduce the font size or margins, or widen a column. The images below show the same table at the same scale. In this run, the actual heights were 70, 100, and 55.2 points: the final row remained taller than its 20-point minimum. Exact text measurements can vary with the fonts available in your environment. Download the saved results: [increased minimum](https://docs.aspose.com/slides/python-net/manage-rows-and-columns/row-height-increased.pptx) and [decreased minimum](https://docs.aspose.com/slides/python-net/manage-rows-and-columns/row-height-decreased.pptx). | Original: minimum 70 pt, actual 70 pt | Increased: minimum 100 pt, actual 100 pt | Decreased: minimum 20 pt, actual 55.2 pt | | --- | --- | --- | | ![Original table with a 70-point first row.](https://docs.aspose.com/slides/python-net/manage-rows-and-columns/row-height-before.png) | ![Table after increasing the first row minimum to 100 points.](https://docs.aspose.com/slides/python-net/manage-rows-and-columns/row-height-increased.png) | ![Table after decreasing the first row minimum to 20 points; wrapped text keeps the row taller than the minimum.](https://docs.aspose.com/slides/python-net/manage-rows-and-columns/row-height-decreased.png) | ## **Set the First Row as a Header** Use the [first_row](https://reference.aspose.com/slides/python-net/aspose.slides/table/first_row/) property to mark the first row for header formatting. Its appearance depends on the table style applied to the table. 1. Load the presentation with the [Presentation](https://reference.aspose.com/slides/python-net/aspose.slides/presentation/) class. 2. Access the first slide. 3. Access the table stored as the first shape on the slide. 4. Enable header formatting for its first row. 5. Save the modified presentation. The example requires `table.pptx` with a table as the first shape on the first slide. It enables header formatting for the first row and saves `First_row_header.pptx`. ```python import aspose.slides as slides with slides.Presentation("table.pptx") as presentation: slide = presentation.slides[0] table = slide.shapes[0] table.first_row = True presentation.save("First_row_header.pptx", slides.export.SaveFormat.PPTX) ``` ## **Clone a Table Row or Column** Clone rows or columns to reuse their content and formatting. You can append a copy to the end of the table or insert it at a specific position. 1. Load the presentation with the [Presentation](https://reference.aspose.com/slides/python-net/aspose.slides/presentation/) class. 2. Access the first slide. 3. Define the column widths and row heights. 4. Add a table with the [add_table](https://reference.aspose.com/slides/python-net/aspose.slides/shapecollection/add_table/) method. 5. Clone the required rows. 6. Clone the required columns. 7. Save the modified presentation. The example requires `Test.pptx` with at least one slide. It creates a table with three columns and five rows, with dimensions specified in points. It appends copies of the first row and column, then inserts copies of the second row and column at index 3 (the fourth position). The resulting table has seven rows and five columns. The `False` argument disables cloning into adjacent merged rows or columns; this table has no merged cells. ```python import aspose.slides as slides with slides.Presentation("Test.pptx") as presentation: slide = presentation.slides[0] column_widths = [50, 50, 50] row_heights = [50, 30, 30, 30, 30] table = slide.shapes.add_table(100, 50, column_widths, row_heights) table.rows[0][0].text_frame.text = "Row 1 Cell 1" table.rows[0][1].text_frame.text = "Row 1 Cell 2" table.rows.add_clone(table.rows[0], False) table.rows[1][0].text_frame.text = "Row 2 Cell 1" table.rows[1][1].text_frame.text = "Row 2 Cell 2" table.rows.insert_clone(3, table.rows[1], False) table.columns.add_clone(table.columns[0], False) table.columns.insert_clone(3, table.columns[1], False) presentation.save("table_out.pptx", slides.export.SaveFormat.PPTX) ``` ## **Remove a Row or Column from a Table** Remove rows or columns that are no longer needed in a table. Removing an item shifts the indices of the rows or columns that follow it. 1. Create a presentation with the [Presentation](https://reference.aspose.com/slides/python-net/aspose.slides/presentation/) class. 2. Access the first slide. 3. Define the column widths and row heights. 4. Add a table with the [add_table](https://reference.aspose.com/slides/python-net/aspose.slides/shapecollection/add_table/) method. 5. Remove the second row and second column. 6. Save the modified presentation. This example creates a three-by-three table and removes the row and column at index 1, leaving a two-by-two table in `TestTable_out.pptx`. The dimensions are in points. The `False` argument disables removal of adjacent merged rows or columns; this table has no merged cells. ```python import aspose.slides as slides with slides.Presentation() as presentation: slide = presentation.slides[0] column_widths = [100, 50, 30] row_heights = [30, 50, 30] table = slide.shapes.add_table(100, 100, column_widths, row_heights) table.rows.remove_at(1, False) table.columns.remove_at(1, False) presentation.save("TestTable_out.pptx", slides.export.SaveFormat.PPTX) ``` ## **Set Text Formatting at the Table Row Level** Apply text formatting to an entire row to keep its cells consistent. You can set font properties, paragraph formatting, and text direction without formatting each cell individually. 1. Load the presentation with the [Presentation](https://reference.aspose.com/slides/python-net/aspose.slides/presentation/) class. 2. Access the table on the first slide. 3. Set [font_height](https://reference.aspose.com/slides/python-net/aspose.slides/portionformat/font_height/) for the first row. 4. Set [alignment](https://reference.aspose.com/slides/python-net/aspose.slides/paragraphformat/alignment/) and [margin_right](https://reference.aspose.com/slides/python-net/aspose.slides/paragraphformat/margin_right/) for the first row. 5. Set [text_vertical_type](https://reference.aspose.com/slides/python-net/aspose.slides/textframeformat/text_vertical_type/) for the second row. 6. Save the modified presentation. The example requires `table.pptx` with a table as the first shape on the first slide and at least two rows. It applies 25-point text, right alignment, and a 20-point right paragraph margin to the first row, then sets vertical text in the second row. ```python import aspose.slides as slides with slides.Presentation("table.pptx") as presentation: slide = presentation.slides[0] table = slide.shapes[0] portion_format = slides.PortionFormat() portion_format.font_height = 25 table.rows[0].set_text_format(portion_format) paragraph_format = slides.ParagraphFormat() paragraph_format.alignment = slides.TextAlignment.RIGHT paragraph_format.margin_right = 20 table.rows[0].set_text_format(paragraph_format) text_frame_format = slides.TextFrameFormat() text_frame_format.text_vertical_type = slides.TextVerticalType.VERTICAL table.rows[1].set_text_format(text_frame_format) presentation.save("row_formatting.pptx", slides.export.SaveFormat.PPTX) ``` ## **Set Text Formatting at the Table Column Level** Apply text formatting to an entire column to keep its cells consistent. You can set font properties, paragraph formatting, and text direction without formatting each cell individually. 1. Load the presentation with the [Presentation](https://reference.aspose.com/slides/python-net/aspose.slides/presentation/) class. 2. Access the table on the first slide. 3. Set [font_height](https://reference.aspose.com/slides/python-net/aspose.slides/portionformat/font_height/) for the first column. 4. Set [alignment](https://reference.aspose.com/slides/python-net/aspose.slides/paragraphformat/alignment/) and [margin_right](https://reference.aspose.com/slides/python-net/aspose.slides/paragraphformat/margin_right/) for the first column. 5. Set [text_vertical_type](https://reference.aspose.com/slides/python-net/aspose.slides/textframeformat/text_vertical_type/) for the second column. 6. Save the modified presentation. The example requires `table.pptx` with a table as the first shape on the first slide and at least two columns. It applies 25-point text, right alignment, and a 20-point right paragraph margin to the first column, then sets vertical text in the second column. ```python import aspose.slides as slides with slides.Presentation("table.pptx") as presentation: slide = presentation.slides[0] table = slide.shapes[0] portion_format = slides.PortionFormat() portion_format.font_height = 25 table.columns[0].set_text_format(portion_format) paragraph_format = slides.ParagraphFormat() paragraph_format.alignment = slides.TextAlignment.RIGHT paragraph_format.margin_right = 20 table.columns[0].set_text_format(paragraph_format) text_frame_format = slides.TextFrameFormat() text_frame_format.text_vertical_type = slides.TextVerticalType.VERTICAL table.columns[1].set_text_format(text_frame_format) presentation.save("column_formatting.pptx", slides.export.SaveFormat.PPTX) ``` ## **Get Table Style Properties** Use the [style_preset](https://reference.aspose.com/slides/python-net/aspose.slides/table/style_preset/) property to retrieve the preset applied to a table and reuse it on another table. This identifies the preset rather than individual cell formatting overrides. The example creates a table, applies [TableStylePreset.DARK_STYLE1](https://reference.aspose.com/slides/python-net/aspose.slides/tablestylepreset/), and reads the preset back. It prints `True` when the retrieved preset matches the applied preset and saves the table in `table.pptx`. ```python import aspose.slides as slides with slides.Presentation() as presentation: slide = presentation.slides[0] column_widths = [100, 150] row_heights = [5, 5, 5] table = slide.shapes.add_table(10, 10, column_widths, row_heights) table.style_preset = slides.TableStylePreset.DARK_STYLE1 style_preset = table.style_preset print(style_preset == slides.TableStylePreset.DARK_STYLE1) presentation.save("table.pptx", slides.export.SaveFormat.PPTX) ``` ## **Apply Row or Column Banding** Set [horizontal_banding](https://reference.aspose.com/slides/python-net/aspose.slides/table/horizontal_banding/) to alternate row fills or [vertical_banding](https://reference.aspose.com/slides/python-net/aspose.slides/table/vertical_banding/) to alternate column fills. The table style supplies the band colors. To keep a particular cell the same color in every configuration, set its [fill_format](https://reference.aspose.com/slides/python-net/aspose.slides/cellformat/fill_format/) to a solid fill. The example saves three versions of the same table. Only the two banding flags change between saves. ```python import aspose.slides as slides with slides.Presentation() as presentation: slide = presentation.slides[0] column_widths = [100] * 4 row_heights = [50] * 4 table = slide.shapes.add_table(40, 40, column_widths, row_heights) table.style_preset = slides.TableStylePreset.MEDIUM_STYLE_2_ACCENT_1 table.first_row = False table.first_col = False table.last_row = False table.last_col = False for row in range(len(row_heights)): for column in range(len(column_widths)): table.rows[row][column].text_frame.text = f"{row + 1},{column + 1}" fill = table.rows[1][1].cell_format.fill_format fill.fill_type = slides.FillType.SOLID fill.solid_fill_color.color = "#FFA500" table.horizontal_banding = True table.vertical_banding = False presentation.save("rows.pptx", slides.export.SaveFormat.PPTX) table.horizontal_banding = False table.vertical_banding = True presentation.save("columns.pptx", slides.export.SaveFormat.PPTX) table.vertical_banding = False presentation.save("off.pptx", slides.export.SaveFormat.PPTX) ``` In PowerPoint, cell `2,2` stays orange in all three versions. Its neighbors alternate in color by row or by column and share a single fill when both flags are off. | Row banding | Column banding | Both off | | --- | --- | --- | | ![Alternating row fills with cell 2,2 in orange.](https://docs.aspose.com/slides/python-net/manage-rows-and-columns/row-banding.png) | ![Alternating column fills with cell 2,2 in orange.](https://docs.aspose.com/slides/python-net/manage-rows-and-columns/column-banding.png) | ![Uniform fill except for the orange cell.](https://docs.aspose.com/slides/python-net/manage-rows-and-columns/banding-off.png) | ## **FAQ** **Can I apply PowerPoint themes/styles to a table that's already created?** Yes. The table inherits the slide/layout/master theme, and you can still override fills, borders, and text colors on top of that theme. **Can I sort table rows like in Excel?** No, Aspose.Slides tables don't have built-in sorting or filters. Sort your data in memory first, then repopulate the table rows in that order. **Can I have banded (striped) columns while keeping custom colors on specific cells?** Yes. Enable banded columns and apply a local fill to the cells you want to highlight. See [Apply Row or Column Banding](https://docs.aspose.com/slides/python-net/manage-rows-and-columns/#apply-row-or-column-banding). ## Related articles - [Create and Customize PowerPoint Tables in Python](https://docs.aspose.com/slides/python-net/powerpoint-table/) - [Manage Presentation Tables with Python](https://docs.aspose.com/slides/python-net/manage-table/) - [Manage Table Cells in Presentations with Python](https://docs.aspose.com/slides/python-net/manage-cells/) # Manage Slide Show in Python > Learn how to manage slide shows in Aspose.Slides for Python via .NET. Control slide transitions, timings and more across PPT, PPTX and ODP formats with ease. Source: https://docs.aspose.com/slides/python-net/manage-slide-show/ Updated: 2026-08-05 ## **Introduction** In Microsoft PowerPoint, the **Slide Show** settings are a key tool for preparing and delivering professional presentations. One of the most important features in this section is **Set Up Show**, which allows you to tailor your presentation to specific conditions and audiences, ensuring flexibility and convenience. With this feature, you can select the show type (e.g., presented by a speaker, browsed by an individual, or browsed at a kiosk), enable or disable looping, choose specific slides to display, and use timings. This step in preparation is crucial for making your presentation more effective and professional. `slide_show_settings` is a property of the [Presentation](https://reference.aspose.com/slides/python-net/aspose.slides/presentation/) class, of type [SlideShowSettings](https://reference.aspose.com/slides/python-net/aspose.slides/slideshowsettings/), which allows you to manage the slide show settings in a PowerPoint presentation. In this article, we will explore how to use this property to configure and control various aspects of slide show settings. ## **Select Show Type** `SlideShowSettings.slide_show_type` defines the type of slide show, which can be an instance of the following classes: [PresentedBySpeaker](https://reference.aspose.com/slides/python-net/aspose.slides/presentedbyspeaker/), [BrowsedByIndividual](https://reference.aspose.com/slides/python-net/aspose.slides/browsedbyindividual/), or [BrowsedAtKiosk](https://reference.aspose.com/slides/python-net/aspose.slides/browsedatkiosk/). Using this property allows you to adapt the presentation for different usage scenarios, such as automated kiosks or manual presentations. The code example below creates a new presentation and sets the show type to "Browsed by an individual" without displaying the scrollbar. ```py import aspose.slides as slides with slides.Presentation() as presentation: show_type = slides.BrowsedByIndividual() show_type.show_scrollbar = False presentation.slide_show_settings.slide_show_type = show_type presentation.save("output.pptx", slides.export.SaveFormat.PPTX) ``` ## **Enable Show Options** `SlideShowSettings.loop` determines whether the slide show should repeat in a loop until manually stopped. This is useful for automated presentations that need to run continuously. `SlideShowSettings.show_narration` determines whether voice narrations should be played during the slide show. It is useful for automated presentations that contain voice guidance for the audience. `SlideShowSettings.show_animation` determines whether animations added to slide objects should be played. This is useful for providing the full visual effect of the presentation. The following code example creates a new presentation and loops the slide show. ```py import aspose.slides as slides with slides.Presentation() as presentation: presentation.slide_show_settings.loop = True presentation.save("output.pptx", slides.export.SaveFormat.PPTX) ``` ## **Select Slides to Show** `SlideShowSettings.slides` property allows you to select a range of slides to be shown during the presentation. This is useful when you need to show only part of the presentation rather than all slides. The following code example creates a new presentation and sets the slide range to display from slides `2` to `9`. ```py import aspose.slides as slides with slides.Presentation() as presentation: slide_range = slides.SlidesRange() slide_range.start = 2 slide_range.end = 9 presentation.slide_show_settings.slides = slide_range presentation.save("output.pptx", slides.export.SaveFormat.PPTX) ``` ## **Use Advance Slides** `SlideShowSettings.use_timings` property allows you to enable or disable the use of preset timings for each slide. This is useful for automatically showing slides with pre-defined display durations. The code example below creates a new presentation and disables the use of timings. ```py import aspose.slides as slides with slides.Presentation() as presentation: presentation.slide_show_settings.use_timings = False presentation.save("output.pptx", slides.export.SaveFormat.PPTX) ``` ## **Show Media Controls** `SlideShowSettings.show_media_controls` property determines whether media controls (such as play, pause, and stop) should be displayed during the slide show when multimedia content (e.g., video or audio) is played. This is useful when you want to give the presenter control over media playback during the presentation. The following code example creates a new presentation and enables media controls to be displayed. ```py import aspose.slides as slides with slides.Presentation() as presentation: presentation.slide_show_settings.show_media_controls = True presentation.save("output.pptx", slides.export.SaveFormat.PPTX) ``` ## **FAQ** ### Can I save a presentation so it opens directly in slide show mode? Yes. Save the file as PPSX or PPSM; these formats launch directly in slide show when opened in PowerPoint. In Aspose.Slides, choose the corresponding save format [during export](https://docs.aspose.com/slides/python-net/save-presentation/). ### Can I exclude individual slides from the show without deleting them from the file? Yes. Mark a slide as [hidden](https://reference.aspose.com/slides/python-net/aspose.slides/slide/hidden/). Hidden slides remain in the presentation but are not displayed during the slide show. ### Can Aspose.Slides play a slide show or control a live presentation on screen? No. Aspose.Slides edits, analyzes, and converts presentation files; the actual playback is handled by a viewer application such as PowerPoint. # Manage SmartArt Shape Nodes in Presentations Using Python > Manage SmartArt shape nodes in PPT, PPTX and ODP with Aspose.Slides for Python via .NET. Get clear code samples and tips to streamline your presentations. Source: https://docs.aspose.com/slides/python-net/manage-smartart-shape-node/ Updated: 2026-08-05 ## **Overview** SmartArt graphics in PowerPoint presentations are organized through nodes that contain text and define the structure of the diagram. Aspose.Slides allows you to work with these SmartArt nodes programmatically: add new nodes and child nodes, insert child nodes at a specific position, access existing nodes, and read their text, level, and position. This article explains how to manage SmartArt shape nodes. It shows how to remove nodes, work with child nodes by index or position, change an assistant node to a normal node, adjust the position, size, and rotation of SmartArt node shapes, set node fill formats, and generate a thumbnail image for a SmartArt node. ## **Add SmartArt Node** Aspose.Slides for Python via .NET has provided the simplest API to manage the SmartArt shapes in an easiest way. The following sample code will help to add node and child node inside SmartArt shape. - Create an instance of [Presentation](https://reference.aspose.com/slides/python-net/aspose.slides/presentation/) class and load the presentation with SmartArt Shape. - Obtain the reference of first slide by using its Index. - Traverse through every shape inside first slide. - Check if shape is of SmartArt type and Typecast selected shape to SmartArt if it is SmartArt. - Add a new Node in SmartArt shape NodeCollection and set the text in TextFrame. - Now, Add a Child Node in newly added SmartArt Node and set the text in TextFrame. - Save the Presentation. ```py import aspose.pydrawing as draw import aspose.slides as slides import aspose.slides.smartart as art # Load the desired the presentation with slides.Presentation("AddNodes.pptx") as pres: # Traverse through every shape inside first slide for shape in pres.slides[0].shapes: # Check if shape is of SmartArt type if type(shape) is art.SmartArt: # Adding a new SmartArt Node node1 = shape.all_nodes.add_node() # Adding text node1.text_frame.text = "Test" # Adding new child node in parent node. It will be added in the end of collection new_node = node1.child_nodes.add_node() # Adding text new_node.text_frame.text = "New Node Added" # Saving Presentation pres.save("AddSmartArtNode_out.pptx", slides.export.SaveFormat.PPTX) ``` ## **Add SmartArt Node at Specific Position** In the following sample code we have explained how to add the child nodes belonging to respective nodes of SmartArt shape at particular position. - Create an instance of `Presentation` class. - Obtain the reference of first slide by using its Index. - Add a StackedList type SmartArt shape in accessed slide. - Access the first node in added SmartArt shape. - Now, add the Child Node for selected Node at position 2 and set its text. - Save the Presentation. ```py import aspose.pydrawing as draw import aspose.slides as slides import aspose.slides.smartart as art # Creating a presentation instance with slides.Presentation() as pres: # Access the presentation slide slide = pres.slides[0] # Add Smart Art IShape smart = slide.shapes.add_smart_art(0, 0, 400, 400, art.SmartArtLayoutType.STACKED_LIST) # Accessing the SmartArt node at index 0 node = smart.all_nodes[0] # Adding new child node at position 2 in parent node chNode = node.child_nodes.add_node_by_position(2) # Add text chNode.text_frame.text = "Sample text Added" # save Presentation pres.save("AddSmartArtNodeByPosition_out.pptx", slides.export.SaveFormat.PPTX) ``` ## **Access SmartArt Node** The following sample code will help to access nodes inside SmartArt shape. Please note that you cannot change the LayoutType of the SmartArt as it is read only and is set only when the SmartArt shape is added. - Create an instance of `Presentation` class and load the presentation with SmartArt Shape. - Obtain the reference of first slide by using its Index. - Traverse through every shape inside first slide. - Check if shape is of SmartArt type and Typecast selected shape to SmartArt if it is SmartArt. - Traverse through all Nodes inside SmartArt Shape. - Access and display information like SmartArt Node position, level and Text. ```py import aspose.pydrawing as draw import aspose.slides as slides import aspose.slides.smartart as art # Load the desired the presentation with slides.Presentation("AccessSmartArt.pptx") as pres: # Traverse through every shape inside first slide for shape in pres.slides[0].shapes: # Check if shape is of SmartArt type if type(shape) is art.SmartArt: # Traverse through all nodes inside SmartArt for i in range(len(shape.all_nodes)): # Accessing SmartArt node at index i node = shape.all_nodes[i] # Printing the SmartArt node parameters print("i = {0}, text = {1}, level = {2}, position = {3}".format(i, node.text_frame.text, node.level, node.position)) ``` ## **Access SmartArt Child Node** The following sample code will help to access the child nodes belonging to respective nodes of SmartArt shape. - Create an instance of PresentationEx class and load the presentation with SmartArt Shape. - Obtain the reference of first slide by using its Index. - Traverse through every shape inside first slide. - Check if shape is of SmartArt type and Typecast selected shape to SmartArtEx if it is SmartArt. - Traverse through all Nodes inside SmartArt Shape. - For every selected SmartArt shape Node, traverse through all Child Nodes inside particular node. - Access and display information like Child Node position, level and Text. ```py import aspose.pydrawing as draw import aspose.slides as slides import aspose.slides.smartart as art # Load the desired the presentation with slides.Presentation("AccessChildNodes.pptx") as pres: # Traverse through every shape inside first slide for shape in pres.slides[0].shapes: # Check if shape is of SmartArt type if type(shape) is art.SmartArt: # Traverse through all nodes inside SmartArt for node0 in shape.all_nodes: # Traversing through the child nodes for j in range(len(node0.child_nodes)): # Accessing the child node in SmartArt node node = node0.child_nodes[j] # Printing the SmartArt child node parameters print("j = {0}, text = {1}, level = {2}, position = {3}".format(j, node.text_frame.text, node.level, node.position)) ``` ## **Access SmartArt Child Node at Specific Position** In this example, we will learn to access the child nodes at some particular position belonging to respective nodes of SmartArt shape. - Create an instance of `Presentation` class. - Obtain the reference of first slide by using its Index. - Add a StackedList type SmartArt shape. - Access the added SmartArt shape. - Access the node at index 0 for accessed SmartArt shape. - Now, access the Child Node at position 1 for accessed SmartArt node using GetNodeByPosition() method. - Access and display information like Child Node position, level and Text. ```py import aspose.pydrawing as draw import aspose.slides as slides import aspose.slides.smartart as art # Instantiate the presentation with slides.Presentation() as pres: # Accessing the first slide slide = pres.slides[0] # Adding the SmartArt shape in first slide smart = slide.shapes.add_smart_art(0, 0, 400, 400, art.SmartArtLayoutType.STACKED_LIST) # Accessing the SmartArt node at index 0 node = smart.all_nodes[0] # Accessing the child node at position 1 in parent node position = 1 chNode = node.child_nodes[position] # Printing the SmartArt child node parameters print("j = {0}, text = {1}, level = {2}, position = {3}".format(position, chNode.text_frame.text, chNode.level, chNode.position)) ``` ## **Remove SmartArt Node** In this example, we will learn to remove the nodes inside SmartArt shape. - Create an instance of `Presentation` class and load the presentation with SmartArt Shape. - Obtain the reference of first slide by using its Index. - Traverse through every shape inside first slide. - Check if shape is of SmartArt type and Typecast selected shape to SmartArt if it is SmartArt. - Check if the SmartArt has more than 0 nodes. - Select the SmartArt node to be deleted. - Now, remove the selected node using RemoveNode() method* Save the Presentation. ```py import aspose.pydrawing as draw import aspose.slides as slides import aspose.slides.smartart as art # Load the desired the presentation with slides.Presentation("RemoveNode.pptx") as pres: # Traverse through every shape inside first slide for shape in pres.slides[0].shapes: # Check if shape is of SmartArt type if type(shape) is art.SmartArt: # Typecast shape to SmartArtEx if len(shape.all_nodes) > 0: # Accessing SmartArt node at index 0 node = shape.all_nodes[0] # Removing the selected node shape.all_nodes.remove_node(node) # save Presentation pres.save("RemoveSmartArtNode_out.pptx", slides.export.SaveFormat.PPTX) ``` ## **Remove SmartArt Node at Specific Position** In this example, we will learn to remove the nodes inside SmartArt shape at particular position. - Create an instance of `Presentation` class and load the presentation with SmartArt Shape. - Obtain the reference of first slide by using its Index. - Traverse through every shape inside first slide. - Check if shape is of SmartArt type and Typecast selected shape to SmartArt if it is SmartArt. - Select the SmartArt shape node at index 0. - Now, check if the selected SmartArt node has at least 2 child nodes. - Now, remove the child node at position 1 using the remove_node() method. - Save the Presentation. ```py import aspose.pydrawing as draw import aspose.slides as slides import aspose.slides.smartart as art # Load the desired the presentation with slides.Presentation("RemoveNodeSpecificPosition.pptx") as pres: # Traverse through every shape inside first slide for shape in pres.slides[0].shapes: # Check if shape is of SmartArt type if type(shape) is art.SmartArt: # Typecast shape to SmartArt if len(shape.all_nodes) > 0: # Accessing SmartArt node at index 0 node = shape.all_nodes[0] if len(node.child_nodes) >= 2: # Removing the child node at position 1 node.child_nodes.remove_node(1) # save Presentation pres.save("RemoveSmartArtNodeByPosition_out.pptx", slides.export.SaveFormat.PPTX) ``` ## **Set Custom Position for Child Node in SmartArt** Now Aspose.Slides for Python via .NET support for setting SmartArtShape X and Y properties. The code snippet below shows how to set custom SmartArtShape position, size and rotation also please note that adding new nodes causes a recalculation of the positions and sizes of all nodes. ```py import aspose.pydrawing as draw import aspose.slides as slides import aspose.slides.smartart as art # Create a presentation with slides.Presentation() as pres: smart = pres.slides[0].shapes.add_smart_art(20, 20, 600, 500, art.SmartArtLayoutType.ORGANIZATION_CHART) # Move SmartArt shape to new position node = smart.all_nodes[1] shape = node.shapes[1] shape.x += (shape.width * 2) shape.y -= (shape.height / 2) # Change SmartArt shape's widths node = smart.all_nodes[2] shape = node.shapes[1] shape.width += (shape.width / 2) # Change SmartArt shape's height node = smart.all_nodes[3] shape = node.shapes[1] shape.height += (shape.height / 2) # Change SmartArt shape's rotation node = smart.all_nodes[4] shape = node.shapes[1] shape.rotation = 90 pres.save("SmartArt.pptx", slides.export.SaveFormat.PPTX) ``` ## **Check Assistant Node** In the following sample code we will investigate how to identify Assistant Nodes in the SmartArt nodes collection and changing them. - Create an instance of PresentationEx class and load the presentation with SmartArt Shape. - Obtain the reference of second slide by using its Index. - Traverse through every shape inside first slide. - Check if shape is of SmartArt type and Typecast selected shape to SmartArtEx if it is SmartArt. - Traverse through all nodes inside SmartArt shape and check if they are Assistant Nodes. - Change the status of Assistant Node to normal node. - Save the Presentation. ```py import aspose.pydrawing as draw import aspose.slides as slides import aspose.slides.smartart as art # Creating a presentation instance with slides.Presentation("AssistantNode.pptx") as pres: # Traverse through every shape inside first slide for shape in pres.slides[0].shapes: # Check if shape is of SmartArt type if type(shape) is art.SmartArt: # Traversing through all nodes of SmartArt shape for node in shape.all_nodes: tc = node.text_frame.text # Check if node is Assitant node if node.is_assistant: # Setting Assitant node to false and making it normal node node.is_assistant = False # save Presentation pres.save("ChangeAssitantNode_out.pptx", slides.export.SaveFormat.PPTX) ``` ## **Set Node's Fill Format** Aspose.Slides for Python via .NET makes it possible to add custom SmartArt shapes and set their fill formats. This article explains how to create and access SmartArt shapes and set their fill format using Aspose.Slides for Python via .NET. Please follow the steps below: - Create an instance of the `Presentation` class. - Obtain the reference of a slide using its index. - Add a SmartArt shape by setting its LayoutType. - Set the FillFormat for the SmartArt shape nodes. - Write the modified presentation as a PPTX file. ```py import aspose.pydrawing as draw import aspose.slides as slides import aspose.slides.smartart as art with slides.Presentation() as presentation: # Accessing the slide slide = presentation.slides[0] # Adding SmartArt shape and nodes chevron = slide.shapes.add_smart_art(10, 10, 800, 60, art.SmartArtLayoutType.CLOSED_CHEVRON_PROCESS) node = chevron.all_nodes.add_node() node.text_frame.text = "Some text" # Setting node fill color for item in node.shapes: item.fill_format.fill_type = slides.FillType.SOLID item.fill_format.solid_fill_color.color = draw.Color.red # Saving Presentation presentation.save("FillFormat_SmartArt_ShapeNode_out.pptx", slides.export.SaveFormat.PPTX) ``` ## **Generate Thumbnail of SmartArt Node** Developers can generate a thumbnail of a node of a SmartArt by following the steps below: 1. Instantiate `Presentation` class that represents the PPTX file. 1. Add SmartArt. 1. Obtain the reference of a node by using its Index 1. Get the thumbnail image. 1. Save the thumbnail image in any desired image format. The example below generates a thumbnail of the shape of a SmartArt node ```py import aspose.slides as slides import aspose.slides.smartart as art # Instantiate Presentation class that represents the PPTX file with slides.Presentation() as presentation: # Add SmartArt smart = presentation.slides[0].shapes.add_smart_art(10, 10, 400, 300, art.SmartArtLayoutType.BASIC_CYCLE) # Obtain the reference of a node by using its Index node = smart.nodes[1] # Get thumbnail with node.shapes[0].get_image() as bmp: # save thumbnail bmp.save("SmartArt_ChildNote_Thumbnail_out.jpeg", slides.ImageFormat.JPEG) ``` ## **FAQ** ### Is SmartArt animation supported? Yes. SmartArt is treated as a regular shape, so you can [apply standard animations](https://docs.aspose.com/slides/python-net/shape-animation/) (entrance, exit, emphasis, motion paths) and adjust timing. You can also animate shapes inside SmartArt nodes when needed. ### How can I reliably locate a specific SmartArt on a slide if its internal ID is unknown? Assign and search by [alternative text](https://reference.aspose.com/slides/python-net/aspose.slides.smartart/smartart/alternative_text/). Setting a distinctive AltText on the SmartArt lets you find it programmatically without relying on internal identifiers. ### Will the SmartArt appearance be preserved when converting the presentation to PDF? Yes. Aspose.Slides renders SmartArt with high visual fidelity during [PDF export](https://docs.aspose.com/slides/python-net/convert-powerpoint-to-pdf/), preserving layout, colors, and effects. ### Can I extract an image of the entire SmartArt (for previews or reports)? Yes. You can render a SmartArt shape to [raster formats](https://reference.aspose.com/slides/python-net/aspose.slides.smartart/smartart/get_image/) or to [SVG](https://reference.aspose.com/slides/python-net/aspose.slides.smartart/smartart/write_as_svg/) for scalable vector output, making it suitable for thumbnails, reports, or web use. ## Related articles - [Manage SmartArt in PowerPoint Presentations Using Python](https://docs.aspose.com/slides/python-net/manage-smartart/) - [Manage PowerPoint SmartArt in Python](https://docs.aspose.com/slides/python-net/powerpoint-smartart/) # Manage SmartArt Graphics in Presentations Using Python > Automate PowerPoint SmartArt creation, editing, and styling in Python via .NET using Aspose.Slides, featuring concise code examples and performance-focused guidance. Source: https://docs.aspose.com/slides/python-net/manage-smartart-shape/ Updated: 2026-08-05 ## **Overview** Aspose.Slides allows you to create and manage SmartArt graphics in PowerPoint presentations programmatically. This article explains how to add a SmartArt shape to a slide, access existing SmartArt shapes, find SmartArt by a specific layout type, and update its visual appearance by changing the SmartArt style or color style. The examples show how to work with SmartArt shapes through the presentation slide’s shape collection, check whether a shape is SmartArt and then modify or inspect its properties. ## **Create SmartArt Shapes** Aspose.Slides for Python via .NET allows you to add custom SmartArt shapes to slides from scratch. The API makes this easy. To add a SmartArt shape to a slide: 1. Create an instance of the [Presentation](https://reference.aspose.com/slides/python-net/aspose.slides/presentation/) class. 1. Get the target slide by its index. 1. Add a SmartArt shape, specifying its layout type. 1. Save the modified presentation as a PPTX file. ```py import aspose.slides as slides import aspose.slides.smartart as smartart # Instantiate the Presentation class. with slides.Presentation() as presentation: # Access the presentation slide. slide = presentation.slides[0] # Add a SmartArt shape. smart_art = slide.shapes.add_smart_art(0, 0, 400, 400, smartart.SmartArtLayoutType.BASIC_BLOCK_LIST) # Save the presentation to disk. presentation.save("output.pptx", slides.export.SaveFormat.PPTX) ``` ## **Access SmartArt Shapes on Slides** The following code demonstrates how to access SmartArt shapes on a slide. The sample iterates through each shape on the slide and checks whether it is a [SmartArt](https://reference.aspose.com/slides/python-net/aspose.slides.smartart/smartart/) object. ```py import aspose.slides as slides import aspose.slides.smartart as smartart # Load a presentation file. with slides.Presentation("SmartArt.pptx") as presentation: # Iterate through every shape on the first slide. for shape in presentation.slides[0].shapes: # Check whether the shape is a SmartArt shape. if isinstance(shape, smartart.SmartArt): # Print the shape name. print("Shape name:", shape.name) ``` ## **Access SmartArt Shapes with a Specified Layout Type** The following example shows how to access a SmartArt shape with a specified layout type. Note that you cannot change a SmartArt’s layout type—it’s read-only and is set when the shape is created. 1. Create a [Presentation](https://reference.aspose.com/slides/python-net/aspose.slides/presentation/) instance and load the presentation that contains the SmartArt shape. 1. Get a reference to the first slide by index. 1. Iterate over every shape on the first slide. 1. Check whether the shape is a [SmartArt](https://reference.aspose.com/slides/python-net/aspose.slides.smartart/smartart/) object. 1. If the SmartArt shape’s layout type matches the one you need, perform the required actions. ```py import aspose.slides as slides import aspose.slides.smartart as smartart with slides.Presentation("SmartArt.pptx") as presentation: # Iterate through every shape on the first slide. for shape in presentation.slides[0].shapes: # Check whether the shape is a SmartArt shape. if isinstance(shape, smartart.SmartArt): # Check the SmartArt layout type. if shape.layout == smartart.SmartArtLayoutType.BASIC_BLOCK_LIST: print("Do something here...") ``` ## **Change the SmartArt Shape Style** The following example shows how to locate SmartArt shapes and change their style: 1. Create a [Presentation](https://reference.aspose.com/slides/python-net/aspose.slides/presentation/) and load the file that contains the SmartArt shape(s). 1. Get a reference to the first slide by index. 1. Iterate over each shape on the first slide. 1. Find the SmartArt shape with the specified style. 1. Assign the new style to the SmartArt shape. 1. Save the presentation. ```py import aspose.slides as slides import aspose.slides.smartart as smartart with slides.Presentation("SmartArt.pptx") as presentation: # Iterate through every shape on the first slide. for shape in presentation.slides[0].shapes: # Check whether the shape is a SmartArt shape. if isinstance(shape, smartart.SmartArt): # Check the SmartArt style. if shape.quick_style == smartart.SmartArtQuickStyleType.SIMPLE_FILL: # Change the SmartArt style. shape.quick_style = smartart.SmartArtQuickStyleType.CARTOON # Save the presentation. presentation.save("output.pptx", slides.export.SaveFormat.PPTX) ``` ## **Change the Color Style of SmartArt Shapes** This example shows how to change the color style of a SmartArt shape. The sample code locates a SmartArt shape with a specified color style and updates it. 1. Create an instance of the [Presentation](https://reference.aspose.com/slides/python-net/aspose.slides/presentation/) class and load the presentation that contains the SmartArt shape(s). 1. Get a reference to the first slide by index. 1. Iterate over each shape on the first slide. 1. Check whether the shape is a [SmartArt](https://reference.aspose.com/slides/python-net/aspose.slides.smartart/smartart/) object. 1. Locate the SmartArt shape with the specified color style. 1. Set the new color style for that SmartArt shape. 1. Save the presentation. ```py import aspose.slides as slides import aspose.slides.smartart as smartart with slides.Presentation("SmartArt.pptx") as presentation: # Iterate through every shape on the first slide. for shape in presentation.slides[0].shapes: # Check whether the shape is a SmartArt shape. if isinstance(shape, smartart.SmartArt): # Check the color type. if shape.color_style == smartart.SmartArtColorType.COLORED_FILL_ACCENT1: # Change the color type. shape.color_style = smartart.SmartArtColorType.COLORFUL_ACCENT_COLORS # Save the presentation. presentation.save("output.pptx", slides.export.SaveFormat.PPTX) ``` ## **FAQ** ### Can I animate SmartArt as a single object? Yes. SmartArt is a shape, so you can apply [standard animations](https://docs.aspose.com/slides/python-net/powerpoint-animation/) via the animations API (entrance, exit, emphasis, motion paths) just like for other shapes. ### How can I find a specific SmartArt on a slide if I don’t know its internal ID? Set and use the Alternative Text (AltText) and search for the shape by that value—this is a recommended way to locate the target shape. ### Can I group SmartArt with other shapes? Yes. You can group SmartArt with other shapes (pictures, tables, etc.) and then [manipulate the group](https://docs.aspose.com/slides/python-net/group/). ### How do I get an image of a specific SmartArt (e.g., for a preview or report)? Export a thumbnail/image of the shape; the library can [render individual shapes](https://docs.aspose.com/slides/python-net/create-shape-thumbnails/) to raster files (PNG/JPG/TIFF). ### Will the SmartArt appearance be preserved when converting the whole presentation to PDF? Yes. The rendering engine targets high fidelity for [PDF export](https://docs.aspose.com/slides/python-net/convert-powerpoint-to-pdf/), with a range of quality and compatibility options. ## Related articles - [SmartArt](https://docs.aspose.com/slides/python-net/examples/elements/smart-art/) - [Manage PowerPoint SmartArt in Python](https://docs.aspose.com/slides/python-net/powerpoint-smartart/) # Manage SmartArt in PowerPoint Presentations Using Python > Learn to build and edit PowerPoint SmartArt with Aspose.Slides for Python via .NET using clear code samples that speed up slide design and automation. Source: https://docs.aspose.com/slides/python-net/manage-smartart/ Updated: 2026-11-08 ## **Overview** SmartArt is a PowerPoint diagram made from nodes, node shapes, and a layout. With Aspose.Slides for Python via .NET, you can create SmartArt, read text from its nodes, change its layout, inspect hidden nodes, configure organization chart layouts, and create picture organization charts. ## **Get Text from a SmartArt Object** A SmartArt node can contain one or more shapes. To read text from the node shapes, iterate through [SmartArt.all_nodes](https://reference.aspose.com/slides/python-net/aspose.slides.smartart/smartart/all_nodes/), then read the [TextFrame](https://reference.aspose.com/slides/python-net/aspose.slides/textframe/) returned by [SmartArtShape.text_frame](https://reference.aspose.com/slides/python-net/aspose.slides.smartart/smartartshape/text_frame/). The example requires a presentation with at least one slide and a SmartArt object as the first shape on that slide. It prints each available text frame to the console. ```python import aspose.slides as slides import aspose.slides.smartart as smartart with slides.Presentation("sample.pptx") as presentation: slide = presentation.slides[0] shape = slide.shapes[0] if isinstance(shape, smartart.SmartArt): for node in shape.all_nodes: for node_shape in node.shapes: if node_shape.text_frame is not None: print(node_shape.text_frame.text) ``` ## **Change the Layout Type of a SmartArt Object** The SmartArt layout controls how nodes are arranged and connected. The following example creates a SmartArt object with the [SmartArtLayoutType](https://reference.aspose.com/slides/python-net/aspose.slides.smartart/smartartlayouttype/) `BASIC_BLOCK_LIST` value, changes it to the `BASIC_PROCESS` value, and saves the presentation. The position and size passed to [ShapeCollection.add_smart_art](https://reference.aspose.com/slides/python-net/aspose.slides/shapecollection/add_smart_art/) are measured in points. Set [SmartArt.layout](https://reference.aspose.com/slides/python-net/aspose.slides.smartart/smartart/layout/) to change the layout. ```python import aspose.slides as slides import aspose.slides.smartart as smartart with slides.Presentation() as presentation: slide = presentation.slides[0] smart_art = slide.shapes.add_smart_art(10, 10, 400, 300, smartart.SmartArtLayoutType.BASIC_BLOCK_LIST) smart_art.layout = smartart.SmartArtLayoutType.BASIC_PROCESS presentation.save("ChangeSmartArtLayout.pptx", slides.export.SaveFormat.PPTX) ``` ## **Check Whether a SmartArt Node Is Hidden** [SmartArtNode.is_hidden](https://reference.aspose.com/slides/python-net/aspose.slides.smartart/smartartnode/is_hidden/) indicates whether the node is hidden in the SmartArt data model. Hidden nodes can exist in the structure even when the selected layout does not display them as visible diagram elements. The following example adds a node to a SmartArt object that uses the [SmartArtLayoutType](https://reference.aspose.com/slides/python-net/aspose.slides.smartart/smartartlayouttype/) `RADIAL_CYCLE` value and checks the added node's hidden state. It prints a message if the node is hidden and saves the diagram. ```python import aspose.slides as slides import aspose.slides.smartart as smartart with slides.Presentation() as presentation: slide = presentation.slides[0] smart_art = slide.shapes.add_smart_art(10, 10, 400, 300, smartart.SmartArtLayoutType.RADIAL_CYCLE) node = smart_art.all_nodes.add_node() is_hidden = node.is_hidden if is_hidden: print("The node is hidden in the SmartArt data model.") presentation.save("CheckSmartArtHiddenProperty.pptx", slides.export.SaveFormat.PPTX) ``` ## **Get or Set the Organization Chart Layout** For SmartArt diagrams that use an organization chart layout, [SmartArtNode.organization_chart_layout](https://reference.aspose.com/slides/python-net/aspose.slides.smartart/smartartnode/organization_chart_layout/) defines how child nodes are arranged under a parent node. For example, you can set child nodes to hang from the left, right, or both sides, depending on the selected [OrganizationChartLayoutType](https://reference.aspose.com/slides/python-net/aspose.slides.smartart/organizationchartlayouttype/). The following example creates an organization chart and sets the layout for the first node to the [OrganizationChartLayoutType](https://reference.aspose.com/slides/python-net/aspose.slides.smartart/organizationchartlayouttype/) `LEFT_HANGING` value. The zero-based index `0` selects the first top-level node; its child nodes use the selected arrangement. The modified presentation is then saved. ```python import aspose.slides as slides import aspose.slides.smartart as smartart with slides.Presentation() as presentation: slide = presentation.slides[0] smart_art = slide.shapes.add_smart_art(10, 10, 400, 300, smartart.SmartArtLayoutType.ORGANIZATION_CHART) root_node = smart_art.nodes[0] root_node.organization_chart_layout = smartart.OrganizationChartLayoutType.LEFT_HANGING presentation.save("OrganizationChartLayout.pptx", slides.export.SaveFormat.PPTX) ``` [![The same labelled organization-chart nodes change from the default arrangement to left-hanging children under parent A.](https://docs.aspose.com/slides/python-net/manage-smartart/visual-smartart-layouts-3487c8138eeb.svg)](https://docs.aspose.com/slides/python-net/manage-smartart/visual-smartart-layouts-3487c8138eeb.svg) *Illustrative .NET 26.11 fixture with labels added for identification. LeftHanging changes the child arrangement of the selected top-level parent; it is distinct from changing the whole SmartArt layout type.* ## **Create a Picture Organization Chart** A picture organization chart is a SmartArt layout designed for hierarchy diagrams that include image placeholders. Use the [SmartArtLayoutType](https://reference.aspose.com/slides/python-net/aspose.slides.smartart/smartartlayouttype/) `PICTURE_ORGANIZATION_CHART` value when adding the SmartArt object to a slide. This example saves a diagram with image placeholders; it does not populate the placeholders with images. ```python import aspose.slides as slides import aspose.slides.smartart as smartart with slides.Presentation() as presentation: slide = presentation.slides[0] smart_art = slide.shapes.add_smart_art(0, 0, 400, 400, smartart.SmartArtLayoutType.PICTURE_ORGANIZATION_CHART) presentation.save("PictureOrganizationChart.pptx", slides.export.SaveFormat.PPTX) ``` ## **Convert Legacy Diagrams to Groups of Shapes** When modernizing an existing presentation, you may need to update an organization chart originally created in PowerPoint 97–2003. Aspose.Slides represents these legacy diagrams as [LegacyDiagram](https://reference.aspose.com/slides/python-net/aspose.slides/legacydiagram/) objects. Use [LegacyDiagram.convert_to_group_shape](https://reference.aspose.com/slides/python-net/aspose.slides/legacydiagram/convert_to_group_shape/) to convert a diagram into a group of shapes so that you can edit individual visual elements. See the [LegacyDiagram API Reference](https://reference.aspose.com/slides/python-net/aspose.slides/legacydiagram/) for details. Conversion adds a new group to the shape collection without removing the original diagram. After successful conversion, remove the original with [ShapeCollection.remove](https://reference.aspose.com/slides/python-net/aspose.slides/shapecollection/remove/) to avoid duplicate content. Collect the legacy diagrams into a list before converting them so that adding and removing shapes does not disrupt iteration. The following example opens a presentation, searches every slide, converts the diagrams to groups of shapes, and saves the updated presentation as PPTX. ```python import aspose.slides as slides with slides.Presentation("legacy-diagrams.ppt") as presentation: for slide in presentation.slides: legacy_diagrams = [shape for shape in slide.shapes if isinstance(shape, slides.LegacyDiagram)] for legacy_diagram in legacy_diagrams: group_shape = legacy_diagram.convert_to_group_shape() if group_shape is not None: slide.shapes.remove(legacy_diagram) presentation.save("modernized.pptx", slides.export.SaveFormat.PPTX) ``` The saved presentation contains editable groups of shapes in place of the converted legacy diagrams, with no original diagrams left alongside them. Open the PPTX in PowerPoint to edit individual elements within each group, such as their text, fill, or position. ## **FAQ** **Does SmartArt support mirroring or reversing for RTL languages?** Yes. The [SmartArt.is_reversed](https://reference.aspose.com/slides/python-net/aspose.slides.smartart/smartart/is_reversed/) property switches the diagram direction from left-to-right to right-to-left, or back, when the selected SmartArt layout supports reversal. **How can I copy SmartArt to the same slide or to another presentation while preserving formatting?** You can [clone the SmartArt shape](https://docs.aspose.com/slides/python-net/shape-manipulations/) with [ShapeCollection.add_clone](https://reference.aspose.com/slides/python-net/aspose.slides/shapecollection/add_clone/) or [clone the whole slide](https://docs.aspose.com/slides/python-net/clone-slides/) that contains the SmartArt. Both approaches preserve size, position, and formatting. **How do I render SmartArt to a raster image for preview or web export?** [Render the slide](https://docs.aspose.com/slides/python-net/convert-powerpoint-to-png/) or the whole presentation to PNG or JPEG. SmartArt is rendered as part of the slide. **How can I find a specific SmartArt object on a slide if there are several?** Set a distinctive [Shape.alternative_text](https://reference.aspose.com/slides/python-net/aspose.slides/shape/alternative_text/) or [Shape.name](https://reference.aspose.com/slides/python-net/aspose.slides/shape/name/) value on the SmartArt shape, search for that value in [Slide.shapes](https://reference.aspose.com/slides/python-net/aspose.slides/slide/shapes/), and then check that the matching shape is a [SmartArt](https://reference.aspose.com/slides/python-net/aspose.slides.smartart/smartart/). ## Related articles - [Manage PowerPoint SmartArt in Python](https://docs.aspose.com/slides/python-net/powerpoint-smartart/) - [Manage SmartArt Shape Nodes in Presentations Using Python](https://docs.aspose.com/slides/python-net/manage-smartart-shape-node/) - [SmartArt](https://docs.aspose.com/slides/python-net/examples/elements/smart-art/) # Manage Presentation Tables with Python > Create & edit tables in PowerPoint and OpenDocument slides with Aspose.Slides for Python via .NET. Discover simple code examples to streamline your table workflows. Source: https://docs.aspose.com/slides/python-net/manage-table/ Updated: 2026-10-26 ## **Introduction** Tables in PowerPoint organize information into rows and columns, making it easier to read and compare values. Aspose.Slides provides the [Table](https://reference.aspose.com/slides/python-net/aspose.slides/table/) and [Cell](https://reference.aspose.com/slides/python-net/aspose.slides/cell/) classes and other types to allow you to create, update, and manage tables in presentations. ## **Create a Table from Scratch** Create a table by specifying its position, column widths, and row heights. After adding it to a slide, you can format cell borders, merge cells, and insert text. 1. Create an instance of the [Presentation](https://reference.aspose.com/slides/python-net/aspose.slides/presentation/) class. 2. Get a reference to the slide by its index. 3. Define a list of column widths in points. 4. Define a list of row heights in points. 5. Add a [Table](https://reference.aspose.com/slides/python-net/aspose.slides/table/) object to the slide through the [add_table](https://reference.aspose.com/slides/python-net/aspose.slides/shapecollection/add_table/) method. 6. Iterate through each [Cell](https://reference.aspose.com/slides/python-net/aspose.slides/cell/) to apply formatting to the top, bottom, right, and left borders. 7. Merge the first two cells of the table's first row. 8. Access the merged cell through its [text_frame](https://reference.aspose.com/slides/python-net/aspose.slides/cell/text_frame/) property. 9. Set the text in the merged cell. 10. Save the modified presentation. The example below creates a table with three columns and five rows at (100, 50) points. It applies red borders with a width of 5 points, merges the first two cells in the first row, and saves the result as `table.pptx`. ```python import aspose.pydrawing as draw import aspose.slides as slides with slides.Presentation() as presentation: slide = presentation.slides[0] column_widths = [50, 50, 50] row_heights = [50, 30, 30, 30, 30] table = slide.shapes.add_table(100, 50, column_widths, row_heights) for row in table.rows: for cell in row: cell_format = cell.cell_format cell_format.border_top.fill_format.fill_type = slides.FillType.SOLID cell_format.border_top.fill_format.solid_fill_color.color = draw.Color.red cell_format.border_top.width = 5 cell_format.border_bottom.fill_format.fill_type = slides.FillType.SOLID cell_format.border_bottom.fill_format.solid_fill_color.color = draw.Color.red cell_format.border_bottom.width = 5 cell_format.border_left.fill_format.fill_type = slides.FillType.SOLID cell_format.border_left.fill_format.solid_fill_color.color = draw.Color.red cell_format.border_left.width = 5 cell_format.border_right.fill_format.fill_type = slides.FillType.SOLID cell_format.border_right.fill_format.solid_fill_color.color = draw.Color.red cell_format.border_right.width = 5 table.merge_cells(table.rows[0][0], table.rows[0][1], False) table.rows[0][0].text_frame.text = "Merged Cells" presentation.save("table.pptx", slides.export.SaveFormat.PPTX) ``` ## **Numbering in a Standard Table** In a standard table, cell indices are zero-based and use the order (column, row). The first cell is indexed as (0, 0). In Python, access a cell with `table.rows[row_index][column_index]`; the row index comes first in this expression. For example, the cells in a table with 4 columns and 4 rows are numbered this way: | (0, 0) | (1, 0) | (2, 0) | (3, 0) | | :----- | :----- | :----- | :----- | | (0, 1) | (1, 1) | (2, 1) | (3, 1) | | (0, 2) | (1, 2) | (2, 2) | (3, 2) | | (0, 3) | (1, 3) | (2, 3) | (3, 3) | This example creates the 4 × 4 table illustrated above, with column widths and row heights of 70 points and red cell borders with a width of 5 points. The coordinates illustrate cell indices; the example leaves the cells empty and saves the table as `StandardTables_out.pptx`. ```python import aspose.pydrawing as draw import aspose.slides as slides with slides.Presentation() as presentation: slide = presentation.slides[0] column_widths = [70, 70, 70, 70] row_heights = [70, 70, 70, 70] table = slide.shapes.add_table(100, 50, column_widths, row_heights) for row in table.rows: for cell in row: cell_format = cell.cell_format cell_format.border_top.fill_format.fill_type = slides.FillType.SOLID cell_format.border_top.fill_format.solid_fill_color.color = draw.Color.red cell_format.border_top.width = 5 cell_format.border_bottom.fill_format.fill_type = slides.FillType.SOLID cell_format.border_bottom.fill_format.solid_fill_color.color = draw.Color.red cell_format.border_bottom.width = 5 cell_format.border_left.fill_format.fill_type = slides.FillType.SOLID cell_format.border_left.fill_format.solid_fill_color.color = draw.Color.red cell_format.border_left.width = 5 cell_format.border_right.fill_format.fill_type = slides.FillType.SOLID cell_format.border_right.fill_format.solid_fill_color.color = draw.Color.red cell_format.border_right.width = 5 presentation.save("StandardTables_out.pptx", slides.export.SaveFormat.PPTX) ``` ## **Access an Existing Table** Tables are stored in a slide's shape collection. Iterate through the shapes to locate a table, then use the [Table](https://reference.aspose.com/slides/python-net/aspose.slides/table/) class to read or update its cells. 1. Load the presentation using the [Presentation](https://reference.aspose.com/slides/python-net/aspose.slides/presentation/) class. 2. Get a reference to the slide containing the table by its index. 3. Iterate through the [Shape](https://reference.aspose.com/slides/python-net/aspose.slides/shape/) objects and stop when a table is found. If the slide contains several tables, use [alternative_text](https://reference.aspose.com/slides/python-net/aspose.slides/shape/alternative_text/) to identify the one you need. 4. Update the text in the target cell. 5. Save the modified presentation. The example below opens `UpdateExistingTable.pptx` and finds the first table on the first slide. It sets the cell at column 0, row 1 to `New` and saves the result as `table1_out.pptx`. The input must contain at least one slide, and the first table on that slide must have at least one column and two rows. ```python import aspose.slides as slides with slides.Presentation("UpdateExistingTable.pptx") as presentation: slide = presentation.slides[0] table = None for shape in slide.shapes: if isinstance(shape, slides.Table): table = shape break if table is not None and len(table.rows) >= 2: table.rows[1][0].text_frame.text = "New" presentation.save("table1_out.pptx", slides.export.SaveFormat.PPTX) ``` To resize a row in an existing table and understand why its actual height can exceed the requested minimum, see [Control Row Height](https://docs.aspose.com/slides/python-net/manage-rows-and-columns/#control-row-height). ## **Find the Cell That Owns a Text Frame** When generic text-processing code receives a [TextFrame](https://reference.aspose.com/slides/python-net/aspose.slides/textframe/) from a table, use the [TextFrame.parent_cell](https://reference.aspose.com/slides/python-net/aspose.slides/textframe/parent_cell/) property to retrieve the owning [Cell](https://reference.aspose.com/slides/python-net/aspose.slides/cell/). For a table-cell text frame, [TextFrame.parent_cell](https://reference.aspose.com/slides/python-net/aspose.slides/textframe/parent_cell/) is set and [TextFrame.parent_shape](https://reference.aspose.com/slides/python-net/aspose.slides/textframe/parent_shape/) is `None`, even though the table itself is a shape. The cell coordinates are available through the read-only [Cell.first_column_index](https://reference.aspose.com/slides/python-net/aspose.slides/cell/first_column_index/) and [Cell.first_row_index](https://reference.aspose.com/slides/python-net/aspose.slides/cell/first_row_index/) properties. [TextFrame.parent_cell](https://reference.aspose.com/slides/python-net/aspose.slides/textframe/parent_cell/) is also read-only: it provides navigation to the owner but does not change ownership. Always check the returned cell for `None` before using it. For a complete example that identifies table-cell and shape owners, including shapes associated with SmartArt nodes, see [Search and Replace Text](https://docs.aspose.com/slides/python-net/search-and-replace-text/). ## **Align Text in a Table** You can control the vertical anchoring and text direction of individual table cells. The example in this section centers text within the first cell and rotates it by 270 degrees. 1. Create an instance of the [Presentation](https://reference.aspose.com/slides/python-net/aspose.slides/presentation/) class. 2. Get a reference to the slide by its index. 3. Add a [Table](https://reference.aspose.com/slides/python-net/aspose.slides/table/) object to the slide. 4. Access a [TextFrame](https://reference.aspose.com/slides/python-net/aspose.slides/textframe/) object from the table. 5. Access the first [Paragraph](https://reference.aspose.com/slides/python-net/aspose.slides/paragraph/) and set its text and color. 6. Set the cell's [text_anchor_type](https://reference.aspose.com/slides/python-net/aspose.slides/cell/text_anchor_type/) and [text_vertical_type](https://reference.aspose.com/slides/python-net/aspose.slides/cell/text_vertical_type/). 7. Save the modified presentation. This example creates a 4 × 4 table with column widths of 120 points and row heights of 100 points. It formats the text in cell (0, 0), adds values to the remaining cells in the first row, and saves the result as `Vertical_Align_Text_out.pptx`. ```python import aspose.pydrawing as draw import aspose.slides as slides with slides.Presentation() as presentation: slide = presentation.slides[0] column_widths = [120, 120, 120, 120] row_heights = [100, 100, 100, 100] table = slide.shapes.add_table(100, 50, column_widths, row_heights) table.rows[0][1].text_frame.text = "10" table.rows[0][2].text_frame.text = "20" table.rows[0][3].text_frame.text = "30" cell = table.rows[0][0] paragraph = cell.text_frame.paragraphs[0] portion = paragraph.portions[0] portion.text = "Text here" portion.portion_format.fill_format.fill_type = slides.FillType.SOLID portion.portion_format.fill_format.solid_fill_color.color = draw.Color.black cell.text_anchor_type = slides.TextAnchorType.CENTER cell.text_vertical_type = slides.TextVerticalType.VERTICAL270 presentation.save("Vertical_Align_Text_out.pptx", slides.export.SaveFormat.PPTX) ``` ## **Set Text Formatting on the Table Level** Use [set_text_format](https://reference.aspose.com/slides/python-net/aspose.slides/table/set_text_format/) to apply text formatting to all cells in a table. Its overloads accept portion, paragraph, and text frame formatting, so you can set these properties without iterating through individual cells. 1. Load the presentation using the [Presentation](https://reference.aspose.com/slides/python-net/aspose.slides/presentation/) class. 2. Get a reference to the slide by its index. 3. Access a [Table](https://reference.aspose.com/slides/python-net/aspose.slides/table/) object from the slide. 4. Set the [font_height](https://reference.aspose.com/slides/python-net/aspose.slides/baseportionformat/font_height/) for the text. 5. Set the [alignment](https://reference.aspose.com/slides/python-net/aspose.slides/paragraphformat/alignment/) and [margin_right](https://reference.aspose.com/slides/python-net/aspose.slides/paragraphformat/margin_right/). 6. Set the [text_vertical_type](https://reference.aspose.com/slides/python-net/aspose.slides/textframeformat/text_vertical_type/). 7. Save the modified presentation. The example below opens `table.pptx`, which must contain at least one slide with a table as its first shape. It sets the font size to 25 points, right-aligns paragraphs with a right margin of 20 points, and makes the text vertical. The formatted presentation is saved as `result.pptx`. ```python import aspose.slides as slides with slides.Presentation("table.pptx") as presentation: slide = presentation.slides[0] table = slide.shapes[0] portion_format = slides.PortionFormat() portion_format.font_height = 25 table.set_text_format(portion_format) paragraph_format = slides.ParagraphFormat() paragraph_format.alignment = slides.TextAlignment.RIGHT paragraph_format.margin_right = 20 table.set_text_format(paragraph_format) text_frame_format = slides.TextFrameFormat() text_frame_format.text_vertical_type = slides.TextVerticalType.VERTICAL table.set_text_format(text_frame_format) presentation.save("result.pptx", slides.export.SaveFormat.PPTX) ``` ## **Get Table Style Properties** Use [style_preset](https://reference.aspose.com/slides/python-net/aspose.slides/table/style_preset/) to read or assign a table's preset style. This example applies [TableStylePreset.DARK_STYLE1](https://reference.aspose.com/slides/python-net/aspose.slides/tablestylepreset/) to one table, prints the preset name, and assigns the same preset to a second table. Both tables are saved in `table-style.pptx`. ```python import aspose.slides as slides with slides.Presentation() as presentation: slide = presentation.slides[0] column_widths = [100, 150] row_heights = [5, 5, 5] table = slide.shapes.add_table(10, 10, column_widths, row_heights) table.style_preset = slides.TableStylePreset.DARK_STYLE1 style_preset = table.style_preset print(f"Table style preset: {style_preset.name}") another_table = slide.shapes.add_table(10, 100, column_widths, row_heights) another_table.style_preset = style_preset presentation.save("table-style.pptx", slides.export.SaveFormat.PPTX) ``` ## **Lock Aspect Ratio of a Table** A table's aspect ratio is the ratio of its width to its height. Use [aspect_ratio_locked](https://reference.aspose.com/slides/python-net/aspose.slides/graphicalobjectlock/aspect_ratio_locked/) to lock this ratio for a table. The example below opens `pres.pptx`, which must contain at least one slide with a table as its first shape. It prints the current lock state, enables the aspect ratio lock, prints the updated state (`True`), and saves the result as `pres-out.pptx`. ```python import aspose.slides as slides with slides.Presentation("pres.pptx") as presentation: slide = presentation.slides[0] table = slide.shapes[0] print(f"Lock aspect ratio set: {table.shape_lock.aspect_ratio_locked}") table.shape_lock.aspect_ratio_locked = True print(f"Lock aspect ratio set: {table.shape_lock.aspect_ratio_locked}") presentation.save("pres-out.pptx", slides.export.SaveFormat.PPTX) ``` ## **FAQ** **Can I enable right-to-left (RTL) reading direction for an entire table and the text in its cells?** Yes. The table exposes a [right_to_left](https://reference.aspose.com/slides/python-net/aspose.slides/table/right_to_left/) property, and paragraphs have [ParagraphFormat.right_to_left](https://reference.aspose.com/slides/python-net/aspose.slides/paragraphformat/right_to_left/). Using both ensures the correct RTL order and rendering inside cells. **How can I prevent users from moving or resizing a table in the final file?** Use [shape locks](https://docs.aspose.com/slides/python-net/applying-protection-to-presentation/) to disable moving, resizing, selection, etc. These locks apply to tables as well. **Is inserting an image inside a cell as a background supported?** Yes. You can set a [picture fill](https://reference.aspose.com/slides/python-net/aspose.slides/picturefillformat/) for a cell; the image will cover the cell area according to the chosen mode (stretch or tile). Related feature: [Create tables on slides](https://docs.aspose.com/slides/features/create-tables/). ## Related articles - [Manage Table Cells in Presentations with Python](https://docs.aspose.com/slides/python-net/manage-cells/) - [Create and Customize PowerPoint Tables in Python](https://docs.aspose.com/slides/python-net/powerpoint-table/) - [Manage Rows and Columns in PowerPoint Tables Using Python](https://docs.aspose.com/slides/python-net/manage-rows-and-columns/) # Manage Text in Presentations with Python > Learn to manage text in Aspose.Slides for Python via .NET: edit placeholders, fonts, paragraphs, and bullets with clear code examples for PPT, PPTX, and ODP. Source: https://docs.aspose.com/slides/python-net/manage-text/ Updated: 2025-08-03 --- lastmod: 2025-08-03T12:20:36+04:00 title: Manage Text in Presentations with Python linktitle: Manage Text type: docs weight: 50 url: /python-net/manage-text/ keywords: - text - placeholder - text box - autofit - paragraph - format text - animate text - bulleted list - numbered list - superscript - subscript - text extration - localization - WordArt - PowerPoint - OpenDocument - presentation - Aspose.Slides description: "Learn to manage text in Aspose.Slides for Python via .NET: edit placeholders, fonts, paragraphs, and bullets with clear code examples for PPT, PPTX, and ODP." --- ## Related articles - [Manage Bulleted and Numbered Lists in Presentations in Python](https://docs.aspose.com/slides/python-net/manage-lists/) - [Manage Superscript and Subscript in Python](https://docs.aspose.com/slides/python-net/superscript-and-subscript/) # Manage Text Boxes in Presentations with Python > Create, identify, format, and update text boxes in PowerPoint and OpenDocument presentations using Aspose.Slides for Python via .NET. Source: https://docs.aspose.com/slides/python-net/manage-textbox/ Updated: 2026-09-03 ## **Introduction** In Aspose.Slides for Python via .NET, slide text is stored in text frames that belong to shapes. The [AutoShape](https://reference.aspose.com/slides/python-net/aspose.slides/autoshape/) class represents the most common text-bearing shape and exposes its text through the [AutoShape.text_frame](https://reference.aspose.com/slides/python-net/aspose.slides/autoshape/text_frame/) property. Every auto shape inherits from [Shape](https://reference.aspose.com/slides/python-net/aspose.slides/shape/), but not every shape is an auto shape or supports a text frame. When processing an existing presentation, use `isinstance(shape, slides.AutoShape)` to check the shape type before accessing its text. ## **Create a Text Box on a Slide** To create a text box, add an auto shape to a slide, add text to its text frame, and save the presentation. The following example creates a rectangular text box: ```python import aspose.slides as slides with slides.Presentation() as presentation: slide = presentation.slides[0] text_box = slide.shapes.add_auto_shape(slides.ShapeType.RECTANGLE, 150, 75, 300, 50) text_box.add_text_frame("Aspose TextBox") presentation.save("TextBox.pptx", slides.export.SaveFormat.PPTX) ``` The coordinates and dimensions passed to [ShapeCollection.add_auto_shape](https://reference.aspose.com/slides/python-net/aspose.slides/shapecollection/add_auto_shape/) are measured in points. [AutoShape.add_text_frame](https://reference.aspose.com/slides/python-net/aspose.slides/autoshape/add_text_frame/) initializes the text frame with the supplied text. ## **Check for a Text Box Shape** Use the [AutoShape.is_text_box](https://reference.aspose.com/slides/python-net/aspose.slides/autoshape/is_text_box/) property to determine whether an auto shape is treated as a text box. This is useful when a presentation contains both text-bearing and purely graphical auto shapes. ![A text box and a shape](https://docs.aspose.com/slides/python-net/manage-textbox/istextbox.png) The following example inspects every auto shape in a presentation: ```python import aspose.slides as slides with slides.Presentation() as presentation: slide = presentation.slides[0] text_box = slide.shapes.add_auto_shape(slides.ShapeType.RECTANGLE, 10, 10, 120, 40) text_box.add_text_frame("Text box") slide.shapes.add_auto_shape(slides.ShapeType.ELLIPSE, 150, 10, 40, 40) for current_slide in presentation.slides: for shape in current_slide.shapes: if isinstance(shape, slides.AutoShape): print("The shape is a text box." if shape.is_text_box else "The shape is not a text box.") ``` A newly added auto shape is not considered a text box until it contains non-empty text. You can supply that text through [AutoShape.add_text_frame](https://reference.aspose.com/slides/python-net/aspose.slides/autoshape/add_text_frame/) or [TextFrame.text](https://reference.aspose.com/slides/python-net/aspose.slides/textframe/text/). Adding or assigning an empty string leaves [is_text_box](https://reference.aspose.com/slides/python-net/aspose.slides/autoshape/is_text_box/) set to `False`: ```python import aspose.slides as slides with slides.Presentation() as presentation: slide = presentation.slides[0] shape1 = slide.shapes.add_auto_shape(slides.ShapeType.RECTANGLE, 10, 10, 100, 40) shape1.add_text_frame("Shape 1") print(shape1.is_text_box) shape2 = slide.shapes.add_auto_shape(slides.ShapeType.RECTANGLE, 10, 70, 100, 40) shape2.text_frame.text = "Shape 2" print(shape2.is_text_box) shape3 = slide.shapes.add_auto_shape(slides.ShapeType.RECTANGLE, 10, 130, 100, 40) shape3.add_text_frame("") print(shape3.is_text_box) shape4 = slide.shapes.add_auto_shape(slides.ShapeType.RECTANGLE, 10, 190, 100, 40) shape4.text_frame.text = "" print(shape4.is_text_box) ``` The first two calls print `True`; the last two print `False`. ## **Find the Shape That Owns a Text Frame** Generic text-processing code may receive a [TextFrame](https://reference.aspose.com/slides/python-net/aspose.slides/textframe/) without knowing which presentation object contains it. Use the read-only [TextFrame.parent_shape](https://reference.aspose.com/slides/python-net/aspose.slides/textframe/parent_shape/) property to navigate back to its owning [Shape](https://reference.aspose.com/slides/python-net/aspose.slides/shape/). For a text frame owned by an auto shape or another text-bearing shape, [parent_shape](https://reference.aspose.com/slides/python-net/aspose.slides/textframe/parent_shape/) contains the owner and [TextFrame.parent_cell](https://reference.aspose.com/slides/python-net/aspose.slides/textframe/parent_cell/) is `None`. Check the returned value before accessing it. To identify both shape and table-cell owners, including shapes associated with SmartArt nodes, see [Search and Replace Text](https://docs.aspose.com/slides/python-net/search-and-replace-text/). ## **Add Columns to a Text Box** The [TextFrameFormat.column_count](https://reference.aspose.com/slides/python-net/aspose.slides/textframeformat/column_count/) property divides the text frame into columns, while [TextFrameFormat.column_spacing](https://reference.aspose.com/slides/python-net/aspose.slides/textframeformat/column_spacing/) sets the gap between columns in points. Both settings belong to [TextFrameFormat](https://reference.aspose.com/slides/python-net/aspose.slides/textframeformat/) and can be changed through the text frame of an existing text box. Text reflows between columns inside the same shape; it does not continue into another shape. The following example creates a three-column text box with 10 points between columns, saves the presentation, and reads the stored settings back from the output file: ```python import aspose.slides as slides with slides.Presentation() as presentation: slide = presentation.slides[0] text_box = slide.shapes.add_auto_shape(slides.ShapeType.RECTANGLE, 100, 100, 300, 200) text_box.add_text_frame("This text is distributed automatically across all columns in the text box.") text_frame_format = text_box.text_frame.text_frame_format text_frame_format.column_count = 3 text_frame_format.column_spacing = 10 presentation.save("TextBoxColumns.pptx", slides.export.SaveFormat.PPTX) with slides.Presentation("TextBoxColumns.pptx") as saved_presentation: saved_text_box = saved_presentation.slides[0].shapes[0] if isinstance(saved_text_box, slides.AutoShape): saved_format = saved_text_box.text_frame.text_frame_format print(f"Columns: {saved_format.column_count}; spacing: {saved_format.column_spacing} points") ``` ## **Extract Text from Individual Columns** Use [TextFrame.split_text_by_columns](https://reference.aspose.com/slides/python-net/aspose.slides/textframe/split_text_by_columns/) to retrieve the text assigned to each visual column in an existing text frame. The method returns one string for each column, in column-based reading order. A single-column text frame produces a list with one element, and an empty column is represented by an empty string. The strings contain plain text only; portion-level formatting is not preserved. This is useful when you need to: - Extract text while preserving its column-based reading order. - Index or compare the content of multi-column slides. - Export each column to a separate file, database field, or other destination. - Inspect how text is redistributed after changing [TextFrameFormat.column_count](https://reference.aspose.com/slides/python-net/aspose.slides/textframeformat/column_count/), [TextFrameFormat.column_spacing](https://reference.aspose.com/slides/python-net/aspose.slides/textframeformat/column_spacing/), the font, or the text-frame size. The method reports the text distributed within the current [TextFrame](https://reference.aspose.com/slides/python-net/aspose.slides/textframe/); it does not automatically flow text between separate shapes or text boxes. Column distribution can depend on available fonts and other text-layout settings, so make sure that the required fonts are available when consistent results are important. The following example loads a presentation, finds the first multi-column auto shape with a text frame, reads its configured column count, and writes the text from every column to a separate file. Shapes that do not provide a text frame are skipped. ```python import aspose.slides as slides with slides.Presentation("MultiColumnText.pptx") as presentation: text_box = None for shape in presentation.slides[0].shapes: if isinstance(shape, slides.AutoShape) and shape.text_frame is not None: column_count = shape.text_frame.text_frame_format.column_count if column_count > 1: text_box = shape break if text_box is None: print("No multi-column text frame was found.") else: text_frame = text_box.text_frame configured_column_count = text_frame.text_frame_format.column_count column_texts = text_frame.split_text_by_columns() print(f"Configured columns: {configured_column_count}") for column_number, column_text in enumerate(column_texts, start=1): print(f"Column {column_number}: {column_text}") with open(f"Column-{column_number}.txt", "w", encoding="utf-8") as column_file: column_file.write(column_text) ``` ## **Update Text** To update text throughout a presentation, iterate through the slides and shapes, select auto shapes, and then edit their text portions. Working at the portion level lets you change both text and character formatting. The following example replaces every occurrence of `years` with `months` in auto-shape text and makes each affected portion bold: ```python import aspose.slides as slides with slides.Presentation("Text.pptx") as presentation: for slide in presentation.slides: for shape in slide.shapes: if not isinstance(shape, slides.AutoShape) or shape.text_frame is None: continue for paragraph in shape.text_frame.paragraphs: for portion in paragraph.portions: if "years" in portion.text: portion.text = portion.text.replace("years", "months") portion.portion_format.font_bold = slides.NullableBool.TRUE presentation.save("TextChanged.pptx", slides.export.SaveFormat.PPTX) ``` This traversal updates text only in auto shapes. Text stored in tables, charts, SmartArt, or grouped shapes requires traversal of those objects' own collections. ## **Add a Text Box with a Hyperlink** A hyperlink can be assigned to a specific text portion, so only that text acts as the clickable link. Use [HyperlinkManager.set_external_hyperlink_click](https://reference.aspose.com/slides/python-net/aspose.slides/hyperlinkmanager/set_external_hyperlink_click/) to associate the portion with an external URL. The following example creates linked text and saves it to a presentation: ```python import aspose.slides as slides with slides.Presentation() as presentation: slide = presentation.slides[0] text_box = slide.shapes.add_auto_shape(slides.ShapeType.RECTANGLE, 150, 150, 200, 50) text_box.add_text_frame("Aspose.Slides") text_portion = text_box.text_frame.paragraphs[0].portions[0] text_portion.portion_format.hyperlink_manager.set_external_hyperlink_click("https://www.aspose.com/") presentation.save("Hyperlink.pptx", slides.export.SaveFormat.PPTX) ``` ## **FAQ** **What is the difference between a text box and a text placeholder on a master or layout slide?** A [placeholder](https://docs.aspose.com/slides/python-net/manage-placeholder/) can inherit its position and formatting from a [master slide](https://reference.aspose.com/slides/python-net/aspose.slides/masterslide/) or [layout slide](https://reference.aspose.com/slides/python-net/aspose.slides/layoutslide/). A regular text box is an independent shape on the slide where it was created and does not acquire placeholder behavior when the layout changes. **How can I replace text without changing text in charts, tables, or SmartArt?** Limit the traversal to [AutoShape](https://reference.aspose.com/slides/python-net/aspose.slides/autoshape/) instances, as shown in the Update Text example. Charts, tables, and SmartArt store text in their own object models, so they are not modified by that loop. # Manage Presentation Zoom with Python > Create and customize Zoom with Aspose.Slides for Python via .NET — jump between sections, add thumbnails and transitions in PowerPoint presentations. Source: https://docs.aspose.com/slides/python-net/manage-zoom/ Updated: 2026-11-09 ## **Introduction** PowerPoint zooms let you navigate between specific slides and sections during a slide show. With Aspose.Slides for Python via .NET, you can create slide, section, and summary zooms and customize their previews, borders, and transitions. ![PowerPoint zoom overview](https://docs.aspose.com/slides/python-net/manage-zoom/overview.png) * To summarize an entire presentation on a single slide, use a [Summary Zoom](https://docs.aspose.com/slides/python-net/manage-zoom/#summary-zoom). * To show selected slides only, use a [Slide Zoom](https://docs.aspose.com/slides/python-net/manage-zoom/#slide-zoom). * To show a single section only, use a [Section Zoom](https://docs.aspose.com/slides/python-net/manage-zoom/#section-zoom). ## **Slide Zoom** A slide zoom can make your presentation more dynamic, allowing you to navigate freely between slides in any order you choose without interrupting the flow of your presentation. Slide zooms are great for short presentations without many sections, but you can still use them in different presentation scenarios. Slide zooms let you explore related information from a single overview slide. ![Selecting slides for a slide zoom](https://docs.aspose.com/slides/python-net/manage-zoom/slidezoomsel.png) For slide zoom objects, Aspose.Slides provides the [ZoomImageType](https://reference.aspose.com/slides/python-net/aspose.slides/zoomimagetype/) enumeration, the [ZoomFrame](https://reference.aspose.com/slides/python-net/aspose.slides/zoomframe/) class, and methods on the [ShapeCollection](https://reference.aspose.com/slides/python-net/aspose.slides/shapecollection/) class. ### **Create Zoom Frames** Use [ShapeCollection.add_zoom_frame](https://reference.aspose.com/slides/python-net/aspose.slides/shapecollection/add_zoom_frame/) to place links to individual slides on an overview slide. This example creates two target slides with distinct backgrounds and labels, then adds a preview of each to the first slide and saves the presentation as PPTX. Frame positions and dimensions are specified in points. ```python import aspose.pydrawing as draw import aspose.slides as slides with slides.Presentation() as presentation: overview_slide = presentation.slides[0] second_slide = presentation.slides.add_empty_slide(overview_slide.layout_slide) third_slide = presentation.slides.add_empty_slide(overview_slide.layout_slide) second_slide.background.type = slides.BackgroundType.OWN_BACKGROUND second_slide.background.fill_format.fill_type = slides.FillType.SOLID second_slide.background.fill_format.solid_fill_color.color = draw.Color.cyan text_box = second_slide.shapes.add_auto_shape(slides.ShapeType.RECTANGLE, 100, 200, 500, 200) text_box.text_frame.text = "Second Slide" third_slide.background.type = slides.BackgroundType.OWN_BACKGROUND third_slide.background.fill_format.fill_type = slides.FillType.SOLID third_slide.background.fill_format.solid_fill_color.color = draw.Color.dark_khaki text_box = third_slide.shapes.add_auto_shape(slides.ShapeType.RECTANGLE, 100, 200, 500, 200) text_box.text_frame.text = "Third Slide" overview_slide.shapes.add_zoom_frame(20, 20, 250, 200, second_slide) overview_slide.shapes.add_zoom_frame(200, 250, 250, 200, third_slide) presentation.save("presentation.pptx", slides.export.SaveFormat.PPTX) ``` ### **Create Zoom Frames with Custom Images** Pass a custom image to [ShapeCollection.add_zoom_frame](https://reference.aspose.com/slides/python-net/aspose.slides/shapecollection/add_zoom_frame/) to replace the target slide's default preview. This example requires a local image, loads it with [Images.from_file](https://reference.aspose.com/slides/python-net/aspose.slides/images/from_file/), and adds it to the presentation using [ImageCollection.add_image](https://reference.aspose.com/slides/python-net/aspose.slides/imagecollection/add_image/). The resulting frame displays that image while still linking to the second slide. ```python import aspose.pydrawing as draw import aspose.slides as slides with slides.Presentation() as presentation: overview_slide = presentation.slides[0] slide = presentation.slides.add_empty_slide(overview_slide.layout_slide) slide.background.type = slides.BackgroundType.OWN_BACKGROUND slide.background.fill_format.fill_type = slides.FillType.SOLID slide.background.fill_format.solid_fill_color.color = draw.Color.cyan text_box = slide.shapes.add_auto_shape(slides.ShapeType.RECTANGLE, 100, 200, 500, 200) text_box.text_frame.text = "Second Slide" with slides.Images.from_file("image.png") as image: preview_image = presentation.images.add_image(image) overview_slide.shapes.add_zoom_frame(20, 20, 300, 200, slide, preview_image) presentation.save("presentation.pptx", slides.export.SaveFormat.PPTX) ``` ### **Format Zoom Frames** This example customizes two slide zoom frames. It assigns a local image to the first frame through [ZoomObject.zoom_image](https://reference.aspose.com/slides/python-net/aspose.slides/zoomobject/zoom_image/), and gives the second frame a five-point, dash-dot pink border through [Shape.line_format](https://reference.aspose.com/slides/python-net/aspose.slides/shape/line_format/). Setting [ZoomObject.show_background](https://reference.aspose.com/slides/python-net/aspose.slides/zoomobject/show_background/) to `False` hides the second frame's background. A local image is required for the custom preview; both frames retain their slide targets in the saved PPTX. ```python import aspose.pydrawing as draw import aspose.slides as slides with slides.Presentation() as presentation: overview_slide = presentation.slides[0] second_slide = presentation.slides.add_empty_slide(overview_slide.layout_slide) third_slide = presentation.slides.add_empty_slide(overview_slide.layout_slide) second_slide.background.type = slides.BackgroundType.OWN_BACKGROUND second_slide.background.fill_format.fill_type = slides.FillType.SOLID second_slide.background.fill_format.solid_fill_color.color = draw.Color.cyan text_box = second_slide.shapes.add_auto_shape(slides.ShapeType.RECTANGLE, 100, 200, 500, 200) text_box.text_frame.text = "Second Slide" third_slide.background.type = slides.BackgroundType.OWN_BACKGROUND third_slide.background.fill_format.fill_type = slides.FillType.SOLID third_slide.background.fill_format.solid_fill_color.color = draw.Color.dark_khaki text_box = third_slide.shapes.add_auto_shape(slides.ShapeType.RECTANGLE, 100, 200, 500, 200) text_box.text_frame.text = "Third Slide" first_zoom_frame = overview_slide.shapes.add_zoom_frame(20, 20, 250, 200, second_slide) second_zoom_frame = overview_slide.shapes.add_zoom_frame(200, 250, 250, 200, third_slide) with slides.Images.from_file("image.png") as image: preview_image = presentation.images.add_image(image) first_zoom_frame.zoom_image = preview_image second_zoom_frame.line_format.width = 5 second_zoom_frame.line_format.fill_format.fill_type = slides.FillType.SOLID second_zoom_frame.line_format.fill_format.solid_fill_color.color = draw.Color.hot_pink second_zoom_frame.line_format.dash_style = slides.LineDashStyle.DASH_DOT second_zoom_frame.show_background = False presentation.save("presentation.pptx", slides.export.SaveFormat.PPTX) ``` ## **Section Zoom** A section zoom links to a section in your presentation. Use it to revisit a topic or show how different parts of the presentation connect. ![Selecting a section for a section zoom](https://docs.aspose.com/slides/python-net/manage-zoom/seczoomsel.png) For section zoom objects, Aspose.Slides provides the [SectionZoomFrame](https://reference.aspose.com/slides/python-net/aspose.slides/sectionzoomframe/) class and methods on the [ShapeCollection](https://reference.aspose.com/slides/python-net/aspose.slides/shapecollection/) class. ### **Create Section Zoom Frames** Create a section with [SectionCollection.add_section](https://reference.aspose.com/slides/python-net/aspose.slides/sectioncollection/add_section/), then pass the returned section to [ShapeCollection.add_section_zoom_frame](https://reference.aspose.com/slides/python-net/aspose.slides/shapecollection/add_section_zoom_frame/). This example places a section zoom on the first slide and links it to a section beginning with a colored slide. The frame's position and dimensions are specified in points, and the presentation is saved as PPTX. ```python import aspose.pydrawing as draw import aspose.slides as slides with slides.Presentation() as presentation: overview_slide = presentation.slides[0] slide = presentation.slides.add_empty_slide(overview_slide.layout_slide) slide.background.fill_format.fill_type = slides.FillType.SOLID slide.background.fill_format.solid_fill_color.color = draw.Color.yellow_green slide.background.type = slides.BackgroundType.OWN_BACKGROUND section = presentation.sections.add_section("Section 1", slide) section_zoom_frame = overview_slide.shapes.add_section_zoom_frame(20, 20, 300, 200, section) presentation.save("presentation.pptx", slides.export.SaveFormat.PPTX) ``` ### **Create Section Zoom Frames with Custom Images** The image overload of [ShapeCollection.add_section_zoom_frame](https://reference.aspose.com/slides/python-net/aspose.slides/shapecollection/add_section_zoom_frame/) lets you display a custom preview without changing the destination section. This example requires a local image, which is loaded with [Images.from_file](https://reference.aspose.com/slides/python-net/aspose.slides/images/from_file/) and added through [ImageCollection.add_image](https://reference.aspose.com/slides/python-net/aspose.slides/imagecollection/add_image/). The saved presentation contains a section zoom on the first slide linked to the newly created section. ```python import aspose.pydrawing as draw import aspose.slides as slides with slides.Presentation() as presentation: overview_slide = presentation.slides[0] slide = presentation.slides.add_empty_slide(overview_slide.layout_slide) slide.background.fill_format.fill_type = slides.FillType.SOLID slide.background.fill_format.solid_fill_color.color = draw.Color.yellow_green slide.background.type = slides.BackgroundType.OWN_BACKGROUND with slides.Images.from_file("image.png") as image: preview_image = presentation.images.add_image(image) section = presentation.sections.add_section("Section 1", slide) section_zoom_frame = overview_slide.shapes.add_section_zoom_frame(20, 20, 300, 200, section, preview_image) presentation.save("presentation.pptx", slides.export.SaveFormat.PPTX) ``` ### **Change a Section Zoom's Target Section** Use [SectionZoomFrame.target_section](https://reference.aspose.com/slides/python-net/aspose.slides/sectionzoomframe/target_section/) to redirect an existing section zoom without recreating it. Choose a populated section from the same presentation's [sections](https://reference.aspose.com/slides/python-net/aspose.slides/presentation/sections/) collection. Assigning an empty section leaves the current target unchanged, so check [Section.get_slides_list_of_section](https://reference.aspose.com/slides/python-net/aspose.slides/section/get_slides_list_of_section/) before assigning it. See [Manage Slide Sections](https://docs.aspose.com/slides/python-net/slide-section/) for more about sections. The following example loads a presentation file, which must contain multiple populated sections, an existing section zoom named `Section navigation`, and a section with the unique name `Results`. It searches all slides for the zoom and finds the destination by name rather than by a collection index that can change when sections are reordered. If names are not unique, use [Section.section_id](https://reference.aspose.com/slides/python-net/aspose.slides/section/section_id/) to identify the destination instead. ```python import aspose.slides as slides with slides.Presentation("section-zoom.pptx") as presentation: zoom = None for slide in presentation.slides: for shape in slide.shapes: if isinstance(shape, slides.SectionZoomFrame) and shape.name == "Section navigation": zoom = shape break if zoom is not None: break target_section = next((section for section in presentation.sections if section.name == "Results"), None) if zoom is None or target_section is None: print("The section zoom or destination section was not found.") elif len(target_section.get_slides_list_of_section()) == 0: print("The destination section is empty.") else: if zoom.target_section is not None: print(f"Current section: {zoom.target_section.name}") zoom.target_section = target_section presentation.save("section-zoom-updated.pptx", slides.export.SaveFormat.PPTX) ``` ### **Format Section Zoom Frames** This example moves and resizes a section zoom to 100 by 75 points, assigns a local image through [ZoomObject.zoom_image](https://reference.aspose.com/slides/python-net/aspose.slides/zoomobject/zoom_image/), and applies a 2.5-point, dash-dot brown border. It enables [ZoomObject.return_to_parent](https://reference.aspose.com/slides/python-net/aspose.slides/zoomobject/return_to_parent/) to return to the originating slide after the section, disables [ZoomObject.show_background](https://reference.aspose.com/slides/python-net/aspose.slides/zoomobject/show_background/), and sets [ZoomObject.transition_duration](https://reference.aspose.com/slides/python-net/aspose.slides/zoomobject/transition_duration/) to 1.5 seconds. A local image is required for the custom preview. ```python import aspose.pydrawing as draw import aspose.slides as slides with slides.Presentation() as presentation: overview_slide = presentation.slides[0] slide = presentation.slides.add_empty_slide(overview_slide.layout_slide) slide.background.fill_format.fill_type = slides.FillType.SOLID slide.background.fill_format.solid_fill_color.color = draw.Color.yellow_green slide.background.type = slides.BackgroundType.OWN_BACKGROUND section = presentation.sections.add_section("Section 1", slide) section_zoom_frame = overview_slide.shapes.add_section_zoom_frame(20, 20, 300, 200, section) section_zoom_frame.x = 100 section_zoom_frame.y = 300 section_zoom_frame.width = 100 section_zoom_frame.height = 75 with slides.Images.from_file("image.png") as image: preview_image = presentation.images.add_image(image) section_zoom_frame.zoom_image = preview_image section_zoom_frame.return_to_parent = True section_zoom_frame.show_background = False section_zoom_frame.line_format.fill_format.fill_type = slides.FillType.SOLID section_zoom_frame.line_format.fill_format.solid_fill_color.color = draw.Color.brown section_zoom_frame.line_format.dash_style = slides.LineDashStyle.DASH_DOT section_zoom_frame.line_format.width = 2.5 section_zoom_frame.transition_duration = 1.5 presentation.save("presentation.pptx", slides.export.SaveFormat.PPTX) ``` ## **Summary Zoom** A summary zoom provides an overview of presentation sections. During a slide show, you can use it to jump to a section, skip ahead, or revisit a topic without following the slide order. ![Selecting sections for a summary zoom](https://docs.aspose.com/slides/python-net/manage-zoom/sumzoomsel.png) For summary zoom objects, Aspose.Slides provides the [SummaryZoomFrame](https://reference.aspose.com/slides/python-net/aspose.slides/summaryzoomframe/), [SummaryZoomSection](https://reference.aspose.com/slides/python-net/aspose.slides/summaryzoomsection/), and [SummaryZoomSectionCollection](https://reference.aspose.com/slides/python-net/aspose.slides/summaryzoomsectioncollection/) classes and methods on the [ShapeCollection](https://reference.aspose.com/slides/python-net/aspose.slides/shapecollection/) class. ### **Create a Summary Zoom** Use [ShapeCollection.add_summary_zoom_frame](https://reference.aspose.com/slides/python-net/aspose.slides/shapecollection/add_summary_zoom_frame/) to create an overview of the presentation's sections. This example creates four sections with distinct slide backgrounds and adds a summary zoom to the first slide. The frame's position and dimensions are specified in points, and the resulting overview is saved in a PPTX presentation. ```python import aspose.pydrawing as draw import aspose.slides as slides with slides.Presentation() as presentation: overview_slide = presentation.slides[0] slide = presentation.slides.add_empty_slide(overview_slide.layout_slide) slide.background.fill_format.fill_type = slides.FillType.SOLID slide.background.fill_format.solid_fill_color.color = draw.Color.brown slide.background.type = slides.BackgroundType.OWN_BACKGROUND presentation.sections.add_section("Section 1", slide) slide = presentation.slides.add_empty_slide(overview_slide.layout_slide) slide.background.fill_format.fill_type = slides.FillType.SOLID slide.background.fill_format.solid_fill_color.color = draw.Color.aqua slide.background.type = slides.BackgroundType.OWN_BACKGROUND presentation.sections.add_section("Section 2", slide) slide = presentation.slides.add_empty_slide(overview_slide.layout_slide) slide.background.fill_format.fill_type = slides.FillType.SOLID slide.background.fill_format.solid_fill_color.color = draw.Color.chartreuse slide.background.type = slides.BackgroundType.OWN_BACKGROUND presentation.sections.add_section("Section 3", slide) slide = presentation.slides.add_empty_slide(overview_slide.layout_slide) slide.background.fill_format.fill_type = slides.FillType.SOLID slide.background.fill_format.solid_fill_color.color = draw.Color.dark_green slide.background.type = slides.BackgroundType.OWN_BACKGROUND presentation.sections.add_section("Section 4", slide) summary_zoom_frame = overview_slide.shapes.add_summary_zoom_frame(150, 50, 300, 200) presentation.save("presentation.pptx", slides.export.SaveFormat.PPTX) ``` ### **Add and Remove a Summary Zoom Section** A summary zoom stores its [SummaryZoomSection](https://reference.aspose.com/slides/python-net/aspose.slides/summaryzoomsection/) objects in [SummaryZoomFrame.summary_zoom_collection](https://reference.aspose.com/slides/python-net/aspose.slides/summaryzoomframe/summary_zoom_collection/). This example creates an overview of two sections, adds a third section using [SummaryZoomSectionCollection.add_summary_zoom_section](https://reference.aspose.com/slides/python-net/aspose.slides/summaryzoomsectioncollection/add_summary_zoom_section/), and removes the first section's entry using [SummaryZoomSectionCollection.remove_summary_zoom_section](https://reference.aspose.com/slides/python-net/aspose.slides/summaryzoomsectioncollection/remove_summary_zoom_section/). Removing the entry leaves the presentation section and its slides intact. ```python import aspose.pydrawing as draw import aspose.slides as slides with slides.Presentation() as presentation: overview_slide = presentation.slides[0] slide = presentation.slides.add_empty_slide(overview_slide.layout_slide) slide.background.fill_format.fill_type = slides.FillType.SOLID slide.background.fill_format.solid_fill_color.color = draw.Color.brown slide.background.type = slides.BackgroundType.OWN_BACKGROUND first_section = presentation.sections.add_section("Section 1", slide) slide = presentation.slides.add_empty_slide(overview_slide.layout_slide) slide.background.fill_format.fill_type = slides.FillType.SOLID slide.background.fill_format.solid_fill_color.color = draw.Color.aqua slide.background.type = slides.BackgroundType.OWN_BACKGROUND presentation.sections.add_section("Section 2", slide) summary_zoom_frame = overview_slide.shapes.add_summary_zoom_frame(150, 50, 300, 200) slide = presentation.slides.add_empty_slide(overview_slide.layout_slide) slide.background.fill_format.fill_type = slides.FillType.SOLID slide.background.fill_format.solid_fill_color.color = draw.Color.chartreuse slide.background.type = slides.BackgroundType.OWN_BACKGROUND third_section = presentation.sections.add_section("Section 3", slide) summary_zoom_frame.summary_zoom_collection.add_summary_zoom_section(third_section) summary_zoom_frame.summary_zoom_collection.remove_summary_zoom_section(first_section) presentation.save("presentation.pptx", slides.export.SaveFormat.PPTX) ``` ### **Format Summary Zoom Sections** This example formats the first entry in [SummaryZoomFrame.summary_zoom_collection](https://reference.aspose.com/slides/python-net/aspose.slides/summaryzoomframe/summary_zoom_collection/), using the zero-based index `0`. It requires a local image for [ZoomObject.zoom_image](https://reference.aspose.com/slides/python-net/aspose.slides/zoomobject/zoom_image/), applies a 1.5-point, dash-dot black border, and sets [ZoomObject.transition_duration](https://reference.aspose.com/slides/python-net/aspose.slides/zoomobject/transition_duration/) to 1.5 seconds. Setting [ZoomObject.return_to_parent](https://reference.aspose.com/slides/python-net/aspose.slides/zoomobject/return_to_parent/) to `False` disables the automatic return to the summary slide for this entry. ```python import aspose.pydrawing as draw import aspose.slides as slides with slides.Presentation() as presentation: overview_slide = presentation.slides[0] slide = presentation.slides.add_empty_slide(overview_slide.layout_slide) slide.background.fill_format.fill_type = slides.FillType.SOLID slide.background.fill_format.solid_fill_color.color = draw.Color.brown slide.background.type = slides.BackgroundType.OWN_BACKGROUND presentation.sections.add_section("Section 1", slide) slide = presentation.slides.add_empty_slide(overview_slide.layout_slide) slide.background.fill_format.fill_type = slides.FillType.SOLID slide.background.fill_format.solid_fill_color.color = draw.Color.aqua slide.background.type = slides.BackgroundType.OWN_BACKGROUND presentation.sections.add_section("Section 2", slide) summary_zoom_frame = overview_slide.shapes.add_summary_zoom_frame(150, 50, 300, 200) summary_section = summary_zoom_frame.summary_zoom_collection[0] with slides.Images.from_file("image.png") as image: preview_image = presentation.images.add_image(image) summary_section.zoom_image = preview_image summary_section.return_to_parent = False summary_section.line_format.fill_format.fill_type = slides.FillType.SOLID summary_section.line_format.fill_format.solid_fill_color.color = draw.Color.black summary_section.line_format.dash_style = slides.LineDashStyle.DASH_DOT summary_section.line_format.width = 1.5 summary_section.transition_duration = 1.5 presentation.save("presentation.pptx", slides.export.SaveFormat.PPTX) ``` ## **FAQ** **Can I control returning to the 'parent' slide after showing the target?** Yes. Set [ZoomObject.return_to_parent](https://reference.aspose.com/slides/python-net/aspose.slides/zoomobject/return_to_parent/) to `True` to return to the originating slide after the target content is shown. **Can I adjust the 'speed' or duration of the Zoom transition?** Yes. Set [ZoomObject.transition_duration](https://reference.aspose.com/slides/python-net/aspose.slides/zoomobject/transition_duration/) to control the transition duration in seconds. **Are there limits on how many Zoom objects a presentation can contain?** There is no hard API limit documented. Practical limits depend on overall presentation complexity and the viewer's performance. You can add many Zoom frames, but consider file size and rendering time. # Manage Tags and Custom Data in Presentations with Python > Learn how to manage tags and custom XML data in PowerPoint presentations with Aspose.Slides for Python via .NET, including adding, reading, updating, auditing, and removing custom XML parts. Source: https://docs.aspose.com/slides/python-net/managing-tags-and-custom-data/ Updated: 2026-08-13 ## **Overview** This article explains how Aspose.Slides works with tags and custom data in PowerPoint presentations. Presentation-specific data can be stored as tags or custom XML parts. Tags are simple key-value string pairs, while custom XML parts can store structured metadata and application-specific XML payloads. Aspose.Slides provides APIs for adding, reading, updating, auditing, and removing custom XML parts at the presentation, slide, and shape levels. Custom XML parts are useful for integrations that store information such as document-management identifiers, workflow state, compliance metadata, template-binding data, or other structured application data inside a presentation. ## **Data Storage in Presentation Files** PPTX files—files with the `.pptx` extension—are stored in the PresentationML format, which is part of the Office Open XML specification. Office Open XML defines the package structure and relationships used to store presentation content and related data. A presentation contains multiple parts connected by relationships. For example, a slide part contains the content of a single slide and can have explicit relationships to other parts defined by ISO/IEC 29500. Custom data can be stored as tags ([TagCollection](https://reference.aspose.com/slides/python-net/aspose.slides/tagcollection/)) or custom XML parts ([CustomXmlPartCollection](https://reference.aspose.com/slides/python-net/aspose.slides/customxmlpartcollection/)). Both are available through the [`CustomData`](https://reference.aspose.com/slides/python-net/aspose.slides/customdata/) class. Tags store simple string key-value pairs. Custom XML parts store structured XML data and can be associated with a presentation, slide, or shape. ## **Work with Custom XML Parts** The [`CustomData.custom_xml_parts`](https://reference.aspose.com/slides/python-net/aspose.slides/customdata/custom_xml_parts/) property returns the collection of custom XML parts associated with a particular presentation object. For example: - `presentation.custom_data.custom_xml_parts` contains custom XML parts associated with the presentation itself. - `slide.custom_data.custom_xml_parts` contains custom XML parts associated with a specific slide. - `shape.custom_data.custom_xml_parts` contains custom XML parts associated with a specific shape. Use [`Presentation.all_custom_xml_parts`](https://reference.aspose.com/slides/python-net/aspose.slides/presentation/all_custom_xml_parts/) when you need to inspect all custom XML parts in the presentation regardless of where they are associated. ### **Add a Custom XML Part to a Presentation** Use [`CustomXmlPartCollection.add`](https://reference.aspose.com/slides/python-net/aspose.slides/customxmlpartcollection/add/) to add XML data to a custom XML part collection. The XML must be valid and non-empty. The following example adds structured metadata to the presentation-level custom data collection: ```py import uuid import aspose.slides as slides custom_xml_content = ( '' '' 'DOC-1001' 'Draft' '' ) with slides.Presentation() as presentation: custom_xml_part = presentation.custom_data.custom_xml_parts.add(custom_xml_content) # add assigns an identifier automatically. Set a specific GUID only when required. custom_xml_part.item_id = uuid.uuid4() presentation.save("presentation_with_custom_xml.pptx", slides.export.SaveFormat.PPTX) ``` The `add` method can also accept XML as a byte array or stream, which is useful when XML content is already available in binary form. ### **Add a Custom XML Part to a Slide or Shape** Custom XML data can be associated with a specific slide or shape instead of the whole presentation. This is useful when metadata describes only one object, such as a template key, external record identifier, or binding information. The following example adds one custom XML part to a slide and another to a shape: ```py import aspose.slides as slides with slides.Presentation() as presentation: slide = presentation.slides[0] slide.custom_data.custom_xml_parts.add( '' 'TitleSlide' '' ) shape = slide.shapes.add_auto_shape(slides.ShapeType.RECTANGLE, 50, 50, 250, 80) shape.text_frame.text = "Customer data" shape.custom_data.custom_xml_parts.add( '' 'CRM-4281' '' ) presentation.save("object_custom_xml.pptx", slides.export.SaveFormat.PPTX) ``` The level at which a part is added determines which object's `custom_data.custom_xml_parts` collection contains the relationship to that part. Presentation-level data is appropriate for document-wide metadata, slide-level data for information that belongs to a particular slide, and shape-level data for metadata tied to an individual shape. ### **List and Audit All Custom XML Parts** Use [`Presentation.all_custom_xml_parts`](https://reference.aspose.com/slides/python-net/aspose.slides/presentation/all_custom_xml_parts/) to retrieve all custom XML parts from a presentation. Each [`CustomXmlPart`](https://reference.aspose.com/slides/python-net/aspose.slides/customxmlpart/) exposes its identifier, XML content, and associated namespace schemas. The following example lists all custom XML parts and their namespace schemas: ```py import aspose.slides as slides with slides.Presentation("presentation.pptx") as presentation: for custom_xml_part in presentation.all_custom_xml_parts: print("ItemId: " + str(custom_xml_part.item_id)) print("XML:") print(custom_xml_part.xml_as_string) for namespace_schema in custom_xml_part.namespace_schemas: print("Namespace schema: " + namespace_schema) print() ``` [`CustomXmlPart.namespace_schemas`](https://reference.aspose.com/slides/python-net/aspose.slides/customxmlpart/namespace_schemas/) returns the XML schemas associated with the custom XML part. This information can be useful when auditing presentations that contain XML produced by external systems. ### **Read and Update XML Content and ItemId** Use [`CustomXmlPart.xml_as_string`](https://reference.aspose.com/slides/python-net/aspose.slides/customxmlpart/xml_as_string/) to work with XML as a UTF-8 string, or [`CustomXmlPart.xml_data`](https://reference.aspose.com/slides/python-net/aspose.slides/customxmlpart/xml_data/) to work with the raw XML bytes. Both properties can be read and updated. The [`CustomXmlPart.item_id`](https://reference.aspose.com/slides/python-net/aspose.slides/customxmlpart/item_id/) property contains the GUID that identifies the custom XML part in the Office Open XML document. It can also be changed when an integration requires a new identifier. The following example updates the XML content and the identifier: ```py import uuid import aspose.slides as slides with slides.Presentation("presentation.pptx") as presentation: custom_xml_part = presentation.all_custom_xml_parts[0] # Read the current XML as text. current_xml_content = custom_xml_part.xml_as_string print(current_xml_content) # Update the XML as a UTF-8 string. custom_xml_part.xml_as_string = ( '' 'DOC-1001' 'Approved' '' ) # xml_data provides the same XML content as raw bytes. custom_xml_data = custom_xml_part.xml_data print(custom_xml_data.decode("utf-8")) # Replace the identifier when required by the integration. custom_xml_part.item_id = uuid.uuid4() presentation.save("updated_custom_xml.pptx", slides.export.SaveFormat.PPTX) ``` When assigning `xml_as_string` or `xml_data`, provide valid, non-empty XML. Use one representation or the other depending on whether the application works primarily with strings or byte data. ### **Remove a Custom XML Part** Aspose.Slides provides several ways to remove custom XML data: - [`CustomXmlPart.remove`](https://reference.aspose.com/slides/python-net/aspose.slides/customxmlpart/remove/) removes the custom XML part from the presentation. - [`CustomXmlPartCollection.remove`](https://reference.aspose.com/slides/python-net/aspose.slides/customxmlpartcollection/remove/) removes a specific part from a custom XML part collection. - [`CustomXmlPartCollection.remove_at`](https://reference.aspose.com/slides/python-net/aspose.slides/customxmlpartcollection/remove_at/) removes the part at a specified collection index. - [`CustomXmlPartCollection.clear`](https://reference.aspose.com/slides/python-net/aspose.slides/customxmlpartcollection/clear/) removes all parts from a specific collection. The following example removes one presentation-level custom XML part by reference: ```py import aspose.slides as slides with slides.Presentation("presentation.pptx") as presentation: custom_xml_parts = presentation.custom_data.custom_xml_parts if len(custom_xml_parts) > 0: custom_xml_part = custom_xml_parts[0] custom_xml_parts.remove(custom_xml_part) presentation.save("custom_xml_removed.pptx", slides.export.SaveFormat.PPTX) ``` If you already have a `CustomXmlPart` and want to remove that part from the presentation rather than addressing a particular collection, call `custom_xml_part.remove()`. You can also remove an item by index: ```py presentation.custom_data.custom_xml_parts.remove_at(0) ``` ### **Clear All Custom XML Parts from a Collection** Use `clear` when all custom XML parts associated with a particular presentation object should be removed. ```py import aspose.slides as slides with slides.Presentation("presentation.pptx") as presentation: presentation.slides[0].custom_data.custom_xml_parts.clear() presentation.save("slide_custom_xml_cleared.pptx", slides.export.SaveFormat.PPTX) ``` `clear` affects only the selected collection. For example, clearing a slide's collection does not clear the presentation-level or shape-level collections. To remove every custom XML part in the presentation, iterate through `all_custom_xml_parts` and remove each part: ```py import aspose.slides as slides with slides.Presentation("presentation.pptx") as presentation: for custom_xml_part in presentation.all_custom_xml_parts: custom_xml_part.remove() presentation.save("all_custom_xml_removed.pptx", slides.export.SaveFormat.PPTX) ``` ### **Handle Linked or Shared Custom XML Parts** In an Office Open XML presentation, the same custom XML part can be referenced from more than one presentation object. For example, an existing file can contain relationships from multiple slides or shapes to the same underlying custom XML part. A shared part should be treated as one data object with multiple references: - Updating its `xml_as_string`, `xml_data`, or `item_id` changes the underlying custom XML part, so the change applies wherever that part is referenced. - `item_id` can be used to identify the same custom XML part while auditing object-level collections. - Removing a part from a specific `custom_xml_parts` collection removes it from that collection. Use `CustomXmlPart.remove()` when the part itself should be removed from the presentation. - Before deleting or replacing a shared part, inspect the object-level collections to determine whether other slides or shapes still reference it. The `add` overloads create a new custom XML part from XML content; they do not accept an existing `CustomXmlPart`. Therefore, shared relationships are most commonly encountered when loading presentations that already contain them. The following example audits presentation-, slide-, and shape-level collections by `item_id` and reports parts referenced from more than one place: ```py import aspose.slides as slides with slides.Presentation("presentation.pptx") as presentation: references_by_item_id = {} def register_custom_xml_parts(owner_name, custom_xml_parts): for custom_xml_part in custom_xml_parts: references_by_item_id.setdefault(custom_xml_part.item_id, []).append(owner_name) register_custom_xml_parts("Presentation", presentation.custom_data.custom_xml_parts) for slide_index, slide in enumerate(presentation.slides): register_custom_xml_parts( "Slide " + str(slide_index + 1), slide.custom_data.custom_xml_parts ) for shape_index, shape in enumerate(slide.shapes): register_custom_xml_parts( "Slide " + str(slide_index + 1) + ", shape " + str(shape_index), shape.custom_data.custom_xml_parts ) for item_id, owner_names in references_by_item_id.items(): if len(owner_names) > 1: print("Shared custom XML part: " + str(item_id)) for owner_name in owner_names: print(" Referenced by: " + owner_name) ``` This type of audit is useful before modifying or deleting custom XML data in presentations created by external systems, because the same metadata part may participate in more than one relationship. ## **Get Values of Tags** In slides, a tag corresponds to the `DocumentProperties.keywords` property. This sample code shows how to get a tag value with Aspose.Slides for Python via .NET for [Presentation](https://reference.aspose.com/slides/python-net/aspose.slides/presentation/): ```py import aspose.slides as slides with slides.Presentation("presentation.pptx") as presentation: keywords = presentation.document_properties.keywords ``` ## **Add Tags to Presentations** Aspose.Slides allows you to add tags to presentations. A tag typically consists of two items: - the name of a custom property, for example, `MyTag`; - the value of the custom property, for example, `My Tag Value`. If you need to classify presentations based on a specific rule or property, you can add tags for that purpose. For example, if you want to categorize presentations from North American countries, you can create a North American tag and assign the relevant country as its value. This sample code shows how to add a tag to a [Presentation](https://reference.aspose.com/slides/python-net/aspose.slides/presentation/) using Aspose.Slides for Python via .NET: ```py import aspose.slides as slides with slides.Presentation("presentation.pptx") as presentation: tags = presentation.custom_data.tags tags.add("MyTag", "My Tag Value") ``` Tags can also be set for a [Slide](https://reference.aspose.com/slides/python-net/aspose.slides/slide/): ```py import aspose.slides as slides with slides.Presentation() as presentation: slide = presentation.slides[0] slide.custom_data.tags.add("tag", "value") ``` Or for an individual [Shape](https://reference.aspose.com/slides/python-net/aspose.slides/shape/): ```py import aspose.slides as slides with slides.Presentation() as presentation: slide = presentation.slides[0] shape = slide.shapes.add_auto_shape(slides.ShapeType.RECTANGLE, 10, 10, 100, 50) shape.text_frame.text = "My text" shape.custom_data.tags.add("tag", "value") ``` ### **Limitations** Tags added through the `custom_data.tags` collection are stored only in the PowerPoint file. They are **not** transferred to the PDF tag structure when the presentation is exported to PDF. Consequently, a custom identifier assigned as a tag cannot be retrieved from the tagged PDF. **Workaround**: You can store a custom identifier in the object's **Alt Text** (for example, `shape.alternative_text = "MyId"`). After exporting to PDF, the Alt Text may appear in the PDF tag structure. ## **FAQ** **Can I remove all tags from a presentation, slide, or shape in one operation?** Yes. The [tag collection](https://reference.aspose.com/slides/python-net/aspose.slides/tagcollection/) supports a [clear](https://reference.aspose.com/slides/python-net/aspose.slides/tagcollection/clear/) operation that deletes all key-value pairs at once. **How do I delete a single tag by its name without iterating over the whole collection?** Use [remove(name)](https://reference.aspose.com/slides/python-net/aspose.slides/tagcollection/remove/) on [TagCollection](https://reference.aspose.com/slides/python-net/aspose.slides/tagcollection/) to delete the tag by its key. **How can I retrieve the complete list of tag names for analytics or filtering?** Use [get_names_of_tags](https://reference.aspose.com/slides/python-net/aspose.slides/tagcollection/get_names_of_tags/) on the [tag collection](https://reference.aspose.com/slides/python-net/aspose.slides/tagcollection/); it returns an array of all tag names. **How can I find all custom XML parts regardless of where they are stored?** Use [`Presentation.all_custom_xml_parts`](https://reference.aspose.com/slides/python-net/aspose.slides/presentation/all_custom_xml_parts/) to retrieve all custom XML parts in the presentation. **Should I use `xml_as_string` or `xml_data` to update a custom XML part?** Use `xml_as_string` when the application works with UTF-8 XML text. Use `xml_data` when the XML is already available as a byte array or when binary-oriented processing is more convenient. Both properties represent the XML content of the same custom XML part. # Efficiently Merge Presentations with Python > Learn how to merge PowerPoint and OpenDocument presentations in Python by cloning slides, controlling masters and layouts, resizing slide content, preserving sections, and handling protected or large files. Source: https://docs.aspose.com/slides/python-net/merge-presentation/ Updated: 2026-11-08 ## **Overview** Aspose.Slides for Python via .NET merges presentations by cloning slides from one [Presentation](https://reference.aspose.com/slides/python-net/aspose.slides/presentation/) into another. The main operation is [SlideCollection.add_clone](https://reference.aspose.com/slides/python-net/aspose.slides/slidecollection/add_clone/), which can preserve the source slide's formatting or attach the cloned slide to a master or layout in the destination presentation. This article covers the most common merging workflows: - merge all slides while preserving their source formatting; - merge selected slides; - apply a master from the destination presentation; - apply a specific layout from the destination presentation; - normalize different slide sizes before merging; - add cloned slides to a section; - merge several presentations in one end-to-end workflow; - handle masters, resources, notes, comments, media, fonts, passwords, large files, and multithreading concerns. ## **How Slide Cloning Affects Masters and Layouts** A slide inherits much of its appearance from its layout and master. For that reason, the cloning overload you choose determines how the merged slide is integrated into the destination presentation. Use [SlideCollection.add_clone](https://reference.aspose.com/slides/python-net/aspose.slides/slidecollection/add_clone/) in one of these ways: - `add_clone(source_slide)` — preserve the source slide's layout and formatting. When required, the source master can be cloned into the destination presentation automatically. Aspose.Slides tracks automatically cloned masters so repeated slides that use the same source master do not cause that master to be cloned repeatedly. - `add_clone(source_slide, destination_master, allow_clone_missing_layout)` — attach the cloned slide to a specific destination [IMasterSlide](https://reference.aspose.com/slides/python-net/aspose.slides/imasterslide/). Aspose.Slides looks for a matching layout under that master by layout type or name. - `add_clone(source_slide, destination_layout)` — attach the cloned slide directly to a specific destination [ILayoutSlide](https://reference.aspose.com/slides/python-net/aspose.slides/ilayoutslide/). The master or layout passed to an `add_clone` overload must belong to the **destination** presentation, not the source presentation. [![Three actual renders use the blue source banner, orange destination-master banner, or green destination-layout banner while retaining the content panel.](https://docs.aspose.com/slides/python-net/merge-presentation/visual-merge-presentation-9d5f131d779a.svg)](https://docs.aspose.com/slides/python-net/merge-presentation/visual-merge-presentation-9d5f131d779a.svg) *Illustrative .NET 26.11 fixture comparing source design, a selected destination master with a matching layout, and an explicit destination layout. The panel retains its explicit geometry and looks the same in this fixture. The selected master or layout must belong to the destination; changing inheritance does not redesign every object.* ## **Merge Entire Presentations and Preserve Source Formatting** The simplest merge copies every slide from the source presentation to the destination presentation. This is the appropriate choice when the imported slides should keep their original theme, master, and layout relationships. ```python import aspose.slides as slides with slides.Presentation("destination.pptx") as destination: with slides.Presentation("source.pptx") as source: for slide in source.slides: destination.slides.add_clone(slide) destination.save("merged.pptx", slides.export.SaveFormat.PPTX) ``` The resulting presentation may contain multiple masters when the source and destination use different designs. This is expected when source formatting is intentionally preserved. ## **Merge Selected Slides** You do not have to clone every slide. The following example imports only selected slide indexes from the source presentation. ```python import aspose.slides as slides with slides.Presentation("destination.pptx") as destination: with slides.Presentation("source.pptx") as source: slide_indexes = [0, 2, 4] for index in slide_indexes: destination.slides.add_clone(source.slides[index]) destination.save("merged-selected-slides.pptx", slides.export.SaveFormat.PPTX) ``` Validate slide indexes before cloning when they come from user input or external configuration. ## **Merge Slides Using a Destination Master** Use the [add_clone(source_slide, destination_master, allow_clone_missing_layout)](https://reference.aspose.com/slides/python-net/aspose.slides/slidecollection/add_clone/) overload when imported slides should follow a master that already belongs to the destination presentation. ```python import aspose.slides as slides with slides.Presentation("destination.pptx") as destination: with slides.Presentation("source.pptx") as source: destination_master = destination.masters[0] for slide in source.slides: destination.slides.add_clone(slide, destination_master, True) destination.save("merged-with-destination-master.pptx", slides.export.SaveFormat.PPTX) ``` Aspose.Slides selects an appropriate layout under the specified master by matching the source layout's type or name. If no suitable layout exists and `allow_clone_missing_layout` is `True`, the source layout is cloned so the slide can be added. If it is `False`, a [PptxEditException](https://reference.aspose.com/slides/python-net/aspose.slides/pptxeditexception/) is thrown. Use `False` when you want the merge to fail instead of introducing an additional layout into the destination master. ## **Merge Slides Using a Specific Destination Layout** Use the [add_clone(source_slide, destination_layout)](https://reference.aspose.com/slides/python-net/aspose.slides/slidecollection/add_clone/) overload when you know exactly which destination layout the imported slides should use. ```python import aspose.slides as slides with slides.Presentation("destination.pptx") as destination: with slides.Presentation("source.pptx") as source: destination_layout = destination.layout_slides[0] for slide in source.slides: destination.slides.add_clone(slide, destination_layout) destination.save("merged-with-destination-layout.pptx", slides.export.SaveFormat.PPTX) ``` Applying a destination layout changes the inherited layout relationship; it does not redesign the source slide content. If the source and destination layouts have different placeholder structures, inspect the result to confirm that the inherited formatting and placeholder behavior are appropriate. ## **Merge Presentations with Different Slide Sizes** Presentations with different slide dimensions can be merged, but cloning a slide into a presentation with another slide size does not automatically redesign its content for the new canvas. Shapes may therefore appear shifted, scaled unexpectedly, or outside the visible slide area. A practical approach is to resize the source presentation before cloning. The [SlideSize.set_size](https://reference.aspose.com/slides/python-net/aspose.slides/slidesize/set_size/) method can scale existing content while changing the slide dimensions. [SlideSizeScaleType.ENSURE_FIT](https://reference.aspose.com/slides/python-net/aspose.slides/slidesizescaletype/) scales content to fit within the requested size. ```python import aspose.slides as slides with slides.Presentation("destination.pptx") as destination: with slides.Presentation("source.pptx") as source: if ( source.slide_size.size.width != destination.slide_size.size.width or source.slide_size.size.height != destination.slide_size.size.height ): source.slide_size.set_size( destination.slide_size.size.width, destination.slide_size.size.height, slides.SlideSizeScaleType.ENSURE_FIT) for slide in source.slides: destination.slides.add_clone(slide) destination.save("merged-same-slide-size.pptx", slides.export.SaveFormat.PPTX) ``` Resizing changes the source presentation object in memory. If you need the original source presentation unchanged for other operations, open a separate instance for the merge. ## **Merge Slides into a Presentation Section** The basic slide-cloning loop does not recreate the source presentation's section hierarchy. If sections matter in the output, create or select sections in the destination presentation and clone slides into them explicitly with [SlideCollection.add_clone](https://reference.aspose.com/slides/python-net/aspose.slides/slidecollection/add_clone/). ```python import aspose.slides as slides with slides.Presentation("destination.pptx") as destination: with slides.Presentation("source.pptx") as source: imported_section = destination.sections.append_empty_section("Imported slides") for slide in source.slides: destination.slides.add_clone(slide, imported_section) destination.save("merged-with-section.pptx", slides.export.SaveFormat.PPTX) ``` The cloned slides are appended to the specified destination section. To preserve several source sections, enumerate [Presentation.sections](https://reference.aspose.com/slides/python-net/aspose.slides/presentation/sections/), retrieve each source section's current slides with [Section.get_slides_list_of_section](https://reference.aspose.com/slides/python-net/aspose.slides/section/get_slides_list_of_section/), recreate the sections in the destination, and clone each returned slide into its corresponding destination section. See [Manage Slide Sections](https://docs.aspose.com/slides/python-net/slide-section/) for a complete section-enumeration example, including empty sections and structural changes. ## **Merge Multiple Presentations Safely** The following end-to-end example uses the first presentation as the destination, normalizes the slide size of each additional source, keeps each source open only while it is being copied, and saves the final file once. ```python import aspose.slides as slides input_files = ["part1.pptx", "part2.pptx", "part3.pptx"] with slides.Presentation(input_files[0]) as merged: for file_index in range(1, len(input_files)): with slides.Presentation(input_files[file_index]) as source: if ( source.slide_size.size.width != merged.slide_size.size.width or source.slide_size.size.height != merged.slide_size.size.height ): source.slide_size.set_size( merged.slide_size.size.width, merged.slide_size.size.height, slides.SlideSizeScaleType.ENSURE_FIT) for slide in source.slides: merged.slides.add_clone(slide) merged.save("merged.pptx", slides.export.SaveFormat.PPTX) ``` This is a useful baseline for preserving the source formatting of imported slides. If your output must use a single destination theme, replace the simple `add_clone(slide)` call with the appropriate destination-master or destination-layout overload shown earlier. ## **Practical Considerations** ### **Masters, Layouts, and Formatting Fidelity** Default slide cloning can automatically bring a required source master into the destination presentation. Aspose.Slides keeps an internal registry for automatically cloned masters to avoid cloning the same master repeatedly. Manually cloned masters are not tracked by that registry, so avoid pre-cloning masters unless you need explicit control over the master structure. Do not assume that two masters or layouts with the same name are visually equivalent. If a corporate template must control the final appearance, choose a destination master or layout explicitly and verify the result after merging. ### **Notes and Comments** Speaker notes and slide comments are associated with slide content and are copied when a slide is cloned. Aspose.Slides also exposes dedicated APIs for [presentation notes](https://docs.aspose.com/slides/python-net/presentation-notes/) and [presentation comments](https://docs.aspose.com/slides/python-net/presentation-comments/). If notes-page formatting is important, verify the merged presentation because notes masters are presentation-level objects and may differ between source files. For review workflows, also verify comment authors and threaded comments after combining files from different authors or templates. ### **Images, Audio, Video, OLE Objects, and External Links** Slides can reference presentation-level resources such as images, embedded audio, embedded video, and OLE data. Clone the slide itself rather than copying only its visible shapes so Aspose.Slides can maintain the slide's relationships to its resources. Embedded and linked resources should be treated differently. A linked audio, video, OLE object, or hyperlink remains dependent on its external target; cloning a slide does not turn an external link into embedded content. Test linked-resource paths and URLs in the environment where the merged presentation will be opened. Aspose.Slides explicitly tracks automatically cloned masters, but this should not be treated as a general guarantee that identical binary resources from unrelated source presentations will always be deduplicated. If output file size is important, inspect the merged package and measure the result instead of relying on implicit deduplication. ### **Embedded Fonts and Font Availability** Fonts are managed at the presentation level. If typography must remain consistent across machines, do not assume that cloning slides alone guarantees that every required font is available in the destination environment. You can inspect embedded fonts with [FontsManager.get_embedded_fonts](https://reference.aspose.com/slides/python-net/aspose.slides/fontsmanager/get_embedded_fonts/) and manage embedding explicitly as described in [Embed Fonts in Presentations](https://docs.aspose.com/slides/python-net/embedded-font/). Also verify that you are permitted to embed the fonts used by the source files. Font licenses can restrict embedding. ### **Password-Protected Presentations** A password-protected source must be opened successfully before its slides can be cloned. Supply the password through [LoadOptions.password](https://reference.aspose.com/slides/python-net/aspose.slides/loadoptions/password/). ```python import aspose.slides as slides load_options = slides.LoadOptions() load_options.password = "YOUR_PASSWORD" with slides.Presentation("protected.pptx", load_options) as source: print(len(source.slides)) ``` Opening an encrypted source does not automatically apply the same protection to the destination presentation. Configure output protection separately when required. ### **Large Presentations and Memory Use** Large presentations containing high-resolution images, audio, video, or other large binary objects can consume significant memory. [LoadOptions.blob_management_options](https://reference.aspose.com/slides/python-net/aspose.slides/loadoptions/blob_management_options/) provides controls for BLOB handling and temporary-file usage. See [Manage Presentation BLOBs](https://docs.aspose.com/slides/python-net/manage-blob/) for large-file strategies. For large files, prefer loading from file paths when possible, close each source presentation as soon as it has been merged, and avoid repeatedly saving intermediate results unless the workflow requires checkpoints. Using `with slides.Presentation(...)` ensures that presentation resources are released when the context exits. ### **Thread Safety** Do not load, save, or clone a [Presentation](https://reference.aspose.com/slides/python-net/aspose.slides/presentation/) instance concurrently from multiple threads. Keep each merge operation single-threaded. If you parallelize independent merge jobs, use separate single-threaded processes and independent presentation instances as described in the [Aspose.Slides multithreading guidance](https://docs.aspose.com/slides/python-net/multithreading/). ## **FAQ** **How do I keep each source presentation's original design?** Use [add_clone](https://reference.aspose.com/slides/python-net/aspose.slides/slidecollection/add_clone/) without supplying a destination master or layout. Aspose.Slides can automatically clone the source master when it is needed by the imported slide. **How do I make imported slides use the destination theme?** Use the overload that accepts a destination master. Pass a master from the destination presentation, not from the source. Aspose.Slides will try to map each source slide to an appropriate layout under that master. **When should I use a specific destination layout instead of a destination master?** Use a specific layout when every imported slide should use one known layout. Use a master when you want Aspose.Slides to select among that master's layouts based on the source layout type or name. **Can presentations with different slide sizes be merged?** Yes, but slide content is not automatically redesigned for the destination dimensions. Resize the source presentation first when you need predictable placement, for example with [SlideSize.set_size](https://reference.aspose.com/slides/python-net/aspose.slides/slidesize/set_size/) and [SlideSizeScaleType.ENSURE_FIT](https://reference.aspose.com/slides/python-net/aspose.slides/slidesizescaletype/). **Can I merge PPT, PPTX, and ODP presentations into one file?** Yes. Load each source presentation, clone the required slides into one destination, and save the destination in a supported output format. Because presentation formats do not support exactly the same feature set, verify complex content after cross-format merges. See [Supported File Formats](https://docs.aspose.com/slides/python-net/supported-file-formats/). **Are source sections preserved automatically?** Not by a basic loop that only clones slides. Recreate the required sections in the destination and use the section overload of [add_clone](https://reference.aspose.com/slides/python-net/aspose.slides/slidecollection/add_clone/) when section structure must be preserved. **Are speaker notes and comments preserved?** They are copied with the cloned slide. For workflows that depend on notes-master styling, comment authors, or threaded review data, verify the merged result because those scenarios involve presentation-level structures as well as slide-level content. **What happens to audio, video, OLE objects, and hyperlinks?** Embedded content is carried as part of the cloned slide's resource relationships. External links remain external, so their target files or URLs must still be available after the merge. **Are embedded fonts from every source guaranteed to be available in the merged presentation?** Do not rely on slide cloning alone for font deployment. Inspect the destination's embedded fonts and explicitly manage font embedding or external font availability when typography is important. **How do I merge a password-protected file?** Open it with the correct [LoadOptions.password](https://reference.aspose.com/slides/python-net/aspose.slides/loadoptions/password/), then clone its slides normally. Output protection is configured separately. **How should I handle very large presentations?** Use BLOB management when large binary objects dominate memory usage, prefer file-path loading for very large files, close source presentations promptly, and save the final result only when needed. **Can I merge slides from multiple threads?** Do not load, save, or clone [Presentation](https://reference.aspose.com/slides/python-net/aspose.slides/presentation/) instances in multiple threads. Keep each merge operation single-threaded; use independent single-threaded processes if you need to parallelize separate merge jobs. ## Related articles - [Clone PowerPoint Slides in Python](https://docs.aspose.com/slides/python-net/clone-slides/) # Metered Licensing > Learn how Aspose.Slides for Python via .NET metered licensing lets you process PowerPoint and OpenDocument files flexibly, paying only for what you use. Source: https://docs.aspose.com/slides/python-net/metered-licensing/ Updated: 2026-08-13 ## **Introduction** Metered licensing is a licensing mechanism that can be used alongside existing licensing methods. If you want to be billed based on your usage of Aspose.Slides API features, you choose metered licensing. ## **Apply Metered Keys** Metered licensing is a new licensing mechanism that can be used alongside existing licensing methods. If you want to be billed based on your usage of Aspose.Slides API features, you choose metered licensing. When you purchase a metered license, you get keys (and not a license file). This metered key can be applied using the [Metered](https://reference.aspose.com/slides/python-net/aspose.slides/metered/) class Aspose provided for metering operations. For more details, see [Metered Licensing FAQ](https://purchase.aspose.com/faqs/licensing/metered). 1. Create an instance the [Metered](https://reference.aspose.com/slides/python-net/aspose.slides/metered/) class. 1. Pass your public and private keys to the [set_metered_key](https://reference.aspose.com/slides/python-net/aspose.slides/metered/set_metered_key/#str-str) method. 1. Do some processing (perform tasks). 1. Call the [get_consumption_quantity](https://reference.aspose.com/slides/python-net/aspose.slides/metered/get_consumption_quantity/#) method of the `Metered` class. You should see the amount/quantity of API requests you have consumed so far. This sample code shows you how to use metered licensing: ```python import aspose.slides as slides # Creates an instance of the Metered class metered = slides.Metered() # Passes the public and private keys to the Metered object metered.set_metered_key("", "") # Gets the consumed quantity value before API calls amount_before = slides.Metered.get_consumption_quantity() print("Amount consumed before:", amount_before) # Do something with Aspose.Slides API here # ... # Gets the consumed quantity value after API calls amount_after = slides.Metered.get_consumption_quantity() print("Amount consumed after:", amount_after) ``` To use metered licensing, you need a stable internet connection because the licensing mechanism uses the internet to constantly interact with our services and perform calculations. ## **FAQ** ### Can I use a metered license together with a regular one (perpetual or temporary) in the same application? Yes. Metered is an additional licensing mechanism that can be used alongside existing [licensing methods](https://docs.aspose.com/slides/python-net/licensing/). You choose which mechanism to apply when the application starts. ### What exactly counts as consumption under a metered license: operations or files? API usage is counted, meaning the number of requests or operations. You can obtain the current consumption via [consumption-tracking methods](https://reference.aspose.com/slides/python-net/aspose.slides/metered/). ### Is metered suitable for microservices and serverless environments where instances restart frequently? Yes. Since accounting is done at the API-call level, scenarios with frequent cold starts are compatible, provided there is stable network access for metered calculations. ### Does the library’s functionality differ when using a metered license compared to a perpetual license? No. This is only about the licensing and billing mechanism; the product’s capabilities are the same. ### How does metered relate to the trial version and the temporary license? The trial version has limitations and watermarks, the [temporary license](https://purchase.aspose.com/temporary-license/) removes limitations for 30 days, and metered removes limitations and charges based on actual usage. ### Can I control the budget by automatically reacting when a consumption threshold is exceeded? Yes. A common practice is to periodically read current consumption via [tracking methods](https://reference.aspose.com/slides/python-net/aspose.slides/metered/) and implement your own limits or alerts at the application or monitoring level. # Migrate to the New Python-to-.NET Engine in Version 26.8 > Move your Python code to the new Aspose.Slides engine in version 26.8: relocate drawing primitives to aspose.slides, and fix imports automatically. Source: https://docs.aspose.com/slides/python-net/migrate-to-new-engine/ Updated: 2026-09-02 ## **Introduction** Version 26.8 replaces the engine that connects Python to .NET. The drawing primitives moved into the `aspose.slides` module. Jump straight to [I Have an Error](https://docs.aspose.com/slides/python-net/migrate-to-new-engine/#i-have-an-error) if you have an issues after upgrade. ### **Drawing Primitives Moved to aspose.slides** Seven types moved. They keep their names, arguments, and behavior: |Type|Before 26.8|26.8 and Later| | :- | :- | :- | |Point|`aspose.pydrawing.Point`|[aspose.slides.Point](https://reference.aspose.com/slides/python-net/aspose.slides/point/)| |PointF|`aspose.pydrawing.PointF`|[aspose.slides.PointF](https://reference.aspose.com/slides/python-net/aspose.slides/pointf/)| |Size|`aspose.pydrawing.Size`|[aspose.slides.Size](https://reference.aspose.com/slides/python-net/aspose.slides/size/)| |SizeF|`aspose.pydrawing.SizeF`|[aspose.slides.SizeF](https://reference.aspose.com/slides/python-net/aspose.slides/sizef/)| |Rectangle|`aspose.pydrawing.Rectangle`|[aspose.slides.Rectangle](https://reference.aspose.com/slides/python-net/aspose.slides/rectangle/)| |RectangleF|`aspose.pydrawing.RectangleF`|[aspose.slides.RectangleF](https://reference.aspose.com/slides/python-net/aspose.slides/rectanglef/)| |Color|`aspose.pydrawing.Color`|[aspose.slides.Color](https://reference.aspose.com/slides/python-net/aspose.slides/color/)| These seven types were the entire remaining content of `aspose.pydrawing`. Once you have repointed them, nothing in your code needs to reference `aspose.pydrawing` at all, and every import of it can be removed. That also makes the result easy to check - see [Verify the Migration](https://docs.aspose.com/slides/python-net/migrate-to-new-engine/#verify-the-migration). **Legacy code:** ```python import aspose.slides as slides import aspose.pydrawing as drawing with slides.Presentation() as presentation: slide = presentation.slides[0] shape = slide.shapes.add_auto_shape(slides.ShapeType.RECTANGLE, 50, 50, 200, 100) shape.fill_format.fill_type = slides.FillType.SOLID shape.fill_format.solid_fill_color.color = drawing.Color.red with slide.get_image(drawing.Size(1920, 1080)) as slide_image: slide_image.save("slide1.jpeg", slides.ImageFormat.JPEG) ``` **Version 26.8:** ```python import aspose.slides as slides with slides.Presentation() as presentation: slide = presentation.slides[0] shape = slide.shapes.add_auto_shape(slides.ShapeType.RECTANGLE, 50, 50, 200, 100) shape.fill_format.fill_type = slides.FillType.SOLID shape.fill_format.solid_fill_color.color = slides.Color.red with slide.get_image(slides.Size(1920, 1080)) as slide_image: slide_image.save("slide1.jpeg", slides.ImageFormat.JPEG) ``` The `from` import form changes the same way: ```python # Legacy code from aspose.pydrawing import Color, Point # Version 26.8 from aspose.slides import Color, Point ``` ## **Fix an Import Error** Find your traceback in the first column. |Error|Cause|Fix| | :- | :- | :- | |`AttributeError: module 'aspose.pydrawing' has no attribute 'Color'` (or `Point`, `Rectangle`, and so on)|The package is 26.8, the code still points at the old module|[Update your code](https://docs.aspose.com/slides/python-net/migrate-to-new-engine/#update-your-code)| |`ImportError: cannot import name 'Color' from 'aspose.pydrawing'`|The same cause, `from` import form|[Update your code](https://docs.aspose.com/slides/python-net/migrate-to-new-engine/#update-your-code)| |`ModuleNotFoundError: No module named 'aspose.pydrawing'`|The module and all seven of its types moved into `aspose.slides`|[Update your code](https://docs.aspose.com/slides/python-net/migrate-to-new-engine/#update-your-code), then delete the `aspose.pydrawing` import| |`ImportError: cannot import name 'Color' from 'aspose.slides'`|The code was migrated, but the installed package is 26.7 or older|`pip install --upgrade aspose.slides`| |`TypeError` on a color, point, or size argument|A value created from `aspose.pydrawing` is passed to the new API|Create the value from `aspose.slides` as well| ## **Update Your Code** Because `aspose.pydrawing` has no content other than the seven moved types, the migration is a rename of the module. Every import form is covered by that single rename, including aliases: ```python # Legacy code import aspose.pydrawing as drawing color = drawing.Color.red # Version 26.8 - the alias keeps working import aspose.slides as drawing color = drawing.Color.red ``` This is valid in any scope, including inside a function body, because the alias remains bound exactly where it was bound before. The only drawback is a misleading name, so consider making the intent explicit: ```python import aspose.slides as slides color = slides.Color.red ``` Choose the approach that matches the size of your code base. ### **Replace Manually** For a few files, search for `aspose.pydrawing` and replace it with `aspose.slides`, then remove any import that is no longer needed. ### **Replace with a Shell Command** This is a plain text replacement, so it also affects occurrences inside strings and comments. Both commands write a `.bak` copy of every file they change. **Linux:** ```bash grep -rlZ --include='*.py' 'aspose\.pydrawing' . \ | xargs -0 -r sed -i.bak 's/aspose\.pydrawing/aspose.slides/g' ``` On macOS, use `sed -i ''` instead of `sed -i.bak`, or install GNU sed as `gsed`. **Windows PowerShell:** ``` Get-ChildItem -Recurse -Filter *.py | ForEach-Object { $t = Get-Content $_ -Raw $new = $t -replace 'aspose\.pydrawing', 'aspose.slides' if ($new -ne $t) { Copy-Item $_.FullName "$($_.FullName).bak" Set-Content $_.FullName $new -NoNewline $_.FullName } } ``` To roll back on Linux or macOS: ```bash find . -name '*.py.bak' -exec sh -c 'mv "$1" "${1%.bak}"' _ {} \; ``` To roll back on Windows: ``` Get-ChildItem -Recurse -Filter *.py.bak | ForEach-Object { Move-Item $_.FullName ($_.FullName -replace '\.bak$', '') -Force } ``` ### **Replace with a Python Script** The same rename, portable across Linux, macOS, and Windows. The script takes the path as an argument and previews the changes unless `--write` is passed. Add `--backup` to keep a `.bak` copy of every changed file. Save it under any name - the usage message picks the name up at run time. ```python """Rename aspose.pydrawing to aspose.slides. Plain text replacement. python src/ # preview python src/ --write # apply python src/ --write --backup # apply, keeping .bak copies """ import sys from pathlib import Path W = "--write" in sys.argv B = "--backup" in sys.argv ROOT = next((a for a in sys.argv[1:] if not a.startswith("-")), None) if ROOT is None: sys.exit(f"usage: python {Path(sys.argv[0]).name} [--write] [--backup]") root = Path(ROOT) if not root.exists(): sys.exit(f"no such path: {root}") files = [root] if root.is_file() else root.rglob("*.py") changed = 0 for p in files: if {".venv", "venv", "__pycache__", ".git"} & set(p.parts): continue s = p.read_text(encoding="utf-8") n = s.replace("aspose.pydrawing", "aspose.slides") if n == s: continue changed += 1 print(("wrote " if W else "would change ") + str(p)) if W: if B: p.with_suffix(p.suffix + ".bak").write_text(s, encoding="utf-8") p.write_text(n, encoding="utf-8") print(f"{changed} file(s) {'changed' if W else 'to change'}" + ("" if W or not changed else "; rerun with --write to apply")) ``` A typical run looks like this: ```console $ python migrate.py src/ would change src/render.py would change src/export/slides.py 2 file(s) to change; rerun with --write to apply $ python migrate.py src/ --write --backup wrote src/render.py wrote src/export/slides.py 2 file(s) changed ``` The path can be a directory, which is walked recursively, or a single `.py` file. ### **Replace with an AST-Based Script** Recommended for larger code bases. This script performs the same rename, but parses each file first, so it never touches occurrences inside strings, comments, or docstrings. Because it renames the module in place and leaves aliases alone, every import form is handled without special cases: `import aspose.pydrawing`, `import aspose.pydrawing as X`, `from aspose.pydrawing import Color`, `from aspose.pydrawing import Color as C`, multi-line parenthesized imports, imports inside functions, and the module passed as a value. It accepts the same `--write` and `--backup` flags. ```python """Rename aspose.pydrawing to aspose.slides, skipping strings and comments. python src/ # preview python src/ --write # apply python src/ --write --backup # apply, keeping .bak copies """ import ast, sys from pathlib import Path MOD, DST = "aspose.pydrawing", "aspose.slides" W = "--write" in sys.argv B = "--backup" in sys.argv ROOT = next((a for a in sys.argv[1:] if not a.startswith("-")), None) if ROOT is None: sys.exit(f"usage: python {Path(sys.argv[0]).name} [--write] [--backup]") root = Path(ROOT) if not root.exists(): sys.exit(f"no such path: {root}") files = [root] if root.is_file() else root.rglob("*.py") changed = 0 def chain(n): p = [] while isinstance(n, ast.Attribute): p.append(n.attr) n = n.value return ".".join(reversed(p + [n.id])) if isinstance(n, ast.Name) else None def fix(src): tree = ast.parse(src) off, o = [], 0 for l in src.encode().splitlines(keepends=True): off.append(o) o += len(l) off.append(o) edits = [] for n in ast.walk(tree): # import aspose.pydrawing [as X] / from aspose.pydrawing import ... # The module name is renamed in place, so any alias stays bound as before. if (isinstance(n, ast.Import) and any(a.name == MOD for a in n.names)) or \ (isinstance(n, ast.ImportFrom) and n.module == MOD): s, e = off[n.lineno - 1], off[n.end_lineno - 1] + n.end_col_offset edits.append((s, e, src.encode()[s:e].decode().replace(MOD, DST))) # Any expression referring to the module, including bare `fn(aspose.pydrawing)`. elif isinstance(n, ast.Attribute) and chain(n) == MOD: edits.append((off[n.lineno - 1] + n.col_offset, off[n.end_lineno - 1] + n.end_col_offset, DST)) b = src.encode() for s, e, r in sorted(edits, reverse=True): # back to front keeps offsets valid b = b[:s] + r.encode() + b[e:] return b.decode() for p in files: if {".venv", "venv", "__pycache__", ".git"} & set(p.parts): continue s = p.read_text(encoding="utf-8") try: n = fix(s) except SyntaxError as e: print(f"skipped {p}: {e}") continue if n != s: print(("wrote " if W else "would change ") + str(p)) if W: if B: p.with_suffix(p.suffix + ".bak").write_text(s, encoding="utf-8") p.write_text(n, encoding="utf-8") ``` Both scripts are idempotent: running them again on migrated code changes nothing. ## **Verify the Migration** A text search shows whether anything is left: ```bash grep -rn 'aspose\.pydrawing' --include='*.py' --exclude-dir=.venv . ``` This is quick, but it also matches inside strings and comments, so clean code can still produce hits. For a definitive answer, use the check below. It reports only real code references and exits with a non-zero status if any remain, which makes it usable as a build gate. ```python import ast, sys from pathlib import Path MOD = "aspose.pydrawing" ROOT = next((a for a in sys.argv[1:] if not a.startswith("-")), ".") def chain(n): p = [] while isinstance(n, ast.Attribute): p.append(n.attr) n = n.value return ".".join(reversed(p + [n.id])) if isinstance(n, ast.Name) else None def scan(tree): for n in ast.walk(tree): if isinstance(n, ast.Import) and any(a.name == MOD for a in n.names): yield n.lineno, f"import {MOD}" elif isinstance(n, ast.ImportFrom) and n.module == MOD: names = ", ".join(a.name for a in n.names) yield n.lineno, f"from {MOD} import {names}" elif isinstance(n, ast.Attribute) and chain(n) == MOD: yield n.lineno, f"reference to {MOD}" hits = 0 for p in sorted(Path(ROOT).rglob("*.py")): if {".venv", "venv", "__pycache__", ".git"} & set(p.parts): continue try: tree = ast.parse(p.read_text(encoding="utf-8")) except SyntaxError as e: print(f"skipped {p}: {e}") continue for lineno, what in sorted(scan(tree)): print(f"{p}:{lineno}: {what}") hits += 1 print("migration complete" if not hits else f"{hits} reference(s) left") sys.exit(1 if hits else 0) ``` Run it before and after the migration: ```console $ python verify.py src/ src/render.py:4: from aspose.pydrawing import Color, Point src/render.py:11: import aspose.pydrawing src/render.py:12: reference to aspose.pydrawing 3 reference(s) left $ python migrate.py src/ --write wrote src/render.py $ python verify.py src/ migration complete ``` Finally, run a smoke test that exercises the moved types: ```python import aspose.slides as slides with slides.Presentation() as presentation: slide = presentation.slides[0] shape = slide.shapes.add_auto_shape(slides.ShapeType.RECTANGLE, 50, 50, 200, 100) shape.fill_format.fill_type = slides.FillType.SOLID shape.fill_format.solid_fill_color.color = slides.Color.red presentation.save("smoke.pptx", slides.export.SaveFormat.PPTX) print("OK") ``` ## **Recommended Migration Order** 1. **Save a baseline.** Run your tests on the current version and keep reference renders. This lets you separate migration errors from rendering differences later. 2. **Preview the migration.** Run one of the scripts without `--write` and review the list of files it would change. 3. **Apply and verify.** Run with `--write --backup`, then the verification script and the smoke test. 4. **Compare renders with a tolerance.** The move to the .NET 6 build may produce small differences in text and effects. Use a threshold-based comparison rather than a byte-for-byte check. 5. **Remove the backups.** Once the result is confirmed, delete the `.bak` files: `find . -name '*.py.bak' -delete` on Linux and macOS, or `Get-ChildItem -Recurse -Filter *.py.bak | Remove-Item` on Windows. ## **Support Both Versions in One Code Base** If you need to run against 26.7 and 26.8 from the same source: ```python try: from aspose.slides import Color, Point, Rectangle # 26.8 and later except ImportError: from aspose.pydrawing import Color, Point, Rectangle # 26.7 and earlier ``` ## **What Did Not Change** - Names, arguments, and behavior of the moved primitives. - The rest of the `aspose.slides` API surface. - Licensing and how the license file is applied. - File formats and the saving and loading behavior. - System requirements on Windows and macOS. - The absence of a separate .NET installation - the runtime is still bundled. # Enhance Image Processing with the Modern API > Modernize slide image processing by replacing deprecated imaging APIs with the Python Modern API for seamless PowerPoint and OpenDocument automation. Source: https://docs.aspose.com/slides/python-net/modern-api/ Updated: 2026-08-05 ## **Introduction** The Aspose.Slides for Python public API currently depends on the following `aspose.pydrawing` types: - `aspose.pydrawing.Graphics` - `aspose.pydrawing.Image` - `aspose.pydrawing.Bitmap` - `aspose.pydrawing.printing.PrinterSettings` As of version 24.4, this public API is **deprecated** due to [changes](https://releases.aspose.com/slides/python-net/release-notes/2024/aspose-slides-for-python-net-24-4-release-notes/#introducing-a-new-modern-api) in the Aspose.Slides for Python public API. To eliminate `aspose.pydrawing` from the public API, we introduced the **Modern API**. Methods that use `aspose.pydrawing.Image` and `aspose.pydrawing.Bitmap` are deprecated and should be replaced by their Modern API equivalents. Methods that use `aspose.pydrawing.Graphics` are deprecated and have no direct Modern API replacement. In current versions, the members that depend on `aspose.pydrawing` have already been removed from the public API, so calling them raises an `AttributeError` (or a `TypeError` for the affected overloads). The legacy snippets below are shown only to illustrate what to migrate from — use the Modern API for new code and when migrating existing image-processing workflows. ## **Modern API** The following classes and enums have been added to the public API: - [aspose.slides.IImage](https://reference.aspose.com/slides/python-net/aspose.slides/iimage/) - represents a raster or vector image. - [aspose.slides.ImageFormat](https://reference.aspose.com/slides/python-net/aspose.slides/imageformat/) - represents an image file format. - [aspose.slides.Images](https://reference.aspose.com/slides/python-net/aspose.slides/images/) - provides methods to create and work with [IImage](https://reference.aspose.com/slides/python-net/aspose.slides/iimage/). Use `get_image` to render a single slide or shape. Use `get_images` to render several presentation slides. Use [Images](https://reference.aspose.com/slides/python-net/aspose.slides/images/) methods to load images, `add_image` with [IImage](https://reference.aspose.com/slides/python-net/aspose.slides/iimage/) to add them to a presentation, and `replace_image` with [IImage](https://reference.aspose.com/slides/python-net/aspose.slides/iimage/) to update an existing presentation image. A typical usage scenario for the new API looks like this: ```python import aspose.slides as slides import aspose.pydrawing as drawing with slides.Presentation() as presentation: slide = presentation.slides[0] with slides.Images.from_file("image.png") as image: pp_image = presentation.images.add_image(image) slide.shapes.add_picture_frame(slides.ShapeType.RECTANGLE, 10, 10, 100, 100, pp_image) with slide.get_image(drawing.Size(1920, 1080)) as slide_image: slide_image.save("slide1.jpeg", slides.ImageFormat.JPEG) ``` ## **Replace Old Code with the Modern API** For an easier transition, the new [IImage](https://reference.aspose.com/slides/python-net/aspose.slides/iimage/) class mirrors the separate APIs of the `aspose.pydrawing.Image` and `aspose.pydrawing.Bitmap` classes. In most cases, you only need to replace calls to methods that use `aspose.pydrawing` with their Modern API equivalents. ### **Get a Slide Thumbnail** **Deprecated API:** ```python import aspose.slides as slides with slides.Presentation("sample.pptx") as presentation: slide = presentation.slides[0] slide.get_thumbnail().save("slide1.png") ``` **Modern API:** ```python import aspose.slides as slides with slides.Presentation("sample.pptx") as presentation: slide = presentation.slides[0] with slide.get_image() as image: image.save("slide1.png") ``` ### **Get a Shape Thumbnail** **Deprecated API:** ```python import aspose.slides as slides with slides.Presentation("sample.pptx") as presentation: shape = presentation.slides[0].shapes[0] shape.get_thumbnail().save("shape.png") ``` **Modern API:** ```python import aspose.slides as slides with slides.Presentation("sample.pptx") as presentation: shape = presentation.slides[0].shapes[0] with shape.get_image() as image: image.save("shape.png") ``` ### **Get a Presentation Thumbnail** **Deprecated API:** ```python import aspose.slides as slides import aspose.pydrawing as drawing with slides.Presentation("sample.pptx") as presentation: thumbnails = presentation.get_thumbnails(slides.export.RenderingOptions(), drawing.Size(1980, 1028)) for index, thumbnail in enumerate(thumbnails): thumbnail.save(f"slide_{index}.png", drawing.imaging.ImageFormat.png) ``` **Modern API:** ```python import aspose.slides as slides import aspose.pydrawing as drawing with slides.Presentation("sample.pptx") as presentation: thumbnails = presentation.get_images(slides.export.RenderingOptions(), drawing.Size(1980, 1028)) for index, thumbnail in enumerate(thumbnails): thumbnail.save(f"slide_{index}.png", slides.ImageFormat.PNG) ``` ### **Add a Picture to a Presentation** **Deprecated API:** ```python import aspose.slides as slides import aspose.pydrawing as drawing with slides.Presentation() as presentation: slide = presentation.slides[0] image = drawing.Image.from_file("image.png") pp_image = presentation.images.add_image(image) slide.shapes.add_picture_frame(slides.ShapeType.RECTANGLE, 10, 10, 100, 100, pp_image) ``` **Modern API:** ```python import aspose.slides as slides with slides.Presentation() as presentation: slide = presentation.slides[0] with slides.Images.from_file("image.png") as image: pp_image = presentation.images.add_image(image) slide.shapes.add_picture_frame(slides.ShapeType.RECTANGLE, 10, 10, 100, 100, pp_image) ``` ## **Removed Methods and Properties and Their Modern Replacements** ### **Presentation Class** |Method Signature|Replacement Method Signature| | :- | :- | |get_thumbnails(options)|[get_images(options)](https://reference.aspose.com/slides/python-net/aspose.slides/presentation/get_images/#asposeslidesexportirenderingoptions)| |get_thumbnails(options, slides)|[get_images(options, slides)](https://reference.aspose.com/slides/python-net/aspose.slides/presentation/get_images/#asposeslidesexportirenderingoptions-listint)| |get_thumbnails(options, scale_x, scale_y)|[get_images(options, scale_x, scale_y)](https://reference.aspose.com/slides/python-net/aspose.slides/presentation/get_images/#asposeslidesexportirenderingoptions-float-float)| |get_thumbnails(options, slides, scale_x, scale_y)|[get_images(options, slides, scale_x, scale_y)](https://reference.aspose.com/slides/python-net/aspose.slides/presentation/get_images/#asposeslidesexportirenderingoptions-listint-float-float)| |get_thumbnails(options, image_size)|[get_images(options, image_size)](https://reference.aspose.com/slides/python-net/aspose.slides/presentation/get_images/#asposeslidesexportirenderingoptions-asposepydrawingsize)| |get_thumbnails(options, slides, image_size)|[get_images(options, slides, image_size)](https://reference.aspose.com/slides/python-net/aspose.slides/presentation/get_images/#asposeslidesexportirenderingoptions-listint-asposepydrawingsize)| |save(fname, format, response, show_inline)|No Modern API replacement| |save(fname, format, options, response, show_inline)|No Modern API replacement| |print()|No Modern API replacement| |print(printer_settings)|No Modern API replacement| |print(printer_name)|No Modern API replacement| |print(printer_settings, pres_name)|No Modern API replacement| ### **Slide Class** |Method Signature|Replacement Method Signature| | :- | :- | |get_thumbnail()|[get_image()](https://reference.aspose.com/slides/python-net/aspose.slides/slide/get_image/#)| |get_thumbnail(scale_x, scale_y)|[get_image(scale_x, scale_y)](https://reference.aspose.com/slides/python-net/aspose.slides/slide/get_image/#float-float)| |get_thumbnail(image_size)|[get_image(image_size)](https://reference.aspose.com/slides/python-net/aspose.slides/slide/get_image/#asposepydrawingsize)| |get_thumbnail(options)|[get_image(options: ITiffOptions)](https://reference.aspose.com/slides/python-net/aspose.slides/slide/get_image/#asposeslidesexportitiffoptions)| |get_thumbnail(options)|[get_image(options: IRenderingOptions)](https://reference.aspose.com/slides/python-net/aspose.slides/slide/get_image/#asposeslidesexportirenderingoptions)| |get_thumbnail(options, scale_x, scale_y)|[get_image(options, scale_x, scale_y)](https://reference.aspose.com/slides/python-net/aspose.slides/slide/get_image/#asposeslidesexportirenderingoptions-float-float)| |get_thumbnail(options, image_size)|[get_image(options, image_size)](https://reference.aspose.com/slides/python-net/aspose.slides/slide/get_image/#asposeslidesexportirenderingoptions-asposepydrawingsize)| |render_to_graphics(options, graphics)|No Modern API replacement| |render_to_graphics(options, graphics, scale_x, scale_y)|No Modern API replacement| |render_to_graphics(options, graphics, rendering_size)|No Modern API replacement| ### **Shape Class** |Method Signature|Replacement Method Signature| | :- | :- | |get_thumbnail()|[get_image()](https://reference.aspose.com/slides/python-net/aspose.slides/shape/get_image/#)| |get_thumbnail(bounds, scale_x, scale_y)|[get_image(bounds, scale_x, scale_y)](https://reference.aspose.com/slides/python-net/aspose.slides/shape/get_image/#shapethumbnailbounds-float-float)| ### **ImageCollection Class** |Method Signature|Replacement Method Signature| | :- | :- | |add_image(image: aspose.pydrawing.Image)|[add_image(image)](https://reference.aspose.com/slides/python-net/aspose.slides/imagecollection/add_image/#iimage)| ### **PPImage Class** |Method/Property Signature|Replacement Method/Property Signature| | :- | :- | |replace_image(new_image: aspose.pydrawing.Image)|[replace_image(new_image)](https://reference.aspose.com/slides/python-net/aspose.slides/ppimage/replace_image/#iimage)| |system_image|[image](https://reference.aspose.com/slides/python-net/aspose.slides/ppimage/image/)| ### **ImageWrapperFactory Class** |Method Signature|Replacement Method Signature| | :- | :- | |create_image_wrapper(image: aspose.pydrawing.Image)|[create_image_wrapper(image)](https://reference.aspose.com/slides/python-net/aspose.slides/iimagewrapperfactory/create_image_wrapper/#iimage)| ### **PatternFormat Class** |Method Signature|Replacement Method Signature| | :- | :- | |get_tile_image(background, foreground)|[get_tile(background, foreground)](https://reference.aspose.com/slides/python-net/aspose.slides/patternformat/get_tile/#asposepydrawingcolor-asposepydrawingcolor)| |get_tile_image(style_color)|[get_tile(style_color)](https://reference.aspose.com/slides/python-net/aspose.slides/patternformat/get_tile/#asposepydrawingcolor)| ### **IPatternFormatEffectiveData Class** |Method Signature|Replacement Method Signature| | :- | :- | |get_tile_image(background, foreground)|[get_tile_i_image(background, foreground)](https://reference.aspose.com/slides/python-net/aspose.slides/ipatternformateffectivedata/get_tile_i_image/#asposepydrawingcolor-asposepydrawingcolor)| ### **Output Class** |Method Signature|Replacement Method Signature| | :- | :- | |add(path, image: aspose.pydrawing.Image)|[add(path, image)](https://reference.aspose.com/slides/python-net/aspose.slides.export.web/output/add/#str-iimage)| ## **API Support for aspose.pydrawing.Graphics** Methods that use `aspose.pydrawing.Graphics` are deprecated and have no direct Modern API replacement. Use the Modern API image-rendering methods instead of the API that renders to `aspose.pydrawing.Graphics`: - `aspose.slides.Slide.render_to_graphics(options, graphics)` - `aspose.slides.Slide.render_to_graphics(options, graphics, scale_x, scale_y)` - `aspose.slides.Slide.render_to_graphics(options, graphics, rendering_size)` # **FAQ** ### Why was `aspose.pydrawing.Graphics` dropped? Support for `aspose.pydrawing.Graphics` is deprecated in the public API to unify work with rendering and images, eliminate ties to platform-specific dependencies, and switch to a cross-platform approach with [IImage](https://reference.aspose.com/slides/python-net/aspose.slides/iimage/). Use `get_image` or `get_images` instead of rendering to `aspose.pydrawing.Graphics`. ### What is the practical benefit of [IImage](https://reference.aspose.com/slides/python-net/aspose.slides/iimage/) compared to `aspose.pydrawing.Image`/`aspose.pydrawing.Bitmap`? [IImage](https://reference.aspose.com/slides/python-net/aspose.slides/iimage/) unifies working with both raster and vector images, simplifies saving to various formats via [ImageFormat](https://reference.aspose.com/slides/python-net/aspose.slides/imageformat/), reduces dependence on pydrawing, and makes code more portable across environments. ### Will the Modern API affect the performance of generating thumbnails? Switching from `get_thumbnail` to `get_image` does not worsen scenarios: the new methods provide the same capabilities for producing images with options and sizes, while retaining support for rendering options. The specific gain or drop depends on the scenario, but functionally the replacements are equivalent. # Multithreading in Aspose.Slides for Python > Aspose.Slides for Python via .NET multithreading boosts PowerPoint and OpenDocument processing. Discover best practices for efficient presentation workflows. Source: https://docs.aspose.com/slides/python-net/multithreading/ Updated: 2026-08-05 ## **Introduction** While parallel work with presentations is possible (besides parsing/loading/cloning) and everything goes well (most times), there is a small chance you might get incorrect results when you use the library in multiple threads. We strongly recommend that you do **not** use a single [Presentation](https://reference.aspose.com/slides/python-net/aspose.slides/presentation/) instance in a multi-threading environment because it might result in unpredictable errors or failures that are not easily detected. It is **not** safe to load, save, and/or clone an instance of a [Presentation](https://reference.aspose.com/slides/python-net/aspose.slides/presentation/) class in multiple threads. Such operations are **not** supported. If you need to perform such tasks, you have to parallel the operations using several single-threaded processes—and each of these processes should use its own presentation instance. ## **Convert Presentation Slides to Images in Parallel** Let's say we want to convert all the slides from a PowerPoint presentation to PNG images in parallel. Since it is unsafe to use a single `Presentation` instance in multiple threads, we first split the presentation slides into separate presentations—cloning, like loading, must stay on a single thread—and only then convert the slides to images in parallel, using each presentation in a separate thread. The following code example shows how to do this. ```py import aspose.slides as slides from concurrent.futures import ThreadPoolExecutor input_file_path = "sample.pptx" output_file_path_template = "slide_{0}.png" image_scale = 2 slide_presentations = [] # Extract every slide into a separate presentation. This runs on a single thread # because loading and cloning a presentation must not be done in parallel. with slides.Presentation(input_file_path) as presentation: slide_size = presentation.slide_size.size for source_slide in presentation.slides: slide_presentation = slides.Presentation() slide_presentation.slide_size.set_size(slide_size.width, slide_size.height, slides.SlideSizeScaleType.DO_NOT_SCALE) slide_presentation.slides.remove_at(0) slide_presentation.slides.add_clone(source_slide) slide_presentations.append(slide_presentation) def convert_slide(slide_index): # Each thread works with its own presentation instance. with slide_presentations[slide_index] as slide_presentation: slide_number = slide_index + 1 slide = slide_presentation.slides[0] # Convert the slide to an image. with slide.get_image(image_scale, image_scale) as image: image_file_path = output_file_path_template.format(slide_number) image.save(image_file_path, slides.ImageFormat.PNG) conversion_tasks = [] with ThreadPoolExecutor() as thread_executor: for index in range(len(slide_presentations)): conversion_tasks.append(thread_executor.submit(convert_slide, index)) # Wait for all tasks to complete. for task in conversion_tasks: task.result() ``` ## **FAQ** ### Do I need to call license setup in every thread? No. It’s enough to do it once per process/app domain before threads start. If [license setup](https://docs.aspose.com/slides/python-net/licensing/) might be invoked concurrently (for example, during lazy initialization), synchronize that call because the license setup method itself is not thread-safe. ### Can I pass `Presentation` or `Slide` objects between threads? Passing "live" presentation objects between threads is not recommended: use independent instances per thread or precreate separate presentations/slide containers for each thread. This approach follows the general recommendation not to share a single presentation instance across threads. ### Is it safe to parallelize export to different formats (PDF, HTML, images) provided each thread has its own `Presentation` instance? Yes. With independent instances and separate output paths, such tasks typically parallelize correctly; avoid any shared presentation objects and shared I/O streams. ### What should I do with global font settings (folders, substitutions) in multithreading? Initialize all global font settings before starting the threads and do not change them during parallel work. This eliminates races when accessing shared font resources. # Change Notes Page Size and Orientation in Python > Read and change notes page dimensions in Aspose.Slides for Python via .NET, switch orientation, verify saved sizes, and export notes or handouts to PDF and images. Source: https://docs.aspose.com/slides/python-net/notes-size/ Updated: 2026-11-08 ## **Overview** Use [Presentation.notes_size](https://reference.aspose.com/slides/python-net/aspose.slides/presentation/notes_size/) to access the presentation's notes page settings. It returns a [NotesSize](https://reference.aspose.com/slides/python-net/aspose.slides/notessize/) object whose [size](https://reference.aspose.com/slides/python-net/aspose.slides/notessize/size/) property is writable. Although the settings object itself is read-only, you can assign new dimensions to its size property. Width and height are specified in **points**, with 72 points per inch. For example, 900 × 600 points is 12.5 × 8⅓ inches. These settings apply to the presentation, rather than to an individual slide's notes. | Setting | Purpose | | --- | --- | | [Presentation.notes_size](https://reference.aspose.com/slides/python-net/aspose.slides/presentation/notes_size/) | Controls notes page dimensions and the page dimensions used for handout export. | | [Presentation.slide_size](https://reference.aspose.com/slides/python-net/aspose.slides/presentation/slide_size/) | Controls regular presentation slide dimensions through [SlideSize](https://reference.aspose.com/slides/python-net/aspose.slides/slidesize/). | Changing either setting does not automatically change the other. Changing the notes page orientation also does not rotate the regular slides. See [Slide Size](https://docs.aspose.com/slides/python-net/slide-size/) to resize regular slides. The examples below use an existing `sample.pptx`. For the export examples, use a presentation with at least one slide containing speaker notes. Each example can be run independently. ## **Read the Notes Page Size and Orientation** Read the width and height and compare them to determine the orientation: a wider page is landscape, a taller page is portrait, and equal dimensions describe a square page. This example prints the actual dimensions in points, without assuming a standard paper size. ```python import aspose.slides as slides with slides.Presentation("sample.pptx") as presentation: size = presentation.notes_size.size orientation = "Square" if size.width > size.height: orientation = "Landscape" elif size.width < size.height: orientation = "Portrait" print(f"Notes page: {size.width:g} x {size.height:g} points") print(f"Orientation: {orientation}") ``` ## **Switch to Landscape Without Changing the Paper Size** To change only the orientation, swap the existing width and height. This preserves the lengths of both sides, including those of a custom paper size. The condition below prevents an already-landscape page from being switched back to portrait and leaves a square page unchanged. ```python import aspose.pydrawing as drawing import aspose.slides as slides with slides.Presentation("sample.pptx") as presentation: size = presentation.notes_size.size if size.width < size.height: presentation.notes_size.size = drawing.SizeF(size.height, size.width) presentation.save("landscape-notes.pptx", slides.export.SaveFormat.PPTX) ``` For portrait orientation, use the same assignment when `size.width > size.height`. Do not substitute A4 or Letter dimensions unless you also want to change the paper size. [![A regular 960 by 540-point slide keeps its 16 to 9 ratio. A portrait notes PDF measures 600 by 900 points, and the landscape export measures 900 by 600 points.](https://docs.aspose.com/slides/python-net/notes-size/visual-notes-size-dff02bd439bd.svg)](https://docs.aspose.com/slides/python-net/notes-size/visual-notes-size-dff02bd439bd.svg) *Swapping the stored notes dimensions gives 600 × 900 and 900 × 600-point PDF pages in this example. The regular slide keeps its 16:9 proportions.* ## **Set and Verify a Custom Notes Page Size** Assign both dimensions together, then use [Presentation.save](https://reference.aspose.com/slides/python-net/aspose.slides/presentation/save/) to write the presentation. This example sets a 900 × 600-point landscape page, saves it as PPTX, and opens the saved file again to check the persisted values. The comparison allows a 0.01-point tolerance for floating-point values; it is not a guarantee of precision for every file format. ```python import aspose.pydrawing as drawing import aspose.slides as slides expected_size = drawing.SizeF(900, 600) with slides.Presentation("sample.pptx") as presentation: presentation.notes_size.size = expected_size presentation.save("custom-notes.pptx", slides.export.SaveFormat.PPTX) with slides.Presentation("custom-notes.pptx") as reopened: actual_size = reopened.notes_size.size width_matches = abs(actual_size.width - expected_size.width) < 0.01 height_matches = abs(actual_size.height - expected_size.height) < 0.01 preserved = width_matches and height_matches print(f"Stored notes page: {actual_size.width:g} x {actual_size.height:g} points") print(f"Size preserved: {preserved}") ``` The expected result is `900 x 600 points` and `Size preserved: True`. Checking a newly opened presentation verifies the saved file, rather than only the in-memory settings. ## **Export Notes and Handouts** The page dimensions define the available area for notes or handout layouts. They do not enable those layouts by themselves: configure the export options as well. Regular slide export continues to use the slide dimensions. ### **Export Notes to PDF and PNG** Assign [NotesCommentsLayoutingOptions](https://reference.aspose.com/slides/python-net/aspose.slides.export/notescommentslayoutingoptions/) to [PdfOptions.slides_layout_options](https://reference.aspose.com/slides/python-net/aspose.slides.export/pdfoptions/slides_layout_options/) to include notes in the PDF. This example also renders the first slide with notes to PNG using [Slide.get_image](https://reference.aspose.com/slides/python-net/aspose.slides/slide/get_image/) and [RenderingOptions](https://reference.aspose.com/slides/python-net/aspose.slides.export/renderingoptions/). The [BOTTOM_TRUNCATED](https://reference.aspose.com/slides/python-net/aspose.slides.export/notespositions/) mode keeps the notes on one page; notes that do not fit can be truncated. The PDF uses 900 × 600-point pages. At the image scale of 1 × 1 used below, the PNG is 900 × 600 pixels. Points describe the page geometry; pixels describe the raster output, whose dimensions also depend on the rendering scale. ```python import aspose.pydrawing as drawing import aspose.slides as slides with slides.Presentation("sample.pptx") as presentation: presentation.notes_size.size = drawing.SizeF(900, 600) layout = slides.export.NotesCommentsLayoutingOptions() layout.notes_position = slides.export.NotesPositions.BOTTOM_TRUNCATED pdf_options = slides.export.PdfOptions() pdf_options.slides_layout_options = layout presentation.save("notes.pdf", slides.export.SaveFormat.PDF, pdf_options) rendering_options = slides.export.RenderingOptions() rendering_options.slides_layout_options = layout with presentation.slides[0].get_image(rendering_options, 1, 1) as image: image.save("first-slide-notes.png", slides.ImageFormat.PNG) ``` For PDF export with long notes, [BOTTOM_FULL](https://reference.aspose.com/slides/python-net/aspose.slides.export/notespositions/) allows additional pages as needed. Do not use that mode with the single-slide image call above, which does not support it. After resizing, inspect the output for clipped notes and the placement of existing notes-master objects; changing page dimensions alone should not be treated as a guarantee that all content will fit. See [Convert PowerPoint to PDF with Notes](https://docs.aspose.com/slides/python-net/convert-powerpoint-to-pdf-with-notes/) for more about notes export. ### **Export Handouts to PDF** Use [HandoutLayoutingOptions](https://reference.aspose.com/slides/python-net/aspose.slides.export/handoutlayoutingoptions/) for multiple slide thumbnails on one page. The following example sets a 900 × 600-point page and uses [HandoutType.HANDOUTS_4_HORIZONTAL](https://reference.aspose.com/slides/python-net/aspose.slides.export/handouttype/) to arrange up to four slides per page. The horizontal preset controls slide ordering; the page orientation comes from its width and height. ```python import aspose.pydrawing as drawing import aspose.slides as slides with slides.Presentation("sample.pptx") as presentation: presentation.notes_size.size = drawing.SizeF(900, 600) layout = slides.export.HandoutLayoutingOptions() layout.handout = slides.export.HandoutType.HANDOUTS_4_HORIZONTAL pdf_options = slides.export.PdfOptions() pdf_options.slides_layout_options = layout presentation.save("handouts.pdf", slides.export.SaveFormat.PDF, pdf_options) ``` Changing the page size changes the area available for the handout grid without changing the source slides' dimensions. For handout images, use [Presentation.get_images](https://reference.aspose.com/slides/python-net/aspose.slides/presentation/get_images/) with the handout layout, rather than an individual slide's image method. In Aspose.Slides, presentation-level handout rendering uses the notes page dimensions, while the individual slide image call does not produce the handout page. See [Handout Mode](https://docs.aspose.com/slides/python-net/convert-powerpoint-in-handout-mode/) for layout options. ## **Page Size in Viewers, Export, and Printing** Keep the stored presentation size, the exported page size, and the printed paper size distinct: - **Presentation viewers:** A viewer can display or print notes using its own layout rules. If another application saves the file, reopen it and check the dimensions again; that application's format conversion may normalize them. - **Export formats:** The notes and handout PDF examples above use the configured page dimensions. Raster images use integer pixel dimensions and a rendering scale, so fractional point values can be rounded in the image output. Exporting regular slides does not apply the notes page size. - **Printer drivers:** Paper selection, automatic rotation, and fit-to-page settings can change the physical output without changing the dimensions stored in the presentation or PDF. For a specific paper size, match the printer settings and inspect the print preview. ## **FAQ** **Can I set the notes size for just one slide?** The notes page size is a presentation-level setting. Individual slides can have different notes content, but this property does not provide a separate page size for each slide. **Why did changing notes orientation not change my slides?** Notes pages and regular slides have independent dimensions. Use the regular slide size settings when you want to resize the slides themselves. **Why does my saved or printed result have a different size?** First reopen the saved presentation and compare its notes dimensions. If those changed, check whether saving or converting the file in another application changed the page settings. If they did not, check the export layout, image scale, viewer settings, and printer paper selection. # Object Preview Issue When Adding OleObjectFrame > Learn why EMBEDDED OLE OBJECT appears when adding OleObjectFrame in Aspose.Slides for Python and how to fix preview issues in PPT, PPTX and ODP presentations. Source: https://docs.aspose.com/slides/python-net/object-preview-issue-when-adding-oleobjectframe/ Updated: 2026-08-05 ## **Introduction** Using Aspose.Slides for Python via .NET, when you add [OleObjectFrame](https://reference.aspose.com/slides/python-net/aspose.slides/oleobjectframe/) to a slide, an "EMBEDDED OLE OBJECT" message is shown on the output slide. This message is intentional and NOT a bug. For more information on working with OLE objects, see [Manage OLE](https://docs.aspose.com/slides/python-net/manage-ole/). ## **Explanation and Solution** Aspose.Slides displays the "EMBEDDED OLE OBJECT" message to notify you that the OLE object has been changed and the preview image has to be updated. For example, if you add a Microsoft Excel сhart as an [OleObjectFrame](https://reference.aspose.com/slides/python-net/aspose.slides/oleobjectframe/) to a slide (for more details, see the "Manage OLE" article) and then open the presentation in the Microsoft PowerPoint, you will see this image on the slide: ![OLE object message](https://docs.aspose.com/slides/python-net/object-preview-issue-when-adding-oleobjectframe/OLE_object_message.png) If you want to check and confirm that your OLE object was added to the slide, you have to double-click on the "EMBEDDED OLE OBJECT" message, or you can right-click on it and go through **Object > Edit** option. ![OLE object > Edit](https://docs.aspose.com/slides/python-net/object-preview-issue-when-adding-oleobjectframe/OLE_object_edit.png) PowerPoint then opens the embedded OLE object. ![OLE object data](https://docs.aspose.com/slides/python-net/object-preview-issue-when-adding-oleobjectframe/OLE_object_data.png) The slide may retain the "EMBEDDED OLE OBJECT" message. Once you click the OLE object, the slide preview gets updated and the "EMBEDDED OLE OBJECT" message is replaced by the actual image for the OLE object. ![OLE object preview](https://docs.aspose.com/slides/python-net/object-preview-issue-when-adding-oleobjectframe/OLE_object_preview.png) Now, you may want to save your presentation to ensure the image for the OLE Object gets updated correctly. This way, after saving the presentation, when you open the presentation again, you will NOT see the "EMBEDDED OLE OBJECT" message. ## **Other Solutions** ### **Solution 1: Replace the "Embedded OLE Object" Message with an Image** If you do not want to remove the "EMBEDDED OLE OBJECT" message by opening the presentation in PowerPoint and then saving it, you can replace the message with your preferred preview image. These lines of code demonstrate the process: ```py import aspose.slides as slides with slides.Presentation("embeddedOLE.pptx") as presentation: slide = presentation.slides[0] ole_frame = slide.shapes[0] # Add an image to presentation resources. with slides.Images.from_file("myImage.png") as image: ole_image = presentation.images.add_image(image) # Set the image for the OLE object preview. ole_frame.substitute_picture_format.picture.image = ole_image ole_frame.is_object_icon = False presentation.save("embeddedOLE-newImage.pptx", slides.export.SaveFormat.PPTX) ``` `is_object_icon` must be `False` so that the picture is shown as the object preview rather than as an icon caption. `substitute_picture_title` is saved only for objects displayed as icons, so it is not used here. The slide containing the `OleObjectFrame` then changes to this: ![New OLE object image](https://docs.aspose.com/slides/python-net/object-preview-issue-when-adding-oleobjectframe/OLE_object_new_image.png) ### **Solution 2: Create an Add-On for PowerPoint** You can also create an add-on for Microsoft PowerPoint that updates all OLE objects when you open presentations in the program. ## Related articles - [Manage OLE in Presentations Using Python](https://docs.aspose.com/slides/python-net/manage-ole/) # Open Presentations in Python > Learn how to open PowerPoint and OpenDocument presentations in Python, supply opening passwords, and reduce memory use with Aspose.Slides for Python via .NET. Source: https://docs.aspose.com/slides/python-net/open-presentation/ Updated: 2026-10-27 ## **Introduction** [Aspose.Slides for Python via .NET](https://products.aspose.com/slides/python-net/) can load PowerPoint and OpenDocument presentations from files and streams. After a presentation is loaded, you can inspect its structure, edit slides, manage resources, and save it in the original or another supported format. Loading behavior can be customized through the [LoadOptions](https://reference.aspose.com/slides/python-net/aspose.slides/loadoptions/) class. For example, you can supply an opening password, keep large binary objects outside memory, or omit embedded binary data. ## **Open Presentations** After loading a file or stream, you can [determine its original presentation format](https://docs.aspose.com/slides/python-net/detect-presentation-source-format/) to choose how your application processes it. To open an existing presentation, pass its file path to the [Presentation](https://reference.aspose.com/slides/python-net/aspose.slides/presentation/) constructor. Use a `with` statement so that file handles, temporary data, and other resources are released promptly. The following Python example shows how to open a presentation and get its slide count: ```python import aspose.slides as slides with slides.Presentation("sample.pptx") as presentation: print("Slide count: " + str(len(presentation.slides))) ``` ## **Open Password-Protected Presentations** An opening password encrypts presentation content. To load the complete presentation, assign the correct password to [LoadOptions.password](https://reference.aspose.com/slides/python-net/aspose.slides/loadoptions/password/) and pass the options to the [Presentation](https://reference.aspose.com/slides/python-net/aspose.slides/presentation/) constructor. Loading fails when the password is missing or incorrect. ```python import aspose.slides as slides load_options = slides.LoadOptions() load_options.password = "open_password" with slides.Presentation("encrypted-presentation.pptx", load_options) as presentation: print("Slide count: " + str(len(presentation.slides))) ``` For password detection, validation, and encryption workflows, see [Password-Protect Presentations](https://docs.aspose.com/slides/python-net/password-protected-presentation/). If an encrypted presentation was deliberately saved with public document properties, those properties can be read without a password; see [Manage Presentation Properties](https://docs.aspose.com/slides/python-net/presentation-properties/). ## **Open Large Presentations** [LoadOptions.blob_management_options](https://reference.aspose.com/slides/python-net/aspose.slides/loadoptions/blob_management_options/) controls how Aspose.Slides handles binary large objects such as images, audio, and video. You can keep the source file locked, allow temporary files, and limit the amount of BLOB data retained in memory. This Python code demonstrates loading a large presentation (for example, 2 GB): ```python import aspose.slides as slides file_path = "large-presentation.pptx" load_options = slides.LoadOptions() load_options.blob_management_options.presentation_locking_behavior = slides.PresentationLockingBehavior.KEEP_LOCKED load_options.blob_management_options.is_temporary_files_allowed = True load_options.blob_management_options.max_blobs_bytes_in_memory = 10 * 1024 * 1024 with slides.Presentation(file_path, load_options) as presentation: presentation.slides[0].name = "Large presentation" presentation.save("large-presentation-copy.pptx", slides.export.SaveFormat.PPTX) ``` With `PresentationLockingBehavior.KEEP_LOCKED`, the source file remains locked until the `Presentation` object is disposed. Do not move, overwrite, or delete the source file while that object is alive. Aspose.Slides may copy the contents of an input stream while loading it. For large presentations, a file path is therefore generally more efficient than a stream. See [Manage BLOBs](https://docs.aspose.com/slides/python-net/manage-blob/) for additional storage and memory-management options. ## **Load Presentations without Embedded Binary Objects** A presentation may contain embedded binary data that an application does not need or does not want to retain. Examples include: - VBA projects, available through [Presentation.vba_project](https://reference.aspose.com/slides/python-net/aspose.slides/presentation/vba_project/); - embedded OLE data, available through [OleEmbeddedDataInfo.embedded_file_data](https://reference.aspose.com/slides/python-net/aspose.slides/ioleembeddeddatainfo/embedded_file_data/); - ActiveX control data, available through [Control.active_x_control_binary](https://reference.aspose.com/slides/python-net/aspose.slides/control/active_x_control_binary/). Set [LoadOptions.delete_embedded_binary_objects](https://reference.aspose.com/slides/python-net/aspose.slides/loadoptions/delete_embedded_binary_objects/) to `True` to remove this binary data while loading. Save the loaded presentation to persist the sanitized result. This option reduces exposure to unwanted embedded payloads, but it is not a complete malware-detection or content-sanitization system. ```python import aspose.slides as slides load_options = slides.LoadOptions() load_options.delete_embedded_binary_objects = True with slides.Presentation("presentation-with-embedded-data.pptx", load_options) as presentation: presentation.save("presentation-without-embedded-data.pptx", slides.export.SaveFormat.PPTX) ``` ## **FAQ** **How can I tell that a file is corrupted and cannot be opened?** Aspose.Slides raises a parsing or format exception during loading. Handle that failure separately from an incorrect-password error so that the application can report the cause accurately. **What happens if required fonts are missing?** The presentation can still load, but rendering and export may substitute fonts. You can [configure font substitution](https://docs.aspose.com/slides/python-net/font-substitution/) or [provide custom fonts](https://docs.aspose.com/slides/python-net/custom-font/) to make output more predictable. **Does loading a presentation also load its embedded media?** Embedded audio and video become available through the presentation object model. External resources are resolved according to the default resource-loading behavior and may be unavailable if their locations cannot be accessed. Related feature: [Read PPTX presentations](https://docs.aspose.com/slides/features/powerpoint-files/). # Get Paragraph Bounds from Presentations in Python > Learn how to retrieve paragraph bounds in Aspose.Slides for Python via .NET to optimize text positioning in PowerPoint and OpenDocument presentations. Source: https://docs.aspose.com/slides/python-net/paragraph-bounds/ Updated: 2026-08-02 ## **Overview** This article explains how to get the bounds, size, and coordinates of paragraphs in Aspose.Slides. It shows how to retrieve a paragraph rectangle from a [TextFrame](https://reference.aspose.com/slides/python-net/aspose.slides/textframe/) by using [Paragraph.get_rect](https://reference.aspose.com/slides/python-net/aspose.slides/paragraph/get_rect/), how to get paragraph coordinates inside a table cell text frame, and highlights important details such as measurement units, the effect of text wrapping on bounds, pixel conversion, and effective paragraph formatting values. ## **Get Rectangular Coordinates of a Paragraph** Use [Paragraph.get_rect](https://reference.aspose.com/slides/python-net/aspose.slides/paragraph/get_rect/) to get the bounding rectangle of a paragraph. ```py import aspose.slides as slides with slides.Presentation("Shapes.pptx") as presentation: slide = presentation.slides[0] shape = slide.shapes[0] paragraph = shape.text_frame.paragraphs[0] rectangle = paragraph.get_rect() ``` ## **Get the Size of a Paragraph Inside a Table Cell TextFrame** To get the size and coordinates of a [Paragraph](https://reference.aspose.com/slides/python-net/aspose.slides/paragraph/) in a table cell text frame, use [Paragraph.get_rect](https://reference.aspose.com/slides/python-net/aspose.slides/paragraph/get_rect/). The returned rectangle is relative to the table cell text frame, so add the table position and cell offset when you need slide-level coordinates. The following example gets paragraph bounds inside a table cell and draws rectangles on the slide to visualize those bounds: ```py import aspose.slides as slides import aspose.pydrawing as draw with slides.Presentation("source.pptx") as presentation: slide = presentation.slides[0] table = slide.shapes[0] cell = table.rows[1][1] cell_x = table.x + cell.offset_x cell_y = table.y + cell.offset_y for paragraph in cell.text_frame.paragraphs: if paragraph.text == "": continue paragraph_rectangle = paragraph.get_rect() paragraph_rectangle_x = paragraph_rectangle.x + cell_x paragraph_rectangle_y = paragraph_rectangle.y + cell_y paragraph_bounds_shape = slide.shapes.add_auto_shape( slides.ShapeType.RECTANGLE, paragraph_rectangle_x, paragraph_rectangle_y, paragraph_rectangle.width, paragraph_rectangle.height) paragraph_bounds_shape.fill_format.fill_type = slides.FillType.NO_FILL paragraph_bounds_shape.line_format.fill_format.solid_fill_color.color = draw.Color.yellow paragraph_bounds_shape.line_format.fill_format.fill_type = slides.FillType.SOLID presentation.save("output.pptx", slides.export.SaveFormat.PPTX) ``` ## **FAQ** ### In what units are paragraph coordinates measured? They are measured in points, where 1 inch equals 72 points. This applies to all coordinates and dimensions on the slide. ### Does word wrapping affect a paragraph's bounds? Yes. If [TextFrameFormat.wrap_text](https://reference.aspose.com/slides/python-net/aspose.slides/textframeformat/wrap_text/) is enabled for the [TextFrame](https://reference.aspose.com/slides/python-net/aspose.slides/textframe/), the text breaks to fit the area width, which changes the paragraph's actual bounds. ### Can paragraph coordinates be reliably mapped to pixels in the exported image? Yes. Convert points to pixels using this formula: pixels = points x (DPI / 72). The result depends on the DPI chosen for rendering or export. ### How do I get the "effective" paragraph formatting parameters, taking style inheritance into account? Use the [effective paragraph formatting data structure](https://docs.aspose.com/slides/python-net/shape-effective-properties/); it returns the final consolidated values for indents, spacing, wrapping, RTL, and more. ## Related articles - [Get Text Portion Bounds from Presentations in Python](https://docs.aspose.com/slides/python-net/portion-bounds/) # Password-Protect Presentations in Python > Encrypt, detect, validate, open, and decrypt password-protected PowerPoint PPT and PPTX presentations in Python with Aspose.Slides. Source: https://docs.aspose.com/slides/python-net/password-protected-presentation/ Updated: 2026-09-04 ## **Overview** An opening password encrypts a presentation. The correct password is required to load and view the presentation content, so this protection provides confidentiality. An opening password is different from a write-protection password. Write protection restricts modification but does not encrypt the content or prevent the presentation from being loaded. To manage passwords for modifying presentations, see [Write-Protect Presentations](https://docs.aspose.com/slides/python-net/write-protected-presentation/). The workflows below apply to both PPT and PPTX presentations. The examples use both formats where their file-based and stream-based behavior is important. ## **Encrypt a Presentation with an Opening Password** Use [ProtectionManager.encrypt](https://reference.aspose.com/slides/python-net/aspose.slides/protectionmanager/encrypt/) to assign an opening password. Then use [Presentation.save](https://reference.aspose.com/slides/python-net/aspose.slides/presentation/save/) to persist the encrypted presentation. The following example encrypts a PPTX presentation: ```python import aspose.slides as slides with slides.Presentation("pres.pptx") as presentation: presentation.protection_manager.encrypt("open_password") presentation.save("encrypted-pres.pptx", slides.export.SaveFormat.PPTX) ``` ## **Keep Document Properties Public** By default, Aspose.Slides includes document properties in presentation encryption. The [ProtectionManager.encrypt_document_properties](https://reference.aspose.com/slides/python-net/aspose.slides/protectionmanager/encrypt_document_properties/) property controls this behavior independently of slide-content encryption. Set it to `False` before calling [ProtectionManager.encrypt](https://reference.aspose.com/slides/python-net/aspose.slides/protectionmanager/encrypt/) when an indexing, classification, search, or document-management system must read metadata without the opening password. The following example creates an encrypted PPTX presentation while leaving its built-in document properties public: ```python import aspose.slides as slides with slides.Presentation() as presentation: properties = presentation.document_properties properties.author = "Contoso Knowledge Management" properties.title = "Quarterly Product Roadmap" properties.keywords = "roadmap, planning, internal" presentation.slides[0].name = "Encrypted presentation content" presentation.protection_manager.encrypt_document_properties = False presentation.protection_manager.encrypt("open_password") presentation.save("public-properties-encrypted.pptx", slides.export.SaveFormat.PPTX) ``` Setting `encrypt_document_properties` to `False` does not make slides, masters, layouts, shapes, media, or other presentation content public. It affects only document properties. To read those properties without loading the encrypted content, see [Manage Presentation Properties](https://docs.aspose.com/slides/python-net/presentation-properties/). ## **Load an Encrypted Presentation** Set [LoadOptions.password](https://reference.aspose.com/slides/python-net/aspose.slides/loadoptions/password/) to the opening password and pass the options to [Presentation](https://reference.aspose.com/slides/python-net/aspose.slides/presentation/) when loading the file. Loading fails when an opening password is required but the supplied password is missing or incorrect. ```python import aspose.slides as slides load_options = slides.LoadOptions() load_options.password = "open_password" with slides.Presentation("encrypted-pres.pptx", load_options) as presentation: # Work with the decrypted presentation. pass ``` ## **Remove Encryption from a Presentation** Load the presentation with its opening password, call [ProtectionManager.remove_encryption](https://reference.aspose.com/slides/python-net/aspose.slides/protectionmanager/remove_encryption/), and save the result. The saved presentation can then be loaded without a password. ```python import aspose.slides as slides load_options = slides.LoadOptions() load_options.password = "open_password" with slides.Presentation("encrypted-pres.pptx", load_options) as presentation: presentation.protection_manager.remove_encryption() presentation.save("encryption-removed.pptx", slides.export.SaveFormat.PPTX) ``` ## **Validate an Opening Password Before Loading** Use [PresentationFactory.get_presentation_info](https://reference.aspose.com/slides/python-net/aspose.slides/presentationfactory/get_presentation_info/) to obtain [PresentationInfo](https://reference.aspose.com/slides/python-net/aspose.slides/presentationinfo/) without creating a complete presentation instance. Check [PresentationInfo.is_password_protected](https://reference.aspose.com/slides/python-net/aspose.slides/presentationinfo/is_password_protected/) before requesting or validating a password. When protection is present, validate the supplied value with [PresentationInfo.check_password](https://reference.aspose.com/slides/python-net/aspose.slides/presentationinfo/check_password/). ### **File-Path Workflow** The following example validates an opening password for a PPTX file, passes the validated value to [LoadOptions.password](https://reference.aspose.com/slides/python-net/aspose.slides/loadoptions/password/), and then loads the complete presentation: ```python import aspose.slides as slides file_path = "protected-presentation.pptx" password = "open_password" presentation_info = slides.PresentationFactory.instance.get_presentation_info(file_path) if not presentation_info.is_password_protected: print("The presentation does not have an opening password.") elif not presentation_info.check_password(password): print("The opening password is incorrect.") else: load_options = slides.LoadOptions() load_options.password = password with slides.Presentation(file_path, load_options) as presentation: print("The presentation was validated and loaded successfully.") ``` ### **Stream Workflow** The stream overload of [PresentationFactory.get_presentation_info](https://reference.aspose.com/slides/python-net/aspose.slides/presentationfactory/get_presentation_info/) provides the same workflow. Reset the position of a seekable stream before loading the complete presentation from that stream. The following example uses a PPT file: ```python import aspose.slides as slides password = "open_password" with open("protected-presentation.ppt", "rb") as presentation_stream: presentation_info = slides.PresentationFactory.instance.get_presentation_info(presentation_stream) if not presentation_info.is_password_protected: print("The presentation does not have an opening password.") elif not presentation_info.check_password(password): print("The opening password is incorrect.") else: presentation_stream.seek(0) load_options = slides.LoadOptions() load_options.password = password with slides.Presentation(presentation_stream, load_options) as presentation: print("The presentation was validated and loaded successfully.") ``` ### **CheckPassword Return Values** [PresentationInfo.check_password](https://reference.aspose.com/slides/python-net/aspose.slides/presentationinfo/check_password/) returns `True` only when the presentation has an opening password and the supplied password is correct. It returns `False` in each of these cases: - The password is incorrect. - The presentation does not have an opening password. - The supplied password is `None` or empty. The behavior is the same for PPT and PPTX presentations. ## **Check Whether a Loaded Presentation Is Encrypted** After loading a presentation with the correct password, inspect [ProtectionManager.is_encrypted](https://reference.aspose.com/slides/python-net/aspose.slides/protectionmanager/is_encrypted/) to confirm that the source presentation was encrypted. To detect opening-password protection before loading, use `PresentationInfo.is_password_protected` as shown above. ```python import aspose.slides as slides load_options = slides.LoadOptions() load_options.password = "open_password" with slides.Presentation("encrypted-pres.pptx", load_options) as presentation: is_encrypted = presentation.protection_manager.is_encrypted print("The presentation is encrypted: " + str(is_encrypted)) ``` ## **Security Recommendations** Do not log opening passwords or include them in diagnostic messages. Avoid unnecessary repeated validation attempts, keep passwords in memory only as long as needed, and reuse a successful validation result when immediately loading the presentation. Public document properties may disclose author names, titles, subjects, keywords, company information, comments, and custom values even though the presentation content is encrypted. Encrypt sensitive metadata together with the presentation. Leaving properties public should be an explicit decision made only when systems must index, classify, search, or manage the file without an opening password. ## **Password-Protect a Presentation Online** 1. Open the [Aspose.Slides Lock](https://products.aspose.app/slides/lock) application. 1. Select or upload the presentation. 1. Enter a password for view protection. 1. Optionally enter a separate password for edit protection. 1. Apply the protection and download the resulting file. - [Write-Protect Presentations](https://docs.aspose.com/slides/python-net/write-protected-presentation/) - [Digital Signature in PowerPoint](https://docs.aspose.com/slides/python-net/digital-signature-in-powerpoint/) ## **FAQ** **What is the difference between an opening password and a write-protection password?** An opening password encrypts the presentation and is required to load its content. A write-protection password restricts modification without encrypting the content. **Can I validate an opening password without loading all slides?** Yes. Obtain presentation information, check whether opening-password protection is present, and validate the password before creating a complete presentation instance. **Can an application read metadata without the opening password?** Yes, but only when the presentation was encrypted with `encrypt_document_properties` set to `False`. The application must then use the document-properties-only loading mode described in [Manage Presentation Properties](https://docs.aspose.com/slides/python-net/presentation-properties/). **Do the password-checking workflows support both PPT and PPTX?** Yes. File-path and stream-based password detection and validation behave the same for PPT and PPTX presentations. ## Related articles - [Secure Presentations in Python](https://docs.aspose.com/slides/python-net/presentation-security/) # Manage Picture Frames in Presentations with Python > Create, format, link, crop, extract, and compress picture frames in presentations with Aspose.Slides for Python via .NET. Source: https://docs.aspose.com/slides/python-net/picture-frame/ Updated: 2026-11-08 ## **Overview** A picture frame is a slide shape that displays an image. In Aspose.Slides, the image resource and the shape that displays it are separate objects: a [Presentation](https://reference.aspose.com/slides/python-net/aspose.slides/presentation/) owns embedded image resources through its [ImageCollection](https://reference.aspose.com/slides/python-net/aspose.slides/imagecollection/), while a [PictureFrame](https://reference.aspose.com/slides/python-net/aspose.slides/pictureframe/) controls the image's position, size, line formatting, rotation, cropping, picture effects, and other frame-level settings. This separation is useful when the same image is shown more than once. Add the image to the presentation once, keep the returned [PPImage](https://reference.aspose.com/slides/python-net/aspose.slides/ppimage/), and use that image resource when creating picture frames. Picture frames can contain raster images such as PNG or JPEG and vector SVG images. They can also refer to linked images instead of storing the image bytes in the presentation. The choice affects portability, file size, extraction, and export behavior, so it is useful to decide how the image should be stored before applying formatting or optimization. ## **Add and Format an Embedded Image** For an embedded image, add the image data to the presentation and create a picture frame with [ShapeCollection.add_picture_frame](https://reference.aspose.com/slides/python-net/aspose.slides/shapecollection/add_picture_frame/). The image becomes part of the presentation package, so the presentation remains self-contained when it is moved to another computer. The following example adds a JPEG image, creates a frame at the image's native dimensions, and applies line formatting and rotation: ```python import aspose.pydrawing as draw import aspose.slides as slides with slides.Presentation() as presentation: slide = presentation.slides[0] with slides.Images.from_file("photo.jpg") as source_image: image = presentation.images.add_image(source_image) picture_frame = slide.shapes.add_picture_frame(slides.ShapeType.RECTANGLE, 50, 100, image.width, image.height, image) picture_frame.line_format.fill_format.fill_type = slides.FillType.SOLID picture_frame.line_format.fill_format.solid_fill_color.color = draw.Color.blue picture_frame.line_format.width = 3 picture_frame.rotation = 15 presentation.save("picture-frame.pptx", slides.export.SaveFormat.PPTX) ``` The picture frame controls the displayed geometry; changing the frame size does not change the original pixel dimensions stored in the embedded image resource. This distinction becomes important when cropping or compressing an image later. ## **Use Relative Scale** [PictureFrame](https://reference.aspose.com/slides/python-net/aspose.slides/pictureframe/) exposes [relative_scale_width](https://reference.aspose.com/slides/python-net/aspose.slides/pictureframe/relative_scale_width/) and [relative_scale_height](https://reference.aspose.com/slides/python-net/aspose.slides/pictureframe/relative_scale_height/) for the frame. A value of `1.0` corresponds to 100% of the original picture size. Relative scale is useful when a workflow needs to preserve a relationship to the source image size instead of calculating final dimensions manually. ```python import aspose.slides as slides with slides.Presentation() as presentation: slide = presentation.slides[0] with slides.Images.from_file("photo.jpg") as source_image: image = presentation.images.add_image(source_image) picture_frame = slide.shapes.add_picture_frame(slides.ShapeType.RECTANGLE, 50, 50, 100, 100, image) picture_frame.relative_scale_width = 1.35 picture_frame.relative_scale_height = 0.8 presentation.save("relative-scale.pptx", slides.export.SaveFormat.PPTX) ``` Relative scale changes the frame's scale settings; it does not resample or compress the embedded image. ## **Embedded and Linked Images** An embedded picture stores image data inside the presentation and is therefore the safest choice for portability and predictable rendering. A linked picture stores an external location through the [Picture](https://reference.aspose.com/slides/python-net/aspose.slides/picture/) link path instead of embedding the image data in the same way. Linked images can reduce the amount of image data stored in the PPTX, but they introduce an external dependency. The linked file must remain accessible to the application that opens or renders the presentation. If the path changes, the file is moved, or the resource is unavailable, the linked picture may not be displayed as expected. For presentations that must be emailed, archived, or rendered in isolated environments, embedded images are usually more reliable. ### **Add a Linked Image** The following example creates a picture frame and points it to a local image file. It deals only with image linking; video linking is a separate media workflow and is intentionally not mixed into this example. ```python import os import aspose.slides as slides with slides.Presentation() as presentation: slide = presentation.slides[0] picture_frame = slide.shapes.add_picture_frame(slides.ShapeType.RECTANGLE, 50, 50, 320, 180, None) linked_image_path = os.path.abspath("linked-image.jpg") picture_frame.picture_format.picture.link_path_long = linked_image_path presentation.save("linked-image.pptx", slides.export.SaveFormat.PPTX) ``` Use links when external file management is intentional. Do not use them merely as a replacement for compression: a small PPTX with broken image dependencies is usually less useful than a larger self-contained presentation. ## **Extract Images from Picture Frames** Before extracting an image from an existing presentation, check that a shape is actually a [PictureFrame](https://reference.aspose.com/slides/python-net/aspose.slides/pictureframe/) and that it contains an embedded image. Linked picture frames may not contain image bytes that can be extracted in the same way. ### **Extract a Raster Image** The modern image API uses [IImage](https://reference.aspose.com/slides/python-net/aspose.slides/iimage/) directly. The following example finds the first embedded raster picture on a slide and saves it as PNG: ```python import aspose.slides as slides with slides.Presentation("sample.pptx") as presentation: slide = presentation.slides[0] for shape in slide.shapes: if not isinstance(shape, slides.PictureFrame): continue embedded_image = shape.picture_format.picture.image if embedded_image is None or embedded_image.svg_image is not None: continue raster_image = embedded_image.image raster_image.save("extracted-image.png", slides.ImageFormat.PNG) break ``` Saving through [IImage](https://reference.aspose.com/slides/python-net/aspose.slides/iimage/) converts the extracted image to the requested output format. If you need the encoded bytes stored in the presentation rather than a converted raster file, use the [PPImage.binary_data](https://reference.aspose.com/slides/python-net/aspose.slides/ppimage/binary_data/) property instead. ### **Extract an SVG Image** For an SVG picture, the [PPImage](https://reference.aspose.com/slides/python-net/aspose.slides/ppimage/) exposes an [SvgImage](https://reference.aspose.com/slides/python-net/aspose.slides/svgimage/) object. This lets you retrieve the SVG data directly instead of rasterizing the picture first. ```python import aspose.slides as slides with slides.Presentation("sample.pptx") as presentation: slide = presentation.slides[0] for shape in slide.shapes: if not isinstance(shape, slides.PictureFrame): continue embedded_image = shape.picture_format.picture.image svg_image = embedded_image.svg_image if embedded_image is not None else None if svg_image is None: continue svg_data = bytes(svg_image.svg_data) with open("extracted-image.svg", "wb") as svg_stream: svg_stream.write(svg_data) break ``` Keeping SVG content as SVG preserves the vector source inside the presentation. Raster exports such as PNG or JPEG necessarily render that vector content to pixels. PDF or SVG slide export is also a rendering operation, so the exported graphics should not be treated as a byte-for-byte copy of the original embedded SVG; use the embedded [SvgImage.svg_data](https://reference.aspose.com/slides/python-net/aspose.slides/svgimage/svg_data/) when the original vector resource itself is required. ## **Crop an Image** Cropping changes which part of an image is visible inside the frame. The crop values on [PictureFillFormat](https://reference.aspose.com/slides/python-net/aspose.slides/picturefillformat/) are percentages of the source image dimensions. Cropping does not initially delete the hidden pixels from the embedded image; it only changes the visible region. The following example finds a picture frame safely and applies crop values: ```python import aspose.slides as slides with slides.Presentation("sample.pptx") as presentation: slide = presentation.slides[0] picture_frame = None for shape in slide.shapes: if isinstance(shape, slides.PictureFrame): picture_frame = shape break if picture_frame is not None: picture_frame.picture_format.crop_left = 23.6 picture_frame.picture_format.crop_right = 21.5 picture_frame.picture_format.crop_top = 3 picture_frame.picture_format.crop_bottom = 31 presentation.save("cropped-image.pptx", slides.export.SaveFormat.PPTX) ``` Because the hidden image data is still present, the crop can be changed later without losing the original pixels. If file size matters more than reversibility, the cropped regions can be physically removed as described in the next section. ## **Remove Cropped Image Data** [PictureFillFormat.delete_picture_cropped_areas](https://reference.aspose.com/slides/python-net/aspose.slides/picturefillformat/delete_picture_cropped_areas/) removes image data outside the current crop rectangle and returns the resulting image resource. This can reduce file size, but it is a destructive optimization: after the presentation is saved, the removed pixels are no longer available for a later uncrop operation. ```python import aspose.slides as slides with slides.Presentation("cropped-image.pptx") as presentation: slide = presentation.slides[0] picture_frame = None for shape in slide.shapes: if isinstance(shape, slides.PictureFrame): picture_frame = shape break if picture_frame is not None: cropped_image = picture_frame.picture_format.delete_picture_cropped_areas() if cropped_image is not None: presentation.save("cropped-data-removed.pptx", slides.export.SaveFormat.PPTX) ``` The method may add a new image resource to the presentation. If the original image is also used by other picture frames, those frames still need their existing resource, so deleting cropped areas does not necessarily reduce the total number of images. Cropping WMF or EMF content with this method rasterizes the cropped result to PNG. ## **Compress Raster Images** [PictureFillFormat.compress_image](https://reference.aspose.com/slides/python-net/aspose.slides/picturefillformat/compress_image/) reduces raster image resolution relative to the size at which the picture is displayed. It can also remove cropped regions in the same operation. The method returns `True` when the image was resized or cropped and `False` when no change was necessary. Use a predefined [PicturesCompression](https://reference.aspose.com/slides/python-net/aspose.slides.export/picturescompression/) value when a standard target resolution is sufficient: ```python import aspose.slides as slides with slides.Presentation("sample.pptx") as presentation: slide = presentation.slides[0] picture_frame = None for shape in slide.shapes: if isinstance(shape, slides.PictureFrame): picture_frame = shape break if picture_frame is not None: compressed = picture_frame.picture_format.compress_image(True, slides.export.PicturesCompression.DPI150) print("The image was compressed." if compressed else "No compression was necessary.") presentation.save("compressed-image.pptx", slides.export.SaveFormat.PPTX) ``` A custom positive DPI value can be passed instead of an enum value when a specific target is required. Compression is intended for raster images. SVG and metafile content is not reduced by this raster compression workflow. Also remember that lower resolution and deleted cropped regions cannot be recovered from the optimized presentation. Choose a target resolution based on the largest size at which the image will actually be viewed or exported rather than applying the lowest DPI globally. ## **Manage Image Transform Effects** For a complete workflow covering brightness, contrast, color transformations, blur, alpha effects, ordered chains, inspection, removal, and round-trip verification, see [Image Transform Effects](https://docs.aspose.com/slides/python-net/image-transform-effects/). ## **Lock Picture Frame Geometry** The [PictureFrameLock](https://reference.aspose.com/slides/python-net/aspose.slides/pictureframelock/) settings control which editing operations are disabled for a picture frame. For example, the [aspect_ratio_locked](https://reference.aspose.com/slides/python-net/aspose.slides/pictureframelock/aspect_ratio_locked/) property preserves the shape's proportions while it is resized. ```python import aspose.slides as slides with slides.Presentation() as presentation: slide = presentation.slides[0] with slides.Images.from_file("photo.jpg") as source_image: image = presentation.images.add_image(source_image) picture_frame = slide.shapes.add_picture_frame(slides.ShapeType.RECTANGLE, 50, 100, image.width, image.height, image) picture_frame.picture_frame_lock.aspect_ratio_locked = True presentation.save("locked-picture-frame.pptx", slides.export.SaveFormat.PPTX) ``` The lock applies to the picture frame shape. It does not force the source image to be resampled or permanently changed to the same aspect ratio. ## **Adjust the StretchOffset Values** When the picture fill mode is stretch, the stretch-offset values on [PictureFillFormat](https://reference.aspose.com/slides/python-net/aspose.slides/picturefillformat/) define the fill rectangle relative to the picture frame's bounding box. Positive percentages create an inset from an edge, while negative percentages create an outset. This is different from cropping. Crop values select which part of the source image is visible; stretch offsets change the rectangle into which the visible picture fill is stretched. ```python import aspose.slides as slides with slides.Presentation() as presentation: slide = presentation.slides[0] with slides.Images.from_file("photo.png") as source_image: image = presentation.images.add_image(source_image) picture_frame = slide.shapes.add_picture_frame(slides.ShapeType.RECTANGLE, 10, 10, 400, 300, image) picture_frame.picture_format.picture_fill_mode = slides.PictureFillMode.STRETCH picture_frame.picture_format.stretch_offset_left = 12 picture_frame.picture_format.stretch_offset_right = 12 picture_frame.picture_format.stretch_offset_top = 8 picture_frame.picture_format.stretch_offset_bottom = 8 presentation.save("stretch-offsets.pptx", slides.export.SaveFormat.PPTX) ``` Use stretch offsets for fill placement. Use crop properties when the goal is to hide source-image edges. [![Crop selects source pixels. Positive stretch offsets inset the fill. Negative offsets extend it beyond the frame.](https://docs.aspose.com/slides/python-net/picture-frame/visual-image-crop-and-fit-8eb4e26c4fa1.svg)](https://docs.aspose.com/slides/python-net/picture-frame/visual-image-crop-and-fit-8eb4e26c4fa1.svg) *The solid outline marks the frame and the dashed outline marks the offset fill. The same image and frame are used in all three renders.* ## **Storage, File Size, and Export Considerations** The main tradeoffs are easier to manage when image storage and picture-frame formatting are treated separately: - **Embedded images** make the presentation self-contained and are the most reliable for sharing and server-side rendering, but large raster images increase PPTX size and memory use. - **Linked images** can keep the package smaller, but the presentation depends on external files remaining available at the stored paths or locations. - **Cropping** is initially non-destructive. The hidden pixels remain embedded until cropped areas are explicitly deleted or removed during compression. - **Compression** can reduce file size substantially for oversized raster images, but it trades away source resolution. It should be applied after the intended on-slide size is known. - **SVG images** should remain as SVG when vector preservation is important. Extract the embedded SVG directly when you need the vector resource itself. Raster slide exports always convert the rendered slide to pixels. - **Repeated images** should reuse an existing [PPImage](https://reference.aspose.com/slides/python-net/aspose.slides/ppimage/) resource when possible instead of repeatedly loading the same file into the presentation workflow. For large presentations, image optimization is usually most effective when performed selectively: keep logos and diagrams as vector content, compress photographs according to their real display size, remove cropped pixels only when later editing is not required, and avoid external links unless dependency management is part of the deployment design. ## **FAQ** **What is the difference between a picture frame and an image resource?** A [PPImage](https://reference.aspose.com/slides/python-net/aspose.slides/ppimage/) represents an image resource associated with the presentation. A [PictureFrame](https://reference.aspose.com/slides/python-net/aspose.slides/pictureframe/) is a shape on a slide that displays an image and stores frame-level geometry and formatting such as size, rotation, crop values, effects, and locks. **Should I embed or link images?** Embed images when the presentation must be portable, archived, or rendered without access to external resources. Link images only when keeping image files outside the PPTX is intentional and the external locations can be maintained reliably. **Does cropping reduce PPTX file size?** Not by itself. Normal crop settings hide parts of the source image but keep the underlying pixels. Use [PictureFillFormat.delete_picture_cropped_areas](https://reference.aspose.com/slides/python-net/aspose.slides/picturefillformat/delete_picture_cropped_areas/) or image compression with cropped-area removal when those pixels can be discarded permanently. **Can I restore image quality after compression?** No. Compression can reduce stored raster resolution, and removing cropped regions discards image data. Keep the original source image outside the presentation if later high-resolution editing may be required. **How should SVG images be handled?** Keep SVG content as SVG when vector fidelity matters. The embedded [SvgImage](https://reference.aspose.com/slides/python-net/aspose.slides/svgimage/) can be extracted directly. Rendering a slide to a raster format such as PNG or JPEG rasterizes the SVG as part of the slide image. **How can I avoid unsafe casts when reading existing slides?** Check the shape type before using picture-frame-specific members. Using `isinstance(shape, slides.PictureFrame)` avoids invalid casts and lets the code handle slides that do not contain picture frames. ## Related articles - [Picture](https://docs.aspose.com/slides/python-net/examples/elements/picture/) - [Optimize Image Management in PowerPoint with Python](https://docs.aspose.com/slides/python-net/image/) # Customize Pie Charts in Presentations with Python > Create and customize pie charts in Python with Aspose.Slides. Configure secondary plots, display data labels, and apply automatic slice colors in PowerPoint. Source: https://docs.aspose.com/slides/python-net/pie-chart/ Updated: 2026-10-26 ## **Overview** This article explains how to work with pie charts in Aspose.Slides. It shows how to configure secondary plot options for Pie of Pie and Bar of Pie charts, and how to enable automatic slice coloring for a standard pie chart. The examples focus on chart customization tasks such as adding a chart to a slide, adjusting series and label settings, replacing default chart data with custom categories and values, and saving the updated presentation. ## **Second Plot Options for Pie of Pie and Bar of Pie Charts** Aspose.Slides for Python via .NET supports secondary plot options for Pie of Pie and Bar of Pie charts. These options control the size of the secondary plot and how data points are split between the two plots. The following example creates a Pie of Pie chart in a new presentation and displays data point values as labels. The [second_pie_size](https://reference.aspose.com/slides/python-net/aspose.slides.charts/chartseriesgroup/second_pie_size/) property sets the secondary plot size to 149% of the main plot. [pie_split_by](https://reference.aspose.com/slides/python-net/aspose.slides.charts/chartseriesgroup/pie_split_by/) selects percentage-based splitting, and [pie_split_position](https://reference.aspose.com/slides/python-net/aspose.slides.charts/chartseriesgroup/pie_split_position/) sets the threshold to 53%. ```python import aspose.slides as slides import aspose.slides.charts as charts with slides.Presentation() as presentation: slide = presentation.slides[0] chart = slide.shapes.add_chart(charts.ChartType.PIE_OF_PIE, 50, 50, 500, 400) series = chart.chart_data.series[0] # Display values and configure the secondary plot. series.labels.default_data_label_format.show_value = True series_group = series.parent_series_group series_group.second_pie_size = 149 series_group.pie_split_by = charts.PieSplitType.BY_PERCENTAGE series_group.pie_split_position = 53 presentation.save("pie_of_pie.pptx", slides.export.SaveFormat.PPTX) ``` To show or hide the lines connecting the main and secondary plots in Pie of Pie and Bar of Pie charts, see [Show or Hide Series Lines](https://docs.aspose.com/slides/python-net/chart-series/#show-or-hide-series-lines). The setting applies to the entire series group. ### **Select Categories for the Secondary Plot** Use custom splitting when you want to group specific categories in the secondary plot regardless of their percentage values. For example, a sales report might show Online and Events together so readers can compare these two channels, even though they account for 35% and 10% of total sales. Set [pie_split_by](https://reference.aspose.com/slides/python-net/aspose.slides.charts/chartseriesgroup/pie_split_by/) to [PieSplitType.CUSTOM](https://reference.aspose.com/slides/python-net/aspose.slides.charts/piesplittype/) and select the points through [pie_split_custom_points](https://reference.aspose.com/slides/python-net/aspose.slides.charts/chartseriesgroup/pie_split_custom_points/). The collection's [add](https://reference.aspose.com/slides/python-net/aspose.slides.charts/piesplitcustompointcollection/add/) method accepts either a zero-based index in the series or a data point object. In this example, index 1 selects Online, and the point at index 3 selects Events. Partners is also added temporarily, then excluded using [remove](https://reference.aspose.com/slides/python-net/aspose.slides.charts/piesplitcustompointcollection/). ```python import aspose.slides as slides import aspose.slides.charts as charts with slides.Presentation() as presentation: slide = presentation.slides[0] chart = slide.shapes.add_chart(charts.ChartType.PIE_OF_PIE, 50, 50, 600, 200) # Replace the default data with sales by channel. workbook = chart.chart_data.chart_data_workbook chart.chart_data.series.clear() chart.chart_data.categories.clear() category_names = ["Retail", "Online", "Partners", "Events"] values = [40, 35, 15, 10] series_name_cell = workbook.get_cell(0, 0, 1, "Sales") series = chart.chart_data.series.add(series_name_cell, chart.type) for i, category_name in enumerate(category_names): category_cell = workbook.get_cell(0, i + 1, 0, category_name) chart.chart_data.categories.add(category_cell) value_cell = workbook.get_cell(0, i + 1, 1, values[i]) series.data_points.add_data_point_for_pie_series(value_cell) series.labels.default_data_label_format.show_value = True series_group = series.parent_series_group series_group.pie_split_by = charts.PieSplitType.CUSTOM series_group.is_color_varied = True # Select Online by its zero-based index and Events by its data point object. series_group.pie_split_custom_points.add(1) series_group.pie_split_custom_points.add(series.data_points[3]) # Exclude Partners from the selection without deleting its source data. series_group.pie_split_custom_points.add(2) series_group.pie_split_custom_points.remove(series.data_points[2]) presentation.save("pie_of_pie_custom.pptx", slides.export.SaveFormat.PPTX) ``` Online (35) and Events (10) appear as separate slices in the secondary plot. In the primary plot, they are represented by one combined slice with a value of 45, alongside Retail (40) and Partners (15). Removing Partners from the custom selection keeps it in the primary plot; it does not remove the category or its value from the chart's source data. The following image shows the saved presentation in PowerPoint: ![Pie of Pie chart with Online and Events in the secondary plot and their combined value of 45 in the primary plot](https://docs.aspose.com/slides/python-net/pie-chart/pie_of_pie_custom.png) ## **Set Automatic Pie Chart Slice Colors** Aspose.Slides for Python via .NET can automatically assign different colors to pie chart slices. The following example creates a pie chart with a centered title and replaces the default data with three quarterly categories and their values. The [show_value](https://reference.aspose.com/slides/python-net/aspose.slides.charts/datalabelformat/show_value/) property displays the values 20, 50, and 30 as labels, while [is_color_varied](https://reference.aspose.com/slides/python-net/aspose.slides.charts/chartseriesgroup/is_color_varied/) enables a distinct color for each slice. ```python import aspose.slides as slides import aspose.slides.charts as charts with slides.Presentation() as presentation: slide = presentation.slides[0] chart = slide.shapes.add_chart(charts.ChartType.PIE, 100, 100, 400, 400) # Add a centered chart title. chart.chart_title.add_text_frame_for_overriding("Sample Title") chart.chart_title.text_frame_for_overriding.text_frame_format.center_text = slides.NullableBool.TRUE chart.chart_title.height = 20 chart.has_title = True # Replace the default data using the first worksheet. workbook = chart.chart_data.chart_data_workbook worksheet_index = 0 chart.chart_data.series.clear() chart.chart_data.categories.clear() category_names = ["First Qtr", "2nd Qtr", "3rd Qtr"] values = [20, 50, 30] series_name_cell = workbook.get_cell(worksheet_index, 0, 1, "Series 1") series = chart.chart_data.series.add(series_name_cell, chart.type) for i, category_name in enumerate(category_names): category_cell = workbook.get_cell(worksheet_index, i + 1, 0, category_name) chart.chart_data.categories.add(category_cell) value_cell = workbook.get_cell(worksheet_index, i + 1, 1, values[i]) series.data_points.add_data_point_for_pie_series(value_cell) # Show values and assign different colors to the slices. series.labels.default_data_label_format.show_value = True series.parent_series_group.is_color_varied = True presentation.save("pie.pptx", slides.export.SaveFormat.PPTX) ``` ## **FAQ** **Are the Pie of Pie and Bar of Pie variations supported?** Yes, the library [supports](https://reference.aspose.com/slides/python-net/aspose.slides.charts/charttype/) a secondary plot for pie charts, including the Pie of Pie and Bar of Pie types. **Can I export just the chart as an image (for example, PNG)?** Yes, you can [export the chart itself as an image](https://reference.aspose.com/slides/python-net/aspose.slides.charts/chart/get_image/) (such as PNG) without exporting the entire presentation. # Get Text Portion Bounds from Presentations in Python > Learn how to retrieve text portion bounds in PowerPoint and OpenDocument presentations using Aspose.Slides for Python via .NET. Source: https://docs.aspose.com/slides/python-net/portion-bounds/ Updated: 2026-08-02 ## **Overview** A text portion represents a specific fragment of text inside a paragraph and allows you to work with that fragment independently from surrounding content. In Aspose.Slides, portions can be used when you need to retrieve the bounds of a text fragment, apply formatting to only part of a paragraph, or control text behavior at a more detailed level. This article shows how to get the bounding rectangle of a portion by using [Portion.get_rect](https://reference.aspose.com/slides/python-net/aspose.slides/portion/get_rect/). It also shows how to get the coordinates of the beginning of a portion by using [Portion.get_coordinates](https://reference.aspose.com/slides/python-net/aspose.slides/portion/get_coordinates/). In addition, it highlights common portion-related scenarios, such as applying a hyperlink to a single text fragment, understanding how formatting is resolved through portion, paragraph, text frame, and theme inheritance, and handling cases where a specified font is unavailable. ## **Get Bounds of a Text Portion** Use [Portion.get_rect](https://reference.aspose.com/slides/python-net/aspose.slides/portion/get_rect/) to retrieve the bounding rectangle of a text portion: ```py import aspose.slides as slides with slides.Presentation("Shapes.pptx") as presentation: slide = presentation.slides[0] shape = slide.shapes[0] for paragraph in shape.text_frame.paragraphs: for portion in paragraph.portions: rectangle = portion.get_rect() print(f"X = {rectangle.x}; Y = {rectangle.y}; Width = {rectangle.width}; Height = {rectangle.height}") ``` ## **Get Coordinates of a Text Portion** Use [Portion.get_coordinates](https://reference.aspose.com/slides/python-net/aspose.slides/portion/get_coordinates/) to retrieve the coordinates of the beginning of a text portion: ```py import aspose.slides as slides with slides.Presentation("Shapes.pptx") as presentation: slide = presentation.slides[0] shape = slide.shapes[0] for paragraph in shape.text_frame.paragraphs: for portion in paragraph.portions: point = portion.get_coordinates() print(f"X = {point.x}; Y = {point.y}") ``` ## **FAQ** ### Can I apply a hyperlink to only part of the text within a single paragraph? Yes, you can [assign a hyperlink](https://docs.aspose.com/slides/python-net/manage-hyperlinks/) to an individual portion; only that fragment will be clickable, not the entire paragraph. ### How does style inheritance work: what does a portion override, and what is taken from a paragraph or text frame? Portion-level properties have the highest precedence. If a property is not set on the [Portion](https://reference.aspose.com/slides/python-net/aspose.slides/portion/), Aspose.Slides takes it from the [Paragraph](https://reference.aspose.com/slides/python-net/aspose.slides/paragraph/). If it is not set there either, Aspose.Slides uses the [TextFrame](https://reference.aspose.com/slides/python-net/aspose.slides/textframe/) or [theme](https://reference.aspose.com/slides/python-net/aspose.slides.theme/theme/) style. ### What happens if the font specified for a portion is missing on the target machine or server? [Font substitution rules](https://docs.aspose.com/slides/python-net/font-selection-sequence/) apply. The text may reflow: metrics, hyphenation, and width can change, which matters for precise positioning. ### Can I set portion-specific text fill transparency or a gradient independently of the rest of the paragraph? Yes, text color, fill, and transparency at the [Portion](https://reference.aspose.com/slides/python-net/aspose.slides/portion/) level can differ from neighboring fragments. ## Related articles - [Get Paragraph Bounds from Presentations in Python](https://docs.aspose.com/slides/python-net/paragraph-bounds/) # Enhance PowerPoint Presentations with Animations in Python > Explore the capabilities of Aspose.Slides for Python via .NET in handling PowerPoint animations. This general overview highlights key features and offers insights to enhance your presentations. Source: https://docs.aspose.com/slides/python-net/powerpoint-animation/ Updated: 2026-09-18 ## **Introduction** Presentations are designed to convey information, so their visual appearance and interactive behavior are key considerations during creation. **PowerPoint animation** plays an important role in making a presentation eye-catching and engaging for viewers. Aspose.Slides for Python via .NET provides a wide range of options to add animation to a PowerPoint presentation. You can: - Apply various animation effects to shapes, charts, tables, OLE objects, and other elements. - Use multiple animation effects on a single shape. - Control effects through the animation timeline. - Create custom animations. In Aspose.Slides for Python via .NET, animation effects can be applied to shapes. Because every element on a slide—including text, pictures, OLE objects, and tables—is treated as a shape, you can apply animation effects to any element on the slide. The [aspose.slides.animation](https://reference.aspose.com/slides/python-net/aspose.slides.animation/) namespace provides the classes for working with PowerPoint animations. ## **Installation** ```bash pip install aspose.slides ``` ## **Add an Animation Effect to a Shape in Python** Animation effects live on a slide's main sequence. Add a shape, then call `add_effect` on `slide.timeline.main_sequence`, passing the effect type, its subtype, and the trigger that starts it. ```python import aspose.slides as slides with slides.Presentation() as presentation: slide = presentation.slides[0] shape = slide.shapes.add_auto_shape(slides.ShapeType.RECTANGLE, 50, 150, 300, 100) shape.text_frame.text = "Animated shape" sequence = slide.timeline.main_sequence effect = sequence.add_effect( shape, slides.animation.EffectType.FLY, slides.animation.EffectSubtype.LEFT, slides.animation.EffectTriggerType.ON_CLICK, ) effect.timing.duration = 2.0 presentation.save("animated.pptx", slides.export.SaveFormat.PPTX) ``` The saved file contains one effect on the first slide: the rectangle flies in from the left over two seconds when the presenter clicks. Reopening it and reading `slide.timeline.main_sequence` returns that effect, so the animation survives the round trip rather than only existing in memory. ## **Animation Effects** Aspose.Slides supports **150+ animation effects**, including basic effects such as Bounce, PathFootball, and Zoom, as well as specialized effects like OLEObjectShow and OLEObjectOpen. You can find the full list in the [EffectType](https://reference.aspose.com/slides/python-net/aspose.slides.animation/effecttype/) enumeration. Additionally, these animation effects can be combined with the following effects: - [ColorEffect](https://reference.aspose.com/slides/python-net/aspose.slides.animation/coloreffect/) - [CommandEffect](https://reference.aspose.com/slides/python-net/aspose.slides.animation/commandeffect/) - [FilterEffect](https://reference.aspose.com/slides/python-net/aspose.slides.animation/filtereffect/) - [MotionEffect](https://reference.aspose.com/slides/python-net/aspose.slides.animation/motioneffect/) - [PropertyEffect](https://reference.aspose.com/slides/python-net/aspose.slides.animation/propertyeffect/) - [RotationEffect](https://reference.aspose.com/slides/python-net/aspose.slides.animation/rotationeffect) - [ScaleEffect](https://reference.aspose.com/slides/python-net/aspose.slides.animation/scaleeffect/) - [SetEffect](https://reference.aspose.com/slides/python-net/aspose.slides.animation/seteffect/) ## **Custom Animation** For complete Python examples that create, inspect, and modify behaviors and editable motion paths, see [Custom Animation](https://docs.aspose.com/slides/python-net/custom-animation/). You can create your own **custom animations** in Aspose.Slides by combining multiple behaviors into a single effect. [Behavior](https://reference.aspose.com/slides/python-net/aspose.slides.animation/behavior/) is a building block of a PowerPoint animation effect. Combine behaviors to customize an effect, or add a behavior to extend a predefined effect. Repetition is configured through timing settings rather than a separate repeat behavior. [Animation Point](https://reference.aspose.com/slides/python-net/aspose.slides.animation/point/) marks the moment or position at which a behavior is applied (a keyframe). ## **Animation Time Line** [Sequence](https://reference.aspose.com/slides/python-net/aspose.slides.animation/sequence/) is a collection of animation effects that can target different shapes. [Timeline](https://reference.aspose.com/slides/python-net/aspose.slides.animation/animationtimeline/) is the set of sequences used on a specific slide. It was introduced in PowerPoint 2002. In earlier versions of PowerPoint, adding animation effects was difficult and often required workarounds. Timeline replaces the old `AnimationSettings` class and provides a clearer object model for PowerPoint animation. Each slide can have only one animation timeline. ## **Interactive Animation** [Trigger](https://reference.aspose.com/slides/python-net/aspose.slides.animation/effecttriggertype/) allows you to define user actions (e.g., a button click) that start a specific animation. Triggers were added only in the latest versions of PowerPoint. ## **Shape Animation** Aspose.Slides lets you apply animations to shapes—such as text, rectangles, lines, frames, OLE objects, and more. Read more [**About Shape Animation**](https://docs.aspose.com/slides/python-net/shape-animation/). ## **Animated Charts** To create animated charts, use the same classes as you do for shapes. However, PowerPoint animations can be applied only to chart categories or chart series. You can also apply an animation effect to an individual category element or series element. Read more [**About Animated Charts**](https://docs.aspose.com/slides/python-net/animated-charts/). ## **Animated Text** In addition to animating text, you can apply animation to a paragraph. Read more [**About Animated Text**](https://docs.aspose.com/slides/python-net/animated-text/). ## **FAQ** **Will animations be preserved when exporting to PDF?** No. PDF is a static format, so animations and [slide transitions](https://docs.aspose.com/slides/python-net/slide-transition/) don’t play. If you need motion, export to [HTML5](https://docs.aspose.com/slides/python-net/export-to-html5/), [animated GIF](https://docs.aspose.com/slides/python-net/convert-powerpoint-to-animated-gif/), or [video](https://docs.aspose.com/slides/python-net/convert-powerpoint-to-video/) instead. **Can I turn an animated presentation into a video and control the frame rate and frame size?** Yes. You can [render the presentation as frames](https://docs.aspose.com/slides/python-net/convert-powerpoint-to-video/) and encode them into a video (e.g., via ffmpeg), choosing the FPS and resolution. Animations and slide transitions are played during rendering. **Will animations remain intact when working with ODP (not just PPTX)?** PPT, PPTX, and ODP are supported for [reading](https://docs.aspose.com/slides/python-net/open-presentation/) and [writing](https://docs.aspose.com/slides/python-net/save-presentation/), but this does not guarantee animation preservation. Custom animation data can be lost when converting to ODP. See [Custom Animation](https://docs.aspose.com/slides/python-net/custom-animation/) for examples and guidance on checking format compatibility. ## Related articles - [Animate PowerPoint Text in Python](https://docs.aspose.com/slides/python-net/animated-text/) - [Animate PowerPoint Charts in Python](https://docs.aspose.com/slides/python-net/animated-charts/) - [Apply Shape Animations in Presentations with Python](https://docs.aspose.com/slides/python-net/shape-animation/) # Create and Customize PowerPoint Charts in Python > Create and customize PowerPoint charts in Python with Aspose.Slides — work with data, styles, and chart types in PPT and PPTX using clear code examples. Source: https://docs.aspose.com/slides/python-net/powerpoint-charts/ Updated: 2025-12-02 --- lastmod: 2025-12-02T13:32:50+06:00 title: Create and Customize PowerPoint Charts in Python linktitle: PowerPoint Charts type: docs weight: 70 url: /python-net/powerpoint-charts/ keywords: - add chart - create chart - update chart - change chart - modify chart - customize chart - chart type - chart entities - format chart - chart workbook - animated chart - export chart - PowerPoint - presentation - Python - Aspose.Slides description: "Create and customize PowerPoint charts in Python with Aspose.Slides — work with data, styles, and chart types in PPT and PPTX using clear code examples." --- ## Related articles - [Chart](https://docs.aspose.com/slides/python-net/examples/elements/chart/) - [Customize Presentation Charts in Python](https://docs.aspose.com/slides/python-net/chart-types/) - [Customize Presentation Chart Entities in Python](https://docs.aspose.com/slides/python-net/chart-entities/) # Master PowerPoint Fonts with Python > Learn to control PowerPoint fonts in Aspose.Slides for Python via .NET: embed, substitute, load custom fonts, and resolve missing glyphs with concise code. Source: https://docs.aspose.com/slides/python-net/powerpoint-fonts/ Updated: 2025-07-27 --- lastmod: 2025-07-27T12:13:05+04:00 title: Master PowerPoint Fonts with Python linktitle: PowerPoint Fonts type: docs weight: 30 url: /python-net/powerpoint-fonts/ keywords: - PowerPoint font - customize font - default font - embed font - fallback font - font replacement - font substitution - font selection - PowerPoint - Python - Aspose.Slides description: "Learn to control PowerPoint fonts in Aspose.Slides for Python via .NET: embed, substitute, load custom fonts, and resolve missing glyphs with concise code." --- ## Related articles - [Manage Fallback Fonts for Presentations in Python](https://docs.aspose.com/slides/python-net/fallback-font/) - [Streamline Font Replacement in Presentations Using Python](https://docs.aspose.com/slides/python-net/font-replacement/) - [Font Selection Sequence in Aspose.Slides for Python](https://docs.aspose.com/slides/python-net/font-selection-sequence/) # Add Math Equations to PowerPoint Presentations in Python > Insert and edit math equations in PowerPoint PPT and PPTX with Aspose.Slides for Python via .NET, supporting OMML, formatting controls, and clear Python code samples. Source: https://docs.aspose.com/slides/python-net/powerpoint-math-equations/ Updated: 2026-11-18 ## **Overview** PowerPoint stores equations as Office Math Markup Language (OMML). With Aspose.Slides for Python via .NET, you can create the same kind of math content programmatically: fractions, radicals, functions, limits, N-ary operators, matrices, arrays, and formatted math blocks. In PowerPoint, users normally add equations from **Insert > Equation**: ![PowerPoint Insert tab with the Equation command selected](https://docs.aspose.com/slides/python-net/powerpoint-math-equations/powerpoint-math-equations_1.png) The result is editable math text on the slide: ![A PowerPoint slide containing an editable math equation](https://docs.aspose.com/slides/python-net/powerpoint-math-equations/powerpoint-math-equations_2.png) Aspose.Slides builds that math text through three main objects: - A math shape, created with [add_math_shape](https://reference.aspose.com/slides/python-net/aspose.slides/shapecollection/add_math_shape/), is the shape that contains the equation. - [MathPortion](https://reference.aspose.com/slides/python-net/aspose.slides.mathtext/mathportion/) stores math content inside the shape text frame. - [MathParagraph](https://reference.aspose.com/slides/python-net/aspose.slides.mathtext/mathparagraph/) contains one or more [MathBlock](https://reference.aspose.com/slides/python-net/aspose.slides.mathtext/mathblock/) objects. Most examples below use [MathematicalText](https://reference.aspose.com/slides/python-net/aspose.slides.mathtext/mathematicaltext/) and the fluent methods from [MathElementBase](https://reference.aspose.com/slides/python-net/aspose.slides.mathtext/mathelementbase/) to keep the code short and readable. For MathML export scenarios, see [Export Math Equations from Presentations in Python via .NET](https://docs.aspose.com/slides/python-net/exporting-math-equations/). ## **Create an Equation** This example uses [add_math_shape](https://reference.aspose.com/slides/python-net/aspose.slides/shapecollection/add_math_shape/) to create a math shape and adds the Pythagorean theorem: ![The equation c squared equals a squared plus b squared](https://docs.aspose.com/slides/python-net/powerpoint-math-equations/powerpoint-math-equations_3.png) ```py import aspose.slides as slides import aspose.slides.mathtext as math with slides.Presentation() as presentation: slide = presentation.slides[0] math_shape = slide.shapes.add_math_shape(20, 20, 700, 120) math_paragraph = math_shape.text_frame.paragraphs[0].portions[0].math_paragraph equation = ( math.MathematicalText("c") .set_superscript("2") .join("=") .join(math.MathematicalText("a").set_superscript("2")) .join("+") .join(math.MathematicalText("b").set_superscript("2")) ) math_paragraph.add(equation) presentation.save("pythagorean-theorem.pptx", slides.export.SaveFormat.PPTX) ``` [add_math_shape](https://reference.aspose.com/slides/python-net/aspose.slides/shapecollection/add_math_shape/) creates a shape that already contains a math paragraph. Access the first [MathPortion](https://reference.aspose.com/slides/python-net/aspose.slides.mathtext/mathportion/), get its [math_paragraph](https://reference.aspose.com/slides/python-net/aspose.slides.mathtext/mathportion/math_paragraph/), and add math blocks or math elements to it. ## **Add Fractions** Use [divide](https://reference.aspose.com/slides/python-net/aspose.slides.mathtext/mathelementbase/divide/) to create a fraction. You can choose a fraction style with [MathFractionTypes](https://reference.aspose.com/slides/python-net/aspose.slides.mathtext/mathfractiontypes/). ![A skewed math fraction showing one divided by x](https://docs.aspose.com/slides/python-net/powerpoint-math-equations/powerpoint-math-equations_4.png) ```py import aspose.slides as slides import aspose.slides.mathtext as math with slides.Presentation() as presentation: slide = presentation.slides[0] math_shape = slide.shapes.add_math_shape(20, 20, 700, 100) math_paragraph = math_shape.text_frame.paragraphs[0].portions[0].math_paragraph fraction = math.MathematicalText("1").divide("x", math.MathFractionTypes.SKEWED) math_paragraph.add(math.MathBlock(fraction)) presentation.save("fraction.pptx", slides.export.SaveFormat.PPTX) ``` For a stacked fraction, use [MathFractionTypes.BAR](https://reference.aspose.com/slides/python-net/aspose.slides.mathtext/mathfractiontypes/): ```py import aspose.slides.mathtext as math stacked_fraction = math.MathematicalText("x + 1").divide("y - 1", math.MathFractionTypes.BAR) ``` ## **Add Radicals** Use [radical](https://reference.aspose.com/slides/python-net/aspose.slides.mathtext/mathelementbase/radical/) to create a square root, cube root, or other root. The current element becomes the base, and the argument becomes the degree. ![An n-th root radical expression with x under the radical sign](https://docs.aspose.com/slides/python-net/powerpoint-math-equations/powerpoint-math-equations_5.png) ```py import aspose.slides as slides import aspose.slides.mathtext as math with slides.Presentation() as presentation: slide = presentation.slides[0] math_shape = slide.shapes.add_math_shape(20, 20, 700, 100) math_paragraph = math_shape.text_frame.paragraphs[0].portions[0].math_paragraph radical = math.MathematicalText("x").radical("n") math_paragraph.add(math.MathBlock(radical)) presentation.save("radical.pptx", slides.export.SaveFormat.PPTX) ``` ### **Show or Hide the Degree of a Square Root** A square root can display an explicit 2 or use the conventional √x notation. The [hide_degree](https://reference.aspose.com/slides/python-net/aspose.slides.mathtext/mathradical/hide_degree/) property of [MathRadical](https://reference.aspose.com/slides/python-net/aspose.slides.mathtext/mathradical/) controls which form appears. Both forms retain the degree 2 and the radicand x in the editable equation. ![The square root of x with the degree 2 visible on the left and hidden on the right](https://docs.aspose.com/slides/python-net/powerpoint-math-equations/square-root-degree.png) The example saves the same square root twice. The 2 is visible in `visible-degree.pptx` and hidden in `hidden-degree.pptx`. ```py import aspose.slides as slides import aspose.slides.mathtext as math with slides.Presentation() as presentation: slide = presentation.slides[0] radical = math.MathematicalText("x").radical("2") shape = slide.shapes.add_math_shape(20, 20, 200, 100) portion = shape.text_frame.paragraphs[0].portions[0] portion.math_paragraph.add(math.MathBlock(radical)) radical.hide_degree = False presentation.save("visible-degree.pptx", slides.export.SaveFormat.PPTX) radical.hide_degree = True presentation.save("hidden-degree.pptx", slides.export.SaveFormat.PPTX) ``` ## **Add Functions and Limits** Use [as_argument_of_function](https://reference.aspose.com/slides/python-net/aspose.slides.mathtext/mathelementbase/as_argument_of_function/) or [function](https://reference.aspose.com/slides/python-net/aspose.slides.mathtext/mathelementbase/function/) for functions such as `sin(x)`, `log(x)`, or custom function names. For limits, put `lim` in a [MathLimit](https://reference.aspose.com/slides/python-net/aspose.slides.mathtext/mathlimit/) or use [set_lower_limit](https://reference.aspose.com/slides/python-net/aspose.slides.mathtext/mathelementbase/set_lower_limit/). ![The limit of x as x approaches infinity](https://docs.aspose.com/slides/python-net/powerpoint-math-equations/powerpoint-math-equations_8.png) ```py import aspose.slides as slides import aspose.slides.mathtext as math with slides.Presentation() as presentation: slide = presentation.slides[0] math_shape = slide.shapes.add_math_shape(20, 20, 700, 100) math_paragraph = math_shape.text_frame.paragraphs[0].portions[0].math_paragraph limit = ( math.MathematicalText("lim") .set_lower_limit("x\u2192\u221E") .function("x") ) math_paragraph.add(math.MathBlock(limit)) presentation.save("functions-and-limits.pptx", slides.export.SaveFormat.PPTX) ``` For a custom function name, make the function name the current element and call [function](https://reference.aspose.com/slides/python-net/aspose.slides.mathtext/mathelementbase/function/) with its argument: ```py import aspose.slides.mathtext as math custom_function = math.MathematicalText("f").function("x + 1") ``` ## **Add N-ary Operators and Integrals** Use [nary](https://reference.aspose.com/slides/python-net/aspose.slides.mathtext/mathelementbase/nary/) for summations, unions, intersections, and other large operators. Use [integral](https://reference.aspose.com/slides/python-net/aspose.slides.mathtext/mathelementbase/integral/) for integrals. Both methods let you set lower and upper limits. ![A summation with lower and upper limits](https://docs.aspose.com/slides/python-net/powerpoint-math-equations/powerpoint-math-equations_7.png) ```py import aspose.slides as slides import aspose.slides.mathtext as math with slides.Presentation() as presentation: slide = presentation.slides[0] math_shape = slide.shapes.add_math_shape(20, 20, 700, 120) math_paragraph = math_shape.text_frame.paragraphs[0].portions[0].math_paragraph summation_base = ( math.MathematicalText("x") .set_superscript("k") .join(math.MathematicalText("a").set_superscript("n-k")) ) summation = summation_base.nary(math.MathNaryOperatorTypes.SUMMATION, "k=0", "n") math_paragraph.add(math.MathBlock(summation)) presentation.save("nary-operators.pptx", slides.export.SaveFormat.PPTX) ``` N-ary operators are for large operators with optional limits. Simple operators such as `+`, `-`, and `=` are usually added as [MathematicalText](https://reference.aspose.com/slides/python-net/aspose.slides.mathtext/mathematicaltext/) and joined into the expression. For an integral, use [integral](https://reference.aspose.com/slides/python-net/aspose.slides.mathtext/mathelementbase/integral/): ```py import aspose.slides.mathtext as math integral_base = math.MathematicalText("x").join(math.MathematicalText("dx").to_box()) integral = integral_base.integral(math.MathIntegralTypes.SIMPLE, "0", "1") ``` ## **Add Matrices** Use [MathMatrix](https://reference.aspose.com/slides/python-net/aspose.slides.mathtext/mathmatrix/) for rows and columns. Matrices do not include brackets by default, so enclose the matrix when you need parentheses, brackets, or braces. ![A two-row math matrix with one empty cell](https://docs.aspose.com/slides/python-net/powerpoint-math-equations/powerpoint-math-equations_10.png) ```py import aspose.slides as slides import aspose.slides.mathtext as math with slides.Presentation() as presentation: slide = presentation.slides[0] math_shape = slide.shapes.add_math_shape(20, 20, 700, 120) math_paragraph = math_shape.text_frame.paragraphs[0].portions[0].math_paragraph matrix = math.MathMatrix(2, 3) matrix[0, 0] = math.MathematicalText("1") matrix[0, 1] = math.MathematicalText("x") matrix[1, 0] = math.MathematicalText("x") matrix[1, 1] = math.MathematicalText("2") matrix[1, 2] = math.MathematicalText("y") math_paragraph.add(math.MathBlock(matrix)) presentation.save("matrix.pptx", slides.export.SaveFormat.PPTX) ``` ### **Edit an Existing Matrix** Suppose a linear algebra lesson starts with the coefficient matrix in `matrix.pptx`, saved by the preceding example. For the next exercise, keep the first equation, replace the second with two new equations, and revise the set of variables. Access the existing matrix as a [MathMatrix](https://reference.aspose.com/slides/python-net/aspose.slides.mathtext/mathmatrix/) to keep the coefficients that still apply. ![Original two-row coefficient matrix with entries 1, x, and an empty cell in the first row and x, 2, and y in the second](https://docs.aspose.com/slides/python-net/powerpoint-math-equations/matrix-before-edit.png) Row and column indices start at zero and refer to the matrix as it stands at each call. Inserting a row before index 1 moves the original second row to index 2. Inserting after index 2 then appends a row. Deleting row 2 removes the original second equation and moves the appended row up one position. Columns shift in the same way. ```py import aspose.slides as slides import aspose.slides.mathtext as math with slides.Presentation("matrix.pptx") as presentation: shape = presentation.slides[0].shapes[0] portion = shape.text_frame.paragraphs[0].portions[0] matrix = portion.math_paragraph[0][0] matrix.insert_row_before(1) matrix.insert_row_after(2) matrix.delete_row(2) matrix.insert_column_before(1) matrix.insert_column_after(3) matrix.delete_column(3) matrix[1, 0] = math.MathematicalText("12") matrix[1, 1] = math.MathematicalText("1") matrix[2, 2] = math.MathematicalText("10") matrix[2, 3] = math.MathematicalText("1") for row in range(matrix.row_count): for column in range(matrix.column_count): if matrix[row, column] is None: matrix[row, column] = math.MathematicalText("0") matrix.set_column_alignment(0, math.MathHorizontalAlignment.LEFT) matrix.set_columns_alignment(1, 3, math.MathHorizontalAlignment.RIGHT) presentation.save("updated-matrix.pptx", slides.export.SaveFormat.PPTX) ``` [set_column_alignment](https://reference.aspose.com/slides/python-net/aspose.slides.mathtext/mathmatrix/set_column_alignment/) aligns the first column to the left. [set_columns_alignment](https://reference.aspose.com/slides/python-net/aspose.slides.mathtext/mathmatrix/set_columns_alignment/) aligns three consecutive columns to the right, starting at index 1. In `updated-matrix.pptx`, the matrix has three equations and four variables. The original first-row coefficients `1` and `x` now appear in the first and third columns. ![Updated three-row matrix showing the rows 1, 0, x, 0; 12, 1, 0, 0; and 0, 0, 10, 1](https://docs.aspose.com/slides/python-net/powerpoint-math-equations/matrix-after-edit.png) ## **Add Equation Arrays** Use [to_math_array](https://reference.aspose.com/slides/python-net/aspose.slides.mathtext/mathelementbase/to_math_array/) when you need aligned equations or a vertical stack of expressions. ![A vertical math array with x above y](https://docs.aspose.com/slides/python-net/powerpoint-math-equations/powerpoint-math-equations_11.png) ```py import aspose.slides as slides import aspose.slides.mathtext as math with slides.Presentation() as presentation: slide = presentation.slides[0] math_shape = slide.shapes.add_math_shape(20, 20, 700, 140) math_paragraph = math_shape.text_frame.paragraphs[0].portions[0].math_paragraph equation_array = ( math.MathematicalText("x") .join("y") .to_math_array() ) math_paragraph.add(math.MathBlock(equation_array)) presentation.save("equation-array.pptx", slides.export.SaveFormat.PPTX) ``` ### **Align an Array with Surrounding Elements** [MathArray.base_justification](https://reference.aspose.com/slides/python-net/aspose.slides.mathtext/matharray/base_justification/) controls the vertical alignment of an array relative to the mathematical elements beside it. The example below compares alignment with the first row, the center of the array, and the last row. The following example creates three identical arrays, each with three rows and the neighboring elements `A=` and `=B`. All mathematical text uses Cambria Math at 24 points. Only the array alignment changes. ```py import aspose.slides as slides import aspose.slides.mathtext as math def create_text(value): text = math.MathematicalText(value) text.format.font_height = 24 text.format.latin_font = slides.FontData("Cambria Math") return text with slides.Presentation() as presentation: presentation.slide_size.set_size(780, 200, slides.SlideSizeScaleType.DO_NOT_SCALE) slide = presentation.slides[0] alignments = [math.MathVerticalAlignment.TOP, math.MathVerticalAlignment.CENTER, math.MathVerticalAlignment.BOTTOM] labels = ["Top", "Center", "Bottom"] for i, alignment in enumerate(alignments): label = slide.shapes.add_auto_shape(slides.ShapeType.RECTANGLE, 20 + i * 260, 10, 240, 30) label.fill_format.fill_type = slides.FillType.NO_FILL label.line_format.fill_format.fill_type = slides.FillType.NO_FILL label.text_frame.text = labels[i] label_format = label.text_frame.paragraphs[0].portions[0].portion_format label_format.font_height = 16 label_format.fill_format.fill_type = slides.FillType.SOLID label_format.fill_format.solid_fill_color.color = slides.Color.black math_shape = slide.shapes.add_math_shape(20 + i * 260, 60, 240, 130) math_shape.text_frame.text_frame_format.anchoring_type = slides.TextAnchorType.TOP math_paragraph = math_shape.text_frame.paragraphs[0].portions[0].math_paragraph math_paragraph.justification = math.MathJustification.LEFT_JUSTIFIED rows = [create_text("x+y=3"), create_text("x-y=1"), create_text("x=2")] equation_array = math.MathArray(rows) equation_array.base_justification = alignment left_text = create_text("A=") right_text = create_text("=B") equation = math.MathBlock(left_text).join(equation_array).join(right_text) math_paragraph.add(equation) presentation.save("equation-array-alignment.pptx", slides.export.SaveFormat.PPTX) ``` The following comparison shows the saved presentation in PowerPoint. Notice the position of `A=` and `=B` beside each array. ![Equation arrays in PowerPoint with Top, Center, and Bottom alignment and identical neighboring elements](https://docs.aspose.com/slides/python-net/powerpoint-math-equations/equation-array-alignment.png) ### **Configure Row Spacing** [row_spacing_rule](https://reference.aspose.com/slides/python-net/aspose.slides.mathtext/matharray/row_spacing_rule/) selects the spacing rule for rows within the array. [row_spacing](https://reference.aspose.com/slides/python-net/aspose.slides.mathtext/matharray/row_spacing/) supplies a numeric value for an explicit spacing rule and is ignored by the preset rules. For exact spacing, the value is measured in points. For proportional spacing, it is measured in half-lines: the value `3` in the example specifies 1.5 lines. Set both properties when specifying an explicit value; changing the numeric value alone does not select a spacing rule. The example below saves five presentations with the same equations, alignment, and font settings. The first three use presets; the last two show explicit values. ```py import aspose.slides as slides import aspose.slides.mathtext as math def create_text(value): text = math.MathematicalText(value) text.format.font_height = 24 text.format.latin_font = slides.FontData("Cambria Math") return text settings = [ (math.MathRowSpacingRule.SINGLE_LINE_GAP, 0), (math.MathRowSpacingRule.ONE_AND_A_HALF_LINE_GAP, 0), (math.MathRowSpacingRule.TWO_LINE_GAP, 0), (math.MathRowSpacingRule.EXACTLY, 20), (math.MathRowSpacingRule.MULTIPLE, 3) ] for rule, spacing in settings: file_name = f"equation-array-{rule.name}.pptx" with slides.Presentation() as presentation: math_shape = presentation.slides[0].shapes.add_math_shape(20, 20, 600, 300) paragraph = math_shape.text_frame.paragraphs[0] paragraph.paragraph_format.space_before = 0 paragraph.paragraph_format.space_after = 0 math_paragraph = paragraph.portions[0].math_paragraph math_paragraph.justification = math.MathJustification.LEFT_JUSTIFIED rows = [create_text("x+y=3"), create_text("x-y=1"), create_text("x=2")] equation_array = math.MathArray(rows) equation_array.base_justification = math.MathVerticalAlignment.CENTER equation_array.row_spacing_rule = rule equation_array.row_spacing = spacing left_text = create_text("A=") right_text = create_text("=B") equation = math.MathBlock(left_text).join(equation_array).join(right_text) math_paragraph.add(equation) presentation.save(file_name, slides.export.SaveFormat.PPTX) ``` Array row spacing is separate from paragraph spacing. [space_before](https://reference.aspose.com/slides/python-net/aspose.slides/paragraphformat/space_before/) and [space_after](https://reference.aspose.com/slides/python-net/aspose.slides/paragraphformat/space_after/) add space around the containing paragraph, not between array rows. Likewise, [MathParagraph.justification](https://reference.aspose.com/slides/python-net/aspose.slides.mathtext/mathparagraph/justification/) positions the whole math paragraph horizontally; it does not replace the array's vertical alignment setting. ## **Add Trigonometric Functions** Use [as_argument_of_function](https://reference.aspose.com/slides/python-net/aspose.slides.mathtext/mathelementbase/as_argument_of_function/) when the argument is the current element and the function name is known. ![The trigonometric function cos applied to 2x](https://docs.aspose.com/slides/python-net/powerpoint-math-equations/powerpoint-math-equations_6.png) ```py import aspose.slides as slides import aspose.slides.mathtext as math with slides.Presentation() as presentation: slide = presentation.slides[0] math_shape = slide.shapes.add_math_shape(20, 20, 700, 100) math_paragraph = math_shape.text_frame.paragraphs[0].portions[0].math_paragraph cosine = math.MathematicalText("2x").as_argument_of_function( math.MathFunctionsOfOneArgument.COS ) math_paragraph.add(math.MathBlock(cosine)) presentation.save("trigonometric-function.pptx", slides.export.SaveFormat.PPTX) ``` ## **Add Subscripts and Superscripts** Use the subscript and superscript helpers for indexes and powers. When the indexes must appear on the left side of the base, use [set_sub_superscript_on_the_left](https://reference.aspose.com/slides/python-net/aspose.slides.mathtext/mathelementbase/set_sub_superscript_on_the_left/). ![A capital Y with left-side subscript 1 and superscript n](https://docs.aspose.com/slides/python-net/powerpoint-math-equations/powerpoint-math-equations_9.png) ```py import aspose.slides as slides import aspose.slides.mathtext as math with slides.Presentation() as presentation: slide = presentation.slides[0] math_shape = slide.shapes.add_math_shape(20, 20, 700, 100) math_paragraph = math_shape.text_frame.paragraphs[0].portions[0].math_paragraph scripts = math.MathematicalText("Y").set_sub_superscript_on_the_left("1", "n") math_paragraph.add(math.MathBlock(scripts)) presentation.save("subscript-superscript.pptx", slides.export.SaveFormat.PPTX) ``` ## **Add Delimiters** Use [enclose](https://reference.aspose.com/slides/python-net/aspose.slides.mathtext/mathelementbase/enclose/) to put an expression inside delimiters. You can also set a separator character for delimiter expressions that contain several elements. ![A delimiter expression containing x, y, and z separated by vertical bars](https://docs.aspose.com/slides/python-net/powerpoint-math-equations/powerpoint-math-equations_13.png) ```py import aspose.slides as slides import aspose.slides.mathtext as math with slides.Presentation() as presentation: slide = presentation.slides[0] math_shape = slide.shapes.add_math_shape(20, 20, 700, 100) math_paragraph = math_shape.text_frame.paragraphs[0].portions[0].math_paragraph delimiter = ( math.MathematicalText("x") .join("y") .join("z") .enclose("<", ">") ) delimiter.separator_character = "|" math_paragraph.add(math.MathBlock(delimiter)) presentation.save("delimiters.pptx", slides.export.SaveFormat.PPTX) ``` ### **Size and Align Delimiters** Set [grow_to_match_operand_height](https://reference.aspose.com/slides/python-net/aspose.slides.mathtext/mathdelimiter/grow_to_match_operand_height/) to `True` to let the parentheses grow around a tall operand, or to `False` to keep them at their normal size. [delimiter_shape](https://reference.aspose.com/slides/python-net/aspose.slides.mathtext/mathdelimiter/delimiter_shape/) takes one of two [MathDelimiterShape](https://reference.aspose.com/slides/python-net/aspose.slides.mathtext/mathdelimitershape/) values. `CENTERED` centers the parentheses on the math axis, which runs through the middle of the equals sign. `MATCH` aligns them with the enclosed content. Both settings affect only the delimiters. The expression inside stays the same. The example places a fraction in the exponent of `x` so the expression extends farther above the baseline than below it. All four equations use the same parentheses and font settings. ```python import aspose.slides as slides import aspose.slides.mathtext as math def add_expression(slide, left, top, grow, shape): fraction = math.MathematicalText("a + b").divide("c + d") power = math.MathematicalText("x").set_superscript(fraction) delimiter = power.enclose("(", ")") delimiter.grow_to_match_operand_height = grow delimiter.delimiter_shape = shape math_shape = slide.shapes.add_math_shape(left, top, 300, 100) portion = math_shape.text_frame.paragraphs[0].portions[0] portion.portion_format.font_height = 32 equation = math.MathematicalText("y = ").join(delimiter) portion.math_paragraph.add(equation) with slides.Presentation() as presentation: slide = presentation.slides[0] add_expression(slide, 20, 20, True, math.MathDelimiterShape.CENTERED) add_expression(slide, 350, 20, True, math.MathDelimiterShape.MATCH) add_expression(slide, 20, 140, False, math.MathDelimiterShape.CENTERED) add_expression(slide, 350, 140, False, math.MathDelimiterShape.MATCH) presentation.save("delimiter-sizing.pptx", slides.export.SaveFormat.PPTX) ``` In PowerPoint, compare the rows to see the effect of growth. In the top row, the parentheses grow to enclose the exponent and look alike for both shapes. In the bottom row, growth is off. The smaller parentheses on the left (`CENTERED`) align with the equals sign, while those on the right (`MATCH`) sit higher around the expression. ![Four equations in PowerPoint with delimiter growth enabled above and disabled below, and Centered on the left and Match on the right](https://docs.aspose.com/slides/python-net/powerpoint-math-equations/delimiter-sizing.png) ## **Add a Border Box** Call [to_border_box](https://reference.aspose.com/slides/python-net/aspose.slides.mathtext/mathelementbase/to_border_box/) on a fraction to frame the entire expression. The returned [MathBorderBox](https://reference.aspose.com/slides/python-net/aspose.slides.mathtext/mathborderbox/) shows all four sides by default. Use [hide_top](https://reference.aspose.com/slides/python-net/aspose.slides.mathtext/mathborderbox/hide_top/), [hide_bottom](https://reference.aspose.com/slides/python-net/aspose.slides.mathtext/mathborderbox/hide_bottom/), [hide_left](https://reference.aspose.com/slides/python-net/aspose.slides.mathtext/mathborderbox/hide_left/), and [hide_right](https://reference.aspose.com/slides/python-net/aspose.slides.mathtext/mathborderbox/hide_right/) to remove individual sides. The example places six copies of the same fraction on one slide. To show cancellation, hide all four sides and set [strikethrough_bottom_left_to_top_right](https://reference.aspose.com/slides/python-net/aspose.slides.mathtext/mathborderbox/strikethrough_bottom_left_to_top_right/) for a rising diagonal (↗) or [strikethrough_top_left_to_bottom_right](https://reference.aspose.com/slides/python-net/aspose.slides.mathtext/mathborderbox/strikethrough_top_left_to_bottom_right/) for a falling diagonal (↘). You can also use [strikethrough_horizontal](https://reference.aspose.com/slides/python-net/aspose.slides.mathtext/mathborderbox/strikethrough_horizontal/) or [strikethrough_vertical](https://reference.aspose.com/slides/python-net/aspose.slides.mathtext/mathborderbox/strikethrough_vertical/) with any combination of visible sides. ```py import aspose.slides as slides import aspose.slides.mathtext as math def add_fraction(slide, x, y, hide_border=False): fraction = math.MathematicalText("x+1").divide("y+2") box = fraction.to_border_box() box.hide_top = box.hide_bottom = box.hide_left = box.hide_right = hide_border shape = slide.shapes.add_math_shape(x, y, 160, 90) portion = shape.text_frame.paragraphs[0].portions[0] portion.portion_format.font_height = 28 portion.math_paragraph.add(math.MathBlock(box)) return box with slides.Presentation() as presentation: presentation.slide_size.set_size(540, 220, slides.SlideSizeScaleType.DO_NOT_SCALE) slide = presentation.slides[0] add_fraction(slide, 10, 10) partial = add_fraction(slide, 190, 10) partial.hide_top = True partial.hide_right = True add_fraction(slide, 370, 10, hide_border=True).strikethrough_bottom_left_to_top_right = True add_fraction(slide, 10, 120, hide_border=True).strikethrough_top_left_to_bottom_right = True add_fraction(slide, 190, 120, hide_border=True).strikethrough_horizontal = True add_fraction(slide, 370, 120).strikethrough_vertical = True presentation.save("border-box.pptx", slides.export.SaveFormat.PPTX) ``` ![Six editable fractions in PowerPoint. Top row: full border, bottom and left sides, rising diagonal. Bottom row: falling diagonal, horizontal strike, vertical strike with a full border.](https://docs.aspose.com/slides/python-net/powerpoint-math-equations/border-box-fractions.png) On this fraction, the horizontal strike overlaps the fraction bar. The vertical strike crosses both the numerator and the denominator while the surrounding border stays visible. These lines decorate the whole expression. Ordinary text strikethrough applies to characters in a text run. After reopening the presentation in PowerPoint, you can still edit the numerator and denominator independently. ## **Control Visibility and Layout with Phantom Elements** Wrap an expression in [MathPhantom](https://reference.aspose.com/slides/python-net/aspose.slides.mathtext/mathphantom/) to control its visibility and the space it contributes to an equation independently. Its properties control the following: | Property | Effect | | --- | --- | | [show](https://reference.aspose.com/slides/python-net/aspose.slides.mathtext/mathphantom/show/) | Set to `False` to hide the expression. Its dimensions still contribute to layout unless the corresponding properties below are `True`. | | [zero_width](https://reference.aspose.com/slides/python-net/aspose.slides.mathtext/mathphantom/zero_width/) | Treat the expression's horizontal width as zero, allowing neighboring elements to move closer together. | | [zero_asc](https://reference.aspose.com/slides/python-net/aspose.slides.mathtext/mathphantom/zero_asc/) | Treat its ascent, the height above the baseline, as zero. This can reduce the space reserved above neighboring elements. | | [zero_desc](https://reference.aspose.com/slides/python-net/aspose.slides.mathtext/mathphantom/zero_desc/) | Treat its descent, the depth below the baseline, as zero. This can move a fraction bar or other content below the expression closer to its neighbors. | The baseline is the reference line on which ordinary mathematical letters sit. Hiding content does not remove its dimensions, and treating a dimension as zero does not delete the expression. The underlying expression remains available through [base](https://reference.aspose.com/slides/python-net/aspose.slides.mathtext/mathphantom/base/). Set [show](https://reference.aspose.com/slides/python-net/aspose.slides.mathtext/mathphantom/show/) back to `True` to display it again; the dimension settings remain unchanged. The example below creates five side-by-side variants: a visible fraction, a hidden fraction that reserves space, and three hidden fractions with one dimension treated as zero. Each variant uses the same surrounding expression and Cambria Math at 24 points. All equation shapes have the same top position, marked by the gray guide. Placing the phantom in the numerator of an outer fraction makes the vertical layout changes easier to see. ```py import aspose.slides as slides import aspose.slides.mathtext as math def create_text(value): text = math.MathematicalText(value) text.format.font_height = 24 text.format.latin_font = slides.FontData("Cambria Math") return text with slides.Presentation() as presentation: presentation.slide_size.set_size(1000, 180, slides.SlideSizeScaleType.DO_NOT_SCALE) slide = presentation.slides[0] labels = ["Visible", "Hidden: reserves space", "Hidden: ZeroWidth", "Hidden: ZeroAsc", "Hidden: ZeroDesc"] guide = slide.shapes.add_auto_shape(slides.ShapeType.LINE, 10, 60, 980, 0) guide.line_format.fill_format.fill_type = slides.FillType.SOLID guide.line_format.fill_format.solid_fill_color.color = slides.Color.light_gray for i, label_text in enumerate(labels): left = 10 + i * 200 label = slide.shapes.add_auto_shape(slides.ShapeType.RECTANGLE, left, 10, 190, 30) label.fill_format.fill_type = slides.FillType.NO_FILL label.line_format.fill_format.fill_type = slides.FillType.NO_FILL label.text_frame.text = label_text label_format = label.text_frame.paragraphs[0].portions[0].portion_format label_format.font_height = 14 label_format.fill_format.fill_type = slides.FillType.SOLID label_format.fill_format.solid_fill_color.color = slides.Color.black fraction_numerator = create_text("a+b") fraction_denominator = create_text("c+d") fraction = math.MathFraction(fraction_numerator, fraction_denominator) phantom = math.MathPhantom(fraction) phantom.show = i == 0 phantom.zero_width = i == 2 phantom.zero_asc = i == 3 phantom.zero_desc = i == 4 left_text = create_text("x+") right_text = create_text("+y") numerator = math.MathBlock(left_text).join(phantom).join(right_text) denominator = create_text("z") equation = math.MathFraction(numerator, denominator) shape = slide.shapes.add_math_shape(left, 60, 190, 100) shape.text_frame.text_frame_format.anchoring_type = slides.TextAnchorType.TOP math_paragraph = shape.text_frame.paragraphs[0].portions[0].math_paragraph math_paragraph.add(math.MathBlock(equation)) presentation.save("math-phantom.pptx", slides.export.SaveFormat.PPTX) ``` ![Five equations in PowerPoint comparing a visible fraction, a hidden fraction that reserves space, and hidden fractions with ZeroWidth, ZeroAsc, or ZeroDesc enabled](https://docs.aspose.com/slides/python-net/powerpoint-math-equations/math-phantom.png) ## **Group Terms** Use [group](https://reference.aspose.com/slides/python-net/aspose.slides.mathtext/mathelementbase/group/) to place a grouping character above or below an expression. Add a limit to label the grouped terms. ![The expression x plus y grouped with the label any text below it](https://docs.aspose.com/slides/python-net/powerpoint-math-equations/powerpoint-math-equations_15.png) ```py import aspose.slides as slides import aspose.slides.mathtext as math with slides.Presentation() as presentation: slide = presentation.slides[0] math_shape = slide.shapes.add_math_shape(20, 20, 700, 120) math_paragraph = math_shape.text_frame.paragraphs[0].portions[0].math_paragraph grouped = ( math.MathematicalText("x + y") .group(chr(0x23DF), math.MathTopBotPositions.BOTTOM, math.MathTopBotPositions.TOP) .set_lower_limit("any text") ) math_paragraph.add(math.MathBlock(grouped)) presentation.save("grouped-terms.pptx", slides.export.SaveFormat.PPTX) ``` ## **Format Math Elements** Use formatting helpers only where they clarify the formula. For example, [overbar](https://reference.aspose.com/slides/python-net/aspose.slides.mathtext/mathelementbase/overbar/) places a bar above a math element. ![A math expression ABC with an overbar](https://docs.aspose.com/slides/python-net/powerpoint-math-equations/powerpoint-math-equations_14.png) ```py import aspose.slides as slides import aspose.slides.mathtext as math with slides.Presentation() as presentation: slide = presentation.slides[0] math_shape = slide.shapes.add_math_shape(20, 20, 700, 100) math_paragraph = math_shape.text_frame.paragraphs[0].portions[0].math_paragraph overbar = math.MathematicalText("ABC").overbar() math_paragraph.add(math.MathBlock(overbar)) presentation.save("overbar.pptx", slides.export.SaveFormat.PPTX) ``` ### **Format Text in an Existing Equation** To format text throughout an existing equation, traverse each math block's element tree. [MathElementBase.get_children](https://reference.aspose.com/slides/python-net/aspose.slides.mathtext/mathelementbase/get_children/) returns only the immediate children, so call it recursively to reach text inside fractions, scripts, radicals, and other nested structures. Check the current element as well as its children to include the starting element when it is [MathematicalText](https://reference.aspose.com/slides/python-net/aspose.slides.mathtext/mathematicaltext/). This example assumes that `input.pptx` contains an equation such as `z = xᵢ / ∛y`, with a fraction containing a subscript in its numerator and a radical in its denominator. Processing only the block's top-level elements would miss the text inside the fraction. The example finds mathematical portions in slide text frames, accesses their blocks through [MathPortion.math_paragraph](https://reference.aspose.com/slides/python-net/aspose.slides.mathtext/mathportion/math_paragraph/), and sets [font_height](https://reference.aspose.com/slides/python-net/aspose.slides/baseportionformat/font_height/) to 28 points through each text element's [format](https://reference.aspose.com/slides/python-net/aspose.slides.mathtext/mathematicaltext/format/) property. ```py import aspose.slides as slides import aspose.slides.mathtext as math def format_math_text(element): if isinstance(element, math.MathematicalText): element.format.font_height = 28 for child in element.get_children(): format_math_text(child) with slides.Presentation("input.pptx") as presentation: for slide in presentation.slides: for shape in slide.shapes: if not isinstance(shape, slides.AutoShape) or shape.text_frame is None: continue for paragraph in shape.text_frame.paragraphs: for portion in paragraph.portions: if isinstance(portion, math.MathPortion): for block in portion.math_paragraph: format_math_text(block) presentation.save("formatted-equations.pptx", slides.export.SaveFormat.PPTX) ``` The saved presentation contains the updated text formatting at every level of each processed equation, while preserving its text content and mathematical structure. ## **Quick Reference** | Task | Main API | | --- | --- | | Create math text | [MathematicalText](https://reference.aspose.com/slides/python-net/aspose.slides.mathtext/mathematicaltext/) | | Combine elements | [MathElementBase.join](https://reference.aspose.com/slides/python-net/aspose.slides.mathtext/mathelementbase/join/) | | Create fractions | [MathElementBase.divide](https://reference.aspose.com/slides/python-net/aspose.slides.mathtext/mathelementbase/divide/) | | Add superscript or subscript | [set_superscript](https://reference.aspose.com/slides/python-net/aspose.slides.mathtext/mathelementbase/set_superscript/), [set_subscript](https://reference.aspose.com/slides/python-net/aspose.slides.mathtext/mathelementbase/set_subscript/) | | Add functions | [function](https://reference.aspose.com/slides/python-net/aspose.slides.mathtext/mathelementbase/function/), [as_argument_of_function](https://reference.aspose.com/slides/python-net/aspose.slides.mathtext/mathelementbase/as_argument_of_function/) | | Add radicals | [radical](https://reference.aspose.com/slides/python-net/aspose.slides.mathtext/mathelementbase/radical/) | | Add limits | [set_lower_limit](https://reference.aspose.com/slides/python-net/aspose.slides.mathtext/mathelementbase/set_lower_limit/), [set_upper_limit](https://reference.aspose.com/slides/python-net/aspose.slides.mathtext/mathelementbase/set_upper_limit/) | | Add left-side scripts | [set_sub_superscript_on_the_left](https://reference.aspose.com/slides/python-net/aspose.slides.mathtext/mathelementbase/set_sub_superscript_on_the_left/) | | Add summations and integrals | [nary](https://reference.aspose.com/slides/python-net/aspose.slides.mathtext/mathelementbase/nary/), [integral](https://reference.aspose.com/slides/python-net/aspose.slides.mathtext/mathelementbase/integral/) | | Add matrices | [MathMatrix](https://reference.aspose.com/slides/python-net/aspose.slides.mathtext/mathmatrix/) | | Add equation arrays | [to_math_array](https://reference.aspose.com/slides/python-net/aspose.slides.mathtext/mathelementbase/to_math_array/) | | Add delimiters | [enclose](https://reference.aspose.com/slides/python-net/aspose.slides.mathtext/mathelementbase/enclose/) | | Add bars and borders | [overbar](https://reference.aspose.com/slides/python-net/aspose.slides.mathtext/mathelementbase/overbar/), [to_border_box](https://reference.aspose.com/slides/python-net/aspose.slides.mathtext/mathelementbase/to_border_box/) | | Group terms | [group](https://reference.aspose.com/slides/python-net/aspose.slides.mathtext/mathelementbase/group/) | ## **FAQ** **Can I edit an existing PowerPoint equation?** Yes. Open the presentation, find the shape that contains a [MathPortion](https://reference.aspose.com/slides/python-net/aspose.slides.mathtext/mathportion/), get its [math_paragraph](https://reference.aspose.com/slides/python-net/aspose.slides.mathtext/mathportion/math_paragraph/), and update the math blocks in that paragraph. **Are equations saved as editable PowerPoint math?** Yes. When you save to PPTX, Aspose.Slides writes the equation as editable Office math content. **Can I export equations to LaTeX?** Yes. Get the equation's [MathParagraph](https://reference.aspose.com/slides/python-net/aspose.slides.mathtext/mathparagraph/) from its [MathPortion](https://reference.aspose.com/slides/python-net/aspose.slides.mathtext/mathportion/), and call [MathParagraph.to_latex](https://reference.aspose.com/slides/python-net/aspose.slides.mathtext/mathparagraph/to_latex/) to export it directly. For a complete example, see [Export Math Equations from Presentations in Python via .NET](https://docs.aspose.com/slides/python-net/exporting-math-equations/#export-math-equations-to-latex). ## Related articles - [MathText](https://docs.aspose.com/slides/python-net/examples/elements/math-text/) - [Export Math Equations from Presentations in Python](https://docs.aspose.com/slides/python-net/exporting-math-equations/) # Manage PowerPoint Shapes in Python > Learn how to create, edit, format, and manipulate shapes in Aspose.Slides for Python via .NET, with code examples for PPT, PPTX, and ODP presentations. Source: https://docs.aspose.com/slides/python-net/powerpoint-shapes/ Updated: 2025-08-10 --- lastmod: 2025-08-10T15:41:05+04:00 title: Manage PowerPoint Shapes in Python linktitle: PowerPoint Shapes type: docs weight: 90 url: /python-net/powerpoint-shapes/ keywords: - shape - format shape - shape effect - manage shape - effective properties - animation - rendering - ActiveX - PowerPoint - OpenDocument - presentation - Python - Aspose.Slides description: "Learn how to create, edit, format, and manipulate shapes in Aspose.Slides for Python via .NET, with code examples for PPT, PPTX, and ODP presentations." --- ## Related articles - [ActiveX](https://docs.aspose.com/slides/python-net/examples/elements/activex/) - [Manage Shapes in Presentations with Python](https://docs.aspose.com/slides/python-net/shape-types/) - [Animation](https://docs.aspose.com/slides/python-net/examples/elements/animation/) # Manage PowerPoint SmartArt in Python > Learn how to create and edit PowerPoint SmartArt in Python via Aspose.Slides API: layouts, nodes, styles, with step-by-step examples to automate slides fast. Source: https://docs.aspose.com/slides/python-net/powerpoint-smartart/ Updated: 2025-09-08 --- lastmod: 2025-09-08T16:46:57+04:00 title: Manage PowerPoint SmartArt in Python linktitle: PowerPoint SmartArt type: docs weight: 100 url: /python-net/powerpoint-smartart/ keywords: - SmartArt - manage SmartArt - SmartArt graphic - SmartArt node - PowerPoint - presentation - Python - Aspose.Slides description: "Learn how to create and edit PowerPoint SmartArt in Python via Aspose.Slides API: layouts, nodes, styles, with step-by-step examples to automate slides fast." --- ## Related articles - [SmartArt](https://docs.aspose.com/slides/python-net/examples/elements/smart-art/) - [Manage SmartArt in PowerPoint Presentations Using Python](https://docs.aspose.com/slides/python-net/manage-smartart/) - [Manage SmartArt Shape Nodes in Presentations Using Python](https://docs.aspose.com/slides/python-net/manage-smartart-shape-node/) # Create and Customize PowerPoint Tables in Python > Create and format tables in PowerPoint PPT and PPTX using Aspose.Slides for Python via .NET — insert rows and columns, merge cells, set borders, import data. Source: https://docs.aspose.com/slides/python-net/powerpoint-table/ Updated: 2025-12-02 --- lastmod: 2025-12-02T13:32:50+06:00 title: Create and Customize PowerPoint Tables in Python linktitle: PowerPoint Table type: docs weight: 110 url: /python-net/powerpoint-table/ keywords: - create table - add row - add column - customize table - customize row - customize column - customize cell - PowerPoint - presentation - Python - Aspose.Slides description: "Create and format tables in PowerPoint PPT and PPTX using Aspose.Slides for Python via .NET — insert rows and columns, merge cells, set borders, import data." --- ## Related articles - [Table](https://docs.aspose.com/slides/python-net/examples/elements/table/) - [Manage Rows and Columns in PowerPoint Tables Using Python](https://docs.aspose.com/slides/python-net/manage-rows-and-columns/) - [Manage Presentation Tables with Python](https://docs.aspose.com/slides/python-net/manage-table/) # Understanding the Difference: PPT vs PPTX > Compare PPT vs PPTX for PowerPoint with Aspose.Slides Python via .NET, exploring format differences, benefits, compatibility, and conversion tips. Source: https://docs.aspose.com/slides/python-net/ppt-vs-pptx/ Updated: 2026-08-13 ## **Overview** This article explains the differences between the PPT and PPTX formats. It describes PPT as the legacy binary format used in PowerPoint 97–2003, while PPTX is presented as the modern Office Open XML-based format that offers greater flexibility and is better suited for extending presentation capabilities. The article also outlines key aspects of converting between these formats, including compatibility considerations, and shows how Aspose.Slides can be used to perform such conversions. In general, PPTX is recommended whenever possible. ## **What is PPT?** [**PPT**](https://docs.fileformat.com/presentation/ppt/) is a binary file format, i.e. it is impossible to view its content without special tools. The first PowerPoint 97-2003 versions worked with PPT file format, however its expandability is limited.  ## **What is PPTX?** [**PPTX**](https://docs.fileformat.com/presentation/pptx/) is a new presentation file format, based on the Office Open XML (ISO 29500:2008-2016, ECMA-376) standard. PPTX is an archived set of XML and media files. PPTX format is easily expandable. For example, it is easy to add support for a new chart type or shape type, without changing PPTX format in every new PowerPoint version. PPTX format is used starting from PowerPoint 2007. ## **PPT vs PPTX** Although PPTX provides much broader functionality, PPT remains quite popular. The necessity to convert from PPT to PPTX and vice versa is highy demanded. However, conversion between old PPT and new PPTX format is the most complicated challenge among other Microsoft Office formats. Although the specification of PPT format is open, it is difficult to work with it. PowerPoint can create special parts (MetroBlob) in PPT files to store information from PPTX that is not supported by PPT format and can't be displayed in old PowerPoint versions. This information can be restored when a PPT file is loaded in a modern PowerPoint version or converted to PPTX format. Aspose.Slides provides a common interface to work with all presentation formats. It allows converting from PPT to PPTX and PPTX to PPT in a very simple way. Aspose.Slides completely supports conversion from PPT to PPTX and also supports conversion from PPTX to PPT with some restrictions. We recommend using PPTX format wherever possible. Check the quality of PPT to PPTX and PPTX to PPT conversions with online [**Aspose.Slides Conversion app**](https://products.aspose.app/slides/conversion/). ```py import aspose.slides as slides # Instantiate a Presentation object that represents a PPT file pres = slides.Presentation("PPTtoPPTX.ppt") # Save the loaded presentation in PPTX format pres.save("PPTtoPPTX_out.pptx", slides.export.SaveFormat.PPTX) ``` Read more [**How to Convert Presentations PPT to PPTX**.](https://docs.aspose.com/slides/python-net/convert-ppt-to-pptx/) ## **FAQ** ### Is there any point in keeping old presentations in PPT if they open without errors? If a presentation opens reliably and doesn't need collaboration or newer features, you can keep it in PPT. But for future compatibility and extensibility, it's better to [convert to PPTX](https://docs.aspose.com/slides/python-net/convert-ppt-to-pptx/): the format is based on the open OOXML standard and is more easily supported by modern tools. ### How can I decide which files are critical to convert to PPTX first? Convert first the presentations that: are edited by multiple people; contain complex [charts](https://docs.aspose.com/slides/python-net/create-chart/)/[shapes](https://docs.aspose.com/slides/python-net/shape-manipulations/); are used in external communications; or trigger warnings when [opened](https://docs.aspose.com/slides/python-net/open-presentation/). ### Will password protection be preserved when converting from PPT to PPTX and back? The presence of a password carries over only with a correct conversion and encryption support in the tool you use. It's more reliable to [remove protection](https://docs.aspose.com/slides/python-net/password-protected-presentation/), [convert](https://docs.aspose.com/slides/python-net/convert-ppt-to-pptx/), then reapply protection according to your security policy. ### Why do some effects disappear or get simplified when converting PPTX back to PPT? Because PPT doesn't support some newer objects/properties. PowerPoint and tools can store "traces" of this information in special blocks for later restoration, but older versions of PowerPoint won't render them. # Manage Presentation Accessibility in Python > Discover how Aspose.Slides for Python helps automate presentation accessibility checks in PPT, PPTX and ODP files—enhance screen reader experience and boost compliance. Source: https://docs.aspose.com/slides/python-net/presentation-accessibility/ Updated: 2026-09-25 ## **Introduction** Alternative text helps people using assistive technologies understand the meaning of images, charts, and other informative shapes. This article explains how to read and update alternative text titles and descriptions with Aspose.Slides for Python via .NET, distinguish accessibility descriptions from shape names used in code, and check whether a shape is marked as decorative. These features support presentation accessibility, but do not guarantee it. Reading order, color contrast, text readability, and other accessibility requirements also need review. ## **Manage Alternative Text Titles and Descriptions** Use alternative text to explain the meaning of images, charts, and other informative shapes to people who cannot see them. The following properties serve different purposes: | Property or content | Purpose | | --- | --- | | [alternative_text_title](https://reference.aspose.com/slides/python-net/aspose.slides/shape/alternative_text_title/) | A short title for the alternative description. | | [alternative_text](https://reference.aspose.com/slides/python-net/aspose.slides/shape/alternative_text/) | A meaningful description of the shape's content or purpose in the context of the slide. | | [name](https://reference.aspose.com/slides/python-net/aspose.slides/shape/name/) | The shape's name, which code can use to find a specific shape in the presentation. | | Visible text | Content displayed on the slide, such as a shape's text or a chart's title and labels. Updating alternative text does not change this content. | When a presentation is reused as a template, code may find a shape by its [name](https://reference.aspose.com/slides/python-net/aspose.slides/shape/name/) before updating it. This name serves a different purpose from alternative text, which explains what the visual communicates to the reader. Searching by name allows authors to improve or translate descriptions without changing how code finds the shape. Names can be edited and are not guaranteed to be unique, so check that the name matches the intended shape; see [Identify and Find Shapes](https://docs.aspose.com/slides/python-net/shape-manipulations/#identify-and-find-shapes). The following example requires `input.pptx` with an image of an office entrance as the first shape on the first slide. The image should not be marked as decorative. The example reads and prints its current alternative text title and description, updates both values, and saves the presentation as `output.pptx`. Adapt the wording to the actual image and the information it conveys. ```python import aspose.slides as slides with slides.Presentation("input.pptx") as presentation: shape = presentation.slides[0].shapes[0] print(f"Alternative text title: {shape.alternative_text_title}") print(f"Alternative text description: {shape.alternative_text}") shape.alternative_text_title = "Office entrance" shape.alternative_text = "The office entrance has a wheelchair ramp to the right of the steps." presentation.save("output.pptx", slides.export.SaveFormat.PPTX) ``` Adding alternative text alone does not guarantee presentation accessibility or compliance with accessibility standards. Review the descriptions for accuracy and relevance, and also check reading order, color contrast, readable text, and other accessibility requirements. Informative visuals should not be marked as decorative; the next section shows how to read [is_decorative](https://reference.aspose.com/slides/python-net/aspose.slides/shape/is_decorative/). ## **Mark as Decorative** Mark as decorative flags purely ornamental visuals so screen readers skip them, reducing noise and keeping focus on meaningful content. Apply it to backgrounds, flourishes, and spacers—never to charts, icons, or images that convey information. Aspose.Slides exposes this flag for detection and validation, enabling automated accessibility checks and cleanup. ![Mark as Decorative](https://docs.aspose.com/slides/python-net/presentation-accessibility/mark_as_decorative.png) The following code sample shows how to determine whether a shape is marked as decorative. ```py import aspose.slides as slides with slides.Presentation("sample.pptx") as presentation: shape = presentation.slides[0].shapes[0] print(f"Is shape decorative: {shape.is_decorative}") ``` ## **FAQ** **What should I put in the alternative text title and description?** Use a short title to identify the subject and a description to explain the information the visual conveys in the context of the slide. For a chart, describe the relevant trend or comparison rather than only saying "chart." **Should I use alternative text to locate shapes in a template?** Prefer finding the shape by its [name](https://reference.aspose.com/slides/python-net/aspose.slides/shape/name/) and checking that it is the expected shape. Alternative text may be edited or translated, which can break code that searches for an exact description; see [Identify and Find Shapes](https://docs.aspose.com/slides/python-net/shape-manipulations/). **When should a shape be marked as decorative?** Use the decorative flag for visuals that add no information, such as ornamental flourishes. Images and charts that communicate meaning need an appropriate description instead. **Does adding alternative text make a presentation fully accessible?** No. Alternative text addresses only part of accessibility. Also review reading order, color contrast, text readability, and other applicable requirements; setting these properties alone does not establish compliance. # Manage Presentation Backgrounds in Python > Learn how to set dynamic backgrounds in PowerPoint and OpenDocument files using Aspose.Slides for Python via .NET, with code tips to boost your presentations. Source: https://docs.aspose.com/slides/python-net/presentation-background/ Updated: 2026-08-13 ## **Introduction** Solid colors, gradients, and images are commonly used for slide backgrounds. You can set the background for a **normal slide** (a single slide) or a **master slide** (applies to multiple slides at once). ![PowerPoint background](https://docs.aspose.com/slides/python-net/presentation-background/powerpoint-background.png) ## **Set a Solid Color Background for a Normal Slide** Aspose.Slides allows you to set a solid color as the background for a specific slide in a presentation—even if the presentation uses a master slide. The change applies only to the selected slide. 1. Create an instance of the [Presentation](https://reference.aspose.com/slides/python-net/aspose.slides/presentation/) class. 2. Set the slide’s [BackgroundType](https://reference.aspose.com/slides/python-net/aspose.slides/backgroundtype/) to `OWN_BACKGROUND`. 3. Set the slide background [FillType](https://reference.aspose.com/slides/python-net/aspose.slides/filltype/) to `SOLID`. 4. Use the `solid_fill_color` property on [FillFormat](https://reference.aspose.com/slides/python-net/aspose.slides/fillformat/) to specify the solid background color. 5. Save the modified presentation. The following Python example shows how to set a blue solid color as the background for a normal slide: ```python import aspose.pydrawing as draw import aspose.slides as slides # Create an instance of the Presentation class. with slides.Presentation() as presentation: slide = presentation.slides[0] # Set the background color of the slide to blue. slide.background.type = slides.BackgroundType.OWN_BACKGROUND slide.background.fill_format.fill_type = slides.FillType.SOLID slide.background.fill_format.solid_fill_color.color = draw.Color.blue # Save the presentation to disk. presentation.save("SolidColorBackground.pptx", slides.export.SaveFormat.PPTX) ``` ## **Set a Solid Color Background for the Master Slide** Aspose.Slides allows you to set a solid color as the background for the master slide in a presentation. The master slide acts as a template that controls formatting for all slides, so when you choose a solid color for the master slide’s background, it applies to every slide. 1. Create an instance of the [Presentation](https://reference.aspose.com/slides/python-net/aspose.slides/presentation/) class. 2. Set the master slide’s [BackgroundType](https://reference.aspose.com/slides/python-net/aspose.slides/backgroundtype/) (via `masters`) to `OWN_BACKGROUND`. 3. Set the master slide background [FillType](https://reference.aspose.com/slides/python-net/aspose.slides/filltype/) to `SOLID`. 4. Use the `solid_fill_color` property on [FillFormat](https://reference.aspose.com/slides/python-net/aspose.slides/fillformat/) to specify the solid background color. 5. Save the modified presentation. The following Python example shows how to set a solid color (forest green) as the background for a master slide: ```python import aspose.pydrawing as draw import aspose.slides as slides # Create an instance of the Presentation class. with slides.Presentation() as presentation: master_slide = presentation.masters[0] # Set the background color for the Master slide to Forest Green. master_slide.background.type = slides.BackgroundType.OWN_BACKGROUND master_slide.background.fill_format.fill_type = slides.FillType.SOLID master_slide.background.fill_format.solid_fill_color.color = draw.Color.forest_green # Save the presentation to disk. presentation.save("MasterSlideBackground.pptx", slides.export.SaveFormat.PPTX) ``` ## **Set a Gradient Background for a Slide** A gradient is a graphical effect created by a gradual change in color. When used as a slide background, gradients can make presentations look more artistic and professional. Aspose.Slides allows you to set a gradient color as the background for slides. 1. Create an instance of the [Presentation](https://reference.aspose.com/slides/python-net/aspose.slides/presentation/) class. 2. Set the slide’s [BackgroundType](https://reference.aspose.com/slides/python-net/aspose.slides/backgroundtype/) to `OWN_BACKGROUND`. 3. Set the slide background [FillType](https://reference.aspose.com/slides/python-net/aspose.slides/filltype/) to `GRADIENT`. 4. Use the `gradient_format` property on [FillFormat](https://reference.aspose.com/slides/python-net/aspose.slides/fillformat/) to configure your preferred gradient settings. 5. Save the modified presentation. The following Python example shows how to set a gradient color as the background for a slide: ```python import aspose.pydrawing as draw import aspose.slides as slides # Create an instance of the Presentation class. with slides.Presentation() as presentation: slide = presentation.slides[0] # Apply a gradient effect to the background. slide.background.type = slides.BackgroundType.OWN_BACKGROUND slide.background.fill_format.fill_type = slides.FillType.GRADIENT # Define the gradient colors. gradient_format = slide.background.fill_format.gradient_format gradient_format.gradient_stops.add(0, draw.Color.blue) gradient_format.gradient_stops.add(1, draw.Color.light_blue) gradient_format.tile_flip = slides.TileFlip.FLIP_BOTH # Save the presentation to disk. presentation.save("GradientBackground.pptx", slides.export.SaveFormat.PPTX) ``` ## **Set an Image as a Slide Background** In addition to solid and gradient fills, Aspose.Slides allows you to use images as slide backgrounds. 1. Create an instance of the [Presentation](https://reference.aspose.com/slides/python-net/aspose.slides/presentation/) class. 2. Set the slide’s [BackgroundType](https://reference.aspose.com/slides/python-net/aspose.slides/backgroundtype/) to `OWN_BACKGROUND`. 3. Set the slide background [FillType](https://reference.aspose.com/slides/python-net/aspose.slides/filltype/) to `PICTURE`. 4. Load the image you want to use as the slide background. 5. Add the image to the presentation’s image collection. 6. Use the `picture_fill_format` property on [FillFormat](https://reference.aspose.com/slides/python-net/aspose.slides/fillformat/) to assign the image as the background. 7. Save the modified presentation. The following Python example shows how to set an image as the background for a slide: ```python import aspose.slides as slides # Create an instance of the Presentation class. with slides.Presentation() as presentation: slide = presentation.slides[0] # Set background image properties. slide.background.type = slides.BackgroundType.OWN_BACKGROUND slide.background.fill_format.fill_type = slides.FillType.PICTURE slide.background.fill_format.picture_fill_format.picture_fill_mode = slides.PictureFillMode.STRETCH # Load the image. with slides.Images.from_file("Tulips.jpg") as image: # Add the image to the presentation's image collection. pp_image = presentation.images.add_image(image) slide.background.fill_format.picture_fill_format.picture.image = pp_image # Save the presentation to disk. presentation.save("ImageAsBackground.pptx", slides.export.SaveFormat.PPTX) ``` The following code sample shows how to set the background fill type to a tiled picture and modify the tiling properties: ```py import aspose.slides as slides with slides.Presentation() as presentation: first_slide = presentation.slides[0] background = first_slide.background background.type = slides.BackgroundType.OWN_BACKGROUND background.fill_format.fill_type = slides.FillType.PICTURE with slides.Images.from_file("image.png") as new_image: pp_image = presentation.images.add_image(new_image) # Set the image used for the background fill. back_picture_fill_format = background.fill_format.picture_fill_format back_picture_fill_format.picture.image = pp_image # Set the picture fill mode to Tile and adjust the tile properties. back_picture_fill_format.picture_fill_mode = slides.PictureFillMode.TILE back_picture_fill_format.tile_offset_x = 15.0 back_picture_fill_format.tile_offset_y = 15.0 back_picture_fill_format.tile_scale_x = 46.0 back_picture_fill_format.tile_scale_y = 87.0 back_picture_fill_format.tile_alignment = slides.RectangleAlignment.CENTER back_picture_fill_format.tile_flip = slides.TileFlip.FLIP_Y presentation.save("TileBackground.pptx", slides.export.SaveFormat.PPTX) ``` Read more: [**Tile Picture As Texture**](https://docs.aspose.com/slides/python-net/shape-formatting/#tile-picture-as-texture). ### **Change the Background Image Transparency** You may want to adjust the transparency of a slide's background image to make the contents of the slide stand out. The following Python code shows you how to change the transparency for a slide background image: ```python import aspose.slides as slides with slides.Presentation("ImageAsBackground.pptx") as presentation: slide = presentation.slides[0] transparency_value = 30 # For example. # Get the collection of picture transform operations. image_transform = slide.background.fill_format.picture_fill_format.picture.image_transform transparency_operation = None # Find an existing fixed-percentage transparency effect. for operation in image_transform: if type(operation) is slides.effects.AlphaModulateFixed: transparency_operation = operation break # Set the new transparency value. if transparency_operation is None: image_transform.add_alpha_modulate_fixed_effect(100 - transparency_value) else: transparency_operation.amount = 100 - transparency_value presentation.save("TransparentBackground.pptx", slides.export.SaveFormat.PPTX) ``` ## **Get the Slide Background Value** Aspose.Slides provides the [IBackgroundEffectiveData](https://reference.aspose.com/slides/python-net/aspose.slides/ibackgroundeffectivedata/) class for retrieving a slide’s effective background values. This class exposes the effective [FillFormat](https://reference.aspose.com/slides/python-net/aspose.slides/fillformat/) and [EffectFormat](https://reference.aspose.com/slides/python-net/aspose.slides/effectformat/). Using the [BaseSlide](https://reference.aspose.com/slides/python-net/aspose.slides/baseslide/) class’s `background` property, you can obtain the effective background for a slide. The following Python example shows how to get a slide’s effective background value: ```python import aspose.slides as slides # Create an instance of the Presentation class. with slides.Presentation("Sample.pptx") as presentation: slide = presentation.slides[0] # Retrieve the effective background, taking into account master, layout, and theme. effective_background = slide.background.get_effective() if effective_background.fill_format.fill_type == slides.FillType.SOLID: color = effective_background.fill_format.solid_fill_color print(f"Fill color: Color [A={color.a}, R={color.r}, G={color.g}, B={color.b}]") else: print("Fill type:", str(effective_background.fill_format.fill_type)) ``` ## **FAQ** ### Can I reset a custom background and restore the theme/layout background? Yes. Remove the slide’s custom fill, and the background will be inherited again from the corresponding [layout](https://docs.aspose.com/slides/python-net/slide-layout/)/[master](https://docs.aspose.com/slides/python-net/slide-master/) slide (i.e., the [theme background](https://docs.aspose.com/slides/python-net/presentation-theme/)). ### What happens to the background if I change the presentation’s theme later? If a slide has its own fill, it will remain unchanged. If the background is inherited from the [layout](https://docs.aspose.com/slides/python-net/slide-layout/)/[master](https://docs.aspose.com/slides/python-net/slide-master/), it will update to match the [new theme](https://docs.aspose.com/slides/python-net/presentation-theme/). ## Related articles - [Format PowerPoint Shapes in Python](https://docs.aspose.com/slides/python-net/shape-formatting/) - [Get the Entire Slide Background from a Presentation as an Image](https://docs.aspose.com/slides/python-net/get-the-entire-presentation-slide-background-as-an-image/) # Manage Presentation Comments in Python > Manage presentation comments with Aspose.Slides for Python via .NET: add, read, edit, reply to, and remove comments in PowerPoint presentations. Source: https://docs.aspose.com/slides/python-net/presentation-comments/ Updated: 2026-11-08 ## **Overview** This article explains how to manage presentation comments with Aspose.Slides for Python via .NET. It introduces the main comment-related types and demonstrates how to add comments to slides, access existing comments, work with replies and modern comments, and remove comments from a presentation. The examples cover common review and collaboration scenarios in PowerPoint, such as assigning comments to authors, reading comment text and metadata, building reply chains, and removing selected comments or all comments. In PowerPoint, comments appear as annotations on slides. Selecting a comment displays its text and related discussion. To request that comments be shown or hidden when a presentation opens without changing the comments themselves, see [Show or Hide Comments When Opening a Presentation](https://docs.aspose.com/slides/python-net/presentation-view-properties/). ## **Why Add Comments to Presentations?** You can use comments to provide feedback and collaborate with colleagues when reviewing presentations. Aspose.Slides for Python via .NET provides the following APIs for working with comments: * The [Presentation](https://reference.aspose.com/slides/python-net/aspose.slides/presentation/) class, which provides access to the presentation's comment authors. * The [CommentCollection](https://reference.aspose.com/slides/python-net/aspose.slides/commentcollection/) class, which represents the comments associated with an individual author. * The [Comment](https://reference.aspose.com/slides/python-net/aspose.slides/comment/) class, which provides information about a comment, including its author, creation time, position, and text. * The [CommentAuthor](https://reference.aspose.com/slides/python-net/aspose.slides/commentauthor/) class, which provides information about an author, including their name, initials, and associated comments. ## **Add Slide Comments** The example creates two slides and registers a comment author with [add_author](https://reference.aspose.com/slides/python-net/aspose.slides/commentauthorcollection/add_author/). It uses [add_comment](https://reference.aspose.com/slides/python-net/aspose.slides/commentcollection/add_comment/) to place one comment on each slide, then retrieves the first slide's comments for that author with [get_slide_comments](https://reference.aspose.com/slides/python-net/aspose.slides/slide/get_slide_comments/). The console displays the first comment's text twice, demonstrating access through both the slide and the author, and the saved presentation contains both comments. ```python from datetime import datetime import aspose.slides as slides with slides.Presentation() as presentation: first_slide = presentation.slides[0] second_slide = presentation.slides.add_empty_slide(presentation.layout_slides[0]) author = presentation.comment_authors.add_author("Jawad", "MF") position = slides.PointF(0.2, 0.2) created_time = datetime.now() author.comments.add_comment("Hello Jawad, this is a slide comment", first_slide, position, created_time) author.comments.add_comment("Hello Jawad, this is the second slide comment", second_slide, position, created_time) comments = first_slide.get_slide_comments(author) if len(comments) > 0: first_comment = comments[0] print(first_comment.text) comment_text = first_comment.author.comments[0].text print(comment_text) presentation.save("Comments_out.pptx", slides.export.SaveFormat.PPTX) ``` ## **Find or Create a Comment Author** When an automated review processes the same presentation repeatedly, search its [comment_authors](https://reference.aspose.com/slides/python-net/aspose.slides/presentation/comment_authors/) collection before adding an author. [find_by_name_and_initials](https://reference.aspose.com/slides/python-net/aspose.slides/commentauthorcollection/find_by_name_and_initials/) matches both the name and initials and returns an array of matching authors, or an empty array if no matches exist. In contrast, [find_by_name](https://reference.aspose.com/slides/python-net/aspose.slides/commentauthorcollection/find_by_name/) searches by name alone, regardless of initials. Calling [add_author](https://reference.aspose.com/slides/python-net/aspose.slides/commentauthorcollection/add_author/) with a name and initials already present in the collection throws an exception. The example requires a presentation file with at least one slide. On each of two passes, it reuses the first matching author, or creates one only when the result is empty. If there are multiple matches, it selects the first array element without merging or removing the other authors. It then calls [add_comment](https://reference.aspose.com/slides/python-net/aspose.slides/commentcollection/add_comment/) for the selected author and saves the presentation. The second pass opens the first pass's output and repeats the operation. ```python from datetime import datetime import aspose.slides as slides author_name = "Reviewer" author_initials = "RV" input_file = "input.pptx" position = slides.PointF(20, 20) for pass_number in range(1, 3): with slides.Presentation(input_file) as presentation: matches = presentation.comment_authors.find_by_name_and_initials(author_name, author_initials) author = matches[0] if len(matches) > 0 else presentation.comment_authors.add_author(author_name, author_initials) author.comments.add_comment("Please review this slide.", presentation.slides[0], position, datetime.now()) output_file = f"review_pass_{pass_number}.pptx" presentation.save(output_file, slides.export.SaveFormat.PPTX) input_file = output_file ``` The second pass adds another comment without adding another author or removing existing comments. The final file, `review_pass_2.pptx`, contains both new comments alongside any original comments. Reusing an author does not deduplicate comments: to avoid repeatedly adding the same comment, implement separate duplicate detection before adding it. ## **Access Slide Comments** The example opens an existing presentation and reads its [comment_authors](https://reference.aspose.com/slides/python-net/aspose.slides/presentation/comment_authors/) collection. For each author, it iterates through [comments](https://reference.aspose.com/slides/python-net/aspose.slides/commentauthor/comments/) and prints the slide number, comment text, author name, and creation time. The input presentation must contain comments to produce console output. ```python import aspose.slides as slides with slides.Presentation("Comments1.pptx") as presentation: for author in presentation.comment_authors: for comment in author.comments: print("Slide: " + str(comment.slide.slide_number)) print("Comment: " + comment.text) print("Author: " + comment.author.name) print("Posted at: " + str(comment.created_time)) print() ``` ## **Reply to Comments** A parent comment is the original comment at the top of a reply hierarchy. The [parent_comment](https://reference.aspose.com/slides/python-net/aspose.slides/comment/parent_comment/) property of the [Comment](https://reference.aspose.com/slides/python-net/aspose.slides/comment/) class lets you get or set the parent of a comment. The example creates comments from two authors and uses [parent_comment](https://reference.aspose.com/slides/python-net/aspose.slides/comment/parent_comment/) to build replies, including a reply to another reply. Passing `None` to [get_slide_comments](https://reference.aspose.com/slides/python-net/aspose.slides/slide/get_slide_comments/) retrieves comments from all authors; the console indents each entry according to its depth in the reply hierarchy. The example saves the complete discussion, calls [remove](https://reference.aspose.com/slides/python-net/aspose.slides/comment/remove/) on the first root comment, and saves a second presentation with that comment and its replies removed. ```python from datetime import datetime import aspose.slides as slides with slides.Presentation() as presentation: slide = presentation.slides[0] position = slides.PointF(10, 10) created_time = datetime.now() original_author = presentation.comment_authors.add_author("Author_1", "A.A.") root_comment = original_author.comments.add_comment("comment 1", slide, position, created_time) reviewer = presentation.comment_authors.add_author("Author_2", "B.B.") first_reply = reviewer.comments.add_comment("reply 1 for comment 1", slide, position, created_time) first_reply.parent_comment = root_comment second_reply = reviewer.comments.add_comment("reply 2 for comment 1", slide, position, created_time) second_reply.parent_comment = root_comment sub_reply = original_author.comments.add_comment("subreply 3 for reply 2", slide, position, created_time) sub_reply.parent_comment = second_reply reviewer.comments.add_comment("comment 2", slide, position, created_time) separate_comment = reviewer.comments.add_comment("comment 3", slide, position, created_time) separate_reply = original_author.comments.add_comment("reply 4 for comment 3", slide, position, created_time) separate_reply.parent_comment = separate_comment comments = slide.get_slide_comments(None) for current_comment in comments: comment = current_comment while comment.parent_comment is not None: print("\t", end="") comment = comment.parent_comment print(current_comment.author.name + ": " + current_comment.text) presentation.save("parent_comment.pptx", slides.export.SaveFormat.PPTX) root_comment.remove() presentation.save("remove_comment.pptx", slides.export.SaveFormat.PPTX) ``` * When the [remove](https://reference.aspose.com/slides/python-net/aspose.slides/comment/remove/) method of the [Comment](https://reference.aspose.com/slides/python-net/aspose.slides/comment/) class is used to delete a comment, all replies to that comment are also deleted. * If the [parent_comment](https://reference.aspose.com/slides/python-net/aspose.slides/comment/parent_comment/) property creates a circular reference, a [PptxEditException](https://reference.aspose.com/slides/python-net/aspose.slides/pptxeditexception/) is thrown. ## **Add Modern Comments** Modern comments can be associated with the slide itself, with a specific shape, or with a text range inside an AutoShape. The [CommentCollection.add_modern_comment](https://reference.aspose.com/slides/python-net/aspose.slides/commentcollection/add_modern_comment/) method accepts a [Shape](https://reference.aspose.com/slides/python-net/aspose.slides/shape/) argument in addition to the slide and comment-marker coordinates. When `None` is passed for the shape argument, the comment is a slide-level comment. Its marker is positioned by the supplied coordinates, but it is not associated with a particular shape, so [ModernComment.shape](https://reference.aspose.com/slides/python-net/aspose.slides/moderncomment/shape/) returns `None`. When a [Shape](https://reference.aspose.com/slides/python-net/aspose.slides/shape/) is supplied, the comment is anchored to that shape. The coordinates still define the position of the comment marker on the slide, while the shape association can be retrieved through [ModernComment.shape](https://reference.aspose.com/slides/python-net/aspose.slides/moderncomment/shape/). ### **Anchor a Modern Comment to a Shape** The example calls [add_modern_comment](https://reference.aspose.com/slides/python-net/aspose.slides/commentcollection/add_modern_comment/) twice: once with a `None` shape for a slide-level comment and once with a rectangle as the anchor. Reading [shape](https://reference.aspose.com/slides/python-net/aspose.slides/moderncomment/shape/) prints `True` for the slide-level comment's null check and `Revenue title` for the anchored comment. Both comments are saved with the presentation. ```python from datetime import datetime import aspose.slides as slides with slides.Presentation() as presentation: slide = presentation.slides[0] author = presentation.comment_authors.add_author("Reviewer", "RV") shape = slide.shapes.add_auto_shape(slides.ShapeType.RECTANGLE, 50, 50, 300, 80) shape.name = "Revenue title" shape.text_frame.text = "Quarterly revenue" created_time = datetime.now() slide_comment_position = slides.PointF(20, 20) shape_comment_position = slides.PointF(60, 60) slide_comment = author.comments.add_modern_comment("Review the overall slide layout.", slide, None, slide_comment_position, created_time) shape_comment = author.comments.add_modern_comment("Check this title.", slide, shape, shape_comment_position, created_time) print(slide_comment.shape is None) print(shape_comment.shape.name) presentation.save("modern_comments.pptx", slides.export.SaveFormat.PPTX) ``` ### **Anchor Comments to Different Shape Types** Any slide object derived from [Shape](https://reference.aspose.com/slides/python-net/aspose.slides/shape/) can be used as a shape anchor. Common examples include [AutoShape](https://reference.aspose.com/slides/python-net/aspose.slides/autoshape/), [PictureFrame](https://reference.aspose.com/slides/python-net/aspose.slides/pictureframe/), [GroupShape](https://reference.aspose.com/slides/python-net/aspose.slides/groupshape/), [Connector](https://reference.aspose.com/slides/python-net/aspose.slides/connector/), and [GraphicalObject](https://reference.aspose.com/slides/python-net/aspose.slides/graphicalobject/) instances such as charts. The example uses [add_modern_comment](https://reference.aspose.com/slides/python-net/aspose.slides/commentcollection/add_modern_comment/) to associate a comment with each of five shape types: an AutoShape, a picture frame, a group, a connector, and a chart. The picture uses embedded image data, so no external image is required. Each comment has its own marker position, and the saved presentation retains all five shape associations. ```python import base64 from datetime import datetime import aspose.slides as slides with slides.Presentation() as presentation: slide = presentation.slides[0] author = presentation.comment_authors.add_author("Reviewer", "RV") created_time = datetime.now() auto_shape = slide.shapes.add_auto_shape(slides.ShapeType.RECTANGLE, 20, 20, 180, 60) auto_shape.text_frame.text = "AutoShape" auto_shape_comment_position = slides.PointF(30, 30) author.comments.add_modern_comment("Comment on an AutoShape.", slide, auto_shape, auto_shape_comment_position, created_time) image_base64 = "iVBORw0KGgoAAAANSUhEUgAAAAIAAAACCAIAAAD91JpzAAAAFklEQVR4nGP8//8/AwMDEwMDAwMDAwAkBgMB/DXemwAAAABJRU5ErkJggg==" image_data = base64.b64decode(image_base64) image = presentation.images.add_image(image_data) picture_frame = slide.shapes.add_picture_frame(slides.ShapeType.RECTANGLE, 220, 20, 120, 80, image) picture_comment_position = slides.PointF(230, 30) author.comments.add_modern_comment("Comment on a picture.", slide, picture_frame, picture_comment_position, created_time) group_shape = slide.shapes.add_group_shape() group_shape.shapes.add_auto_shape(slides.ShapeType.RECTANGLE, 0, 0, 80, 40) group_shape.shapes.add_auto_shape(slides.ShapeType.ELLIPSE, 100, 0, 80, 40) group_comment_position = slides.PointF(40, 150) author.comments.add_modern_comment("Comment on a group.", slide, group_shape, group_comment_position, created_time) connector = slide.shapes.add_connector(slides.ShapeType.STRAIGHT_CONNECTOR1, 220, 150, 140, 40) connector_comment_position = slides.PointF(240, 150) author.comments.add_modern_comment("Comment on a connector.", slide, connector, connector_comment_position, created_time) chart = slide.shapes.add_chart(slides.charts.ChartType.CLUSTERED_COLUMN, 400, 20, 250, 180) chart_comment_position = slides.PointF(420, 40) author.comments.add_modern_comment("Comment on a graphical object.", slide, chart, chart_comment_position, created_time) presentation.save("modern_comment_shape_types.pptx", slides.export.SaveFormat.PPTX) ``` ### **Anchor a Comment to Text and Set Its Status** For a modern comment associated with an [AutoShape](https://reference.aspose.com/slides/python-net/aspose.slides/autoshape/), [ModernComment.text_selection_start](https://reference.aspose.com/slides/python-net/aspose.slides/moderncomment/text_selection_start/) specifies the starting position of the selected text in the shape's text frame, while [ModernComment.text_selection_length](https://reference.aspose.com/slides/python-net/aspose.slides/moderncomment/text_selection_length/) specifies the length of the selection. Together, these properties associate the comment with a specific text range inside the AutoShape. The [ModernComment.status](https://reference.aspose.com/slides/python-net/aspose.slides/moderncomment/status/) property can be read or updated with a value from the [ModernCommentStatus](https://reference.aspose.com/slides/python-net/aspose.slides/moderncommentstatus/) enumeration: - `NOT_DEFINED` — no specific modern-comment status is defined. - `ACTIVE` — the comment is active. - `RESOLVED` — the comment has been resolved. - `CLOSED` — the comment is closed. The example anchors a modern comment to the words "quarterly revenue" in a rectangle's text. It calculates the zero-based [text_selection_start](https://reference.aspose.com/slides/python-net/aspose.slides/moderncomment/text_selection_start/) from the text and sets [text_selection_length](https://reference.aspose.com/slides/python-net/aspose.slides/moderncomment/text_selection_length/) to the number of selected characters. After setting [status](https://reference.aspose.com/slides/python-net/aspose.slides/moderncomment/status/) to `RESOLVED`, it saves and reopens the presentation. The four console checks should each print `True`, confirming that the shape anchor, text range, and status were preserved. ```python from datetime import datetime import aspose.slides as slides output_file = "modern_comment_text_anchor.pptx" shape_text = "Review the quarterly revenue forecast." selected_text = "quarterly revenue" expected_selection_start = shape_text.index(selected_text) with slides.Presentation() as presentation: slide = presentation.slides[0] shape = slide.shapes.add_auto_shape(slides.ShapeType.RECTANGLE, 50, 50, 400, 100) shape.name = "Forecast text" shape.text_frame.text = shape_text author = presentation.comment_authors.add_author("Reviewer", "RV") comment_position = slides.PointF(60, 60) comment = author.comments.add_modern_comment("Verify this forecast wording.", slide, shape, comment_position, datetime.now()) comment.text_selection_start = expected_selection_start comment.text_selection_length = len(selected_text) comment.status = slides.ModernCommentStatus.RESOLVED presentation.save(output_file, slides.export.SaveFormat.PPTX) with slides.Presentation(output_file) as reopened_presentation: reopened_slide = reopened_presentation.slides[0] reopened_comments = reopened_slide.get_slide_comments(None) for reopened_comment in reopened_comments: if not isinstance(reopened_comment, slides.ModernComment): continue shape_matches = reopened_comment.shape.name == "Forecast text" selection_start_matches = reopened_comment.text_selection_start == expected_selection_start selection_length_matches = reopened_comment.text_selection_length == len(selected_text) status_matches = reopened_comment.status == slides.ModernCommentStatus.RESOLVED print("Shape anchor preserved: " + str(shape_matches)) print("Text selection start preserved: " + str(selection_start_matches)) print("Text selection length preserved: " + str(selection_length_matches)) print("Resolved status preserved: " + str(status_matches)) ``` [![The phrase quarterly revenue is highlighted inside Forecast text; stored start 11, length 17 and Resolved status are listed separately from marker coordinates (60, 60).](https://docs.aspose.com/slides/python-net/presentation-comments/visual-presentation-comments-94241d308643.svg)](https://docs.aspose.com/slides/python-net/presentation-comments/visual-presentation-comments-94241d308643.svg) *Schematic annotation of the example’s text range. A licensed .NET 26.11 save/reopen check retained the Forecast text anchor, start 11, length 17 and Resolved status. Marker coordinates are separate from the anchor; this figure does not depict a client comment pane.* ### **Inspect Existing Modern Comments** The example requires an existing presentation containing modern comments and prints their text, status, and anchor details. To inspect it, check which comments are instances of [ModernComment](https://reference.aspose.com/slides/python-net/aspose.slides/moderncomment/), then examine [ModernComment.shape](https://reference.aspose.com/slides/python-net/aspose.slides/moderncomment/shape/), [ModernComment.text_selection_start](https://reference.aspose.com/slides/python-net/aspose.slides/moderncomment/text_selection_start/), [ModernComment.text_selection_length](https://reference.aspose.com/slides/python-net/aspose.slides/moderncomment/text_selection_length/), and [ModernComment.status](https://reference.aspose.com/slides/python-net/aspose.slides/moderncomment/status/). A `None` shape indicates a slide-level comment. For an [AutoShape](https://reference.aspose.com/slides/python-net/aspose.slides/autoshape/) anchor, the text-selection properties identify the associated range in the shape's text frame. ```python import aspose.slides as slides with slides.Presentation("comments.pptx") as presentation: for slide in presentation.slides: comments = slide.get_slide_comments(None) for comment in comments: if not isinstance(comment, slides.ModernComment): continue print("Slide: " + str(slide.slide_number)) print("Text: " + comment.text) print("Status: " + str(comment.status)) shape = comment.shape if shape is None: print("Anchor: slide level") else: print("Anchor shape: " + shape.name) print("Anchor type: " + type(shape).__name__) if isinstance(shape, slides.AutoShape): print("Text selection start: " + str(comment.text_selection_start)) print("Text selection length: " + str(comment.text_selection_length)) print() ``` ## **Remove Comments** Aspose.Slides for Python via .NET lets you remove all comments and their authors from a presentation or delete selected comments while keeping the rest. The following examples demonstrate both approaches and save the updated presentation. ### **Remove All Comments and Comment Authors** The example opens an existing presentation and calls [CommentCollection.clear](https://reference.aspose.com/slides/python-net/aspose.slides/commentcollection/clear/) for each author, then calls [CommentAuthorCollection.clear](https://reference.aspose.com/slides/python-net/aspose.slides/commentauthorcollection/clear/) to remove the authors themselves. The saved presentation contains neither comments nor comment authors. Use a presentation containing comments to observe the removal. ```python import aspose.slides as slides with slides.Presentation("example.pptx") as presentation: for author in presentation.comment_authors: author.comments.clear() presentation.comment_authors.clear() presentation.save("example_out.pptx", slides.export.SaveFormat.PPTX) ``` ### **Remove Specific Comments** The example creates two comments on one slide and uses [get_slide_comments](https://reference.aspose.com/slides/python-net/aspose.slides/slide/get_slide_comments/) to find comments by each author. It collects comments whose text equals "comment 1" before calling [CommentCollection.remove](https://reference.aspose.com/slides/python-net/aspose.slides/commentcollection/remove/), avoiding changes to the collection during selection. The saved presentation retains only "comment 2". ```python from datetime import datetime import aspose.slides as slides with slides.Presentation() as presentation: slide = presentation.slides[0] author = presentation.comment_authors.add_author("Author", "A") created_time = datetime.now() first_comment_position = slides.PointF(0.2, 0.2) second_comment_position = slides.PointF(0.3, 0.2) author.comments.add_comment("comment 1", slide, first_comment_position, created_time) author.comments.add_comment("comment 2", slide, second_comment_position, created_time) for comment_author in presentation.comment_authors: comments_to_remove = [] comments = slide.get_slide_comments(comment_author) for comment in comments: if comment.text == "comment 1": comments_to_remove.append(comment) for comment in comments_to_remove: comment_author.comments.remove(comment) presentation.save("pres.pptx", slides.export.SaveFormat.PPTX) ``` ## **FAQ** **Does Aspose.Slides support a resolved status for modern comments?** Yes. [ModernComment.status](https://reference.aspose.com/slides/python-net/aspose.slides/moderncomment/status/) can be read and set with a [ModernCommentStatus](https://reference.aspose.com/slides/python-net/aspose.slides/moderncommentstatus/) value, including `RESOLVED`. The status is stored in the presentation and can be read again after the file is reopened. **Are threaded discussions (reply chains) supported, and is there a nesting limit?** Yes. Each comment can reference its [parent comment](https://reference.aspose.com/slides/python-net/aspose.slides/comment/parent_comment/), enabling reply chains. The API does not define a specific nesting-depth limit. **In what coordinate system is a comment marker's position defined on a slide?** The marker position is defined by floating-point coordinates in the slide coordinate system, allowing you to place it precisely on the slide. ## Related articles - [Comment](https://docs.aspose.com/slides/python-net/examples/elements/comment/) # Manage Presentation Content in Python > Create, edit, and extract presentation content with Aspose.Slides for Python via .NET—get code examples for text, images, shapes, charts; PPT, PPTX and ODP. Source: https://docs.aspose.com/slides/python-net/presentation-content/ Updated: 2025-12-02 --- lastmod: 2025-12-02T13:32:50+06:00 title: Manage Presentation Content in Python linktitle: Presentation Content type: docs weight: 30 url: /python-net/presentation-content/ keywords: - content - BLOB - hyperlink - media - OLE - text - zoom - chart - equation - shape - ink - SmartArt - table - PowerPoint - OpenDocument - presentation - Python - Aspose.Slides description: "Create, edit, and extract presentation content with Aspose.Slides for Python via .NET—get code examples for text, images, shapes, charts; PPT, PPTX and ODP." --- ## Related articles - [OleObject](https://docs.aspose.com/slides/python-net/examples/elements/ole-object/) - [Ink](https://docs.aspose.com/slides/python-net/examples/elements/ink/) - [SmartArt](https://docs.aspose.com/slides/python-net/examples/elements/smart-art/) # Design Professional Presentations in Python > Boost your slides with Aspose.Slides for Python via .NET—design, automate, and convert PowerPoint and OpenDocument presentations effortlessly. Learn more now! Source: https://docs.aspose.com/slides/python-net/presentation-design/ Updated: 2025-07-09 --- lastmod: 2025-07-09T17:52:00+04:00 title: Design Professional Presentations in Python linktitle: Presentation Design type: docs weight: 40 url: /python-net/presentation-design/ keywords: - PowerPoint design - OpenDocument design - presentation design - slide design - PPT design - PPTX design - ODP design - PowerPoint - OpenDocument - presentation - Python - Aspose.Slides description: "Boost your slides with Aspose.Slides for Python via .NET—design, automate, and convert PowerPoint and OpenDocument presentations effortlessly. Learn more now!" --- ## Related articles - [Developer Guide](https://docs.aspose.com/slides/python-net/developer-guide/) # Manage Presentation Headers and Footers with Python > Learn how to manage footer, date-time, slide-number, and header placeholders on slides, notes pages, and handouts with Aspose.Slides for Python via .NET. Source: https://docs.aspose.com/slides/python-net/presentation-header-and-footer/ Updated: 2026-11-08 ## **Overview** PowerPoint uses different header and footer placeholders depending on the page type. Aspose.Slides for Python via .NET lets you control the text and visibility of these placeholders through header/footer manager classes. The available placeholders depend on the scope: | Scope | Header | Footer | Date/time | Slide/page number | |---|---|---|---|---| | Regular slide | No | Yes | Yes | Yes | | Notes master | Yes | Yes | Yes | Yes | | Notes slide | Yes | Yes | Yes | Yes | | Handout master | Yes | Yes | Yes | Yes | A regular presentation slide does not have a header placeholder. Headers are available on notes pages and handouts. For regular slides, use footer, date/time, and slide-number placeholders instead. The scope of a change depends on the manager you use. The [SlideHeaderFooterManager](https://reference.aspose.com/slides/python-net/aspose.slides/slideheaderfootermanager/) class controls one regular slide. The [NotesSlideHeaderFooterManager](https://reference.aspose.com/slides/python-net/aspose.slides/notesslideheaderfootermanager/) class controls one notes slide. Master and layout managers can also propagate settings to dependent slides, while the [MasterHandoutSlideHeaderFooterManager](https://reference.aspose.com/slides/python-net/aspose.slides/masterhandoutslideheaderfootermanager/) class controls the handout master. ## **Update Header, Footer, and Date/Time Text Across a Presentation** Use [Presentation.header_footer_manager](https://reference.aspose.com/slides/python-net/aspose.slides/presentation/header_footer_manager/), which returns a [PresentationHeaderFooterManager](https://reference.aspose.com/slides/python-net/aspose.slides/presentationheaderfootermanager/) instance, to apply consistent text across a presentation without updating each page or master individually. | Method | Affected objects | |---|---| | [set_all_headers_text](https://reference.aspose.com/slides/python-net/aspose.slides/presentationheaderfootermanager/set_all_headers_text/) | Existing notes pages, notes master, and handout master | | [set_all_footers_text](https://reference.aspose.com/slides/python-net/aspose.slides/presentationheaderfootermanager/set_all_footers_text/) | Regular slides, layouts, slide masters, existing notes pages, notes master, and handout master | | [set_all_date_times_text](https://reference.aspose.com/slides/python-net/aspose.slides/presentationheaderfootermanager/set_all_date_times_text/) | Regular slides, layouts, slide masters, existing notes pages, notes master, and handout master | Headers apply only to notes pages and handouts; regular slides do not support header placeholders. Handout settings are updated through the handout master. Setting text does not make a placeholder visible. First use [set_all_headers_visibility](https://reference.aspose.com/slides/python-net/aspose.slides/presentationheaderfootermanager/set_all_headers_visibility/), [set_all_footers_visibility](https://reference.aspose.com/slides/python-net/aspose.slides/presentationheaderfootermanager/set_all_footers_visibility/), and [set_all_date_times_visibility](https://reference.aspose.com/slides/python-net/aspose.slides/presentationheaderfootermanager/set_all_date_times_visibility/) to enable the corresponding placeholders, then set their text. These visibility methods have the same scope as the corresponding text methods. The following example assumes that a presentation contains regular slides, notes pages, a notes master, and a handout master. It applies corporate text and a fixed date label, then saves the result. ```python import aspose.slides as slides with slides.Presentation("presentation.pptx") as presentation: manager = presentation.header_footer_manager manager.set_all_headers_visibility(True) manager.set_all_footers_visibility(True) manager.set_all_date_times_visibility(True) manager.set_all_headers_text("Contoso") manager.set_all_footers_text("Internal use only") manager.set_all_date_times_text("October 2026") presentation.save("updated.pptx", slides.export.SaveFormat.PPTX) ``` The text methods skip missing placeholders. Enabling visibility first creates the required placeholders on existing pages and masters. Neither the text methods nor the visibility methods create missing notes pages, notes masters, or handout masters. The date/time text is a fixed label, not an automatically updating date/time field. For narrower changes, see the examples for [regular slides](https://docs.aspose.com/slides/python-net/presentation-header-and-footer/#set-footer-datetime-and-slide-numbers-on-regular-slides), the [notes master](https://docs.aspose.com/slides/python-net/presentation-header-and-footer/#set-headers-and-footers-on-the-notes-master), an [individual notes page](https://docs.aspose.com/slides/python-net/presentation-header-and-footer/#set-headers-and-footers-on-an-individual-notes-slide), and the [handout master](https://docs.aspose.com/slides/python-net/presentation-header-and-footer/#set-headers-and-footers-on-the-handout-master). See [Presentation Notes](https://docs.aspose.com/slides/python-net/presentation-notes/) for creating and managing notes pages. ## **Set Footer, Date/Time, and Slide Numbers on Regular Slides** For regular slides, the basic workflow is to access each slide's header/footer manager, set the footer and date/time text, enable the required placeholders, and save the presentation. Slide numbers are generated by the presentation, so you only need to control their visibility. Use [set_footer_text](https://reference.aspose.com/slides/python-net/aspose.slides/baseslideheaderfootermanager/set_footer_text/) and [set_date_time_text](https://reference.aspose.com/slides/python-net/aspose.slides/baseslideheaderfootermanager/set_date_time_text/) to set text, and use [set_footer_visibility](https://reference.aspose.com/slides/python-net/aspose.slides/baseslideheaderfootermanager/set_footer_visibility/), [set_date_time_visibility](https://reference.aspose.com/slides/python-net/aspose.slides/baseslideheaderfootermanager/set_date_time_visibility/), and [set_slide_number_visibility](https://reference.aspose.com/slides/python-net/aspose.slides/baseslideheaderfootermanager/set_slide_number_visibility/) to show the corresponding placeholders. The following end-to-end example applies the same footer, date/time text, and slide-number visibility to all regular slides: ```python import aspose.slides as slides with slides.Presentation("presentation.pptx") as presentation: for slide in presentation.slides: header_footer_manager = slide.header_footer_manager header_footer_manager.set_footer_text("Company Confidential") header_footer_manager.set_footer_visibility(True) header_footer_manager.set_date_time_text("Date and time text") header_footer_manager.set_date_time_visibility(True) header_footer_manager.set_slide_number_visibility(True) presentation.save("presentation_with_slide_footers.pptx", slides.export.SaveFormat.PPTX) ``` If you need to update only one slide, access that slide directly through the [slides](https://reference.aspose.com/slides/python-net/aspose.slides/presentation/slides/) collection instead of iterating through the entire collection. ## **Set Headers and Footers on the Notes Master** The notes master defines common formatting and placeholder behavior for notes pages. Use the [MasterNotesSlideHeaderFooterManager](https://reference.aspose.com/slides/python-net/aspose.slides/masternotesslideheaderfootermanager/) class when you want to change only the notes master itself. The following example sets header, footer, and date/time text on the notes master and makes all supported placeholders visible on that master: ```python import aspose.slides as slides with slides.Presentation("presentation.pptx") as presentation: master_notes_slide = presentation.master_notes_slide_manager.master_notes_slide if master_notes_slide is not None: header_footer_manager = master_notes_slide.header_footer_manager header_footer_manager.set_header_text("Notes header") header_footer_manager.set_header_visibility(True) header_footer_manager.set_footer_text("Notes footer") header_footer_manager.set_footer_visibility(True) header_footer_manager.set_date_time_text("Date and time text") header_footer_manager.set_date_time_visibility(True) header_footer_manager.set_slide_number_visibility(True) presentation.save("presentation_with_notes_master_footers.pptx", slides.export.SaveFormat.PPTX) ``` The [master_notes_slide](https://reference.aspose.com/slides/python-net/aspose.slides/imasternotesslidemanager/master_notes_slide/) property returns `None` when the presentation does not contain a notes master. Check the returned value before changing it. To clean up a template without notes pages, see [Remove an Unused Notes Master](https://docs.aspose.com/slides/python-net/presentation-notes/#remove-an-unused-notes-master). ## **Apply Notes Master Settings to Child Notes Slides** A notes master can apply header and footer settings to itself and to all dependent notes slides. Use the dedicated propagation methods on [MasterNotesSlideHeaderFooterManager](https://reference.aspose.com/slides/python-net/aspose.slides/masternotesslideheaderfootermanager/) when the same settings should be applied across the notes hierarchy. For example, [set_header_and_child_headers_text](https://reference.aspose.com/slides/python-net/aspose.slides/masternotesslideheaderfootermanager/set_header_and_child_headers_text/) and [set_header_and_child_headers_visibility](https://reference.aspose.com/slides/python-net/aspose.slides/masternotesslideheaderfootermanager/set_header_and_child_headers_visibility/) update the notes master header and all child headers. Equivalent methods are available for footers, date/time, and slide numbers. ```python import aspose.slides as slides with slides.Presentation("presentation.pptx") as presentation: master_notes_slide = presentation.master_notes_slide_manager.master_notes_slide if master_notes_slide is not None: header_footer_manager = master_notes_slide.header_footer_manager header_footer_manager.set_header_and_child_headers_text("Notes header") header_footer_manager.set_header_and_child_headers_visibility(True) header_footer_manager.set_footer_and_child_footers_text("Notes footer") header_footer_manager.set_footer_and_child_footers_visibility(True) header_footer_manager.set_date_time_and_child_date_times_text("Date and time text") header_footer_manager.set_date_time_and_child_date_times_visibility(True) header_footer_manager.set_slide_number_and_child_slide_numbers_visibility(True) presentation.save("presentation_with_child_notes_footers.pptx", slides.export.SaveFormat.PPTX) ``` The propagation methods used above are [set_footer_and_child_footers_text](https://reference.aspose.com/slides/python-net/aspose.slides/masternotesslideheaderfootermanager/set_footer_and_child_footers_text/), [set_footer_and_child_footers_visibility](https://reference.aspose.com/slides/python-net/aspose.slides/masternotesslideheaderfootermanager/set_footer_and_child_footers_visibility/), [set_date_time_and_child_date_times_text](https://reference.aspose.com/slides/python-net/aspose.slides/masternotesslideheaderfootermanager/set_date_time_and_child_date_times_text/), [set_date_time_and_child_date_times_visibility](https://reference.aspose.com/slides/python-net/aspose.slides/masternotesslideheaderfootermanager/set_date_time_and_child_date_times_visibility/), and [set_slide_number_and_child_slide_numbers_visibility](https://reference.aspose.com/slides/python-net/aspose.slides/masternotesslideheaderfootermanager/set_slide_number_and_child_slide_numbers_visibility/). ## **Set Headers and Footers on an Individual Notes Slide** A notes slide belongs to a specific regular slide. Use its [NotesSlideHeaderFooterManager](https://reference.aspose.com/slides/python-net/aspose.slides/notesslideheaderfootermanager/) class when you want to customize only that notes page. The [add_notes_slide](https://reference.aspose.com/slides/python-net/aspose.slides/notesslidemanager/add_notes_slide/) method returns the notes slide for the current slide and creates one if it does not already exist. The following example configures the notes page associated with the first presentation slide: ```python import aspose.slides as slides with slides.Presentation("presentation.pptx") as presentation: notes_slide = presentation.slides[0].notes_slide_manager.add_notes_slide() header_footer_manager = notes_slide.header_footer_manager header_footer_manager.set_header_text("Header for the first notes page") header_footer_manager.set_header_visibility(True) header_footer_manager.set_footer_text("Footer for the first notes page") header_footer_manager.set_footer_visibility(True) header_footer_manager.set_date_time_text("Date and time text") header_footer_manager.set_date_time_visibility(True) header_footer_manager.set_slide_number_visibility(True) presentation.save("presentation_with_custom_notes_footers.pptx", slides.export.SaveFormat.PPTX) ``` If you first propagate settings from the notes master and then change an individual notes slide, the later per-slide settings let you customize that notes page independently. ## **Set Headers and Footers on the Handout Master** Handout pages use the handout master for their header, footer, date/time, and page-number placeholders. Unlike notes pages, handout settings are managed through the handout master rather than through individual handout slides. Use the [master_handout_slide](https://reference.aspose.com/slides/python-net/aspose.slides/imasterhandoutslidemanager/master_handout_slide/) property to access the handout master. If it is not present, call [set_default_master_handout_slide](https://reference.aspose.com/slides/python-net/aspose.slides/imasterhandoutslidemanager/set_default_master_handout_slide/) to create the default handout master. ```python import aspose.slides as slides with slides.Presentation("presentation.pptx") as presentation: master_handout_slide = presentation.master_handout_slide_manager.master_handout_slide if master_handout_slide is None: presentation.master_handout_slide_manager.set_default_master_handout_slide() master_handout_slide = presentation.master_handout_slide_manager.master_handout_slide if master_handout_slide is not None: header_footer_manager = master_handout_slide.header_footer_manager header_footer_manager.set_header_text("Handout header") header_footer_manager.set_header_visibility(True) header_footer_manager.set_footer_text("Handout footer") header_footer_manager.set_footer_visibility(True) header_footer_manager.set_date_time_text("Date and time text") header_footer_manager.set_date_time_visibility(True) header_footer_manager.set_slide_number_visibility(True) presentation.save("presentation_with_handout_footers.pptx", slides.export.SaveFormat.PPTX) ``` To remove the entire handout master, including its formatting and placeholders, see [Remove a Handout Master](https://docs.aspose.com/slides/python-net/presentation-notes/#remove-a-handout-master). If you only need to hide a header or footer, change its visibility instead to preserve the master's other formatting. ## **Understand Scope and Inheritance** Choose the header/footer manager that matches the scope you want to change: - [PresentationHeaderFooterManager](https://reference.aspose.com/slides/python-net/aspose.slides/presentationheaderfootermanager/) updates supported placeholders throughout the presentation, as shown in the [presentation-wide example](https://docs.aspose.com/slides/python-net/presentation-header-and-footer/#update-header-footer-and-datetime-text-across-a-presentation). - [SlideHeaderFooterManager](https://reference.aspose.com/slides/python-net/aspose.slides/slideheaderfootermanager/) changes footer, date/time, and slide-number settings for one regular slide. - [LayoutSlideHeaderFooterManager](https://reference.aspose.com/slides/python-net/aspose.slides/layoutslideheaderfootermanager/) controls a layout slide and can propagate supported settings to dependent slides. - [MasterSlideHeaderFooterManager](https://reference.aspose.com/slides/python-net/aspose.slides/masterslideheaderfootermanager/) controls a regular slide master and can propagate supported settings to dependent slides. - [MasterNotesSlideHeaderFooterManager](https://reference.aspose.com/slides/python-net/aspose.slides/masternotesslideheaderfootermanager/) controls the notes master and can propagate settings to all dependent notes slides. - [NotesSlideHeaderFooterManager](https://reference.aspose.com/slides/python-net/aspose.slides/notesslideheaderfootermanager/) changes one notes slide and supports a header placeholder in addition to footer, date/time, and slide number. - [MasterHandoutSlideHeaderFooterManager](https://reference.aspose.com/slides/python-net/aspose.slides/masterhandoutslideheaderfootermanager/) changes the handout master and supports all four placeholder types. Use propagation from a master or layout when the same setting should apply throughout its hierarchy. Use an individual slide or notes-slide manager when you need a local setting for one page. [![A scope hierarchy leads to a table: regular slides support footer, date and slide number; notes and handouts also support headers.](https://docs.aspose.com/slides/python-net/presentation-header-and-footer/visual-presentation-header-and-footer-542f03b4f600.svg)](https://docs.aspose.com/slides/python-net/presentation-header-and-footer/visual-presentation-header-and-footer-542f03b4f600.svg) *Choose a manager for the presentation, a regular master/layout, one regular slide, a notes master/slide or a handout master. Regular slides have no header placeholder. Propagation methods apply supported settings to dependents; individual managers target local settings.* ## **FAQ** **Can I add a header to a regular slide?** No. PowerPoint does not define a header placeholder for regular slides. On regular slides, use the footer, date/time, and slide-number placeholders. Header placeholders are available on notes pages and handouts. **What if a footer, date/time, or slide-number placeholder is not visible?** Use the corresponding header/footer manager to check its visibility and enable it when needed. For example, [is_footer_visible](https://reference.aspose.com/slides/python-net/aspose.slides/baseslideheaderfootermanager/is_footer_visible/) reports whether a footer placeholder is present, and [set_footer_visibility](https://reference.aspose.com/slides/python-net/aspose.slides/baseslideheaderfootermanager/set_footer_visibility/) changes its visibility. **How do I start slide numbering from a value other than 1?** Set the presentation's [first_slide_number](https://reference.aspose.com/slides/python-net/aspose.slides/presentation/first_slide_number/) property. The slide-number placeholders then use the updated numbering sequence. **What happens to headers and footers when exporting to PDF, images, or HTML?** Visible header and footer elements are rendered with the rest of the presentation content in the output format. Their appearance depends on the page type being exported and the corresponding placeholder visibility settings. ## Related articles - [HeaderFooter](https://docs.aspose.com/slides/python-net/examples/elements/header-footer/) - [Apply or Change Slide Layouts in Python](https://docs.aspose.com/slides/python-net/slide-layout/) # Automate Presentation Localization with Python > Set proofing languages for PowerPoint and OpenDocument presentation text in Python with Aspose.Slides, including defaults and multilingual paragraphs. Source: https://docs.aspose.com/slides/python-net/presentation-localization/ Updated: 2026-08-31 ## **Overview** Aspose.Slides for Python via .NET lets you configure proofing metadata for individual text portions. Use [BasePortionFormat.language_id](https://reference.aspose.com/slides/python-net/aspose.slides/baseportionformat/language_id/) to identify the proofing language, [BasePortionFormat.spell_check](https://reference.aspose.com/slides/python-net/aspose.slides/baseportionformat/spell_check/) to allow or suppress spelling checks, and [BasePortionFormat.proof_disabled](https://reference.aspose.com/slides/python-net/aspose.slides/baseportionformat/proof_disabled/) to control the broader no-proof state. Because these settings are applied at the portion level, one paragraph can contain multiple languages and different proofing rules. This article explains how to assign a language to specific text, set the default language for new text with [LoadOptions.default_text_language](https://reference.aspose.com/slides/python-net/aspose.slides/loadoptions/default_text_language/), build multilingual paragraphs, choose between `spell_check` and `proof_disabled`, and preserve the intended settings when using [Presentation.join_portions_with_same_formatting](https://reference.aspose.com/slides/python-net/aspose.slides/presentation/join_portions_with_same_formatting/). These properties store metadata for presentation applications; they do not translate text, perform dictionary-based spell checking, or return misspelled words. ## **Set the Proofing Language for Text** Create or load a [Presentation](https://reference.aspose.com/slides/python-net/aspose.slides/presentation/), access the required text portion through [Portion.portion_format](https://reference.aspose.com/slides/python-net/aspose.slides/portion/portion_format/), and assign its language identifier. The following example creates a shape, sets British English as the proofing language, and saves the result with [Presentation.save](https://reference.aspose.com/slides/python-net/aspose.slides/presentation/save/): ```python import aspose.slides as slides with slides.Presentation() as presentation: slide = presentation.slides[0] shape = slide.shapes.add_auto_shape(slides.ShapeType.RECTANGLE, 50, 50, 320, 80) shape.text_frame.text = "Set the proofing language for this text." portion = shape.text_frame.paragraphs[0].portions[0] portion.portion_format.language_id = "en-GB" presentation.save("proofing_language.pptx", slides.export.SaveFormat.PPTX) ``` ## **Set the Default Language for New Text** Use [LoadOptions.default_text_language](https://reference.aspose.com/slides/python-net/aspose.slides/loadoptions/default_text_language/) to specify the proofing language that Aspose.Slides assigns to newly created text. This setting is useful when most or all new text in a presentation uses the same language. It does not change the language metadata of text that already has an explicit language. The following example creates a presentation whose new text uses German proofing rules: ```python import aspose.slides as slides load_options = slides.LoadOptions() load_options.default_text_language = "de-DE" with slides.Presentation(load_options) as presentation: slide = presentation.slides[0] shape = slide.shapes.add_auto_shape(slides.ShapeType.RECTANGLE, 50, 50, 320, 80) shape.text_frame.text = "Willkommen zur Präsentation" presentation.save("default_text_language.pptx", slides.export.SaveFormat.PPTX) ``` ## **Use Multiple Languages in One Paragraph** A [Paragraph](https://reference.aspose.com/slides/python-net/aspose.slides/paragraph/) contains a collection of text portions. Create a separate [Portion](https://reference.aspose.com/slides/python-net/aspose.slides/portion/) for each language and set its `language_id` independently. This example creates one paragraph with English and French portions: ```python import aspose.slides as slides with slides.Presentation() as presentation: slide = presentation.slides[0] shape = slide.shapes.add_auto_shape(slides.ShapeType.RECTANGLE, 50, 50, 420, 80) paragraph = shape.text_frame.paragraphs[0] paragraph.portions.clear() english_portion = slides.Portion("Welcome") english_portion.portion_format.language_id = "en-US" paragraph.portions.add(english_portion) french_portion = slides.Portion(" — Bienvenue") french_portion.portion_format.language_id = "fr-FR" paragraph.portions.add(french_portion) presentation.save("multilingual_text.pptx", slides.export.SaveFormat.PPTX) ``` ## **Enable or Suppress Spell Checking for Individual Portions** [PortionFormat](https://reference.aspose.com/slides/python-net/aspose.slides/portionformat/) inherits the common text properties defined by [BasePortionFormat](https://reference.aspose.com/slides/python-net/aspose.slides/baseportionformat/). Access a portion's format through [Portion.portion_format](https://reference.aspose.com/slides/python-net/aspose.slides/portion/portion_format/) and set [BasePortionFormat.spell_check](https://reference.aspose.com/slides/python-net/aspose.slides/baseportionformat/spell_check/) to control whether a presentation application may check spelling for that portion. The default value is `False`: `True` allows spell checking, while `False` suppresses it. The setting applies to individual text portions. Different portions in the same paragraph can therefore use different values. [BasePortionFormat.language_id](https://reference.aspose.com/slides/python-net/aspose.slides/baseportionformat/language_id/) and `spell_check` serve complementary purposes: `language_id` identifies the proofing language, while `spell_check` determines whether spelling checks are allowed for the portion. [BasePortionFormat.proof_disabled](https://reference.aspose.com/slides/python-net/aspose.slides/baseportionformat/proof_disabled/) also controls proofing, but it represents the broader "do not proof" state as a [NullableBool](https://reference.aspose.com/slides/python-net/aspose.slides/nullablebool/). Use `spell_check` when you need a direct Boolean switch specifically for spelling checks. Use `proof_disabled` when you need to preserve or explicitly control the presentation's no-proof metadata, including its `NOT_DEFINED` state. If you set both properties, keep their values consistent; do not combine `spell_check = True` with `proof_disabled = slides.NullableBool.TRUE`. These properties configure proofing metadata used by PowerPoint and other presentation applications. Aspose.Slides does not use them to run dictionary-based spell checking or return a list of misspelled words. The following complete example creates an input presentation, loads it, assigns different spell-check settings and proofing languages to two portions in the same paragraph, saves the result, reopens it, and verifies the stored values: ```python import aspose.slides as slides input_file = "spell_check_input.pptx" output_file = "spell_check_settings.pptx" with slides.Presentation() as source_presentation: source_slide = source_presentation.slides[0] source_shape = source_slide.shapes.add_auto_shape(slides.ShapeType.RECTANGLE, 50, 50, 420, 80) source_paragraph = source_shape.text_frame.paragraphs[0] source_paragraph.portions.clear() source_english_portion = slides.Portion("Check this text. ") source_english_portion.portion_format.language_id = "en-US" source_paragraph.portions.add(source_english_portion) source_french_portion = slides.Portion("Ignorer ce code : ZX-81.") source_french_portion.portion_format.language_id = "fr-FR" source_paragraph.portions.add(source_french_portion) source_presentation.save(input_file, slides.export.SaveFormat.PPTX) with slides.Presentation(input_file) as presentation: shape = presentation.slides[0].shapes[0] portions = shape.text_frame.paragraphs[0].portions checked_portion = portions[0] checked_portion.portion_format.language_id = "en-US" checked_portion.portion_format.spell_check = True suppressed_portion = portions[1] suppressed_portion.portion_format.language_id = "fr-FR" suppressed_portion.portion_format.spell_check = False presentation.save(output_file, slides.export.SaveFormat.PPTX) with slides.Presentation(output_file) as reopened_presentation: reopened_shape = reopened_presentation.slides[0].shapes[0] stored_portions = reopened_shape.text_frame.paragraphs[0].portions has_two_portions = stored_portions.count == 2 first_portion_stored = ( has_two_portions and stored_portions[0].portion_format.language_id == "en-US" and stored_portions[0].portion_format.spell_check ) second_portion_stored = ( has_two_portions and stored_portions[1].portion_format.language_id == "fr-FR" and not stored_portions[1].portion_format.spell_check ) if first_portion_stored and second_portion_stored: print("The proofing settings were stored correctly.") else: print("The proofing settings could not be verified.") ``` [Presentation.join_portions_with_same_formatting](https://reference.aspose.com/slides/python-net/aspose.slides/presentation/join_portions_with_same_formatting/) combines adjacent portions that have the same formatting. A difference in `spell_check` alone does not keep such portions separate; after they are joined, the resulting portion retains the `spell_check` value of the first portion. If portions need different spell-check settings, call `join_portions_with_same_formatting` before assigning those settings, or inspect the resulting portion boundaries and reapply the settings afterward. Portions with different `language_id` values remain separate because their proofing-language formatting differs. ## **FAQ** **Does a language ID translate the text?** No. [BasePortionFormat.language_id](https://reference.aspose.com/slides/python-net/aspose.slides/baseportionformat/language_id/) stores proofing metadata for spelling and grammar; it does not alter the text content. Translate the text separately, and then set the appropriate language identifier for each translated portion. **Does the proofing language control fonts, hyphenation, or line wrapping?** No. The language identifier is for proofing. Text rendering and layout primarily depend on the available [fonts](https://docs.aspose.com/slides/python-net/powerpoint-fonts/), the writing system, and the text-frame settings. For reliable rendering, provide the required fonts, configure [font substitution](https://docs.aspose.com/slides/python-net/font-substitution/), or [embed fonts](https://docs.aspose.com/slides/python-net/embedded-font/) in the presentation. **Can one paragraph use several proofing languages?** Yes. Assign each language to a separate portion, as shown in the multilingual paragraph example. **Should I use `default_text_language` or `language_id`?** Use [LoadOptions.default_text_language](https://reference.aspose.com/slides/python-net/aspose.slides/loadoptions/default_text_language/) when you want a default for newly created text. Use [BasePortionFormat.language_id](https://reference.aspose.com/slides/python-net/aspose.slides/baseportionformat/language_id/) when a specific portion needs an explicit proofing language or when a paragraph contains multiple languages. # Manage Presentation Notes in Python > Remove slide notes and customize master notes text styles in PowerPoint and OpenDocument presentations with Aspose.Slides for Python via .NET. Source: https://docs.aspose.com/slides/python-net/presentation-notes/ Updated: 2026-10-28 ## **Overview** Aspose.Slides for Python via .NET lets you remove notes from individual slides or an entire presentation, customize the text style defined in the master notes slide, and remove notes and handout masters. This article shows how to perform these operations and save the updated presentation. To read or change notes page dimensions, switch orientation, and check export behavior, see [Notes Page Size](https://docs.aspose.com/slides/python-net/notes-size/). ## **Remove Notes from a Slide** To remove notes from a specific slide, use its [notes_slide_manager](https://reference.aspose.com/slides/python-net/aspose.slides/slide/notes_slide_manager/) and call [remove_notes_slide](https://reference.aspose.com/slides/python-net/aspose.slides/notesslidemanager/remove_notes_slide/). The example loads a presentation containing at least one slide and removes the notes from the first slide, accessed at index zero. Notes on other slides remain unchanged, and the updated presentation is saved in PPTX format. ```python import aspose.slides as slides with slides.Presentation("presentation.pptx") as presentation: notes_manager = presentation.slides[0].notes_slide_manager notes_manager.remove_notes_slide() presentation.save("presentation_without_first_slide_notes.pptx", slides.export.SaveFormat.PPTX) ``` ## **Remove Notes from All Slides** To remove all slide notes, iterate through the presentation's [slides](https://reference.aspose.com/slides/python-net/aspose.slides/presentation/slides/) collection and call [remove_notes_slide](https://reference.aspose.com/slides/python-net/aspose.slides/notesslidemanager/remove_notes_slide/) for each slide. This example processes every slide in an existing presentation and saves a PPTX copy without slide notes. ```python import aspose.slides as slides with slides.Presentation("presentation.pptx") as presentation: for slide in presentation.slides: slide.notes_slide_manager.remove_notes_slide() presentation.save("presentation_without_notes.pptx", slides.export.SaveFormat.PPTX) ``` ## **Remove Notes and Handout Masters** Notes and handout masters define shared formatting and placeholders for their respective page types. Removing a master is a separate operation from removing an individual slide's notes with [remove_notes_slide](https://reference.aspose.com/slides/python-net/aspose.slides/notesslidemanager/remove_notes_slide/). ### **Remove an Unused Notes Master** When cleaning up a template that has no notes pages, you can remove its unused notes master. Access [master_notes_slide_manager](https://reference.aspose.com/slides/python-net/aspose.slides/presentation/master_notes_slide_manager/), check [master_notes_slide](https://reference.aspose.com/slides/python-net/aspose.slides/imasternotesslidemanager/master_notes_slide/), and call [remove_master_notes_slide](https://reference.aspose.com/slides/python-net/aspose.slides/imasternotesslidemanager/remove_master_notes_slide/). The following example requires a presentation to contain no notes pages. It removes the notes master if one exists, including its formatting and header/footer placeholders, and saves the template. ```python import aspose.slides as slides with slides.Presentation("template_without_notes.pptx") as presentation: manager = presentation.master_notes_slide_manager if manager.master_notes_slide is not None: manager.remove_master_notes_slide() presentation.save("template_without_notes_master.pptx", slides.export.SaveFormat.PPTX) ``` After removal, [master_notes_slide](https://reference.aspose.com/slides/python-net/aspose.slides/imasternotesslidemanager/master_notes_slide/) returns `None`. If the master is already absent, the example skips removal and still saves the presentation. ### **Remove a Handout Master** To remove a handout master, access [master_handout_slide_manager](https://reference.aspose.com/slides/python-net/aspose.slides/presentation/master_handout_slide_manager/), check [master_handout_slide](https://reference.aspose.com/slides/python-net/aspose.slides/imasterhandoutslidemanager/master_handout_slide/), and call [remove_master_handout_slide](https://reference.aspose.com/slides/python-net/aspose.slides/imasterhandoutslidemanager/remove_master_handout_slide/). For this example, use a presentation containing slide notes and customized notes and handout masters. Give the handout master a visible banner and header/footer text so that the effect of removal is easy to compare in handout output. ```python import aspose.slides as slides with slides.Presentation("presentation_with_custom_masters.pptx") as presentation: manager = presentation.master_handout_slide_manager if manager.master_handout_slide is not None: manager.remove_master_handout_slide() presentation.save("presentation_without_handout_master.pptx", slides.export.SaveFormat.PPTX) ``` After removal, [master_handout_slide](https://reference.aspose.com/slides/python-net/aspose.slides/imasterhandoutslidemanager/master_handout_slide/) returns `None`. Existing slide notes and the notes master remain unchanged. If the handout master is already absent, the example simply saves the presentation. In handout output, the removed master's banner, formatting, and header, footer, date/time, and page-number placeholders no longer appear. The presentation slides still appear in the handout layout, including any footer or date text on the slides themselves. Slide numbers added by the handout export settings are separate from the master's page-number placeholder. If you only want to hide handout headers or footers, change the corresponding placeholder visibility through the [handout master's header/footer manager](https://docs.aspose.com/slides/python-net/presentation-header-and-footer/#set-headers-and-footers-on-the-handout-master) instead. This keeps the master and its other formatting, such as a custom banner. ## **Add a Notes Style** The [notes_style](https://reference.aspose.com/slides/python-net/aspose.slides/masternotesslide/notes_style/) property of [MasterNotesSlide](https://reference.aspose.com/slides/python-net/aspose.slides/masternotesslide/) defines the master notes text style. The example accesses the existing [master_notes_slide](https://reference.aspose.com/slides/python-net/aspose.slides/imasternotesslidemanager/master_notes_slide/) and uses [get_level](https://reference.aspose.com/slides/python-net/aspose.slides/textstyle/get_level/) with index zero to select the first paragraph level. It sets the bullet type to [BulletType.SYMBOL](https://reference.aspose.com/slides/python-net/aspose.slides/bullettype/) and saves the presentation in PPTX format. The input must contain a master notes slide for the style change to take effect; otherwise, the presentation is saved without changing the notes style. ```python import aspose.slides as slides with slides.Presentation("presentation.pptx") as presentation: notes_master = presentation.master_notes_slide_manager.master_notes_slide if notes_master is not None: notes_style = notes_master.notes_style paragraph_format = notes_style.get_level(0) paragraph_format.bullet.type = slides.BulletType.SYMBOL presentation.save("presentation_with_notes_style.pptx", slides.export.SaveFormat.PPTX) ``` ## **FAQ** **Which API provides access to the notes of a specific slide?** Use the slide's [notes_slide_manager](https://reference.aspose.com/slides/python-net/aspose.slides/slide/notes_slide_manager/) property. The manager's [notes_slide](https://reference.aspose.com/slides/python-net/aspose.slides/notesslidemanager/notes_slide/) property returns the notes slide, or `None` if the slide has no notes. **Does working with notes require Microsoft PowerPoint to be installed?** No. Aspose.Slides works with notes in PowerPoint and OpenDocument presentations without requiring Microsoft PowerPoint to be installed. # Manage Presentation Properties with Python > Master presentation properties in Aspose.Slides for Python via .NET and streamline search, branding and workflow in your PowerPoint files. Source: https://docs.aspose.com/slides/python-net/presentation-properties/ Updated: 2026-11-02 ## **Introduction** Aspose.Slides for Python via .NET supports **built-in** and **custom** document properties. Use these properties to read and update presentation metadata, such as the author, title, and user-defined values. Aspose.Slides allows you to work with presentation document properties through the [DocumentProperties](https://reference.aspose.com/slides/python-net/aspose.slides/documentproperties/) class. An instance of this class is returned by [Presentation.document_properties](https://reference.aspose.com/slides/python-net/aspose.slides/presentation/document_properties/). The following examples show how to read, modify, and manage these properties. Aspose.Slides manages the application and producer metadata when saving presentations; these fields identify the software that created the output. ## **Manage Presentation Properties** Document properties store descriptive information alongside presentation content. They fall into two categories: - **Built-in properties** contain standard metadata, such as the title, author, and document statistics. - **Custom properties** store user-defined name/value pairs. Aspose.Slides for Python via .NET provides access to both categories. In PowerPoint, select **File → Info → Properties → Advanced Properties** to inspect document metadata. The dialog groups information into tabs such as **Summary**, **Statistics**, **Contents**, and **Custom**. Use the **Custom** tab to manage user-defined properties. ## **Read Public Properties from an Encrypted Presentation** An opening password normally protects both presentation content and document properties. When a presentation is encrypted with [ProtectionManager.encrypt_document_properties](https://reference.aspose.com/slides/python-net/aspose.slides/protectionmanager/encrypt_document_properties/) set to `False`, its document properties remain public. An application can then set [LoadOptions.only_load_document_properties](https://reference.aspose.com/slides/python-net/aspose.slides/loadoptions/only_load_document_properties/) to `True` and read the public metadata without supplying the opening password. [LoadOptions.only_load_document_properties](https://reference.aspose.com/slides/python-net/aspose.slides/loadoptions/only_load_document_properties/) controls what Aspose.Slides loads; it does not decrypt anything. If the properties were included in encryption, loading them without the password fails. If the presentation is not encrypted, the option is ignored and the complete presentation is loaded. The example requires an encrypted presentation whose document properties were left public. It verifies the loading mode through [ProtectionManager.is_only_document_properties_loaded](https://reference.aspose.com/slides/python-net/aspose.slides/protectionmanager/is_only_document_properties_loaded/) and then reads built-in properties through [Presentation.document_properties](https://reference.aspose.com/slides/python-net/aspose.slides/presentation/document_properties/): ```python import aspose.slides as slides load_options = slides.LoadOptions() load_options.only_load_document_properties = True with slides.Presentation("public-properties-encrypted.pptx", load_options) as presentation: if presentation.protection_manager.is_only_document_properties_loaded: document_properties = presentation.document_properties print("Author: " + document_properties.author) print("Title: " + document_properties.title) print("Keywords: " + document_properties.keywords) else: print("The presentation was not loaded in document-properties-only mode.") ``` In this mode, slide content is not loaded. Slides, masters, layouts, shapes, media, and other presentation objects are unavailable. Applications should always check [ProtectionManager.is_only_document_properties_loaded](https://reference.aspose.com/slides/python-net/aspose.slides/protectionmanager/is_only_document_properties_loaded/) before performing an operation that requires the complete presentation object model. Public metadata may expose author names, titles, subjects, keywords, company information, comments, and custom values. Encrypt sensitive properties together with the presentation. Leave them public only when indexing, classification, search, or document-management systems have a specific requirement to access them without a password. ## **Update Properties of an Encrypted Presentation** For an encrypted PPTX file, a presentation loaded with [LoadOptions.only_load_document_properties](https://reference.aspose.com/slides/python-net/aspose.slides/loadoptions/only_load_document_properties/) is intended for reading public metadata. Aspose.Slides cannot save changed properties from that metadata-only object because the public properties must remain consistent with the corresponding data inside the encrypted presentation. Updating them therefore requires the correct opening password and a complete load. The example requires an encrypted PPTX presentation with public document properties and a known opening password. It opens the complete presentation with [LoadOptions.password](https://reference.aspose.com/slides/python-net/aspose.slides/loadoptions/password/), updates public built-in properties, and saves the result. It then uses [PresentationInfo.is_encrypted](https://reference.aspose.com/slides/python-net/aspose.slides/presentationinfo/is_encrypted/) to verify that encryption is preserved and reopens the public metadata without a password to verify the new values: ```python import aspose.slides as slides input_path = "public-properties-encrypted.pptx" output_path = "updated-public-properties-encrypted.pptx" load_options = slides.LoadOptions() load_options.password = "open_password" with slides.Presentation(input_path, load_options) as presentation: document_properties = presentation.document_properties document_properties.title = "Updated Product Roadmap" document_properties.keywords = "roadmap, planning, indexed" presentation.save(output_path, slides.export.SaveFormat.PPTX) presentation_info = slides.PresentationFactory.instance.get_presentation_info(output_path) print("The presentation is encrypted: " + str(presentation_info.is_encrypted)) metadata_load_options = slides.LoadOptions() metadata_load_options.only_load_document_properties = True with slides.Presentation(output_path, metadata_load_options) as metadata_presentation: if metadata_presentation.protection_manager.is_only_document_properties_loaded: print("Title: " + metadata_presentation.document_properties.title) print("Keywords: " + metadata_presentation.document_properties.keywords) else: print("The presentation was not loaded in document-properties-only mode.") ``` If an application is not allowed to decrypt or load the presentation content, it must treat public properties of an encrypted PPTX file as read-only. ## **Access Built-in Properties** The [DocumentProperties](https://reference.aspose.com/slides/python-net/aspose.slides/documentproperties/) class exposes built-in metadata through typed properties, including [DocumentProperties.author](https://reference.aspose.com/slides/python-net/aspose.slides/documentproperties/author/), [DocumentProperties.title](https://reference.aspose.com/slides/python-net/aspose.slides/documentproperties/title/), and [DocumentProperties.created_time](https://reference.aspose.com/slides/python-net/aspose.slides/documentproperties/created_time/). This example opens an existing presentation and prints its stored metadata to the console. Values depend on the input presentation; some fields may be empty. ```python import aspose.slides as slides with slides.Presentation("AccessBuiltInProperties.pptx") as presentation: document_properties = presentation.document_properties print("Category:", document_properties.category) print("Content status:", document_properties.content_status) print("Creation date:", document_properties.created_time) print("Author:", document_properties.author) print("Comments:", document_properties.comments) print("Keywords:", document_properties.keywords) print("Last modified by:", document_properties.last_saved_by) print("Manager:", document_properties.manager) print("Modified date:", document_properties.last_saved_time) print("Presentation format:", document_properties.presentation_format) print("Last print date:", document_properties.last_printed) print("Is shared between producers:", document_properties.shared_doc) print("Subject:", document_properties.subject) print("Title:", document_properties.title) ``` ## **Modify Built-in Properties** To update built-in metadata, assign values to the writable properties exposed by [Presentation.document_properties](https://reference.aspose.com/slides/python-net/aspose.slides/presentation/document_properties/). This example opens an existing presentation, sets [DocumentProperties.author](https://reference.aspose.com/slides/python-net/aspose.slides/documentproperties/author/), [DocumentProperties.title](https://reference.aspose.com/slides/python-net/aspose.slides/documentproperties/title/), [DocumentProperties.subject](https://reference.aspose.com/slides/python-net/aspose.slides/documentproperties/subject/), [DocumentProperties.comments](https://reference.aspose.com/slides/python-net/aspose.slides/documentproperties/comments/), and [DocumentProperties.manager](https://reference.aspose.com/slides/python-net/aspose.slides/documentproperties/manager/), then saves the updated presentation with [Presentation.save](https://reference.aspose.com/slides/python-net/aspose.slides/presentation/save/). The saved PPTX contains the new metadata. ```python import aspose.slides as slides with slides.Presentation("ModifyBuiltInProperties.pptx") as presentation: document_properties = presentation.document_properties document_properties.author = "Aspose.Slides for Python via .NET" document_properties.title = "Manage PowerPoint Presentation Properties" document_properties.subject = "Modify Built-in Properties" document_properties.comments = "Aspose description" document_properties.manager = "Aspose manager" presentation.save("DocumentProperties_output.pptx", slides.export.SaveFormat.PPTX) ``` ## **Manage the Hyperlink Base** [DocumentProperties.hyperlink_base](https://reference.aspose.com/slides/python-net/aspose.slides/documentproperties/hyperlink_base/) stores the document-level base for relative hyperlinks. This is useful when moving a presentation and its linked files to another location. It is separate from an individual hyperlink's [Hyperlink.external_url](https://reference.aspose.com/slides/python-net/aspose.slides/hyperlink/external_url/): changing the base does not rewrite the stored link addresses or change absolute destinations. The example requires a presentation containing both a relative link, such as `target.html`, and an absolute link to a file or website. It reads the existing base, assigns a new base address, and saves and reopens the presentation to check the value. It then clears the base with `""` and verifies the empty value in a separate saved file. Replace the example base address with the location of your linked files. ```python import aspose.slides as slides with slides.Presentation("hyperlinks.pptx") as presentation: print("Original base:", presentation.document_properties.hyperlink_base) new_base = "https://example.com/new/" presentation.document_properties.hyperlink_base = new_base presentation.save("hyperlinks-updated.pptx", slides.export.SaveFormat.PPTX) with slides.Presentation("hyperlinks-updated.pptx") as updated_presentation: print("Base preserved:", updated_presentation.document_properties.hyperlink_base == new_base) updated_presentation.document_properties.hyperlink_base = "" updated_presentation.save("hyperlinks-cleared.pptx", slides.export.SaveFormat.PPTX) with slides.Presentation("hyperlinks-cleared.pptx") as cleared_presentation: print("Base cleared:", cleared_presentation.document_properties.hyperlink_base == "") ``` The two verification messages should print `True`. Clearing the base leaves the individual hyperlink addresses intact. A relative link to `target.pptx` opened `old/target.pptx` when the base pointed to the `old` folder. After changing the base to the `new` folder, saving, and reopening the presentation, the same link opened `new/target.pptx`. An absolute link continued to open the same file. Test your relative links in PowerPoint before and after moving the presentation or changing its base. ## **Add Custom Presentation Properties** Custom properties store metadata that has no corresponding built-in field. The [DocumentProperties.set_custom_property_value](https://reference.aspose.com/slides/python-net/aspose.slides/documentproperties/set_custom_property_value/) method lets you assign a value by property name. This example creates a presentation, adds two text values and an integer version value, and saves the presentation with [Presentation.save](https://reference.aspose.com/slides/python-net/aspose.slides/presentation/save/). Assigning a value to an existing name replaces that property’s value. ```python import aspose.slides as slides with slides.Presentation() as presentation: document_properties = presentation.document_properties document_properties.set_custom_property_value("Reviewed by", "John Smith") document_properties.set_custom_property_value("Confidentiality level", "Internal") document_properties.set_custom_property_value("Document version", 2) presentation.save("CustomDocumentProperties_output.pptx", slides.export.SaveFormat.PPTX) ``` ## **Access and Modify Custom Properties** This example opens a presentation containing custom properties and uses [DocumentProperties.count_of_custom_properties](https://reference.aspose.com/slides/python-net/aspose.slides/documentproperties/count_of_custom_properties/) to iterate over them. [DocumentProperties.get_custom_property_name](https://reference.aspose.com/slides/python-net/aspose.slides/documentproperties/get_custom_property_name/) accepts a zero-based index and returns the name used by [DocumentProperties.set_custom_property_value](https://reference.aspose.com/slides/python-net/aspose.slides/documentproperties/set_custom_property_value/). The example requires a presentation whose custom properties are all strings. It prints each original name and value, replaces every value with a numbered string, and saves the changes. If there are no custom properties, the loop makes no changes. ```python import aspose.slides as slides with slides.Presentation("AccessAndModifyProperties.pptx") as presentation: document_properties = presentation.document_properties for i in range(document_properties.count_of_custom_properties): property_name = document_properties.get_custom_property_name(i) property_value = [""] document_properties.get_custom_property_value(property_name, property_value) print("Custom property name:", property_name) print("Custom property value:", property_value[0]) document_properties.set_custom_property_value(property_name, "New Value " + str(i + 1)) presentation.save("CustomProperties_output.pptx", slides.export.SaveFormat.PPTX) ``` [DocumentProperties.get_custom_property_value](https://reference.aspose.com/slides/python-net/aspose.slides/documentproperties/get_custom_property_value/) returns the value through the one-element list passed as its second argument. The placeholder must match the stored property's type: use `[""]` for a string or `[0]` for an integer. A mismatched type raises an `InvalidCastException`; choose the placeholder according to your custom-property schema. ## **Live Example** Try the [**View & Edit PowerPoint Metadata**](https://products.aspose.app/slides/metadata) online app to see how to work with document properties using the Aspose.Slides API: [![View & Edit PowerPoint Metadata](https://docs.aspose.com/slides/python-net/presentation-properties/slides-metadata.png)](https://products.aspose.app/slides/metadata) ## **FAQ** **How can I remove a built-in property from a presentation?** Built-in properties are an integral part of the presentation and cannot be removed entirely. However, you can either change their values or set them to empty if allowed by the specific property. **What happens if I add a custom property that already exists?** If you add a custom property that already exists, its existing value will be overwritten with the new one. You do not need to remove or check the property beforehand, as Aspose.Slides automatically updates the property's value. **Can I access presentation properties without fully loading the presentation?** Yes. Use [PresentationFactory.get_presentation_info](https://reference.aspose.com/slides/python-net/aspose.slides/presentationfactory/get_presentation_info/) and then [PresentationInfo.read_document_properties](https://reference.aspose.com/slides/python-net/aspose.slides/presentationinfo/read_document_properties/) to read stored document metadata without creating a [Presentation](https://reference.aspose.com/slides/python-net/aspose.slides/presentation/) instance. See [Build a Lightweight Presentation Inventory](https://docs.aspose.com/slides/python-net/examine-presentation/) for a complete reporting example and format-specific limitations. **Can I read public properties of an encrypted presentation without its opening password?** Yes. The presentation must have been encrypted with [ProtectionManager.encrypt_document_properties](https://reference.aspose.com/slides/python-net/aspose.slides/protectionmanager/encrypt_document_properties/) set to `False`, and it must be loaded with [LoadOptions.only_load_document_properties](https://reference.aspose.com/slides/python-net/aspose.slides/loadoptions/only_load_document_properties/) set to `True`. **Can I update an encrypted PPTX file in document-properties-only mode?** No. Public and encrypted property data must remain consistent, so updating an encrypted PPTX file requires loading the complete presentation with the correct opening password. # Secure Presentations in Python > Protect PowerPoint PPT, PPTX and ODP presentations in Python with Aspose.Slides—set passwords, apply encryption, enforce read-only, and remove protection with code. Source: https://docs.aspose.com/slides/python-net/presentation-security/ Updated: 2025-12-02 --- lastmod: 2025-12-02T13:32:50+06:00 title: Secure Presentations in Python linktitle: Presentation Security type: docs weight: 60 url: /python-net/presentation-security/ keywords: - presentation security - digital signature - password protection - read only - watermark - PowerPoint - OpenDocument - presentation - Python - Aspose.Slides description: "Protect PowerPoint PPT, PPTX and ODP presentations in Python with Aspose.Slides—set passwords, apply encryption, enforce read-only, and remove protection with code." --- ## Related articles - [Secure Presentations with Passwords Using Python](https://docs.aspose.com/slides/python-net/password-protected-presentation/) # Manage Presentation Slides Using Python > Learn how to create, access, and manage slides in PPT, PPTX, and ODP presentations using Aspose.Slides for Python. Easy-to-follow guide with examples. Source: https://docs.aspose.com/slides/python-net/presentation-slide/ Updated: 2025-08-03 --- lastmod: 2025-08-03T12:20:36+04:00 title: Manage Presentation Slides Using Python linktitle: Presentation Slide type: docs weight: 20 url: /python-net/presentation-slide/ keywords: - PowerPoint - OpenDocument - presentation - slide - add slide - access slide - remove slide - clone slide - copy slide - convert slide - compare slides - slide layout - slide master - slide size - slide transition - slide section - Python - Aspose.Slides description: "Learn how to create, access, and manage slides in PPT, PPTX, and ODP presentations using Aspose.Slides for Python. Easy-to-follow guide with examples." --- ## Related articles - [Animate PowerPoint Text in Python](https://docs.aspose.com/slides/python-net/animated-text/) # Manage PowerPoint Presentation Themes in Python > Master presentation themes in Aspose.Slides for Python via .NET to create, customize and convert PowerPoint files with consistent branding. Source: https://docs.aspose.com/slides/python-net/presentation-theme/ Updated: 2026-10-27 ## **Introduction** A presentation theme defines a coordinated set of colors, fonts, background styles, fills, lines, and effects. Theme-aware objects refer to these shared definitions instead of storing every visual property as a fixed value, so a theme change can update many objects at once. In Aspose.Slides, the presentation-level theme is available through the [Presentation.master_theme](https://reference.aspose.com/slides/python-net/aspose.slides/presentation/master_theme/) property. A presentation can also contain theme overrides at lower levels. A master can override the presentation theme through [MasterThemeManager.override_theme](https://reference.aspose.com/slides/python-net/aspose.slides.theme/masterthememanager/override_theme/), a layout can override its inherited theme through [BaseOverrideThemeManager.override_theme](https://reference.aspose.com/slides/python-net/aspose.slides.theme/baseoverridethememanager/override_theme/), and an individual slide can do the same. In practice, the effective theme for a slide is resolved through this inheritance chain: presentation theme, master override, layout override, and slide override. ![Theme components: colors, fonts, background styles, and effects](https://docs.aspose.com/slides/python-net/presentation-theme/theme-constituents.png) The sections below show the most common theme workflows: inspect a theme, change colors and fonts, copy or apply a theme, update background and effect styles, and read effective values after inheritance and overrides have been resolved. ## **Inspect a Theme** The [MasterTheme](https://reference.aspose.com/slides/python-net/aspose.slides.theme/mastertheme/) object exposes the theme's [color_scheme](https://reference.aspose.com/slides/python-net/aspose.slides.theme/mastertheme/color_scheme/), [font_scheme](https://reference.aspose.com/slides/python-net/aspose.slides.theme/mastertheme/font_scheme/), and [format_scheme](https://reference.aspose.com/slides/python-net/aspose.slides.theme/mastertheme/format_scheme/) properties. Inspecting these collections before changing them is especially useful when a presentation comes from an external source because the number and content of style entries can vary. The following example reads the main theme properties and reports how many background, fill, line, and effect styles are stored in the theme: ```python import aspose.slides as slides with slides.Presentation("input.pptx") as presentation: theme = presentation.master_theme print(f"Theme name: {theme.name}") print(f"Accent 1: {theme.color_scheme.accent1.color}") print(f"Major Latin font: {theme.font_scheme.major.latin_font.font_name}") print(f"Minor Latin font: {theme.font_scheme.minor.latin_font.font_name}") print(f"Background fill styles: {len(theme.format_scheme.background_fill_styles)}") print(f"Fill styles: {len(theme.format_scheme.fill_styles)}") print(f"Line styles: {len(theme.format_scheme.line_styles)}") print(f"Effect styles: {len(theme.format_scheme.effect_styles)}") ``` If a file uses multiple masters, do not assume that every slide has the same effective theme. Inspect the master associated with the slide, and use the effective-theme workflow shown later in this article when layout or slide overrides may be present. ## **Change Theme Colors** Theme-aware fills, lines, and text can refer to a logical color from the [SchemeColor](https://reference.aspose.com/slides/python-net/aspose.slides/schemecolor/) enumeration. When you change the corresponding entry in the theme's [ColorScheme](https://reference.aspose.com/slides/python-net/aspose.slides.theme/colorscheme/), all objects that still reference that theme color are resolved against the new value. Objects that use a direct RGB color are not changed by a theme-color update. The following end-to-end example creates a shape that uses `ACCENT4`, changes the theme's `accent4` color to red, saves the presentation, reopens it, and prints the effective fill color: ```python import aspose.pydrawing as draw import aspose.slides as slides with slides.Presentation() as presentation: slide = presentation.slides[0] shape = slide.shapes.add_auto_shape(slides.ShapeType.RECTANGLE, 10, 10, 100, 100) shape.fill_format.fill_type = slides.FillType.SOLID shape.fill_format.solid_fill_color.scheme_color = slides.SchemeColor.ACCENT4 presentation.master_theme.color_scheme.accent4.color = draw.Color.red presentation.save("theme-color.pptx", slides.export.SaveFormat.PPTX) with slides.Presentation("theme-color.pptx") as saved_presentation: saved_slide = saved_presentation.slides[0] saved_shape = saved_slide.shapes[0] effective_fill = saved_shape.fill_format.get_effective() print(f"Effective fill color: {effective_fill.solid_fill_color}") ``` Because the rectangle remains linked to `ACCENT4`, its visible color becomes red after the theme is changed. If you replace the scheme color with a direct color on the shape, later changes to `accent4` will no longer affect that fill. ### **Use Colors from the Additional Palette** PowerPoint derives lighter and darker variants from a theme color by applying color transformations. Aspose.Slides exposes these transformations through the [ColorTransformOperation](https://reference.aspose.com/slides/python-net/aspose.slides/colortransformoperation/) enumeration. ![Main theme colors and lighter and darker colors generated from the additional palette](https://docs.aspose.com/slides/python-net/presentation-theme/additional-palette-colors.png) **1** - Main theme colors. **2** - Lighter and darker variants produced from the main theme colors. The following example creates six rectangles based on `ACCENT4`, applies luminance transformations to five of them, and saves the result: ```python import aspose.slides as slides with slides.Presentation() as presentation: slide = presentation.slides[0] shape1 = slide.shapes.add_auto_shape(slides.ShapeType.RECTANGLE, 10, 10, 50, 50) shape1.fill_format.fill_type = slides.FillType.SOLID shape1.fill_format.solid_fill_color.scheme_color = slides.SchemeColor.ACCENT4 shape2 = slide.shapes.add_auto_shape(slides.ShapeType.RECTANGLE, 10, 70, 50, 50) shape2.fill_format.fill_type = slides.FillType.SOLID shape2.fill_format.solid_fill_color.scheme_color = slides.SchemeColor.ACCENT4 shape2.fill_format.solid_fill_color.color_transform.add(slides.ColorTransformOperation.MULTIPLY_LUMINANCE, 0.2) shape2.fill_format.solid_fill_color.color_transform.add(slides.ColorTransformOperation.ADD_LUMINANCE, 0.8) shape3 = slide.shapes.add_auto_shape(slides.ShapeType.RECTANGLE, 10, 130, 50, 50) shape3.fill_format.fill_type = slides.FillType.SOLID shape3.fill_format.solid_fill_color.scheme_color = slides.SchemeColor.ACCENT4 shape3.fill_format.solid_fill_color.color_transform.add(slides.ColorTransformOperation.MULTIPLY_LUMINANCE, 0.4) shape3.fill_format.solid_fill_color.color_transform.add(slides.ColorTransformOperation.ADD_LUMINANCE, 0.6) shape4 = slide.shapes.add_auto_shape(slides.ShapeType.RECTANGLE, 10, 190, 50, 50) shape4.fill_format.fill_type = slides.FillType.SOLID shape4.fill_format.solid_fill_color.scheme_color = slides.SchemeColor.ACCENT4 shape4.fill_format.solid_fill_color.color_transform.add(slides.ColorTransformOperation.MULTIPLY_LUMINANCE, 0.6) shape4.fill_format.solid_fill_color.color_transform.add(slides.ColorTransformOperation.ADD_LUMINANCE, 0.4) shape5 = slide.shapes.add_auto_shape(slides.ShapeType.RECTANGLE, 10, 250, 50, 50) shape5.fill_format.fill_type = slides.FillType.SOLID shape5.fill_format.solid_fill_color.scheme_color = slides.SchemeColor.ACCENT4 shape5.fill_format.solid_fill_color.color_transform.add(slides.ColorTransformOperation.MULTIPLY_LUMINANCE, 0.75) shape6 = slide.shapes.add_auto_shape(slides.ShapeType.RECTANGLE, 10, 310, 50, 50) shape6.fill_format.fill_type = slides.FillType.SOLID shape6.fill_format.solid_fill_color.scheme_color = slides.SchemeColor.ACCENT4 shape6.fill_format.solid_fill_color.color_transform.add(slides.ColorTransformOperation.MULTIPLY_LUMINANCE, 0.5) presentation.save("theme-color-palette.pptx", slides.export.SaveFormat.PPTX) ``` These variants remain based on the theme color. If `accent4` changes later, the transformed colors are recalculated from the new `accent4` value. ### **Map `SchemeColor` Values to `ColorScheme` Slots** The [SchemeColor](https://reference.aspose.com/slides/python-net/aspose.slides/schemecolor/) enumeration uses `TEXT1`, `BACKGROUND1`, `TEXT2`, and `BACKGROUND2`, while [ColorScheme](https://reference.aspose.com/slides/python-net/aspose.slides.theme/colorscheme/) exposes the same theme slots as `dark1`, `light1`, `dark2`, and `light2`. The mapping is fixed: * `TEXT1` = `dark1` * `BACKGROUND1` = `light1` * `TEXT2` = `dark2` * `BACKGROUND2` = `light2` These are alternate names for the same theme slots; they are not values that are dynamically converted from one form to another. ## **Change Theme Fonts** A theme font scheme contains a major font set for headings and a minor font set for body text. The [FontScheme.major](https://reference.aspose.com/slides/python-net/aspose.slides.theme/fontscheme/major/) and [FontScheme.minor](https://reference.aspose.com/slides/python-net/aspose.slides.theme/fontscheme/minor/) properties expose those sets. PowerPoint-compatible theme font identifiers can be used in text formatting: * `+mn-lt` - Body Font Latin (Minor Latin Font) * `+mj-lt` - Heading Font Latin (Major Latin Font) * `+mn-ea` - Body Font East Asian (Minor East Asian Font) * `+mj-ea` - Heading Font East Asian (Major East Asian Font) * `+mn-cs` - Body Font Complex Script (Minor Complex Script Font) * `+mj-cs` - Heading Font Complex Script (Major Complex Script Font) The following example creates one heading that uses the major Latin theme font and one body line that uses the minor Latin theme font. It then changes the theme fonts and saves the result: ```python import aspose.slides as slides with slides.Presentation() as presentation: slide = presentation.slides[0] heading = slide.shapes.add_auto_shape(slides.ShapeType.RECTANGLE, 40, 40, 500, 60) heading.text_frame.text = "Theme heading" heading.text_frame.paragraphs[0].portions[0].portion_format.latin_font = slides.FontData("+mj-lt") body = slide.shapes.add_auto_shape(slides.ShapeType.RECTANGLE, 40, 120, 500, 60) body.text_frame.text = "Theme body text" body.text_frame.paragraphs[0].portions[0].portion_format.latin_font = slides.FontData("+mn-lt") presentation.master_theme.font_scheme.major.latin_font = slides.FontData("Aptos Display") presentation.master_theme.font_scheme.minor.latin_font = slides.FontData("Arial") presentation.save("theme-fonts.pptx", slides.export.SaveFormat.PPTX) ``` The heading follows the major font and the body text follows the minor font. Text that has an explicit font name instead of a theme identifier will not automatically switch when the theme font scheme changes. The major and minor font collections can also contain font mappings for individual writing systems, such as Cyrillic, Arabic, Japanese, Georgian, and Thaana. To inspect, add, replace, or remove these mappings, see [Script-Specific Theme Fonts](https://docs.aspose.com/slides/python-net/script-specific-font-mappings/). For more information about presentation fonts, see [PowerPoint Fonts](https://docs.aspose.com/slides/python-net/powerpoint-fonts/). ### **Resolve Theme Font References** When inspecting text, [FontData.font_name](https://reference.aspose.com/slides/python-net/aspose.slides/fontdata/font_name/) can contain a theme reference such as `+mn-lt` instead of a font family name. Call [FontData.get_font_name](https://reference.aspose.com/slides/python-net/aspose.slides/fontdata/get_font_name/) with the appropriate [IThemeEffectiveData](https://reference.aspose.com/slides/python-net/aspose.slides.theme/ithemeeffectivedata/) to resolve that reference. The `+mj` and `+mn` prefixes select the major and minor font sets; the `-lt`, `-ea`, and `-cs` suffixes select their Latin, East Asian, and Complex Script fonts, respectively. Obtain the effective theme through [Slide.create_theme_effective](https://reference.aspose.com/slides/python-net/aspose.slides/slide/create_theme_effective/) on the object whose theme applies to the inspected text. For ordinary text on a slide, use `slide.create_theme_effective` so the context includes that slide's inherited theme and local overrides. When inspecting a layout or master itself, use its own effective theme. Do not assume that the first master's theme applies to every slide. The following example creates a text portion that explicitly references the minor Latin font. It initializes a slide font scheme through [OverrideTheme.init_font_scheme_from_inherited](https://reference.aspose.com/slides/python-net/aspose.slides.theme/overridetheme/init_font_scheme_from_inherited/) and sets the major and minor Latin families to `Arial` and `Calibri`, making the result reproducible without an input file. ```python import aspose.slides as slides with slides.Presentation() as presentation: slide = presentation.slides[0] theme = slide.theme_manager.override_theme theme.init_font_scheme_from_inherited() theme.font_scheme.major.latin_font = slides.FontData("Arial") theme.font_scheme.minor.latin_font = slides.FontData("Calibri") shape = slide.shapes.add_auto_shape(slides.ShapeType.RECTANGLE, 20, 20, 400, 60) shape.text_frame.text = "Text using the minor theme font" portion = shape.text_frame.paragraphs[0].portions[0] portion.portion_format.latin_font = slides.FontData("+mn-lt") font = portion.portion_format.latin_font effective_theme = slide.create_theme_effective() print(f"{font.font_name} -> {font.get_font_name(effective_theme)}") explicit_font = slides.FontData("Verdana") print(f"{explicit_font.font_name} -> {explicit_font.get_font_name(effective_theme)}") ``` The output is `+mn-lt -> Calibri` followed by `Verdana -> Verdana`. The stored reference remains unchanged, while an explicit family name is returned as-is. If the portion used `+mj-lt`, it would resolve to `Arial` in this theme. Resolving a theme reference identifies the font family specified by the theme. It does not check font availability or determine the font file ultimately used after substitution or glyph fallback during rendering. See [Font Selection Sequence](https://docs.aspose.com/slides/python-net/font-selection-sequence/) and [Font Substitution](https://docs.aspose.com/slides/python-net/font-substitution/) for those separate steps. ## **Copy or Apply a Theme** The workflows below solve different theme-related problems. ### **Apply an External Theme to a Master's Dependent Slides** Use [IMasterSlide.apply_external_theme_to_depending_slides](https://reference.aspose.com/slides/python-net/aspose.slides/imasterslide/apply_external_theme_to_depending_slides/) when you have a PowerPoint theme file (`.thmx`) and want to restyle every slide that depends on a particular master. Select the master from the [Presentation.masters](https://reference.aspose.com/slides/python-net/aspose.slides/presentation/masters/) collection, which implements [MasterSlideCollection](https://reference.aspose.com/slides/python-net/aspose.slides/masterslidecollection/), and pass the theme file path to the method. The method performs the following operations: 1. Creates a new master slide based on the selected master. 1. Applies the external theme to the new master. 1. Assigns the new master to all slides that previously depended on the selected master. 1. Returns the newly created [IMasterSlide](https://reference.aspose.com/slides/python-net/aspose.slides/imasterslide/). The following example applies an external theme to the slides that depend on the first master and saves the presentation: ```python import aspose.slides as slides with slides.Presentation("presentation.pptx") as presentation: selected_master = presentation.masters[0] themed_master = selected_master.apply_external_theme_to_depending_slides("corporate-theme.thmx") print(f"Created master: {themed_master.name}") presentation.save("presentation-with-external-theme.pptx", slides.export.SaveFormat.PPTX) ``` An invalid, corrupted, or unsupported theme can cause [PptxException](https://reference.aspose.com/slides/python-net/aspose.slides/pptxexception/) or one of its format-related subclasses. Validate paths supplied by users, handle file-system access failures, and save the presentation only after the theme has been applied successfully. Only the slides that depended on the selected master are reassigned. Slides associated with other masters retain their existing masters and themes. Theme-aware colors, fonts, fills, lines, backgrounds, and effects are resolved against the external theme. Directly assigned colors, fonts, fills, and other explicit formatting may remain unchanged. Layout-level and slide-level overrides can also take precedence over values inherited from the new master. The theme can reference fonts that are not available in the runtime environment. For consistent rendering and export, install the required fonts, provide them through [custom font sources](https://docs.aspose.com/slides/python-net/custom-font/), or configure [font substitution](https://docs.aspose.com/slides/python-net/font-substitution/). This is a direct master-level workflow: the method accepts a file path to a `.thmx` file and does not require manually creating slide-level or layout-level theme overrides. ### **Apply Different External Themes in a Multi-Master Presentation** When the relevant master is not known in advance, obtain it from a representative slide through [Slide.layout_slide](https://reference.aspose.com/slides/python-net/aspose.slides/slide/layout_slide/) and [LayoutSlide.master_slide](https://reference.aspose.com/slides/python-net/aspose.slides/layoutslide/master_slide/). Store the original master references before applying any themes because each call creates another master in the presentation. The following example uses slides from two sections to locate their masters and applies a different external theme to each group: ```python import aspose.slides as slides with slides.Presentation("multi-master-presentation.pptx") as presentation: if len(presentation.slides) < 5: print("The presentation does not contain the expected representative slides.") else: first_group_master = presentation.slides[0].layout_slide.master_slide second_group_master = presentation.slides[4].layout_slide.master_slide if first_group_master.slide_id == second_group_master.slide_id: print("The representative slides use the same master.") else: first_themed_master = first_group_master.apply_external_theme_to_depending_slides("blue-theme.thmx") second_themed_master = second_group_master.apply_external_theme_to_depending_slides("green-theme.thmx") print(f"First themed master: {first_themed_master.name}") print(f"Second themed master: {second_themed_master.name}") presentation.save("multi-master-with-external-themes.pptx", slides.export.SaveFormat.PPTX) ``` The first call affects only slides that depended on `first_group_master`, and the second call affects only slides that depended on `second_group_master`. Slides belonging to any other master are not restyled. ### **Preserve a Source Theme When Moving Slides** If you want to move a slide to another presentation and preserve its original design, clone the source master into the target presentation with [MasterSlideCollection.add_clone](https://reference.aspose.com/slides/python-net/aspose.slides/masterslidecollection/add_clone/), then clone the slide with [SlideCollection.add_clone](https://reference.aspose.com/slides/python-net/aspose.slides/slidecollection/add_clone/) and the cloned master. This carries the master, its layouts, and the associated theme together. ```python import aspose.slides as slides with slides.Presentation("source-theme.pptx") as source: with slides.Presentation("target.pptx") as target: source_slide = source.slides[0] source_master = source_slide.layout_slide.master_slide cloned_master = target.masters.add_clone(source_master) target.slides.add_clone(source_slide, cloned_master, True) target.save("theme-preserved.pptx", slides.export.SaveFormat.PPTX) ``` This is the preferred workflow when the source slide must look the same in the destination. Simply cloning content onto an unrelated destination master can change theme-driven colors, fonts, backgrounds, and effects. ### **Apply Theme Values to an Existing Slide** If the target slide must stay on its current master and layout, initialize a slide-level override from the source theme. The [OverrideTheme.init_color_scheme_from](https://reference.aspose.com/slides/python-net/aspose.slides.theme/overridetheme/init_color_scheme_from/), [OverrideTheme.init_font_scheme_from](https://reference.aspose.com/slides/python-net/aspose.slides.theme/overridetheme/init_font_scheme_from/), and [OverrideTheme.init_format_scheme_from](https://reference.aspose.com/slides/python-net/aspose.slides.theme/overridetheme/init_format_scheme_from/) methods copy the three main theme components into the override. ```python import aspose.slides as slides with slides.Presentation("source-theme.pptx") as source: with slides.Presentation("target.pptx") as target: target_slide = target.slides[0] override_theme = target_slide.theme_manager.override_theme override_theme.init_color_scheme_from(source.master_theme.color_scheme) override_theme.init_font_scheme_from(source.master_theme.font_scheme) override_theme.init_format_scheme_from(source.master_theme.format_scheme) target.save("theme-applied-to-slide.pptx", slides.export.SaveFormat.PPTX) ``` This changes the theme used by that slide without changing the theme inherited by other slides. To remove the local override and return to inherited values, call [OverrideTheme.clear](https://reference.aspose.com/slides/python-net/aspose.slides.theme/overridetheme/clear/). ### **Apply a Theme Override to a Layout** A layout-level override applies to slides that use that layout, unless a particular slide has its own override. The same initialization methods can be used through the layout's [LayoutSlideThemeManager](https://reference.aspose.com/slides/python-net/aspose.slides.theme/layoutslidethememanager/): ```python import aspose.slides as slides with slides.Presentation("source-theme.pptx") as source: with slides.Presentation("target.pptx") as target: target_slide = target.slides[0] override_theme = target_slide.layout_slide.theme_manager.override_theme override_theme.init_color_scheme_from(source.master_theme.color_scheme) override_theme.init_font_scheme_from(source.master_theme.font_scheme) override_theme.init_format_scheme_from(source.master_theme.format_scheme) target.save("theme-applied-to-layout.pptx", slides.export.SaveFormat.PPTX) ``` Use a master or presentation-level theme when many layouts and slides should share the same base design, a layout override when one layout family needs different styling, and a slide override only for true exceptions. Excessive slide-level overrides make later global theme changes harder to predict. ## **Update Theme Background Styles** The theme's background fills are stored in [FormatScheme.background_fill_styles](https://reference.aspose.com/slides/python-net/aspose.slides.theme/formatscheme/background_fill_styles/). PowerPoint can present more background choices in its UI than the number of fill definitions physically stored in this collection because the UI can combine theme fills with theme colors and other style references. ![PowerPoint background style gallery for a presentation theme](https://docs.aspose.com/slides/python-net/presentation-theme/presentation-design_8.png) Before using a background style, inspect the stored collection and the current [Background.style_index](https://reference.aspose.com/slides/python-net/aspose.slides/background/style_index/). `style_index` uses `0` for no themed fill; positive values are theme background-style references. This is different from indexing a Python collection directly, where `[0]` means the first stored item. Do not assume that every presentation contains the same number of background fill styles. The following example reports the available background fill count, assigns a themed background reference to the first master, and saves the presentation: ```python import aspose.slides as slides with slides.Presentation("input.pptx") as presentation: background_styles = presentation.master_theme.format_scheme.background_fill_styles print(f"Background fill styles: {len(background_styles)}") if len(background_styles) == 0: raise RuntimeError("The presentation theme does not contain background fill styles.") master_slide = presentation.masters[0] master_slide.background.type = slides.BackgroundType.THEMED master_slide.background.style_index = 1 presentation.save("theme-background.pptx", slides.export.SaveFormat.PPTX) ``` The visible result depends on the theme entry referenced by the master and on any background overrides at the layout or slide level. If a slide uses its own background, changing only the master background may not change that slide. Use [Background.get_effective](https://reference.aspose.com/slides/python-net/aspose.slides/background/get_effective/) when you need to know the final background after inheritance has been applied. Do not treat `style_index` as a zero-based collection index. Also avoid hard-coding a style number from one file and assuming it has the same appearance in another file; theme style definitions are presentation-specific. For direct background formatting and background inheritance, see [Presentation Background](https://docs.aspose.com/slides/python-net/presentation-background/). ## **Update Theme Effects** A theme format scheme contains separate [FormatScheme.fill_styles](https://reference.aspose.com/slides/python-net/aspose.slides.theme/formatscheme/fill_styles/), [FormatScheme.line_styles](https://reference.aspose.com/slides/python-net/aspose.slides.theme/formatscheme/line_styles/), and [FormatScheme.effect_styles](https://reference.aspose.com/slides/python-net/aspose.slides.theme/formatscheme/effect_styles/) collections. Typical Office themes often contain three principal style entries that correspond visually to subtle, moderate, and intense formatting, but code should inspect each collection instead of assuming a fixed count. ![Subtle, moderate, and intense theme effects applied to the same shape](https://docs.aspose.com/slides/python-net/presentation-theme/presentation-design_10.png) When you access these collections in Python, the collection index is zero-based: `[0]` is the first stored style and `[2]` is the third. A shape's style-reference indexes are a separate concept, exposed through [IShapeStyle](https://reference.aspose.com/slides/python-net/aspose.slides/ishapestyle/). Modifying a theme style affects shapes that reference that theme style; shapes with direct formatting may remain unchanged. The following example checks that the required style entries exist, changes the first line style, changes the third fill style, enables an outer shadow in the third effect style, and saves the result: ```python import aspose.pydrawing as draw import aspose.slides as slides with slides.Presentation("Subtle_Moderate_Intense.pptx") as presentation: format_scheme = presentation.master_theme.format_scheme if len(format_scheme.line_styles) < 1 or len(format_scheme.fill_styles) < 3 or len(format_scheme.effect_styles) < 3: raise RuntimeError("The theme does not contain the style entries required by this example.") format_scheme.line_styles[0].fill_format.fill_type = slides.FillType.SOLID format_scheme.line_styles[0].fill_format.solid_fill_color.color = draw.Color.red format_scheme.fill_styles[2].fill_type = slides.FillType.SOLID format_scheme.fill_styles[2].solid_fill_color.color = draw.Color.forest_green format_scheme.effect_styles[2].effect_format.enable_outer_shadow_effect() format_scheme.effect_styles[2].effect_format.outer_shadow_effect.distance = 10 presentation.save("theme-effects.pptx", slides.export.SaveFormat.PPTX) ``` For shapes that reference these slots, the first theme line style becomes red, the third theme fill style becomes solid forest green, and the third effect style gains an outer shadow with a distance of 10 points. The exact visual result still depends on which style slots each shape references and whether direct formatting overrides the theme. ![Theme effect styles after changing line, fill, and shadow settings](https://docs.aspose.com/slides/python-net/presentation-theme/presentation-design_11.png) ## **Determine Whether an Effective Solid Fill Uses a Theme Color** A fill can be stored directly on an object or inherited from a paragraph, layout, master, theme style, or another formatting level. Call [FillFormat.get_effective](https://reference.aspose.com/slides/python-net/aspose.slides/fillformat/get_effective/) to resolve that hierarchy into immutable [IFillFormatEffectiveData](https://reference.aspose.com/slides/python-net/aspose.slides/ifillformateffectivedata/). First check [IFillFormatEffectiveData.fill_type](https://reference.aspose.com/slides/python-net/aspose.slides/ifillformateffectivedata/fill_type/). Only when it is `FillType.SOLID` should you read the solid-fill properties. For a solid fill, [IFillFormatEffectiveData.solid_fill_color](https://reference.aspose.com/slides/python-net/aspose.slides/ifillformateffectivedata/solid_fill_color/) returns the final rendered RGB value after inheritance, theme lookup, and color transformations are applied. [IFillFormatEffectiveData.solid_fill_scheme_color](https://reference.aspose.com/slides/python-net/aspose.slides/ifillformateffectivedata/solid_fill_scheme_color/) returns the corresponding logical [SchemeColor](https://reference.aspose.com/slides/python-net/aspose.slides/schemecolor/) slot, such as `TEXT1` or `ACCENT6`. A value of `SchemeColor.NOT_DEFINED` means that the effective solid fill is not based on a scheme color. In a workflow where fills are either theme colors or direct RGB colors, this value identifies a direct RGB fill. Do not use the local [IColorFormat.scheme_color](https://reference.aspose.com/slides/python-net/aspose.slides/icolorformat/scheme_color/) value alone to classify a fill. For example, a text portion can have no locally defined scheme color, so its local value is `NOT_DEFINED`, while its effective fill inherits a theme color and resolves to `TEXT1` or `ACCENT6`. Conversely, `solid_fill_scheme_color` tells you which logical theme slot produced the effective color, but it does not tell you whether that slot came from the object, paragraph, layout, master, or another level of the formatting hierarchy. The following example loads a presentation, audits both shape fills and text-portion fills, prints each final RGB value and associated scheme color, and flags solid fills that will not track theme color changes: ```python import aspose.slides as slides def audit_fill(object_name, local_fill): effective_fill = local_fill.get_effective() if effective_fill.fill_type != slides.FillType.SOLID: print(f"{object_name}: fill type = {effective_fill.fill_type}; not a solid fill.") return rgb = effective_fill.solid_fill_color effective_scheme_color = effective_fill.solid_fill_scheme_color local_scheme_color = local_fill.solid_fill_color.scheme_color print(f"{object_name}: RGB = #{rgb.r:02X}{rgb.g:02X}{rgb.b:02X}") print(f"{object_name}: local scheme = {local_scheme_color}, effective scheme = {effective_scheme_color}") if effective_scheme_color == slides.SchemeColor.NOT_DEFINED: print(f"{object_name}: direct RGB or another non-scheme fill; audit as theme-independent.") else: print(f"{object_name}: theme-dependent through {effective_scheme_color}.") with slides.Presentation("input.pptx") as presentation: for slide_index, slide in enumerate(presentation.slides): for shape_index, shape in enumerate(slide.shapes): shape_name = f"Slide {slide_index + 1}, shape {shape_index + 1}" audit_fill(shape_name, shape.fill_format) if isinstance(shape, slides.AutoShape): for paragraph_index, paragraph in enumerate(shape.text_frame.paragraphs): for portion_index, portion in enumerate(paragraph.portions): portion_name = f"{shape_name}, paragraph {paragraph_index + 1}, portion {portion_index + 1}" audit_fill(portion_name, portion.portion_format.fill_format) ``` The `NOT_DEFINED` branch provides an audit list of solid fills that will not respond to changes in theme color slots. Review those objects when a presentation must follow a new brand palette. The reported RGB value still shows the current appearance, while the scheme value explains whether that appearance is connected to the theme. Effective-format objects are snapshots. After changing the presentation theme, a theme override, or any inherited formatting, call `get_effective` again and read a new `IFillFormatEffectiveData` object before comparing or reporting colors. ## **Read Effective Theme Values** Raw theme objects tell you what is defined at a particular level. Effective values tell you what a slide or shape actually uses after inheritance and local overrides are resolved. For a slide, call [BaseOverrideThemeManager.create_theme_effective](https://reference.aspose.com/slides/python-net/aspose.slides.theme/baseoverridethememanager/create_theme_effective/). For a background, use [Background.get_effective](https://reference.aspose.com/slides/python-net/aspose.slides/background/get_effective/), and for a fill, use [FillFormat.get_effective](https://reference.aspose.com/slides/python-net/aspose.slides/fillformat/get_effective/). The following example reads the effective theme, background, and first shape fill from a slide: ```python import aspose.slides as slides with slides.Presentation("input.pptx") as presentation: slide = presentation.slides[0] effective_theme = slide.theme_manager.create_theme_effective() effective_background = slide.background.get_effective() print(f"Effective major Latin font: {effective_theme.font_scheme.major.latin_font.font_name}") print(f"Effective minor Latin font: {effective_theme.font_scheme.minor.latin_font.font_name}") print(f"Effective background fill type: {effective_background.fill_format.fill_type}") if len(slide.shapes) > 0: effective_fill = slide.shapes[0].fill_format.get_effective() print(f"First shape effective fill type: {effective_fill.fill_type}") if effective_fill.fill_type == slides.FillType.SOLID: print(f"First shape effective fill color: {effective_fill.solid_fill_color}") ``` Use effective data for rendering diagnostics, validation, and comparisons. If you inspect only [Presentation.master_theme](https://reference.aspose.com/slides/python-net/aspose.slides/presentation/master_theme/), you can miss a master, layout, slide, or shape override that changes the final appearance. ## **FAQ** **Does applying an external theme affect every slide in the presentation?** No. [IMasterSlide.apply_external_theme_to_depending_slides](https://reference.aspose.com/slides/python-net/aspose.slides/imasterslide/apply_external_theme_to_depending_slides/) reassigns only the slides that depend on the selected master. Slides that use other masters retain their existing themes. **Can I apply a theme to a single slide without changing the master?** Yes. Use the slide's [SlideThemeManager](https://reference.aspose.com/slides/python-net/aspose.slides.theme/slidethememanager/) and initialize its override theme. The change remains local to that slide; other slides continue to inherit their existing themes. **What is the safest way to carry a theme from one presentation to another?** When moving a slide and preserving its source appearance, clone the source master into the destination and clone the slide with that master using [MasterSlideCollection.add_clone](https://reference.aspose.com/slides/python-net/aspose.slides/masterslidecollection/add_clone/) and [SlideCollection.add_clone](https://reference.aspose.com/slides/python-net/aspose.slides/slidecollection/add_clone/). This keeps the master, layouts, and theme together. **How can I see the effective values after inheritance and overrides?** Use [BaseOverrideThemeManager.create_theme_effective](https://reference.aspose.com/slides/python-net/aspose.slides.theme/baseoverridethememanager/create_theme_effective/) for a slide or layout theme and the corresponding effective-data methods for format objects such as [Background.get_effective](https://reference.aspose.com/slides/python-net/aspose.slides/background/get_effective/) and [FillFormat.get_effective](https://reference.aspose.com/slides/python-net/aspose.slides/fillformat/get_effective/). These APIs return the resolved values after inheritance and overrides are applied. # Manage VBA Projects in Presentations with Python > Discover how to generate and manipulate PowerPoint and OpenDocument presentations via VBA with Aspose.Slides for Python via .NET to streamline your workflow. Source: https://docs.aspose.com/slides/python-net/presentation-via-vba/ Updated: 2026-08-13 ## **Overview** This article examines the key capabilities of Aspose.Slides for Python via .NET for working with macros in PowerPoint presentations. The library provides convenient tools for adding, removing, and extracting macros, which enables you to automate the creation and modification of presentations. With Aspose.Slides, you can: - Accelerate presentation development—the automation of routine tasks reduces the time needed to prepare materials. - Ensure flexibility—the ability to manage macros allows you to tailor presentations to specific tasks and scenarios. - Integrate data—simple integration with external data sources helps keep slide content up to date. - Simplify maintenance—centralized macro management makes it easier to apply changes and update presentations. The article goes on to present practical examples of how to use Aspose.Slides to work effectively with macros in PowerPoint. The [aspose.slides.vba](https://reference.aspose.com/slides/python-net/aspose.slides.vba/) namespace provides classes for working with macros and VBA code. When you convert a presentation that contains macros to another format (PDF, HTML, etc.), Aspose.Slides ignores the macros—they are not transferred to the output file. When you add macros to a presentation or resave a presentation that contains macros, Aspose.Slides writes the macro bytes as-is. Aspose.Slides **never** executes macros in a presentation. ## **Add VBA Macros** Aspose.Slides provides the [VbaProject](https://reference.aspose.com/slides/python-net/aspose.slides.vba/vbaproject/) class to create VBA projects (and project references) and to edit existing modules. 1. Create an instance of the [Presentation](https://reference.aspose.com/slides/python-net/aspose.slides/presentation/) class. 1. Use the [VbaProject](https://reference.aspose.com/slides/python-net/aspose.slides.vba/vbaproject/#constructors) constructor to add a new VBA project. 1. Add a module to the VBA project. 1. Set the module’s source code. 1. Add a reference to ``. 1. Add a reference to **Microsoft Office**. 1. Associate the references with the VBA project. 1. Save the presentation. The following Python code shows how to add a VBA macro from scratch to a presentation: ```python import aspose.slides as slides # Create an instance of the Presentation class. with slides.Presentation() as presentation: # Create a new VBA project. presentation.vba_project = slides.vba.VbaProject() # Add an empty module to the VBA project. module = presentation.vba_project.modules.add_empty_module("Module") # Set the module source code. module.source_code = """ Sub Test(oShape As Shape) MsgBox "Hello, world!" End Sub """ # Create a reference to . stdole_reference = slides.vba.VbaReferenceOleTypeLib("stdole", "*\\G{00020430-0000-0000-C000-000000000046}#2.0#0#C:\\Windows\\system32\\stdole2.tlb#OLE Automation") # Create a reference to Microsoft Office. office_reference = slides.vba.VbaReferenceOleTypeLib("Office", "*\\G{2DF8D04C-5BFA-101B-BDE5-00AA0044DE52}#2.0#0#C:\\Program Files\\Common Files\\Microsoft Shared\\OFFICE14\\MSO.DLL#Microsoft Office 14.0 Object Library") # Add the references to the VBA project. presentation.vba_project.references.add(stdole_reference) presentation.vba_project.references.add(office_reference) # Save the presentation. presentation.save("macros.pptm", slides.export.SaveFormat.PPTM) ``` You may want to try the **Aspose** [Macro Remover](https://products.aspose.app/slides/remove-macros), a free web app for removing macros from PowerPoint, Excel, and Word documents. ## **Remove VBA Macros** Using the [vba_project](https://reference.aspose.com/slides/python-net/aspose.slides/presentation/vba_project/) property of the [Presentation](https://reference.aspose.com/slides/python-net/aspose.slides/presentation/) class, you can remove a VBA macro. 1. Create an instance of the [Presentation](https://reference.aspose.com/slides/python-net/aspose.slides/presentation/) class and load the presentation that contains the macro. 1. Access the macro module and remove it. 1. Save the modified presentation. The following Python code shows how to remove a VBA macro: ```python import aspose.slides as slides # Load the presentation that contains the macro. with slides.Presentation("VBA.pptm") as presentation: # Access the VBA module. vba_module = presentation.vba_project.modules[0] # Remove the VBA module. presentation.vba_project.modules.remove(vba_module) # Save the presentation. presentation.save("removed_macro.pptm", slides.export.SaveFormat.PPTM) ``` ## **Extract VBA Macros** Using the `modules` property in the [VbaProject](https://reference.aspose.com/slides/python-net/aspose.slides.vba/vbaproject/) class, you can access all modules of a VBA project. The [VbaModule](https://reference.aspose.com/slides/python-net/aspose.slides.vba/vbamodule/) class can be used to extract module properties such as the name and the code. 1. Create an instance of the [Presentation](https://reference.aspose.com/slides/python-net/aspose.slides/presentation/) class and load the presentation that contains the macro. 1. Check whether the presentation contains a VBA project. 1. Loop through all modules in the VBA project to view the macros. The following Python code shows how to extract VBA macros from a presentation: ```python import aspose.slides as slides with slides.Presentation("VBA.pptm") as presentation: # Check whether the presentation contains a VBA project. if presentation.vba_project is not None: for module in presentation.vba_project.modules: print(module.name) print(module.source_code) ``` ## **Check Whether a VBA Project Is Password-Protected** Using the [VbaProject.is_password_protected](https://reference.aspose.com/slides/python-net/aspose.slides.vba/vbaproject/is_password_protected/) property, you can determine whether a project’s properties are password-protected. 1. Create an instance of the [Presentation](https://reference.aspose.com/slides/python-net/aspose.slides/presentation/) class and load a presentation that contains a macro. 1. Check whether the presentation contains a [VBA project](https://reference.aspose.com/slides/python-net/aspose.slides.vba/vbaproject/). 1. Check whether the VBA project is password-protected to view its properties. ```py import aspose.slides as slides with slides.Presentation("VBA.pptm") as presentation: # Check whether the presentation contains a VBA project. if presentation.vba_project is not None: if presentation.vba_project.is_password_protected: print(f"The VBA Project '{presentation.vba_project.name}' is protected by password to view project properties.") ``` ## **FAQ** ### What happens to macros if I save the presentation as PPTX? Macros will be removed because PPTX does not support VBA. To keep macros, choose PPTM, PPSM, or POTM. ### Can Aspose.Slides run macros inside a presentation to, for example, refresh data? No. The library never executes VBA code; execution is only possible inside PowerPoint with the appropriate security settings. ### Is working with ActiveX controls linked to VBA code supported? Yes, you can access existing [ActiveX controls](https://docs.aspose.com/slides/python-net/activex/), modify their properties, and remove them. This is useful when macros interact with ActiveX. ## Related articles - [VbaMacro](https://docs.aspose.com/slides/python-net/examples/elements/vba-macro/) # Retrieve and Update Presentation View Properties in Python > Use Aspose.Slides for Python via .NET to configure the normal view layout, slide and notes zoom, grid spacing, and comment visibility in PowerPoint presentations. Source: https://docs.aspose.com/slides/python-net/presentation-view-properties/ Updated: 2026-11-16 ## **Introduction** In PowerPoint's normal view, the slide appears between a side pane for thumbnails or an outline and a notes pane below. Aspose.Slides for Python via .NET exposes the presentation's saved editing preferences through [Presentation.view_properties](https://reference.aspose.com/slides/python-net/aspose.slides/presentation/view_properties/). These include the pane layout, zoom levels, grid spacing, and comment visibility. ## **About NormalViewProperties** Use [normal_view_properties](https://reference.aspose.com/slides/python-net/aspose.slides/viewproperties/normal_view_properties/) to access the [NormalViewProperties](https://reference.aspose.com/slides/python-net/aspose.slides/normalviewproperties/) object. [show_outline_icons](https://reference.aspose.com/slides/python-net/aspose.slides/normalviewproperties/show_outline_icons/) controls whether icons appear beside slide titles in the outline. [snap_vertical_splitter](https://reference.aspose.com/slides/python-net/aspose.slides/normalviewproperties/snap_vertical_splitter/) lets the side pane snap to its minimized state when the user narrows it. [prefer_single_view](https://reference.aspose.com/slides/python-net/aspose.slides/normalviewproperties/prefer_single_view/) indicates a preference for displaying one pane in the full window. [vertical_bar_state](https://reference.aspose.com/slides/python-net/aspose.slides/normalviewproperties/vertical_bar_state/) controls the divider between the side pane and the slide. [horizontal_bar_state](https://reference.aspose.com/slides/python-net/aspose.slides/normalviewproperties/horizontal_bar_state/) controls the divider above the notes pane. Both accept a [SplitterBarStateType](https://reference.aspose.com/slides/python-net/aspose.slides/splitterbarstatetype/) value of `MINIMIZED`, `MAXIMIZED`, or `RESTORED`. [![A conceptual editor separates a side panel, slide region and bottom region with labelled vertical and horizontal splitters.](https://docs.aspose.com/slides/python-net/presentation-view-properties/visual-presentation-view-properties-40ae1765a743.svg)](https://docs.aspose.com/slides/python-net/presentation-view-properties/visual-presentation-view-properties-40ae1765a743.svg) *In normal view, the vertical divider controls the width of the side pane. The horizontal divider controls the space above the notes pane.* ## **About Restoring NormalViewProperties** When a divider is restored, [restored_left](https://reference.aspose.com/slides/python-net/aspose.slides/normalviewproperties/restored_left/) supplies the saved size of the side pane and [restored_top](https://reference.aspose.com/slides/python-net/aspose.slides/normalviewproperties/restored_top/) supplies the saved size of the upper slide area. Both expose [NormalViewRestoredProperties](https://reference.aspose.com/slides/python-net/aspose.slides/normalviewrestoredproperties/). Its [dimension_size](https://reference.aspose.com/slides/python-net/aspose.slides/normalviewrestoredproperties/dimension_size/) property accepts a percentage from 0 to 100, and [auto_adjust](https://reference.aspose.com/slides/python-net/aspose.slides/normalviewrestoredproperties/auto_adjust/) controls whether the editor adjusts the size when the window is resized. This example updates an existing presentation. It restores the horizontal divider, sets [restored_top](https://reference.aspose.com/slides/python-net/aspose.slides/normalviewproperties/restored_top/) to 80% with automatic adjustment enabled, and maximizes the vertical divider. It also enables [show_outline_icons](https://reference.aspose.com/slides/python-net/aspose.slides/normalviewproperties/show_outline_icons/) for outline view. ```py import aspose.slides as slides with slides.Presentation("demo.pptx") as presentation: normal_view = presentation.view_properties.normal_view_properties normal_view.horizontal_bar_state = slides.SplitterBarStateType.RESTORED normal_view.vertical_bar_state = slides.SplitterBarStateType.MAXIMIZED normal_view.restored_top.auto_adjust = True normal_view.restored_top.dimension_size = 80 normal_view.show_outline_icons = True presentation.save("presentation_normal_view_state.pptx", slides.export.SaveFormat.PPTX) ``` ## **Set the Default Zoom Value** [slide_view_properties](https://reference.aspose.com/slides/python-net/aspose.slides/viewproperties/slide_view_properties/) and [notes_view_properties](https://reference.aspose.com/slides/python-net/aspose.slides/viewproperties/notes_view_properties/) store independent zoom settings for the editor. These settings do not affect slide dimensions, slide-show playback, or image export resolution. This example opens an existing presentation and enables [variable_scale](https://reference.aspose.com/slides/python-net/aspose.slides/commonslideviewproperties/variable_scale/) to fit the slide to the editing window. For the notes page, it disables automatic scaling and sets [scale](https://reference.aspose.com/slides/python-net/aspose.slides/commonslideviewproperties/scale/) to a fixed 80% zoom. ```py import aspose.slides as slides with slides.Presentation("demo.pptx") as presentation: view_properties = presentation.view_properties view_properties.slide_view_properties.variable_scale = True view_properties.notes_view_properties.variable_scale = False view_properties.notes_view_properties.scale = 80 presentation.save("zoom.pptx", slides.export.SaveFormat.PPTX) ``` ## **Set the Grid Spacing** [grid_spacing](https://reference.aspose.com/slides/python-net/aspose.slides/viewproperties/grid_spacing/) sets the distance between editing grid lines throughout the presentation. It takes a positive value in points, with 72 points per inch. This example prints the current spacing in an existing presentation and saves a quarter-inch grid by setting the interval to 18 points. ```py import aspose.slides as slides with slides.Presentation("demo.pptx") as presentation: view_properties = presentation.view_properties print(f"Current grid spacing: {view_properties.grid_spacing} points") view_properties.grid_spacing = 18.0 presentation.save("grid-spacing.pptx", slides.export.SaveFormat.PPTX) ``` The grid repeats at a fixed interval. [Drawing guides](https://docs.aspose.com/slides/python-net/drawing-guides/) mark individual horizontal or vertical positions. Both are editing aids and appear only in editors that display them. Slide shows and exports to PDF, images, or SVG omit them. ## **Show or Hide Comments When Opening a Presentation** [show_comments](https://reference.aspose.com/slides/python-net/aspose.slides/viewproperties/show_comments/) stores a preference that compatible editors use when opening the presentation. For an existing presentation with comments, this example prints the current setting and saves a copy with comments hidden. It also sets [last_view](https://reference.aspose.com/slides/python-net/aspose.slides/viewproperties/last_view/) to [ViewType.SLIDE_VIEW](https://reference.aspose.com/slides/python-net/aspose.slides/viewtype/) so the copy opens in slide view. ```py import aspose.slides as slides with slides.Presentation("comments.pptx") as presentation: view_properties = presentation.view_properties print(f"Current comment visibility: {view_properties.show_comments}") view_properties.show_comments = slides.NullableBool.FALSE view_properties.last_view = slides.ViewType.SLIDE_VIEW presentation.save("comments-hidden.pptx", slides.export.SaveFormat.PPTX) ``` Hiding comments preserves their text, authors, positions, replies, and statuses. To change the comments themselves, see [Presentation Comments](https://docs.aspose.com/slides/python-net/presentation-comments/). Export settings control whether comments appear in PDF, HTML, images, notes, or handouts. ## **FAQ** **Why is the grid hidden when I reopen the presentation?** The presentation stores the grid interval. To see the grid, enable grid visibility in the editor. **Does clearing drawing guides change the grid spacing?** No. Adding, moving, or clearing a guide leaves the grid interval unchanged. **Can different sections of a presentation have different view settings?** No. [Presentation.view_properties](https://reference.aspose.com/slides/python-net/aspose.slides/presentation/view_properties/) applies to the entire presentation. **Can I save different view settings for different users?** The file stores one set of view properties for everyone. An editor may also apply a user's local preferences. **Can I save view settings in a template?** Yes. Presentations created from the template inherit its saved view settings. # Create a Presentation Viewer in Python > Learn how to create a custom presentation viewer in Python using Aspose.Slides. Easily display PowerPoint (PPTX, PPT) and OpenDocument (ODP) files without Microsoft PowerPoint or other office software. Source: https://docs.aspose.com/slides/python-net/presentation-viewer/ Updated: 2026-08-05 ## **Introduction** Aspose.Slides for Python is used to create presentation files with slides. These slides can be viewed by opening the presentations in Microsoft PowerPoint, for example. However, developers may sometimes need to view slides as images in their preferred image viewer or use them in a custom presentation viewer. In such cases, Aspose.Slides allows you to export individual slides as images. This article explains how to do that. ## **Generate an SVG Image from a Slide** To generate an SVG image from a presentation slide with Aspose.Slides, follow the steps below: 1. Create an instance of the [Presentation](https://reference.aspose.com/slides/python-net/aspose.slides/presentation/) class. 1. Get a reference to the slide by its index. 1. Open a file stream. 1. Save the slide as an SVG image to the file stream. ```py import aspose.slides as slides slide_index = 0 with slides.Presentation("sample.pptx") as presentation: slide = presentation.slides[slide_index] with open("output.svg", "wb") as svg_stream: slide.write_as_svg(svg_stream) ``` ## **Create a Slide Thumbnail Image** Aspose.Slides helps you generate thumbnail images of slides. To generate a thumbnail of a slide using Aspose.Slides, follow the steps below: 1. Create an instance of the [Presentation](https://reference.aspose.com/slides/python-net/aspose.slides/presentation/) class. 1. Get a reference to the slide by its index. 1. Create a thumbnail image of the referenced slide at the desired scale. 1. Save the thumbnail image in your preferred image format. ```py import aspose.slides as slides slide_index = 0 scale_x = 1 scale_y = scale_x with slides.Presentation("sample.pptx") as presentation: slide = presentation.slides[slide_index] with slide.get_image(scale_x, scale_y) as image: image.save("output.jpg", slides.ImageFormat.JPEG) ``` ## **Create a Slide Thumbnail with User Defined Dimensions** To create a slide thumbnail image with user-defined dimensions, follow the steps below: 1. Create an instance of the [Presentation](https://reference.aspose.com/slides/python-net/aspose.slides/presentation/) class. 1. Get a reference to the slide by its index. 1. Generate a thumbnail image of the referenced slide with the specified dimensions. 1. Save the thumbnail image in your preferred image format. ```py import aspose.slides as slides import aspose.pydrawing as pydrawing slide_index = 0 slide_size = pydrawing.Size(1200, 800) with slides.Presentation("sample.pptx") as presentation: slide = presentation.slides[slide_index] with slide.get_image(slide_size) as image: image.save("output.jpg", slides.ImageFormat.JPEG) ``` ## **Create a Slide Thumbnail with Speaker Notes** To generate a thumbnail of a slide with speaker notes using Aspose.Slides, follow the steps below: 1. Create an instance of the [RenderingOptions](https://reference.aspose.com/slides/python-net/aspose.slides.export/renderingoptions/) class. 1. Use the `RenderingOptions.slides_layout_options` property to set the position of the speaker notes. 1. Create an instance of the [Presentation](https://reference.aspose.com/slides/python-net/aspose.slides/presentation/) class. 1. Get a reference to the slide by its index. 1. Generate a thumbnail image of the referenced slide using the rendering options. 1. Save the thumbnail image in your preferred image format. ```py import aspose.slides as slides slide_index = 0 layout_options = slides.export.NotesCommentsLayoutingOptions() layout_options.notes_position = slides.export.NotesPositions.BOTTOM_TRUNCATED rendering_options = slides.export.RenderingOptions() rendering_options.slides_layout_options = layout_options with slides.Presentation("sample.pptx") as presentation: slide = presentation.slides[slide_index] with slide.get_image(rendering_options) as image: image.save("output.png", slides.ImageFormat.PNG) ``` ## **Live Example** Try [**Aspose.Slides Viewer**](https://products.aspose.app/slides/viewer/) free app to see what you can implement with Aspose.Slides API: [![Online PowerPoint Viewer](https://docs.aspose.com/slides/python-net/presentation-viewer/online-PowerPoint-viewer.png)](https://products.aspose.app/slides/viewer/) ## **FAQ** ### Can I embed a presentation viewer in an ASP.NET web application? Yes. You can use Aspose.Slides on the server side to render slides as [images](https://docs.aspose.com/slides/python-net/convert-powerpoint-to-png/) or [HTML](https://docs.aspose.com/slides/python-net/convert-powerpoint-to-html/) and display them in the browser. Navigation and zoom features can be implemented with JavaScript for an interactive experience. ### What is the best way to display slides inside a custom .NET viewer? The recommended approach is to render each slide as an [image](https://docs.aspose.com/slides/python-net/convert-powerpoint-to-png/) (e.g., PNG or SVG) or convert it to [HTML](https://docs.aspose.com/slides/python-net/convert-powerpoint-to-html/) using Aspose.Slides, then display the output inside a picture box (for desktop) or HTML container (for web). ### How do I handle large presentations with many slides? For large decks, consider lazy-loading or on-demand rendering of slides. This means generating a slide’s content only when the user navigates to it, reducing memory and load time. # Product Overview > Aspose.Slides for Python via .NET lets you create, edit and convert PowerPoint (PPT, PPTX) and OpenDocument (ODP) presentations without Microsoft Office. Source: https://docs.aspose.com/slides/python-net/product-overview/ Updated: 2026-10-26 ![todo:image_alt_text](https://docs.aspose.com/slides/python-net/product-overview/product-overview_1.png) ## **Welcome to Aspose.Slides for Python via .NET!** Aspose.Slides is a Microsoft PowerPoint® management API that allows applications to read, write, create, and modify PowerPoint presentations without using Microsoft PowerPoint®. The library supports working with presentations, slides, shapes, tables, text, animations, audio, video, and other presentation elements. With Aspose.Slides, developers can open presentations from different sources, save them in various PowerPoint formats, export presentations to formats such as PDF, TIFF, XPS, SWF, HTML, and SVG, and save slides as images. The API also provides features for managing document properties, applying protection, previewing slides, editing slide content, working with slide notes, and handling advanced presentation elements such as embedded OLE objects. ## **Why You Should Use Aspose.Slides for Python via .NET** - Aspose.Slides for Python via .NET is the first and only component that provides the functionalities required to manage PowerPoint® documents. - Aspose.Slides for Python via .NET offers a lot of key features such as managing texts, shapes, tables & animations, adding audio and video to slides, previewing slides, exporting slides to SVG, PDF, and other formats, and many more capabilities. - Aspose.Slides for Python via .NET not only lets you open PowerPoint files from different sources but also allows you to save your presentations in a variety of ways. For example, you can save your presentations in PPT; you can also save your slides as images. - Aspose.Slides for Python via .NET gives you almost all the features you may or may not find in Microsoft PowerPoint. Given the versatility of Aspose.Slides for Python via .NET, besides tables and different kinds of shapes, you get to use it to add different kinds of frames—text, audio, and video frames—to your slides. - Aspose.Slides for Python via .NET is developed using Managed Python. You can use Aspose.Slides for Python via .NET with any .NET language like Python, VB.NET, J#, etc. Aspose.Slides for Python via .NET can also be used with any kind of application—web or Windows application. - Aspose.Slides for Python via .NET also provides fully featured demos and working examples to help developers get a better understanding of the API. ## **Aspose.Slides Features** Aspose.Slides for Python via .NET features can be divided into these groups: 1. Presentation Features. 1. Slides Features. 1. Graphics and Multimedia Features. 1. Table Features. 1. Text & Paragraph Features 1. Advanced Features ### **Presentation Features** - Opening Microsoft PowerPoint presentations from different sources. - Saving presentations in different Microsoft PowerPoint formats. - Creating presentations from scratch. - Converting presentations to PDF documents without using any other component - Reading or modifying a presentation's document properties - Applying protection on presentation - Exporting presentation to PDF - Exporting presentation to TIFF - Exporting presentation to XPS - Exporting presentation to SWF - Exporting presentation to PDF Note / Tiff Notes - Exporting presentation to HTML ### **Slides Features** - Creating new slides from scratch and adding them to presentations. - Accessing any slide through its position in a presentation. - Copying or cloning slides to the same or another presentation. - Editing and deleting slides. - Copying masters with slides automatically. - Previewing slides. - Getting or setting a slide's name. - Saving slides as images. - Exporting slides to SVG format. - Working with many masters in presentations. - Filling slides background with any supported style. - Adding new or managing slide notes. - Setting new slide masters and styles dynamically. - Adding or modifying slide show transition. - Adding Morph Transitions ### **Graphics & Multimedia Features** - Creating or managing shapes such as lines, rectangles, ellipses, and polylines. - Managing line styles in shapes. - Getting a shape's alternative text. - Rotating flip shapes. - Filling shapes in different styles—for example, solid, gradient, pattern, texture, and picture. - Using any of 48 pre-defined patterns and 24 textures. - Assigning links to shapes. - Reading, modifying, and adding new animation effects to slides and shapes. - Adding new pictures to presentations and managing existing ones. - Adding new picture bullets to presentations and managing existing ones. - Adding new audio frames to presentations and managing existing ones. - Adding new video frames to presentations and managing existing ones. ### **Table Features** - Creating tables from scratch and adding them to slides. - Resizing and moving tables. - Accessing any cell in a table. - Changing the format and borders of any cell. - Resizing columns and rows. - Adding and deleting columns and rows. - Setting border width and color for the whole table. ### **Text & Paragraph Features** - Getting and setting texts in text placeholders and text frames. - Getting a placeholder's type. - Changing the text formatting in a text frame. - Adding new fonts or managing the fonts already used in a presentation. - Changing texts and Text Formatting. - Creating or managing links to the text. - Supporting tabs and effective tabs. - Adding new text frames to almost any type of shape. - Accessing and modifying margins and text wrap settings of text frames. - Accessing and modifying paragraph indentation. ### **Advanced Features** - Accessing OLE objects embedded in presentations. - Locking presentations. ## **Technical support** Aspose provides unlimited free technical support for all its products. The support is available to all users (including users with evaluation packages). If you need help with Aspose.Slides for Python via .NET, consider the following: - The main avenue for support is the [Aspose Forums](https://forum.aspose.com/). Post your question in the [Aspose.Slides forum](https://forum.aspose.com/c/slides/11)—and it will be answered within a few hours. Aspose.Slides support team directly answers questions posted on the forum. - Please note that Aspose does not provide technical support over the phone. Phone support is only available for sales and purchase questions. - When expecting a reply in the forums, please be patient and make evaluations for time zone differences. If you have an issue with Aspose.Slides for Python via .NET, follow these guidelines to resolve it in the most efficient manner: - Check and confirm that you are using the latest Aspose.Slides for Python via .NET version first before reporting the issue. Perhaps, the issue you experienced was already resolved in an update. See [Aspose.Slides download](https://pypi.org/project/aspose.slides/) to get information on the latest product version. - Before reporting an issue, you may want to go through our forums, this documentation, and the API Reference. Perhaps, the answer to your question was provided already. - When reporting an issue, please include the original document and (if possible) a fragment of your code pertaining to the problem. If you need to attach multiple files, put them in a ZIP package. You can safely attach your documents in Aspose.Forums because only you and Aspose developers have access to the attached files. - Create and use one thread for a specific issue. If you experience another issue, you have to create another thread to report it. This table lists important Aspose.Slides for Python via .NET technical resources. |**Resource**|**Description**| | :- | :- | |[Aspose.Slides for Python via .NET home page](https://products.aspose.com/slides/python-net/)|Product home page.| |[Aspose.Slide blog](https://blog.aspose.com/category/slides/)|Check this page regularly for information on new releases and useful tips on Aspose.Slides.| |[Aspose.Slides for Python via .NET download](https://pypi.org/project/aspose.slides/)|Download the latest version of Aspose.Slides here. We often release new versions.| |[Aspose.Slides support forum](https://forum.aspose.com/c/slides/11)|Post your questions and issues here for a speedy resolution.| |[Aspose.Slides for Python via .NET product documentation](https://docs.aspose.com/slides/python-net/)|Full online documentation that contains this document and the Aspose.Slides API Reference.| ## **FAQ** ### Does it support PDF conformance levels for archiving and accessibility (PDF/A and PDF/UA)? Yes. You can save to PDF with PDF/A-2a/2b/2u, PDF/A-3a/3b, as well as PDF/UA by configuring [PDF export options](https://reference.aspose.com/slides/python-net/aspose.slides.export/pdfoptions/). ### Is there a font substitution mechanism and support for custom fonts to ensure correct rendering? Yes. The library lets you [load custom fonts](https://docs.aspose.com/slides/python-net/custom-font/) and [define fallback rules](https://docs.aspose.com/slides/python-net/fallback-font/) so missing glyphs are substituted reliably during conversion and rendering. ### Can I detect whether a file is password-protected without fully opening it? Yes. You can [inspect a presentation](https://docs.aspose.com/slides/python-net/examine-presentation/) to determine if it requires a password before loading the full document. ### Is Microsoft PowerPoint required for processing and conversions? No. Aspose.Slides is a standalone engine; PowerPoint is not needed on the server or workstation. ### Is it safe to process presentations from multiple threads? Yes, you can process different documents in parallel in separate threads; just avoid using the same presentation instance concurrently [across threads](https://docs.aspose.com/slides/python-net/multithreading/). ### Are macros preserved and can I manage VBA in PPTM/PPSM files? Yes. Presentations with macros [are supported](https://docs.aspose.com/slides/python-net/presentation-via-vba/), and you can [inspect and manage VBA projects](https://reference.aspose.com/slides/python-net/aspose.slides.vba/) in those files. ### Can I convert PDF or HTML back into PowerPoint slides? Yes. You can [import PDF pages or HTML content](https://docs.aspose.com/slides/python-net/import-presentation/) to create or populate slides in a presentation. ### Is XPS export supported, and can I control the quality and content of the XPS output? Yes. [Export to XPS](https://docs.aspose.com/slides/python-net/convert-powerpoint-to-xps/) is available, and [save options](https://reference.aspose.com/slides/python-net/aspose.slides.export/xpsoptions/) allow you to tune output quality and included content. ### Can I convert slides to images and control the output quality? Yes. Slides can be [rendered to PNG, JPEG, GIF, BMP, TIFF](https://docs.aspose.com/slides/python-net/convert-powerpoint-to-png/) and other formats with fine-grained control over size and quality. ### Are mathematical formulas supported (MathML/MathText) and can they be exported? Yes. You can [create and edit mathematical text](https://docs.aspose.com/slides/python-net/powerpoint-math-equations/) and [export equations](https://docs.aspose.com/slides/python-net/exporting-math-equations/), including to MathML. ### How does the library handle encryption and passwords (open, set, remove)? [It supports](https://docs.aspose.com/slides/python-net/password-protected-presentation/) opening encrypted presentations, setting or removing passwords for opening and modifying, and checking a file’s protection status. Related feature: [Process presentations without PowerPoint](https://docs.aspose.com/slides/features/without-powerpoint/). ## Related articles - [Product Support](https://docs.aspose.com/slides/python-net/product-support/) - [Features Overview](https://docs.aspose.com/slides/python-net/features-overview/) - [Aspose.Slides for Python via .NET](https://docs.aspose.com/slides/python-net/) # Product Support > Get free, fast Aspose.Slides for Python via .NET product support: forums, docs, updates, code help to fix issues across PowerPoint and OpenDocument workflows. Source: https://docs.aspose.com/slides/python-net/product-support/ Updated: 2026-08-13 ## **Overview** This article explains how to get support for Aspose.Slides and how to report issues effectively. It describes the main support channel, provides recommendations for submitting a problem, and points to useful technical resources such as the product page, blog, downloads, support forum, documentation, and API Reference. The article also answers common questions about paid support, issue escalation, and support for older library versions. ## **Technical support** Aspose provides unlimited free technical support for all its products. The support is available to all users (including users with evaluation packages). When you need help with Aspose.Slides for Python via .NET, consider the following: - The main avenue for support is the [Aspose.Forums](https://forum.aspose.com/c/slides/11). Post your question in the Aspose.Slides forum—and it will be answered within a few hours. Aspose.Slides support team directly answers questions posted on the forum. - Please note that Aspose does not provide technical support over the phone. Phone support is only available for sales and purchase questions. - When expecting a reply in the forums, please be patient and make evaluations for time zone differences. When you experience an issue with Aspose.Slides for Python via .NET, follow these guidelines to resolve it in the most efficient manner: - Check and confirm that you are using the latest Aspose.Slides for Python via .NET version before reporting the issue. Perhaps, the issue you experienced was already resolved in an update. See Aspose.Slides download to get information on the latest version. - Before reporting an issue, you may want to go through our forums, this documentation, and the API Reference. Perhaps, the answer to your question was provided already. - When reporting an issue, please include the original document and (if possible) a fragment of your code pertaining to the problem. If you need to attach multiple files, put them in a ZIP package. You can safely attach your documents in Aspose.Forums because **only** you and Aspose developers have access to the attached files. - Create and use one thread for a specific issue. If you experience another issue, you have to create another thread to report it. ## **Resources** This table list useful Aspose.Slides for Python via .NET technical resources. |**Resource**|**Description**| | :- | :- | |[Aspose.Slides for Python via .NET home page](https://products.aspose.com/slides/python-net/)|Product home page.| |[Aspose.Slides blog](https://blog.aspose.com/category/slides/)|Check this section regularly for information on new releases and useful tips on Aspose.Slides.| |[Aspose.Slides for Python via .NET download](https://pypi.org/project/aspose.slides/)|Download the latest version of Aspose.Slides from this page. We often release new versions.| |[Aspose.Slides support forum](https://forum.aspose.com/c/slides/11)|Post your questions and issues here for a speedy resolution.| |[Aspose.Slides for Python via .NET product documentation](https://docs.aspose.com/slides/python-net/)|Full online documentation that contains this document and the Aspose.Slides API Reference.| ## **FAQ** ### What paid support tiers are available and how do they differ? [Developer, Business, and Enterprise](https://helpdesk.aspose.com/kb/faq/1-Introduction-to-Paid-Support-Services). They differ by the number of incidents included, response priority, and available communication channels. ### Can I escalate a bug directly to the engineering team? Yes. [Paid support](https://helpdesk.aspose.com/) allows escalation to the developers when an issue requires deeper investigation. ### Are older library versions supported, and do you release fixes for them? You can use older versions, but fixes are provided for the current release; patches for legacy versions are not issued. ## Related articles - [Product Overview](https://docs.aspose.com/slides/python-net/product-overview/) # Save Presentations in Read-Only Mode Using Python > Load and save PowerPoint files (PPT, PPTX) in read-only mode with Aspose.Slides for Python via .NET, offering precise slide previews without altering your presentations. Source: https://docs.aspose.com/slides/python-net/read-only-presentation/ Updated: 2026-08-13 ## **Introduction** In PowerPoint 2019, Microsoft introduced the **Always Open Read-Only** setting as one of the options users can use to protect their presentations. You may want to use this Read-Only setting to protect a presentation when - You want to prevent accidental edits and keep the content of your presentation safe. - You want to alert people that the presentation you provided is the final version. After you select the **Always Open Read-Only** option for a presentation, when users open the presentation, they see the **Read-Only** recommendation and may see a message in this form: *To prevent accidental changes, the author has set this file to open as read-only.* The Read-Only recommendation is a simple yet effective deterrent that discourages editing because users have to perform a task to remove it before they are allowed to edit a presentation. If you do not want users to make changes to a presentation and want to tell them about this in a polite way, then the Read-Only recommendation may a good option for you. > If a presentation with the **Read-Only** protection gets opened in an older Microsoft PowerPoint application—which does not support the recently introduced function—the **Read-Only** recommendation gets ignored (the presentation is opened normally). ## **Apply Read-Only Mode** Aspose.Slides for Python via .NET allows you to set a presentation to **Read-Only**, which means users (after they open the presentation) see the **Read-Only** recommendation. This sample code shows you how to set a presentation to **Read-Only** in Python using Aspose.Slides: ```py import aspose.slides as slides with slides.Presentation() as pres: pres.protection_manager.read_only_recommended = True pres.save("ReadOnlyPresentation.pptx", slides.export.SaveFormat.PPTX) ``` **Note**: The **Read-Only** recommendation is simply meant to discourage editing or stop users from making accidental changes to a PowerPoint presentation. If a motivated person—who knows what they are doing—decides to edit your presentation, they can easily remove the Read-Only setting. If you seriously need to prevent unauthorized editing, you are better off using [more stringent protections that involve encryptions and passwords](https://docs.aspose.com/slides/python-net/password-protected-presentation/). ## **FAQ** ### How is 'Read-Only recommended' different from full password protection? 'Read-Only recommended' only displays a suggestion to open the file in read-only mode and is easy to bypass. [Password protection](https://docs.aspose.com/slides/python-net/password-protected-presentation/) actually restricts opening or editing and is appropriate when you need real security controls. ### Can 'Read-Only recommended' be combined with watermarks to further discourage edits? Yes. The recommendation can be paired with [watermarks](https://docs.aspose.com/slides/python-net/watermark/) as a visual deterrent; they are separate mechanisms and work well together. ### Can a macro or external tool still modify the file when the recommendation is enabled? Yes. The recommendation does not block programmatic changes. To prevent automated edits, use [passwords and encryption](https://docs.aspose.com/slides/python-net/password-protected-presentation/). ### How does 'Read-Only recommended' relate to the flags 'is_encrypted' and 'is_write_protected'? They are different signals. 'Read-Only recommended' is a soft, optional prompt; [is_write_protected](https://reference.aspose.com/slides/python-net/aspose.slides/protectionmanager/is_write_protected/) and [is_encrypted](https://reference.aspose.com/slides/python-net/aspose.slides/protectionmanager/is_encrypted/) indicate actual write or read restrictions that depend on passwords or encryption. # Add Rectangles to Presentations in Python > Boost your PowerPoint & OpenDocument presentations by adding rectangles with Aspose.Slides for Python via .NET—easily design and modify shapes programmatically. Source: https://docs.aspose.com/slides/python-net/rectangle/ Updated: 2026-08-02 ## **Overview** This article shows how to add rectangle shapes to PowerPoint slides by using Aspose.Slides. It covers creating a simple rectangle, creating a formatted rectangle, and saving the updated presentation as a PPTX file. You will also see how to apply basic rectangle formatting, such as a solid fill color, line color, and line width. In addition, the article’s FAQ points to related rectangle tasks, including rounded corners, picture fills, visual effects, hyperlinks, shape locks, export options, and effective properties. ## **Create Simple Rectangle** Like previous topics, this one is also about adding a shape and this time the shape we will discuss about is Rectangle. In this topic, we have described that how developers can add simple or formatted rectangles to their slides using Aspose.Slides for Python via .NET . To add a simple rectangle to a selected slide of the presentation, please follow the steps below: 1. Create an instance of [Presentation ](https://reference.aspose.com/slides/python-net/aspose.slides/presentation/)class. 1. Obtain the reference of a slide by using its Index. 1. Add an IAutoShape of Rectangle type using AddAutoShape method exposed by IShapes object. 1. Write the modified presentation as a PPTX file. In the example given below, we have added a simple rectangle to the first slide of the presentation. ```py import aspose.slides as slides # Instantiate Prseetation class that represents the PPTX with slides.Presentation() as pres: # Get the first slide sld = pres.slides[0] # Add autoshape of rectangle type sld.shapes.add_auto_shape(slides.ShapeType.RECTANGLE, 50, 150, 150, 50) #Write the PPTX file to disk pres.save("RectShp1_out.pptx", slides.export.SaveFormat.PPTX) ``` ## **Create Formatted Rectangle** To add a formatted rectangle to a slide, please follow the steps below: 1. Create an instance of [Presentation ](https://reference.aspose.com/slides/python-net/aspose.slides/presentation/)class. 1. Obtain the reference of a slide by using its Index. 1. Add an IAutoShape of Rectangle type using AddAutoShape method exposed by IShapes object. 1. Set the Fill Type of the Rectangle to Solid. 1. Set the Color of the Rectangle using SolidFillColor.Color property as exposed by FillFormat object associated with the IShape object. 1. Set the Color of the lines of the Rectangle. 1. Set the Width of the lines of the Rectangle. 1. Write the modified presentation as PPTX file. The above steps are implemented in the example given below. ```py import aspose.slides as slides import aspose.pydrawing as draw # Instantiate Prseetation class that represents the PPTX with slides.Presentation() as pres: # Get the first slide sld = pres.slides[0] # Add autoshape of rectangle type shp = sld.shapes.add_auto_shape(slides.ShapeType.RECTANGLE, 50, 150, 150, 50) # Apply some formatting to rectangle shape shp.fill_format.fill_type = slides.FillType.SOLID shp.fill_format.solid_fill_color.color = draw.Color.chocolate # Apply some formatting to the line of rectangle shp.line_format.fill_format.fill_type = slides.FillType.SOLID shp.line_format.fill_format.solid_fill_color.color = draw.Color.black shp.line_format.width = 5 #Write the PPTX file to disk pres.save("RectShp2_out.pptx", slides.export.SaveFormat.PPTX) ``` ## **FAQ** ### How do I add a rectangle with rounded corners? Use the rounded-corner [shape type](https://reference.aspose.com/slides/python-net/aspose.slides/shapetype/) and adjust the corner radius in the shape’s properties; rounding can also be applied per corner via geometry adjustments. ### How do I fill a rectangle with an image (texture)? Select the picture [fill type](https://reference.aspose.com/slides/python-net/aspose.slides/filltype/), provide the image source, and configure [stretching/tiling modes](https://reference.aspose.com/slides/python-net/aspose.slides/picturefillmode/). ### Can a rectangle have shadow and glow? Yes. [Outer/inner shadow, glow, and soft edges](https://docs.aspose.com/slides/python-net/shape-effect/) are available with adjustable parameters. ### Can I turn a rectangle into a button with a hyperlink? Yes. [Assign a hyperlink](https://docs.aspose.com/slides/python-net/manage-hyperlinks/) to the shape click (jump to a slide, file, web address, or e-mail). ### How can I protect a rectangle from moving and changes? [Use shape locks](https://docs.aspose.com/slides/python-net/applying-protection-to-presentation/): you can forbid moving, resizing, selection, or text editing to preserve the layout. ### Can I convert a rectangle to a raster image or SVG? Yes. You can [render the shape](http://reference.aspose.com/slides/python-net/aspose.slides/shape/get_image/) to an image with a specified size/scale or [export it as SVG](https://reference.aspose.com/slides/python-net/aspose.slides/shape/write_as_svg/) for vector use. ### How do I quickly get the actual (effective) properties of a rectangle considering theme and inheritance? [Use the shape’s effective properties](https://docs.aspose.com/slides/python-net/shape-effective-properties/): the API returns computed values that account for theme styles, layout, and local settings, simplifying formatting analysis. ## Related articles - [Add Ellipses to Presentations in Python](https://docs.aspose.com/slides/python-net/ellipse/) # Remove Slides from Presentations in Python > Effortlessly remove slides from PowerPoint and OpenDocument presentations with Aspose.Slides for Python via .NET. Get clear code examples and boost your workflow. Source: https://docs.aspose.com/slides/python-net/remove-slide-from-presentation/ Updated: 2026-08-02 ## **Introduction** If a slide (or its contents) is no longer needed, you can delete it. Aspose.Slides provides the [Presentation](https://reference.aspose.com/slides/python-net/aspose.slides/presentation/) class, which encapsulates [SlideCollection](https://reference.aspose.com/slides/python-net/aspose.slides/slidecollection/), the repository for all slides in a presentation. Using a reference or index to a known [Slide](https://reference.aspose.com/slides/python-net/aspose.slides/slide/) object, you can remove the target slide. ## **Remove a Slide by Reference** When you already have a reference to the target [Slide](https://reference.aspose.com/slides/python-net/aspose.slides/slide/), you can remove it directly. This avoids index lookups and keeps the code shorter and clearer. 1. Create an instance of the [Presentation](https://reference.aspose.com/slides/python-net/aspose.slides/presentation/) class. 1. Get a reference to the slide you want to remove by its ID or index. 1. Remove the referenced slide from the presentation. 1. Save the modified presentation. The following Python example removes a slide by reference: ```python import aspose.slides as slides # Instantiate the Presentation class to open a presentation file. with slides.Presentation("sample.pptx") as presentation: # Access a slide by its index in the slides collection. slide = presentation.slides[0] # Remove the slide by reference. presentation.slides.remove(slide) # Save the modified presentation. presentation.save("output.pptx", slides.export.SaveFormat.PPTX) ``` ## **Remove a Slide by Index** If you know the slide’s position in the deck, delete it by its index. This is especially handy in loops or bulk operations where positions are known ahead of time. 1. Create an instance of the [Presentation](https://reference.aspose.com/slides/python-net/aspose.slides/presentation/) class. 1. Remove the slide by its index. 1. Save the modified presentation. This Python example shows how to remove a slide by index: ```python import aspose.slides as slides # Instantiate the Presentation class to open a presentation file. with slides.Presentation("sample.pptx") as presentation: # Remove the slide by its index. presentation.slides.remove_at(0) # Save the modified presentation. presentation.save("output.pptx", slides.export.SaveFormat.PPTX) ``` ## **Remove an Unused Layout Slide** Aspose.Slides provides the `remove_unused_layout_slides` method in the [Compress](https://reference.aspose.com/slides/python-net/aspose.slides.lowcode/compress/) class to delete unwanted, unused layout slides. The following Python example shows how to remove unused layout slides from a PowerPoint presentation: ```python import aspose.slides as slides with slides.Presentation("sample.pptx") as presentation: slides.lowcode.Compress.remove_unused_layout_slides(presentation) presentation.save("output.pptx", slides.export.SaveFormat.PPTX) ``` ## **Remove an Unused Master Slide** Aspose.Slides provides the `remove_unused_master_slides` method in the [Compress](https://reference.aspose.com/slides/python-net/aspose.slides.lowcode/compress/) class to delete unwanted, unused master slides. The following Python example shows how to remove unused master slides from a PowerPoint presentation: ```python import aspose.slides as slides with slides.Presentation("sample.pptx") as presentation: slides.lowcode.Compress.remove_unused_master_slides(presentation) presentation.save("output.pptx", slides.export.SaveFormat.PPTX) ``` ## **FAQ** ### What happens to slide indexes after I delete a slide? After deletion, the [collection](https://reference.aspose.com/slides/python-net/aspose.slides/slidecollection/) reindexes: every subsequent slide shifts left by one position, so previous index numbers become outdated. If you need a stable reference, use each slide’s persistent ID rather than its index. ### Is a slide’s ID different from its index, and does it change when neighboring slides are deleted? Yes. The index is the slide’s position and will change when slides are added or removed. The slide ID is a persistent identifier and does not change when other slides are deleted. ### How does deleting a slide affect slide sections? If the slide belonged to a section, that section will simply contain one fewer slide. The section structure remains; if a section becomes empty, you can [remove or reorganize sections](https://docs.aspose.com/slides/python-net/slide-section/) as needed. ### What happens to notes and comments attached to a slide when it’s deleted? [Notes](https://docs.aspose.com/slides/python-net/presentation-notes/) and [comments](https://docs.aspose.com/slides/python-net/presentation-comments/) are tied to that specific slide and are removed along with it. Content on other slides is unaffected. ### How is deleting slides different from cleaning up unused layouts/masters? Deleting removes specific normal slides from the deck. Cleaning up unused layouts/masters removes layout or master slides that nothing references, reducing file size without changing remaining slide content. These actions are complementary: typically delete first, then clean up. # Render Presentation Slides as SVG Images in Python > Export PowerPoint slides as SVG images in Python and control fonts, text, and images with Aspose.Slides. Source: https://docs.aspose.com/slides/python-net/render-a-slide-as-an-svg-image/ Updated: 2026-11-11 ## **Overview** SVG is a scalable XML-based image format that works well for web publishing, slide viewers, accessibility workflows, and automated post-processing. Aspose.Slides exports each slide to a separate SVG file and lets you control how text, fonts, pictures, and SVG elements are written. Use [SVGOptions](https://reference.aspose.com/slides/python-net/aspose.slides.export/svgoptions/) when the exported SVG must be compact, predictable across browsers, or ready for interactive use. ## **Export a Slide as SVG** Create a [Presentation](https://reference.aspose.com/slides/python-net/aspose.slides/presentation/), select a slide, and write it to a stream. The following example exports every slide in a presentation as a separate SVG file. ```py import aspose.slides as slides with slides.Presentation("presentation.pptx") as presentation: for slide in presentation.slides: with open("slide-{}.svg".format(slide.slide_number), "wb") as svg_stream: slide.write_as_svg(svg_stream) ``` The filename uses [Slide.slide_number](https://reference.aspose.com/slides/python-net/aspose.slides/slide/slide_number/) rather than the loop index. You can also export an individual shape with [Shape.write_as_svg](https://reference.aspose.com/slides/python-net/aspose.slides/shape/write_as_svg/) when a slide viewer or web page needs only that shape. ## **Configure SVG Output** [SVGOptions](https://reference.aspose.com/slides/python-net/aspose.slides.export/svgoptions/) controls SVG rendering. For text frames, [SVGOptions.use_frame_size](https://reference.aspose.com/slides/python-net/aspose.slides.export/svgoptions/use_frame_size/) includes the text frame in the rendering area, and [SVGOptions.use_frame_rotation](https://reference.aspose.com/slides/python-net/aspose.slides.export/svgoptions/use_frame_rotation/) determines whether the frame rotation is applied. Set [SVGOptions.disable_font_ligatures](https://reference.aspose.com/slides/python-net/aspose.slides.export/svgoptions/disable_font_ligatures/) to `True` when text must be rendered without ligatures. ```py import aspose.slides as slides with slides.Presentation("presentation.pptx") as presentation: svg_options = slides.export.SVGOptions() svg_options.disable_font_ligatures = True svg_options.use_frame_size = True svg_options.use_frame_rotation = False with open("slide-with-custom-options.svg", "wb") as svg_stream: presentation.slides[0].write_as_svg(svg_stream, svg_options) ``` ## **Control Line-End Cropping at Arrowheads** SVG 1.1 has no marker inset setting to specify where a line should stop beneath an arrowhead. By default, Aspose.Slides shortens the exported line so its stroke does not protrude through the marker. Set [SVGOptions.disable_line_end_cropping](https://reference.aspose.com/slides/python-net/aspose.slides.export/svgoptions/disable_line_end_cropping/) to `True` to draw the stroke all the way to the line's original endpoint. This setting affects only the SVG output. The line keeps its position and length on the slide. The example draws triangle and diamond arrowheads on lines 2 and 10 points wide. It exports the same slide twice, changing only the cropping option. ```py import aspose.pydrawing as drawing import aspose.slides as slides with slides.Presentation() as presentation: slide = presentation.slides[0] y = 40 for style in (slides.LineArrowheadStyle.TRIANGLE, slides.LineArrowheadStyle.DIAMOND): for width in (2, 10): line = slide.shapes.add_auto_shape(slides.ShapeType.LINE, 40, y, 200, 0) line_format = line.line_format line_format.fill_format.fill_type = slides.FillType.SOLID line_format.fill_format.solid_fill_color.color = drawing.Color.dark_blue line_format.width = width line_format.end_arrowhead_style = style y += 50 options = slides.export.SVGOptions() options.disable_line_end_cropping = False with open("cropped.svg", "wb") as cropped: slide.write_as_svg(cropped, options) options.disable_line_end_cropping = True with open("uncropped.svg", "wb") as uncropped: slide.write_as_svg(uncropped, options) ``` The comparison shows the triangular arrowhead on the 10-point line. With cropping enabled, the tip is sharp. With cropping disabled, the stroke protrudes through the sloping sides of the marker and leaves a flat end. ![Enlarged 10-point triangle with a sharp tip when cropping is enabled and a flat end when cropping is disabled](https://docs.aspose.com/slides/python-net/render-a-slide-as-an-svg-image/line-end-cropping.png) In the other lines from the example, the protruding stroke is less visible on the 2-point triangle. The filled diamond covers the end of the stroke at both widths. ## **Control Text and Fonts** When exporting slides to SVG, you can control whether text remains as text or is converted to vector graphics, and how external fonts are included or referenced. The following options help you balance visual consistency, text selection, and font dependencies in the exported SVG. ### **Vectorize All Text** Set [SVGOptions.vectorize_text](https://reference.aspose.com/slides/python-net/aspose.slides.export/svgoptions/vectorize_text/) to `True` to write all slide text as vector graphics. This eliminates font dependencies and makes the visual result more consistent across browsers, but the text is no longer selectable or searchable as SVG text. ```py import aspose.slides as slides with slides.Presentation("presentation.pptx") as presentation: svg_options = slides.export.SVGOptions() svg_options.vectorize_text = True with open("slide-with-vectorized-text.svg", "wb") as svg_stream: presentation.slides[0].write_as_svg(svg_stream, svg_options) ``` ### **Choose How External Fonts Are Handled** [SVGOptions.external_fonts_handling](https://reference.aspose.com/slides/python-net/aspose.slides.export/svgoptions/external_fonts_handling/) uses a [SvgExternalFontsHandling](https://reference.aspose.com/slides/python-net/aspose.slides.export/svgexternalfontshandling/) value for fonts that are loaded externally. Choose `ADD_LINKS_TO_FONT_FILES` to reference separate font files, `EMBED` to include font data in the SVG, or `VECTORIZE` to render only text that uses external fonts as graphics. Verify font licensing before embedding fonts. ```py import aspose.slides as slides with slides.Presentation("presentation.pptx") as presentation: linked_fonts_options = slides.export.SVGOptions() linked_fonts_options.external_fonts_handling = slides.export.SvgExternalFontsHandling.ADD_LINKS_TO_FONT_FILES with open("slide-with-font-links.svg", "wb") as linked_fonts_stream: presentation.slides[0].write_as_svg(linked_fonts_stream, linked_fonts_options) embedded_fonts_options = slides.export.SVGOptions() embedded_fonts_options.external_fonts_handling = slides.export.SvgExternalFontsHandling.EMBED with open("slide-with-embedded-fonts.svg", "wb") as embedded_fonts_stream: presentation.slides[0].write_as_svg(embedded_fonts_stream, embedded_fonts_options) vectorized_external_fonts_options = slides.export.SVGOptions() vectorized_external_fonts_options.external_fonts_handling = slides.export.SvgExternalFontsHandling.VECTORIZE with open("slide-with-vectorized-external-fonts.svg", "wb") as vectorized_external_fonts_stream: presentation.slides[0].write_as_svg(vectorized_external_fonts_stream, vectorized_external_fonts_options) ``` ## **Reduce Embedded Image Size** Use [SVGOptions.pictures_compression](https://reference.aspose.com/slides/python-net/aspose.slides.export/svgoptions/pictures_compression/) to reduce the resolution of embedded pictures, [SVGOptions.delete_pictures_cropped_areas](https://reference.aspose.com/slides/python-net/aspose.slides.export/svgoptions/delete_pictures_cropped_areas/) to omit cropped source areas, and [SVGOptions.jpeg_quality](https://reference.aspose.com/slides/python-net/aspose.slides.export/svgoptions/jpeg_quality/) to control JPEG encoding quality. These settings reduce file size at the cost of image fidelity or retained image data. ```py import aspose.slides as slides with slides.Presentation("presentation.pptx") as presentation: svg_options = slides.export.SVGOptions() svg_options.pictures_compression = slides.export.PicturesCompression.DPI150 svg_options.delete_pictures_cropped_areas = True svg_options.jpeg_quality = 80 with open("compressed-slide.svg", "wb") as svg_stream: presentation.slides[0].write_as_svg(svg_stream, svg_options) ``` ## **Control Metafile Rasterization Resolution** [SVGOptions.metafile_rasterization_dpi](https://reference.aspose.com/slides/python-net/aspose.slides.export/svgoptions/metafile_rasterization_dpi/) sets the lower resolution limit for rasterizing metafiles during SVG export. Use it to balance detail and file size when an EMF or WMF image is rasterized. It does not define a global DPI for the SVG or force every object on the slide to become a raster image. Download [metafile-rasterization.pptx](https://docs.aspose.com/slides/python-net/render-a-slide-as-an-svg-image/metafile-rasterization.pptx), which contains an EMF image with closely spaced diagonal lines. The following example exports its first slide at three rasterization resolutions through [Slide.write_as_svg](https://reference.aspose.com/slides/python-net/aspose.slides/slide/write_as_svg/). All other export settings remain identical so that the results can be compared. ```py import aspose.slides as slides with slides.Presentation("metafile-rasterization.pptx") as presentation: for dpi in (72, 150, 300): svg_options = slides.export.SVGOptions() svg_options.metafile_rasterization_dpi = dpi svg_options.pictures_compression = slides.export.PicturesCompression.DPI330 svg_options.jpeg_quality = 90 with open("slide-{}.svg".format(dpi), "wb") as svg_stream: presentation.slides[0].write_as_svg(svg_stream, svg_options) ``` In the output, the EMF became one embedded PNG in each SVG. The following measurements are for the supplied presentation; they are not a general formula for converting DPI to pixel dimensions. | Metafile rasterization DPI | Embedded PNG dimensions | SVG file size (bytes) | | --- | --- | --- | | 72 | 1196 × 596 | 170,221 | | 150 | 2492 × 1242 | 423,149 | | 300 | 4983 × 2483 | 1,027,169 | The comparison below shows the same area of the embedded raster at the same enlarged display size. The diagonal lines show visible pixelation at 72 DPI and smoother edges at higher resolutions, while the SVG file grows. Increasing the value does not necessarily improve every detail or change every exported image. ![Enlarged diagonal-line detail at 72, 150, and 300 DPI](https://docs.aspose.com/slides/python-net/render-a-slide-as-an-svg-image/metafile-rasterization-comparison.png) [SVGOptions.pictures_compression](https://reference.aspose.com/slides/python-net/aspose.slides.export/svgoptions/pictures_compression/) controls image resolution reduction and can mask the effect of changing the metafile rasterization resolution. [SVGOptions.jpeg_quality](https://reference.aspose.com/slides/python-net/aspose.slides.export/svgoptions/jpeg_quality/) controls JPEG encoding quality, not metafile rasterization resolution. ## **FAQ** **When should I use [SVGOptions.vectorize_text](https://reference.aspose.com/slides/python-net/aspose.slides.export/svgoptions/vectorize_text/) instead of [SvgExternalFontsHandling.VECTORIZE](https://reference.aspose.com/slides/python-net/aspose.slides.export/svgexternalfontshandling/)?** Use [SVGOptions.vectorize_text](https://reference.aspose.com/slides/python-net/aspose.slides.export/svgoptions/vectorize_text/) when all text must be independent of fonts. Use [SvgExternalFontsHandling.VECTORIZE](https://reference.aspose.com/slides/python-net/aspose.slides.export/svgexternalfontshandling/) when only text that uses external fonts should be converted to graphics. **What is the best way to make an SVG smaller?** Start by compressing embedded pictures, deleting cropped image areas, and choosing linked font files when the target environment can serve them. Test the result because lower image resolution, lower JPEG quality, and vectorized text each have different quality and size tradeoffs. # Render Presentations with Fallback Fonts in Python > Render presentations with fallback fonts in Aspose.Slides for Python via .NET – keep text consistent across PPT, PPTX and ODP with step-by-step code samples. Source: https://docs.aspose.com/slides/python-net/render-presentation-with-fallback-font/ Updated: 2026-08-13 ## **Overview** Aspose.Slides allows you to render presentations using fallback font rules. This article shows how to create a fallback font rules collection, modify its rules by removing or adding fallback fonts, and assign the collection to the `FontsManager.font_fall_back_rules_collection` property. Once the fallback font rules collection is assigned to the presentation's `fonts_manager`, the rules are applied during operations such as saving, rendering, and converting the presentation. The example demonstrates how to use the configured rules when rendering a slide thumbnail and saving it as a PNG image. ## **Render a Slide Using Fallback Font Rules** The following example includes these steps: 1. We [create fallback font rules collection](https://docs.aspose.com/slides/python-net/create-fallback-fonts-collection/). 1. [Remove](https://reference.aspose.com/slides/python-net/aspose.slides/fontfallbackrule/remove/) a fallback font rule and [add_fall_back_fonts](https://reference.aspose.com/slides/python-net/aspose.slides/fontfallbackrule/add_fall_back_fonts/) to another rule. 1. Set rules collection to [FontsManager.font_fall_back_rules_collection](https://reference.aspose.com/slides/python-net/aspose.slides/fontsmanager/font_fall_back_rules_collection/) property. 1. With [Presentation.save()](https://reference.aspose.com/slides/python-net/aspose.slides/presentation/) method we can save presentation in the same format, or save it in another one. After fallback font rules collection is set to FontsManager, these rules are applied during any operations over the presentation: save, render, convert, etc. ```py import aspose.slides as slides # Create new instance of a rules collection rulesList = slides.FontFallBackRulesCollection() # create a number of rules rulesList.add(slides.FontFallBackRule(0x0B80, 0x0BFF, "Vijaya")) rulesList.add(slides.FontFallBackRule(0x3040, 0x309F, "MS Mincho, MS Gothic")) for fallBackRule in rulesList: #Trying to remove FallBack font "Tahoma" from loaded rules fallBackRule.remove("Tahoma") #And to update of rules for specified range if fallBackRule.range_end_index >= 0x4000 and fallBackRule.range_start_index < 0x5000: fallBackRule.add_fall_back_fonts("Verdana") #Also we can remove any existing rules from list if len(rulesList) > 0: rulesList.remove(rulesList[0]) with slides.Presentation("input.pptx") as pres: #Assigning a prepared rules list for using pres.fonts_manager.font_fall_back_rules_collection = rulesList # Rendering of thumbnail with using of initialized rules collection and saving to PNG with pres.slides[0].get_image(1, 1) as img: img.save("Slide_0.png", slides.ImageFormat.PNG) ``` Read more about how to [Convert PowerPoint Slides to PNG in Python](https://docs.aspose.com/slides/python-net/convert-powerpoint-to-png/). ## Related articles - [Configure Fallback Font Collections in Python](https://docs.aspose.com/slides/python-net/create-fallback-fonts-collection/) - [Manage Fallback Fonts for Presentations in Python](https://docs.aspose.com/slides/python-net/fallback-font/) - [Specify Fallback Fonts for Presentations in Python](https://docs.aspose.com/slides/python-net/create-fallback-font/) # Resize Shapes on Presentation Slides in Python > Easily resize shapes on PowerPoint and OpenDocument slides with Aspose.Slides for Python via .NET—automate slide layout adjustments and boost productivity. Source: https://docs.aspose.com/slides/python-net/resizing-shapes-on-slide/ Updated: 2026-11-08 ## **Overview** When you change a presentation's slide size, you may also need to resize and reposition its shapes to fit the new dimensions. This article shows how to scale shapes manually and how to handle tables on slides, masters, and layouts. ## **Resize Shapes** To preserve each shape's relative position and size, multiply its horizontal coordinates and width by the ratio of the new slide width to the original width. Apply the corresponding height ratio to its vertical coordinates and height. The first example loads a presentation whose slides contain no tables, changes the slide size to A4, and saves the result. It uses [SlideSize.set_size](https://reference.aspose.com/slides/python-net/aspose.slides/slidesize/set_size/) with [SlideSizeScaleType.DO_NOT_SCALE](https://reference.aspose.com/slides/python-net/aspose.slides/slidesizescaletype/) so that the subsequent loop controls the scaling. The ratios are unitless; shape positions and dimensions are measured in points. Different width and height ratios can distort shapes, and changing a shape's dimensions does not scale its font sizes. ```python import aspose.slides as slides with slides.Presentation("sample.pptx") as presentation: # Calculate independent horizontal and vertical scale factors. original_size = presentation.slide_size.size presentation.slide_size.set_size(slides.SlideSizeType.A4_PAPER, slides.SlideSizeScaleType.DO_NOT_SCALE) target_size = presentation.slide_size.size width_ratio = target_size.width / original_size.width height_ratio = target_size.height / original_size.height for slide in presentation.slides: for shape in slide.shapes: shape.width *= width_ratio shape.height *= height_ratio shape.x *= width_ratio shape.y *= height_ratio presentation.save("output.pptx", slides.export.SaveFormat.PPTX) ``` Tables require separate handling: scale their column widths and row heights instead of assigning the table's overall width and height. Row heights may remain larger than requested if the cell content requires more space. The second example supports tables and processes shapes on masters and layouts as well as individual slides before saving the resized presentation. Its helper handles each [Table](https://reference.aspose.com/slides/python-net/aspose.slides/table/) by scaling [Column.width](https://reference.aspose.com/slides/python-net/aspose.slides/column/width/) and [Row.minimal_height](https://reference.aspose.com/slides/python-net/aspose.slides/row/minimal_height/). It then scales the table's position without separately scaling its overall dimensions. ```python import aspose.slides as slides def resize_shapes(shapes, width_ratio, height_ratio): for shape in shapes: if isinstance(shape, slides.Table): # Table dimensions are controlled by column widths and row heights. for column in shape.columns: column.width *= width_ratio for row in shape.rows: row.minimal_height *= height_ratio else: shape.width *= width_ratio shape.height *= height_ratio shape.x *= width_ratio shape.y *= height_ratio with slides.Presentation("sample.pptx") as presentation: # Calculate independent horizontal and vertical scale factors. original_size = presentation.slide_size.size presentation.slide_size.set_size(slides.SlideSizeType.A4_PAPER, slides.SlideSizeScaleType.DO_NOT_SCALE) target_size = presentation.slide_size.size width_ratio = target_size.width / original_size.width height_ratio = target_size.height / original_size.height # Resize shapes defined on masters and layouts as well as individual slides. for master in presentation.masters: resize_shapes(master.shapes, width_ratio, height_ratio) for layout_slide in master.layout_slides: resize_shapes(layout_slide.shapes, width_ratio, height_ratio) for slide in presentation.slides: resize_shapes(slide.shapes, width_ratio, height_ratio) presentation.save("output.pptx", slides.export.SaveFormat.PPTX) ``` [![Before and after A4 resizing, the shape and table move and resize. Column widths and minimum row heights increase, while font sizes stay fixed.](https://docs.aspose.com/slides/python-net/resizing-shapes-on-slide/visual-resizing-shapes-on-slide-068c15ee95ae.svg)](https://docs.aspose.com/slides/python-net/resizing-shapes-on-slide/visual-resizing-shapes-on-slide-068c15ee95ae.svg) *In this table-aware resize, the width ratio scales X, shape width and column widths. The height ratio scales Y, shape height and minimum row heights. Font sizes stay fixed.* ## **FAQ** **Why are shapes distorted or cut off after resizing a slide?** If you change the slide size without scaling the shapes, they keep their original positions and dimensions and may extend beyond the slide. Scaling width and height by different ratios can also distort shapes. **Does the provided code work for all shape types?** The first example changes shape bounds directly and is intended for slides without tables. The second example handles tables separately. Check the resulting layout, particularly text and tables, because these examples do not scale font sizes and table content can constrain row heights. **How do I resize tables when resizing a slide?** Scale column widths by the width ratio and minimum row heights by the height ratio, then scale the table's position, as shown in the second example. **Will this resizing work for master slides and layout slides?** Yes. The second example iterates through [Presentation.masters](https://reference.aspose.com/slides/python-net/aspose.slides/presentation/masters/) and each master's [MasterSlide.layout_slides](https://reference.aspose.com/slides/python-net/aspose.slides/masterslide/layout_slides/) and applies the same resizing logic to their shapes. **Can I change the orientation of a slide (portrait/landscape) along with the resizing?** Yes. Set [SlideSize.orientation](https://reference.aspose.com/slides/python-net/aspose.slides/slidesize/orientation/) after changing the slide size and before reading the target dimensions, so the scale factors reflect the final orientation. **Is there a limit to the slide size I can set?** You can specify custom slide dimensions with [SlideSize.set_size](https://reference.aspose.com/slides/python-net/aspose.slides/slidesize/set_size/). The supported dimensions also depend on the presentation format and the application used to open the file. **How can I prevent shapes with a fixed aspect ratio from becoming distorted?** Use the same scale factor for width and height. To fit the original layout within the new slide dimensions, use the smaller of the width and height ratios for both dimensions and positions. This preserves proportions but may leave unused space along one edge. # Save Presentations in Python > Save PowerPoint and OpenDocument presentations to files or streams in Python with Aspose.Slides, and configure PPTX output options. Source: https://docs.aspose.com/slides/python-net/save-presentation/ Updated: 2026-09-22 ## **Overview** After you create a presentation or [open an existing one](https://docs.aspose.com/slides/python-net/open-presentation/), use the [Presentation.save](https://reference.aspose.com/slides/python-net/aspose.slides/ipresentation/save/) method to write the result. Aspose.Slides for Python via .NET can save a presentation to a file or stream in PowerPoint, OpenDocument, PDF, and other formats. The following sections cover the standard save operations and the options available for PPTX output. ## **Save Presentations to Files** To save a presentation to a file, pass the output path and a [SaveFormat](https://reference.aspose.com/slides/python-net/aspose.slides.export/saveformat/) value to the [Presentation.save](https://reference.aspose.com/slides/python-net/aspose.slides/ipresentation/save/) method. The format value determines the type of file that Aspose.Slides creates. The following example creates a presentation and saves it as a PPTX file: ```py import aspose.slides as slides with slides.Presentation() as presentation: # Add or modify presentation content here. presentation.save("Output.pptx", slides.export.SaveFormat.PPTX) ``` ## **Save Presentations in Their Original Format** For file and stream detection examples, the behavior of newly created presentations, and the distinction between source and output formats, see [Determine the Original Presentation Format](https://docs.aspose.com/slides/python-net/detect-presentation-source-format/). In a batch-processing application, the input format may not be known in advance. After loading a file, read its original format from the [Presentation.source_format](https://reference.aspose.com/slides/python-net/aspose.slides/presentation/source_format/) property. Pass the resulting [SourceFormat](https://reference.aspose.com/slides/python-net/aspose.slides/sourceformat/) value to [SlideUtil.to_save_format](https://reference.aspose.com/slides/python-net/aspose.slides.util/slideutil/to_save_format/) to obtain the corresponding [SaveFormat](https://reference.aspose.com/slides/python-net/aspose.slides.export/saveformat/) value, and then use [Presentation.save](https://reference.aspose.com/slides/python-net/aspose.slides/ipresentation/save/) to write the modified presentation. The following complete example processes every file in an input directory, updates its title, and saves it to an output directory in the format from which it was loaded: ```py from pathlib import Path import aspose.slides as slides from aspose.slides.util import SlideUtil input_directory = Path("Input") output_directory = Path("Output") output_directory.mkdir(exist_ok=True) for input_path in input_directory.iterdir(): if not input_path.is_file(): continue try: with slides.Presentation(str(input_path)) as presentation: source_format = presentation.source_format save_format = SlideUtil.to_save_format(source_format) presentation.document_properties.title = "Processed by the batch application" output_path = output_directory / input_path.name presentation.save(str(output_path), save_format) except Exception as exception: print(f"Cannot process '{input_path}': {exception}") ``` [SlideUtil.to_save_format](https://reference.aspose.com/slides/python-net/aspose.slides.util/slideutil/to_save_format/) maps PPT, PPTX, ODP, PPTM, PPSX, PPSM, POTX, POTM, PPS, POT, OTP, FODP, and PowerPoint XML to their corresponding presentation save formats. It maps presentation source formats only; it is not intended to select export formats such as PDF, HTML, TIFF, or images. Passing an unsupported or invalid [SourceFormat](https://reference.aspose.com/slides/python-net/aspose.slides/sourceformat/) value raises an exception. Legacy PPT, PPS, and POT files use the same binary container. When such a presentation is loaded from a stream without a file extension, a PPS or POT file may therefore be identified as PPT. If preserving these legacy subtypes is required, retain the original filename or format metadata separately and use it when choosing the output filename and format. ## **Save Presentations to Streams** To write a presentation without relying on a final file path, pass a writable [BinaryIO](https://docs.python.org/3/library/typing.html#typing.BinaryIO) stream and a [SaveFormat](https://reference.aspose.com/slides/python-net/aspose.slides.export/saveformat/) value to the [Presentation.save](https://reference.aspose.com/slides/python-net/aspose.slides/ipresentation/save/) method. This approach is useful when the output must be returned from a web service, stored in a database, or processed in memory. The following example saves a new presentation to a file stream: ```py import aspose.slides as slides with slides.Presentation() as presentation: with open("Output.pptx", "wb") as output_stream: presentation.save(output_stream, slides.export.SaveFormat.PPTX) ``` ## **Save Presentations with a Predefined View Type** You can specify the view in which PowerPoint initially opens a saved presentation. Set the [ViewProperties.last_view](https://reference.aspose.com/slides/python-net/aspose.slides/viewproperties/last_view/) property to a [ViewType](https://reference.aspose.com/slides/python-net/aspose.slides/viewtype/) value before saving. The following example configures Slide Master view as the initial view: ```py import aspose.slides as slides with slides.Presentation() as presentation: presentation.view_properties.last_view = slides.ViewType.SLIDE_MASTER_VIEW presentation.save("SlideMasterView.pptx", slides.export.SaveFormat.PPTX) ``` ## **Save Presentations in the Strict Office Open XML Format** To create a PPTX file that conforms to the Strict profile of Office Open XML, create a [PptxOptions](https://reference.aspose.com/slides/python-net/aspose.slides.export/pptxoptions/) instance and set its [conformance](https://reference.aspose.com/slides/python-net/aspose.slides.export/pptxoptions/conformance/) property to `Conformance.ISO_29500_2008_STRICT`. Then pass the options to the [Presentation.save](https://reference.aspose.com/slides/python-net/aspose.slides/ipresentation/save/) method. ```py import aspose.slides as slides options = slides.export.PptxOptions() options.conformance = slides.export.Conformance.ISO_29500_2008_STRICT with slides.Presentation() as presentation: presentation.save("StrictOfficeOpenXml.pptx", slides.export.SaveFormat.PPTX, options) ``` ## **Save Presentations in Office Open XML Format in Zip64 Mode** A standard ZIP archive limits the compressed and uncompressed size of each entry, the total archive size, and the number of entries. Because a PPTX file is a ZIP archive, a very large presentation can exceed those limits. ZIP64 extensions raise the applicable size and entry-count limits. Use the [PptxOptions.zip_64_mode](https://reference.aspose.com/slides/python-net/aspose.slides.export/pptxoptions/zip_64_mode/) property to control whether Aspose.Slides writes ZIP64 extensions: - `IF_NECESSARY` uses ZIP64 only when the presentation exceeds standard ZIP limits. This is the default mode. - `NEVER` disables ZIP64 extensions. - `ALWAYS` always writes ZIP64 extensions. The following example always enables ZIP64 extensions for the output presentation: ```py import aspose.slides as slides with slides.Presentation("Sample.pptx") as presentation: options = slides.export.PptxOptions() options.zip_64_mode = slides.export.Zip64Mode.ALWAYS presentation.save("OutputZip64.pptx", slides.export.SaveFormat.PPTX, options) ``` If `Zip64Mode.NEVER` is used and the presentation cannot fit within standard ZIP limits, the save operation raises a [PptxException](https://reference.aspose.com/slides/python-net/aspose.slides/pptxexception/). ## **Save Presentations in Office Open XML Format with Compression Levels** For PPTX output, you can balance saving speed against file size by setting the [PptxOptions.compression_level](https://reference.aspose.com/slides/python-net/aspose.slides.export/pptxoptions/compression_level/) property. The [CompressionLevel](https://reference.aspose.com/slides/python-net/aspose.slides.export/compressionlevel/) enumeration provides these values: - `NONE` stores data without compression. - `LEVEL1` provides the fastest compression and the largest compressed output. - `LEVEL2` through `LEVEL5` progressively favor smaller output over saving speed. - `LEVEL6` balances saving speed and file size. This is the default level. - `LEVEL7` and `LEVEL8` further favor smaller output over saving speed. - `LEVEL9` provides the strongest compression and requires the most processing time. The following example saves a presentation without compression: ```py import aspose.slides as slides with slides.Presentation("Sample.pptx") as presentation: options = slides.export.PptxOptions() options.compression_level = slides.export.CompressionLevel.NONE presentation.save("OutputNoCompression.pptx", slides.export.SaveFormat.PPTX, options) ``` The following example uses the maximum compression level: ```py import aspose.slides as slides with slides.Presentation("Sample.pptx") as presentation: options = slides.export.PptxOptions() options.compression_level = slides.export.CompressionLevel.LEVEL9 presentation.save("OutputMaximumCompression.pptx", slides.export.SaveFormat.PPTX, options) ``` ## **Save Presentations without Refreshing the Thumbnail** When a presentation is saved as PPTX, the [PptxOptions.refresh_thumbnail](https://reference.aspose.com/slides/python-net/aspose.slides.export/pptxoptions/refresh_thumbnail/) property controls its document thumbnail: - `True` regenerates the thumbnail during the save operation. This is the default value. - `False` preserves the existing thumbnail. If the presentation has no thumbnail, Aspose.Slides does not generate one. The following example saves a presentation without refreshing its thumbnail: ```py import aspose.slides as slides with slides.Presentation("Sample.pptx") as presentation: options = slides.export.PptxOptions() options.refresh_thumbnail = False presentation.save("Output.pptx", slides.export.SaveFormat.PPTX, options) ``` Disabling thumbnail refresh can reduce the time required to save a PPTX file. Aspose provides a free [PowerPoint Splitter](https://products.aspose.app/slides/splitter) built with the Aspose.Slides API. It saves selected slides from a presentation as separate PPT or PPTX files. ## **FAQ** **Does Aspose.Slides support incremental or “fast save”?** No. Each save operation writes a complete output file rather than updating only the changed parts. **Can multiple threads save the same Presentation instance?** No. A [Presentation](https://reference.aspose.com/slides/python-net/aspose.slides/presentation/) instance [is not thread-safe](https://docs.aspose.com/slides/python-net/multithreading/). Access and save each instance from only one thread at a time. **What happens to hyperlinks and externally linked files when I save a presentation?** [Hyperlinks](https://docs.aspose.com/slides/python-net/manage-hyperlinks/) remain in the presentation. Aspose.Slides does not copy externally linked files, so the saved presentation must still be able to access their locations. **Can I save document metadata such as the author, title, company, and creation date?** Yes. Set the appropriate [document properties](https://docs.aspose.com/slides/python-net/presentation-properties/) before saving, and Aspose.Slides writes them to the output file. # Manage Script-Specific Theme Fonts in Python > Inspect, add, replace, and remove script-specific font mappings in PowerPoint themes with Aspose.Slides for Python via .NET. Source: https://docs.aspose.com/slides/python-net/script-specific-font-mappings/ Updated: 2026-08-25 ## **Overview** A presentation theme can select different font families for different writing systems. This allows multilingual text that still uses theme fonts to follow one coordinated font scheme while using suitable fonts for Cyrillic, Arabic, Japanese, Georgian, Thaana, and other scripts. The theme's [FontScheme](https://reference.aspose.com/slides/python-net/aspose.slides.theme/fontscheme/) contains a major font collection, typically used for headings, and a minor font collection, typically used for body text. In addition to their Latin and East Asian font properties, both collections expose mappings from writing-system tags to font family names through the [Fonts](https://reference.aspose.com/slides/python-net/aspose.slides/fonts/) class. This article shows how to inspect and modify those mappings in the presentation's master theme and verify that the changes survive a save-and-reload cycle. ## **Understand Script Tags** The script font methods use four-letter BCP 47 script subtags to identify writing systems. Common values include: | Script tag | Writing system | |---|---| | `Cyrl` | Cyrillic | | `Arab` | Arabic | | `Hans` | Simplified Chinese | | `Jpan` | Japanese | | `Geor` | Georgian | | `Thaa` | Thaana | These mappings belong to the theme font scheme, not to individual text portions. A presentation may define different mappings for the major and minor collections, and it may omit mappings for some scripts. ## **Access and Inspect Script Font Mappings** Use [Presentation.master_theme](https://reference.aspose.com/slides/python-net/aspose.slides/presentation/master_theme/) to access the presentation-level theme. The [FontScheme.major](https://reference.aspose.com/slides/python-net/aspose.slides.theme/fontscheme/major/) and [FontScheme.minor](https://reference.aspose.com/slides/python-net/aspose.slides.theme/fontscheme/minor/) properties return the two [Fonts](https://reference.aspose.com/slides/python-net/aspose.slides/fonts/) collections. Call [Fonts.get_script_font_map](https://reference.aspose.com/slides/python-net/aspose.slides/fonts/get_script_font_map/) to retrieve all mappings from a collection. To look up one writing system, call [Fonts.get_script_font](https://reference.aspose.com/slides/python-net/aspose.slides/fonts/get_script_font/) with its script tag. `get_script_font` returns `None` when that collection does not define the requested mapping. ## **Modify Mappings and Verify Persistence** Use [Fonts.set_script_font](https://reference.aspose.com/slides/python-net/aspose.slides/fonts/set_script_font/) to create a mapping or replace its current font family. Use [Fonts.remove_script_font](https://reference.aspose.com/slides/python-net/aspose.slides/fonts/remove_script_font/) to remove a mapping. The following end-to-end example reads all existing major and minor mappings, looks up the Japanese major font, changes the Cyrillic major font, removes the Thaana minor mapping, saves the presentation, and reopens it to verify both changes. To make the removal step independent of the initial theme, the example first creates a Thaana mapping only when one is not already defined. ```python import aspose.slides as slides def print_script_font_map(label, fonts): print(label) for mapping in fonts.get_script_font_map(): print(f" {mapping.key}: {mapping.value}") with slides.Presentation() as presentation: font_scheme = presentation.master_theme.font_scheme major_fonts = font_scheme.major minor_fonts = font_scheme.minor print_script_font_map("Existing major mappings:", major_fonts) print_script_font_map("Existing minor mappings:", minor_fonts) japanese_font = major_fonts.get_script_font("Jpan") if japanese_font is None: print("No major Japanese font is defined.") else: print(f"Major Japanese font: {japanese_font}") major_fonts.set_script_font("Cyrl", "Arial") if minor_fonts.get_script_font("Thaa") is None: minor_fonts.set_script_font("Thaa", "Arial") minor_fonts.remove_script_font("Thaa") presentation.save("script-font-mappings.pptx", slides.export.SaveFormat.PPTX) with slides.Presentation("script-font-mappings.pptx") as saved_presentation: saved_major_fonts = saved_presentation.master_theme.font_scheme.major saved_minor_fonts = saved_presentation.master_theme.font_scheme.minor saved_cyrillic_font = saved_major_fonts.get_script_font("Cyrl") saved_thaana_font = saved_minor_fonts.get_script_font("Thaa") if saved_cyrillic_font == "Arial": print("The Cyrillic mapping was preserved.") else: print("The Cyrillic mapping was not preserved.") if saved_thaana_font is None: print("The Thaana mapping removal was preserved.") else: print("The Thaana mapping still exists.") ``` The verification uses the same `None` behavior as an ordinary lookup: after the removal is saved, `get_script_font("Thaa")` returns `None` for the minor collection. ## **Distinguish Theme Mappings from Other Font Settings** Script-specific theme mappings participate in font selection, but they solve a different problem from direct text formatting, substitution, and fallback: | Mechanism | Purpose | Effect of changing a theme mapping | |---|---|---| | Script-specific theme font mapping | Selects a major or minor theme font for a writing system. | Text that still uses the corresponding theme font can resolve to the new mapped family. | | Font assigned explicitly to a text portion | Fixes the requested font family on that portion instead of relying on the theme. | The portion may remain unchanged because its direct formatting overrides the theme choice. | | Font substitution | Replaces a requested font when that font is unavailable or when a substitution rule applies. | It acts after a font has been requested; it does not redefine the theme's script mapping. | | Font fallback | Supplies glyphs that the selected font does not contain, often for specific Unicode ranges. | It fills missing glyph coverage; it does not change the stored theme mapping. | For more information about the last two mechanisms, see [Font Substitution](https://docs.aspose.com/slides/python-net/font-substitution/) and [Fallback Fonts](https://docs.aspose.com/slides/python-net/fallback-font/). Changing a mapping in [Presentation.master_theme](https://reference.aspose.com/slides/python-net/aspose.slides/presentation/master_theme/) affects only content whose effective formatting still depends on that theme. Text can instead inherit a theme override from a master, layout, or slide, or use an explicitly assigned font. Inspect those levels when the visible result does not follow the presentation-level mapping. ## **Make Mapped Fonts Available and Validate the Result** A script mapping stores a font family name; it does not install or load the corresponding font file. For consistent rendering and export, every mapped font must be installed in the environment or supplied to Aspose.Slides through a custom source such as [FontsLoader.load_external_fonts](https://reference.aspose.com/slides/python-net/aspose.slides/fontsloader/load_external_fonts/) or [LoadOptions.document_level_font_sources](https://reference.aspose.com/slides/python-net/aspose.slides/loadoptions/document_level_font_sources/). See [Custom Fonts](https://docs.aspose.com/slides/python-net/custom-font/) for the available loading options. Verifying the saved mapping confirms only that the theme definition was preserved. It does not prove that the font is available, contains all required glyphs, or produces the intended layout. Render representative text for every required writing system to an image or PDF and inspect the output. This catches missing fonts, incomplete glyph coverage, fallback behavior, and layout changes before the presentation is distributed. See [Convert PowerPoint Presentations](https://docs.aspose.com/slides/python-net/convert-powerpoint/) for rendering and export examples. ## **FAQ** **What does `get_script_font` return when a script is not mapped?** [Fonts.get_script_font](https://reference.aspose.com/slides/python-net/aspose.slides/fonts/get_script_font/) returns `None` when the requested script mapping is not defined in that major or minor font collection. **Does `set_script_font` add a second mapping when the script already exists?** No. [Fonts.set_script_font](https://reference.aspose.com/slides/python-net/aspose.slides/fonts/set_script_font/) creates the mapping when it is missing and replaces the mapped font family when the same script tag is already present. **Why did changing a theme mapping not change some text?** The text may have an explicitly assigned font, inherit a different theme through an override, or be affected by substitution or fallback during rendering. A presentation-level script mapping controls only text whose effective formatting still refers to that theme font collection. **Is saving and reopening enough to validate multilingual output?** No. Reopening verifies persistence of the theme data. Also render representative text from each required writing system to confirm that the mapped fonts are available and contain the necessary glyphs. # Search and Replace Text in PowerPoint Presentations in Python > Search, highlight, and replace text in PowerPoint presentations with Aspose.Slides for Python via .NET. Source: https://docs.aspose.com/slides/python-net/search-and-replace-text/ Updated: 2026-08-27 ## **Overview** Aspose.Slides for Python via .NET can search, highlight, and replace text in an individual text frame or across an entire presentation. These capabilities are useful for review, redaction, terminology checks, template cleanup, and other automated document-processing workflows. In the first examples below, we use a file named "sample.pptx", which contains a single text box on the first slide with the following text: ![Sample text](https://docs.aspose.com/slides/python-net/search-and-replace-text/sample_text.png) ## **Choose the Search Scope** Use methods on [TextFrame](https://reference.aspose.com/slides/python-net/aspose.slides/textframe/) to limit an operation to one text frame. Use methods on [Presentation](https://reference.aspose.com/slides/python-net/aspose.slides/presentation/) to process all applicable text in the presentation. | Operation | One text frame | Entire presentation | |---|---|---| | Highlight literal text | [TextFrame.highlight_text](https://reference.aspose.com/slides/python-net/aspose.slides/textframe/highlight_text/) | [Presentation.highlight_text](https://reference.aspose.com/slides/python-net/aspose.slides/presentation/highlight_text/) | | Highlight regular-expression matches | [TextFrame.highlight_regex](https://reference.aspose.com/slides/python-net/aspose.slides/textframe/highlight_regex/) | [Presentation.highlight_regex](https://reference.aspose.com/slides/python-net/aspose.slides/presentation/highlight_regex/) | | Replace literal text | [TextFrame.replace_text](https://reference.aspose.com/slides/python-net/aspose.slides/textframe/replace_text/) | [Presentation.replace_text](https://reference.aspose.com/slides/python-net/aspose.slides/presentation/replace_text/) | | Replace regular-expression matches | [TextFrame.replace_regex](https://reference.aspose.com/slides/python-net/aspose.slides/textframe/replace_regex/) | [Presentation.replace_regex](https://reference.aspose.com/slides/python-net/aspose.slides/presentation/replace_regex/) | ## **Configure Text Matching** For literal-text operations, use [TextSearchOptions](https://reference.aspose.com/slides/python-net/aspose.slides/textsearchoptions/) to control matching: - [TextSearchOptions.whole_words_only](https://reference.aspose.com/slides/python-net/aspose.slides/textsearchoptions/whole_words_only/) limits matches to complete words. - [TextSearchOptions.case_sensitive](https://reference.aspose.com/slides/python-net/aspose.slides/textsearchoptions/case_sensitive/) controls whether character case must match. - [TextSearchOptions.include_notes](https://reference.aspose.com/slides/python-net/aspose.slides/textsearchoptions/include_notes/) includes slide notes in presentation-level search, replacement, and highlighting operations. Regular-expression operations use a pattern string, so matching rules such as case sensitivity and word boundaries are defined by the expression. ## **Identify the Owner of a Text Frame** Generic text-processing workflows often receive a [TextFrame](https://reference.aspose.com/slides/python-net/aspose.slides/textframe/) while searching, replacing, validating, or exporting text. Use [TextFrame.parent_shape](https://reference.aspose.com/slides/python-net/aspose.slides/textframe/parent_shape/) and [TextFrame.parent_cell](https://reference.aspose.com/slides/python-net/aspose.slides/textframe/parent_cell/) to determine which presentation object owns the text frame. The expected values depend on the owner: | Text frame owner | `parent_shape` | `parent_cell` | |---|---|---| | An AutoShape or another text-containing shape | The owning [Shape](https://reference.aspose.com/slides/python-net/aspose.slides/shape/) | `None` | | A table cell | `None` | The owning [Cell](https://reference.aspose.com/slides/python-net/aspose.slides/cell/) | Both properties are read-only navigation properties. Reading them does not move the text frame or change its owner. Generic code should check both values for `None` and handle the possibility that neither owner is available. The following example uses [SlideUtil.get_all_text_frames](https://reference.aspose.com/slides/python-net/aspose.slides.util/slideutil/get_all_text_frames/) to iterate through the text frames in a presentation. For shapes, it reports the shape name, Python runtime type, and containing slide. For table cells, it reports the zero-based column and row coordinates and the containing slide. ```python import aspose.slides as slides def get_slide_label(base_slide): if isinstance(base_slide, slides.Slide): return f"slide {base_slide.slide_number}" if isinstance(base_slide, slides.NotesSlide): return f"notes for slide {base_slide.parent_slide.slide_number}" return type(base_slide).__name__ with slides.Presentation("presentation.pptx") as presentation: text_frames = slides.util.SlideUtil.get_all_text_frames(presentation, False) for text_frame in text_frames: owner_shape = text_frame.parent_shape if owner_shape is not None: shape_name = owner_shape.name or "(unnamed)" shape_type = type(owner_shape).__name__ slide_label = get_slide_label(owner_shape.slide) print(f"Shape: {shape_name}; type: {shape_type}; {slide_label}") continue owner_cell = text_frame.parent_cell if owner_cell is not None: slide_label = get_slide_label(owner_cell.slide) print(f"Table cell: column {owner_cell.first_column_index}, row {owner_cell.first_row_index}; {slide_label}") continue print("The text frame owner is not available as a shape or table cell.") ``` For SmartArt content, iterate through the shapes in [SmartArtNode.shapes](https://reference.aspose.com/slides/python-net/aspose.slides.smartart/smartartnode/shapes/) and access each [ISmartArtShape.text_frame](https://reference.aspose.com/slides/python-net/aspose.slides.smartart/ismartartshape/text_frame/). The text frame can be traced to its associated shape through [TextFrame.parent_shape](https://reference.aspose.com/slides/python-net/aspose.slides/textframe/parent_shape/), while [TextFrame.parent_cell](https://reference.aspose.com/slides/python-net/aspose.slides/textframe/parent_cell/) is `None`. Therefore, the shape branch in the example also handles text from SmartArt nodes. ## **Highlight Text** Use the [TextFrame.highlight_text](https://reference.aspose.com/slides/python-net/aspose.slides/textframe/highlight_text/) method to highlight literal-text matches in a text frame. Pass [TextSearchOptions](https://reference.aspose.com/slides/python-net/aspose.slides/textsearchoptions/) to control the search. The code example below highlights all occurrences of the characters **"try"** and then highlights only the complete word **"to"**. ```python import aspose.pydrawing as draw import aspose.slides as slides with slides.Presentation("sample.pptx") as presentation: slide = presentation.slides[0] shape = slide.shapes[0] substring_search_options = slides.TextSearchOptions() substring_search_options.case_sensitive = False # Highlight every occurrence of "try" in the text frame. shape.text_frame.highlight_text( "try", draw.Color.light_blue, substring_search_options, None ) whole_word_search_options = slides.TextSearchOptions() whole_word_search_options.whole_words_only = True whole_word_search_options.case_sensitive = False # Highlight only the complete word "to". shape.text_frame.highlight_text( "to", draw.Color.violet, whole_word_search_options, None ) presentation.save("highlighted_text.pptx", slides.export.SaveFormat.PPTX) ``` The result: ![The highlighted text](https://docs.aspose.com/slides/python-net/search-and-replace-text/highlighted_text.png) ## **Highlight Text Using Regular Expressions** The [TextFrame.highlight_regex](https://reference.aspose.com/slides/python-net/aspose.slides/textframe/highlight_regex/) method highlights text matches found by a regular expression in a text frame. The following code highlights all words containing seven or more characters: ```python import aspose.pydrawing as draw import aspose.slides as slides with slides.Presentation("sample.pptx") as presentation: slide = presentation.slides[0] shape = slide.shapes[0] word_pattern = r"\b[^\s]{7,}\b" shape.text_frame.highlight_regex(word_pattern, draw.Color.yellow, None) presentation.save( "highlighted_text_using_regex.pptx", slides.export.SaveFormat.PPTX ) ``` The result: ![The highlighted text using the regular expression](https://docs.aspose.com/slides/python-net/search-and-replace-text/highlighted_text_using_regex.png) ## **Highlight Text Across a Presentation** Use [Presentation.highlight_text](https://reference.aspose.com/slides/python-net/aspose.slides/presentation/highlight_text/) and [Presentation.highlight_regex](https://reference.aspose.com/slides/python-net/aspose.slides/presentation/highlight_regex/) to search all applicable text frames in a presentation. The following example highlights a literal term and all email addresses: ```python import aspose.pydrawing as draw import aspose.slides as slides with slides.Presentation("presentation.pptx") as presentation: search_options = slides.TextSearchOptions() search_options.whole_words_only = True search_options.case_sensitive = False presentation.highlight_text( "confidential", draw.Color.orange, search_options, None ) email_pattern = r"(?i)\b[A-Z0-9._%+-]+@[A-Z0-9.-]+\.[A-Z]{2,}\b" presentation.highlight_regex(email_pattern, draw.Color.yellow) presentation.save( "highlighted_presentation.pptx", slides.export.SaveFormat.PPTX ) ``` ## **Replace Text in a Text Frame** Use [TextFrame.replace_text](https://reference.aspose.com/slides/python-net/aspose.slides/textframe/replace_text/) for literal text and [TextFrame.replace_regex](https://reference.aspose.com/slides/python-net/aspose.slides/textframe/replace_regex/) for pattern-based replacement. These methods update matched text within the existing text frame, which retains the surrounding portion formatting instead of rebuilding the text frame from a plain string. The following example standardizes a spelling variant and then replaces version labels: ```python import aspose.slides as slides with slides.Presentation("presentation.pptx") as presentation: slide = presentation.slides[0] shape = slide.shapes[0] search_options = slides.TextSearchOptions() search_options.whole_words_only = True search_options.case_sensitive = False shape.text_frame.replace_text( "colour", "color", search_options, None ) version_pattern = r"(?i)\bv\d+(?:\.\d+)*\b" shape.text_frame.replace_regex(version_pattern, "current version") presentation.save( "updated_text_frame.pptx", slides.export.SaveFormat.PPTX ) ``` If one match spans portions with different formatting, review the output to confirm which formatting should apply to the replacement text. ## **Replace Text Across a Presentation** Use [Presentation.replace_text](https://reference.aspose.com/slides/python-net/aspose.slides/presentation/replace_text/) and [Presentation.replace_regex](https://reference.aspose.com/slides/python-net/aspose.slides/presentation/replace_regex/) to apply the same operations across the presentation. This is useful for template cleanup, terminology updates, and redaction. ```python import aspose.slides as slides with slides.Presentation("presentation.pptx") as presentation: search_options = slides.TextSearchOptions() search_options.whole_words_only = True search_options.case_sensitive = True presentation.replace_text( "Contoso", "Example Corp", search_options, None ) account_number_pattern = r"\bACCT-\d{6}\b" presentation.replace_regex(account_number_pattern, "ACCT-REDACTED") presentation.save( "updated_presentation.pptx", slides.export.SaveFormat.PPTX ) ``` ## **FAQ** **How can I search only one text box instead of the entire presentation?** Get the shape's text frame and call [TextFrame.highlight_text](https://reference.aspose.com/slides/python-net/aspose.slides/textframe/highlight_text/), [TextFrame.highlight_regex](https://reference.aspose.com/slides/python-net/aspose.slides/textframe/highlight_regex/), [TextFrame.replace_text](https://reference.aspose.com/slides/python-net/aspose.slides/textframe/replace_text/), or [TextFrame.replace_regex](https://reference.aspose.com/slides/python-net/aspose.slides/textframe/replace_regex/) on that text frame. Presentation-level methods process all applicable text frames instead. **How can I match complete words with the correct capitalization?** Set [TextSearchOptions.whole_words_only](https://reference.aspose.com/slides/python-net/aspose.slides/textsearchoptions/whole_words_only/) and [TextSearchOptions.case_sensitive](https://reference.aspose.com/slides/python-net/aspose.slides/textsearchoptions/case_sensitive/) to `True`, and pass the options to a literal-text highlighting or replacement method. For regular expressions, define word boundaries and case sensitivity in the pattern itself. **Can search and replacement include text in slide notes?** Yes. Set [TextSearchOptions.include_notes](https://reference.aspose.com/slides/python-net/aspose.slides/textsearchoptions/include_notes/) to `True` when using a presentation-level literal-text operation. **Does replacing text preserve its formatting?** [TextFrame.replace_text](https://reference.aspose.com/slides/python-net/aspose.slides/textframe/replace_text/) and [TextFrame.replace_regex](https://reference.aspose.com/slides/python-net/aspose.slides/textframe/replace_regex/) modify matched text within the existing text frame and retain the surrounding portion formatting. If a match spans portions with different formatting, inspect the result to ensure the replacement uses the desired style. # Manage Sensitivity Labels in PowerPoint Presentations in Python > Read, add, update, remove, and migrate Microsoft Purview sensitivity labels in PowerPoint PPTX presentations with Aspose.Slides for Python via .NET. Source: https://docs.aspose.com/slides/python-net/sensitivity-labels/ Updated: 2026-08-13 ## **Overview** Microsoft Purview sensitivity labels help organizations classify and govern documents. During automated presentation processing, an application may need to preserve an existing label, apply a label selected by a policy, update its state, or migrate label metadata written by an older Microsoft Information Protection (MIP) workflow. Aspose.Slides for Python via .NET exposes modern sensitivity label metadata through [Presentation.sensitivity_labels](https://reference.aspose.com/slides/python-net/aspose.slides/presentation/sensitivity_labels/). This property returns a [SensitivityLabelCollection](https://reference.aspose.com/slides/python-net/aspose.slides/sensitivitylabelcollection/) that can be inspected and modified before the presentation is saved as PPTX. Sensitivity label identifiers and policy information are defined by your Microsoft Purview configuration. Validate label availability and policy requirements in your environment before adding or migrating metadata. The [SensitivityLabel.content_mark_types](https://reference.aspose.com/slides/python-net/aspose.slides/sensitivitylabel/content_mark_types/) values describe the content markings associated with a label; they do not by themselves add visible text or shapes to slides. ## **Understand Sensitivity Label Properties** Each [SensitivityLabel](https://reference.aspose.com/slides/python-net/aspose.slides/sensitivitylabel/) contains the following metadata: | Property | Purpose | | --- | --- | | [SensitivityLabel.id](https://reference.aspose.com/slides/python-net/aspose.slides/sensitivitylabel/id/) | Identifies the sensitivity label in the Purview policy. | | [SensitivityLabel.site_id](https://reference.aspose.com/slides/python-net/aspose.slides/sensitivitylabel/site_id/) | Identifies the site associated with the label policy. | | [SensitivityLabel.is_enabled](https://reference.aspose.com/slides/python-net/aspose.slides/sensitivitylabel/is_enabled/) | Indicates whether the label is enabled. | | [SensitivityLabel.is_removed](https://reference.aspose.com/slides/python-net/aspose.slides/sensitivitylabel/is_removed/) | Indicates that the label has been removed. Set this property to `True` when the removal state must be retained in the metadata. | | [SensitivityLabel.assignment_method_type](https://reference.aspose.com/slides/python-net/aspose.slides/sensitivitylabel/assignment_method_type/) | Specifies whether the label was applied automatically or through a user decision. | | [SensitivityLabel.content_mark_types](https://reference.aspose.com/slides/python-net/aspose.slides/sensitivitylabel/content_mark_types/) | Lists the content marking types associated with the label. | The [SensitivityLabelAssignmentType](https://reference.aspose.com/slides/python-net/aspose.slides/sensitivitylabelassignmenttype/) enumeration describes how a label was assigned: - [SensitivityLabelAssignmentType.STANDARD](https://reference.aspose.com/slides/python-net/aspose.slides/sensitivitylabelassignmenttype/) represents a default or automatically applied label. - [SensitivityLabelAssignmentType.PRIVILEGED](https://reference.aspose.com/slides/python-net/aspose.slides/sensitivitylabelassignmenttype/) represents a label applied through a user decision, including manually applied, recommended, and mandatory labels. The [SensitivityLabelContentType](https://reference.aspose.com/slides/python-net/aspose.slides/sensitivitylabelcontenttype/) enumeration identifies the marking associated with a label: | Value | Meaning | | --- | --- | | [SensitivityLabelContentType.NONE](https://reference.aspose.com/slides/python-net/aspose.slides/sensitivitylabelcontenttype/) | The label was applied by default or automatically. | | [SensitivityLabelContentType.HEADER](https://reference.aspose.com/slides/python-net/aspose.slides/sensitivitylabelcontenttype/) | Header content marking is associated with the label. | | [SensitivityLabelContentType.FOOTER](https://reference.aspose.com/slides/python-net/aspose.slides/sensitivitylabelcontenttype/) | Footer content marking is associated with the label. | | [SensitivityLabelContentType.WATERMARK](https://reference.aspose.com/slides/python-net/aspose.slides/sensitivitylabelcontenttype/) | Watermark content marking is associated with the label. | | [SensitivityLabelContentType.ENCRYPTION](https://reference.aspose.com/slides/python-net/aspose.slides/sensitivitylabelcontenttype/) | Encryption protection is associated with the label. | Multiple marking types can be associated with one label. ## **List Existing Sensitivity Labels** Read the modern label collection from [Presentation.sensitivity_labels](https://reference.aspose.com/slides/python-net/aspose.slides/presentation/sensitivity_labels/) and enumerate it. The following example lists every property and content marking stored for each label: ```python import aspose.slides as slides with slides.Presentation("presentation.pptx") as presentation: sensitivity_labels = presentation.sensitivity_labels for sensitivity_label in sensitivity_labels: print("Label ID:", sensitivity_label.id) print("Site ID:", sensitivity_label.site_id) print("Enabled:", sensitivity_label.is_enabled) print("Removed:", sensitivity_label.is_removed) print("Assignment method:", sensitivity_label.assignment_method_type) for content_mark_type in sensitivity_label.content_mark_types: print("Content marking:", content_mark_type) ``` ## **Add a Sensitivity Label with Content Marking** Use [SensitivityLabelCollection.add](https://reference.aspose.com/slides/python-net/aspose.slides/sensitivitylabelcollection/add/) with the label identifier, site identifier, enabled state, and assignment method. Pass the site identifier as a Python `uuid.UUID` object. After the method returns the new [SensitivityLabel](https://reference.aspose.com/slides/python-net/aspose.slides/sensitivitylabel/), append the required marking values to [SensitivityLabel.content_mark_types](https://reference.aspose.com/slides/python-net/aspose.slides/sensitivitylabel/content_mark_types/). The following example adds a manually selected label associated with footer and watermark markings, and then saves the result as PPTX: ```python import uuid import aspose.slides as slides with slides.Presentation("presentation.pptx") as presentation: sensitivity_labels = presentation.sensitivity_labels label_identifier = "{11111111-2222-3333-4444-555555555555}" site_identifier = uuid.UUID("aaaaaaaa-bbbb-cccc-dddd-eeeeeeeeeeee") is_enabled = True assignment_method = slides.SensitivityLabelAssignmentType.PRIVILEGED sensitivity_label = sensitivity_labels.add( label_identifier, site_identifier, is_enabled, assignment_method ) sensitivity_label.content_mark_types.append(slides.SensitivityLabelContentType.FOOTER) sensitivity_label.content_mark_types.append(slides.SensitivityLabelContentType.WATERMARK) presentation.save("presentation_with_label.pptx", slides.export.SaveFormat.PPTX) ``` ## **Update a Sensitivity Label** The [SensitivityLabel](https://reference.aspose.com/slides/python-net/aspose.slides/sensitivitylabel/) properties are read/write, except that the list returned by [SensitivityLabel.content_mark_types](https://reference.aspose.com/slides/python-net/aspose.slides/sensitivitylabel/content_mark_types/) is modified through its list operations. After locating the required label, you can update its identifier, site identifier, enabled state, assignment method, removal state, and content marking types. Save the presentation to persist the changes. The following example updates the enabled state and assignment method of the first label: ```python import aspose.slides as slides with slides.Presentation("presentation.pptx") as presentation: sensitivity_labels = presentation.sensitivity_labels if sensitivity_labels.count > 0: sensitivity_label = sensitivity_labels[0] sensitivity_label.is_enabled = True sensitivity_label.assignment_method_type = ( slides.SensitivityLabelAssignmentType.PRIVILEGED ) presentation.save("presentation_with_updated_label.pptx", slides.export.SaveFormat.PPTX) ``` ## **Mark a Sensitivity Label as Removed** To preserve the fact that a label was removed, find the label and set [SensitivityLabel.is_removed](https://reference.aspose.com/slides/python-net/aspose.slides/sensitivitylabel/is_removed/) to `True`. This retains the label entry while recording its removed state. If you instead need to delete an entry from the modern collection, use [SensitivityLabelCollection.remove_at](https://reference.aspose.com/slides/python-net/aspose.slides/sensitivitylabelcollection/remove_at/); use [SensitivityLabelCollection.clear](https://reference.aspose.com/slides/python-net/aspose.slides/sensitivitylabelcollection/clear/) to delete every entry. The following example marks a specific label as removed and saves the updated presentation: ```python import aspose.slides as slides with slides.Presentation("presentation.pptx") as presentation: sensitivity_labels = presentation.sensitivity_labels target_label_identifier = "{11111111-2222-3333-4444-555555555555}" for sensitivity_label in sensitivity_labels: identifiers_match = ( sensitivity_label.id.casefold() == target_label_identifier.casefold() ) if identifiers_match: sensitivity_label.is_removed = True break presentation.save("presentation_with_removed_label.pptx", slides.export.SaveFormat.PPTX) ``` ## **Read and Migrate Legacy MIP Sensitivity Labels** Older MIP-based workflows can store sensitivity label metadata in custom document properties instead of the modern label collection. Read that metadata with [DocumentProperties.get_sensitivity_labels](https://reference.aspose.com/slides/python-net/aspose.slides/documentproperties/get_sensitivity_labels/). The method parses the legacy custom properties and returns [SensitivityLabel](https://reference.aspose.com/slides/python-net/aspose.slides/sensitivitylabel/) objects. To migrate the metadata, add each returned label to the modern [SensitivityLabelCollection](https://reference.aspose.com/slides/python-net/aspose.slides/sensitivitylabelcollection/) through [SensitivityLabelCollection.add](https://reference.aspose.com/slides/python-net/aspose.slides/sensitivitylabelcollection/add/). Because adding a duplicate label identifier raises an exception, the example checks the destination collection before copying each label. You can add further validation to confirm that each legacy label still exists in the current Purview policy. ```python import aspose.slides as slides with slides.Presentation("presentation_with_legacy_labels.pptx") as presentation: legacy_sensitivity_labels = ( presentation.document_properties.get_sensitivity_labels() ) modern_sensitivity_labels = presentation.sensitivity_labels for legacy_sensitivity_label in legacy_sensitivity_labels: label_already_exists = False for modern_sensitivity_label in modern_sensitivity_labels: label_already_exists = ( modern_sensitivity_label.id.casefold() == legacy_sensitivity_label.id.casefold() ) if label_already_exists: break if not label_already_exists: modern_sensitivity_labels.add(legacy_sensitivity_label) presentation.save("presentation_with_modern_labels.pptx", slides.export.SaveFormat.PPTX) ``` The migration copies the parsed label objects into the modern collection. It does not require clearing all custom document properties, so unrelated document metadata remains intact. Use [Presentation.save](https://reference.aspose.com/slides/python-net/aspose.slides/presentation/save/) with [SaveFormat.PPTX](https://reference.aspose.com/slides/python-net/aspose.slides.export/saveformat/) to write the modern label metadata to a PPTX file. ## **FAQ** **Does adding a content marking type create a visible header, footer, or watermark on slides?** No. Values added through [SensitivityLabel.content_mark_types](https://reference.aspose.com/slides/python-net/aspose.slides/sensitivitylabel/content_mark_types/) describe the markings associated with the sensitivity label. They do not create visible text or shapes in the presentation. Add the corresponding slide content separately if your workflow must render those markings. **What is the difference between marking a label as removed and deleting it from the collection?** Setting [SensitivityLabel.is_removed](https://reference.aspose.com/slides/python-net/aspose.slides/sensitivitylabel/is_removed/) to `True` keeps the label entry and records its removed state. Calling [SensitivityLabelCollection.remove_at](https://reference.aspose.com/slides/python-net/aspose.slides/sensitivitylabelcollection/remove_at/) deletes the entry from the modern collection. Choose the operation that matches your organization's metadata retention requirements. **Can a presentation contain both legacy MIP metadata and modern sensitivity labels?** Yes. Legacy labels can remain in custom document properties while modern labels are available through [Presentation.sensitivity_labels](https://reference.aspose.com/slides/python-net/aspose.slides/presentation/sensitivity_labels/). Use [DocumentProperties.get_sensitivity_labels](https://reference.aspose.com/slides/python-net/aspose.slides/documentproperties/get_sensitivity_labels/) to read the legacy metadata and migrate only the valid labels that are not already present in the modern collection. **What happens when a label with the same identifier is added more than once?** [SensitivityLabelCollection.add](https://reference.aspose.com/slides/python-net/aspose.slides/sensitivitylabelcollection/add/) raises an exception when the collection already contains a label with the same identifier. Check existing [SensitivityLabel.id](https://reference.aspose.com/slides/python-net/aspose.slides/sensitivitylabel/id/) values before adding or migrating labels. **Which output format should be used to preserve updated sensitivity labels?** Save the presentation as PPTX by calling [Presentation.save](https://reference.aspose.com/slides/python-net/aspose.slides/presentation/save/) with [SaveFormat.PPTX](https://reference.aspose.com/slides/python-net/aspose.slides.export/saveformat/), as shown in the examples above. # Apply Shape Animations in Presentations with Python > Learn how to add, inspect, and customize shape animations, timing, sounds, after-animation behavior, and animated text with Aspose.Slides for Python via .NET. Source: https://docs.aspose.com/slides/python-net/shape-animation/ Updated: 2026-10-26 ## **Overview** To work with the individual behaviors inside an effect or edit motion-path segments, see [Custom Animation](https://docs.aspose.com/slides/python-net/custom-animation/). Aspose.Slides for Python via .NET represents slide animations as effects in a slide timeline. An effect has a target shape, an animation type and subtype, a trigger, timing settings, and optional properties such as sound or after-animation behavior. The timeline contains two kinds of sequences: - The **main sequence** plays as the slide advances. - An **interactive sequence** starts when its trigger shape is clicked. Because text boxes, pictures, charts, tables, and other slide objects implement [IShape](https://reference.aspose.com/slides/python-net/aspose.slides/ishape/), you use the same [Sequence.add_effect](https://reference.aspose.com/slides/python-net/aspose.slides.animation/sequence/add_effect/) method for most slide content. The available effects are listed in the [EffectType](https://reference.aspose.com/slides/python-net/aspose.slides.animation/effecttype/) enumeration. ## **Add Shape Animations** To add an animation, get the slide's main sequence and call [Sequence.add_effect](https://reference.aspose.com/slides/python-net/aspose.slides.animation/sequence/add_effect/) with the target shape, effect type, subtype, and trigger. For an effect that starts when another shape is clicked, create an interactive sequence whose trigger is that other shape. The following example creates both types of animation and saves the result to `shape-animations.pptx`. ```python import aspose.slides as slides with slides.Presentation() as presentation: slide = presentation.slides[0] target_shape = slide.shapes.add_auto_shape(slides.ShapeType.ROUND_CORNER_RECTANGLE, 120, 100, 320, 80) target_shape.text_frame.text = "Click to animate this shape" main_sequence = slide.timeline.main_sequence entrance_effect = main_sequence.add_effect(target_shape, slides.animation.EffectType.FADE, slides.animation.EffectSubtype.NONE, slides.animation.EffectTriggerType.ON_CLICK) entrance_effect.timing.duration = 1.5 trigger_shape = slide.shapes.add_auto_shape(slides.ShapeType.BEVEL, 20, 20, 100, 40) trigger_shape.text_frame.text = "Move" interactive_sequence = slide.timeline.interactive_sequences.add(trigger_shape) interactive_sequence.add_effect(target_shape, slides.animation.EffectType.PATH_FOOTBALL, slides.animation.EffectSubtype.NONE, slides.animation.EffectTriggerType.ON_CLICK) presentation.save("shape-animations.pptx", slides.export.SaveFormat.PPTX) ``` The trigger controls when an effect starts: - [EffectTriggerType.ON_CLICK](https://reference.aspose.com/slides/python-net/aspose.slides.animation/effecttriggertype/) waits for a click in the main sequence, or for a click on the trigger shape in an interactive sequence. - [EffectTriggerType.WITH_PREVIOUS](https://reference.aspose.com/slides/python-net/aspose.slides.animation/effecttriggertype/) starts with the preceding effect. - [EffectTriggerType.AFTER_PREVIOUS](https://reference.aspose.com/slides/python-net/aspose.slides.animation/effecttriggertype/) starts when the preceding effect finishes. To animate a picture, chart, or another shape type, pass that object to [Sequence.add_effect](https://reference.aspose.com/slides/python-net/aspose.slides.animation/sequence/add_effect/) instead of `target_shape`. For chart-specific grouping options, see [Animated Charts](https://docs.aspose.com/slides/python-net/animated-charts/). ## **Read Shape Animations** Use [Sequence.get_effects_by_shape](https://reference.aspose.com/slides/python-net/aspose.slides.animation/sequence/get_effects_by_shape/) when you know the target shape. To inspect every effect, iterate through the main sequence and every interactive sequence. Iteration avoids assuming that a sequence contains an effect at index `0`. The following example creates a shape with main-sequence and interactive effects, gets the effects that target the shape, and then iterates through every sequence on the slide. ```python import aspose.slides as slides def print_sequence(label, sequence): print(f" {label}: {sequence.count} effect(s)") for effect in sequence: target_name = "unknown" if effect.target_shape is None else effect.target_shape.name effect_description = f"{effect.type.name} {effect.subtype.name}; target: {target_name}; trigger: {effect.timing.trigger_type.name}" print(f" {effect_description}") with slides.Presentation() as presentation: slide = presentation.slides[0] target_shape = slide.shapes.add_auto_shape(slides.ShapeType.RECTANGLE, 120, 100, 320, 80) target_shape.text_frame.text = "Animated shape" main_sequence = slide.timeline.main_sequence main_sequence.add_effect(target_shape, slides.animation.EffectType.FADE, slides.animation.EffectSubtype.NONE, slides.animation.EffectTriggerType.ON_CLICK) trigger_shape = slide.shapes.add_auto_shape(slides.ShapeType.BEVEL, 20, 20, 100, 40) trigger_shape.text_frame.text = "Move" interactive_sequence = slide.timeline.interactive_sequences.add(trigger_shape) interactive_sequence.add_effect(target_shape, slides.animation.EffectType.PATH_FOOTBALL, slides.animation.EffectSubtype.NONE, slides.animation.EffectTriggerType.ON_CLICK) target_effects = main_sequence.get_effects_by_shape(target_shape) print(f"The main sequence contains {len(target_effects)} effect(s) for {target_shape.name}.") print_sequence("Main sequence", main_sequence) for interactive_index, sequence in enumerate(slide.timeline.interactive_sequences, start=1): trigger_name = "unknown" if sequence.trigger_shape is None else sequence.trigger_shape.name sequence_label = f"Interactive sequence {interactive_index}, trigger: {trigger_name}" print_sequence(sequence_label, sequence) ``` If you only need the effects for one shape, first identify the shape by name, placeholder type, or another stable property; then call [Sequence.get_effects_by_shape](https://reference.aspose.com/slides/python-net/aspose.slides.animation/sequence/get_effects_by_shape/). Do not assume that the shape at index `0` is always the intended object. ## **Remove All Animations from a Shape** Use [Sequence.remove_by_shape](https://reference.aspose.com/slides/python-net/aspose.slides.animation/sequence/remove_by_shape/) to remove effects targeting a particular shape. Each call affects only the sequence on which it is invoked. To remove the shape's effects throughout a slide's timeline, call it on [AnimationTimeLine.main_sequence](https://reference.aspose.com/slides/python-net/aspose.slides.animation/animationtimeline/main_sequence/) and on every sequence in [AnimationTimeLine.interactive_sequences](https://reference.aspose.com/slides/python-net/aspose.slides.animation/animationtimeline/interactive_sequences/). The example expects a presentation file with two shapes named `Target` and `Other` on the first slide. Both shapes have effects in the main sequence and in an interactive sequence triggered by clicking `Target`. It finds the target by name, removes its effects from all these sequences, and saves the presentation. ```python import aspose.slides as slides with slides.Presentation("animated-shapes.pptx") as presentation: slide = presentation.slides[0] target_shape = next((shape for shape in slide.shapes if shape.name == "Target"), None) if target_shape is not None: slide.timeline.main_sequence.remove_by_shape(target_shape) for sequence in slide.timeline.interactive_sequences: sequence.remove_by_shape(target_shape) presentation.save("shape-animations-removed.pptx", slides.export.SaveFormat.PPTX) else: print("The target shape was not found.") ``` The `Target` shape remains on the slide, and effects targeting `Other` are preserved in both sequences. An effect's [Effect.target_shape](https://reference.aspose.com/slides/python-net/aspose.slides.animation/effect/target_shape/) is distinct from a sequence's [Sequence.trigger_shape](https://reference.aspose.com/slides/python-net/aspose.slides.animation/sequence/trigger_shape/): removing effects targeting `Target` does not remove every animation triggered by it. In this example, clicking `Target` still starts the interactive effect for `Other`. ## **Work with Inherited Placeholder Effects** A placeholder on a normal slide can inherit animation behavior from the corresponding placeholder on its layout slide and master slide. [Shape.get_base_placeholder](https://reference.aspose.com/slides/python-net/aspose.slides/shape/get_base_placeholder/) returns that parent placeholder, or `None` when no parent exists. In the following example presentation, the footer has **Random Bars** on the normal slide, **Split** on the layout slide, and **Fly In** on the master slide. ![Footer animation effect on the normal slide](https://docs.aspose.com/slides/python-net/shape-animation/slide-shape-animation.png) ![Footer placeholder animation effect on the layout slide](https://docs.aspose.com/slides/python-net/shape-animation/layout-shape-animation.png) ![Footer placeholder animation effect on the master slide](https://docs.aspose.com/slides/python-net/shape-animation/master-shape-animation.png) The next example builds the placeholder hierarchy itself. It adds effects to a master placeholder, a layout placeholder, and the corresponding placeholder on a normal slide. Every call to [Shape.get_base_placeholder](https://reference.aspose.com/slides/python-net/aspose.slides/shape/get_base_placeholder/) is checked before the returned shape is used. ```python import aspose.slides as slides def find_placeholder_with_base(slide): for shape in slide.shapes: if shape.get_base_placeholder() is not None: return shape return None def print_effects(source, effects): print(f"{source}: {len(effects)} effect(s)") for effect in effects: print(f" {effect.type.name} {effect.subtype.name}") with slides.Presentation() as presentation: layout_slide = presentation.layout_slides.get_by_type(slides.SlideLayoutType.BLANK) layout_placeholder = layout_slide.placeholder_manager.add_text_placeholder(100, 100, 400, 80) layout_slide.timeline.main_sequence.add_effect(layout_placeholder, slides.animation.EffectType.SPLIT, slides.animation.EffectSubtype.VERTICAL_IN, slides.animation.EffectTriggerType.ON_CLICK) master_placeholder = layout_placeholder.get_base_placeholder() if master_placeholder is not None: master_sequence = layout_slide.master_slide.timeline.main_sequence master_sequence.add_effect(master_placeholder, slides.animation.EffectType.FLY, slides.animation.EffectSubtype.BOTTOM, slides.animation.EffectTriggerType.ON_CLICK) slide = presentation.slides.add_empty_slide(layout_slide) slide_placeholder = find_placeholder_with_base(slide) if slide_placeholder is None: raise RuntimeError("The slide does not contain a placeholder linked to its layout slide.") slide.timeline.main_sequence.add_effect(slide_placeholder, slides.animation.EffectType.RANDOM_BARS, slides.animation.EffectSubtype.HORIZONTAL, slides.animation.EffectTriggerType.ON_CLICK) print_effects("Normal slide", slide.timeline.main_sequence.get_effects_by_shape(slide_placeholder)) base_layout_placeholder = slide_placeholder.get_base_placeholder() if base_layout_placeholder is not None: print_effects("Layout slide", layout_slide.timeline.main_sequence.get_effects_by_shape(base_layout_placeholder)) base_master_placeholder = base_layout_placeholder.get_base_placeholder() if base_master_placeholder is not None: print_effects("Master slide", layout_slide.master_slide.timeline.main_sequence.get_effects_by_shape(base_master_placeholder)) presentation.save("placeholder-animations.pptx", slides.export.SaveFormat.PPTX) ``` ## **Change Animation Timing** The PowerPoint **Timing** dialog maps to the properties of [Timing](https://reference.aspose.com/slides/python-net/aspose.slides.animation/timing/). ![PowerPoint Timing dialog for an animation effect](https://docs.aspose.com/slides/python-net/shape-animation/shape-animation.png) - **Start** maps to [Timing.trigger_type](https://reference.aspose.com/slides/python-net/aspose.slides.animation/timing/trigger_type/). - **Duration** maps to [Timing.duration](https://reference.aspose.com/slides/python-net/aspose.slides.animation/timing/duration/), in seconds. - **Delay** maps to [Timing.trigger_delay_time](https://reference.aspose.com/slides/python-net/aspose.slides.animation/timing/trigger_delay_time/), in seconds. - **Repeat** maps to [Timing.repeat_count](https://reference.aspose.com/slides/python-net/aspose.slides.animation/timing/repeat_count/), [Timing.repeat_until_next_click](https://reference.aspose.com/slides/python-net/aspose.slides.animation/timing/repeat_until_next_click/), or [Timing.repeat_until_end_slide](https://reference.aspose.com/slides/python-net/aspose.slides.animation/timing/repeat_until_end_slide/). - **Rewind when done playing** maps to [Timing.rewind](https://reference.aspose.com/slides/python-net/aspose.slides.animation/timing/rewind/). This independent example adds an effect, changes its timing through the object returned by [Sequence.add_effect](https://reference.aspose.com/slides/python-net/aspose.slides.animation/sequence/add_effect/), and saves the result. Keeping the returned [Effect](https://reference.aspose.com/slides/python-net/aspose.slides.animation/effect/) reference avoids an unnecessary collection index. ```python import aspose.slides as slides with slides.Presentation() as presentation: slide = presentation.slides[0] shape = slide.shapes.add_auto_shape(slides.ShapeType.RECTANGLE, 120, 100, 320, 80) shape.text_frame.text = "Timed animation" effect = slide.timeline.main_sequence.add_effect(shape, slides.animation.EffectType.FADE, slides.animation.EffectSubtype.NONE, slides.animation.EffectTriggerType.ON_CLICK) effect.timing.trigger_type = slides.animation.EffectTriggerType.ON_CLICK effect.timing.duration = 2.0 effect.timing.trigger_delay_time = 0.5 effect.timing.repeat_until_next_click = False effect.timing.repeat_until_end_slide = False effect.timing.repeat_count = 2.0 effect.timing.rewind = True presentation.save("shape-animation-timing.pptx", slides.export.SaveFormat.PPTX) ``` Use one repeat mode intentionally. Combining a repeat count with an "until" flag can produce confusing results in different viewers. When changing repeat modes, set [Timing.repeat_until_next_click](https://reference.aspose.com/slides/python-net/aspose.slides.animation/timing/repeat_until_next_click/) and [Timing.repeat_until_end_slide](https://reference.aspose.com/slides/python-net/aspose.slides.animation/timing/repeat_until_end_slide/) before [Timing.repeat_count](https://reference.aspose.com/slides/python-net/aspose.slides.animation/timing/repeat_count/), because setting either flag also changes the active repeat mode. ## **Add and Extract Animation Sounds** An animation effect can reference embedded audio through [Effect.sound](https://reference.aspose.com/slides/python-net/aspose.slides.animation/effect/sound/). [Effect.stop_previous_sound](https://reference.aspose.com/slides/python-net/aspose.slides.animation/effect/stop_previous_sound/) tells an effect to stop audio started by an earlier effect. ### **Add a Sound to an Effect** The following example expects a local audio file named `animation-sound.wav`. It creates two effects, embeds that file as the sound for the first effect, and configures the second effect to stop the sound. It uses the objects returned by [Sequence.add_effect](https://reference.aspose.com/slides/python-net/aspose.slides.animation/sequence/add_effect/), so no sequence index is required. ```python import aspose.slides as slides with slides.Presentation() as presentation: slide = presentation.slides[0] first_shape = slide.shapes.add_auto_shape(slides.ShapeType.RECTANGLE, 80, 100, 240, 80) second_shape = slide.shapes.add_auto_shape(slides.ShapeType.RECTANGLE, 400, 100, 240, 80) first_shape.text_frame.text = "Starts sound" second_shape.text_frame.text = "Stops sound" sequence = slide.timeline.main_sequence first_effect = sequence.add_effect(first_shape, slides.animation.EffectType.FADE, slides.animation.EffectSubtype.NONE, slides.animation.EffectTriggerType.ON_CLICK) second_effect = sequence.add_effect(second_shape, slides.animation.EffectType.FADE, slides.animation.EffectSubtype.NONE, slides.animation.EffectTriggerType.ON_CLICK) with open("animation-sound.wav", "rb") as audio_file: effect_sound = presentation.audios.add_audio(audio_file.read()) first_effect.sound = effect_sound second_effect.stop_previous_sound = True presentation.save("shape-animation-sound.pptx", slides.export.SaveFormat.PPTX) ``` ### **Extract Embedded Effect Sounds** The following example expects a local presentation named `presentation-with-animation-sounds.pptx`. It scans both main and interactive sequences and writes every embedded effect sound to the `extracted-animation-sounds` directory. The extension is selected from the audio MIME type exposed by [Audio.content_type](https://reference.aspose.com/slides/python-net/aspose.slides/audio/content_type/). ```python import os import aspose.slides as slides def get_audio_extension(content_type): normalized_type = "" if content_type is None else content_type.lower() if normalized_type == "audio/mpeg": return ".mp3" if normalized_type == "audio/mp4": return ".m4a" if normalized_type == "audio/ogg": return ".ogg" if normalized_type in ("audio/wav", "audio/x-wav"): return ".wav" return ".bin" def save_sounds(sequence, output_directory, sound_index): for effect in sequence: if effect.sound is None: continue extension = get_audio_extension(effect.sound.content_type) output_path = os.path.join(output_directory, f"effect-sound-{sound_index}{extension}") with open(output_path, "wb") as output_file: output_file.write(bytes(effect.sound.binary_data)) sound_index += 1 return sound_index input_path = "presentation-with-animation-sounds.pptx" output_directory = "extracted-animation-sounds" os.makedirs(output_directory, exist_ok=True) with slides.Presentation(input_path) as presentation: sound_index = 1 for slide in presentation.slides: sound_index = save_sounds(slide.timeline.main_sequence, output_directory, sound_index) for sequence in slide.timeline.interactive_sequences: sound_index = save_sounds(sequence, output_directory, sound_index) print(f"Extracted {sound_index - 1} sound file(s) to {os.path.abspath(output_directory)}.") ``` For large audio objects, use [Audio.get_stream](https://reference.aspose.com/slides/python-net/aspose.slides/audio/get_stream/) and copy the stream to a file instead of loading the entire object into a byte array. ## **Set After-Animation Behavior** The **After animation** option controls what happens to a shape after its effect finishes. ![PowerPoint Effect Options dialog showing After animation settings](https://docs.aspose.com/slides/python-net/shape-animation/shape-after-animation.png) The [AfterAnimationType](https://reference.aspose.com/slides/python-net/aspose.slides.animation/afteranimationtype/) enumeration supports leaving the shape unchanged, changing its color, hiding it after the animation, or hiding it on the next click. When the type is [AfterAnimationType.COLOR](https://reference.aspose.com/slides/python-net/aspose.slides.animation/afteranimationtype/), set [Effect.after_animation_color](https://reference.aspose.com/slides/python-net/aspose.slides.animation/effect/after_animation_color/) as well. This independent example creates an effect, sets its after-animation behavior through the returned effect object, and saves the result. ```python import aspose.pydrawing as draw import aspose.slides as slides with slides.Presentation() as presentation: slide = presentation.slides[0] shape = slide.shapes.add_auto_shape(slides.ShapeType.RECTANGLE, 120, 100, 320, 80) shape.text_frame.text = "Dim after animation" effect = slide.timeline.main_sequence.add_effect(shape, slides.animation.EffectType.FADE, slides.animation.EffectSubtype.NONE, slides.animation.EffectTriggerType.ON_CLICK) effect.after_animation_type = slides.animation.AfterAnimationType.COLOR effect.after_animation_color.color = draw.Color.light_gray presentation.save("shape-animation-after-effect.pptx", slides.export.SaveFormat.PPTX) ``` Changing the type away from [AfterAnimationType.COLOR](https://reference.aspose.com/slides/python-net/aspose.slides.animation/afteranimationtype/) clears the after-animation color setting. ## **Animate Text** Text animation has two related controls: - [TextAnimation.build_type](https://reference.aspose.com/slides/python-net/aspose.slides.animation/textanimation/build_type/) controls whether paragraphs appear together or by paragraph level. - [Effect.animate_text_type](https://reference.aspose.com/slides/python-net/aspose.slides.animation/effect/animate_text_type/) controls whether text appears all at once, by word, or by letter. [Effect.delay_between_text_parts](https://reference.aspose.com/slides/python-net/aspose.slides.animation/effect/delay_between_text_parts/) sets the delay between words or letters. A positive value is a percentage of the effect duration; a negative value is a delay in seconds. The following independent example animates the words in a text box. [BuildType.AS_ONE_OBJECT](https://reference.aspose.com/slides/python-net/aspose.slides.animation/buildtype/) disables paragraph-by-paragraph building so that the word setting applies to the entire text frame. ```python import aspose.slides as slides with slides.Presentation() as presentation: slide = presentation.slides[0] text_box = slide.shapes.add_auto_shape(slides.ShapeType.RECTANGLE, 80, 80, 560, 100) text_box.text_frame.text = "Aspose.Slides animates this sentence word by word." effect = slide.timeline.main_sequence.add_effect(text_box, slides.animation.EffectType.FADE, slides.animation.EffectSubtype.NONE, slides.animation.EffectTriggerType.ON_CLICK) effect.text_animation.build_type = slides.animation.BuildType.AS_ONE_OBJECT effect.animate_text_type = slides.animation.AnimateTextType.BY_WORD effect.delay_between_text_parts = 20.0 presentation.save("animated-text.pptx", slides.export.SaveFormat.PPTX) ``` To build a text box by paragraph, set [BuildType.BY_LEVEL_PARAGRAPHS1](https://reference.aspose.com/slides/python-net/aspose.slides.animation/buildtype/) (or another paragraph level). To target a single paragraph with its own effect, use the [Sequence.add_effect](https://reference.aspose.com/slides/python-net/aspose.slides.animation/sequence/add_effect/) overload that accepts an [IParagraph](https://reference.aspose.com/slides/python-net/aspose.slides/iparagraph/). See [Animated Text](https://docs.aspose.com/slides/python-net/animated-text/) for paragraph-level examples. ## **Export and Compatibility Notes** - Saving to PPT or PPTX preserves the animation model, but the final playback is controlled by the presentation viewer. - PDF and static images do not play animations. Use [HTML5 export](https://docs.aspose.com/slides/python-net/export-to-html5/), animated GIF, or [video conversion](https://docs.aspose.com/slides/python-net/convert-powerpoint-to-video/) when the output must show motion. - For HTML5, enable [Html5Options.animate_shapes](https://reference.aspose.com/slides/python-net/aspose.slides.export/html5options/animate_shapes/) and, when needed, [Html5Options.animate_transitions](https://reference.aspose.com/slides/python-net/aspose.slides.export/html5options/animate_transitions/). - Video rendering supports many common entrance, emphasis, exit, and motion-path effects, but not every PowerPoint effect is supported. Check the current [supported animations and effects](https://docs.aspose.com/slides/python-net/convert-powerpoint-to-video/#supported-animations-and-effects) and test critical presentations with your target Aspose.Slides version. - Advanced custom effects and effects imported from other presentation formats may be preserved in the file but render differently in PowerPoint, HTML5, or video. Validate the exported result rather than relying only on the effect name. ## **FAQ** **Why does an animation appear in PowerPoint but not in a PDF?** PDF is a static format, so animations and slide transitions do not play. Export to HTML5, animated GIF, or video when motion must be preserved. **Why does an effect play differently in a video?** Video export renders animations rather than storing the original PowerPoint behavior. Some advanced effects are unsupported or approximated. Review the supported-effects table and test the actual presentation before production use. **Does moving a shape forward or backward change its animation order?** No. Shape z-order controls overlap, while sequence order and triggers control animation playback. Change the timeline if you need a different playback order. ## Related articles - [Animate PowerPoint Text in Python](https://docs.aspose.com/slides/python-net/animated-text/) - [Enhance PowerPoint Presentations with Animations in Python](https://docs.aspose.com/slides/python-net/powerpoint-animation/) # Apply Shape Effects in Presentations with Python > Transform your PPT, PPTX and ODP files with advanced shape effects using Aspose.Slides for Python—create striking, professional slides in seconds. Source: https://docs.aspose.com/slides/python-net/shape-effect/ Updated: 2026-11-04 ## **Introduction** While effects in PowerPoint can be used to make a shape stand out, they differ from [fills](https://docs.aspose.com/slides/python-net/shape-formatting/#gradient-fill) or outlines. Using PowerPoint effects, you can create convincing reflections on a shape, spread a shape's glow, etc. ![Shape effect](https://docs.aspose.com/slides/python-net/shape-effect/shape-effect.png) PowerPoint provides six effects that can be applied to shapes. You can apply one or more effects to a shape. Some combinations of effects look better than others. For this reason, PowerPoint has options under **Preset**. The Preset options are essentially a known good-looking combination of two or more effects. This way, by selecting a preset, you won't have to waste time testing or combining different effects to find a nice combination. Aspose.Slides provides properties and methods under the [EffectFormat](https://reference.aspose.com/slides/python-net/aspose.slides/effectformat/) class that allow you to apply the same effects to shapes in PowerPoint presentations. ## **Apply a Shadow Effect** Aspose.Slides for Python via .NET supports outer and inner shadows for shapes. You can customize their color, direction, distance, and blur radius to match your presentation's design. ### **Apply an Outer Shadow** Use an outer shadow to make a card or panel stand out against the slide background. The shadow extends beyond the shape's edges, creating the impression that the shape is raised above the slide. Adjust its color, direction, distance, and blur radius to match the lighting and styling of your template. This Python code shows how to apply the [outer shadow effect](https://reference.aspose.com/slides/python-net/aspose.slides/effectformat/outer_shadow_effect/) to a rectangle: ```python import aspose.slides as slides with slides.Presentation() as presentation: slide = presentation.slides[0] shape = slide.shapes.add_auto_shape(slides.ShapeType.ROUND_CORNER_RECTANGLE, 20, 20, 200, 100) shape.effect_format.enable_outer_shadow_effect() shape.effect_format.outer_shadow_effect.shadow_color.color = slides.Color.dark_gray shape.effect_format.outer_shadow_effect.distance = 10 shape.effect_format.outer_shadow_effect.direction = 45 presentation.save("shadow_effect.pptx", slides.export.SaveFormat.PPTX) ``` ![Shadow effect](https://docs.aspose.com/slides/python-net/shape-effect/shadow_effect.png) ### **Apply an Inner Shadow** When reproducing a template's visual styling, use an inner shadow to give a card or panel a recessed appearance. An outer shadow extends outside the shape and makes it appear raised, while an inner shadow shades the inside of its edges. Call [enable_inner_shadow_effect](https://reference.aspose.com/slides/python-net/aspose.slides/effectformat/enable_inner_shadow_effect/), then configure [inner_shadow_effect](https://reference.aspose.com/slides/python-net/aspose.slides/effectformat/inner_shadow_effect/). Larger blur-radius values produce softer edges. This Python example creates a light blue card with a dark gray inner shadow and saves it as a PPTX file: ```python import aspose.slides as slides with slides.Presentation() as presentation: slide = presentation.slides[0] shape = slide.shapes.add_auto_shape(slides.ShapeType.RECTANGLE, 20, 20, 200, 100) shape.fill_format.fill_type = slides.FillType.SOLID shape.fill_format.solid_fill_color.color = slides.Color.light_blue shape.line_format.fill_format.fill_type = slides.FillType.NO_FILL shape.effect_format.enable_inner_shadow_effect() shadow = shape.effect_format.inner_shadow_effect shadow.shadow_color.color = slides.Color.dim_gray shadow.direction = 225 shadow.distance = 7 shadow.blur_radius = 6 presentation.save("inner_shadow_effect.pptx", slides.export.SaveFormat.PPTX) ``` ![Light blue rectangle with an inner shadow](https://docs.aspose.com/slides/python-net/shape-effect/inner_shadow_effect.png) To remove the inner shadow, call [disable_inner_shadow_effect](https://reference.aspose.com/slides/python-net/aspose.slides/effectformat/disable_inner_shadow_effect/) on the shape's effect format. ## **Apply a Reflection Effect** To apply a reflection effect in Aspose.Slides for Python via .NET, you can add a mirror-like reflection to shapes, adjusting parameters such as distance, transparency, and size. This effect enhances the aesthetic of your presentations by giving shapes a more polished and sophisticated look. It’s easy to implement with simple code, enabling quick application across multiple elements for a consistent design. This Python code shows how to apply the [reflection effect](https://reference.aspose.com/slides/python-net/aspose.slides/effectformat/reflection_effect/) to a shape: ```python import aspose.slides as slides with slides.Presentation() as presentation: slide = presentation.slides[0] shape = slide.shapes.add_auto_shape(slides.ShapeType.ROUND_CORNER_RECTANGLE, 20, 20, 200, 100) shape.effect_format.enable_reflection_effect() shape.effect_format.reflection_effect.rectangle_align = slides.RectangleAlignment.BOTTOM shape.effect_format.reflection_effect.direction = 90 shape.effect_format.reflection_effect.distance = 40 shape.effect_format.reflection_effect.blur_radius = 2 presentation.save("reflection_effect.pptx", slides.export.SaveFormat.PPTX) ``` ![Reflection effect](https://docs.aspose.com/slides/python-net/shape-effect/reflection_effect.png) ## **Apply a Glow Effect** To apply a glow effect to a shape in Aspose.Slides for Python via .NET, you can add a soft, luminous aura around shapes, adjusting properties like color and size. This effect helps make shapes stand out and adds an attractive, eye-catching visual element to your presentation. It's easy to implement with minimal code, enhancing the overall look of your slides. This Python code shows how to apply the [glow effect](https://reference.aspose.com/slides/python-net/aspose.slides/effectformat/glow_effect/) to a shape: ```python import aspose.slides as slides with slides.Presentation() as presentation: slide = presentation.slides[0] shape = slide.shapes.add_auto_shape(slides.ShapeType.ROUND_CORNER_RECTANGLE, 20, 20, 200, 100) shape.effect_format.enable_glow_effect() shape.effect_format.glow_effect.color.color = slides.Color.magenta shape.effect_format.glow_effect.radius = 15 presentation.save("glow_effect.pptx", slides.export.SaveFormat.PPTX) ``` ![Glow effect](https://docs.aspose.com/slides/python-net/shape-effect/glow_effect.png) ## **Apply a Soft Edges Effect** To apply a soft edges effect in Aspose.Slides for Python via .NET, you can create a smooth, blurred transition around the edges of a shape. This effect adds a more subtle and refined look, perfect for designs that need a gentle, softer appearance. You can easily adjust parameters like radius to achieve the desired effect across various shapes in your presentation. This Python code shows how to apply the [soft edges](https://reference.aspose.com/slides/python-net/aspose.slides/effectformat/soft_edge_effect/) to a shape: ```python import aspose.slides as slides with slides.Presentation() as presentation: slide = presentation.slides[0] shape = slide.shapes.add_auto_shape(slides.ShapeType.ROUND_CORNER_RECTANGLE, 20, 20, 200, 150) shape.effect_format.enable_soft_edge_effect() shape.effect_format.soft_edge_effect.radius = 8 presentation.save("soft_edges_effect.pptx", slides.export.SaveFormat.PPTX) ``` ![Soft edges effect](https://docs.aspose.com/slides/python-net/shape-effect/soft_edges_effect.png) ## **Apply a Blur Effect** Use shape blur to soften a shape's fill and outline while keeping the shape editable. Call [set_blur_effect](https://reference.aspose.com/slides/python-net/aspose.slides/effectformat/set_blur_effect/) on the shape's effect format. The radius is measured in points (1/72 inch): use a nonnegative value, with larger values producing stronger blur. A radius of zero leaves the appearance unchanged. The [grow](https://reference.aspose.com/slides/python-net/aspose.slides.effects/blur/grow/) setting controls the visible bounds of the effect. With `False`, the blur is clipped to the original painted bounds, including the outline. With `True`, the blur can extend beyond those bounds. Neither setting changes the shape's position or dimensions. The comparison below uses the same fill, outline, and shape dimensions throughout. The top row uses `grow = False`; the bottom row uses `grow = True`. ![Original rectangle compared with blur radii of 5 and 15 points, with grow disabled and enabled](https://docs.aspose.com/slides/python-net/shape-effect/shape_blur_comparison.png) This Python example creates an orange rectangle with a dark blue outline, applies a 5-point blur, and then updates it to a 15-point blur by calling [set_blur_effect](https://reference.aspose.com/slides/python-net/aspose.slides/effectformat/set_blur_effect/) again. It saves both blurred states, then calls [disable_blur_effect](https://reference.aspose.com/slides/python-net/aspose.slides/effectformat/disable_blur_effect/) and saves the shape without blur. ```python import aspose.slides as slides with slides.Presentation() as presentation: slide = presentation.slides[0] shape = slide.shapes.add_auto_shape(slides.ShapeType.RECTANGLE, 100, 80, 160, 100) shape.fill_format.fill_type = slides.FillType.SOLID shape.fill_format.solid_fill_color.color = slides.Color.orange shape.line_format.fill_format.fill_type = slides.FillType.SOLID shape.line_format.fill_format.solid_fill_color.color = slides.Color.dark_blue shape.line_format.width = 8 shape.effect_format.set_blur_effect(5, False) presentation.save("shape_blur_5.pptx", slides.export.SaveFormat.PPTX) shape.effect_format.set_blur_effect(15, True) presentation.save("shape_blur_15.pptx", slides.export.SaveFormat.PPTX) shape.effect_format.disable_blur_effect() presentation.save("shape_blur_removed.pptx", slides.export.SaveFormat.PPTX) ``` Shape blur affects the fill and outline together. A soft edges effect fades the shape's edges, while shadow blur softens only the shadow. Image transformation effects operate on image content; this example applies blur directly to the shape's effect format without converting the shape to an image. ## **FAQ** **Can I apply multiple effects to the same shape?** Yes, you can combine different effects, such as shadow, reflection, and glow, on a single shape to create a more dynamic appearance. **What shapes can I apply effects to?** You can apply effects to various shapes, including autoshapes, charts, tables, pictures, SmartArt objects, OLE objects, and more. **Can I apply effects to grouped shapes?** Yes, you can apply effects to grouped shapes. The effect will apply to the entire group. ## Related articles - [Create and Apply WordArt Effects in Python](https://docs.aspose.com/slides/python-net/wordart/) # Get Shape Effective Properties from Presentations in Python > Learn how to use Aspose.Slides for Python via .NET to distinguish local, inherited, and effective shape formatting in PowerPoint presentations. Source: https://docs.aspose.com/slides/python-net/shape-effective-properties/ Updated: 2026-11-08 ## **Understand Local, Inherited, and Effective Properties** PowerPoint formatting can come from several places. The value stored directly on an object is its **local value**. If that value is not set, PowerPoint looks at parent formatting sources, such as a paragraph default, a text style, a layout or master slide, a theme, or presentation-level defaults. Those values are **inherited values**. The value that remains after the entire hierarchy is resolved is the **effective value**, which is used to render the object. For example, a text portion may not define its own font height. Its local [font_height](https://reference.aspose.com/slides/python-net/aspose.slides/ibaseportionformat/font_height/) is then `float("nan")`, which means "not set here." The portion can inherit a height from its paragraph, the presentation's default text style, or another applicable source. Calling [get_effective](https://reference.aspose.com/slides/python-net/aspose.slides/iportionformat/get_effective/) on the portion format returns the final resolved height. Use the two kinds of formatting data for different purposes: - Read or change a local format object, such as [IPortionFormat](https://reference.aspose.com/slides/python-net/aspose.slides/iportionformat/), when you need to control where a value is defined. - Read an effective data object, such as [IPortionFormatEffectiveData](https://reference.aspose.com/slides/python-net/aspose.slides/iportionformateffectivedata/), when you need the final, rendered result. Effective data is read-only. ## **Compare Local, Inherited, and Effective Values** The following complete example creates a shape and applies font heights at the presentation, paragraph, and portion levels. Each step prints the values defined at those levels and the resulting effective value for the same text portion. It also demonstrates why effective data must be read again after formatting changes. ```python import math import aspose.slides as slides def format_local_value(value): return "" if math.isnan(value) else str(value) def print_font_heights(caption, presentation, paragraph, portion): presentation_value = presentation.default_text_style.get_level(0).default_portion_format.font_height paragraph_value = paragraph.paragraph_format.default_portion_format.font_height local_value = portion.portion_format.font_height # Read effective data after the preceding changes. effective_value = portion.portion_format.get_effective().font_height print(caption) print(" Presentation default: " + format_local_value(presentation_value)) print(" Paragraph default: " + format_local_value(paragraph_value)) print(" Portion local: " + format_local_value(local_value)) print(" Portion effective: " + str(effective_value)) with slides.Presentation() as presentation: slide = presentation.slides[0] shape = slide.shapes.add_auto_shape(slides.ShapeType.RECTANGLE, 100, 100, 500, 80, False) text_frame = shape.add_text_frame("Effective formatting") paragraph = text_frame.paragraphs[0] portion = paragraph.portions[0] # Define inherited values at two different levels. presentation.default_text_style.get_level(0).default_portion_format.font_height = 20 paragraph.paragraph_format.default_portion_format.font_height = 28 print_font_heights("The portion inherits from the paragraph", presentation, paragraph, portion) # A local value on the portion overrides both inherited values. portion.portion_format.font_height = 36 print_font_heights("A local value overrides inherited values", presentation, paragraph, portion) # Changing an inherited value does not override an existing local value. paragraph.paragraph_format.default_portion_format.font_height = 30 print_font_heights("The local value still has priority", presentation, paragraph, portion) # Clear the local value. The portion now inherits from the paragraph again. portion.portion_format.font_height = float("nan") print_font_heights("The local value is cleared", presentation, paragraph, portion) # Clear the paragraph value. The presentation default now supplies the result. paragraph.paragraph_format.default_portion_format.font_height = float("nan") print_font_heights("The paragraph value is cleared", presentation, paragraph, portion) presentation.save("effective-properties.pptx", slides.export.SaveFormat.PPTX) ``` The priority in this example is portion local formatting, then paragraph formatting, then the presentation default. Other objects can have different inheritance chains, but the principle is the same: a more specific explicit value wins, and [get_effective](https://reference.aspose.com/slides/python-net/aspose.slides/iportionformat/get_effective/) returns the final result. [![Five rows resolve font sizes to 28, 36, 36, 30 and 20 points as local and inherited values are set and cleared.](https://docs.aspose.com/slides/python-net/shape-effective-properties/visual-shape-effective-properties-b9645b4ca164.svg)](https://docs.aspose.com/slides/python-net/shape-effective-properties/visual-shape-effective-properties-b9645b4ca164.svg) *Verified .NET 26.11 values for the article’s sequence: 28 → 36 → 36 → 30 → 20 points. A set portion value wins over the paragraph; clearing it restores inheritance. “Unset” is not zero. Other properties can use different inheritance chains, so read their effective data after changes.* ## **Get Effective Text Properties** Text formatting is split across several objects: - [ITextFrameFormat.get_effective()](https://reference.aspose.com/slides/python-net/aspose.slides/itextframeformat/get_effective/) resolves text-frame properties such as margins, anchoring, autofit, and vertical text direction. - [ITextStyle.get_effective()](https://reference.aspose.com/slides/python-net/aspose.slides/itextstyle/get_effective/) resolves paragraph formatting for each text style level. - [IParagraphFormat.get_effective()](https://reference.aspose.com/slides/python-net/aspose.slides/iparagraphformat/get_effective/) resolves paragraph properties such as alignment, indentation, and bullets. - [IPortionFormat.get_effective()](https://reference.aspose.com/slides/python-net/aspose.slides/iportionformat/get_effective/) resolves character properties such as font height, typeface, color, bold, and italic. For the next example, `text-formatting.pptx` must contain at least one slide and one [AutoShape](https://reference.aspose.com/slides/python-net/aspose.slides/autoshape/) with a non-empty text frame. The AutoShape can appear at any position in the shape collection; the code searches for a suitable object and validates it before use. ```python import aspose.slides as slides def has_non_empty_text(shape): if not isinstance(shape, slides.AutoShape): return False if shape.text_frame is None: return False if shape.text_frame.paragraphs.count == 0: return False return shape.text_frame.paragraphs[0].portions.count > 0 with slides.Presentation("text-formatting.pptx") as presentation: if presentation.slides.count == 0: raise RuntimeError("The presentation contains no slides.") shape = None for candidate in presentation.slides[0].shapes: if has_non_empty_text(candidate): shape = candidate break if shape is None: raise RuntimeError("The first slide must contain an AutoShape with non-empty text.") text_frame = shape.text_frame paragraph = text_frame.paragraphs[0] portion = paragraph.portions[0] text_frame_effective = text_frame.text_frame_format.get_effective() paragraph_effective = paragraph.paragraph_format.get_effective() portion_effective = portion.portion_format.get_effective() print("Text frame margins:") print(" Left: " + str(text_frame_effective.margin_left)) print(" Top: " + str(text_frame_effective.margin_top)) print(" Right: " + str(text_frame_effective.margin_right)) print(" Bottom: " + str(text_frame_effective.margin_bottom)) print("Paragraph alignment: " + str(paragraph_effective.alignment)) print("Font height: " + str(portion_effective.font_height)) print("Bold: " + str(portion_effective.font_bold)) effective_text_style = text_frame.text_frame_format.text_style.get_effective() for level in range(9): level_effective = effective_text_style.get_level(level) print("Level " + str(level) + " indent: " + str(level_effective.indent)) ``` ## **Get Effective 3D Properties** [IThreeDFormat.get_effective()](https://reference.aspose.com/slides/python-net/aspose.slides/ithreedformat/get_effective/) returns one [IThreeDFormatEffectiveData](https://reference.aspose.com/slides/python-net/aspose.slides/ithreedformateffectivedata/) object that groups all resolved 3D settings. Its [camera](https://reference.aspose.com/slides/python-net/aspose.slides/ithreedformateffectivedata/camera/), [light_rig](https://reference.aspose.com/slides/python-net/aspose.slides/ithreedformateffectivedata/light_rig/), [bevel_top](https://reference.aspose.com/slides/python-net/aspose.slides/ithreedformateffectivedata/bevel_top/), and [bevel_bottom](https://reference.aspose.com/slides/python-net/aspose.slides/ithreedformateffectivedata/bevel_bottom/) properties expose the corresponding effective data. Reading these related settings together makes it easier to understand the final 3D appearance of a shape. For this example, `shape-3d.pptx` must contain at least one shape on its first slide. Apply 3D camera, lighting, or bevel settings to that shape if you want the output to contain values other than the defaults. ```python import aspose.slides as slides with slides.Presentation("shape-3d.pptx") as presentation: if presentation.slides.count == 0 or presentation.slides[0].shapes.count == 0: raise RuntimeError("The first slide must contain a shape.") shape = presentation.slides[0].shapes[0] three_d_effective = shape.three_d_format.get_effective() print("Camera:") print(" Type: " + str(three_d_effective.camera.camera_type)) print(" Field of view: " + str(three_d_effective.camera.field_of_view_angle)) print(" Zoom: " + str(three_d_effective.camera.zoom)) print("Light rig:") print(" Type: " + str(three_d_effective.light_rig.light_type)) print(" Direction: " + str(three_d_effective.light_rig.direction)) print("Top bevel:") print(" Type: " + str(three_d_effective.bevel_top.bevel_type)) print(" Width: " + str(three_d_effective.bevel_top.width)) print(" Height: " + str(three_d_effective.bevel_top.height)) ``` ## **Get Effective Table Formatting** Table formatting can come from the table style and from formats applied to the whole table, a column, a row, or an individual cell. For conflicts among explicitly defined fills, the priority is cell, row, column, and then whole table. The effective format of a cell is the final format used to draw that cell. For this example, `table-formatting.pptx` must contain at least one table on its first slide. The table must have at least one row and one column. The code searches for a [Table](https://reference.aspose.com/slides/python-net/aspose.slides/table/) instead of assuming that `shapes[0]` is a table. ```python import aspose.slides as slides with slides.Presentation("table-formatting.pptx") as presentation: if presentation.slides.count == 0: raise RuntimeError("The presentation contains no slides.") table = None for shape in presentation.slides[0].shapes: if isinstance(shape, slides.Table): table = shape break if table is None: raise RuntimeError("The first slide must contain a table.") if table.rows.count == 0 or table.columns.count == 0: raise RuntimeError("The table must contain at least one cell.") table_effective = table.table_format.get_effective() row_effective = table.rows[0].row_format.get_effective() column_effective = table.columns[0].column_format.get_effective() cell_effective = table.rows[0][0].cell_format.get_effective() print("Table fill: " + str(table_effective.fill_format.fill_type)) print("Row fill: " + str(row_effective.fill_format.fill_type)) print("Column fill: " + str(column_effective.fill_format.fill_type)) print("Final cell fill: " + str(cell_effective.fill_format.fill_type)) ``` If you need the color rather than only the fill type, first check the effective [fill_type](https://reference.aspose.com/slides/python-net/aspose.slides/ifillformateffectivedata/fill_type/), and then read the property that applies to that type, for example, [solid_fill_color](https://reference.aspose.com/slides/python-net/aspose.slides/ifillformateffectivedata/solid_fill_color/) for a solid fill. ## **Re-read Effective Data After Changes** Effective data describes the formatting hierarchy at the time it is resolved. Call `get_effective` again after changing anything that can participate in that hierarchy, including: - the object's local formatting; - paragraph or text-frame defaults; - a table style, table, column, row, or cell format; - layout or master slide formatting; - theme data or presentation-level defaults; - the layout or master assigned to a slide. Do not keep an effective data object as a permanent snapshot. Aspose.Slides may cache some effective data internally, and a later `get_effective` call can refresh that data. If you need to compare values before and after a change, copy the scalar values you need, such as a font height, color, alignment, or bevel width, into your own variables before making the change. To change a value, update the appropriate local format object and then call `get_effective` to verify the result. Effective data objects themselves are read-only. ## **FAQ** **How can I tell which level supplied an effective value?** Effective data contains the final value, not its source. Inspect the applicable local objects from the most specific level outward. For text, this can include the portion, paragraph, text frame, layout, master, theme, and presentation defaults. Undefined values such as `float("nan")` or `None` indicate that the search continues to another level. **What happens when no level defines a property?** Aspose.Slides resolves the appropriate PowerPoint or library default. That resolved value appears in the effective data even though no local object explicitly defines it. **Why does an effective value sometimes equal the local value?** The local value won the inheritance calculation. This is expected when the property is explicitly set on the object and no more specific rule overrides it. **When should I use local data instead of effective data?** Use local data to inspect or edit a specific formatting level. Use effective data when you need the final appearance after inheritance, theme rules, and applicable styles have been resolved. The [complete comparison example](https://docs.aspose.com/slides/python-net/shape-effective-properties/#compare-local-inherited-and-effective-values) demonstrates both in the same workflow. # Format PowerPoint Shapes in Python > Learn how to format PowerPoint shapes in Python using Aspose.Slides—set fill, line, and effect styles for PPT, PPTX, and ODP files with precision and full control. Source: https://docs.aspose.com/slides/python-net/shape-formatting/ Updated: 2026-11-05 ## **Introduction** Format shapes in PowerPoint by adjusting their outlines, fills, and effects. Aspose.Slides for Python via .NET lets you control these settings programmatically, including transparency, rotation, and 3D formatting. ![Shape formatting options in PowerPoint](https://docs.aspose.com/slides/python-net/shape-formatting/format-shape-powerpoint.png) Aspose.Slides for Python via .NET provides classes and properties that allow you to format shapes using the same options available in PowerPoint. ## **Format Lines** Use [Shape.line_format](https://reference.aspose.com/slides/python-net/aspose.slides/shape/line_format/) to control a shape’s outline. This example creates an unfilled rectangle with a blue, dashed outline. [LineFormat.style](https://reference.aspose.com/slides/python-net/aspose.slides/lineformat/style/) selects a thick-thin compound line, while [LineFormat.width](https://reference.aspose.com/slides/python-net/aspose.slides/lineformat/width/) sets its width to 7 points and [LineFormat.dash_style](https://reference.aspose.com/slides/python-net/aspose.slides/lineformat/dash_style/) selects the dash pattern. ```python import aspose.slides as slides import aspose.pydrawing as draw with slides.Presentation() as presentation: slide = presentation.slides[0] shape = slide.shapes.add_auto_shape(slides.ShapeType.RECTANGLE, 50, 50, 150, 75) shape.fill_format.fill_type = slides.FillType.NO_FILL shape.line_format.style = slides.LineStyle.THICK_THIN shape.line_format.width = 7 shape.line_format.dash_style = slides.LineDashStyle.DASH shape.line_format.fill_format.fill_type = slides.FillType.SOLID shape.line_format.fill_format.solid_fill_color.color = draw.Color.blue presentation.save("formatted_lines.pptx", slides.export.SaveFormat.PPTX) ``` The result: ![The formatted lines in the presentation](https://docs.aspose.com/slides/python-net/shape-formatting/formatted-lines.png) ### **Set Custom Line Dash Patterns** Use [LineFormat.custom_dash_pattern](https://reference.aspose.com/slides/python-net/aspose.slides/lineformat/custom_dash_pattern/) when predefined line styles do not provide the dash lengths and gaps you need, for example for branded outlines or technical diagrams. Assigning a pattern automatically sets [LineFormat.dash_style](https://reference.aspose.com/slides/python-net/aspose.slides/lineformat/dash_style/) to [LineDashStyle.CUSTOM](https://reference.aspose.com/slides/python-net/aspose.slides/linedashstyle/). List entries alternate between dash and gap lengths, starting with a dash. Each value is a multiple of the line width: `[4, 2]` at a width of 3 points produces a 12-point dash followed by a 6-point gap. Use pairs of finite, nonnegative values to define complete dash-and-gap segments. The example uses positive values to keep every dash and gap visible. This example creates five blue lines with the same length and flat caps. The first three compare patterns at a width of 3 points. The fourth repeats the first pattern at twice the width, doubling both the dash and gap lengths. The fifth switches from a custom pattern to a solid line. ```python import aspose.slides as slides with slides.Presentation() as presentation: presentation.slide_size.set_size(600, 300, slides.SlideSizeScaleType.DO_NOT_SCALE) slide = presentation.slides[0] patterns = [ [4, 2], [1, 2], [6, 2, 1, 2], [4, 2], [4, 2] ] for i, pattern in enumerate(patterns): line = slide.shapes.add_auto_shape(slides.ShapeType.LINE, 50, 50 + i * 50, 500, 0) line.line_format.width = 6 if i == 3 else 3 line.line_format.fill_format.fill_type = slides.FillType.SOLID line.line_format.fill_format.solid_fill_color.preset_color = slides.PresetColor.DARK_BLUE line.line_format.cap_style = slides.LineCapStyle.FLAT line.line_format.begin_arrowhead_style = slides.LineArrowheadStyle.NONE line.line_format.end_arrowhead_style = slides.LineArrowheadStyle.NONE line.line_format.custom_dash_pattern = pattern # Return the last line to a solid style. slide.shapes[4].line_format.dash_style = slides.LineDashStyle.SOLID presentation.save("custom_dash_patterns.pptx", slides.export.SaveFormat.PPTX) ``` To return to a predefined dashed style instead, assign [LineDashStyle.DASH](https://reference.aspose.com/slides/python-net/aspose.slides/linedashstyle/) to [LineFormat.dash_style](https://reference.aspose.com/slides/python-net/aspose.slides/lineformat/dash_style/). The selected style controls the line's appearance. The result in PowerPoint, from top to bottom: **{4, 2}, 3 pt**; **{1, 2}, 3 pt**; **{6, 2, 1, 2}, 3 pt**; **{4, 2}, 6 pt**; and **Solid, 3 pt**. ![Three custom dash patterns, a wider line using the first pattern, and a solid line in PowerPoint](https://docs.aspose.com/slides/python-net/shape-formatting/custom-dash-patterns.png) ### **Set Line Caps** Use [LineFormat.cap_style](https://reference.aspose.com/slides/python-net/aspose.slides/lineformat/cap_style/) to set the ends of an open line. The [LineCapStyle](https://reference.aspose.com/slides/python-net/aspose.slides/linecapstyle/) enumeration provides three explicit cap styles: - `FLAT`: The stroke stops at the endpoint. - `ROUND`: A semicircular cap extends beyond the endpoint by half the line width. - `SQUARE`: A square cap extends beyond the endpoint by half the line width. The enumeration also includes `NOT_DEFINED`, which means that no cap style is explicitly assigned. Caps are different from arrowheads, which add symbols to line ends, and joins, which control corners between line segments. This example disables arrowheads through [LineFormat.begin_arrowhead_style](https://reference.aspose.com/slides/python-net/aspose.slides/lineformat/begin_arrowhead_style/) and [LineFormat.end_arrowhead_style](https://reference.aspose.com/slides/python-net/aspose.slides/lineformat/end_arrowhead_style/) so that only the cap shapes are compared. The following example creates three otherwise identical horizontal lines, 20 points wide. From top to bottom, they use flat, round, and square caps. Their endpoints have the same horizontal coordinates; the round and square caps extend 10 points beyond each endpoint. ```python import aspose.slides as slides with slides.Presentation() as presentation: presentation.slide_size.set_size(500, 240, slides.SlideSizeScaleType.DO_NOT_SCALE) slide = presentation.slides[0] cap_styles = [slides.LineCapStyle.FLAT, slides.LineCapStyle.ROUND, slides.LineCapStyle.SQUARE] for i, cap_style in enumerate(cap_styles): line = slide.shapes.add_auto_shape(slides.ShapeType.LINE, 100, 50 + i * 70, 300, 0) line.line_format.width = 20 line.line_format.fill_format.fill_type = slides.FillType.SOLID line.line_format.fill_format.solid_fill_color.preset_color = slides.PresetColor.DARK_BLUE line.line_format.dash_style = slides.LineDashStyle.SOLID line.line_format.cap_style = cap_style line.line_format.begin_arrowhead_style = slides.LineArrowheadStyle.NONE line.line_format.end_arrowhead_style = slides.LineArrowheadStyle.NONE presentation.save("line_caps.pptx", slides.export.SaveFormat.PPTX) ``` The result in PowerPoint, from top to bottom: **Flat**, **Round**, and **Square**. ![Flat, round, and square caps on identical thick lines in PowerPoint](https://docs.aspose.com/slides/python-net/shape-formatting/line-caps.png) ## **Apply Sketch Effects to Shape Lines** A sketch effect makes a shape line look hand-drawn. Use [Shape.line_format](https://reference.aspose.com/slides/python-net/aspose.slides/shape/line_format/) to access the line settings, [LineFormat.sketch_format](https://reference.aspose.com/slides/python-net/aspose.slides/lineformat/sketch_format/) to access the sketch settings, and [SketchFormat.sketch_type](https://reference.aspose.com/slides/python-net/aspose.slides/sketchformat/sketch_type/) to select a value from the [LineSketchType](https://reference.aspose.com/slides/python-net/aspose.slides/linesketchtype/) enumeration. The following Python code shows how to apply a [LineSketchType.CURVED](https://reference.aspose.com/slides/python-net/aspose.slides/linesketchtype/) effect, read the explicitly assigned value, and remove the effect with [LineSketchType.NONE](https://reference.aspose.com/slides/python-net/aspose.slides/linesketchtype/): ```python import aspose.slides as slides with slides.Presentation() as presentation: slide = presentation.slides[0] shape = slide.shapes.add_auto_shape(slides.ShapeType.RECTANGLE, 50, 50, 200, 100) sketch_format = shape.line_format.sketch_format sketch_format.sketch_type = slides.LineSketchType.CURVED explicit_sketch_type = sketch_format.sketch_type print(f"Explicit sketch type: {explicit_sketch_type}") sketch_format.sketch_type = slides.LineSketchType.NONE ``` The value returned by [SketchFormat.sketch_type](https://reference.aspose.com/slides/python-net/aspose.slides/sketchformat/sketch_type/) represents the setting assigned directly to the shape. If the line formatting can be inherited from a theme, master slide, or layout slide, use [LineFormat.get_effective](https://reference.aspose.com/slides/python-net/aspose.slides/lineformat/get_effective/), access [ILineFormatEffectiveData.sketch_format](https://reference.aspose.com/slides/python-net/aspose.slides/ilineformateffectivedata/sketch_format/), and read [ISketchFormatEffectiveData.sketch_type](https://reference.aspose.com/slides/python-net/aspose.slides/isketchformateffectivedata/sketch_type/). The effective value reflects the formatting that is actually applied after inheritance is resolved. This example requires an existing presentation with at least one shape on its first slide and prints both values: ```python import aspose.slides as slides with slides.Presentation("presentation.pptx") as presentation: shape = presentation.slides[0].shapes[0] line_format = shape.line_format explicit_sketch_type = line_format.sketch_format.sketch_type effective_line_format = line_format.get_effective() effective_sketch_type = effective_line_format.sketch_format.sketch_type print(f"Explicit sketch type: {explicit_sketch_type}") print(f"Effective sketch type: {effective_sketch_type}") ``` ## **Format Join Styles** Here are the three join type options: * Round * Miter * Bevel The join style controls how two outline segments meet at a corner. Use **Round** for rounded corners, **Miter** for sharp corners, or **Bevel** for flattened corners. ![The join style in the presentation](https://docs.aspose.com/slides/python-net/shape-formatting/join-style-powerpoint.png) This example creates three black rectangles with blue outlines 15 points wide. It sets [LineFormat.join_style](https://reference.aspose.com/slides/python-net/aspose.slides/lineformat/join_style/) to the miter, bevel, and round values of [LineJoinStyle](https://reference.aspose.com/slides/python-net/aspose.slides/linejoinstyle/), respectively, to compare how the corners are drawn. ```python import aspose.slides as slides import aspose.pydrawing as draw with slides.Presentation() as presentation: slide = presentation.slides[0] miter_shape = slide.shapes.add_auto_shape(slides.ShapeType.RECTANGLE, 20, 20, 150, 75) bevel_shape = slide.shapes.add_auto_shape(slides.ShapeType.RECTANGLE, 210, 20, 150, 75) round_shape = slide.shapes.add_auto_shape(slides.ShapeType.RECTANGLE, 20, 135, 150, 75) miter_shape.fill_format.fill_type = slides.FillType.SOLID miter_shape.fill_format.solid_fill_color.color = draw.Color.black bevel_shape.fill_format.fill_type = slides.FillType.SOLID bevel_shape.fill_format.solid_fill_color.color = draw.Color.black round_shape.fill_format.fill_type = slides.FillType.SOLID round_shape.fill_format.solid_fill_color.color = draw.Color.black miter_shape.line_format.width = 15 bevel_shape.line_format.width = 15 round_shape.line_format.width = 15 miter_shape.line_format.fill_format.fill_type = slides.FillType.SOLID miter_shape.line_format.fill_format.solid_fill_color.color = draw.Color.blue bevel_shape.line_format.fill_format.fill_type = slides.FillType.SOLID bevel_shape.line_format.fill_format.solid_fill_color.color = draw.Color.blue round_shape.line_format.fill_format.fill_type = slides.FillType.SOLID round_shape.line_format.fill_format.solid_fill_color.color = draw.Color.blue miter_shape.line_format.join_style = slides.LineJoinStyle.MITER bevel_shape.line_format.join_style = slides.LineJoinStyle.BEVEL round_shape.line_format.join_style = slides.LineJoinStyle.ROUND miter_shape.text_frame.text = "Miter Join Style" bevel_shape.text_frame.text = "Bevel Join Style" round_shape.text_frame.text = "Round Join Style" presentation.save("join_styles.pptx", slides.export.SaveFormat.PPTX) ``` ### **Limit Miter Joins at Sharp Corners** Use [LineFormat.miter_limit](https://reference.aspose.com/slides/python-net/aspose.slides/lineformat/miter_limit/) with [LineFormat.join_style](https://reference.aspose.com/slides/python-net/aspose.slides/lineformat/join_style/) set to [LineJoinStyle.MITER](https://reference.aspose.com/slides/python-net/aspose.slides/linejoinstyle/) to limit how far a sharp corner can extend. The limit is a ratio of the distance between the inner and outer corners of the join to the line width. For example, a value of `8` permits a miter length of up to eight times the line width; it is not a measurement in points. If the corner would exceed the limit, PowerPoint uses a beveled join at that corner. A larger limit allows sharper points. The setting affects miter joins only, and changing it has no visible effect when the corner remains within both limits. This example creates two identical, unfilled triangles with outlines 20 points wide. The left triangle uses a limit of `2`, and the right uses `8`. Each triangle is 80 points wide and 160 points high, giving its top corner a miter-length-to-line-width ratio of approximately `4.12`. Consequently, PowerPoint bevels the left apex and preserves the right apex. ```python import aspose.slides as slides with slides.Presentation() as presentation: presentation.slide_size.set_size(500, 320, slides.SlideSizeScaleType.DO_NOT_SCALE) slide = presentation.slides[0] miter_limits = [2.0, 8.0] for i, miter_limit in enumerate(miter_limits): triangle = slide.shapes.add_auto_shape(slides.ShapeType.TRIANGLE, 90 + i * 240, 110, 80, 160) triangle.fill_format.fill_type = slides.FillType.NO_FILL triangle.line_format.width = 20 triangle.line_format.fill_format.fill_type = slides.FillType.SOLID triangle.line_format.fill_format.solid_fill_color.preset_color = slides.PresetColor.DARK_BLUE triangle.line_format.join_style = slides.LineJoinStyle.MITER triangle.line_format.miter_limit = miter_limit presentation.save("miter_limits.pptx", slides.export.SaveFormat.PPTX) ``` The result in PowerPoint: **Miter limit 2** on the left and **miter limit 8** on the right. ![A beveled apex with miter limit 2 and a pointed apex with miter limit 8 in PowerPoint](https://docs.aspose.com/slides/python-net/shape-formatting/miter-limits.png) ## **Gradient Fill** A gradient fill blends colors across a shape. This example fills an ellipse with a linear gradient at a 45-degree angle from red to purple using [FillFormat.gradient_format](https://reference.aspose.com/slides/python-net/aspose.slides/fillformat/gradient_format/). The [GradientStopCollection.add](https://reference.aspose.com/slides/python-net/aspose.slides/gradientstopcollection/add/) method places the color stops at 0 and 1, the beginning and end of the gradient. Clearing the existing stops ensures that only these two colors are used. ```python import aspose.slides as slides with slides.Presentation() as presentation: slide = presentation.slides[0] shape = slide.shapes.add_auto_shape(slides.ShapeType.ELLIPSE, 50, 50, 150, 75) shape.fill_format.fill_type = slides.FillType.GRADIENT shape.fill_format.gradient_format.gradient_shape = slides.GradientShape.LINEAR shape.fill_format.gradient_format.linear_gradient_angle = 45 shape.fill_format.gradient_format.gradient_stops.clear() shape.fill_format.gradient_format.gradient_stops.add(1.0, slides.PresetColor.PURPLE) shape.fill_format.gradient_format.gradient_stops.add(0.0, slides.PresetColor.RED) presentation.save("gradient_fill.pptx", slides.export.SaveFormat.PPTX) ``` The result: ![The ellipse with gradient fill](https://docs.aspose.com/slides/python-net/shape-formatting/gradient-fill.png) If a gradient looks different in an exported image than it does in PowerPoint, see [Choose a Gradient Rendering Style](https://docs.aspose.com/slides/python-net/convert-powerpoint-to-png/#choose-a-gradient-rendering-style). You can select a rendering style without changing the gradient fill stored in the presentation. ### **Set the Linear Gradient Angle** Use [GradientFormat.linear_gradient_angle](https://reference.aspose.com/slides/python-net/aspose.slides/gradientformat/linear_gradient_angle/) to control the orientation of a [GradientShape.LINEAR](https://reference.aspose.com/slides/python-net/aspose.slides/gradientshape/) fill. The angle is measured in degrees and increases clockwise: `0` runs from left to right, `90` from top to bottom, `180` from right to left, and `270` from bottom to top. Fractional angles are supported. Finite angles outside `[0, 360)` are normalized to one revolution; for example, `-45` becomes `315` and `360` becomes `0`. This example creates six rectangles with identical red, green, and blue stops at positions `0`, `0.5`, and `1`. Scaling is disabled so that the angle can be compared independently of the rectangles' proportions. The angles, from left to right, are `0`, `45`, and `90` in the first row, and `135`, `180`, and `270` in the second row. ```python import aspose.slides as slides with slides.Presentation() as presentation: presentation.slide_size.set_size(720, 400, slides.SlideSizeScaleType.DO_NOT_SCALE) slide = presentation.slides[0] angles = [0, 45, 90, 135, 180, 270] for i, angle in enumerate(angles): x = 30 + (i % 3) * 230 y = 30 + (i // 3) * 190 shape = slide.shapes.add_auto_shape(slides.ShapeType.RECTANGLE, x, y, 200, 150) shape.line_format.fill_format.fill_type = slides.FillType.NO_FILL shape.fill_format.fill_type = slides.FillType.GRADIENT gradient = shape.fill_format.gradient_format gradient.gradient_shape = slides.GradientShape.LINEAR gradient.gradient_stops.clear() gradient.gradient_stops.add(0.0, slides.PresetColor.RED) gradient.gradient_stops.add(0.5, slides.PresetColor.LIME) gradient.gradient_stops.add(1.0, slides.PresetColor.BLUE) gradient.linear_gradient_scaled = slides.NullableBool.FALSE gradient.linear_gradient_angle = angle presentation.save("linear_gradient_angles.pptx", slides.export.SaveFormat.PPTX) ``` The result in PowerPoint: ![Linear gradients at 0, 45, and 90 degrees in the top row, and 135, 180, and 270 degrees in the bottom row](https://docs.aspose.com/slides/python-net/shape-formatting/linear-gradient-angles.png) ### **Scale a Linear Gradient with the Shape** [GradientFormat.linear_gradient_scaled](https://reference.aspose.com/slides/python-net/aspose.slides/gradientformat/linear_gradient_scaled/) accepts a [NullableBool](https://reference.aspose.com/slides/python-net/aspose.slides/nullablebool/) value. Set it explicitly to `FALSE` to keep the geometric gradient angle as the shape's proportions change, or to `TRUE` to scale the gradient with the shape's width and height. With scaling enabled, the visible angle can differ from the assigned angle on a non-square shape. The following example uses a `45`-degree angle and the same color stops as the angle comparison. The left column uses `FALSE`; the right column uses `TRUE`. Each column contains a wide rectangle above a tall rectangle. Both start with the same wide dimensions; changing the second rectangle's width and height demonstrates how the fill responds to resizing without changing its gradient settings. ```python import aspose.slides as slides with slides.Presentation() as presentation: presentation.slide_size.set_size(720, 460, slides.SlideSizeScaleType.DO_NOT_SCALE) slide = presentation.slides[0] scaling_options = [slides.NullableBool.FALSE, slides.NullableBool.TRUE] for column, scaling in enumerate(scaling_options): for row in range(2): x = 30 + column * 360 y = 30 if row == 0 else 150 shape = slide.shapes.add_auto_shape(slides.ShapeType.RECTANGLE, x, y, 300, 90) shape.line_format.fill_format.fill_type = slides.FillType.NO_FILL shape.fill_format.fill_type = slides.FillType.GRADIENT gradient = shape.fill_format.gradient_format gradient.gradient_shape = slides.GradientShape.LINEAR gradient.gradient_stops.clear() gradient.gradient_stops.add(0.0, slides.PresetColor.RED) gradient.gradient_stops.add(0.5, slides.PresetColor.LIME) gradient.gradient_stops.add(1.0, slides.PresetColor.BLUE) gradient.linear_gradient_angle = 45 gradient.linear_gradient_scaled = scaling if row == 1: shape.width = 90 shape.height = 280 presentation.save("linear_gradient_scaling.pptx", slides.export.SaveFormat.PPTX) ``` The result in PowerPoint, with scaling disabled on the left and enabled on the right: ![Wide and tall rectangles with a 45-degree gradient, comparing linear_gradient_scaled FALSE on the left with TRUE on the right](https://docs.aspose.com/slides/python-net/shape-formatting/linear-gradient-scaling.png) With scaling disabled, the diagonal color bands keep the same orientation in both rectangles. With scaling enabled, the bands stretch with the shape's proportions. This helps reproduce a template's gradient when adapting a shape to a different size. On a square, enabling scaling does not change the appearance of this `45`-degree gradient. Both the angle and scaling settings apply to linear gradients. They do not control [GradientShape.RADIAL or GradientShape.RECTANGLE](https://reference.aspose.com/slides/python-net/aspose.slides/gradientshape/) fills. ### **Combine the Angle with Gradient Direction** [GradientFormat.gradient_direction](https://reference.aspose.com/slides/python-net/aspose.slides/gradientformat/gradient_direction/) selects a gradient style from the [GradientDirection](https://reference.aspose.com/slides/python-net/aspose.slides/gradientdirection/) enumeration; it is not a substitute for a numeric angle. For a linear gradient, the corner styles can change the area over which the colors are distributed without changing [linear_gradient_angle](https://reference.aspose.com/slides/python-net/aspose.slides/gradientformat/linear_gradient_angle/). Keep the direction unchanged when comparing angles or scaling. The following example applies the same settings in opposite orders. The two rectangles have the same appearance: assigning the direction before or after the angle does not change the result. ```python import aspose.slides as slides with slides.Presentation() as presentation: slide = presentation.slides[0] for i in range(2): shape = slide.shapes.add_auto_shape(slides.ShapeType.RECTANGLE, 30, 30 + i * 140, 320, 100) shape.line_format.fill_format.fill_type = slides.FillType.NO_FILL shape.fill_format.fill_type = slides.FillType.GRADIENT gradient = shape.fill_format.gradient_format gradient.gradient_shape = slides.GradientShape.LINEAR gradient.gradient_stops.clear() gradient.gradient_stops.add(0.0, slides.PresetColor.RED) gradient.gradient_stops.add(0.5, slides.PresetColor.LIME) gradient.gradient_stops.add(1.0, slides.PresetColor.BLUE) gradient.linear_gradient_scaled = slides.NullableBool.TRUE if i == 0: gradient.gradient_direction = slides.GradientDirection.FROM_CORNER1 gradient.linear_gradient_angle = 30 else: gradient.linear_gradient_angle = 30 gradient.gradient_direction = slides.GradientDirection.FROM_CORNER1 presentation.save("linear_gradient_direction.pptx", slides.export.SaveFormat.PPTX) ``` ## **Pattern Fill** A pattern fill applies a two-color design, such as dots, stripes, or checks. This example uses [PatternFormat.pattern_style](https://reference.aspose.com/slides/python-net/aspose.slides/patternformat/pattern_style/) to select a trellis pattern. [PatternFormat.back_color](https://reference.aspose.com/slides/python-net/aspose.slides/patternformat/back_color/) supplies the light gray background, and [PatternFormat.fore_color](https://reference.aspose.com/slides/python-net/aspose.slides/patternformat/fore_color/) supplies the yellow pattern color. ```python import aspose.slides as slides import aspose.pydrawing as draw with slides.Presentation() as presentation: slide = presentation.slides[0] shape = slide.shapes.add_auto_shape(slides.ShapeType.RECTANGLE, 50, 50, 150, 75) shape.fill_format.fill_type = slides.FillType.PATTERN shape.fill_format.pattern_format.pattern_style = slides.PatternStyle.TRELLIS shape.fill_format.pattern_format.back_color.color = draw.Color.light_gray shape.fill_format.pattern_format.fore_color.color = draw.Color.yellow presentation.save("pattern_fill.pptx", slides.export.SaveFormat.PPTX) ``` The result: ![The rectangle with pattern fill](https://docs.aspose.com/slides/python-net/shape-formatting/pattern-fill.png) ## **Picture Fill** A picture fill uses an image inside a shape. This example requires a local image and uses [Images.from_file](https://reference.aspose.com/slides/python-net/aspose.slides/images/from_file/) to load it into the presentation’s image collection. Setting [PictureFillFormat.picture_fill_mode](https://reference.aspose.com/slides/python-net/aspose.slides/picturefillformat/picture_fill_mode/) to the tiled mode repeats the image within the rectangle. The source image used here is shown below: ![The lotus picture](https://docs.aspose.com/slides/python-net/shape-formatting/lotus.png) ```python import aspose.slides as slides with slides.Presentation() as presentation: slide = presentation.slides[0] shape = slide.shapes.add_auto_shape(slides.ShapeType.RECTANGLE, 50, 50, 255, 130) shape.fill_format.fill_type = slides.FillType.PICTURE shape.fill_format.picture_fill_format.picture_fill_mode = slides.PictureFillMode.TILE with slides.Images.from_file("lotus.png") as image: presentation_image = presentation.images.add_image(image) shape.fill_format.picture_fill_format.picture.image = presentation_image presentation.save("picture_fill.pptx", slides.export.SaveFormat.PPTX) ``` The result: ![The shape with picture fill](https://docs.aspose.com/slides/python-net/shape-formatting/picture-fill.png) ### **Tile Picture As Texture** If you want to set a tiled picture as a texture and customize the tiling behavior, you can use the following properties of the [PictureFillFormat](https://reference.aspose.com/slides/python-net/aspose.slides/picturefillformat/) class: - [picture_fill_mode](https://reference.aspose.com/slides/python-net/aspose.slides/picturefillformat/picture_fill_mode/): Sets the picture fill mode—either `TILE` or `STRETCH`. - [tile_alignment](https://reference.aspose.com/slides/python-net/aspose.slides/picturefillformat/tile_alignment/): Specifies the alignment of the tiles within the shape. - [tile_flip](https://reference.aspose.com/slides/python-net/aspose.slides/picturefillformat/tile_flip/): Controls whether the tile is flipped horizontally, vertically, or both. - [tile_offset_x](https://reference.aspose.com/slides/python-net/aspose.slides/picturefillformat/tile_offset_x/): Sets the horizontal offset of the tile (in points) from the shape’s origin. - [tile_offset_y](https://reference.aspose.com/slides/python-net/aspose.slides/picturefillformat/tile_offset_y/): Sets the vertical offset of the tile (in points) from the shape’s origin. - [tile_scale_x](https://reference.aspose.com/slides/python-net/aspose.slides/picturefillformat/tile_scale_x/): Defines the horizontal scale of the tile as a percentage. - [tile_scale_y](https://reference.aspose.com/slides/python-net/aspose.slides/picturefillformat/tile_scale_y/): Defines the vertical scale of the tile as a percentage. This example requires a local image and configures [PictureFillFormat](https://reference.aspose.com/slides/python-net/aspose.slides/picturefillformat/) to repeat it at 50% of its original size. Offsets of −32 points shift the tiles horizontally and vertically; bottom-right alignment and flipping in both directions determine how the repeated texture is arranged. ```python import aspose.slides as slides with slides.Presentation() as presentation: first_slide = presentation.slides[0] shape = first_slide.shapes.add_auto_shape(slides.ShapeType.RECTANGLE, 50, 50, 190, 95) shape.fill_format.fill_type = slides.FillType.PICTURE with slides.Images.from_file("lotus.png") as source_image: presentation_image = presentation.images.add_image(source_image) picture_fill_format = shape.fill_format.picture_fill_format picture_fill_format.picture.image = presentation_image picture_fill_format.picture_fill_mode = slides.PictureFillMode.TILE picture_fill_format.tile_offset_x = -32 picture_fill_format.tile_offset_y = -32 picture_fill_format.tile_scale_x = 50 picture_fill_format.tile_scale_y = 50 picture_fill_format.tile_alignment = slides.RectangleAlignment.BOTTOM_RIGHT picture_fill_format.tile_flip = slides.TileFlip.FLIP_BOTH presentation.save("tile.pptx", slides.export.SaveFormat.PPTX) ``` The result: ![The tile options](https://docs.aspose.com/slides/python-net/shape-formatting/tile-options.png) ## **Solid Color Fill** A solid fill gives a shape a single, uniform color. This example sets [FillFormat.fill_type](https://reference.aspose.com/slides/python-net/aspose.slides/fillformat/fill_type/) to the solid fill mode and assigns yellow through [FillFormat.solid_fill_color](https://reference.aspose.com/slides/python-net/aspose.slides/fillformat/solid_fill_color/), then saves the rectangle in a presentation. ```python import aspose.slides as slides import aspose.pydrawing as draw with slides.Presentation() as presentation: slide = presentation.slides[0] shape = slide.shapes.add_auto_shape(slides.ShapeType.RECTANGLE, 50, 50, 150, 75) shape.fill_format.fill_type = slides.FillType.SOLID shape.fill_format.solid_fill_color.color = draw.Color.yellow presentation.save("solid_color_fill.pptx", slides.export.SaveFormat.PPTX) ``` The result: ![The shape with solid color fill](https://docs.aspose.com/slides/python-net/shape-formatting/solid-color-fill.png) ### **Copy Colors While Preserving Theme References** Use [ColorFormat.copy_from](https://reference.aspose.com/slides/python-net/aspose.slides/colorformat/copy_from/) to copy a color definition, including its color type, theme reference, and transformations. This is useful when transferring a fill color between shapes that should continue to follow the presentation theme. The method copies only the color: it does not copy the fill type, outline, or other shape formatting. Set the destination's [FillFormat.fill_type](https://reference.aspose.com/slides/python-net/aspose.slides/fillformat/fill_type/) explicitly. This example creates three rectangles, from left to right: the source, a theme-aware copy, and a fixed RGB copy. The source uses [ColorFormat.scheme_color](https://reference.aspose.com/slides/python-net/aspose.slides/colorformat/scheme_color/) to reference the first accent color and adds a tint through [ColorOperationCollection.add](https://reference.aspose.com/slides/python-net/aspose.slides/coloroperationcollection/add/). The RGB copy uses the source's effective fill color so all three initially look identical. Assigning [ColorFormat.color](https://reference.aspose.com/slides/python-net/aspose.slides/colorformat/color/) sets a fixed RGB value and clears any existing color transformations. ```python import aspose.slides as slides import aspose.pydrawing as draw with slides.Presentation() as presentation: presentation.slide_size.set_size(660, 220, slides.SlideSizeScaleType.DO_NOT_SCALE) slide = presentation.slides[0] presentation.master_theme.color_scheme.accent1.color = draw.Color.royal_blue source = slide.shapes.add_auto_shape(slides.ShapeType.RECTANGLE, 30, 40, 180, 140) theme_copy = slide.shapes.add_auto_shape(slides.ShapeType.RECTANGLE, 240, 40, 180, 140) rgb_copy = slide.shapes.add_auto_shape(slides.ShapeType.RECTANGLE, 450, 40, 180, 140) for shape in (source, theme_copy, rgb_copy): shape.fill_format.fill_type = slides.FillType.SOLID shape.line_format.fill_format.fill_type = slides.FillType.NO_FILL source_color = source.fill_format.solid_fill_color source_color.scheme_color = slides.SchemeColor.ACCENT1 source_color.color_transform.add(slides.ColorTransformOperation.TINT, 0.75) theme_copy.fill_format.solid_fill_color.copy_from(source_color) rgb_copy.fill_format.solid_fill_color.color = source.fill_format.get_effective().solid_fill_color with slide.get_image(1.0, 1.0) as before: before.save("color-copy-before.png", slides.ImageFormat.PNG) # Theme references follow the new accent color; the fixed RGB value does not. presentation.master_theme.color_scheme.accent1.color = draw.Color.orange_red with slide.get_image(1.0, 1.0) as after: after.save("color-copy-after.png", slides.ImageFormat.PNG) presentation.save("copied_colors.pptx", slides.export.SaveFormat.PPTX) ``` Before the theme change, all three fills match: ![Source, copy_from destination, and fixed RGB destination with identical blue fills](https://docs.aspose.com/slides/python-net/shape-formatting/color-copy-before.png) After the theme change, the source and the theme-aware copy follow the new accent color and retain their tint. The fixed RGB copy remains blue: ![Source and copy_from destination with orange fills, while the fixed RGB destination remains blue](https://docs.aspose.com/slides/python-net/shape-formatting/color-copy-after.png) The copied definition is independent of the source. Subsequently changing the source's theme reference, assigning another color, or adding or removing its transformations does not change the destination. A theme change still affects both shapes because each independently refers to the same theme color. Saving and reopening the PPTX preserves the copied color's [ColorFormat.color_type](https://reference.aspose.com/slides/python-net/aspose.slides/colorformat/color_type/), theme reference, and [ColorFormat.color_transform](https://reference.aspose.com/slides/python-net/aspose.slides/colorformat/color_transform/) collection; it does not flatten the definition to RGB. When copying between different theme contexts, such as presentations with different accent palettes, the copied reference resolves against the destination's theme. The same reference and transformations can therefore produce a different visible color. See [Presentation Theme](https://docs.aspose.com/slides/python-net/presentation-theme/) for more about configuring theme colors. ## **Use the Slide Background as a Shape Fill** Use [AutoShape.use_background_fill](https://reference.aspose.com/slides/python-net/aspose.slides/autoshape/use_background_fill/) when a shape should match the slide background, for example in a presentation template. Set [FillFormat.fill_type](https://reference.aspose.com/slides/python-net/aspose.slides/fillformat/fill_type/) to [FillType.NOT_DEFINED](https://reference.aspose.com/slides/python-net/aspose.slides/filltype/) first to remove any explicit fill. With this combination, the shape uses the slide background instead of its style fill. Enabling the flag alone does not remove an existing explicit fill. This differs from [FillType.NO_FILL](https://reference.aspose.com/slides/python-net/aspose.slides/filltype/): background fill covers objects behind the shape with the corresponding area of the slide background, while no fill leaves those objects visible. A gradient remains aligned with the slide rather than restarting inside each shape. The following example creates a master background inherited by the slide and places a magenta band behind three rectangles. The left rectangle uses the background, the middle rectangle has no fill, and the right rectangle switches from background fill to an explicit orange fill. ```python import aspose.slides as slides import aspose.pydrawing as draw with slides.Presentation() as presentation: presentation.slide_size.set_size(720, 400, slides.SlideSizeScaleType.DO_NOT_SCALE) slide = presentation.slides[0] # Inherit the gradient from the master. slide.background.type = slides.BackgroundType.NOT_DEFINED slide.layout_slide.background.type = slides.BackgroundType.NOT_DEFINED background = slide.layout_slide.master_slide.background background.type = slides.BackgroundType.OWN_BACKGROUND background.fill_format.fill_type = slides.FillType.GRADIENT gradient = background.fill_format.gradient_format gradient.gradient_shape = slides.GradientShape.LINEAR gradient.linear_gradient_angle = 0 gradient.gradient_stops.clear() gradient.gradient_stops.add(0, draw.Color.dark_blue) gradient.gradient_stops.add(1, draw.Color.light_sky_blue) # Add this object first so it appears behind the rectangles. band = slide.shapes.add_auto_shape(slides.ShapeType.RECTANGLE, 25, 150, 670, 100) band.fill_format.fill_type = slides.FillType.SOLID band.fill_format.solid_fill_color.color = draw.Color.magenta band.line_format.fill_format.fill_type = slides.FillType.NO_FILL background_shape = slide.shapes.add_auto_shape(slides.ShapeType.RECTANGLE, 50, 100, 160, 200) background_shape.fill_format.fill_type = slides.FillType.NOT_DEFINED background_shape.use_background_fill = True no_fill_shape = slide.shapes.add_auto_shape(slides.ShapeType.RECTANGLE, 280, 100, 160, 200) no_fill_shape.fill_format.fill_type = slides.FillType.NO_FILL explicit_shape = slide.shapes.add_auto_shape(slides.ShapeType.RECTANGLE, 510, 100, 160, 200) explicit_shape.fill_format.fill_type = slides.FillType.NOT_DEFINED explicit_shape.use_background_fill = True # Disable background fill before applying an explicit fill. explicit_shape.use_background_fill = False explicit_shape.fill_format.fill_type = slides.FillType.SOLID explicit_shape.fill_format.solid_fill_color.color = draw.Color.orange presentation.save("background_fill.pptx", slides.export.SaveFormat.PPTX) ``` The result, from left to right: **background fill**, **no fill**, and **explicit fill**. The magenta band is hidden by the left and right rectangles but remains visible through the middle rectangle. ![Background fill, no fill, and explicit orange fill over a magenta band](https://docs.aspose.com/slides/python-net/shape-formatting/background-fill.png) The same behavior applies to a background defined directly on the slide or inherited from a layout. The shape uses the slide's resolved background; the example leaves both the slide and layout backgrounds undefined so the master supplies it. ## **Set Transparency** For a solid fill, the color’s alpha component controls opacity: 0 is fully transparent and 255 is fully opaque. This example uses an alpha value of 128 for a yellow rectangle, making it approximately 50% transparent so the rectangle underneath remains visible. The color is assigned through [FillFormat.solid_fill_color](https://reference.aspose.com/slides/python-net/aspose.slides/fillformat/solid_fill_color/). ```python import aspose.slides as slides import aspose.pydrawing as draw alpha = 128 with slides.Presentation() as presentation: slide = presentation.slides[0] solid_shape = slide.shapes.add_auto_shape(slides.ShapeType.RECTANGLE, 50, 50, 150, 75) transparent_shape = slide.shapes.add_auto_shape(slides.ShapeType.RECTANGLE, 80, 80, 150, 75) transparent_shape.fill_format.fill_type = slides.FillType.SOLID transparent_shape.fill_format.solid_fill_color.color = draw.Color.from_argb(alpha, draw.Color.yellow) presentation.save("shape_transparency.pptx", slides.export.SaveFormat.PPTX) ``` The result: ![The transparent shape](https://docs.aspose.com/slides/python-net/shape-formatting/shape-transparency.png) ## **Rotate Shapes** Use [Shape.rotation](https://reference.aspose.com/slides/python-net/aspose.slides/shape/rotation/) to rotate a shape in the slide plane. The angle is measured in degrees; this example rotates a rectangle 5 degrees clockwise and saves the presentation. ```python import aspose.slides as slides with slides.Presentation() as presentation: slide = presentation.slides[0] shape = slide.shapes.add_auto_shape(slides.ShapeType.RECTANGLE, 50, 50, 150, 75) shape.rotation = 5 presentation.save("shape_rotation.pptx", slides.export.SaveFormat.PPTX) ``` The result: ![The shape rotation](https://docs.aspose.com/slides/python-net/shape-formatting/shape-rotation.png) ## **Add 3D Bevel Effects** Use [Shape.three_d_format](https://reference.aspose.com/slides/python-net/aspose.slides/shape/three_d_format/) to give a shape depth and beveled edges. This example creates a green ellipse with an orange outline, sets [ThreeDFormat.depth](https://reference.aspose.com/slides/python-net/aspose.slides/threedformat/depth/) to 4 points, and applies a circular top bevel with a width and height of 6 points through [ThreeDFormat.bevel_top](https://reference.aspose.com/slides/python-net/aspose.slides/threedformat/bevel_top/). A front-facing orthographic camera and three-point lighting make the bevel visible. ```python import aspose.slides as slides import aspose.pydrawing as draw with slides.Presentation() as presentation: slide = presentation.slides[0] shape = slide.shapes.add_auto_shape(slides.ShapeType.ELLIPSE, 50, 50, 100, 100) shape.fill_format.fill_type = slides.FillType.SOLID shape.fill_format.solid_fill_color.color = draw.Color.green shape.line_format.fill_format.fill_type = slides.FillType.SOLID shape.line_format.fill_format.solid_fill_color.color = draw.Color.orange shape.line_format.width = 2.0 shape.three_d_format.depth = 4 shape.three_d_format.bevel_top.bevel_type = slides.BevelPresetType.CIRCLE shape.three_d_format.bevel_top.height = 6 shape.three_d_format.bevel_top.width = 6 shape.three_d_format.camera.camera_type = slides.CameraPresetType.ORTHOGRAPHIC_FRONT shape.three_d_format.light_rig.light_type = slides.LightRigPresetType.THREE_PT shape.three_d_format.light_rig.direction = slides.LightingDirection.TOP presentation.save("3D_bevel_effect.pptx", slides.export.SaveFormat.PPTX) ``` The result: ![The 3D bevel effect](https://docs.aspose.com/slides/python-net/shape-formatting/3D-bevel-effect.png) ## **Add 3D Rotation Effects** A shape’s 3D view is controlled by its camera settings. This example uses [Camera.set_rotation](https://reference.aspose.com/slides/python-net/aspose.slides/camera/set_rotation/) with latitude, longitude, and revolution angles of 40, 35, and 20 degrees, respectively. It selects an isometric camera through [Camera.camera_type](https://reference.aspose.com/slides/python-net/aspose.slides/camera/camera_type/) and balanced lighting through [LightRig.light_type](https://reference.aspose.com/slides/python-net/aspose.slides/lightrig/light_type/), then saves the formatted rectangle. ```python import aspose.slides as slides with slides.Presentation() as presentation: slide = presentation.slides[0] auto_shape = slide.shapes.add_auto_shape(slides.ShapeType.RECTANGLE, 50, 50, 150, 75) auto_shape.text_frame.text = "Hello, Aspose!" auto_shape.three_d_format.camera.camera_type = slides.CameraPresetType.ISOMETRIC_LEFT_UP auto_shape.three_d_format.camera.set_rotation(40, 35, 20) auto_shape.three_d_format.light_rig.light_type = slides.LightRigPresetType.BALANCED presentation.save("3D_rotation_effect.pptx", slides.export.SaveFormat.PPTX) ``` The result: ![The 3D rotation effect](https://docs.aspose.com/slides/python-net/shape-formatting/3D-rotation-effect.png) ## **Control Black-and-White Rendering for Shapes** The [Shape.black_white_mode](https://reference.aspose.com/slides/python-net/aspose.slides/shape/black_white_mode/) property specifies how an individual shape is rendered when a presentation is viewed or processed in black-and-white mode. It does not enable black-and-white display by itself, and it does not change the shape's fill, line, or other formatting in normal color mode. Use a value from the [BlackWhiteMode](https://reference.aspose.com/slides/python-net/aspose.slides/blackwhitemode/) enumeration to select the desired behavior. For example, `AUTOMATIC` lets the rendering application choose the conversion, `GRAY` and `LIGHT_GRAY` use gray coloring, `BLACK_WHITE` uses only black and white, `BLACK` and `WHITE` force a single color, `COLOR` preserves normal coloring, and `HIDDEN` omits the shape in black-and-white mode. `NOT_DEFINED` means that no shape-level mode is assigned. This example creates an orange rectangle and sets [Shape.black_white_mode](https://reference.aspose.com/slides/python-net/aspose.slides/shape/black_white_mode/) to gray. The saved shape retains its orange fill for normal color display and requests gray coloring from applications that honor black-and-white display settings: ```python import aspose.slides as slides import aspose.pydrawing as draw with slides.Presentation() as presentation: slide = presentation.slides[0] shape = slide.shapes.add_auto_shape(slides.ShapeType.RECTANGLE, 50, 50, 200, 100) shape.fill_format.fill_type = slides.FillType.SOLID shape.fill_format.solid_fill_color.color = draw.Color.orange shape.black_white_mode = slides.BlackWhiteMode.GRAY presentation.save("shape_black_white_mode.pptx", slides.export.SaveFormat.PPTX) ``` In normal color mode, the rectangle retains its orange fill. In a black-and-white display workflow, it uses gray coloring because its mode is set to `GRAY`. This lets you preserve a full-color slide while defining a distinct appearance for printing, previewing, or other workflows that honor the presentation's black-and-white display settings. ## **Reset Formatting** Use [Slide.reset](https://reference.aspose.com/slides/python-net/aspose.slides/slide/reset/) to restore the position, size, and formatting of slide placeholders from their corresponding layout placeholders. This example requires an existing presentation with layout-linked placeholders and resets every slide before saving. Shapes without corresponding layout placeholders are not reset. ```python import aspose.slides as slides with slides.Presentation("sample.pptx") as presentation: for slide in presentation.slides: slide.reset() presentation.save("reset_formatting.pptx", slides.export.SaveFormat.PPTX) ``` ## **FAQ** **Does shape formatting affect the final presentation file size?** Colors, line styles, and effect settings generally add little data compared with embedded images and media. Picture fills can increase the file size because their images are stored in the presentation. **How can I detect shapes on a slide that share identical formatting so I can group them?** Compare each shape’s key formatting properties—fill, line, and effect settings. If all corresponding values match, treat their styles as identical and logically group those shapes, which simplifies later style management. **Can I save a set of custom shape styles to a separate file for reuse in other presentations?** Yes. Store sample shapes with the desired styles in a template slide deck or a .POTX template file. When creating a new presentation, open the template, clone the styled shapes you need, and reapply their formatting wherever required. ## Related articles - [Manage Presentation Backgrounds in Python](https://docs.aspose.com/slides/python-net/presentation-background/) # Manage Presentation Shapes in Python > Learn how to identify, adjust, clone, remove, hide, reorder, export, align, and flip presentation shapes with Aspose.Slides for Python via .NET. Source: https://docs.aspose.com/slides/python-net/shape-manipulations/ Updated: 2026-09-25 ## **Overview** Aspose.Slides for Python via .NET represents the shapes on a slide as an ordered [ShapeCollection](https://reference.aspose.com/slides/python-net/aspose.slides/shapecollection/). The collection is both the place where you find and modify shapes and the source of their stacking order: index `0` is the backmost shape, while the last index is the frontmost shape. This article follows that model. It first explains how to identify a shape reliably and modify preset shape adjustment points, then shows how to clone, remove, hide, and reorder shapes. The final sections cover layout-level formatting, SVG export, alignment, and flip settings. Each example is independent, so you can use only the operations your workflow requires. ## **Identify and Find Shapes** Collection indexes are convenient while processing a known file, but they are not stable identifiers. Adding, removing, or reordering a shape can change its index. Choose an identifier according to how the presentation is authored and maintained: - [Shape.name](https://reference.aspose.com/slides/python-net/aspose.slides/shape/name/) is useful for developer-controlled templates and is easy to inspect in PowerPoint's Selection Pane. Names can be edited and are not guaranteed to be unique, so establish a naming convention if code depends on them. - [Shape.alternative_text](https://reference.aspose.com/slides/python-net/aspose.slides/shape/alternative_text/) is useful when an accessibility description or an author-supplied tag already identifies the shape. It is visible to users, may be localized or rewritten for accessibility, and is not guaranteed to be unique. Do not silently repurpose meaningful accessibility text as a database key. - [Shape.office_interop_shape_id](https://reference.aspose.com/slides/python-net/aspose.slides/shape/office_interop_shape_id/) is a read-only identifier that is unique within a slide and corresponds to the shape ID used by PowerPoint interop. Use it when integrating with PowerPoint or when you need an unambiguous reference during the lifetime of a shape. A cloned or recreated shape is a different shape and receives its own ID. The related [Shape.unique_id](https://reference.aspose.com/slides/python-net/aspose.slides/shape/unique_id/) property has presentation scope, but it is intended for add-ins and can be reassigned. It should not be treated as a permanent external key. If long-term identity is essential, keep the mapping in application data and validate that the expected shape still exists. For a practical example of reading and updating both the alternative text title and description, see [Manage Alternative Text Titles and Descriptions](https://docs.aspose.com/slides/python-net/presentation-accessibility/). Use alternative text to explain the visual's meaning to readers, and keep it separate from shape names used by code to find shapes. The following example searches by `name` with an exact comparison and reports the slide-scoped interop ID. When the template does not contain the expected shape, the code reports that result instead of continuing with the wrong object. ```python import aspose.slides as slides with slides.Presentation("input.pptx") as presentation: slide = presentation.slides[0] target_shape = None for shape in slide.shapes: if shape.name == "RevenueChart": target_shape = shape break if target_shape is None: print("The shape 'RevenueChart' was not found on slide 1.") else: print("Found {}; interop ID: {}".format(target_shape.name, target_shape.office_interop_shape_id)) ``` When an operation is specific to a shape type, check the type before using type-specific members. This example updates text and alternative text only if the named object is an [AutoShape](https://reference.aspose.com/slides/python-net/aspose.slides/autoshape/). ```python import aspose.slides as slides with slides.Presentation("input.pptx") as presentation: slide = presentation.slides[0] candidate = None for shape in slide.shapes: if shape.name == "StatusLabel": candidate = shape break if isinstance(candidate, slides.AutoShape): candidate.text_frame.text = "Approved" candidate.alternative_text = "Approval status: approved" presentation.save("identified-shape.pptx", slides.export.SaveFormat.PPTX) else: print("'StatusLabel' is missing or is not an AutoShape.") ``` ## **Identify and Modify Preset Shape Adjustments** Preset geometry shapes can expose adjustment points that control features such as corner size, arrow proportions, or arc angles. Access them through the read-only [GeometryShape.adjustments](https://reference.aspose.com/slides/python-net/aspose.slides/geometryshape/adjustments/) collection. The collection itself is supplied by the shape, but each [AdjustValue](https://reference.aspose.com/slides/python-net/aspose.slides/adjustvalue/) contains a value that can be changed. Do not rely only on a fixed collection index. Iterate through the adjustments and inspect the read-only [AdjustValue.type](https://reference.aspose.com/slides/python-net/aspose.slides/adjustvalue/type/) property, whose [ShapeAdjustmentType](https://reference.aspose.com/slides/python-net/aspose.slides/shapeadjustmenttype/) value describes what the adjustment controls. The read-only [AdjustValue.name](https://reference.aspose.com/slides/python-net/aspose.slides/adjustvalue/name/) property provides additional identification information and is especially useful when a preset contains more than one adjustment with the same semantic type. Use the value property that matches the adjustment's meaning: | Adjustment type | Purpose | Value to change | |---|---|---| | `CORNER_SIZE` | Size of rounded corners | [raw_value](https://reference.aspose.com/slides/python-net/aspose.slides/adjustvalue/raw_value/) | | `ARROW_TAIL_THICKNESS` | Thickness of an arrow tail | `raw_value` | | `ARROWHEAD_LENGTH` | Length of an arrowhead | `raw_value` | | `ARROWHEAD_WIDTH` | Width of an arrowhead | `raw_value` | | `START_ANGLE` | Start angle of a pie or arc | [angle_value](https://reference.aspose.com/slides/python-net/aspose.slides/adjustvalue/angle_value/) | | `END_ANGLE` | End angle of a pie or arc | `angle_value` | `type` and `name` cannot be assigned. `raw_value` is a read/write integer in the preset's native geometry units, while `angle_value` is a read/write angle in degrees. The number, order, meaning, and valid range of adjustments depend on the preset [GeometryShape.shape_type](https://reference.aspose.com/slides/python-net/aspose.slides/geometryshape/shape_type/). A value that is valid for one preset may be invalid or have a different effect for another. When `type` is `ShapeAdjustmentType.CUSTOM`, the API does not recognize a standard semantic meaning. Inspect `name`, the preset type, and the existing value, and leave the adjustment unchanged unless the expected meaning and range are known. Even for recognized types, check whether the same type occurs more than once before selecting a value. The [Connector](https://docs.aspose.com/slides/python-net/connector/) article shows this situation with connector bend adjustments. The following complete example creates default and modified versions of three preset shapes. It iterates through every adjustment, reports its `name` and `type`, changes size-related values through `raw_value`, changes angles through `angle_value`, and saves the result. The left column retains the default geometry; the right column shows the adjusted rounded rectangle, four-way arrow, and pie. ```python import aspose.slides as slides with slides.Presentation() as presentation: slide = presentation.slides[0] # Add headers for the default and adjusted shape columns. default_column_label = slide.shapes.add_auto_shape(slides.ShapeType.RECTANGLE, 40, 20, 250, 30) default_column_label.text_frame.text = "Default preset geometry" adjusted_column_label = slide.shapes.add_auto_shape(slides.ShapeType.RECTANGLE, 390, 20, 250, 30) adjusted_column_label.text_frame.text = "Modified adjustment values" slide.shapes.add_auto_shape(slides.ShapeType.ROUND_CORNER_RECTANGLE, 80, 70, 160, 70) modified_rounded_rectangle = slide.shapes.add_auto_shape(slides.ShapeType.ROUND_CORNER_RECTANGLE, 430, 70, 160, 70) modified_rounded_rectangle.name = "ModifiedRoundedRectangle" slide.shapes.add_auto_shape(slides.ShapeType.QUAD_ARROW, 80, 180, 160, 110) modified_arrow = slide.shapes.add_auto_shape(slides.ShapeType.QUAD_ARROW, 430, 180, 160, 110) modified_arrow.name = "ModifiedQuadArrow" slide.shapes.add_auto_shape(slides.ShapeType.PIE, 95, 330, 130, 130) modified_pie = slide.shapes.add_auto_shape(slides.ShapeType.PIE, 445, 330, 130, 130) modified_pie.name = "ModifiedPie" shapes_to_adjust = [modified_rounded_rectangle, modified_arrow, modified_pie] for shape in shapes_to_adjust: for adjustment in shape.adjustments: print("{} / {}: {}".format(shape.name, adjustment.name, adjustment.type.name)) if adjustment.type == slides.ShapeAdjustmentType.CORNER_SIZE: adjustment.raw_value = 5000 elif adjustment.type == slides.ShapeAdjustmentType.ARROW_TAIL_THICKNESS: adjustment.raw_value = 25000 elif adjustment.type == slides.ShapeAdjustmentType.ARROWHEAD_LENGTH: adjustment.raw_value = 30000 elif adjustment.type == slides.ShapeAdjustmentType.ARROWHEAD_WIDTH: adjustment.raw_value = 40000 elif adjustment.type == slides.ShapeAdjustmentType.START_ANGLE: adjustment.angle_value = 30 elif adjustment.type == slides.ShapeAdjustmentType.END_ANGLE: adjustment.angle_value = 300 elif adjustment.type == slides.ShapeAdjustmentType.CUSTOM: print("Custom adjustment '{}' was not changed.".format(adjustment.name)) presentation.save("preset-shape-adjustments.pptx", slides.export.SaveFormat.PPTX) ``` Checking the semantic type before changing a value makes the code explicit about its intent and avoids assuming that a particular collection index has the same meaning across different preset shapes. ## **Modify the Shape Collection** The add, clone, remove, and reorder methods operate on the collection immediately. If an operation changes the number or order of shapes, do not continue to rely on indexes captured before that operation. ### **Clone a Shape** [ShapeCollection.add_clone](https://reference.aspose.com/slides/python-net/aspose.slides/shapecollection/add_clone/) creates an independent copy and appends it to the target collection. [ShapeCollection.insert_clone](https://reference.aspose.com/slides/python-net/aspose.slides/shapecollection/insert_clone/) also creates a copy but places it at a specified z-order index. The overloads that accept coordinates move the clone without changing its size; overloads with width and height can resize it as well. The example creates a destination slide, clones a labeled rectangle to the front, and inserts a second clone at the back. Changes to either clone do not modify the source shape. ```python import aspose.slides as slides with slides.Presentation() as presentation: source_slide = presentation.slides[0] source_shape = source_slide.shapes.add_auto_shape(slides.ShapeType.RECTANGLE, 40, 40, 180, 60) source_shape.name = "SourceLabel" source_shape.text_frame.text = "Source" blank_layout = presentation.masters[0].layout_slides.get_by_type(slides.SlideLayoutType.BLANK) destination_slide = presentation.slides.add_empty_slide(blank_layout) front_clone_shape = destination_slide.shapes.add_clone(source_shape, 80, 80) front_clone_shape.name = "FrontClone" if isinstance(front_clone_shape, slides.AutoShape): front_clone_shape.text_frame.text = "Front clone" else: print("The front clone is not an AutoShape; its text was not changed.") back_clone_shape = destination_slide.shapes.insert_clone(0, source_shape, 80, 180) back_clone_shape.name = "BackClone" if isinstance(back_clone_shape, slides.AutoShape): back_clone_shape.text_frame.text = "Back clone" else: print("The back clone is not an AutoShape; its text was not changed.") presentation.save("cloned-shapes.pptx", slides.export.SaveFormat.PPTX) ``` Cloning copies the shape's content and formatting, including its name and alternative text. Assign new logical identifiers to the clone when those values must be unique. Resources used by complex shapes are handled by the presentation, but a clone remains a new collection item with a new shape identity. ### **Remove Shapes** [ShapeCollection.remove](https://reference.aspose.com/slides/python-net/aspose.slides/shapecollection/remove/) deletes a specific shape object from its collection. When removing multiple matches during indexed iteration, traverse from the end so that each remaining index stays valid. This example removes every shape with a designated name. It reads `slide.shapes[index]`, not a fixed collection item, and it does not cast the shape unnecessarily. ```python import aspose.slides as slides with slides.Presentation() as presentation: slide = presentation.slides[0] keep_shape = slide.shapes.add_auto_shape(slides.ShapeType.RECTANGLE, 40, 40, 140, 60) keep_shape.name = "Keep" first_temporary_shape = slide.shapes.add_auto_shape(slides.ShapeType.ELLIPSE, 220, 40, 80, 80) first_temporary_shape.name = "Temporary" second_temporary_shape = slide.shapes.add_auto_shape(slides.ShapeType.TRIANGLE, 340, 40, 100, 80) second_temporary_shape.name = "Temporary" for index in range(len(slide.shapes) - 1, -1, -1): shape = slide.shapes[index] if shape.name == "Temporary": slide.shapes.remove(shape) presentation.save("removed-shapes.pptx", slides.export.SaveFormat.PPTX) ``` After removal, the shape count and the indexes of later shapes change. References to unaffected shapes remain more reliable than saved indexes. Also consider connectors, animations, and other presentation features that may refer to the removed object; removing a visible shape can change more than the slide's appearance. ### **Hide a Shape** Setting [Shape.hidden](https://reference.aspose.com/slides/python-net/aspose.slides/shape/hidden/) to `True` keeps the shape in the collection but prevents it from appearing in the normal slide show. Its index, formatting, and content remain available to code, so hiding is appropriate for optional elements that may be restored later. ```python import aspose.slides as slides with slides.Presentation() as presentation: slide = presentation.slides[0] visible_shape = slide.shapes.add_auto_shape(slides.ShapeType.RECTANGLE, 40, 40, 160, 60) visible_shape.name = "VisibleLabel" optional_shape = slide.shapes.add_auto_shape(slides.ShapeType.MOON, 240, 40, 100, 100) optional_shape.name = "OptionalDecoration" for shape in slide.shapes: if shape.name == "OptionalDecoration": shape.hidden = True presentation.save("hidden-shape.pptx", slides.export.SaveFormat.PPTX) ``` Hiding is not deletion or security. The object can still be discovered and unhidden by a user or by code, and it remains part of the presentation file. ### **Change the Z-Order** Overlapping shapes are painted in collection order. [ShapeCollection.reorder](https://reference.aspose.com/slides/python-net/aspose.slides/shapecollection/reorder/) moves an existing shape to a target index without cloning it. Index `0` is the back; `len(slide.shapes) - 1` is the front. ```python import aspose.pydrawing as draw import aspose.slides as slides with slides.Presentation() as presentation: slide = presentation.slides[0] blue_rectangle = slide.shapes.add_auto_shape(slides.ShapeType.RECTANGLE, 100, 100, 220, 120) blue_rectangle.name = "BlueRectangle" blue_rectangle.fill_format.fill_type = slides.FillType.SOLID blue_rectangle.fill_format.solid_fill_color.color = draw.Color.steel_blue orange_ellipse = slide.shapes.add_auto_shape(slides.ShapeType.ELLIPSE, 180, 140, 220, 120) orange_ellipse.name = "OrangeEllipse" orange_ellipse.fill_format.fill_type = slides.FillType.SOLID orange_ellipse.fill_format.solid_fill_color.color = draw.Color.orange slide.shapes.reorder(len(slide.shapes) - 1, blue_rectangle) presentation.save("reordered-shapes.pptx", slides.export.SaveFormat.PPTX) ``` The rectangle is created first and initially sits behind the ellipse. Moving it to the final index puts it in front. Finalize z-order after adding or cloning all related shapes, because those operations append or insert new collection items and can alter the intended stack. ## **Inspect Shapes on Layout Slides** Normal slides, layout slides, and master slides have separate shape collections. A shape in a layout collection is not the same object as a similarly positioned shape on a normal slide. Inspect layout shapes when you need to understand or change formatting supplied by a layout. The following example reads each layout shape's [Shape.fill_format](https://reference.aspose.com/slides/python-net/aspose.slides/shape/fill_format/) and [Shape.line_format](https://reference.aspose.com/slides/python-net/aspose.slides/shape/line_format/) without assuming that every shape is an `AutoShape`. ```python import aspose.slides as slides with slides.Presentation("input.pptx") as presentation: for layout_slide in presentation.layout_slides: for shape in layout_slide.shapes: fill_type = shape.fill_format.fill_type line_width = shape.line_format.width print("{} / {}: fill={}, line width={}".format(layout_slide.name, shape.name, fill_type, line_width)) ``` Editing a layout can affect multiple slides that use it. Before changing a layout shape, determine whether a normal slide inherits the object or contains a local override, and test every slide that uses that layout. ## **Export a Shape to SVG** [Shape.write_as_svg](https://reference.aspose.com/slides/python-net/aspose.slides/shape/write_as_svg/) writes one shape's rendered content to a stream. The result contains the shape, not the entire slide background or neighboring shapes. ```python import aspose.slides as slides with slides.Presentation("input.pptx") as presentation: slide = presentation.slides[0] if len(slide.shapes) == 0: print("Slide 1 does not contain a shape to export.") else: shape = slide.shapes[0] with open("shape.svg", "wb") as svg_stream: shape.write_as_svg(svg_stream) ``` Keep the presentation open while rendering. The output depends on the shape's formatting and on resources such as fonts and images. If you need the whole composition, export the slide rather than an individual shape. The caller owns the stream and must close it. ## **Align Shapes** The [SlideUtil.align_shapes](https://reference.aspose.com/slides/python-net/aspose.slides.util/slideutil/align_shapes/) overloads align either all shapes or selected collection indexes. [ShapesAlignmentType](https://reference.aspose.com/slides/python-net/aspose.slides/shapesalignmenttype/) specifies the edge, center line, or distribution mode. Set `align_to_slide` to `True` to use the slide edges; set it to `False` to align the selected shapes relative to one another. This example aligns three shapes to the top edge of the slide. Their current indexes are resolved immediately before alignment. ```python import aspose.slides as slides with slides.Presentation() as presentation: slide = presentation.slides[0] first_shape = slide.shapes.add_auto_shape(slides.ShapeType.RECTANGLE, 60, 80, 120, 50) second_shape = slide.shapes.add_auto_shape(slides.ShapeType.ELLIPSE, 240, 160, 120, 50) third_shape = slide.shapes.add_auto_shape(slides.ShapeType.TRIANGLE, 420, 240, 120, 50) first_shape.name = "FirstAlignedShape" second_shape.name = "SecondAlignedShape" third_shape.name = "ThirdAlignedShape" shape_indexes = [ slide.shapes.index_of(first_shape), slide.shapes.index_of(second_shape), slide.shapes.index_of(third_shape) ] slides.util.SlideUtil.align_shapes(slides.ShapesAlignmentType.ALIGN_TOP, True, slide, shape_indexes) presentation.save("aligned-shapes.pptx", slides.export.SaveFormat.PPTX) ``` Alignment changes positions, not z-order. Relative alignment normally needs at least two shapes, while horizontal or vertical distribution needs enough shapes to define spacing. Recompute indexes if you modify the collection before calling the method. ## **Flip a Shape** The [ShapeFrame](https://reference.aspose.com/slides/python-net/aspose.slides/shapeframe/) class stores position, size, horizontal and vertical flip settings, and rotation. Its `flip_h` and `flip_v` values use [NullableBool](https://reference.aspose.com/slides/python-net/aspose.slides/nullablebool/): `TRUE` enables the flip, `FALSE` disables it, and `NOT_DEFINED` preserves the unspecified or default state. The input presentation below contains one unflipped shape. ![The shape before flipping](https://docs.aspose.com/slides/python-net/shape-manipulations/shape_to_be_flipped.png) The example preserves every other frame value and replaces only the two flip settings. This is important because assigning a new [Shape.frame](https://reference.aspose.com/slides/python-net/aspose.slides/shape/frame/) replaces the complete frame. ```python import aspose.slides as slides with slides.Presentation("sample.pptx") as presentation: shape = presentation.slides[0].shapes[0] frame = shape.frame print("Horizontal flip before change:", frame.flip_h) print("Vertical flip before change:", frame.flip_v) shape.frame = slides.ShapeFrame( frame.x, frame.y, frame.width, frame.height, slides.NullableBool.TRUE, slides.NullableBool.TRUE, frame.rotation) presentation.save("flipped-shape.pptx", slides.export.SaveFormat.PPTX) ``` The saved shape is mirrored horizontally and vertically while keeping its position, size, and rotation. ![The shape after flipping](https://docs.aspose.com/slides/python-net/shape-manipulations/flipped_shape.png) ## **FAQ** **Should I use a collection index as a shape identifier?** Only for short-lived processing when the collection will not change before the index is used. Prefer a validated `name` or `alternative_text` convention for authored templates, or `office_interop_shape_id` for slide-scoped interop work. **Does hiding a shape remove it from the z-order?** No. A hidden shape remains in the collection at the same index. It can be found, reordered, edited, or made visible again. **Why did a cloned shape appear in front of another shape?** `add_clone` appends the clone to the end of the collection, which is the front of the z-order. Use `insert_clone` to choose the initial index or `reorder` after all shapes have been added. **Can I use a fixed index to identify a preset shape adjustment?** Only after validating the exact preset and collection layout. Prefer iterating through `GeometryShape.adjustments` and checking `AdjustValue.type`; use `AdjustValue.name` as additional information when the same semantic type appears more than once. # Manage Shapes in Presentations with Python > Learn every shape type in Aspose.Slides for Python via .NET, with clear examples to create, format, and edit shapes in PPT, PPTX and ODP presentations. Source: https://docs.aspose.com/slides/python-net/shape-types/ Updated: 2025-08-03 --- lastmod: 2025-08-03T12:20:36+04:00 title: Manage Shapes in Presentations with Python linktitle: Manage Shapes type: docs weight: 10 url: /python-net/shape-types/ keywords: - shape - connector - ellipse - group - line - rectangle - PowerPoint - OpenDocument - presentation - Python - Aspose.Slides description: "Learn every shape type in Aspose.Slides for Python via .NET, with clear examples to create, format, and edit shapes in PPT, PPTX and ODP presentations." --- ## Related articles - [Manage PowerPoint Shapes in Python](https://docs.aspose.com/slides/python-net/powerpoint-shapes/) - [Connector](https://docs.aspose.com/slides/python-net/examples/elements/connector/) - [Add Ellipses to Presentations in Python](https://docs.aspose.com/slides/python-net/ellipse/) # Apply or Change Slide Layouts in Python > Apply, create, and modify slide layouts in Aspose.Slides for Python via .NET, add placeholders, remove unused layouts, and control footer visibility. Source: https://docs.aspose.com/slides/python-net/slide-layout/ Updated: 2026-11-08 ## **Overview** A slide layout defines the positions and formatting of placeholders such as titles, text, pictures, charts, and tables. Applying a layout gives slides a consistent structure while allowing each slide to contain its own content. The most common layouts include: - **Title Slide**: Contains title and subtitle placeholders. - **Title and Content**: Contains a title placeholder and a general-purpose content placeholder. - **Blank**: Contains no content placeholders and is useful when every shape will be positioned manually. ## **Understand Layout Inheritance** A presentation has three related levels: 1. A [master slide](https://reference.aspose.com/slides/python-net/aspose.slides/masterslide/) defines the theme, shared formatting, backgrounds, and common objects. 1. A [layout slide](https://reference.aspose.com/slides/python-net/aspose.slides/layoutslide/) belongs to a master and defines a particular arrangement of placeholders. 1. A [normal slide](https://reference.aspose.com/slides/python-net/aspose.slides/slide/) uses one layout and stores the content entered for that slide. A normal slide inherits theme and formatting from its layout, and the layout inherits from its master. A value set directly on a normal slide overrides the inherited value at that level. When a normal slide is created, its placeholder shapes are generated from the selected layout, while the content entered into those placeholders belongs to the normal slide. Add required placeholders to a layout before creating slides from it. Adding another placeholder to a layout later does not automatically add a corresponding placeholder shape to existing normal slides. This relationship has two important consequences: - Changing inherited formatting or existing placeholder geometry on a layout can update every slide that depends on it. Before editing a layout that is already in use, inspect its dependent slides and review the resulting presentation. - A layout that is still used by a slide cannot be removed. Reassign its dependent slides to another layout first, or remove only unused layouts. For more information about the top level of this hierarchy, see [Slide Master](https://docs.aspose.com/slides/python-net/slide-master/). To hide inherited logos or decorative master shapes on one slide or through a shared layout, see [Control the Visibility of Master Graphics](https://docs.aspose.com/slides/python-net/slide-master/). The example compares two slides using the same master. [![A master supplies design to a layout; existing and new slides inherit settings, but only the new slide receives a newly added placeholder.](https://docs.aspose.com/slides/python-net/slide-layout/visual-master-layout-slides-68f75c126f65.svg)](https://docs.aspose.com/slides/python-net/slide-layout/visual-master-layout-slides-68f75c126f65.svg) *The master supplies shared design, the layout supplies placeholder structure, and each slide owns its content. Existing inherited settings can update dependent slides. Add required placeholders before creating slides: a placeholder added later to the layout is not automatically inserted into existing slides.* ## **Select and Apply a Slide Layout** Use a layout type when the presentation follows standard PowerPoint layout definitions. Layout names are user-editable and can be localized, so name-based selection is less reliable unless you control the source template. The following example looks for **Title and Content** on the first master. If that layout is unavailable, it deliberately falls back to **Blank**. The second null check is necessary because a presentation can contain only custom layouts. The selected layout is then applied to the first normal slide through the [Slide.layout_slide](https://reference.aspose.com/slides/python-net/aspose.slides/slide/layout_slide/) property. ```python import aspose.slides as slides with slides.Presentation("input.pptx") as presentation: layout_slides = presentation.masters[0].layout_slides target_layout = layout_slides.get_by_type(slides.SlideLayoutType.TITLE_AND_OBJECT) if target_layout is None: target_layout = layout_slides.get_by_type(slides.SlideLayoutType.BLANK) if target_layout is None: raise RuntimeError("The first master does not contain a suitable layout slide.") presentation.slides[0].layout_slide = target_layout presentation.save("output-with-new-layout.pptx", slides.export.SaveFormat.PPTX) ``` Changing a slide's layout does not remove ordinary shapes added directly to the slide. However, placeholder positions, inherited formatting, and the correspondence between existing placeholders and the new layout can change, so inspect the output when switching between substantially different layouts. ## **Add a Layout Slide** Selection and creation are separate operations. The previous example selects an existing layout; it does not create one. To create a layout, call the [MasterLayoutSlideCollection.add](https://reference.aspose.com/slides/python-net/aspose.slides/masterlayoutslidecollection/add/) method on the target master's layout collection. The following example always adds a new **Title and Content** layout named `Report Title and Content`, then adds a normal slide based on it. Layout names must be unique within the collection. ```python import aspose.slides as slides with slides.Presentation("input.pptx") as presentation: master_slide = presentation.masters[0] report_layout = master_slide.layout_slides.add(slides.SlideLayoutType.TITLE_AND_OBJECT, "Report Title and Content") presentation.slides.add_empty_slide(report_layout) presentation.save("output-with-report-layout.pptx", slides.export.SaveFormat.PPTX) ``` Add a layout only when the template genuinely needs another reusable structure. If a suitable layout already exists, select and reuse it instead of creating a duplicate. ## **Add Placeholders to a Layout Slide** The [LayoutSlide.placeholder_manager](https://reference.aspose.com/slides/python-net/aspose.slides/layoutslide/placeholder_manager/) property provides a [LayoutPlaceholderManager](https://reference.aspose.com/slides/python-net/aspose.slides/layoutplaceholdermanager/) for adding placeholder shapes to a layout. | PowerPoint Placeholder | `LayoutPlaceholderManager` Method | | ----------------------------------- | --------------------------------- | | ![Content](https://docs.aspose.com/slides/python-net/slide-layout/content.png) | [`add_content_placeholder(x, y, width, height)`](https://reference.aspose.com/slides/python-net/aspose.slides/layoutplaceholdermanager/add_content_placeholder/) | | ![Content (Vertical)](https://docs.aspose.com/slides/python-net/slide-layout/contentV.png) | [`add_vertical_content_placeholder(x, y, width, height)`](https://reference.aspose.com/slides/python-net/aspose.slides/layoutplaceholdermanager/add_vertical_content_placeholder/) | | ![Text](https://docs.aspose.com/slides/python-net/slide-layout/text.png) | [`add_text_placeholder(x, y, width, height)`](https://reference.aspose.com/slides/python-net/aspose.slides/layoutplaceholdermanager/add_text_placeholder/) | | ![Text (Vertical)](https://docs.aspose.com/slides/python-net/slide-layout/textV.png) | [`add_vertical_text_placeholder(x, y, width, height)`](https://reference.aspose.com/slides/python-net/aspose.slides/layoutplaceholdermanager/add_vertical_text_placeholder/) | | ![Picture](https://docs.aspose.com/slides/python-net/slide-layout/picture.png) | [`add_picture_placeholder(x, y, width, height)`](https://reference.aspose.com/slides/python-net/aspose.slides/layoutplaceholdermanager/add_picture_placeholder/) | | ![Chart](https://docs.aspose.com/slides/python-net/slide-layout/chart.png) | [`add_chart_placeholder(x, y, width, height)`](https://reference.aspose.com/slides/python-net/aspose.slides/layoutplaceholdermanager/add_chart_placeholder/) | | ![Table](https://docs.aspose.com/slides/python-net/slide-layout/table.png) | [`add_table_placeholder(x, y, width, height)`](https://reference.aspose.com/slides/python-net/aspose.slides/layoutplaceholdermanager/add_table_placeholder/) | | ![SmartArt](https://docs.aspose.com/slides/python-net/slide-layout/smartart.png) | [`add_smart_art_placeholder(x, y, width, height)`](https://reference.aspose.com/slides/python-net/aspose.slides/layoutplaceholdermanager/add_smart_art_placeholder/) | | ![Media](https://docs.aspose.com/slides/python-net/slide-layout/media.png) | [`add_media_placeholder(x, y, width, height)`](https://reference.aspose.com/slides/python-net/aspose.slides/layoutplaceholdermanager/add_media_placeholder/) | | ![Online Image](https://docs.aspose.com/slides/python-net/slide-layout/onlineImage.png) | [`add_online_image_placeholder(x, y, width, height)`](https://reference.aspose.com/slides/python-net/aspose.slides/layoutplaceholdermanager/add_online_image_placeholder/) | The following example verifies that the **Blank** layout exists, adds four placeholders to it, and then creates a normal slide that uses the modified layout. The order is intentional: the placeholders are added before the normal slide is created, so Aspose.Slides can generate the corresponding placeholder shapes on that slide. ```python import aspose.slides as slides with slides.Presentation() as presentation: blank_layout = presentation.layout_slides.get_by_type(slides.SlideLayoutType.BLANK) if blank_layout is None: raise RuntimeError("The presentation does not contain a Blank layout slide.") placeholder_manager = blank_layout.placeholder_manager placeholder_manager.add_content_placeholder(20, 20, 310, 270) placeholder_manager.add_vertical_text_placeholder(350, 20, 350, 270) placeholder_manager.add_chart_placeholder(20, 310, 310, 180) placeholder_manager.add_table_placeholder(350, 310, 350, 180) presentation.slides.add_empty_slide(blank_layout) presentation.save("output-with-placeholders.pptx", slides.export.SaveFormat.PPTX) ``` The result: ![The placeholders on the layout slide](https://docs.aspose.com/slides/python-net/slide-layout/add_placeholders.png) Changing inherited formatting or the geometry of existing layout placeholders can affect dependent slides. A newly added layout placeholder is not backfilled into existing normal slides. Test layout changes on a copy of the presentation and inspect every dependent slide. ## **Remove Unused Layout Slides** Use the [Compress.remove_unused_layout_slides](https://reference.aspose.com/slides/python-net/aspose.slides.lowcode/compress/remove_unused_layout_slides/) method to remove layouts that no normal slide references. The method leaves layouts that are still in use intact. ```python import aspose.slides as slides with slides.Presentation("input.pptx") as presentation: slides.lowcode.Compress.remove_unused_layout_slides(presentation) presentation.save("output-without-unused-layouts.pptx", slides.export.SaveFormat.PPTX) ``` To remove one specific layout, first use its [has_depending_slides](https://reference.aspose.com/slides/python-net/aspose.slides/layoutslide/has_depending_slides/) property or [get_depending_slides](https://reference.aspose.com/slides/python-net/aspose.slides/layoutslide/get_depending_slides/) method. Reassign any dependent slides before calling [LayoutSlide.remove](https://reference.aspose.com/slides/python-net/aspose.slides/layoutslide/remove/). Attempting to remove a used layout raises a [PptxEditException](https://reference.aspose.com/slides/python-net/aspose.slides/pptxeditexception/). ## **Control Footer Visibility on a Layout Slide** A layout has its own footer, slide-number, and date-time placeholders. Use the [LayoutSlide.header_footer_manager](https://reference.aspose.com/slides/python-net/aspose.slides/layoutslide/header_footer_manager/) property to control those placeholders for one layout. This is useful when, for example, content layouts should show footers but title layouts should not. The following example selects a layout safely and makes its footer elements visible: ```python import aspose.slides as slides with slides.Presentation("input.pptx") as presentation: layout_slide = presentation.layout_slides.get_by_type(slides.SlideLayoutType.TITLE_AND_OBJECT) if layout_slide is None: layout_slide = presentation.layout_slides.get_by_type(slides.SlideLayoutType.BLANK) if layout_slide is None: raise RuntimeError("The presentation does not contain a suitable layout slide.") header_footer_manager = layout_slide.header_footer_manager header_footer_manager.set_footer_visibility(True) header_footer_manager.set_slide_number_visibility(True) header_footer_manager.set_date_time_visibility(True) header_footer_manager.set_footer_text("Footer text") header_footer_manager.set_date_time_text("Date and time text") presentation.save("output-with-layout-footers.pptx", slides.export.SaveFormat.PPTX) ``` ## **Control Footer Visibility on a Master and Its Child Layouts** To apply consistent footer settings across a master hierarchy, use the [MasterSlide.header_footer_manager](https://reference.aspose.com/slides/python-net/aspose.slides/masterslide/header_footer_manager/) property. The propagation methods of [MasterSlideHeaderFooterManager](https://reference.aspose.com/slides/python-net/aspose.slides/masterslideheaderfootermanager/) operate on the master and its dependent layout slides and normal slides; they do not target just one normal slide. ```python import aspose.slides as slides with slides.Presentation("input.pptx") as presentation: header_footer_manager = presentation.masters[0].header_footer_manager header_footer_manager.set_footer_and_child_footers_visibility(True) header_footer_manager.set_slide_number_and_child_slide_numbers_visibility(True) header_footer_manager.set_date_time_and_child_date_times_visibility(True) header_footer_manager.set_footer_and_child_footers_text("Footer text") header_footer_manager.set_date_time_and_child_date_times_text("Date and time text") presentation.save("output-with-master-footers.pptx", slides.export.SaveFormat.PPTX) ``` ## **FAQ** **What Is the Difference Between a Master Slide and a Layout Slide?** A master slide defines the presentation's theme and shared formatting. A layout slide belongs to a master and defines one reusable arrangement of placeholders. Normal slides use those layouts and store slide-specific content. **Can I Copy a Layout Slide from One Presentation to Another?** Yes. Add a copy to the destination collection with the [add_clone](https://reference.aspose.com/slides/python-net/aspose.slides/globallayoutslidecollection/add_clone/) method. When copying between presentations, also verify fonts, themes, images, and other resources used by the source layout. **What Happens When I Modify a Layout That Is Already in Use?** Dependent slides inherit the layout changes unless they override the affected formatting or objects locally. Placeholder geometry and inherited styling can therefore change on many slides at once. Use [get_depending_slides](https://reference.aspose.com/slides/python-net/aspose.slides/layoutslide/get_depending_slides/) to identify the affected slides before editing the layout. **What Happens If I Remove a Layout That Is Still in Use?** Aspose.Slides raises a [PptxEditException](https://reference.aspose.com/slides/python-net/aspose.slides/pptxeditexception/). Reassign the dependent slides first, or use [remove_unused_layout_slides](https://reference.aspose.com/slides/python-net/aspose.slides.lowcode/compress/remove_unused_layout_slides/) to remove only unreferenced layouts. ## Related articles - [Manage Presentation Headers and Footers with Python](https://docs.aspose.com/slides/python-net/presentation-header-and-footer/) - [Manage Presentation Slide Masters in Python](https://docs.aspose.com/slides/python-net/slide-master/) # Manage Presentation Slide Masters in Python > Manage slide masters in Aspose.Slides for Python via .NET: access, edit, clone, compare, and remove master slides in PowerPoint and OpenDocument presentations. Source: https://docs.aspose.com/slides/python-net/slide-master/ Updated: 2026-09-28 ## **Overview** A **slide master** defines shared design settings for a group of slides. It can contain common shapes, logos, backgrounds, text styles, theme settings, and footer settings. In PowerPoint, editing a slide master is the usual way to keep a presentation consistent without repeating the same formatting on every slide. Aspose.Slides for Python via .NET supports the same model. A presentation can contain one or more master slides, and each master slide can contain several layout slides. Normal slides do not usually refer to a master slide directly. Instead, a normal slide uses a layout slide, and that layout slide belongs to a master slide. The hierarchy is: 1. **Slide master** - defines the shared design and theme. 1. **Layout slide** - defines a specific arrangement of placeholders and layout-level formatting. 1. **Normal slide** - contains the actual presentation content and uses one layout slide. ![The hierarchy of master slides, layout slides, and normal slides](https://docs.aspose.com/slides/python-net/slide-master/slide-master_2.jpg) In Aspose.Slides, a slide master is represented by the [MasterSlide](https://reference.aspose.com/slides/python-net/aspose.slides/masterslide/) class. All master slides in a presentation are available through the `Presentation.masters` collection. When the same property is defined at more than one level, the more specific level wins. For example, if a master slide and a layout slide both define a background, slides based on that layout use the layout background. For more information about layout slides, see [Apply or Change Slide Layouts](https://docs.aspose.com/slides/python-net/slide-layout/). ## **Access Slide Masters** In PowerPoint, you can open the Slide Master view from **View** > **Slide Master**. ![The Slide Master command on the PowerPoint View tab](https://docs.aspose.com/slides/python-net/slide-master/slide-master_3.jpg) In Aspose.Slides, use the `masters` collection to access master slides: ```python import aspose.slides as slides with slides.Presentation("presentation.pptx") as presentation: first_master_slide = presentation.masters[0] master_slide_count = len(presentation.masters) first_master_layout_slide_count = len(first_master_slide.layout_slides) print("Master slides: " + str(master_slide_count)) print("Layouts in the first master: " + str(first_master_layout_slide_count)) ``` You can also get the master slide used by a normal slide through its layout: ```python import aspose.slides as slides with slides.Presentation("presentation.pptx") as presentation: slide = presentation.slides[0] layout_slide = slide.layout_slide master_slide = layout_slide.master_slide master_slide_name = master_slide.name print(master_slide_name) ``` ## **What a Slide Master Contains** A master slide is a slide-like object. It inherits common slide behavior from the [BaseSlide](https://reference.aspose.com/slides/python-net/aspose.slides/baseslide/) class, so it exposes many of the same slide properties used by normal and layout slides. Master-specific members are listed on the [MasterSlide](https://reference.aspose.com/slides/python-net/aspose.slides/masterslide/) API page. Commonly used master slide members include: | Member | Purpose | | --- | --- | | `background` | Sets the master-level slide background. | | `shapes` | Stores shapes placed on the master, such as logos, picture frames, and shared text. | | `layout_slides` | Stores the layout slides that belong to the master. | | `theme_manager` | Provides access to the master theme APIs. | | `header_footer_manager` | Controls headers, footers, dates, and slide numbers for the master and its child layouts. | | `get_depending_slides` | Returns normal slides that depend on the master through their layouts. | ## **Add an Image to a Slide Master** When you add an image to a master slide, it appears on slides that use layouts from that master. This is useful for logos, watermarks, decorative bands, and other repeated visual elements. The following example adds a logo to the first master slide: ```python import aspose.slides as slides with slides.Presentation("presentation.pptx") as presentation: master_slide = presentation.masters[0] with open("logo.png", "rb") as logo_stream: logo_bytes = logo_stream.read() logo_image = presentation.images.add_image(logo_bytes) master_slide.shapes.add_picture_frame( slides.ShapeType.RECTANGLE, 20, 20, 80, 80, logo_image) presentation.save("presentation-with-logo.pptx", slides.export.SaveFormat.PPTX) ``` For more information about picture frames, see [Picture Frame](https://docs.aspose.com/slides/python-net/picture-frame/). ## **Control the Visibility of Master Graphics** Use [BaseSlide.show_master_shapes](https://reference.aspose.com/slides/python-net/aspose.slides/baseslide/show_master_shapes/) to hide inherited master graphics, such as logos or decorative shapes, without deleting them from the master. Set [Slide.show_master_shapes](https://reference.aspose.com/slides/python-net/aspose.slides/slide/show_master_shapes/) to `False` on the slide that should omit those graphics and keep it `True` on slides that should display them. The following self-contained example creates a blue decorative band on a master and two slides that use the same blank layout. The band is visible on the first slide and hidden on the second. No input presentation or image is required. ```python import aspose.pydrawing as draw import aspose.slides as slides with slides.Presentation() as presentation: master_slide = presentation.masters[0] layout_slide = master_slide.layout_slides.get_by_type(slides.SlideLayoutType.BLANK) layout_slide.show_master_shapes = True slide_height = presentation.slide_size.size.height band = master_slide.shapes.add_auto_shape(slides.ShapeType.RECTANGLE, 0, 0, 60, slide_height) band.fill_format.fill_type = slides.FillType.SOLID band.fill_format.solid_fill_color.color = draw.Color.steel_blue band.line_format.fill_format.fill_type = slides.FillType.NO_FILL visible_slide = presentation.slides[0] visible_slide.layout_slide = layout_slide visible_slide.shapes.clear() hidden_slide = presentation.slides.add_empty_slide(layout_slide) visible_slide.show_master_shapes = True hidden_slide.show_master_shapes = False presentation.save("master-graphics.pptx", slides.export.SaveFormat.PPTX) ``` The example uses the **Blank** layout supplied with a new presentation and removes the initial slide's own placeholders. ### **Choose the Scope of the Setting** A normal slide uses its master through [Slide.layout_slide](https://reference.aspose.com/slides/python-net/aspose.slides/slide/layout_slide/) and [LayoutSlide.master_slide](https://reference.aspose.com/slides/python-net/aspose.slides/layoutslide/master_slide/). Setting the property on an individual slide affects only that slide. Setting [LayoutSlide.show_master_shapes](https://reference.aspose.com/slides/python-net/aspose.slides/layoutslide/show_master_shapes/) to `False` hides master graphics for slides that use that shared layout, even if their own setting is `True`. To hide graphics on just one slide, change the slide property and leave the shared layout unchanged. The setting is not supported as a visibility control on the master slide itself. On a master it always returns `False`, and assigning `True` raises an exception. Apply it to a normal slide or a layout instead. ### **Distinguish Graphics from the Background** | Operation | Effect | | --- | --- | | Hide master graphics | Controls the visibility of inherited master shapes without deleting them or changing the slide's own shapes. | | Change the slide background fill | Changes the background color, gradient, or image. Master graphics are separate shapes and can remain visible over that background. See [Presentation Background](https://docs.aspose.com/slides/python-net/presentation-background/). | | Delete a shape from the master | Removes the shared source shape, so it is no longer available to any slide using that master. | ## **Work with Placeholders** Placeholders are normally defined on layout slides. The master slide provides the shared style and theme that those layouts inherit, while each layout decides which placeholders are available and where they are placed. In PowerPoint, placeholder commands are available in Slide Master view. ![The Insert Placeholder command in PowerPoint Slide Master view](https://docs.aspose.com/slides/python-net/slide-master/slide-master_5.png) To add new placeholders with Aspose.Slides, work with the layout slide that belongs to the master: ```python import aspose.slides as slides with slides.Presentation("presentation.pptx") as presentation: master_slide = presentation.masters[0] blank_layout_slide = master_slide.layout_slides.get_by_type(slides.SlideLayoutType.BLANK) if blank_layout_slide is None: blank_layout_slide = presentation.layout_slides.add( master_slide, slides.SlideLayoutType.BLANK, "Blank") blank_layout_slide.placeholder_manager.add_text_placeholder(60, 120, 600, 80) presentation.slides.add_empty_slide(blank_layout_slide) presentation.save("presentation-with-placeholder.pptx", slides.export.SaveFormat.PPTX) ``` You can also format placeholder shapes that already exist on a master slide. The following example finds the title placeholder and applies a linear gradient fill: ```python import aspose.pydrawing as draw import aspose.slides as slides def find_placeholder(master_slide, placeholder_type): for shape in master_slide.shapes: if isinstance(shape, slides.AutoShape) and shape.placeholder is not None: if shape.placeholder.type == placeholder_type: return shape return None with slides.Presentation("presentation.pptx") as presentation: master_slide = presentation.masters[0] title_placeholder = find_placeholder(master_slide, slides.PlaceholderType.TITLE) if title_placeholder is not None: red_gradient_color = draw.Color.from_argb(255, 0, 0) purple_gradient_color = draw.Color.from_argb(128, 0, 128) title_placeholder.fill_format.fill_type = slides.FillType.GRADIENT title_placeholder.fill_format.gradient_format.gradient_shape = slides.GradientShape.LINEAR title_placeholder.fill_format.gradient_format.gradient_stops.add(0, red_gradient_color) title_placeholder.fill_format.gradient_format.gradient_stops.add(1, purple_gradient_color) presentation.save("presentation-title-style.pptx", slides.export.SaveFormat.PPTX) ``` ![Formatted title placeholder inherited by normal slides](https://docs.aspose.com/slides/python-net/slide-master/slide-master_8.png) For more placeholder and text formatting options, see [Set Prompt Text in Placeholder](https://docs.aspose.com/slides/python-net/manage-placeholder/) and [Text Formatting](https://docs.aspose.com/slides/python-net/text-formatting/). ## **Change a Slide Master Background** A master background is inherited by layouts and slides that do not override it. The following example sets a solid background color for the first master slide: ```python import aspose.pydrawing as draw import aspose.slides as slides with slides.Presentation("presentation.pptx") as presentation: master_slide = presentation.masters[0] master_slide.background.type = slides.BackgroundType.OWN_BACKGROUND master_slide.background.fill_format.fill_type = slides.FillType.SOLID master_slide.background.fill_format.solid_fill_color.color = draw.Color.forest_green presentation.save("presentation-master-background.pptx", slides.export.SaveFormat.PPTX) ``` For related topics, see [Presentation Background](https://docs.aspose.com/slides/python-net/presentation-background/) and [Presentation Theme](https://docs.aspose.com/slides/python-net/presentation-theme/). ## **Clone a Slide Master to Another Presentation** Use the `add_clone` method on the [MasterSlideCollection](https://reference.aspose.com/slides/python-net/aspose.slides/masterslidecollection/) class to copy a master slide into another presentation. The copied master can then be used by layouts and slides in the destination presentation. ```python import aspose.slides as slides with slides.Presentation("source.pptx") as source_presentation: with slides.Presentation("destination.pptx") as destination_presentation: source_master_slide = source_presentation.masters[0] cloned_master_slide = destination_presentation.masters.add_clone(source_master_slide) destination_presentation.save("destination-with-master.pptx", slides.export.SaveFormat.PPTX) ``` If you need to clone normal slides together with their master, see [Clone Slides](https://docs.aspose.com/slides/python-net/clone-slides/). ## **Add Multiple Slide Masters** A presentation can contain multiple master slides. This is useful when different sections require different branding, page structure, or theme settings. ![PowerPoint commands for inserting and managing master slides](https://docs.aspose.com/slides/python-net/slide-master/slide-master_9.jpg) The following example clones the default master, gives the clone a different background, gets a blank layout under that cloned master, and adds a new slide based on that layout: ```python import aspose.pydrawing as draw import aspose.slides as slides with slides.Presentation("presentation.pptx") as presentation: default_master_slide = presentation.masters[0] section_master_slide = presentation.masters.add_clone(default_master_slide) section_master_slide.background.type = slides.BackgroundType.OWN_BACKGROUND section_master_slide.background.fill_format.fill_type = slides.FillType.SOLID section_master_slide.background.fill_format.solid_fill_color.color = draw.Color.light_steel_blue section_blank_layout = section_master_slide.layout_slides.get_by_type(slides.SlideLayoutType.BLANK) if section_blank_layout is None: section_blank_layout = presentation.layout_slides.add( section_master_slide, slides.SlideLayoutType.BLANK, "Section Blank") presentation.slides.add_empty_slide(section_blank_layout) presentation.save("presentation-with-multiple-masters.pptx", slides.export.SaveFormat.PPTX) ``` ## **Compare Slide Masters** Master slides can be compared with the `equals` method inherited from the [BaseSlide](https://reference.aspose.com/slides/python-net/aspose.slides/baseslide/) class. The comparison checks structure and static content, such as shapes, text, formatting, animations, and other slide settings. It does not compare unique identifiers, such as slide IDs, or dynamic placeholder values, such as the current date. ```python import aspose.slides as slides with slides.Presentation("first.pptx") as first_presentation: with slides.Presentation("second.pptx") as second_presentation: first_presentation_master_count = len(first_presentation.masters) second_presentation_master_count = len(second_presentation.masters) for first_master_index in range(first_presentation_master_count): for second_master_index in range(second_presentation_master_count): first_master_slide = first_presentation.masters[first_master_index] second_master_slide = second_presentation.masters[second_master_index] are_master_slides_equal = first_master_slide.equals(second_master_slide) if are_master_slides_equal: print( "first.pptx master #{} equals second.pptx master #{}".format( first_master_index, second_master_index)) ``` For more information, see [Compare Presentation Slides](https://docs.aspose.com/slides/python-net/compare-slides/). ## **Set Slide Master View as the Default View** Use the `last_view` property on the presentation [ViewProperties](https://reference.aspose.com/slides/python-net/aspose.slides/viewproperties/) to control the view that PowerPoint opens first. The following example opens the presentation in Slide Master view: ```python import aspose.slides as slides with slides.Presentation("presentation.pptx") as presentation: presentation.view_properties.last_view = slides.ViewType.SLIDE_MASTER_VIEW presentation.save("presentation-master-view.pptx", slides.export.SaveFormat.PPTX) ``` For more view settings, see [Save Presentation](https://docs.aspose.com/slides/python-net/save-presentation/). ## **Remove Unused Master Slides** Presentations sometimes contain master slides that are no longer used by any normal slides. Removing unused masters can reduce file size and simplify template maintenance. Use `remove_unused` to remove unused masters from the `masters` collection: ```python import aspose.slides as slides with slides.Presentation("presentation.pptx") as presentation: presentation.masters.remove_unused(True) presentation.save("presentation-clean.pptx", slides.export.SaveFormat.PPTX) ``` You can also use the low-code `remove_unused_master_slides` method from the [Compress](https://reference.aspose.com/slides/python-net/aspose.slides.lowcode/compress/) class: ```python import aspose.slides as slides with slides.Presentation("presentation.pptx") as presentation: slides.lowcode.Compress.remove_unused_master_slides(presentation) presentation.save("presentation-clean.pptx", slides.export.SaveFormat.PPTX) ``` ## **FAQ** **What is the difference between a slide master and a layout slide?** A slide master defines shared design settings such as theme, background, common shapes, and text styles. A layout slide belongs to a master slide and defines a specific arrangement of placeholders. A normal slide uses a layout slide, so it inherits from both the layout and the master. **Can one presentation contain several slide masters?** Yes. A presentation can contain several slide masters. Use multiple masters when different sections need different visual systems or branding. **Should I add placeholders to a master slide or a layout slide?** In most cases, add placeholders to layout slides. Put shared visual elements and shared formatting on the master slide, then put content placeholders on the layouts that normal slides will use. **Can I delete a master slide that is still used?** No. A master slide that has dependent slides cannot be safely removed directly. First move those slides to layouts under another master, or use an unused-master cleanup method that removes only masters that are not in use. ## Related articles - [Master Slide](https://docs.aspose.com/slides/python-net/examples/elements/master-slide/) - [Apply or Change Slide Layouts in Python](https://docs.aspose.com/slides/python-net/slide-layout/) - [Layout Slide](https://docs.aspose.com/slides/python-net/examples/elements/layout-slide/) # Manage Slide Sections in Presentations with Python > Manage slide sections with Aspose.Slides for Python via .NET: create, rename, reorder, retrieve, and process section slides in PPTX presentations. Source: https://docs.aspose.com/slides/python-net/slide-section/ Updated: 2026-08-25 ## **Introduction** Sections organize consecutive slides into named groups without changing the slide content. With Aspose.Slides for Python via .NET, you can create, reorder, rename, inspect, and remove sections through the [Presentation.sections](https://reference.aspose.com/slides/python-net/aspose.slides/presentation/sections/) property. Sections are especially useful when: - a large presentation needs to be divided into logical topics or chapters; - different groups of slides are assigned to different collaborators; - slides need to be processed, moved, or merged as groups. Choose concise section names that describe the purpose of the grouped slides. Because sections are part of the presentation structure, use the section APIs to determine membership instead of deriving it from slide positions. ## **Create and Manage Sections** Use [SectionCollection.add_section](https://reference.aspose.com/slides/python-net/aspose.slides/sectioncollection/add_section/) to create a section by specifying its name and starting slide. Aspose.Slides determines which slides belong to the section from the presentation's current section structure. The same [SectionCollection](https://reference.aspose.com/slides/python-net/aspose.slides/sectioncollection/) also lets you: - move a section together with its slides by using [SectionCollection.reorder_section_with_slides](https://reference.aspose.com/slides/python-net/aspose.slides/sectioncollection/reorder_section_with_slides/); - remove only the section definition with [SectionCollection.remove_section](https://reference.aspose.com/slides/python-net/aspose.slides/sectioncollection/remove_section/), which retains its slides; - remove a section and its slides with [SectionCollection.remove_section_with_slides](https://reference.aspose.com/slides/python-net/aspose.slides/sectioncollection/remove_section_with_slides/); - add an empty section at the end with [SectionCollection.append_empty_section](https://reference.aspose.com/slides/python-net/aspose.slides/sectioncollection/append_empty_section/). The following example creates two sections, moves one of them, removes it together with its slides, and appends an empty section: ```py import aspose.slides as slides with slides.Presentation() as presentation: title_slide = presentation.slides[0] presentation.slides.add_empty_slide(presentation.layout_slides[0]) results_slide = presentation.slides.add_empty_slide(presentation.layout_slides[0]) presentation.slides.add_empty_slide(presentation.layout_slides[0]) presentation.sections.add_section("Introduction", title_slide) results_section = presentation.sections.add_section("Results", results_slide) presentation.sections.reorder_section_with_slides(results_section, 0) presentation.sections.remove_section_with_slides(results_section) presentation.sections.append_empty_section("Appendix") ``` After these operations, the presentation contains the `Introduction` section with its slides and an empty `Appendix` section. The `Results` section and its slides have been removed. ## **Rename Sections** To rename a section, set its [Section.name](https://reference.aspose.com/slides/python-net/aspose.slides/section/name/) property. The section's slides and position remain unchanged. The following example creates a section and changes its name: ```py import aspose.slides as slides with slides.Presentation() as presentation: slide = presentation.slides[0] section = presentation.sections.add_section("Overview", slide) section.name = "Introduction" ``` ## **Retrieve Slides from Sections** The [Presentation.sections](https://reference.aspose.com/slides/python-net/aspose.slides/presentation/sections/) property returns a [SectionCollection](https://reference.aspose.com/slides/python-net/aspose.slides/sectioncollection/) that you can iterate over. For each [Section](https://reference.aspose.com/slides/python-net/aspose.slides/section/), call [Section.get_slides_list_of_section](https://reference.aspose.com/slides/python-net/aspose.slides/section/get_slides_list_of_section/) to obtain the slides that currently belong to it. The method returns a [SectionSlideCollection](https://reference.aspose.com/slides/python-net/aspose.slides/sectionslidecollection/), which provides a count, indexed access, and iteration. The following example creates two populated sections and one empty section, then prints each section's [name](https://reference.aspose.com/slides/python-net/aspose.slides/section/name/), [identifier](https://reference.aspose.com/slides/python-net/aspose.slides/section/section_id/), [starting slide](https://reference.aspose.com/slides/python-net/aspose.slides/section/started_from_slide/), slide count, and slide numbers. It uses indexed access to read the first slide and a `for` loop to process every slide. For the empty section, the returned collection has a count of zero, the index is not accessed, and iteration performs no steps. ```py import aspose.slides as slides with slides.Presentation() as presentation: first_slide = presentation.slides[0] presentation.slides.add_empty_slide(presentation.layout_slides[0]) third_slide = presentation.slides.add_empty_slide(presentation.layout_slides[0]) presentation.sections.add_section("Introduction", first_slide) presentation.sections.add_section("Details", third_slide) presentation.sections.append_empty_section("Appendix") for section in presentation.sections: section_slides = section.get_slides_list_of_section() starting_slide = "none" if section.started_from_slide is None else str(section.started_from_slide.slide_number) print(f"Section: {section.name}") print(f"ID: {section.section_id}") print(f"Starting slide: {starting_slide}") print(f"Slide count: {section_slides.count}") if section_slides.count > 0: print(f"First slide via index: {section_slides[0].slide_number}") print("Slide numbers:", end="") for slide in section_slides: print(f" {slide.slide_number}", end="") print() ``` Section membership is determined by the presentation's section structure. Do not calculate a section's range manually from [Section.started_from_slide](https://reference.aspose.com/slides/python-net/aspose.slides/section/started_from_slide/), slide indexes, and the next section's starting slide. Structural edits can change both the slides returned for a section and their slide numbers. This includes reordering slides, cloning a slide into a section, moving a section together with its slides, removing slides, and removing sections. The next example calls [Section.get_slides_list_of_section](https://reference.aspose.com/slides/python-net/aspose.slides/section/get_slides_list_of_section/) after every such change instead of retaining assumptions about the section's former boundaries. ```py import aspose.slides as slides def print_section_slides(label, section): section_slides = section.get_slides_list_of_section() print(f"{label} ({section_slides.count} slides):", end="") for slide in section_slides: print(f" {slide.slide_number}", end="") print() with slides.Presentation() as presentation: first_slide = presentation.slides[0] presentation.slides.add_empty_slide(presentation.layout_slides[0]) third_slide = presentation.slides.add_empty_slide(presentation.layout_slides[0]) presentation.slides.add_empty_slide(presentation.layout_slides[0]) first_section = presentation.sections.add_section("First", first_slide) second_section = presentation.sections.add_section("Second", third_slide) print_section_slides("Initially", first_section) slides_before_clone = first_section.get_slides_list_of_section() presentation.slides.add_clone(slides_before_clone[0], first_section) print_section_slides("After cloning into the section", first_section) slides_before_reorder = first_section.get_slides_list_of_section() first_section_position = slides_before_reorder[0].slide_number - 1 presentation.slides.reorder(first_section_position, slides_before_reorder[slides_before_reorder.count - 1]) print_section_slides("After reordering slides", first_section) presentation.sections.reorder_section_with_slides(first_section, 1) print_section_slides("After moving the section", first_section) slides_before_removal = first_section.get_slides_list_of_section() presentation.slides.remove(slides_before_removal[0]) print_section_slides("After removing a slide", first_section) presentation.sections.remove_section_with_slides(second_section) for section in presentation.sections: print_section_slides("Remaining section", section) ``` Call [Section.get_slides_list_of_section](https://reference.aspose.com/slides/python-net/aspose.slides/section/get_slides_list_of_section/) again whenever slides or sections are reordered, cloned, moved, or removed. This keeps subsequent processing aligned with the current presentation structure. The PPT (PowerPoint 97–2003) format does not preserve section metadata. Use this workflow with a format that supports sections, such as PPTX; converting to PPT removes the section structure needed for later iteration. ## **FAQ** **Are sections preserved when saving to the PPT (PowerPoint 97–2003) format?** No. The PPT format does not support section metadata, so section grouping is lost when saving to .ppt. **Can an entire section be "hidden"?** No. A section has no visibility state. To hide its contents, set the [Slide.hidden](https://reference.aspose.com/slides/python-net/aspose.slides/slide/hidden/) property for each slide in the section. **How can I find the section that contains a slide?** Iterate over [Presentation.sections](https://reference.aspose.com/slides/python-net/aspose.slides/presentation/sections/), call [Section.get_slides_list_of_section](https://reference.aspose.com/slides/python-net/aspose.slides/section/get_slides_list_of_section/) for each section, and compare the returned slides with the target slide. For a non-empty section, [Section.started_from_slide](https://reference.aspose.com/slides/python-net/aspose.slides/section/started_from_slide/) returns its first slide; for an empty section, it returns `None`. ## Related articles - [Section](https://docs.aspose.com/slides/python-net/examples/elements/section/) # Change the Slide Size in Presentations with Python > Learn how to quickly resize slides in PPT, PPTX and ODP files with Python and Aspose.Slides, optimize presentations for any screen without losing quality. Source: https://docs.aspose.com/slides/python-net/slide-size/ Updated: 2026-11-08 ## **Introduction** Aspose.Slides provides comprehensive tools to adjust the slide size and aspect ratio in PowerPoint presentations, critical for both printing and on-screen display. Popular Slide Sizes and Ratios: - **Standard (4:3 Aspect Ratio)**: Ideal for older screens and devices. - **Widescreen (16:9 Aspect Ratio)**: Recommended for modern projectors and displays. Ensure consistency throughout your presentation as a single slide size and aspect ratio apply to all slides. For optimal results, set your slide dimensions at the beginning of your presentation creation process to avoid complications. By default, presentations created with Aspose.Slides use the standard 4:3 aspect ratio. Notes and handout pages have separate dimensions from regular slides. See [Notes Page Size](https://docs.aspose.com/slides/python-net/notes-size/) to change their size and orientation. ## **Change the Slide Size in a Presentation** This sample code shows you how to change the slide size in a presentation in Python using Aspose.Slides: ```py import aspose.slides as slides with slides.Presentation("AccessSlides.pptx") as pres: pres.slide_size.set_size(slides.SlideSizeType.ON_SCREEN_16X9, slides.SlideSizeScaleType.DO_NOT_SCALE) pres.save("pres-16x9-aspect-ratio.pptx", slides.export.SaveFormat.PPTX) ``` ## **Specify Custom Slide Sizes** If you find the common slide sizes (4:3 and 16:9) unsuitable for your work, you may decide to use a specific or unique slide size. For example, if you plan to print full-size slides from your presentation on a custom page layout or if you intend to display your presentation on certain screen types, you are likely to benefit from using a custom size setting for your presentation. This sample code shows you how to use Aspose.Slides for Python via .NET to specify a custom slide size for a presentation in Python: ```py import aspose.slides as slides with slides.Presentation("AccessSlides.pptx") as pres: pres.slide_size.set_size(780, 540, slides.SlideSizeScaleType.DO_NOT_SCALE) # A4 paper size pres.save("pres-a4-slide-size.pptx", slides.export.SaveFormat.PPTX) ``` ## **Handle Slide Content After Resizing** After you change the slide size for a presentation, the slides’ contents (images or objects, for example) may become distorted. By default, the objects get automatically resized to fit the new slide size. However, when changing a presentation's slide size, you can specify a setting that determines how Aspose.Slides deals with the contents on the slides. Depending on what you intend to do or achieve, you can use any of these settings: - `DO_NOT_SCALE` If you do NOT want the objects on the slides to be resized, use this setting. - `ENSURE_FIT` If you want to scale to a smaller slide size and you need Aspose.Slides to scale down the slides’ objects to ensure they all fit on slides (this way, you avoid losing content), use this setting. - `MAXIMIZE` If you want to scale to a larger slide size and you need Aspose.Slides to enlarge the slides’ objects to make them proportional to the new slide size, use this setting. This sample code shows you how to use the `MAXIMIZE` setting when changing the size of a presentation’s slide: ```py import aspose.slides as slides with slides.Presentation("AccessSlides.pptx") as pres: pres.slide_size.set_size(slides.SlideSizeType.LEDGER, slides.SlideSizeScaleType.MAXIMIZE) ``` [![One shared display scale shows an original 720 by 480-point slide and three 600 by 300-point outputs. DoNotScale keeps shape sizes, EnsureFit leaves side margins, and Maximize crops edge shapes.](https://docs.aspose.com/slides/python-net/slide-size/visual-slide-size-1dbb49bb41cc.svg)](https://docs.aspose.com/slides/python-net/slide-size/visual-slide-size-1dbb49bb41cc.svg) *One .NET fixture resized to the same 600 × 300-point canvas in each mode. The figure uses one display scale throughout. Dashed marks show where shape frames extend beyond the canvas.* ## **FAQ** **Can I set a custom slide size using units other than inches (for example, points or millimeters)?** Yes. Aspose.Slides uses points internally, where 1 point equals 1/72 of an inch. You can convert any unit (such as millimeters or centimeters) to points and use the converted values to define slide width and height. **Will a very large custom slide size affect performance and memory usage during rendering?** Yes. Larger slide dimensions (in points) combined with higher rendering scale lead to increased memory consumption and longer processing times. Aim for a practical slide size and adjust rendering scale only as needed to achieve the desired output quality. **Can I define one non-standard slide size and then merge slides from presentations that have different sizes?** You can’t [merge presentations](https://docs.aspose.com/slides/python-net/merge-presentation/) while they have different slide sizes — first, resize one presentation to match the other. When changing the slide size, you can choose how existing content is handled via the [SlideSizeScaleType](https://reference.aspose.com/slides/python-net/aspose.slides/slidesizescaletype/) option. After aligning sizes, you can merge slides while preserving formatting. **Can I generate thumbnails for individual shapes or specific regions of a slide, and will they respect the new slide size?** Yes. Aspose.Slides can render thumbnails for [entire slides](https://reference.aspose.com/slides/python-net/aspose.slides/slide/get_image/) as well as for [selected shapes](https://reference.aspose.com/slides/python-net/aspose.slides/shape/get_image/). The resulting images reflect the current slide size and aspect ratio, ensuring consistent framing and geometry. # Slide Text Extraction: PPT, PPTX, ODP Essentials > Turn slides into data: extract text from PPT, PPTX, and ODP for search, automation, and accessibility, with format insights—usable in Python and cloud platforms. Source: https://docs.aspose.com/slides/python-net/slide-text-extraction-ppt-pptx-odp-essentials/ Updated: 2025-12-02 ## **Introduction** Extracting text from presentation files is critical for **automating business processes**, **data analytics**, and **streamlining document workflows**. In today’s digital landscape, many organizations need **rapid access** to information contained in slides. Whether for **search indexing**, **content analysis**, **accessibility**, or **localization**, reliable text extraction ensures that valuable slide content can be reused, processed, and analyzed across various systems. ## **Practical Applications of Text Extraction** - **Automating Document Workflows**: Seamlessly integrate PPTX and ODP files into corporate document management systems (DMS) like SharePoint, Alfresco, or 1C:Document Management. - **Search Indexing**: Create high-speed search systems by indexing extracted text, enabling quick retrieval of pertinent data from large presentation archives. - **Content Analysis**: Automatically identify key phrases, topics, and trends to aid marketing and analytics teams in forecasting and strategic decision-making. - **Accessibility and Localization**: Generate subtitles, translate slides into multiple languages, or integrate content with screen-reading software for improved access. - **Text Positioning and Visual Analysis**: Beyond text itself, analyzing layout and positioning helps ensure proper slide structure, formatting, and alignment with corporate guidelines. This article explores several popular presentation file formats and how each affects the text extraction process. ## **Overview of Presentation Formats** ### **PPT (Legacy PowerPoint Format)** Originally used by Microsoft PowerPoint until 2007, **PPT** was prevalent in **MS Office 97–2003**. As a **binary format**, PPT is more difficult to process without specialized tools than modern XML-based formats. **Main Difficulties in Text Extraction** - Proprietary binary structure makes **data access** challenging without the official Microsoft API or specialized libraries. - **Text may appear** in multiple locations (slides, notes, comments), requiring a comprehensive approach to extraction. - **Encoding and font conflicts** can arise when dealing with custom characters. ### **PPTX (Open XML Specification)** Introduced in **PowerPoint 2007**, **PPTX** is built on **Office Open XML**, an XML-based standard that simplifies text extraction. **File Structure Basics** - PPTX files are **ZIP archives** containing multiple **XML documents**. - Slides, notes sections, and metadata each reside in separate **XML files**. **Extracting Text from Structured XML** PPTX allows more efficient text extraction due to its clear XML organization: - **Text resides in `ppt/slides/slideX.xml`** within `` tags. - **Notes and comments** are found in `ppt/notesSlides/`. - **Retaining formatting** may require parsing additional XML attributes. ### **ODP (OpenDocument Presentation)** Based on the **OpenDocument Format (ODF)**, **ODP** is commonly used in open-source office suites such as **LibreOffice Impress**. **Differences from PPTX** - Relies on **OpenDocument XML**, not Open XML. - Structurally similar but **uses different tags and a distinct hierarchy**. - Text is often stored in **content.xml** within `` elements. ## **Conclusion** A solid grasp of presentation file structures is paramount for successful text extraction. Although **PPTX and ODP** offer XML-based transparency, older **PPT** files demand additional steps due to their binary nature. Specialized tools and libraries designed for each format help automate and optimize the extraction process, ensuring that extracted data can power a broad array of use cases—from robust indexing to comprehensive accessibility solutions. ## Related articles - [Extracting Text from PPT, PPTX, ODP](https://docs.aspose.com/slides/python-net/extracting-text-from-ppt-pptx-odp-on-cloud-platforms/) # Manage Slide Transitions in Presentations Using Python > Apply slide transitions, configure automatic slide advancement, and customize Morph and other transition effects with Aspose.Slides for Python via .NET. Source: https://docs.aspose.com/slides/python-net/slide-transition/ Updated: 2026-11-17 ## **Overview** Slide transitions control how slides appear during a slide show. With Aspose.Slides for Python via .NET, you can choose a transition effect for each slide, configure advancement by mouse click or timer, and adjust options specific to an effect. This article uses Python examples to apply transitions, set exact transition durations, manage slide timing, and create a Morph transition between two slides. The examples also show how to save the settings to a PPTX file. ## **Add Slide Transition** To apply a transition, load a presentation with the [Presentation](https://reference.aspose.com/slides/python-net/aspose.slides/presentation/) class and access the slide's [slide_show_transition](https://reference.aspose.com/slides/python-net/aspose.slides/slide/slide_show_transition/) property. Set its [type](https://reference.aspose.com/slides/python-net/aspose.slides.slideshow/slideshowtransition/type/) to a value from the [TransitionType](https://reference.aspose.com/slides/python-net/aspose.slides.slideshow/transitiontype/) enumeration, then save the presentation. The following example applies a Circle transition to the first slide and a Comb transition to the second. Use an `input.pptx` file with at least two slides. ```python import aspose.slides as slides with slides.Presentation("input.pptx") as presentation: if len(presentation.slides) >= 2: presentation.slides[0].slide_show_transition.type = slides.slideshow.TransitionType.CIRCLE presentation.slides[1].slide_show_transition.type = slides.slideshow.TransitionType.COMB presentation.save("slide-transitions.pptx", slides.export.SaveFormat.PPTX) else: print("The input presentation must contain at least two slides.") ``` ## **Wheel Transition** The [spokes](https://reference.aspose.com/slides/python-net/aspose.slides.slideshow/wheeltransition/spokes/) property of [WheelTransition](https://reference.aspose.com/slides/python-net/aspose.slides.slideshow/wheeltransition/) controls the number of radial sectors that reveal the destination slide. Set the slide's transition [type](https://reference.aspose.com/slides/python-net/aspose.slides.slideshow/slideshowtransition/type/) to WHEEL from [TransitionType](https://reference.aspose.com/slides/python-net/aspose.slides.slideshow/transitiontype/) before accessing [value](https://reference.aspose.com/slides/python-net/aspose.slides.slideshow/slideshowtransition/value/) as [WheelTransition](https://reference.aspose.com/slides/python-net/aspose.slides.slideshow/wheeltransition/). This example creates two identical pairs of slides: a black slide followed by a slide with a gold rectangle. The destination slides use spoke counts of 1 and 8, with the same [speed](https://reference.aspose.com/slides/python-net/aspose.slides.slideshow/slideshowtransition/speed/) and an explicit [duration](https://reference.aspose.com/slides/python-net/aspose.slides.slideshow/slideshowtransition/duration/) of 8,000 milliseconds to make the difference easy to observe. ```python import aspose.slides as slides with slides.Presentation() as presentation: slide_width = presentation.slide_size.size.width slide_height = presentation.slide_size.size.height black_slide = presentation.slides[0] black_slide.shapes.clear() black_slide.background.type = slides.BackgroundType.OWN_BACKGROUND black_slide.background.fill_format.fill_type = slides.FillType.SOLID black_slide.background.fill_format.solid_fill_color.preset_color = slides.PresetColor.BLACK destination_slide = presentation.slides.add_clone(black_slide) rectangle = destination_slide.shapes.add_auto_shape(slides.ShapeType.RECTANGLE, 0, 0, slide_width, slide_height) rectangle.fill_format.fill_type = slides.FillType.SOLID rectangle.fill_format.solid_fill_color.preset_color = slides.PresetColor.GOLD rectangle.text_frame.text = "Wheel transition" presentation.slides.add_clone(black_slide) presentation.slides.add_clone(destination_slide) spoke_counts = [1, 8] for i, spoke_count in enumerate(spoke_counts): transition = presentation.slides[i * 2 + 1].slide_show_transition transition.type = slides.slideshow.TransitionType.WHEEL wheel_transition = transition.value wheel_transition.spokes = spoke_count transition.speed = slides.slideshow.TransitionSpeed.SLOW transition.duration = 8000 presentation.save("wheel-transitions.pptx", slides.export.SaveFormat.PPTX) ``` Open the output presentation in PowerPoint and run the slide show. Advance from slide 1 to slide 2, then from slide 3 to slide 4. In PowerPoint playback, the verified spoke count of 1 reveals the slide with one clockwise sweep; the verified count of 8 reveals it through eight radial sectors simultaneously. The destination content and transition timing are identical, so the difference is the number of reveal sectors. ## **Add Advanced Slide Transition** You can configure how long a slide remains on screen and whether a mouse click advances the slide show. The following properties control this behavior: - [advance_on_click](https://reference.aspose.com/slides/python-net/aspose.slides.slideshow/slideshowtransition/advance_on_click/) allows the viewer to advance by clicking the mouse. - [advance_after](https://reference.aspose.com/slides/python-net/aspose.slides.slideshow/slideshowtransition/advance_after/) enables automatic advancement. - [advance_after_time](https://reference.aspose.com/slides/python-net/aspose.slides.slideshow/slideshowtransition/advance_after_time/) specifies the delay before automatic advancement, in milliseconds. Enable both click and timed advancement to let the viewer move on with a click or wait for the timer. To use only the timer, set [advance_on_click](https://reference.aspose.com/slides/python-net/aspose.slides.slideshow/slideshowtransition/advance_on_click/) to `False`. The delay controls when the slide show advances; it does not set the duration of the visual transition effect. This example assigns different effects to the first three slides and enables automatic advancement after 3, 5, and 7 seconds, respectively. Mouse clicks can also advance these slides. Use an `input.pptx` file with at least three slides. ```python import aspose.slides as slides with slides.Presentation("input.pptx") as presentation: if len(presentation.slides) >= 3: first_transition = presentation.slides[0].slide_show_transition first_transition.type = slides.slideshow.TransitionType.CIRCLE first_transition.advance_on_click = True first_transition.advance_after = True first_transition.advance_after_time = 3000 second_transition = presentation.slides[1].slide_show_transition second_transition.type = slides.slideshow.TransitionType.COMB second_transition.advance_on_click = True second_transition.advance_after = True second_transition.advance_after_time = 5000 third_transition = presentation.slides[2].slide_show_transition third_transition.type = slides.slideshow.TransitionType.ZOOM third_transition.advance_on_click = True third_transition.advance_after = True third_transition.advance_after_time = 7000 presentation.save("advanced-transitions.pptx", slides.export.SaveFormat.PPTX) else: print("The input presentation must contain at least three slides.") ``` To check whether timed advancement is enabled, read [advance_after](https://reference.aspose.com/slides/python-net/aspose.slides.slideshow/slideshowtransition/advance_after/). A stored delay alone does not indicate that the timer is active. The next example opens the file saved above, reports each enabled timer, and disables automatic advancement for slides with a delay greater than two seconds. It enables mouse clicks for those slides and saves the updated settings. ```python import aspose.slides as slides with slides.Presentation("advanced-transitions.pptx") as presentation: for slide in presentation.slides: transition = slide.slide_show_transition if transition.advance_after: print(f"Slide {slide.slide_number}: advance after {transition.advance_after_time} ms.") if transition.advance_after_time > 2000: transition.advance_after = False transition.advance_on_click = True presentation.save("adjusted-transitions.pptx", slides.export.SaveFormat.PPTX) ``` ## **Control Transition Timing Precisely** Use [duration](https://reference.aspose.com/slides/python-net/aspose.slides.slideshow/slideshowtransition/duration/) to specify the exact length of a transition effect in milliseconds. The slide's [slide_show_transition](https://reference.aspose.com/slides/python-net/aspose.slides/slide/slide_show_transition/) property exposes these settings through [SlideShowTransition](https://reference.aspose.com/slides/python-net/aspose.slides.slideshow/slideshowtransition/): | Property | Purpose | | --- | --- | | [duration](https://reference.aspose.com/slides/python-net/aspose.slides.slideshow/slideshowtransition/duration/) | Sets the duration of the transition effect itself, in milliseconds. | | [advance_after_time](https://reference.aspose.com/slides/python-net/aspose.slides.slideshow/slideshowtransition/advance_after_time/) | Sets the delay before the slide advances automatically, in milliseconds. Enable [advance_after](https://reference.aspose.com/slides/python-net/aspose.slides.slideshow/slideshowtransition/advance_after/) to activate this timer. | | [speed](https://reference.aspose.com/slides/python-net/aspose.slides.slideshow/slideshowtransition/speed/) | Selects a predefined speed category from [TransitionSpeed](https://reference.aspose.com/slides/python-net/aspose.slides.slideshow/transitionspeed/): SLOW, MEDIUM, or FAST. It is used when an exact duration is not specified. | [duration](https://reference.aspose.com/slides/python-net/aspose.slides.slideshow/slideshowtransition/duration/) controls only the transition effect; it does not determine how long the slide remains visible. Configure the automatic advancement delay separately. When no explicit duration is set, Aspose.Slides determines the effect duration from the transition type and [speed](https://reference.aspose.com/slides/python-net/aspose.slides.slideshow/slideshowtransition/speed/) value. [![Separate bars identify the 750-ms transition duration and 5,000-ms automatic advancement setting.](https://docs.aspose.com/slides/python-net/slide-transition/visual-slide-transition-1f705a740cf6.svg)](https://docs.aspose.com/slides/python-net/slide-transition/visual-slide-transition-1f705a740cf6.svg) *The shared example gives each slide a 750-ms Fade transition and separately enables automatic advancement at 5,000 ms. Transition duration controls the effect; advancement controls when to leave the slide. These bars are schematic settings, not a measured combined timeline.* ### **Apply the Same Duration to Every Slide** For consistent pacing, apply the same effect and exact duration to every slide. This example loads `input.pptx`, selects Fade from [TransitionType](https://reference.aspose.com/slides/python-net/aspose.slides.slideshow/transitiontype/), and gives each transition a duration of 750 milliseconds. It separately enables automatic advancement after 5,000 milliseconds and disables advancement by mouse click, then saves the result as PPTX. ```python import aspose.slides as slides with slides.Presentation("input.pptx") as presentation: for slide in presentation.slides: transition = slide.slide_show_transition transition.type = slides.slideshow.TransitionType.FADE transition.duration = 750 # Configure automatic advancement independently of the effect duration. transition.advance_after = True transition.advance_after_time = 5000 transition.advance_on_click = False presentation.save("precise-transitions.pptx", slides.export.SaveFormat.PPTX) ``` ### **Set Different Durations for Individual Slides** Different slides can use different effect durations. For example, use a brief transition for a title slide and a longer transition for a section introduction. This example sets 500 milliseconds for the first slide and 1,200 milliseconds for the second. Use an `input.pptx` file with at least two slides. ```python import aspose.slides as slides with slides.Presentation("input.pptx") as presentation: if len(presentation.slides) >= 2: first_transition = presentation.slides[0].slide_show_transition first_transition.type = slides.slideshow.TransitionType.FADE first_transition.duration = 500 second_transition = presentation.slides[1].slide_show_transition second_transition.type = slides.slideshow.TransitionType.PUSH second_transition.duration = 1200 presentation.save("individual-transition-durations.pptx", slides.export.SaveFormat.PPTX) else: print("The input presentation must contain at least two slides.") ``` ### **Coordinate Transitions with Animated Output** When preparing an [animated GIF](https://docs.aspose.com/slides/python-net/convert-powerpoint-to-animated-gif/), [HTML5 presentation](https://docs.aspose.com/slides/python-net/export-to-html5/), or [video](https://docs.aspose.com/slides/python-net/convert-powerpoint-to-video/), set exact transition durations before export to match the intended pacing. For example, use a 600-millisecond fade between scenes, and adjust each slide's advancement delay separately to allow time for its narration or content. For GIF and video, coordinate the output frame rate with the effect duration: 600 milliseconds corresponds to 18 frames at 30 frames per second. In HTML5, enable animated transitions in the export settings. Check the chosen export format's supported effects and timing options, and preview the output to confirm synchronization. ### **Read an Existing Transition Duration** Read [duration](https://reference.aspose.com/slides/python-net/aspose.slides.slideshow/slideshowtransition/duration/) before modifying the transition to determine whether an explicit value is stored. A value of `-1` means no explicit duration is set; a nonnegative value specifies the stored duration in milliseconds. The unset value is not the calculated playback duration: Aspose.Slides uses the transition type and [speed](https://reference.aspose.com/slides/python-net/aspose.slides.slideshow/slideshowtransition/speed/) to determine that duration. Setting a transition type can initialize a duration, so inspect the original settings first. ```python import aspose.slides as slides with slides.Presentation("input.pptx") as presentation: for slide in presentation.slides: transition = slide.slide_show_transition duration = transition.duration if duration >= 0: print(f"Slide {slide.slide_number}: stored transition duration is {duration} ms.") else: print(f"Slide {slide.slide_number}: no explicit duration; timing depends on {transition.type} and {transition.speed}.") ``` ## **Morph Transition** The Morph transition animates changes between objects on consecutive slides. To create a simple Morph effect, clone a slide, move or resize an object on the clone, and apply the Morph transition to the second slide. This gives the transition corresponding objects to animate between their original and modified states. The following example creates a slide with a text rectangle, clones the slide, and changes the rectangle's position and size on the clone. It then selects Morph from the [TransitionType](https://reference.aspose.com/slides/python-net/aspose.slides.slideshow/transitiontype/) enumeration for the second slide. Open the saved file in a presentation viewer that supports Morph to see the effect during a slide show. ```python import aspose.slides as slides with slides.Presentation() as presentation: first_slide = presentation.slides[0] rectangle = first_slide.shapes.add_auto_shape(slides.ShapeType.RECTANGLE, 100, 100, 400, 100) rectangle.text_frame.text = "Morph transition" second_slide = presentation.slides.add_clone(first_slide) moved_rectangle = second_slide.shapes[0] moved_rectangle.x += 100 moved_rectangle.y += 50 moved_rectangle.width -= 200 moved_rectangle.height -= 10 second_slide.slide_show_transition.type = slides.slideshow.TransitionType.MORPH presentation.save("morph-transition.pptx", slides.export.SaveFormat.PPTX) ``` ## **Morph Transition Types** The [TransitionMorphType](https://reference.aspose.com/slides/python-net/aspose.slides.slideshow/transitionmorphtype/) enumeration controls how Morph matches and animates content: - [BY_OBJECT](https://reference.aspose.com/slides/python-net/aspose.slides.slideshow/transitionmorphtype/) treats each shape as a whole object. - [BY_WORD](https://reference.aspose.com/slides/python-net/aspose.slides.slideshow/transitionmorphtype/) animates text by matching words where possible. - [BY_CHAR](https://reference.aspose.com/slides/python-net/aspose.slides.slideshow/transitionmorphtype/) animates text by matching characters where possible. Set the transition [type](https://reference.aspose.com/slides/python-net/aspose.slides.slideshow/slideshowtransition/type/) to Morph before accessing its [value](https://reference.aspose.com/slides/python-net/aspose.slides.slideshow/slideshowtransition/value/). The value then provides the [MorphTransition](https://reference.aspose.com/slides/python-net/aspose.slides.slideshow/morphtransition/) object, whose [morph_type](https://reference.aspose.com/slides/python-net/aspose.slides.slideshow/morphtransition/morph_type/) property selects the matching mode. This example opens the presentation created in the previous section and configures the second slide to use word-based Morph animation. ```python import aspose.slides as slides with slides.Presentation("morph-transition.pptx") as presentation: if len(presentation.slides) >= 2: transition = presentation.slides[1].slide_show_transition transition.type = slides.slideshow.TransitionType.MORPH morph_transition = transition.value if isinstance(morph_transition, slides.slideshow.MorphTransition): morph_transition.morph_type = slides.slideshow.TransitionMorphType.BY_WORD presentation.save("morph-by-word.pptx", slides.export.SaveFormat.PPTX) else: print("Morph transition options are unavailable.") else: print("The input presentation must contain at least two slides.") ``` ## **Set Transition Effects** Some transitions expose additional options, such as direction or whether the effect starts from a black screen. The available options depend on the selected transition [type](https://reference.aspose.com/slides/python-net/aspose.slides.slideshow/slideshowtransition/type/). Set the type first, then use the appropriate transition object from its [value](https://reference.aspose.com/slides/python-net/aspose.slides.slideshow/slideshowtransition/value/). The following example applies a Cut transition to the first slide of `input.pptx`. It sets [from_black](https://reference.aspose.com/slides/python-net/aspose.slides.slideshow/optionalblacktransition/from_black/) through [OptionalBlackTransition](https://reference.aspose.com/slides/python-net/aspose.slides.slideshow/optionalblacktransition/) so that the transition starts from a black screen. ```python import aspose.slides as slides with slides.Presentation("input.pptx") as presentation: transition = presentation.slides[0].slide_show_transition transition.type = slides.slideshow.TransitionType.CUT cut_transition = transition.value if isinstance(cut_transition, slides.slideshow.OptionalBlackTransition): cut_transition.from_black = True presentation.save("cut-from-black.pptx", slides.export.SaveFormat.PPTX) else: print("Cut transition options are unavailable.") ``` ## **FAQ** **Can I control the playback speed of a slide transition?** Yes. Prefer [duration](https://reference.aspose.com/slides/python-net/aspose.slides.slideshow/slideshowtransition/duration/) when you need an exact effect duration in milliseconds. Use [speed](https://reference.aspose.com/slides/python-net/aspose.slides.slideshow/slideshowtransition/speed/) when a predefined [TransitionSpeed](https://reference.aspose.com/slides/python-net/aspose.slides.slideshow/transitionspeed/) category—SLOW, MEDIUM, or FAST—is sufficient and no explicit duration is set. These settings control the transition effect independently of the automatic advancement delay. **Can I attach audio to a transition and make it loop?** Yes. Assign embedded audio to [sound](https://reference.aspose.com/slides/python-net/aspose.slides.slideshow/slideshowtransition/sound/), set [sound_mode](https://reference.aspose.com/slides/python-net/aspose.slides.slideshow/slideshowtransition/sound_mode/) to START_SOUND from the [TransitionSoundMode](https://reference.aspose.com/slides/python-net/aspose.slides.slideshow/transitionsoundmode/) enumeration, and enable [sound_loop](https://reference.aspose.com/slides/python-net/aspose.slides.slideshow/slideshowtransition/sound_loop/). The audio loops until the next sound event in the slide show. **What's the fastest way to apply the same transition to every slide?** Loop through the presentation's [slides](https://reference.aspose.com/slides/python-net/aspose.slides/presentation/slides/) collection and set each slide's transition [type](https://reference.aspose.com/slides/python-net/aspose.slides.slideshow/slideshowtransition/type/) to the same value. Set any timing and effect options in the same loop to keep the behavior consistent across slides. **How can I check which transition is currently set on a slide?** Read the [type](https://reference.aspose.com/slides/python-net/aspose.slides.slideshow/slideshowtransition/type/) property from the slide's [slide_show_transition](https://reference.aspose.com/slides/python-net/aspose.slides/slide/slide_show_transition/). It returns a value from the [TransitionType](https://reference.aspose.com/slides/python-net/aspose.slides.slideshow/transitiontype/) enumeration; NONE means that no transition effect is applied. ## Related articles - [SlideTransition](https://docs.aspose.com/slides/python-net/examples/elements/slide-transition/) # Slides on Cloud Platforms > See how Aspose.Slides runs on major cloud platforms, with deployment tips, scaling guidance, and best practices for processing PowerPoint and OpenDocument. Source: https://docs.aspose.com/slides/python-net/slides-on-cloud-platforms/ Updated: 2025-12-02 --- lastmod: 2025-12-02T13:32:50+06:00 title: Slides on Cloud Platforms type: docs weight: 40 url: /python-net/slides-on-cloud-platforms/ keywords: - cloud platforms - cloud integration - PowerPoint automation - text extraction - Google integration - PowerPoint - OpenDocument - presentation - Python - Aspose.Slides description: "See how Aspose.Slides runs on major cloud platforms, with deployment tips, scaling guidance, and best practices for processing PowerPoint and OpenDocument." --- ## Related articles - [Extracting Text from PPT, PPTX, ODP](https://docs.aspose.com/slides/python-net/extracting-text-from-ppt-pptx-odp-on-cloud-platforms/) # Manage Superscript and Subscript in Python > Master superscript and subscript in Aspose.Slides for Python via .NET and elevate your presentations with professional text formatting for maximum impact. Source: https://docs.aspose.com/slides/python-net/superscript-and-subscript/ Updated: 2026-08-02 ## **Overview** Aspose.Slides provides features for integrating superscript and subscript text into your PowerPoint (PPT, PPTX) and OpenDocument (ODP) presentations. Whether you need to highlight chemical formulas, mathematical equations, or annotate content with footnotes, these specialized formatting options help maintain clarity and precision. In this article, you'll learn how to seamlessly apply superscript and subscript styles and ensure professional results in every slide. ## **Add Superscript and Subscript Text** You can add superscript and subscript text to any paragraph portion. In Aspose.Slides, use the `escapement` property of the [PortionFormat](https://reference.aspose.com/slides/python-net/aspose.slides/portionformat/) class to control this. `escapement` is a percentage from **-100% to 100%**: - **> 0** → superscript (e.g., 25% = slight raise; 100% = full superscript) - **0** → baseline (no super/subscript) - **< 0** → subscript (e.g., -25% = slight lower; -100% = full subscript) Steps: 1. Create a [Presentation](https://reference.aspose.com/slides/python-net/aspose.slides/presentation/) and get a slide. 1. Add a rectangle [AutoShape](https://reference.aspose.com/slides/python-net/aspose.slides/autoshape/) and access its [TextFrame](https://reference.aspose.com/slides/python-net/aspose.slides/textframe/). 1. Clear existing paragraphs. 1. For superscript: create a paragraph and a portion, set `portion.portion_format.escapement` to a value between **0 and 100**, set text, and add the portion. 1. For subscript: create another paragraph and portion, set `escapement` to a value between **-100 and 0**, set text, and add the portion. 1. Save the presentation as PPTX. ```py import aspose.slides as slides with slides.Presentation("pres.pptx") as presentation: # Get a slide. slide = presentation.slides[0] # Create a text box. shape = slide.shapes.add_auto_shape(slides.ShapeType.RECTANGLE, 100, 100, 200, 100) shape.text_frame.paragraphs.clear() # Create a paragraph for superscript text. superscript_paragraph = slides.Paragraph() # Create a text portion with regular text. portion1 = slides.Portion() portion1.text = "SlideTitle" superscript_paragraph.portions.add(portion1) # Create a text portion with superscript text. superscript_portion = slides.Portion() superscript_portion.portion_format.escapement = 30 superscript_portion.text = "TM" superscript_paragraph.portions.add(superscript_portion) # Create a paragraph for the subscript text. subscript_paragraph = slides.Paragraph() # Create a text portion with regular text. portion2 = slides.Portion() portion2.text = "a" subscript_paragraph.portions.add(portion2) # Create a text portion with subscript text. subscript_portion = slides.Portion() subscript_portion.portion_format.escapement = -25 subscript_portion.text = "i" subscript_paragraph.portions.add(subscript_portion) # Add the paragraphs to the text box. shape.text_frame.paragraphs.add(superscript_paragraph) shape.text_frame.paragraphs.add(subscript_paragraph) presentation.save("TestOut.pptx", slides.export.SaveFormat.PPTX) ``` ## **FAQ** ### Can I apply superscript/subscript in tables and other containers, not just regular text boxes? Yes. You can format text as superscript or subscript inside any object that exposes a [TextFrame](https://reference.aspose.com/slides/python-net/aspose.slides/textframe/) (including table cells). The formatting applies to text portions within that frame. ### Will superscripts/subscripts be preserved when exporting to PDF, HTML, or images? Yes. Aspose.Slides preserves superscript/subscript formatting during export to common formats like [PDF](https://docs.aspose.com/slides/python-net/convert-powerpoint-to-pdf/), [HTML](https://docs.aspose.com/slides/python-net/convert-powerpoint-to-html/), and [raster images](https://docs.aspose.com/slides/python-net/convert-powerpoint-to-png/) because the rendering pipeline respects portion-level text formatting. ### Can I combine superscript/subscript with hyperlinks in the same text fragment? Yes. [Hyperlinks](https://docs.aspose.com/slides/python-net/manage-hyperlinks/) are assigned at the portion (fragment) level, so a portion can simultaneously have a hyperlink and be formatted as superscript or subscript. ## Related articles - [Manage Text in Presentations with Python](https://docs.aspose.com/slides/python-net/manage-text/) # Supported File Formats > Discover all file formats Aspose.Slides for Python via .NET can open, save, and convert — including PPT, PPTX and ODP — with clear import/export support notes. Source: https://docs.aspose.com/slides/python-net/supported-file-formats/ Updated: 2026-08-02 ## **Overview** Aspose.Slides supports presentation files from Microsoft PowerPoint 97 through Office 365, including Microsoft PowerPoint for Mac. This article lists the PowerPoint versions supported by the library and provides a table of file formats that can be loaded, saved, or both. The article also answers common questions about PDF compliance, font embedding, password-protected files, custom fonts, font fallback, and XPS export options. ## **Supported Microsoft PowerPoint Versions** - Microsoft PowerPoint 97 - Microsoft PowerPoint 2000 - Microsoft PowerPoint XP - Microsoft PowerPoint 2003 - Microsoft PowerPoint 2007 - Microsoft PowerPoint 2010 - Microsoft PowerPoint 2013 - Microsoft PowerPoint 2016 - Microsoft PowerPoint 2019 - Microsoft PowerPoint for MAC - Office 365 ## **Supported File Formats** This table contains the file formats that Aspose.Slides for Python via .NET can load and save: |**Format**|**Description**|**Load**|**Save**|**Remarks**| | :- | :- | :- | :- | :- | |[PPT](https://docs.fileformat.com/presentation/ppt/)|PowerPoint 97-2003 Presentation|✓|✓| | |[POT](https://docs.fileformat.com/presentation/pot/)|PowerPoint 97-2003 Template|✓|✓| | |[PPS](https://docs.fileformat.com/presentation/pps/)|PowerPoint 97-2003 Show|✓|✓| | |[PPTX](https://docs.fileformat.com/presentation/pptx/)|PowerPoint Presentation|✓|✓| | |[POTX](https://docs.fileformat.com/presentation/potx/)|PowerPoint Template|✓|✓| | |[PPSX ](https://docs.fileformat.com/presentation/ppsx/)|PowerPoint Show|✓|✓| | |[PPTM](https://docs.fileformat.com/presentation/pptm/)|PowerPoint Macro-Enabled Presentation|✓|✓| | |[PPSM](https://docs.fileformat.com/presentation/ppsm/)|PowerPoint Macro-Enabled Show|✓|✓| | |[POTM](https://docs.fileformat.com/presentation/potm/)|PowerPoint Macro-Enabled Template|✓|✓| | |[ODP/FODP](https://docs.fileformat.com/presentation/odp/)|OpenDocument Presentation|✓|✓| | |[OTP](https://docs.fileformat.com/presentation/otp/)|OpenDocument Presentation Template|✓|✓| | |[TIFF](https://docs.fileformat.com/image/tiff/)|Tag Image File Format| |✓| | |[EMF](https://docs.fileformat.com/image/emf/)|Enhanced Metafile Format| |✓| | |[PDF](https://docs.fileformat.com/pdf/)|Portable Document Format|✓|✓| | |[XPS](https://docs.fileformat.com/page-description-language/xps/)|XML Paper Specification| |✓| | |[JPEG](https://docs.fileformat.com/image/jpeg/)|Joint Photographic Experts Group| |✓| | |[PNG](https://docs.fileformat.com/image/png/)|Portable Network Graphics| |✓| | |[GIF](https://docs.fileformat.com/image/gif/)|Graphics Interchange Format| |✓| | |[BMP](https://docs.fileformat.com/image/bmp/)|Device Independent Bitmap| |✓| | |[SVG](https://docs.fileformat.com/page-description-language/svg/)|Scalable Vector Graphics| |✓| | |[SWF](https://docs.fileformat.com/page-description-language/swf/)|Small Web Format| |✓| | |[HTML](https://docs.fileformat.com/web/html/)|Hypertext Markup Language|✓|✓| | |[XAML](https://docs.fileformat.com/web/xaml/)|Extensible Application Markup Language| |✓| | |[MD](https://docs.fileformat.com/word-processing/md/)|Markdown| |✓| | |[XML](https://docs.fileformat.com/web/xml/)|PowerPoint XML Presentation| |✓| | ## **FAQ** ### Can I save presentations to PDF that meet archival and accessibility standards (PDF/A and PDF/UA)? Yes. Aspose.Slides for Python via .NET supports exporting to PDF with compliance levels such as PDF/A-2a, PDF/A-2b, PDF/A-2u, PDF/A-3a, PDF/A-3b, as well as PDF/UA through the [compliance](https://reference.aspose.com/slides/python-net/aspose.slides.export/pdfoptions/compliance/) setting in [PDF export options](https://reference.aspose.com/slides/python-net/aspose.slides.export/pdfoptions/). ### Does the library support font embedding when exporting to PDF, with fine-grained control over what gets embedded? Yes. You can control whether fonts are fully embedded or subsetted (only used glyphs), specify how common system fonts are treated, and configure behavior for ASCII text through [PDF export options](https://reference.aspose.com/slides/python-net/aspose.slides.export/pdfoptions/). ### Can I detect whether a file is password-protected before actually loading it? Yes. Using the [factory-based inspection API](https://reference.aspose.com/slides/python-net/aspose.slides/presentationfactory/), you can query a presentation file to determine if it is password-protected without opening it fully. ### Are there font fallback mechanisms and support for custom fonts? Yes. The library supports [loading](https://docs.aspose.com/slides/python-net/custom-font/) and [embedding](https://docs.aspose.com/slides/python-net/embedded-font/) custom fonts and provides font [fallback rules](https://docs.aspose.com/slides/python-net/fallback-font/) to prevent missing glyphs during rendering and conversion. ### Can I export slides to XPS, and are there options to tune the XPS output? Yes. [Export to XPS](https://docs.aspose.com/slides/python-net/convert-powerpoint-to-xps/) is supported, and you can adjust relevant [save options](https://reference.aspose.com/slides/python-net/aspose.slides.export/xpsoptions/) to control the output quality and content of the XPS document. ## Related articles - [Convert OpenDocument Presentations in Python](https://docs.aspose.com/slides/python-net/convert-openoffice-odp/) - [Convert Presentations to Multiple Formats in Python](https://docs.aspose.com/slides/python-net/convert-presentation/) # System Requirements > Discover Aspose.Slides for Python via .NET system requirements. Ensure seamless PowerPoint and OpenDocument support on Windows, Linux, and macOS. Source: https://docs.aspose.com/slides/python-net/system-requirements/ Updated: 2026-08-02 ## **Introduction** Aspose.Slides for Python via .NET does not require any third-party products, such as Microsoft PowerPoint, to be installed. Aspose.Slides is an engine for creating, modifying, converting, and rendering documents in various formats, including Microsoft PowerPoint presentation formats. ## **Supported Operating Systems** Aspose.Slides for Python supports Windows (32-bit and 64-bit), macOS, and 64-bit Linux on systems with Python 3.5 or later installed.
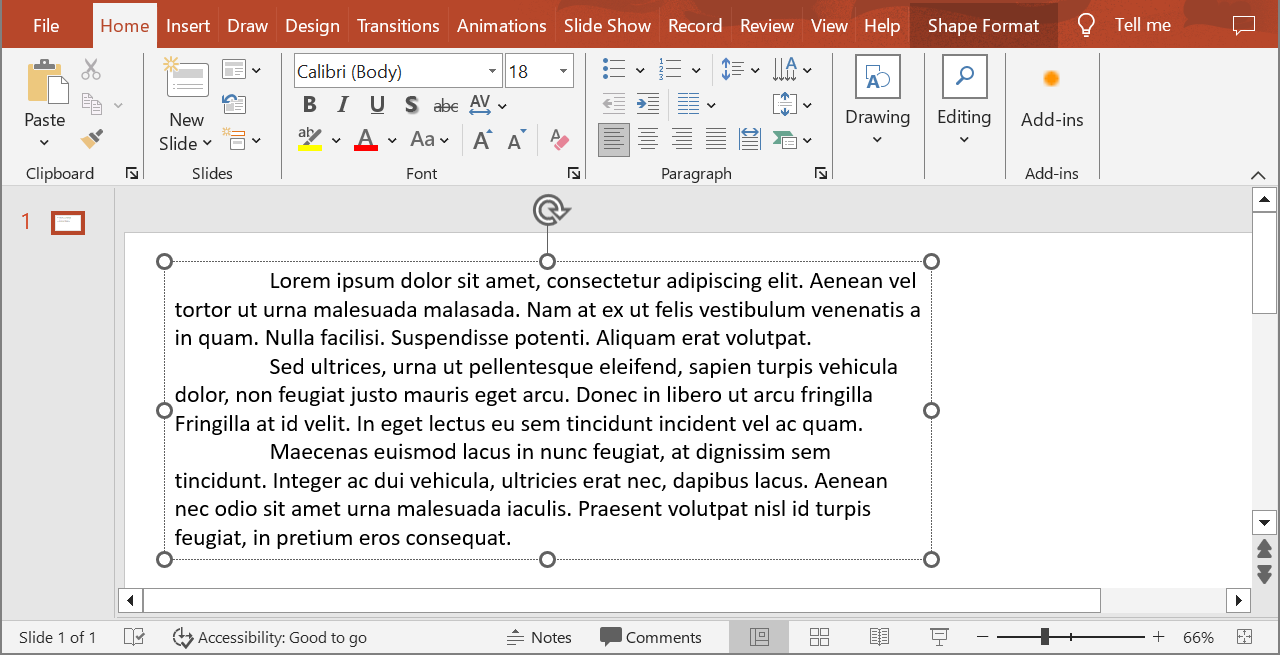

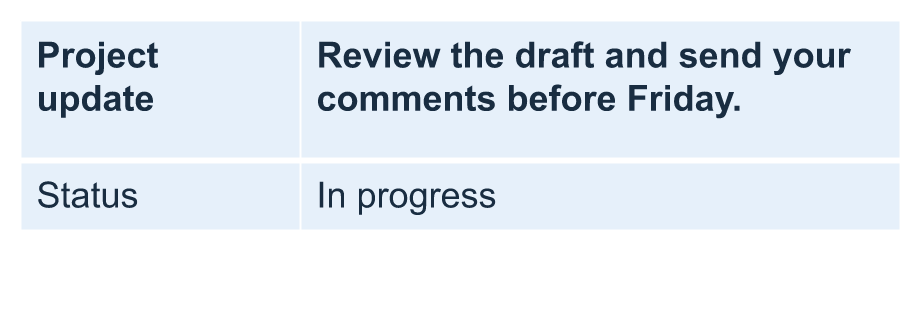
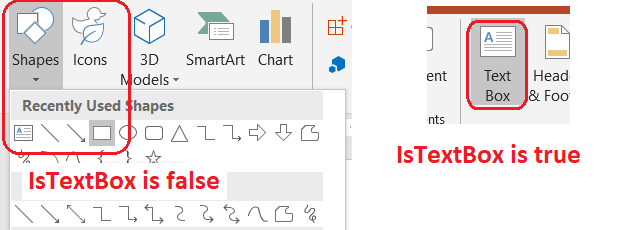
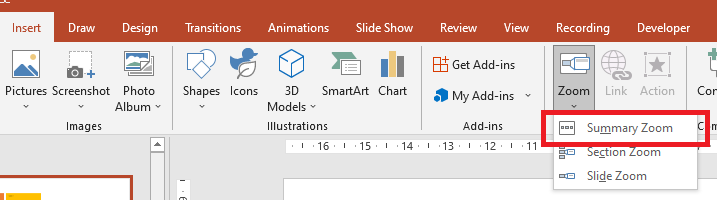
Operating System Versions
Microsoft Windows
  • Windows 2003 Server
  • Windows 2008 Server
  • Windows 2012 Server
  • Windows 2012 R2 Server
  • Windows 2016 Server
  • Windows 2019 Server
  • Windows XP
  • Windows Vista
  • Windows 7
  • Windows 8, 8.1
  • Windows 10
  • Windows 11
Linux
  • Ubuntu
  • OpenSUSE
  • CentOS
  • and others
macOS
  • 12 "Monterey"
## **System Requirements for Target Linux and macOS Platforms** - GCC 6 runtime libraries (or later). - [libgdiplus](https://github.com/mono/libgdiplus), an open-source implementation of the GDI+ API. - Dependencies of the .NET Core Runtime. Installing the .NET Core Runtime itself is NOT required. - For Python 3.5–3.7: the `pymalloc` build of Python is required. The `--with-pymalloc` build option is enabled by default. Typically, the `pymalloc` build of Python is marked with an `m` suffix in the filename. - The `libpython` shared library. The `--enable-shared` Python build option is disabled by default, and some Python distributions do not include the `libpython` shared library. On some Linux platforms, you can install the `libpython` shared library using the package manager (for example, `sudo apt-get install libpython3.7`). A common issue is that the `libpython` library is installed in a nonstandard location for shared libraries. You can resolve this by using Python build options to set alternate library paths when compiling Python, or by creating a symbolic link to the `libpython` library file in the system’s standard shared library location. Typically, the `libpython` shared library filename is `libpythonX.Ym.so.1.0` for Python 3.5–3.7 or `libpythonX.Y.so.1.0` for Python 3.8 or later (for example, `libpython3.7m.so.1.0`, `libpython3.9.so.1.0`). ## **FAQ** ### Do I need Microsoft PowerPoint installed for conversions and rendering? No, PowerPoint is not required; Aspose.Slides is a standalone engine for [creating](https://docs.aspose.com/slides/python-net/create-presentation/), modifying, [converting](https://docs.aspose.com/slides/python-net/convert-presentation/), and [rendering](https://docs.aspose.com/slides/python-net/convert-powerpoint-to-png/) presentations. ### Is a specific .NET version (Core/5+/6+) required on the machine? Installing the .NET Runtime itself is not required, but its dependencies must be present on Linux/macOS. This means the system should contain the packages that are usually installed as .NET dependencies, without installing the runtime in full. ### Which fonts are needed for correct rendering? In practice, the fonts used in the presentation or proper [substitutes](https://docs.aspose.com/slides/python-net/font-substitution/) must be available. To ensure consistent rendering on Linux/macOS, it is advisable to install common font packages. ### Why does a custom font render as a fallback or missing text on Linux? If the font file has inconsistent or corrupted name-table entries, the Linux font-matching stack (FreeType/fontconfig) may select an invalid record, causing the font to be unresolved. Using a font version with corrected name-table records or installing a consistent replacement resolves the issue. ## Related articles - [Features Overview](https://docs.aspose.com/slides/python-net/features-overview/) - [Installation](https://docs.aspose.com/slides/python-net/installation/) # Technical Articles > Technical articles for Aspose.Slides for Python via .NET: OLE, chart, HTML export, threading, and more—best practices for the PPT, PPTX and ODP formats. Source: https://docs.aspose.com/slides/python-net/technical-articles/ Updated: 2025-12-02 --- lastmod: 2025-12-02T13:32:50+06:00 title: Technical Articles type: docs weight: 270 url: /python-net/technical-articles/ keywords: - technical article - OLE object - worksheet resizing - embed Excel cnart - chart resizing - prevent editing - shape lock - extract image - slide backgroud - export presentation - externally linked image - warning callback - font substitution - resize shape - interruptable library - background task - multithreading - API limitations - integrate Excel data - PowerPoint - OpenDocument - presentation - Python - Aspose.Slides description: "Technical articles for Aspose.Slides for Python via .NET: OLE, chart, HTML export, threading, and more—best practices for the PPT, PPTX and ODP formats." --- # Manage Text Fields in PowerPoint Presentations in Python > Create, inspect, modify, and remove text fields in PowerPoint presentations with Aspose.Slides for Python via .NET. Preserve formatting and verify saved PPTX and PPT files. Source: https://docs.aspose.com/slides/python-net/text-fields/ Updated: 2026-09-21 ## **Overview** A text paragraph consists of portions. An ordinary [Portion](https://reference.aspose.com/slides/python-net/aspose.slides/portion/) contains literal text; a field portion also has a [Field](https://reference.aspose.com/slides/python-net/aspose.slides/field/) whose type identifies an automatically updated value, such as a slide number or date. Two portions can display the same characters while only one contains a field. Use [Portion.field](https://reference.aspose.com/slides/python-net/aspose.slides/portion/field/) to distinguish them: it is `None` for ordinary text. [Portion.add_field](https://reference.aspose.com/slides/python-net/aspose.slides/portion/add_field/) converts an existing portion into a field. Keep a label and its dynamic value in separate portions so that converting the value does not also replace the label. This guide covers fields inside text, their formatting, and saving them in PPTX and PPT. For text frames and paragraphs, see [Manage Text](https://docs.aspose.com/slides/python-net/manage-text/). ## **Create a Slide Number Field** The following complete example creates a text box containing a literal `Slide ` label followed by an automatically updated number. It sets the number's size, weight, and color before adding the field, then reopens the saved presentation and checks the field type, text, and formatting. No input file is required. ```python import aspose.pydrawing as draw import aspose.slides as slides with slides.Presentation() as presentation: slide = presentation.slides[0] shape = slide.shapes.add_auto_shape(slides.ShapeType.RECTANGLE, 40, 40, 240, 50) shape.add_text_frame("Slide ") paragraph = shape.text_frame.paragraphs[0] number_portion = slides.Portion() number_portion.portion_format.font_height = 24 number_portion.portion_format.font_bold = slides.NullableBool.TRUE number_portion.portion_format.fill_format.fill_type = slides.FillType.SOLID number_portion.portion_format.fill_format.solid_fill_color.color = draw.Color.dark_blue paragraph.portions.add(number_portion) number_portion.add_field(slides.FieldType.slide_number) presentation.save("slide_number.pptx", slides.export.SaveFormat.PPTX) with slides.Presentation("slide_number.pptx") as reopened: saved_shape = reopened.slides[0].shapes[0] saved_number = saved_shape.text_frame.paragraphs[0].portions[1] has_number_field = saved_number.field is not None and saved_number.field.type.internal_string == slides.FieldType.slide_number.internal_string portion_format = saved_number.portion_format formatting_preserved = portion_format.font_height == 24 and portion_format.font_bold == slides.NullableBool.TRUE formatting_preserved &= portion_format.fill_format.solid_fill_color.color.to_argb() == draw.Color.dark_blue.to_argb() print(f"Text: {saved_shape.text_frame.text}") print(f"Slide number field: {has_number_field}") print(f"Formatting preserved: {formatting_preserved}") ``` The new presentation starts with slide number 1, so the text is `Slide 1`, and both checks print `True`. The number remains a field after reopening; it is not a literal `1`. The indices in the verification refer to the shape and portions created by this example. ## **Choose a Field Type** [FieldType](https://reference.aspose.com/slides/python-net/aspose.slides/fieldtype/) provides the following predefined values. Pass the appropriate value to [add_field](https://reference.aspose.com/slides/python-net/aspose.slides/portion/add_field/). | Value | Purpose | |---|---| | [slide_number](https://reference.aspose.com/slides/python-net/aspose.slides/fieldtype/slide_number/) | The current slide number. | | [date_time](https://reference.aspose.com/slides/python-net/aspose.slides/fieldtype/date_time/) | Date/time in the rendering application's default format. | | [date_time1](https://reference.aspose.com/slides/python-net/aspose.slides/fieldtype/date_time1/)–[date_time9](https://reference.aspose.com/slides/python-net/aspose.slides/fieldtype/date_time9/) | Predefined date or combined date/time formats. | | [date_time10](https://reference.aspose.com/slides/python-net/aspose.slides/fieldtype/date_time10/)–[date_time13](https://reference.aspose.com/slides/python-net/aspose.slides/fieldtype/date_time13/) | Predefined time formats, with options for seconds and a 12-hour clock. | | [header](https://reference.aspose.com/slides/python-net/aspose.slides/fieldtype/header/) | A header field; see the placeholder and format limitations below. | | [footer](https://reference.aspose.com/slides/python-net/aspose.slides/fieldtype/footer/) | A footer field. | For example, [date_time3](https://reference.aspose.com/slides/python-net/aspose.slides/fieldtype/date_time3/) represents a day, full month name, and year in English. These are predefined field formats, not arbitrary Python date-format strings. The portion's [language_id](https://reference.aspose.com/slides/python-net/aspose.slides/baseportionformat/language_id/) and the application processing the presentation can affect the displayed result. ## **Create a Field from an Internal String** The string overload of [add_field](https://reference.aspose.com/slides/python-net/aspose.slides/portion/add_field/) accepts an internal field identifier. Use it when preserving an identifier supplied by another application that has no predefined value. You can also construct a [FieldType](https://reference.aspose.com/slides/python-net/aspose.slides/fieldtype/__init__/) from the identifier. [FieldType.internal_string](https://reference.aspose.com/slides/python-net/aspose.slides/fieldtype/internal_string/) exposes that identifier for inspection. This example stores an application-specific `custom-report-id` field with the fallback text `Report-042`. The identifier does not register a calculation: Aspose.Slides does not generate report IDs for an unknown type. The application that understands this identifier must supply its meaning and update its value. ```python import aspose.slides as slides with slides.Presentation() as presentation: shape = presentation.slides[0].shapes.add_auto_shape(slides.ShapeType.RECTANGLE, 40, 40, 300, 50) shape.add_text_frame("Report-042") portion = shape.text_frame.paragraphs[0].portions[0] portion.add_field("custom-report-id") presentation.save("custom_field.pptx", slides.export.SaveFormat.PPTX) with slides.Presentation("custom_field.pptx") as reopened: saved_shape = reopened.slides[0].shapes[0] saved_portion = saved_shape.text_frame.paragraphs[0].portions[0] type_name = saved_portion.field.type.internal_string if saved_portion.field is not None else "ordinary text" print(f"Type: {type_name}") print(f"Text: {saved_portion.text}") ``` After this PPTX round trip, the type is `custom-report-id` and the text is `Report-042`. Passing a string such as `%Y-%m-%d` would name a field type; it would not configure a custom date format. For a fixed date in an arbitrary format, use ordinary text. ## **Inspect, Modify, and Remove Date/Time Fields** Read and change an existing field through [Field.type](https://reference.aspose.com/slides/python-net/aspose.slides/field/type/). Check that the field exists before accessing its type. To stop automatic updates, call [Portion.remove_field](https://reference.aspose.com/slides/python-net/aspose.slides/portion/remove_field/). This keeps the portion and its current text while removing the field association. If you need a specific fixed value, assign that text after removing the field. For the API setting associated with date/time field processing, see [Presentation.current_date_time](https://reference.aspose.com/slides/python-net/aspose.slides/presentation/current_date_time/). The example below uses an explicit approval date when converting a field to ordinary text. An English month-name tuple keeps the fixed date independent of the system locale. Download [sample.pptx](https://docs.aspose.com/slides/python-net/text-fields/sample.pptx) and place it in the working directory. It contains two named text shapes, `UpdatedAt` and `ApprovedDate`, each with a date/time field, plus ordinary text labels. The following example walks top-level text shapes on regular slides. It changes date/time fields to a long-date format and makes them italic, while preserving their other formatting. Only fields in `ApprovedDate` become fixed text. The sample recognizes the built-in internal identifiers `datetime` and `datetime1` through `datetime13`. Groups, tables, notes, layouts, and masters require traversal of their own text containers and are outside this example's scope. ```python from datetime import date import aspose.slides as slides with slides.Presentation("sample.pptx") as presentation: approval_date = date(2030, 4, 5) english_months = ("January", "February", "March", "April", "May", "June", "July", "August", "September", "October", "November", "December") approval_text = f"{approval_date.day:02d} {english_months[approval_date.month - 1]} {approval_date.year}" date_time_types = {"datetime"} | {f"datetime{index}" for index in range(1, 14)} for slide in presentation.slides: for shape in slide.shapes: if not isinstance(shape, slides.AutoShape) or shape.text_frame is None: continue for paragraph in shape.text_frame.paragraphs: for portion in paragraph.portions: field = portion.field if field is None: continue if field.type.internal_string not in date_time_types: continue field.type = slides.FieldType.date_time3 portion.portion_format.language_id = "en-US" portion.portion_format.font_italic = slides.NullableBool.TRUE if shape.name == "ApprovedDate": portion.remove_field() portion.text = approval_text presentation.save("updated_dates.pptx", slides.export.SaveFormat.PPTX) with slides.Presentation("updated_dates.pptx") as reopened: for shape in reopened.slides[0].shapes: if not isinstance(shape, slides.AutoShape) or shape.text_frame is None: continue if shape.name not in {"UpdatedAt", "ApprovedDate"}: continue portion = shape.text_frame.paragraphs[0].portions[0] type_name = portion.field.type.internal_string if portion.field is not None else "ordinary text" print(f"{shape.name}: {type_name}; {portion.text}") print(f"Italic: {portion.portion_format.font_italic == slides.NullableBool.TRUE}") ``` After reopening, `UpdatedAt` has type `datetime3` and remains dynamic. `ApprovedDate` has no field and contains `05 April 2030`. Both date portions are italic, and their original font size, bold setting, and color remain intact. The ordinary text labels are unchanged. The verification reads the first portion of the two known shapes in the supplied sample. ## **Preserve Text Formatting** Work with the existing portion when adding a field, changing its type, or removing it. These operations retain that portion's formatting. Use [Portion.portion_format](https://reference.aspose.com/slides/python-net/aspose.slides/portion/portion_format/) to change only the required properties, as the examples do for color or italics. Avoid rebuilding an entire text frame just to update one field: doing so can lose the original portion boundaries and their individual formatting. Also distinguish explicitly set formatting from formatting inherited from the paragraph, layout, or theme. See [Text Formatting](https://docs.aspose.com/slides/python-net/text-formatting/) for broader formatting options. ## **Fields and Header/Footer Placeholders** A field is part of a text portion. A placeholder is a shape with a presentation role, such as a footer or slide number. Adding a field to an ordinary text box does not turn that shape into a placeholder. The header/footer managers control placeholder text and visibility on slides, layouts, and masters, including propagation to dependent slides. A number field in a custom text box can therefore be useful even when you are not using the slide-number placeholder. Conversely, changing placeholder visibility does not remove a field from an unrelated text box. The predefined header and footer types do not create the corresponding placeholders or supply their content. In particular, a regular PowerPoint slide has no header placeholder; headers belong to notes pages and handouts. Do not assume that a header or footer field in an arbitrary shape will automatically obtain the text configured through a placeholder manager. For that workflow, see [Presentation Headers and Footers](https://docs.aspose.com/slides/python-net/presentation-header-and-footer/). ## **PPTX and PPT Limitations** Check both the field type and its resulting text after saving and reopening. Preserving an identifier does not prove that an application can calculate or display its value. | Format | Field behavior and limitations | |---|---| | PPTX | Stores internal field identifiers alongside field text. In round-trip checks, the predefined types and the custom identifier used above survived saving and reopening. The unknown custom type retained its fallback text; it did not acquire automatic calculation logic. Another application may treat unsupported identifiers differently. | | PPT | Uses legacy field representations and has more limited compatibility. In round-trip checks, slide-number and predefined date/time fields survived saving and reopening. A custom field in an ordinary slide text box reopened with its identifier but with `*` as its text; a header field in the same context also produced `*`. Do not rely on custom fields or unsupported field contexts retaining their visible text. | For portable, fixed output, convert unsupported fields to ordinary text and explicitly assign the value you want before saving. This preserves the chosen text but intentionally stops automatic updates. Test the target application as well when its own field recalculation is part of your workflow. ## **FAQ** **How can I tell whether a displayed number or date is a field?** Inspect [Portion.field](https://reference.aspose.com/slides/python-net/aspose.slides/portion/field/). A value other than `None` identifies a field; the displayed text alone cannot tell you. **Does removing a field remove its text or formatting?** No. [remove_field](https://reference.aspose.com/slides/python-net/aspose.slides/portion/remove_field/) converts the existing portion to ordinary text. Assign an explicit value afterward if you need a particular frozen date or fallback value. **Can an internal string define a new date format or formula?** No. It identifies a field type. An unknown identifier does not provide an evaluator or a Python date-format pattern. Use a supported predefined type or format a value yourself as ordinary text. **Why check a presentation again after saving it?** Field identifiers, calculated text, and formatting are separate things to verify. Format conversion can change the visible result even when the field identifier is still present. # Format Presentation Text in Python > Format and style text in PowerPoint and OpenDocument presentations using Aspose.Slides for Python via .NET. Customize fonts, colors, alignment, and more. Source: https://docs.aspose.com/slides/python-net/text-formatting/ Updated: 2026-11-05 ## **Overview** This article shows how to format text in PowerPoint and OpenDocument presentations using Aspose.Slides for Python via .NET. It covers background colors, transparency, character spacing, font properties, rotation, paragraph spacing, autofit behavior, text anchoring, tab stops, and language settings. Unless stated otherwise, the examples use [sample.pptx](https://docs.aspose.com/slides/python-net/text-formatting/sample.pptx). The first shape on its first slide is a text box, and its first paragraph contains the text shown below. Both slide and shape indices are zero-based. Examples that select bold portions use effective formatting, including inherited bold formatting: ![Sample text](https://docs.aspose.com/slides/python-net/text-formatting/sample_text.png) To find and highlight literal text or regular-expression matches, see [Search and Replace Text](https://docs.aspose.com/slides/python-net/search-and-replace-text/). ## **Set Text Background Color** Use [ParagraphFormat.default_portion_format](https://reference.aspose.com/slides/python-net/aspose.slides/paragraphformat/default_portion_format/) to set the default highlight color for a paragraph, or use [BasePortionFormat.highlight_color](https://reference.aspose.com/slides/python-net/aspose.slides/baseportionformat/highlight_color/) for individual text portions. The following example sets a light gray highlight as the default for the first paragraph. Explicit highlight colors on individual portions take precedence over this default: ```python import aspose.pydrawing as draw import aspose.slides as slides with slides.Presentation("sample.pptx") as presentation: slide = presentation.slides[0] auto_shape = slide.shapes[0] paragraph = auto_shape.text_frame.paragraphs[0] # Set the highlight color for the entire paragraph. paragraph.paragraph_format.default_portion_format.highlight_color.color = draw.Color.light_gray presentation.save("gray_paragraph.pptx", slides.export.SaveFormat.PPTX) ``` The result: ![The gray paragraph](https://docs.aspose.com/slides/python-net/text-formatting/gray_paragraph.png) The code example below demonstrates how to set the background color for **text portions with a bold font**: ```python import aspose.pydrawing as draw import aspose.slides as slides with slides.Presentation("sample.pptx") as presentation: slide = presentation.slides[0] auto_shape = slide.shapes[0] paragraph = auto_shape.text_frame.paragraphs[0] for portion in paragraph.portions: if portion.portion_format.get_effective().font_bold: # Set the highlight color for the text portion. portion.portion_format.highlight_color.color = draw.Color.light_gray presentation.save("gray_text_portions.pptx", slides.export.SaveFormat.PPTX) ``` The result: ![The gray text portions](https://docs.aspose.com/slides/python-net/text-formatting/gray_text_portions.png) ## **Align Text Paragraphs** Use [ParagraphFormat.alignment](https://reference.aspose.com/slides/python-net/aspose.slides/paragraphformat/alignment/) to set paragraph alignment within a text frame. The value can be centered, left-aligned, right-aligned, justified, and so on. The following code example shows how to align the paragraph to the **center**: ```python import aspose.slides as slides with slides.Presentation("sample.pptx") as presentation: slide = presentation.slides[0] auto_shape = slide.shapes[0] paragraph = auto_shape.text_frame.paragraphs[0] # Set the alignment of the paragraph to center. paragraph.paragraph_format.alignment = slides.TextAlignment.CENTER presentation.save("aligned_paragraph.pptx", slides.export.SaveFormat.PPTX) ``` The result: ![The aligned paragraph](https://docs.aspose.com/slides/python-net/text-formatting/aligned_paragraph.png) ## **Align Fonts Within a Line** Use [ParagraphFormat.font_alignment](https://reference.aspose.com/slides/python-net/aspose.slides/paragraphformat/font_alignment/) to vertically align text portions of different font sizes within a line. This setting applies to the entire paragraph and controls alignment within each of its lines. The following self-contained example creates four labeled text boxes on one slide. Each paragraph contains the same text at 18, 36, and 54 points, with a different font alignment. It uses Arial, disables autofit and wrapping, and keeps the text frames large enough for a single line. ```python import aspose.pydrawing as draw import aspose.slides as slides with slides.Presentation() as presentation: slide = presentation.slides[0] alignments = [slides.FontAlignment.BASELINE, slides.FontAlignment.TOP, slides.FontAlignment.CENTER, slides.FontAlignment.BOTTOM] font_sizes = [18, 36, 54] for i, alignment in enumerate(alignments): shape = slide.shapes.add_auto_shape(slides.ShapeType.RECTANGLE, 30, 20 + i * 130, 660, 120) shape.fill_format.fill_type = slides.FillType.NO_FILL shape.line_format.fill_format.fill_type = slides.FillType.NO_FILL text_frame = shape.text_frame text_frame.text_frame_format.anchoring_type = slides.TextAnchorType.TOP text_frame.text_frame_format.autofit_type = slides.TextAutofitType.NONE text_frame.text_frame_format.wrap_text = slides.NullableBool.FALSE label = text_frame.paragraphs[0] label.text = alignment.name.title() label.paragraph_format.alignment = slides.TextAlignment.LEFT label.paragraph_format.default_portion_format.font_height = 14 label.paragraph_format.default_portion_format.latin_font = slides.FontData("Arial") label.paragraph_format.default_portion_format.fill_format.fill_type = slides.FillType.SOLID label.paragraph_format.default_portion_format.fill_format.solid_fill_color.color = draw.Color.gray paragraph = slides.Paragraph() paragraph.paragraph_format.font_alignment = alignment paragraph.paragraph_format.alignment = slides.TextAlignment.LEFT paragraph.paragraph_format.default_portion_format.latin_font = slides.FontData("Arial") paragraph.paragraph_format.default_portion_format.fill_format.fill_type = slides.FillType.SOLID paragraph.paragraph_format.default_portion_format.fill_format.solid_fill_color.color = draw.Color.black for font_size in font_sizes: portion = slides.Portion("Ag ") portion.portion_format.font_height = font_size paragraph.portions.add(portion) text_frame.paragraphs.add(paragraph) presentation.save("font_alignment.pptx", slides.export.SaveFormat.PPTX) ``` The result: ![Comparison of Baseline, Top, Center, and Bottom font alignment with mixed font sizes](https://docs.aspose.com/slides/python-net/text-formatting/font_alignment.png) Font alignment uses font metrics, so the visible edges of individual letters do not necessarily line up exactly. The example includes both an uppercase letter and a descender to help show the difference between baseline and bottom alignment. Font availability and substitution, the characters used, and the difference in font sizes affect the result. Frame dimensions, margins, line spacing, wrapping, and autofit also affect layout; use the same fonts and layout settings when comparing modes. This setting differs from [ParagraphFormat.alignment](https://reference.aspose.com/slides/python-net/aspose.slides/paragraphformat/alignment/), which controls horizontal paragraph alignment, and [TextFrameFormat.anchoring_type](https://reference.aspose.com/slides/python-net/aspose.slides/textframeformat/anchoring_type/), which positions the text block vertically within its shape. Superscript and subscript formatting through [BasePortionFormat.escapement](https://reference.aspose.com/slides/python-net/aspose.slides/baseportionformat/escapement/) shifts individual portions relative to the baseline instead of setting font alignment for the paragraph's lines. ## **Set Transparency for Text** Text transparency is controlled through the alpha component of the color assigned to [BasePortionFormat.fill_format](https://reference.aspose.com/slides/python-net/aspose.slides/baseportionformat/fill_format/). In the examples below, `alpha = 50` is an ARGB alpha-channel value on the 0–255 scale, not a transparency percentage. The code example below shows how to apply transparency to the **entire paragraph**: ```python import aspose.pydrawing as draw import aspose.slides as slides alpha = 50 with slides.Presentation("sample.pptx") as presentation: slide = presentation.slides[0] auto_shape = slide.shapes[0] paragraph = auto_shape.text_frame.paragraphs[0] # Set a semitransparent black fill for the text. paragraph.paragraph_format.default_portion_format.fill_format.fill_type = slides.FillType.SOLID paragraph.paragraph_format.default_portion_format.fill_format.solid_fill_color.color = draw.Color.from_argb(alpha, draw.Color.black) presentation.save("transparent_paragraph.pptx", slides.export.SaveFormat.PPTX) ``` The result: ![The transparent paragraph](https://docs.aspose.com/slides/python-net/text-formatting/transparent_paragraph.png) The following code example shows how to apply transparency to **text portions with a bold font**: ```python import aspose.pydrawing as draw import aspose.slides as slides alpha = 50 with slides.Presentation("sample.pptx") as presentation: slide = presentation.slides[0] auto_shape = slide.shapes[0] paragraph = auto_shape.text_frame.paragraphs[0] for portion in paragraph.portions: if portion.portion_format.get_effective().font_bold: # Set the transparency of the text portion. portion.portion_format.fill_format.fill_type = slides.FillType.SOLID portion.portion_format.fill_format.solid_fill_color.color = draw.Color.from_argb(alpha, draw.Color.black) presentation.save("transparent_text_portions.pptx", slides.export.SaveFormat.PPTX) ``` The result: ![The transparent text portions](https://docs.aspose.com/slides/python-net/text-formatting/transparent_text_portions.png) ## **Set Character Spacing for Text** Use [BasePortionFormat.spacing](https://reference.aspose.com/slides/python-net/aspose.slides/baseportionformat/spacing/) to expand or condense spacing between characters in a text box. The examples add 3 points of spacing; negative values condense the text. The following Python code shows how to expand the character spacing in the **entire paragraph**: ```python import aspose.slides as slides with slides.Presentation("sample.pptx") as presentation: slide = presentation.slides[0] auto_shape = slide.shapes[0] paragraph = auto_shape.text_frame.paragraphs[0] # Note: Use negative values to compress the character spacing. paragraph.paragraph_format.default_portion_format.spacing = 3 # Expand character spacing. presentation.save("character_spacing_in_paragraph.pptx", slides.export.SaveFormat.PPTX) ``` The result: ![The character spacing in the paragraph](https://docs.aspose.com/slides/python-net/text-formatting/character_spacing_in_paragraph.png) The code example below shows how to expand the character spacing in **text portions with a bold font**: ```python import aspose.slides as slides with slides.Presentation("sample.pptx") as presentation: slide = presentation.slides[0] auto_shape = slide.shapes[0] paragraph = auto_shape.text_frame.paragraphs[0] for portion in paragraph.portions: if portion.portion_format.get_effective().font_bold: # Note: Use negative values to compress the character spacing. portion.portion_format.spacing = 3 # Expand character spacing. presentation.save("character_spacing_in_text_portions.pptx", slides.export.SaveFormat.PPTX) ``` The result: ![The character spacing in the text portions](https://docs.aspose.com/slides/python-net/text-formatting/character_spacing_in_text_portions.png) ### **Disable Kerning for Specific Fonts** In some cases, text rendered by Aspose.Slides may look slightly tighter than the same text displayed in PowerPoint. This can happen because PowerPoint may ignore kerning data for certain fonts, even when the font contains valid kerning information and kerning is enabled in PowerPoint settings. To make the rendered output closer to PowerPoint in such cases, you can disable kerning for text portions that use the affected font. Set [BasePortionFormat.kerning_minimal_size](https://reference.aspose.com/slides/python-net/aspose.slides/baseportionformat/kerning_minimal_size/) to a value larger than the actual font size. This example requires "presentation.pptx" with a text box as the first shape on the first slide. It checks effective font names, including inherited fonts, and sets a 100-point threshold for portions that use Roboto. This disables kerning for matching portions with a font size below 100 points: ```python import aspose.slides as slides with slides.Presentation("presentation.pptx") as presentation: slide = presentation.slides[0] auto_shape = slide.shapes[0] target_font = "Roboto" for paragraph in auto_shape.text_frame.paragraphs: for portion in paragraph.portions: text_format = portion.portion_format.get_effective() fonts = (text_format.latin_font, text_format.east_asian_font, text_format.complex_script_font) uses_target_font = any(font is not None and font.font_name == target_font for font in fonts) if uses_target_font: portion.portion_format.kerning_minimal_size = 100 presentation.save("output.pptx", slides.export.SaveFormat.PPTX) ``` For matching text below the threshold, this setting prevents kerning and can help align Aspose.Slides rendering with PowerPoint’s visual output for fonts affected by this PowerPoint-specific behavior. ## **Manage Text Font Properties** Font properties can be set at the paragraph level through [ParagraphFormat.default_portion_format](https://reference.aspose.com/slides/python-net/aspose.slides/paragraphformat/default_portion_format/) or on individual portions through [PortionFormat](https://reference.aspose.com/slides/python-net/aspose.slides/portionformat/). The following example sets the first paragraph’s default font to 12-point Times New Roman with bold, italic, and dotted underline formatting. Explicit formatting on individual portions takes precedence over these defaults. ```python import aspose.slides as slides with slides.Presentation("sample.pptx") as presentation: slide = presentation.slides[0] auto_shape = slide.shapes[0] paragraph = auto_shape.text_frame.paragraphs[0] # Set the font properties for the paragraph. portion_format = paragraph.paragraph_format.default_portion_format portion_format.font_height = 12 portion_format.font_bold = slides.NullableBool.TRUE portion_format.font_italic = slides.NullableBool.TRUE portion_format.font_underline = slides.TextUnderlineType.DOTTED portion_format.latin_font = slides.FontData("Times New Roman") presentation.save("font_properties_for_paragraph.pptx", slides.export.SaveFormat.PPTX) ``` The result: ![The font properties for the paragraph](https://docs.aspose.com/slides/python-net/text-formatting/font_properties_for_paragraph.png) The following example applies 13-point Times New Roman, italic formatting, and a dotted underline to portions whose effective formatting is bold: ```python import aspose.slides as slides with slides.Presentation("sample.pptx") as presentation: slide = presentation.slides[0] auto_shape = slide.shapes[0] paragraph = auto_shape.text_frame.paragraphs[0] for portion in paragraph.portions: if portion.portion_format.get_effective().font_bold: # Set the font properties for the text portion. portion.portion_format.font_height = 13 portion.portion_format.font_italic = slides.NullableBool.TRUE portion.portion_format.font_underline = slides.TextUnderlineType.DOTTED portion.portion_format.latin_font = slides.FontData("Times New Roman") presentation.save("font_properties_for_text_portions.pptx", slides.export.SaveFormat.PPTX) ``` The result: ![The font properties for text portions](https://docs.aspose.com/slides/python-net/text-formatting/font_properties_for_text_portions.png) ## **Control Text Height Normalization** Use [BasePortionFormat.normalise_height](https://reference.aspose.com/slides/python-net/aspose.slides/baseportionformat/normalise_height/) when reproducing template typography or investigating differences in character height. In PowerPoint, enabling normalization stretches or compresses individual characters vertically to give them a uniform visible height within the text portion. It does not guarantee equal text heights across different fonts. Set the property to [NullableBool.TRUE or FALSE](https://reference.aspose.com/slides/python-net/aspose.slides/nullablebool/) to explicitly enable or disable normalization. `NullableBool.NOT_DEFINED` leaves the local setting unset so that the portion inherits its value, for example, from the paragraph's [default_portion_format](https://reference.aspose.com/slides/python-net/aspose.slides/paragraphformat/default_portion_format/). It does not mean `False`. Use [PortionFormat.get_effective](https://reference.aspose.com/slides/python-net/aspose.slides/portionformat/get_effective/) and read [IBasePortionFormatEffectiveData.normalise_height](https://reference.aspose.com/slides/python-net/aspose.slides/ibaseportionformateffectivedata/normalise_height/) to obtain the resolved Boolean value. The following self-contained example requires **Arial** to be installed. It creates two text blocks containing the same uppercase letters, lowercase letters, descenders, and accented characters at 54 points. Both paragraphs enable normalization by default. The top portion explicitly disables it; the bottom portion inherits it. The frame sizes, margins, and paragraph spacing are identical, with wrapping and autofit disabled to keep the comparison consistent. The example prints `FALSE: False` and `NOT_DEFINED: True`, then saves "text_height_normalization.pptx". ```python import aspose.slides as slides with slides.Presentation() as presentation: slide = presentation.slides[0] settings = [slides.NullableBool.FALSE, slides.NullableBool.NOT_DEFINED] for i, setting in enumerate(settings): shape = slide.shapes.add_auto_shape(slides.ShapeType.RECTANGLE, 30, 60 + i * 200, 660, 150) shape.fill_format.fill_type = slides.FillType.NO_FILL shape.line_format.fill_format.fill_type = slides.FillType.NO_FILL text_frame = shape.text_frame text_frame.text = "Hxgjpq ÅÉ 0123" text_frame.text_frame_format.autofit_type = slides.TextAutofitType.NONE text_frame.text_frame_format.wrap_text = slides.NullableBool.FALSE text_frame.text_frame_format.anchoring_type = slides.TextAnchorType.TOP text_frame.text_frame_format.margin_top = 0 text_frame.text_frame_format.margin_left = 0 paragraph = text_frame.paragraphs[0] paragraph.paragraph_format.alignment = slides.TextAlignment.LEFT paragraph.paragraph_format.space_before = 0 paragraph.paragraph_format.space_after = 0 paragraph.paragraph_format.space_within = 100 paragraph.paragraph_format.default_portion_format.normalise_height = slides.NullableBool.TRUE portion = paragraph.portions[0] portion.portion_format.latin_font = slides.FontData("Arial") portion.portion_format.font_height = 54 portion.portion_format.fill_format.fill_type = slides.FillType.SOLID portion.portion_format.fill_format.solid_fill_color.color = "black" portion.portion_format.normalise_height = setting print(f"{setting.name}: {portion.portion_format.get_effective().normalise_height}") presentation.save("text_height_normalization.pptx", slides.export.SaveFormat.PPTX) ``` The comparison below was exported from the saved presentation. The top row has normalization disabled (`FALSE`); the bottom row inherits the enabled setting (`NOT_DEFINED` → `True`). Keep Arial installed to reproduce this appearance. ![Arial 54-point text with normalization disabled above and inherited normalization enabled below](https://docs.aspose.com/slides/python-net/text-formatting/text_height_normalization.png) Normalization changes character height without changing the assigned [font_height](https://reference.aspose.com/slides/python-net/aspose.slides/baseportionformat/font_height/) value, which specifies the font size in points. Paragraph [space_within](https://reference.aspose.com/slides/python-net/aspose.slides/paragraphformat/space_within/) controls line spacing, while text-frame [autofit_type](https://reference.aspose.com/slides/python-net/aspose.slides/textframeformat/autofit_type/) controls how text or its container adjusts to fit. These settings serve different purposes and can affect the overall layout independently. For more on paragraph formatting and inheritance, see [Manage Paragraph](https://docs.aspose.com/slides/python-net/manage-paragraph/). ## **Apply and Remove Strikethrough** Use [BasePortionFormat.strikethrough_type](https://reference.aspose.com/slides/python-net/aspose.slides/baseportionformat/strikethrough_type/) on a text portion to display corrections, cancelled terms, or previous prices without deleting the original text. Set it to [TextStrikethroughType.SINGLE or DOUBLE](https://reference.aspose.com/slides/python-net/aspose.slides/textstrikethroughtype/) for one or two lines through the text. To remove strikethrough, assign `TextStrikethroughType.NONE`. This explicitly disables the effect, even if the surrounding formatting specifies strikethrough. By contrast, `TextStrikethroughType.NOT_DEFINED` leaves the local setting undefined, allowing the portion to inherit formatting, for example, from the paragraph. It does not guarantee that strikethrough is removed. Use [PortionFormat.get_effective](https://reference.aspose.com/slides/python-net/aspose.slides/portionformat/get_effective/) to read the resulting formatting, including inherited values. The following self-contained example creates three price comparisons. Each paragraph has separate portions for the label, previous price, and current price, so only the previous price is affected. The first row applies and then removes strikethrough; the other rows retain single and double strikethrough. Changing this property preserves the text and its other formatting, including the bold previous price. ```python import aspose.pydrawing as draw import aspose.slides as slides with slides.Presentation() as presentation: slide = presentation.slides[0] shape = slide.shapes.add_auto_shape(slides.ShapeType.RECTANGLE, 50, 50, 620, 220) shape.fill_format.fill_type = slides.FillType.NO_FILL shape.line_format.fill_format.fill_type = slides.FillType.NO_FILL shape.text_frame.paragraphs.clear() labels = ["None: ", "Single: ", "Double: "] for label in labels: paragraph = slides.Paragraph() paragraph.paragraph_format.alignment = slides.TextAlignment.LEFT paragraph.paragraph_format.space_after = 20 portion_format = paragraph.paragraph_format.default_portion_format portion_format.font_height = 28 portion_format.latin_font = slides.FontData("Arial") portion_format.fill_format.fill_type = slides.FillType.SOLID portion_format.fill_format.solid_fill_color.color = draw.Color.black paragraph.portions.add(slides.Portion(label)) previous_price = slides.Portion("$100") previous_price.portion_format.font_bold = slides.NullableBool.TRUE paragraph.portions.add(previous_price) paragraph.portions.add(slides.Portion(" → $80")) shape.text_frame.paragraphs.add(paragraph) paragraphs = shape.text_frame.paragraphs # Apply strikethrough, then explicitly remove it from the first previous price. paragraphs[0].portions[1].portion_format.strikethrough_type = slides.TextStrikethroughType.SINGLE paragraphs[0].portions[1].portion_format.strikethrough_type = slides.TextStrikethroughType.NONE paragraphs[1].portions[1].portion_format.strikethrough_type = slides.TextStrikethroughType.SINGLE paragraphs[2].portions[1].portion_format.strikethrough_type = slides.TextStrikethroughType.DOUBLE presentation.save("strikethrough.pptx", slides.export.SaveFormat.PPTX) ``` The result, from top to bottom: no strikethrough, single strikethrough, and double strikethrough. ![Previous prices without strikethrough, with single strikethrough, and with double strikethrough](https://docs.aspose.com/slides/python-net/text-formatting/strikethrough.png) ## **Set Text Rotation** Use [TextFrameFormat.text_vertical_type](https://reference.aspose.com/slides/python-net/aspose.slides/textframeformat/text_vertical_type/) to set a predefined text orientation within a shape. The following code example sets the text orientation in the shape to [TextVerticalType.VERTICAL270](https://reference.aspose.com/slides/python-net/aspose.slides/textverticaltype/), which rotates the text **90 degrees counterclockwise**: ```python import aspose.slides as slides with slides.Presentation("sample.pptx") as presentation: slide = presentation.slides[0] auto_shape = slide.shapes[0] auto_shape.text_frame.text_frame_format.text_vertical_type = slides.TextVerticalType.VERTICAL270 presentation.save("text_rotation.pptx", slides.export.SaveFormat.PPTX) ``` The result: ![The text rotation](https://docs.aspose.com/slides/python-net/text-formatting/text_rotation.png) ## **Set Custom Rotation for Text Frames** Use [TextFrameFormat.rotation_angle](https://reference.aspose.com/slides/python-net/aspose.slides/textframeformat/rotation_angle/) to set a custom rotation angle for a [TextFrame](https://reference.aspose.com/slides/python-net/aspose.slides/textframe/). The code example below rotates the text frame by 3 degrees clockwise within the shape: ```python import aspose.slides as slides with slides.Presentation("sample.pptx") as presentation: slide = presentation.slides[0] auto_shape = slide.shapes[0] auto_shape.text_frame.text_frame_format.rotation_angle = 3 presentation.save("custom_text_rotation.pptx", slides.export.SaveFormat.PPTX) ``` The result: ![The custom text rotation](https://docs.aspose.com/slides/python-net/text-formatting/custom_text_rotation.png) ## **Set Line Spacing of Paragraphs** Aspose.Slides provides [ParagraphFormat.space_after](https://reference.aspose.com/slides/python-net/aspose.slides/paragraphformat/space_after/), [ParagraphFormat.space_before](https://reference.aspose.com/slides/python-net/aspose.slides/paragraphformat/space_before/), and [ParagraphFormat.space_within](https://reference.aspose.com/slides/python-net/aspose.slides/paragraphformat/space_within/) to control paragraph spacing. These properties are used as follows: * Use a positive value to specify line spacing as a percentage of the line height. * Use a negative value to specify line spacing in points. The following example sets spacing within the first paragraph to 200% of the line height (double spacing): ```python import aspose.slides as slides with slides.Presentation("sample.pptx") as presentation: slide = presentation.slides[0] auto_shape = slide.shapes[0] paragraph = auto_shape.text_frame.paragraphs[0] paragraph.paragraph_format.space_within = 200 presentation.save("line_spacing.pptx", slides.export.SaveFormat.PPTX) ``` The result: ![The line spacing within the paragraph](https://docs.aspose.com/slides/python-net/text-formatting/line_spacing.png) ## **Control Line Breaking** Paragraph line-breaking rules are useful in narrow text blocks and presentations that mix Latin and East Asian text. The following properties belong to [ParagraphFormat](https://reference.aspose.com/slides/python-net/aspose.slides/paragraphformat/), so they apply to an entire paragraph: - [latin_line_break](https://reference.aspose.com/slides/python-net/aspose.slides/paragraphformat/latin_line_break/) controls Latin line-breaking rules. In mixed text, changing it can also change where adjacent East Asian text and punctuation wrap. - [east_asian_line_break](https://reference.aspose.com/slides/python-net/aspose.slides/paragraphformat/east_asian_line_break/) controls East Asian line-breaking rules, including restrictions on characters at the beginning and end of a line. These rules do not replace [TextFrameFormat.wrap_text](https://reference.aspose.com/slides/python-net/aspose.slides/textframeformat/wrap_text/), which enables automatic wrapping within a text frame. They influence the layout when wrapping occurs; they do not insert line-break characters. An explicit line break forces a new line within the paragraph independently of the available width. The following self-contained example creates a narrow text block containing Chinese and Latin text. It sets both line-breaking properties explicitly and saves "line_breaking.pptx". To experiment with either rule, change that property's value while keeping the other settings fixed. The example uses 24-point Arial and SimSun with a 160-point frame width and zero horizontal text-frame margins. [TextFrameFormat.autofit_type](https://reference.aspose.com/slides/python-net/aspose.slides/textframeformat/autofit_type/) is set to [TextAutofitType.NONE](https://reference.aspose.com/slides/python-net/aspose.slides/textautofittype/) so that text size and frame dimensions remain fixed. ```python import aspose.pydrawing as draw import aspose.slides as slides with slides.Presentation() as presentation: slide = presentation.slides[0] shape = slide.shapes.add_auto_shape(slides.ShapeType.RECTANGLE, 50, 50, 160, 300) shape.fill_format.fill_type = slides.FillType.NO_FILL text_frame = shape.text_frame text_frame.text_frame_format.wrap_text = slides.NullableBool.TRUE text_frame.text_frame_format.autofit_type = slides.TextAutofitType.NONE text_frame.text_frame_format.margin_left = 0 text_frame.text_frame_format.margin_right = 0 paragraph = text_frame.paragraphs[0] paragraph.text = "中文排版测试,PowerPoint 中文演示。" paragraph_format = paragraph.paragraph_format paragraph_format.alignment = slides.TextAlignment.LEFT paragraph_format.default_portion_format.font_height = 24 paragraph_format.default_portion_format.latin_font = slides.FontData("Arial") paragraph_format.default_portion_format.east_asian_font = slides.FontData("SimSun") paragraph_format.default_portion_format.fill_format.fill_type = slides.FillType.SOLID paragraph_format.default_portion_format.fill_format.solid_fill_color.color = draw.Color.black paragraph_format.latin_line_break = slides.NullableBool.FALSE paragraph_format.east_asian_line_break = slides.NullableBool.TRUE presentation.save("line_breaking.pptx", slides.export.SaveFormat.PPTX) ``` ## **Control Hanging Punctuation** [ParagraphFormat.hanging_punctuation](https://reference.aspose.com/slides/python-net/aspose.slides/paragraphformat/hanging_punctuation/) allows eligible punctuation to extend beyond the text line's right edge instead of occupying the next line. It applies to the entire paragraph and is different from a hanging indent. The following self-contained example enables hanging punctuation in a 100-point-wide text frame and saves "hanging_punctuation.pptx". With 24-point Arial and zero horizontal text-frame margins, the final period stays after "sentence" and extends beyond the right text edge. Set the property to [NullableBool.FALSE](https://reference.aspose.com/slides/python-net/aspose.slides/nullablebool/) to compare: with these settings, the period occupies a separate line. Wrapping is enabled and autofit is disabled to keep the available width fixed. ```python import aspose.pydrawing as draw import aspose.slides as slides with slides.Presentation() as presentation: slide = presentation.slides[0] shape = slide.shapes.add_auto_shape(slides.ShapeType.RECTANGLE, 50, 50, 100, 200) shape.fill_format.fill_type = slides.FillType.NO_FILL text_frame = shape.text_frame text_frame.text_frame_format.wrap_text = slides.NullableBool.TRUE text_frame.text_frame_format.autofit_type = slides.TextAutofitType.NONE text_frame.text_frame_format.margin_left = 0 text_frame.text_frame_format.margin_right = 0 paragraph = text_frame.paragraphs[0] paragraph.text = "Simple text, next sentence." paragraph_format = paragraph.paragraph_format paragraph_format.alignment = slides.TextAlignment.LEFT paragraph_format.default_portion_format.font_height = 24 paragraph_format.default_portion_format.latin_font = slides.FontData("Arial") paragraph_format.default_portion_format.fill_format.fill_type = slides.FillType.SOLID paragraph_format.default_portion_format.fill_format.solid_fill_color.color = draw.Color.black paragraph_format.hanging_punctuation = slides.NullableBool.TRUE presentation.save("hanging_punctuation.pptx", slides.export.SaveFormat.PPTX) ``` Not every punctuation mark can hang. The visible result depends on [font and layout conditions](https://docs.aspose.com/slides/python-net/text-formatting/#control-line-breaking): changing the font, available width, margins, or autofit settings can remove the visible difference. ## **Set Autofit Type for Text Frames** [TextFrameFormat.autofit_type](https://reference.aspose.com/slides/python-net/aspose.slides/textframeformat/autofit_type/) determines how text behaves when it exceeds the boundaries of its container. Use it to control whether the text shrinks, overflows, or resizes the shape automatically. The following example configures the shape to resize to fit its text and saves the result to "autofit_type.pptx". ```python import aspose.slides as slides with slides.Presentation("sample.pptx") as presentation: slide = presentation.slides[0] auto_shape = slide.shapes[0] auto_shape.text_frame.text_frame_format.autofit_type = slides.TextAutofitType.SHAPE presentation.save("autofit_type.pptx", slides.export.SaveFormat.PPTX) ``` To count lines after automatic wrapping and see how text or shape width changes the result, see [Count Rendered Lines](https://docs.aspose.com/slides/python-net/manage-paragraph/). Line count alone does not indicate whether text overflows its container. ## **Set Anchor of Text Frames** [TextFrameFormat.anchoring_type](https://reference.aspose.com/slides/python-net/aspose.slides/textframeformat/anchoring_type/) defines how text is positioned vertically inside a shape, for example, at the top, middle, or bottom. The following example anchors the text to the bottom of the first shape and saves the result to "text_anchor.pptx". ```python import aspose.slides as slides with slides.Presentation("sample.pptx") as presentation: slide = presentation.slides[0] auto_shape = slide.shapes[0] auto_shape.text_frame.text_frame_format.anchoring_type = slides.TextAnchorType.BOTTOM presentation.save("text_anchor.pptx", slides.export.SaveFormat.PPTX) ``` ## **Set Text Tabulation** Use [ParagraphFormat.default_tab_size](https://reference.aspose.com/slides/python-net/aspose.slides/paragraphformat/default_tab_size/) and [ParagraphFormat.tabs](https://reference.aspose.com/slides/python-net/aspose.slides/paragraphformat/tabs/) to configure tab stops in a paragraph. The following example sets the default tab interval to 100 points and adds a left-aligned tab stop at 30 points. These settings affect text containing tab characters. ```python import aspose.slides as slides with slides.Presentation("sample.pptx") as presentation: slide = presentation.slides[0] auto_shape = slide.shapes[0] paragraph = auto_shape.text_frame.paragraphs[0] paragraph.paragraph_format.default_tab_size = 100 paragraph.paragraph_format.tabs.add(30, slides.TabAlignment.LEFT) presentation.save("paragraph_tabs.pptx", slides.export.SaveFormat.PPTX) ``` The result: ![The paragraph tabs](https://docs.aspose.com/slides/python-net/text-formatting/paragraph_tabs.png) ## **Set Proofing Language** Aspose.Slides provides [BasePortionFormat.language_id](https://reference.aspose.com/slides/python-net/aspose.slides/baseportionformat/language_id/), which allows you to set the proofing language for a text portion. The proofing language determines the language used for spelling and grammar checks in PowerPoint. The following example requires "presentation.pptx" with a text box as the first shape on the first slide and at least one paragraph. It replaces the first paragraph’s contents with "1。", sets SimSun as its font, and assigns the Simplified Chinese proofing language (`zh-CN`). It saves the result to "proofing_language.pptx": ```python import aspose.slides as slides with slides.Presentation("presentation.pptx") as presentation: slide = presentation.slides[0] auto_shape = slide.shapes[0] paragraph = auto_shape.text_frame.paragraphs[0] paragraph.portions.clear() font = slides.FontData("SimSun") text_portion = slides.Portion() text_portion.portion_format.complex_script_font = font text_portion.portion_format.east_asian_font = font text_portion.portion_format.latin_font = font # Set the proofing language to Simplified Chinese. text_portion.portion_format.language_id = "zh-CN" text_portion.text = "1。" paragraph.portions.add(text_portion) presentation.save("proofing_language.pptx", slides.export.SaveFormat.PPTX) ``` ## **Set Default Language** Use [LoadOptions.default_text_language](https://reference.aspose.com/slides/python-net/aspose.slides/loadoptions/default_text_language/) to define the default language for text created while loading or creating a presentation. The following example creates a presentation with US English as the default text language, adds a text box, and prints `en-US` for its first text portion. ```python import aspose.slides as slides load_options = slides.LoadOptions() load_options.default_text_language = "en-US" with slides.Presentation(load_options) as presentation: slide = presentation.slides[0] # Add a new rectangle shape with text. shape = slide.shapes.add_auto_shape(slides.ShapeType.RECTANGLE, 20, 20, 150, 50) shape.text_frame.text = "Sample text" # Check the first portion language. portion = shape.text_frame.paragraphs[0].portions[0] print(portion.portion_format.language_id) ``` ## **Set Default Text Style** To apply default text formatting at the presentation level, use [Presentation.default_text_style](https://reference.aspose.com/slides/python-net/aspose.slides/presentation/default_text_style/). The following example sets a 14-point bold font as the default for top-level paragraphs in a new presentation and saves it to "default_text_style.pptx". Text can inherit these defaults unless more specific formatting overrides them. ```python import aspose.slides as slides with slides.Presentation() as presentation: # Get the top level paragraph format. paragraph_format = presentation.default_text_style.get_level(0) if paragraph_format is not None: paragraph_format.default_portion_format.font_height = 14 paragraph_format.default_portion_format.font_bold = slides.NullableBool.TRUE presentation.save("default_text_style.pptx", slides.export.SaveFormat.PPTX) ``` ## **Extract Text with the All-Caps Effect** In PowerPoint, applying the **All Caps** font effect makes text appear in uppercase on the slide even when it was originally typed in lowercase. When you retrieve such a text portion with Aspose.Slides, the library returns the text exactly as it was entered. To match the displayed text, check [TextCapType](https://reference.aspose.com/slides/python-net/aspose.slides/textcaptype/) and convert the returned string to uppercase when the value is `ALL`. This example requires "sample2.pptx" with a text box as the first shape on the first slide. Its first paragraph’s first portion contains "Hello, Aspose!" with the All Caps effect applied, as shown below. ![The All Caps effect](https://docs.aspose.com/slides/python-net/text-formatting/all_caps_effect.png) The code example below shows how to extract the text with the **All Caps** effect applied: ```python import aspose.slides as slides with slides.Presentation("sample2.pptx") as presentation: slide = presentation.slides[0] auto_shape = slide.shapes[0] text_portion = auto_shape.text_frame.paragraphs[0].portions[0] print("Original text:", text_portion.text) text_format = text_portion.portion_format.get_effective() if text_format.text_cap_type == slides.TextCapType.ALL: text = text_portion.text.upper() print("All-Caps effect:", text) ``` Output: ```text Original text: Hello, Aspose! All-Caps effect: HELLO, ASPOSE! ``` ## **FAQ** **How do I modify text in a table on a slide?** To modify text in a table on a slide, use [Table](https://reference.aspose.com/slides/python-net/aspose.slides/table/). Iterate through the cells and update each cell through [Cell.text_frame](https://reference.aspose.com/slides/python-net/aspose.slides/cell/text_frame/) and paragraph formatting through [Paragraph.paragraph_format](https://reference.aspose.com/slides/python-net/aspose.slides/paragraph/paragraph_format/). **How do I apply a gradient color to text on a PowerPoint slide?** To apply a gradient color to text, use [BasePortionFormat.fill_format](https://reference.aspose.com/slides/python-net/aspose.slides/baseportionformat/fill_format/). Set [FillFormat.fill_type](https://reference.aspose.com/slides/python-net/aspose.slides/fillformat/fill_type/) to [FillType.GRADIENT](https://reference.aspose.com/slides/python-net/aspose.slides/filltype/) and configure the gradient stops, direction, and transparency. Related feature: [Format text within slides](https://docs.aspose.com/slides/features/text-formatting/). # Add Trend Lines to Presentation Charts in Python > Quickly add and customize trend lines in PowerPoint charts with Aspose.Slides for Python via .NET — a practical guide to engage your audience. Source: https://docs.aspose.com/slides/python-net/trend-line/ Updated: 2026-10-16 ## **Overview** This article explains how to add trend lines to presentation charts by using Aspose.Slides. It shows how to create a chart, add trend lines to chart series, and work with several trend line types, including exponential, linear, logarithmic, moving average, polynomial, and power. It also describes how to add a custom line to a chart by inserting a line shape, and includes a short FAQ about forward and backward trend line projection values and whether trend lines are preserved during export to PDF or SVG and when rendering charts as images. ## **Add a Trend Line** Use [TrendlineCollection.add](https://reference.aspose.com/slides/python-net/aspose.slides.charts/trendlinecollection/add/) to add a trend line to a chart series, selecting its type with [TrendlineType](https://reference.aspose.com/slides/python-net/aspose.slides.charts/trendlinetype/). The example creates a clustered column chart with default data and adds two trend lines to each of its three series. The exponential trend line hides its equation and R-squared value through [display_equation](https://reference.aspose.com/slides/python-net/aspose.slides.charts/trendline/display_equation/) and [display_r_squared_value](https://reference.aspose.com/slides/python-net/aspose.slides.charts/trendline/display_r_squared_value/), while the linear trend line is red. The logarithmic trend line uses [add_text_frame_for_overriding](https://reference.aspose.com/slides/python-net/aspose.slides.charts/trendline/add_text_frame_for_overriding/) for a custom label. The moving average uses a [period](https://reference.aspose.com/slides/python-net/aspose.slides.charts/trendline/period/) of three data points and a custom [trendline_name](https://reference.aspose.com/slides/python-net/aspose.slides.charts/trendline/trendline_name/). The polynomial trend line has an [order](https://reference.aspose.com/slides/python-net/aspose.slides.charts/trendline/order/) of three and extends one category forward through [forward](https://reference.aspose.com/slides/python-net/aspose.slides.charts/trendline/forward/). The power trend line extends one category backward through [backward](https://reference.aspose.com/slides/python-net/aspose.slides.charts/trendline/backward/). ```python import aspose.slides as slides import aspose.slides.charts as charts with slides.Presentation() as presentation: slide = presentation.slides[0] chart = slide.shapes.add_chart(charts.ChartType.CLUSTERED_COLUMN, 20, 20, 500, 400) first_series = chart.chart_data.series[0] exponential_trendline = first_series.trend_lines.add(charts.TrendlineType.EXPONENTIAL) exponential_trendline.display_equation = False exponential_trendline.display_r_squared_value = False linear_trendline = first_series.trend_lines.add(charts.TrendlineType.LINEAR) linear_trendline.format.line.fill_format.fill_type = slides.FillType.SOLID linear_trendline.format.line.fill_format.solid_fill_color.r = 255 linear_trendline.format.line.fill_format.solid_fill_color.g = 0 linear_trendline.format.line.fill_format.solid_fill_color.b = 0 second_series = chart.chart_data.series[1] logarithmic_trendline = second_series.trend_lines.add(charts.TrendlineType.LOGARITHMIC) logarithmic_trendline.add_text_frame_for_overriding("New log trend line") moving_average_trendline = second_series.trend_lines.add(charts.TrendlineType.MOVING_AVERAGE) moving_average_trendline.period = 3 moving_average_trendline.trendline_name = "New TrendLine Name" third_series = chart.chart_data.series[2] polynomial_trendline = third_series.trend_lines.add(charts.TrendlineType.POLYNOMIAL) polynomial_trendline.forward = 1 polynomial_trendline.order = 3 power_trendline = third_series.trend_lines.add(charts.TrendlineType.POWER) power_trendline.backward = 1 presentation.save("ChartTrendLines.pptx", slides.export.SaveFormat.PPTX) ``` ## **Set a Trend Line Intercept** Use [intercept](https://reference.aspose.com/slides/python-net/aspose.slides.charts/trendline/intercept/) to fix a trend line's Y value at X = 0. This setting is supported for linear, exponential, and polynomial trend lines. For example, a production cost model may need to start at known fixed costs of 100, even when measurements at nonzero production volumes suggest a different baseline. For a linear trend line, fixing the intercept constrains the equation `y = ax + b` to `b = 100`; the slope is fitted to the data under that constraint. It does not simply move an already fitted line. Axis crossing settings control where the chart axes meet, not the coefficients of the fitted trend line. The following example creates a scatter (XY) chart with production volumes from 1 to 4 and costs of 170, 200, 230, and 260. It saves the chart with the default automatic intercept, sets the intercept to 100, and saves a second PPTX. The two files differ only in the intercept setting. The trend line displays its equation and extends back to X = 0. ```python import aspose.slides as slides import aspose.slides.charts as charts with slides.Presentation() as presentation: slide = presentation.slides[0] chart = slide.shapes.add_chart(charts.ChartType.SCATTER_WITH_MARKERS, 20, 20, 480, 210) chart.has_legend = False chart.chart_data.series.clear() chart.chart_data.categories.clear() workbook = chart.chart_data.chart_data_workbook workbook.clear(0) name_cell = workbook.get_cell(0, 0, 1, "Production cost") series = chart.chart_data.series.add(name_cell, charts.ChartType.SCATTER_WITH_MARKERS) costs = [170, 200, 230, 260] for i, cost in enumerate(costs): x_cell = workbook.get_cell(0, i + 1, 0, i + 1) y_cell = workbook.get_cell(0, i + 1, 1, cost) series.data_points.add_data_point_for_scatter_series(x_cell, y_cell) trendline = series.trend_lines.add(charts.TrendlineType.LINEAR) trendline.display_equation = True trendline.backward = 1 presentation.save("AutomaticIntercept.pptx", slides.export.SaveFormat.PPTX) trendline.intercept = 100 presentation.save("FixedIntercept.pptx", slides.export.SaveFormat.PPTX) ``` With automatic calculation, these data produce `y = 30x + 140`. Setting the intercept to 100 instead produces approximately `y = 43.33x + 100`: the fitted value at zero matches the known baseline, while the line no longer passes through every data point. | Automatic intercept | Fixed intercept of 100 | | --- | --- | | ![Linear trend line with an automatically calculated intercept of 140](https://docs.aspose.com/slides/python-net/trend-line/intercept-automatic.png) | ![Linear trend line with a fixed intercept of 100](https://docs.aspose.com/slides/python-net/trend-line/intercept-fixed.png) | Both images use the same data and axis scales. The trend lines are extended back to X = 0 to show their intercepts. By default, the property contains `float("nan")`, which represents an unspecified intercept rather than zero. The intercept is then calculated automatically from the data. ## **Add a Custom Line** A custom line is a shape drawn over the chart rather than a trend line calculated from series data. This example uses [ShapeCollection.add_auto_shape](https://reference.aspose.com/slides/python-net/aspose.slides/shapecollection/add_auto_shape/) to add a horizontal line to the slide over the chart. The line's position is specified in slide coordinates, measured in points, so it starts at the chart's left edge and sits halfway down the chart. Its width matches the chart's width. The [line_format](https://reference.aspose.com/slides/python-net/aspose.slides/shape/line_format/) gives the line a solid red color. ```python import aspose.slides as slides import aspose.slides.charts as charts with slides.Presentation() as presentation: slide = presentation.slides[0] chart = slide.shapes.add_chart(charts.ChartType.CLUSTERED_COLUMN, 100, 100, 500, 400) line = slide.shapes.add_auto_shape(slides.ShapeType.LINE, chart.x, chart.y + chart.height / 2, chart.width, 0) line.line_format.fill_format.fill_type = slides.FillType.SOLID line.line_format.fill_format.solid_fill_color.r = 255 line.line_format.fill_format.solid_fill_color.g = 0 line.line_format.fill_format.solid_fill_color.b = 0 presentation.save("AddCustomLines.pptx", slides.export.SaveFormat.PPTX) ``` ## **FAQ** **What do 'forward' and 'backward' mean for a trend line?** They are the lengths of the trend line projected forward/backward: for scatter (XY) charts — in axis units; for non-scatter charts — in number of categories. Only non-negative values are allowed. **Will the trend line be preserved when exporting the presentation to PDF or SVG, or when rendering a slide to an image?** Yes. Aspose.Slides converts presentations to [PDF](https://docs.aspose.com/slides/python-net/convert-powerpoint-to-pdf/) or [SVG](https://docs.aspose.com/slides/python-net/render-a-slide-as-an-svg-image/) and renders charts to images; trend lines, as part of the chart, are preserved during these operations. A method is also available to [export an image of the chart](https://docs.aspose.com/slides/python-net/create-shape-thumbnails/) itself. # Manage Video Frames in Presentations in Python > Learn to programmatically add and extract video frames in PowerPoint and OpenDocument slides using Aspose.Slides for Python via .NET. Fast how-to guide. Source: https://docs.aspose.com/slides/python-net/video-frame/ Updated: 2026-10-09 ## **Introduction** Videos can help explain ideas and engage an audience. Aspose.Slides for Python via .NET lets you add video frames to slides, adjust playback settings, manage captions, and extract embedded video data. PowerPoint supports local videos and links to online videos, such as YouTube videos. To represent video data and video frames, Aspose.Slides provides the [Video](https://reference.aspose.com/slides/python-net/aspose.slides/video/) class, [VideoFrame](https://reference.aspose.com/slides/python-net/aspose.slides/videoframe/) class, and other relevant types. ## **Create an Embedded Video Frame** If the video file you want to add to your slide is stored locally, you can create a video frame to embed the video in your presentation. This example embeds a local video on the first slide of an existing presentation and saves the result. Frame coordinates and dimensions are in points. The stream stays open until saving finishes because [LoadingStreamBehavior.KEEP_LOCKED](https://reference.aspose.com/slides/python-net/aspose.slides/loadingstreambehavior/) keeps it locked while the presentation uses it. ```python import aspose.slides as slides with slides.Presentation("presentation.pptx") as presentation: slide = presentation.slides[0] with open("video.mp4", "rb") as video_stream: video = presentation.videos.add_video(video_stream, slides.LoadingStreamBehavior.KEEP_LOCKED) slide.shapes.add_video_frame(10, 10, 150, 250, video) presentation.save("embedded_video.pptx", slides.export.SaveFormat.PPTX) ``` You can also pass a local video path directly to [add_video_frame](https://reference.aspose.com/slides/python-net/aspose.slides/shapecollection/add_video_frame/). This example embeds the video on the first slide of a new presentation. The video must remain accessible until the presentation is saved. ```python import aspose.slides as slides with slides.Presentation() as presentation: slide = presentation.slides[0] slide.shapes.add_video_frame(50, 150, 300, 150, "video.avi") presentation.save("video_from_path.pptx", slides.export.SaveFormat.PPTX) ``` ## **Create a Video Frame with Video from a Web Source** Microsoft [PowerPoint](https://support.microsoft.com/en-us/powerpoint/training/insert-a-video-from-youtube-or-another-site) supports online videos in presentations. You can create a video frame that links to an online video, such as a YouTube video. This example adds a YouTube video link and thumbnail to the first slide. Replace the video identifier to use another video. The [play_mode](https://reference.aspose.com/slides/python-net/aspose.slides/videoframe/play_mode/) setting requests automatic playback. Downloading the thumbnail and playing the video require internet access. The presentation viewer must also support online video playback. ```python from urllib.request import urlopen import aspose.slides as slides with slides.Presentation() as presentation: slide = presentation.slides[0] video_id = "aqz-KE-bpKQ" video_url = f"https://www.youtube.com/embed/{video_id}" video_frame = slide.shapes.add_video_frame(10, 10, 427, 240, video_url) video_frame.play_mode = slides.VideoPlayModePreset.AUTO thumbnail_url = f"https://img.youtube.com/vi/{video_id}/hqdefault.jpg" with urlopen(thumbnail_url) as response: thumbnail_data = response.read() thumbnail = presentation.images.add_image(thumbnail_data) video_frame.picture_format.picture.image = thumbnail presentation.save("online_video.pptx", slides.export.SaveFormat.PPTX) ``` ## **Play a Video in Full-Screen Mode** In a training presentation, you can play a software demonstration in full-screen mode so the audience can see the details. Set [full_screen_mode](https://reference.aspose.com/slides/python-net/aspose.slides/videoframe/full_screen_mode/) to `True` to enable this behavior during playback. This example opens a presentation, finds the first [VideoFrame](https://reference.aspose.com/slides/python-net/aspose.slides/videoframe/) on the first slide, and enables full-screen playback. The input presentation must contain at least one slide with an existing video frame on the first slide. ```python import aspose.slides as slides with slides.Presentation("training.pptx") as presentation: slide = presentation.slides[0] for shape in slide.shapes: if isinstance(shape, slides.VideoFrame): shape.full_screen_mode = True break presentation.save("full_screen_video.pptx", slides.export.SaveFormat.PPTX) ``` Full-screen playback controls how the video is displayed. Independently, [play_mode](https://reference.aspose.com/slides/python-net/aspose.slides/videoframe/play_mode/) controls whether it starts automatically or on click, and [play_loop_mode](https://reference.aspose.com/slides/python-net/aspose.slides/videoframe/play_loop_mode/) controls whether it repeats. To choose the start behavior, set the playback mode to [VideoPlayModePreset.AUTO or VideoPlayModePreset.ON_CLICK](https://reference.aspose.com/slides/python-net/aspose.slides/videoplaymodepreset/). The example preserves the existing start and loop settings. ## **Rewind a Video After Playback** In a training presentation, returning a demonstration video to its beginning makes it ready for the presenter to play again. Set [rewind_video](https://reference.aspose.com/slides/python-net/aspose.slides/videoframe/rewind_video/) to `True` to return the video to the beginning after playback finishes. This example opens a presentation, finds the first [VideoFrame](https://reference.aspose.com/slides/python-net/aspose.slides/videoframe/) on the first slide, and enables rewinding. It disables looping so playback can finish and sets playback to start on click. The input presentation must contain at least one slide with an existing video frame on the first slide. ```python import aspose.slides as slides with slides.Presentation("training.pptx") as presentation: slide = presentation.slides[0] for shape in slide.shapes: if isinstance(shape, slides.VideoFrame): shape.rewind_video = True shape.play_loop_mode = False shape.play_mode = slides.VideoPlayModePreset.ON_CLICK break presentation.save("rewind_video.pptx", slides.export.SaveFormat.PPTX) ``` Rewinding returns the video to its beginning without starting it again. In contrast, enabling [play_loop_mode](https://reference.aspose.com/slides/python-net/aspose.slides/videoframe/play_loop_mode/) repeats playback automatically. Keep looping disabled when you want the video to finish and remain ready to replay. [play_mode](https://reference.aspose.com/slides/python-net/aspose.slides/videoframe/play_mode/) independently controls automatic or on-click startup; this example uses [VideoPlayModePreset.ON_CLICK](https://reference.aspose.com/slides/python-net/aspose.slides/videoplaymodepreset/) so the presenter controls when playback starts. Set the playback mode after the loop setting, as shown in the example. Rewinding works independently of [full_screen_mode](https://reference.aspose.com/slides/python-net/aspose.slides/videoframe/full_screen_mode/). ## **Trim a Video Frame** Use [VideoFrame.trim_from_start](https://reference.aspose.com/slides/python-net/aspose.slides/videoframe/trim_from_start/) and [VideoFrame.trim_from_end](https://reference.aspose.com/slides/python-net/aspose.slides/videoframe/trim_from_end/) to skip part of the beginning or end of a video during playback. Both values are in milliseconds. Trimming changes playback settings without modifying the embedded video data. **Set Trim Settings** This example embeds a local video and skips the first 2.5 seconds and the last second during playback. Use a video longer than 3.5 seconds so a playable segment remains. ```python import aspose.slides as slides with slides.Presentation() as presentation: slide = presentation.slides[0] with open("video.mp4", "rb") as video_stream: video_data = video_stream.read() video = presentation.videos.add_video(video_data) video_frame = slide.shapes.add_video_frame(50, 50, 640, 360, video) video_frame.trim_from_start = 2500.0 video_frame.trim_from_end = 1000.0 presentation.save("video_with_trim.pptx", slides.export.SaveFormat.PPTX) ``` **Read Trim Settings** This example prints the trim values of the first video frame on the first slide in milliseconds. The presentation must contain at least one slide. If that slide has no video frame, nothing is printed. The preceding example produces values of 2500 and 1000. ```python import aspose.slides as slides with slides.Presentation("video_with_trim.pptx") as presentation: slide = presentation.slides[0] for shape in slide.shapes: if isinstance(shape, slides.VideoFrame): print(f"Trim from start: {shape.trim_from_start} ms") print(f"Trim from end: {shape.trim_from_end} ms") break ``` ## **Manage Video Captions** Aspose.Slides allows you to manage closed captions for video frames in PowerPoint presentations. Captions are stored in WebVTT format and are exposed through the [VideoFrame.caption_tracks](https://reference.aspose.com/slides/python-net/aspose.slides/videoframe/caption_tracks/) property. **Add Captions to a Video Frame** This example embeds a local video and adds a WebVTT caption track labeled English. The caption timestamps should match the video. The saved presentation includes both the video and its captions. ```python import aspose.slides as slides with slides.Presentation() as presentation: slide = presentation.slides[0] with open("video.mp4", "rb") as video_stream: video_data = video_stream.read() video = presentation.videos.add_video(video_data) video_frame = slide.shapes.add_video_frame(0, 0, 100, 100, video) video_frame.caption_tracks.add("English", "track.vtt") presentation.save("video_with_captions.pptx", slides.export.SaveFormat.PPTX) ``` The [CaptionsCollection](https://reference.aspose.com/slides/python-net/aspose.slides/captionscollection/) class also provides an overload that lets you add captions from a stream. **Extract Captions from a Video Frame** This example saves all caption tracks from video frames on the first slide as separate WebVTT files. Sequential numbers keep the output files distinct. The console reports the number of extracted tracks. The presentation must contain at least one slide. ```python import aspose.slides as slides with slides.Presentation("video_with_captions.pptx") as presentation: slide = presentation.slides[0] track_count = 0 for shape in slide.shapes: if isinstance(shape, slides.VideoFrame): for caption_track in shape.caption_tracks: track_count += 1 output_path = f"captions_{track_count}.vtt" with open(output_path, "wb") as track_stream: track_stream.write(bytes(caption_track.binary_data)) print(f"Caption tracks extracted: {track_count}") ``` Each [Captions](https://reference.aspose.com/slides/python-net/aspose.slides/captions/) object exposes the caption identifier, label, binary data, and caption text as a UTF-8 string. **Remove Captions from a Video Frame** This example removes all captions from the video frame at the first shape position on the first slide and saves the result. It assumes that the slide and shape exist and that the shape is a video frame. ```python import aspose.slides as slides with slides.Presentation("video_with_captions.pptx") as presentation: slide = presentation.slides[0] video_frame = slide.shapes[0] video_frame.caption_tracks.clear() presentation.save("video_without_captions.pptx", slides.export.SaveFormat.PPTX) ``` If you need to remove only one caption track, use the [remove](https://reference.aspose.com/slides/python-net/aspose.slides/captionscollection/remove/) or [remove_at](https://reference.aspose.com/slides/python-net/aspose.slides/captionscollection/remove_at/) methods instead of [clear](https://reference.aspose.com/slides/python-net/aspose.slides/captionscollection/clear/). ## **Extract Video from a Slide** Besides adding videos to slides, Aspose.Slides allows you to extract videos embedded in presentations. This example extracts embedded videos from every slide into separate, numbered binary files. Linked videos are skipped because they have no embedded data. The console prints each video’s MIME type and the total count. Output uses the generic `.bin` extension; change it to match the reported media type when needed. ```python import aspose.slides as slides with slides.Presentation("presentation_with_videos.pptx") as presentation: video_count = 0 for slide in presentation.slides: for shape in slide.shapes: if isinstance(shape, slides.VideoFrame): video = shape.embedded_video if video is None: print("Skipped a linked video: no embedded data is available.") continue video_count += 1 output_path = f"extracted_video_{video_count}.bin" with open(output_path, "wb") as video_stream: video_stream.write(bytes(video.binary_data)) print(f"Video {video_count}: {video.content_type}") print(f"Embedded videos extracted: {video_count}") ``` ## **FAQ** **Which video playback parameters can be changed for a video frame?** You can control the [playback mode](https://reference.aspose.com/slides/python-net/aspose.slides/videoframe/play_mode/) (auto or on click) and [looping](https://reference.aspose.com/slides/python-net/aspose.slides/videoframe/play_loop_mode/). These options are available via the [VideoFrame](https://reference.aspose.com/slides/python-net/aspose.slides/videoframe/) object's properties. **Does adding a video affect the PPTX file size?** Yes. When you embed a local video, the binary data is included in the document, so the presentation size grows in proportion to the file size. When you link to an online video and add a thumbnail, the presentation stores the link and preview image rather than the video data, so the size increase is usually smaller. **Can I replace the video in an existing video frame without changing its position and size?** Yes. You can swap the [video content](https://reference.aspose.com/slides/python-net/aspose.slides/videoframe/embedded_video/) within the frame while preserving the shape's geometry; this is a common scenario for updating media in an existing layout. **Can the content type (MIME) of an embedded video be determined?** Yes. An embedded video has a [content type](https://reference.aspose.com/slides/python-net/aspose.slides/video/content_type/) that you can read and use, for example when saving it to disk. ## Related articles - [Manage Audio in Presentations Using Python](https://docs.aspose.com/slides/python-net/audio-frame/) - [Video](https://docs.aspose.com/slides/python-net/examples/elements/video/) # Add Watermarks to Presentations in Python > Learn how to manage text and image watermarks in PowerPoint and OpenDocument presentations in Python to indicate a draft, confidential information, copyright, and more. Source: https://docs.aspose.com/slides/python-net/watermark/ Updated: 2026-08-13 ## **Introduction** **A watermark** in a presentation is a text or image stamp used on a slide or throughout all presentation slides. Usually, a watermark is used to indicate that the presentation is a draft (e.g., a "Draft" watermark), that it contains confidential information (e.g., a "Confidential" watermark), to specify which company it belongs to (e.g., a "Company Name" watermark), to identify the presentation author, etc. A watermark helps to prevent copyright violations by indicating that the presentation should not be copied. Watermarks are used in both PowerPoint and OpenOffice presentation formats. In Aspose.Slides, you can add a watermark to PowerPoint PPT, PPTX, and OpenOffice ODP file formats. In [**Aspose.Slides**](https://products.aspose.com/slides/python-net/), there are various ways you can create watermarks in PowerPoint or OpenOffice documents and modify their design and behavior. The common aspect is that to add text watermarks, you should use the [TextFrame](https://reference.aspose.com/slides/python-net/aspose.slides/textframe/) class, and to add image watermarks, use the [PictureFrame](https://reference.aspose.com/slides/python-net/aspose.slides/pictureframe/) class or fill a watermark shape with an image. `PictureFrame` implements the [Shape](https://reference.aspose.com/slides/python-net/aspose.slides/shape/) class, allowing you to use all the flexible settings of the shape object. Since `TextFrame` is not a shape and its settings are limited, it is wrapped into an [Shape](https://reference.aspose.com/slides/python-net/aspose.slides/shape/) object. There are two ways a watermark can be applied: to a single slide or to all presentation slides. The Slide Master is used to apply a watermark to all presentation slides — the watermark is added to the Slide Master, fully designed there, and applied to all slides without affecting the permission to modify the watermark on individual slides. A watermark is usually considered to be unavailable for editing by other users. To prevent the watermark (or rather the watermark's parent shape) from being edited, Aspose.Slides provides shape locking functionality. A specific shape can be locked on a normal slide or on a Slide Master. When the watermark shape is locked on the Slide Master, it will be locked on all presentation slides. You can set a name for the watermark so that in the future, if you want to delete it, you can find it in the slide's shapes by name. You can design the watermark in any way; however, there are usually common features in watermarks, such as center alignment, rotation, front position, etc. We will consider how to use these in the examples below. ## **Text Watermark** ### **Add a Text Watermark to a Slide** To add a text watermark in PPT, PPTX, or ODP, you can first add a shape to the slide, then add a text frame to this shape. The text frame is represented by the [TextFrame](https://reference.aspose.com/slides/python-net/aspose.slides/textframe/) class. This type is not inherited from [Shape](https://reference.aspose.com/slides/python-net/aspose.slides/shape/), which has a wide set of properties for positioning the watermark in a flexible way. Therefore, the [TextFrame](https://reference.aspose.com/slides/python-net/aspose.slides/textframe/) object is wrapped in an [AutoShape](https://reference.aspose.com/slides/python-net/aspose.slides/autoshape/) object. To add watermark text to the shape, use the [add_text_frame](https://reference.aspose.com/slides/python-net/aspose.slides/autoshape/add_text_frame/#str) method as shown below. ```py import aspose.slides as slides watermark_text = "CONFIDENTIAL" with slides.Presentation() as presentation: slide = presentation.slides[0] watermark_shape = slide.shapes.add_auto_shape(slides.ShapeType.RECTANGLE, 100, 100, 400, 40) watermark_frame = watermark_shape.add_text_frame(watermark_text) ``` - [How to Use the TextFrame Class](https://docs.aspose.com/slides/python-net/text-formatting/) ### **Add a Text Watermark to a Presentation** If you want to add a text watermark to the entire presentation (i.e., all slides at once), add it to the [MasterSlide](https://reference.aspose.com/slides/python-net/aspose.slides/masterslide/). The rest of the logic is the same as when adding a watermark to a single slide — create an [AutoShape](https://reference.aspose.com/slides/python-net/aspose.slides/autoshape/) object and then add the watermark to it using the [add_text_frame](https://reference.aspose.com/slides/python-net/aspose.slides/autoshape/add_text_frame/#str) method. ```py import aspose.slides as slides watermark_text = "CONFIDENTIAL" with slides.Presentation() as presentation: master_slide = presentation.masters[0] watermark_shape = master_slide.shapes.add_auto_shape(slides.ShapeType.RECTANGLE, 100, 100, 400, 40) watermark_frame = watermark_shape.add_text_frame(watermark_text) ``` - [How to Use the Slide Master](https://docs.aspose.com/slides/python-net/slide-master/) ### **Set Watermark Shape Transparency** By default, the rectangle shape is styled with fill and line colors. The following lines of code make the shape transparent. ```py import aspose.slides as slides with slides.Presentation() as presentation: slide = presentation.slides[0] watermark_shape = slide.shapes.add_auto_shape(slides.ShapeType.RECTANGLE, 100, 100, 400, 40) watermark_shape.fill_format.fill_type = slides.FillType.NO_FILL watermark_shape.line_format.fill_format.fill_type = slides.FillType.NO_FILL ``` ### **Set the Font for a Text Watermark** You can change the font of the text watermark as shown below. ```py import aspose.slides as slides with slides.Presentation() as presentation: slide = presentation.slides[0] watermark_shape = slide.shapes.add_auto_shape(slides.ShapeType.RECTANGLE, 100, 100, 400, 40) watermark_frame = watermark_shape.add_text_frame("CONFIDENTIAL") text_format = watermark_frame.paragraphs[0].paragraph_format.default_portion_format text_format.latin_font = slides.FontData("Arial") text_format.font_height = 50 ``` ### **Set the Watermark Text Color** To set the color of the watermark text, use this code: ```py import aspose.slides as slides import aspose.pydrawing as drawing alpha = 150 red = 200 green = 200 blue = 200 with slides.Presentation() as presentation: slide = presentation.slides[0] watermark_shape = slide.shapes.add_auto_shape(slides.ShapeType.RECTANGLE, 100, 100, 400, 40) watermark_frame = watermark_shape.add_text_frame("CONFIDENTIAL") fill_format = watermark_frame.paragraphs[0].paragraph_format.default_portion_format.fill_format fill_format.fill_type = slides.FillType.SOLID fill_format.solid_fill_color.color = drawing.Color.from_argb(alpha, red, green, blue) ``` ### **Center a Text Watermark** It is possible to center the watermark on a slide, and for that, you can do the following: ```py import aspose.slides as slides watermark_text = "CONFIDENTIAL" with slides.Presentation() as presentation: slide = presentation.slides[0] slide_size = presentation.slide_size.size watermark_width = 400 watermark_height = 40 watermark_x = (slide_size.width - watermark_width) / 2 watermark_y = (slide_size.height - watermark_height) / 2 watermark_shape = slide.shapes.add_auto_shape( slides.ShapeType.RECTANGLE, watermark_x, watermark_y, watermark_width, watermark_height) watermark_frame = watermark_shape.add_text_frame(watermark_text) ``` The image below shows the final result. ![The text watermark](https://docs.aspose.com/slides/python-net/watermark/text_watermark.png) ## **Image Watermark** ### **Add an Image Watermark to a Presentation** To add an image watermark to a presentation slide, you can do the following: ```py import aspose.slides as slides with slides.Presentation() as presentation: slide = presentation.slides[0] watermark_shape = slide.shapes.add_auto_shape(slides.ShapeType.RECTANGLE, 100, 100, 400, 40) with open("watermark.png", "rb") as image_stream: image = presentation.images.add_image(image_stream.read()) watermark_shape.fill_format.fill_type = slides.FillType.PICTURE watermark_shape.fill_format.picture_fill_format.picture.image = image watermark_shape.fill_format.picture_fill_format.picture_fill_mode = slides.PictureFillMode.STRETCH ``` ## **Lock a Watermark from Editing** If it is necessary to prevent a watermark from being edited, use the [AutoShape.auto_shape_lock](https://reference.aspose.com/slides/python-net/aspose.slides/autoshape/auto_shape_lock/) property on the shape. With this property, you can protect the shape from being selected, resized, repositioned, grouped with other elements, lock its text from editing, and much more: ```py import aspose.slides as slides with slides.Presentation() as presentation: slide = presentation.slides[0] watermark_shape = slide.shapes.add_auto_shape(slides.ShapeType.RECTANGLE, 100, 100, 400, 40) # Lock the watermark shape from modifying watermark_shape.auto_shape_lock.select_locked = True watermark_shape.auto_shape_lock.size_locked = True watermark_shape.auto_shape_lock.text_locked = True watermark_shape.auto_shape_lock.position_locked = True watermark_shape.auto_shape_lock.grouping_locked = True ``` ## **Bring a Watermark to Front** In Aspose.Slides, the Z-order of shapes can be set via the [ShapeCollection.reorder](https://reference.aspose.com/slides/python-net/aspose.slides/ishapecollection/reorder/#int-ishape) method. To do this, you need to call this method from the presentation slides list and pass the shape reference and its order number into the method. This way, it is possible to bring a shape to the front or send it to the back of the slide. This feature is especially useful if you need to place a watermark in front of the presentation: ```py import aspose.slides as slides with slides.Presentation() as presentation: slide = presentation.slides[0] watermark_shape = slide.shapes.add_auto_shape(slides.ShapeType.RECTANGLE, 100, 100, 400, 40) shape_count = len(slide.shapes) slide.shapes.reorder(shape_count - 1, watermark_shape) ``` ## **Set Watermark Rotation** Here is a code example of how to adjust the rotation of the watermark so that it is positioned diagonally across the slide: ```py import math import aspose.slides as slides with slides.Presentation() as presentation: slide = presentation.slides[0] slide_size = presentation.slide_size.size watermark_shape = slide.shapes.add_auto_shape(slides.ShapeType.RECTANGLE, 100, 100, 400, 40) diagonal_angle = math.atan(slide_size.height / slide_size.width) * 180 / math.pi watermark_shape.rotation = float(diagonal_angle) ``` ## **Set a Name for a Watermark** Aspose.Slides allows you to set the name of a shape. By using the shape name, you can access it in the future to modify or delete it. To set the name of the watermark shape, assign it to the [AutoShape.name](https://reference.aspose.com/slides/python-net/aspose.slides/autoshape/name/) property: ```py import aspose.slides as slides with slides.Presentation() as presentation: slide = presentation.slides[0] watermark_shape = slide.shapes.add_auto_shape(slides.ShapeType.RECTANGLE, 100, 100, 400, 40) watermark_shape.name = "watermark" ``` ## **Remove a Watermark** To remove the watermark shape, use the [AutoShape.name](https://reference.aspose.com/slides/python-net/aspose.slides/autoshape/name/) method to find it in the slide shapes. Then, pass the watermark shape into the [ShapeCollection.remove](https://reference.aspose.com/slides/python-net/aspose.slides/shapecollection/remove/#ishape) method: ```py import aspose.slides as slides with slides.Presentation("sample.pptx") as presentation: slide = presentation.slides[0] slide_shapes = list(slide.shapes) for shape in slide_shapes: if shape.name == "watermark": slide.shapes.remove(shape) ``` ## **A Live Example** You may want to check out the **Aspose.Slides free** [Add Watermark](https://products.aspose.app/slides/watermark) and [Remove Watermark](https://products.aspose.app/slides/watermark/remove-watermark) online tools. ![Online tools to add and remove watermarks](https://docs.aspose.com/slides/python-net/watermark/online_tools.png) ## **FAQ** ### What is a watermark and why should I use it? A watermark is a text or image overlay applied to slides that helps protect intellectual property, enhance brand recognition, or prevent unauthorized use of presentations. ### Can I add a watermark to all slides in a presentation? Yes, Aspose.Slides allows you to add a watermark to every slide in a presentation. You can iterate through all the slides and apply the watermark settings individually. ### How can I adjust the transparency of the watermark? You can adjust the transparency of the watermark by modifying the fill settings ([FillFormat](https://reference.aspose.com/slides/python-net/aspose.slides/fillformat/)) of the shape. This ensures that the watermark is subtle and does not distract from the slide content. ### What image formats are supported for watermarks? Aspose.Slides supports various image formats such as PNG, JPEG, GIF, BMP, SVG, and more. ### Can I customize the font and style of a text watermark? Yes, you can choose any font, size, and style to match the design of your presentation and maintain brand consistency. ### How do I change the position or orientation of a watermark? You can adjust the position and orientation of the watermark by modifying the [shape](https://reference.aspose.com/slides/python-net/aspose.slides/shape/)'s coordinates, size, and rotation properties. # Create and Apply WordArt Effects in Python > Create and customize WordArt effects in Aspose.Slides for Python via .NET. This step-by-step guide helps developers enhance presentations with professional text in Python. Source: https://docs.aspose.com/slides/python-net/wordart/ Updated: 2026-09-25 ## **Overview** WordArt effects let you style text with fills, outlines, shadows, reflections, glow, transformations, and 3D formatting. This article explains how to create and customize these effects in PowerPoint presentations using Aspose.Slides for Python via .NET, without Microsoft Office installed. ## **Create a Simple WordArt Template and Apply It to Text** The following examples build a simple WordArt style by setting the text, font, pattern fill, and outline. Each example creates a new presentation and adds a rectangle to its first slide; no input file is required. The first example sets the text to "Aspose.Slides". The shape position and dimensions are measured in points: ```python import aspose.slides as slides with slides.Presentation() as presentation: slide = presentation.slides[0] auto_shape = slide.shapes.add_auto_shape(slides.ShapeType.RECTANGLE, 20, 20, 400, 200) text_frame = auto_shape.text_frame portion = text_frame.paragraphs[0].portions[0] portion.text = "Aspose.Slides" ``` Set the font to Arial Black at 36 points to make the formatting more noticeable: ```python import aspose.slides as slides with slides.Presentation() as presentation: slide = presentation.slides[0] auto_shape = slide.shapes.add_auto_shape(slides.ShapeType.RECTANGLE, 20, 20, 400, 200) portion = auto_shape.text_frame.paragraphs[0].portions[0] portion.text = "Aspose.Slides" portion.portion_format.latin_font = slides.FontData("Arial Black") portion.portion_format.font_height = 36 ``` Apply a [SMALL_GRID](https://reference.aspose.com/slides/python-net/aspose.slides/patternstyle/) pattern with a dark orange foreground and a white background, then add a black text outline with a width of 1 point: ```python import aspose.slides as slides import aspose.pydrawing as draw with slides.Presentation() as presentation: slide = presentation.slides[0] auto_shape = slide.shapes.add_auto_shape(slides.ShapeType.RECTANGLE, 20, 20, 400, 200) portion = auto_shape.text_frame.paragraphs[0].portions[0] portion.text = "Aspose.Slides" portion.portion_format.latin_font = slides.FontData("Arial Black") portion.portion_format.font_height = 36 portion.portion_format.fill_format.fill_type = slides.FillType.PATTERN portion.portion_format.fill_format.pattern_format.fore_color.color = draw.Color.dark_orange portion.portion_format.fill_format.pattern_format.back_color.color = draw.Color.white portion.portion_format.fill_format.pattern_format.pattern_style = slides.PatternStyle.SMALL_GRID portion.portion_format.line_format.width = 1 portion.portion_format.line_format.fill_format.fill_type = slides.FillType.SOLID portion.portion_format.line_format.fill_format.solid_fill_color.color = draw.Color.black ``` The resulting text: ![The simple WordArt template](https://docs.aspose.com/slides/python-net/wordart/WordArt_template.png) ## **Apply Other WordArt Effects** The following examples demonstrate how to apply shadows, reflections, glow, transformations, and 3D effects to text. ### **Apply Outer Shadow Effects** An outer shadow adds depth by placing a shadow behind the text. You can customize its color, direction, distance, blur radius, scale, and skew. This example calls [enable_outer_shadow_effect](https://reference.aspose.com/slides/python-net/aspose.slides/effectformat/enable_outer_shadow_effect/) and sets a black shadow with a 4-point blur radius, a 230-degree direction, and a 30-point distance. Scale values of 100 preserve the shadow size, while horizontal skew tilts it by 20 degrees. The alpha transform sets its opacity to 32%: ```python import aspose.slides as slides import aspose.pydrawing as draw with slides.Presentation() as presentation: slide = presentation.slides[0] auto_shape = slide.shapes.add_auto_shape(slides.ShapeType.RECTANGLE, 20, 20, 400, 200) portion = auto_shape.text_frame.paragraphs[0].portions[0] portion.text = "Aspose.Slides" portion.portion_format.latin_font = slides.FontData("Arial Black") portion.portion_format.font_height = 36 portion.portion_format.effect_format.enable_outer_shadow_effect() portion.portion_format.effect_format.outer_shadow_effect.shadow_color.color = draw.Color.black portion.portion_format.effect_format.outer_shadow_effect.scale_horizontal = 100 portion.portion_format.effect_format.outer_shadow_effect.scale_vertical = 100 portion.portion_format.effect_format.outer_shadow_effect.blur_radius = 4 portion.portion_format.effect_format.outer_shadow_effect.direction = 230 portion.portion_format.effect_format.outer_shadow_effect.distance = 30 portion.portion_format.effect_format.outer_shadow_effect.skew_horizontal = 20 portion.portion_format.effect_format.outer_shadow_effect.skew_vertical = 0 portion.portion_format.effect_format.outer_shadow_effect.shadow_color.color_transform.add(slides.ColorTransformOperation.SET_ALPHA, 0.32) ``` The resulting text: ![The Outer Shadow effect](https://docs.aspose.com/slides/python-net/wordart/outer_shadow_effect.png) - When outer and preset shadows are used together, only the outer shadow is applied. - If outer and inner shadows are used simultaneously, the resulting effect depends on the PowerPoint version. For example, in PowerPoint 2013, the effect is doubled, whereas in PowerPoint 2007, only the outer shadow is applied. ### **Apply Reflection Effects** A reflection creates a mirrored copy of the text. Adjust its position, scale, blur, and opacity to control its appearance. This example calls [enable_reflection_effect](https://reference.aspose.com/slides/python-net/aspose.slides/effectformat/enable_reflection_effect/) and flips the reflection vertically with a scale of -100%. It uses a 0.5-point blur radius and a 4.72-point distance. Opacity decreases from 60% to 0.9% between positions 0% and 60% along the reflection: ```python import aspose.slides as slides with slides.Presentation() as presentation: slide = presentation.slides[0] auto_shape = slide.shapes.add_auto_shape(slides.ShapeType.RECTANGLE, 20, 20, 400, 200) portion = auto_shape.text_frame.paragraphs[0].portions[0] portion.text = "Aspose.Slides" portion.portion_format.latin_font = slides.FontData("Arial Black") portion.portion_format.font_height = 36 portion.portion_format.effect_format.enable_reflection_effect() portion.portion_format.effect_format.reflection_effect.blur_radius = 0.5 portion.portion_format.effect_format.reflection_effect.distance = 4.72 portion.portion_format.effect_format.reflection_effect.start_pos_alpha = 0 portion.portion_format.effect_format.reflection_effect.end_pos_alpha = 60 portion.portion_format.effect_format.reflection_effect.direction = 90 portion.portion_format.effect_format.reflection_effect.scale_horizontal = 100 portion.portion_format.effect_format.reflection_effect.scale_vertical = -100 portion.portion_format.effect_format.reflection_effect.start_reflection_opacity = 60 portion.portion_format.effect_format.reflection_effect.end_reflection_opacity = 0.9 portion.portion_format.effect_format.reflection_effect.rectangle_align = slides.RectangleAlignment.BOTTOM_LEFT ``` The resulting text: ![The Reflection effect](https://docs.aspose.com/slides/python-net/wordart/reflection_effect.png) ### **Apply Glow Effects** A glow adds a soft colored outline around the text. Adjust its color, opacity, and radius to control the effect. This example calls [enable_glow_effect](https://reference.aspose.com/slides/python-net/aspose.slides/effectformat/enable_glow_effect/) and applies a red glow with 54% opacity and a radius of 7 points: ```python import aspose.slides as slides import aspose.pydrawing as draw with slides.Presentation() as presentation: slide = presentation.slides[0] auto_shape = slide.shapes.add_auto_shape(slides.ShapeType.RECTANGLE, 20, 20, 400, 200) portion = auto_shape.text_frame.paragraphs[0].portions[0] portion.text = "Aspose.Slides" portion.portion_format.latin_font = slides.FontData("Arial Black") portion.portion_format.font_height = 36 portion.portion_format.effect_format.enable_glow_effect() portion.portion_format.effect_format.glow_effect.color.color = draw.Color.red portion.portion_format.effect_format.glow_effect.color.color_transform.add(slides.ColorTransformOperation.SET_ALPHA, 0.54) portion.portion_format.effect_format.glow_effect.radius = 7 ``` The resulting text: ![The Glow effect](https://docs.aspose.com/slides/python-net/wordart/glow_effect.png) ### **Apply WordArt Transformations** WordArt transformations bend, stretch, or warp a block of text. Set [transform](https://reference.aspose.com/slides/python-net/aspose.slides/textframeformat/transform/) to [ARCH_UP_POUR](https://reference.aspose.com/slides/python-net/aspose.slides/textshapetype/) to curve the entire text frame upward: ```python import aspose.slides as slides with slides.Presentation() as presentation: slide = presentation.slides[0] auto_shape = slide.shapes.add_auto_shape(slides.ShapeType.RECTANGLE, 20, 20, 400, 200) text_frame = auto_shape.text_frame text_frame.text = "Aspose.Slides" text_frame.text_frame_format.transform = slides.TextShapeType.ARCH_UP_POUR ``` The resulting text: ![The WordArt transformation](https://docs.aspose.com/slides/python-net/wordart/transform_effect.png) Aspose.Slides for Python via .NET provides a set of predefined [transformation types](https://reference.aspose.com/slides/python-net/aspose.slides/textshapetype/). ### **Apply 3D Effects to Shapes and Text** You can apply 3D effects to a shape or to its text. Bevels, extrusion, lighting, and camera settings control the resulting appearance. The following example uses [ThreeDFormat](https://reference.aspose.com/slides/python-net/aspose.slides/threedformat/) to add circular bevels, orange extrusion, and a dark red contour to the rectangle. Bevel dimensions, extrusion height, contour width, and depth are measured in points. A plastic material, balanced lighting rotated by 40 degrees around the Z axis, and a perspective camera define its appearance: ```python import aspose.slides as slides import aspose.pydrawing as draw with slides.Presentation() as presentation: slide = presentation.slides[0] auto_shape = slide.shapes.add_auto_shape(slides.ShapeType.RECTANGLE, 20, 20, 400, 200) auto_shape.text_frame.text = "Aspose.Slides" auto_shape.three_d_format.bevel_bottom.bevel_type = slides.BevelPresetType.CIRCLE auto_shape.three_d_format.bevel_bottom.height = 10.5 auto_shape.three_d_format.bevel_bottom.width = 10.5 auto_shape.three_d_format.bevel_top.bevel_type = slides.BevelPresetType.CIRCLE auto_shape.three_d_format.bevel_top.height = 12.5 auto_shape.three_d_format.bevel_top.width = 11 auto_shape.three_d_format.extrusion_color.color = draw.Color.orange auto_shape.three_d_format.extrusion_height = 6 auto_shape.three_d_format.contour_color.color = draw.Color.dark_red auto_shape.three_d_format.contour_width = 1.5 auto_shape.three_d_format.depth = 3 auto_shape.three_d_format.material = slides.MaterialPresetType.PLASTIC auto_shape.three_d_format.light_rig.direction = slides.LightingDirection.TOP auto_shape.three_d_format.light_rig.light_type = slides.LightRigPresetType.BALANCED auto_shape.three_d_format.light_rig.set_rotation(0, 0, 40) auto_shape.three_d_format.camera.camera_type = slides.CameraPresetType.PERSPECTIVE_CONTRASTING_RIGHT_FACING ``` The resulting shape: ![The shape 3D effect](https://docs.aspose.com/slides/python-net/wordart/shape_3D_effect.png) This example applies similar 3D formatting to the text through [TextFrameFormat.three_d_format](https://reference.aspose.com/slides/python-net/aspose.slides/textframeformat/three_d_format/). Smaller bevels shape the letter edges, while extrusion and lighting give the text depth: ```python import aspose.slides as slides import aspose.pydrawing as draw with slides.Presentation() as presentation: slide = presentation.slides[0] auto_shape = slide.shapes.add_auto_shape(slides.ShapeType.RECTANGLE, 20, 20, 400, 200) text_frame = auto_shape.text_frame text_frame.text = "Aspose.Slides" text_frame.text_frame_format.three_d_format.bevel_bottom.bevel_type = slides.BevelPresetType.CIRCLE text_frame.text_frame_format.three_d_format.bevel_bottom.height = 3.5 text_frame.text_frame_format.three_d_format.bevel_bottom.width = 3.5 text_frame.text_frame_format.three_d_format.bevel_top.bevel_type = slides.BevelPresetType.CIRCLE text_frame.text_frame_format.three_d_format.bevel_top.height = 4 text_frame.text_frame_format.three_d_format.bevel_top.width = 4 text_frame.text_frame_format.three_d_format.extrusion_color.color = draw.Color.orange text_frame.text_frame_format.three_d_format.extrusion_height = 6 text_frame.text_frame_format.three_d_format.contour_color.color = draw.Color.dark_red text_frame.text_frame_format.three_d_format.contour_width = 1.5 text_frame.text_frame_format.three_d_format.depth = 3 text_frame.text_frame_format.three_d_format.material = slides.MaterialPresetType.PLASTIC text_frame.text_frame_format.three_d_format.light_rig.direction = slides.LightingDirection.TOP text_frame.text_frame_format.three_d_format.light_rig.light_type = slides.LightRigPresetType.BALANCED text_frame.text_frame_format.three_d_format.light_rig.set_rotation(0, 0, 40) text_frame.text_frame_format.three_d_format.camera.camera_type = slides.CameraPresetType.PERSPECTIVE_CONTRASTING_RIGHT_FACING ``` The resulting text: ![The text 3D effect](https://docs.aspose.com/slides/python-net/wordart/text_3D_effect.png) The application of 3D effects to text or their shapes—and the interaction between these effects—is governed by specific rules. Consider a scene involving both text and the shape containing it. A 3D effect includes the object's 3D representation and the scene in which it is placed. - If a scene is set for both the shape and the text, the shape’s scene takes priority and the text’s scene is ignored. - If the shape lacks its own scene but has a 3D representation, the text’s scene is used. - If the shape has no 3D effect at all, it is treated as flat, and the 3D effect is applied only to the text. These behaviors relate to the [ThreeDFormat.light_rig](https://reference.aspose.com/slides/python-net/aspose.slides/threedformat/light_rig/) and [ThreeDFormat.camera](https://reference.aspose.com/slides/python-net/aspose.slides/threedformat/camera/) properties. To keep text flat and readable while retaining its shape's 3D formatting, see [Keep Text Flat on a 3D Shape](https://docs.aspose.com/slides/python-net/3d-presentation/) for a comparison of both settings and a complete Python example. ## **FAQ** **Can I use WordArt effects with different fonts or scripts (e.g., Arabic, Chinese)?** Yes, Aspose.Slides for Python via .NET supports Unicode and works with all major fonts and scripts. WordArt effects such as shadow, fill, and outline can be applied regardless of the language, although font availability and rendering may depend on the system fonts. **Can I apply WordArt effects to slide master elements?** Yes, you can apply WordArt effects to shapes on master slides, including title placeholders, footers, or background text. Changes made to the master layout will be reflected across all associated slides. **Do WordArt effects affect presentation file size?** Slightly. WordArt effects like shadows, glows, and gradient fills may slightly increase the file size due to added formatting metadata, but the difference is usually negligible. **Can I preview the result of WordArt effects without saving the presentation?** Yes, you can render slides containing WordArt to images (e.g., PNG, JPEG) using [Slide.get_image](https://reference.aspose.com/slides/python-net/aspose.slides/slide/get_image/), or render individual shapes using [Shape.get_image](https://reference.aspose.com/slides/python-net/aspose.slides/shape/get_image/). This lets you preview the result in memory or on screen before saving or exporting the full presentation. ## Related articles - [Apply Shape Effects in Presentations with Python](https://docs.aspose.com/slides/python-net/shape-effect/) # Working Solution for Chart Resizing in PPTX > Fix unexpected chart resizing in PPTX when using embedded Excel OLE objects with Aspose.Slides for Python via .NET. Set fixed chart dimensions to keep the chart and OLE frame sizes consistent. Source: https://docs.aspose.com/slides/python-net/working-solution-for-chart-resizing-in-pptx/ Updated: 2026-11-08 ## **Overview** Excel charts embedded as OLE objects in PowerPoint presentations using Aspose components can change size after their first activation. This can cause a noticeable difference in the chart's appearance before and after activation. This article explains why resizing occurs and shows how to prevent it by matching fixed chart dimensions to the OLE frame. In [Create Excel Charts and Embed Them as OLE Objects in Presentations](https://docs.aspose.com/slides/python-net/creating-excel-chart-and-embedding-it-in-presentation-as-ole-object/), we explained how to create an Excel chart with Aspose.Cells for Python via .NET and embed it in a PowerPoint presentation using Aspose.Slides for Python via .NET. To address the [object preview issue](https://docs.aspose.com/slides/python-net/object-preview-issue-when-adding-oleobjectframe/), we assigned the chart image to the chart’s OLE object frame. In the output presentation, when you double-click the OLE object frame displaying the chart image, the Excel chart is activated. Users can edit the embedded Excel workbook and then return to the slide by clicking outside the activated workbook. The size of the OLE object frame changes when the user returns to the slide, and the resizing factor varies depending on the original sizes of both the OLE object frame and the embedded Excel workbook. ## **Cause of Resizing** The embedded Excel workbook has its own window dimensions, which Excel tries to retain when the object is first activated. The OLE frame on the slide has independently defined dimensions. When the Excel workbook is activated, Excel and PowerPoint negotiate the object's size to maintain its proportions as part of the embedding process. Differences between the workbook window and the OLE frame can therefore cause the object to resize. ## **Working Solution** Match the chart size to the OLE frame on the slide and keep the chart dimensions independent of the workbook window. This solution works with a new presentation or an existing template. The example requires Aspose.Cells for Python via .NET and Aspose.Slides for Python via .NET. It creates a simple column chart on an active chart sheet and embeds the workbook in XLS format. No chart preview image is assigned; the chart becomes visible when the OLE object is activated in PowerPoint. The example creates a new presentation with a 9.5 × 4-inch OLE frame positioned 0.5 inches from the left edge and 1 inch from the top. Slide coordinates and dimensions are in points (72 points per inch). For an existing presentation, see [Use a Template](https://docs.aspose.com/slides/python-net/working-solution-for-chart-resizing-in-pptx/#use-a-template). ## **Set a Fixed Chart Size** Set [size_with_window](https://reference.aspose.com/cells/python-net/aspose.cells.charts/chart/size_with_window/) to false so that the chart dimensions are independent of the workbook window. Set the [chart_object](https://reference.aspose.com/cells/python-net/aspose.cells.charts/chart/chart_object/) dimensions through [width](https://reference.aspose.com/cells/python-net/aspose.cells.drawing/shape/width/) and [height](https://reference.aspose.com/cells/python-net/aspose.cells.drawing/shape/height/), converting points to pixels using 96 pixels per inch: a frame measuring 684 × 288 points corresponds to a chart measuring 912 × 384 pixels. Set [print_size](https://reference.aspose.com/cells/python-net/aspose.cells.charts/chart/print_size/) to the CUSTOM value of [PrintSizeType](https://reference.aspose.com/cells/python-net/aspose.cells/printsizetype/). The example embeds the workbook with [add_ole_object_frame](https://reference.aspose.com/slides/python-net/aspose.slides/ishapecollection/add_ole_object_frame/) and saves a presentation with a 9.5 × 4-inch OLE frame. ```python import io import aspose.cells as cells import aspose.cells.charts as charts import aspose.slides as slides workbook = cells.Workbook() data_sheet = workbook.worksheets[0] data_sheet.name = "Data" data_sheet.cells.get("A1").put_value(10) data_sheet.cells.get("A2").put_value(20) chart_sheet_index = workbook.worksheets.add(cells.SheetType.CHART) chart_sheet = workbook.worksheets[chart_sheet_index] chart_index = chart_sheet.charts.add(charts.ChartType.COLUMN, 0, 0, 20, 10) chart = chart_sheet.charts[chart_index] chart.n_series.add("Data!A1:A2", True) workbook.worksheets.active_sheet_index = chart_sheet_index with slides.Presentation() as presentation: slide = presentation.slides[0] # Slide coordinates and dimensions are in points (72 points per inch). width = 684.0 # 9.5 inches. height = 288.0 # 4 inches. chart.size_with_window = False # Convert points to chart pixels using 96 pixels per inch. chart.chart_object.width = int(width / 72 * 96) chart.chart_object.height = int(height / 72 * 96) chart.print_size = cells.PrintSizeType.CUSTOM with io.BytesIO() as workbook_stream: workbook.save(workbook_stream, cells.SaveFormat.EXCEL_97_TO_2003) data_info = slides.dom.ole.OleEmbeddedDataInfo(workbook_stream.getvalue(), "xls") slide.shapes.add_ole_object_frame(36, 72, width, height, data_info) presentation.save("chart-fixed-size.pptx", slides.export.SaveFormat.PPTX) ``` [![A 684 by 288 point OLE frame matches a 912 by 384 pixel chart at 96 DPI, with chart size independent of its window.](https://docs.aspose.com/slides/python-net/working-solution-for-chart-resizing-in-pptx/visual-working-solution-for-chart-resizing-in-pptx-62dff4f20ea9.svg)](https://docs.aspose.com/slides/python-net/working-solution-for-chart-resizing-in-pptx/visual-working-solution-for-chart-resizing-in-pptx-62dff4f20ea9.svg) *Use the same physical dimensions for the fixed chart and OLE frame: 684 × 288 points equals 912 × 384 pixels at 96 DPI. This diagram explains the configuration; it does not show a measured first-activation result.* ## **Use a Template** The sizing logic is the same for an existing presentation. To adapt the example: 1. Load the template presentation instead of creating an empty presentation. 1. Check that the first slide contains at least three shapes, then use the shape at index 2 as the placeholder. 1. Take the frame width and height from that shape instead of using the fixed values 684 and 288. Keep the sizing calculations unchanged. 1. Add the OLE frame at the placeholder's position instead of the fixed coordinates 36 and 72. 1. Remove the placeholder before saving the presentation. ## **FAQ** **Why does my embedded Excel chart change size after activating it in PowerPoint?** This happens because Excel tries to restore the original window size when first activated, whereas the OLE object frame in PowerPoint has its own dimensions. PowerPoint and Excel negotiate the size to maintain the aspect ratio, which can cause the resizing. **How can I keep the chart and OLE frame sizes consistent?** Set fixed chart dimensions that match the OLE frame and use a custom chart print size before embedding the workbook. The example above shows the required settings and unit conversions. **Is matching the workbook window size sufficient?** Matching the workbook window size alone does not reliably prevent the OLE frame from changing size after activation. Use fixed chart dimensions as shown in the example. **Does this solution work with both template-based presentations and new presentations?** Yes. For a template, use the placeholder's dimensions and position. For a new presentation, specify the frame dimensions and position directly. **Can I use this example with charts created in other spreadsheet programs?** The example uses an Excel workbook created with Aspose.Cells. It does not demonstrate activation behavior for other spreadsheet programs. ## **Related Sections** - [Create Excel Charts and Embed Them as OLE Objects in Presentations](https://docs.aspose.com/slides/python-net/creating-excel-chart-and-embedding-it-in-presentation-as-ole-object/) - [Update OLE Objects Automatically Using a PowerPoint Add-In](https://docs.aspose.com/slides/net/updating-ole-objects-automatically-using-ms-powerpoint-add-in/) # Working Solution for Worksheet Resizing > Fix Excel worksheet OLE resizing in presentations: two ways to keep object frames consistent—scale the frame or the sheet—across the PPT and PPTX formats. Source: https://docs.aspose.com/slides/python-net/working-solution-for-worksheet-resizing/ Updated: 2026-11-08 Excel worksheets embedded as OLE objects in a PowerPoint presentation using Aspose components may resize unexpectedly after their first activation. This behavior creates a noticeable visual difference between the OLE object before and after activation. This article explains the issue and describes two ways to address it. ## **Background** In the article [Manage OLE](https://docs.aspose.com/slides/python-net/manage-ole/), we explained how to add an OLE frame to a PowerPoint presentation using Aspose.Slides for Python via .NET. To address the [object preview issue](https://docs.aspose.com/slides/python-net/object-preview-issue-when-adding-oleobjectframe/), we assigned an image of the selected worksheet area to the OLE object frame. In the output presentation, when you double-click the OLE object frame displaying the worksheet image, the Excel workbook is activated. End users can make any desired changes to the actual Excel workbook and then return to the slide by clicking outside the activated Excel workbook. The size of the OLE object frame will change when the user returns to the slide. The resizing factor will vary depending on the size of the OLE object frame and the embedded Excel workbook. ## **Cause of Resizing** Since the Excel workbook has its own window size, it tries to retain its original size upon first activation. On the other hand, the OLE object frame has its own size. According to Microsoft, when the Excel workbook is activated, Excel and PowerPoint negotiate the size to ensure it maintains the correct proportions as part of the embedding process. The resizing occurs based on the differences between the Excel window size and the OLE object frame's size and position. ## **Working Solution** There are two possible solutions to avoid the resizing effect. - Scale the OLE frame in the PowerPoint presentation to match the total height and width of the selected rows and columns. - Keep the OLE frame size constant and scale the selected rows and columns to fit within it. ### **Scale the OLE Frame Size** This approach sets the OLE frame size to match the total height and width of the selected rows and columns in the embedded Excel worksheet. The example loads an existing Excel workbook and selects the first 10 rows and 13 columns of its first worksheet using zero-based indices. [WorksheetCollection.set_ole_size](https://reference.aspose.com/cells/python-net/aspose.cells/worksheetcollection/set_ole_size/) defines the displayed range. The preview is rendered at 96 DPI, and its pixel dimensions are converted to points using 72 points per inch. [ShapeCollection.add_ole_object_frame](https://reference.aspose.com/slides/python-net/aspose.slides/shapecollection/add_ole_object_frame/) embeds the modified workbook in a frame with those dimensions. The preview is assigned through [OleObjectFrame.substitute_picture_format](https://reference.aspose.com/slides/python-net/aspose.slides/oleobjectframe/substitute_picture_format/) to replace the "EMBEDDED OLE OBJECT" placeholder in the saved presentation. The preview helper sets [PageSetup.print_area](https://reference.aspose.com/cells/python-net/aspose.cells/pagesetup/print_area/) to the selected range and removes margins, headers, and footers. With [ImageOrPrintOptions.only_area](https://reference.aspose.com/cells/python-net/aspose.cells.rendering/imageorprintoptions/only_area/) enabled, [SheetRender.to_image](https://reference.aspose.com/cells/python-net/aspose.cells.rendering/sheetrender/to_image/) renders the range as a PNG image. The helper rewinds the image stream before returning it for use in the presentation. ```py import io import aspose.cells as cells def create_ole_image(cell_range, image_resolution): page_setup = cell_range.worksheet.page_setup page_setup.print_area = cell_range.address page_setup.left_margin = 0.0 page_setup.right_margin = 0.0 page_setup.top_margin = 0.0 page_setup.bottom_margin = 0.0 page_setup.clear_header_footer() image_options = cells.rendering.ImageOrPrintOptions() image_options.image_type = cells.drawing.ImageType.PNG image_options.vertical_resolution = image_resolution image_options.horizontal_resolution = image_resolution image_options.one_page_per_sheet = True image_options.only_area = True sheet_render = cells.rendering.SheetRender(cell_range.worksheet, image_options) image_data = io.BytesIO() sheet_render.to_image(0, image_data) image_data.seek(0) return image_data ``` The complete example below combines the helpers with workbook embedding and saves the presentation as `output.pptx`. ```py import io import aspose.slides as slides import aspose.cells as cells def create_ole_image(cell_range, image_resolution): page_setup = cell_range.worksheet.page_setup page_setup.print_area = cell_range.address page_setup.left_margin = 0.0 page_setup.right_margin = 0.0 page_setup.top_margin = 0.0 page_setup.bottom_margin = 0.0 page_setup.clear_header_footer() image_options = cells.rendering.ImageOrPrintOptions() image_options.image_type = cells.drawing.ImageType.PNG image_options.vertical_resolution = image_resolution image_options.horizontal_resolution = image_resolution image_options.one_page_per_sheet = True image_options.only_area = True sheet_render = cells.rendering.SheetRender(cell_range.worksheet, image_options) image_data = io.BytesIO() sheet_render.to_image(0, image_data) image_data.seek(0) return image_data start_row, row_count = 0, 10 start_column, column_count = 0, 13 worksheet_index = 0 image_resolution = 96 with cells.Workbook("sample.xlsx") as workbook: worksheet = workbook.worksheets[worksheet_index] # Set the displayed size when the workbook file is used as an OLE object in PowerPoint. last_row = start_row + row_count - 1 last_column = start_column + column_count - 1 workbook.worksheets.set_ole_size(start_row, last_row, start_column, last_column) cell_range = worksheet.cells.create_range(start_row, start_column, row_count, column_count) image_stream = create_ole_image(cell_range, image_resolution) # Get the width and height of the OLE image in points. with slides.Images.from_stream(image_stream) as image: image_width = image.width * 72 / image_resolution image_height = image.height * 72 / image_resolution # We need to use the modified workbook. with io.BytesIO() as ole_stream: workbook.save(ole_stream, cells.SaveFormat.XLSX) with slides.Presentation() as presentation: slide = presentation.slides[0] # Add the OLE image to the presentation resources. image_stream.seek(0) ole_image = presentation.images.add_image(image_stream) # Create the OLE object frame. data_info = slides.dom.ole.OleEmbeddedDataInfo(ole_stream.getvalue(), "xlsx") ole_frame = slide.shapes.add_ole_object_frame(10, 10, image_width, image_height, data_info) ole_frame.substitute_picture_format.picture.image = ole_image ole_frame.is_object_icon = False presentation.save("output.pptx", slides.export.SaveFormat.PPTX) ``` [![Approach A resizes the OLE frame to an unchanged range; approach B scales the range to a fixed 400 by 100 point frame.](https://docs.aspose.com/slides/python-net/working-solution-for-worksheet-resizing/visual-working-solution-for-worksheet-resizing-37277e3a014f.svg)](https://docs.aspose.com/slides/python-net/working-solution-for-worksheet-resizing/visual-working-solution-for-worksheet-resizing-37277e3a014f.svg) *The selected section uses approach A: preserve the selected cells and size the OLE frame to match their range. Approach B is a separate alternative. Convert 96-DPI preview pixels to slide points using 72 ÷ 96.* ### **Scale the Cell Range Size** This approach scales the heights of the selected rows and the widths of the selected columns to match a custom OLE frame size. The example loads an existing Excel workbook and selects the first 10 rows and 13 columns of its first worksheet using zero-based indices. [WorksheetCollection.set_ole_size](https://reference.aspose.com/cells/python-net/aspose.cells/worksheetcollection/set_ole_size/) defines the displayed range, and the helper below scales that range to fit a frame 400 points wide and 100 points high. After saving the modified workbook to a stream, [ShapeCollection.add_ole_object_frame](https://reference.aspose.com/slides/python-net/aspose.slides/shapecollection/add_ole_object_frame/) embeds it at the specified size. A preview rendered at 96 DPI is assigned through [OleObjectFrame.substitute_picture_format](https://reference.aspose.com/slides/python-net/aspose.slides/oleobjectframe/substitute_picture_format/), so the saved presentation displays the selected cells instead of the default placeholder. The scaling helper calculates separate width and height ratios for the selected range, preserving the relative widths of its columns and the relative heights of its rows. It converts the calculated dimensions from points to inches before applying them with [Cells.set_column_width_inch](https://reference.aspose.com/cells/python-net/aspose.cells/cells/set_column_width_inch/) and [Cells.set_row_height_inch](https://reference.aspose.com/cells/python-net/aspose.cells/cells/set_row_height_inch/). The selected range must have nonzero width and height. ```py import aspose.cells as cells # The expected width of the cell range in points. # The expected height of the cell range in points. def scale_cell_range(cell_range, width, height): range_width = cell_range.width range_height = cell_range.height for i in range(cell_range.column_count): column_index = cell_range.first_column + i column_width = cell_range.worksheet.cells.get_column_width(column_index, False, cells.CellsUnitType.POINT) new_column_width = column_width * width / range_width width_in_inches = new_column_width / 72 cell_range.worksheet.cells.set_column_width_inch(column_index, width_in_inches) for i in range(cell_range.row_count): row_index = cell_range.first_row + i row_height = cell_range.worksheet.cells.get_row_height(row_index, False, cells.CellsUnitType.POINT) new_row_height = row_height * height / range_height height_in_inches = new_row_height / 72 cell_range.worksheet.cells.set_row_height_inch(row_index, height_in_inches) ``` This preview helper renders the resized range using [SheetRender.to_image](https://reference.aspose.com/cells/python-net/aspose.cells.rendering/sheetrender/to_image/). It limits [PageSetup.print_area](https://reference.aspose.com/cells/python-net/aspose.cells/pagesetup/print_area/) to that range, removes margins, headers, and footers, and returns a PNG stream positioned at its beginning. ```py import io import aspose.cells as cells def create_ole_image(cell_range, image_resolution): page_setup = cell_range.worksheet.page_setup page_setup.print_area = cell_range.address page_setup.left_margin = 0.0 page_setup.right_margin = 0.0 page_setup.top_margin = 0.0 page_setup.bottom_margin = 0.0 page_setup.clear_header_footer() image_options = cells.rendering.ImageOrPrintOptions() image_options.image_type = cells.drawing.ImageType.PNG image_options.vertical_resolution = image_resolution image_options.horizontal_resolution = image_resolution image_options.one_page_per_sheet = True image_options.only_area = True sheet_render = cells.rendering.SheetRender(cell_range.worksheet, image_options) image_data = io.BytesIO() sheet_render.to_image(0, image_data) image_data.seek(0) return image_data ``` The complete example below combines the helpers with workbook embedding and saves the presentation as `output.pptx`. ```py import io import aspose.slides as slides import aspose.cells as cells # The expected width of the cell range in points. # The expected height of the cell range in points. def scale_cell_range(cell_range, width, height): range_width = cell_range.width range_height = cell_range.height for i in range(cell_range.column_count): column_index = cell_range.first_column + i column_width = cell_range.worksheet.cells.get_column_width(column_index, False, cells.CellsUnitType.POINT) new_column_width = column_width * width / range_width width_in_inches = new_column_width / 72 cell_range.worksheet.cells.set_column_width_inch(column_index, width_in_inches) for i in range(cell_range.row_count): row_index = cell_range.first_row + i row_height = cell_range.worksheet.cells.get_row_height(row_index, False, cells.CellsUnitType.POINT) new_row_height = row_height * height / range_height height_in_inches = new_row_height / 72 cell_range.worksheet.cells.set_row_height_inch(row_index, height_in_inches) def create_ole_image(cell_range, image_resolution): page_setup = cell_range.worksheet.page_setup page_setup.print_area = cell_range.address page_setup.left_margin = 0.0 page_setup.right_margin = 0.0 page_setup.top_margin = 0.0 page_setup.bottom_margin = 0.0 page_setup.clear_header_footer() image_options = cells.rendering.ImageOrPrintOptions() image_options.image_type = cells.drawing.ImageType.PNG image_options.vertical_resolution = image_resolution image_options.horizontal_resolution = image_resolution image_options.one_page_per_sheet = True image_options.only_area = True sheet_render = cells.rendering.SheetRender(cell_range.worksheet, image_options) image_data = io.BytesIO() sheet_render.to_image(0, image_data) image_data.seek(0) return image_data start_row, row_count = 0, 10 start_column, column_count = 0, 13 worksheet_index = 0 image_resolution = 96 frame_width, frame_height = 400.0, 100.0 with cells.Workbook("sample.xlsx") as workbook: worksheet = workbook.worksheets[worksheet_index] # Set the displayed size when the workbook file is used as an OLE object in PowerPoint. last_row = start_row + row_count - 1 last_column = start_column + column_count - 1 workbook.worksheets.set_ole_size(start_row, last_row, start_column, last_column) # Scale the cell range to fit the frame size. cell_range = worksheet.cells.create_range(start_row, start_column, row_count, column_count) scale_cell_range(cell_range, frame_width, frame_height) image_stream = create_ole_image(cell_range, image_resolution) # We need to use the modified workbook. with io.BytesIO() as ole_stream: workbook.save(ole_stream, cells.SaveFormat.XLSX) with slides.Presentation() as presentation: slide = presentation.slides[0] # Add the OLE image to the presentation resources. ole_image = presentation.images.add_image(image_stream) # Create the OLE object frame. data_info = slides.dom.ole.OleEmbeddedDataInfo(ole_stream.getvalue(), "xlsx") ole_frame = slide.shapes.add_ole_object_frame(10, 10, frame_width, frame_height, data_info) ole_frame.substitute_picture_format.picture.image = ole_image ole_frame.is_object_icon = False presentation.save("output.pptx", slides.export.SaveFormat.PPTX) ``` ## **Conclusion** There are two approaches to fix the worksheet resizing issue. Choose the approach that best fits your requirements and use case. Both approaches work the same way, whether the presentations are created from a template or from scratch. Additionally, there is no limit on the size of the OLE object frame in this solution. ## **FAQ** **Why does an embedded Excel worksheet change size when first activated in PowerPoint?** This happens because Excel tries to maintain the original window size when activated, while the OLE object frame in PowerPoint has its own dimensions. PowerPoint and Excel negotiate the size to maintain the aspect ratio, which can cause the resizing. **Is it possible to prevent this resizing issue entirely?** Yes. By scaling the OLE frame to fit the Excel cell range size or scaling the cell range to fit the desired OLE frame size, you can prevent unwanted resizing. **Which scaling method should I use, OLE frame scaling or cell range scaling?** Select **OLE frame scaling** if you want to maintain the original Excel row and column sizes. Select **cell range scaling** if you want a fixed size for the OLE frame in your presentation. **Will these solutions work if my presentation is based on a template?** Yes. Both solutions work for presentations created from templates and from scratch. **Is there a limit to the size of the OLE frame when using these methods?** No. You can make the OLE object frame any size as long as you set the scale appropriately. **Is there a way to avoid the "EMBEDDED OLE OBJECT" placeholder text in PowerPoint?** Yes. By taking a snapshot of the target Excel cell range and setting it as the OLE frame's placeholder image, you can display a custom preview image in place of the default placeholder. # Write-Protect Presentations in Python > Set, detect, validate, and remove write-protection passwords in PowerPoint PPT and PPTX presentations using Aspose.Slides for Python. Source: https://docs.aspose.com/slides/python-net/write-protected-presentation/ Updated: 2026-08-26 ## **Introduction** A write-protection password restricts modification of a presentation but does not encrypt its content. Users can load and view a write-protected presentation without the password. Depending on the application, they may also be able to edit the content and save it under a different name, so write protection should not be treated as a confidentiality mechanism. An opening password serves a different purpose: it encrypts the presentation and is required to load its content. To encrypt a presentation or validate an opening password, see [Password-Protect Presentations](https://docs.aspose.com/slides/python-net/password-protected-presentation/). The workflows in this article apply to both PPT and PPTX presentations. The examples use PPTX files; when saving to PPT, use the `.ppt` extension and the corresponding PPT save format. ## **Set Write Protection on a Presentation** Use [ProtectionManager.set_write_protection](https://reference.aspose.com/slides/python-net/aspose.slides/protectionmanager/set_write_protection/) to assign a password for modifying a presentation. Saving the presentation persists the protection setting. The following example sets write protection on a PPTX presentation: ```python import aspose.slides as slides with slides.Presentation("pres.pptx") as presentation: presentation.protection_manager.set_write_protection("modify_password") presentation.save("write-protected-pres.pptx", slides.export.SaveFormat.PPTX) ``` ## **Load a Write-Protected Presentation** Because write protection does not encrypt presentation content, no password is required to load the presentation. The password is relevant only when validating authorization to modify the protected presentation. ```python import aspose.slides as slides with slides.Presentation("write-protected-pres.pptx") as presentation: print("Slide count: " + str(len(presentation.slides))) ``` Do not pass a write-protection password to [LoadOptions.password](https://reference.aspose.com/slides/python-net/aspose.slides/loadoptions/password/). That property accepts an opening password for encrypted content. If a presentation has both protection types, supply the opening password to load it and handle the write-protection password separately. ## **Remove Write Protection from a Presentation** Use [ProtectionManager.remove_write_protection](https://reference.aspose.com/slides/python-net/aspose.slides/protectionmanager/remove_write_protection/) to remove the modification restriction, then save the presentation. ```python import aspose.slides as slides with slides.Presentation("write-protected-pres.pptx") as presentation: presentation.protection_manager.remove_write_protection() presentation.save("write-protection-removed.pptx", slides.export.SaveFormat.PPTX) ``` ## **Check Whether a Presentation Is Write Protected** To inspect a file without creating a complete [Presentation](https://reference.aspose.com/slides/python-net/aspose.slides/presentation/) instance, call [PresentationFactory.get_presentation_info](https://reference.aspose.com/slides/python-net/aspose.slides/presentationfactory/get_presentation_info/) and inspect [PresentationInfo.is_write_protected](https://reference.aspose.com/slides/python-net/aspose.slides/presentationinfo/is_write_protected/). The property uses [NullableBool](https://reference.aspose.com/slides/python-net/aspose.slides/nullablebool/) and returns `NullableBool.TRUE` when write protection is detected. ```python import aspose.slides as slides presentation_info = slides.PresentationFactory.instance.get_presentation_info("write-protected-pres.pptx") if presentation_info.is_write_protected == slides.NullableBool.TRUE: print("The presentation is write protected.") else: print("Write protection was not detected.") ``` The stream overload of [PresentationFactory.get_presentation_info](https://reference.aspose.com/slides/python-net/aspose.slides/presentationfactory/get_presentation_info/) provides the same information for a presentation supplied as a stream. ## **Validate a Write-Protection Password** Use [PresentationInfo.check_write_protection](https://reference.aspose.com/slides/python-net/aspose.slides/presentationinfo/check_write_protection/) to validate a modification password without loading the complete presentation. Check [PresentationInfo.is_write_protected](https://reference.aspose.com/slides/python-net/aspose.slides/presentationinfo/is_write_protected/) first so that the application requests or validates a password only when write protection is present. ```python import aspose.slides as slides presentation_info = slides.PresentationFactory.instance.get_presentation_info("write-protected-pres.pptx") if presentation_info.is_write_protected != slides.NullableBool.TRUE: print("The presentation is not write protected.") elif presentation_info.check_write_protection("modify_password"): print("The write-protection password is correct.") else: print("The write-protection password is incorrect.") ``` [PresentationInfo.check_write_protection](https://reference.aspose.com/slides/python-net/aspose.slides/presentationinfo/check_write_protection/) validates only the write-protection password. It does not validate an opening password or determine whether encrypted content can be loaded. Conversely, [PresentationInfo.check_password](https://reference.aspose.com/slides/python-net/aspose.slides/presentationinfo/check_password/) validates only an opening password. If a complete presentation has already been loaded, [ProtectionManager.check_write_protection](https://reference.aspose.com/slides/python-net/aspose.slides/protectionmanager/check_write_protection/) provides the equivalent write-protection check through its protection manager. In production applications, do not log passwords or include them in diagnostic messages. Avoid unnecessary repeated validation attempts, and retain passwords in memory only as long as needed. - [Password-Protect Presentations](https://docs.aspose.com/slides/python-net/password-protected-presentation/) - [Read-Only Presentations](https://docs.aspose.com/slides/python-net/read-only-presentation/) - [Digital Signature in PowerPoint](https://docs.aspose.com/slides/python-net/digital-signature-in-powerpoint/) ## **FAQ** **Does write protection encrypt a presentation?** No. It restricts modification but leaves the presentation content available for loading and viewing. **Is the write-protection password required to open a presentation?** No. Only an opening password is required to load encrypted presentation content. **Can a presentation have both an opening password and a write-protection password?** Yes. Supply the opening password through the load options to open the encrypted presentation, and validate the write-protection password separately when modification authorization is required.