外部 LaTeX パッケージ | Aspose.TeX for .NET
外部 LaTeX パッケージ
Aspose.TeX ライブラリには、 common LaTeX packages が多数含まれています。そのため、これらのパッケージをライブラリの TeX エンジンに提供する方法を心配する必要はありません。ただし、時には(あるいは頻繁に) LaTeX ファイルが「ネイティブに」サポートされているパッケージバンドルに含まれていないパッケージを必要とすることがあります。その場合は、 TeXOptions クラスインスタンスの RequiredInputDirectory オプションを使用して、必要なパッケージのソースファイル(必須入力)を提供できます。2 つの例でその方法を見てみましょう。
アンパックされた必須入力(fancybox パッケージ)
次のシンプルな LaTeX ファイル(例のソリューションからの required-input-fs.tex)があるとします。
1\documentclass{article}
2\usepackage[a6paper,landscape]{geometry}
3\usepackage{fancybox}
4\begin{document}
5Test: \fbox{
6 \begin{Bitemize}[b]
7 \item First item
8 \item A second one\\ on two lines
9 \item(2pt) A third with extra space
10 \end{Bitemize}
11}
12\par\bigskip
13Test: \fbox{
14 \begin{Beqnarray}[t]
15 y & = & x^2 \\
16 a^2 + 2ab + b^2 & = & (a + b)^2 \\
17 \int_0^\infty e^{-ax} dx & = & \frac{1}{a}
18 \end{Beqnarray}
19}
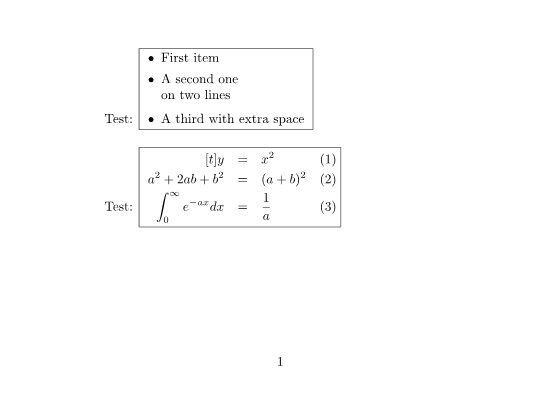
20\end{document}3 行目で fancybox パッケージが必要であることが分かりますが、これは「ネイティブに」サポートされていません。また、fancybox パッケージのソースファイルがあると仮定します。このパッケージはシンプルで、実際には単一ファイルで構成されています。このファイルをファイルシステム上の任意の場所に配置し、以下のようにディレクトリパスを指定できます。
1options.RequiredInputDirectory = new InputFileSystemDirectory("path-to-directory-where-fancybox.sty-located");このオプションで TeX ジョブを実行すると(他のオプションを必要に応じて調整するのを忘れずに)、出力ドキュメント(PNG 画像)が得られます。
以下はサンプルの完全なソースコードです。
 1// External LaTeX packages from file system
 2
 3// Create conversion options for Object LaTeX format upon Object TeX engine extension.
 4TeXOptions options = TeXOptions.ConsoleAppOptions(TeXConfig.ObjectLaTeX);
 5// Specify a file system working directory for the output.
 6options.OutputWorkingDirectory = new OutputFileSystemDirectory(OutputDir);
 7// Specify a file system working directory for the required input.
 8// The directory containing packages may be located anywhere.
 9options.RequiredInputDirectory = new InputFileSystemDirectory(Path.Combine(DataDir, "packages"));
10// Initialize the options for saving in PNG format.
11options.SaveOptions = new PngSaveOptions();
12// Run LaTeX to PNG conversion.
13new TeXJob(Path.Combine(DataDir, "required-input-fs.tex"), new ImageDevice(), options).Run();アーカイブされた必須入力(pgfplots パッケージ)
次に、同様にシンプルな LaTeX ファイル(例のソリューションからの required-input-zip.tex)があるとします。
1\documentclass{article}
2\usepackage[margin=0.25in]{geometry}
3\usepackage{pgfplots}
4\pgfplotsset{width=10cm,compat=1.18}
5\begin{document}
6
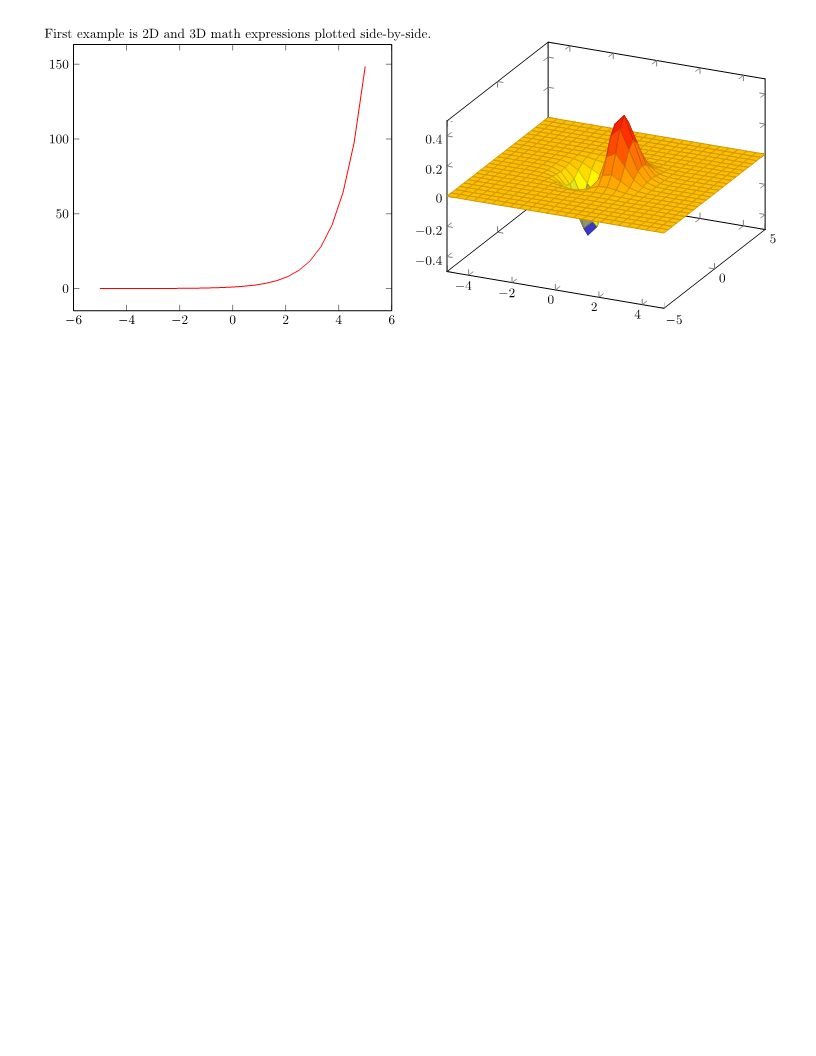
7最初の例は、2D と 3D の数式を並べてプロットしたものです。
8
9%Here begins the 2D plot
10\begin{tikzpicture}
11\begin{axis}
12\addplot[color=red]{exp(x)};
13\end{axis}
14\end{tikzpicture}
15%Here ends the 2D plot
16\hskip 5pt
17%Here begins the 3D plot
18\begin{tikzpicture}
19\begin{axis}
20\addplot3[
21 surf,
22]
23{exp(-x^2-y^2)*x};
24\end{axis}
25\end{tikzpicture}
26%Here ends the 3D plot
27
28\end{document}3 行目で pgfplots パッケージが必要であることが分かりますが、これも「ネイティブに」サポートされていません。再び、pgfplots パッケージのソースファイルがあると仮定します。これは多数のファイルから構成されており、任意の LaTeX タイプセットアプリケーションのインストールディレクトリ内の \tex\generic と \tex\latex フォルダーに分かれています。これら両方のフォルダーの内容を Aspose.TeX ライブラリに必須入力として提供する必要があります。ソースファイルは ZIP アーカイブにパッケージ化したいので、以下がアーカイブのレイアウトです。
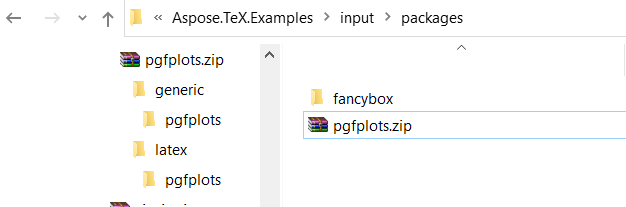
そして、これらのソースファイルへのアクセスは次のように指定します。
1using (Stream zipStream = File.Open("path-to-zip-with-pgfplots-sources", FileMode.Open))
2{
3    ...
4    options.RequiredInputDirectory = new InputZipDirectory(zipStream);
5    ...
6}
このオプションで TeX ジョブを実行すると、出力ドキュメントが得られます。
以下はサンプルの完全なソースコードです。
 1// External LaTeX packages from ZIP archive
 2
 3// Create conversion options for Object LaTeX format upon Object TeX engine extension.
 4TeXOptions options = TeXOptions.ConsoleAppOptions(TeXConfig.ObjectLaTeX);
 5// Specify a file system working directory for the output.
 6options.OutputWorkingDirectory = new OutputFileSystemDirectory(OutputDir);
 7// Initialize the options for saving in PNG format.
 8options.SaveOptions = new PngSaveOptions();
 9// Create a file stream for the ZIP archive containing the required package.
10// The ZIP archive may be located anywhere.
11using (Stream zipStream = File.Open(Path.Combine(DataDir, "packages\\pgfplots.zip"), FileMode.Open))
12{
13    // Specify a ZIP working directory for the required input.
14    options.RequiredInputDirectory = new InputZipDirectory(zipStream, "");
15
16    // Run LaTeX to PNG conversion.
17    new TeXJob(Path.Combine(DataDir, "required-input-zip.tex"), new ImageDevice(), options).Run();
18}NOTE: 結果は
pgfplotsパッケージ バージョン 1.18.1 を使用して検証しました。Aspose.TeX ライブラリに含まれるpfgパッケージのバージョンは 3.1.9a です。
外部フォントパッケージの利用
一般的に、LaTeX 配布には組版用に利用できるデフォルトフォントのセットが提供されています。これらのフォントに加えて、Aspose.TeX には多数の非標準フォントパッケージ(例: amsfonts、eurosym、wasysym)が含まれています。上記で見たように、Aspose.TeX は外部パッケージの使用もサポートしていますが、主にフォントを含まないパッケージについて説明しています。
Aspose.TeX の Object TeX エンジン拡張は、フォントマップ(拡張子が .map のテキストファイル)を必要とします。フォントマップは、物理フォントが TeX の内部フォント名にどのように対応するかを決定するために使用され、初期化フェーズで TeX のメモリにロードされます。したがって、マップファイルはパッケージに含まれている必要があります。エンジンはすべての .map 拡張子のファイルを検索するため、
RequiredInputDirectory オプションの値として使用される
IInputWorkingDirectory インターフェイスの実装は、拡張子別にファイル名のコレクションにアクセスする方法を提供しなければなりません。具体的には、この実装は
IFileCollector インターフェイスも実装する必要があります。標準実装である
InputFileSystemDirectory と
InputZipDirectory は既にこの機能を備えています。
以下に、 IFileCollector インターフェイスも実装したカスタム必須入力ディレクトリの例を示します。拡張子別にファイル名を収集することに焦点を当て、ファイルの実際の保存・取得の詳細は省略しています。
 1// Custom implementation of IInputWorkingDirectory for external packages with fonts
 2
 3// This is an implementation of IInputWorkingDirectory that is suitable for the TeX job's RequiredInputDirectory option
 4// in case required input contains fonts provided by external packages.
 5// The class additionally implements IFileCollector, which provides access to file collections by extension.
 6// This is necessary to load external font maps, which are files (outside TeX syntax) that map TeX's
 7// internal font names to file names of physical fonts.
 8public class RequiredInputDirectory : IInputWorkingDirectory, IFileCollector
 9{
10    private Dictionary<string, Dictionary<string, string>> _fileNames =
11        new Dictionary<string, Dictionary<string, string>>();
12
13    public RequiredInputDirectory()
14    {
15    }
16
17    // This method should preliminarily be called for each file entry that is supposed to be located inside
18    // the required input directory. Inside is an example of how the dictionary of file names could be organized
19    // for easy collection of file names by extension.
20    // Here fileName is a full file name. This can be a file path on a file system, a URL, or whatever else (theoretically).
21    public void StoreFileName(string fileName)
22    {
23        string extension = Path.GetExtension(fileName);
24        string name = Path.GetFileNameWithoutExtension(fileName);
25
26        Dictionary<string, string> files;
27        if (!_fileNames.TryGetValue(extension, out files))
28            _fileNames.Add(extension, files = new Dictionary<string, string>());
29
30        files[name] = fileName;
31    }
32
33    // The IInputWorkingDirectory implementation.
34    public NamedStream GetFile(string fileName, bool searchSubdirectories = false)
35    {
36        // Try to find the file in our stored files
37        foreach (var extFiles in _fileNames.Values)
38        {
39            foreach (var file in extFiles.Values)
40            {
41                if (file.EndsWith(fileName) || Path.GetFileName(file) == fileName)
42                {
43                    return new NamedStream(File.OpenRead(file), fileName);
44                }
45            }
46        }
47        // If not found in stored files, return null (file not available)
48        return new NamedStream(null, fileName);
49    }
50
51    // Here is how we gather file collections by extension.
52    public string[] GetFileNamesByExtension(string extension, string path = null)
53    {
54        Dictionary<string, string> files;
55        if (!_fileNames.TryGetValue(extension, out files))
56            return new string[0];
57
58        return new List<string>(files.Values).ToArray();
59    }
60
61    public void Dispose()
62    {
63        _fileNames.Clear();
64    }
65}制限事項
LaTeX ファイルが LaTeX3e カーネル向けに開発されたパッケージを要求する場合、そのパッケージは Aspose.TeX ライブラリ(LaTeX2e カーネルに基づく)では動作しない可能性が高いです。
また、LaTeX ファイルが直接デバイス依存のプリミティブコマンドを呼び出すパッケージを要求する場合、Aspose.TeX の Object TeX エンジンはそれらをサポートしていないため、該当パッケージは確実に動作しません。