使用DocumentBuilder修改文档
指定格式
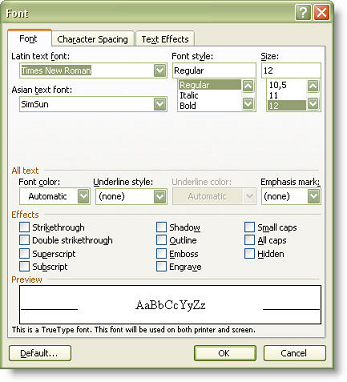
字体格式
当前字体格式由DocumentBuilder.Font属性返回的Font对象表示。 Font类包含在Microsoft Word中可能的各种字体属性。
 |
|---|
| 下面的代码示例演示如何设置字体格式。 |
| // For complete examples and data files, please go to https://github.com/aspose-words/Aspose.Words-for-Java | |
| Document doc = new Document(); | |
| DocumentBuilder builder = new DocumentBuilder(doc); | |
| // Set font formatting properties | |
| Font font = builder.getFont(); | |
| font.setBold(true); | |
| font.setColor(Color.BLUE); | |
| font.setItalic(true); | |
| font.setName("Arial"); | |
| font.setSize(24); | |
| font.setSpacing(5); | |
| font.setUnderline(Underline.DOUBLE); | |
| builder.write("I'm a very nice formatted string."); |
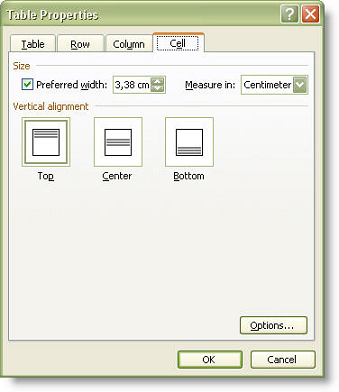
单元格格式
单元格格式在生成表期间使用。 它由DocumentBuilder.CellFormat属性返回的CellFormat对象表示。 CellFormat封装了各种表格单元格属性,如宽度或垂直对齐。
 |
|---|
| 下面的代码示例演示如何创建包含单个格式化单元格的表。 |
| // For complete examples and data files, please go to https://github.com/aspose-words/Aspose.Words-for-Java | |
| // The path to the documents directory. | |
| String dataDir = Utils.getDataDir(DocumentBuilderSetTableCellFormatting.class); | |
| // Open the document. | |
| Document doc = new Document(); | |
| DocumentBuilder builder = new DocumentBuilder(doc); | |
| builder.insertCell(); | |
| CellFormat cellFormat = builder.getCellFormat(); | |
| cellFormat.setWidth(250); | |
| cellFormat.setLeftPadding(30); | |
| cellFormat.setRightPadding(30); | |
| cellFormat.setBottomPadding(30); | |
| cellFormat.setTopPadding(30); | |
| builder.writeln("I'm a wonderful formatted cell."); | |
| builder.endRow(); | |
| builder.endTable(); | |
| doc.save(dataDir + "output.doc"); |
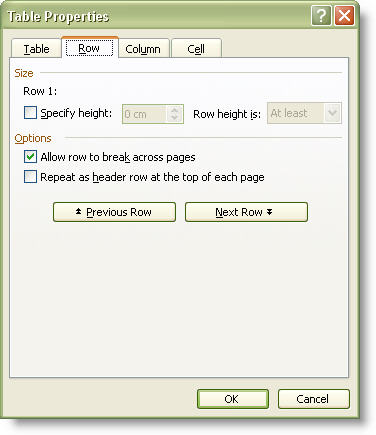
行格式设置
当前行格式由DocumentBuilder.RowFormat属性返回的RowFormat对象确定。 该对象封装了有关所有表行格式的信息。
 |
|---|
| Below code示例演示如何创建包含单个单元格的表并应用行格式。 |
| // For complete examples and data files, please go to https://github.com/aspose-words/Aspose.Words-for-Java | |
| // The path to the documents directory. | |
| String dataDir = Utils.getDataDir(DocumentBuilderSetTableRowFormatting.class); | |
| // Open the document. | |
| Document doc = new Document(); | |
| DocumentBuilder builder = new DocumentBuilder(doc); | |
| Table table = builder.startTable(); | |
| builder.insertCell(); | |
| RowFormat rowFormat = builder.getRowFormat(); | |
| rowFormat.setHeight(100); | |
| rowFormat.setHeightRule(HeightRule.EXACTLY); | |
| table.setBottomPadding(30); | |
| table.setTopPadding(30); | |
| table.setLeftPadding(30); | |
| table.setRightPadding(30); | |
| builder.writeln("I'm a wonderful formatted row."); | |
| builder.endRow(); | |
| builder.endTable(); | |
| doc.save(dataDir + "output.doc"); |
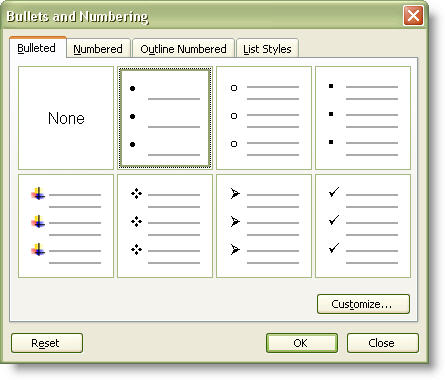
列表格式
Aspose.Words允许通过应用列表格式轻松创建列表。 DocumentBuilder提供返回ListFormat对象的DocumentBuilder.ListFormat属性。 此对象有几种方法来开始和结束列表以及增加/减少缩进。
 |
|---|
| Microsoft Word中有两种一般类型的列表:项目符号和编号。 |
- 要启动项目符号列表,请调用ListFormat.applyBulletDefault。
- 要开始编号列表,请调用ListFormat.applyNumberDefault。
项目符号或数字和格式将添加到当前段落以及使用DocumentBuilder创建的所有其他段落,直到调用ListFormat.removeNumbers停止项目符号列表格式。
在Word文档中,列表最多可包含九个级别。 每个级别的列表格式指定使用的项目符号或数字,左缩进,项目符号和文本之间的空格等。
- 要将当前段落的列表级别增加一个级别,请调用ListFormat.listIndent。
- 若要将当前段落的列表级别降低一个级别,请调用ListFormat.listOutdent。
这些方法更改列表级别并应用新级别的格式属性。
下面的代码示例演示如何构建多级列表。
| // For complete examples and data files, please go to https://github.com/aspose-words/Aspose.Words-for-Java | |
| // The path to the documents directory. | |
| String dataDir = Utils.getDataDir(DocumentBuilderSetMultilevelListFormatting.class); | |
| // Open the document. | |
| Document doc = new Document(); | |
| DocumentBuilder builder = new DocumentBuilder(doc); | |
| builder.getListFormat().applyNumberDefault(); | |
| builder.writeln("Item 1"); | |
| builder.writeln("Item 2"); | |
| builder.getListFormat().listIndent(); | |
| builder.writeln("Item 2.1"); | |
| builder.writeln("Item 2.2"); | |
| builder.getListFormat().listIndent(); | |
| builder.writeln("Item 2.1.1"); | |
| builder.writeln("Item 2.2.2"); | |
| builder.getListFormat().listOutdent(); | |
| builder.writeln("Item 3"); | |
| builder.getListFormat().removeNumbers(); | |
| doc.save(dataDir + "output.doc"); |
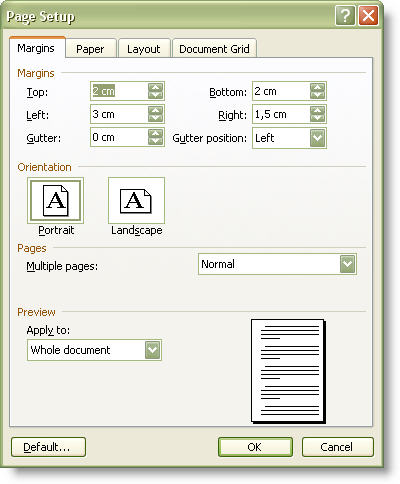
页面设置和节格式
页面设置和节属性封装在DocumentBuilder.PageSetup属性返回的PageSetup对象中。 该对象包含部分的所有页面设置属性(左边距、下边距、纸张大小等)作为属性。
 |
|---|
| 下面的代码示例演示如何为当前部分设置页面大小和方向等属性。 |
| // For complete examples and data files, please go to https://github.com/aspose-words/Aspose.Words-for-Java | |
| // The path to the documents directory. | |
| String dataDir = Utils.getDataDir(DocumentBuilderSetPageSetupAndSectionFormatting.class); | |
| // Open the document. | |
| Document doc = new Document(); | |
| DocumentBuilder builder = new DocumentBuilder(doc); | |
| builder.getPageSetup().setOrientation(Orientation.LANDSCAPE); | |
| builder.getPageSetup().setLeftMargin(50); | |
| builder.getPageSetup().setPaperSize(PaperSize.PAPER_10_X_14); | |
| doc.save(dataDir + "output.doc"); |
应用样式
一些格式化对象(如Font或ParagraphFormat)支持样式。 单个内置或用户定义的样式由Style对象表示,该对象包含相应的样式属性,如样式的名称、基本样式、字体和段落格式等。
此外,Style对象提供Style.getStyleIdentifier属性,该属性返回由Style.StyleIdentifier枚举值表示的与区域设置无关的样式标识符。 重点是Microsoft Word中内置样式的名称是针对不同语言进行本地化的。 使用样式标识符,无论文档语言如何,都可以找到正确的样式。 枚举值对应于Microsoft Word内置样式,如Normal,Heading 1,Heading 2等。 所有用户定义的样式都分配StyleIdentifier.User value。
 |
|---|
| 下面的代码示例演示如何应用段落样式。 |
| // For complete examples and data files, please go to https://github.com/aspose-words/Aspose.Words-for-Java | |
| // Open the document. | |
| Document doc = new Document(); | |
| // Set paragraph style | |
| DocumentBuilder builder = new DocumentBuilder(doc); | |
| builder.getParagraphFormat().setStyleIdentifier(StyleIdentifier.TITLE); | |
| builder.write("Hello"); | |
| doc.save(dataDir + "ApplyParagraphStyle_out.doc"); |
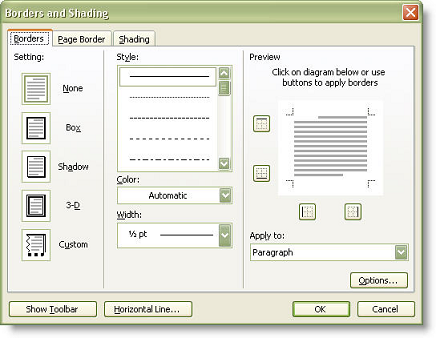
边框和阴影
边框由BorderCollection表示。 这是按索引或按边框类型访问的边框对象的集合。 边框类型由BorderType枚举表示。 枚举的某些值适用于多个或仅一个文档元素。 例如,BorderType.Bottom适用于段落或表格单元格,而BorderType.DiagonalDown仅指定表格单元格中的对角线边框。
边框集合和每个单独的边框都具有类似的属性,如颜色,线条样式,线条宽度,与文本的距离和可选阴影。 它们由同名属性表示。 您可以通过组合属性值来实现不同的边框类型。 此外,BorderCollection和Border对象都允许您通过调用Border.clearFormatting方法将这些值重置为默认值。 请注意,当边框属性重置为默认值时,边框不可见。
 |
|---|
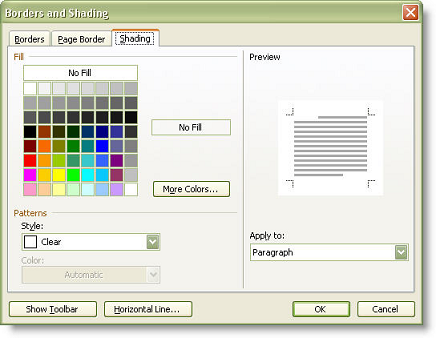
| Shading类包含文档元素的着色属性。 您可以设置所需的着色纹理以及应用于元素背景和前景的颜色。 |
阴影纹理设置有 TextureIndex 允许将各种模式应用于Shading对象的枚举值。 例如,要为文档元素设置背景颜色,请使用 TextureIndex.TextureSolid 值并视情况设置前景底纹颜色。
 |
|---|
| 下面的示例演示如何对段落应用边框和阴影。 |
| // For complete examples and data files, please go to https://github.com/aspose-words/Aspose.Words-for-Java | |
| // Open the document. | |
| Document doc = new Document(); | |
| DocumentBuilder builder = new DocumentBuilder(doc); | |
| // Set paragraph borders | |
| BorderCollection borders = builder.getParagraphFormat().getBorders(); | |
| borders.setDistanceFromText(20); | |
| borders.getByBorderType(BorderType.LEFT).setLineStyle(LineStyle.DOUBLE); | |
| borders.getByBorderType(BorderType.RIGHT).setLineStyle(LineStyle.DOUBLE); | |
| borders.getByBorderType(BorderType.TOP).setLineStyle(LineStyle.DOUBLE); | |
| borders.getByBorderType(BorderType.BOTTOM).setLineStyle(LineStyle.DOUBLE); | |
| // Set paragraph shading | |
| Shading shading = builder.getParagraphFormat().getShading(); | |
| shading.setTexture(TextureIndex.TEXTURE_DIAGONAL_CROSS); | |
| shading.setBackgroundPatternColor(Color.YELLOW); | |
| shading.setForegroundPatternColor(Color.GREEN); | |
| builder.write("I'm a formatted paragraph with double border and nice shading."); | |
| doc.save(dataDir + "ApplyBordersAndShading_out.doc"); |
捕捉到网格
Aspose.Words提供了两个属性ParagraphFormat.SnapToGrid和Font.SnapToGrid来获取和设置段落属性snap到网格。
| // For complete examples and data files, please go to https://github.com/aspose-words/Aspose.Words-for-Java | |
| Document doc = new Document(dataDir + "Input.docx"); | |
| Paragraph par = doc.getFirstSection().getBody().getFirstParagraph(); | |
| par.getParagraphFormat().setSnapToGrid(true); | |
| par.getRuns().get(0).getFont().setSnapToGrid(true); | |
| dataDir = dataDir + "SetSnapToGrid_out.doc"; | |
| doc.save(dataDir); |
移动光标
检测当前光标位置
您可以随时获取构建器光标当前的位置。 DocumentBuilder.getCurrentNode属性返回当前在此构建器中选择的节点。 节点是段落的直接子节点。 您使用DocumentBuilder执行的任何插入操作都将在DocumentBuilder.CurrentNode之前插入。 当当前段落为空或光标位于段落末尾之前时,DocumentBuilder.CurrentNode返回null。
此外,您可以使用DocumentBuilder.getCurrentParagraph属性,它获取当前在此DocumentBuilder中选择的段落。 Below code示例演示如何访问文档生成器中的当前节点。
| // For complete examples and data files, please go to https://github.com/aspose-words/Aspose.Words-for-Java | |
| // The path to the documents directory. | |
| String dataDir = Utils.getDataDir(DocumentBuilderCursorPosition.class); | |
| // Open the document. | |
| Document doc = new Document(); | |
| DocumentBuilder builder = new DocumentBuilder(doc); | |
| Node node = builder.getCurrentNode(); | |
| Paragraph curParagraph = builder.getCurrentParagraph(); | |
| doc.save(dataDir + "output.doc"); |
移动到任何节点(段落及其子节点)
如果您有一个文档对象节点(即段落或段落的直接子节点),则可以将构建器的光标指向此节点。 使用DocumentBuilder.moveTo方法执行此操作。 下面的代码示例演示如何将光标位置移动到指定节点。
| // For complete examples and data files, please go to https://github.com/aspose-words/Aspose.Words-for-Java | |
| Document doc = new Document(); | |
| DocumentBuilder builder = new DocumentBuilder(doc); | |
| // Start a bookmark and add content to it using a DocumentBuilder. | |
| builder.startBookmark("MyBookmark"); | |
| builder.writeln("Bookmark contents."); | |
| builder.endBookmark("MyBookmark"); | |
| // The node that the DocumentBuilder is currently at is past the boundaries of the bookmark. | |
| Assert.assertEquals(doc.getRange().getBookmarks().get(0).getBookmarkEnd(), builder.getCurrentParagraph().getFirstChild()); | |
| // If we wish to revise the content of our bookmark with the DocumentBuilder, we can move back to it like this. | |
| builder.moveToBookmark("MyBookmark"); | |
| // Now we're located between the bookmark's BookmarkStart and BookmarkEnd nodes, so any text the builder adds will be within it. | |
| Assert.assertEquals(doc.getRange().getBookmarks().get(0).getBookmarkStart(), builder.getCurrentParagraph().getFirstChild()); | |
| // We can move the builder to an individual node, | |
| // which in this case will be the first node of the first paragraph, like this. | |
| builder.moveTo(doc.getFirstSection().getBody().getFirstParagraph().getChildNodes(NodeType.ANY, false).get(0)); | |
| Assert.assertEquals(NodeType.BOOKMARK_START, builder.getCurrentNode().getNodeType()); | |
| Assert.assertTrue(builder.isAtStartOfParagraph()); | |
| // A shorter way of moving the very start/end of a document is with these methods. | |
| builder.moveToDocumentEnd(); | |
| Assert.assertTrue(builder.isAtEndOfParagraph()); | |
| builder.moveToDocumentStart(); | |
| Assert.assertTrue(builder.isAtStartOfParagraph()); |
移动到文档开始/结束
如果需要移动到文档的开头,请调用DocumentBuilder.moveToDocumentStart。 如果您需要移动到文档的末尾,请调用DocumentBuilder.moveToDocumentEnd。
| // For complete examples and data files, please go to https://github.com/aspose-words/Aspose.Words-for-Java | |
| String dataDir = Utils.getDataDir(DocumentBuilderMoveToDocumentStartEnd.class); | |
| Document doc = new Document(dataDir + "Document.docx"); | |
| DocumentBuilder builder = new DocumentBuilder(doc); | |
| // Move the cursor position to the beginning of your document. | |
| builder.moveToDocumentStart(); | |
| builder.writeln("This is the beginning of the document."); | |
| // Move the cursor position to the end of your document. | |
| builder.moveToDocumentEnd(); | |
| builder.writeln("This is the end of the document."); |
移动到一个部分
如果您正在处理包含多个部分的文档,则可以使用DocumentBuilder.moveToSection移动到所需的部分。 此方法将光标移动到指定节的开头,并接受所需节的索引。 当节索引大于或等于0时,它指定从文档开头开始的索引,0是第一个节。 当节索引小于0时,它指定从文档末尾开始的索引,-1是最后一个节。 Below code示例演示如何将光标位置移动到指定的部分。 您可以从以下位置下载此示例的模板文件 这里.
| // The path to the documents directory. | |
| String dataDir = Utils.getDataDir(DocumentBuilderMoveToSection.class); | |
| // Open the document. | |
| Document doc = new Document(dataDir + "Rendering.docx"); | |
| DocumentBuilder builder = new DocumentBuilder(doc); | |
| builder.moveToSection(2); | |
| builder.write("\nThis is third Section\n"); | |
| doc.save(dataDir + "output.doc"); |
移动到页眉/页脚
当您需要将一些数据放入页眉或页脚时,您应该首先使用DocumentBuilder.moveToHeaderFooter移动到那里。该方法接受一个HeaderFooterType枚举值,该值标识应将光标移动到的页眉或页脚的类型。
如果要为第一页创建不同的页眉和页脚,则需要将PageSetup.getDifferentFirstPageHeaderFooter属性设置为true。 如果要为偶数页和奇数页创建不同的页眉和页脚,则需要将PageSetup.getOddAndEvenPagesHeaderFooter设置为true。
如果您需要回到主要故事,请使用DocumentBuilder.moveToSection移出页眉或页脚。 下面的示例使用DocumentBuilder在文档中创建页眉和页脚。
移动到段落
使用DocumentBuilder.moveToParagraph将光标移动到当前部分中所需的段落。 您应该向此方法传递两个参数:paragraphIndex(要移动到的段落的索引)和characterIndex(段落内字符的索引)。
导航是在当前部分的当前故事中执行的。 也就是说,如果将光标移动到第一节的主标题,则paragraphIndex指定该节标题内段落的索引。
当paragraphIndex大于或等于0时,它指定从节的开头开始的索引,0是第一段。 当paragraphIndex小于0时,它指定从节末尾开始的索引,-1是最后一段。 字符索引当前只能指定为0以移动到段落的开头或-1以移动到段落的结尾。 下面的代码示例演示如何将光标位置移动到指定的段落。 您可以从以下位置下载此示例的模板文件 这里.
| // The path to the documents directory. | |
| String dataDir = Utils.getDataDir(DocumentBuilderMoveToParagraph.class); | |
| // Open the document. | |
| Document doc = new Document(dataDir + "Rendering.docx"); | |
| DocumentBuilder builder = new DocumentBuilder(doc); | |
| builder.moveToParagraph(2, 0); | |
| builder.writeln("This is the 3rd paragraph."); | |
| doc.save(dataDir + "output.doc"); |
移动到表格单元格
如果需要将光标移动到当前节中的表格单元格,请使用DocumentBuilder.moveToCell。 此方法接受四个参数:
- tableIndex-要移动到的表的索引。
- rowIndex-表中行的索引。
- columnIndex-表中列的索引。
- characterIndex-单元格内字符的索引。
导航是在当前部分的当前故事中执行的。
对于索引参数,当索引大于或等于0时,它从开头指定一个索引,0是第一个元素。 当索引小于0时,它指定从末尾开始的索引,-1是最后一个元素。
另外,请注意,characterIndex当前只能指定0移动到单元格的开头或-1移动到单元格的末尾。 下面的代码示例演示如何将光标位置移动到指定的表格单元格。 您可以从以下位置下载此示例的模板文件 这里.
| // For complete examples and data files, please go to https://github.com/aspose-words/Aspose.Words-for-Java | |
| String dataDir = Utils.getDataDir(DocumentBuilderMoveToTableCell.class); | |
| Document doc = new Document(dataDir + "Tables.docx"); | |
| DocumentBuilder builder = new DocumentBuilder(doc); | |
| // Move the builder to row 3, cell 4 of the first table. | |
| builder.moveToCell(0, 2, 3, 0); | |
| builder.write("\nCell contents added by DocumentBuilder"); | |
| Table table = (Table)doc.getChild(NodeType.TABLE, 0, true); | |
| Assert.assertEquals(table.getRows().get(2).getCells().get(3), builder.getCurrentNode().getParentNode().getParentNode()); | |
| Assert.assertEquals("Cell contents added by DocumentBuilderCell 3 contents\u0007", table.getRows().get(2).getCells().get(3).getText().trim()); |
移动到书签
书签经常用于标记文档中要插入新元素的特定位置。 要移动到书签,请使用DocumentBuilder.moveToBookmark。 此方法有两个重载。 最简单的一个只接受要移动光标的书签的名称。 下面的代码示例演示如何将光标位置移动到书签。
| // For complete examples and data files, please go to https://github.com/aspose-words/Aspose.Words-for-Java | |
| Document doc = new Document(); | |
| DocumentBuilder builder = new DocumentBuilder(doc); | |
| // Start a bookmark and add content to it using a DocumentBuilder. | |
| builder.startBookmark("MyBookmark"); | |
| builder.writeln("Bookmark contents."); | |
| builder.endBookmark("MyBookmark"); | |
| // If we wish to revise the content of our bookmark with the DocumentBuilder, we can move back to it like this. | |
| builder.moveToBookmark("MyBookmark"); | |
| // Now we're located between the bookmark's BookmarkStart and BookmarkEnd nodes, so any text the builder adds will be within it. | |
| Assert.assertEquals(doc.getRange().getBookmarks().get(0).getBookmarkStart(), builder.getCurrentParagraph().getFirstChild()); | |
| // We can move the builder to an individual node, | |
| // which in this case will be the first node of the first paragraph, like this. | |
| builder.moveTo(doc.getFirstSection().getBody().getFirstParagraph().getChildNodes(NodeType.ANY, false).get(0)); | |
| Assert.assertEquals(NodeType.BOOKMARK_START, builder.getCurrentNode().getNodeType()); |
此重载将光标移动到具有指定名称的书签开始后的位置。 另一个重载DocumentBuilder.moveToBookmark以更高的精度将光标移动到书签。 它接受两个额外的布尔参数:
- isStart确定是将光标移动到书签的开头还是结尾。
- isAfter确定是将光标移动到书签开始或结束位置之后,还是将光标移动到书签开始或结束位置之前。
下面的代码示例演示如何将光标位置移动到书签结束后。
| // For complete examples and data files, please go to https://github.com/aspose-words/Aspose.Words-for-Java | |
| // The path to the documents directory. | |
| String dataDir = Utils.getDataDir(DocumentBuilderMoveToBookmarkEnd.class); | |
| // Open the document. | |
| Document doc = new Document(dataDir + "DocumentBuilder.doc"); | |
| DocumentBuilder builder = new DocumentBuilder(doc); | |
| builder.moveToBookmark("CoolBookmark", false, true); | |
| builder.writeln("This is a very cool bookmark."); | |
| doc.save(dataDir + "output.doc"); |
以这种方式插入新文本不会替换书签的现有文本。 请注意,文档中的某些书签被分配给表单字段。 移动到这样的书签并在那里插入文本将文本插入表单字段代码中。 虽然这不会使表单字段无效,但插入的文本将不可见,因为它成为字段代码的一部分。
移动到Merge字段
有时您可能需要使用DocumentBuilder执行"手动"Mail Merge或在Mail Merge事件处理程序中以特殊方式填充合并字段。 这就是DocumentBuilder.moveToMergeField可能有用的时候。 该方法接受合并字段的名称。 它将光标移动到刚好超出指定合并字段的位置,并删除合并字段。 下面的代码示例演示如何将光标移动到指定合并字段之外的位置。
| // For complete examples and data files, please go to https://github.com/aspose-words/Aspose.Words-for-Java | |
| Document doc = new Document(); | |
| DocumentBuilder builder = new DocumentBuilder(doc); | |
| // Insert a field using the DocumentBuilder and add a run of text after it. | |
| Field field = builder.insertField("MERGEFIELD field"); | |
| builder.write(" Text after the field."); | |
| // The builder's cursor is currently at end of the document. | |
| Assert.assertNull(builder.getCurrentNode()); | |
| // We can move the builder to a field like this, placing the cursor at immediately after the field. | |
| builder.moveToField(field, true); | |
| // Note that the cursor is at a place past the FieldEnd node of the field, meaning that we are not actually inside the field. | |
| // If we wish to move the DocumentBuilder to inside a field, | |
| // we will need to move it to a field's FieldStart or FieldSeparator node using the DocumentBuilder.MoveTo() method. | |
| Assert.assertEquals(field.getEnd(), builder.getCurrentNode().getPreviousSibling()); | |
| builder.write(" Text immediately after the field."); |
如何在测量单位之间转换
Aspose.WordsAPI中提供的大多数表示某些测量值(宽度/高度,边距和各种距离)的对象属性都接受以点为单位的值(1英寸等于72点)。 有时这不方便,所以有ConvertUtil类提供帮助函数在各种测量单位之间进行转换。 它允许将英寸转换为点,点转换为英寸,像素转换为点,点转换为像素。 当像素转换为点时,反之亦然,它可以在96dpi(每英寸点数)分辨率或指定的dpi分辨率下执行。
ConvertUtil
下面的代码示例演示如何以英寸为单位指定页面属性。
| // For complete examples and data files, please go to https://github.com/aspose-words/Aspose.Words-for-Java | |
| // The path to the documents directory. | |
| String dataDir = Utils.getDataDir(ConvertBetweenMeasurementUnits.class); | |
| // Open the document. | |
| Document doc = new Document(); | |
| DocumentBuilder builder = new DocumentBuilder(doc); | |
| PageSetup pageSetup = builder.getPageSetup(); | |
| pageSetup.setTopMargin(ConvertUtil.inchToPoint(1.0)); | |
| pageSetup.setBottomMargin(ConvertUtil.inchToPoint(1.0)); | |
| pageSetup.setLeftMargin(ConvertUtil.inchToPoint(1.5)); | |
| pageSetup.setRightMargin(ConvertUtil.inchToPoint(1.5)); | |
| pageSetup.setHeaderDistance(ConvertUtil.inchToPoint(0.2)); | |
| pageSetup.setFooterDistance(ConvertUtil.inchToPoint(0.2)); | |
| doc.save(dataDir + "output.doc"); |