How to Run Aspose.CAD Docker image in Azure Function
Prerequisites
- Docker must be installed on your system. For information on how to install Docker on Windows or Mac, refer to the links in the “See Also” section.
- Visual Studio 2022.
- NET 6 SDK is used in the example.
- Postman
Azure Function
In this example, you create a simple conversion function that converts a CAD file and saves it as an image. The application can then be built in Docker and run in Azure Function.
Creating the Azure Function
To create the Azure Function program, follow the steps below:
- Once Docker is installed, make sure that it uses Linux Containers (default). If necessary, select the Switch to Linux containers option from the Docker Desktops menu.
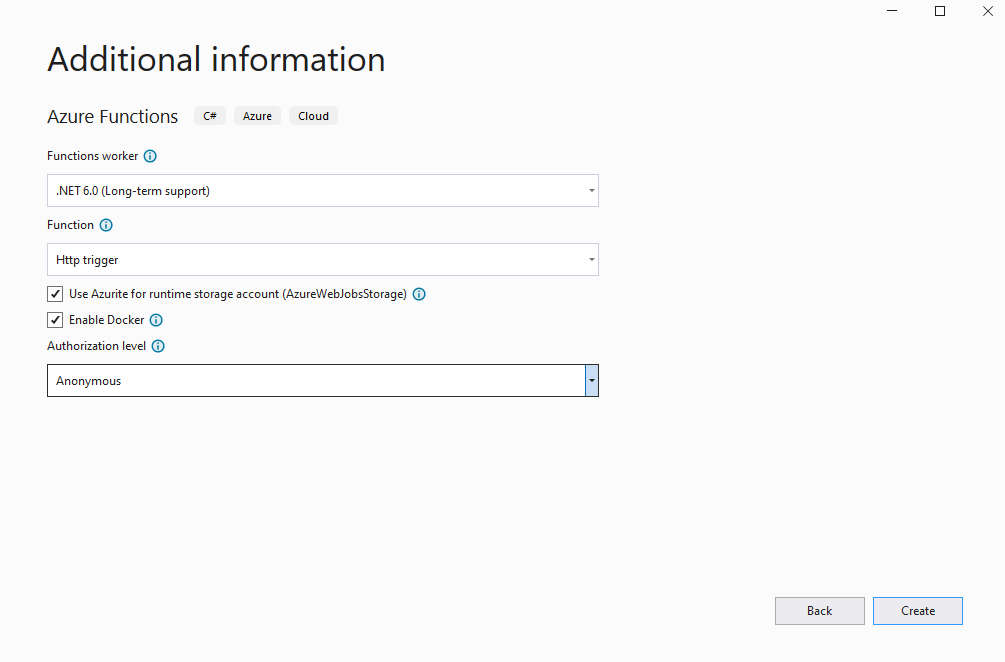
- In Visual Studio, create a NET 6 Azure Function.
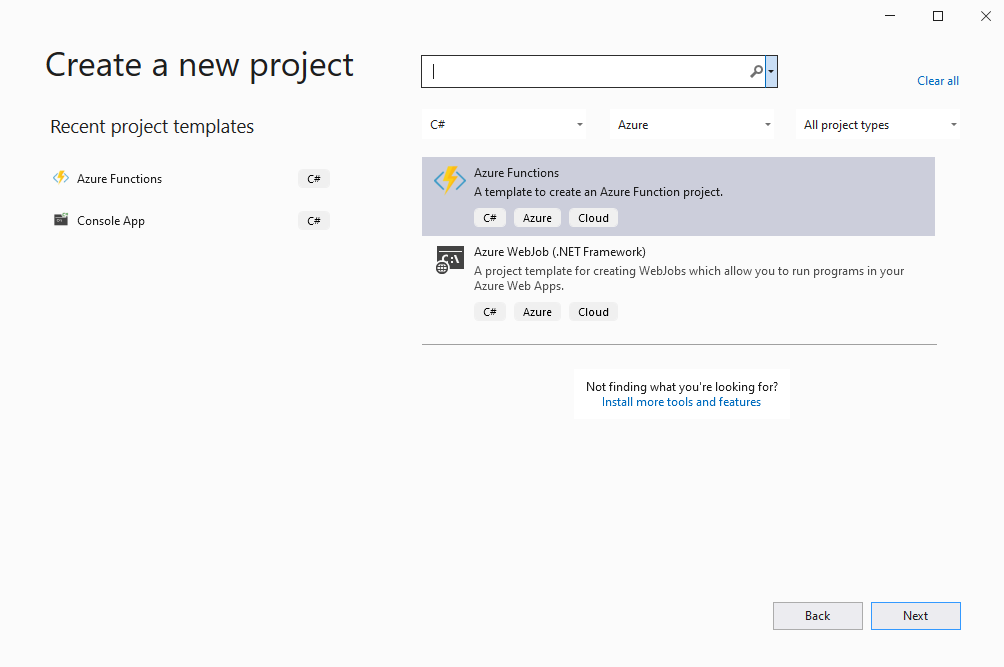
- Additional information.
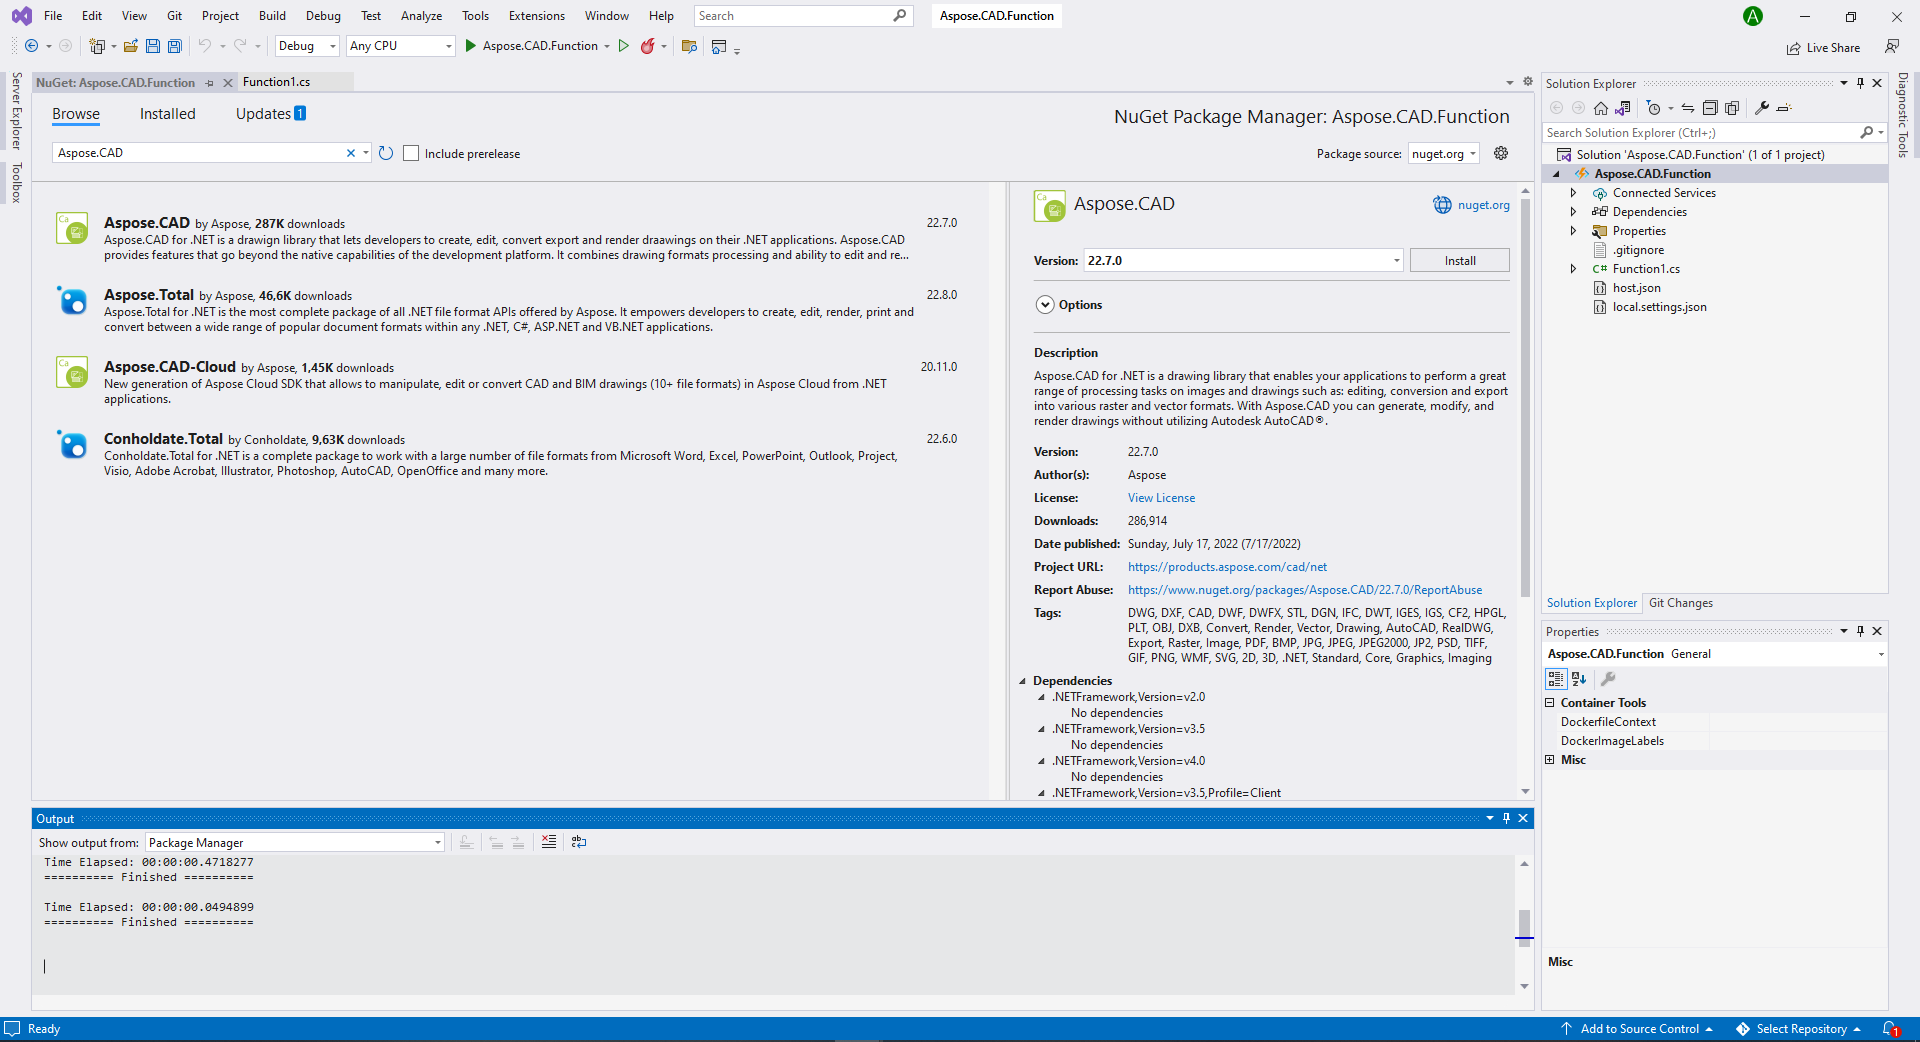
- Install the latest Aspose.CAD version from NuGet.
- Since the application will be run on Linux, you may be needed to install additional fonts. You could prefer ttf-mscorefonts-installer.
- When all required dependencies are added, write a simple program that creates an ellipse and saves it as an image:
public static class Function1
{
[FunctionName("convert")]
public static async Task<IActionResult> Run(
[HttpTrigger(AuthorizationLevel.Anonymous, "get", "post", Route = null)] HttpRequest req,
ILogger log)
{
log.LogInformation("C# HTTP trigger function processed a request.");
try
{
using (var image = (CadImage)Image.Load(req.Body))
{
var ms = new MemoryStream();
image.Save(ms, new PngOptions());
ms.Seek(0, (System.IO.SeekOrigin)SeekOrigin.Begin);
return new FileContentResult(ms.ToArray(), "application/octet-stream")
{
FileDownloadName = "Export.png"
};
}
}
catch (Exception e)
{
return new OkObjectResult(e.Message);
}
}
}Configuring a Dockerfile
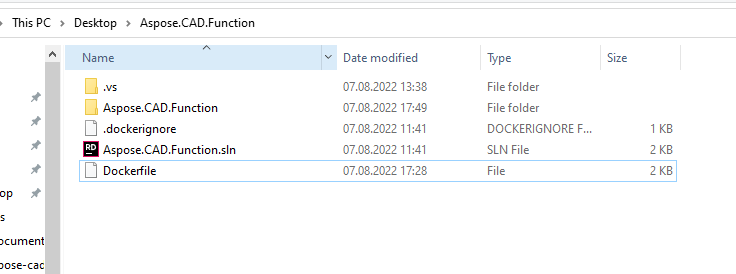
The next step is to create and configure the Dockerfile in root project folder.
- Create the Dockerfile and place it next to the solution file of your application. Keep this file name without extension (the default).
- In the Dockerfile, specify:
FROM mcr.microsoft.com/azure-functions/dotnet:4 AS base
WORKDIR /home/site/wwwroot
RUN apt-get update
RUN apt-get install -y apt-utils
RUN apt-get install -y libgdiplus
RUN apt-get install -y libc6-dev
RUN ln -s /usr/lib/libgdiplus.so/usr/lib/gdiplus.dll
EXPOSE 80
FROM mcr.microsoft.com/dotnet/sdk:6.0 AS build
WORKDIR /src
COPY ["Aspose.CAD.Function/Aspose.CAD.Function.csproj", "Aspose.CAD.Function/"]
RUN dotnet restore "Aspose.CAD.Function/Aspose.CAD.Function.csproj"
COPY . .
WORKDIR "/src/Aspose.CAD.Function"
RUN dotnet build "Aspose.CAD.Function.csproj" -c Release -o /app/build
FROM build AS publish
RUN dotnet publish "Aspose.CAD.Function.csproj" -c Release -o /app/publish
FROM base AS final
WORKDIR /home/site/wwwroot
COPY --from=publish /app/publish .
ENV AzureWebJobsScriptRoot=/home/site/wwwroot \
AzureFunctionsJobHost__Logging__Console__IsEnabled=trueThe above is a simple Dockerfile, which contains the following instructions:
- The SDK image to be used. Here it is the Net 6 image. Docker will download it when the build is run. The version of SDK is specified as a tag.
- After, you may need to install Fonts because the SDK image contains very few fonts. Also, you can use local fonts copied to docker image.
- The working directory, which is specified in the next line.
- The command to copy everything to container, publish the application, and specify the entry point.
Docker Hub
- Login Docker Hub
- Create public Repository
Building and Running the Application in Docker
Now the application can be built and run in Docker. Open your favorite command prompt, change directory to the folder with the application (folder where the solution file and the Dockerfile are placed) and run the following command:
//example
docker build -t <user name>/<repository name> .
docker build -t user/asposefunction .The first time you run this command, it may take longer because Docker needs to download the necessary images. After the previous command completes, run the following command to push the image to docker hub:
//example
docker push <user name>/<repository name>:tagname
docker push user/asposefunction:latestAzure
- Login Azure.
- Choose Azure services.
- Choose Function App and create a function.

- Repeat the basic settings as in the image below.
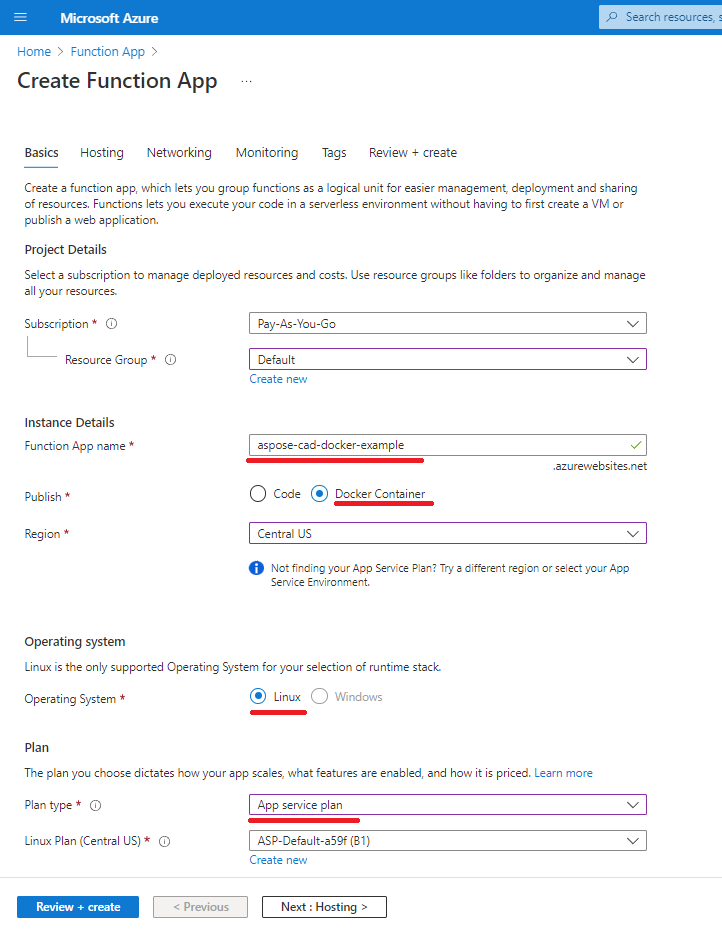
- Click ‘Review + create’ -> Create.
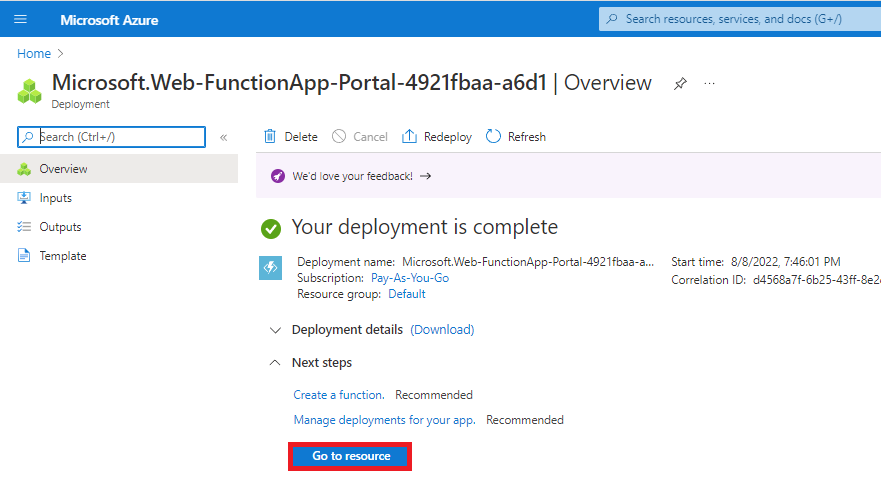
- Wait for deployment to finish.
- Click ‘Go to resorce’ button.
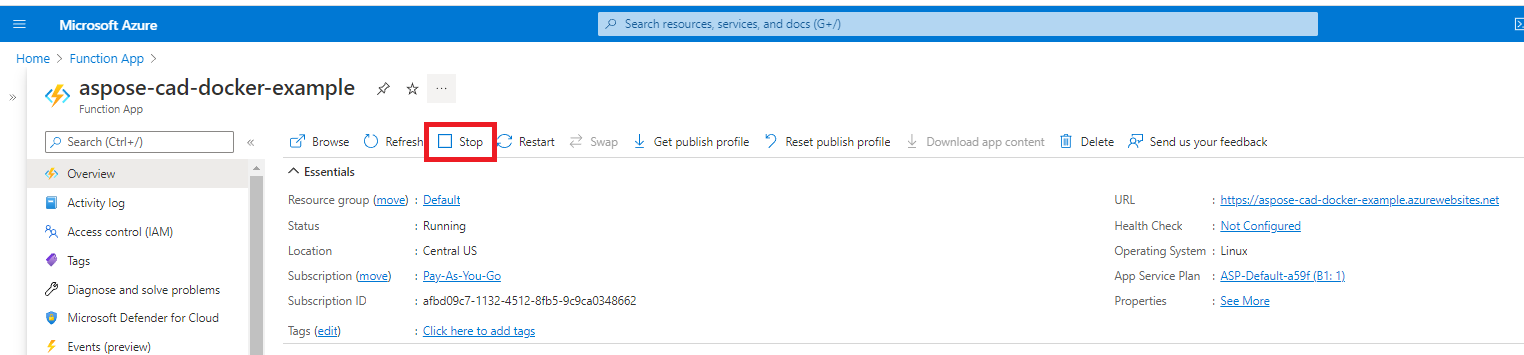
- Stop aspose-cad-docker-example function.
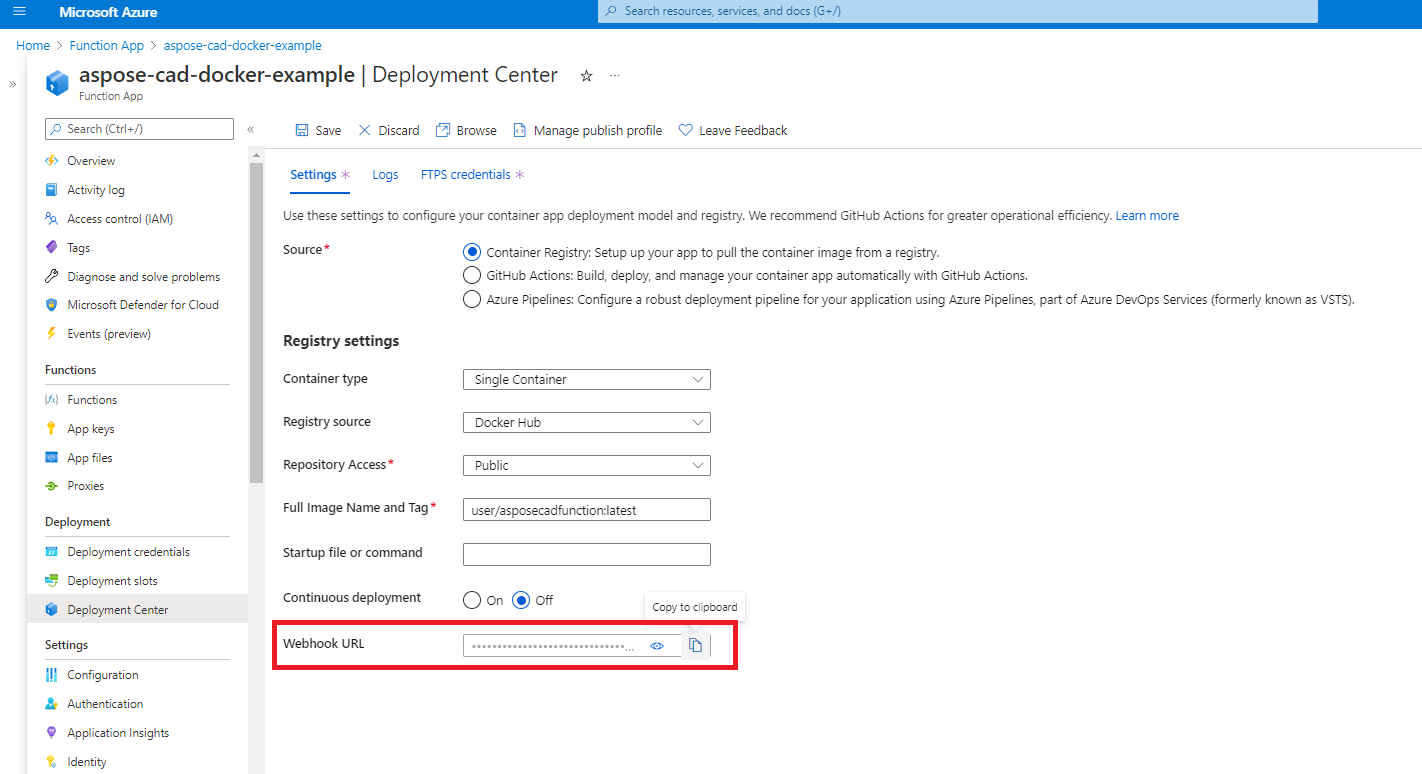
- Go to the deployment center menu and make the appropriate settings.
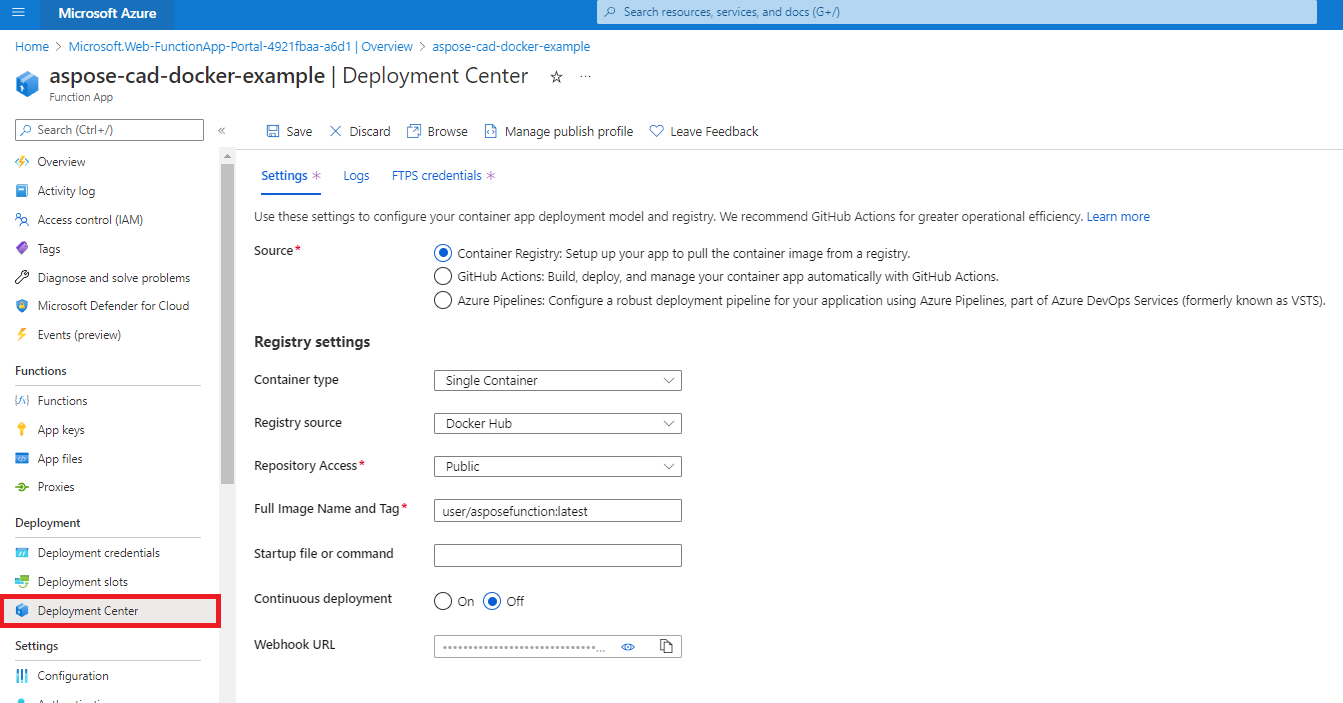
- Save settings
- Copy Webhook URL from deployment center settings.
- Go to Docker Hub, select your repository and select webhooks.
- Paste the ‘Webhook url’ from Azure into the Docker Hub webhook url and set the name.
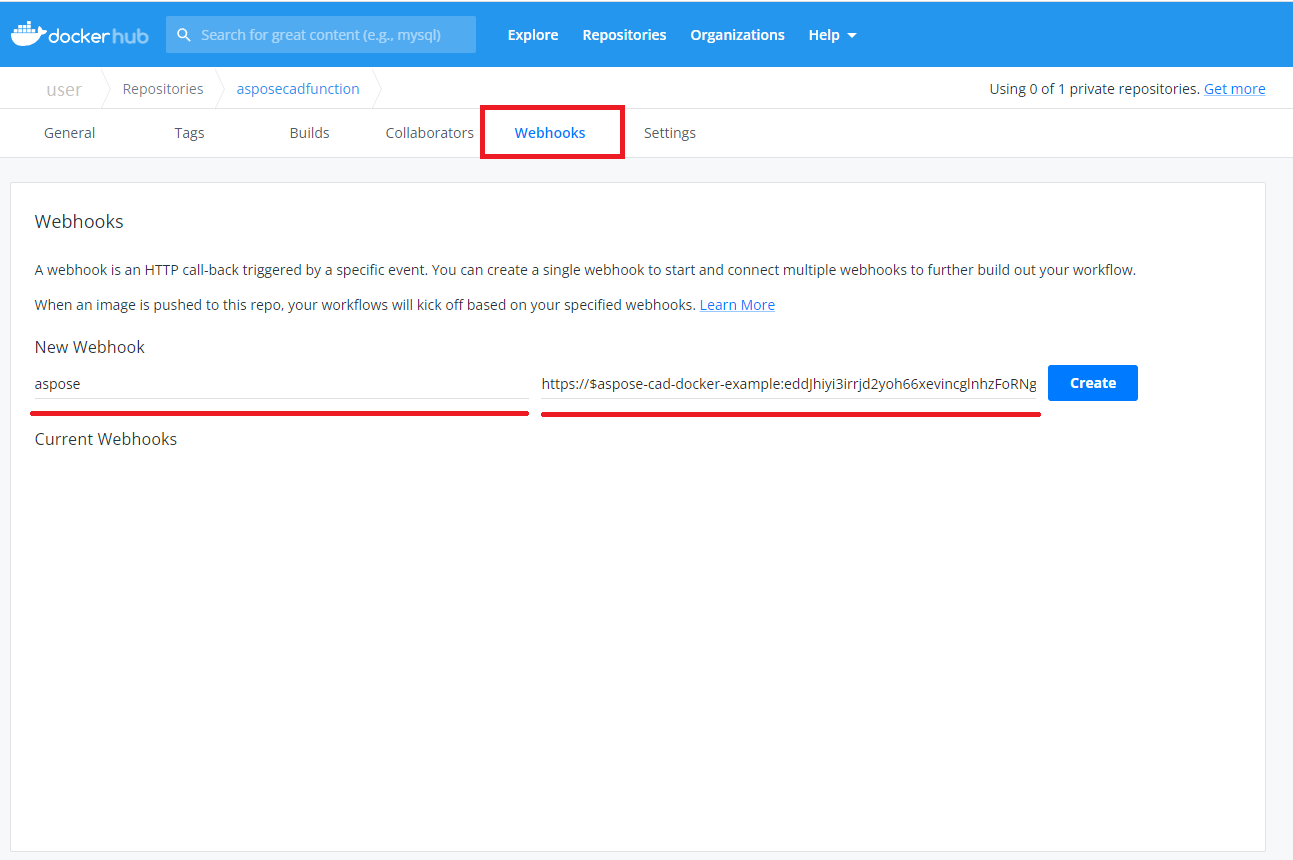
- Click create button.
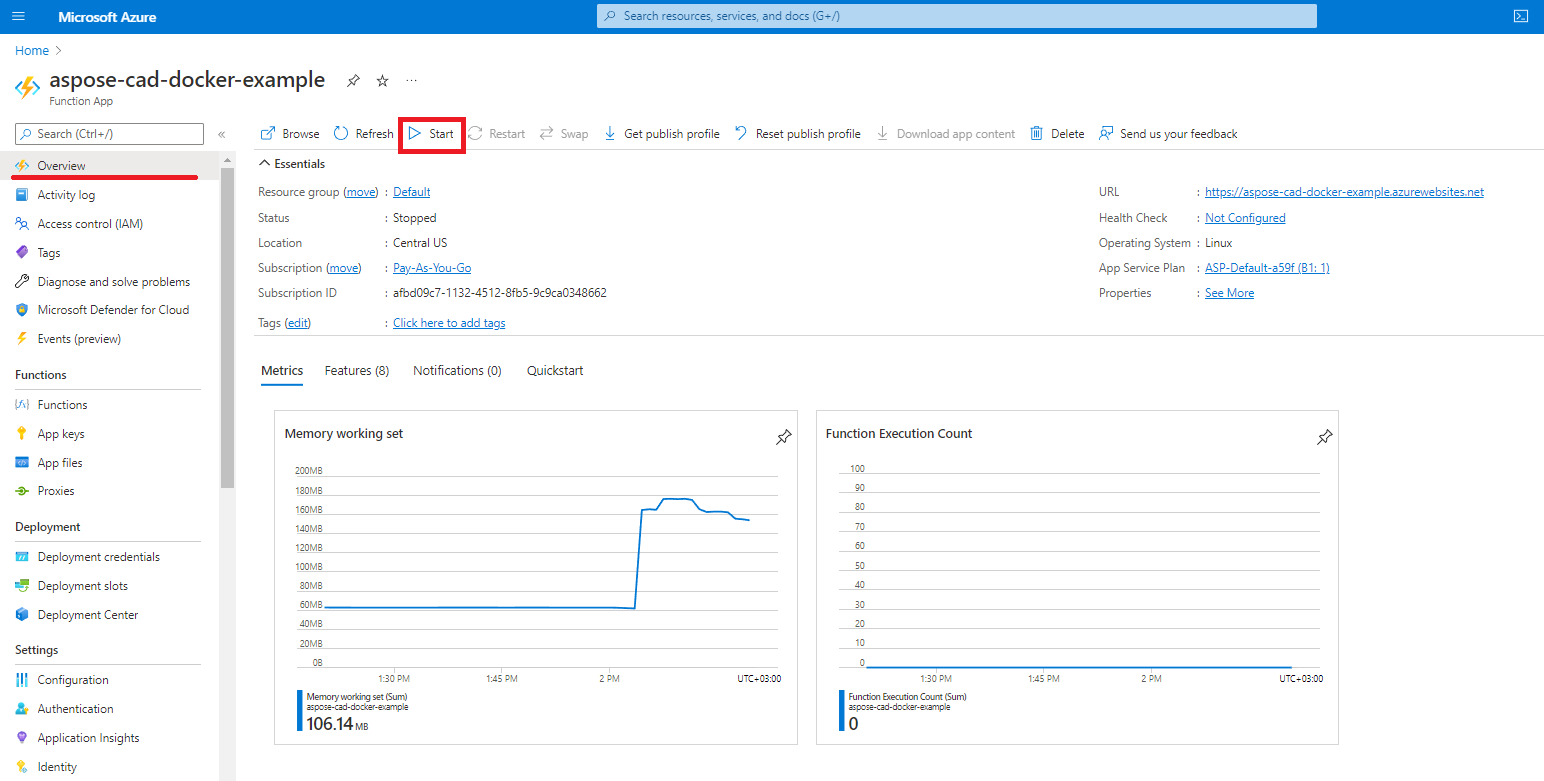
- Return to overview azure function and start container.
Execution example
- Postman settings.
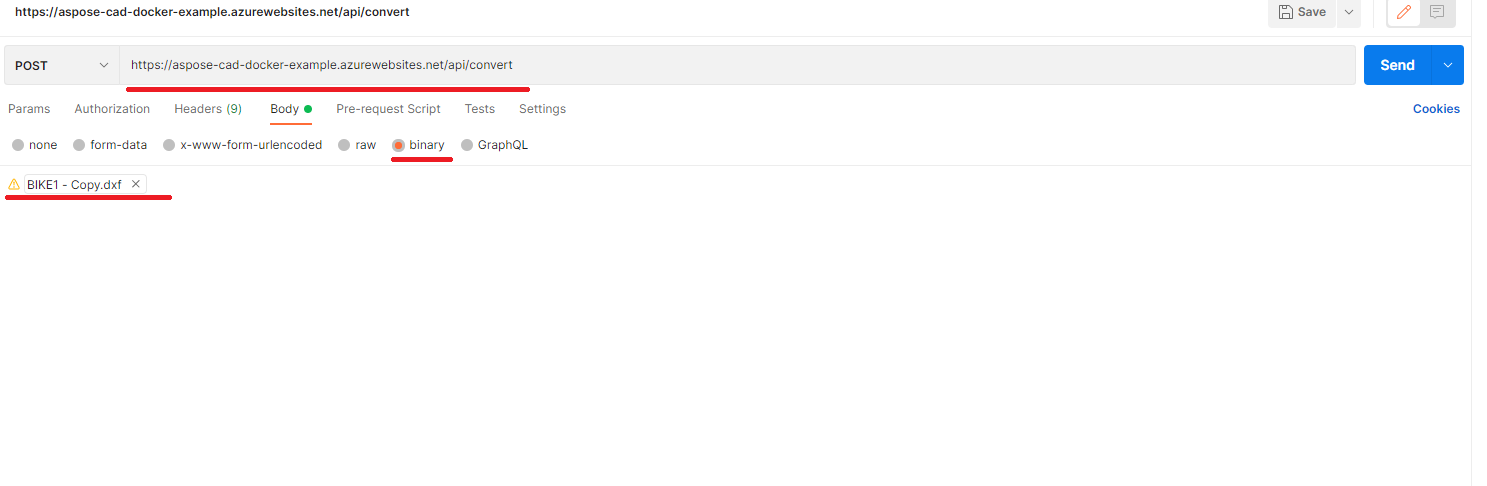
- Select any DXF, DWG, DGN, DWF, DWFX, IFC, STL, DWT, IGES, PLT, CF2, OBJ, HPGL, IGS, PCL, FBX, PDF, SVG file.
- Click the send button.
More Examples
For more samples of how you can use Aspose.CAD in Docker, see the examples.
See Also
- Install Docker Desktop on Windows
- Install Docker Desktop on Mac
- Visual Studio 2022, NET 6 SDK
- Switch to Linux containers option
- Additional information on .NET Core SDK