
How to Run the Examples
Download from GitHub
All examples of Aspose.Email for Java are hosted on Github. You can either clone the repository using your favorite Github client or download the ZIP file from here.
Extract the contents of ZIP file to any folder on your computer. All the examples are located in the Examples folder.

The project uses Maven build system. Any modern IDE can easily open or import the project and its dependencies. Below we show you how to use popular IDEs to build and run the examples.
How to use Aspose.Emil for Android via Java
This topic will guide you through the necessary steps by setup Aspose.Email for Android via Java in Android Studio IDE, assuming that you already have the latest version of Android Studio installed on your machine and you have also acquired the latest version of Aspose.Email for Android via Java package.
Aspose.Email for Android via Java package can be downloaded from here. Please note, each release package of Aspose.Email for Android via Java mainly consists of 2 files as detailed below.
- aspose-email-x.x.x.jar is the main library file containing all the namespaces from Aspose.Email for Android via Java API.
- aspose-email-x.x.x-libs.apk is the APK containing the 3rd party bcprov-jdk15-146.jar used for encryption and decryption facilities offered by Aspose.Email for Android via Java API.
Getting Started with Aspose.Email for Android via Java in Android Studio
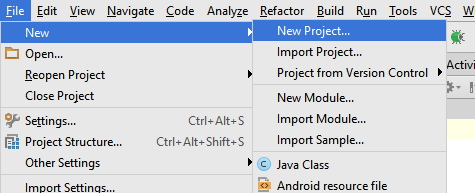
Once the Android Studio IDE loads, click on File > New > New Project as shown below.
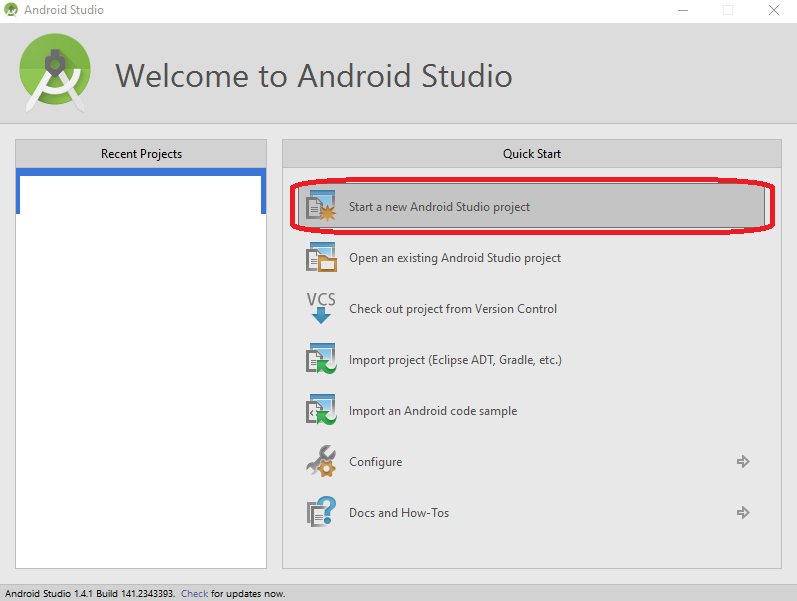
You can also create a new project from the Android Studio’s Welcome Screen as shown below.
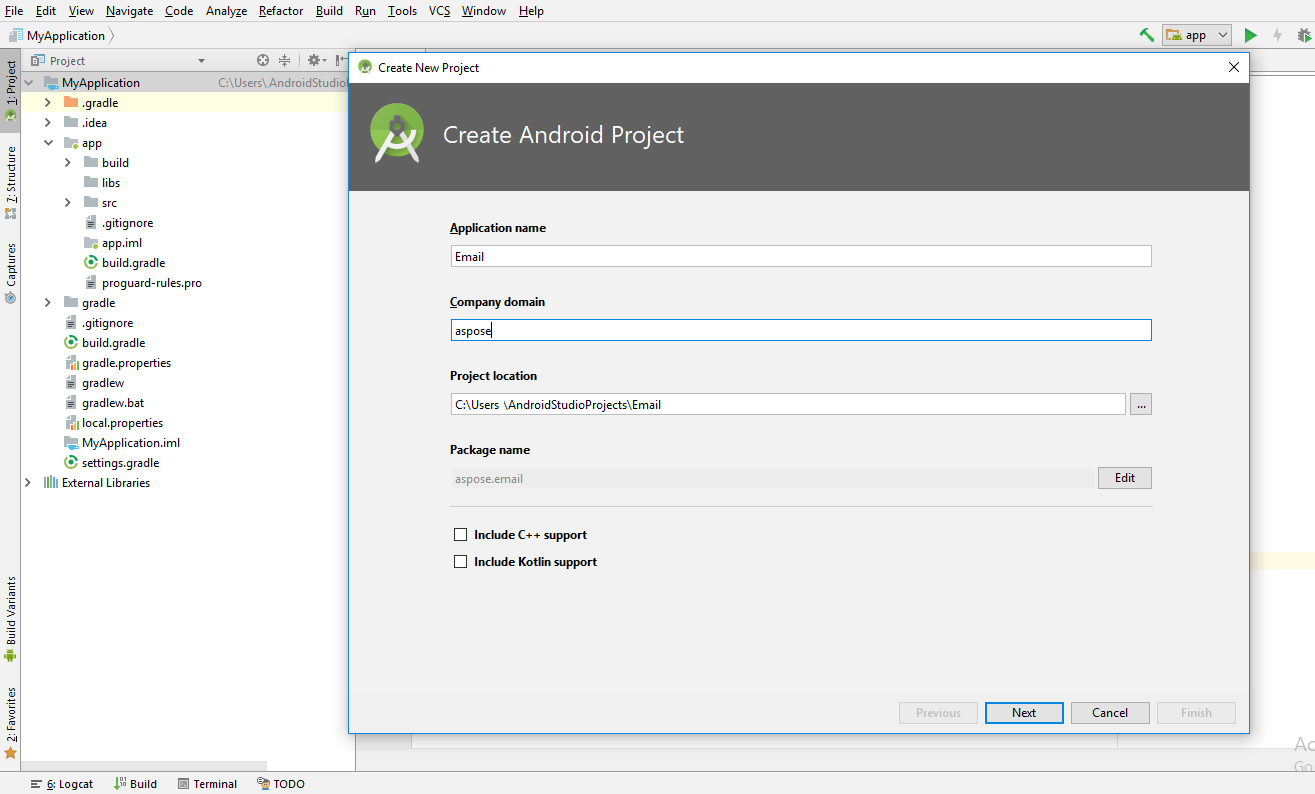
Next, you will be prompt to specify the application name, domain & location to store the project files. You can choose to change the default values as per your your choice or let them as they are, and click Next.
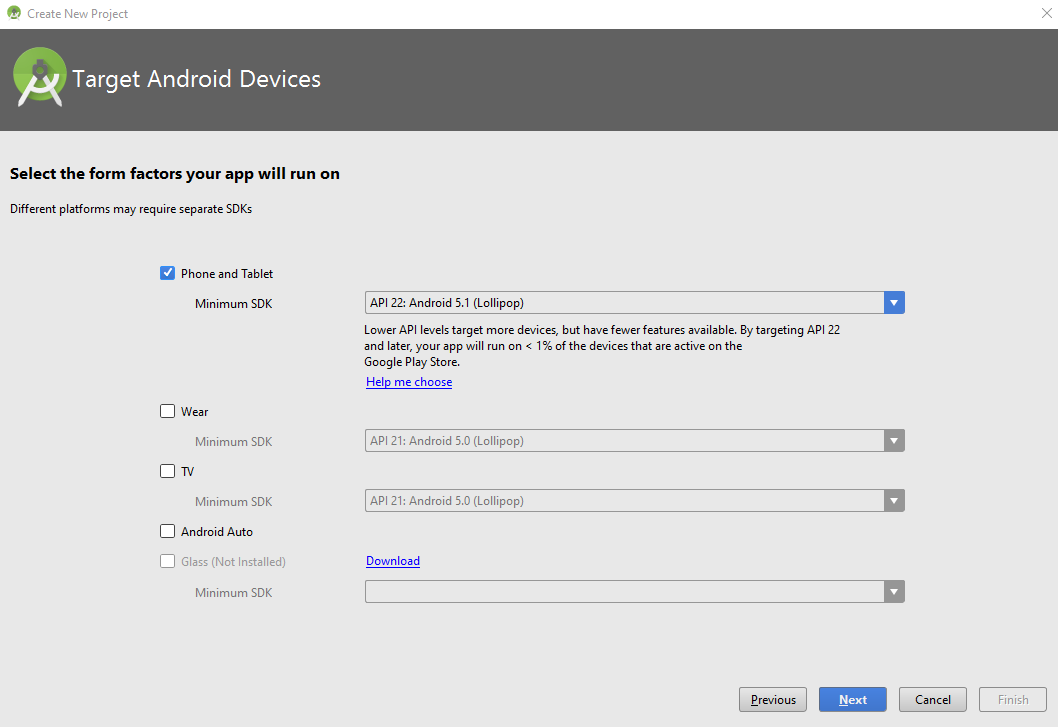
In next step, you have to specify the Android Device you wish to host/run your application. Once selected, click on Next button.
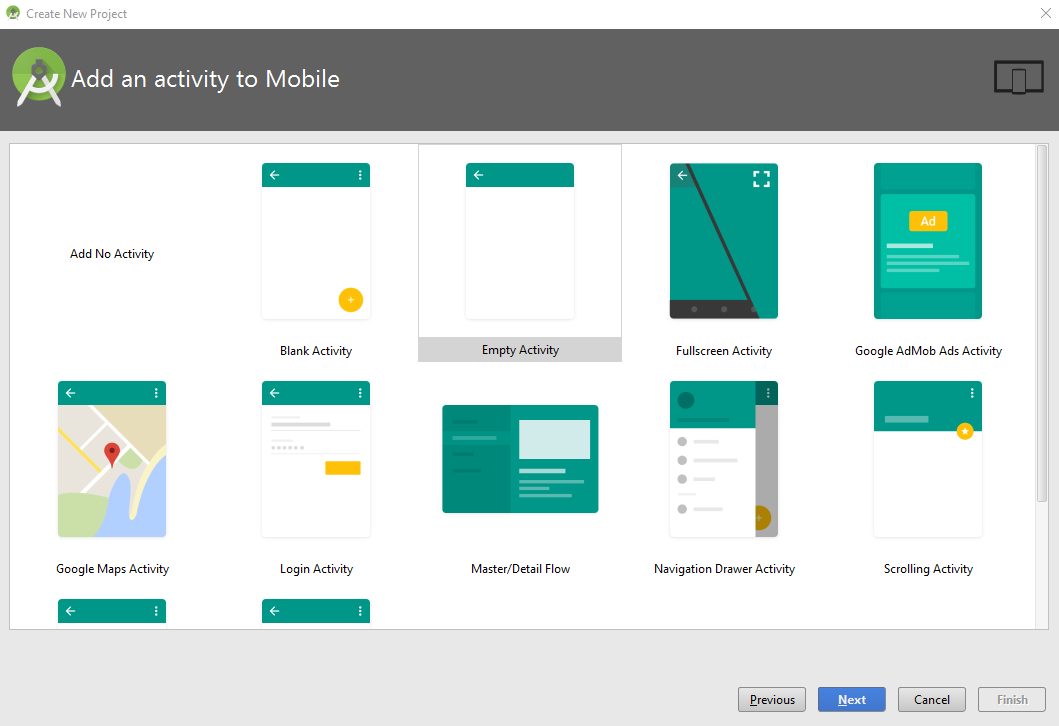
Now you need to select the Activity from a predefined list of templates. In order to keep the demonstration simple, we have selected the Empty Activity template as shown below.
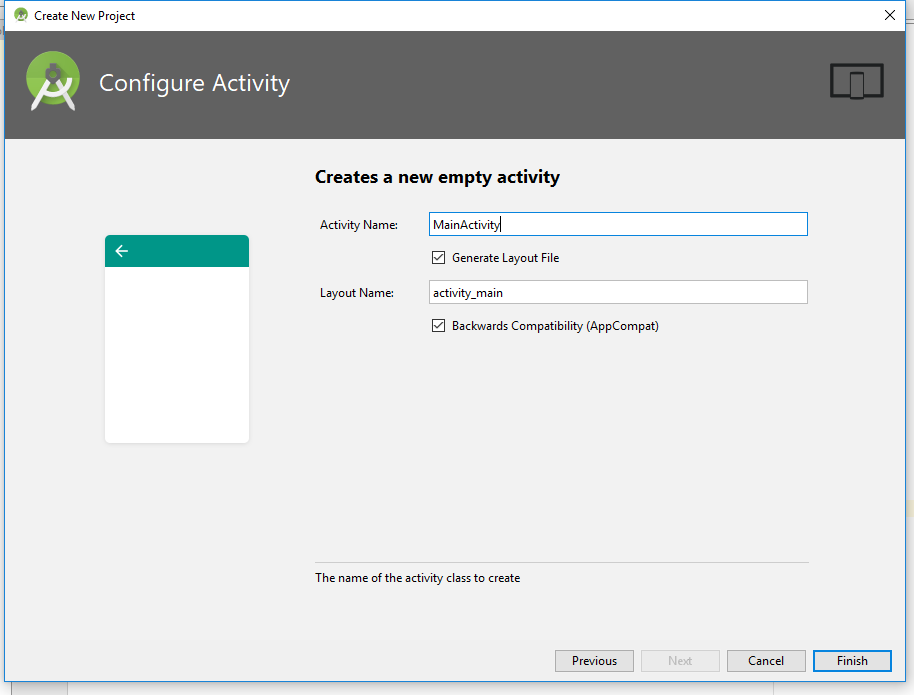
Click on Finish button on the Customize the Activity dialog as we will keep all the default settings as they are.
As soon as you click on the Finish button on the previous step, the IDE will start building the project as shown below. Let it finish or click Cancel button.

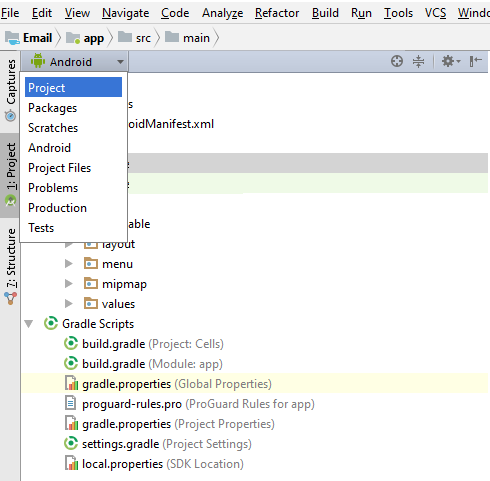
Now the project has been loaded in the IDE, however, you may wish to change the view to Project so that you can view the complete hierarchy of the project files. In order to change the view, please check the following snapshot.
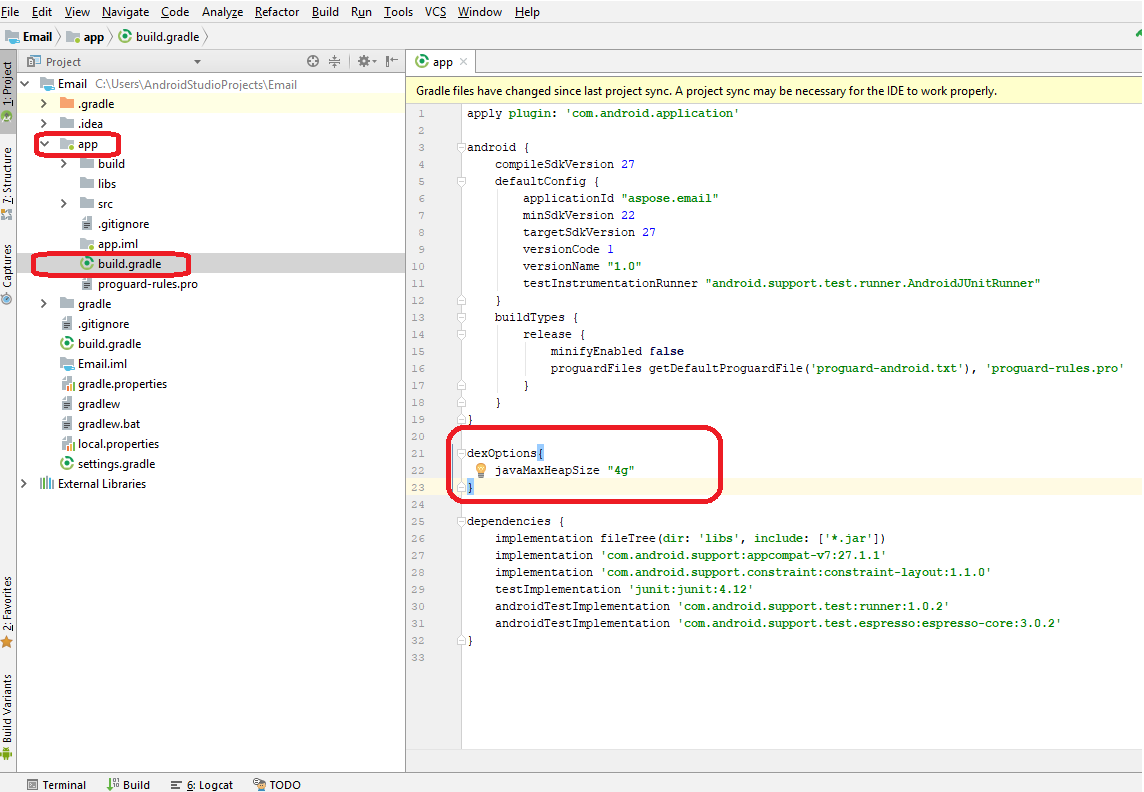
After changing the view to Project, find & load the build.gradle file in the editor and paste the following snippet as shown below.
 dexOptions{

    javaMaxHeapSize "4g"

}
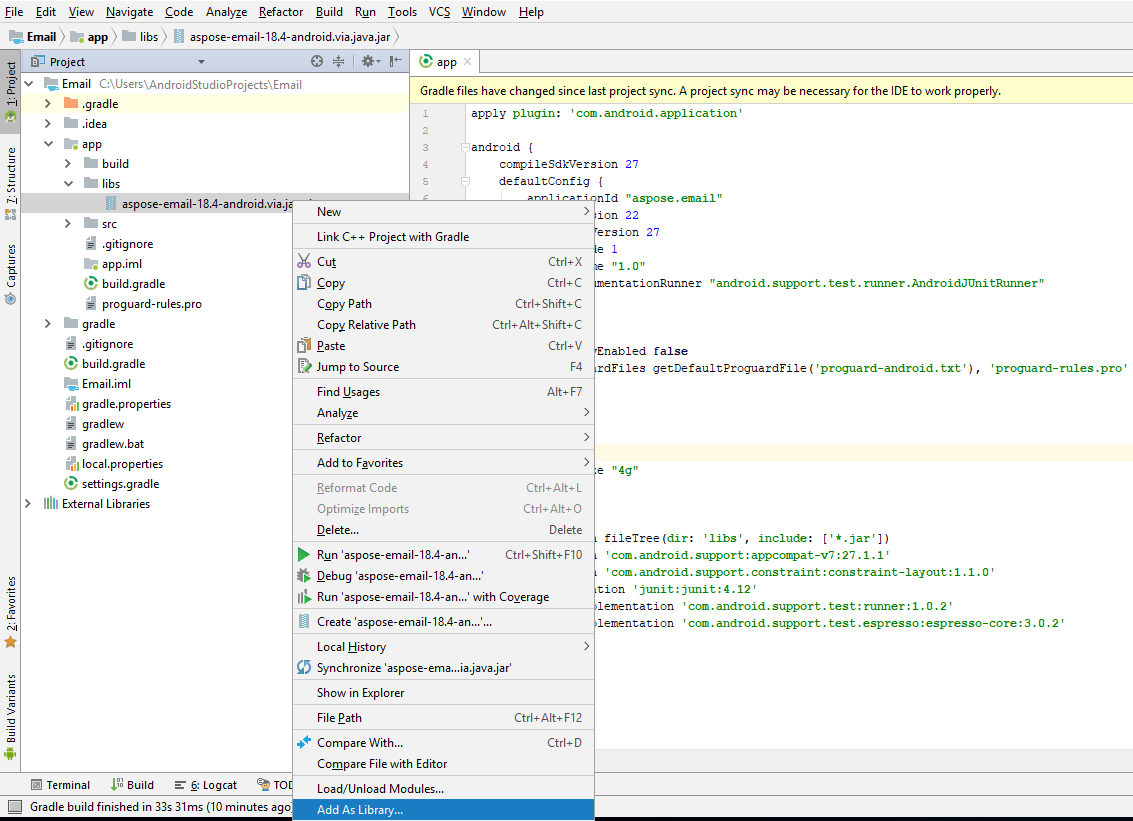
Next, we will add the Aspose.Email for Android via Java Jar to the project. There are 2 important steps as detailed below.
- Manually copy the Aspose.Email for Android via Java Jar to the \app\libs folder.
- Add Aspose.Email for Android via Java Jar as Library to the module as shown below.
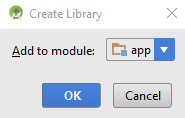
You will be prompt to select the module to which you wish to add the Aspose.Email for Java.Android Jar as library. Please choose appropriately and click OK.
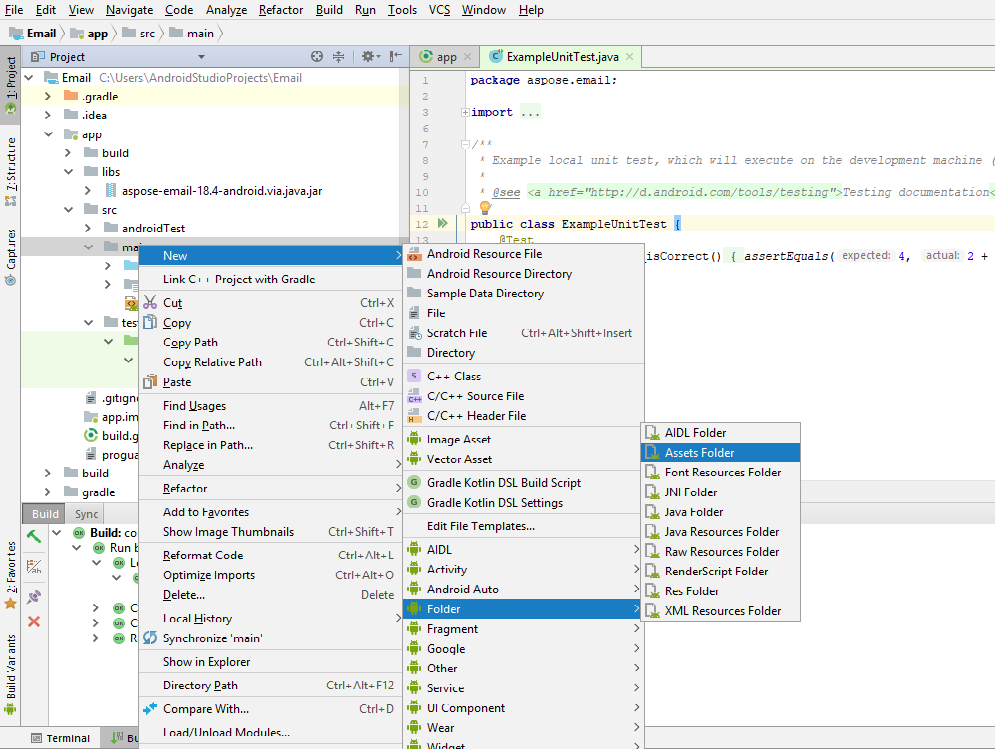
You also need to add the APK file to the project. You have to copy the APK to the \app\src\main\assets folder. If you do not have the assets folder under the main folder, you can create one by right clicking the main node in the Project view. Select New > Folder > Asset Folder.
Once the APK has been added to the project, it needs to be loaded by the project. There are 2 ways to load the APK as follow.
- Load the APK in a custom application class using the snippet provided below, and register the custom application class to the AndroidManifest.xml.
LibsLoadHelper.loadLibs(this);
- Load the APK in the OnCreate method of MainActivity.
LibsLoadHelper.loadLibs(getApplicationContext());
Now we are ready to use the code from Examples archive.
Contribute
If you like to add or improve an example, we encourage you to contribute to the project. All examples and showcase projects in this repository are open source and can be freely used in your own applications.
To contribute, you can fork the repository, edit the source code and create a pull request. We will review the changes and include it in the repository if found helpful.