Analyzing your prompt, please hold on...
An error occurred while retrieving the results. Please refresh the page and try again.
In this article, you will learn how to build 2 simple C++ applications for creating and recognizing a simple questionnaire with Aspose.OMR for C++.
While our OMR application requires minimal coding, the underlying process is a bit more complex than the typical Hello World. Let’s look at the necessary steps to be taken.
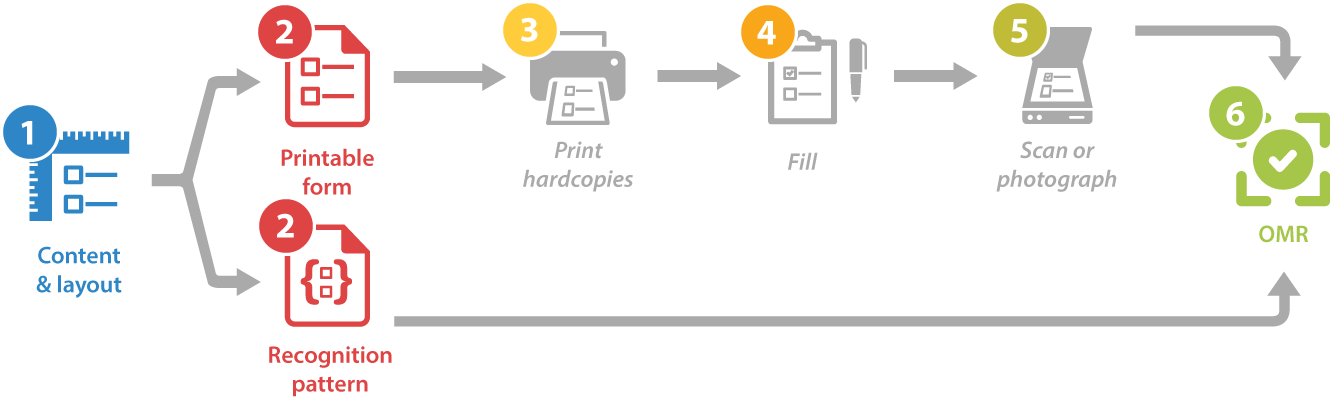
Aspose.OMR for C++ not only performs recognition, but also allows you to design OMR forms of any layout and complexity.
The structure and layout of the questionnaire (template source) is defined in a plain-text file that uses a special notation. You can create it with any text editor, including Notepad or Visual Studio.
?text=Hello, World!
	font_style=bold
	font_size=24
	align=center

#How are you doing today?
	() Pretty good, thanks! () I won't respond until I see my lawyer.
In this article, we won’t delve into the full syntax of the template. Let’s just take a look at its key building blocks:
?text= keyword is rendered as a simple paragraph. You can optionally format it by adding layout attributes (font, style, and the like) on the lines immediately following the text. Each attribute definition must be preceded by a tab character.#). The hash itself is not rendered.Save the template source somewhere on you disk under the name template.txt. You will need it on the next step.
Once you have finished with the questionnaire structure and layout, let’s build a simple utility that generates a printable form from it.
System::SharedPtr<Api::OmrEngine> engine = System::MakeObject<Api::OmrEngine>();
System::SharedPtr<Generation::GenerationResult> result = engine->GenerateTemplate(u"template.txt");
result.Save("target", "omr-form");
Full listing:
// Initialize OMR engine
System::SharedPtr<Api::OmrEngine> engine = System::MakeObject<Api::OmrEngine>();
// Generate and save printable form and recognition pattern file
System::SharedPtr<Generation::GenerationResult> result = engine->GenerateTemplate(u"template.txt");
result.Save("target", "omr-form");
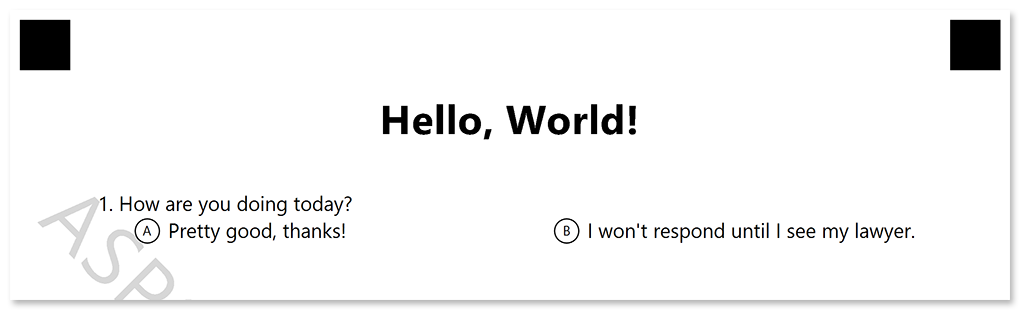
Now run the program. If the template is correct, you should get 2 files in bin\Debug directory of the project:
Let’s take a break from the computer and get back to the good old pen and paper.
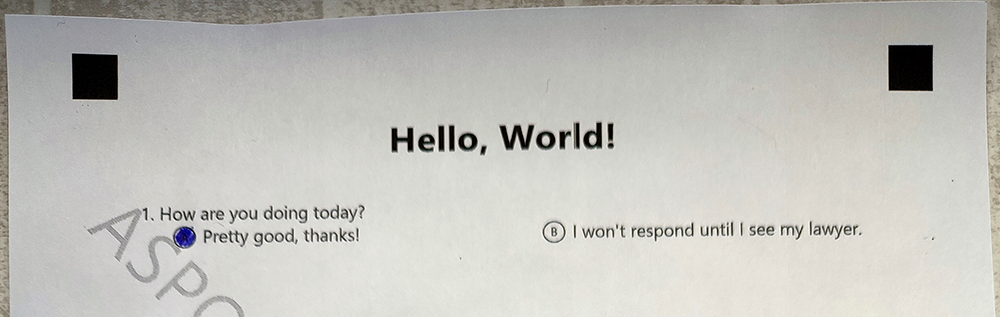
Now we are ready for what OMR stands for – optical mark recognition.
System::SharedPtr<Api::OmrEngine> engine = System::MakeObject<Api::OmrEngine>();
System::SharedPtr<Api::TemplateProcessor> processor = engine->GetTemplateProcessor(u"omr-form.omr");
System::SharedPtr<Model::RecognitionResult> result = processor->RecognizeImage(u"IMG_20220401.jpg");
System::String resultCsv = result->GetCsv();
Full listing:
// Initialize OMR engine
System::SharedPtr<Api::OmrEngine> engine = System::MakeObject<Api::OmrEngine>();
// Load recognition pattern file
System::SharedPtr<Api::TemplateProcessor> processor = engine->GetTemplateProcessor(u"omr-form.omr");
// Recognized completed survey
System::SharedPtr<Model::RecognitionResult> result = processor->RecognizeImage(u"IMG_20220401.jpg");
// Get results in CSV format
System::String resultCsv = result->GetCsv();
Now run the program. You should get the following recognition results:
Element Name,Value,
Question1,"A"
Congratulations! You have taken the first steps in optical mark recognition technology. Read the Developer reference and API reference for details on developing advanced OMR forms and applications with Aspose.OMR for C++.
Analyzing your prompt, please hold on...
An error occurred while retrieving the results. Please refresh the page and try again.