Converting a File to PDF via Workflow Activity
Setting up a Workflow
This example creates a workflow that converts any new item in a document library to PDF format and stores it in another document library. The example users the Personal Documents library as the source library and the Pdf sub-folder in the Shared Documents library as the destination library.
Aspose.PDF for SharePoint supports conversion of HTML, text and image files.
Design the Workflow using SharePoint Designer
-
Open SharePoint Designer and connect to the site where the workflow will be implemented.
-
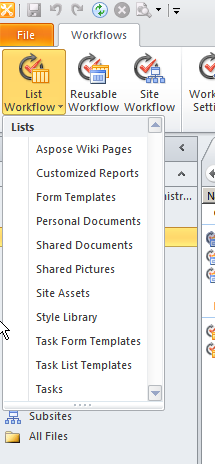
Select Workflows from site objects and then open List Workflow.
-
Select the Personal Documents library to create and attach a new list workflow to the document library.
Selecting Personal Documents from the menu
-
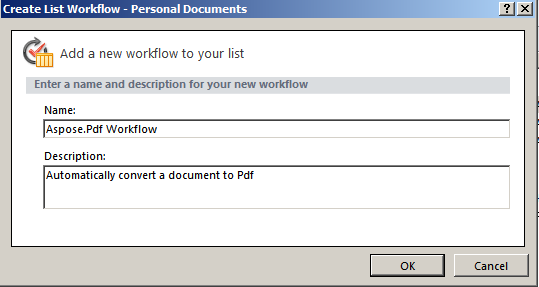
Create and attach the list workflow to the Personal Documents library by typing a workflow name and description.
-
Click OK to complete this step.
Creating a list workflow
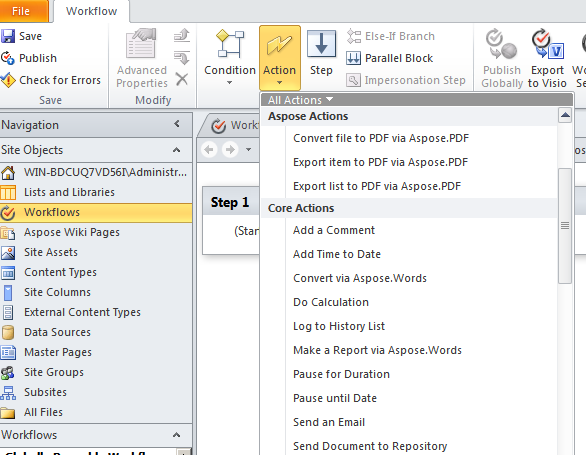
A workflow step editor appears. This is used to define conditions and actions for workflows. Now add an action to convert a new document to PDF without any condition, from Aspose Actions.
-
Select the Convert file to PDF via Aspose.PDF action from the Action menu.
Selecting and action
- Configure the action parameters:
-
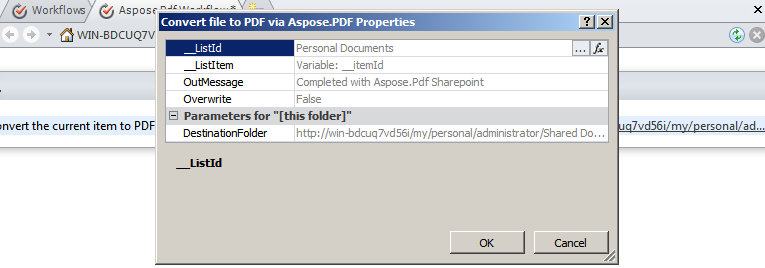
Set this folder parameter to the destination folder.
-
Either leave the other action parameters as default values or set using the action properties window. The default value for the Overwrite parameter is false.
The Workflow Editor
-

Setting the destination library

Setting the properties
-
From the Workflow menu, select Workflow Settings.
-
Select start workflow automatically when a new item created and clear other options from Start Options.
Setting the start options
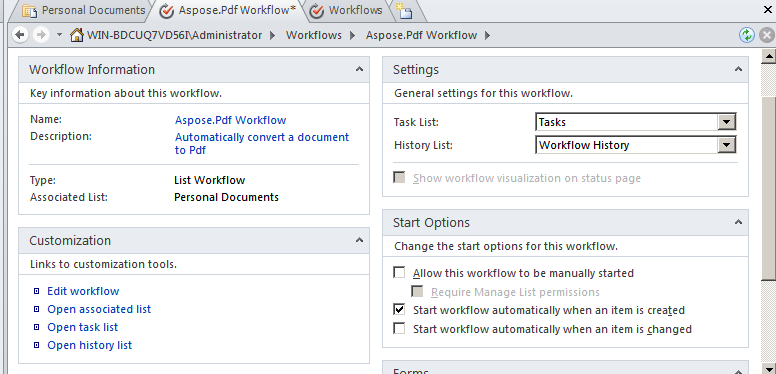
The workflow design is finished.
- Save and publish the workflow to implement it on the SharePoint site.
Test the Workflow
To test the workflow:
-
Open the SharePoint site and upload a new document to the Personal Documents document library. Aspose.PDF for SharePoint supports conversion from HTML files, text files, and images (JPG, PNG, GIF, TIFF and BMP*) to PDF. The workflow is configured to start automatically when a new item is created, so files are process automatically.
-
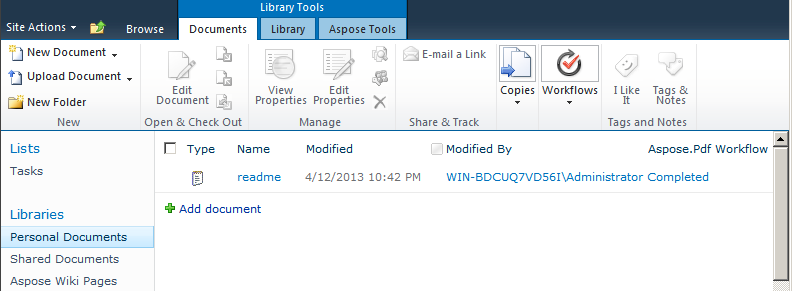
Refresh the browser. The workflow status appear in the workflow column, Aspose.PDF Workflow in this case.
Adding a document to the source library
-
Open the destination document library to view the converted document. Shared Documents/Pdf is the path in this example.
The destination library
