将 PDF 转换为图像格式
Aspose.PDF for Java 允许您使用两种方法将 PDF 文档转换为图像格式,如 BMP、JPEG、GIF、PNG、EMF、TIFF 和 SVG。转换是使用 Device 和 SaveOption 完成的。
库中有几个类允许您使用虚拟设备转换图像。DocumentDevice 适用于转换整个文档,而 ImageDevice 则针对特定页面。
使用 DocumentDevice 类转换 PDF
Aspose.PDF for Java 可以将 PDF 页面转换为 TIFF 图像。
TiffDevice 类 允许您将 PDF 页面转换为 TIFF 图像。 这个类提供了一个名为 Process 的方法,允许您将 PDF 文件中的所有页面转换为单个 TIFF 图像。
将 PDF 页面转换为单个 TIFF 图像
Aspose.PDF for Java 解释了如何将 PDF 文件中的所有页面转换为单个 TIFF 图像:
- 创建一个 Document 类的对象。
- 调用 Process 方法来转换文档。
- 要设置输出文件的属性,请使用 TiffSettings 类。
下面的代码片段显示了如何将所有 PDF 页面转换为单个 TIFF 图像。
// 打开文档
String documentFileName = Paths.get(DATA_DIR.toString(), "PageToTIFF.pdf").toString();
Document document = new Document(documentFileName);

// 创建 Resolution 对象
Resolution resolution = new Resolution(300);

// 创建 TiffSettings 对象
TiffSettings tiffSettings = new TiffSettings();
tiffSettings.setCompression(CompressionType.None);
tiffSettings.setDepth(ColorDepth.Default);
tiffSettings.setShape(ShapeType.Landscape);
tiffSettings.setSkipBlankPages(false);

// 创建 TIFF 设备
TiffDevice tiffDevice = new TiffDevice(resolution, tiffSettings);

// 转换特定页面并将图像保存到流中
tiffDevice.process(document, DATA_DIR + "AllPagesToTIFF_out.tif");
将单页转换为 TIFF 图像
Aspose.PDF for Java 允许将 PDF 文件中的特定页面转换为 TIFF 图像,使用重载版本的 Process(..) 方法,该方法接受页码作为转换参数。以下代码片段展示了如何将 PDF 的第一页转换为 TIFF 格式。
// 打开文档
String documentFileName = Paths.get(DATA_DIR.toString(), "PageToTIFF.pdf").toString();
String tiffFileName = Paths.get(DATA_DIR.toString(), "PageToTIFF_out.tif").toString();
Document document = new Document(documentFileName);

// 创建 Resolution 对象
Resolution resolution = new Resolution(300);

// 创建 TiffSettings 对象
TiffSettings tiffSettings = new TiffSettings();
tiffSettings.setCompression(CompressionType.None);
tiffSettings.setDepth(ColorDepth.Default);
tiffSettings.setShape(ShapeType.Landscape);

// 创建 TIFF 设备
TiffDevice tiffDevice = new TiffDevice(resolution, tiffSettings);

// 转换特定页面并将图像保存到流中
tiffDevice.process(document, 1, 1, tiffFileName);
在转换过程中使用Bradley算法
Aspose.PDF for Java已经支持使用LZW压缩将PDF转换为TIFF,然后使用AForge可以应用二值化。然而,有一个客户要求对于某些图像,他们需要使用Otsu获取阈值,因此他们还希望使用Bradley。
// 打开文档
String documentFileName = Paths.get(DATA_DIR.toString(), "PageToTIFF.pdf").toString();
Document document = new Document(documentFileName);

String outputImageFileName = Paths.get(DATA_DIR.toString(), "resultant_out.tif").toString();
String outputBinImageFileName = Paths.get(DATA_DIR.toString(), "tiff-bin_out.tif").toString();

java.io.OutputStream outputImageFile = new java.io.FileOutputStream(outputImageFileName);
java.io.OutputStream outputBinImageFile = new java.io.FileOutputStream(outputBinImageFileName);

// 创建Resolution对象
Resolution resolution = new Resolution(300);
// 创建TiffSettings对象
TiffSettings tiffSettings = new TiffSettings();
tiffSettings.setCompression(CompressionType.LZW);
tiffSettings.setDepth(ColorDepth.Format1bpp);

// 创建TIFF设备
TiffDevice tiffDevice = new TiffDevice(resolution, tiffSettings);
// 转换特定页面并将图像保存到流中
tiffDevice.process(document, outputImageFile);
outputImageFile.close();

// 创建流对象以保存输出图像
java.io.InputStream inStream = new java.io.FileInputStream(outputImageFileName);
tiffDevice.binarizeBradley(inStream, outputBinImageFile, 0.1);
将PDF页面转换为像素化的TIFF图像
要将PDF文件中的所有页面转换为像素化的TIFF格式,请使用IndexedConversionType的Pixelated选项
// 将PDF页面转换为像素化的TIFF图像
// 要将PDF文件中的所有页面转换为像素化的TIFF格式,请使用IndexedConversionType的Pixelated选项。

// 打开文档
String documentFileName = Paths.get(DATA_DIR.toString(), "PageToTIFF.pdf").toString();
Document document = new Document(documentFileName);

// 创建流对象以保存输出图像
java.io.OutputStream imageStream = new java.io.FileOutputStream("Image.tiff");

// 创建Resolution对象
com.aspose.pdf.devices.Resolution resolution = new com.aspose.pdf.devices.Resolution(300);

// 实例化TiffSettings对象
com.aspose.pdf.devices.TiffSettings tiffSettings = new com.aspose.pdf.devices.TiffSettings();

// 设置生成的TIFF图像的压缩
tiffSettings.setCompression(com.aspose.pdf.devices.CompressionType.CCITT4);
// 设置生成图像的颜色深度
tiffSettings.setDepth(com.aspose.pdf.devices.ColorDepth.Format4bpp);
// 在将PDF渲染为TIFF时跳过空白页
tiffSettings.setSkipBlankPages(true);
// 设置图像亮度
tiffSettings.setBrightness(.5f);

// 设置IndexedConversion Type,默认值为simple
tiffSettings.setIndexedConversionType(IndexedConversionType.Pixelated);

// 使用特定分辨率创建TiffDevice对象
TiffDevice tiffDevice = new TiffDevice(2480, 3508, resolution, tiffSettings);

// 转换特定页面(第1页)并将图像保存到流中
tiffDevice.process(document, 1, 1, imageStream);

// 关闭流
imageStream.close();
使用 ImageDevice 类转换 PDF
ImageDevice 是 BmpDevice、JpegDevice、GifDevice、PngDevice 和 EmfDevice 的祖先。
-
BmpDevice 类允许您将 PDF 页面转换为 BMP 图像。
-
EmfDevice 类允许您将 PDF 页面转换为 EMF 图像。
-
JpegDevice 类允许您将 PDF 页面转换为 JPEG 图像。
-
PngDevice 类允许您将 PDF 页面转换为 PNG 图像。
-
GifDevice 类允许您将 PDF 页面转换为 GIF 图像。
让我们看看如何将 PDF 页面转换为图像。
BmpDevice 类提供了一个名为 Process 的方法,允许您将 PDF 文件的特定页面转换为 BMP 图像格式。其他类具有相同的方法。因此,如果我们需要将 PDF 页面转换为图像,我们只需实例化所需的类。
以下代码片段展示了这种可能性:
package com.aspose.pdf.examples.conversion;

import com.aspose.pdf.Document;
import com.aspose.pdf.devices.*;

import java.io.IOException;
import java.nio.file.Path;
import java.nio.file.Paths;

/**
 * 将 PDF 转换为图像。
 */
public final class ConvertPDFtoImage {
    private static final Path DATA_DIR = Paths.get("/home/aspose/pdf-examples/Samples");

    private ConvertPDFtoImage() {

    }

    public static void run() throws IOException {
        runConvertPdfUsingImageDevice();
    }

    public static void runConvertPdfUsingImageDevice() throws IOException {
        // 创建分辨率对象
        Resolution resolution = new Resolution(300);
        BmpDevice bmpDevice = new BmpDevice(resolution);
        JpegDevice jpegDevice = new JpegDevice(resolution);
        GifDevice gifDevice = new GifDevice(resolution);
        PngDevice pngDevice = new PngDevice(resolution);
        EmfDevice emfDevice = new EmfDevice(resolution);

        Document document = new Document(DATA_DIR + "ConvertAllPagesToBmp.pdf");

        convertPDFtoImages(bmpDevice, "bmp", document);
        convertPDFtoImages(jpegDevice, "jpeg", document);
        convertPDFtoImages(gifDevice, "gif", document);
        convertPDFtoImages(pngDevice, "png", document);
        convertPDFtoImages(emfDevice, "emf", document);
    }

    public static void convertPDFtoImages(
            ImageDevice imageDevice,
            String ext,
            Document document)
            throws IOException {
        for (int pageCount = 1; pageCount <= document.getPages().size(); pageCount++) {
            java.io.OutputStream imageStream = new java.io.FileOutputStream(
                    DATA_DIR + "image" + pageCount + "_out." + ext);
            // 转换特定页面并将图像保存到流
            imageDevice.process(document.getPages().get_Item(pageCount), imageStream);

            // 关闭流
            imageStream.close();
        }
    }
}
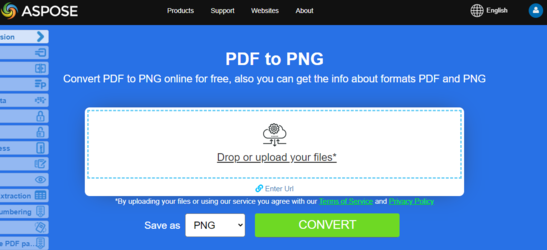
尝试在线将 PDF 转换为 PNG
作为我们免费应用程序如何工作的示例,请查看下一个功能。
Aspose.PDF for Java 为您提供在线免费应用程序 “PDF to PNG”,您可以尝试调查其功能和工作质量。
使用 SaveOptions 类转换 PDF
本文的这一部分向您展示如何使用 Java 和 SaveOptions 类将 PDF 转换为 SVG。
可扩展矢量图形 (SVG) 是一种基于 XML 的二维矢量图形文件格式的规格家族,包括静态和动态(交互式或动画)的图形。SVG 规范是一个开放标准,自 1999 年以来由万维网联盟 (W3C) 开发。
SVG 图像及其行为在 XML 文本文件中定义。这意味着它们可以被搜索、索引、脚本化,并在需要时进行压缩。作为 XML 文件,SVG 图像可以使用任何文本编辑器创建和编辑,但通常使用诸如 Inkscape 这样的绘图程序来创建它们更为方便。
将 PDF 页面转换为 SVG 图像
Aspose.PDF for Java 支持将 PDF 文件转换为 SVG 格式的功能。 要满足此要求,SvgSaveOptions 类已被引入到 com.aspose.pdf 包中。实例化一个 SvgSaveOptions 对象,并将其作为第二个参数传递给 Document.save(..) 方法。
以下代码片段显示了将 PDF 文件转换为 SVG 格式的步骤。
package com.aspose.pdf.examples.conversion;

import com.aspose.pdf.Document;
import com.aspose.pdf.SvgSaveOptions;

import java.io.IOException;
import java.nio.file.Path;
import java.nio.file.Paths;

/**
 * 将 PDF 转换为 SVG。
 */
public class ConvertPDFtoSVG {
    // 文档目录的路径。
    private static final Path DATA_DIR = Paths.get("/home/aspose/pdf-examples/Samples");

    private ConvertPDFtoSVG() {

    }

    public static void run() throws IOException {
        String pdfFileName = Paths.get(DATA_DIR.toString(), "input.pdf").toString();
        String svgFileName = Paths.get(DATA_DIR.toString(), "PDFToSVG_out.svg").toString();

        // 加载 PDF 文档
        Document document = new Document(pdfFileName);

        // 实例化 SvgSaveOptions 对象
        SvgSaveOptions saveOptions = new SvgSaveOptions();

        // 不将 SVG 图像压缩到 Zip 存档
        saveOptions.setCompressOutputToZipArchive(false);

        // 将输出保存到 SVG 文件
        document.save(svgFileName, saveOptions);
        document.close();
    }
}


