# Aspose.Slides for .NET
> Complete English documentation. Each page retains its canonical source URL.
# Aspose.Slides for .NET
> Start here: install Aspose.Slides for .NET, create a first presentation, and find the guides for common tasks, deployment and the API reference.
Source: https://docs.aspose.com/slides/net/
Updated: 2026-10-27
Explore features and support
------
Get Started
GETTING STARTED
EVALUATE
Build with Slides
COMMON TASKS
SLIDES WORKFLOWS
EXAMPLES
Deploy & Support
DEPLOY
REFERENCE
SUPPORT
------
();
}
else
{
authorsPart = doc.PresentationPart.CommentAuthorsPart;
}
// Verify that there is a comment author list in the comment authors part.
if (authorsPart.CommentAuthorList == null)
{
// If not, add a new one.
authorsPart.CommentAuthorList = new CommentAuthorList();
}
// Declare a new author ID.
uint authorId = 0;
CommentAuthor author = null;
// If there are existing child elements in the comment authors list...
if (authorsPart.CommentAuthorList.HasChildren)
{
// Verify that the author passed in is on the list.
var authors = authorsPart.CommentAuthorList.Elements().Where(a => a.Name == name && a.Initials == initials);
// If so...
if (authors.Any())
{
// Assign the new comment author the existing author ID.
author = authors.First();
authorId = author.Id;
}
// If not...
if (author == null)
{
// Assign the author passed in a new ID
authorId = authorsPart.CommentAuthorList.Elements().Select(a => a.Id.Value).Max();
}
}
// If there are no existing child elements in the comment authors list.
if (author == null)
{
authorId++;
// Add a new child element(comment author) to the comment author list.
author = authorsPart.CommentAuthorList.AppendChild
(new CommentAuthor()
{
Id = authorId,
Name = name,
Initials = initials,
ColorIndex = 0
});
}
// Get the first slide, using the GetFirstSlide method.
SlidePart slidePart1 = GetFirstSlide(doc);
// Declare a comments part.
SlideCommentsPart commentsPart;
// Verify that there is a comments part in the first slide part.
if (slidePart1.GetPartsOfType().Count() == 0)
{
// If not, add a new comments part.
commentsPart = slidePart1.AddNewPart();
}
else
{
// Else, use the first comments part in the slide part.
commentsPart = slidePart1.GetPartsOfType().First();
}
// If the comment list does not exist.
if (commentsPart.CommentList == null)
{
// Add a new comments list.
commentsPart.CommentList = new CommentList();
}
// Get the new comment ID.
uint commentIdx = author.LastIndex == null ? 1 : author.LastIndex + 1;
author.LastIndex = commentIdx;
// Add a new comment.
Comment comment = commentsPart.CommentList.AppendChild(
new Comment()
{
AuthorId = authorId,
Index = commentIdx,
DateTime = DateTime.Now
});
// Add the position child node to the comment element.
comment.Append(
new Position() { X = 100, Y = 200 },
new Text() { Text = text });
// Save the comment authors part.
authorsPart.CommentAuthorList.Save();
// Save the comments part.
commentsPart.CommentList.Save();
}
}
// Get the slide part of the first slide in the presentation document.
private static SlidePart GetFirstSlide(PresentationDocument presentationDocument)
{
// Get relationship ID of the first slide
PresentationPart part = presentationDocument.PresentationPart;
SlideId slideId = part.Presentation.SlideIdList.GetFirstChild();
string relId = slideId.RelationshipId;
// Get the slide part by the relationship ID.
SlidePart slidePart = (SlidePart)part.GetPartById(relId);
return slidePart;
}
```
## **Aspose.Slides**
In **Aspose.Slides** for .NET, the PPT slide comment collection is included in every **Slide** class. The **CommentCollection** class is used to hold the particular slide comments. The **Comment** class include information like author who added slide comment, his initials, time of creation, the position of slide comment on slide and the comment text. The **CommentAuthor** class is used to add the authors for slide comments on presentation level. The **Presentation** class holds the collection of authors for presentation in **CommentAuthors** class.
In the following example, we have added the code snippet for adding the slide comments.
``` csharp
using System.Drawing;
using Aspose.Slides;
string FilePath = @"..\..\..\..\Sample Files\";
string FileName = FilePath + "Add a comment to a slide.pptx";
using (Presentation pres = new Presentation())
{
//Adding Empty slide
pres.Slides.AddEmptySlide(pres.LayoutSlides[0]);
//Adding Autthor
ICommentAuthor author = pres.CommentAuthors.AddAuthor("Zeeshan", "MZ");
//Position of comments
PointF point = new PointF();
point.X = 1;
point.Y = 1;
//Adding slide comment for an author on slide
author.Comments.AddComment("Hello Zeeshan, this is slide comment", pres.Slides[0], point, DateTime.Now);
pres.Save(FileName, Aspose.Slides.Export.SaveFormat.Pptx);
}
```
## **Download Sample Code**
- [GitHub](https://github.com/aspose-slides/Aspose.Slides-for-.NET/releases/tag/AsposeSlidesVsOpenXML1.1)
- [Sourceforge](https://sourceforge.net/projects/asposeopenxml/files/Aspose.Slides%20Vs%20OpenXML/Add%20a%20comment%20to%20a%20slide%20%28Aspose.Slides%29.zip/download)
- [Bitbucket](https://bitbucket.org/asposemarketplace/aspose-for-openxml/src/master/Aspose.Slides%20Vs%20OpenXML/Add%20a%20comment%20to%20a%20slide/)
## Related articles
- [Manage Presentation Comments in .NET](https://docs.aspose.com/slides/net/presentation-comments/)
- [Comment](https://docs.aspose.com/slides/net/examples/elements/comment/)
# Add Image in Table Cell
>
Source: https://docs.aspose.com/slides/net/add-image-in-table-cell/
Updated: 2026-08-05
## **VSTO**
Below is the code for adding image in Table cell:
``` csharp
using Aspose.Slides;
//Open Prsentation class that contains the table
string FileName = "Adding Image in Table Cell.pptx";
string ImageFile = "AsposeLogo.jpg";
Presentation pres = Application.Presentations.Open(FileName);
//Get the first slide
Slide sld = pres.Slides[1];
foreach (Shape shp in sld.Shapes)
{
if (shp.HasTable == Microsoft.Office.Core.MsoTriState.msoTrue)
{
Cell cell= shp.Table.Rows[1].Cells[1];
cell.Shape.Fill.UserPicture(ImageFile);
}
}
```
## **Aspose.Slides**
Aspose.Slides for .NET has provided the simplest API to work with tables in an easiest way. To add image in a cell of a table that already exists in a presentation, please follow the steps below:
- Create an instance of Presentation class from the file that contains the table
- Obtain the reference of a slide by using its Index
- Load the image file into an IImage object using the Images.FromFile method
- Add the loaded image to the presentation's image collection to get an IPPImage object
- Find the table among the shapes of the slide
- Set Fill Format of the Table Cell as Picture
- Add the image to the first cell of the table
- Save the modified presentation as a PPTX file
``` csharp
using Aspose.Slides;
using Aspose.Slides.Export;
string fileName = "Adding Image in Table Cell.pptx";
string imageFile = "AsposeLogo.jpg";
using Presentation presentation = new Presentation(fileName);
//Get First Slide
ISlide sld = presentation.Slides[0];
//Load the image file
using IImage image = Images.FromFile(imageFile);
//Create an IPPImage object using the loaded image
IPPImage imgx1 = presentation.Images.AddImage(image);
foreach (IShape shp in sld.Shapes)
{
if (shp is ITable tbl)
{
//Add image to first table cell
tbl[0, 0].CellFormat.FillFormat.FillType = FillType.Picture;
tbl[0, 0].CellFormat.FillFormat.PictureFillFormat.PictureFillMode = PictureFillMode.Stretch;
tbl[0, 0].CellFormat.FillFormat.PictureFillFormat.Picture.Image = imgx1;
}
}
//Save PPTX to Disk
presentation.Save(fileName, SaveFormat.Pptx);
```
## **Download Running Code**
- [Github](https://github.com/aspose-slides/Aspose.Slides-for-.NET/releases/tag/AsposeSlidesVsVSTOv1.1)
## **Download Sample Code**
- [Github](https://github.com/aspose-slides/Aspose.Slides-for-.NET/tree/master/Plugins/Aspose.Slides%20Vs%20VSTO%20Presentations/Code%20Comparison%20of%20Common%20Features/Adding%20image%20in%20table%20cell)
## Related articles
- [Removing row or column in Table in VSTO and Aspose.Slides](https://docs.aspose.com/slides/net/removing-row-or-column-in-table-in-vsto-and-aspose-slides/)
- [Creating a Table on PowerPoint Slide in VSTO and Aspose.Slides](https://docs.aspose.com/slides/net/creating-a-table-on-powerpoint-slide-in-vsto-and-aspose-slides/)
- [Adding Shapes to Presentation](https://docs.aspose.com/slides/net/adding-shapes-to-presentation/)
# Add layout Slide to Presentation
>
Source: https://docs.aspose.com/slides/net/add-layout-slide-to-presentation/
Updated: 2026-08-13
Aspose.Slides for .NET allows developers to add new Layout slides in presentation. To add a Layout Slide, please follow the steps below:
- Create an instance of Presentation class
- Access the Master Slide collection
- Try to find existing Layout slides to see if the required one is already available in Layout Slide collection or not
- Add a new Layout slide if the desired layout is unavailable
- Add an empty slide with newly added Layout slide
- Finally, write the presentation file using the Presentation object.
## **Example**
``` csharp
using Aspose.Slides;
using Aspose.Slides.Export;
//Instantiate Presentation class that represents the presentation file
using (Presentation p = new Presentation("Test.pptx"))
{
// Try to search by layout slide type
IMasterLayoutSlideCollection layoutSlides = p.Masters[0].LayoutSlides;
ILayoutSlide layoutSlide =
layoutSlides.GetByType(SlideLayoutType.TitleAndObject) ??
layoutSlides.GetByType(SlideLayoutType.Title);
if (layoutSlide == null)
{
// The situation when a presentation doesn't contain some type of layouts.
// Technographics.pptx presentation only contains Blank and Custom layout types.
// But layout slides with Custom types has different slide names,
// like "Title", "Title and Content", etc. And it is possible to use these
// names for layout slide selection.
// Also it is possible to use the set of placeholder shape types. For example,
// Title slide should have only Title pleceholder type, etc.
foreach (ILayoutSlide titleAndObjectLayoutSlide in layoutSlides)
{
if (titleAndObjectLayoutSlide.Name == "Title and Object")
{
layoutSlide = titleAndObjectLayoutSlide;
break;
}
}
if (layoutSlide == null)
{
foreach (ILayoutSlide titleLayoutSlide in layoutSlides)
{
if (titleLayoutSlide.Name == "Title")
{
layoutSlide = titleLayoutSlide;
break;
}
}
if (layoutSlide == null)
{
layoutSlide = layoutSlides.GetByType(SlideLayoutType.Blank);
if (layoutSlide == null)
{
layoutSlide = layoutSlides.Add(SlideLayoutType.TitleAndObject, "Title and Object");
}
}
}
}
//Adding empty slide with added layout slide
p.Slides.InsertEmptySlide(0, layoutSlide);
//Save presentation
p.Save("Output.pptx", SaveFormat.Pptx);
}
```
## **Download Running Example**
- [GitHub](https://github.com/aspose-slides/Aspose.Slides-for-.NET/tree/master/Plugins/Aspose.Slides%20Vs%20VSTO%20Presentations/Aspose.Slides%20Features%20missing%20in%20VSTO/Adding%20Layout%20Slides)
## **Download Sample Code**
- [GitHub](https://github.com/aspose-slides/Aspose.Slides-for-.NET/releases/tag/Aspose.SlidesFeaturesmissingInVSTOv1.1)
For more details, visit [Apply or Change Slide Layouts in .NET](https://docs.aspose.com/slides/net/slide-layout/).
## Related articles
- [Add Layout Slides to Presentation](https://docs.aspose.com/slides/net/add-layout-slides-to-presentation/)
- [Create Slide as SVG Image](https://docs.aspose.com/slides/net/create-slide-as-svg-image/)
- [Convert Presentation to HTML](https://docs.aspose.com/slides/net/convert-presentation-to-html/)
# Add Layout Slides to Presentation
>
Source: https://docs.aspose.com/slides/net/add-layout-slides-to-presentation/
Updated: 2026-08-13
Aspose.Slides for .NET allows developers to add new Layout slides in presentation. To add a Layout Slide, please follow the steps below:
- Create an instance of Presentation class
- Access the Master Slide collection
- Try to find existing Layout slides to see if the required one is already available in Layout Slide collection or not
- Add a new Layout slide if the desired layout is unavailable
- Add an empty slide with newly added Layout slide
- Finally, write the presentation file using the Presentation object
## **Example**
``` csharp
using Aspose.Slides;
using Aspose.Slides.Export;
string FilePath = @"..\..\..\Sample Files\";
string FileName = FilePath + "Adding Layout Slides.pptx";
//Instantiate Presentation class that represents the presentation file
using (Presentation p = new Presentation(FileName))
{
// Try to search by layout slide type
IMasterLayoutSlideCollection layoutSlides = p.Masters[0].LayoutSlides;
ILayoutSlide layoutSlide =
layoutSlides.GetByType(SlideLayoutType.TitleAndObject) ??
layoutSlides.GetByType(SlideLayoutType.Title);
if (layoutSlide == null)
{
// The situation when a presentation doesn't contain some type of layouts.
// Technographics.pptx presentation only contains Blank and Custom layout types.
// But layout slides with Custom types has different slide names,
// like "Title", "Title and Content", etc. And it is possible to use these
// names for layout slide selection.
// Also it is possible to use the set of placeholder shape types. For example,
// Title slide should have only Title pleceholder type, etc.
foreach (ILayoutSlide titleAndObjectLayoutSlide in layoutSlides)
{
if (titleAndObjectLayoutSlide.Name == "Title and Object")
{
layoutSlide = titleAndObjectLayoutSlide;
break;
}
}
if (layoutSlide == null)
{
foreach (ILayoutSlide titleLayoutSlide in layoutSlides)
{
if (titleLayoutSlide.Name == "Title")
{
layoutSlide = titleLayoutSlide;
break;
}
}
if (layoutSlide == null)
{
layoutSlide = layoutSlides.GetByType(SlideLayoutType.Blank);
if (layoutSlide == null)
{
layoutSlide = layoutSlides.Add(SlideLayoutType.TitleAndObject, "Title and Object");
}
}
}
}
//Adding empty slide with added layout slide
p.Slides.InsertEmptySlide(0, layoutSlide);
//Save presentation
p.Save(FileName, SaveFormat.Pptx);
}
```
## **Download Sample Code**
- [Github](https://github.com/aspose-slides/Aspose.Slides-for-.NET/releases/tag/MissingFeaturesAsposeSlidesForOpenXMLv1.1)
## **Download Running Example**
- [Github](https://github.com/aspose-slides/Aspose.Slides-for-.NET/tree/master/Plugins/OpenXML/Missing%20Features/Adding%20Layout%20Slides)
For more details, visit [Apply or Change Slide Layouts in .NET](https://docs.aspose.com/slides/net/slide-layout/).
## Related articles
- [Add layout Slide to Presentation](https://docs.aspose.com/slides/net/add-layout-slide-to-presentation/)
- [Create Slide as SVG Image](https://docs.aspose.com/slides/net/create-slide-as-svg-image/)
- [Convert Presentation to HTML](https://docs.aspose.com/slides/net/convert-presentation-to-html/)
# Add Picture Frame to Presentation
>
Source: https://docs.aspose.com/slides/net/add-picture-frame-to-presentation/
Updated: 2026-08-05
## **VSTO**
Below is the code for adding picture in VSTO presentation:
``` csharp
using Aspose.Slides;
string ImageFilePath="AddPicture.jpg";
Slide slide = Application.ActivePresentation.Slides[1];
slide.Shapes.AddPicture(ImageFilePath, Microsoft.Office.Core.MsoTriState.msoFalse,
Microsoft.Office.Core.MsoTriState.msoCTrue, 0, 0);
```
## **Aspose.Slides**
To add a simple picture frame to your slide, please follow the steps below:
1. Create an instance of the Presentation class.
1. Obtain the reference of a slide by using its index.
1. Create an Image object by adding an image to the Images collection associated with the Presentation object that will be used to fill the Shape.
1. Calculate the width and height of the image.
1. Create a PictureFrame according to the width and height of the image by using the AddPictureFrame method exposed by the Shapes object associated with the referenced slide.
1. Add a picture frame (containing the picture) to the slide.
1. Write the modified presentation as a PPTX file.
The above steps are implemented in the example given below.
``` csharp
using Aspose.Slides;
string ImageFilePath = "AddPicture.jpg";
//Instantiate Prseetation class that represents the PPTX
Presentation pres = new Presentation();
//Get the first slide
ISlide sld = pres.Slides[0];
//Instantiate the ImageEx class
using IImage img = Images.FromFile(ImageFilePath);
IPPImage imgx = pres.Images.AddImage(img);
//Add Picture Frame with height and width equivalent of Picture
sld.Shapes.AddPictureFrame(ShapeType.Rectangle, 50, 150, imgx.Width, imgx.Height, imgx);
```
## **Download Running Code**
- [Github](https://github.com/aspose-slides/Aspose.Slides-for-.NET/releases/tag/AsposeSlidesVsVSTOv1.1)
## **Download Sample Code**
- [Github](https://github.com/aspose-slides/Aspose.Slides-for-.NET/tree/master/Plugins/Aspose.Slides%20Vs%20VSTO%20Presentations/Code%20Comparison%20of%20Common%20Features/Add%20Picture%20Frame)
## Related articles
- [Adding Shapes to Presentation](https://docs.aspose.com/slides/net/adding-shapes-to-presentation/)
- [Adding Picture Frame with Animation in VSTO and Aspose.Slides](https://docs.aspose.com/slides/net/adding-picture-frame-with-animation-in-vsto-and-aspose-slides/)
- [Add Image in Table Cell](https://docs.aspose.com/slides/net/add-image-in-table-cell/)
# Add Slides to Presentations in .NET
> Easily add slides to your PowerPoint and OpenDocument presentations using Aspose.Slides for .NET—seamless, efficient slide insertion in seconds.
Source: https://docs.aspose.com/slides/net/add-slide-to-presentation/
Updated: 2026-08-02
## **Overview**
Aspose.Slides allows you to add slides to PowerPoint presentations programmatically. A presentation contains master/layout slides and normal slides, and normal slides are arranged by a zero-based index. Each slide has a unique ID, and presentation files without slides are not supported.
This article explains how to create a `Presentation` object, access its slide collection, add an empty slide, work with the newly added slide, and save the updated presentation. It also covers related points such as inserting slides at a specific position, using layouts, and understanding the blank slide that exists in a newly created presentation.
## **Add a Slide to a Presentation**
Before talking about adding slides to the presentation files, let us discuss some facts about the slides. Each PowerPoint presentation file contains Master / Layout slide and other Normal slides. It means that a presentation file contains at least one or more slides. It is important to know that presentation files without slides are not supported by Aspose.Slides for .NET. Each slide has a unique Id and all the Normal Slides are arranged in an order specified by the zero based index. Aspose.Slides for .NET allows developers to add empty slides to their presentation. To add an empty slide in the presentation, please follow the steps below:
- Create an instance of [Presentation](https://reference.aspose.com/slides/net/aspose.slides/presentation) class.
- Instantiate [ISlideCollection](https://reference.aspose.com/slides/net/aspose.slides/islidecollection) class by setting a reference to the Slides (collection of content Slide objects) property exposed by the Presentation object.
- Add an empty slide to the presentation at the end of the content slides collection by calling the AddEmptySlide methods exposed by ISlideCollection object
- Do some work with the newly added empty slide.
- Finally, write the presentation file using the [Presentation](https://reference.aspose.com/slides/net/aspose.slides/presentation) object.
```csharp
// For complete examples and data files, please go to https://github.com/aspose-slides/Aspose.Slides-for-.NET
// The path to the documents directory.
string dataDir = RunExamples.GetDataDir_Slides_Presentations();
// Instantiate Presentation class that represents the presentation file
using (Presentation presentation = new Presentation())
{
// Instantiate SlideCollection calss
ISlideCollection slide = presentation.Slides;
for (int i = 0; i < presentation.LayoutSlides.Count; i++)
{
// Add an empty slide to the Slides collection
slide.AddEmptySlide(presentation.LayoutSlides[i]);
}
// Save the PPTX file to the Disk
presentation.Save(dataDir + "EmptySlide_out.pptx", Aspose.Slides.Export.SaveFormat.Pptx);
}
```
[Source: Examples-CSharp-Slides-AddSlides-AddSlides.cs](https://gist.githubusercontent.com/aspose-slides/53249e5573d2cd6e66f91f708e8fe008/raw/c24e7b82f71395d380647aed5862122c5fe947bf/Examples-CSharp-Slides-AddSlides-AddSlides.cs)
## **FAQ**
### Can I insert a new slide at a specific position, not just at the end?
Yes. The library supports slide collections and [insert](https://reference.aspose.com/slides/net/aspose.slides/slidecollection/insertemptyslide/)/[clone](https://reference.aspose.com/slides/net/aspose.slides/slidecollection/insertclone/) operations, so you can add a slide at the required index rather than only at the end.
### Are the theme/styles preserved when adding a slide based on a layout?
Yes. A layout inherits formatting from its master, and the new slide inherits from the selected layout and its associated master.
### Which slide is present in a new "empty" presentation before adding slides?
A newly created presentation already contains one blank slide with index zero. This is important to consider when calculating insertion indices.
### How do I choose the "right" layout for a new slide if the master has many options?
Generally choose the [LayoutSlide](https://reference.aspose.com/slides/net/aspose.slides/layoutslide/) that matches the required structure ([Title and Content, Two Content, etc.](https://reference.aspose.com/slides/net/aspose.slides/slidelayouttype/)). If such a layout is missing, you can [add it to the master](https://docs.aspose.com/slides/net/slide-layout/) and then use it.
## Related features
- [Add, remove and reorder slides](https://docs.aspose.com/slides/features/manage-slides/)
## Related articles
- [Assemble Slides](https://docs.aspose.com/slides/net/assemble-slides/)
- [Adding Slide to Presentation](https://docs.aspose.com/slides/net/adding-slide-to-presentation/)
- [Add layout Slide to Presentation](https://docs.aspose.com/slides/net/add-layout-slide-to-presentation/)
# Adding Picture Frame with Animation in VSTO and Aspose.Slides
>
Source: https://docs.aspose.com/slides/net/adding-picture-frame-with-animation-in-vsto-and-aspose-slides/
Updated: 2026-08-05
The code samples below create a presentation with a slide, add an image with a picture frame and applies animation to it.
## **VSTO**
Using VSTO, take the following steps:
1. Create a presentation.
1. Add an empty slide.
1. Add a picture shape to the slide.
1. Apply animation to the picture.
1. Write the presentation to disk.
``` csharp
//Creating empty presentation
PowerPoint.Presentation pres = Globals.ThisAddIn.Application.Presentations.Add(Microsoft.Office.Core.MsoTriState.msoFalse);
//Add a blank slide
PowerPoint.Slide sld = pres.Slides.Add(1, PowerPoint.PpSlideLayout.ppLayoutBlank);
//Add Picture Frame
PowerPoint.Shape PicFrame = sld.Shapes.AddPicture("pic.jpeg",
Microsoft.Office.Core.MsoTriState.msoTriStateMixed,
Microsoft.Office.Core.MsoTriState.msoTriStateMixed, 150, 100, 400, 300);
//Applying animation on picture frame
PicFrame.AnimationSettings.EntryEffect = Microsoft.Office.Interop.PowerPoint.PpEntryEffect.ppEffectBoxIn;
//Saving Presentation
pres.SaveAs("VSTOAnim.ppt", PowerPoint.PpSaveAsFileType.ppSaveAsPresentation,
Microsoft.Office.Core.MsoTriState.msoFalse);
```
## **Aspose.Slides**
Using Aspose.Slides for .NET, perform the following steps:
1. Create a presentation.
1. Access the first slide.
1. Add an image to a picture collection.
1. Add a picture shape to the slide.
1. Apply animation to the picture.
1. Write the presentation to disk.
``` csharp
using Aspose.Slides;
using Aspose.Slides.Animation;
using Aspose.Slides.Export;
// Creating empty presentation
using (Presentation pres = new Presentation())
{
// Accessing the first slide
ISlide slide = pres.Slides[0];
// Adding the image to the image collection of the presentation
IImage image = Images.FromFile("pic.jpeg");
IPPImage ppImage = pres.Images.AddImage(image);
image.Dispose();
// Adding Picture Frame
IPictureFrame picFrame = slide.Shapes.AddPictureFrame(ShapeType.Rectangle, 150, 100, 400, 300, ppImage);
// Applying animation on picture frame
ISequence sequence = slide.Timeline.MainSequence;
sequence.AddEffect(picFrame, EffectType.Box, EffectSubtype.In, EffectTriggerType.OnClick);
// Saving Presentation
pres.Save("AsposeAnim.ppt", SaveFormat.Ppt);
}
```
## **Download Sample Code**
- [Github](https://github.com/aspose-slides/Aspose.Slides-for-.NET/releases/download/AsposeSlidesVsVSTOv1.1/Adding.Picture.Frame.with.Animation.Aspose.Slides.zip)
- [Sourceforge](https://sourceforge.net/projects/asposevsto/files/Aspose.Slides%20Vs%20VSTO%20Slides/Adding%20Picture%20Frame%20with%20Animation%20%28Aspose.Slides%29.zip/download)
- [Bitbucket](https://bitbucket.org/asposemarketplace/aspose-for-vsto/src/master/Aspose.Slides%20Vs%20VSTO%20Slides/Adding%20Picture%20Frame%20with%20Animation/)
## Related articles
- [Adding Picture Frames with Animation Using VSTO and Aspose.Slides for .NET](https://docs.aspose.com/slides/net/adding-picture-frame-with-animation/)
- [Creating a Table on PowerPoint Slide in VSTO and Aspose.Slides](https://docs.aspose.com/slides/net/creating-a-table-on-powerpoint-slide-in-vsto-and-aspose-slides/)
- [Add Picture Frame to Presentation](https://docs.aspose.com/slides/net/add-picture-frame-to-presentation/)
# Adding Picture Frames with Animation Using VSTO and Aspose.Slides for .NET
> Migrate from Microsoft Office automation to Aspose.Slides for .NET and animate picture frames in PowerPoint (PPT, PPTX) slides with clean C# code.
Source: https://docs.aspose.com/slides/net/adding-picture-frame-with-animation/
Updated: 2026-08-13
Picture frames are applied to shapes or images in Microsoft PowerPoint to frame images in a presentation. This article shows how to create a picture frame and apply animation on it programmatically using first [VSTO 2008](https://docs.aspose.com/slides/net/adding-picture-frame-with-animation/) and then [Aspose.Slides for .NET](https://docs.aspose.com/slides/net/adding-picture-frame-with-animation/). First, we show you how to apply a frame and animation using VSTO 2008. We then show you how to perform the same steps using Aspose.Slides for .NET.
## **Adding Picture Frames with Animation**
The code samples below create a presentation with a slide, add an image with a picture frame and applies animation to it.
### **VSTO 2008 Example**
Using VSTO 2008, take the following steps:
1. Create a presentation.
1. Add an empty slide.
1. Add a picture shape to the slide.
1. Apply animation to the picture.
1. Write the presentation to disk.
**The output presentation, created with VSTO**

```c#
//Creating empty presentation
PowerPoint.Presentation pres = Globals.ThisAddIn.Application.Presentations.Add(Microsoft.Office.Core.MsoTriState.msoFalse);
//Add a blank slide
PowerPoint.Slide sld = pres.Slides.Add(1, PowerPoint.PpSlideLayout.ppLayoutBlank);
//Add Picture Frame
PowerPoint.Shape PicFrame = sld.Shapes.AddPicture(@"D:\Aspose Data\Desert.jpg",
Microsoft.Office.Core.MsoTriState.msoTriStateMixed,
Microsoft.Office.Core.MsoTriState.msoTriStateMixed, 150, 100, 400, 300);
//Applying animation on picture frame
PicFrame.AnimationSettings.EntryEffect = Microsoft.Office.Interop.PowerPoint.PpEntryEffect.ppEffectBoxIn;
//Saving Presentation
pres.SaveAs("d:\\ VSTOAnim.ppt", PowerPoint.PpSaveAsFileType.ppSaveAsPresentation,
Microsoft.Office.Core.MsoTriState.msoFalse);
```
### **Aspose.Slides for .NET Example**
Using Aspose.Slides for .NET, perform the following steps:
1. Create a presentation.
1. Access the first slide.
1. Add an image to a picture collection.
1. Add a picture shape to the slide.
1. Apply animation to the picture.
1. Write the presentation to disk.
**The output presentation, created with Aspose.Slides**

```c#
using Aspose.Slides;
using Aspose.Slides.Animation;
using Aspose.Slides.Export;
// Create an empty presentation
using (Presentation pres = new Presentation())
{
// Access the first slide
ISlide slide = pres.Slides[0];
// Add an image to the image collection of the presentation
IImage image = Images.FromFile("aspose.jpg");
IPPImage ppImage = pres.Images.AddImage(image);
image.Dispose();
// Add a picture frame whose height and width match the height and width of the image
IPictureFrame pictureFrame = slide.Shapes.AddPictureFrame(ShapeType.Rectangle, 50, 150, ppImage.Width, ppImage.Height, ppImage);
// Get the main animation sequence of the slide
ISequence sequence = pres.Slides[0].Timeline.MainSequence;
// Add the Fly from Left animation effect to the picture frame
IEffect effect = sequence.AddEffect(pictureFrame, EffectType.Fly, EffectSubtype.Left, EffectTriggerType.OnClick);
// Save the presentation
pres.Save("AsposeAnim.ppt", SaveFormat.Ppt);
}
```
## Related articles
- [Adding Picture Frame with Animation in VSTO and Aspose.Slides](https://docs.aspose.com/slides/net/adding-picture-frame-with-animation-in-vsto-and-aspose-slides/)
- [Creating Tables Using VSTO and Aspose.Slides for .NET](https://docs.aspose.com/slides/net/creating-a-table-on-powerpoint-slide/)
- [Format Text Using VSTO and Aspose.Slides for .NET](https://docs.aspose.com/slides/net/format-text-using-vsto-and-aspose-slides-and-net/)
# Adding Shapes to Presentation
>
Source: https://docs.aspose.com/slides/net/adding-shapes-to-presentation/
Updated: 2026-08-05
## **VSTO**
Below is the code snippet for adding line shape:
``` csharp
using Aspose.Slides;
Slide slide = Application.ActivePresentation.Slides[1];
slide.Shapes.AddLine(10, 10, 100, 10);
```
## **Aspose.Slides**
To add a simple plain line to a selected slide of the presentation, please follow the steps below:
- Create an instance of Presentation class
- Obtain the reference of a slide by using its Index
- Add an AutoShape of Line type using AddAutoShape method exposed by Shapes object
- Write the modified presentation as a PPTX file
In the example given below, we have added a line to the first slide of the presentation.
``` csharp
using Aspose.Slides;
//Instantiate Prseetation class that represents the PPTX
Presentation pres = new Presentation();
//Get the first slide
ISlide slide = pres.Slides[0];
//Add an autoshape of type line
slide.Shapes.AddAutoShape(ShapeType.Line, 50, 150, 300, 0);
```
## **Download Running Code**
- [Github](https://github.com/aspose-slides/Aspose.Slides-for-.NET/releases/tag/AsposeSlidesVsVSTOv1.1)
## **Download Sample Code**
- [Github](https://github.com/aspose-slides/Aspose.Slides-for-.NET/tree/master/Plugins/Aspose.Slides%20Vs%20VSTO%20Presentations/Code%20Comparison%20of%20Common%20Features/Adding%20Shape%20to%20Presentation)
## Related articles
- [Add Picture Frame to Presentation](https://docs.aspose.com/slides/net/add-picture-frame-to-presentation/)
- [Add Image in Table Cell](https://docs.aspose.com/slides/net/add-image-in-table-cell/)
- [Change the fill color of a shape in a presentation](https://docs.aspose.com/slides/net/change-the-fill-color-of-a-shape-in-a-presentation/)
# Adding Slide to Presentation
>
Source: https://docs.aspose.com/slides/net/adding-slide-to-presentation/
Updated: 2026-08-05
## **OpenXML Presentation**
In below functionality by default a slide is added to presentation.Here we are adding new slide at index 2 having some text in it.
``` csharp
string FilePath = @"..\..\..\..\Sample Files\";
string FileName = FilePath + "Adding Slide to Presentation.pptx";
InsertNewSlide(FileName, 1, "My new slide");
// Insert a slide into the specified presentation.
public static void InsertNewSlide(string presentationFile, int position, string slideTitle)
{
// Open the source document as read/write.
using (PresentationDocument presentationDocument = PresentationDocument.Open(presentationFile, true))
{
// Pass the source document and the position and title of the slide to be inserted to the next method.
InsertNewSlide(presentationDocument, position, slideTitle);
}
}
// Insert the specified slide into the presentation at the specified position.
public static void InsertNewSlide(PresentationDocument presentationDocument, int position, string slideTitle)
{
if (presentationDocument == null)
{
throw new ArgumentNullException("presentationDocument");
}
if (slideTitle == null)
{
throw new ArgumentNullException("slideTitle");
}
PresentationPart presentationPart = presentationDocument.PresentationPart;
// Verify that the presentation is not empty.
if (presentationPart == null)
{
throw new InvalidOperationException("The presentation document is empty.");
}
// Declare and instantiate a new slide.
Slide slide = new Slide(new CommonSlideData(new ShapeTree()));
uint drawingObjectId = 1;
// Construct the slide content.
// Specify the non-visual properties of the new slide.
NonVisualGroupShapeProperties nonVisualProperties = slide.CommonSlideData.ShapeTree.AppendChild(new NonVisualGroupShapeProperties());
nonVisualProperties.NonVisualDrawingProperties = new NonVisualDrawingProperties() { Id = 1, Name = "" };
nonVisualProperties.NonVisualGroupShapeDrawingProperties = new NonVisualGroupShapeDrawingProperties();
nonVisualProperties.ApplicationNonVisualDrawingProperties = new ApplicationNonVisualDrawingProperties();
// Specify the group shape properties of the new slide.
slide.CommonSlideData.ShapeTree.AppendChild(new GroupShapeProperties());
// Declare and instantiate the title shape of the new slide.
Shape titleShape = slide.CommonSlideData.ShapeTree.AppendChild(new Shape());
drawingObjectId++;
// Specify the required shape properties for the title shape.
titleShape.NonVisualShapeProperties = new NonVisualShapeProperties
(new NonVisualDrawingProperties() { Id = drawingObjectId, Name = "Title" },
new NonVisualShapeDrawingProperties(new Drawing.ShapeLocks() { NoGrouping = true }),
new ApplicationNonVisualDrawingProperties(new PlaceholderShape() { Type = PlaceholderValues.Title }));
titleShape.ShapeProperties = new ShapeProperties();
// Specify the text of the title shape.
titleShape.TextBody = new TextBody(new Drawing.BodyProperties(),
new Drawing.ListStyle(),
new Drawing.Paragraph(new Drawing.Run(new Drawing.Text() { Text = slideTitle })));
// Declare and instantiate the body shape of the new slide.
Shape bodyShape = slide.CommonSlideData.ShapeTree.AppendChild(new Shape());
drawingObjectId++;
// Specify the required shape properties for the body shape.
bodyShape.NonVisualShapeProperties = new NonVisualShapeProperties(new NonVisualDrawingProperties() { Id = drawingObjectId, Name = "Content Placeholder" },
new NonVisualShapeDrawingProperties(new Drawing.ShapeLocks() { NoGrouping = true }),
new ApplicationNonVisualDrawingProperties(new PlaceholderShape() { Index = 1 }));
bodyShape.ShapeProperties = new ShapeProperties();
// Specify the text of the body shape.
bodyShape.TextBody = new TextBody(new Drawing.BodyProperties(),
new Drawing.ListStyle(),
new Drawing.Paragraph());
// Create the slide part for the new slide.
SlidePart slidePart = presentationPart.AddNewPart();
// Save the new slide part.
slide.Save(slidePart);
// Modify the slide ID list in the presentation part.
// The slide ID list should not be null.
SlideIdList slideIdList = presentationPart.Presentation.SlideIdList;
// Find the highest slide ID in the current list.
uint maxSlideId = 1;
SlideId prevSlideId = null;
foreach (SlideId slideId in slideIdList.ChildElements)
{
if (slideId.Id > maxSlideId)
{
maxSlideId = slideId.Id;
}
position--;
if (position == 0)
{
prevSlideId = slideId;
}
}
maxSlideId++;
// Get the ID of the previous slide.
SlidePart lastSlidePart;
if (prevSlideId != null)
{
lastSlidePart = (SlidePart)presentationPart.GetPartById(prevSlideId.RelationshipId);
}
else
{
lastSlidePart = (SlidePart)presentationPart.GetPartById(((SlideId)(slideIdList.ChildElements[0])).RelationshipId);
}
// Use the same slide layout as that of the previous slide.
if (null != lastSlidePart.SlideLayoutPart)
{
slidePart.AddPart(lastSlidePart.SlideLayoutPart);
}
// Insert the new slide into the slide list after the previous slide.
SlideId newSlideId = slideIdList.InsertAfter(new SlideId(), prevSlideId);
newSlideId.Id = maxSlideId;
newSlideId.RelationshipId = presentationPart.GetIdOfPart(slidePart);
// Save the modified presentation.
presentationPart.Presentation.Save();
}
}
```
## **Aspose.Slides**
Each PowerPoint presentation file contains one **Main Master slide** and other **Normal slides**. It means that a presentation file contains at least one or more slides. It is important to know that presentation files without slides are not supported by Aspose.Slides for .NET. Each slide has specific position and a **unique Id**. The **slide Id** can range from 0 to 255 for master slides and from 256 to 65535 for normal slides.
Aspose.Slides for .NET allows developers to add empty slides to the presentations using the **AddEmptySlide** method exposed by **Presentation** object.To add an empty slide in the presentation, please follow the steps below:
- Create an instance of Presentation class
- Call the AddEmptySlide method exposed by Presentation object
- Do some work with the newly added empty slide
- Add another slide and insert text on it.
- Finally, write the PPT file using the Write method exposed by Presentation object
``` csharp
using Aspose.Slides;
string FilePath = @"..\..\..\..\Sample Files\";
string FileName = FilePath + "Adding Slide to Presentation.pptx";
//Instantiate the Presentation class that represents the PPTX file
Presentation pres = new Presentation();
//Blank slide is added by default, when you create
//presentation from default constructor
//Adding an empty slide to the presentation and getting the reference of
//that empty slide
ISlide slide = pres.Slides.AddEmptySlide(pres.LayoutSlides[0]);
//Write the output to disk
pres.Save(FileName,Aspose.Slides.Export.SaveFormat.Pptx);
```
## **Download Sample Code**
- [GitHub](https://github.com/aspose-slides/Aspose.Slides-for-.NET/releases/tag/AsposeSlidesVsOpenXML1.1)
- [Sourceforge](https://sourceforge.net/projects/asposeopenxml/files/)
## Related articles
- [Assemble Slides](https://docs.aspose.com/slides/net/assemble-slides/)
- [Add Slides to Presentations in .NET](https://docs.aspose.com/slides/net/add-slide-to-presentation/)
- [Add Layout Slides to Presentation](https://docs.aspose.com/slides/net/add-layout-slides-to-presentation/)
# Adding Text Dynamically Using VSTO and Aspose.Slides for .NET
> See how to migrate from Microsoft Office automation to Aspose.Slides for .NET and add dynamic text to PowerPoint (PPT, PPTX) presentations in C#.
Source: https://docs.aspose.com/slides/net/adding-text-dynamically-using-vsto-and-aspose-slides-for-net/
Updated: 2026-08-13
A common task that developers are developers to accomplish is adding text to slides dynamically. This article shows code examples for adding text dynamically using [VSTO](https://docs.aspose.com/slides/net/adding-text-dynamically-using-vsto-and-aspose-slides-for-net/) and [Aspose.Slides for .NET](https://docs.aspose.com/slides/net/adding-text-dynamically-using-vsto-and-aspose-slides-for-net/).
## **Adding Text Dynamically**
Both methods follow these steps:
1. Create a presentation.
1. Add a blank slide.
1. Add a text box.
1. Set some text.
1. Write the presentation.
## **VSTO Code Example**
The code snippets below results in a presentation with a plain slide and a string of text on it.
**The presentation as created in VSTO**
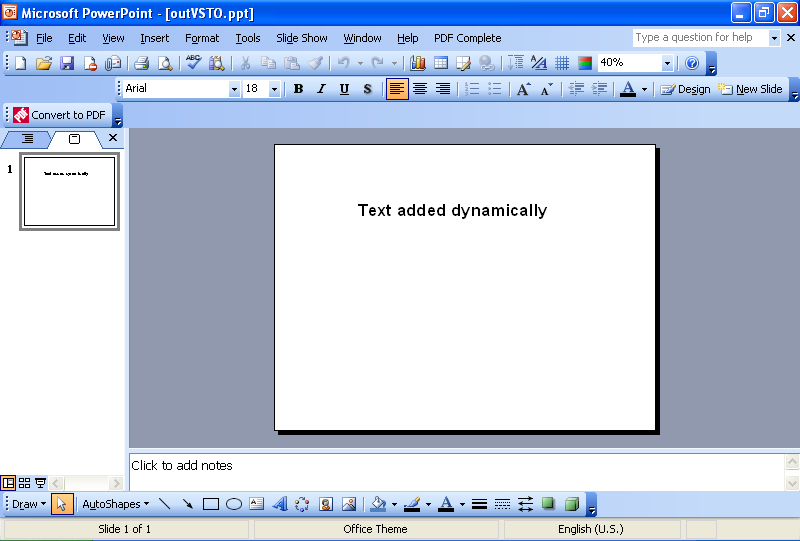
```c#
//Note: PowerPoint is a namespace which has been defined above like this
//using PowerPoint = Microsoft.Office.Interop.PowerPoint;
//Create a presentation
PowerPoint.Presentation pres = Globals.ThisAddIn.Application
.Presentations.Add(Microsoft.Office.Core.MsoTriState.msoFalse);
//Get the blank slide layout
PowerPoint.CustomLayout layout = pres.SlideMaster.
CustomLayouts[7];
//Add a blank slide
PowerPoint.Slide sld = pres.Slides.AddSlide(1, layout);
//Add a text
PowerPoint.Shape shp = sld.Shapes.AddTextbox(Microsoft.Office.Core.MsoTextOrientation.msoTextOrientationHorizontal, 150, 100, 400, 100);
//Set a text
PowerPoint.TextRange txtRange = shp.TextFrame.TextRange;
txtRange.Text = "Text added dynamically";
txtRange.Font.Name = "Arial";
txtRange.Font.Bold = Microsoft.Office.Core.MsoTriState.msoTrue;
txtRange.Font.Size = 32;
//Write the output to disk
pres.SaveAs("c:\\outVSTO.ppt",
PowerPoint.PpSaveAsFileType.ppSaveAsPresentation,
Microsoft.Office.Core.MsoTriState.msoFalse);
```
## **Aspose.Slides for .NET Example**
The code snippets below use Aspose.Slides to create a presentation with a plain slide and a string of text on it.
**The presentation as created using Aspose.Slides for .NET**
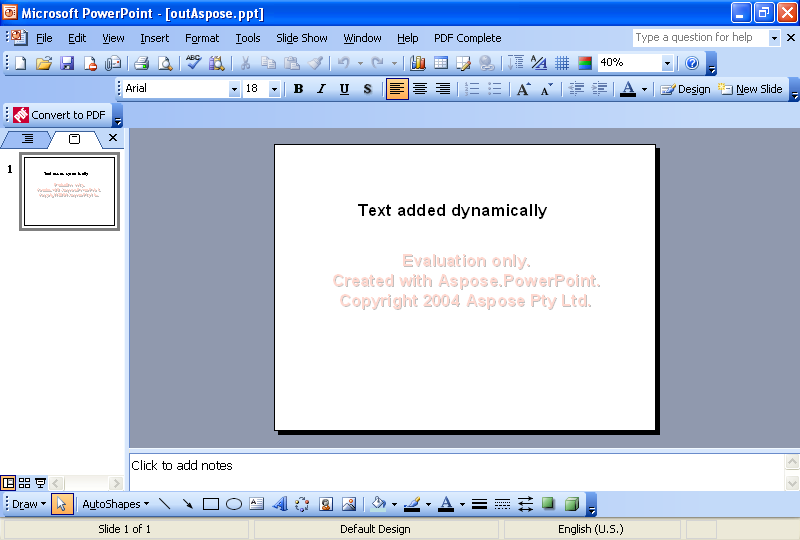
```c#
using Aspose.Slides;
using Aspose.Slides.Export;
//Create a presentation
Presentation pres = new Presentation();
//Blank slide is added by default, when you create
//presentation from default constructor
//So, we don't need to add any blank slide
ISlide sld = pres.Slides[1];
//Add a textbox
//To add it, we will first add a rectangle
IShape shp = sld.Shapes.AddAutoShape(ShapeType.Rectangle, 1200, 800, 3200, 370);
//Hide its line
shp.LineFormat.Style = LineStyle.NotDefined;
//Then add a textframe inside it
ITextFrame tf = ((IAutoShape)shp).TextFrame;
//Set a text
tf.Text = "Text added dynamically";
IPortion port = tf.Paragraphs[0].Portions[0];
port.PortionFormat.FontBold = NullableBool.True;
port.PortionFormat.FontHeight = 32;
//Write the output to disk
pres.Save("outAspose.ppt", SaveFormat.Ppt);
```
## Related articles
- [Creating Tables Using VSTO and Aspose.Slides for .NET](https://docs.aspose.com/slides/net/creating-a-table-on-powerpoint-slide/)
- [Format Text Using VSTO and Aspose.Slides for .NET](https://docs.aspose.com/slides/net/format-text-using-vsto-and-aspose-slides-and-net/)
- [Migration from Microsoft Office Automation to Aspose.Slides for .NET](https://docs.aspose.com/slides/net/migration-from-microsoft-office-automation-to-aspose/)
# Adding Text Dynamically
>
Source: https://docs.aspose.com/slides/net/adding-text-dynamically/
Updated: 2026-08-05
Both methods follow these steps:
- Create a presentation.
- Add a blank slide.
- Add a text box.
- Set some text.
- Write the presentation.
## **VSTO**
``` csharp
private void AddTextBox()
{
//Create a presentation
PowerPoint.Presentation pres = Globals.ThisAddIn.Application
.Presentations.Add(Microsoft.Office.Core.MsoTriState.msoFalse);
//Get the blank slide layout
PowerPoint.CustomLayout layout = pres.SlideMaster.
CustomLayouts[7];
//Add a blank slide
PowerPoint.Slide sld = pres.Slides.AddSlide(1, layout);
//Add a text
PowerPoint.Shape shp =sld.Shapes.AddTextbox
(Microsoft.Office.Core.MsoTextOrientation.msoTextOrientationHorizontal,150, 100, 400, 100);
//Set a text
PowerPoint.TextRange txtRange = shp.TextFrame.TextRange;
txtRange.Text = "Text added dynamically";
txtRange.Font.Name = "Arial";
txtRange.Font.Bold = Microsoft.Office.Core.MsoTriState.msoTrue;
txtRange.Font.Size = 32;
//Write the output to disk
pres.SaveAs("outVSTOAddingText.ppt",
PowerPoint.PpSaveAsFileType.ppSaveAsPresentation,
Microsoft.Office.Core.MsoTriState.msoFalse);
}
```
## **Aspose.Slides**
``` csharp
using Aspose.Slides;
using Aspose.Slides.Export;
static void AddTextBox()
{
//Create a presentation
//Blank slide is added by default, when you create
//presentation from default constructor
//So, we don't need to add any blank slide
using (Presentation pres = new Presentation())
{
ISlide sld = pres.Slides[0];
//Add a textbox
//To add it, we will first add a rectangle
IAutoShape shp = sld.Shapes.AddAutoShape(ShapeType.Rectangle, 150, 100, 400, 100);
//Hide its line
shp.LineFormat.FillFormat.FillType = FillType.NoFill;
//Then add a textframe inside it
ITextFrame tf = shp.AddTextFrame("");
//Set a text
tf.Text = "Text added dynamically";
IPortion port = tf.Paragraphs[0].Portions[0];
port.PortionFormat.LatinFont = new FontData("Arial");
port.PortionFormat.FontBold = NullableBool.True;
port.PortionFormat.FontHeight = 32;
//Write the output to disk
pres.Save("outAspose.pptx", SaveFormat.Pptx);
}
}
```
## **Download Sample Code**
- [Github](https://github.com/aspose-slides/Aspose.Slides-for-.NET/releases/download/AsposeSlidesVsVSTOv1.1/Adding.Text.Dynamically.Aspose.Slides.zip)
- [Sourceforge](https://sourceforge.net/projects/asposevsto/files/Aspose.Slides%20Vs%20VSTO%20Slides/Adding%20Text%20Dynamically%20%28Aspose.Slides%29.zip/download)
- [Bitbucket](https://bitbucket.org/asposemarketplace/aspose-for-vsto/src/master/Aspose.Slides%20Vs%20VSTO%20Slides/Adding%20Text%20Dynamically%20using%20VSTO%20and%20Aspose.Slides/)
# AI Features in Aspose.Slides
> Explore AI features in Aspose.Slides for .NET to generate, analyze, and enhance presentations in C#, with guides for PowerPoint and OpenDocument formats.
Source: https://docs.aspose.com/slides/net/ai/
Updated: 2025-09-15
---
lastmod: 2025-09-15T09:30:49+06:00
title: AI Features in Aspose.Slides
linktitle: AI
type: docs
weight: 40
url: /net/ai/
keywords:
- AI features
- AI presentation translator
- AI presentation generator
- AI slide translator
- AI slide generator
- multilingual presentation
- multilingual slide
- PowerPoint
- OpenDocument
- presentation
- .NET
- C#
- Aspose.Slides
description: "Explore AI features in Aspose.Slides for .NET to generate, analyze, and enhance presentations in C#, with guides for PowerPoint and OpenDocument formats."
---
## Related features
- [Connect your own AI model provider](https://docs.aspose.com/slides/features/ai-model-provider/)
- [Connect a self-hosted AI endpoint](https://docs.aspose.com/slides/features/ai-local-endpoint/)
# AI-Powered Multilingual Slide Generator
> Generate multilingual slides from text with Aspose.Slides for .NET. Apply your template and export polished decks to PowerPoint and OpenDocument. Learn more.
Source: https://docs.aspose.com/slides/net/ai/generator/
Updated: 2026-08-05
## **Introduction**
Aspose.Slides introduces a new AI-powered feature, the Presentation Generator, which enables developers to automatically create well-structured PowerPoint presentations from simple text inputs such as topic descriptions, summaries, quotations, or bullet points.
Users can adjust the level of content detail and optionally apply a custom presentation template to define the visual design.
Currently, the AI Presentation Generator structures content using text blocks, bullet lists, and tables. Image generation is not yet supported; however, images can be easily added afterward using Aspose.Slides tools or manually.
The output is a complete PowerPoint presentation that can be used as-is or exported to any format supported by the Aspose.Slides API. While the generator produces high-quality results, minor post-editing may be required to meet specific requirements.
## **How It Works**
Aspose.Slides does not include built-in AI models; instead, it integrates with external AI services over the internet. This integration is handled by the [SlidesAIAgent](https://reference.aspose.com/slides/net/aspose.slides.ai/slidesaiagent/) class, which uses an implementation of the [IAIWebClient](https://reference.aspose.com/slides/net/aspose.slides.ai/iaiwebclient/) interface to communicate with the AI model.
You can use the built-in [OpenAIWebClient](https://reference.aspose.com/slides/net/aspose.slides.ai/openaiwebclient/), which connects to OpenAI’s API, or provide a custom implementation of [IAIWebClient](https://reference.aspose.com/slides/net/aspose.slides.ai/iaiwebclient/) to work with another AI provider or language model. Aspose.Slides manages all communication with the AI service and processes the AI’s responses to generate slides. Note that the OpenAI API is a paid service, so an account and API key are required when using the built-in [OpenAIWebClient](https://reference.aspose.com/slides/net/aspose.slides.ai/openaiwebclient/).
## **Let's Code**
### **Example 1**
This example demonstrates how to generate a presentation on the topic Aspose.Slides using the built-in [OpenAIWebClient](https://reference.aspose.com/slides/net/aspose.slides.ai/openaiwebclient/).
```csharp
using Aspose.Slides;
using Aspose.Slides.AI;
using Aspose.Slides.Export;
// Create an instance of OpenAIWebClient, the built-in implementation of the OpenAI web client.
using var aiWebClient = new OpenAIWebClient("gpt-4o-mini", "apiKey", null);
// Create an instance of SlidesAIAgent, which provides access to AI-powered features.
var aiAgent = new SlidesAIAgent(aiWebClient);
// Define the instruction for generating the presentation.
var instruction = "Generate a presentation about Aspose.Slides for .NET, highlighting its capabilities and advantages over competitors.";
// Generate a presentation with a medium amount of content based on the instruction.
using IPresentation presentation = await aiAgent.GeneratePresentationAsync(instruction, PresentationContentAmountType.Medium);
// Save the generated presentation to the local disk as a PowerPoint (.pptx) file.
presentation.Save("Aspose.Slides.NET.pptx", SaveFormat.Pptx);
```
### **Example 2**
The following example demonstrates the overloads of the [GeneratePresentation](https://reference.aspose.com/slides/net/aspose.slides.ai/slidesaiagent/generatepresentation/) method. In this case, an externally managed [HttpClient](https://learn.microsoft.com/en-us/dotnet/api/system.net.http.httpclient) instance and the user’s `master presentation` are used.
By default, the built-in [OpenAIWebClient](https://reference.aspose.com/slides/net/aspose.slides.ai/openaiwebclient/) creates and manages its own internal [HttpClient](https://learn.microsoft.com/en-us/dotnet/api/system.net.http.httpclient) instance, handling its lifecycle and disposal automatically. However, if you prefer to manage the [HttpClient](https://learn.microsoft.com/en-us/dotnet/api/system.net.http.httpclient) yourself—for example, when using an [IHttpClientFactory](https://learn.microsoft.com/en-us/dotnet/core/extensions/httpclient-factory) for improved resource management and performance—you can supply your own [HttpClient](https://learn.microsoft.com/en-us/dotnet/api/system.net.http.httpclient) instance when constructing the [OpenAIWebClient](https://reference.aspose.com/slides/net/aspose.slides.ai/openaiwebclient/).
```csharp
using System.Net.Http;
using Aspose.Slides;
using Aspose.Slides.AI;
using Aspose.Slides.Export;
// Create an externally managed HttpClient instance.
using var httpClient = new HttpClient();
// Pass the HttpClient to the OpenAIWebClient constructor.
using var aiWebClient = new OpenAIWebClient("gpt-4o-mini", "apiKey", "organizationId", httpClient);
// Create an instance of SlidesAIAgent.
var aiAgent = new SlidesAIAgent(aiWebClient);
// Define the instruction for generating the presentation.
var instruction = "Generate a presentation about Aspose.Slides for .NET, highlighting its capabilities and advantages over competitors.";
// Load a master presentation from the local disk to use as the design template.
using var masterPresentation = new Presentation("masterPresentation.pptx");
// Generate a detailed presentation using the instruction and master template.
using IPresentation presentation = await aiAgent.GeneratePresentationAsync(instruction, PresentationContentAmountType.Detailed, masterPresentation);
// Save the generated presentation as a PDF.
presentation.Save("Aspose.Slides.NET.pdf", SaveFormat.Pdf);
```
It is worth noting that many customers use Aspose.Slides in synchronous contexts. To support this, the [SlidesAIAgent](https://reference.aspose.com/slides/net/aspose.slides.ai/slidesaiagent/) class provides both synchronous and asynchronous methods, allowing you to choose the approach that best fits your application’s workflow.
## **Key Benefits**
The new AI Presentation Generator in Aspose.Slides provides a fast and flexible way to produce structured slide decks from simple text prompts. With support for custom templates, externally managed [HttpClient](https://learn.microsoft.com/en-us/dotnet/api/system.net.http.httpclient) instances, and both synchronous and asynchronous workflows, it can be seamlessly integrated into a wide range of applications.
Typical use cases include creating marketing presentations, educational materials, client reports, and internal slide decks. Although image generation is not yet supported, the tool already offers a strong foundation for automating presentation creation, with further enhancements expected in the future.
## Related features
- [Generate a presentation from a prompt](https://docs.aspose.com/slides/features/ai-generate-presentations/)
- [Generate presentations from a template](https://docs.aspose.com/slides/features/ai-template-generation/)
- [Generate slides using an existing deck's style](https://docs.aspose.com/slides/features/ai-match-style/)
## Related articles
- [AI-Powered Presentation Translator](https://docs.aspose.com/slides/net/ai/translator/)
# AI-Powered Presentation Translator
> Translate PowerPoint slides with AI using Aspose.Slides for .NET. Localize PPT, PPTX and ODP while preserving layout—fast and developer-friendly. Try it.
Source: https://docs.aspose.com/slides/net/ai/translator/
Updated: 2026-09-15
## **Introduction**
Aspose.Slides is a powerful API for programmatically managing PowerPoint presentations. In addition to creating, editing, and converting slides, it offers AI-driven features - such as the [Presentation Translation API](https://reference.aspose.com/slides/net/aspose.slides.ai/) for multilingual slide content.
## **How It Works**
Aspose.Slides does not include built-in AI capabilities but integrates with external AI models over the internet. This functionality is exposed via the [SlidesAIAgent](https://reference.aspose.com/slides/net/aspose.slides.ai/slidesaiagent) class, which uses an implementation of the [IAIWebClient](https://reference.aspose.com/slides/net/aspose.slides.ai/iaiwebclient/) interface to communicate with AI services.
You can use the built-in [OpenAIWebClient](https://reference.aspose.com/slides/net/aspose.slides.ai/openaiwebclient/) to connect to OpenAI’s API or implement your own [IAIWebClient](https://reference.aspose.com/slides/net/aspose.slides.ai/iaiwebclient/) to use a different AI provider or language model.
Aspose.Slides handles the communication, parses the AI responses, and intelligently inserts translated content while preserving the original slide layout and formatting.
Note that the OpenAI API is a paid service, so you will need to create an account and supply your API key when using the built-in [OpenAIWebClient](https://reference.aspose.com/slides/net/aspose.slides.ai/openaiwebclient/).
## **Example**
In this example, we translate a PowerPoint presentation into Japanese using the built-in [OpenAIWebClient](https://reference.aspose.com/slides/net/aspose.slides.ai/openaiwebclient/) with a specified OpenAI [model](https://platform.openai.com/docs/models).
```csharp
using Aspose.Slides;
using Aspose.Slides.AI;
using Aspose.Slides.Export;
// Load a presentation to translate.
using var presentation = new Presentation("sample.pptx");
// Create an AI client with OpenAIWebClient, specifying your model and API key.
using var aiWebClient = new OpenAIWebClient(model: "gpt-4o-mini", apiKey: "apiKey", organizationId: null);
// Initialize SlidesAIAgent with the AI client.
var aiAgent = new SlidesAIAgent(aiWebClient);
// Translate the presentation to Japanese.
await aiAgent.TranslateAsync(presentation, "japanese");
// Save the translated presentation as a PDF.
presentation.Save("sample_jp.pdf", SaveFormat.Pdf);
```
By default, the built-in [OpenAIWebClient](https://reference.aspose.com/slides/net/aspose.slides.ai/openaiwebclient/) creates and manages its own internal [HttpClient](https://learn.microsoft.com/en-us/dotnet/api/system.net.http.httpclient) instance, handling its lifecycle and disposal automatically. However, if you prefer to manage the [HttpClient](https://learn.microsoft.com/en-us/dotnet/api/system.net.http.httpclient) yourself - such as when using an [IHttpClientFactory](https://learn.microsoft.com/en-us/dotnet/core/extensions/httpclient-factory) for better resource management and performance - you can provide your own `HttpClient` instance when constructing the [OpenAIWebClient](https://reference.aspose.com/slides/net/aspose.slides.ai/openaiwebclient/).
```csharp
using System.Net.Http;
using Aspose.Slides.AI;
// Use an HttpClient you manage yourself - for example, one created by an IHttpClientFactory
// injected via dependency injection.
HttpClient httpClient = new HttpClient();
using var aiWebClient = new OpenAIWebClient("gpt-4o-mini", "apiKey", null, httpClient);
```
Aspose.Slides is commonly used in synchronous environments. To support this, the [SlidesAIAgent](https://reference.aspose.com/slides/net/aspose.slides.ai/slidesaiagent/) class offers both synchronous and asynchronous methods - allowing you to choose the approach that best fits your application’s workflow.
### **Azure OpenAI Example**
Aspose.Slides for .NET supports OpenAI-compatible providers, including Azure OpenAI. You can configure the translator to use your in-house Azure deployment with the [OpenAICompatibleWebClient](https://reference.aspose.com/slides/net/aspose.slides.ai/openaicompatiblewebclient/).
```csharp
using Aspose.Slides;
using Aspose.Slides.AI;
using Aspose.Slides.Export;
var model = "your-azure-deployment-name";
var apiKey = "your-azure-api-key";
var baseUrl = "https://your-resource.openai.azure.com/openai/v1/";
using var aiWebClient = new OpenAICompatibleWebClient(model, apiKey, baseUrl);
var aiAgent = new SlidesAIAgent(aiWebClient);
using var presentation = new Presentation("Presentation.pptx");
aiAgent.Translate(presentation, "spanish");
presentation.Save("Translated.pptx", SaveFormat.Pptx);
```
This snippet demonstrates translating a presentation using your Azure OpenAI endpoint. Replace the placeholder values with your deployment name, API key, and endpoint URL.
## **Key Benefits**
The Aspose.Slides [Presentation Translation API](https://reference.aspose.com/slides/net/aspose.slides.ai/) offers an AI-powered solution for delivering multilingual PowerPoint presentations. By automating translation while preserving layout and design, it saves time and minimizes errors compared to manual workflows. Whether you're a developer, educator, or business professional, this API enables you to create engaging, localized presentations for global audiences - expanding your reach and improving communication.
## Related features
- [Translate slide text with AI](https://docs.aspose.com/slides/features/ai-translate-text/)
## Related articles
- [AI-Powered Multilingual Slide Generator](https://docs.aspose.com/slides/net/ai/generator/)
# Animate PowerPoint Charts in .NET
> Create stunning animated charts in .NET with Aspose.Slides. Boost presentations with dynamic visuals in PPT and PPTX files—get started now.
Source: https://docs.aspose.com/slides/net/animated-charts/
Updated: 2026-11-08
## **Introduction**
Aspose.Slides for .NET supports animating the chart elements. **Series**, **Categories**, **Series Elements**, **Categories Elements** can be animated with [ISequence.AddEffect](https://reference.aspose.com/slides/net/aspose.slides.animation/isequence/methods/addeffect) method and two enums [EffectChartMajorGroupingType](https://reference.aspose.com/slides/net/aspose.slides.animation/effectchartmajorgroupingtype) and [EffectChartMinorGroupingType](https://reference.aspose.com/slides/net/aspose.slides.animation/effectchartminorgroupingtype).
## **Chart Series Animation**
If you want to animate a chart series, write the code according to the steps listed below:
1. Load a presentation.
1. Get reference of the chart object.
1. Animate the series.
1. Write the presentation file to disk.
In the example given below, we animated chart series.
```c#
using Aspose.Slides;
using Aspose.Slides.Animation;
using Aspose.Slides.Charts;
using Aspose.Slides.Export;
// Instantiate Presentation class that represents a presentation file
using (Presentation presentation = new Presentation("ExistingChart.pptx"))
{
// Get reference of the chart object
var slide = presentation.Slides[0] as Slide;
var shapes = slide.Shapes as ShapeCollection;
var chart = shapes[0] as IChart;
// Animate the series
slide.Timeline.MainSequence.AddEffect(chart, EffectType.Fade, EffectSubtype.None,
EffectTriggerType.AfterPrevious);
((Sequence)slide.Timeline.MainSequence).AddEffect(chart,
EffectChartMajorGroupingType.BySeries, 0,
EffectType.Appear, EffectSubtype.None, EffectTriggerType.AfterPrevious);
((Sequence)slide.Timeline.MainSequence).AddEffect(chart,
EffectChartMajorGroupingType.BySeries, 1,
EffectType.Appear, EffectSubtype.None, EffectTriggerType.AfterPrevious);
((Sequence)slide.Timeline.MainSequence).AddEffect(chart,
EffectChartMajorGroupingType.BySeries, 2,
EffectType.Appear, EffectSubtype.None, EffectTriggerType.AfterPrevious);
((Sequence)slide.Timeline.MainSequence).AddEffect(chart,
EffectChartMajorGroupingType.BySeries, 3,
EffectType.Appear, EffectSubtype.None, EffectTriggerType.AfterPrevious);
// Write the modified presentation to disk
presentation.Save("AnimatingSeries_out.pptx", SaveFormat.Pptx);
}
```
## **Chart Category Animation**
If you want to animate a chart category, write the code according to the steps listed below:
1. Load a presentation.
1. Get reference of the chart object.
1. Animate the Category.
1. Write the presentation file to disk.
In the example given below, we animated chart category.
```c#
using Aspose.Slides;
using Aspose.Slides.Animation;
using Aspose.Slides.Charts;
using Aspose.Slides.Export;
using (Presentation presentation = new Presentation("ExistingChart.pptx"))
{
// Get reference of the chart object
var slide = presentation.Slides[0] as Slide;
var shapes = slide.Shapes as ShapeCollection;
var chart = shapes[0] as IChart;
// Animate the categories
slide.Timeline.MainSequence.AddEffect(chart, EffectType.Fade, EffectSubtype.None,
EffectTriggerType.AfterPrevious);
((Sequence)slide.Timeline.MainSequence).AddEffect(chart,
EffectChartMajorGroupingType.ByCategory, 0,
EffectType.Appear, EffectSubtype.None, EffectTriggerType.AfterPrevious);
((Sequence)slide.Timeline.MainSequence).AddEffect(chart,
EffectChartMajorGroupingType.ByCategory, 1,
EffectType.Appear, EffectSubtype.None, EffectTriggerType.AfterPrevious);
((Sequence)slide.Timeline.MainSequence).AddEffect(chart,
EffectChartMajorGroupingType.ByCategory, 2,
EffectType.Appear, EffectSubtype.None, EffectTriggerType.AfterPrevious);
((Sequence)slide.Timeline.MainSequence).AddEffect(chart,
EffectChartMajorGroupingType.ByCategory, 3,
EffectType.Appear, EffectSubtype.None, EffectTriggerType.AfterPrevious);
// Write the presentation file to disk
presentation.Save("AnimatingCategories_out.pptx", SaveFormat.Pptx);
}
```
[](https://docs.aspose.com/slides/net/animated-charts/visual-chart-animation-grouping-8de3c15d52e6.svg)
*The sample adds a chart fade followed by ByCategory effects at indices 0–3. All use AfterPrevious. This is a configuration diagram, not a playback capture.*
## **Animation in a Series Element**
If you want to animate series elements, write the code according to the steps listed below:
1. Load a presentation.
1. Get reference of the chart object.
1. Animate series elements.
1. Write the presentation file to disk.
In the example given below, we have animated series' elements.
```c#
using Aspose.Slides;
using Aspose.Slides.Animation;
using Aspose.Slides.Charts;
using Aspose.Slides.Export;
// Load a presentation
using (Presentation presentation = new Presentation("ExistingChart.pptx"))
{
// Get reference of the chart object
var slide = presentation.Slides[0] as Slide;
var shapes = slide.Shapes as ShapeCollection;
var chart = shapes[0] as IChart;
// Animate series elements
slide.Timeline.MainSequence.AddEffect(chart, EffectType.Fade, EffectSubtype.None, EffectTriggerType.AfterPrevious);
((Sequence)slide.Timeline.MainSequence).AddEffect(chart, EffectChartMinorGroupingType.ByElementInSeries, 0, 0, EffectType.Appear, EffectSubtype.None, EffectTriggerType.AfterPrevious);
((Sequence)slide.Timeline.MainSequence).AddEffect(chart, EffectChartMinorGroupingType.ByElementInSeries, 0, 1, EffectType.Appear, EffectSubtype.None, EffectTriggerType.AfterPrevious);
((Sequence)slide.Timeline.MainSequence).AddEffect(chart, EffectChartMinorGroupingType.ByElementInSeries, 0, 2, EffectType.Appear, EffectSubtype.None, EffectTriggerType.AfterPrevious);
((Sequence)slide.Timeline.MainSequence).AddEffect(chart, EffectChartMinorGroupingType.ByElementInSeries, 0, 3, EffectType.Appear, EffectSubtype.None, EffectTriggerType.AfterPrevious);
((Sequence)slide.Timeline.MainSequence).AddEffect(chart, EffectChartMinorGroupingType.ByElementInSeries, 1, 0, EffectType.Appear, EffectSubtype.None, EffectTriggerType.AfterPrevious);
((Sequence)slide.Timeline.MainSequence).AddEffect(chart, EffectChartMinorGroupingType.ByElementInSeries, 1, 1, EffectType.Appear, EffectSubtype.None, EffectTriggerType.AfterPrevious);
((Sequence)slide.Timeline.MainSequence).AddEffect(chart, EffectChartMinorGroupingType.ByElementInSeries, 1, 2, EffectType.Appear, EffectSubtype.None, EffectTriggerType.AfterPrevious);
((Sequence)slide.Timeline.MainSequence).AddEffect(chart, EffectChartMinorGroupingType.ByElementInSeries, 1, 3, EffectType.Appear, EffectSubtype.None, EffectTriggerType.AfterPrevious);
((Sequence)slide.Timeline.MainSequence).AddEffect(chart, EffectChartMinorGroupingType.ByElementInSeries, 2, 0, EffectType.Appear, EffectSubtype.None, EffectTriggerType.AfterPrevious);
((Sequence)slide.Timeline.MainSequence).AddEffect(chart, EffectChartMinorGroupingType.ByElementInSeries, 2, 1, EffectType.Appear, EffectSubtype.None, EffectTriggerType.AfterPrevious);
((Sequence)slide.Timeline.MainSequence).AddEffect(chart, EffectChartMinorGroupingType.ByElementInSeries, 2, 2, EffectType.Appear, EffectSubtype.None, EffectTriggerType.AfterPrevious);
((Sequence)slide.Timeline.MainSequence).AddEffect(chart, EffectChartMinorGroupingType.ByElementInSeries, 2, 3, EffectType.Appear, EffectSubtype.None, EffectTriggerType.AfterPrevious);
// Write the presentation file to disk
presentation.Save("AnimatingSeriesElements_out.pptx", SaveFormat.Pptx);
}
```
## **Animation in a Category Element**
If you want to animate categories elements, write the code according to the steps listed below:
1. Load a presentation.
1. Get reference of the chart object.
1. Animate categories elements.
1. Write the presentation file to disk.
In the example given below, we have animated categories elements.
```c#
using Aspose.Slides;
using Aspose.Slides.Animation;
using Aspose.Slides.Charts;
using Aspose.Slides.Export;
using (Presentation presentation = new Presentation("ExistingChart.pptx"))
{
// Get reference of the chart object
var slide = presentation.Slides[0] as Slide;
var shapes = slide.Shapes as ShapeCollection;
var chart = shapes[0] as IChart;
// Animate categories' elements
slide.Timeline.MainSequence.AddEffect(chart, EffectType.Fade, EffectSubtype.None, EffectTriggerType.AfterPrevious);
((Sequence)slide.Timeline.MainSequence).AddEffect(chart, EffectChartMinorGroupingType.ByElementInCategory, 0, 0, EffectType.Appear, EffectSubtype.None, EffectTriggerType.AfterPrevious);
((Sequence)slide.Timeline.MainSequence).AddEffect(chart, EffectChartMinorGroupingType.ByElementInCategory, 0, 1, EffectType.Appear, EffectSubtype.None, EffectTriggerType.AfterPrevious);
((Sequence)slide.Timeline.MainSequence).AddEffect(chart, EffectChartMinorGroupingType.ByElementInCategory, 0, 2, EffectType.Appear, EffectSubtype.None, EffectTriggerType.AfterPrevious);
((Sequence)slide.Timeline.MainSequence).AddEffect(chart, EffectChartMinorGroupingType.ByElementInCategory, 0, 3, EffectType.Appear, EffectSubtype.None, EffectTriggerType.AfterPrevious);
((Sequence)slide.Timeline.MainSequence).AddEffect(chart, EffectChartMinorGroupingType.ByElementInCategory, 1, 0, EffectType.Appear, EffectSubtype.None, EffectTriggerType.AfterPrevious);
((Sequence)slide.Timeline.MainSequence).AddEffect(chart, EffectChartMinorGroupingType.ByElementInCategory, 1, 1, EffectType.Appear, EffectSubtype.None, EffectTriggerType.AfterPrevious);
((Sequence)slide.Timeline.MainSequence).AddEffect(chart, EffectChartMinorGroupingType.ByElementInCategory, 1, 2, EffectType.Appear, EffectSubtype.None, EffectTriggerType.AfterPrevious);
((Sequence)slide.Timeline.MainSequence).AddEffect(chart, EffectChartMinorGroupingType.ByElementInCategory, 1, 3, EffectType.Appear, EffectSubtype.None, EffectTriggerType.AfterPrevious);
((Sequence)slide.Timeline.MainSequence).AddEffect(chart, EffectChartMinorGroupingType.ByElementInCategory, 2, 0, EffectType.Appear, EffectSubtype.None, EffectTriggerType.AfterPrevious);
((Sequence)slide.Timeline.MainSequence).AddEffect(chart, EffectChartMinorGroupingType.ByElementInCategory, 2, 1, EffectType.Appear, EffectSubtype.None, EffectTriggerType.AfterPrevious);
((Sequence)slide.Timeline.MainSequence).AddEffect(chart, EffectChartMinorGroupingType.ByElementInCategory, 2, 2, EffectType.Appear, EffectSubtype.None, EffectTriggerType.AfterPrevious);
((Sequence)slide.Timeline.MainSequence).AddEffect(chart, EffectChartMinorGroupingType.ByElementInCategory, 2, 3, EffectType.Appear, EffectSubtype.None, EffectTriggerType.AfterPrevious);
// Write the presentation file to disk
presentation.Save("AnimatingCategoriesElements_out.pptx", SaveFormat.Pptx);
}
```
## **FAQ**
### Are different effect types (e.g., entrance, emphasis, exit) supported for charts like for regular shapes?
Yes. A chart is treated as a shape, so it supports the standard animation effect types, including entrance, emphasis, and exit, with full control via the slide's timeline and animation sequences.
### Can I combine chart animation with slide transitions?
Yes. [Transitions](https://docs.aspose.com/slides/net/slide-transition/) apply to the slide, while animation effects apply to objects on the slide. You can use both together in the same presentation and control them independently.
### Are chart animations preserved when saving to PPTX?
Yes. When you [save to PPTX](https://docs.aspose.com/slides/net/save-presentation/), all animation effects and their ordering are preserved because they are part of the presentation's native animation model.
### Can I read existing chart animations from a presentation and modify them?
Yes. The [API](https://reference.aspose.com/slides/net/aspose.slides.animation/) provides access to the slide timeline, sequences, and effects, allowing you to inspect existing chart animations and adjust them without recreating everything from scratch.
### Can I produce a video that includes chart animations using Aspose.Slides?
Yes. You can [export a presentation to video](https://docs.aspose.com/slides/net/convert-powerpoint-to-video/) while preserving animations, configuring timings and other export settings so the resulting clip reflects the animated playback.
## Related features
- [Animate charts](https://docs.aspose.com/slides/features/chart-animation/)
## Related articles
- [Animate PowerPoint Text in .NET](https://docs.aspose.com/slides/net/animated-text/)
- [Enhance PowerPoint Presentations with Animations in .NET](https://docs.aspose.com/slides/net/powerpoint-animation/)
# Animate PowerPoint Text in .NET
> Create dynamic animated text in PowerPoint and OpenDocument presentations using Aspose.Slides for .NET, with easy-to-follow, optimized C# code examples.
Source: https://docs.aspose.com/slides/net/animated-text/
Updated: 2026-08-05
## **Overview**
This article explains how to work with animated text in Aspose.Slides by applying animation effects to individual paragraphs and retrieving the effects already assigned to paragraphs in a text frame. It focuses on the API methods used to add paragraph-level animation and inspect existing paragraph animation effects in a presentation.
## **Add Animation Effects to Paragraphs**
We added the [**AddEffect()**](https://reference.aspose.com/slides/net/aspose.slides.animation/sequence/methods/addeffect/index) method to the [**Sequence**](https://reference.aspose.com/slides/net/aspose.slides.animation/sequence) and [**ISequence**](https://reference.aspose.com/slides/net/aspose.slides.animation/isequence) classes. This method allows you to add animation effects to a single paragraph. This sample code shows you how to add an animation effect to a single paragraph:
```c#
using Aspose.Slides;
using Aspose.Slides.Animation;
using Aspose.Slides.Export;
using (Presentation presentation = new Presentation("Presentation1.pptx"))
{
// select paragraph to add effect
IAutoShape autoShape = (IAutoShape)presentation.Slides[0].Shapes[0];
IParagraph paragraph = autoShape.TextFrame.Paragraphs[0];
// add Fly animation effect to selected paragraph
IEffect effect = presentation.Slides[0].Timeline.MainSequence.AddEffect(paragraph, EffectType.Fly, EffectSubtype.Left, EffectTriggerType.OnClick);
presentation.Save("AnimationEffectinParagraph.pptx", SaveFormat.Pptx);
}
```
## **Get Animation Effects for Paragraphs**
You may decide to find out the animation effects added to a paragraph—for example, in one scenario, you want to get the animation effects in a paragraph because you plan to apply those effects to another paragraph or shape.
Aspose.Slides for .NET allows you to get all the animation effects applied to paragraphs contained in a text frame (shape). This sample code shows you how to get the animation effects in a paragraph:
```c#
using Aspose.Slides;
using Aspose.Slides.Animation;
using (Presentation pres = new Presentation("Test.pptx"))
{
ISequence sequence = pres.Slides[0].Timeline.MainSequence;
IAutoShape autoShape = (IAutoShape)pres.Slides[0].Shapes[1];
foreach (IParagraph paragraph in autoShape.TextFrame.Paragraphs)
{
IEffect[] effects = sequence.GetEffectsByParagraph(paragraph);
if (effects.Length > 0)
Console.WriteLine("Paragraph \"" + paragraph.Text + "\" has " + effects[0].Type + " effect.");
}
}
```
## **FAQ**
### How do text animations differ from slide transitions, and can they be combined?
Text animations control object behavior over time on a slide, while [transitions](https://docs.aspose.com/slides/net/slide-transition/) control how slides change. They’re independent and can be used together; playback order is governed by the animation timeline and the transition settings.
### Are text animations preserved when exporting to PDF or images?
No. PDF and raster images are static, so you’ll see a single state of the slide without motion. To keep movement, use [video](https://docs.aspose.com/slides/net/convert-powerpoint-to-video/) or [HTML](https://docs.aspose.com/slides/net/export-to-html5/) export.
### Do text animations work in layouts and the slide master?
Effects applied to layout/master objects are inherited by slides, but their timing and interaction with slide-level animations depend on the final sequence on the slide.
## Related articles
- [Animation](https://docs.aspose.com/slides/net/examples/elements/animation/)
- [Animate PowerPoint Charts in .NET](https://docs.aspose.com/slides/net/animated-charts/)
- [Enhance PowerPoint Presentations with Animations in .NET](https://docs.aspose.com/slides/net/powerpoint-animation/)
# Output Metadata Limitations
> Aspose.Slides for .NET writes fixed application, creator, and producer metadata to saved PPTX, PDF, and ODP files, whatever application name you set.
Source: https://docs.aspose.com/slides/net/api-limitations/
Updated: 2026-09-28
## **Overview**
When presentations are created or exported with Aspose.Slides, certain technical metadata is written to the output file. This article explains the limitations related to the `Application`, `Creator`, `Producer`, and generator metadata fields in PPTX, PDF, and ODP files.
## **Application and Producer**
When you create or export presentations with Aspose.Slides for .NET, some technical metadata is written into the file. Two fields often raise questions:
**Application** identifies the program that created or last saved a **PPTX** presentation. In Aspose.Slides for .NET, this value is fixed and shows the library name rather than your app name, even if you set [DocumentProperties.NameOfApplication](https://reference.aspose.com/slides/net/aspose.slides/documentproperties/nameofapplication/).
**Producer** identifies the rendering engine that generated the final file during export. In **PDF** exports, metadata uses **Creator** and **Producer** fields. With Aspose.Slides for .NET, both of these are fixed and reflect the library and its version.
**What’s restricted**
You cannot override these fields through the API for the formats above. For **PPTX**, the Application property is written as "Aspose.Slides for .NET". For **PDF**, the Creator and Producer properties are written as "Aspose.Slides for .NET" followed by the library version. For **ODP**, the generator field is written as "Aspose.Slides for .NET" followed by the library version. This behavior is by design and applies regardless of how you load or save the file, and regardless of values assigned to [DocumentProperties.NameOfApplication](https://reference.aspose.com/slides/net/aspose.slides/documentproperties/nameofapplication/).
This restriction does not apply to **PPT** files: in a PPT file, the application name that you set in [DocumentProperties.NameOfApplication](https://reference.aspose.com/slides/net/aspose.slides/documentproperties/nameofapplication/) is saved.
# API Reference
> Create, edit, and convert presentations in .NET—no PowerPoint needed. Aspose.Slides supports PPT, PPTX, and ODP with fast SVG/PDF export.
Source: https://docs.aspose.com/slides/net/api-reference/
Updated: 2026-08-13
Aspose.Slides for .NET is a class library that enables .NET applications to read and write presentation documents without using Microsoft PowerPoint® or others. Aspose.Slides for .NET allows to manage text, shapes, tables & animations, add audio and video to slides, preview slides, export slides to SVG, PDF format and more.
Latest API Reference can be found at [Aspose.Slides for .NET API Reference](https://reference.aspose.com/slides/net).
## Related articles
- [Aspose.Slides for .NET](https://docs.aspose.com/slides/net/)
# Apply a theme to a presentation
>
Source: https://docs.aspose.com/slides/net/apply-a-theme-to-a-presentation/
Updated: 2026-08-05
## **OpenXML Presentation**
``` csharp
string FilePath = @"..\..\..\..\Sample Files\";
string FileName = FilePath + "Apply Theme to Presentation.pptx";
string ThemeFileName = FilePath + "Theme.pptx";
ApplyThemeToPresentation(FileName, ThemeFileName);
// Apply a new theme to the presentation.
public static void ApplyThemeToPresentation(string presentationFile, string themePresentation)
{
using (PresentationDocument themeDocument = PresentationDocument.Open(themePresentation, false))
using (PresentationDocument presentationDocument = PresentationDocument.Open(presentationFile, true))
{
ApplyThemeToPresentation(presentationDocument, themeDocument);
}
}
// Apply a new theme to the presentation.
public static void ApplyThemeToPresentation(PresentationDocument presentationDocument, PresentationDocument themeDocument)
{
if (presentationDocument == null)
{
throw new ArgumentNullException("presentationDocument");
}
if (themeDocument == null)
{
throw new ArgumentNullException("themeDocument");
}
// Get the presentation part of the presentation document.
PresentationPart presentationPart = presentationDocument.PresentationPart;
// Get the existing slide master part.
SlideMasterPart slideMasterPart = presentationPart.SlideMasterParts.ElementAt(0);
string relationshipId = presentationPart.GetIdOfPart(slideMasterPart);
// Get the new slide master part.
SlideMasterPart newSlideMasterPart = themeDocument.PresentationPart.SlideMasterParts.ElementAt(0);
// Remove the existing theme part.
presentationPart.DeletePart(presentationPart.ThemePart);
// Remove the old slide master part.
presentationPart.DeletePart(slideMasterPart);
// Import the new slide master part, and reuse the old relationship ID.
newSlideMasterPart = presentationPart.AddPart(newSlideMasterPart, relationshipId);
// Change to the new theme part.
presentationPart.AddPart(newSlideMasterPart.ThemePart);
Dictionary newSlideLayouts = new Dictionary();
foreach (var slideLayoutPart in newSlideMasterPart.SlideLayoutParts)
{
newSlideLayouts.Add(GetSlideLayoutType(slideLayoutPart), slideLayoutPart);
}
string layoutType = null;
SlideLayoutPart newLayoutPart = null;
// Insert the code for the layout for this example.
string defaultLayoutType = "Title and Content";
// Remove the slide layout relationship on all slides.
foreach (var slidePart in presentationPart.SlideParts)
{
layoutType = null;
if (slidePart.SlideLayoutPart != null)
{
// Determine the slide layout type for each slide.
layoutType = GetSlideLayoutType(slidePart.SlideLayoutPart);
// Delete the old layout part.
slidePart.DeletePart(slidePart.SlideLayoutPart);
}
if (layoutType != null && newSlideLayouts.TryGetValue(layoutType, out newLayoutPart))
{
// Apply the new layout part.
slidePart.AddPart(newLayoutPart);
}
else
{
newLayoutPart = newSlideLayouts[defaultLayoutType];
// Apply the new default layout part.
slidePart.AddPart(newLayoutPart);
}
}
}
// Get the slide layout type.
public static string GetSlideLayoutType(SlideLayoutPart slideLayoutPart)
{
CommonSlideData slideData = slideLayoutPart.SlideLayout.CommonSlideData;
// Remarks: If this is used in production code, check for a null reference.
return slideData.Name;
}
```
## **Aspose.Slides**
In order to apply theme we need to clone the slide with master, please follow the steps below:
- Create an instance of the Presentation class containing the source presentation the slide will be cloned from.
- Create an instance of the Presentation class containing the destination presentation the slide will be cloned to.
- Access the slide to be cloned along with the master slide.
- Instantiate the IMasterSlideCollection class by referencing the Masters collection exposed by the Presentation object of the destination presentation.
- Call the AddClone method exposed by the IMasterSlideCollection object and pass the master from the source PPTX to be cloned as parameter to the AddClone method.
- Instantiate the ISlideCollection class by setting the reference to the Slides collection exposed by the Presentation object of the destination presentation.
- Call the AddClone method exposed by the ISlideCollection object and pass the slide from the source presentation to be cloned and master slide as parameter to the AddClone method.
- Write the modified destination presentation file.
``` csharp
using Aspose.Slides;
using Aspose.Slides.Export;
string FilePath = @"..\..\..\..\Sample Files\";
string FileName = FilePath + "Apply Theme to Presentation.pptx";
string ThemeFileName = FilePath + "Theme.pptx";
ApplyThemeToPresentation(ThemeFileName, FileName);
static void ApplyThemeToPresentation(string presentationFile, string outputFile)
{
//Instantiate Presentation class to load the source presentation file
using Presentation srcPres = new Presentation(presentationFile);
//Instantiate Presentation class for destination presentation (where slide is to be cloned)
using Presentation destPres = new Presentation(outputFile);
//Instantiate ISlide from the collection of slides in source presentation along with
//master slide
ISlide SourceSlide = srcPres.Slides[0];
IMasterSlide SourceMaster = SourceSlide.LayoutSlide.MasterSlide;
//Clone the desired master slide from the source presentation to the collection of masters in the
//destination presentation
IMasterSlideCollection masters = destPres.Masters;
IMasterSlide iSlide = masters.AddClone(SourceMaster);
//Clone the desired slide from the source presentation with the desired master to the end of the
//collection of slides in the destination presentation
ISlideCollection slds = destPres.Slides;
slds.AddClone(SourceSlide, iSlide, true);
//Save the destination presentation to disk
destPres.Save(outputFile, SaveFormat.Pptx);
}
```
## **Download Running Code Example**
- [GitHub](https://github.com/aspose-slides/Aspose.Slides-for-.NET/releases/tag/AsposeSlidesVsOpenXML1.1)
## **Sample Code**
- [GitHub](https://github.com/aspose-slides/Aspose.Slides-for-.NET/tree/master/Plugins/OpenXML/Common%20Features/Apply%20Theme%20to%20Presentation)
## Related articles
- [Clone Presentation Slides in .NET](https://docs.aspose.com/slides/net/clone-slides/)
# Restrict Presentation Edits with Shape Locks in .NET
> Learn how to lock and unlock shapes in PPTX presentations with Aspose.Slides for .NET to restrict selection, movement, resizing, and grouping.
Source: https://docs.aspose.com/slides/net/applying-protection-to-presentation/
Updated: 2026-10-20
## **Background**
A common use for Aspose.Slides for .NET is to create, update, and save PowerPoint (PPTX) presentations as part of an automated workflow. When users receive these presentations, restricting changes to shapes can help preserve the intended layout and content.
This article explains how shapes are organized on slides and how to apply and remove shape locks in a PPTX presentation. These locks let you restrict specific editing operations on individual shapes.
## **Composition of a Slide**
A presentation slide is composed of components such as autoshapes, tables, OLE objects, grouped shapes, picture frames, video frames, connectors, and other elements used to build a presentation. In Aspose.Slides for .NET, each element on a slide is represented by an object that implements the [IShape](https://reference.aspose.com/slides/net/aspose.slides/ishape/) interface or inherits from a class that does.
Different shape types expose different locking options. The [IBaseShapeLock](https://reference.aspose.com/slides/net/aspose.slides/ibaseshapelock/) interface is the base interface for shape locks. Aspose.Slides for .NET provides the following lock interfaces:
- [IAutoShapeLock](https://reference.aspose.com/slides/net/aspose.slides/iautoshapelock/) locks autoshapes.
- [IConnectorLock](https://reference.aspose.com/slides/net/aspose.slides/iconnectorlock/) locks connector shapes.
- [IGraphicalObjectLock](https://reference.aspose.com/slides/net/aspose.slides/igraphicalobjectlock/) locks graphical objects.
- [IGroupShapeLock](https://reference.aspose.com/slides/net/aspose.slides/igroupshapelock/) locks group shapes.
- [IPictureFrameLock](https://reference.aspose.com/slides/net/aspose.slides/ipictureframelock/) locks picture frames.
To apply locks across a [Presentation](https://reference.aspose.com/slides/net/aspose.slides/presentation/), iterate through its slides and set the appropriate locks on each supported shape.
## **Apply and Remove Protection**
Shape locks restrict operations such as selecting, moving, and resizing shapes. They do not make the entire presentation uneditable.
### **Apply Protection to PPTX Shapes**
Aspose.Slides for .NET provides the [IShape](https://reference.aspose.com/slides/net/aspose.slides/ishape/) interface to work with shapes on a slide.
The example sets [SelectLocked](https://reference.aspose.com/slides/net/aspose.slides/iautoshapelock/selectlocked/), [PositionLocked](https://reference.aspose.com/slides/net/aspose.slides/iautoshapelock/positionlocked/), and [SizeLocked](https://reference.aspose.com/slides/net/aspose.slides/iautoshapelock/sizelocked/) to `true` for autoshapes, with equivalent locks for group shapes, connectors, and picture frames. Connectors use [PositionMove](https://reference.aspose.com/slides/net/aspose.slides/iconnectorlock/positionmove/) for movement; groups also use [GroupingLocked](https://reference.aspose.com/slides/net/aspose.slides/igroupshapelock/groupinglocked/) to restrict grouping.
The example loads an existing PPTX presentation, checks the shapes in each slide's shape collection, and saves a copy with these restrictions applied. Shapes outside the four handled types are left unchanged. The loop does not traverse the child shapes inside a group.
```cs
using Aspose.Slides;
using Aspose.Slides.Export;
using var presentation = new Presentation("Sample.pptx");
foreach (var slide in presentation.Slides)
{
foreach (var shape in slide.Shapes)
{
if (shape is IAutoShape autoShape)
{
autoShape.ShapeLock.PositionLocked = true;
autoShape.ShapeLock.SelectLocked = true;
autoShape.ShapeLock.SizeLocked = true;
}
else if (shape is IGroupShape groupShape)
{
groupShape.ShapeLock.GroupingLocked = true;
groupShape.ShapeLock.PositionLocked = true;
groupShape.ShapeLock.SelectLocked = true;
groupShape.ShapeLock.SizeLocked = true;
}
else if (shape is IConnector connectorShape)
{
connectorShape.ShapeLock.PositionMove = true;
connectorShape.ShapeLock.SelectLocked = true;
connectorShape.ShapeLock.SizeLocked = true;
}
else if (shape is IPictureFrame pictureFrame)
{
pictureFrame.ShapeLock.PositionLocked = true;
pictureFrame.ShapeLock.SelectLocked = true;
pictureFrame.ShapeLock.SizeLocked = true;
}
}
}
presentation.Save("ProtectedSample.pptx", SaveFormat.Pptx);
```
### **Remove Protection**
To remove a shape lock, set its value to `false`. The following example loads a presentation with shape locks and clears the selection, movement, and resizing restrictions through [IAutoShapeLock](https://reference.aspose.com/slides/net/aspose.slides/iautoshapelock/), [IGroupShapeLock](https://reference.aspose.com/slides/net/aspose.slides/igroupshapelock/), [IConnectorLock](https://reference.aspose.com/slides/net/aspose.slides/iconnectorlock/), and [IPictureFrameLock](https://reference.aspose.com/slides/net/aspose.slides/ipictureframelock/). It also clears [IGroupShapeLock.GroupingLocked](https://reference.aspose.com/slides/net/aspose.slides/igroupshapelock/groupinglocked/) and saves a copy of the presentation. Other lock settings are left unchanged.
```cs
using Aspose.Slides;
using Aspose.Slides.Export;
using var presentation = new Presentation("ProtectedSample.pptx");
foreach (var slide in presentation.Slides)
{
foreach (var shape in slide.Shapes)
{
if (shape is IAutoShape autoShape)
{
autoShape.ShapeLock.PositionLocked = false;
autoShape.ShapeLock.SelectLocked = false;
autoShape.ShapeLock.SizeLocked = false;
}
else if (shape is IGroupShape groupShape)
{
groupShape.ShapeLock.GroupingLocked = false;
groupShape.ShapeLock.PositionLocked = false;
groupShape.ShapeLock.SelectLocked = false;
groupShape.ShapeLock.SizeLocked = false;
}
else if (shape is IConnector connectorShape)
{
connectorShape.ShapeLock.PositionMove = false;
connectorShape.ShapeLock.SelectLocked = false;
connectorShape.ShapeLock.SizeLocked = false;
}
else if (shape is IPictureFrame pictureFrame)
{
pictureFrame.ShapeLock.PositionLocked = false;
pictureFrame.ShapeLock.SelectLocked = false;
pictureFrame.ShapeLock.SizeLocked = false;
}
}
}
presentation.Save("RemovedProtectionSample.pptx", SaveFormat.Pptx);
```
### **Conclusion**
Aspose.Slides for .NET lets you restrict specific editing operations on individual shapes or apply the same restrictions across slides. Choose the locks supported by each shape type, and set their values to `false` when you need to remove those restrictions.
## **FAQ**
**Can I combine shape locks and password protection in the same presentation?**
Yes. Shape locks restrict specific editing operations, while [password protection](https://docs.aspose.com/slides/net/password-protected-presentation/) can restrict opening or modifying the presentation. You can use both in the same file.
**Can I restrict editing on specific slides without affecting others?**
Yes. Apply locks only to shapes on the selected slides. This does not change the lock settings on other slides.
**How can I apply locks to individual shapes inside a group?**
Iterate through the group's [Shapes](https://reference.aspose.com/slides/net/aspose.slides/igroupshape/shapes/) collection and apply the appropriate locks to each child shape. Repeat this for any nested groups. The examples above process only the slide's shape collection, so they do not set locks on individual group members.
## Related features
- [Lock shapes against editing](https://docs.aspose.com/slides/features/shape-locks/)
## Related articles
- [Presentation Locking](https://docs.aspose.com/slides/net/presentation-locking/)
# Aspose.Slides for OpenXML
>
Source: https://docs.aspose.com/slides/net/aspose-slides-for-openxml/
Updated: 2026-08-31
## **What Is OpenXML?**
OpenXML SDK is a .NET SDK from Microsoft in order to process Microsoft Office 2007 and above file formats. These file formats are basically zipped packages and the Open XML SDK for Office simplifies the task of manipulating Open XML packages and the underlying Open XML schema elements within a package. The classes in the Open XML SDK encapsulate many common tasks that developers perform on Open XML packages, so that you can perform complex operations with lines of code.
Once you have installed the Open XML SDK 2.5, open your existing project or application in Visual Studio, or create a new project or application. Then, in your project or application, add references to the following components:
- DocumentFormat.OpenXml
- WindowsBase
## **Aspose.Slides for .NET**
Aspose.Slides for .NET is a unique PowerPoint® management component that enables .NET applications to read, write and manipulate PowerPoint documents without using Microsoft PowerPoint.
Aspose.Slides for .NET is the first and only .NET component that provides functionality to manage PowerPoint documents within your own applications. As with all Aspose .NET components, Aspose.Slides is written in managed C#, incredibly priced and lightning fast.
## **Aspose.Slides for OpenXML**
## **Introduction**
The developers looking for file format libraries may need to walk through the features provided by the libraries available on the market. Mainly, two factors are considered when choosing an option:
- Features
- Efforts required to use the library
If you are a .NET developer looking for faster,easy and light-weight file format library to process files, you may need to compare VSTO(Visual Studio tool for Office) with Aspose. In this case, this project will help you to compare features and code in both libraries.
## **System Requirements and Supported Platforms**
### **System Requirements**
One or more of the following editions of Visual Studio Tools for Office:
- Microsoft Visual Studio 2005 Tools for the Microsoft Office System
- Microsoft Visual Studio 2005 Tools for the 2007 Microsoft Office System
- Visual Studio 2008 Professional Edition
- Visual Studio 2008 Team Suite Edition
- One version of Microsoft Office:
- Microsoft Office Professional 2003 SP1
- 2007 Microsoft Office system
### **Supported Operating Systems**
- Windows 2000; Windows Server 2003; Windows Vista; Windows XP
### **.NET Framework Versions Supported**
- only .NET framework 2.0 or greater.
## **Downloading**
You can download the latest code at:
- [Github](http://goo.gl/sZsbbu)
- [Sourceforge](http://goo.gl/AWc3J3)
- [Bitbucket](http://goo.gl/8B9p3b)
## **Installing**
To open the project you need to download and install the latest version of Aspose.Slides for .NET from [here](http://www.aspose.com/.net/powerpoint-component.aspx) and include it in the project.
## **Support, Extend and Contribute**
### **Support**
We offer free support. Anyone who uses our product, whether they have bought them or are using an evaluation, deserves our full attention and respect.
You can log any issues or suggestions related to Aspose .NET for OpenXML using any of the following platforms:
- [Github](http://goo.gl/UHkCJe)
- [Sourceforge](http://goo.gl/f8zdLU)
- [Bitbucket](http://goo.gl/1Eo1DQ)
### **Extend and Contribute**
Comparison code for Aspose.Slides for .NET and OpenXML source code is available on major social coding websites listed below.Developers are encouraged to download the source code to migrate from OpenXML to Aspose.Slides as per their requirements.
### **Source Code**
You can get the latest source code from one of the following locations.
- [Github](https://goo.gl/gN0nf2)
- [Sourceforge](https://goo.gl/noku6v)
- [Bitbucket](https://goo.gl/T83r2D)
### **How to Configure the Source Code**
Please follow these simple steps to get started
- Download/Clone the source code.
- Open Visual Studio 2010 and Choose File > Open Project.
- Browse to the latest source code that you have downloaded and Open the .sln file.
## **Sample Code Examples**
This section includes the following topics
- [Code Comparison for common features with OpenXML](https://docs.aspose.com/slides/net/code-comparison-for-common-features-with-openxml/)
- [Add a comment to a slide](https://docs.aspose.com/slides/net/add-a-comment-to-a-slide/)
- [Adding Slide to Presentation](https://docs.aspose.com/slides/net/adding-slide-to-presentation/)
- [Apply a theme to a presentation](https://docs.aspose.com/slides/net/apply-a-theme-to-a-presentation/)
- [Change the fill color of a shape in a presentation](https://docs.aspose.com/slides/net/change-the-fill-color-of-a-shape-in-a-presentation/)
- [Count the number of Slides](https://docs.aspose.com/slides/net/count-the-number-of-slides/)
- [Create a presentation document](https://docs.aspose.com/slides/net/create-a-presentation-document/)
- [Delete all the comments by an author](https://docs.aspose.com/slides/net/delete-all-the-comments-by-an-author/)
- [Delete a Slide](https://docs.aspose.com/slides/net/delete-a-slide/)
- [Get all the external hyperlinks in a presentation](https://docs.aspose.com/slides/net/get-all-the-external-hyperlinks-in-a-presentation/)
- [Get all the text in all the slides](https://docs.aspose.com/slides/net/get-all-the-text-in-all-the-slides/)
- [Get all the text in a slide](https://docs.aspose.com/slides/net/get-all-the-text-in-a-slide/)
- [Get the titles of all the slides](https://docs.aspose.com/slides/net/get-the-titles-of-all-the-slides/)
- [Move a paragraph from one presentation to another](https://docs.aspose.com/slides/net/move-a-paragraph-from-one-presentation-to-another/)
- [Move a slide to a new position](https://docs.aspose.com/slides/net/move-a-slide-to-a-new-position/)
- [Missing Features in OpenXML](https://docs.aspose.com/slides/net/missing-features-in-openxml/)
- [Access OpenDocument Presentation](https://docs.aspose.com/slides/net/access-opendocument-presentation/)
- [Add Layout Slides to Presentation](https://docs.aspose.com/slides/net/add-layout-slides-to-presentation/)
- [Conversion from PPT to different formats](https://docs.aspose.com/slides/net/conversion-from-ppt-to-different-formats/)
- [Conversion from PPT to PPTX format in Aspose.Slides](https://docs.aspose.com/slides/net/conversion-from-ppt-to-pptx-format-in-aspose-slides/)
- [Conversion to HTML](https://docs.aspose.com/slides/net/conversion-to-html/)
- [Conversion to PDF](https://docs.aspose.com/slides/net/conversion-to-pdf/)
- [Conversion to XPS](https://docs.aspose.com/slides/net/conversion-to-xps/)
- [Export Media files to HTML file](https://docs.aspose.com/slides/net/export-media-files-to-html-file/)
- [Get the File Format of Presentation](https://docs.aspose.com/slides/net/get-the-file-format-of-presentation/)
- [High level Programming with Presentation Document Object Model](https://docs.aspose.com/slides/net/high-level-programming-with-presentation-document-object-model/)
- [Assemble Slides](https://docs.aspose.com/slides/net/assemble-slides/)
- [Find and Replace in Presentation](https://docs.aspose.com/slides/net/find-and-replace-in-presentation/)
- [Presentation Rendering](https://docs.aspose.com/slides/net/presentation-rendering/)
- [Conversion to Tiff with Notes](https://docs.aspose.com/slides/net/conversion-to-tiff-with-notes/)
- [Rendered As Tiff](https://docs.aspose.com/slides/net/rendered-as-tiff/)
- [Rendered As Tiff By User Defined Dimension](https://docs.aspose.com/slides/net/rendered-as-tiff-by-user-defined-dimension/)
- [Render Slide As SVG Image](https://docs.aspose.com/slides/net/render-slide-as-svg-image/)
- [Render Slide As thumbnail to JPEG](https://docs.aspose.com/slides/net/render-slide-as-thumbnail-to-jpeg/)
- [Render Slide As Thumbnail to JPEG by User defined Values](https://docs.aspose.com/slides/net/render-slide-as-thumbnail-to-jpeg-by-user-defined-values/)
- [Slide Transitions](https://docs.aspose.com/slides/net/slide-transitions/)
- [Working with Size and Layout of Presentation](https://docs.aspose.com/slides/net/working-with-size-and-layout-of-presentation/)
## Related articles
- [Aspose.Slides .NET for VSTO](https://docs.aspose.com/slides/net/aspose-slides-net-for-vsto/)
- [Aspose.Slides Visual Studio Plugin](https://docs.aspose.com/slides/net/aspose-slides-visual-studio-plugin/)
- [Missing Features in OpenXML](https://docs.aspose.com/slides/net/missing-features-in-openxml/)
# Aspose.Slides for Xamarin (Historical)
> Historical: how Aspose.Slides for .NET versions 20.2 to 22.10 supported Xamarin.Android through a separate library. Current versions do not include it.
Source: https://docs.aspose.com/slides/net/aspose-slides-for-xamarin/
Updated: 2026-09-28
This is a historical page. Versions 20.2 to 22.10 of the Aspose.Slides.NET package included a separate Xamarin.Android library, *Aspose.Slides.Droid.dll*, which the code on this page uses. Later versions do not include it: the current package contains builds for .NET Framework 4.6.2, .NET 6, and .NET Standard 2.0 only. Microsoft ended support for all Xamarin SDKs on May 1, 2024; see the [Xamarin support policy](https://dotnet.microsoft.com/en-us/platform/support/policy/xamarin).
## **Introduction**
Xamarin is a framework used for mobile development in .NET C#. Xamarin has tools and libraries that extend the capabilities of the .NET platform. It allows developers to build applications for the **Android** operating system.
For development in Xamarin, programmers can use their regular development environments (C#, Visual Studio, and 3rd party libraries).
Aspose.Slides API worked on the Xamarin platform. To achieve this, the Aspose.Slides.NET package, in versions 20.2 to 22.10, added a separate DLL for Xamarin. Aspose.Slides for Xamarin supported most of the features available in the .NET version:
- converting and viewing presentations.
- editing contents in presentations: text, shapes, charts, SmartArt, audio/video, fonts, etc.
- handling/dealing with animation, 2D effects, WordArt, etc.
- handling/dealing with metadata and document properties.
- cloning, merging, comparing, splitting, etc.
We provided a comparison of the full features in another section close to the bottom of this page.
In Aspose.Slides for Xamarin API, the classes, namespaces, logic, and behavior were as similar as possible to the .NET version. You could migrate your Aspose.Slides .NET applications to Xamarin with minimal costs.
## **Quick Example**
You could use Aspose.Slides for Xamarin to build and utilize your C# application through Slides for Android.
We are providing an example of Android via Xamarin application that uses Aspose.Slides to display presentation slides and adds a new shape on the slide on touch. You can find the full source of the examples on [GitHub](https://github.com/aspose-slides/Aspose.Slides-for-.NET/tree/master/Xamarin).
Let’s start by creating a Xamarin Android App:

First, we create a content layout that will contain an image view, Prev, and Next buttons:
**XML - content_main.xml - Create content layout**
```xml
```
Here, we reference the "Aspose.Slides.Droid.dll" library that includes a sample presentation ("HelloWorld.pptx") into Xamarin application Assets and adds its initialization to MainActivity:
**C# - MainActivity.cs - Initialization**
``` csharp
using System.Diagnostics;
using Aspose.Slides.Theme;
[Activity(Label = "@string/app_name", Theme = "@style/AppTheme.NoActionBar", MainLauncher = true)]
public class MainActivity : AppCompatActivity
{
private Aspose.Slides.Presentation presentation;
protected override void OnCreate(Bundle savedInstanceState)
{
base.OnCreate(savedInstanceState);
SetContentView(Resource.Layout.activity_main);
}
protected override void OnResume()
{
if (presentation == null)
{
using (Stream input = Assets.Open("HelloWorld.pptx"))
{
presentation = new Aspose.Slides.Presentation(input);
}
}
}
protected override void OnPause()
{
if (presentation != null)
{
presentation.Dispose();
presentation = null;
}
}
}
```
Let’s add the function to display the Prev and Next slides on the tapping of buttons:
**C# - MainActivity.cs - Display slides on Prev and Next button click**
``` csharp
using System.Diagnostics;
using Aspose.Slides.Theme;
[Activity(Label = "@string/app_name", Theme = "@style/AppTheme.NoActionBar", MainLauncher = true)]
public class MainActivity : AppCompatActivity
{
private Button buttonNext;
private Button buttonPrev;
ImageView imageView;
private Aspose.Slides.Presentation presentation;
private int currentSlideNumber;
protected override void OnCreate(Bundle savedInstanceState)
{
base.OnCreate(savedInstanceState);
SetContentView(Resource.Layout.activity_main);
}
protected override void OnResume()
{
base.OnResume();
LoadPresentation();
currentSlideNumber = 0;
if (buttonNext == null)
{
buttonNext = FindViewById(Resource.Id.buttonNext);
}
if (buttonPrev == null)
{
buttonPrev = FindViewById(Resource.Id.buttonPrev);
}
if(imageView == null)
{
imageView= FindViewById(Resource.Id.imageView);
}
buttonNext.Click += ButtonNext_Click;
buttonPrev.Click += ButtonPrev_Click;
RefreshButtonsStatus();
ShowSlide(currentSlideNumber);
}
private void ButtonNext_Click(object sender, System.EventArgs e)
{
if (currentSlideNumber > (presentation.Slides.Count - 1))
{
return;
}
ShowSlide(++currentSlideNumber);
RefreshButtonsStatus();
}
private void ButtonPrev_Click(object sender, System.EventArgs e)
{
if (currentSlideNumber == 0)
{
return;
}
ShowSlide(--currentSlideNumber);
RefreshButtonsStatus();
}
protected override void OnPause()
{
base.OnPause();
if (buttonNext != null)
{
buttonNext.Dispose();
buttonNext = null;
}
if (buttonPrev != null)
{
buttonPrev.Dispose();
buttonPrev = null;
}
if(imageView != null)
{
imageView.Dispose();
imageView = null;
}
DisposePresentation();
}
private void RefreshButtonsStatus()
{
buttonNext.Enabled = currentSlideNumber < (presentation.Slides.Count - 1);
buttonPrev.Enabled = currentSlideNumber > 0;
}
private void ShowSlide(int slideNumber)
{
Aspose.Slides.Drawing.Xamarin.Size size = presentation.SlideSize.Size.ToSize();
Aspose.Slides.Drawing.Xamarin.Bitmap bitmap = presentation.Slides[slideNumber].GetThumbnail(size);
imageView.SetImageBitmap(bitmap.ToNativeBitmap());
}
private void LoadPresentation()
{
if(presentation != null)
{
return;
}
using (Stream input = Assets.Open("HelloWorld.pptx"))
{
presentation = new Aspose.Slides.Presentation(input);
}
}
private void DisposePresentation()
{
if(presentation == null)
{
return;
}
presentation.Dispose();
presentation = null;
}
}
```
Finally, let’s implement a function to add an ellipse shape on a touch on the slide:
**C# - MainActivity.cs - Add ellipse by slide click**
``` csharp
private void ImageView_Touch(object sender, Android.Views.View.TouchEventArgs e)
{
int[] location = new int[2];
imageView.GetLocationOnScreen(location);
int x = (int)e.Event.GetX();
int y = (int)e.Event.GetY();
int posX = x - location[0];
int posY = y - location[0];
Aspose.Slides.Drawing.Xamarin.Size presSize = presentation.SlideSize.Size.ToSize();
float coeffX = (float)presSize.Width / imageView.Width;
float coeffY = (float)presSize.Height / imageView.Height;
int presPosX = (int)(posX * coeffX);
int presPosY = (int)(posY * coeffY);
int width = presSize.Width / 50;
int height = width;
Aspose.Slides.IAutoShape ellipse = presentation.Slides[currentSlideNumber].Shapes.AddAutoShape(Aspose.Slides.ShapeType.Ellipse, presPosX, presPosY, width, height);
ellipse.FillFormat.FillType = Aspose.Slides.FillType.Solid;
Random random = new Random();
Aspose.Slides.Drawing.Xamarin.Color slidesColor = Aspose.Slides.Drawing.Xamarin.Color.FromArgb(random.Next(256), random.Next(256), random.Next(256));
ellipse.FillFormat.SolidFillColor.Color = slidesColor;
ShowSlide(currentSlideNumber);
}
```
Each click on the presentation slide causes a random colored ellipse to be added:
## **Supported Features**
|**FEATURES** |**Aspose.Slides for .NET** |**Aspose.Slides for Xamarin**|
| :- | :- | :- |
|**Presentation features**: | | |
|Create new presentations |✓|✓|
|PowerPoint 97 - 2003 formats open/save |✓|✓|
|PowerPoint 2007 formats open/save |✓|✓|
|PowerPoint 2010 extensions support |✓|✓|
|PowerPoint 2013 extensions support |✓|✓|
|PowerPoint 2016 features support |restricted|restricted|
|PowerPoint 2019 features support |restricted |restricted|
|PPT 2 PPTX conversion |✓|✓|
|PPTX 2 PPT conversion |✓|✓|
|PPTX in PPT |restricted|restricted|
|Themes processing |✓|✓|
|Macros processing |✓|✓|
|Document properties processing |✓|✓|
|Password protection |✓|✓|
|Fast text extraction |✓|✓|
|Embedding fonts |✓|✓|
|Comments rendering |✓ |✓|
|Interrupting of long-running tasks |✓|✓ |
|**Export formats:** | | |
|PDF |✓|✓|
|XPS |✓|✓|
|HTML |✓|✓|
|TIFF |✓|✗|
|ODP |restricted |restricted|
|SWF |restricted|restricted|
|SVG |✓|✓|
|**Import formats:** | | |
|HTML |restricted|restricted|
|ODP |✓|✓|
|THMX |✓|✓|
|**Master slides features:** | | |
|Accessing all existing master slide |✓|✓|
|Creating/removing master slides |✓|✓|
|Cloning master slides |✓|✓|
|**Layout slides features:** | | |
|Accessing all existing layout slides |✓|✓|
|Creating/removing layout slides |✓|✓|
|Cloning layout slides |✓|✓|
|**Slide features:** | | |
|Accessing all existing slides |✓|✓|
|Creating/removing slides |✓|✓|
|Cloning slides |✓|✓|
|Exporting slides to images |✓|✓|
|Creating/editing/removing slide sections |✓|✓|
|**Notes slides features**: | | |
|Accessing all existing notes slides |✓|✓|
|**Shape features:** | | |
|Accessing all slide shapes |✓|✓|
|Adding new shapes |✓|✓|
|Cloning shapes |✓|✓|
|Exporting separate shapes to images |✓|✓|
|**Supported shape types:** | | |
|All predefined shape types |✓|✓|
|Picture frames |✓|✓|
|Tables |✓|✓|
|Charts |✓|✓|
|SmartArt |✓|✓|
|Legacy diagram |✓|✓|
|WordArt |✓|✓|
|OLE, ActiveX objects |restricted|restricted|
|Video frames |✓|✓|
|Audio frames |✓|✓|
|Connectors |✓|✓|
|**Group shape features:** | | |
|Accessing group shapes |✓|✓|
|Creating group shapes |✓|✓|
|Ungrouping existing group shapes |✓|✓|
|**Shape effects features:** | | |
|2D effects |restricted|restricted|
|3D effects |✗|✗|
|**Text features:** | | |
|Paragraphs formatting |✓|✓|
|Portions formatting |✓|✓|
|**Animation Features:** | | |
|Export animation to SWF |✗|✗|
|Export animation to HTML |✗|✗|
# Aspose.Slides .NET for VisualStudio
>
Source: https://docs.aspose.com/slides/net/aspose-slides-net-for-visualstudio/
Updated: 2024-11-01
This section has the following topics:
- [Aspose.Slides Visual Studio Plugin](https://docs.aspose.com/slides/net/aspose-slides-visual-studio-plugin/)
# Aspose.Slides .NET for VSTO
>
Source: https://docs.aspose.com/slides/net/aspose-slides-net-for-vsto/
Updated: 2026-01-19
## **What Is VSTO?**
VSTO, or Visual Studio Tools for Office, or Microsoft Visual Studio Tools is part of Microsoft's Visual Studio .NET tools suite and supports the Microsoft .NET Framework. It is used by developers to write code connecting Microsoft Office Word, Excel and Outlook applications. Developers using VSTO can employ C# or Visual Basic languages. It is an alternative to Visual Basic for Applications, or VBA.
## **Aspose.Slides for .NET**
Aspose.Slides for .NET is a unique PowerPoint® management component that enables .NET applications to read, write and manipulate PowerPoint documents without using Microsoft PowerPoint.
Aspose.Slides for .NET is the first and only .NET component that provides functionality to manage PowerPoint documents within your own applications. As with all Aspose .NET components, Aspose.Slides is written in managed C#, incredibly priced and lightning fast.
## **Aspose.Slides for VSTO**
## **Introduction**
The developers looking for file format libraries may need to walk through the features provided by the libraries available on the market. Mainly, two factors are considered when choosing an option:
- Features
- Efforts required to use the library
If you are a .NET developer looking for faster,easy and light-weight file format library to process files, you may need to compare VSTO(Visual Studio tool for Office) with Aspose. In this case, this project will help you to compare features and code in both libraries.
## **System Requirements and Supported Platforms**
### **System Requirements**
One or more of the following editions of Visual Studio Tools for Office:
- Microsoft Visual Studio 2005 Tools for the Microsoft Office System
- Microsoft Visual Studio 2005 Tools for the 2007 Microsoft Office System
- Visual Studio 2008 Professional Edition
- Visual Studio 2008 Team Suite Edition
- One version of Microsoft Office:
- Microsoft Office Professional 2003 SP1
- 2007 Microsoft Office system
### **Supported Operating Systems**
Windows 2000; Windows Server 2003; Windows Vista; Windows XP
### **.NET Framework Versions Supported**
only .NET framework 2.0 or greater.
## **Downloading**
You can download the latest code at:
- [Github](http://goo.gl/vaB1lL)
- [Sourceforge](http://goo.gl/F4oLnp)
- [Bitbucket](http://goo.gl/BzCiz1)
## **Installing**
To open the project you need to download and install the latest version of Aspose.Slides for .NET from [here](http://www.aspose.com/.net/powerpoint-component.aspx) and include it in the project.
## **Support, Extend and Contribute**
### **Support**
We offer free support. Anyone who uses our product, whether they have bought them or are using an evaluation, deserves our full attention and respect.
You can log any issues or suggestions related to Aspose .NET for VSTO using any of the following platforms:
- [Github](http://goo.gl/tDjFqA)
- [Sourceforge](http://goo.gl/9CgWQu)
- [Bitbucket](http://goo.gl/q7tEu9)
### **Extend and Contribute**
Comparison code for Aspose.Slides for .NET and VSTO source code is available on major social coding websites listed below.Developers are encouraged to download the source code to migrate from VSTO to Aspose.Slides as per their requirements.
### **Source Code**
You can get the latest source code from one of the following locations.
- [Github](https://goo.gl/JA8x5M)
- [Sourceforge](https://goo.gl/XbE5rO)
- [Bitbucket](https://goo.gl/XBqAzx)
### **How to Configure the Source Code**
Please follow these simple steps to get started
- Download/Clone the source code.
- Open Visual Studio 2010 and Choose File > Open Project.
- Browse to the latest source code that you have downloaded and Open the .sln file.
## **Sample Code Examples**
This section includes the following topics
- [Code Comparison for common features with VSTO](https://docs.aspose.com/slides/net/code-comparison-for-common-features-with-vsto/)
- [Add Image in Table Cell](https://docs.aspose.com/slides/net/add-image-in-table-cell/)
- [Adding Picture Frame with Animation in VSTO and Aspose.Slides](https://docs.aspose.com/slides/net/adding-picture-frame-with-animation-in-vsto-and-aspose-slides/)
- [Adding Shapes to Presentation](https://docs.aspose.com/slides/net/adding-shapes-to-presentation/)
- [Adding Text Dynamically](https://docs.aspose.com/slides/net/adding-text-dynamically/)
- [Add Picture Frame to Presentation](https://docs.aspose.com/slides/net/add-picture-frame-to-presentation/)
- [Create a Chart](https://docs.aspose.com/slides/net/create-a-chart/)
- [Create and Embed an Excel Chart as an OLE Object](https://docs.aspose.com/slides/net/create-and-embed-an-excel-chart-as-an-ole-object/)
- [Create a New Presentation in VSTO and Aspose.Slides](https://docs.aspose.com/slides/net/create-a-new-presentation-in-vsto-and-aspose-slides/)
- [Creating a Table on PowerPoint Slide in VSTO and Aspose.Slides](https://docs.aspose.com/slides/net/creating-a-table-on-powerpoint-slide-in-vsto-and-aspose-slides/)
- [Find and Replace Text without Losing Format in Presentation](https://docs.aspose.com/slides/net/find-and-replace-text-without-losing-format-in-presentation/)
- [Format Text](https://docs.aspose.com/slides/net/format-text/)
- [Opening a Presentation in VSTO and Aspose.Slides](https://docs.aspose.com/slides/net/opening-a-presentation-in-vsto-and-aspose-slides/)
- [Removing row or column in Table in VSTO and Aspose.Slides](https://docs.aspose.com/slides/net/removing-row-or-column-in-table-in-vsto-and-aspose-slides/)
- [Setting Background Color of Master Slide](https://docs.aspose.com/slides/net/setting-background-color-of-master-slide/)
- [Missing Features in VSTO](https://docs.aspose.com/slides/net/missing-features-in-vsto/)
- [Add layout Slide to Presentation](https://docs.aspose.com/slides/net/add-layout-slide-to-presentation/)
- [Conversion from PPT to PPTX format](https://docs.aspose.com/slides/net/conversion-from-ppt-to-pptx-format/)
- [Conversion of OpenOffice Document](https://docs.aspose.com/slides/net/conversion-of-openoffice-document/)
- [Convert Presentation to HTML](https://docs.aspose.com/slides/net/export-media-files-into-html-file/)
- [Convert Presentation to Tiff with Notes](https://docs.aspose.com/slides/net/convert-presentation-to-tiff-with-notes/)
- [Convert Presentation to XPS](https://docs.aspose.com/slides/net/convert-presentation-to-xps/)
- [Create Slide as SVG Image](https://docs.aspose.com/slides/net/create-slide-as-svg-image/)
- [Export media files into HTML file](https://docs.aspose.com/slides/net/export-media-files-into-html-file/)
- [Generate Slide Thumbnail as JPEG](https://docs.aspose.com/slides/net/generate-slide-thumbnail-as-jpeg/)
- [Generating a Thumbnail from a Slide with User Defined Dimensions](https://docs.aspose.com/slides/net/generating-a-thumbnail-from-a-slide-with-user-defined-dimensions/)
- [Presentation Locking](https://docs.aspose.com/slides/net/presentation-locking/)
- [Rendering Shapes on Slide as Images](https://docs.aspose.com/slides/net/rendering-shapes-on-slide-as-images/)
## Related articles
- [Aspose.Slides for OpenXML](https://docs.aspose.com/slides/net/aspose-slides-for-openxml/)
- [Aspose.Slides Visual Studio Plugin](https://docs.aspose.com/slides/net/aspose-slides-visual-studio-plugin/)
- [Code Comparison for common features with VSTO](https://docs.aspose.com/slides/net/code-comparison-for-common-features-with-vsto/)
# Aspose.Slides Visual Studio Plugin
>
Source: https://docs.aspose.com/slides/net/aspose-slides-visual-studio-plugin/
Updated: 2026-01-19
## **Introduction**
Microsoft Visual Studio is an integrated development environment (IDE) from Microsoft. It is used to develop computer programs for Microsoft Windows, as well as web sites, web applications and web services. Visual Studio uses Microsoft software development platforms such as Windows API, Windows Forms, Windows Presentation Foundation, Windows Store and Microsoft Silverlight. It can produce both native code and managed code.
### **Aspose.Slides for .NET**
Aspose.Slides for .NET is a unique PowerPoint® management API that enables .NET applications to read, write and manipulate PowerPoint documents without using Microsoft PowerPoint.
Aspose.Slides for .NET is the first and only .NET PowerPoint API that provides functionality to manage PowerPoint documents within your own applications. As with all Aspose .NET components, Aspose.Slides is written in managed C#, incredibly priced and lightning fast.
For more details about [Aspose.Slides for .NET API](http://www.aspose.com/.net/powerpoint-component.aspx)
### **Explore Aspose.Slides for .NET Examples Using Visual Studio**
Aspose Visual Studio Plugin - **Explore Aspose.Slides for .NET Examples** is a great tool to quickly download and explore Aspose.Slides for .NET API examples. It saves lots of time and efforts by providing a very simple option to seamlessly select, download and open the latest example projects without having to leave your Visual Studio.
This version provides the following features:
- Supports Visual Studio 2010 and Visual Studio 2012 and Visual Studio 2013.
- Easy to launch from **File > Aspose** menu in Visual Studio
- Saves time and reduces the learning curve.
- Enables you to select and open the latest Aspose.Slides for .NET API examples hosted on Github.com.
- Allow you to open **C#** or **VB.NET** examples project
- A selected project is automatically opened in Visual Studio with all required references set to give you a ready to run and explore environment.
- Automatically downloads the latest API libraries from **NuGet** and examples from **GitHub**.

## **System Requirements and Supported Platforms**
In order to install and use Aspose Visual Studio Plugin you need to have one of the following Visual Studio version installed
- Visual Studio 2010, 2012, 2013
Please feel free to contact us if you find any issues in installing or using this plugin.
## **Installing**
It is very simple and easy to install Aspose Visual Studio Plugin, please follow these simple steps
- Double click the downloaded msi file
- Follow the steps, you can simply press Next on each screen to install it using standard settings.
You will get a success dialog once the installation is completed.

**Note:** Please make sure to restart Visual Studio for the changes to take effect.
## **Using**
Once installed you can easy launch and use the interactive plugin as described below:
**1.** Open the plugin by selecting **File > Aspose** followed by **New Aspose.Slides Example Project** in Visual Studio.

**2.** The first time you open the plugin you see the API selection dialog as shown below. It will take few minutes to download the latest API and their libraries from **NuGet** and latest examples source code from **GitHub**.

**3.** In the Select an API to View Examples dialog, select or change the location where the example projects will be created and also select or change examples project type as **C#** or **VB.NET** and click **Continue** to open the example project in Visual Studio.

**4.** New Examples projects as per project type selection of **C#** or **VB.NET** in Visual Studio.
|**C# Examples** |**VB.NET Examples** |
| :- | :- |
|||
## **Video Demo**
Please check [the video](https://www.youtube.com/watch?v=FyJ2TFlbLE4) below to see the module in action.
## **Support, Extend and Contribute**
### **Support**
From the very first days of Aspose, we knew that just giving our customers good products would not be enough. We also needed to deliver good service. We are developers ourselves and understand how frustrating it is when a technical issue or a quirk in the software stops you from doing what you need to do. We're here to solve problems, not create them.
This is why we offer free support. Anyone who uses our product, whether they have bought them or are using an evaluation, deserves our full attention and respect.
You can log any issues or suggestions related to Aspose Visual Studio Plugin using any of the following platforms
- [Github ](https://github.com/asposeSlides/Aspose.Slides-for-.NET/issues)
### **Extend and Contribute**
**Explore Aspose.Slides for .NET Examples** for Visual Studio is open source and its source code is available on the major social coding websites listed below. Developers are encouraged to download the source code and extend the functionality as per their own requirements.
#### **Source Code**
You can get the latest source code from one of the following locations
- [Github ](https://github.com/aspose-slides/Aspose.Slides-for-.NET)
#### **How to Configure the Source Code**
You need to have the following installed in order to open and extend the source code
- Visual Studio 2010
Please follow these simple steps to get started
1. Download/Clone the source code.
1. Open Visual Studio 2010 and Choose **File** > **Open Project**
1. Browse to the latest source code that you have downloaded and open **AsposeVisualStudioPlugin.sln**
#### **Source code overview**
There are two projects in the solution
- **AsposeVisualStudioPlugin** - Contains the integration with Visual Studio, selection and automatic download of Aspose APIs and Examples.
- **Installer** - Wix installer project to generate msi installer file for the plugin.
## Related articles
- [Aspose.Slides .NET for VSTO](https://docs.aspose.com/slides/net/aspose-slides-net-for-vsto/)
- [Aspose.Slides for OpenXML](https://docs.aspose.com/slides/net/aspose-slides-for-openxml/)
- [How to Run Examples](https://docs.aspose.com/slides/net/how-to-run-examples/)
# Assemble Slides
>
Source: https://docs.aspose.com/slides/net/assemble-slides/
Updated: 2026-08-05
## **Add a Slide to a Presentation**
Before talking about adding slides to the presentation files, let us discuss some facts about the slides. Each PowerPoint presentation file contains Master / Layout slide and other Normal slides. It means that a presentation file contains at least one or more slides. It is important to know that presentation files without slides are not supported by Aspose.Slides for .NET. Each slide has unique Id and all the Normal Slides are arranged in an order specified by the zero based index.
Aspose.Slides for .NET allows developers to add empty slides to their presentation. To add an empty slide in the presentation, please follow the steps below:
- Create an instance of **Presentation** class
- Instantiate **SlideCollection** class by setting a reference to the Slides (collection of content Slide objects) property exposed by the Presentation object.
- Add an empty slide to the presentation at the end of the content slides collection by calling the **AddEmptySlide** methods exposed by **SlideCollection** object
- Do some work with the newly added empty slide
- Finally, write the presentation file using the **Presentation** object
``` csharp
using Aspose.Slides;
using Aspose.Slides.Export;
using (Presentation pres = new Presentation())
{
// Instantiate the slide collection
ISlideCollection slds = pres.Slides;
for (int i = 0; i < pres.LayoutSlides.Count; i++)
{
// Add an empty slide to the Slides collection
slds.AddEmptySlide(pres.LayoutSlides[i]);
}
// Save the PPTX file to the disk
pres.Save("EmptySlide.pptx", SaveFormat.Pptx);
}
```
## **Access Slides of a Presentation**
Aspose.Slides for .NET provides Presentation class that can be used to find and access any desired slide present in the presentation.
**Using Slides Collection**
**Presentation** class represents a presentation file and exposes all slides in it as a **SlideCollection** collection (that is a collection of **Slide** objects). All of these slides can be accessed from this **Slides** collection using a slide index.
``` csharp
using Aspose.Slides;
// Instantiate a Presentation object that represents a presentation file
using (Presentation pres = new Presentation("Slides Test Presentation.pptx"))
{
// Accessing a slide using its slide index
ISlide slide = pres.Slides[0];
}
```
## **Remove Slides**
We know that Presentation class in **Aspose.Slides for .NET** represents a presentation file. Presentation class encapsulates a **SlideCollection** that acts as a repository of all slides that are the part of the presentation. Developers can remove a slide from this Slides collection in two ways:
- Using Slide Reference
- Using Slide Index
**Using Slide Reference**
To remove a slide using its reference, please follow the steps below:
- Create an instance of Presentation class
- Obtain the reference of a slide by using its Id or Index
- Remove the referenced slide from the presentation
- Write the modified presentation file
``` csharp
using Aspose.Slides;
using Aspose.Slides.Export;
// Instantiate a Presentation object that represents a presentation file
using (Presentation pres = new Presentation("Slides Test Presentation.pptx"))
{
// Accessing a slide using its index in the slides collection
ISlide slide = pres.Slides[0];
// Removing a slide using its reference
pres.Slides.Remove(slide);
// Writing the presentation file
pres.Save("modified.pptx", SaveFormat.Pptx);
}
```
## **Change the Position of a Slide**
It's very simple to change the position of a slide in the presentation. Just follow the steps below:
- Create an instance of Presentation class
- Obtain the reference of a slide by using its Index
- Change the SlideNumber of the referenced slide
- Write the modified presentation file
In the example given below, we have changed the position of a slide (lying at the zero index position 1) of the presentation) to index 1 (Position 2).
``` csharp
using Aspose.Slides;
using Aspose.Slides.Export;
private static string MyDir = @"..\..\..\Sample Files\";
static void Main(string[] args)
{
AddingSlidetoPresentation();
AccessingSlidesOfPresentation();
RemovingSlides();
ChangingPositionOfSlide();
}
public static void AddingSlidetoPresentation()
{
Presentation pres = new Presentation();
//Instantiate SlideCollection class
ISlideCollection slds = pres.Slides;
for (int i = 0; i < pres.LayoutSlides.Count; i++)
{
//Add an empty slide to the Slides collection
slds.AddEmptySlide(pres.LayoutSlides[i]);
}
//Save the PPTX file to the Disk
pres.Save(MyDir + "Assemble Slides.pptx", SaveFormat.Pptx);
}
public static void AccessingSlidesOfPresentation()
{
//Instantiate a Presentation object that represents a presentation file
Presentation pres = new Presentation(MyDir + "Assemble Slides.pptx");
//Accessing a slide using its slide index
ISlide slide = pres.Slides[0];
}
public static void RemovingSlides()
{
//Instantiate a Presentation object that represents a presentation file
Presentation pres = new Presentation(MyDir + "Assemble Slides.pptx");
//Accessing a slide using its index in the slides collection
ISlide slide = pres.Slides[0];
//Removing a slide using its reference
pres.Slides.Remove(slide);
//Writing the presentation file
pres.Save(MyDir + "Assemble Slides.pptx", SaveFormat.Pptx);
}
public static void ChangingPositionOfSlide()
{
//Instantiate Presentation class to load the source presentation file
Presentation pres = new Presentation(MyDir + "Assemble Slides.pptx");
{
//Get the slide whose position is to be changed
ISlide sld = pres.Slides[0];
//Set the new position for the slide
sld.SlideNumber = 2;
//Write the presentation to disk
pres.Save(MyDir + "Assemble Slides.pptx", SaveFormat.Pptx);
}
}
```
## **Download Sample Code**
- [Github](https://github.com/aspose-slides/Aspose.Slides-for-.NET/releases/tag/MissingFeaturesAsposeSlidesForOpenXMLv1.1)
- [Bitbucket](https://bitbucket.org/asposemarketplace/aspose-for-openxml/downloads/Assemble%20Slides%20%28Aspose.Slides%29.zip)
## Related articles
- [Add Slides to Presentations in .NET](https://docs.aspose.com/slides/net/add-slide-to-presentation/)
- [Adding Slide to Presentation](https://docs.aspose.com/slides/net/adding-slide-to-presentation/)
- [Add layout Slide to Presentation](https://docs.aspose.com/slides/net/add-layout-slide-to-presentation/)
# Manage Audio Frames in Presentations in .NET
> Create and control audio frames in Aspose.Slides for .NET—C# examples to embed, trim, loop, and configure playback across PPT, PPTX, and ODP presentations.
Source: https://docs.aspose.com/slides/net/audio-frame/
Updated: 2026-08-05
## **Overview**
This article explains how to work with audio frames in Aspose.Slides. It shows how to add embedded audio to slides, customize the audio frame thumbnail, configure playback options such as volume, looping, hiding, trimming, and fade durations, and extract audio used in slide show transitions.
## **Create Audio Frames**
Aspose.Slides for .NET allows you to add audio files to slides. The audio files are embedded in slides as audio frames.
1. Create an instance of the [Presentation ](https://reference.aspose.com/slides/net/aspose.slides/presentation)class.
2. Get a slide's reference through its index.
3. Load the audio file stream you want to embed in the slide.
4. Add the embedded audio frame (containing the audio file) to the slide.
5. Set [PlayMode](https://reference.aspose.com/slides/net/aspose.slides/audioplaymodepreset) and `Volume` exposed by the [IAudioFrame](https://reference.aspose.com/slides/net/aspose.slides/audioframe) object.
6. Save the modified presentation.
This C# code shows you how to add an embedded audio frame to a slide:
```c#
using Aspose.Slides;
using Aspose.Slides.Export;
// Instantiates a presentation class that represents a presentation file
using (Presentation pres = new Presentation())
{
// Gets the first slide
ISlide sld = pres.Slides[0];
// Loads the the wav sound file to stream
FileStream fstr = new FileStream("sampleaudio.wav", FileMode.Open, FileAccess.Read);
// Adds the Audio Frame
IAudioFrame audioFrame = sld.Shapes.AddAudioFrameEmbedded(50, 150, 100, 100, fstr);
// Sets the Play Mode and Volume of the Audio
audioFrame.PlayMode = AudioPlayModePreset.Auto;
audioFrame.Volume = AudioVolumeMode.Loud;
// Writes the PowerPoint file to disk
pres.Save("AudioFrameEmbed_out.pptx", SaveFormat.Pptx);
}
```
## **Change the Audio Frame Thumbnail**
When you add an audio file to a presentation, the audio appears as a frame with a standard default image (see the image in the section below). You change the audio frame's thumbnail (set your preferred image).
This C# code shows you how to change an audio frame's thumbnail or preview image:
```c#
using Aspose.Slides;
using Aspose.Slides.Export;
using (var presentation = new Presentation())
{
var slide = presentation.Slides[0];
// Adds an audio frame to the slide with a specified position and size.
var audioStream = new FileStream("sample2.mp3", FileMode.Open, FileAccess.Read);
var audioFrame = slide.Shapes.AddAudioFrameEmbedded(150, 100, 50, 50, audioStream);
audioStream.Dispose();
// Adds an image to presentation resources.
var imageStream = File.OpenRead("eagle.jpeg");
var audioImage = presentation.Images.AddImage(imageStream);
imageStream.Dispose();
// Sets the image for the audio frame.
audioFrame.PictureFormat.Picture.Image = audioImage; // <-----
//Saves the modified presentation to disk
presentation.Save("example_out.pptx", SaveFormat.Pptx);
}
```
## **Change Audio Play Options**
Aspose.Slides for .NET allows you to change options that control an audio's playback or properties. For example, you can adjust an audio's volume, set the audio to play looped, or even hide the audio icon.
The **Audio Options** pane in Microsoft PowerPoint:

PowerPoint **Audio Options** that correspond to Aspose.Slides [AudioFrame](https://reference.aspose.com/slides/net/aspose.slides/audioframe) properties:
- **Start** drop-down menu matches the [AudioFrame.PlayMode](https://reference.aspose.com/slides/net/aspose.slides/audioframe/properties/playmode) property
- **Volume** matches the [AudioFrame.Volume](https://reference.aspose.com/slides/net/aspose.slides/audioframe/properties/volume) property
- **Play Across Slides** matches the [AudioFrame.PlayAcrossSlides](https://reference.aspose.com/slides/net/aspose.slides/audioframe/properties/playacrossslides) property
- **Loop until Stopped** matches the [AudioFrame.PlayLoopMode](https://reference.aspose.com/slides/net/aspose.slides/audioframe/properties/playloopmode) property
- **Hide During Show** matches the [AudioFrame.HideAtShowing](https://reference.aspose.com/slides/net/aspose.slides/audioframe/properties/hideatshowing) property
- **Rewind after Playing** matches the [AudioFrame.RewindAudio ](https://reference.aspose.com/slides/net/aspose.slides/audioframe/properties/rewindaudio) property
PowerPoint **Editing** options that correspond to Aspose.Slides [AudioFrame](https://reference.aspose.com/slides/net/aspose.slides/audioframe) properties:
- **Fade In** matches the [AudioFrame.FadeInDuration](https://reference.aspose.com/slides/net/aspose.slides/audioframe/fadeinduration/) property
- **Fade Out** matches the [AudioFrame.FadeOutDuration](https://reference.aspose.com/slides/net/aspose.slides/audioframe/fadeoutduration/) property
- **Trim Audio Start Time** matches the [AudioFrame.TrimFromStart](https://reference.aspose.com/slides/net/aspose.slides/audioframe/trimfromstart/) property
- **Trim Audio End Time** value equals the audio duration minus the value of [AudioFrame.TrimFromEnd](https://reference.aspose.com/slides/net/aspose.slides/audioframe/trimfromend/) property
The PowerPoint **Volume controll** on the audio control panel corresponds to the [AudioFrame.VolumeValue](https://reference.aspose.com/slides/net/aspose.slides/audioframe/volumevalue/) property. It lets you change the audio volume as a percentage.
This is how you change the Audio Play options:
1. [Сreate](https://docs.aspose.com/slides/net/audio-frame/#create-audio-frame) or get the Audio Frame.
2. Set new values for the Audio Frame properties you want to adjust.
3. Save the modified PowerPoint file.
This C# code demonstrates an operation in which an audio's options are adjusted:
``` csharp
using Aspose.Slides;
using Aspose.Slides.Export;
using (Presentation pres = new Presentation("AudioFrameEmbed_out.pptx"))
{
// Gets the AudioFrame shape
AudioFrame audioFrame = (AudioFrame)pres.Slides[0].Shapes[0];
// Sets the Play mode to play on click
audioFrame.PlayMode = AudioPlayModePreset.OnClick;
// Sets the volume to Low
audioFrame.Volume = AudioVolumeMode.Low;
// Sets the audio to play across slides
audioFrame.PlayAcrossSlides = true;
// Disables loop for the audio
audioFrame.PlayLoopMode = false;
// Hides the AudioFrame during the slide show
audioFrame.HideAtShowing = true;
// Rewinds the audio to start after playing
audioFrame.RewindAudio = true;
// Saves the PowerPoint file to disk
pres.Save("AudioFrameEmbed_changed.pptx", SaveFormat.Pptx);
}
```
This C# example shows how to add a new audio frame with embedded audio, trim it, and set the fade durations:
```c#
using Aspose.Slides;
using Aspose.Slides.Export;
using (Presentation pres = new Presentation())
{
ISlide slide = pres.Slides[0];
byte[] audioData = File.ReadAllBytes("sampleaudio.mp3");
IAudio audio = pres.Audios.AddAudio(audioData);
IAudioFrame audioFrame = slide.Shapes.AddAudioFrameEmbedded(50, 50, 100, 100, audio);
// Sets the trimming start offset to 1.5 seconds
audioFrame.TrimFromStart = 1500f;
// Sets the trimming end offset to 2 seconds
audioFrame.TrimFromEnd = 2000f;
// Sets the fade-in duration to 200 ms
audioFrame.FadeInDuration = 200f;
// Sets the fade-out duration to 500 ms
audioFrame.FadeOutDuration = 500f;
pres.Save("AudioFrameTrimFade_out.pptx", SaveFormat.Pptx);
}
```
The following code sample shows how to retrieve an audio frame with embedded audio and set its volume to 85%:
```c#
using Aspose.Slides;
using Aspose.Slides.Export;
using (Presentation pres = new Presentation("AudioFrameEmbed_out.pptx"))
{
// Gets an audio frame shape
IAudioFrame audioFrame = (IAudioFrame)pres.Slides[0].Shapes[0];
// Sets the audio volume to 85%
audioFrame.VolumeValue = 85f;
pres.Save("AudioFrameValue_out.pptx", SaveFormat.Pptx);
}
```
## **Manage Audio Captions**
Aspose.Slides allows you to add closed captions to an audio frame through the [CaptionTracks](https://reference.aspose.com/slides/net/aspose.slides/iaudioframe/captiontracks/) property. This property returns an [ICaptionsCollection](https://reference.aspose.com/slides/net/aspose.slides/icaptionscollection/), which lets you add WebVTT caption tracks, iterate through existing tracks, and remove them when necessary.
**Add Audio Captions**
Use the [CaptionTracks](https://reference.aspose.com/slides/net/aspose.slides/iaudioframe/captiontracks/) property to attach one or more caption tracks to an audio frame. In the following example, an audio file is added to a slide, and then a new caption track is loaded from a `.vtt` file.
```cs
using Aspose.Slides;
using Aspose.Slides.Export;
using (Presentation presentation = new Presentation())
{
byte[] audioData = File.ReadAllBytes("audio.mp3");
IAudio audio = presentation.Audios.AddAudio(audioData);
ISlide slide = presentation.Slides[0];
IAudioFrame audioFrame = slide.Shapes.AddAudioFrameEmbedded(10, 10, 50, 50, audio);
// Add a new caption track from a WebVTT file.
audioFrame.CaptionTracks.Add("New track", "track.vtt");
presentation.Save("audio_with_captions.pptx", SaveFormat.Pptx);
}
```
**Extract Audio Captions**
You can iterate through the caption tracks associated with an audio frame and save them as `.vtt` files. Each caption track exposes its binary data and unique identifier, which can be used when exporting captions.
```cs
using Aspose.Slides;
using (Presentation presentation = new Presentation("audio_with_captions.pptx"))
{
ISlide slide = presentation.Slides[0];
foreach (IShape shape in slide.Shapes)
{
if (shape is IAudioFrame audioFrame)
{
foreach (ICaptions captionTrack in audioFrame.CaptionTracks)
{
// Save the caption track as a .vtt file.
File.WriteAllBytes($"{captionTrack.CaptionId}.vtt", captionTrack.BinaryData);
}
}
}
}
```
**Remove Audio Captions**
To remove captions from an audio frame, use the methods provided by [ICaptionsCollection](https://reference.aspose.com/slides/net/aspose.slides/icaptionscollection/), such as [Clear](https://reference.aspose.com/slides/net/aspose.slides/icaptionscollection/clear/), [Remove](https://reference.aspose.com/slides/net/aspose.slides/icaptionscollection/remove/), or [RemoveAt](https://reference.aspose.com/slides/net/aspose.slides/icaptionscollection/removeat/). The following example removes all caption tracks from an audio frame.
```cs
using Aspose.Slides;
using Aspose.Slides.Export;
using (Presentation presentation = new Presentation("audio_with_captions.pptx"))
{
ISlide slide = presentation.Slides[0];
IAudioFrame audioFrame = slide.Shapes[0] as IAudioFrame;
// Remove all caption tracks from the audio frame.
audioFrame.CaptionTracks.Clear();
presentation.Save("audio_without_captions.pptx", SaveFormat.Pptx);
}
```
## **Extract Audio**
Aspose.Slides for .NET allows you to extract the sound used in slide show transitions. For example, you can extract the sound used in a specific slide.
1. Create an instance of the [Presentation](https://reference.aspose.com/slides/net/aspose.slides/presentation) class and load the presentation containing the audio.
2. Get the relevant slide's reference through its index.
3. Access the slideshow transitions for the slide.
4. Extract the sound in byte data.
This C# code shows you how to extract the audio used in a slide:
```c#
using Aspose.Slides;
string presName = "AudioSlide.pptx";
// Instantiates a Presentation class that represents a presentation file
Presentation pres = new Presentation(presName);
// Accesses the slide
ISlide slide = pres.Slides[0];
// Gets the slideshow transition effects for the slide
ISlideShowTransition transition = slide.SlideShowTransition;
//Extracts the sound in byte array
byte[] audio = transition.Sound.BinaryData;
System.Console.WriteLine("Length: " + audio.Length);
```
## **FAQ**
### Can I reuse the same audio asset across multiple slides without inflating the file size?
Yes. Add the audio once to the presentation’s shared [audio collection](https://reference.aspose.com/slides/net/aspose.slides/presentation/audios/) and create additional audio frames that reference that existing asset. This avoids duplicating media data and keeps the presentation size under control.
### Can I replace the sound in an existing audio frame without recreating the shape?
Yes. For a linked sound, update the [link path](https://reference.aspose.com/slides/net/aspose.slides/audioframe/linkpathlong/) to point to the new file. For an embedded sound, swap the [embedded audio](https://reference.aspose.com/slides/net/aspose.slides/audioframe/embeddedaudio/) object with another one from the presentation’s [audio collection](https://reference.aspose.com/slides/net/aspose.slides/presentation/audios/). The frame’s formatting and most playback settings remain intact.
### Does trimming change the underlying audio data stored in the presentation?
No. Trimming adjusts only the playback boundaries. The original audio bytes remain untouched and accessible through the embedded audio or the presentation’s audio collection.
## Related features
- [Add embedded audio and set playback options](https://docs.aspose.com/slides/features/embedded-audio/)
## Related articles
- [Audio](https://docs.aspose.com/slides/net/examples/elements/audio/)
- [Manage Video Frames in Presentations in .NET](https://docs.aspose.com/slides/net/video-frame/)
# Automating PowerPoint Generation in .NET: Create Dynamic Presentations Easily
> Automate slide creation on cloud platforms with Aspose.Slides for .NET—generate, edit, and convert PowerPoint and OpenDocument files fast and reliably.
Source: https://docs.aspose.com/slides/net/automating-powerpoint-generation-on-cloud-platforms/
Updated: 2026-08-05
## **Introduction**
Creating PowerPoint presentations manually can be a time-consuming and repetitive task—especially when the content is based on dynamic data that frequently changes. Whether it's generating weekly business reports, assembling educational material, or producing client-ready sales decks, automation can save countless hours and ensure consistency across teams.
For .NET developers, automating the creation of PowerPoint presentations opens up powerful possibilities. You can integrate slide generation into web portals, desktop tools, backend services, or cloud platforms to dynamically convert data into professional, branded presentations—on-demand.
In this article, we’ll explore the common use cases for automated PowerPoint generation in .NET apps (including deployments on cloud platforms) and why it's becoming an essential feature in modern solutions. From pulling real-time business data to converting text or images into slides, the goal is to transform raw content into structured, visual formats your audience can instantly understand.
## **Common Use Cases for PowerPoint Automation in .NET**
Automating PowerPoint generation is especially useful in scenarios where presentation content needs to be dynamically assembled, personalized, or frequently updated. Some of the most common real-world use cases include:
- **Business Reports & Dashboards**
Generate sales summaries, KPIs, or financial performance reports by pulling live data from databases or APIs.
- **Personalized Sales & Marketing Decks**
Automatically create client-specific pitch decks using CRM or form data, ensuring quick turnaround and brand consistency.
- **Educational Content**
Convert learning material, quizzes, or course summaries into structured slide decks for e-learning platforms.
- **Data & AI-Powered Insights**
Use natural language processing or analytics engines to transform raw data or long-form text into summarized presentations.
- **Media-Based Slides**
Assemble presentations from uploaded images, annotated screenshots, or video keyframes with supporting descriptions.
- **Document Conversion**
Automatically convert Word documents, PDFs, or form inputs into visual presentations with minimal manual effort.
- **Developer and Technical Tools**
Create tech demos, documentation overviews, or changelogs in slide format directly from code or markdown content.
By automating these workflows, organizations can scale their content creation, maintain consistency, and free up time for more strategic work.
## **Let's Code**
For this example, we’ve chosen **[Aspose.Slides for .NET](https://products.aspose.com/slides/net)** to demonstrate PowerPoint automation due to its comprehensive feature set and ease of use when working with presentations programmatically.
Unlike lower-level libraries like the **[Open XML SDK](https://github.com/dotnet/Open-XML-SDK)**, which require developers to work directly with the Open XML structure (often resulting in verbose and less readable code), Aspose.Slides provides a higher-level API. It abstracts away the complexity, allowing developers to focus on presentation logic—such as layout, formatting, and data binding—without needing to understand the PowerPoint file format in detail.
Although Aspose.Slides is a commercial library, it offers a [free trial](https://releases.aspose.com/slides/net/) version that is fully capable of running the examples provided in this article. For the purpose of demonstrating ideas, testing features, or building a proof of concept like the one we’re covering here, the trial is more than sufficient. This makes it a convenient option for experimenting with automated PowerPoint generation without needing to commit to a license upfront.
For those looking for open-source or license-free alternatives, libraries like Open XML SDK or [NPOI](https://github.com/dotnetcore/NPOI) are worth considering, though they often require more code and deeper knowledge of the underlying file format.
Ok, let’s walk through building a sample presentation using real-world content.
Make sure you’ve added a reference to the Aspose.Slides NuGet package before starting:
```sh
dotnet add package Aspose.Slides.NET
```
### **Create a Title Slide**
We'll begin by creating a new presentation and adding a title slide with a main heading and subtitle.
```cs
using Aspose.Slides;
using var presentation = new Presentation();
var slide0 = presentation.Slides[0];
slide0.LayoutSlide = presentation.LayoutSlides.GetByType(SlideLayoutType.Title);
var titleShape = slide0.Shapes[0] as IAutoShape;
var subtitleShape = slide0.Shapes[1] as IAutoShape;
titleShape.TextFrame.Text = "Quarterly Business Review – Q1 2025";
subtitleShape.TextFrame.Text = "Prepared for Executive Team";
```

### **Add a Slide with a Column Chart**
Next, we’ll create a slide showing regional sales performance as a column chart.
```cs
using Aspose.Slides;
using Aspose.Slides.Charts;
using var presentation = new Presentation();
var layoutSlide1 = presentation.LayoutSlides.GetByType(SlideLayoutType.Blank);
var slide1 = presentation.Slides.AddEmptySlide(layoutSlide1);
var chart = slide1.Shapes.AddChart(ChartType.ClusteredColumn, 100, 100, 500, 350, false);
chart.Legend.Position = LegendPositionType.Bottom;
chart.HasTitle = true;
chart.ChartTitle.AddTextFrameForOverriding("Data from January – March 2025");
chart.ChartTitle.Overlay = false;
var workbook = chart.ChartData.ChartDataWorkbook;
var worksheetIndex = 0;
chart.ChartData.Categories.Add(workbook.GetCell(worksheetIndex, 1, 0, "North America"));
chart.ChartData.Categories.Add(workbook.GetCell(worksheetIndex, 2, 0, "Europe"));
chart.ChartData.Categories.Add(workbook.GetCell(worksheetIndex, 3, 0, "Asia Pacific"));
chart.ChartData.Categories.Add(workbook.GetCell(worksheetIndex, 4, 0, "Latin America"));
chart.ChartData.Categories.Add(workbook.GetCell(worksheetIndex, 5, 0, "Middle East"));
var series = chart.ChartData.Series.Add(workbook.GetCell(worksheetIndex, 0, 1, "Sales ($K)"), chart.Type);
series.DataPoints.AddDataPointForBarSeries(workbook.GetCell(worksheetIndex, 1, 1, 480));
series.DataPoints.AddDataPointForBarSeries(workbook.GetCell(worksheetIndex, 2, 1, 365));
series.DataPoints.AddDataPointForBarSeries(workbook.GetCell(worksheetIndex, 3, 1, 290));
series.DataPoints.AddDataPointForBarSeries(workbook.GetCell(worksheetIndex, 4, 1, 150));
series.DataPoints.AddDataPointForBarSeries(workbook.GetCell(worksheetIndex, 5, 1, 120));
```

### **Add a Slide with a Table**
We’ll now add a slide that presents key performance metrics in table format.
```cs
using Aspose.Slides;
using var presentation = new Presentation();
var layoutSlide2 = presentation.LayoutSlides.GetByType(SlideLayoutType.Blank);
var slide2 = presentation.Slides.AddEmptySlide(layoutSlide2);
var columnWidths = new double[] { 200, 100 };
var rowHeights = new double[] { 40, 40, 40, 40, 40 };
var table = slide2.Shapes.AddTable(200, 200, columnWidths, rowHeights);
table[0, 0].TextFrame.Text = "Metric";
table[1, 0].TextFrame.Text = "Value";
table[0, 1].TextFrame.Text = "Total Revenue";
table[1, 1].TextFrame.Text = "$1.4M";
table[0, 2].TextFrame.Text = "Gross Margin";
table[1, 2].TextFrame.Text = "54%";
table[0, 3].TextFrame.Text = "New Customers";
table[1, 3].TextFrame.Text = "340";
table[0, 4].TextFrame.Text = "Customer Retention";
table[1, 4].TextFrame.Text = "87%";
```

### **Add a Summary Slide with Bullet Points**
Lastly, we’ll include a summary and action plan using a simple bullet list.
```cs
using System.Drawing;
using Aspose.Slides;
IParagraph CreateBulletParagraph(string text)
{
var paragraph = new Paragraph();
paragraph.ParagraphFormat.Bullet.Type = BulletType.Symbol;
paragraph.ParagraphFormat.Indent = 15;
paragraph.ParagraphFormat.DefaultPortionFormat.FillFormat.FillType = FillType.Solid;
paragraph.ParagraphFormat.DefaultPortionFormat.FillFormat.SolidFillColor.Color = Color.Black;
paragraph.Text = text;
return paragraph;
}
```
```cs
using System.Drawing;
using Aspose.Slides;
using var presentation = new Presentation();
var layoutSlide3 = presentation.LayoutSlides.GetByType(SlideLayoutType.Blank);
var slide3 = presentation.Slides.AddEmptySlide(layoutSlide3);
var bulletList = slide3.Shapes.AddAutoShape(ShapeType.Rectangle, 100, 50, 600, 200);
bulletList.FillFormat.FillType = FillType.NoFill;
bulletList.LineFormat.FillFormat.FillType = FillType.NoFill;
bulletList.TextFrame.Paragraphs.Clear();
bulletList.TextFrame.Paragraphs.Add(CreateBulletParagraph("Strong performance in North America; growth opportunity in Asia Pacific"));
bulletList.TextFrame.Paragraphs.Add(CreateBulletParagraph("Improve marketing outreach in underperforming regions"));
bulletList.TextFrame.Paragraphs.Add(CreateBulletParagraph("Prepare new campaign strategy for Q2"));
bulletList.TextFrame.Paragraphs.Add(CreateBulletParagraph("Schedule follow-up review in early July"));
IParagraph CreateBulletParagraph(string text)
{
var paragraph = new Paragraph();
paragraph.ParagraphFormat.Bullet.Type = BulletType.Symbol;
paragraph.ParagraphFormat.Indent = 15;
paragraph.ParagraphFormat.DefaultPortionFormat.FillFormat.FillType = FillType.Solid;
paragraph.ParagraphFormat.DefaultPortionFormat.FillFormat.SolidFillColor.Color = Color.Black;
paragraph.Text = text;
return paragraph;
}
```

### **Save the Presentation**
Each snippet above creates its own `Presentation` object so that it can be run on its own. Here we put the four steps together into a single presentation and save it to disk:
```cs
using System.Drawing;
using Aspose.Slides;
using Aspose.Slides.Charts;
using Aspose.Slides.Export;
using var presentation = new Presentation();
// The title slide.
var slide0 = presentation.Slides[0];
slide0.LayoutSlide = presentation.LayoutSlides.GetByType(SlideLayoutType.Title);
var titleShape = slide0.Shapes[0] as IAutoShape;
var subtitleShape = slide0.Shapes[1] as IAutoShape;
titleShape.TextFrame.Text = "Quarterly Business Review – Q1 2025";
subtitleShape.TextFrame.Text = "Prepared for Executive Team";
// The slide with the column chart.
var layoutSlide1 = presentation.LayoutSlides.GetByType(SlideLayoutType.Blank);
var slide1 = presentation.Slides.AddEmptySlide(layoutSlide1);
var chart = slide1.Shapes.AddChart(ChartType.ClusteredColumn, 100, 100, 500, 350, false);
chart.Legend.Position = LegendPositionType.Bottom;
chart.HasTitle = true;
chart.ChartTitle.AddTextFrameForOverriding("Data from January – March 2025");
chart.ChartTitle.Overlay = false;
var workbook = chart.ChartData.ChartDataWorkbook;
var worksheetIndex = 0;
chart.ChartData.Categories.Add(workbook.GetCell(worksheetIndex, 1, 0, "North America"));
chart.ChartData.Categories.Add(workbook.GetCell(worksheetIndex, 2, 0, "Europe"));
chart.ChartData.Categories.Add(workbook.GetCell(worksheetIndex, 3, 0, "Asia Pacific"));
chart.ChartData.Categories.Add(workbook.GetCell(worksheetIndex, 4, 0, "Latin America"));
chart.ChartData.Categories.Add(workbook.GetCell(worksheetIndex, 5, 0, "Middle East"));
var series = chart.ChartData.Series.Add(workbook.GetCell(worksheetIndex, 0, 1, "Sales ($K)"), chart.Type);
series.DataPoints.AddDataPointForBarSeries(workbook.GetCell(worksheetIndex, 1, 1, 480));
series.DataPoints.AddDataPointForBarSeries(workbook.GetCell(worksheetIndex, 2, 1, 365));
series.DataPoints.AddDataPointForBarSeries(workbook.GetCell(worksheetIndex, 3, 1, 290));
series.DataPoints.AddDataPointForBarSeries(workbook.GetCell(worksheetIndex, 4, 1, 150));
series.DataPoints.AddDataPointForBarSeries(workbook.GetCell(worksheetIndex, 5, 1, 120));
// The slide with the table.
var layoutSlide2 = presentation.LayoutSlides.GetByType(SlideLayoutType.Blank);
var slide2 = presentation.Slides.AddEmptySlide(layoutSlide2);
var columnWidths = new double[] { 200, 100 };
var rowHeights = new double[] { 40, 40, 40, 40, 40 };
var table = slide2.Shapes.AddTable(200, 200, columnWidths, rowHeights);
table[0, 0].TextFrame.Text = "Metric";
table[1, 0].TextFrame.Text = "Value";
table[0, 1].TextFrame.Text = "Total Revenue";
table[1, 1].TextFrame.Text = "$1.4M";
table[0, 2].TextFrame.Text = "Gross Margin";
table[1, 2].TextFrame.Text = "54%";
table[0, 3].TextFrame.Text = "New Customers";
table[1, 3].TextFrame.Text = "340";
table[0, 4].TextFrame.Text = "Customer Retention";
table[1, 4].TextFrame.Text = "87%";
// The summary slide with bullet points.
var layoutSlide3 = presentation.LayoutSlides.GetByType(SlideLayoutType.Blank);
var slide3 = presentation.Slides.AddEmptySlide(layoutSlide3);
var bulletList = slide3.Shapes.AddAutoShape(ShapeType.Rectangle, 100, 50, 600, 200);
bulletList.FillFormat.FillType = FillType.NoFill;
bulletList.LineFormat.FillFormat.FillType = FillType.NoFill;
bulletList.TextFrame.Paragraphs.Clear();
bulletList.TextFrame.Paragraphs.Add(CreateBulletParagraph("Strong performance in North America; growth opportunity in Asia Pacific"));
bulletList.TextFrame.Paragraphs.Add(CreateBulletParagraph("Improve marketing outreach in underperforming regions"));
bulletList.TextFrame.Paragraphs.Add(CreateBulletParagraph("Prepare new campaign strategy for Q2"));
bulletList.TextFrame.Paragraphs.Add(CreateBulletParagraph("Schedule follow-up review in early July"));
presentation.Save("presentation.pptx", SaveFormat.Pptx);
IParagraph CreateBulletParagraph(string text)
{
var paragraph = new Paragraph();
paragraph.ParagraphFormat.Bullet.Type = BulletType.Symbol;
paragraph.ParagraphFormat.Indent = 15;
paragraph.ParagraphFormat.DefaultPortionFormat.FillFormat.FillType = FillType.Solid;
paragraph.ParagraphFormat.DefaultPortionFormat.FillFormat.SolidFillColor.Color = Color.Black;
paragraph.Text = text;
return paragraph;
}
```
## **Conclusion**
Automating PowerPoint generation in .NET applications offers clear benefits in saving time and reducing manual effort. By integrating dynamic content such as charts, tables, and text, developers can quickly produce consistent, professional presentations—ideal for business reports, client meetings, or educational content.
In this article, we've demonstrated how to automate the creation of a presentation from scratch, including adding a title slide, charts, and tables. This approach can be applied across various use cases where automated, data-driven presentations are needed.
By leveraging the right tools, .NET developers can efficiently automate PowerPoint creation, enhancing productivity and ensuring consistency across presentations.
# Customize Bubble Charts in Presentations in .NET
> Create and customize powerful bubble charts in PowerPoint with Aspose.Slides for .NET to enhance your data visualization easily.
Source: https://docs.aspose.com/slides/net/bubble-chart/
Updated: 2026-11-08
## **Overview**
This article shows how to work with bubble charts in Aspose.Slides. It covers two specific customization options: scaling bubble sizes through the `BubbleSizeScale` property and controlling how bubble size values are represented through the `BubbleSizeRepresentation` property.
The examples demonstrate how to create a bubble chart, adjust its size scaling, and switch the bubble size representation to use width. The article also includes a short FAQ section that clarifies support for the “Bubble with 3-D” chart type, notes that practical chart limits depend on performance and the target PowerPoint version, and explains that export preserves the chart’s appearance through the Aspose.Slides rendering engine.
## **Bubble Chart Size Scaling**
Aspose.Slides for .NET provides support for Bubble chart size scaling. In Aspose.Slides for .NET **IChartSeries.BubbleSizeScale** and **IChartSeriesGroup.BubbleSizeScale** properties have been added. Below sample example is given.
```c#
using Aspose.Slides;
using Aspose.Slides.Charts;
using (Presentation pres = new Presentation())
{
IChart chart = pres.Slides[0].Shapes.AddChart(ChartType.Bubble, 100, 100, 400, 300);
chart.ChartData.SeriesGroups[0].BubbleSizeScale = 150;
pres.Save("Result.pptx",Aspose.Slides.Export.SaveFormat.Pptx);
}
```
## **Represent Data as Bubble Chart Sizes**
Property **BubbleSizeRepresentation** has been added to IChartSeries, IChartSeriesGroup interfaces, and related classes. **BubbleSizeRepresentation** specifies how the bubble size values are represented in the bubble chart. Possible values are: **BubbleSizeRepresentationType.Area** and **BubbleSizeRepresentationType.Width**. Accordingly, **BubbleSizeRepresentationType** enum has been added to specify the possible ways to represent data as bubble chart sizes. Sample code is given below.
```c#
using Aspose.Slides;
using Aspose.Slides.Charts;
using Aspose.Slides.Export;
using (Presentation pres = new Presentation())
{
IChart chart = pres.Slides[0].Shapes.AddChart(ChartType.Bubble, 50, 50, 600, 400, true);
chart.ChartData.SeriesGroups[0].BubbleSizeRepresentation = BubbleSizeRepresentationType.Width;
pres.Save("Presentation_BubbleSizeRepresentation.pptx", SaveFormat.Pptx);
}
```
[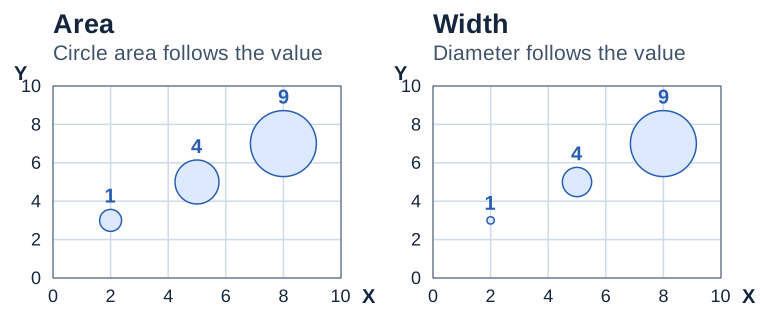](https://docs.aspose.com/slides/net/bubble-chart/visual-bubble-chart-bf890435c020.svg)
*Illustrative comparison at the same scale. Area uses the circle’s area, while Width uses its diameter.*
## **FAQ**
### Is a "bubble chart with 3-D effect" supported, and how does it differ from a regular one?
Yes. There is a separate chart type, "Bubble with 3-D." It applies 3-D styling to the bubbles but does not add an additional axis; the data remain X-Y-S (size). The type is available in the [chart type](https://reference.aspose.com/slides/net/aspose.slides.charts/charttype/) enumeration.
### Is there a limit on the number of series and points in a bubble chart?
There is no hard limit at the API level; constraints are determined by performance and the target PowerPoint version. It is recommended to keep the number of points reasonable for readability and rendering speed.
### How will export affect the appearance of a bubble chart (PDF, images)?
Export to supported formats preserves the chart’s appearance; rendering is performed by the Aspose.Slides engine. For raster/vector formats, general chart-graphics rendering rules apply (resolution, anti-aliasing), so choose sufficient DPI for printing.
# Manage Callouts in Presentation Charts in .NET
> Create and style callouts in Aspose.Slides for .NET with concise C# code examples, compatible with PPT and PPTX to automate presentation workflows.
Source: https://docs.aspose.com/slides/net/callout/
Updated: 2026-08-05
## **Overview**
This article explains how to work with callouts for chart data labels in Aspose.Slides. It shows how to use the `ShowLabelAsDataCallout` property to display labels as callouts, how to configure callout-related label settings for a doughnut chart, and notes that callouts and their appearance are preserved when presentations are exported to PDF, HTML5, SVG, and raster image formats.
## **Using Callouts**
New property **ShowLabelAsDataCallout** has been added to **DataLabelFormat** class and **IDataLabelFormat** interface, which determines either specified chart's data label will be displayed as data callout or as data label. In the example given below, we have set the Callouts.
```c#
using Aspose.Slides;
using Aspose.Slides.Charts;
using Aspose.Slides.Export;
using (Presentation presentation = new Presentation())
{
IChart chart = presentation.Slides[0].Shapes.AddChart(ChartType.Pie, 50, 50, 500, 400);
chart.ChartData.Series[0].Labels.DefaultDataLabelFormat.ShowValue = true;
chart.ChartData.Series[0].Labels.DefaultDataLabelFormat.ShowLabelAsDataCallout = true;
chart.ChartData.Series[0].Labels[2].DataLabelFormat.ShowLabelAsDataCallout = false;
presentation.Save("DisplayChartLabels_out.pptx", SaveFormat.Pptx);
}
```
## **Set a Callout for a Doughnut Chart**
Aspose.Slides for .NET provides support for setting series data label callout shape for a Doughnut chart. Below sample example is given.
```c#
using System.Drawing;
using Aspose.Slides;
using Aspose.Slides.Charts;
Presentation pres = new Presentation("testc.pptx");
ISlide slide = pres.Slides[0];
IChart chart = slide.Shapes.AddChart(ChartType.Doughnut, 10, 10, 500, 500, false);
IChartDataWorkbook workBook = chart.ChartData.ChartDataWorkbook;
chart.ChartData.Series.Clear();
chart.ChartData.Categories.Clear();
chart.HasLegend = false;
int seriesIndex = 0;
while (seriesIndex < 15)
{
IChartSeries series = chart.ChartData.Series.Add(workBook.GetCell(0, 0, seriesIndex + 1, "SERIES " + seriesIndex), chart.Type);
series.Explosion = 0;
series.ParentSeriesGroup.DoughnutHoleSize = (byte)20;
series.ParentSeriesGroup.FirstSliceAngle = 351;
seriesIndex++;
}
int categoryIndex = 0;
while (categoryIndex < 15)
{
chart.ChartData.Categories.Add(workBook.GetCell(0, categoryIndex + 1, 0, "CATEGORY " + categoryIndex));
int i = 0;
while (i < chart.ChartData.Series.Count)
{
IChartSeries iCS = chart.ChartData.Series[i];
IChartDataPoint dataPoint = iCS.DataPoints.AddDataPointForDoughnutSeries(workBook.GetCell(0, categoryIndex + 1, i + 1, 1));
dataPoint.Format.Fill.FillType = FillType.Solid;
dataPoint.Format.Line.FillFormat.FillType = FillType.Solid;
dataPoint.Format.Line.FillFormat.SolidFillColor.Color = Color.White;
dataPoint.Format.Line.Width = 1;
dataPoint.Format.Line.Style = LineStyle.Single;
dataPoint.Format.Line.DashStyle = LineDashStyle.Solid;
if (i == chart.ChartData.Series.Count - 1)
{
IDataLabel lbl = dataPoint.Label;
lbl.TextFormat.TextBlockFormat.AutofitType = TextAutofitType.Shape;
lbl.DataLabelFormat.TextFormat.PortionFormat.FontBold = NullableBool.True;
lbl.DataLabelFormat.TextFormat.PortionFormat.LatinFont = new FontData("DINPro-Bold");
lbl.DataLabelFormat.TextFormat.PortionFormat.FontHeight = 12;
lbl.DataLabelFormat.TextFormat.PortionFormat.FillFormat.FillType = FillType.Solid;
lbl.DataLabelFormat.TextFormat.PortionFormat.FillFormat.SolidFillColor.Color = Color.LightGray;
lbl.DataLabelFormat.Format.Line.FillFormat.SolidFillColor.Color = Color.White;
lbl.DataLabelFormat.ShowValue = false;
lbl.DataLabelFormat.ShowCategoryName = true;
lbl.DataLabelFormat.ShowSeriesName = false;
lbl.DataLabelFormat.ShowLabelAsDataCallout = true;
lbl.DataLabelFormat.ShowLeaderLines = true;
chart.ValidateChartLayout();
lbl.AsILayoutable.X = (float)lbl.AsILayoutable.X + (float)0.5;
lbl.AsILayoutable.Y = (float)lbl.AsILayoutable.Y + (float)0.5;
}
i++;
}
categoryIndex++;
}
pres.Save("chart.pptx", Aspose.Slides.Export.SaveFormat.Pptx);
```
## **FAQ**
### Are callouts preserved when converting a presentation to PDF, HTML5, SVG, or images?
Yes. Callouts are part of the chart rendering, so when you export to [PDF](https://docs.aspose.com/slides/net/convert-powerpoint-to-pdf/), [HTML5](https://docs.aspose.com/slides/net/export-to-html5/), [SVG](https://docs.aspose.com/slides/net/render-a-slide-as-an-svg-image/), or [raster images](https://docs.aspose.com/slides/net/convert-powerpoint-to-png/), they are preserved together with the slide’s formatting.
### Do custom fonts work in callouts, and can their appearance be preserved on export?
Yes. Aspose.Slides supports [embedding fonts](https://docs.aspose.com/slides/net/embedded-font/) into the presentation and controls font embedding during exports such as [PDF](https://docs.aspose.com/slides/net/convert-powerpoint-to-pdf/), ensuring the callouts look the same across different systems.
# Change the fill color of a shape in a presentation
>
Source: https://docs.aspose.com/slides/net/change-the-fill-color-of-a-shape-in-a-presentation/
Updated: 2026-08-05
## **OpenXML Presentation**
``` csharp
string FilePath = @"..\..\..\..\Sample Files\";
string FileName = FilePath + "Fill color of a shape.pptx";
SetPPTShapeColor(FileName);
// Change the fill color of a shape.
// The test file must have a filled shape as the first shape on the first slide.
public static void SetPPTShapeColor(string docName)
{
using (PresentationDocument ppt = PresentationDocument.Open(docName, true))
{
// Get the relationship ID of the first slide.
PresentationPart part = ppt.PresentationPart;
OpenXmlElementList slideIds = part.Presentation.SlideIdList.ChildElements;
string relId = (slideIds[0] as SlideId).RelationshipId;
// Get the slide part from the relationship ID.
SlidePart slide = (SlidePart)part.GetPartById(relId);
if (slide != null)
{
// Get the shape tree that contains the shape to change.
ShapeTree tree = slide.Slide.CommonSlideData.ShapeTree;
// Get the first shape in the shape tree.
Shape shape = tree.GetFirstChild();
if (shape != null)
{
// Get the style of the shape.
ShapeStyle style = shape.ShapeStyle;
// Get the fill reference.
Drawing.FillReference fillRef = style.FillReference;
// Set the fill color to SchemeColor Accent 6;
fillRef.SchemeColor = new Drawing.SchemeColor();
fillRef.SchemeColor.Val = Drawing.SchemeColorValues.Accent6;
// Save the modified slide.
slide.Slide.Save();
}
}
}
}
```
## **Aspose.Slides**
We need to follow following steps to fill the shapes in presentation:
- Create an instance of Presentation class.
- Obtain the reference of a slide by using its Index.
- Add an IShape to the slide.
- Set the Fill Type of the Shape to Solid.
- Set the color of the Shape.
- Write the modified presentation as a PPTX file.
``` csharp
using System.Drawing;
using Aspose.Slides;
using Aspose.Slides.Export;
string FilePath = @"..\..\..\..\Sample Files\";
string FileName = FilePath + "Fill color of a shape.pptx";
//Instantiate PrseetationEx class that represents the PPTX
using (Presentation pres = new Presentation())
{
//Get the first slide
ISlide sld = pres.Slides[0];
//Add autoshape of rectangle type
IShape shp = sld.Shapes.AddAutoShape(ShapeType.Rectangle, 50, 150, 75, 150);
//Set the fill type to Solid
shp.FillFormat.FillType = FillType.Solid;
//Set the color of the rectangle
shp.FillFormat.SolidFillColor.Color = Color.Yellow;
//Write the PPTX file to disk
pres.Save(FileName, SaveFormat.Pptx);
}
```
## **Download Running Code Example**
- [GitHub](https://github.com/aspose-slides/Aspose.Slides-for-.NET/releases/tag/AsposeSlidesVsOpenXML1.1)
## **Sample Code**
- [GitHub](https://github.com/aspose-slides/Aspose.Slides-for-.NET/tree/master/Plugins/OpenXML/Common%20Features/Fill%20Color%20of%20a%20Shape)
## Related articles
- [Adding Shapes to Presentation](https://docs.aspose.com/slides/net/adding-shapes-to-presentation/)
- [Move a paragraph from one presentation to another](https://docs.aspose.com/slides/net/move-a-paragraph-from-one-presentation-to-another/)
- [Add Picture Frame to Presentation](https://docs.aspose.com/slides/net/add-picture-frame-to-presentation/)
# Customize Chart Axes in Presentations in .NET
> Discover how to use Aspose.Slides for .NET to customize chart axes in PowerPoint presentations for reports and visualizations.
Source: https://docs.aspose.com/slides/net/chart-axis/
Updated: 2026-10-30
## **Overview**
This article explains how to customize chart axes with Aspose.Slides for .NET. It covers calculated axis values, switching chart rows and columns, axis visibility, category label and tick-mark intervals, date categories and formatting, title rotation, axis positioning, display units, and logarithmic scaling.
## **Get the Max Values on the Vertical Axis on Charts**
Create a [Presentation](https://reference.aspose.com/slides/net/aspose.slides/presentation/) and add an area chart with default data. Call [ValidateChartLayout](https://reference.aspose.com/slides/net/aspose.slides.charts/chart/validatechartlayout/) before reading calculated axis values so that the chart layout is up to date.
Read [ActualMaxValue](https://reference.aspose.com/slides/net/aspose.slides.charts/axis/actualmaxvalue/) and [ActualMinValue](https://reference.aspose.com/slides/net/aspose.slides.charts/axis/actualminvalue/) for the axis limits, and [ActualMajorUnit](https://reference.aspose.com/slides/net/aspose.slides.charts/axis/actualmajorunit/) and [ActualMinorUnit](https://reference.aspose.com/slides/net/aspose.slides.charts/axis/actualminorunit/) for the tick intervals. [ActualMajorUnitScale](https://reference.aspose.com/slides/net/aspose.slides.charts/axis/actualmajorunitscale/) and [ActualMinorUnitScale](https://reference.aspose.com/slides/net/aspose.slides.charts/axis/actualminorunitscale/) provide time-unit scales, which are relevant to date axes. The example stores these values in local variables and saves the chart.
```csharp
using Aspose.Slides;
using Aspose.Slides.Charts;
using Aspose.Slides.Export;
using var presentation = new Presentation();
var slide = presentation.Slides[0];
var chart = slide.Shapes.AddChart(ChartType.Area, 100, 100, 500, 350);
chart.ValidateChartLayout();
var maxValue = chart.Axes.VerticalAxis.ActualMaxValue;
var minValue = chart.Axes.VerticalAxis.ActualMinValue;
var majorUnit = chart.Axes.VerticalAxis.ActualMajorUnit;
var minorUnit = chart.Axes.VerticalAxis.ActualMinorUnit;
var majorUnitScale = chart.Axes.VerticalAxis.ActualMajorUnitScale;
var minorUnitScale = chart.Axes.VerticalAxis.ActualMinorUnitScale;
presentation.Save("AxisValues_out.pptx", SaveFormat.Pptx);
```
## **Swap the Data between Axes**
Use [SwitchRowColumn](https://reference.aspose.com/slides/net/aspose.slides.charts/chartdata/switchrowcolumn/) to exchange the roles of series and categories in chart data. Each former category becomes a series, and each former series becomes a category. This changes how the data is grouped; it does not exchange the horizontal and vertical axes. The example uses [SetRange](https://reference.aspose.com/slides/net/aspose.slides.charts/chartdata/setrange/) to bind the default data to `Sheet1!A1:D5`, including the header row and category column, before switching rows and columns. It saves a chart with four series and three categories.
```csharp
using Aspose.Slides;
using Aspose.Slides.Charts;
using Aspose.Slides.Export;
using var presentation = new Presentation();
var slide = presentation.Slides[0];
var chart = slide.Shapes.AddChart(ChartType.ClusteredColumn, 100, 100, 400, 300);
chart.ChartData.SetRange("Sheet1!A1:D5");
chart.ChartData.SwitchRowColumn();
presentation.Save("SwitchChartRowColumns_out.pptx", SaveFormat.Pptx);
```
## **Reverse the Plotting Order of an Axis**
Use [IsPlotOrderReversed](https://reference.aspose.com/slides/net/aspose.slides.charts/axis/isplotorderreversed/) to reverse a category or value axis. For example, a horizontal bar chart can show project stages from top to bottom in the same order as the worksheet: Planning, Development, Testing. Reversing an axis changes the plotting direction; it does not sort or rearrange the workbook data. By comparison, [SwitchRowColumn](https://reference.aspose.com/slides/net/aspose.slides.charts/chartdata/switchrowcolumn/) exchanges the roles of series and categories.
The following example creates a horizontal bar chart with three stages and one series. It saves a presentation with three slides: normal order, reversed categories, and reversed values. Each copy uses the same dataset, and only one axis is reversed on each copy.
```csharp
using Aspose.Slides;
using Aspose.Slides.Charts;
using Aspose.Slides.Export;
using var presentation = new Presentation();
var slide = presentation.Slides[0];
var chart = slide.Shapes.AddChart(ChartType.ClusteredBar, 50, 40, 620, 320);
chart.HasLegend = false;
chart.ChartData.Categories.Clear();
chart.ChartData.Series.Clear();
var workbook = chart.ChartData.ChartDataWorkbook;
workbook.Clear(0);
var series = chart.ChartData.Series.Add(ChartType.ClusteredBar);
var stages = new[] { "Planning", "Development", "Testing" };
var values = new[] { 10, 30, 20 };
for (var i = 0; i < stages.Length; i++)
{
var categoryCell = workbook.GetCell(0, i + 1, 0, stages[i]);
chart.ChartData.Categories.Add(categoryCell);
var valueCell = workbook.GetCell(0, i + 1, 1, values[i]);
series.DataPoints.AddDataPointForBarSeries(valueCell);
}
// Slide 2: display the first category at the top.
var categorySlide = presentation.Slides.AddClone(slide);
var categoryChart = (IChart)categorySlide.Shapes[0];
categoryChart.Axes.VerticalAxis.IsPlotOrderReversed = true;
// Keep the horizontal value axis at the bottom.
categoryChart.Axes.VerticalAxis.CrossType = CrossesType.Maximum;
// Slide 3: reverse only the horizontal numeric scale.
var valueSlide = presentation.Slides.AddClone(slide);
var valueChart = (IChart)valueSlide.Shapes[0];
valueChart.Axes.HorizontalAxis.IsPlotOrderReversed = true;
presentation.Save("ReversedAxes.pptx", SaveFormat.Pptx);
```
Reversing an axis can also move the perpendicular axis to the opposite side of the plot. [CrossType](https://reference.aspose.com/slides/net/aspose.slides.charts/axis/crosstype/) controls where the other axis crosses the axis being configured. In slide 2, setting it to `Maximum` on the reversed category axis keeps the horizontal value axis at the bottom. For a specific crossing point, use [CrossAt](https://reference.aspose.com/slides/net/aspose.slides.charts/axis/crossat/). Check the crossing settings when changing direction, especially if the chart already has a custom crossing point. Set `IsPlotOrderReversed` back to `false` to restore the normal plotting direction; crossing settings are separate.
| Normal order (slide 1) | Reversed categories (slide 2) | Reversed values (slide 3) |
| --- | --- | --- |
| 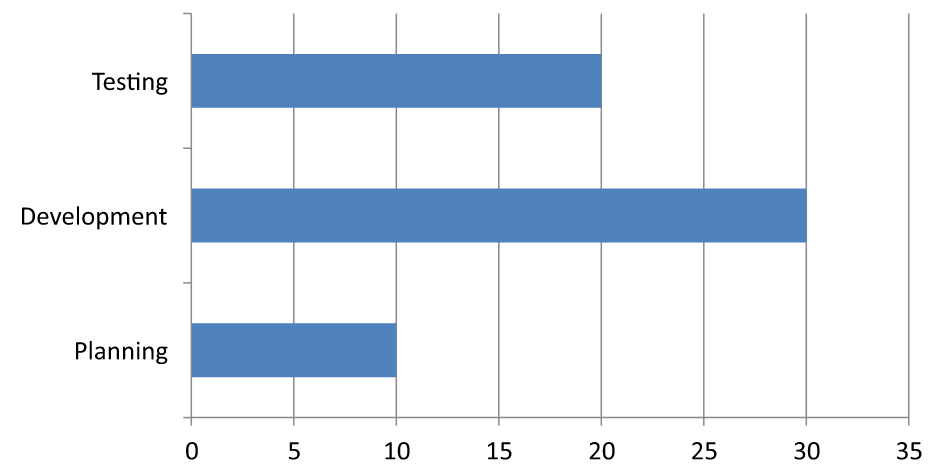 |  |  |
| Categories run from bottom to top; values increase from left to right. | Planning, Development, and Testing run from top to bottom. Values and workbook row order are unchanged. | Categories retain their normal order; values increase from right to left. The category axis crosses at zero on the right. |
## **Disable the Vertical Axis for Line Charts**
Set [IsVisible](https://reference.aspose.com/slides/net/aspose.slides.charts/axis/isvisible/) to `false` on the vertical axis to hide it. The example creates a line chart with default data and saves it with the vertical axis hidden.
```csharp
using Aspose.Slides;
using Aspose.Slides.Charts;
using Aspose.Slides.Export;
using var presentation = new Presentation();
var slide = presentation.Slides[0];
var chart = slide.Shapes.AddChart(ChartType.Line, 100, 100, 400, 300);
chart.Axes.VerticalAxis.IsVisible = false;
presentation.Save("HiddenVerticalAxis.pptx", SaveFormat.Pptx);
```
## **Disable the Horizontal Axis for Line Charts**
Set [IsVisible](https://reference.aspose.com/slides/net/aspose.slides.charts/axis/isvisible/) to `false` on the horizontal axis to hide it. The example creates a line chart with default data and saves it with the horizontal axis hidden.
```csharp
using Aspose.Slides;
using Aspose.Slides.Charts;
using Aspose.Slides.Export;
using var presentation = new Presentation();
var slide = presentation.Slides[0];
var chart = slide.Shapes.AddChart(ChartType.Line, 100, 100, 400, 300);
chart.Axes.HorizontalAxis.IsVisible = false;
presentation.Save("HiddenHorizontalAxis.pptx", SaveFormat.Pptx);
```
## **Change a Category Axis**
Set [CategoryAxisType](https://reference.aspose.com/slides/net/aspose.slides.charts/axis/categoryaxistype/) to choose a date or text category axis. This example requires `ExistingChart.pptx`, with a chart as the first shape on the first slide and category cells containing numeric Excel date values. It changes the horizontal axis to a date axis. Setting [IsAutomaticMajorUnit](https://reference.aspose.com/slides/net/aspose.slides.charts/axis/isautomaticmajorunit/) to `false`, [MajorUnit](https://reference.aspose.com/slides/net/aspose.slides.charts/axis/majorunit/) to `1`, and [MajorUnitScale](https://reference.aspose.com/slides/net/aspose.slides.charts/axis/majorunitscale/) to months places major ticks at one-month intervals.
```csharp
using System;
using Aspose.Slides;
using Aspose.Slides.Charts;
using Aspose.Slides.Export;
using var presentation = new Presentation("ExistingChart.pptx");
var slide = presentation.Slides[0];
var chart = (IChart) slide.Shapes[0];
chart.Axes.HorizontalAxis.CategoryAxisType = CategoryAxisType.Date;
chart.Axes.HorizontalAxis.IsAutomaticMajorUnit = false;
chart.Axes.HorizontalAxis.MajorUnit = 1;
chart.Axes.HorizontalAxis.MajorUnitScale = TimeUnitType.Months;
presentation.Save("ChangeChartCategoryAxis_out.pptx", SaveFormat.Pptx);
```
### **Determine the Category Axis Type from Data**
Call [SetCategoryAxisTypeAutomatically](https://reference.aspose.com/slides/net/aspose.slides.charts/iaxis/setcategoryaxistypeautomatically/) after populating the categories, then read [CategoryAxisType](https://reference.aspose.com/slides/net/aspose.slides.charts/iaxis/categoryaxistype/) to inspect the selection. This is useful when the same chart receives either text labels or numeric date values. The method determines the type when called; it does not enable a persistent mode that reevaluates later data changes. Call it again after replacing the categories.
The following example creates a chart with text categories and prints `Text`. It then replaces the category cell values with dates and calls the method again, which prints `Date`. Dates are stored as numeric OLE Automation values returned by [DateTime.ToOADate](https://learn.microsoft.com/en-us/dotnet/api/system.datetime.tooadate), rather than date strings. [CustomNumberFormat](https://reference.aspose.com/slides/net/aspose.slides.charts/ichartdatacell/customnumberformat/) controls how those values are displayed; it does not convert text into numeric dates. For more on category cells, see [Chart Workbook](https://docs.aspose.com/slides/net/chart-workbook/).
Use automatic determination when the input is known to contain text categories or numeric dates, as in this example. For ordinary numeric labels, mixed categories, or empty data, explicitly set [CategoryAxisType](https://reference.aspose.com/slides/net/aspose.slides.charts/iaxis/categoryaxistype/) to match the intended meaning. Numeric values alone do not establish that the categories represent dates.
```csharp
using System;
using Aspose.Slides;
using Aspose.Slides.Charts;
using Aspose.Slides.Export;
using var presentation = new Presentation();
var slide = presentation.Slides[0];
var chart = slide.Shapes.AddChart(ChartType.ClusteredColumn, 30, 40, 660, 320);
chart.ChartData.Categories.Clear();
chart.ChartData.Series.Clear();
var workbook = chart.ChartData.ChartDataWorkbook;
workbook.Clear(0);
var seriesName = workbook.GetCell(0, 0, 1, "Sales");
var series = chart.ChartData.Series.Add(seriesName, chart.Type);
var labels = new[] { "First", "Second", "Third" };
for (var i = 0; i < labels.Length; i++)
{
var categoryCell = workbook.GetCell(0, i + 1, 0, labels[i]);
chart.ChartData.Categories.Add(categoryCell);
var valueCell = workbook.GetCell(0, i + 1, 1, (i + 1) * 10);
series.DataPoints.AddDataPointForBarSeries(valueCell);
}
var axis = chart.Axes.HorizontalAxis;
axis.SetCategoryAxisTypeAutomatically();
Console.WriteLine(axis.CategoryAxisType); // Text
var dates = new[] { new DateTime(2026, 1, 1), new DateTime(2026, 1, 2), new DateTime(2026, 2, 1) };
for (var i = 0; i < dates.Length; i++)
{
var categoryCell = workbook.GetCell(0, i + 1, 0);
categoryCell.Value = dates[i].ToOADate();
categoryCell.CustomNumberFormat = "yyyy-mm-dd";
}
axis.SetCategoryAxisTypeAutomatically();
Console.WriteLine(axis.CategoryAxisType); // Date
presentation.Save("AutomaticCategoryAxis.pptx", SaveFormat.Pptx);
```
## **Control Category Axis Label Intervals**
When a chart has many categories, reduce the number of visible axis labels without removing categories or data points. Set [IsAutomaticTickLabelSpacing](https://reference.aspose.com/slides/net/aspose.slides.charts/iaxis/isautomaticticklabelspacing/) to `false`, then set [TickLabelSpacing](https://reference.aspose.com/slides/net/aspose.slides.charts/iaxis/ticklabelspacing/) to the desired category interval. For text categories in their normal order, counting starts at the first category:
| Interval | Labels displayed in the example |
| --- | --- |
| `1` | Category 1, Category 2, Category 3, ... Category 24 |
| `2` | Category 1, Category 3, Category 5, ... Category 23 |
| `3` | Category 1, Category 4, Category 7, ... Category 22 |
An interval of `3` displays every third label, leaving two labels hidden between displayed labels. It does not remove the corresponding columns. Automatic spacing chooses an interval based on the available space; it does not necessarily display every label.
Tick marks have separate controls. Set [IsAutomaticTickMarksSpacing](https://reference.aspose.com/slides/net/aspose.slides.charts/iaxis/isautomatictickmarksspacing/) to `false` and use [TickMarksSpacing](https://reference.aspose.com/slides/net/aspose.slides.charts/iaxis/tickmarksspacing/) to set their interval. For example, `1` keeps a tick mark at every category interval while labels appear only every third category. Set [MajorTickMark](https://reference.aspose.com/slides/net/aspose.slides.charts/iaxis/majortickmark/) to a visible style so you can see the result. Setting either automatic-spacing property back to `true` lets the chart choose that interval again.
The following self-contained example creates 24 categories and one series, then saves three slides in `CategoryAxisIntervals.pptx`: automatic spacing, manual label spacing with independent tick marks, and restored automatic spacing. The two copies retain the original chart data. No input presentation is required. Horizontal label text makes the difference in density easy to see.
```csharp
using Aspose.Slides;
using Aspose.Slides.Charts;
using Aspose.Slides.Export;
using var presentation = new Presentation();
var slide = presentation.Slides[0];
var chart = slide.Shapes.AddChart(ChartType.ClusteredColumn, 30, 40, 660, 320);
chart.HasLegend = false;
chart.ChartData.Categories.Clear();
chart.ChartData.Series.Clear();
var workbook = chart.ChartData.ChartDataWorkbook;
workbook.Clear(0);
var series = chart.ChartData.Series.Add(ChartType.ClusteredColumn);
for (var i = 0; i < 24; i++)
{
var categoryCell = workbook.GetCell(0, i + 1, 0, $"Category {i + 1}");
chart.ChartData.Categories.Add(categoryCell);
var valueCell = workbook.GetCell(0, i + 1, 1, 10 + i % 6 * 5);
series.DataPoints.AddDataPointForBarSeries(valueCell);
}
var axis = chart.Axes.HorizontalAxis;
axis.CategoryAxisType = CategoryAxisType.Text;
axis.TextFormat.TextBlockFormat.RotationAngle = 0;
axis.TextFormat.PortionFormat.FontHeight = 12;
axis.MajorTickMark = TickMarkType.Outside;
axis.IsAutomaticTickLabelSpacing = true;
axis.IsAutomaticTickMarksSpacing = true;
// Slide 2: show every third label, but keep a tick mark for every category.
var manualSlide = presentation.Slides.AddClone(slide);
var manualChart = (IChart)manualSlide.Shapes[0];
var manualAxis = manualChart.Axes.HorizontalAxis;
manualAxis.IsAutomaticTickLabelSpacing = false;
manualAxis.TickLabelSpacing = 3;
manualAxis.IsAutomaticTickMarksSpacing = false;
manualAxis.TickMarksSpacing = 1;
// Slide 3: let the chart choose both intervals again.
var restoredSlide = presentation.Slides.AddClone(manualSlide);
var restoredChart = (IChart)restoredSlide.Shapes[0];
restoredChart.Axes.HorizontalAxis.IsAutomaticTickLabelSpacing = true;
restoredChart.Axes.HorizontalAxis.IsAutomaticTickMarksSpacing = true;
presentation.Save("CategoryAxisIntervals.pptx", SaveFormat.Pptx);
```
**Automatic spacing (slide 1):** In this rendering, every second category label is displayed and wraps onto two lines. The automatic result can vary with chart size, fonts, and the renderer.

**Manual spacing (slide 2):** Every third label is displayed on one line, while tick marks remain at every category interval. All 24 columns, including those without labels, remain visible with the same values. Slide 3 restores the automatic appearance shown above.

### **Choose the Correct Axis and Interval**
Use this category-count interval for a text category axis, such as the category axis of a column, line, area, or bar chart. In a column chart, it is the horizontal axis. In a horizontal bar chart, the category axis is vertical, so apply these settings to [VerticalAxis](https://reference.aspose.com/slides/net/aspose.slides.charts/iaxesmanager/verticalaxis/). Tick-mark spacing also applies to a series axis in charts that have one.
Do not use category label spacing to set the numeric scale of a value axis. On a value axis, [MajorUnit](https://reference.aspose.com/slides/net/aspose.slides.charts/iaxis/majorunit/) specifies a difference in values: for example, a major unit of `10` produces ticks at 0, 10, 20, and so on when the axis starts at zero. A category label interval of `3` instead counts category positions, regardless of their data values. Scatter and bubble charts use value axes rather than a text category axis. For a date axis, use time-based major units and scales as described in [Change a Category Axis](https://docs.aspose.com/slides/net/chart-axis/#change-a-category-axis).
## **Set the Date Format for Category Axis Values**
The example replaces the default chart data with four annual values. Dates are stored as OLE Automation serial numbers in the first worksheet (index `0`). Set [CategoryAxisType](https://reference.aspose.com/slides/net/aspose.slides.charts/axis/categoryaxistype/) to a date axis, disable [IsNumberFormatLinkedToSource](https://reference.aspose.com/slides/net/aspose.slides.charts/axis/isnumberformatlinkedtosource/), and assign `yyyy` to [NumberFormat](https://reference.aspose.com/slides/net/aspose.slides.charts/axis/numberformat/) so the category labels display four-digit years independently of the cell formatting.
```csharp
using System;
using Aspose.Slides;
using Aspose.Slides.Charts;
using Aspose.Slides.Export;
using var presentation = new Presentation();
var slide = presentation.Slides[0];
var chart = slide.Shapes.AddChart(ChartType.Line, 50, 50, 450, 300);
chart.ChartData.Categories.Clear();
chart.ChartData.Series.Clear();
var workbook = chart.ChartData.ChartDataWorkbook;
workbook.Clear(0);
var series = chart.ChartData.Series.Add(ChartType.Line);
for (var i = 0; i < 4; i++)
{
var date = new DateTime(2015 + i, 1, 1);
var categoryCell = workbook.GetCell(0, i + 1, 0, date.ToOADate());
chart.ChartData.Categories.Add(categoryCell);
var valueCell = workbook.GetCell(0, i + 1, 1, i + 1);
series.DataPoints.AddDataPointForLineSeries(valueCell);
}
chart.Axes.HorizontalAxis.CategoryAxisType = CategoryAxisType.Date;
chart.Axes.HorizontalAxis.IsNumberFormatLinkedToSource = false;
chart.Axes.HorizontalAxis.NumberFormat = "yyyy";
presentation.Save("DateAxisFormat.pptx", SaveFormat.Pptx);
```
## **Set a Rotation Angle for a Chart Axis Title**
Enable [HasTitle](https://reference.aspose.com/slides/net/aspose.slides.charts/axis/hastitle/) on the vertical axis, provide title text, and set [RotationAngle](https://reference.aspose.com/slides/net/aspose.slides.charts/icharttextblockformat/rotationangle/) to rotate the title. The angle is measured in degrees; this example saves a column chart with its value-axis title rotated by 90 degrees.
```csharp
using Aspose.Slides;
using Aspose.Slides.Charts;
using Aspose.Slides.Export;
using var presentation = new Presentation();
var slide = presentation.Slides[0];
var chart = slide.Shapes.AddChart(ChartType.ClusteredColumn, 50, 50, 450, 300);
chart.Axes.VerticalAxis.HasTitle = true;
chart.Axes.VerticalAxis.Title.AddTextFrameForOverriding("Value");
chart.Axes.VerticalAxis.Title.TextFormat.TextBlockFormat.RotationAngle = 90;
presentation.Save("RotatedAxisTitle.pptx", SaveFormat.Pptx);
```
## **Set the Axis Position on a Category or Value Axis**
Use [AxisBetweenCategories](https://reference.aspose.com/slides/net/aspose.slides.charts/axis/axisbetweencategories/) to control whether the value axis crosses the category axis between categories or at category tick marks. This property applies to category axes. The example sets it to `true` on the horizontal category axis of a column chart and saves the result.
```csharp
using Aspose.Slides;
using Aspose.Slides.Charts;
using Aspose.Slides.Export;
using var presentation = new Presentation();
var slide = presentation.Slides[0];
var chart = slide.Shapes.AddChart(ChartType.ClusteredColumn, 50, 50, 450, 300);
chart.Axes.HorizontalAxis.AxisBetweenCategories = true;
presentation.Save("AxisBetweenCategories.pptx", SaveFormat.Pptx);
```
## **Set the Display Unit on a Chart Value Axis**
Set [DisplayUnit](https://reference.aspose.com/slides/net/aspose.slides.charts/axis/displayunit/) to scale the labels on a value axis without changing the underlying data. With [DisplayUnitType](https://reference.aspose.com/slides/net/aspose.slides.charts/displayunittype/) set to `Millions`, a value of 60,000,000 is displayed as 60. The example creates a column chart and applies the millions display unit to its vertical axis.
```csharp
using Aspose.Slides;
using Aspose.Slides.Charts;
using Aspose.Slides.Export;
using var presentation = new Presentation();
var slide = presentation.Slides[0];
var chart = slide.Shapes.AddChart(ChartType.ClusteredColumn, 50, 50, 450, 300);
chart.Axes.VerticalAxis.DisplayUnit = DisplayUnitType.Millions;
presentation.Save("Result.pptx", SaveFormat.Pptx);
```
## **Configure a Logarithmic Value Axis**
A logarithmic value axis is useful when positive values span several orders of magnitude. For example, a service might receive 10, 100, 1,000, 10,000, and 100,000 requests over five periods. On a linear scale, the smaller values appear close together near zero. A logarithmic scale makes their relative growth easier to compare: equal distances represent equal ratios rather than equal differences.
Set [IsLogarithmic](https://reference.aspose.com/slides/net/aspose.slides.charts/axis/islogarithmic/) to `true` on the value axis and use [LogBase](https://reference.aspose.com/slides/net/aspose.slides.charts/axis/logbase/) to choose the base. This changes how the existing values are displayed; it does not change the data or add a logarithmic trend line. A trend line represents a fitted relationship in the data and is a separate feature.
### **Choose the Value Axis and Base**
For a line or column chart, the value axis is [VerticalAxis](https://reference.aspose.com/slides/net/aspose.slides.charts/iaxesmanager/verticalaxis/). For a horizontal bar chart, it is [HorizontalAxis](https://reference.aspose.com/slides/net/aspose.slides.charts/iaxesmanager/horizontalaxis/). Scatter and bubble charts have two value axes, so choose the horizontal axis for X values, the vertical axis for Y values, or both. Do not apply logarithmic scaling to a category axis.
The default logarithmic base is `10`. For PPTX charts, use a base from `2` through `1000`, inclusive; fractional bases such as `2.5` are also supported. With base `10`, successive powers such as 10, 100, 1,000, and 10,000 are equally spaced.
### **Compare Linear and Logarithmic Scaling**
The following self-contained example creates a line chart with the five request counts on the first slide, then clones that slide and enables a base-10 logarithmic value axis on the second. Both slides retain the same data.
```csharp
using Aspose.Slides;
using Aspose.Slides.Charts;
using Aspose.Slides.Export;
using var presentation = new Presentation();
var slide = presentation.Slides[0];
var chart = slide.Shapes.AddChart(ChartType.Line, 30, 40, 660, 200);
chart.HasLegend = false;
chart.ChartData.Categories.Clear();
chart.ChartData.Series.Clear();
var workbook = chart.ChartData.ChartDataWorkbook;
workbook.Clear(0);
var series = chart.ChartData.Series.Add(ChartType.Line);
var values = new double[] { 10, 100, 1000, 10000, 100000 };
for (var i = 0; i < values.Length; i++)
{
var categoryCell = workbook.GetCell(0, i + 1, 0, $"Period {i + 1}");
chart.ChartData.Categories.Add(categoryCell);
var valueCell = workbook.GetCell(0, i + 1, 1, values[i]);
series.DataPoints.AddDataPointForLineSeries(valueCell);
}
// Keep the first slide linear and change only the copy's value-axis scale.
var logarithmicSlide = presentation.Slides.AddClone(slide);
var logarithmicChart = (IChart)logarithmicSlide.Shapes[0];
var valueAxis = logarithmicChart.Axes.VerticalAxis;
valueAxis.IsLogarithmic = true;
valueAxis.LogBase = 10;
presentation.Save("LogarithmicAxis.pptx", SaveFormat.Pptx);
```
**Linear scale (slide 1):** Equal vertical distances represent equal differences in request counts. The largest value dominates the chart, making the smaller values difficult to distinguish.
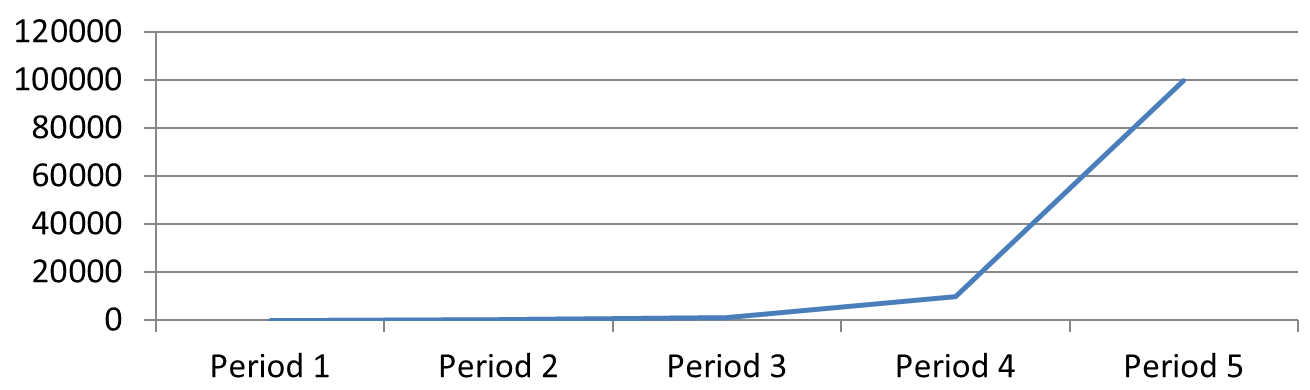
**Logarithmic scale (slide 2):** Equal vertical distances represent equal ratios. Each period has ten times as many requests as the previous one, so the points form a straight rising line on the base-10 scale. The axis labels still show the original request counts.
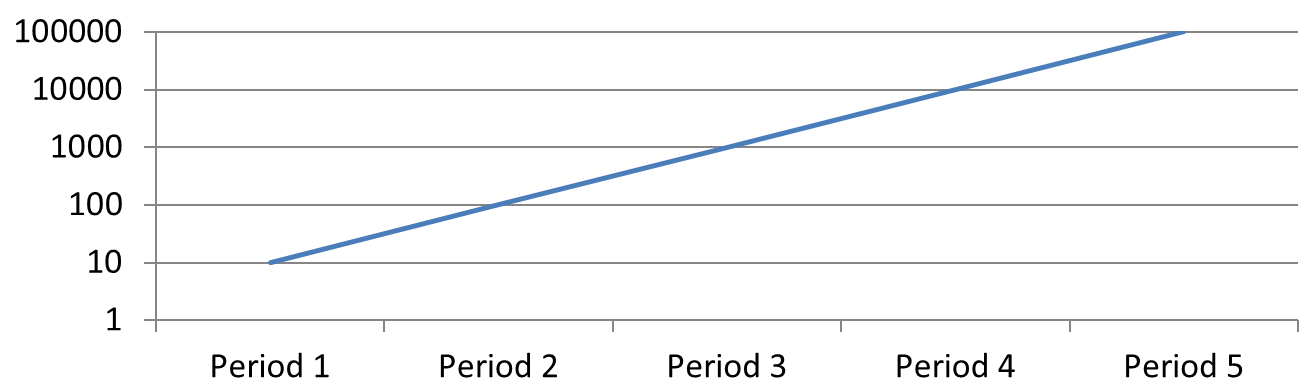
### **Handle Zero and Negative Values**
A logarithmic scale can display only strictly positive values. Check the data before enabling it. If zero or negative values are meaningful, keep a linear scale or show them separately. If excluding those values is appropriate for the analysis, explain the omission. Do not silently replace them with small positive numbers, as this changes the meaning of the data. Any manually configured minimum or maximum for a logarithmic axis must also be positive.
## **FAQ**
**How do I set the value at which one axis crosses the other (axis crossing)?**
Use [CrossType](https://reference.aspose.com/slides/net/aspose.slides.charts/axis/crosstype/) to select the crossing behavior. To specify a numeric crossing value, set [CrossAt](https://reference.aspose.com/slides/net/aspose.slides.charts/axis/crossat/). These settings let you move the axis crossing to a suitable baseline.
**How can I position tick labels relative to the axis?**
Set [TickLabelPosition](https://reference.aspose.com/slides/net/aspose.slides.charts/axis/ticklabelposition/) using [TickLabelPositionType](https://reference.aspose.com/slides/net/aspose.slides.charts/ticklabelpositiontype/): `Low`, `High`, `NextTo`, or `None`. To control the tick marks themselves, use [MajorTickMark](https://reference.aspose.com/slides/net/aspose.slides.charts/axis/majortickmark/) or [MinorTickMark](https://reference.aspose.com/slides/net/aspose.slides.charts/axis/minortickmark/); these are separate from label positioning.
## Related features
- [Configure chart axes](https://docs.aspose.com/slides/features/chart-axes/)
## Related articles
- [Format Presentation Charts in .NET](https://docs.aspose.com/slides/net/chart-formatting/)
- [Create a Chart](https://docs.aspose.com/slides/net/create-a-chart/)
# Optimize Chart Calculations for Presentations in .NET
> Understand chart calculations, data updates, and precision control in Aspose.Slides for .NET for PPT and PPTX, with practical C# code examples.
Source: https://docs.aspose.com/slides/net/chart-calculations/
Updated: 2026-08-05
## **Overview**
Aspose.Slides provides APIs for working with chart calculations and layout data in presentations. This article shows how to retrieve the actual values of chart elements, including the real position and size of elements that implement `IActualLayout` and the actual values of chart axes. It also explains that these values are populated after chart layout validation.
In addition, the article demonstrates how to get the actual position of parent chart elements and how to hide chart components such as the title, axes, legend, and grid lines. Together, these examples help you inspect chart layout information and control the visibility of chart elements in PowerPoint presentations programmatically.
## **Calculate Actual Values of Chart Elements**
Aspose.Slides for .NET provides a simple API for getting these properties. This will help you to Calculates actual values of chart elements. The actual values include position of elements that implement IActualLayout interface (IActualLayout.ActualX, IActualLayout.ActualY, IActualLayout.ActualWidth, IActualLayout.ActualHeight) and actual axes values (IAxis.ActualMaxValue, IAxis.ActualMinValue, IAxis.ActualMajorUnit, IAxis.ActualMinorUnit, IAxis.ActualMajorUnitScale, IAxis.ActualMinorUnitScale).
```c#
using Aspose.Slides;
using Aspose.Slides.Charts;
using Aspose.Slides.Export;
using (Presentation pres = new Presentation("test.pptx"))
{
Chart chart = (Chart)pres.Slides[0].Shapes.AddChart(ChartType.ClusteredColumn, 100, 100, 500, 350);
chart.ValidateChartLayout();
double x = chart.PlotArea.ActualX;
double y = chart.PlotArea.ActualY;
double w = chart.PlotArea.ActualWidth;
double h = chart.PlotArea.ActualHeight;
// Saving presentation
pres.Save("Result.pptx", SaveFormat.Pptx);
}
```
## **Calculate Actual Position of Parent Chart Elements**
Aspose.Slides for .NET provides a simple API for getting these properties. Properties of IActualLayout provide information about actual position of parent chart element. It is necessary to call method IChart.ValidateChartLayout() previously to fill properties with actual values.
```c#
using Aspose.Slides;
using Aspose.Slides.Charts;
// Creating empty presentation
using (Presentation pres = new Presentation())
{
Chart chart = (Chart)pres.Slides[0].Shapes.AddChart(ChartType.ClusteredColumn, 100, 100, 500, 350);
chart.ValidateChartLayout();
double x = chart.PlotArea.ActualX;
double y = chart.PlotArea.ActualY;
double w = chart.PlotArea.ActualWidth;
double h = chart.PlotArea.ActualHeight;
}
```
## **Hide Chart Elements**
This topic helps you to understand how to hide information from chart. Using Aspose.Slides for .NET you can hide **Title, Vertical Axis, Horizontal Axis, Legend** and **Grid Lines** from chart. Below code example shows how to use these properties.
```c#
using System.Drawing;
using Aspose.Slides;
using Aspose.Slides.Charts;
using Aspose.Slides.Export;
using (Presentation pres = new Presentation())
{
ISlide slide = pres.Slides[0];
IChart chart = slide.Shapes.AddChart(ChartType.LineWithMarkers, 140, 118, 320, 370);
//Hiding chart Title
chart.HasTitle = false;
///Hiding Values axis
chart.Axes.VerticalAxis.IsVisible = false;
//Category Axis visibility
chart.Axes.HorizontalAxis.IsVisible = false;
//Hiding Legend
chart.HasLegend = false;
//Hiding MajorGridLines of both axes
chart.Axes.HorizontalAxis.MajorGridLinesFormat.Line.FillFormat.FillType = FillType.NoFill;
chart.Axes.VerticalAxis.MajorGridLinesFormat.Line.FillFormat.FillType = FillType.NoFill;
//Keeping only the first series
for (int i = chart.ChartData.Series.Count - 1; i > 0; i--)
{
chart.ChartData.Series.RemoveAt(i);
}
IChartSeries series = chart.ChartData.Series[0];
series.Marker.Symbol = MarkerStyleType.Circle;
series.Labels.DefaultDataLabelFormat.ShowValue = true;
series.Labels.DefaultDataLabelFormat.Position = LegendDataLabelPosition.Top;
series.Marker.Size = 15;
//Setting series line color
series.Format.Line.FillFormat.FillType = FillType.Solid;
series.Format.Line.FillFormat.SolidFillColor.Color = Color.Purple;
series.Format.Line.DashStyle = LineDashStyle.Solid;
pres.Save("HideInformationFromChart.pptx", SaveFormat.Pptx);
}
```
## **FAQ**
### Do external Excel workbooks work as a data source, and how does that affect recalculation?
Yes. A chart can reference an external workbook: when you connect or refresh the external source, formulas and values are taken from that workbook, and the chart reflects the updates during open/edit operations. The API lets you [specify the external workbook](https://reference.aspose.com/slides/net/aspose.slides.charts/chartdata/setexternalworkbook/) path and manage the linked data.
### Can I compute and display trendlines without implementing regression myself?
Yes. [Trendlines](https://docs.aspose.com/slides/net/trend-line/) (linear, exponential, and others) are added and updated by Aspose.Slides; their parameters are recalculated from the series data automatically, so you don’t need to implement your own calculations.
### If a presentation has multiple charts with external links, can I control which workbook each chart uses for computed values?
Yes. Each chart can point to its own [external workbook](https://reference.aspose.com/slides/net/aspose.slides.charts/chartdata/setexternalworkbook/), or you can create/replace an external workbook per chart independently of the others.
# Manage Chart Data Labels in Presentations in .NET
> Learn to add and format chart data labels in PowerPoint presentations using Aspose.Slides for .NET for more engaging slides.
Source: https://docs.aspose.com/slides/net/chart-data-label/
Updated: 2026-11-07
## **Introduction**
Data labels display information about chart series and individual data points, helping readers identify values and understand the chart. This article explains how to format values, display percentages, read label text, control labels beyond the axis maximum, adjust category axis label spacing, and position pie chart labels.
## **Count Visible Data Labels**
Use [CountOfVisibleDataLabels](https://reference.aspose.com/slides/net/aspose.slides.charts/idatalabelcollection/countofvisibledatalabels/) to check how many data labels are enabled for display before publishing a presentation. Unlike [Count](https://reference.aspose.com/slides/net/aspose.slides.charts/idatalabelcollection/count/), which returns the total number of labels in the collection, it takes the series defaults and individual label settings into account.
This example creates a column chart with one series and three data points. It accesses the series' [Labels](https://reference.aspose.com/slides/net/aspose.slides.charts/ichartseries/labels/) collection and prints the visible count as the settings change: **0, 3, 2, 3**. The total count remains **3**.
```csharp
using System;
using Aspose.Slides;
using Aspose.Slides.Charts;
using var presentation = new Presentation();
var slide = presentation.Slides[0];
var chart = slide.Shapes.AddChart(ChartType.ClusteredColumn, 50, 50, 500, 300);
chart.ChartData.Series.Clear();
chart.ChartData.Categories.Clear();
var workbook = chart.ChartData.ChartDataWorkbook;
var seriesCell = workbook.GetCell(0, 0, 1, "Values");
var series = chart.ChartData.Series.Add(seriesCell, chart.Type);
for (int i = 0; i < 3; i++)
{
var categoryCell = workbook.GetCell(0, i + 1, 0, $"Category {i + 1}");
chart.ChartData.Categories.Add(categoryCell);
var valueCell = workbook.GetCell(0, i + 1, 1, (i + 1) * 10);
series.DataPoints.AddDataPointForBarSeries(valueCell);
}
var labels = series.Labels;
Console.WriteLine($"Total: {labels.Count}; visible: {labels.CountOfVisibleDataLabels}"); // Total: 3; visible: 0
labels.DefaultDataLabelFormat.ShowValue = true;
Console.WriteLine($"Visible: {labels.CountOfVisibleDataLabels}"); // Visible: 3
labels[1].DataLabelFormat.ShowValue = false;
Console.WriteLine($"Visible: {labels.CountOfVisibleDataLabels}"); // Visible: 2
labels[1].DataLabelFormat.ShowLegendKey = true;
Console.WriteLine($"Visible: {labels.CountOfVisibleDataLabels}"); // Visible: 3
```
The series' [DefaultDataLabelFormat](https://reference.aspose.com/slides/net/aspose.slides.charts/idatalabelcollection/defaultdatalabelformat/) supplies the default settings. Enabling [ShowValue](https://reference.aspose.com/slides/net/aspose.slides.charts/idatalabelformat/showvalue/) there displays values for all three labels. Setting it to `false` through one label's [DataLabelFormat](https://reference.aspose.com/slides/net/aspose.slides.charts/idatalabel/datalabelformat/) overrides that setting for the selected label. Enabling [ShowLegendKey](https://reference.aspose.com/slides/net/aspose.slides.charts/idatalabelformat/showlegendkey/) makes that label count as visible again, even though its value remains hidden.
The visible count reflects visibility settings. It does not measure whether labels overlap, are clipped, or are readable in the rendered chart.
## **Set Data Precision in Chart Data Labels**
Use [NumberFormatOfValues](https://reference.aspose.com/slides/net/aspose.slides.charts/ichartseries/numberformatofvalues/) to format series values. This example creates a line chart with default data, displays its data table, and enables value labels for the first series. The format `#,##0.00` displays a thousands separator and two decimal places without changing the underlying values.
```csharp
using Aspose.Slides;
using Aspose.Slides.Charts;
using Aspose.Slides.Export;
using var presentation = new Presentation();
var slide = presentation.Slides[0];
var chart = slide.Shapes.AddChart(ChartType.Line, 50, 50, 450, 300);
chart.HasDataTable = true;
var series = chart.ChartData.Series[0];
series.NumberFormatOfValues = "#,##0.00";
series.Labels.DefaultDataLabelFormat.ShowValue = true;
presentation.Save("PrecisionOfDatalabels_out.pptx", SaveFormat.Pptx);
```
To format the numeric cells in a chart's embedded workbook, see [Set Custom Number Formats for Workbook Cells](https://docs.aspose.com/slides/net/chart-workbook/#set-custom-number-formats-for-workbook-cells). That example also shows value labels following their source cell formats while preserving the stored numeric values.
## **Display Percentage as Labels**
For a stacked column chart, calculate each value as a percentage of its category total and assign the text to [TextFrameForOverriding](https://reference.aspose.com/slides/net/aspose.slides.charts/ioverridabletext/textframeforoverriding/). This example uses the default chart data and displays percentages with two decimal places in an 8-point font. Categories with a total of zero are skipped to avoid division by zero. Recalculate the custom label text if the chart data changes.
```csharp
using System;
using Aspose.Slides;
using Aspose.Slides.Charts;
using Aspose.Slides.Export;
using var presentation = new Presentation();
var slide = presentation.Slides[0];
var chart = slide.Shapes.AddChart(ChartType.StackedColumn, 20, 20, 400, 400);
var categoryTotals = new double[chart.ChartData.Categories.Count];
for (int k = 0; k < chart.ChartData.Categories.Count; k++)
{
for (int i = 0; i < chart.ChartData.Series.Count; i++)
{
var series = chart.ChartData.Series[i];
var pointValue = Convert.ToDouble(series.DataPoints[k].Value.Data);
categoryTotals[k] += pointValue;
}
}
for (int x = 0; x < chart.ChartData.Series.Count; x++)
{
var series = chart.ChartData.Series[x];
series.Labels.DefaultDataLabelFormat.ShowLegendKey = false;
for (int j = 0; j < series.DataPoints.Count; j++)
{
var label = series.DataPoints[j].Label;
if (categoryTotals[j] == 0)
{
continue;
}
var pointValue = Convert.ToDouble(series.DataPoints[j].Value.Data);
var dataPointPercent = (pointValue / categoryTotals[j]) * 100;
var portion = new Portion();
portion.Text = string.Format("{0:F2} %", dataPointPercent);
portion.PortionFormat.FontHeight = 8f;
label.TextFrameForOverriding.Text = "";
var paragraph = label.TextFrameForOverriding.Paragraphs[0];
paragraph.Portions.Add(portion);
label.DataLabelFormat.ShowValue = true;
label.DataLabelFormat.ShowSeriesName = false;
label.DataLabelFormat.ShowPercentage = false;
label.DataLabelFormat.ShowLegendKey = false;
label.DataLabelFormat.ShowCategoryName = false;
label.DataLabelFormat.ShowBubbleSize = false;
}
}
presentation.Save("DisplayPercentageAsLabels_out.pptx", SaveFormat.Pptx);
```
## **Set Percentage Sign with Chart Data Labels**
When values are stored as fractions, use [NumberFormat](https://reference.aspose.com/slides/net/aspose.slides.charts/idatalabelformat/numberformat/) to display percentages. Set [IsNumberFormatLinkedToSource](https://reference.aspose.com/slides/net/aspose.slides.charts/idatalabelformat/isnumberformatlinkedtosource/) to `false` to apply the label format independently of the source cells.
This example creates a 100% stacked column chart with red and blue series across four categories. Each pair of values adds up to 1. The label format `0.0%` displays 0.30 as 30.0%, while the vertical axis uses two decimal places. Both series use white, 10-point label text.
```csharp
using System.Drawing;
using Aspose.Slides;
using Aspose.Slides.Charts;
using Aspose.Slides.Export;
using var presentation = new Presentation();
var slide = presentation.Slides[0];
var chart = slide.Shapes.AddChart(ChartType.PercentsStackedColumn, 20, 20, 500, 400);
chart.Axes.VerticalAxis.IsNumberFormatLinkedToSource = false;
chart.Axes.VerticalAxis.NumberFormat = "0.00%";
chart.ChartData.Series.Clear();
chart.ChartData.Categories.Clear();
var workbook = chart.ChartData.ChartDataWorkbook;
int worksheetIndex = 0;
for (int i = 0; i < 4; i++)
{
var categoryCell = workbook.GetCell(worksheetIndex, i + 1, 0, $"Category {i + 1}");
chart.ChartData.Categories.Add(categoryCell);
}
string[] seriesNames = { "Reds", "Blues" };
Color[] seriesColors = { Color.Red, Color.Blue };
double[,] values = { { 0.30, 0.50, 0.80, 0.65 }, { 0.70, 0.50, 0.20, 0.35 } };
for (int i = 0; i < seriesNames.Length; i++)
{
var seriesCell = workbook.GetCell(worksheetIndex, 0, i + 1, seriesNames[i]);
var series = chart.ChartData.Series.Add(seriesCell, chart.Type);
for (int j = 0; j < 4; j++)
{
var valueCell = workbook.GetCell(worksheetIndex, j + 1, i + 1, values[i, j]);
series.DataPoints.AddDataPointForBarSeries(valueCell);
}
series.Format.Fill.FillType = FillType.Solid;
series.Format.Fill.SolidFillColor.Color = seriesColors[i];
var labelFormat = series.Labels.DefaultDataLabelFormat;
labelFormat.ShowValue = true;
labelFormat.IsNumberFormatLinkedToSource = false;
labelFormat.NumberFormat = "0.0%";
labelFormat.TextFormat.PortionFormat.FontHeight = 10;
labelFormat.TextFormat.PortionFormat.FillFormat.FillType = FillType.Solid;
labelFormat.TextFormat.PortionFormat.FillFormat.SolidFillColor.Color = Color.White;
}
presentation.Save("SetDataLabelsPercentageSign_out.pptx", SaveFormat.Pptx);
```
## **Read the Actual Text of Data Labels**
Use [GetActualLabelText](https://reference.aspose.com/slides/net/aspose.slides.charts/idatalabel/getactuallabeltext/) to retrieve the text produced by a data label's settings. This is useful when extracting labels for reports, searching presentation content, or validating generated charts. In the example below, the default [data label format](https://reference.aspose.com/slides/net/aspose.slides.charts/idatalabelformat/) combines each category name, series name, and value. One point formats its value as a percentage, and another uses custom text from [TextFrameForOverriding](https://reference.aspose.com/slides/net/aspose.slides.charts/ioverridabletext/textframeforoverriding/).
```csharp
using System;
using Aspose.Slides;
using Aspose.Slides.Charts;
using var presentation = new Presentation();
var slide = presentation.Slides[0];
var chart = slide.Shapes.AddChart(ChartType.ClusteredColumn, 20, 20, 500, 300);
chart.ChartData.Series.Clear();
chart.ChartData.Categories.Clear();
var workbook = chart.ChartData.ChartDataWorkbook;
chart.ChartData.Categories.Add(workbook.GetCell(0, 1, 0, "Q1"));
chart.ChartData.Categories.Add(workbook.GetCell(0, 2, 0, "Q2"));
var north = chart.ChartData.Series.Add(workbook.GetCell(0, 0, 1, "North"), chart.Type);
north.DataPoints.AddDataPointForBarSeries(workbook.GetCell(0, 1, 1, 0.25));
north.DataPoints.AddDataPointForBarSeries(workbook.GetCell(0, 2, 1, 0.75));
var south = chart.ChartData.Series.Add(workbook.GetCell(0, 0, 2, "South"), chart.Type);
south.DataPoints.AddDataPointForBarSeries(workbook.GetCell(0, 1, 2, 0.40));
south.DataPoints.AddDataPointForBarSeries(workbook.GetCell(0, 2, 2, 0.60));
foreach (var series in chart.ChartData.Series)
{
var format = series.Labels.DefaultDataLabelFormat;
format.ShowCategoryName = true;
format.ShowSeriesName = true;
format.ShowValue = true;
}
north.Labels[1].DataLabelFormat.IsNumberFormatLinkedToSource = false;
north.Labels[1].DataLabelFormat.NumberFormat = "0%";
south.Labels[0].TextFrameForOverriding.Text = "Reviewed";
foreach (var series in chart.ChartData.Series)
{
foreach (var point in series.DataPoints)
{
var label = point.Label;
if (!label.IsVisible)
{
continue;
}
Console.WriteLine($"Value: {point.Value.Data}; label: {label.GetActualLabelText()}");
}
}
```
The number stored in a data point remains `0.75`, even when its label shows `75%` along with the category and series names. Custom text replaces the generated label text. [GetActualLabelText](https://reference.aspose.com/slides/net/aspose.slides.charts/idatalabel/getactuallabeltext/) returns the resulting label string in either case. Check [IsVisible](https://reference.aspose.com/slides/net/aspose.slides.charts/idatalabel/isvisible/) separately, as shown above, when you want to extract only visible labels.
## **Control Data Labels Beyond the Axis Maximum**
When you limit an axis range manually, some data points may exceed its maximum. Use [ShowDataLabelsOverMaximum](https://reference.aspose.com/slides/net/aspose.slides.charts/ichart/showdatalabelsovermaximum/) to control whether their data labels are shown. This setting changes label visibility; it does not change the axis range or the underlying data values.
The example below creates a 2D clustered column chart with values of 60 and 120. It sets [IsAutomaticMaxValue](https://reference.aspose.com/slides/net/aspose.slides.charts/iaxis/isautomaticmaxvalue/) to `false` and [MaxValue](https://reference.aspose.com/slides/net/aspose.slides.charts/iaxis/maxvalue/) to 100 on the vertical axis. The first slide allows labels beyond the maximum; a copy of that slide disables them. Both slides are saved in `DataLabelsOverMaximum.pptx`.
Enable value labels with [ShowValue](https://reference.aspose.com/slides/net/aspose.slides.charts/idatalabelformat/showvalue/). The chart-level setting does not enable value display by itself or override an individual label's disabled value display. This example enables values for the entire series and uses [Position](https://reference.aspose.com/slides/net/aspose.slides.charts/idatalabelformat/position/) to place labels at the outside end of each column.
```csharp
using Aspose.Slides;
using Aspose.Slides.Charts;
using Aspose.Slides.Export;
using var presentation = new Presentation();
var slide = presentation.Slides[0];
var chart = slide.Shapes.AddChart(ChartType.ClusteredColumn, 50, 50, 600, 400);
chart.HasLegend = false;
chart.ChartData.Series.Clear();
chart.ChartData.Categories.Clear();
var workbook = chart.ChartData.ChartDataWorkbook;
var firstCategory = workbook.GetCell(0, 1, 0, "Within range");
var secondCategory = workbook.GetCell(0, 2, 0, "Above maximum");
chart.ChartData.Categories.Add(firstCategory);
chart.ChartData.Categories.Add(secondCategory);
var seriesName = workbook.GetCell(0, 0, 1, "Values");
var series = chart.ChartData.Series.Add(seriesName, chart.Type);
var firstValue = workbook.GetCell(0, 1, 1, 60);
var secondValue = workbook.GetCell(0, 2, 1, 120);
series.DataPoints.AddDataPointForBarSeries(firstValue);
series.DataPoints.AddDataPointForBarSeries(secondValue);
series.Labels.DefaultDataLabelFormat.ShowValue = true;
series.Labels.DefaultDataLabelFormat.Position = LegendDataLabelPosition.OutsideEnd;
chart.Axes.VerticalAxis.IsAutomaticMaxValue = false;
chart.Axes.VerticalAxis.MaxValue = 100;
chart.ShowDataLabelsOverMaximum = true;
var secondSlide = presentation.Slides.AddClone(slide);
var secondChart = (IChart)secondSlide.Shapes[0];
secondChart.ShowDataLabelsOverMaximum = false;
presentation.Save("DataLabelsOverMaximum.pptx", SaveFormat.Pptx);
```
The following images show the saved slides rendered by Microsoft PowerPoint. With `true`, the label **120** is visible at the upper boundary; with `false`, it is hidden. The label **60** remains visible, the axis maximum stays at **100**, and the second data point remains **120** in both cases.
| ShowDataLabelsOverMaximum = true | ShowDataLabelsOverMaximum = false |
| --- | --- |
|  | 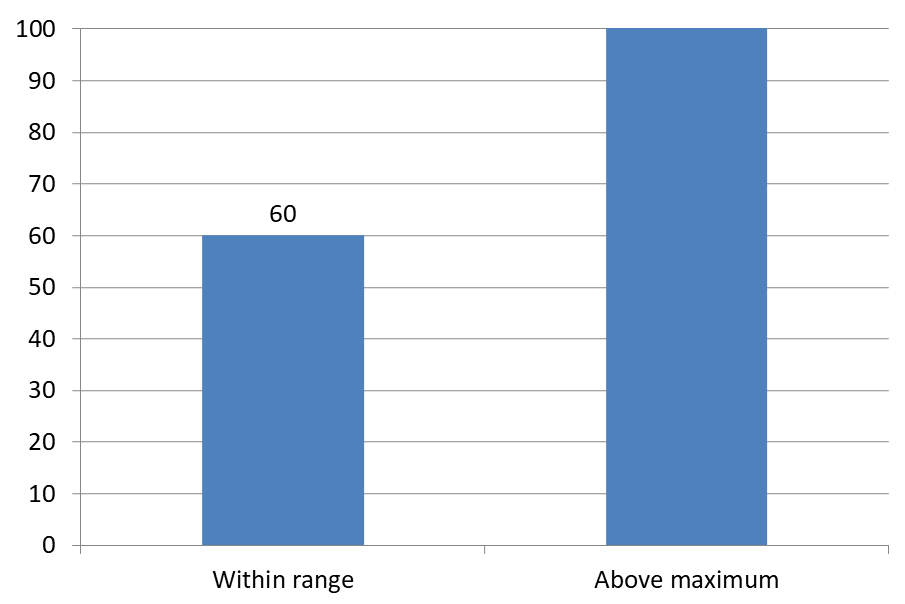 |
This example uses a 2D column chart with a value axis. Charts without a value axis, such as pie and doughnut charts, do not have an axis maximum to limit in this way.
## **Set Label Distance from an Axis**
Use [LabelOffset](https://reference.aspose.com/slides/net/aspose.slides.charts/iaxis/labeloffset/) to control the distance between category axis labels and the axis. The value is a percentage of the maximum font size of the axis labels. This example creates a clustered column chart and sets the horizontal axis label offset to 500. This setting affects category axis labels rather than labels attached to individual data points.
```csharp
using Aspose.Slides;
using Aspose.Slides.Charts;
using Aspose.Slides.Export;
using var presentation = new Presentation();
var slide = presentation.Slides[0];
var chart = slide.Shapes.AddChart(ChartType.ClusteredColumn, 20, 20, 500, 300);
chart.Axes.HorizontalAxis.LabelOffset = 500;
presentation.Save("SetCategoryAxisLabelDistance_out.pptx", SaveFormat.Pptx);
```
## **Adjust Label Location**
On a pie chart, adjust data label positions to improve spacing and make room for leader lines.
This example displays the value of the first data point, places its label outside the slice, and adjusts its [X](https://reference.aspose.com/slides/net/aspose.slides.charts/ilayoutable/x/) and [Y](https://reference.aspose.com/slides/net/aspose.slides.charts/ilayoutable/y/) offsets. These offsets are relative to the chart width and height, respectively.
```csharp
using Aspose.Slides;
using Aspose.Slides.Charts;
using Aspose.Slides.Export;
using var presentation = new Presentation();
var slide = presentation.Slides[0];
var chart = slide.Shapes.AddChart(ChartType.Pie, 50, 50, 200, 200);
var series = chart.ChartData.Series;
var label = series[0].Labels[0];
label.DataLabelFormat.ShowValue = true;
label.DataLabelFormat.Position = LegendDataLabelPosition.OutsideEnd;
label.X = 0.71f;
label.Y = 0.04f;
presentation.Save("presentation.pptx", SaveFormat.Pptx);
```
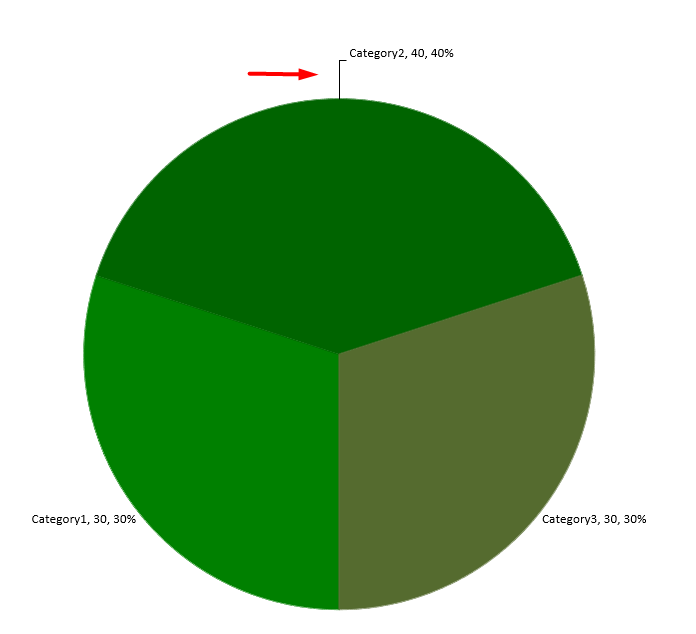
## **Format Leader Lines**
When pie chart labels sit outside their slices, leader lines help readers match each value to the correct slice. A contrasting color and a slightly thicker line can make these connections easier to follow, while transparency and a dashed style keep the lines visually unobtrusive.
Use [LeaderLinesFormat](https://reference.aspose.com/slides/net/aspose.slides.charts/datalabelcollection/leaderlinesformat/) to format leader lines at the series' data label collection level. The settings in `series.Labels.LeaderLinesFormat.Line` apply to the collection, rather than to an individual label.
This example creates a pie chart with default data, displays values outside the slices, and enables [ShowLeaderLines](https://reference.aspose.com/slides/net/aspose.slides.charts/idatalabelformat/showleaderlines/). It moves two labels farther from their slices using [X](https://reference.aspose.com/slides/net/aspose.slides.charts/ilayoutable/x/) and [Y](https://reference.aspose.com/slides/net/aspose.slides.charts/ilayoutable/y/) offsets, expressed as fractions of the chart width and height. No input presentation is required.
The line's [FillFormat](https://reference.aspose.com/slides/net/aspose.slides/ilineformat/fillformat/) sets a solid blue color with an alpha value of 191 out of 255, giving approximately 25% transparency. [Width](https://reference.aspose.com/slides/net/aspose.slides/ilineformat/width/) sets the thickness to 2 points, and [DashStyle](https://reference.aspose.com/slides/net/aspose.slides/ilineformat/dashstyle/) makes the line dashed.
```csharp
using System.Drawing;
using Aspose.Slides;
using Aspose.Slides.Charts;
using Aspose.Slides.Export;
using var presentation = new Presentation();
var slide = presentation.Slides[0];
var chart = slide.Shapes.AddChart(ChartType.Pie, 80, 50, 560, 400);
chart.HasLegend = false;
var series = chart.ChartData.Series[0];
var labelFormat = series.Labels.DefaultDataLabelFormat;
labelFormat.ShowValue = true;
labelFormat.Position = LegendDataLabelPosition.OutsideEnd;
labelFormat.ShowLeaderLines = true;
// Move two labels farther away from their slices.
series.Labels[0].X = 0.10f;
series.Labels[0].Y = -0.05f;
series.Labels[1].X = -0.10f;
series.Labels[1].Y = 0.05f;
var line = series.Labels.LeaderLinesFormat.Line;
line.FillFormat.FillType = FillType.Solid;
line.FillFormat.SolidFillColor.Color = Color.FromArgb(191, 30, 90, 160);
line.Width = 2;
line.DashStyle = LineDashStyle.Dash;
presentation.Save("FormattedLeaderLines.pptx", SaveFormat.Pptx);
```
Enabling leader lines does not guarantee that a line will appear for every label. Visibility depends on label placement and the chart's layout behavior. In this example, the two displaced labels have visible leader lines; the labels that remain close to their slices do not need them.
The following image shows the saved `FormattedLeaderLines.pptx` rendered with Aspose.Slides:

## **Add Multiple Rows of Data Labels Above a Column Chart**
This example creates a column chart with two rows of data labels above the plot area. Series A displays the visible columns, while Series B and Series C provide the additional labels. Their columns are hidden by removing the fill and outline. The [Overlap](https://reference.aspose.com/slides/net/aspose.slides.charts/ichartseriesgroup/overlap/) property aligns all three series with the same category centers.
The [PlotArea](https://reference.aspose.com/slides/net/aspose.slides.charts/ichart/plotarea/) settings reserve space for the label rows. After [ValidateChartLayout](https://reference.aspose.com/slides/net/aspose.slides.charts/ichart/validatechartlayout/) calculates the default positions, [X](https://reference.aspose.com/slides/net/aspose.slides.charts/ilayoutable/x/) and [Y](https://reference.aspose.com/slides/net/aspose.slides.charts/ilayoutable/y/) preserve the horizontal alignment and apply vertical offsets to arrange the labels in two rows. The numbers remain data labels linked to the series values; only the row headings are separate text shapes.
```csharp
using System.Drawing;
using Aspose.Slides;
using Aspose.Slides.Charts;
using Aspose.Slides.Export;
using var presentation = new Presentation();
var slide = presentation.Slides[0];
var chart = slide.Shapes.AddChart(ChartType.ClusteredColumn, 40, 40, 640, 200);
chart.HasTitle = false;
chart.HasLegend = false;
chart.TextFormat.PortionFormat.FontHeight = 12;
chart.ChartData.Series.Clear();
chart.ChartData.Categories.Clear();
var workbook = chart.ChartData.ChartDataWorkbook;
workbook.Clear(0);
string[] categories = { "North", "South", "East", "West" };
string[] seriesNames = { "Series A", "Series B", "Series C" };
double[,] seriesValues = {
{ 35, 42, 28, 47 },
{ 22, 31, 19, 26 },
{ 12, 16, 14, 18 }
};
for (int categoryIndex = 0; categoryIndex < categories.Length; categoryIndex++)
{
var categoryCell = workbook.GetCell(0, categoryIndex + 1, 0, categories[categoryIndex]);
chart.ChartData.Categories.Add(categoryCell);
}
for (int seriesIndex = 0; seriesIndex < seriesNames.Length; seriesIndex++)
{
var seriesCell = workbook.GetCell(0, 0, seriesIndex + 1, seriesNames[seriesIndex]);
var series = chart.ChartData.Series.Add(seriesCell, ChartType.ClusteredColumn);
for (int categoryIndex = 0; categoryIndex < categories.Length; categoryIndex++)
{
var valueCell = workbook.GetCell(0, categoryIndex + 1, seriesIndex + 1, seriesValues[seriesIndex, categoryIndex]);
series.DataPoints.AddDataPointForBarSeries(valueCell);
}
if (seriesIndex > 0)
{
// Hide the columns of B and C, but keep their data labels.
series.Format.Fill.FillType = FillType.NoFill;
series.Format.Line.FillFormat.FillType = FillType.NoFill;
var labelFormat = series.Labels.DefaultDataLabelFormat;
labelFormat.ShowValue = true;
labelFormat.TextFormat.PortionFormat.FontHeight = 12;
var labelFill = labelFormat.TextFormat.PortionFormat.FillFormat;
labelFill.FillType = FillType.Solid;
labelFill.SolidFillColor.Color = Color.Black;
labelFormat.Position = LegendDataLabelPosition.InsideBase;
}
}
// Align all three series with the same category centers.
chart.ChartData.Series[0].ParentSeriesGroup.Overlap = 100;
// Use fewer gridlines for this compact example.
chart.Axes.VerticalAxis.IsAutomaticMajorUnit = false;
chart.Axes.VerticalAxis.MajorUnit = 10;
// Reserve space above the plot for two rows of data labels.
chart.PlotArea.LayoutTargetType = LayoutTargetType.Inner;
chart.PlotArea.X = 0.15f;
chart.PlotArea.Y = 0.32f;
chart.PlotArea.Width = 0.80f;
chart.PlotArea.Height = 0.48f;
chart.ValidateChartLayout();
for (int seriesIndex = 1; seriesIndex < seriesNames.Length; seriesIndex++)
{
var series = chart.ChartData.Series[seriesIndex];
float rowTop = seriesIndex == 1 ? 0.15f : 0.03f;
for (int categoryIndex = 0; categoryIndex < categories.Length; categoryIndex++)
{
var dataLabel = series.DataPoints[categoryIndex].Label;
// Keep the default horizontal position. Y is an offset from
// the default label position, expressed as a chart-height fraction.
dataLabel.X = 0;
dataLabel.Y = rowTop - dataLabel.ActualY / chart.Height;
}
// Only the row heading is a separate text shape.
var rowHeading = slide.Shapes.AddAutoShape(ShapeType.Rectangle, chart.X, chart.Y + rowTop * chart.Height, 85, 18);
rowHeading.FillFormat.FillType = FillType.NoFill;
rowHeading.LineFormat.FillFormat.FillType = FillType.NoFill;
rowHeading.AddTextFrame(seriesNames[seriesIndex]);
rowHeading.TextFrame.TextFrameFormat.MarginTop = 0;
rowHeading.TextFrame.TextFrameFormat.MarginBottom = 0;
var headingFormat = rowHeading.TextFrame.Paragraphs[0].Portions[0].PortionFormat;
headingFormat.FontHeight = 12;
headingFormat.FillFormat.FillType = FillType.Solid;
headingFormat.FillFormat.SolidFillColor.Color = Color.Black;
}
presentation.Save("multiple-rows-of-labels.pptx", SaveFormat.Pptx);
```

## **Change Data Label Shapes**
Aspose.Slides for .NET 26.11 adds [IDataLabel.LabelShapeType](https://reference.aspose.com/slides/net/aspose.slides.charts/idatalabel/labelshapetype/) for one label and [IDataLabelCollection.DefaultLabelShapeType](https://reference.aspose.com/slides/net/aspose.slides.charts/idatalabelcollection/defaultlabelshapetype/) for all current labels in a series. These change the label's shape, not its point marker. For the separate callout setting, see [Data Label Callouts](https://docs.aspose.com/slides/net/callout/).
The collection assignment updates existing labels, so apply individual overrides **after** the collection setting. This complete example requires [Aspose.Slides for .NET](https://docs.aspose.com/slides/net/installation/) 26.11 or later. It creates visible value labels, selects ellipses for the first series and then makes its first label rectangular.
```csharp
using System.Drawing;
using Aspose.Slides;
using Aspose.Slides.Charts;
using Aspose.Slides.Export;
using var presentation = new Presentation();
var chart = presentation.Slides[0].Shapes.AddChart(ChartType.ClusteredColumn, 50, 50, 600, 350);
var labels = chart.ChartData.Series[0].Labels;
labels.DefaultDataLabelFormat.ShowValue = true;
labels.DefaultLabelShapeType = ShapeType.Ellipse;
labels[0].LabelShapeType = ShapeType.Rectangle;
foreach (var label in labels)
{
var format = label.DataLabelFormat.Format;
format.Fill.FillType = FillType.Solid;
format.Fill.SolidFillColor.Color = Color.LightYellow;
format.Line.FillFormat.FillType = FillType.Solid;
format.Line.FillFormat.SolidFillColor.Color = Color.DarkBlue;
}
presentation.Save("label-shapes.pptx", SaveFormat.Pptx);
// Reset the explicit shape choices on all current labels.
labels.DefaultLabelShapeType = ShapeType.NotDefined;
presentation.Save("label-shapes-reset.pptx", SaveFormat.Pptx);
```
Assigning the collection shape again also replaces earlier individual shape choices. [NotDefined](https://reference.aspose.com/slides/net/aspose.slides/shapetype/) clears the explicit shape selection; it does not hide the labels or clear their other formatting. Set the desired shapes after populating the series rather than assuming that points added later inherit an earlier assignment. Rectangle and Ellipse are used here; inspect the rendered result when choosing other shape types.
## **FAQ**
**How can I prevent data labels from overlapping on dense charts?**
Combine automatic label placement, leader lines, and reduced font size; if necessary, hide some fields (for example, the category) or show labels only for extreme values or key points.
**How can I disable labels only for zero, negative, or empty values?**
Filter data points before enabling labels and turn off display for values of 0, negative values, or missing values according to a defined rule.
**How can I ensure a consistent label style when exporting to PDF/images?**
Explicitly set the font family and size and verify that the font is available in the rendering environment to avoid fallback.
## Related features
- [Format chart data labels](https://docs.aspose.com/slides/features/chart-data-labels/)
# Manage Chart Data Markers in Presentations in .NET
> Learn how to customize chart data markers in Aspose.Slides for .NET, boosting presentation impact across PPT and PPTX formats with clear C# code examples.
Source: https://docs.aspose.com/slides/net/chart-data-marker/
Updated: 2026-08-05
## **Overview**
This article explains how to work with chart data markers in Aspose.Slides. It shows how to create a chart, access a series and its data points, apply picture fills to markers at the data-point level, adjust marker size, and save the updated presentation. It also notes that standard marker shapes are available through the `MarkerStyleType` enumeration and that marker appearance is preserved when exporting charts to raster formats or SVG.
## **Set Chart Marker Options**
The markers can be set on chart data points inside particular series. In order to set chart marker options. Please follow the steps below:
- Instantiate [Presentation](https://reference.aspose.com/slides/net/aspose.slides/presentation) class.
- Creating the default chart.
- Set the picture.
- Take first chart series.
- Add new data point.
- Write presentation to disk.
In the example given below, we have set the chart marker options on data points level.
```c#
using Aspose.Slides;
using Aspose.Slides.Charts;
using Aspose.Slides.Export;
// Create an instance of Presentation class
using Presentation presentation = new Presentation();
ISlide slide = presentation.Slides[0];
// Creating the default chart
IChart chart = slide.Shapes.AddChart(ChartType.LineWithMarkers, 0, 0, 400, 400);
// Getting the default chart data worksheet index
int defaultWorksheetIndex = 0;
// Getting the chart data worksheet
IChartDataWorkbook fact = chart.ChartData.ChartDataWorkbook;
// Delete demo series
chart.ChartData.Series.Clear();
// Add new series
chart.ChartData.Series.Add(fact.GetCell(defaultWorksheetIndex, 0, 1, "Series 1"), chart.Type);
// Set the picture
using IImage image1 = Images.FromFile("aspose-logo.jpg");
IPPImage imgx1 = presentation.Images.AddImage(image1);
// Set the picture
using IImage image2 = Images.FromFile("Tulips.jpg");
IPPImage imgx2 = presentation.Images.AddImage(image2);
// Take first chart series
IChartSeries series = chart.ChartData.Series[0];
// Add new point (1:3) there.
IChartDataPoint point = series.DataPoints.AddDataPointForLineSeries(fact.GetCell(defaultWorksheetIndex, 1, 1, (double)4.5));
point.Marker.Format.Fill.FillType = FillType.Picture;
point.Marker.Format.Fill.PictureFillFormat.Picture.Image = imgx1;
point = series.DataPoints.AddDataPointForLineSeries(fact.GetCell(defaultWorksheetIndex, 2, 1, (double)2.5));
point.Marker.Format.Fill.FillType = FillType.Picture;
point.Marker.Format.Fill.PictureFillFormat.Picture.Image = imgx2;
point = series.DataPoints.AddDataPointForLineSeries(fact.GetCell(defaultWorksheetIndex, 3, 1, (double)3.5));
point.Marker.Format.Fill.FillType = FillType.Picture;
point.Marker.Format.Fill.PictureFillFormat.Picture.Image = imgx1;
point = series.DataPoints.AddDataPointForLineSeries(fact.GetCell(defaultWorksheetIndex, 4, 1, (double)4.5));
point.Marker.Format.Fill.FillType = FillType.Picture;
point.Marker.Format.Fill.PictureFillFormat.Picture.Image = imgx2;
// Changing the chart series marker
series.Marker.Size = 15;
// Write presentation to disk
presentation.Save("MarkOptions_out.pptx", SaveFormat.Pptx);
```
## **FAQ**
### Which marker shapes are available out of the box?
Standard shapes are available (circle, square, diamond, triangle, etc.); the list is defined by the [MarkerStyleType](https://reference.aspose.com/slides/net/aspose.slides.charts/markerstyletype/) enumeration. If you need a non-standard shape, use a marker with a picture fill to emulate custom visuals.
### Are markers preserved when exporting a chart to an image or SVG?
Yes. When rendering charts to [raster formats](https://docs.aspose.com/slides/net/convert-powerpoint-to-png/) or saving [shapes as SVG](https://docs.aspose.com/slides/net/render-a-slide-as-an-svg-image/), markers retain their appearance and settings, including size, fill, and outline.
# Customize Chart Data Tables in Presentations in .NET
> Customize chart data table fonts, borders, and legend keys in PowerPoint presentations using Aspose.Slides for .NET and C#.
Source: https://docs.aspose.com/slides/net/chart-data-table/
Updated: 2026-09-24
## **Overview**
Aspose.Slides for .NET lets you display a chart's data table and customize its text formatting, borders, and legend keys. This article explains how to enable the table, format its text, control each type of border, and show or hide legend keys. The examples save the configured charts in PPTX files.
## **Set Font Properties**
To display a chart's data table, set [HasDataTable](https://reference.aspose.com/slides/net/aspose.slides.charts/chart/hasdatatable/) to `true`. Use [ChartDataTable](https://reference.aspose.com/slides/net/aspose.slides.charts/chart/chartdatatable/) to access the table and configure its text formatting.
1. Load the presentation using the [Presentation](https://reference.aspose.com/slides/net/aspose.slides/presentation/) class.
1. Add a clustered column chart to the first slide.
1. Enable the chart's data table.
1. Enable bold text with [FontBold](https://reference.aspose.com/slides/net/aspose.slides/baseportionformat/fontbold/) and set [FontHeight](https://reference.aspose.com/slides/net/aspose.slides/baseportionformat/fontheight/) to `20` for 20-point text.
1. Save the modified presentation.
The following example requires `test.pptx` in the working directory with at least one slide. It adds a chart with default data at position (50, 50), with a width of 600 points and a height of 400 points. The saved `output.pptx` contains the chart with its data table enabled and the specified font settings applied.
```cs
using Aspose.Slides;
using Aspose.Slides.Charts;
using Aspose.Slides.Export;
using var presentation = new Presentation("test.pptx");
var slide = presentation.Slides[0];
var chart = slide.Shapes.AddChart(ChartType.ClusteredColumn, 50, 50, 600, 400);
chart.HasDataTable = true;
var portionFormat = chart.ChartDataTable.TextFormat.PortionFormat;
portionFormat.FontBold = NullableBool.True;
portionFormat.FontHeight = 20;
presentation.Save("output.pptx", SaveFormat.Pptx);
```
## **Customize Data Table Borders**
Enable the table with [IChart.HasDataTable](https://reference.aspose.com/slides/net/aspose.slides.charts/ichart/hasdatatable/) and access it through [IChart.ChartDataTable](https://reference.aspose.com/slides/net/aspose.slides.charts/ichart/chartdatatable/). You can control three types of borders independently:
- [HasBorderHorizontal](https://reference.aspose.com/slides/net/aspose.slides.charts/idatatable/hasborderhorizontal/) controls horizontal cell borders.
- [HasBorderVertical](https://reference.aspose.com/slides/net/aspose.slides.charts/idatatable/hasbordervertical/) controls vertical cell borders.
- [HasBorderOutline](https://reference.aspose.com/slides/net/aspose.slides.charts/idatatable/hasborderoutline/) controls the outer border of the table.
Set each property to `true` to display its borders or `false` to hide them. The following example creates a clustered column chart with default data, displays horizontal borders and the outer border, and hides vertical borders. It requires no input file. The chart's position and size are specified in points.
```cs
using Aspose.Slides;
using Aspose.Slides.Charts;
using Aspose.Slides.Export;
using var presentation = new Presentation();
var slide = presentation.Slides[0];
var chart = slide.Shapes.AddChart(ChartType.ClusteredColumn, 50, 50, 600, 400);
chart.HasDataTable = true;
var dataTable = chart.ChartDataTable;
dataTable.HasBorderHorizontal = true;
dataTable.HasBorderVertical = false;
dataTable.HasBorderOutline = true;
presentation.Save("data-table-borders.pptx", SaveFormat.Pptx);
```
The comparison below uses the same chart data and legend key setting in all four cases. Starting with all borders enabled, each remaining variant disables just one border property. The lower-left variant matches the border settings in the example.
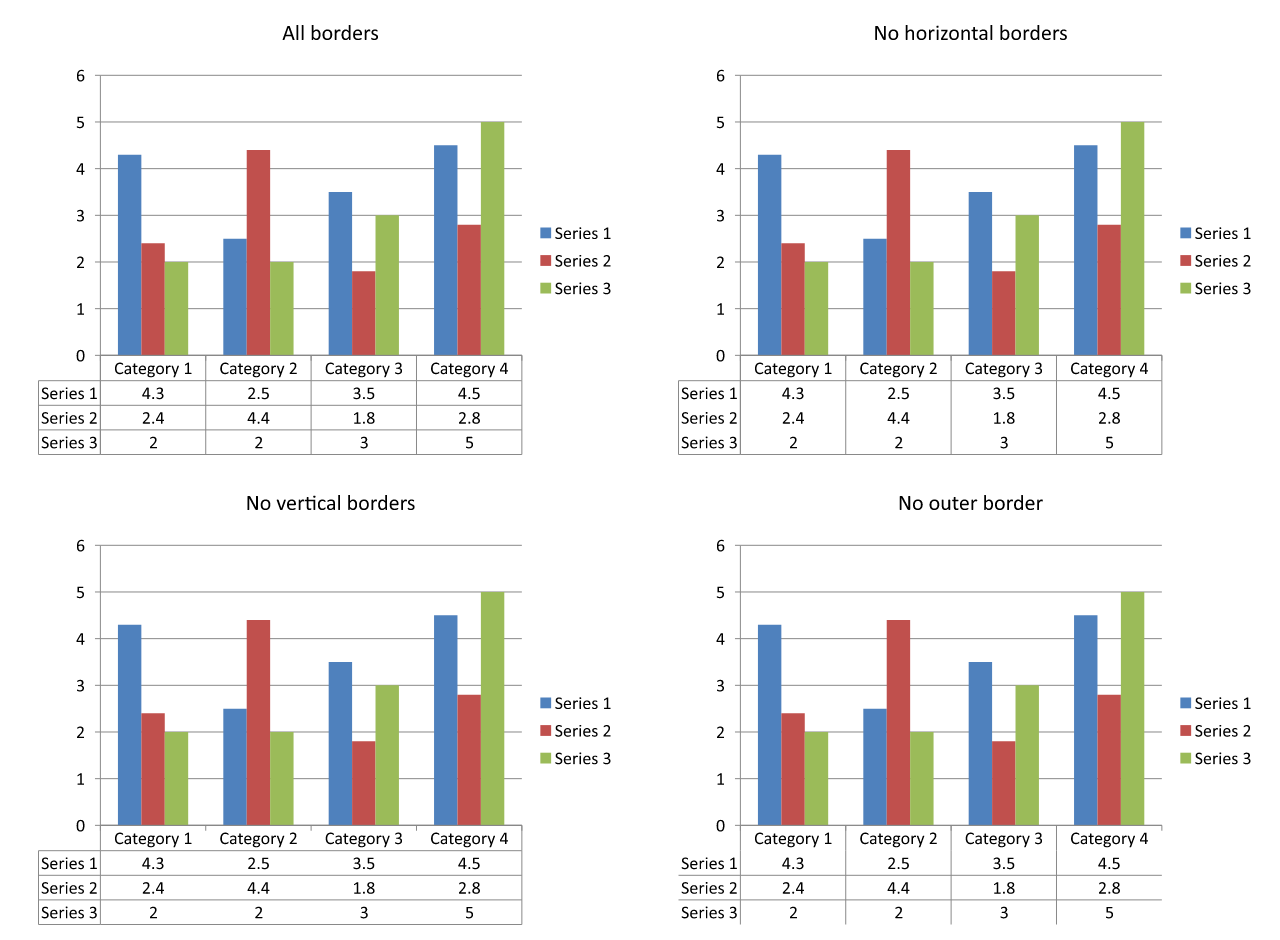
## **Show or Hide Legend Keys**
Legend keys are small colored markers beside the series names in the data table. They help readers match each table row to a chart series. Set [ShowLegendKey](https://reference.aspose.com/slides/net/aspose.slides.charts/idatatable/showlegendkey/) to `true` to show these markers or `false` to hide them.
The chart's separate legend is controlled by [IChart.HasLegend](https://reference.aspose.com/slides/net/aspose.slides.charts/ichart/haslegend/). These settings are independent: hiding the separate legend does not hide the keys inside the data table, and hiding the table's keys does not hide the separate legend.
The following example creates a chart with default data, enables its data table, and shows legend keys inside it while hiding the separate legend. All table borders are explicitly enabled. No input presentation is required. To hide only the table's keys, change `dataTable.ShowLegendKey` to `false`.
```cs
using Aspose.Slides;
using Aspose.Slides.Charts;
using Aspose.Slides.Export;
using var presentation = new Presentation();
var slide = presentation.Slides[0];
var chart = slide.Shapes.AddChart(ChartType.ClusteredColumn, 50, 50, 600, 400);
chart.HasDataTable = true;
chart.HasLegend = false;
var dataTable = chart.ChartDataTable;
dataTable.HasBorderHorizontal = true;
dataTable.HasBorderVertical = true;
dataTable.HasBorderOutline = true;
dataTable.ShowLegendKey = true;
presentation.Save("data-table-legend-keys.pptx", SaveFormat.Pptx);
```
The comparison below shows the same table with legend keys enabled and disabled. All borders remain enabled, and the separate chart legend is hidden in both cases.
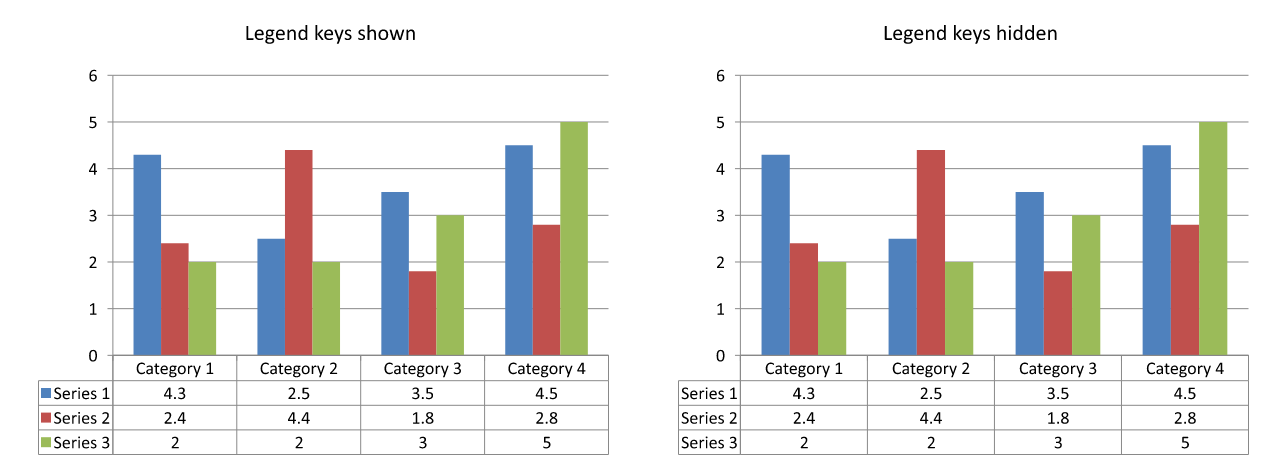
## **FAQ**
**Can I show legend keys in a chart's data table?**
Yes. Set [ShowLegendKey](https://reference.aspose.com/slides/net/aspose.slides.charts/datatable/showlegendkey/) to `true` to display legend keys or to `false` to hide them.
**Will the data table be preserved when exporting the presentation to PDF, HTML, or images?**
Yes. Aspose.Slides renders the chart and its displayed data table as part of the slide when exporting to [PDF](https://docs.aspose.com/slides/net/convert-powerpoint-to-pdf/), [HTML](https://docs.aspose.com/slides/net/convert-powerpoint-to-html/), or [images](https://docs.aspose.com/slides/net/convert-powerpoint-to-png/).
**Can I work with data tables in charts loaded from a template?**
Yes. For a chart loaded from an existing presentation or template, use [HasDataTable](https://reference.aspose.com/slides/net/aspose.slides.charts/chart/hasdatatable/) to check or change whether its data table is displayed.
**How can I find charts that have a data table enabled?**
Iterate through the shapes on each slide, identify the charts, and check their [HasDataTable](https://reference.aspose.com/slides/net/aspose.slides.charts/chart/hasdatatable/) property. A value of `true` indicates that the data table is enabled.
# Customize Presentation Chart Entities in .NET
> Understand chart entities in Aspose.Slides for .NET and learn to manage series, categories, data points and axes in PowerPoint PPT and PPTX using C#.
Source: https://docs.aspose.com/slides/net/chart-entities/
Updated: 2025-11-13
---
lastmod: 2025-11-13T18:56:36+04:00
title: Customize Presentation Chart Entities in .NET
linktitle: Chart Entities
type: docs
weight: 30
url: /net/chart-entities/
keywords:
- callout
- axis
- data label
- data marker
- data table
- legend
- plot area
- data series
- error bar
- trend line
- PowerPoint
- presentation
- .NET
- C#
- Aspose.Slides
description: "Understand chart entities in Aspose.Slides for .NET and learn to manage series, categories, data points and axes in PowerPoint PPT and PPTX using C#."
---
## Related articles
- [Create and Customize PowerPoint Charts in .NET](https://docs.aspose.com/slides/net/powerpoint-charts/)
- [Format Presentation Charts in .NET](https://docs.aspose.com/slides/net/chart-formatting/)
# Format Presentation Charts in .NET
> Learn chart formatting in Aspose.Slides for .NET and elevate your PowerPoint presentation with custom axes, fonts, number formats, and rounded chart borders.
Source: https://docs.aspose.com/slides/net/chart-formatting/
Updated: 2026-11-09
## **Overview**
This article explains how to format charts in PowerPoint presentations by using Aspose.Slides. It shows how to customize key chart elements such as axes, grid lines, titles, legends, the plot area, and wall fills to improve the appearance and readability of chart data.
It also demonstrates how to set font properties for chart text, apply preset numeric formats to chart data, and enable rounded corners for the chart area. Together, these examples show how to control both the visual style and data presentation of charts in a presentation.
For separate fills and outlines on rising and falling intervals, see the [stock chart example](https://docs.aspose.com/slides/net/create-chart/#create-stock-charts).
## **Format Chart Entities**
Use [IChart](https://reference.aspose.com/slides/net/aspose.slides.charts/ichart/) to format chart titles, axes, grid lines, legends, and the plot area. This example creates a line chart with markers and default data, then applies separate text and line styles to its value and category axes. Font sizes and line widths are specified in points; category labels are rotated by 45 degrees.
The value axis uses [NumberFormat](https://reference.aspose.com/slides/net/aspose.slides.charts/iaxis/numberformat/) independently of the source cells. Its scale runs from -2 to 15, with major intervals of 2 and minor intervals of 0.5. The example also combines percentage formatting with [DisplayUnit](https://reference.aspose.com/slides/net/aspose.slides.charts/iaxis/displayunit/) set to thousands, so adapt these settings to the meaning and magnitude of your data. The legend stays outside the plot area because [Overlay](https://reference.aspose.com/slides/net/aspose.slides.charts/ilegend/overlay/) is disabled. Back-wall and floor fills are configured through [BackWall](https://reference.aspose.com/slides/net/aspose.slides.charts/ichart/backwall/) and [Floor](https://reference.aspose.com/slides/net/aspose.slides.charts/ichart/floor/), but these surfaces are only visible in 3D charts.
```csharp
using System.Drawing;
using Aspose.Slides;
using Aspose.Slides.Charts;
using Aspose.Slides.Export;
using var presentation = new Presentation();
var slide = presentation.Slides[0];
var chart = slide.Shapes.AddChart(ChartType.LineWithMarkers, 50, 50, 500, 400);
chart.HasTitle = true;
chart.ChartTitle.AddTextFrameForOverriding("");
var chartTitle = chart.ChartTitle.TextFrameForOverriding.Paragraphs[0].Portions[0];
chartTitle.Text = "Sample Chart";
chartTitle.PortionFormat.FillFormat.FillType = FillType.Solid;
chartTitle.PortionFormat.FillFormat.SolidFillColor.Color = Color.Gray;
chartTitle.PortionFormat.FontHeight = 20;
chartTitle.PortionFormat.FontBold = NullableBool.True;
chartTitle.PortionFormat.FontItalic = NullableBool.True;
chart.Axes.VerticalAxis.MajorGridLinesFormat.Line.FillFormat.FillType = FillType.Solid;
chart.Axes.VerticalAxis.MajorGridLinesFormat.Line.FillFormat.SolidFillColor.Color = Color.Blue;
chart.Axes.VerticalAxis.MajorGridLinesFormat.Line.Width = 5;
chart.Axes.VerticalAxis.MajorGridLinesFormat.Line.DashStyle = LineDashStyle.DashDot;
chart.Axes.VerticalAxis.MinorGridLinesFormat.Line.FillFormat.FillType = FillType.Solid;
chart.Axes.VerticalAxis.MinorGridLinesFormat.Line.FillFormat.SolidFillColor.Color = Color.Red;
chart.Axes.VerticalAxis.MinorGridLinesFormat.Line.Width = 3;
chart.Axes.VerticalAxis.IsNumberFormatLinkedToSource = false;
chart.Axes.VerticalAxis.DisplayUnit = DisplayUnitType.Thousands;
chart.Axes.VerticalAxis.NumberFormat = "0.0%";
chart.Axes.VerticalAxis.IsAutomaticMajorUnit = false;
chart.Axes.VerticalAxis.IsAutomaticMaxValue = false;
chart.Axes.VerticalAxis.IsAutomaticMinorUnit = false;
chart.Axes.VerticalAxis.IsAutomaticMinValue = false;
chart.Axes.VerticalAxis.MaxValue = 15f;
chart.Axes.VerticalAxis.MinValue = -2f;
chart.Axes.VerticalAxis.MinorUnit = 0.5f;
chart.Axes.VerticalAxis.MajorUnit = 2.0f;
var valueAxisText = chart.Axes.VerticalAxis.TextFormat.PortionFormat;
valueAxisText.FontBold = NullableBool.True;
valueAxisText.FontHeight = 16;
valueAxisText.FontItalic = NullableBool.True;
valueAxisText.FillFormat.FillType = FillType.Solid;
valueAxisText.FillFormat.SolidFillColor.Color = Color.DarkGreen;
valueAxisText.LatinFont = new FontData("Times New Roman");
chart.Axes.VerticalAxis.HasTitle = true;
chart.Axes.VerticalAxis.Title.AddTextFrameForOverriding("");
var valueAxisTitle = chart.Axes.VerticalAxis.Title.TextFrameForOverriding.Paragraphs[0].Portions[0];
valueAxisTitle.Text = "Primary Axis";
valueAxisTitle.PortionFormat.FillFormat.FillType = FillType.Solid;
valueAxisTitle.PortionFormat.FillFormat.SolidFillColor.Color = Color.Gray;
valueAxisTitle.PortionFormat.FontHeight = 20;
valueAxisTitle.PortionFormat.FontBold = NullableBool.True;
valueAxisTitle.PortionFormat.FontItalic = NullableBool.True;
chart.Axes.HorizontalAxis.MajorGridLinesFormat.Line.FillFormat.FillType = FillType.Solid;
chart.Axes.HorizontalAxis.MajorGridLinesFormat.Line.FillFormat.SolidFillColor.Color = Color.Green;
chart.Axes.HorizontalAxis.MajorGridLinesFormat.Line.Width = 5;
chart.Axes.HorizontalAxis.MinorGridLinesFormat.Line.FillFormat.FillType = FillType.Solid;
chart.Axes.HorizontalAxis.MinorGridLinesFormat.Line.FillFormat.SolidFillColor.Color = Color.Yellow;
chart.Axes.HorizontalAxis.MinorGridLinesFormat.Line.Width = 3;
var categoryAxisText = chart.Axes.HorizontalAxis.TextFormat.PortionFormat;
categoryAxisText.FontBold = NullableBool.True;
categoryAxisText.FontHeight = 16;
categoryAxisText.FontItalic = NullableBool.True;
categoryAxisText.FillFormat.FillType = FillType.Solid;
categoryAxisText.FillFormat.SolidFillColor.Color = Color.Blue;
categoryAxisText.LatinFont = new FontData("Arial");
chart.Axes.HorizontalAxis.HasTitle = true;
chart.Axes.HorizontalAxis.Title.AddTextFrameForOverriding("");
var categoryAxisTitle = chart.Axes.HorizontalAxis.Title.TextFrameForOverriding.Paragraphs[0].Portions[0];
categoryAxisTitle.Text = "Sample Category";
categoryAxisTitle.PortionFormat.FillFormat.FillType = FillType.Solid;
categoryAxisTitle.PortionFormat.FillFormat.SolidFillColor.Color = Color.Gray;
categoryAxisTitle.PortionFormat.FontHeight = 20;
categoryAxisTitle.PortionFormat.FontBold = NullableBool.True;
categoryAxisTitle.PortionFormat.FontItalic = NullableBool.True;
chart.Axes.HorizontalAxis.TickLabelPosition = TickLabelPositionType.Low;
chart.Axes.HorizontalAxis.TickLabelRotationAngle = 45;
var legendText = chart.Legend.TextFormat.PortionFormat;
legendText.FontBold = NullableBool.True;
legendText.FontHeight = 16;
legendText.FontItalic = NullableBool.True;
legendText.FillFormat.FillType = FillType.Solid;
legendText.FillFormat.SolidFillColor.Color = Color.DarkRed;
chart.Legend.Overlay = false;
chart.BackWall.Thickness = 1;
chart.BackWall.Format.Fill.FillType = FillType.Solid;
chart.BackWall.Format.Fill.SolidFillColor.Color = Color.Orange;
chart.Floor.Format.Fill.FillType = FillType.Solid;
chart.Floor.Format.Fill.SolidFillColor.Color = Color.Red;
chart.PlotArea.Format.Fill.FillType = FillType.Solid;
chart.PlotArea.Format.Fill.SolidFillColor.Color = Color.LightCyan;
presentation.Save("FormattedChart_out.pptx", SaveFormat.Pptx);
```
## **Set Font Properties for a Chart**
Set the default font size for chart text through [Chart.TextFormat](https://reference.aspose.com/slides/net/aspose.slides.charts/chart/textformat/). The example creates a clustered column chart with a 20-point font and enables value labels for the first series through [ShowValue](https://reference.aspose.com/slides/net/aspose.slides.charts/idatalabelformat/showvalue/). Text elements with their own explicit font settings can override the chart default.
```csharp
using Aspose.Slides;
using Aspose.Slides.Charts;
using Aspose.Slides.Export;
using var presentation = new Presentation();
var slide = presentation.Slides[0];
var chart = slide.Shapes.AddChart(ChartType.ClusteredColumn, 100, 100, 500, 400);
chart.TextFormat.PortionFormat.FontHeight = 20;
chart.ChartData.Series[0].Labels.DefaultDataLabelFormat.ShowValue = true;
presentation.Save("FontPropertiesForChart.pptx", SaveFormat.Pptx);
```
## **Set the Numeric Format**
Use [IChartDataCell.PresetNumberFormat](https://reference.aspose.com/slides/net/aspose.slides.charts/ichartdatacell/presetnumberformat/) to apply a built-in number format to chart workbook cells. This example creates a clustered column chart with default, cell-backed data and applies format index 10 (`0.00%`) to each series value cell. This changes how the values are displayed in the workbook without changing the underlying numbers; for example, 0.25 is displayed as 25.00%. Axis and data-label formats can be configured separately.
```csharp
using Aspose.Slides;
using Aspose.Slides.Charts;
using Aspose.Slides.Export;
using var presentation = new Presentation();
var slide = presentation.Slides[0];
var chart = slide.Shapes.AddChart(ChartType.ClusteredColumn, 50, 50, 500, 400);
var series = chart.ChartData.Series;
foreach (var chartSeries in series)
{
foreach (var dataPoint in chartSeries.DataPoints)
{
dataPoint.Value.AsCell.PresetNumberFormat = 10; //0.00%
}
}
presentation.Save("PresetNumberFormat_out.pptx", SaveFormat.Pptx);
```
The following table lists built-in number format indices with representative Excel formats for the English (United States) locale. The exact format strings and their display can vary by application and locale, particularly for currency and dates. Some Excel formats also differ from the defaults in the OOXML standard, as described in [Microsoft's number format implementation notes](https://learn.microsoft.com/en-us/openspecs/office_standards/ms-oi29500/17d11129-219b-4e2c-88db-45844d21e528).
| Index | Format |
| --- | --- |
| 0 | `General` |
| 1 | `0` |
| 2 | `0.00` |
| 3 | `#,##0` |
| 4 | `#,##0.00` |
| 5 | `"$"#,##0_);("$"#,##0)` |
| 6 | `"$"#,##0_);[Red]("$"#,##0)` |
| 7 | `"$"#,##0.00_);("$"#,##0.00)` |
| 8 | `"$"#,##0.00_);[Red]("$"#,##0.00)` |
| 9 | `0%` |
| 10 | `0.00%` |
| 11 | `0.00E+00` |
| 12 | `# ?/?` |
| 13 | `# ??/??` |
| 14 | `m/d/yyyy` |
| 15 | `d-mmm-yy` |
| 16 | `d-mmm` |
| 17 | `mmm-yy` |
| 18 | `h:mm AM/PM` |
| 19 | `h:mm:ss AM/PM` |
| 20 | `h:mm` |
| 21 | `h:mm:ss` |
| 22 | `m/d/yyyy h:mm` |
| 37 | `#,##0_);(#,##0)` |
| 38 | `#,##0_);[Red](#,##0)` |
| 39 | `#,##0.00_);(#,##0.00)` |
| 40 | `#,##0.00_);[Red](#,##0.00)` |
| 41 | `_(* #,##0_);_(* (#,##0);_(* "-"_);_(@_)` |
| 42 | `_("$"* #,##0_);_("$"* (#,##0);_("$"* "-"_);_(@_)` |
| 43 | `_(* #,##0.00_);_(* (#,##0.00);_(* "-"??_);_(@_)` |
| 44 | `_("$"* #,##0.00_);_("$"* (#,##0.00);_("$"* "-"??_);_(@_)` |
| 45 | `mm:ss` |
| 46 | `[h]:mm:ss` |
| 47 | `mm:ss.0` |
| 48 | `##0.0E+0` |
| 49 | `@` |
## **Set Chart Area Rounded Borders**
Enable [IChart.HasRoundedCorners](https://reference.aspose.com/slides/net/aspose.slides.charts/ichart/hasroundedcorners/) to round the corners of the chart area. The example creates a clustered column chart and uses [LineFormat](https://reference.aspose.com/slides/net/aspose.slides/ishape/lineformat/) to give its outline a solid gray color and a single-line style before saving the presentation.
```csharp
using System.Drawing;
using Aspose.Slides;
using Aspose.Slides.Charts;
using Aspose.Slides.Export;
using var presentation = new Presentation();
var slide = presentation.Slides[0];
var chart = slide.Shapes.AddChart(ChartType.ClusteredColumn, 20, 100, 600, 400);
chart.LineFormat.FillFormat.FillType = FillType.Solid;
chart.LineFormat.FillFormat.SolidFillColor.Color = Color.Gray;
chart.LineFormat.Style = LineStyle.Single;
chart.HasRoundedCorners = true;
presentation.Save("out.pptx", SaveFormat.Pptx);
```
## **Edit Existing Chart Annotations**
A chart can contain custom shapes, such as a text annotation explaining the status of a report. Access these shapes through [IChart.UserShapes](https://reference.aspose.com/slides/net/aspose.slides.charts/ichart/usershapes/), also listed under [Chart.UserShapes](https://reference.aspose.com/slides/net/aspose.slides.charts/chart/usershapes/) in the Chart API Reference. Its [Shapes](https://reference.aspose.com/slides/net/aspose.slides/igroupshape/shapes/) collection contains the chart-owned shapes.
An ordinary text box placed over a chart belongs to the slide, even if it looks like part of the chart. Iterating through [Slide.Shapes](https://reference.aspose.com/slides/net/aspose.slides/baseslide/shapes/) finds the chart and ordinary slide shapes, but does not enumerate the individual shapes inside the chart. Chart titles and data labels are separate chart elements, not custom annotations in this collection.
Download [chart-annotations.pptx](https://docs.aspose.com/slides/net/chart-formatting/chart-annotations.pptx) and place it in the application's working directory. Its first slide contains a chart with an ungrouped annotation reading "Preliminary results", a chart-owned line, and an ordinary slide text box reading "Slide overlay". The example finds the first chart on that slide and changes the annotation to "Final results" when the report is ready to publish. It checks for an empty collection and only edits an [IAutoShape](https://reference.aspose.com/slides/net/aspose.slides/iautoshape/) with a non-null [TextFrame](https://reference.aspose.com/slides/net/aspose.slides/iautoshape/textframe/) and the expected text.
```csharp
using System;
using System.Linq;
using Aspose.Slides;
using Aspose.Slides.Charts;
using Aspose.Slides.Export;
using var presentation = new Presentation("chart-annotations.pptx");
var slide = presentation.Slides[0];
var chart = slide.Shapes.OfType().FirstOrDefault();
if (chart == null || chart.UserShapes.Shapes.Count == 0)
{
Console.WriteLine("No chart or chart-owned shapes found.");
return;
}
var updated = false;
foreach (var shape in chart.UserShapes.Shapes)
{
if (shape is IAutoShape annotation &&
annotation.TextFrame != null &&
annotation.TextFrame.Text == "Preliminary results")
{
annotation.TextFrame.Text = "Final results";
updated = true;
break;
}
}
if (updated)
{
presentation.Save("chart-annotations-updated.pptx", SaveFormat.Pptx);
}
else
{
Console.WriteLine("No matching text annotation found.");
}
```
The line and the slide text box remain unchanged. The following images show the input and the saved, reopened result:
| Before editing | After editing |
| --- | --- |
| 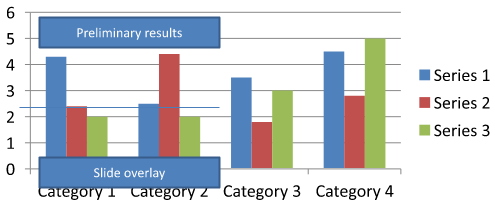 | 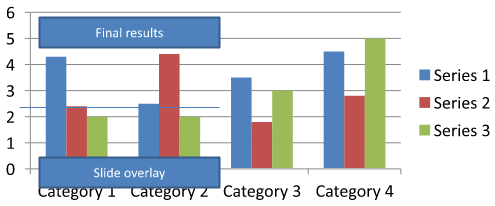 |
The example inspects only the top-level chart-owned shapes. If an annotation is inside an [IGroupShape](https://reference.aspose.com/slides/net/aspose.slides/igroupshape/), inspect that group's [Shapes](https://reference.aspose.com/slides/net/aspose.slides/igroupshape/shapes/) collection as well. Repeat this recursively for nested groups, applying the same text checks to their child shapes. A group itself is a container; do not treat it as a text box.
## **FAQ**
**Can I set semi-transparent fills for columns/areas while keeping the border opaque?**
Yes. Fill transparency and the outline are configured separately. This is useful for improving the readability of the grid and data in dense visualizations.
**How can I deal with data labels when they overlap?**
Reduce the font size, disable nonessential label components (for example, categories), adjust the label position, show labels only for selected points if necessary, or switch the format to "value + legend".
**Can I apply gradient or pattern fills to series?**
Yes. Series support solid, gradient, and pattern fills. In practice, use gradients sparingly and avoid combinations that reduce contrast with the grid and text.
## Related articles
- [Customize Chart Axes in Presentations in .NET](https://docs.aspose.com/slides/net/chart-axis/)
- [Customize Presentation Chart Entities in .NET](https://docs.aspose.com/slides/net/chart-entities/)
# Customize Chart Legends in Presentations in .NET
> Customize chart legends with Aspose.Slides for .NET to optimize PowerPoint presentations with tailored legend formatting.
Source: https://docs.aspose.com/slides/net/chart-legend/
Updated: 2026-09-30
## **Overview**
Aspose.Slides for .NET provides options for customizing chart legends in PowerPoint presentations. This article shows how to position and size a legend, set the font size for the whole legend, format an individual legend entry, and hide or restore selected entries.
The FAQ covers related behaviors, including reserving space for the legend, displaying multiline labels, and inheriting formatting from the presentation theme.
## **Legend Positioning**
Use the legend's [X](https://reference.aspose.com/slides/net/aspose.slides.charts/legend/x/), [Y](https://reference.aspose.com/slides/net/aspose.slides.charts/legend/y/), [Width](https://reference.aspose.com/slides/net/aspose.slides.charts/legend/width/), and [Height](https://reference.aspose.com/slides/net/aspose.slides.charts/legend/height/) properties to specify its position and size as fractions of the chart's dimensions.
This example creates a presentation and adds a clustered column chart with default data to the first slide. Dividing the desired legend offsets and dimensions by the chart's width and height converts them to relative values: the legend is offset by 50 points from the chart's top-left corner and sized to 100 by 100 points.
```cs
using Aspose.Slides;
using Aspose.Slides.Charts;
using Aspose.Slides.Export;
using var presentation = new Presentation();
var slide = presentation.Slides[0];
var chart = slide.Shapes.AddChart(ChartType.ClusteredColumn, 50, 50, 500, 500);
// Express the legend's position and size relative to the chart.
chart.Legend.X = 50 / chart.Width;
chart.Legend.Y = 50 / chart.Height;
chart.Legend.Width = 100 / chart.Width;
chart.Legend.Height = 100 / chart.Height;
presentation.Save("legend_position.pptx", SaveFormat.Pptx);
```
## **Set the Font Size of a Legend**
Use the legend's [TextFormat](https://reference.aspose.com/slides/net/aspose.slides.charts/legend/textformat/) to access its text formatting and set [FontHeight](https://reference.aspose.com/slides/net/aspose.slides/baseportionformat/fontheight/) in points.
This example creates a chart with default data and sets the legend text to 20 points. It also disables automatic bounds for the vertical axis and sets its range to -5 through 10.
```cs
using Aspose.Slides;
using Aspose.Slides.Charts;
using Aspose.Slides.Export;
using var presentation = new Presentation();
var slide = presentation.Slides[0];
var chart = slide.Shapes.AddChart(ChartType.ClusteredColumn, 50, 50, 600, 400);
chart.Legend.TextFormat.PortionFormat.FontHeight = 20;
chart.Axes.VerticalAxis.IsAutomaticMinValue = false;
chart.Axes.VerticalAxis.MinValue = -5;
chart.Axes.VerticalAxis.IsAutomaticMaxValue = false;
chart.Axes.VerticalAxis.MaxValue = 10;
presentation.Save("legend_font_size.pptx", SaveFormat.Pptx);
```
## **Set the Font Size of an Individual Legend Entry**
Use the legend's [Entries](https://reference.aspose.com/slides/net/aspose.slides.charts/legend/entries/) collection to access formatting for a specific entry. Entry indices are zero-based, so index `1` refers to the second entry.
This example creates a clustered column chart whose default data includes at least two series. It formats the second legend entry with bold, italic, and 20-point blue text.
```cs
using System.Drawing;
using Aspose.Slides;
using Aspose.Slides.Charts;
using Aspose.Slides.Export;
using var presentation = new Presentation();
var slide = presentation.Slides[0];
var chart = slide.Shapes.AddChart(ChartType.ClusteredColumn, 50, 50, 600, 400);
var textFormat = chart.Legend.Entries[1].TextFormat;
textFormat.PortionFormat.FontBold = NullableBool.True;
textFormat.PortionFormat.FontHeight = 20;
textFormat.PortionFormat.FontItalic = NullableBool.True;
textFormat.PortionFormat.FillFormat.FillType = FillType.Solid;
textFormat.PortionFormat.FillFormat.SolidFillColor.Color = Color.Blue;
presentation.Save("legend_entry_format.pptx", SaveFormat.Pptx);
```
## **Hide Individual Legend Entries**
To exclude an auxiliary series from the legend while keeping its data visible, set [ILegendEntryProperties.Hide](https://reference.aspose.com/slides/net/aspose.slides.charts/ilegendentryproperties/hide/) to `true` through [IChartSeries.RelatedLegendEntry](https://reference.aspose.com/slides/net/aspose.slides.charts/ichartseries/relatedlegendentry/). This hides only the selected legend entry; it does not remove the series or its data points. Setting [IChart.HasLegend](https://reference.aspose.com/slides/net/aspose.slides.charts/ichart/haslegend/) to `false`, in contrast, hides the entire legend.
The example below creates a clustered column chart with multiple series using default data. It hides the second series' legend entry (index `1`) and saves the presentation. It then restores the entry by setting `Hide` to `false` and saves a second copy. The columns remain visible in both files.
```cs
using Aspose.Slides;
using Aspose.Slides.Charts;
using Aspose.Slides.Export;
using var presentation = new Presentation();
var slide = presentation.Slides[0];
var chart = slide.Shapes.AddChart(ChartType.ClusteredColumn, 50, 50, 600, 200);
chart.HasLegend = true;
var legendEntry = chart.ChartData.Series[1].RelatedLegendEntry;
legendEntry.Hide = true;
presentation.Save("hidden_legend_entry.pptx", SaveFormat.Pptx);
// Restore the same entry without changing the chart data.
legendEntry.Hide = false;
presentation.Save("restored_legend_entry.pptx", SaveFormat.Pptx);
```
The comparison below shows the same chart with all entries visible and with the second entry hidden. The second series' columns remain unchanged.

In column, bar, and line charts, legend entries identify series. For pie charts, they identify individual data points (slices), so use [IChartDataPoint.RelatedLegendEntry](https://reference.aspose.com/slides/net/aspose.slides.charts/ichartdatapoint/relatedlegendentry/) on the selected slice instead. The API documents this data-point property for the `Pie`, `Pie3D`, `ExplodedPie`, `ExplodedPie3D`, `PieOfPie`, and `BarOfPie` chart types. Do not assume it applies to doughnut charts, which are not included in that list.
## **FAQ**
**Can I make the chart allocate space for the legend instead of overlaying it?**
Yes. Set [Overlay](https://reference.aspose.com/slides/net/aspose.slides.charts/legend/overlay/) to `false` to reserve space for the legend instead of allowing it to overlap the plot area.
**Can I make multiline legend labels?**
Yes. Long labels can wrap when the available width is insufficient. You can also use newline characters in series names to request line breaks.
**How do I make the legend follow the presentation theme's color scheme?**
Leave the legend's colors, fills, and fonts unset so that it can inherit theme formatting. Explicit formatting overrides the corresponding theme settings.
## Related features
- [Configure chart legends](https://docs.aspose.com/slides/features/chart-legends/)
# Customize Plot Areas of Presentation Charts in .NET
> Discover how to customize chart plot areas in PowerPoint presentations with Aspose.Slides for .NET. Improve your slide visuals effortlessly.
Source: https://docs.aspose.com/slides/net/chart-plot-area/
Updated: 2026-11-08
## **Overview**
This article shows how to work with a chart’s plot area in Aspose.Slides. It explains how to get the actual position and size of the plot area by validating the chart layout and then reading its X, Y, width, and height values.
It also demonstrates how to configure the plot area’s layout mode when the layout is set manually, using `LayoutTargetType` to define whether the plot area is calculated by its inner region or by its outer region together with axes and axis labels.
## **Get Width and Height of a Chart Plot Area**
Aspose.Slides for .NET provides a simple API for .
1. Create an instance of the [Presentation](https://reference.aspose.com/slides/net/aspose.slides/presentation) class.
1. Access first slide.
1. Add chart with default data.
1. Call method IChart.ValidateChartLayout() before to get actual values.
1. Gets actual X location (left) of the chart element relative to the left top corner of the chart.
1. Gets actual top of the chart element relative to the left top corner of the chart.
1. Gets actual width of the chart element.
1. Gets actual height of the chart element.
```c#
using Aspose.Slides;
using Aspose.Slides.Charts;
using Aspose.Slides.Export;
using (Presentation pres = new Presentation("test.Pptx"))
{
Chart chart = (Chart)pres.Slides[0].Shapes.AddChart(ChartType.ClusteredColumn, 100, 100, 500, 350);
chart.ValidateChartLayout();
double x = chart.PlotArea.ActualX;
double y = chart.PlotArea.ActualY;
double w = chart.PlotArea.ActualWidth;
double h = chart.PlotArea.ActualHeight;
// Save presentation with chart
pres.Save("Chart_out.pptx", SaveFormat.Pptx);
}
```
## **Set the Layout Mode of a Chart Plot Area**
Aspose.Slides for .NET provides a simple API to set the layout mode of the chart plot area. Property **LayoutTargetType** has been added to **ChartPlotArea** and **IChartPlotArea** classes. If the layout of the plot area defined manually this property specifies whether to layout the plot area by its inside (not including axis and axis labels) or outside (including axis and axis labels). There are two possible values which are defined in **LayoutTargetType** enum.
- **LayoutTargetType.Inner** - specifies that the plot area size shall determine the size of the plot area, not including the tick marks and axis labels.
- **LayoutTargetType.Outer** - specifies that the plot area size shall determine the size of the plot area, the tick marks, and the axis labels.
[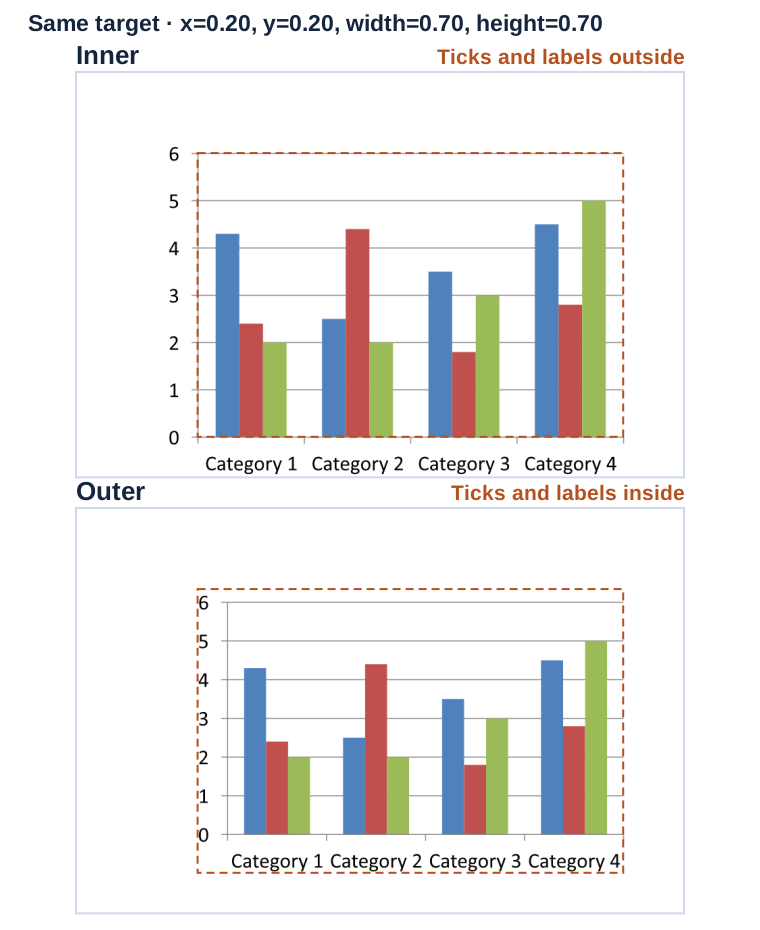](https://docs.aspose.com/slides/net/chart-plot-area/visual-chart-plot-area-2345b90e2bdf.svg)
*The dashed outline marks the same manual rectangle in both renders. Inner leaves room for ticks and labels outside it. Outer fits them inside it.*
Sample code is given below.
```c#
using Aspose.Slides;
using Aspose.Slides.Charts;
using Aspose.Slides.Export;
using (Presentation presentation = new Presentation())
{
ISlide slide = presentation.Slides[0];
IChart chart = slide.Shapes.AddChart(ChartType.ClusteredColumn, 20, 100, 600, 400);
chart.PlotArea.AsILayoutable.X = 0.2f;
chart.PlotArea.AsILayoutable.Y = 0.2f;
chart.PlotArea.AsILayoutable.Width = 0.7f;
chart.PlotArea.AsILayoutable.Height = 0.7f;
chart.PlotArea.LayoutTargetType = LayoutTargetType.Inner;
presentation.Save("SetLayoutMode_inner.pptx", SaveFormat.Pptx);
}
```
## **FAQ**
### In what units are ActualX, ActualY, ActualWidth, and ActualHeight returned?
In points; 1 inch = 72 points. These are Aspose.Slides coordinate units.
### How does the Plot Area differ from the Chart Area in terms of content?
The Plot Area is the data drawing region (series, gridlines, trendlines, etc.); the Chart Area includes the surrounding elements (title, legend, etc.). In 3D charts, the Plot Area also includes the walls/floor and the axes.
### How are the Plot Area’s X, Y, Width, and Height interpreted when layout is manual?
They are fractions (0–1) of the chart’s overall size; in this mode, auto-positioning is disabled and the fractions you set are used.
### Why did the Plot Area position change after adding/moving the legend?
The legend sits in the chart area outside the Plot Area but affects layout and available space, so the Plot Area may shift when auto-positioning is in effect. (This is standard behavior for PowerPoint charts.)
## Related features
- [Format the chart plot area](https://docs.aspose.com/slides/features/chart-plot-area/)
# Manage Chart Data Series in Presentations in .NET
> Learn how to manage chart series, data points, workbook cells, formatting, overlap, gap width, and negative values in presentations with C#.
Source: https://docs.aspose.com/slides/net/chart-series/
Updated: 2026-10-26
## **Overview**
A chart can store its plotted values in workbook cells or directly as numeric literals. An [IChartSeries](https://reference.aspose.com/slides/net/aspose.slides.charts/ichartseries/) represents one set of related values, and each [IChartDataPoint](https://reference.aspose.com/slides/net/aspose.slides.charts/ichartdatapoint/) represents a point in that series. [IChartCategory](https://reference.aspose.com/slides/net/aspose.slides.charts/ichartcategory/) objects provide the labels or grouping values shared by the series. In charts created with default data, series names, categories, and point values use [IChartDataCell](https://reference.aspose.com/slides/net/aspose.slides.charts/ichartdatacell/) objects from the chart workbook.
For a typical category chart, the default workbook uses row 0 for series names, column 0 for category names, and the remaining cells for series values. Worksheet, row, and column indexes passed to [IChartDataWorkbook.GetCell](https://reference.aspose.com/slides/net/aspose.slides.charts/ichartdataworkbook/getcell/) are zero-based. This layout is useful when you create a chart with default data, but do not assume that every existing chart uses it. For a loaded presentation, inspect the cells referenced by the series, categories, and data points before changing workbook values.
Chart settings have three different scopes:
- Series-level settings, such as [IChartSeries.Format](https://reference.aspose.com/slides/net/aspose.slides.charts/ichartseries/format/), provide the default appearance for all points in one series.
- Data-point settings, such as [IChartDataPoint.Format](https://reference.aspose.com/slides/net/aspose.slides.charts/ichartdatapoint/format/), override the series appearance for one point.
- Group settings apply to compatible series that belong to the same [IChartSeriesGroup](https://reference.aspose.com/slides/net/aspose.slides.charts/ichartseriesgroup/). Access the group through [IChartSeries.ParentSeriesGroup](https://reference.aspose.com/slides/net/aspose.slides.charts/ichartseries/parentseriesgroup/) when you need to set options such as overlap or gap width.
When no explicit point or series fill is set, the chart style and theme determine the automatic appearance. When both series and point formatting are present, the point formatting takes precedence for that point.
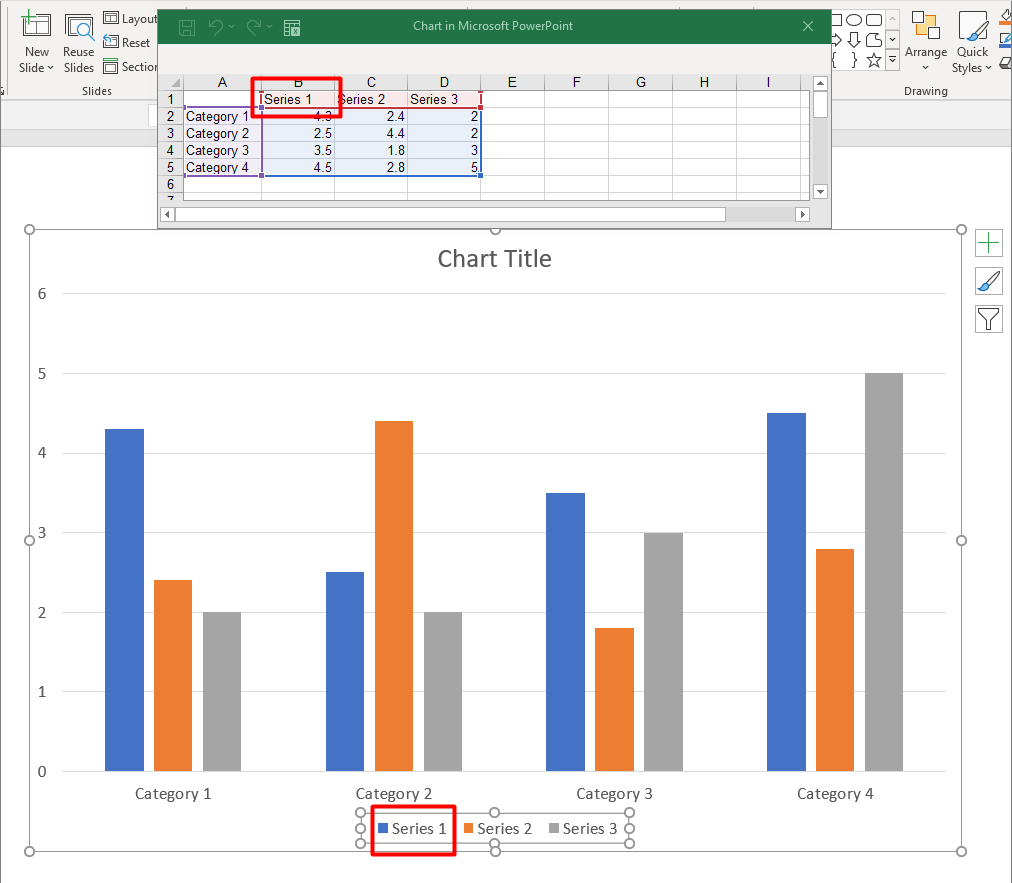
## **Set Series Values Using Numeric Literals**
Use numeric literals when series values come from application data or calculations and do not need worksheet cell references. Set [DataSourceTypeForValues](https://reference.aspose.com/slides/net/aspose.slides.charts/ichartdatapointcollection/datasourcetypeforvalues/) to [DataSourceType.DoubleLiterals](https://reference.aspose.com/slides/net/aspose.slides.charts/datasourcetype/) before assigning each point's [Value](https://reference.aspose.com/slides/net/aspose.slides.charts/ichartdatapoint/value/) through [AsLiteralDouble](https://reference.aspose.com/slides/net/aspose.slides.charts/idoublechartvalue/asliteraldouble/).
The collection setting controls the source type of all point values in that series. Each point's [Value.DataSourceType](https://reference.aspose.com/slides/net/aspose.slides.charts/ibasechartvalue/datasourcetype/) reports the selected type; change it through the collection setting. With `Worksheet`, use [AsCell](https://reference.aspose.com/slides/net/aspose.slides.charts/isinglecellchartvalue/ascell/) to access the referenced cell. With `DoubleLiterals`, use `AsLiteralDouble` to read or write the number directly.
The following example creates a column chart with default series and categories, then assigns calculated values of 10, 20, and so on to the existing points of its first series. It saves the presentation, reopens it, and prints the stored values.
```cs
using System;
using Aspose.Slides;
using Aspose.Slides.Charts;
using Aspose.Slides.Export;
using var presentation = new Presentation();
var slide = presentation.Slides[0];
var chart = slide.Shapes.AddChart(ChartType.ClusteredColumn, 20, 20, 500, 300);
var series = chart.ChartData.Series[0];
series.DataPoints.DataSourceTypeForValues = DataSourceType.DoubleLiterals;
for (var i = 0; i < series.DataPoints.Count; i++)
{
series.DataPoints[i].Value.AsLiteralDouble = (i + 1) * 10;
}
presentation.Save("numeric_literals.pptx", SaveFormat.Pptx);
using var reopenedPresentation = new Presentation("numeric_literals.pptx");
var reopenedSlide = reopenedPresentation.Slides[0];
var reopenedChart = (IChart)reopenedSlide.Shapes[0];
var reopenedSeries = reopenedChart.ChartData.Series[0];
foreach (var point in reopenedSeries.DataPoints)
{
Console.WriteLine(point.Value.AsLiteralDouble);
}
```
The point value source type is separate from [IChartData.DataSourceType](https://reference.aspose.com/slides/net/aspose.slides.charts/ichartdata/datasourcetype/), which identifies the chart's internal or external workbook configuration. Using numeric literals does not, by itself, remove the embedded workbook. In this example, the workbook remains available for category labels, series names, and the other series. See [Chart Workbook](https://docs.aspose.com/slides/net/chart-workbook/) for workbook management.
For scatter and bubble charts, set [DataSourceTypeForXValues](https://reference.aspose.com/slides/net/aspose.slides.charts/ichartdatapointcollection/datasourcetypeforxvalues/) and [DataSourceTypeForYValues](https://reference.aspose.com/slides/net/aspose.slides.charts/ichartdatapointcollection/datasourcetypeforyvalues/) to choose the sources for [XValue](https://reference.aspose.com/slides/net/aspose.slides.charts/ichartdatapoint/xvalue/) and [YValue](https://reference.aspose.com/slides/net/aspose.slides.charts/ichartdatapoint/yvalue/). Bubble charts also use [DataSourceTypeForBubbleSizes](https://reference.aspose.com/slides/net/aspose.slides.charts/ichartdatapointcollection/datasourcetypeforbubblesizes/) for [BubbleSize](https://reference.aspose.com/slides/net/aspose.slides.charts/ichartdatapoint/bubblesize/). Set each applicable source to `DoubleLiterals` before assigning numbers through that value's `AsLiteralDouble` property.
## **Set the Chart Series Overlap**
[IChartSeries.Overlap](https://reference.aspose.com/slides/net/aspose.slides.charts/ichartseries/overlap/) reports how much bars or columns overlap in a 2D chart, from -100 through 100 percent. It is a read-only projection of the setting on the parent series group. Set [IChartSeriesGroup.Overlap](https://reference.aspose.com/slides/net/aspose.slides.charts/ichartseriesgroup/overlap/) to update every compatible series in that group. This option applies to chart types that display grouped bars or columns; it does not affect unrelated series groups in a combination chart.
The following example sets the overlap for the group that contains the first series:
```cs
using Aspose.Slides;
using Aspose.Slides.Charts;
using Aspose.Slides.Export;
const int firstSlideIndex = 0;
const int firstSeriesIndex = 0;
const sbyte overlapPercent = 30;
using var presentation = new Presentation();
var slide = presentation.Slides[firstSlideIndex];
// The new chart contains sample series, categories, and values.
var chart = slide.Shapes.AddChart(ChartType.ClusteredColumn, 20, 20, 500, 200);
var series = chart.ChartData.Series[firstSeriesIndex];
series.ParentSeriesGroup.Overlap = overlapPercent;
presentation.Save("series_overlap.pptx", SaveFormat.Pptx);
```
The result:

## **Change the Series Fill Color**
Use [IChartSeries.Format](https://reference.aspose.com/slides/net/aspose.slides.charts/ichartseries/format/) to set the default fill for an entire series. If a point already has an explicit fill, its [IChartDataPoint.Format](https://reference.aspose.com/slides/net/aspose.slides.charts/ichartdatapoint/format/) setting overrides the series fill for that point.
The following example applies a solid blue fill to the first series:
```cs
using System.Drawing;
using Aspose.Slides;
using Aspose.Slides.Charts;
using Aspose.Slides.Export;
const int firstSlideIndex = 0;
const int firstSeriesIndex = 0;
using var presentation = new Presentation();
var slide = presentation.Slides[firstSlideIndex];
var chart = slide.Shapes.AddChart(ChartType.ClusteredColumn, 20, 20, 500, 200);
var series = chart.ChartData.Series[firstSeriesIndex];
series.Format.Fill.FillType = FillType.Solid;
series.Format.Fill.SolidFillColor.Color = Color.Blue;
presentation.Save("series_color.pptx", SaveFormat.Pptx);
```
The result:

## **Change the Series Name**
A series name is stored in the chart data workbook and is normally displayed in the legend. In the default workbook created for a clustered column chart, cell B1 is at row 0, column 1 and contains the name of the first series. The named constants in the following example make that structure explicit:
```cs
using Aspose.Slides;
using Aspose.Slides.Charts;
using Aspose.Slides.Export;
const int firstSlideIndex = 0;
const int worksheetIndex = 0;
const int seriesNameRowIndex = 0;
const int firstSeriesColumnIndex = 1;
using var presentation = new Presentation();
var slide = presentation.Slides[firstSlideIndex];
var chart = slide.Shapes.AddChart(ChartType.ClusteredColumn, 20, 20, 500, 200);
var workbook = chart.ChartData.ChartDataWorkbook;
var seriesNameCell = workbook.GetCell(worksheetIndex, seriesNameRowIndex, firstSeriesColumnIndex);
seriesNameCell.Value = "Revenue";
presentation.Save("series_name.pptx", SaveFormat.Pptx);
```
You can also update the cell already referenced by [IChartSeries.Name](https://reference.aspose.com/slides/net/aspose.slides.charts/ichartseries/name/). This approach avoids assuming a particular row and column in an existing chart:
```cs
using Aspose.Slides;
using Aspose.Slides.Charts;
using Aspose.Slides.Export;
const int firstSlideIndex = 0;
const int firstSeriesIndex = 0;
const int firstNameCellIndex = 0;
using var presentation = new Presentation();
var slide = presentation.Slides[firstSlideIndex];
var chart = slide.Shapes.AddChart(ChartType.ClusteredColumn, 20, 20, 500, 200);
var series = chart.ChartData.Series[firstSeriesIndex];
var seriesNameCell = series.Name.AsCells[firstNameCellIndex];
seriesNameCell.Value = "Revenue";
presentation.Save("series_name.pptx", SaveFormat.Pptx);
```
The result:

### **Create a Series with a Name from Multiple Cells**
A composite series name is useful when a product name and a reporting period are stored in separate workbook cells. For example, you can combine `Product A` in B1 and `2026` in C1 into a single series name while keeping both parts linked to their source cells.
Use [IChartDataWorkbook.GetCellCollection](https://reference.aspose.com/slides/net/aspose.slides.charts/ichartdataworkbook/getcellcollection/) to retrieve the name range, then pass that collection to [IChartSeriesCollection.Add](https://reference.aspose.com/slides/net/aspose.slides.charts/ichartseriescollection/add/). The `skipHiddenCells` argument controls whether hidden cells are included: `true` excludes them, while `false` includes them. This example uses `false` to include every cell in the name range.
The following example creates a presentation with one series and two data points. Cells B1:C1 supply only the series name; A2:A3 supply the category labels, and B2:B3 supply the numeric values.
```cs
using Aspose.Slides;
using Aspose.Slides.Charts;
using Aspose.Slides.Export;
using var presentation = new Presentation();
var slide = presentation.Slides[0];
var chart = slide.Shapes.AddChart(ChartType.ClusteredColumn, 50, 50, 620, 180);
chart.ChartData.Series.Clear();
chart.ChartData.Categories.Clear();
chart.HasLegend = true;
var workbook = chart.ChartData.ChartDataWorkbook;
workbook.Clear(0);
// These two cells supply the series name.
workbook.GetCell(0, 0, 1, "Product A");
workbook.GetCell(0, 0, 2, "2026");
var nameCells = workbook.GetCellCollection("Sheet1!$B$1:$C$1", skipHiddenCells: false);
var series = chart.ChartData.Series.Add(nameCells, ChartType.ClusteredColumn);
// Separate cells supply the categories and numeric data points.
var northCategory = workbook.GetCell(0, 1, 0, "North");
var southCategory = workbook.GetCell(0, 2, 0, "South");
chart.ChartData.Categories.Add(northCategory);
chart.ChartData.Categories.Add(southCategory);
var northValue = workbook.GetCell(0, 1, 1, 120);
var southValue = workbook.GetCell(0, 2, 1, 150);
series.DataPoints.AddDataPointForBarSeries(northValue);
series.DataPoints.AddDataPointForBarSeries(southValue);
presentation.Save("composite_series_name.pptx", SaveFormat.Pptx);
```
The resulting series name is `Product A 2026`, with a space between the two cell values. The legend displays this as one entry for both columns. The image below was rendered from the saved presentation:

## **Get the Automatic Series Fill Color**
[IChartSeries.GetAutomaticSeriesColor](https://reference.aspose.com/slides/net/aspose.slides.charts/ichartseries/getautomaticseriescolor/) returns the color calculated from the series index and the chart style. This is the color used when the series fill has not been explicitly defined. Calling the method reads the calculated color; it does not assign a new fill.
The following example prints the automatic color of each default series:
```cs
using System;
using Aspose.Slides;
using Aspose.Slides.Charts;
const int firstSlideIndex = 0;
using var presentation = new Presentation();
var slide = presentation.Slides[firstSlideIndex];
var chart = slide.Shapes.AddChart(ChartType.ClusteredColumn, 20, 20, 500, 200);
var seriesCount = chart.ChartData.Series.Count;
for (var seriesIndex = 0; seriesIndex < seriesCount; seriesIndex++)
{
var series = chart.ChartData.Series[seriesIndex];
var automaticColor = series.GetAutomaticSeriesColor();
Console.WriteLine($"Series {seriesIndex}: {automaticColor.Name}");
}
```
Example output for the default chart style:
```text
Series 0: ff4f81bd
Series 1: ffc0504d
Series 2: ff9bbb59
```
The exact colors depend on the chart style and theme.
## **Set Invert Fill Color for a Chart Series**
For bar, column, and bubble series, [IChartSeries.InvertIfNegative](https://reference.aspose.com/slides/net/aspose.slides.charts/ichartseries/invertifnegative/) can display negative values with a different fill. Set the regular series fill to solid, enable inversion, and assign the negative-value color through [IChartSeries.InvertedSolidFillColor](https://reference.aspose.com/slides/net/aspose.slides.charts/ichartseries/invertedsolidfillcolor/). Negative numbers remain unchanged in the workbook; only their display color changes.
The following example replaces the default chart data with one series. Worksheet row 0 contains the series name, column 0 contains category names, and column 1 contains the values:
```cs
using System.Drawing;
using Aspose.Slides;
using Aspose.Slides.Charts;
using Aspose.Slides.Export;
const int firstSlideIndex = 0;
const int worksheetIndex = 0;
const int headerRowIndex = 0;
const int categoryColumnIndex = 0;
const int firstSeriesColumnIndex = 1;
const int firstDataRowIndex = 1;
var categoryNames = new[] { "Category 1", "Category 2", "Category 3" };
var seriesValues = new[] { -20, 50, -30 };
using var presentation = new Presentation();
var slide = presentation.Slides[firstSlideIndex];
var chart = slide.Shapes.AddChart(ChartType.ClusteredColumn, 20, 20, 500, 200);
var chartData = chart.ChartData;
var workbook = chartData.ChartDataWorkbook;
chartData.Series.Clear();
chartData.Categories.Clear();
var seriesNameCell = workbook.GetCell(worksheetIndex, headerRowIndex, firstSeriesColumnIndex, "Series 1");
var series = chartData.Series.Add(seriesNameCell, chart.Type);
for (var categoryIndex = 0; categoryIndex < categoryNames.Length; categoryIndex++)
{
var dataRowIndex = firstDataRowIndex + categoryIndex;
var categoryName = categoryNames[categoryIndex];
var seriesValue = seriesValues[categoryIndex];
var categoryCell = workbook.GetCell(worksheetIndex, dataRowIndex, categoryColumnIndex, categoryName);
chartData.Categories.Add(categoryCell);
var valueCell = workbook.GetCell(worksheetIndex, dataRowIndex, firstSeriesColumnIndex, seriesValue);
series.DataPoints.AddDataPointForBarSeries(valueCell);
}
var automaticSeriesColor = series.GetAutomaticSeriesColor();
series.Format.Fill.FillType = FillType.Solid;
series.Format.Fill.SolidFillColor.Color = automaticSeriesColor;
series.InvertIfNegative = true;
series.InvertedSolidFillColor.Color = Color.Red;
presentation.Save("inverted_solid_fill_color.pptx", SaveFormat.Pptx);
```
The result:

You can enable inversion for one point through [IChartDataPoint.InvertIfNegative](https://reference.aspose.com/slides/net/aspose.slides.charts/ichartdatapoint/invertifnegative/). In the following example, inversion is disabled for the series and enabled only for the selected point. The point is also assigned a negative value so that the effect is visible:
```cs
using System.Drawing;
using Aspose.Slides;
using Aspose.Slides.Charts;
using Aspose.Slides.Export;
const int firstSlideIndex = 0;
const int firstSeriesIndex = 0;
const int targetDataPointIndex = 2;
const int negativeValue = -30;
using var presentation = new Presentation();
var slide = presentation.Slides[firstSlideIndex];
var chart = slide.Shapes.AddChart(ChartType.ClusteredColumn, 20, 20, 500, 200);
var series = chart.ChartData.Series[firstSeriesIndex];
var automaticSeriesColor = series.GetAutomaticSeriesColor();
series.Format.Fill.FillType = FillType.Solid;
series.Format.Fill.SolidFillColor.Color = automaticSeriesColor;
series.InvertedSolidFillColor.Color = Color.Red;
series.InvertIfNegative = false;
var dataPoint = series.DataPoints[targetDataPointIndex];
dataPoint.YValue.AsCell.Value = negativeValue;
dataPoint.InvertIfNegative = true;
presentation.Save("data_point_invert_color_if_negative.pptx", SaveFormat.Pptx);
```
## **Clear a Specific Data Point Value**
To make one point empty without removing the other points, set its backing workbook cell to `null`. For a column chart, the plotted value is available through [IChartDataPoint.YValue](https://reference.aspose.com/slides/net/aspose.slides.charts/ichartdatapoint/yvalue/). The data point stays at the same category position, but the chart treats its value as blank according to the chart's blank-value settings.
The following example clears only the second point in the first series:
```cs
using Aspose.Slides;
using Aspose.Slides.Charts;
using Aspose.Slides.Export;
const int firstSlideIndex = 0;
const int firstSeriesIndex = 0;
const int targetDataPointIndex = 1;
using var presentation = new Presentation();
var slide = presentation.Slides[firstSlideIndex];
var chart = slide.Shapes.AddChart(ChartType.ClusteredColumn, 20, 20, 500, 200);
var series = chart.ChartData.Series[firstSeriesIndex];
var dataPoint = series.DataPoints[targetDataPointIndex];
dataPoint.YValue.AsCell.Value = null;
presentation.Save("clear_data_point_value.pptx", SaveFormat.Pptx);
```
Scatter charts use separate X and Y cells, and bubble charts also use a size cell. Clear only the cell that represents the value you intend to remove. Do not call [IChartDataPointCollection.Clear](https://reference.aspose.com/slides/net/aspose.slides.charts/ichartdatapointcollection/clear/) when you want to keep the other points, because that method removes every data point from the collection.
## **Control the Display of Empty Cells**
Hidden cells that contain values are a separate case from empty cells. To include or exclude data from hidden worksheet rows and columns, see [Include Data from Hidden Rows and Columns](https://docs.aspose.com/slides/net/chart-workbook/#include-data-from-hidden-rows-and-columns).
An empty workbook cell represents missing data; a cell containing `0` represents a known numeric value. Set [IChartDataCell.Value](https://reference.aspose.com/slides/net/aspose.slides.charts/ichartdatacell/value/) to `null` to make a cell empty. A numeric zero remains a zero regardless of the blank-cell setting.
Use [IChart.DisplayBlanksAs](https://reference.aspose.com/slides/net/aspose.slides.charts/ichart/displayblanksas/) to choose how the chart displays empty cells. This setting applies to the whole chart. It changes how blanks are plotted, without filling the empty workbook cell with zero or an interpolated value.
The following self-contained example creates a line chart with one series, clears the value for Day 3, and saves the same chart with each mode. No input file is required. The [IChartDataWorkbook](https://reference.aspose.com/slides/net/aspose.slides.charts/ichartdataworkbook/) uses worksheet 0, column 0 for category labels, and column 1 for values; row 0 holds the series name. The final data is `10, 20, empty, 30, 40`.
```cs
using Aspose.Slides;
using Aspose.Slides.Charts;
using Aspose.Slides.Export;
using var presentation = new Presentation();
var slide = presentation.Slides[0];
var chart = slide.Shapes.AddChart(ChartType.LineWithMarkers, 40, 40, 640, 400);
var chartData = chart.ChartData;
var workbook = chartData.ChartDataWorkbook;
chartData.Series.Clear();
chartData.Categories.Clear();
var seriesNameCell = workbook.GetCell(0, 0, 1, "Measurements");
var series = chartData.Series.Add(seriesNameCell, chart.Type);
var values = new[] { 10, 20, 25, 30, 40 };
for (var i = 0; i < values.Length; i++)
{
var categoryCell = workbook.GetCell(0, i + 1, 0, $"Day {i + 1}");
chartData.Categories.Add(categoryCell);
var valueCell = workbook.GetCell(0, i + 1, 1, values[i]);
series.DataPoints.AddDataPointForLineSeries(valueCell);
}
// Leave Day 3 genuinely empty, while retaining its category and data point.
workbook.GetCell(0, 3, 1).Value = null;
var modes = new[] { DisplayBlanksAsType.Gap, DisplayBlanksAsType.Zero, DisplayBlanksAsType.Span };
foreach (var mode in modes)
{
chart.DisplayBlanksAs = mode;
presentation.Save($"empty_cells_{mode}.pptx", SaveFormat.Pptx);
}
```
Each output file stores the mode assigned before saving: `empty_cells_Gap.pptx`, `empty_cells_Zero.pptx`, and `empty_cells_Span.pptx`. To save only one version, assign the desired mode and save the presentation once instead of iterating over the modes.
The comparison below shows the same data in all three files. Day 3 is empty in the workbook in every case:

The visible effect depends on the chart type. A line chart makes all three modes easy to compare. Bar and column charts have no line to connect across a missing category, so `Span` cannot produce the connecting segment shown above; a missing column and a zero-height column can also look alike. Similarly, a scatter chart with markers only has no connecting line. Do not expect three distinct results for every chart type; check the output for the type you use.
## **Set the Series Gap Width**
Gap width is the space between adjacent bar or column clusters, expressed as a percentage of the bar or column width. Like overlap, it belongs to the parent series group rather than to one series. Set [IChartSeriesGroup.GapWidth](https://reference.aspose.com/slides/net/aspose.slides.charts/ichartseriesgroup/gapwidth/) once for the group. A larger value creates more space between clusters; a smaller value makes them denser.
The following example changes the gap width and saves only the final presentation:
```cs
using Aspose.Slides;
using Aspose.Slides.Charts;
using Aspose.Slides.Export;
const int firstSlideIndex = 0;
const int firstSeriesIndex = 0;
const int gapWidthPercent = 30;
using var presentation = new Presentation();
var slide = presentation.Slides[firstSlideIndex];
var chart = slide.Shapes.AddChart(ChartType.StackedColumn, 20, 20, 500, 200);
var series = chart.ChartData.Series[firstSeriesIndex];
series.ParentSeriesGroup.GapWidth = gapWidthPercent;
presentation.Save("gap_width_30.pptx", SaveFormat.Pptx);
```
The result:

## **Show or Hide Series Lines**
Series lines visually connect related parts of a chart. Use [IChartSeriesGroup.HasSeriesLines](https://reference.aspose.com/slides/net/aspose.slides.charts/ichartseriesgroup/hasserieslines/) to show or hide them in supported stacked bar and OfPie charts. In two-dimensional stacked bar and column charts, they connect corresponding stack boundaries across categories. In Pie of Pie and Bar of Pie charts, they connect the main plot to the secondary plot. This setting is not a general-purpose connector for other chart types.
Access the group through [IChartSeries.ParentSeriesGroup](https://reference.aspose.com/slides/net/aspose.slides.charts/ichartseries/parentseriesgroup/). The setting applies to every series in that group. [IChartSeries.HasSeriesLines](https://reference.aspose.com/slides/net/aspose.slides.charts/ichartseries/hasserieslines/) is read-only and reflects the parent group's setting; change the group property to update it.
The following example creates one [PieOfPie](https://reference.aspose.com/slides/net/aspose.slides.charts/charttype/) chart with default data. It saves the same chart with series lines enabled and then disabled, producing two presentations for comparison.
```cs
using Aspose.Slides;
using Aspose.Slides.Charts;
using Aspose.Slides.Export;
using var presentation = new Presentation();
var slide = presentation.Slides[0];
var chart = slide.Shapes.AddChart(ChartType.PieOfPie, 50, 50, 600, 400);
var series = chart.ChartData.Series[0];
var seriesGroup = series.ParentSeriesGroup;
seriesGroup.HasSeriesLines = true;
presentation.Save("series_lines_enabled.pptx", SaveFormat.Pptx);
seriesGroup.HasSeriesLines = false;
presentation.Save("series_lines_disabled.pptx", SaveFormat.Pptx);
```
| Series lines enabled | Series lines disabled |
| --- | --- |
|  |  |
| The two lines connect the main pie to the secondary pie. | Both pies remain visible, but the connecting lines are hidden. |
Series lines differ from data label leader lines, which connect labels to their data points; gridlines, which mark intervals along chart axes; and the lines in a line chart, which represent data values. This setting does not control those elements.
## **FAQ**
**Which chart types support data series?**
All chart types represented by the [ChartType](https://reference.aspose.com/slides/net/aspose.slides.charts/charttype/) enumeration use chart data, but their series do not all have the same value structure or settings. For example, category charts use categories and values, scatter charts use X and Y values, and bubble charts add bubble sizes. Use the data-point creation method that matches the series type. Options such as overlap and gap width apply only to compatible bar or column groups.
**What is a chart series group?**
An [IChartSeriesGroup](https://reference.aspose.com/slides/net/aspose.slides.charts/ichartseriesgroup/) contains compatible series that share group-level plotting settings. A combination chart can contain more than one group, so changing the group reached through one series does not necessarily change every series in the chart.
**Does a newly created chart contain default data?**
Yes. By default, [IShapeCollection.AddChart](https://reference.aspose.com/slides/net/aspose.slides/ishapecollection/addchart/) creates sample series, categories, and values. You can edit those cells or clear both the series and category collections before adding a completely custom data set. An overload can also create a chart without default data.
**How are chart objects connected to workbook cells?**
Series names, category labels, and data-point values reference cells in an [IChartDataWorkbook](https://reference.aspose.com/slides/net/aspose.slides.charts/ichartdataworkbook/). Changing a referenced cell updates the corresponding chart element. When you build custom data, keep category rows and series-value rows aligned so that each point is plotted under the intended category.
**How do I clear one point instead of the whole series?**
Set the relevant value cell to `null` to retain the point's category position as an empty point. Use [IChartDataPointCollection.Clear](https://reference.aspose.com/slides/net/aspose.slides.charts/ichartdatapointcollection/clear/) only when you intend to remove all points from that series. If you also remove categories, update every series so their values remain aligned with the category collection.
**How are empty points displayed?**
The result depends on the chart type and [IChart.DisplayBlanksAs](https://reference.aspose.com/slides/net/aspose.slides.charts/ichart/displayblanksas/). Supported charts can display blanks as gaps, as zero values, or by connecting neighboring points. Choose the setting that matches the meaning of missing data in your presentation. See [Control the Display of Empty Cells](https://docs.aspose.com/slides/net/chart-series/#control-the-display-of-empty-cells) for a complete example and visual comparison.
**How are negative values formatted?**
For supported bar, column, and bubble series, enable [IChartSeries.InvertIfNegative](https://reference.aspose.com/slides/net/aspose.slides.charts/ichartseries/invertifnegative/) and set [IChartSeries.InvertedSolidFillColor](https://reference.aspose.com/slides/net/aspose.slides.charts/ichartseries/invertedsolidfillcolor/). You can override the behavior for an individual point with [IChartDataPoint.InvertIfNegative](https://reference.aspose.com/slides/net/aspose.slides.charts/ichartdatapoint/invertifnegative/). These properties affect formatting, not the stored numeric values.
**Which formatting wins when both a series and a point are formatted?**
Explicit data-point formatting takes precedence for that point. Other points continue to use the explicit series format or, when the series format is not defined, the automatic chart style and theme. Group properties such as overlap and gap width control layout and are not point-level formatting overrides.
**Is there a limit to how many series a chart can contain?**
Aspose.Slides does not impose a separate fixed series-count limit. In practice, presentation file constraints, available memory, rendering time, and chart readability determine a useful limit.
**What should I change when columns are too close together or too far apart?**
Set [IChartSeriesGroup.GapWidth](https://reference.aspose.com/slides/net/aspose.slides.charts/ichartseriesgroup/gapwidth/) on the appropriate parent series group. Increase the value to widen the space between clusters, or decrease it to bring the clusters closer together.
## Related features
- [Work with chart series](https://docs.aspose.com/slides/features/chart-series/)
# Customize Presentation Charts in .NET
> Explore every chart type you can create or edit with Aspose.Slides for .NET – fast, code-first guides for PowerPoint presentations.
Source: https://docs.aspose.com/slides/net/chart-types/
Updated: 2025-11-13
---
lastmod: 2025-11-13T18:56:36+04:00
title: Customize Presentation Charts in .NET
linktitle: Chart Types
type: docs
weight: 20
url: /net/chart-types/
keywords:
- customize chart
- manage chart
- chart type
- PowerPoint chart
- presentation chart
- PPT chart
- PPTX chart
- PowerPoint
- presentation
- .NET
- C#
- Aspose.Slides
description: "Explore every chart type you can create or edit with Aspose.Slides for .NET – fast, code-first guides for PowerPoint presentations."
---
## Related features
- [Choose a chart type](https://docs.aspose.com/slides/features/chart-types/)
## Related articles
- [Create and Customize PowerPoint Charts in .NET](https://docs.aspose.com/slides/net/powerpoint-charts/)
# Manage Chart Workbooks in Presentations in .NET
> Discover Aspose.Slides for .NET: effortlessly manage chart workbooks in PowerPoint and OpenDocument formats to streamline your presentation data.
Source: https://docs.aspose.com/slides/net/chart-workbook/
Updated: 2026-11-07
## **Overview**
This article explains how to work with chart workbooks in Aspose.Slides. It shows how to read and write chart data through workbook streams, use workbook cells as chart data labels, access worksheet collections, and specify the data source type for chart values.
It also covers working with external workbooks as chart data sources. The examples demonstrate how to create and assign an external workbook, retrieve the path of an external workbook linked to a chart, and edit chart data when the workbook is available.
For workbook cells that represent missing data, see [Control the Display of Empty Cells](https://docs.aspose.com/slides/net/chart-series/) for the difference between an empty cell and zero, and a line-chart comparison of the available display modes.
## **Include Data from Hidden Rows and Columns**
Use [IChart.PlotVisibleCellsOnly](https://reference.aspose.com/slides/net/aspose.slides.charts/ichart/plotvisiblecellsonly/) to control whether a chart plots data from hidden worksheet rows and columns. Set it to `true` to plot only visible cells, or `false` to include both visible and hidden cells. This setting controls chart plotting; it does not hide or unhide worksheet rows or columns.
The [sample presentation](https://docs.aspose.com/slides/net/chart-workbook/hidden-source-data.pptx) contains a column chart as the first shape on its first slide. The embedded worksheet, `Sheet1`, contains the following source range, `A1:C4`. Row 3 and column C are hidden, but their cells still contain values.
| Worksheet row | A: Month | B: Retail | C: Wholesale (hidden column) |
| --- | --- | --- | --- |
| 2 | January | 10 | 30 |
| 3 (hidden row) | February | 40 | 60 |
| 4 | March | 20 | 50 |
Access source cells through [IChartData.ChartDataWorkbook](https://reference.aspose.com/slides/net/aspose.slides.charts/ichartdata/chartdataworkbook/) and read [IChartDataCell.IsHidden](https://reference.aspose.com/slides/net/aspose.slides.charts/ichartdatacell/ishidden/) to inspect their hidden status. This property is read-only. In this file, B2 is visible, B3 belongs to the hidden row, and C2 belongs to the hidden column; the example prints `False`, `True`, and `True`, respectively.
For this example, refresh the chart data after changing the plotting setting: retain the embedded workbook with [ReadWorkbookStream](https://reference.aspose.com/slides/net/aspose.slides.charts/ichartdata/readworkbookstream/) and reload it with [WriteWorkbookStream](https://reference.aspose.com/slides/net/aspose.slides.charts/ichartdata/writeworkbookstream/). When including all cells, also use [SetRange](https://reference.aspose.com/slides/net/aspose.slides.charts/ichartdata/setrange/) to restore the complete range, including the hidden February category. Simply changing the flag is insufficient to refresh this sample's cached chart data and category labels.
```csharp
using System;
using Aspose.Slides;
using Aspose.Slides.Charts;
using Aspose.Slides.Export;
using var presentation = new Presentation("hidden-source-data.pptx");
var slide = presentation.Slides[0];
if (slide.Shapes[0] is IChart chart)
{
var workbook = chart.ChartData.ChartDataWorkbook;
Console.WriteLine($"B2 hidden: {workbook.GetCell(0, "B2").IsHidden}");
Console.WriteLine($"B3 hidden: {workbook.GetCell(0, "B3").IsHidden}");
Console.WriteLine($"C2 hidden: {workbook.GetCell(0, "C2").IsHidden}");
using var workbookStream = chart.ChartData.ReadWorkbookStream();
foreach (var visibleOnly in new[] { true, false })
{
chart.PlotVisibleCellsOnly = visibleOnly;
// Refresh the chart data from the embedded workbook.
workbookStream.Position = 0;
chart.ChartData.WriteWorkbookStream(workbookStream);
if (!visibleOnly)
{
// Restore the complete source range, including hidden categories.
chart.ChartData.SetRange("Sheet1!$A$1:$C$4");
}
presentation.Save($"hidden_cells_{visibleOnly}.pptx", SaveFormat.Pptx);
}
}
else
{
Console.WriteLine("The first shape is not a chart.");
}
```
The example saves two versions of the presentation: one with only the visible Retail values (10 and 20), and another with all six values. The images below were rendered from the saved presentations after reopening them; both files preserve their assigned plotting setting. Row 3 and column C remain hidden in both embedded workbooks.
| Only visible cells (`true`) | All cells (`false`) |
| --- | --- |
| 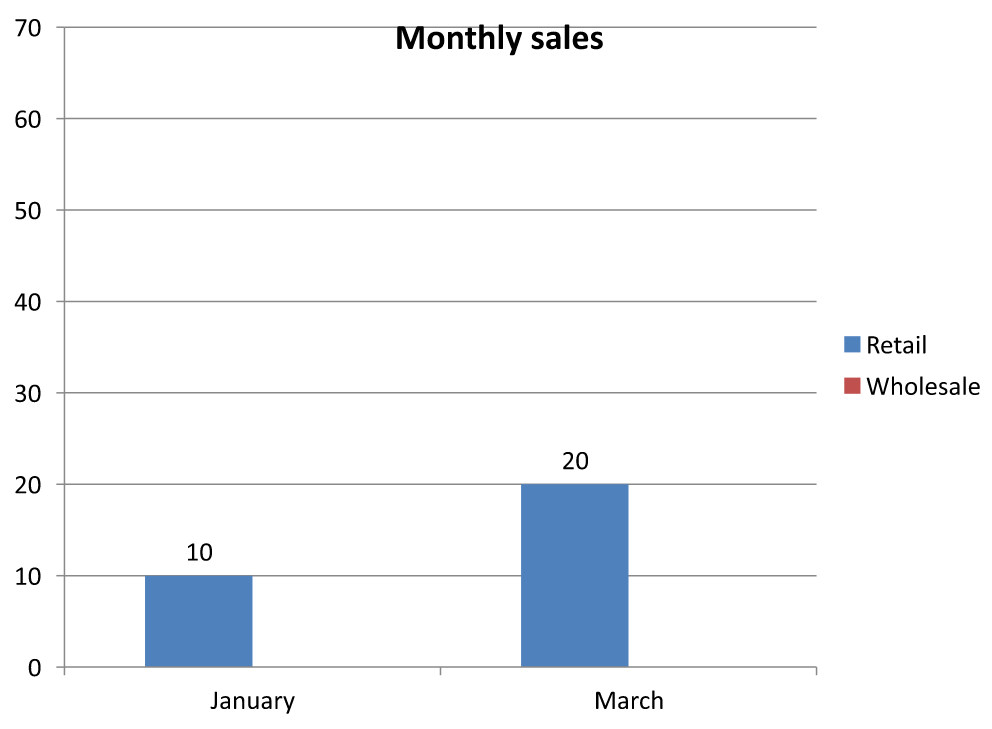 | 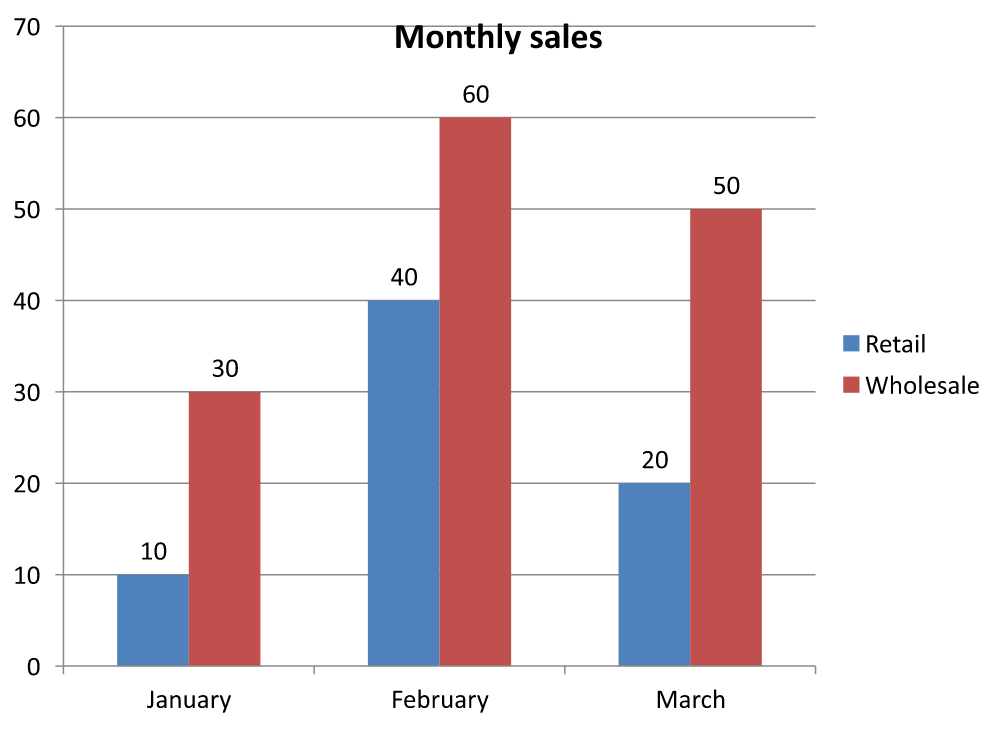 |
A hidden cell containing a value is different from an empty cell. [IChart.DisplayBlanksAs](https://reference.aspose.com/slides/net/aspose.slides.charts/ichart/displayblanksas/) controls how missing values are displayed; it does not include or exclude hidden source data. See [Control the Display of Empty Cells](https://docs.aspose.com/slides/net/chart-series/#control-the-display-of-empty-cells) for an example.
## **Retrieve a Chart's Data Range**
Before updating workbook data in an existing presentation, inspect the source ranges to identify which worksheet cells each chart uses. The [IChartData.GetRange](https://reference.aspose.com/slides/net/aspose.slides.charts/ichartdata/getrange/) method returns the current data range as a worksheet-qualified formula, such as `Sheet1!$A$1:$D$5`. Here, `Sheet1` is the worksheet name, `!` separates it from the cell range, and `$A$1:$D$5` identifies cells A1 through D5, inclusive. The dollar signs indicate absolute row and column references.
The method reads the current range without changing the chart or its workbook. If the chart does not use a workbook as its data source, it throws [InvalidOperationException](https://learn.microsoft.com/en-us/dotnet/api/system.invalidoperationexception). For more information, see the [ChartData API Reference](https://reference.aspose.com/slides/net/aspose.slides.charts/chartdata/).
This example opens a presentation and checks the shapes directly on each slide for charts. It prints each chart's name and source range. If a chart does not use a workbook, it prints a message and continues to the next chart.
```csharp
using System;
using Aspose.Slides;
using Aspose.Slides.Charts;
using var presentation = new Presentation("presentation.pptx");
foreach (var slide in presentation.Slides)
{
foreach (var shape in slide.Shapes)
{
if (shape is IChart chart)
{
try
{
var range = chart.ChartData.GetRange();
Console.WriteLine($"{chart.Name}: {range}");
}
catch (InvalidOperationException)
{
Console.WriteLine($"{chart.Name}: The chart does not use a workbook as its data source.");
}
}
}
}
```
## **Read and Write Chart Data from a Workbook**
Aspose.Slides for .NET provides the [ReadWorkbookStream](https://reference.aspose.com/slides/net/aspose.slides.charts/ichartdata/readworkbookstream/) and [WriteWorkbookStream](https://reference.aspose.com/slides/net/aspose.slides.charts/ichartdata/writeworkbookstream/) methods that allow you to read and write chart data workbooks (containing chart data edited with Aspose.Cells). **Note** that the chart data has to be organized in the same manner or must have a structure similar to the source.
This example uses a presentation with a chart as the first shape on its first slide. It reads the embedded workbook into a stream, clears the existing series and categories, and writes the same workbook back. The changes remain in memory; the example does not save the presentation.
```csharp
using System;
using Aspose.Slides;
using Aspose.Slides.Charts;
using var presentation = new Presentation("chart.pptx");
var slide = presentation.Slides[0];
var shapeCount = slide.Shapes.Count;
if (shapeCount > 0 && slide.Shapes[0] is IChart chart)
{
var chartData = chart.ChartData;
using var workbookStream = chartData.ReadWorkbookStream();
chartData.Series.Clear();
chartData.Categories.Clear();
workbookStream.Position = 0;
chartData.WriteWorkbookStream(workbookStream);
}
else
{
Console.WriteLine("The first shape is not a chart.");
}
```
### **Validate Chart Layout After Workbook Modification**
When you replace an embedded workbook with a modified one, the chart retains its original series and category collections. This mismatch can cause [IChart.ValidateChartLayout](https://reference.aspose.com/slides/net/aspose.slides.charts/ichart/validatechartlayout/) to fail with an index-out-of-range error. Clear the existing series and categories before writing the updated workbook back to the chart. This example uses a chart that is the first shape on the first slide. The comment marks where workbook editing would occur; the runnable example writes the original workbook back and validates the layout in memory.
```csharp
using System;
using Aspose.Slides;
using Aspose.Slides.Charts;
using var presentation = new Presentation("chart.pptx");
var slide = presentation.Slides[0];
var shapeCount = slide.Shapes.Count;
if (shapeCount > 0 && slide.Shapes[0] is IChart chart)
{
var chartData = chart.ChartData;
using var workbookStream = chartData.ReadWorkbookStream();
// Modify the workbook stream here, for example, using Aspose.Cells.
chartData.Series.Clear();
chartData.Categories.Clear();
workbookStream.Position = 0;
chartData.WriteWorkbookStream(workbookStream);
chart.ValidateChartLayout();
}
else
{
Console.WriteLine("The first shape is not a chart.");
}
```
Clearing the collections removes stale data references before the workbook is written back. Rebuild any required series and category mappings for the updated workbook before using the chart.
## **Set Custom Number Formats for Workbook Cells**
Use [ChartDataCell.CustomNumberFormat](https://reference.aspose.com/slides/net/aspose.slides.charts/chartdatacell/customnumberformat/) to control how numeric values appear in a chart's embedded workbook. For example, a report may need a conversion rate displayed as a percentage with four decimal places and a coefficient displayed with five decimal places. Keep both values numeric so they remain available for calculations and chart plotting.
A number format changes the display, not the stored value. The format `0.0000%` displays `0.125` as `12.5000%`; it does not replace the stored number with `12.5`. Similarly, `0.00000` displays `0.1234567` as `0.12346` without rounding the stored value. If the custom format is an empty string (`""`), [PresetNumberFormat](https://reference.aspose.com/slides/net/aspose.slides.charts/chartdatacell/presetnumberformat/) is used instead.
The following example creates a column chart and accesses its cells through [ChartDataWorkbook](https://reference.aspose.com/slides/net/aspose.slides.charts/ichartdata/chartdataworkbook/). On worksheet 0, B2 contains the conversion rate and C2 contains the coefficient. Both cells supply chart values. The example also enables value labels linked to the source formats.
```csharp
using Aspose.Slides;
using Aspose.Slides.Charts;
using Aspose.Slides.Export;
using var presentation = new Presentation();
presentation.SlideSize.SetSize(720, 270, SlideSizeScaleType.DoNotScale);
var slide = presentation.Slides[0];
var chart = slide.Shapes.AddChart(ChartType.ClusteredColumn, 50, 20, 620, 210);
chart.HasTitle = false;
chart.Axes.VerticalAxis.IsNumberFormatLinkedToSource = false;
chart.Axes.VerticalAxis.NumberFormat = "0.00";
chart.Axes.VerticalAxis.IsAutomaticMinValue = false;
chart.Axes.VerticalAxis.MinValue = 0;
chart.ChartData.Series.Clear();
chart.ChartData.Categories.Clear();
var workbook = chart.ChartData.ChartDataWorkbook;
workbook.Clear(0);
var categoryCell = workbook.GetCell(0, "A2", "Sample");
chart.ChartData.Categories.Add(categoryCell);
var percentageCell = workbook.GetCell(0, "B2", 0.125);
percentageCell.CustomNumberFormat = "0.0000%";
var percentageName = workbook.GetCell(0, "B1", "Conversion rate");
var percentageSeries = chart.ChartData.Series.Add(percentageName, chart.Type);
percentageSeries.DataPoints.AddDataPointForBarSeries(percentageCell);
var precisionCell = workbook.GetCell(0, "C2", 0.1234567);
precisionCell.CustomNumberFormat = "0.00000";
var precisionName = workbook.GetCell(0, "C1", "Coefficient");
var precisionSeries = chart.ChartData.Series.Add(precisionName, chart.Type);
precisionSeries.DataPoints.AddDataPointForBarSeries(precisionCell);
foreach (var series in chart.ChartData.Series)
{
var labelFormat = series.DataPoints[0].Label.DataLabelFormat;
labelFormat.ShowValue = true;
labelFormat.IsNumberFormatLinkedToSource = true;
}
presentation.Save("CustomCellFormats.pptx", SaveFormat.Pptx);
```
Workbook cell formats are separate from formats set directly on chart axes or data labels. In this example, each label displays its source cell's value because [ShowValue](https://reference.aspose.com/slides/net/aspose.slides.charts/idatalabelformat/showvalue/) is enabled, and follows the source number format because [IsNumberFormatLinkedToSource](https://reference.aspose.com/slides/net/aspose.slides.charts/idatalabelformat/isnumberformatlinkedtosource/) is `true`. After saving and reopening the presentation, the labels display `12.5000%` and `0.12346`, as shown below. The vertical axis uses its own [NumberFormat](https://reference.aspose.com/slides/net/aspose.slides.charts/iaxis/numberformat/) of `0.00`, with [IsNumberFormatLinkedToSource](https://reference.aspose.com/slides/net/aspose.slides.charts/iaxis/isnumberformatlinkedtosource/) set to `false`.
To format a data label independently, set its source-link flag to `false` and assign its [NumberFormat](https://reference.aspose.com/slides/net/aspose.slides.charts/idatalabelformat/numberformat/). This does not change the workbook cell's format. For example, an independent label format of `0.00` displays the first value as `0.13`, while B2 still displays `12.5000%`. See [Chart Data Labels](https://docs.aspose.com/slides/net/chart-data-label/#set-percentage-sign-with-chart-data-labels) for direct label formatting.
The image below was rendered from the saved presentation after reopening it:

## **Set a Workbook Cell as a Chart Data Label**
You can use text from workbook cells as chart data labels.
This example adds a bubble chart with default data to the first slide of an existing presentation. It uses cells A10:A12 on worksheet 0 for the first three labels in the first series, enables labels from cells, and saves the updated presentation.
```csharp
using Aspose.Slides;
using Aspose.Slides.Charts;
using Aspose.Slides.Export;
using var presentation = new Presentation("chart2.pptx");
var slide = presentation.Slides[0];
var chart = slide.Shapes.AddChart(ChartType.Bubble, 50, 50, 600, 400, true);
var series = chart.ChartData.Series[0];
var workbook = chart.ChartData.ChartDataWorkbook;
series.Labels.DefaultDataLabelFormat.ShowLabelValueFromCell = true;
series.Labels[0].ValueFromCell = workbook.GetCell(0, "A10", "Label 0 cell value");
series.Labels[1].ValueFromCell = workbook.GetCell(0, "A11", "Label 1 cell value");
series.Labels[2].ValueFromCell = workbook.GetCell(0, "A12", "Label 2 cell value");
presentation.Save("resultchart.pptx", SaveFormat.Pptx);
```
## **Manage Worksheets**
The [IChartDataWorkbook.Worksheets](https://reference.aspose.com/slides/net/aspose.slides.charts/ichartdataworkbook/worksheets/) property provides access to the worksheets in a chart workbook. This example creates a pie chart with default data and prints each worksheet name to the console.
```csharp
using System;
using Aspose.Slides;
using Aspose.Slides.Charts;
using var presentation = new Presentation();
var slide = presentation.Slides[0];
var chart = slide.Shapes.AddChart(ChartType.Pie, 50, 50, 400, 500);
var workbook = chart.ChartData.ChartDataWorkbook;
for (var i = 0; i < workbook.Worksheets.Count; i++)
{
Console.WriteLine(workbook.Worksheets[i].Name);
}
```
## **Specify the Data Source Type**
Series point values can also be stored directly as numeric literals. See [Set Series Values Using Numeric Literals](https://docs.aspose.com/slides/net/chart-series/#set-series-values-using-numeric-literals) for a complete example that saves and reads them. The source type of point values is separate from the chart's internal or external workbook configuration; using numeric literals does not, by itself, remove the embedded workbook.
This example creates a 3D column chart with default data and sets two series names using different data sources. The first name uses a string literal; the second uses cell C1 on worksheet 0. The [DataSourceType](https://reference.aspose.com/slides/net/aspose.slides.charts/datasourcetype/) enumeration selects the source for each name. The example saves the presentation with the updated series names.
```csharp
using Aspose.Slides;
using Aspose.Slides.Charts;
using Aspose.Slides.Export;
using var presentation = new Presentation();
var slide = presentation.Slides[0];
var chart = slide.Shapes.AddChart(ChartType.Column3D, 50, 50, 600, 400, true);
var literalName = chart.ChartData.Series[0].Name;
literalName.DataSourceType = DataSourceType.StringLiterals;
literalName.Data = "LiteralString";
var cellName = chart.ChartData.Series[1].Name;
var nameCell = chart.ChartData.ChartDataWorkbook.GetCell(0, "C1", "NewCell");
cellName.DataSourceType = DataSourceType.Worksheet;
cellName.Data = nameCell;
presentation.Save("pres.pptx", SaveFormat.Pptx);
```
## **Detect Unsupported Embedded Workbook Formats**
Aspose.Slides does not support the Excel binary workbook (.xlsb) format that can be embedded in some charts. You can use the [EmbeddedWorkbookType](https://reference.aspose.com/slides/net/aspose.slides.charts/ichartdata/embeddedworkbooktype/) property on [IChartData](https://reference.aspose.com/slides/net/aspose.slides.charts/ichartdata/) together with the [WorkbookType](https://reference.aspose.com/slides/net/aspose.slides.charts/workbooktype/) enumeration to detect unsupported formats and skip those charts. This example inspects the shapes on the first slide of an existing presentation, skips non-chart shapes, and prints a diagnostic message for each chart with an embedded .xlsb workbook.
```csharp
using System;
using Aspose.Slides;
using Aspose.Slides.Charts;
using var presentation = new Presentation("sample.pptx");
var slide = presentation.Slides[0];
foreach (var shape in slide.Shapes)
{
if (shape is not IChart chart)
{
continue;
}
var chartData = chart.ChartData;
var isInternalWorkbook = chartData.DataSourceType == ChartDataSourceType.InternalWorkbook;
var isBinaryMacro = chartData.EmbeddedWorkbookType == WorkbookType.WorkbookBinaryMacro;
if (isInternalWorkbook && isBinaryMacro)
{
Console.WriteLine("Skipping a chart with an unsupported .xlsb workbook.");
continue;
}
// Read or modify supported chart workbook data here.
}
```
## **External Workbook**
Aspose.Slides supports using external workbooks as a data source for charts.
### **Create an External Workbook**
Use [ReadWorkbookStream](https://reference.aspose.com/slides/net/aspose.slides.charts/ichartdata/readworkbookstream/) and [SetExternalWorkbook](https://reference.aspose.com/slides/net/aspose.slides.charts/ichartdata/setexternalworkbook/) to export an embedded chart workbook to a file and link the chart to that external workbook.
This example creates a pie chart with default data and exports its workbook. It closes the output stream before assigning the external workbook as the chart data source, then saves the linked presentation.
```csharp
using System.IO;
using Aspose.Slides;
using Aspose.Slides.Charts;
using Aspose.Slides.Export;
using var presentation = new Presentation();
var slide = presentation.Slides[0];
var chart = slide.Shapes.AddChart(ChartType.Pie, 50, 50, 400, 600);
var workbookPath = Path.GetFullPath("externalWorkbook1.xlsx");
using (var workbookStream = chart.ChartData.ReadWorkbookStream())
using (var fileStream = File.Create(workbookPath))
{
workbookStream.CopyTo(fileStream);
}
chart.ChartData.SetExternalWorkbook(workbookPath);
presentation.Save("externalWorkbook.pptx", SaveFormat.Pptx);
```
### **Set an External Workbook**
Using the [SetExternalWorkbook](https://reference.aspose.com/slides/net/aspose.slides.charts/ichartdata/setexternalworkbook/) method, you can assign an external workbook to a chart as its data source. This method can also be used to update a path to the external workbook (if the latter has been moved).
While you cannot edit the data in workbooks stored in remote locations or resources, you can still use such workbooks as an external data source. If the relative path for an external workbook is provided, it gets converted to a full path automatically.
This example uses an external workbook whose worksheet named `Sheet1` contains a series name in B1, category names in A2:A4, and numeric values in B2:B4. The example creates a pie chart, links the workbook, and uses [SetRange](https://reference.aspose.com/slides/net/aspose.slides.charts/ichartdata/setrange/) to map A1:B4 to one series and three categories. It saves the presentation with the linked chart.
```csharp
using System.IO;
using Aspose.Slides;
using Aspose.Slides.Charts;
using Aspose.Slides.Export;
using var presentation = new Presentation();
var slide = presentation.Slides[0];
var chart = slide.Shapes.AddChart(ChartType.Pie, 50, 50, 400, 600, true);
var chartData = chart.ChartData;
var workbookPath = Path.GetFullPath("externalWorkbook.xlsx");
chartData.SetExternalWorkbook(workbookPath);
chartData.SetRange("Sheet1!$A$1:$B$4");
presentation.Save("Presentation_with_externalWorkbook.pptx", SaveFormat.Pptx);
```
The `updateChartData` parameter of [SetExternalWorkbook](https://reference.aspose.com/slides/net/aspose.slides.charts/ichartdata/setexternalworkbook/) controls whether the workbook is loaded.
* When `updateChartData` is `false`, only the workbook path is updated. The chart data is not loaded or updated from the target workbook, so the workbook can be unavailable.
* When `updateChartData` is `true`, the chart data is updated from the target workbook.
The following example assigns a placeholder URL with `updateChartData` set to `false`. It retains the pie chart's default data and saves the presentation without loading the unavailable workbook.
```csharp
using Aspose.Slides;
using Aspose.Slides.Charts;
using Aspose.Slides.Export;
using var presentation = new Presentation();
var slide = presentation.Slides[0];
var chart = slide.Shapes.AddChart(ChartType.Pie, 50, 50, 400, 600, true);
chart.ChartData.SetExternalWorkbook("https://example.com/unavailable-workbook.xlsx", false);
presentation.Save("SetExternalWorkbookWithUpdateChartData.pptx", SaveFormat.Pptx);
```
### **Get the External Data Source Workbook Path of a Chart**
To identify the workbook linked to a chart, check whether the chart uses an external data source and retrieve its workbook path.
This example inspects the first shape on the first slide of a presentation with a linked external workbook. If it is a chart linked to an external workbook, the example prints [ExternalWorkbookPath](https://reference.aspose.com/slides/net/aspose.slides.charts/ichartdata/externalworkbookpath/) to the console. It then saves a copy of the presentation.
```csharp
using System;
using Aspose.Slides;
using Aspose.Slides.Charts;
using Aspose.Slides.Export;
using var presentation = new Presentation("externalWorkbook.pptx");
var slide = presentation.Slides[0];
var shapeCount = slide.Shapes.Count;
if (shapeCount > 0 && slide.Shapes[0] is IChart chart)
{
var chartData = chart.ChartData;
if (chartData.DataSourceType == ChartDataSourceType.ExternalWorkbook)
{
Console.WriteLine(chartData.ExternalWorkbookPath);
}
else
{
Console.WriteLine("The chart does not use an external workbook.");
}
}
else
{
Console.WriteLine("The first shape is not a chart.");
}
presentation.Save("Result.pptx", SaveFormat.Pptx);
```
### **Edit Chart Data**
You can edit the data in external workbooks the same way you make changes to the contents of internal workbooks. When an external workbook cannot be loaded, an exception is thrown.
This example uses a chart that is the first shape on the first slide and is linked to an accessible external workbook. It sets the cell-backed value of the first data point in the first series to 100 and saves the updated presentation. Editing cell values can update the linked external XLSX file, so use a copy if you need to preserve the original workbook.
```csharp
using System;
using Aspose.Slides;
using Aspose.Slides.Charts;
using Aspose.Slides.Export;
using var presentation = new Presentation("presentation.pptx");
var slide = presentation.Slides[0];
var shapeCount = slide.Shapes.Count;
if (shapeCount > 0 && slide.Shapes[0] is IChart chart)
{
var series = chart.ChartData.Series;
if (series.Count > 0 && series[0].DataPoints.Count > 0)
{
var valueCell = series[0].DataPoints[0].Value.AsCell;
if (valueCell != null)
{
valueCell.Value = 100;
presentation.Save("presentation_out.pptx", SaveFormat.Pptx);
}
else
{
Console.WriteLine("The first data point is not linked to a workbook cell.");
}
}
else
{
Console.WriteLine("The chart has no data points to edit.");
}
}
else
{
Console.WriteLine("The first shape is not a chart.");
}
```
## **Refresh Chart Data from Source Workbooks**
Aspose.Slides for .NET 26.11 adds [IChartData.RefreshData](https://reference.aspose.com/slides/net/aspose.slides.charts/ichartdata/refreshdata/) for one chart and [IPresentation.RefreshChartsData](https://reference.aspose.com/slides/net/aspose.slides/ipresentation/refreshchartsdata/) for the presentation. Use them after source workbook values change. External workbooks must be accessible and supported.
With [Aspose.Slides for .NET](https://docs.aspose.com/slides/net/installation/) 26.11 or later installed, this example refreshes the first chart on the first slide of `charts.pptx`. Its source workbook must be available. Save the result to retain the updated chart data.
```csharp
using System;
using System.Linq;
using Aspose.Slides;
using Aspose.Slides.Charts;
using Aspose.Slides.Export;
using var presentation = new Presentation("charts.pptx");
var chart = presentation.Slides[0].Shapes.OfType().FirstOrDefault();
if (chart == null)
{
Console.WriteLine("The first slide must contain a chart.");
return;
}
chart.ChartData.RefreshData();
presentation.Save("refreshed-chart.pptx", SaveFormat.Pptx);
```
To refresh all charts, use a separate presentation instance as follows. Passing `false` makes a refresh failure propagate to the caller; it does not roll back charts already refreshed.
```csharp
using Aspose.Slides;
using Aspose.Slides.Export;
using var presentation = new Presentation("charts.pptx");
presentation.RefreshChartsData(skipFailedCharts: false);
presentation.Save("refreshed-charts.pptx", SaveFormat.Pptx);
```
The parameter defaults to `true`: [RefreshChartsData](https://reference.aspose.com/slides/net/aspose.slides/ipresentation/refreshchartsdata/) skips a failed chart and continues with others. It returns no per-chart results, so a completed call does not prove that every chart refreshed. Use individual [RefreshData](https://reference.aspose.com/slides/net/aspose.slides.charts/ichartdata/refreshdata/) calls if you need to identify each failing chart.
Refresh reloads source data. It is separate from formula calculation, chart layout validation and updating an OLE preview. Inspect live cell-backed values to check a refresh in memory. A [CachedValue](https://reference.aspose.com/slides/net/aspose.slides.charts/ichartdatapoint/cachedvalue/) can still describe the previously saved chart until you save and reopen the presentation.
### **Read Cached Chart Values without a Workbook**
In .NET 26.11, cached-value accessors read the values stored with the chart without opening its workbook. They are useful when the linked file is unavailable and you only need the chart's last stored data. This is different from reconstructing a workbook using the recovery option below.
| Object | Cached accessor |
| --- | --- |
| Ordinary series data point | [CachedValue](https://reference.aspose.com/slides/net/aspose.slides.charts/ichartdatapoint/cachedvalue/) |
| Scatter or bubble data point | [CachedXValue](https://reference.aspose.com/slides/net/aspose.slides.charts/ichartdatapoint/cachedxvalue/), [CachedYValue](https://reference.aspose.com/slides/net/aspose.slides.charts/ichartdatapoint/cachedyvalue/) |
| Bubble data point | [CachedBubbleSize](https://reference.aspose.com/slides/net/aspose.slides.charts/ichartdatapoint/cachedbubblesize/) |
| Chart category | [CachedValue](https://reference.aspose.com/slides/net/aspose.slides.charts/ichartcategory/cachedvalue/) |
Each accessor returns [ICachedChartValue](https://reference.aspose.com/slides/net/aspose.slides.charts/icachedchartvalue/). [Data](https://reference.aspose.com/slides/net/aspose.slides.charts/icachedchartvalue/data/) exposes the stored object; [ToString](https://reference.aspose.com/slides/net/aspose.slides.charts/cachedchartvalue/tostring/) provides text; [ToDouble](https://reference.aspose.com/slides/net/aspose.slides.charts/icachedchartvalue/todouble/) returns `NaN` for an absent or nonnumeric value. A cache can be missing or stale, including on a newly created chart that has not been saved. Do not assume that every field exists or contains a number.
This example reads all those fields from `cached-chart.pptx`, a saved presentation containing charts. A missing external workbook is acceptable because the code does not access [ChartDataWorkbook](https://reference.aspose.com/slides/net/aspose.slides.charts/ichartdata/chartdataworkbook/) or live workbook cells.
```csharp
using System;
using Aspose.Slides;
using Aspose.Slides.Charts;
using var presentation = new Presentation("cached-chart.pptx");
foreach (var slide in presentation.Slides)
foreach (var shape in slide.Shapes)
{
if (shape is not IChart chart)
continue;
foreach (var category in chart.ChartData.Categories)
PrintCache("Category", category.CachedValue);
foreach (var series in chart.ChartData.Series)
foreach (var point in series.DataPoints)
{
PrintCache("Value", point.CachedValue);
PrintCache("X", point.CachedXValue);
PrintCache("Y", point.CachedYValue);
PrintCache("Bubble size", point.CachedBubbleSize);
}
}
static void PrintCache(string name, ICachedChartValue value)
{
var number = value.ToDouble();
if (value.Data == null)
Console.WriteLine($"{name}: no cached value");
else if (double.IsNaN(number))
Console.WriteLine($"{name}: {value} (not numeric)");
else
Console.WriteLine($"{name}: {number}");
}
```
Use refresh when you need current source data; use cached reads when the stored snapshot is sufficient. The cache is not a complete copy of the workbook and cannot supply changes made after it was last updated.
### **Recover a Workbook from the Chart Cache**
If a chart uses an external workbook that is missing or unavailable, Aspose.Slides can reconstruct the chart workbook from the data cached in the presentation. Create [LoadOptions](https://reference.aspose.com/slides/net/aspose.slides/loadoptions/), configure its [SpreadsheetOptions](https://reference.aspose.com/slides/net/aspose.slides/loadoptions/spreadsheetoptions/), and set [ISpreadsheetOptions.RecoverWorkbookFromChartCache](https://reference.aspose.com/slides/net/aspose.slides/ispreadsheetoptions/recoverworkbookfromchartcache/) to `true` before opening the presentation.
The following C# example recovers workbook data for a chart that is the first shape on the first slide and references an unavailable external workbook. It accesses the recovered data through [IChart.ChartData](https://reference.aspose.com/slides/net/aspose.slides.charts/ichart/chartdata/) and [IChartData.ChartDataWorkbook](https://reference.aspose.com/slides/net/aspose.slides.charts/ichartdata/chartdataworkbook/):
```csharp
using System;
using Aspose.Slides;
using Aspose.Slides.Charts;
var spreadsheetOptions = new SpreadsheetOptions
{
RecoverWorkbookFromChartCache = true
};
var loadOptions = new LoadOptions
{
SpreadsheetOptions = spreadsheetOptions
};
using var presentation = new Presentation("presentation.pptx", loadOptions);
var slide = presentation.Slides[0];
var shapeCount = slide.Shapes.Count;
if (shapeCount > 0 && slide.Shapes[0] is IChart chart)
{
var recoveredWorkbook = chart.ChartData.ChartDataWorkbook;
// Read or modify the recovered workbook data here.
}
else
{
Console.WriteLine("The first shape is not a chart.");
}
```
If code accesses the external workbook while it is unavailable and recovery is disabled, Aspose.Slides throws an [InvalidOperationException](https://learn.microsoft.com/en-us/dotnet/api/system.invalidoperationexception). Enable recovery only when using the cached chart data is an acceptable fallback, because the cache may not contain changes made to the external workbook after the presentation was last updated.
## **FAQ**
**Can I determine whether a specific chart is linked to an external or an embedded workbook?**
Yes. A chart has a [data source type](https://reference.aspose.com/slides/net/aspose.slides.charts/chartdata/datasourcetype/) and a [path to an external workbook](https://reference.aspose.com/slides/net/aspose.slides.charts/chartdata/externalworkbookpath/); if the source is an external workbook, you can read the full path to make sure an external file is being used.
**Are relative paths to external workbooks supported, and how are they stored?**
Yes. If you specify a relative path, it is automatically converted to an absolute path. The presentation stores the absolute path in the PPTX file, so moving the workbook may require updating the link.
**Can I use workbooks located on network resources/shares?**
Yes, such workbooks can be used as an external data source. However, editing remote workbooks directly from Aspose.Slides is not supported—they can only be used as a source.
**Does Aspose.Slides overwrite the external XLSX when saving the presentation?**
The presentation stores a [link to the external file](https://reference.aspose.com/slides/net/aspose.slides.charts/chartdata/externalworkbookpath/). Editing cell-backed chart data can also update the linked local XLSX file. Use a copy of the workbook if the original must remain unchanged.
**What should I do if the external file is password-protected?**
Aspose.Slides does not accept a password when linking. A common approach is to remove protection in advance or prepare a decrypted copy (for example, using [Aspose.Cells](https://reference.aspose.com/cells/net/)) and link to that copy.
**Can multiple charts reference the same external workbook?**
Yes. Each chart stores its own link. If they all point to the same file, updating that file will be reflected in each chart the next time the data is loaded.
## Related features
- [Edit a chart's embedded workbook](https://docs.aspose.com/slides/features/chart-workbook/)
- [Link charts to external workbooks](https://docs.aspose.com/slides/features/external-chart-workbook/)
- [Fill editable charts with data](https://docs.aspose.com/slides/features/chart-data-binding/)
# Apply Chart Worksheet Formulas in Presentations in .NET
> Apply Excel-style formulas in Aspose.Slides for .NET chart worksheets, recalculate values, and use the results in PowerPoint charts.
Source: https://docs.aspose.com/slides/net/chart-worksheet-formulas/
Updated: 2026-08-21
## **Overview**
PowerPoint charts usually store their source data in an embedded worksheet. In Aspose.Slides for .NET, you can access that worksheet through the chart data workbook, write input values, assign formulas to cells, calculate supported formulas, and use the calculated cells as chart data.
This article explains the complete formula workflow: create a chart, populate its worksheet, assign A1-style or R1C1-style formulas, recalculate them, read the calculated values, connect those cells to a chart series, and save the presentation. It also describes the supported formula syntax, the built-in function subset, cached values, unsupported formulas, and spreadsheet-specific errors.
## **Chart Worksheets and Formulas**
A chart worksheet contains the categories, series names, and values used by a chart. In PowerPoint, you can inspect the worksheet by opening the chart data editor:
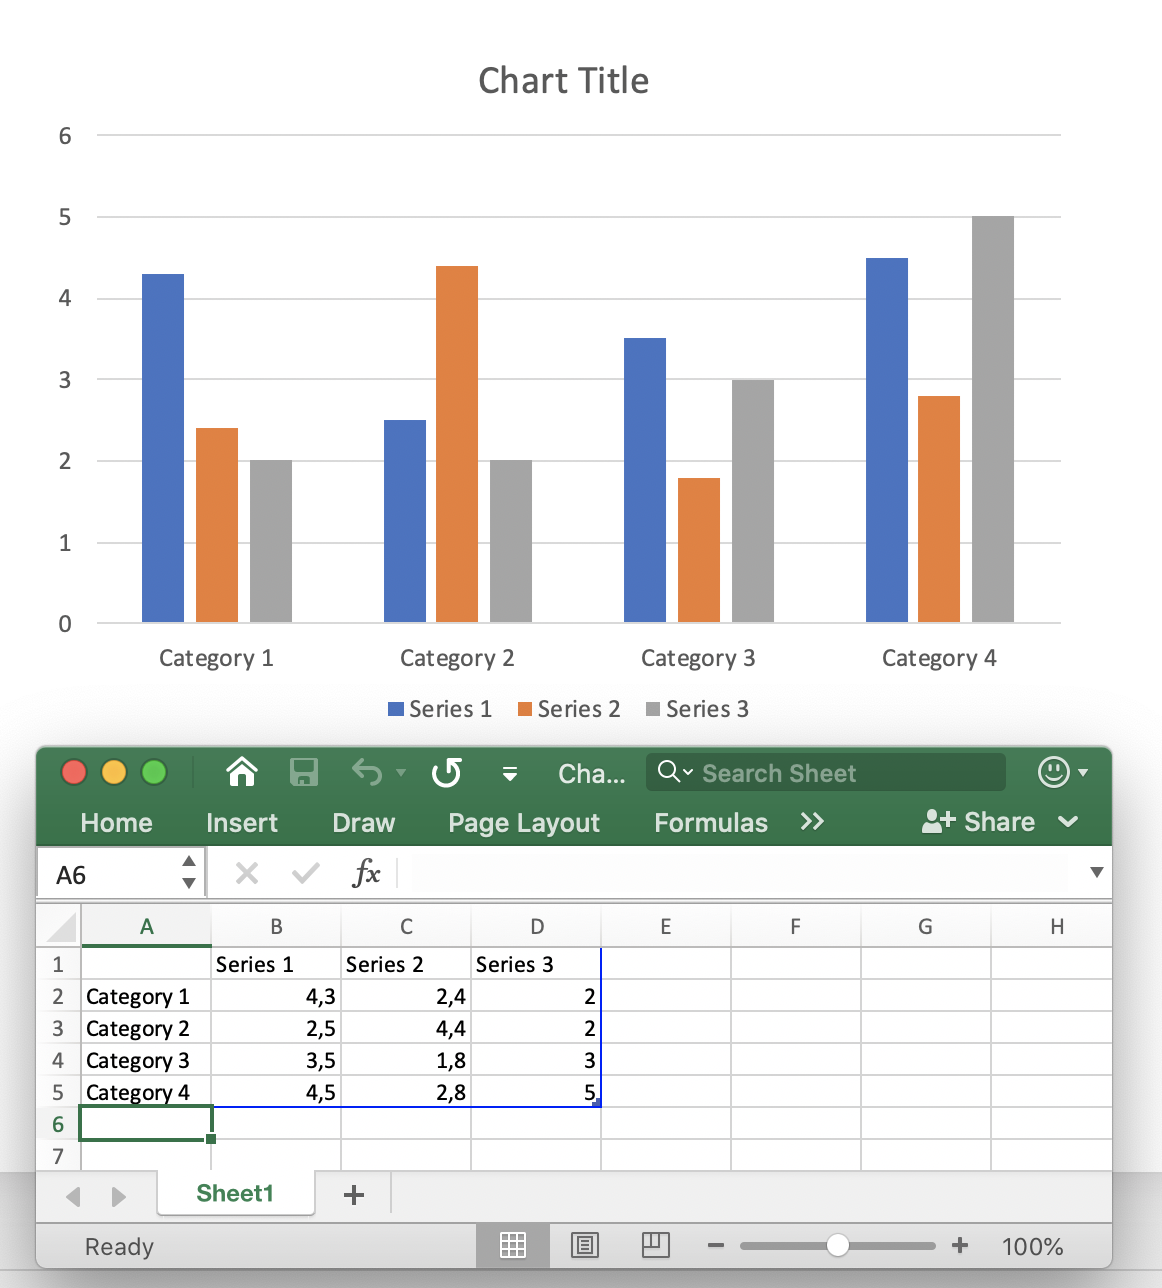
In Aspose.Slides, the worksheet is exposed through the [chart data workbook](https://reference.aspose.com/slides/net/aspose.slides.charts/ichartdataworkbook/). Use the [Formula](https://reference.aspose.com/slides/net/aspose.slides.charts/ichartdatacell/formula/) property for A1-style formulas and the [R1C1Formula](https://reference.aspose.com/slides/net/aspose.slides.charts/ichartdatacell/r1c1formula/) property for R1C1-style formulas. After changing input cells or formulas, call [CalculateFormulas](https://reference.aspose.com/slides/net/aspose.slides.charts/ichartdataworkbook/calculateformulas/) to recalculate supported formulas and update the corresponding cell values.
A calculated cell still exposes its result through the [Value](https://reference.aspose.com/slides/net/aspose.slides.charts/ichartdatacell/value/) property. This is important when you need to inspect a formula result in code or use the cell as a chart data point.
## **Create a Chart and Calculate Worksheet Formulas**
The following example demonstrates an end-to-end workflow. It creates a clustered column chart, clears the sample data, writes quarterly revenue and expense values, calculates profit with formulas, reads the results, uses the calculated cells as chart values, and saves the presentation.
```csharp
using System;
using Aspose.Slides;
using Aspose.Slides.Charts;
using Aspose.Slides.Export;
using var presentation = new Presentation();
var slide = presentation.Slides[0];
var chart = slide.Shapes.AddChart(ChartType.ClusteredColumn, 50, 50, 600, 350);
var workbook = chart.ChartData.ChartDataWorkbook;
var worksheetIndex = 0;
chart.ChartData.Series.Clear();
chart.ChartData.Categories.Clear();
workbook.Clear(worksheetIndex);
var category1 = workbook.GetCell(worksheetIndex, "A2", "Q1");
var category2 = workbook.GetCell(worksheetIndex, "A3", "Q2");
var category3 = workbook.GetCell(worksheetIndex, "A4", "Q3");
workbook.GetCell(worksheetIndex, "B1", "Revenue");
workbook.GetCell(worksheetIndex, "C1", "Expenses");
workbook.GetCell(worksheetIndex, "D1", "Profit");
workbook.GetCell(worksheetIndex, "B2").Value = 120.0;
workbook.GetCell(worksheetIndex, "C2").Value = 80.0;
workbook.GetCell(worksheetIndex, "B3").Value = 150.0;
workbook.GetCell(worksheetIndex, "C3").Value = 95.0;
workbook.GetCell(worksheetIndex, "B4").Value = 135.0;
workbook.GetCell(worksheetIndex, "C4").Value = 110.0;
var profit1 = workbook.GetCell(worksheetIndex, "D2");
var profit2 = workbook.GetCell(worksheetIndex, "D3");
var profit3 = workbook.GetCell(worksheetIndex, "D4");
profit1.Formula = "B2-C2";
profit2.Formula = "B3-C3";
profit3.Formula = "B4-C4";
workbook.CalculateFormulas();
var q1Profit = Convert.ToDouble(profit1.Value); // 40
var q2Profit = Convert.ToDouble(profit2.Value); // 55
var q3Profit = Convert.ToDouble(profit3.Value); // 25
Console.WriteLine($"Q1 profit: {q1Profit}");
Console.WriteLine($"Q2 profit: {q2Profit}");
Console.WriteLine($"Q3 profit: {q3Profit}");
chart.ChartData.Categories.Add(category1);
chart.ChartData.Categories.Add(category2);
chart.ChartData.Categories.Add(category3);
var profitSeries = chart.ChartData.Series.Add(workbook.GetCell(worksheetIndex, "D1"), chart.Type);
profitSeries.DataPoints.AddDataPointForBarSeries(profit1);
profitSeries.DataPoints.AddDataPointForBarSeries(profit2);
profitSeries.DataPoints.AddDataPointForBarSeries(profit3);
profitSeries.Labels.DefaultDataLabelFormat.ShowValue = true;
presentation.Save("chart-formulas.pptx", SaveFormat.Pptx);
```
The chart data points reference `D2:D4`, so the chart uses the calculated profit values. There is no separate chart-refresh call in this workflow: recalculate the workbook first, then use or save the chart data that points to the calculated cells.
## **Use A1-Style Formulas**
A1 notation identifies columns with letters and rows with numbers. Assign A1-style expressions through [IChartDataCell.Formula](https://reference.aspose.com/slides/net/aspose.slides.charts/ichartdatacell/formula/).
```csharp
using Aspose.Slides;
using Aspose.Slides.Charts;
using var presentation = new Presentation();
var slide = presentation.Slides[0];
var chart = slide.Shapes.AddChart(ChartType.ClusteredColumn, 50, 50, 500, 300);
var workbook = chart.ChartData.ChartDataWorkbook;
workbook.GetCell(0, "C3").Value = 10;
workbook.GetCell(0, "F2").Value = 2;
workbook.GetCell(0, "G2").Value = 3;
workbook.GetCell(0, "H2").Value = 4;
var cell = workbook.GetCell(0, "A2");
cell.Formula = "C3+SUM(F2:H2)";
workbook.CalculateFormulas();
var value = cell.Value; // 19
```
Common A1 reference forms are:
| Reference | Relative | Absolute | Mixed |
|---|---|---|---|
| Cell | `A2` | `$A$2` | `A$2`, `$A2` |
| Row | `2:2` | `$2:$2` | — |
| Column | `A:A` | `$A:$A` | — |
| Range | `A2:C4` | `$A$2:$C$4` | `A$2:$C4`, `$A2:C$4` |
Relative references can change when a formula is moved or copied by a spreadsheet application. Absolute references keep both coordinates fixed, while mixed references fix only a row or a column.
## **Use R1C1-Style Formulas**
R1C1 notation identifies both rows and columns numerically. Relative references use offsets in square brackets. Assign this syntax through [IChartDataCell.R1C1Formula](https://reference.aspose.com/slides/net/aspose.slides.charts/ichartdatacell/r1c1formula/).
```csharp
using Aspose.Slides;
using Aspose.Slides.Charts;
using var presentation = new Presentation();
var slide = presentation.Slides[0];
var chart = slide.Shapes.AddChart(ChartType.ClusteredColumn, 50, 50, 500, 300);
var workbook = chart.ChartData.ChartDataWorkbook;
workbook.GetCell(0, "B2").Value = 12;
workbook.GetCell(0, "C2").Value = 5;
var cell = workbook.GetCell(0, "D2");
cell.R1C1Formula = "RC[-2]-RC[-1]";
workbook.CalculateFormulas();
var value = cell.Value; // 7
```
Common R1C1 reference forms are:
| Reference | Relative | Absolute | Mixed |
|---|---|---|---|
| Cell | `R[2]C[3]` | `R2C3` | `R2C[3]`, `R[2]C3` |
| Row | `R[2]` | `R2` | — |
| Column | `C[3]` | `C3` | — |
| Range | `R[2]C[3]:R[5]C[7]` | `R2C3:R5C7` | `R2C3:R[5]C[7]`, `R[2]C3:R5C[7]` |
For example, in cell `D2`, `RC[-2]` means the cell in the same row two columns to the left (`B2`).
## **Formula Constants and Operators**
The built-in formula evaluator supports logical values, numeric literals, strings, spreadsheet error values, arithmetic operators, and comparison operators.
### **Constants and Literals**
| Type | Examples | Notes |
|---|---|---|
| Logical | `TRUE`, `FALSE` | Can be used directly in logical expressions such as `A2=TRUE`. |
| Numeric | `1`, `0.5`, `.3`, `1E-2` | Common and scientific notation are supported. |
| String | `"abc"`, `"2/3/2020 12:00"` | Text literals are enclosed in double quotation marks inside the formula. |
| Error result | `#DIV/0!`, `#N/A`, `#REF!` | A valid formula can evaluate to a spreadsheet error value instead of a normal result. |
This example uses several constant types:
```csharp
using Aspose.Slides;
using Aspose.Slides.Charts;
using var presentation = new Presentation();
var slide = presentation.Slides[0];
var chart = slide.Shapes.AddChart(ChartType.ClusteredColumn, 50, 50, 500, 300);
var workbook = chart.ChartData.ChartDataWorkbook;
workbook.GetCell(0, "A2").Value = false;
workbook.GetCell(0, "B2").Formula = "A2=TRUE";
workbook.GetCell(0, "C2").Formula = "1+0.5";
workbook.GetCell(0, "D2").Formula = ".3*1E-2";
workbook.GetCell(0, "E2").Formula = "\"abc\"";
workbook.GetCell(0, "F2").Formula = "2/0";
workbook.CalculateFormulas();
var logicalValue = workbook.GetCell(0, "B2").Value; // False
var numericValue = workbook.GetCell(0, "C2").Value; // 1.5
var scientificValue = workbook.GetCell(0, "D2").Value; // 0.003
var stringValue = workbook.GetCell(0, "E2").Value; // abc
var errorValue = workbook.GetCell(0, "F2").Value; // #DIV/0!
```
### **Arithmetic Operators**
| Operator | Meaning | Example |
|---|---|---|
| `+` | Addition or unary plus | `2+3` |
| `-` | Subtraction or negation | `2-3`, `-3` |
| `*` | Multiplication | `2*3` |
| `/` | Division | `2/3` |
| `%` | Percent | `30%` |
| `^` | Exponentiation | `2^3` |
Use parentheses to make evaluation order explicit, for example `(A2+B2)*C2`.
### **Comparison Operators**
Comparison expressions return logical values.
| Operator | Meaning | Example |
|---|---|---|
| `=` | Equal to | `A2=3` |
| `<>` | Not equal to | `A2<>3` |
| `>` | Greater than | `A2>3` |
| `>=` | Greater than or equal to | `A2>=3` |
| `<` | Less than | `A2<3` |
| `<=` | Less than or equal to | `A2<=3` |
## **Supported Predefined Functions**
Aspose.Slides includes a built-in formula evaluator for chart worksheets, but it is not a complete Excel calculation engine. The documented function set is limited to the functions below. Do not assume that an arbitrary Excel function can be recalculated by [CalculateFormulas](https://reference.aspose.com/slides/net/aspose.slides.charts/ichartdataworkbook/calculateformulas/).
| Function | Purpose or supported form | Example |
|---|---|---|
| `ABS` | Absolute value | `ABS(A2)` |
| `AVERAGE` | Arithmetic mean | `AVERAGE(B2:B5)` |
| `CEILING` | Round a number upward to a multiple | `CEILING(A2,5)` |
| `CHOOSE` | Select a value by index | `CHOOSE(A2,"Low","High")` |
| `CONCAT` | Join text values | `CONCAT(A2,B2)` |
| `CONCATENATE` | Join text values | `CONCATENATE(A2," ",B2)` |
| `DATE` | Create a date value using the 1900 date system | `DATE(2026,8,19)` |
| `DAYS` | Return the number of days between dates | `DAYS(B2,A2)` |
| `FIND` | Find one text value inside another | `FIND("-",A2)` |
| `FINDB` | Byte-oriented text search | `FINDB("a",A2)` |
| `IF` | Conditional result | `IF(A2>0,A2,0)` |
| `INDEX` | Reference form | `INDEX(A2:C4,2,3)` |
| `LOOKUP` | Vector form | `LOOKUP(A2,B2:B5,C2:C5)` |
| `MATCH` | Vector form | `MATCH(A2,B2:B5,0)` |
| `MAX` | Maximum value | `MAX(B2:B5)` |
| `SUM` | Sum values | `SUM(B2:B5)` |
| `VLOOKUP` | Vertical lookup | `VLOOKUP(A2,B2:D10,3,FALSE)` |
The restrictions shown in the table are significant: `INDEX` is documented in reference form, while `LOOKUP` and `MATCH` are documented in their vector forms. `DATE` uses the 1900 date system. Features and functions not listed here should be treated as unsupported by the Aspose.Slides formula evaluator unless they are documented separately.
## **Calculate Formulas with a Preferred Culture**
Some chart workbook functions interpret text according to culture-specific rules. This is especially important for functions intended for languages that use double-byte character sets (DBCS). To calculate such formulas correctly, create [LoadOptions](https://reference.aspose.com/slides/net/aspose.slides/loadoptions/), set [ISpreadsheetOptions.PreferredCulture](https://reference.aspose.com/slides/net/aspose.slides/ispreadsheetoptions/preferredculture/) through [LoadOptions.SpreadsheetOptions](https://reference.aspose.com/slides/net/aspose.slides/loadoptions/spreadsheetoptions/), and then load the presentation.
The following example selects the Japanese culture, opens a presentation with the configured load options, and calls [IChartDataWorkbook.CalculateFormulas](https://reference.aspose.com/slides/net/aspose.slides.charts/ichartdataworkbook/calculateformulas/) for every chart workbook:
```csharp
using System.Globalization;
using Aspose.Slides;
using Aspose.Slides.Charts;
var loadOptions = new LoadOptions
{
SpreadsheetOptions = new SpreadsheetOptions
{
PreferredCulture = CultureInfo.GetCultureInfo("ja-JP")
}
};
using var presentation = new Presentation("presentation.pptx", loadOptions);
foreach (var slide in presentation.Slides)
{
foreach (var shape in slide.Shapes)
{
if (shape is IChart chart)
{
chart.ChartData.ChartDataWorkbook.CalculateFormulas();
}
}
}
```
The preferred culture is part of the presentation loading configuration, so specify it before creating the [Presentation](https://reference.aspose.com/slides/net/aspose.slides/presentation/) instance. Use the culture expected by the workbook formulas; for example, use `ja-JP` for formulas that should follow Japanese DBCS calculation rules.
## **Recalculation and Cached Values**
Spreadsheet files commonly store both a formula and its last calculated value. Aspose.Slides can therefore read a cached value from [IChartDataCell.Value](https://reference.aspose.com/slides/net/aspose.slides.charts/ichartdatacell/value/) when a presentation is loaded and the relevant chart data has not been changed.
After changing input cells or formulas, do not rely on an old cached result. Call [IChartDataWorkbook.CalculateFormulas](https://reference.aspose.com/slides/net/aspose.slides.charts/ichartdataworkbook/calculateformulas/) before reading calculated values or saving chart data that depends on them.
For formulas outside the supported subset, Aspose.Slides may be unable to parse the formula or establish its dependencies. If the workbook has been modified, the previous cached value can no longer be considered reliable. In that situation, reading the value of a cell with unsupported data can raise [CellUnsupportedDataException](https://reference.aspose.com/slides/net/aspose.slides.spreadsheet/cellunsupporteddataexception/).
If your chart depends on Excel functions that Aspose.Slides does not evaluate, calculate those formulas with a spreadsheet engine that supports them and write the resulting values back to the chart workbook. Do not replace unsupported formulas with guessed values.
## **Handle Formula Errors**
There are two different kinds of problems to distinguish.
A formula can be valid but produce a spreadsheet error result such as `#DIV/0!`, `#N/A`, `#NAME?`, `#NULL!`, `#NUM!`, `#REF!`, or `#VALUE!`. In this case, the error token is a cell result and can be returned through `Value`.
A formula can also fail at the parsing, reference, dependency, or supported-data level. Aspose.Slides provides spreadsheet-specific exceptions for these cases: [CellInvalidFormulaException](https://reference.aspose.com/slides/net/aspose.slides.spreadsheet/cellinvalidformulaexception/), [CellInvalidReferenceException](https://reference.aspose.com/slides/net/aspose.slides.spreadsheet/cellinvalidreferenceexception/), [CellCircularReferenceException](https://reference.aspose.com/slides/net/aspose.slides.spreadsheet/cellcircularreferenceexception/), and [CellUnsupportedDataException](https://reference.aspose.com/slides/net/aspose.slides.spreadsheet/cellunsupporteddataexception/).
When formulas come from templates or user input, handle these exceptions around recalculation and value access:
```csharp
using System;
using Aspose.Slides;
using Aspose.Slides.Charts;
using Aspose.Slides.Spreadsheet;
using var presentation = new Presentation();
var slide = presentation.Slides[0];
var chart = slide.Shapes.AddChart(ChartType.ClusteredColumn, 50, 50, 500, 300);
var workbook = chart.ChartData.ChartDataWorkbook;
var cell = workbook.GetCell(0, "A2");
cell.Formula = "SUM(B2:B5)";
try
{
workbook.CalculateFormulas();
Console.WriteLine(cell.Value);
}
catch (CellInvalidFormulaException ex)
{
Console.Error.WriteLine($"Invalid formula: {ex.Message}");
}
catch (CellInvalidReferenceException ex)
{
Console.Error.WriteLine($"Invalid cell reference: {ex.Message}");
}
catch (CellCircularReferenceException ex)
{
Console.Error.WriteLine($"Circular reference: {ex.Message}");
}
catch (CellUnsupportedDataException ex)
{
Console.Error.WriteLine($"Unsupported spreadsheet data: {ex.Message}");
}
```
## **Practical Limitations**
The formula support in chart worksheets is intended for a defined subset of spreadsheet calculations, not for full Excel compatibility. Keep these constraints in mind when designing a reporting workflow:
- Use only the documented constants, operators, references, and functions when you need Aspose.Slides to recalculate formulas.
- Recalculate after changing cells that formula results depend on.
- Treat cached values from loaded presentations as snapshots, not as a replacement for recalculation after edits.
- Test formulas from existing templates before relying on their calculated values, especially when they use functions outside the documented list.
- For formulas that require a full spreadsheet calculation engine, calculate them externally and then update the chart workbook with the resulting values.
## **FAQ**
**What is the difference between `Formula` and `R1C1Formula`?**
[Formula](https://reference.aspose.com/slides/net/aspose.slides.charts/ichartdatacell/formula/) stores an A1-style expression such as `B2-C2`. [R1C1Formula](https://reference.aspose.com/slides/net/aspose.slides.charts/ichartdatacell/r1c1formula/) stores an R1C1-style expression such as `RC[-2]-RC[-1]`. Use the notation that best matches how you generate or copy formulas.
**Do I need to read the cell itself or its value after calculation?**
[IChartDataWorkbook.GetCell](https://reference.aspose.com/slides/net/aspose.slides.charts/ichartdataworkbook/getcell/) returns an `IChartDataCell`. To obtain the calculated result, read that cell's [Value](https://reference.aspose.com/slides/net/aspose.slides.charts/ichartdatacell/value/) property after recalculation.
**When should I call `CalculateFormulas`?**
Call [CalculateFormulas](https://reference.aspose.com/slides/net/aspose.slides.charts/ichartdataworkbook/calculateformulas/) after changing input values or formulas and before you depend on the calculated results. This updates the values of formulas that the built-in evaluator supports.
**Does Aspose.Slides support every Excel function?**
No. The built-in evaluator supports a documented subset of functions. Functions outside that subset should not be assumed to recalculate correctly. If full Excel formula compatibility is required, perform the calculation with an appropriate spreadsheet engine and write the final values to the chart workbook.
**What happens if a loaded presentation contains an unsupported formula?**
If the chart data has not changed, the workbook may still contain a previously calculated cached value. After related data is modified, that cached value may no longer be valid. Accessing a cell whose formula cannot be handled can raise [CellUnsupportedDataException](https://reference.aspose.com/slides/net/aspose.slides.spreadsheet/cellunsupporteddataexception/).
**Are formula error values the same as .NET exceptions?**
No. A result such as `#DIV/0!` is a spreadsheet value produced by a valid calculation. Exceptions such as [CellInvalidFormulaException](https://reference.aspose.com/slides/net/aspose.slides.spreadsheet/cellinvalidformulaexception/) or [CellCircularReferenceException](https://reference.aspose.com/slides/net/aspose.slides.spreadsheet/cellcircularreferenceexception/) indicate that the formula cannot be processed normally.
**Does a chart update automatically when a formula cell changes?**
A chart series can reference workbook cells. Recalculate the workbook first, then save or render the presentation. If the chart data points reference the calculated cells, the chart uses those updated cell values; no separate chart-refresh method is required for this workflow.
**Can charts use an external Excel workbook?**
Yes, chart data can be configured to use an external workbook through the chart data API. However, the formula calculation workflow described in this article concerns the chart data workbook and the formula subset evaluated by Aspose.Slides. Do not assume that [CalculateFormulas](https://reference.aspose.com/slides/net/aspose.slides.charts/ichartdataworkbook/calculateformulas/) provides full recalculation of arbitrary formulas in an external XLSX file.
**Can I use formulas that reference another worksheet or workbook?**
Excel-style references may exist in chart workbooks, but formula evaluation is limited by the supported parser and function set. If a cross-sheet or external reference is essential, validate that exact formula with your target Aspose.Slides version. For workflows that require broad Excel reference compatibility, calculate the workbook externally and write the resolved values back to the chart data.
**Should formula strings start with `=`?**
The Aspose.Slides API examples assign expressions such as `B2-C2` or `SUM(B2:B5)` without a leading `=`. Using that form keeps generated formulas consistent with the documented API examples.
## Related features
- [Recalculate chart workbook formulas](https://docs.aspose.com/slides/features/chart-formulas/)
# Clone Presentation Slides in .NET
> Quickly duplicate PowerPoint slides with Aspose.Slides for .NET. Follow our clear code examples to automate PPT creation in seconds and eliminate manual work.
Source: https://docs.aspose.com/slides/net/clone-slides/
Updated: 2026-10-26
## **Introduction**
Cloning is the process of making an exact copy or replica of something. Aspose.Slides also allows you to copy (clone) any slide and then insert the cloned slide into the current presentation or any other open presentation. Slide cloning creates a new slide that developers can modify without affecting the original slide. There are several ways to clone a slide:
- Clone at the end of a presentation.
- Clone at another position within a presentation.
- Clone at the end of another presentation.
- Clone at another position in another presentation.
- Clone together with its master slide into another presentation.
In Aspose.Slides for .NET, the slide collection (a collection of [ISlide](https://reference.aspose.com/slides/net/aspose.slides/islide/) objects) exposed by the [Presentation](https://reference.aspose.com/slides/net/aspose.slides/presentation/) object provides the [AddClone](https://reference.aspose.com/slides/net/aspose.slides/islidecollection/addclone/) and [InsertClone](https://reference.aspose.com/slides/net/aspose.slides/ishapecollection/insertclone/) methods to perform the slide cloning operations described above.
## **Clone a Slide at the End of a Presentation**
If you want to clone a slide and then use it within the same presentation file at the end of the existing slides, use the [AddClone](https://reference.aspose.com/slides/net/aspose.slides/islidecollection/methods/addclone/index) method according to the steps listed below:
1. Create an instance of the [Presentation](https://reference.aspose.com/slides/net/aspose.slides/presentation) class.
1. Instantiate the [ISlideCollection](https://reference.aspose.com/slides/net/aspose.slides/islidecollection) class by referencing the Slides collection exposed by the [Presentation](https://reference.aspose.com/slides/net/aspose.slides/presentation) object.
1. Call the [AddClone](https://reference.aspose.com/slides/net/aspose.slides/islidecollection/methods/addclone/index) method exposed by the [ISlideCollection](https://reference.aspose.com/slides/net/aspose.slides/islidecollection) object and pass the slide to be cloned as a parameter to the [AddClone](https://reference.aspose.com/slides/net/aspose.slides/islidecollection/methods/addclone/index) method.
1. Write the modified presentation file.
In the example given below, we have cloned a slide (lying at the first position – zero index – of the presentation) to the end of the presentation.
```c#
using Aspose.Slides;
using Aspose.Slides.Export;
// Instantiate Presentation class that represents a presentation file
using (Presentation pres = new Presentation("CloneWithinSamePresentationToEnd.pptx"))
{
// Clone the desired slide to the end of the collection of slides in the same presentation
ISlideCollection slds = pres.Slides;
slds.AddClone(pres.Slides[0]);
// Write the modified presentation to disk
pres.Save("Aspose_CloneWithinSamePresentationToEnd_out.pptx", SaveFormat.Pptx);
}
```
## **Clone a Slide to Another Position within a Presentation**
If you want to clone a slide and then use it within the same presentation file but at a different position, use the [InsertClone](https://reference.aspose.com/slides/net/aspose.slides.ishapecollection/insertclone/methods/1) method:
1. Create an instance of the [Presentation](https://reference.aspose.com/slides/net/aspose.slides/presentation) class.
1. Instantiate the class by referencing the **Slides** collection exposed by the [Presentation](https://reference.aspose.com/slides/net/aspose.slides/presentation) object.
1. Call the [InsertClone](https://reference.aspose.com/slides/net/aspose.slides.ishapecollection/insertclone/methods/1) method exposed by the [ISlideCollection](https://reference.aspose.com/slides/net/aspose.slides/islidecollection) object and pass the slide to be cloned along with the index for the new position as a parameter to the [InsertClone](https://reference.aspose.com/slides/net/aspose.slides.ishapecollection/insertclone/methods/1) method.
1. Write the modified presentation as a PPTX file.
In the example given below, we have cloned a slide (lying at index 1 – position 2 – of the presentation) to index 2 – position 3 – of the presentation.
```c#
using Aspose.Slides;
using Aspose.Slides.Export;
// Instantiate Presentation class that represents a presentation file
using (Presentation pres = new Presentation("CloneWithInSamePresentation.pptx"))
{
// Clone the desired slide to the end of the collection of slides in the same presentation
ISlideCollection slds = pres.Slides;
// Clone the desired slide to the specified index in the same presentation
slds.InsertClone(2, pres.Slides[1]);
// Write the modified presentation to disk
pres.Save("Aspose_CloneWithInSamePresentation_out.pptx", SaveFormat.Pptx);
}
```
## **Clone a Slide at the End of Another Presentation**
If you need to clone a slide from one presentation and use it in another presentation file, at the end of the existing slides:
1. Create an instance of the [Presentation](https://reference.aspose.com/slides/net/aspose.slides/presentation) class containing the presentation the slide will be cloned from.
1. Create an instance of the [Presentation](https://reference.aspose.com/slides/net/aspose.slides/presentation) class containing the destination presentation that the slide will be added to.
1. Instantiate the [ISlideCollection](https://reference.aspose.com/slides/net/aspose.slides/islidecollection) class by referencing the **Slides** collection exposed by the Presentation object of the destination presentation.
1. Call the [AddClone](https://reference.aspose.com/slides/net/aspose.slides/islidecollection/methods/addclone/index) method exposed by the [ISlideCollection](https://reference.aspose.com/slides/net/aspose.slides/islidecollection) object and pass the slide from the source presentation as a parameter to the [AddClone](https://reference.aspose.com/slides/net/aspose.slides/islidecollection/methods/addclone/index) method.
1. Write the modified destination presentation file.
In the example given below, we have cloned a slide (from the first index of the source presentation) to the end of the destination presentation.
```c#
using Aspose.Slides;
using Aspose.Slides.Export;
// Instantiate Presentation class to load the source presentation file
using (Presentation srcPres = new Presentation("CloneAtEndOfAnother.pptx"))
{
// Instantiate Presentation class for destination PPTX (where slide is to be cloned)
using (Presentation destPres = new Presentation())
{
// Clone the desired slide from the source presentation to the end of the collection of slides in destination presentation
ISlideCollection slds = destPres.Slides;
slds.AddClone(srcPres.Slides[0]);
// Write the destination presentation to disk
destPres.Save("Aspose2_out.pptx", SaveFormat.Pptx);
}
}
```
## **Clone a Slide to Another Position in Another Presentation**
If you need to clone a slide from one presentation and use it in another presentation file, at a specific position:
1. Create an instance of the [Presentation](https://reference.aspose.com/slides/net/aspose.slides/presentation) class containing the source presentation the slide will be cloned from.
1. Create an instance of the [Presentation](https://reference.aspose.com/slides/net/aspose.slides/presentation) class containing the presentation the slide will be added to.
1. Instantiate the [ISlideCollection](https://reference.aspose.com/slides/net/aspose.slides/islidecollection) class by referencing the Slides collection exposed by the Presentation object of the destination presentation.
1. Call the [InsertClone](https://reference.aspose.com/slides/net/aspose.slides.ishapecollection/insertclone/methods/1) method exposed by the [ISlideCollection](https://reference.aspose.com/slides/net/aspose.slides/islidecollection) object and pass the slide from the source presentation along with the desired position as a parameter to the [InsertClone](https://reference.aspose.com/slides/net/aspose.slides.ishapecollection/insertclone/methods/1) method.
1. Write the modified destination presentation file.
In the example given below, we have cloned a slide (from the zero index of the source presentation) to index 1 (position 2) of the destination presentation.
```c#
using Aspose.Slides;
using Aspose.Slides.Export;
// Instantiate Presentation class to load the source presentation file
using (Presentation srcPres = new Presentation("CloneAtEndOfAnother.pptx"))
{
// Instantiate Presentation class for destination PPTX (where slide is to be cloned)
using (Presentation destPres = new Presentation())
{
ISlideCollection slds = destPres.Slides;
slds.InsertClone(2, srcPres.Slides[0]);
// Write the destination presentation to disk
destPres.Save("Aspose2_out.pptx", SaveFormat.Pptx);
}
}
```
## **Clone a Slide with Its Master Slide to Another Presentation**
If you need to clone a slide with a master slide from one presentation from and use it in another presentation, you need to clone the desired master slide from source presentation to destination presentation first. Then you need to use that master slide for cloning slide with master slide. The **AddClone(ISlide, IMasterSlide)** expects a master slide from destination presentation rather than from source presentation. In order to clone the slide with a master, please follow the steps below:
1. Create an instance of the [Presentation](https://reference.aspose.com/slides/net/aspose.slides/presentation) class containing the source presentation the slide will be cloned from.
1. Create an instance of the [Presentation](https://reference.aspose.com/slides/net/aspose.slides/presentation) class containing the destination presentation the slide will be cloned to.
1. Access the slide to be cloned along with the master slide.
1. Instantiate the [IMasterSlideCollection](https://reference.aspose.com/slides/net/aspose.slides/imasterslidecollection) class by referencing the Masters collection exposed by the [Presentation](https://reference.aspose.com/slides/net/aspose.slides/presentation) object of the destination presentation.
1. Call the [AddClone](https://reference.aspose.com/slides/net/aspose.slides/islidecollection/methods/addclone/index) method exposed by the [IMasterSlideCollection](https://reference.aspose.com/slides/net/aspose.slides/imasterslidecollection) object and pass the master from the source PPTX to be cloned as a parameter to the [AddClone](https://reference.aspose.com/slides/net/aspose.slides/islidecollection/methods/addclone/index) method.
1. Instantiate the [ISlideCollection](https://reference.aspose.com/slides/net/aspose.slides/islidecollection) class by setting the reference to the Slides collection exposed by the [Presentation](https://reference.aspose.com/slides/net/aspose.slides/presentation) object of the destination presentation.
1. Call the [AddClone](https://reference.aspose.com/slides/net/aspose.slides/islidecollection/methods/addclone/index) method exposed by the [ISlideCollection](https://reference.aspose.com/slides/net/aspose.slides/islidecollection) object and pass the slide from the source presentation to be cloned and master slide as a parameter to the [AddClone](https://reference.aspose.com/slides/net/aspose.slides/islidecollection/methods/addclone/index) method.
1. Write the modified destination presentation file.
In the example given below, we have cloned a slide with a master (lying at the zero index of the source presentation) to the end of the destination presentation using a master from source slide.
```c#
using Aspose.Slides;
using Aspose.Slides.Export;
// Instantiate Presentation class to load the source presentation file
using (Presentation srcPres = new Presentation("CloneToAnotherPresentationWithMaster.pptx"))
{
// Instantiate Presentation class for destination presentation (where slide is to be cloned)
using (Presentation destPres = new Presentation())
{
// Instantiate ISlide from the collection of slides in source presentation along with
// Master slide
ISlide SourceSlide = srcPres.Slides[0];
IMasterSlide SourceMaster = SourceSlide.LayoutSlide.MasterSlide;
// Clone the desired master slide from the source presentation to the collection of masters in the
// Destination presentation
IMasterSlideCollection masters = destPres.Masters;
IMasterSlide DestMaster = SourceSlide.LayoutSlide.MasterSlide;
// Clone the desired master slide from the source presentation to the collection of masters in the
// Destination presentation
IMasterSlide iSlide = masters.AddClone(SourceMaster);
// Clone the desired slide from the source presentation with the desired master to the end of the
// Collection of slides in the destination presentation
ISlideCollection slds = destPres.Slides;
slds.AddClone(SourceSlide, iSlide, true);
// Clone the desired master slide from the source presentation to the collection of masters in the // Destination presentation
// Save the destination presentation to disk
destPres.Save("CloneToAnotherPresentationWithMaster_out.pptx", SaveFormat.Pptx);
}
}
```
## **Clone a Slide at the End of a Specified Section**
With Aspose.Slides for .NET, you can clone a slide from one section of a presentation and insert that slide into another section in the same presentation. In this case, you have to use the [AddClone](https://reference.aspose.com/slides/net/aspose.slides/islidecollection/methods/addclone/index) method from the [ISlideCollection](https://reference.aspose.com/slides/net/aspose.slides/islidecollection) Interface.
This C# code shows you how to clone a slide and insert the cloned slide into a specified section:
```c#
using Aspose.Slides;
using Aspose.Slides.Export;
using (Presentation pres = new Presentation())
{
ISlide slide = pres.Slides.AddEmptySlide(pres.Slides[0].LayoutSlide);
slide.Shapes.AddAutoShape(ShapeType.Ellipse, 150, 150, 100, 100); // to clone
ISlide slide2 = pres.Slides.AddEmptySlide(pres.Slides[0].LayoutSlide);
ISection section = pres.Sections.AddSection("Section2", slide2);
pres.Slides.AddClone(slide, section);
pres.Save("pres.pptx", SaveFormat.Pptx);
}
```
## **Ensure Matching Slide Size**
When cloning slides into another presentation, make sure the destination presentation has the same slide size as the source. If the slide sizes differ, Aspose.Slides does not automatically rescale the cloned shapes—their original coordinates and dimensions are preserved, which may cause the content to appear misaligned or extend beyond the slide boundaries.
You can set the destination presentation's slide size to match the source before cloning the master and slide:
```cs
SizeF sourceSize = sourcePresentation.SlideSize.Size;
targetPresentation.SlideSize.SetSize(
sourceSize.Width, sourceSize.Height, SlideSizeScaleType.DoNotScale);
```
Do this before cloning the master and the slide.
## **FAQ**
**Do speaker notes and reviewer comments get cloned?**
Yes. The notes page and review comments are included in the clone. If you don’t want them, [remove them](https://docs.aspose.com/slides/net/presentation-notes/) after insertion.
**How are charts and their data sources handled?**
The chart object, formatting, and embedded data are copied. If the chart was linked to an external source (e.g., an OLE-embedded workbook), that linkage is preserved as an [OLE object](https://docs.aspose.com/slides/net/manage-ole/). After moving between files, verify data availability and refresh behavior.
**Can I control the insertion position and sections for the clone?**
Yes. You can insert the clone at a specific slide index and place it into a chosen [section](https://docs.aspose.com/slides/net/slide-section/). If the target section doesn’t exist, create it first and then move the slide into it.
Related feature: [Clone slides between presentations](https://docs.aspose.com/slides/features/clone-slides/).
## Related features
- [Split presentations by cloning slides](https://docs.aspose.com/slides/features/split-presentations/)
## Related articles
- [Apply a theme to a presentation](https://docs.aspose.com/slides/net/apply-a-theme-to-a-presentation/)
- [Public API and Backwards Incompatible Changes in Aspose.Slides for .NET 14.4.0](https://docs.aspose.com/slides/net/public-api-and-backwards-incompatible-changes-in-aspose-slides-for-net-14-4-0/)
# Code Comparison for common features with OpenXML
>
Source: https://docs.aspose.com/slides/net/code-comparison-for-common-features-with-openxml/
Updated: 2024-11-01
This section includes the following topics
- [Add a comment to a slide](https://docs.aspose.com/slides/net/add-a-comment-to-a-slide/)
- [Adding Slide to Presentation](https://docs.aspose.com/slides/net/adding-slide-to-presentation/)
- [Apply a theme to a presentation](https://docs.aspose.com/slides/net/apply-a-theme-to-a-presentation/)
- [Change the fill color of a shape in a presentation](https://docs.aspose.com/slides/net/change-the-fill-color-of-a-shape-in-a-presentation/)
- [Count the number of Slides](https://docs.aspose.com/slides/net/count-the-number-of-slides/)
- [Create a presentation document](https://docs.aspose.com/slides/net/create-a-presentation-document/)
- [Delete all the comments by an author](https://docs.aspose.com/slides/net/delete-all-the-comments-by-an-author/)
- [Delete a Slide](https://docs.aspose.com/slides/net/delete-a-slide/)
- [Get all the external hyperlinks in a presentation](https://docs.aspose.com/slides/net/get-all-the-external-hyperlinks-in-a-presentation/)
- [Get all the text in all the slides](https://docs.aspose.com/slides/net/get-all-the-text-in-all-the-slides/)
- [Get all the text in a slide](https://docs.aspose.com/slides/net/get-all-the-text-in-a-slide/)
- [Get the titles of all the slides](https://docs.aspose.com/slides/net/get-the-titles-of-all-the-slides/)
- [Move a paragraph from one presentation to another](https://docs.aspose.com/slides/net/move-a-paragraph-from-one-presentation-to-another/)
- [Move a slide to a new position](https://docs.aspose.com/slides/net/move-a-slide-to-a-new-position/)
## Related articles
- [Missing Features in OpenXML](https://docs.aspose.com/slides/net/missing-features-in-openxml/)
- [Aspose.Slides for OpenXML](https://docs.aspose.com/slides/net/aspose-slides-for-openxml/)
- [Code Comparison for common features with VSTO](https://docs.aspose.com/slides/net/code-comparison-for-common-features-with-vsto/)
# Code Comparison for common features with VSTO
>
Source: https://docs.aspose.com/slides/net/code-comparison-for-common-features-with-vsto/
Updated: 2024-11-01
This section includes the following topics
- [Add Image in Table Cell](https://docs.aspose.com/slides/net/add-image-in-table-cell/)
- [Adding Picture Frame with Animation in VSTO and Aspose.Slides](https://docs.aspose.com/slides/net/adding-picture-frame-with-animation-in-vsto-and-aspose-slides/)
- [Adding Shapes to Presentation](https://docs.aspose.com/slides/net/adding-shapes-to-presentation/)
- [Adding Text Dynamically](https://docs.aspose.com/slides/net/adding-text-dynamically/)
- [Add Picture Frame to Presentation](https://docs.aspose.com/slides/net/add-picture-frame-to-presentation/)
- [Create a Chart](https://docs.aspose.com/slides/net/create-a-chart/)
- [Create and Embed an Excel Chart as an OLE Object](https://docs.aspose.com/slides/net/create-and-embed-an-excel-chart-as-an-ole-object/)
- [Create a New Presentation in VSTO and Aspose.Slides](https://docs.aspose.com/slides/net/create-a-new-presentation-in-vsto-and-aspose-slides/)
- [Creating a Table on PowerPoint Slide in VSTO and Aspose.Slides](https://docs.aspose.com/slides/net/creating-a-table-on-powerpoint-slide-in-vsto-and-aspose-slides/)
- [Find and Replace Text without Losing Format in Presentation](https://docs.aspose.com/slides/net/find-and-replace-text-without-losing-format-in-presentation/)
- [Format Text](https://docs.aspose.com/slides/net/format-text/)
- [Opening a Presentation in VSTO and Aspose.Slides](https://docs.aspose.com/slides/net/opening-a-presentation-in-vsto-and-aspose-slides/)
- [Removing row or column in Table in VSTO and Aspose.Slides](https://docs.aspose.com/slides/net/removing-row-or-column-in-table-in-vsto-and-aspose-slides/)
- [Setting Background Color of Master Slide](https://docs.aspose.com/slides/net/setting-background-color-of-master-slide/)
## Related articles
- [Creating a Table on PowerPoint Slide in VSTO and Aspose.Slides](https://docs.aspose.com/slides/net/creating-a-table-on-powerpoint-slide-in-vsto-and-aspose-slides/)
- [Adding Picture Frame with Animation in VSTO and Aspose.Slides](https://docs.aspose.com/slides/net/adding-picture-frame-with-animation-in-vsto-and-aspose-slides/)
- [Missing Features in VSTO](https://docs.aspose.com/slides/net/missing-features-in-vsto/)
# Compare Presentation Slides in .NET
> Compare PowerPoint and OpenDocument presentations programmatically with Aspose.Slides for .NET. Identify slide differences in code quickly.
Source: https://docs.aspose.com/slides/net/compare-slides/
Updated: 2026-08-05
## **Overview**
Aspose.Slides allows you to compare slides, layout slides, and master slides using the `Equals` method provided by the `IBaseSlide` interface and the `BaseSlide` class. This method returns `true` when the compared slides are identical in their structure and static content.
## **Compare Two Slides**
Equals method has been added to [IBaseSlide](https://reference.aspose.com/slides/net/aspose.slides/ibaseslide) interface and [BaseSlide](https://reference.aspose.com/slides/net/aspose.slides/baseslide) class. It returns true for the slides/layout and slides/master slides which identical by its structure and static content.
Two slides are equal if all shapes, styles, texts, animation and other settings. etc. The comparison doesn't take into account unique identifier values, e.g. SlideId and dynamic content, e.g. current date value in Date Placeholder.
```c#
using Aspose.Slides;
using (Presentation presentation1 = new Presentation("AccessSlides.pptx"))
using (Presentation presentation2 = new Presentation("HelloWorld.pptx"))
{
for (int i = 0; i < presentation1.Masters.Count; i++)
{
for (int j = 0; j < presentation2.Masters.Count; j++)
{
if (presentation1.Masters[i].Equals(presentation2.Masters[j]))
Console.WriteLine(string.Format("SomePresentation1 MasterSlide#{0} is equal to SomePresentation2 MasterSlide#{1}", i, j));
}
}
}
```
## **FAQ**
### Does the fact that a slide is hidden affect the comparison of the slides themselves?
[Hidden status](https://reference.aspose.com/slides/net/aspose.slides/slide/hidden/) is a presentation/playback-level property, not visual content. The equality of two specific slides is determined by their structure and static content; the mere fact that a slide is hidden does not make the slides different.
### Are hyperlinks and their parameters taken into account?
Yes. Links are part of a slide’s static content. If the URL or the hyperlink action differs, this is usually treated as a difference in static content.
### If a chart refers to an external Excel file, will the contents of that file be taken into account?
No. The comparison is performed based on the slides themselves. External data sources are generally not read at comparison time; only what is present in the slide’s structure and static state is considered.
## Related features
- [Compare slides](https://docs.aspose.com/slides/features/compare-slides/)
# Manage Connectors in Presentations in .NET
> Learn how to add, attach, reroute, adjust, and inspect straight, bent, and curved PowerPoint connectors with Aspose.Slides for .NET.
Source: https://docs.aspose.com/slides/net/connector/
Updated: 2026-08-27
## **Overview**
A connector is a line that can remain attached to two shapes when either shape moves. Its ends attach to connection sites, represented by green dots in PowerPoint. Some bent and curved connectors also expose adjustment points, represented by orange dots, that control the position of individual connector segments.
Aspose.Slides represents connectors through the [IConnector](https://reference.aspose.com/slides/net/aspose.slides/iconnector/) interface. You can create them, attach their ends to shapes, choose connection sites, reroute them, and modify the geometry of connectors that have adjustment points.
## **Connector Types**
The [ShapeType](https://reference.aspose.com/slides/net/aspose.slides/shapetype/) enumeration includes straight, bent, and curved connector presets. The following table shows the available connector geometries and the number of adjustment points defined by each preset.
| Connector | Image | Number of adjustment points |
|---|---|---|
| `ShapeType.Line` |  | 0 |
| `ShapeType.StraightConnector1` |  | 0 |
| `ShapeType.BentConnector2` |  | 0 |
| `ShapeType.BentConnector3` |  | 1 |
| `ShapeType.BentConnector4` |  | 2 |
| `ShapeType.BentConnector5` | 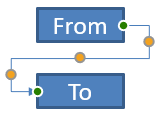 | 3 |
| `ShapeType.CurvedConnector2` |  | 0 |
| `ShapeType.CurvedConnector3` |  | 1 |
| `ShapeType.CurvedConnector4` |  | 2 |
| `ShapeType.CurvedConnector5` | 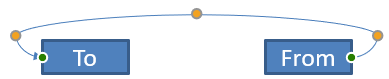 | 3 |
The number and meaning of adjustment points are part of the selected connector preset. Do not assume that two different connector types expose the same collection layout.
## **Connect Two Shapes**
Use [IShapeCollection.AddConnector](https://reference.aspose.com/slides/net/aspose.slides/ishapecollection/addconnector/) to add a connector, and assign its [StartShapeConnectedTo](https://reference.aspose.com/slides/net/aspose.slides/connector/startshapeconnectedto/) and [EndShapeConnectedTo](https://reference.aspose.com/slides/net/aspose.slides/connector/endshapeconnectedto/) properties. After both ends are attached, [IConnector.Reroute](https://reference.aspose.com/slides/net/aspose.slides/iconnector/reroute/) selects a short route between the shapes.
The following example connects an ellipse and a rectangle with a bent connector:
```csharp
using Aspose.Slides;
using Aspose.Slides.Export;
using var presentation = new Presentation();
var slide = presentation.Slides[0];
var ellipse = slide.Shapes.AddAutoShape(ShapeType.Ellipse, 40, 80, 120, 80);
var rectangle = slide.Shapes.AddAutoShape(ShapeType.Rectangle, 320, 240, 140, 80);
var connector = slide.Shapes.AddConnector(ShapeType.BentConnector2, 0, 0, 10, 10);
connector.StartShapeConnectedTo = ellipse;
connector.EndShapeConnectedTo = rectangle;
connector.Reroute();
presentation.Save("connected-shapes.pptx", SaveFormat.Pptx);
```
Calling `Reroute` can change the [StartShapeConnectionSiteIndex](https://reference.aspose.com/slides/net/aspose.slides/connector/startshapeconnectionsiteindex/) and [EndShapeConnectionSiteIndex](https://reference.aspose.com/slides/net/aspose.slides/connector/endshapeconnectionsiteindex/) values. Assign specific connection sites after rerouting if those sites must remain fixed.
## **Choose a Connection Site**
Each connectable shape reports its number of sites through [ConnectionSiteCount](https://reference.aspose.com/slides/net/aspose.slides/shape/connectionsitecount/). Validate a preferred zero-based site index before assigning it to a connector end; site counts vary by shape geometry.
This example attaches the connector to a particular site on the ellipse when that site exists:
```csharp
using System;
using Aspose.Slides;
using Aspose.Slides.Export;
using var presentation = new Presentation();
var slide = presentation.Slides[0];
var ellipse = slide.Shapes.AddAutoShape(ShapeType.Ellipse, 40, 80, 120, 80);
var rectangle = slide.Shapes.AddAutoShape(ShapeType.Rectangle, 320, 240, 140, 80);
var connector = slide.Shapes.AddConnector(ShapeType.BentConnector3, 0, 0, 10, 10);
connector.StartShapeConnectedTo = ellipse;
connector.EndShapeConnectedTo = rectangle;
uint preferredSiteIndex = 2;
if (preferredSiteIndex < ellipse.ConnectionSiteCount)
{
connector.StartShapeConnectionSiteIndex = preferredSiteIndex;
}
else
{
Console.WriteLine($"The ellipse has only {ellipse.ConnectionSiteCount} connection sites.");
}
presentation.Save("specific-connection-site.pptx", SaveFormat.Pptx);
```
## **Adjust a Connector Point**
Connectors with adjustment points expose them through [IGeometryShape.Adjustments](https://reference.aspose.com/slides/net/aspose.slides/igeometryshape/adjustments/). Inspect every [IAdjustValue](https://reference.aspose.com/slides/net/aspose.slides/iadjustvalue/) and check its [Type](https://reference.aspose.com/slides/net/aspose.slides/adjustvalue/type/) before changing its [RawValue](https://reference.aspose.com/slides/net/aspose.slides/adjustvalue/rawvalue/). The general rules for identifying preset shape adjustments are described in [Shape Manipulation](https://docs.aspose.com/slides/net/shape-manipulations/).
The number, order, meaning, and valid value range of connector adjustments depend on the connector preset. The `Type` property is read-only, while the adjustment value is writable. The read-only [Name](https://reference.aspose.com/slides/net/aspose.slides/adjustvalue/name/) property provides additional identification when a connector contains more than one adjustment of the same semantic type.
### **Route Around an Obstacle**
In the following layout, a `BentConnector5` connector between two shapes passes through a third shape:
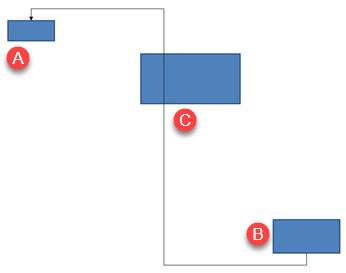
This code creates the obstructed connector:
```csharp
using System.Drawing;
using Aspose.Slides;
using Aspose.Slides.Export;
using var presentation = new Presentation();
var slide = presentation.Slides[0];
slide.Shapes.AddAutoShape(ShapeType.Rectangle, 300, 150, 150, 75);
var sourceShape = slide.Shapes.AddAutoShape(ShapeType.Rectangle, 500, 400, 100, 50);
var targetShape = slide.Shapes.AddAutoShape(ShapeType.Rectangle, 100, 100, 70, 30);
var connector = slide.Shapes.AddConnector(ShapeType.BentConnector5, 20, 20, 400, 300);
connector.LineFormat.EndArrowheadStyle = LineArrowheadStyle.Triangle;
connector.LineFormat.FillFormat.FillType = FillType.Solid;
connector.LineFormat.FillFormat.SolidFillColor.Color = Color.Black;
connector.StartShapeConnectedTo = sourceShape;
connector.EndShapeConnectedTo = targetShape;
connector.StartShapeConnectionSiteIndex = 2;
presentation.Save("connector-obstruction.pptx", SaveFormat.Pptx);
```
Moving the vertical bend changes the route so that the connector bypasses the obstacle:
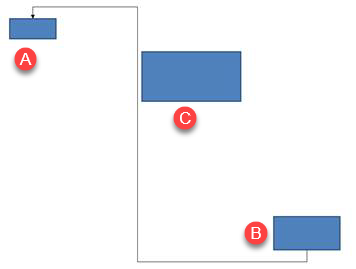
Instead of assuming that collection index `1` always represents the vertical bend, this example searches for `ConnectorBendPositionY` and changes it only when the expected semantic type is present:
```csharp
using System;
using System.Drawing;
using Aspose.Slides;
using Aspose.Slides.Export;
using var presentation = new Presentation();
var slide = presentation.Slides[0];
slide.Shapes.AddAutoShape(ShapeType.Rectangle, 300, 150, 150, 75);
var sourceShape = slide.Shapes.AddAutoShape(ShapeType.Rectangle, 500, 400, 100, 50);
var targetShape = slide.Shapes.AddAutoShape(ShapeType.Rectangle, 100, 100, 70, 30);
var connector = slide.Shapes.AddConnector(ShapeType.BentConnector5, 20, 20, 400, 300);
connector.LineFormat.EndArrowheadStyle = LineArrowheadStyle.Triangle;
connector.LineFormat.FillFormat.FillType = FillType.Solid;
connector.LineFormat.FillFormat.SolidFillColor.Color = Color.Black;
connector.StartShapeConnectedTo = sourceShape;
connector.EndShapeConnectedTo = targetShape;
connector.StartShapeConnectionSiteIndex = 2;
IAdjustValue? verticalBend = null;
for (var adjustmentIndex = 0; adjustmentIndex < connector.Adjustments.Count; adjustmentIndex++)
{
var adjustment = connector.Adjustments[adjustmentIndex];
Console.WriteLine($"{adjustment.Name}: {adjustment.Type}, raw value = {adjustment.RawValue}");
if (adjustment.Type == ShapeAdjustmentType.ConnectorBendPositionY)
{
verticalBend = adjustment;
break;
}
}
if (verticalBend is null)
{
Console.WriteLine("The connector does not expose a vertical bend adjustment.");
}
else
{
verticalBend.RawValue = 60000;
presentation.Save("connector-obstruction-fixed.pptx", SaveFormat.Pptx);
}
```
A `BentConnector5` has two `ConnectorBendPositionX` adjustments and one `ConnectorBendPositionY` adjustment. If the type you need occurs more than once, inspect `Name` and the known geometry of that preset before selecting one. If an adjustment reports `ShapeAdjustmentType.Custom`, treat its meaning and range as preset-specific and do not change it until that contract is known.
## **Relate Adjustment Values to Connector Geometry**
For bent connectors, adjustment values can be used to estimate the positions of individual segments. These calculations are specific to the connector preset:
- `BentConnector4` normally exposes one `ConnectorBendPositionX` and one `ConnectorBendPositionY` adjustment.
- For these bend positions, `RawValue / 100000f` produces the fraction of the connector frame width or height used by the examples below.
- A connector frame can be rotated or flipped, so frame coordinates must be transformed before they are compared with slide coordinates.
The following examples use `Type` to identify the adjustments first. They do not treat collection indexes as portable identifiers.
### **Unrotated Connector**
The initial layout contains two text shapes connected by a `BentConnector4`:
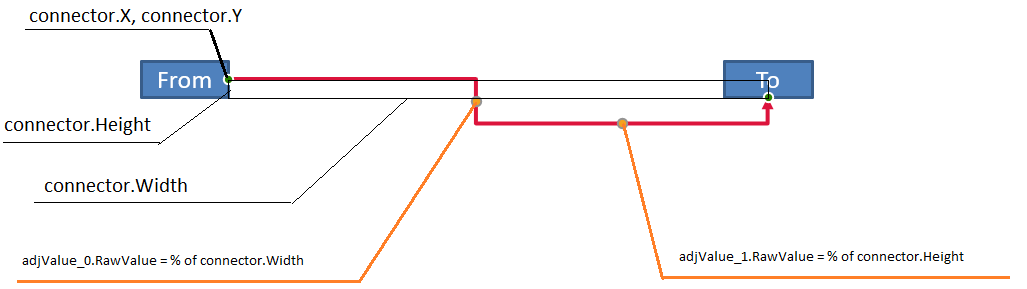
This example inspects the connector and obtains its horizontal and vertical bend adjustments:
```csharp
using System;
using System.Drawing;
using Aspose.Slides;
using var presentation = new Presentation();
var slide = presentation.Slides[0];
var sourceShape = slide.Shapes.AddAutoShape(ShapeType.Rectangle, 100, 100, 60, 25);
sourceShape.TextFrame.Text = "From";
var targetShape = slide.Shapes.AddAutoShape(ShapeType.Rectangle, 500, 100, 60, 25);
targetShape.TextFrame.Text = "To";
var connector = slide.Shapes.AddConnector(ShapeType.BentConnector4, 20, 20, 400, 300);
connector.LineFormat.EndArrowheadStyle = LineArrowheadStyle.Triangle;
connector.LineFormat.FillFormat.FillType = FillType.Solid;
connector.LineFormat.FillFormat.SolidFillColor.Color = Color.Crimson;
connector.LineFormat.Width = 3;
connector.StartShapeConnectedTo = sourceShape;
connector.StartShapeConnectionSiteIndex = 3;
connector.EndShapeConnectedTo = targetShape;
connector.EndShapeConnectionSiteIndex = 2;
for (var adjustmentIndex = 0; adjustmentIndex < connector.Adjustments.Count; adjustmentIndex++)
{
var adjustment = connector.Adjustments[adjustmentIndex];
Console.WriteLine($"{adjustment.Name}: {adjustment.Type}, raw value = {adjustment.RawValue}");
}
```
To change both bends, locate each expected type and modify the values only after both have been found:
```csharp
using System;
using Aspose.Slides;
using Aspose.Slides.Export;
using var presentation = new Presentation();
var slide = presentation.Slides[0];
var sourceShape = slide.Shapes.AddAutoShape(ShapeType.Rectangle, 100, 100, 60, 25);
var targetShape = slide.Shapes.AddAutoShape(ShapeType.Rectangle, 500, 100, 60, 25);
var connector = slide.Shapes.AddConnector(ShapeType.BentConnector4, 20, 20, 400, 300);
connector.StartShapeConnectedTo = sourceShape;
connector.StartShapeConnectionSiteIndex = 3;
connector.EndShapeConnectedTo = targetShape;
connector.EndShapeConnectionSiteIndex = 2;
IAdjustValue? horizontalBend = null;
IAdjustValue? verticalBend = null;
for (var adjustmentIndex = 0; adjustmentIndex < connector.Adjustments.Count; adjustmentIndex++)
{
var adjustment = connector.Adjustments[adjustmentIndex];
if (adjustment.Type == ShapeAdjustmentType.ConnectorBendPositionX)
{
horizontalBend = adjustment;
}
else if (adjustment.Type == ShapeAdjustmentType.ConnectorBendPositionY)
{
verticalBend = adjustment;
}
}
if (horizontalBend is null || verticalBend is null)
{
Console.WriteLine("The connector does not expose the expected bend adjustments.");
}
else
{
horizontalBend.RawValue += 20000;
verticalBend.RawValue += 200000;
presentation.Save("connector-adjusted.pptx", SaveFormat.Pptx);
}
```
The result is a connector whose horizontal and vertical segments have moved:

Once the semantic types are known, their values can be converted into connector-frame coordinates. This example draws a thin rectangle over the vertical segment controlled by the two bend adjustments:
```csharp
using System;
using Aspose.Slides;
using Aspose.Slides.Export;
using var presentation = new Presentation();
var slide = presentation.Slides[0];
var sourceShape = slide.Shapes.AddAutoShape(ShapeType.Rectangle, 100, 100, 60, 25);
var targetShape = slide.Shapes.AddAutoShape(ShapeType.Rectangle, 500, 100, 60, 25);
var connector = slide.Shapes.AddConnector(ShapeType.BentConnector4, 20, 20, 400, 300);
connector.StartShapeConnectedTo = sourceShape;
connector.StartShapeConnectionSiteIndex = 3;
connector.EndShapeConnectedTo = targetShape;
connector.EndShapeConnectionSiteIndex = 2;
IAdjustValue? horizontalBend = null;
IAdjustValue? verticalBend = null;
for (var adjustmentIndex = 0; adjustmentIndex < connector.Adjustments.Count; adjustmentIndex++)
{
var adjustment = connector.Adjustments[adjustmentIndex];
if (adjustment.Type == ShapeAdjustmentType.ConnectorBendPositionX)
{
horizontalBend = adjustment;
}
else if (adjustment.Type == ShapeAdjustmentType.ConnectorBendPositionY)
{
verticalBend = adjustment;
}
}
if (horizontalBend is null || verticalBend is null)
{
Console.WriteLine("The connector does not expose the expected bend adjustments.");
}
else
{
var x = connector.X + connector.Width * horizontalBend.RawValue / 100000f;
var y = connector.Y;
var height = connector.Height * verticalBend.RawValue / 100000f;
slide.Shapes.AddAutoShape(ShapeType.Rectangle, x, y, 1, height);
presentation.Save("connector-segment-guide.pptx", SaveFormat.Pptx);
}
```
The guide shape marks the calculated segment:

### **Rotated or Flipped Connector**
When the same connector geometry is oriented vertically, its [Frame](https://reference.aspose.com/slides/net/aspose.slides/ishape/frame/), [FlipH](https://reference.aspose.com/slides/net/aspose.slides/shapeframe/fliph/), and [FlipV](https://reference.aspose.com/slides/net/aspose.slides/shapeframe/flipv/) values affect the conversion from connector-frame coordinates to slide coordinates.
This example creates and adjusts the vertically oriented connector:
```csharp
using System;
using System.Drawing;
using Aspose.Slides;
using Aspose.Slides.Export;
using var presentation = new Presentation();
var slide = presentation.Slides[0];
var sourceShape = slide.Shapes.AddAutoShape(ShapeType.Rectangle, 100, 100, 60, 25);
sourceShape.TextFrame.Text = "From";
var targetShape = slide.Shapes.AddAutoShape(ShapeType.Rectangle, 100, 400, 60, 25);
targetShape.TextFrame.Text = "To 1";
var connector = slide.Shapes.AddConnector(ShapeType.BentConnector4, 20, 20, 400, 300);
connector.LineFormat.EndArrowheadStyle = LineArrowheadStyle.Triangle;
connector.LineFormat.FillFormat.FillType = FillType.Solid;
connector.LineFormat.FillFormat.SolidFillColor.Color = Color.MediumAquamarine;
connector.LineFormat.Width = 3;
connector.StartShapeConnectedTo = sourceShape;
connector.StartShapeConnectionSiteIndex = 2;
connector.EndShapeConnectedTo = targetShape;
connector.EndShapeConnectionSiteIndex = 3;
for (var adjustmentIndex = 0; adjustmentIndex < connector.Adjustments.Count; adjustmentIndex++)
{
var adjustment = connector.Adjustments[adjustmentIndex];
if (adjustment.Type == ShapeAdjustmentType.ConnectorBendPositionX)
{
adjustment.RawValue += 20000;
}
else if (adjustment.Type == ShapeAdjustmentType.ConnectorBendPositionY)
{
adjustment.RawValue += 200000;
}
}
presentation.Save("vertical-connector-adjusted.pptx", SaveFormat.Pptx);
```
The adjusted connector appears vertically between the shapes:
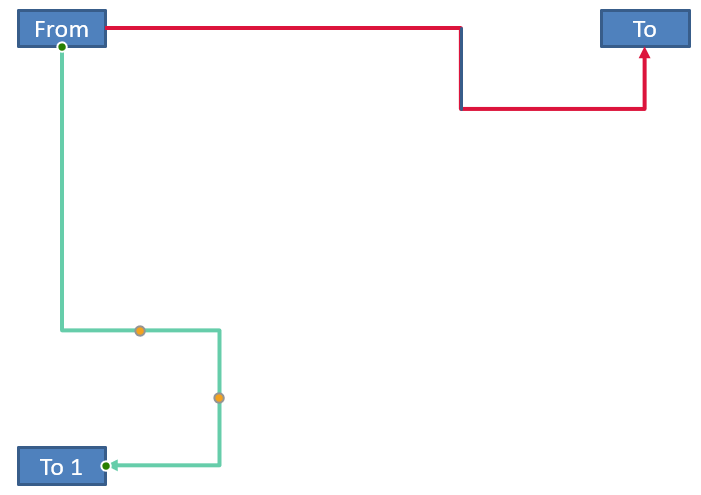
For an arbitrary rotation angle `alpha`, rotate a connector-frame point `(x, y)` around the frame center `(x0, y0)`:
`X = (x - x0) * cos(alpha) - (y - y0) * sin(alpha) + x0`
`Y = (x - x0) * sin(alpha) + (y - y0) * cos(alpha) + y0`
The following code handles the 90-degree orientation used in this example and draws a red guide over the corresponding connector segment:
```csharp
using System;
using System.Drawing;
using Aspose.Slides;
using Aspose.Slides.Export;
using var presentation = new Presentation();
var slide = presentation.Slides[0];
var sourceShape = slide.Shapes.AddAutoShape(ShapeType.Rectangle, 100, 100, 60, 25);
var targetShape = slide.Shapes.AddAutoShape(ShapeType.Rectangle, 100, 400, 60, 25);
var connector = slide.Shapes.AddConnector(ShapeType.BentConnector4, 20, 20, 400, 300);
connector.StartShapeConnectedTo = sourceShape;
connector.StartShapeConnectionSiteIndex = 2;
connector.EndShapeConnectedTo = targetShape;
connector.EndShapeConnectionSiteIndex = 3;
IAdjustValue? horizontalBend = null;
IAdjustValue? verticalBend = null;
for (var adjustmentIndex = 0; adjustmentIndex < connector.Adjustments.Count; adjustmentIndex++)
{
var adjustment = connector.Adjustments[adjustmentIndex];
if (adjustment.Type == ShapeAdjustmentType.ConnectorBendPositionX)
{
horizontalBend = adjustment;
}
else if (adjustment.Type == ShapeAdjustmentType.ConnectorBendPositionY)
{
verticalBend = adjustment;
}
}
if (horizontalBend is null || verticalBend is null)
{
Console.WriteLine("The connector does not expose the expected bend adjustments.");
}
else
{
horizontalBend.RawValue += 20000;
verticalBend.RawValue += 200000;
var x = connector.X;
var y = connector.Y;
if (connector.Frame.FlipH == NullableBool.True)
{
x += connector.Width;
}
if (connector.Frame.FlipV == NullableBool.True)
{
y += connector.Height;
}
x += connector.Width * horizontalBend.RawValue / 100000f;
var rotatedX = connector.Frame.CenterX - y + connector.Frame.CenterY;
var rotatedY = x - connector.Frame.CenterX + connector.Frame.CenterY;
var segmentWidth = connector.Height * verticalBend.RawValue / 100000f;
var guide = slide.Shapes.AddAutoShape(ShapeType.Rectangle, rotatedX, rotatedY, segmentWidth, 1);
guide.LineFormat.FillFormat.FillType = FillType.Solid;
guide.LineFormat.FillFormat.SolidFillColor.Color = Color.Red;
presentation.Save("rotated-connector-segment-guide.pptx", SaveFormat.Pptx);
}
```
The red guide marks the calculated segment after the coordinate transformation:
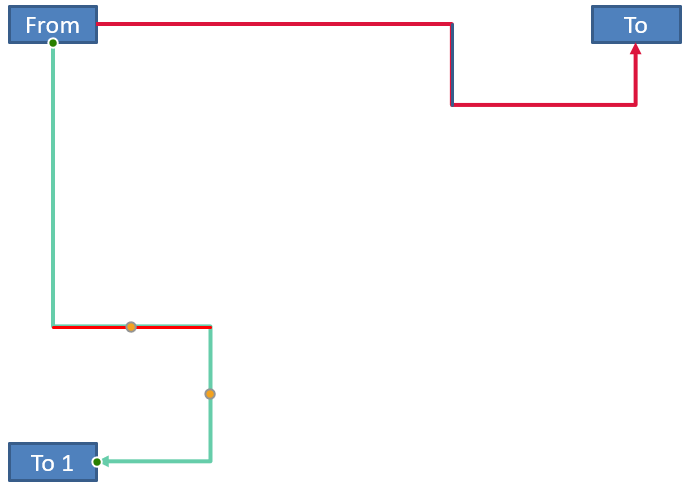
These formulas describe the presets used in the examples, not a universal connector model. Validate the adjustment types, frame orientation, and value ranges before applying the same calculation to a different preset.
## **Find a Connector Direction Angle**
The direction of a straight connector can be calculated from its width and height, with horizontal and vertical flips applied. The following example reports the clockwise angle from the positive horizontal axis in slide coordinates:
```csharp
using System;
using Aspose.Slides;
using var presentation = new Presentation();
var slide = presentation.Slides[0];
var connector = slide.Shapes.AddConnector(ShapeType.StraightConnector1, 100, 100, 200, 100);
var flipH = connector.Frame.FlipH == NullableBool.True;
var flipV = connector.Frame.FlipV == NullableBool.True;
var deltaX = connector.Width * (flipH ? -1 : 1);
var deltaY = connector.Height * (flipV ? -1 : 1);
var angle = Math.Atan2(deltaY, deltaX) * 180.0 / Math.PI;
if (angle < 0)
{
angle += 360;
}
Console.WriteLine($"Connector direction: {angle:F2} degrees");
```
## **FAQ**
**How can I tell whether a connector can attach to a shape?**
Check the shape's `ConnectionSiteCount`. A positive count means the shape exposes connection sites. Validate the selected site index before assigning it to either connector end.
**Can I identify a connector adjustment by its collection index?**
An index is meaningful only for a known connector preset and collection layout. Check `IAdjustValue.Type` before modifying a value, and use `IAdjustValue.Name` as additional information when the same semantic type occurs more than once.
**What happens when a connected shape is deleted?**
The corresponding connector end becomes detached. The connector remains on the slide and can be deleted, positioned as a free line, or attached to another shape.
**Are connector bindings preserved when a slide is copied?**
Bindings are generally preserved when the connected shapes are copied with the slide. If a connector is copied without one of its target shapes, the affected end must be attached again.
## Related features
- [Connect shapes](https://docs.aspose.com/slides/features/connectors/)
# Conversion from PPT to different formats
>
Source: https://docs.aspose.com/slides/net/conversion-from-ppt-to-different-formats/
Updated: 2024-11-01
This section includes the following topics
- [Conversion from PPT to PPTX format in Aspose.Slides](https://docs.aspose.com/slides/net/conversion-from-ppt-to-pptx-format-in-aspose-slides/)
- [Conversion to HTML](https://docs.aspose.com/slides/net/conversion-to-html/)
- [Conversion to PDF](https://docs.aspose.com/slides/net/conversion-to-pdf/)
- [Conversion to XPS](https://docs.aspose.com/slides/net/conversion-to-xps/)
# Conversion from PPT to PPTX format in Aspose.Slides
>
Source: https://docs.aspose.com/slides/net/conversion-from-ppt-to-pptx-format-in-aspose-slides/
Updated: 2026-08-05
**Aspose.Slides** for .NET now facilitates the developers to access the PPT using Presentation class instance and converting that to respective PPTX format. Presently, it supports partial conversion of PPT to PPTX. For more details about what features are supported and unsupported in PPT to PPTX conversion, please proceed to this documentation link.
**Aspose.Slides** for .NET offers Presentation class that represents a PPTX presentation file. Presentation class can now also access PPT through Presentation when the object is instantiated.
``` csharp
using Aspose.Slides;
using Aspose.Slides.Export;
//Instantiate a Presentation object that represents a PPT file
using (Presentation pres = new Presentation("Conversion.ppt"))
{
//Saving the presentation to PPTX format
pres.Save("Converted.pptx", SaveFormat.Pptx);
}
```
## **Download Sample Code**
- [Bitbucket](https://bitbucket.org/asposemarketplace/aspose-for-openxml/downloads/Conversion%20PPT%20to%20PPTX%20%28Aspose.Slides%29.zip)
## Related articles
- [Conversion of OpenOffice Document](https://docs.aspose.com/slides/net/conversion-of-openoffice-document/)
# Conversion from PPT to PPTX format
>
Source: https://docs.aspose.com/slides/net/conversion-from-ppt-to-pptx-format/
Updated: 2026-08-05
Aspose.Slides unique feature that provide flexibility in version conversions without affecting work.
SaveFormat is enumeration that can convert document in the extensions given below in table.
|**Member Name**|**Value**|**Description**|
| :- | :- | :- |
|HTML|13| |
|ODP|6| |
|PDF|1| |
|PDF Notes|12| |
|POTM|11| |
|POTX|10| |
|PPS|0| |
|PPSM|9| |
|PPSX|4| |
|PPT|0| |
|PPTM|7| |
|PPTX|3| |
|TIFF|5| |
|TiffNotes|14| |
|XPS|2| |
Below is a code snippet that shows conversion from PPT to PPTX you can do it vice versa as well.
``` csharp
using Aspose.Slides;
using Aspose.Slides.Export;
string FilePath = @"..\..\..\Sample Files\";
string srcFileName = FilePath + "Conversion PPT to PPTX.ppt";
string destFileName = FilePath + "Conversion PPT to PPTX.pptx";
//Instantiate a Presentation object that represents a PPTX file
Presentation pres = new Presentation(srcFileName);
//Saving the PPTX presentation to PPTX format
pres.Save(destFileName, SaveFormat.Pptx);
```
## **Download Sample Code**
- [Github](https://github.com/aspose-slides/Aspose.Slides-for-.NET/releases/tag/MissingFeaturesAsposeSlidesForOpenXMLv1.1)
- [Bitbucket](https://bitbucket.org/asposemarketplace/aspose-for-vsto/downloads/Conversion%20between%20different%20presentation%20version%20%28Aspose.Slides%29.zip)
# Conversion of OpenOffice Document
>
Source: https://docs.aspose.com/slides/net/conversion-of-openoffice-document/
Updated: 2026-01-19
Aspose.Slides for .NET offers **Presentation** class that represents a presentation file. **Presentation** class can now also access **ODP** through Presentation constructor when the object is instantiated.
Below is the example of converting from ODP to PPT/PPTX.
## **Example**
```
//Instantiate a Presentation object that represents a presentation file
using(PresentationEx pres = new PresentationEx("OpenOfficePresentation.odp"))
{
//Saving the PPTX presentation to PPTX format
pres.Save("ConvertedFromOdp",Aspose.Slides.Export.SaveFormat.Pptx);
}
```
Below is the example of converting from PPT/PPTX to ODP.
## **Example**
```
//Instantiate a Presentation object that represents a presentation file
using (PresentationEx pres = new PresentationEx("ConversionFromPresentation.pptx"))
{
//Saving the PPTX presentation to PPTX format
pres.Save("ConvertedToOdp", Aspose.Slides.Export.SaveFormat.Odp);
}
```
## **Download Running Example**
- [GitHub](https://github.com/aspose-slides/Aspose.Slides-for-.NET/tree/master/Plugins/Aspose.Slides%20Vs%20VSTO%20Presentations/Aspose.Slides%20Features%20missing%20in%20VSTO/Conversion%20from%20ODP%20to%20PPTX)
## **Download Sample Code**
- [GitHub](https://github.com/aspose-slides/Aspose.Slides-for-.NET/releases/tag/Aspose.SlidesFeaturesmissingInVSTOv1.1)
## Related articles
- [Conversion from PPT to PPTX format in Aspose.Slides](https://docs.aspose.com/slides/net/conversion-from-ppt-to-pptx-format-in-aspose-slides/)
- [Convert Presentation to HTML](https://docs.aspose.com/slides/net/convert-presentation-to-html/)
- [Adding Shapes to Presentation](https://docs.aspose.com/slides/net/adding-shapes-to-presentation/)
# Conversion to HTML
>
Source: https://docs.aspose.com/slides/net/conversion-to-html/
Updated: 2026-08-05
**HTML** is one of several widely used format for exchanging data. **Aspose.Slides for .NET** provides support for converting a presentation to HTML. Below is code snippet that shows you how.
``` csharp
using Aspose.Slides;
using Aspose.Slides.Export;
string FilePath = @"..\..\..\Sample Files\";
string srcFileName = FilePath + "Conversion.pptx";
string destFileName = FilePath + "Converting to HTML.html";
//Instantiate a Presentation object that represents a presentation file
Presentation pres = new Presentation(srcFileName);
HtmlOptions htmlOpt = new HtmlOptions();
htmlOpt.HtmlFormatter = HtmlFormatter.CreateDocumentFormatter("", false);
//Saving the presentation to HTML
pres.Save(destFileName, Aspose.Slides.Export.SaveFormat.Html, htmlOpt);
```
## **Download Sample Code**
- [Github](https://github.com/aspose-slides/Aspose.Slides-for-.NET/releases/tag/MissingFeaturesAsposeSlidesForOpenXMLv1.1)
- [Bitbucket](https://bitbucket.org/asposemarketplace/aspose-for-openxml/downloads/Converting%20to%20HTML%20%28Aspose.Slides%29.zip)
# Conversion to PDF
>
Source: https://docs.aspose.com/slides/net/conversion-to-pdf/
Updated: 2026-08-05
PDF documents are widely used as a standard format of exchanging documents between organizations, government sectors and individuals. It's a popular format so developers are often asked to convert Microsoft PowerPoint presentation files to PDF documents. Realizing this possible requirement, Aspose.Slides for .NET supports converting presentations to PDF documents without using any other component.
**Aspose.Slides for .NET** offers the Presentation class that represents a presentation file. The **Presentation** class exposes the Save method that can be called to convert the whole presentation into a **PDF** document. The **PdfOptions** class provides options for creating the **PDF** such as JpegQuality, TextCompression, Compliance and others. These options can be used to get the desired standard of PDF.
``` csharp
using Aspose.Slides;
string FilePath = @"..\..\..\Sample Files\";
string srcFileName = FilePath + "Conversion.pptx";
string destFileName = FilePath + "Converting to PDF.pdf";
//Instantiate a Presentation object that represents a presentation file
Presentation pres = new Presentation(srcFileName);
//Save the presentation to PDF with default options
pres.Save(destFileName, Aspose.Slides.Export.SaveFormat.Pdf);
```
## **Download Sample Code**
- [Github](https://github.com/aspose-slides/Aspose.Slides-for-.NET/releases/tag/MissingFeaturesAsposeSlidesForOpenXMLv1.1)
- [Bitbucket](https://bitbucket.org/asposemarketplace/aspose-for-openxml/downloads/Converting%20to%20PDF%20%28Aspose.Slides%29.zip)
## Related articles
- [Convert Presentation to HTML](https://docs.aspose.com/slides/net/convert-presentation-to-html/)
- [Conversion to XPS](https://docs.aspose.com/slides/net/conversion-to-xps/)
# Conversion to Tiff with Notes
>
Source: https://docs.aspose.com/slides/net/conversion-to-tiff-with-notes/
Updated: 2026-08-31
TIFF is one of several widely used image formats that Aspose.Slides for .NET supports for converting a presentation with notes to images. You can also generate slide thumbnails in the Notes Slide view. Below are two code snippets that shows how to generate TIFF images of a presentation in Notes Slide view.
The **Save** method exposed by the **Presentation** Class can be used to convert the whole presentation in Notes Slide view to TIFF. You can also generate a slide thumbnail in Notes Slide view for individual slides.
``` csharp
using Aspose.Slides;
using Aspose.Slides.Export;
string FilePath = @"..\..\..\Sample Files\";
string srcFileName = FilePath + "Tiff conversion with note.pptx";
string destFileName = FilePath + "Tiff conversion with note.tiff";
//Instantiate a Presentation object that represents a presentation file
using (Presentation pres = new Presentation(srcFileName))
{
//Place the speaker notes under each rendered slide
TiffOptions tiffOptions = new TiffOptions();
tiffOptions.SlidesLayoutOptions = new NotesCommentsLayoutingOptions
{
NotesPosition = NotesPositions.BottomFull
};
//Saving the presentation to TIFF with notes
pres.Save(destFileName, SaveFormat.Tiff, tiffOptions);
}
```
## **Download Sample Code**
- [Github](https://github.com/aspose-slides/Aspose.Slides-for-.NET/releases/tag/MissingFeaturesAsposeSlidesForOpenXMLv1.1)
- [Bitbucket](https://bitbucket.org/asposemarketplace/aspose-for-openxml/downloads/Tiff%20conversion%20with%20note%20%28Aspose.Slides%29.zip)
## Related articles
- [Convert Presentation to Tiff with Notes](https://docs.aspose.com/slides/net/convert-presentation-to-tiff-with-notes/)
- [Rendered As Tiff](https://docs.aspose.com/slides/net/rendered-as-tiff/)
- [Convert PowerPoint Presentations to TIFF with Notes in .NET](https://docs.aspose.com/slides/net/convert-powerpoint-to-tiff-with-notes/)
# Conversion to XPS
>
Source: https://docs.aspose.com/slides/net/conversion-to-xps/
Updated: 2026-08-05
**XPS** format is also widely used for exchange of data. Aspose.Slides for .NET takes care of its importance and provides the built-in support for converting a presentation into XPS document.
The **Save** method exposed by Presentation class can be used to convert the whole presentation into **XPS** document. Further, **XpsOptions** class exposes **SaveMetafileAsPng** property that can be set to true or false as per requirement.
``` csharp
using Aspose.Slides;
string FilePath = @"..\..\..\Sample Files\";
string srcFileName = FilePath + "Conversion.pptx";
string destFileName = FilePath + "Converting to XPS.xps";
//Instantiate a Presentation object that represents a presentation file
Presentation pres = new Presentation(srcFileName);
//Saving the presentation to TIFF document
pres.Save(destFileName, Aspose.Slides.Export.SaveFormat.Xps);
```
## **Download Sample Code**
- [Github](https://github.com/aspose-slides/Aspose.Slides-for-.NET/releases/tag/MissingFeaturesAsposeSlidesForOpenXMLv1.1)
- [Bitbucket](https://bitbucket.org/asposemarketplace/aspose-for-openxml/downloads/Converting%20to%20XPS%20%28Aspose.Slides%29.zip)
## Related articles
- [Convert Presentation to XPS](https://docs.aspose.com/slides/net/convert-presentation-to-xps/)
- [Rendered As Tiff](https://docs.aspose.com/slides/net/rendered-as-tiff/)
- [Conversion to Tiff with Notes](https://docs.aspose.com/slides/net/conversion-to-tiff-with-notes/)
# Convert ODP to PPTX in .NET
> Convert ODP to PPTX with Aspose.Slides for .NET. Clean C# code examples, batch tips, and high-quality results—no PowerPoint needed.
Source: https://docs.aspose.com/slides/net/convert-odp-to-pptx/
Updated: 2026-08-05
## **Overview**
This article explains how to convert an ODP presentation to PPTX format using Aspose.Slides.
## **ODP to PPTX Conversion**
Aspose.Slides for .NET offers Presentation class that represents a presentation file. [**Presentation**](https://reference.aspose.com/slides/net/aspose.slides/presentation) class can now also access ODP through Presentation constructor when the object is instantiated. The following example shows how to convert a ODP Presentation into PPTX Presentation.
Steps: Convert ODP to PPTX in C# Steps: Convert ODP to PowerPoint in C# ())
{
_fontOutputDirectory = fontOutputDirectory;
_fontUrlPrefix = fontUrlPrefix.TrimEnd('/') + "/";
Directory.CreateDirectory(_fontOutputDirectory);
}
public override void WriteFont(
IHtmlGenerator generator,
IFontData originalFont,
IFontData substitutedFont,
string fontStyle,
string fontWeight,
byte[] fontData)
{
var font = substitutedFont ?? originalFont;
var safeFontName = MakeSafeFileName(font.FontName);
var safeFontStyle = string.IsNullOrWhiteSpace(fontStyle) ? "normal" : fontStyle;
var safeFontWeight = string.IsNullOrWhiteSpace(fontWeight) ? "normal" : fontWeight;
var fontFileName = $"{safeFontName}-{safeFontStyle}-{safeFontWeight}.woff";
var fontFilePath = Path.Combine(_fontOutputDirectory, fontFileName);
File.WriteAllBytes(fontFilePath, fontData);
var fontUrl = _fontUrlPrefix + Uri.EscapeDataString(fontFileName);
var fontFamily = font.FontName.Replace("\\", "\\\\").Replace("'", "\\'");
generator.AddHtml("");
}
private static string MakeSafeFileName(string fileName)
{
var invalidCharacters = Path.GetInvalidFileNameChars();
var safeCharacters = fileName.ToCharArray();
for (var characterIndex = 0; characterIndex < safeCharacters.Length; characterIndex++)
{
if (Array.IndexOf(invalidCharacters, safeCharacters[characterIndex]) >= 0)
{
safeCharacters[characterIndex] = '_';
}
}
return new string(safeCharacters);
}
}
```
In this example, font files are saved to `html-output/fonts`, and the HTML references them with URLs such as `fonts/BrandFont-normal-400.woff`. If the HTML file and fonts are deployed to another location, choose `fontUrlPrefix` so that it matches the deployed URL path.
## **Save Resources Externally**
Self-contained HTML is easy to move around, but embedded Base64 resources can make the file large. If your application needs external image files, implement [ILinkEmbedController](https://reference.aspose.com/slides/net/aspose.slides.export/ilinkembedcontroller/) and pass it to the [HtmlOptions](https://reference.aspose.com/slides/net/aspose.slides.export/htmloptions/htmloptions/) constructor.
When you externalize resources, choose two paths deliberately:
- The file system output path, where your application writes generated images, fonts, audio, or video.
- The URL path, which is what the browser uses from the HTML document to load those files.
For a full image-linking implementation, see [Export Presentations to HTML with Externally Linked Images](https://docs.aspose.com/slides/net/exporting-presentations-to-html-with-externally-linked-images/).
## **Export Media Files**
[VideoPlayerHtmlController](https://reference.aspose.com/slides/net/aspose.slides.export/videoplayerhtmlcontroller/) exports video and audio files and writes HTML that can play them in a browser. Its constructor takes:
- `path`: the directory where generated media files will be written.
- `fileName`: the HTML file name being generated.
- `baseUri`: the absolute URI prefix used in the HTML links to media files.
If the HTML file is `html-output/presentation.html` and media files are saved in `html-output/media`, `path` should point to the media directory on disk, while `baseUri` should point to the same directory from the browser's point of view. For local preview, you can build a `file:///` URI from the media directory. For a deployed application, use the absolute URL of the published media directory.
```csharp
using Aspose.Slides;
using Aspose.Slides.Export;
var outputDirectory = Path.Combine(Environment.CurrentDirectory, "html-output");
var mediaDirectory = Path.Combine(outputDirectory, "media");
Directory.CreateDirectory(outputDirectory);
Directory.CreateDirectory(mediaDirectory);
var htmlFileName = "presentation.html";
var mediaBaseUri = new Uri(mediaDirectory + Path.DirectorySeparatorChar).AbsoluteUri;
using var presentation = new Presentation();
using var videoStream = new FileStream("intro.mp4", FileMode.Open, FileAccess.Read);
var video = presentation.Videos.AddVideo(videoStream, LoadingStreamBehavior.ReadStreamAndRelease);
var slide = presentation.Slides[0];
slide.Shapes.AddVideoFrame(20, 20, 480, 270, video);
var controller = new VideoPlayerHtmlController(mediaDirectory, htmlFileName, mediaBaseUri);
var formatter = HtmlFormatter.CreateCustomFormatter(controller);
var svgOptions = new SVGOptions(controller);
var slideImageFormat = SlideImageFormat.Svg(svgOptions);
var htmlOptions = new HtmlOptions(controller)
{
HtmlFormatter = formatter,
SlideImageFormat = slideImageFormat
};
var htmlFilePath = Path.Combine(outputDirectory, htmlFileName);
presentation.Save(htmlFilePath, SaveFormat.Html, htmlOptions);
```
Use output directories that are unique per export job, especially in server applications. Shared output paths can cause files from different conversions to overwrite each other.
## **Performance and Resource Management**
HTML conversion is a rendering operation, so processing time and memory use depend on slide count, image resolution, fonts, effects, charts, and embedded media. Higher `PicturesCompression` DPI values, embedded fonts, SVG output, and retained cropped image areas can improve fidelity but usually increase output size.
For batch conversion:
- Dispose every [Presentation](https://reference.aspose.com/slides/net/aspose.slides/presentation/) instance promptly.
- Use separate output directories for separate jobs.
- Avoid embedding common fonts unless fidelity requires it.
- Lower image DPI when the HTML is for preview or thumbnails.
- Keep the source presentation, generated HTML, and external resources together until deployment paths are final.
## **FAQ**
### Are hyperlinks preserved in HTML output?
Yes. Presentation hyperlinks are exported to HTML and remain clickable when the target URL is valid.
### Can I convert presentations to HTML in parallel?
Yes, but do not share one [Presentation](https://reference.aspose.com/slides/net/aspose.slides/presentation/) instance across threads. Process different files with separate presentation instances, separate streams, and separate output directories. See the [multithreading guidance](https://docs.aspose.com/slides/net/multithreading/) for details.
### Is a Presentation object thread-safe?
No. A single [Presentation](https://reference.aspose.com/slides/net/aspose.slides/presentation/) instance should be loaded, modified, saved, and disposed on one thread. For parallel work, create an independent instance per thread or process.
### Why is the generated HTML file large?
The default export can embed resources directly in the HTML. Embedded fonts, high-DPI images, media, SVG content, and retained cropped image areas also increase size. Use external resources, exclude common fonts from embedding, and lower `PicturesCompression` when smaller output is more important than maximum fidelity.
### Why does a PowerPoint font size such as 24 pt appear as 17.999819 pt in HTML?
This can happen because PowerPoint and HTML use different DPI models. PowerPoint stores text sizes in typographic points based on 72 DPI, while HTML layout is based on CSS pixels in a 96 DPI model. When Aspose.Slides exports a presentation to HTML, the font size is translated between these systems, and the conversion may introduce small rounding differences.
These values do not indicate a real visual font-size change. They are only a mathematical side effect of converting text metrics between PowerPoint and HTML.
### How should I choose baseUri for media export?
Choose `baseUri` from the browser's point of view and pass it as an absolute URI. For local preview, you can derive it from the output directory with `new Uri(mediaDirectory + Path.DirectorySeparatorChar).AbsoluteUri`. For deployment, use the absolute URL of the published media directory. The file system `path` and browser `baseUri` do not have to be the same string, but they must describe the same resource location.
### Can I include hidden slides?
Yes. Set `ShowHiddenSlides = true` on [HtmlOptions](https://reference.aspose.com/slides/net/aspose.slides.export/htmloptions/) when hidden slides must be exported.
## Related features
- [Export presentations to HTML](https://docs.aspose.com/slides/features/html-export/)
- [Create responsive HTML output](https://docs.aspose.com/slides/features/responsive-html/)
## Related articles
- [Export Presentations to HTML with Externally Linked Images](https://docs.aspose.com/slides/net/exporting-presentations-to-html-with-externally-linked-images/)
# Convert PPT and PPTX to JPG in .NET
> Convert PowerPoint (PPT, PPTX) slides to high-quality JPG images in C# with Aspose.Slides for .NET using fast, reliable code examples.
Source: https://docs.aspose.com/slides/net/convert-powerpoint-to-jpg/
Updated: 2026-08-13
## **Introduction**
Converting PowerPoint and OpenDocument presentations to JPG images helps with sharing slides, optimizing performance, and embedding content into websites or applications. Aspose.Slides for .NET allows you to transform PPTX, PPT, and ODP files into high-quality JPEG images. This guide explains different methods for conversion.
With these features, it's easy to implement your own presentation viewer and create a thumbnail for every slide. This may be useful if you want to protect presentation slides from copying or demonstrate the presentation in read-only mode. Aspose.Slides allows you to convert the whole presentation or a specific slide into image formats.
## **Convert Presentation Slides to JPG Images**
Here are the steps to convert a PPT, PPTX, or ODP file to JPG:
1. Create an instance of the [Presentation](https://reference.aspose.com/slides/net/aspose.slides/presentation) class.
1. Get the slide object of the [ISlide](https://reference.aspose.com/slides/net/aspose.slides/islide) type from the [Presentation.Slides](https://reference.aspose.com/slides/net/aspose.slides/presentation/properties/slides) collection.
1. Create an image of the slide using the [ISlide.GetImage(float, float)](https://reference.aspose.com/slides/net/aspose.slides/islide/getimage/#getimage_5) method.
1. Call the [IImage.Save(string, ImageFormat)](https://reference.aspose.com/slides/net/aspose.slides/iimage/save/#save_3) method on the image object. Pass the output file name and image format as arguments.
**Note:** PPT, PPTX, or ODP to JPG conversion differs from conversion to other formats in the Aspose.Slides .NET API. For other formats, you typically use the [IPresentation.Save(String, SaveFormat, ISaveOptions)](https://reference.aspose.com/slides/net/aspose.slides/ipresentation/save/#save_5) method. However, for JPG conversion, you need to use the [IImage.Save(string, ImageFormat)](https://reference.aspose.com/slides/net/aspose.slides/iimage/save/#save_3) method.
```c#
using Aspose.Slides;
int scaleX = 1;
int scaleY = scaleX;
using (Presentation presentation = new Presentation("PowerPoint_Presentation.ppt"))
{
foreach (ISlide slide in presentation.Slides)
{
// Create a slide image of the specified scale.
using (IImage thumbnail = slide.GetImage(scaleX, scaleY))
{
// Save the image to disk in JPEG format.
string imageFileName = $"Slide_{slide.SlideNumber}.jpg";
thumbnail.Save(imageFileName, ImageFormat.Jpeg);
}
}
}
```
## **Convert Slides to JPG with Customized Dimensions**
To change the dimensions of the resulting JPG images, you can set the image size by passing it into the [ISlide.GetImage(Size)](https://reference.aspose.com/slides/net/aspose.slides/islide/getimage/#getimage_6) method. This allows you to generate images with specific width and height values, ensuring that the output meets your requirements for resolution and aspect ratio. This flexibility is particularly useful when generating images for web applications, reports, or documentation, where precise image dimensions are required.
```c#
using System.Drawing;
using Aspose.Slides;
Size imageSize = new Size(1200, 800);
using (Presentation presentation = new Presentation("PowerPoint_Presentation.pptx"))
{
foreach (ISlide slide in presentation.Slides)
{
// Create a slide image of the specified size.
using (IImage thumbnail = slide.GetImage(imageSize))
{
// Save the image to disk in JPEG format.
string imageFileName = $"Slide_{slide.SlideNumber}.jpg";
thumbnail.Save(imageFileName, ImageFormat.Jpeg);
}
}
}
```
## **Render Comments When Saving Slides as Images**
Aspose.Slides for .NET provides a feature that allows you to render comments on a presentation's slides when converting them into JPG images. This functionality is particularly useful for preserving annotations, feedback, or discussions added by collaborators in PowerPoint presentations. By enabling this option, you ensure that comments are visible in the generated images, making it easier to review and share feedback without needing to open the original presentation file.
Let's say we have a presentation file, "sample.pptx," with a slide that contains comments:

The following C# code converts the slide to a JPG image while preserving the comments:
```c#
using System.Drawing;
using Aspose.Slides;
using Aspose.Slides.Export;
int scaleX = 2;
int scaleY = scaleX;
using (Presentation presentation = new Presentation("sample.pptx"))
{
IRenderingOptions options = new RenderingOptions
{
// Set options for the slide comments.
SlidesLayoutOptions = new NotesCommentsLayoutingOptions
{
CommentsPosition = CommentsPositions.Right,
CommentsAreaWidth = 200,
CommentsAreaColor = Color.DarkOrange
}
};
// Convert the first slide to an image.
using (IImage image = presentation.Slides[0].GetImage(options, scaleX, scaleY))
{
image.Save("Slide_1.jpg", ImageFormat.Jpeg);
}
}
```
The result:

## **See Also**
See other options for converting PPT, PPTX, or ODP to images, such as:
- [Convert PowerPoint to GIF](https://docs.aspose.com/slides/net/convert-powerpoint-to-animated-gif/)
- [Convert PowerPoint to PNG](https://docs.aspose.com/slides/net/convert-powerpoint-to-png/)
- [Convert PowerPoint to TIFF](https://docs.aspose.com/slides/net/convert-powerpoint-to-tiff/)
- [Convert PowerPoint to SVG](https://docs.aspose.com/slides/net/render-a-slide-as-an-svg-image/)
To see how Aspose.Slides converts PowerPoint to JPG images, try these free online converters: PowerPoint [PPTX to JPG](https://products.aspose.app/slides/conversion/pptx-to-jpg) and [PPT to JPG](https://products.aspose.app/slides/conversion/ppt-to-jpg).

Aspose provides a [FREE Collage web app](https://products.aspose.app/slides/collage). Using this online service, you can merge [JPG to JPG](https://products.aspose.app/slides/collage/jpg) or PNG to PNG images, create [photo grids](https://products.aspose.app/slides/collage/photo-grid), and so on.
Using the same principles described in this article, you can convert images from one format to another. For more information, see these pages: convert [image to JPG](https://products.aspose.com/slides/net/conversion/image-to-jpg/); convert [JPG to image](https://products.aspose.com/slides/net/conversion/jpg-to-image/); convert [JPG to PNG](https://products.aspose.com/slides/net/conversion/jpg-to-png/), convert [PNG to JPG](https://products.aspose.com/slides/net/conversion/png-to-jpg/); convert [PNG to SVG](https://products.aspose.com/slides/net/conversion/png-to-svg/), convert [SVG to PNG](https://products.aspose.com/slides/net/conversion/svg-to-png/).
## **FAQ**
### Does this method support batch conversion?
Yes, Aspose.Slides allows batch conversion of multiple slides to JPG in a single operation.
### Does the conversion support SmartArt, charts, and other complex objects?
Yes, Aspose.Slides renders all content, including SmartArt, charts, tables, shapes, and more. However, the rendering accuracy may vary slightly compared to PowerPoint, especially when using custom or missing fonts.
### Are there any limitations on the number of slides that can be processed?
Aspose.Slides itself does not impose any strict limits on the number of slides you can process. However, you may encounter out-of-memory error when working with large presentations or high-resolution images.
## Related articles
- [Convert PowerPoint Slides to PNG in .NET](https://docs.aspose.com/slides/net/convert-powerpoint-to-png/)
- [Convert Presentation Slides to Images in .NET](https://docs.aspose.com/slides/net/convert-slide/)
# Convert PowerPoint Presentations to Markdown in .NET
> Convert PPT and PPTX presentations to Markdown in .NET and control where exported bitmap, metafile, and SVG images are saved and referenced.
Source: https://docs.aspose.com/slides/net/convert-powerpoint-to-markdown/
Updated: 2026-10-01
## **Overview**
Aspose.Slides for .NET can convert PPT and PPTX presentations to Markdown for documentation, static-site, content-migration, and version-control workflows. You can choose a Markdown flavor, control how slide content is rendered, and decide where exported images are stored and how the generated Markdown references them.
By default, Markdown export uses text-only output. To export visual content, set the [MarkdownSaveOptions.ExportType](https://reference.aspose.com/slides/net/aspose.slides.export/markdownsaveoptions/exporttype/) property to the `Sequential` or `Visual` value from the [MarkdownExportType](https://reference.aspose.com/slides/net/aspose.slides.export/markdownexporttype/) enumeration. `Sequential` renders slide items separately and in order, whereas `Visual` keeps grouped items together to preserve their visual relationship. The `TextOnly` value does not emit image resources, so the image-saving events are not invoked in that mode.
## **Convert a Presentation to Markdown**
Load the source file with the [Presentation](https://reference.aspose.com/slides/net/aspose.slides/presentation/) class, and then call the [Presentation.Save](https://reference.aspose.com/slides/net/aspose.slides/presentation/save/) method with the `Md` value from the [SaveFormat](https://reference.aspose.com/slides/net/aspose.slides.export/saveformat/) enumeration.
```csharp
using Aspose.Slides;
using Aspose.Slides.Export;
using var presentation = new Presentation("presentation.pptx");
presentation.Save("presentation.md", SaveFormat.Md);
```
## **Select a Markdown Flavor**
The [MarkdownSaveOptions.Flavor](https://reference.aspose.com/slides/net/aspose.slides.export/markdownsaveoptions/flavor/) property controls the Markdown specification used for the output. The [Flavor](https://reference.aspose.com/slides/net/aspose.slides.export/flavor/) enumeration includes CommonMark, GitHub Flavored Markdown, and other supported variants.
The following example exports a presentation as CommonMark:
```csharp
using Aspose.Slides;
using Aspose.Slides.Export;
using var presentation = new Presentation("presentation.pptx");
var options = new MarkdownSaveOptions
{
Flavor = Flavor.CommonMark
};
presentation.Save("presentation.md", SaveFormat.Md, options);
```
## **Control Repeated Spaces**
When preparing slide text for documentation, text processing, or publication, use [MarkdownSaveOptions.HandleRepeatedSpaces](https://reference.aspose.com/slides/net/aspose.slides.export/markdownsaveoptions/handlerepeatedspaces/) to control consecutive regular spaces.
Single spaces remain regular spaces in all three modes. The following self-contained example creates text with one, two, and three consecutive spaces and exports the same slide using each mode.
```csharp
using Aspose.Slides;
using Aspose.Slides.Export;
using var presentation = new Presentation();
var slide = presentation.Slides[0];
var shape = slide.Shapes.AddAutoShape(ShapeType.Rectangle, 20, 20, 600, 100);
shape.TextFrame.Text = "One space; two spaces; three spaces.";
var modes = new[]
{
HandleRepeatedSpaces.None,
HandleRepeatedSpaces.AlternateSpacesToNbsp,
HandleRepeatedSpaces.MultipleSpacesToNbsp
};
foreach (var mode in modes)
{
var options = new MarkdownSaveOptions
{
Flavor = Flavor.CommonMark,
HandleRepeatedSpaces = mode
};
presentation.Save($"spaces-{mode}.md", SaveFormat.Md, options);
}
```
The exported text lines are shown below. These excerpts omit the slide separator and the two trailing spaces added by the exporter.
`None`:
```markdown
One space; two spaces; three spaces.
```
`AlternateSpacesToNbsp`:
```markdown
One space; two spaces; three spaces.
```
`MultipleSpacesToNbsp`:
```markdown
One space; two spaces; three spaces.
```
In a typical HTML-based Markdown viewer, consecutive regular spaces collapse visually even though they remain in the source. Both replacement modes preserve the visible spacing in this example; their source differs for the three-space sequence.
Choose `None` when downstream tools need ordinary space characters without HTML entities. Choose a replacement mode when visible spacing matters more. A text-processing pipeline consuming that output may need to decode ` ` and normalize the resulting nonbreaking spaces. Nonbreaking spaces also affect where a viewer can wrap text.
## **Remove Empty Lines**
The [MarkdownSaveOptions.RemoveEmptyLines](https://reference.aspose.com/slides/net/aspose.slides.export/markdownsaveoptions/removeemptylines/) property controls whether empty or whitespace-only lines are removed during export. Its default value is `false`. This controls vertical separation, independently of how repeated spaces within text are represented.
The following example creates two text paragraphs separated by an empty paragraph and a paragraph containing three regular spaces. It exports both settings. The `\r` characters create paragraph boundaries in the text frame; `HandleRepeatedSpaces.None` makes the treatment of ordinary spaces easier to inspect.
```csharp
using Aspose.Slides;
using Aspose.Slides.Export;
using var presentation = new Presentation();
var slide = presentation.Slides[0];
var shape = slide.Shapes.AddAutoShape(ShapeType.Rectangle, 20, 20, 600, 300);
// Include an empty paragraph and a paragraph containing three regular spaces.
shape.TextFrame.Text = "First paragraph.\r\r \rSecond paragraph.";
var options = new MarkdownSaveOptions
{
Flavor = Flavor.CommonMark,
HandleRepeatedSpaces = HandleRepeatedSpaces.None,
RemoveEmptyLines = false
};
presentation.Save("empty-lines-kept.md", SaveFormat.Md, options);
options.RemoveEmptyLines = true;
presentation.Save("empty-lines-removed.md", SaveFormat.Md, options);
```
With `false`, the generated Markdown is:
```markdown
---
First paragraph.
Second paragraph.
```
With `true`, it becomes:
```markdown
---
First paragraph.
Second paragraph.
```
With `RemoveEmptyLines = false`, the exported Markdown preserves the empty and whitespace-only paragraphs. The ` ` line represents an empty paragraph.
With `RemoveEmptyLines = true`, these blank paragraphs are removed. The two text paragraphs become a single Markdown paragraph with a line break between them. This line break is preserved by two trailing spaces after `First paragraph.`—Markdown syntax for a hard line break.
The slide separator (`---`) remains in both outputs. Keep `RemoveEmptyLines = false` when you need to preserve paragraph separation. If your presentation contains lists or code blocks, check the exported result in your target Markdown viewer, since blank lines can affect how that content is interpreted.
## **Export Images Using the Default Local-Saving Behavior**
The [MarkdownSaveOptions](https://reference.aspose.com/slides/net/aspose.slides.export/markdownsaveoptions/) class provides two properties for locally saved images:
- [BasePath](https://reference.aspose.com/slides/net/aspose.slides.export/markdownsaveoptions/basepath/) specifies the base directory for the Markdown document and its resources.
- [ImagesSaveFolderName](https://reference.aspose.com/slides/net/aspose.slides.export/markdownsaveoptions/imagessavefoldername/) specifies the image subdirectory. Its default value is `Images`.
The following example renders visual content, writes images to `output/assets`, and creates relative image references in the Markdown document:
```csharp
using System.IO;
using Aspose.Slides;
using Aspose.Slides.Export;
const string outputDirectory = "output";
Directory.CreateDirectory(outputDirectory);
using var presentation = new Presentation("presentation.pptx");
var options = new MarkdownSaveOptions
{
ExportType = MarkdownExportType.Visual,
BasePath = outputDirectory,
ImagesSaveFolderName = "assets"
};
var markdownPath = Path.Combine(outputDirectory, "presentation.md");
presentation.Save(markdownPath, SaveFormat.Md, options);
```
This behavior also serves as the fallback when a custom image-saving handler returns `false`.
## **Customize Image Saving and Markdown Links**
Use the [MarkdownSaveOptions.ImageSaving](https://reference.aspose.com/slides/net/aspose.slides.export/markdownsaveoptions/imagesaving/) event for non-SVG bitmap and metafile resources emitted during Markdown export. Its [MarkdownImageSavingHandler](https://reference.aspose.com/slides/net/aspose.slides.export/markdownsaveoptions.markdownimagesavinghandler/) delegate receives the [IImage](https://reference.aspose.com/slides/net/aspose.slides/iimage/) object, its [ImageFormat](https://reference.aspose.com/slides/net/aspose.slides/imageformat/), and the generated Markdown link as a `ref string` parameter. Save or upload the image with the supplied format, and replace `link` with the reference that must appear in the Markdown output.
Resources emitted in SVG format are handled separately. Subscribe to the [MarkdownSaveOptions.SvgImageSaving](https://reference.aspose.com/slides/net/aspose.slides.export/markdownsaveoptions/svgimagesaving/) event, whose [MarkdownSvgImageSavingHandler](https://reference.aspose.com/slides/net/aspose.slides.export/markdownsaveoptions.markdownsvgimagesavinghandler/) delegate receives an [ISvgImage](https://reference.aspose.com/slides/net/aspose.slides/isvgimage/) object and the `ref string link` parameter. An SVG has no `ImageFormat` argument; write or upload its XML data from the [ISvgImage.SvgData](https://reference.aspose.com/slides/net/aspose.slides/isvgimage/svgdata/) property instead. Depending on the export mode and visual grouping, an SVG in the source presentation can be rasterized or combined with other content; the resulting non-SVG resource is then passed to `ImageSaving`. Subscribe to both events when every exported visual resource requires custom processing.
The handler return value determines who processes the image:
- Return `true` after the handler has saved, uploaded, transformed, or otherwise processed the image and assigned a valid value to `link`. Aspose.Slides writes that value to the Markdown document and does not perform its default local save.
- Return `false` to let Aspose.Slides save the image locally and generate its link according to [MarkdownSaveOptions.BasePath](https://reference.aspose.com/slides/net/aspose.slides.export/markdownsaveoptions/basepath/) and [MarkdownSaveOptions.ImagesSaveFolderName](https://reference.aspose.com/slides/net/aspose.slides.export/markdownsaveoptions/imagessavefoldername/).
A handler that returns `true` takes responsibility for the image. If it returns `true` without assigning a valid, nonempty link, the export fails with an `InvalidOperationException`.
### **Save Images to a CDN Origin Directory and Use External URLs**
The following example treats `cdn-origin/presentations/quarterly-report` as a mounted or synchronized CDN origin directory. Each handler extracts the generated file name, saves the image to that custom directory, and replaces the generated local reference with a public CDN URL. The sample itself performs no network upload: the URL becomes valid only after the directory is mounted as the CDN origin or its files are published to the CDN. For object storage, replace the file-system write with the storage SDK's upload operation and assign `link` only after the upload succeeds.
```csharp
using System;
using System.IO;
using Aspose.Slides;
using Aspose.Slides.Export;
const string outputDirectory = "output";
const string publicBaseUrl = "https://cdn.example.com/presentations/quarterly-report";
var storageDirectory = Path.Combine("cdn-origin", "presentations", "quarterly-report");
Directory.CreateDirectory(outputDirectory);
Directory.CreateDirectory(storageDirectory);
static string GetFileNameFromLink(string generatedLink)
{
var urlCompatibleLink = generatedLink.Replace('\\', '/');
return urlCompatibleLink[(urlCompatibleLink.LastIndexOf('/') + 1)..];
}
static string BuildPublicUrl(string baseUrl, string fileName)
{
return $"{baseUrl}/{Uri.EscapeDataString(fileName)}";
}
using var presentation = new Presentation("presentation.pptx");
var options = new MarkdownSaveOptions
{
ExportType = MarkdownExportType.Visual,
BasePath = outputDirectory,
ImagesSaveFolderName = "fallback-images"
};
options.ImageSaving += (IImage image, ImageFormat format, ref string link) =>
{
if (image.Width < 128 || image.Height < 128)
{
return false;
}
var fileName = GetFileNameFromLink(link);
var storagePath = Path.Combine(storageDirectory, fileName);
image.Save(storagePath, format);
link = BuildPublicUrl(publicBaseUrl, fileName);
return true;
};
options.SvgImageSaving += (ISvgImage svgImage, ref string link) =>
{
var fileName = GetFileNameFromLink(link);
var storagePath = Path.Combine(storageDirectory, fileName);
File.WriteAllBytes(storagePath, svgImage.SvgData);
link = BuildPublicUrl(publicBaseUrl, fileName);
return true;
};
var markdownPath = Path.Combine(outputDirectory, "presentation.md");
presentation.Save(markdownPath, SaveFormat.Md, options);
```
The bitmap handler deliberately returns `false` for images smaller than 128 × 128 pixels, so Aspose.Slides saves those images to `output/fallback-images` using the default behavior. Larger bitmap and metafile resources, as well as SVG resources, are handled by the custom code. For example, a generated local reference such as `fallback-images/image1.png` becomes `https://cdn.example.com/presentations/quarterly-report/image1.png`. The handlers use operating-system paths only when writing files; links written to Markdown use forward slashes and URL-escaped file names. Apply the same rule when building relative links: use `/`, not the platform-specific directory separator.
## **FAQ**
**Can one handler process both raster images and SVG images?**
No. Use [MarkdownSaveOptions.ImageSaving](https://reference.aspose.com/slides/net/aspose.slides.export/markdownsaveoptions/imagesaving/) for emitted bitmap and metafile resources and [MarkdownSaveOptions.SvgImageSaving](https://reference.aspose.com/slides/net/aspose.slides.export/markdownsaveoptions/svgimagesaving/) for resources emitted as SVG. The former provides an [IImage](https://reference.aspose.com/slides/net/aspose.slides/iimage/) object and an [ImageFormat](https://reference.aspose.com/slides/net/aspose.slides/imageformat/); the latter provides an [ISvgImage](https://reference.aspose.com/slides/net/aspose.slides/isvgimage/) object whose SVG data can be read from [ISvgImage.SvgData](https://reference.aspose.com/slides/net/aspose.slides/isvgimage/svgdata/). A source SVG that is rasterized during export is processed by `ImageSaving` instead.
**What happens when an image-saving handler returns `false`?**
Aspose.Slides uses its default local-saving behavior. The image location and generated reference are controlled by [MarkdownSaveOptions.BasePath](https://reference.aspose.com/slides/net/aspose.slides.export/markdownsaveoptions/basepath/) and [MarkdownSaveOptions.ImagesSaveFolderName](https://reference.aspose.com/slides/net/aspose.slides.export/markdownsaveoptions/imagessavefoldername/).
**Can a handler provide a URL without saving the image locally?**
Yes. The handler can upload the image to object storage or pass it to another service, assign the resulting URL to `link`, and return `true`. The handler must complete the processing itself; returning `true` prevents the default local save.
**Why does Markdown export throw an `InvalidOperationException` from a handler?**
This exception occurs when the handler returns `true` but does not provide a valid link. Assign the relative path or external URL that should be written to Markdown before returning `true`.
**Which path separator should image links use?**
Use forward slashes in Markdown links and URLs. Use `Path.Combine` only for file-system paths, then construct or normalize the Markdown reference separately.
**Are hyperlinks preserved during Markdown export?**
Yes. Text [hyperlinks](https://docs.aspose.com/slides/net/manage-hyperlinks/) are preserved as standard Markdown links. Slide [transitions](https://docs.aspose.com/slides/net/slide-transition/) and [animations](https://docs.aspose.com/slides/net/powerpoint-animation/) are not converted.
**Can presentations be converted to Markdown in parallel?**
You can process different presentation files in parallel, but do not share the same [Presentation](https://reference.aspose.com/slides/net/aspose.slides/presentation/) instance between threads. Follow the [multithreading guidelines](https://docs.aspose.com/slides/net/multithreading/) and use a separate instance for each file.
## Related features
- [Export presentations to Markdown](https://docs.aspose.com/slides/features/markdown-export/)
# Convert PowerPoint Presentations to PDF with Notes in .NET
> Convert formats PPT and PPTX to PDF with notes using Aspose.Slides for .NET. Preserve layouts and speaker notes for professional presentations.
Source: https://docs.aspose.com/slides/net/convert-powerpoint-to-pdf-with-notes/
Updated: 2026-09-21
## **Overview**
In this article, you will learn how to convert PowerPoint presentations to PDF format with speaker notes using Aspose.Slides. This guide will cover the necessary steps and provide code examples to help you achieve this task efficiently. By the end of this article, you will be able to:
- Implement the conversion process to transform PowerPoint slides into PDF documents while preserving the speaker notes.
- Customize the output PDF to ensure that the speaker notes are included and formatted according to your requirements.
To set the notes page dimensions and orientation before export, see [Notes Page Size](https://docs.aspose.com/slides/net/notes-size/).
## **Convert PowerPoint to PDF with Notes**
The `Save` method in the [Presentation](https://reference.aspose.com/slides/net/aspose.slides/presentation/) class can be used to convert a PPT or PPTX presentation to a PDF with speaker notes. With Aspose.Slides, you simply load the presentation, configure the layout options using the [NotesCommentsLayoutingOptions](https://reference.aspose.com/slides/net/aspose.slides.export/notescommentslayoutingoptions/) class to include speaker notes, and then save the file as a PDF. The following code snippet demonstrates how to convert a sample presentation to a PDF in Notes Slide view.
```cs
using Aspose.Slides;
using Aspose.Slides.Export;
using (Presentation presentation = new Presentation("sample.pptx"))
{
// Configure PDF options for rendering speaker notes.
PdfOptions pdfOptions = new PdfOptions
{
SlidesLayoutOptions = new NotesCommentsLayoutingOptions
{
NotesPosition = NotesPositions.BottomFull // Render speaker notes below the slide.
}
};
// Save the presentation to PDF with speaker notes.
presentation.Save("output.pdf", SaveFormat.Pdf, pdfOptions);
}
```
You may to want to check out Aspose [Online PowerPoint to PDF Converter](https://products.aspose.app/slides/conversion).
## Related features
- [Export slides with speaker notes](https://docs.aspose.com/slides/features/export-notes/)
## Related articles
- [Note](https://docs.aspose.com/slides/net/examples/elements/note/)
- [Convert PowerPoint Presentations to TIFF with Notes in .NET](https://docs.aspose.com/slides/net/convert-powerpoint-to-tiff-with-notes/)
# Convert PPT and PPTX to PDF in .NET [Advanced Features Included]
> Convert PowerPoint PPT/PPTX to high-quality, searchable PDFs in .NET using Aspose.Slides, with fast C# code examples and advanced conversion options.
Source: https://docs.aspose.com/slides/net/convert-powerpoint-to-pdf/
Updated: 2026-11-11
## **Overview**
Converting PowerPoint presentations (PPT, PPTX, ODP, etc.) into PDF format in C# offers several advantages, including compatibility across different devices and preserving the layout and formatting of your presentation. This guide demonstrates how to convert presentations to PDF documents, use various options to control image quality, include hidden slides, password-protect PDF files, detect font substitutions, select specific slides for conversion, and apply compliance standards to output documents.
## **PowerPoint to PDF Conversions**
Using Aspose.Slides, you can convert presentations in the following formats to PDF:
* **PPT**
* **PPTX**
* **ODP**
To convert a presentation to PDF, pass the file name as an argument to the [Presentation](https://reference.aspose.com/slides/net/aspose.slides/presentation/) class and then save the presentation as a PDF using a [Save](https://reference.aspose.com/slides/net/aspose.slides/presentation/save/) method. The [Presentation](https://reference.aspose.com/slides/net/aspose.slides/presentation/) class exposes the [Save](https://reference.aspose.com/slides/net/aspose.slides/presentation/save/) method that is typically used to convert a presentation to PDF.
Aspose.Slides for .NET inserts its API information and version number into output documents. For example, when converting a presentation to PDF, Aspose.Slides populates the Application field with "*Aspose.Slides*" and the PDF Producer field with a value in "*Aspose.Slides v XX.XX*" form. **Note** that you cannot instruct Aspose.Slides to change or remove this information from output documents.
Aspose.Slides allows you to convert:
* Entire presentations to PDF
* Specific slides from a presentation to PDF
Aspose.Slides exports presentations to PDF, ensuring the resulting PDFs closely match the original presentations. Elements and attributes are rendered accurately in the conversion, including:
* Images
* Text boxes and shapes
* Text formatting
* Paragraph formatting
* Hyperlinks
* Headers and footers
* Bullets
* Tables
## **Convert PowerPoint to PDF**
The standard PowerPoint-to-PDF conversion process uses default options. In this case, Aspose.Slides tries to convert the provided presentation to PDF using optimal settings at the maximum quality levels.
The following example loads a presentation and saves all visible slides to PDF using the default export settings.
```csharp
using Aspose.Slides;
using Aspose.Slides.Export;
using var presentation = new Presentation("PowerPoint.ppt");
presentation.Save("PDF-result.pdf", SaveFormat.Pdf);
```
Aspose offers a free online [**PowerPoint to PDF converter**](https://products.aspose.app/slides/conversion/ppt-to-pdf) that demonstrates the presentation-to-PDF conversion process. You can run a test with this converter for a live implementation of the procedure described here.
## **Convert PowerPoint to PDF with Options**
Aspose.Slides provides custom options—properties under the [PdfOptions](https://reference.aspose.com/slides/net/aspose.slides.export/pdfoptions/) class—that allow you to customize the resulting PDF, lock the PDF with a password, or specify how the conversion process should proceed.
### **Convert PowerPoint to PDF with Custom Options**
Using custom conversion options, you can define your preferred quality setting for raster images, specify how metafiles should be handled, set a compression level for text, configure DPI for images, and more.
The following example exports a presentation to PDF 1.5 with JPEG quality set to 90, image resolution set to 300 DPI, metafiles saved as PNG, and Flate text compression.
```csharp
using Aspose.Slides;
using Aspose.Slides.Export;
var pdfOptions = new PdfOptions
{
JpegQuality = 90,
SufficientResolution = 300,
SaveMetafilesAsPng = true,
TextCompression = PdfTextCompression.Flate,
Compliance = PdfCompliance.Pdf15
};
using var presentation = new Presentation("PowerPoint.pptx");
presentation.Save("PowerPoint-to-PDF.pdf", SaveFormat.Pdf, pdfOptions);
```
> **Note:** You can improve the rendering quality of text shadow and reflection effects when converting to PDF by setting `PdfOptions.SufficientResolution` to a higher value (e.g., `300`). This produces PDF output that more closely matches the appearance in Microsoft PowerPoint.
### **Automatically Select Image Compression**
When a presentation contains many photographs or screenshots, reducing the size of the exported PDF can make it easier to email or download. Set [PdfOptions.BestImagesCompressionRatio](https://reference.aspose.com/slides/net/aspose.slides.export/pdfoptions/bestimagescompressionratio/) to `true` to automatically select the most appropriate compression algorithm for each image during PDF export.
The following example loads an existing presentation, enables automatic image compression selection, and saves it a PDF document. All other PDF export settings retain their default values.
```csharp
using Aspose.Slides;
using Aspose.Slides.Export;
var pdfOptions = new PdfOptions { BestImagesCompressionRatio = true };
using var presentation = new Presentation("image-heavy.pptx");
presentation.Save("image-heavy.pdf", SaveFormat.Pdf, pdfOptions);
```
This option selects a compression algorithm for each image. Lowering [JpegQuality](https://reference.aspose.com/slides/net/aspose.slides.export/pdfoptions/jpegquality/) instead reduces JPEG image quality, while lowering [SufficientResolution](https://reference.aspose.com/slides/net/aspose.slides.export/pdfoptions/sufficientresolution/) allows images to be downsampled to a lower resolution, which can reduce detail. Enabling automatic compression selection does not itself lower either of these settings.
Selecting image compression algorithms requires additional processing time and memory. The size reduction depends on the presentation's images and export settings; a fixed reduction is not guaranteed for every presentation.
### **Preserve Embedded OLE Files as PDF Attachments**
If a presentation contains an embedded Excel workbook, you may want PDF recipients to access the workbook's data as well as view the slides. Set [PdfOptions.IncludeOleData](https://reference.aspose.com/slides/net/aspose.slides.export/pdfoptions/includeoledata/) to `true` to preserve embedded OLE files as attachments in the resulting PDF.
The default value is `false`: the OLE object's preview image or icon is rendered on the PDF page, but its embedded file is not included as an attachment. Setting the option to `true` additionally includes the file data. The preview remains a visual representation; the attachment lets recipients open or save the embedded file separately. The OLE object does not become an interactive Excel worksheet on the PDF page.
The following example loads a presentation that already contains an embedded Excel workbook and exports it to PDF with the workbook attached.
```csharp
using Aspose.Slides;
using Aspose.Slides.Export;
var pdfOptions = new PdfOptions { IncludeOleData = true };
using var presentation = new Presentation("presentation.pptx");
presentation.Save("presentation.pdf", SaveFormat.Pdf, pdfOptions);
```
To check the result:
1. Open the exported PDF in a viewer that supports file attachments, such as Adobe Acrobat Reader.
2. Open the viewer's **Attachments** panel and locate the embedded workbook.
3. Save the attachment and open it in Excel to inspect its data, or open it directly if the viewer permits it. The preview on the PDF page is separate from the attachment.
The PDF/A standards impose restrictions on attachments: PDF/A-1 prohibits embedded files, PDF/A-2 permits only PDF/A attachments, and PDF/A-3 permits other file types, including Excel workbooks. These are requirements of the standards, not restrictions specific to Aspose.Slides. This example uses the default PDF compliance setting and does not demonstrate PDF/A export.
### **Convert PowerPoint to PDF with Hidden Slides**
If a presentation contains hidden slides, you can use the [ShowHiddenSlides](https://reference.aspose.com/slides/net/aspose.slides.export/pdfoptions/showhiddenslides/) property from the [PdfOptions](https://reference.aspose.com/slides/net/aspose.slides.export/pdfoptions/) class to include the hidden slides as pages in the resulting PDF.
The following example exports a presentation to PDF, including any hidden slides.
```csharp
using Aspose.Slides;
using Aspose.Slides.Export;
var pdfOptions = new PdfOptions();
pdfOptions.ShowHiddenSlides = true;
using var presentation = new Presentation("PowerPoint.pptx");
presentation.Save("PowerPoint-to-PDF.pdf", SaveFormat.Pdf, pdfOptions);
```
### **Convert PowerPoint to a Password-Protected PDF**
The following example exports a presentation to a PDF that requires the password `password` to open. The access permissions allow printing, including high-quality printing.
```csharp
using Aspose.Slides;
using Aspose.Slides.Export;
var pdfOptions = new PdfOptions();
pdfOptions.Password = "password";
pdfOptions.AccessPermissions = PdfAccessPermissions.PrintDocument | PdfAccessPermissions.HighQualityPrint;
using var presentation = new Presentation("PowerPoint.pptx");
presentation.Save("PPTX-to-PDF.pdf", SaveFormat.Pdf, pdfOptions);
```
### **Detect Font Substitutions**
Aspose.Slides provides the [WarningCallback](https://reference.aspose.com/slides/net/aspose.slides.export/saveoptions/warningcallback/) property under the [PdfOptions](https://reference.aspose.com/slides/net/aspose.slides.export/pdfoptions/) class, enabling you to detect font substitutions during the presentation-to-PDF conversion process.
The following example exports a presentation to PDF and prints font substitution warnings to the console. A warning is printed only when an unavailable font is substituted during export.
```csharp
using Aspose.Slides;
using Aspose.Slides.Export;
using Aspose.Slides.Warnings;
using System;
var pdfOptions = new PdfOptions();
pdfOptions.WarningCallback = new FontSubstitutionHandler();
using var presentation = new Presentation("sample.pptx");
presentation.Save("output.pdf", SaveFormat.Pdf, pdfOptions);
class FontSubstitutionHandler : IWarningCallback
{
public ReturnAction Warning(IWarningInfo warning)
{
if (warning.WarningType == WarningType.DataLoss && warning.Description.StartsWith("Font will be substituted"))
{
Console.WriteLine($"Font substitution warning: {warning.Description}");
}
return ReturnAction.Continue;
}
}
```
For more information on font substitution, see the [Font Substitution](https://docs.aspose.com/slides/net/font-substitution/) article.
### **Handle Fonts Without a Dedicated Bold Typeface**
A presentation can apply bold formatting to text even when its font has no dedicated bold typeface. The text can still appear bold through synthetic bolding, which artificially thickens the regular glyphs. When that text looks too heavy or otherwise differs from the intended appearance in PDF, try setting [PdfOptions.RasterizeUnsupportedFontStyles](https://reference.aspose.com/slides/net/aspose.slides.export/pdfoptions/rasterizeunsupportedfontstyles/) to `true`. This option renders the affected text as a bitmap during PDF export and can improve its appearance for certain fonts. Its default value is `false`.
The sample presentation contains two text boxes: one with regular text and one with bold formatting applied to the same font, which has no dedicated bold typeface. The following example loads the presentation, enables rasterization of unsupported font styles, and exports it to PDF:
```csharp
using Aspose.Slides;
using Aspose.Slides.Export;
var pdfOptions = new PdfOptions
{
RasterizeUnsupportedFontStyles = true
};
using var presentation = new Presentation("unsupported-bold.pptx");
presentation.Save("rasterized.pdf", SaveFormat.Pdf, pdfOptions);
```
The following previews show the disabled output and the enabled output. In this example, the bold text has heavier strokes with the option disabled. With the option enabled, its strokes are lighter; the regular text is unchanged. Compare the results before choosing the setting for your presentation.
| Option disabled (`false`, the default) | Option enabled (`true`) |
|---|---|
|  |  |
In this example, enabling the option turns only the bold text into a bitmap: it cannot be selected, copied, or searched as text without OCR, and its edges appear softer at 800% zoom. The regular text remains searchable. With the option disabled, both strings remain text.
This option rasterizes text formatted as bold when its font has no dedicated bold typeface. [Font substitution](https://docs.aspose.com/slides/net/font-substitution/) instead selects another font when the original is unavailable.
## **Convert Selected Slides from PowerPoint to PDF**
The following example exports slides 1 and 3 from a presentation to PDF. Slide numbers in this array are one-based, and the input presentation must contain at least three slides.
```csharp
using Aspose.Slides;
using Aspose.Slides.Export;
using var presentation = new Presentation("PowerPoint.pptx");
var slides = new[] { 1, 3 };
presentation.Save("PPTX-to-PDF.pdf", slides, SaveFormat.Pdf);
```
## **Convert PowerPoint to PDF with Custom Slide Size**
The following example copies the first slide from a presentation into a new presentation with a slide size of 612 × 792 points (8.5 × 11 inches). It scales the slide content to fit and exports the single slide to PDF.
```csharp
using Aspose.Slides;
using Aspose.Slides.Export;
var slideWidth = 612;
var slideHeight = 792;
using var presentation = new Presentation("SelectedSlides.pptx");
using var resizedPresentation = new Presentation();
resizedPresentation.SlideSize.SetSize(slideWidth, slideHeight, SlideSizeScaleType.EnsureFit);
var slide = presentation.Slides[0];
resizedPresentation.Slides.InsertClone(0, slide);
// Remove the blank slide that the new presentation was created with.
resizedPresentation.Slides.RemoveAt(1);
resizedPresentation.Save("PDF_with_custom_slide_size.pdf", SaveFormat.Pdf);
```
## **Convert PowerPoint to PDF in Notes Slide View**
The following example exports a presentation to PDF, placing each slide's speaker notes below the slide. Use a presentation containing speaker notes to see the result.
```csharp
using Aspose.Slides;
using Aspose.Slides.Export;
var pdfOptions = new PdfOptions
{
SlidesLayoutOptions = new NotesCommentsLayoutingOptions
{
NotesPosition = NotesPositions.BottomFull
}
};
using var presentation = new Presentation("NotesFile.pptx");
presentation.Save("PDF_with_notes.pdf", SaveFormat.Pdf, pdfOptions);
```
## **Accessibility and Compliance Standards for PDF**
Aspose.Slides allows you to use a conversion procedure that complies with [Web Content Accessibility Guidelines (**WCAG**)](https://www.w3.org/TR/WCAG-TECHS/pdf.html). You can export a PowerPoint document to PDF using any of these compliance standards: **PDF/A1a**, **PDF/A1b**, and **PDF/UA**.
This C# code demonstrates a PowerPoint-to-PDF conversion process that produces multiple PDFs based on different compliance standards:
```csharp
using Aspose.Slides;
using Aspose.Slides.Export;
using var presentation = new Presentation("pres.pptx");
presentation.Save("pres-a1a-compliance.pdf", SaveFormat.Pdf, new PdfOptions
{
Compliance = PdfCompliance.PdfA1a
});
presentation.Save("pres-a1b-compliance.pdf", SaveFormat.Pdf, new PdfOptions
{
Compliance = PdfCompliance.PdfA1b
});
presentation.Save("pres-ua-compliance.pdf", SaveFormat.Pdf, new PdfOptions
{
Compliance = PdfCompliance.PdfUa
});
```
Aspose.Slides supports PDF conversion operations, allowing you to convert PDF files to popular file formats. You can perform [PDF to HTML](https://products.aspose.com/slides/net/conversion/pdf-to-html/), [PDF to image](https://products.aspose.com/slides/net/conversion/pdf-to-image/), [PDF to JPG](https://products.aspose.com/slides/net/conversion/pdf-to-jpg/), and [PDF to PNG](https://products.aspose.com/slides/net/conversion/pdf-to-png/) conversions. Other PDF conversion operations to specialized formats—[PDF to SVG](https://products.aspose.com/slides/net/conversion/pdf-to-svg/), [PDF to TIFF](https://products.aspose.com/slides/net/conversion/pdf-to-tiff/), and [PDF to XML](https://products.aspose.com/slides/net/conversion/pdf-to-xml/)—are also supported.
> **Note:** When exporting to PDF/UA, Aspose.Slides treats complex graphics such as SmartArt, charts, and formulas as a single figure. Individual path elements are not preserved as separate content and may be marked as artifacts; alternative text is provided only for the whole figure.
## **FAQ**
**Can I convert multiple PowerPoint files to PDF in bulk?**
Yes, Aspose.Slides supports batch conversion of multiple PPT or PPTX files to PDF. You can iterate through your files and apply the conversion process programmatically.
**Is it possible to password-protect the converted PDF?**
Yes. Use the [PdfOptions](https://reference.aspose.com/slides/net/aspose.slides.export/pdfoptions/) class to set a password and define access permissions during the conversion process.
**How do I include hidden slides in the PDF?**
Set the [ShowHiddenSlides](https://reference.aspose.com/slides/net/aspose.slides.export/pdfoptions/showhiddenslides/) property in the [PdfOptions](https://reference.aspose.com/slides/net/aspose.slides.export/pdfoptions/) class to `true` to include hidden slides in the resulting PDF.
**Can Aspose.Slides maintain high image quality in the PDF?**
Yes, you can control image quality by setting properties such as [JpegQuality](https://reference.aspose.com/slides/net/aspose.slides.export/pdfoptions/jpegquality/) and [SufficientResolution](https://reference.aspose.com/slides/net/aspose.slides.export/pdfoptions/sufficientresolution/) in the [PdfOptions](https://reference.aspose.com/slides/net/aspose.slides.export/pdfoptions/) class to ensure high-quality images in your PDF.
**Does Aspose.Slides support PDF/A compliance standards?**
Yes, Aspose.Slides allows you to export PDFs that comply with various standards, including PDF/A1a, PDF/A1b, and PDF/UA, ensuring your documents meet accessibility and archival requirements.
## **Additional Resources**
- [Aspose.Slides for .NET Documentation](https://docs.aspose.com/slides/net/)
- [Aspose.Slides for .NET API Reference](https://reference.aspose.com/slides/net/)
- [Aspose Free Online Converters](https://products.aspose.app/slides/conversion)
Related feature: [Export presentations to PDF](https://docs.aspose.com/slides/features/pdf-export/).
## Related features
- [Track export progress](https://docs.aspose.com/slides/features/export-progress/)
- [Hide and show slides](https://docs.aspose.com/slides/features/hidden-slides/)
- [Choose PDF compliance settings](https://docs.aspose.com/slides/features/pdf-compliance/)
- [Adjust image quality and compression](https://docs.aspose.com/slides/features/image-quality/)
- [Protect PDF output with a password](https://docs.aspose.com/slides/features/pdf-password/)
# Convert PowerPoint Slides to PNG in .NET
> Convert PowerPoint presentations to high-quality PNG images quickly with Aspose.Slides for .NET, ensuring precise, automated results.
Source: https://docs.aspose.com/slides/net/convert-powerpoint-to-png/
Updated: 2026-10-14
## **Overview**
This article explains how to convert presentation slides to PNG images using Aspose.Slides for .NET. You can load presentations in formats such as PPT, PPTX, and ODP, render each slide, and save it as a separate PNG image.
The examples below demonstrate rendering thumbnails, setting scale factors, specifying the output dimensions in pixels, and choosing a gradient rendering style.
## **Convert PowerPoint to PNG**
Load a presentation with the [Presentation](https://reference.aspose.com/slides/net/aspose.slides/presentation/) class and access its slides through the [Slides](https://reference.aspose.com/slides/net/aspose.slides/presentation/slides/) collection. The example renders every slide with [ISlide.GetImage](https://reference.aspose.com/slides/net/aspose.slides/islide/getimage/) without parameters to create a thumbnail. It then calls [IImage.Save](https://reference.aspose.com/slides/net/aspose.slides/iimage/save/) with [ImageFormat.Png](https://reference.aspose.com/slides/net/aspose.slides/imageformat/) to save each rendered slide as a PNG image.
```cs
using Aspose.Slides;
using var presentation = new Presentation("presentation.pptx");
var slideCount = presentation.Slides.Count;
for (var index = 0; index < slideCount; index++)
{
var slide = presentation.Slides[index];
using var image = slide.GetImage();
image.Save($"slide_{index}.png", ImageFormat.Png);
}
```
The parameterless [ISlide.GetImage](https://reference.aspose.com/slides/net/aspose.slides/islide/getimage/) overload renders at a scale of 0.2. For example, a slide measuring 720 × 540 points produces a 144 × 108 pixel thumbnail. To control the output dimensions, use the overloads with scale factors or an explicit image size shown below.
## **Convert PowerPoint to PNG With Custom Dimensions**
Pass horizontal and vertical scale factors to [ISlide.GetImage](https://reference.aspose.com/slides/net/aspose.slides/islide/getimage/) to control the rendered dimensions. In this example, both factors are 2, so a slide measuring 720 × 540 points produces a 1440 × 1080 pixel image. Equal scale factors preserve the slide's aspect ratio. Each image is saved in PNG format with [IImage.Save](https://reference.aspose.com/slides/net/aspose.slides/iimage/save/).
```cs
using Aspose.Slides;
using var presentation = new Presentation("presentation.pptx");
var scaleX = 2f;
var scaleY = scaleX;
var slideCount = presentation.Slides.Count;
for (var index = 0; index < slideCount; index++)
{
var slide = presentation.Slides[index];
using var image = slide.GetImage(scaleX, scaleY);
image.Save($"slide_{index}.png", ImageFormat.Png);
}
```
## **Convert PowerPoint to PNG With Custom Size**
To specify output dimensions in pixels, pass a size to [ISlide.GetImage](https://reference.aspose.com/slides/net/aspose.slides/islide/getimage/) instead of scale factors. This example renders every slide at 960 × 720 pixels and saves the result with [IImage.Save](https://reference.aspose.com/slides/net/aspose.slides/iimage/save/). Choose dimensions that match the slide's aspect ratio to avoid stretching the image.
```cs
using System.Drawing;
using Aspose.Slides;
using var presentation = new Presentation("presentation.pptx");
var imageSize = new Size(960, 720);
var slideCount = presentation.Slides.Count;
for (var index = 0; index < slideCount; index++)
{
var slide = presentation.Slides[index];
using var image = slide.GetImage(imageSize);
image.Save($"slide_{index}.png", ImageFormat.Png);
}
```
## **Choose a Gradient Rendering Style**
Suppose a slide contains gradient fills, but the transitions in the exported PNG look lighter or otherwise different from what you see in PowerPoint. You can use the [GradientStyle](https://reference.aspose.com/slides/net/aspose.slides.export/saveoptions/gradientstyle/) property of [RenderingOptions](https://reference.aspose.com/slides/net/aspose.slides.export/renderingoptions/) to choose how the gradients are rendered.
Download [gradient-styles.pptx](https://docs.aspose.com/slides/net/convert-powerpoint-to-png/gradient-styles.pptx) and place it in the application's working directory. Its first slide contains two linear gradients: cyan to orange at the top and blue to yellow at the bottom. Each gradient has two stops, at 0% and 100%.
The following example loads this presentation and renders the same first slide in both modes with [ISlide.GetImage](https://reference.aspose.com/slides/net/aspose.slides/islide/getimage/).
```cs
using Aspose.Slides;
using Aspose.Slides.Export;
using var presentation = new Presentation("gradient-styles.pptx");
var slide = presentation.Slides[0];
var gradientStyles = new[] { GradientStyle.Default, GradientStyle.PowerPointUI };
foreach (var style in gradientStyles)
{
var options = new RenderingOptions { GradientStyle = style };
using var image = slide.GetImage(options, 1f, 1f);
image.Save($"gradient-{style}.png", ImageFormat.Png);
}
```
The images below show the output from the same slide, with both gradients in each image:
| Default | PowerPointUI |
| --- | --- |
|  |  |
In this example, `Default` produces lighter intermediate colors, while `PowerPointUI` produces darker intermediate colors. The difference depends on the colors and stops in the gradient.
Choose `Default` when the standard Aspose.Slides output suits your needs. Try `PowerPointUI` when your priority is matching the appearance in PowerPoint. Compare both outputs with your intended result; neither mode is universally preferable.
## **FAQ**
**How can I export a specific shape, such as a chart or picture, instead of the entire slide?**
Aspose.Slides supports [generating thumbnails for individual shapes](https://docs.aspose.com/slides/net/create-shape-thumbnails/), allowing you to render a shape as a PNG image.
**Is parallel conversion supported on a server?**
Yes. Use a separate presentation instance for each thread or process; [do not share a single instance across threads](https://docs.aspose.com/slides/net/multithreading/).
**What are the evaluation limitations when exporting to PNG?**
Evaluation mode adds a watermark to output images and applies [other restrictions](https://docs.aspose.com/slides/net/licensing/) until a license is applied.
## Related features
- [Render slides as images](https://docs.aspose.com/slides/features/slide-images/)
## Related articles
- [Convert PPT and PPTX to JPG in .NET](https://docs.aspose.com/slides/net/convert-powerpoint-to-jpg/)
# Convert PowerPoint Presentations to SWF Flash in .NET
> Convert PowerPoint (PPT/PPTX) to SWF Flash in .NET with Aspose.Slides. Step‑by‑step C# code samples, fast quality output, no PowerPoint automation.
Source: https://docs.aspose.com/slides/net/convert-powerpoint-to-swf-flash/
Updated: 2026-08-05
## **Overview**
This article explains how to convert PowerPoint presentations to SWF by using Aspose.Slides. It shows how to save a presentation as an SWF file with the [Presentation.Save](https://reference.aspose.com/slides/net/aspose.slides/presentation/save/) method and how to configure the export with [SwfOptions](https://reference.aspose.com/slides/net/aspose.slides.export/swfoptions/), including viewer settings and notes or comments layout.
## **Convert Presentations to Flash**
The [Save](https://reference.aspose.com/slides/net/aspose.slides/presentation/methods/save/index) method exposed by [Presentation](https://reference.aspose.com/slides/net/aspose.slides/presentation) class can be used to convert the whole presentation into SWF document. You can also include comments in generated SWF by using [SWFOptions](https://reference.aspose.com/slides/net/aspose.slides.export/swfoptions) class and [INotesCommentsLayoutingOptions ](https://reference.aspose.com/slides/net/aspose.slides.export/inotescommentslayoutingoptions)interface. The following example shows how to convert a presentation into SWF document by using options provided by SWFOptions class.
```c#
using Aspose.Slides;
using Aspose.Slides.Export;
// Instantiate a Presentation object that represents a presentation file
using (Presentation presentation = new Presentation("HelloWorld.pptx"))
{
SwfOptions swfOptions = new SwfOptions();
swfOptions.ViewerIncluded = false;
swfOptions.SlidesLayoutOptions = new NotesCommentsLayoutingOptions
{
NotesPosition = NotesPositions.BottomFull
};
// Saving presentation and notes pages
presentation.Save("SaveAsSwf_out.swf", SaveFormat.Swf, swfOptions);
swfOptions.ViewerIncluded = true;
presentation.Save("SaveNotes_out.swf", SaveFormat.Swf, swfOptions);
}
```
## **FAQ**
### Can I include hidden slides in the SWF?
Yes. Enable the [ShowHiddenSlides](https://reference.aspose.com/slides/net/aspose.slides.export/swfoptions/showhiddenslides/) option in [SwfOptions](https://reference.aspose.com/slides/net/aspose.slides.export/swfoptions/). By default, hidden slides are not exported.
### How can I control compression and the final SWF size?
Use the [Compressed](https://reference.aspose.com/slides/net/aspose.slides.export/swfoptions/compressed/) flag (enabled by default) and adjust [JpegQuality](https://reference.aspose.com/slides/net/aspose.slides.export/swfoptions/jpegquality/) to balance file size and image fidelity.
### What is 'ViewerIncluded' for, and when should I disable it?
[ViewerIncluded](https://reference.aspose.com/slides/net/aspose.slides.export/swfoptions/viewerincluded/) adds an embedded player UI (navigation controls, panels, search). Disable it if you plan to use your own player or need a bare SWF frame without UI.
### What happens if a source font is missing on the export machine?
Aspose.Slides will substitute the font you specify via [DefaultRegularFont](https://reference.aspose.com/slides/net/aspose.slides.export/saveoptions/defaultregularfont/) in [SwfOptions](https://reference.aspose.com/slides/net/aspose.slides.export/saveoptions/) to avoid an unintended fallback.
## Related articles
- [Extract Flash Objects from Presentations in .NET](https://docs.aspose.com/slides/net/flash/)
# Convert PowerPoint Presentations to TIFF with Notes in .NET
> Convert PowerPoint presentations to TIFF with notes using Aspose.Slides for .NET. Learn how to export slides with speaker notes efficiently.
Source: https://docs.aspose.com/slides/net/convert-powerpoint-to-tiff-with-notes/
Updated: 2026-08-13
## **Introduction**
Aspose.Slides for .NET provides a simple solution for converting PowerPoint and OpenDocument presentations (PPT, PPTX, and ODP) with notes to the TIFF format. This format is widely used for high-quality image storage, printing, and document archiving. With Aspose.Slides, you can not only export entire presentations with speaker notes but also generate slide thumbnails in the Notes Slide view. The conversion process is simple and efficient, utilizing the `Save` method of the [Presentation](https://reference.aspose.com/slides/net/aspose.slides/presentation/) class to transform the entire presentation into a series of TIFF images while preserving the notes and layout.
## **Convert a Presentation to TIFF with Notes**
Saving a PowerPoint or OpenDocument presentation to TIFF with notes using Aspose.Slides for .NET involves the following steps:
1. Instantiate the [Presentation](https://reference.aspose.com/slides/net/aspose.slides/presentation/) class: Load a PowerPoint or OpenDocument file.
1. Configure the output layout options: Use the [NotesCommentsLayoutingOptions](https://reference.aspose.com/slides/net/aspose.slides.export/notescommentslayoutingoptions/) class to specify how notes and comments should be displayed.
1. Save the presentation to TIFF: Pass the configured options to the [Save](https://reference.aspose.com/slides/net/aspose.slides/presentation/methods/save/index) method.
Let's say we have a "speaker_notes.pptx" file with the following slide:

The code snippet below demonstrates how to convert the presentation to a TIFF image in Notes Slide view using the [SlidesLayoutOptions](https://reference.aspose.com/slides/net/aspose.slides.export/tiffoptions/slideslayoutoptions/) property.
```c#
using Aspose.Slides;
using Aspose.Slides.Export;
// Instantiate the Presentation class that represents a presentation file.
using (Presentation presentation = new Presentation("speaker_notes.pptx"))
{
// Configure the TIFF options with Notes layouting.
TiffOptions tiffOptions = new TiffOptions
{
DpiX = 300,
DpiY = 300,
SlidesLayoutOptions = new NotesCommentsLayoutingOptions
{
NotesPosition = NotesPositions.BottomFull // Display the notes below the slide.
}
};
// Save the presentation to TIFF with the speaker notes.
presentation.Save("TIFF_with_notes.tiff", SaveFormat.Tiff, tiffOptions);
}
```
The result:

Check out Aspose [Free PowerPoint to Poster Converter](https://products.aspose.app/slides/conversion/convert-ppt-to-poster-online).
## **FAQ**
### Can I control the position of the notes area in the resulting TIFF?
Yes. Use the [notes layout settings](https://reference.aspose.com/slides/net/aspose.slides.export/tiffoptions/slideslayoutoptions/) to choose among options like `None`, `BottomTruncated`, or `BottomFull`, which respectively hide notes, fit them into a single page, or allow them to flow onto additional pages.
### How can I reduce the size of a TIFF file with notes without visible loss of quality?
Pick an [efficient compression](https://reference.aspose.com/slides/net/aspose.slides.export/tiffoptions/compressiontype/) (e.g., `LZW` or `RLE`), set a reasonable DPI, and, if acceptable, use a lower [pixel format](https://reference.aspose.com/slides/net/aspose.slides.export/tiffoptions/pixelformat/) (such as 8 bpp or 1 bpp for monochrome). Slightly reducing the [image dimensions](https://reference.aspose.com/slides/net/aspose.slides.export/tiffoptions/imagesize/) can also help without noticeably hurting readability.
### Does the font in the notes affect the result if the original fonts are missing from the system?
Yes. Missing fonts trigger [substitution](https://docs.aspose.com/slides/net/font-selection-sequence/), which can change text metrics and appearance. To avoid this, [supply the required fonts](https://docs.aspose.com/slides/net/custom-font/) or set a default [fallback font](https://docs.aspose.com/slides/net/fallback-font/) so the intended typefaces are used.
## Related articles
- [Convert PowerPoint Presentations to PDF with Notes in .NET](https://docs.aspose.com/slides/net/convert-powerpoint-to-pdf-with-notes/)
- [Convert Presentation to Tiff with Notes](https://docs.aspose.com/slides/net/convert-presentation-to-tiff-with-notes/)
- [Conversion to Tiff with Notes](https://docs.aspose.com/slides/net/conversion-to-tiff-with-notes/)
# Convert PowerPoint Presentations to TIFF in .NET
> Learn how to easily convert PowerPoint (PPT, PPTX) presentations to high-quality TIFF images using Aspose.Slides for .NET. C# code examples.
Source: https://docs.aspose.com/slides/net/convert-powerpoint-to-tiff/
Updated: 2026-08-25
## **Introduction**
TIFF (**Tagged Image File Format**) is a widely-used, lossless raster image format known for its exceptional quality and detailed preservation of graphics. Designers, photographers, and desktop publishers often choose TIFF to maintain layers, color accuracy, and original settings in their images.
Using Aspose.Slides, you can effortlessly convert your PowerPoint slides (PPT, PPTX) and OpenDocument slides (ODP) directly into high-quality TIFF images, ensuring your presentations retain maximum visual fidelity.
## **Convert a Presentation to TIFF**
Using the [Save](https://reference.aspose.com/slides/net/aspose.slides/presentation/save/) method provided by the [Presentation](https://reference.aspose.com/slides/net/aspose.slides/presentation/) class, you can quickly convert an entire PowerPoint presentation to TIFF. The resulting TIFF images correspond to the default slide size.
This C# code demonstrates how to convert a PowerPoint presentation to TIFF:
```cs
using Aspose.Slides;
using Aspose.Slides.Export;
// Instantiate the Presentation class that represents a presentation file (PPT, PPTX, ODP, etc.).
using (Presentation presentation = new Presentation("Demo_File.pptx"))
{
// Save the presentation as TIFF.
presentation.Save("Output.tiff", SaveFormat.Tiff);
}
```
## **Convert a Presentation to Black-and-White TIFF**
The property [BwConversionMode](https://reference.aspose.com/slides/net/aspose.slides.export/tiffoptions/bwconversionmode/) in the [TiffOptions](https://reference.aspose.com/slides/net/aspose.slides.export/tiffoptions/) class allows you to specify the algorithm used when converting a colored slide or image to a black-and-white TIFF. Note that this setting applies only when the [CompressionType](https://reference.aspose.com/slides/net/aspose.slides.export/tiffoptions/compressiontype/) property is set to `CCITT4` or `CCITT3`.
[TiffOptions.BwConversionMode](https://reference.aspose.com/slides/net/aspose.slides.export/tiffoptions/bwconversionmode/) is an export-level setting that selects a pixel-conversion algorithm for the complete TIFF image. To define how an individual shape should appear when black-and-white display mode is active, use [IShape.BlackWhiteMode](https://reference.aspose.com/slides/net/aspose.slides/ishape/blackwhitemode/). See [Control Black-and-White Rendering for Shapes](https://docs.aspose.com/slides/net/shape-formatting/#control-black-and-white-rendering-for-shapes) for examples.
Let's say we have a "sample.pptx" file with the following slide:

This C# code demonstrates how to convert the colored slide to a black-and-white TIFF:
```cs
using Aspose.Slides;
using Aspose.Slides.Export;
TiffOptions tiffOptions = new TiffOptions
{
CompressionType = TiffCompressionTypes.CCITT4,
BwConversionMode = BlackWhiteConversionMode.Dithering
};
using (Presentation presentation = new Presentation("sample.pptx"))
{
presentation.Save("output.tiff", SaveFormat.Tiff, tiffOptions);
}
```
The result:

## **Convert a Presentation to TIFF with Custom Size**
If you require a TIFF image with specific dimensions, you can set your desired values using properties available in [TiffOptions](https://reference.aspose.com/slides/net/aspose.slides.export/tiffoptions/). For instance, the [ImageSize](https://reference.aspose.com/slides/net/aspose.slides.export/tiffoptions/imagesize/) property allows you to define the size of the resulting image.
This C# code demonstrates how to convert a PowerPoint presentation to TIFF images with a custom size:
```cs
using System.Drawing;
using Aspose.Slides;
using Aspose.Slides.Export;
// Instantiate the Presentation class that represents a presentation file (PPT, PPTX, ODP, etc.).
using (Presentation presentation = new Presentation("sample.pptx"))
{
TiffOptions tiffOptions = new TiffOptions();
// Set the compression type.
tiffOptions.CompressionType = TiffCompressionTypes.Default;
/*
Compression types:
Default - Specifies the default compression scheme (LZW).
None - Specifies no compression.
CCITT3
CCITT4
LZW
RLE
*/
// The depth depends on the compression type and cannot be set manually.
// Set the image DPI.
tiffOptions.DpiX = 200;
tiffOptions.DpiY = 200;
// Set the image size.
tiffOptions.ImageSize = new Size(1728, 1078);
tiffOptions.SlidesLayoutOptions = new NotesCommentsLayoutingOptions
{
NotesPosition = NotesPositions.BottomFull
};
// Save the presentation as TIFF with the specified size.
presentation.Save("custom_size.tiff", SaveFormat.Tiff, tiffOptions);
}
```
## **Convert a Presentation to TIFF with Custom Image Pixel Format**
Using the [PixelFormat](https://reference.aspose.com/slides/net/aspose.slides.export/tiffoptions/pixelformat/) property from the [TiffOptions](https://reference.aspose.com/slides/net/aspose.slides.export/tiffoptions) class, you can specify your preferred pixel format for the resulting TIFF image.
This C# code demonstrates how to convert a PowerPoint presentation to a TIFF image with a custom pixel format:
```cs
using Aspose.Slides;
using Aspose.Slides.Export;
// Instantiate the Presentation class that represents a presentation file (PPT, PPTX, ODP, etc.).
using (Presentation presentation = new Presentation("Demo_File.pptx"))
{
TiffOptions tiffOptions = new TiffOptions();
tiffOptions.PixelFormat = ImagePixelFormat.Format8bppIndexed;
/*
ImagePixelFormat contains the following values (as stated in the documentation):
Format1bppIndexed - 1 bit per pixel, indexed.
Format4bppIndexed - 4 bits per pixel, indexed.
Format8bppIndexed - 8 bits per pixel, indexed.
Format24bppRgb - 24 bits per pixel, RGB.
Format32bppArgb - 32 bits per pixel, ARGB.
*/
// Save the presentation as TIFF with the specified image size.
presentation.Save("Custom_Image_Pixel_Format.tiff", SaveFormat.Tiff, tiffOptions);
}
```
Check out Aspose's [FREE PowerPoint to Poster converter](https://products.aspose.app/slides/conversion/convert-ppt-to-poster-online).
## **FAQ**
**Can I convert an individual slide instead of entire PowerPoint presentation to TIFF?**
Yes. Aspose.Slides allows you to convert individual slides from PowerPoint and OpenDocument presentations into TIFF images separately.
**Is there any limit to the number of slides when converting a presentation to TIFF?**
No, Aspose.Slides does not impose any restrictions on the number of slides. You can convert presentations of any size into TIFF format.
**Are PowerPoint animations and transition effects preserved when converting slides to TIFF?**
No, TIFF is a static image format. Therefore, animations and transition effects are not preserved; only static snapshots of slides are exported.
## Related features
- [Set rendering resolution](https://docs.aspose.com/slides/features/rendering-resolution/)
## Related articles
- [Convert Presentation Slides to Images in .NET](https://docs.aspose.com/slides/net/convert-slide/)
- [Rendered As Tiff](https://docs.aspose.com/slides/net/rendered-as-tiff/)
- [Convert PowerPoint Presentations to TIFF with Notes in .NET](https://docs.aspose.com/slides/net/convert-powerpoint-to-tiff-with-notes/)
# Convert PowerPoint Presentations to Video in .NET
> Learn how to convert PowerPoint presentations to video in .NET. Discover sample C# code and automation techniques to streamline your workflow.
Source: https://docs.aspose.com/slides/net/convert-powerpoint-to-video/
Updated: 2026-11-08
## **Introduction**
By converting your PowerPoint or OpenDocument presentation to video, you gain:
**Increased accessibility:** All devices, regardless of platform, are equipped with video players by default, making it easier for users to open or play videos compared to traditional presentation applications.
**Wider reach:** Videos enable you to reach a larger audience and present information in a more engaging format. Surveys and statistics indicate that people prefer to watch and consume video content over other forms, making your message more impactful.
Check out our [**PowerPoint to Video Online Converter**](https://products.aspose.app/slides/video) because it offers a live and effective implementation of the process described here.
In Aspose.Slides for .NET, we implemented support for converting presentations to video.
* Use Aspose.Slides for .NET to generate frames from the presentation slides at a specified frame rate (FPS).
* Then, use a third-party utility like ffmpeg to compile these frames into a video.
## **Convert a PowerPoint Presentation to Video**
1. Use the `dotnet add package` command to add Aspose.Slides and the FFMpegCore library to your project:
* run `dotnet add package Aspose.Slides.NET --version 22.11.0`
* run `dotnet add package FFMpegCore --version 4.8.0`
2. Dowload ffmpeg from [here](https://ffmpeg.org/download.html).
3. FFMpegCore requires you to specify the path to the downloaded ffmpeg (e.g., extracted to "C:\tools\ffmpeg"):
```cs
GlobalFFOptions.Configure(new FFOptions { BinaryFolder = @"c:\tools\ffmpeg\bin" });
```
4. Run the PowerPoint-to-video conversion code.
This C# code demonstrates how to convert a presentation (containing a shape and two animation effects) into a video:
```c#
using System.Collections.Generic;
using Aspose.Slides;
using FFMpegCore; // will use the FFmpeg binaries we extracted to C:\tools\ffmpeg earlier.
using Aspose.Slides.Animation;
using (Presentation presentation = new Presentation())
{
ISlide slide = presentation.Slides[0];
// Add a smile shape and then animate it.
IAutoShape smile = slide.Shapes.AddAutoShape(ShapeType.SmileyFace, 110, 20, 500, 500);
IEffect effectIn = slide.Timeline.MainSequence.AddEffect(
smile, EffectType.Fly, EffectSubtype.TopLeft, EffectTriggerType.AfterPrevious);
IEffect effectOut = slide.Timeline.MainSequence.AddEffect(
smile, EffectType.Fly, EffectSubtype.BottomRight, EffectTriggerType.AfterPrevious);
effectIn.Timing.Duration = 2f;
effectOut.PresetClassType = EffectPresetClassType.Exit;
const int Fps = 33;
List frames = new List();
using (var animationsGenerator = new PresentationAnimationsGenerator(presentation))
using (var player = new PresentationPlayer(animationsGenerator, Fps))
{
player.FrameTick += (sender, args) =>
{
string frame = $"frame_{(sender.FrameIndex):D4}.png";
args.GetFrame().Save(frame);
frames.Add(frame);
};
animationsGenerator.Run(presentation.Slides);
}
// Configure the ffmpeg binaries folder. See this page: https://github.com/rosenbjerg/FFMpegCore#installation
GlobalFFOptions.Configure(new FFOptions { BinaryFolder = @"c:\tools\ffmpeg\bin" });
// Convert the frames to a webm video.
FFMpeg.JoinImageSequence("smile.webm", Fps, frames.Select(frame => ImageInfo.FromPath(frame)).ToArray());
}
```
## **Video Effects**
When converting a PowerPoint presentation to video using Aspose.Slides for .NET, you can apply various video effects to enhance the visual quality of the output. These effects allow you to control the appearance of slides in the final video by adding smooth transitions, animations, and other visual elements. This section explains the available video effect options and shows how to apply them.
See:
- [Enhancing PowerPoint Presentations with Animations in C#](https://docs.aspose.com/slides/net/powerpoint-animation/)
- [Shape Animation](https://docs.aspose.com/slides/net/shape-animation/)
- [Apply Shape Effects in PowerPoint Using C#](https://docs.aspose.com/slides/net/shape-effect/)
Animations and transitions make slideshows more engaging and interesting — and they do the same for videos. Let's add another slide and transition to the code for the previous presentation:
```c#
using System.Drawing;
using Aspose.Slides;
using Aspose.Slides.SlideShow;
using (Presentation presentation = new Presentation())
{
// Add a smile shape and animate it (see the code above).
// Add a new slide and an animated transition.
ISlide newSlide = presentation.Slides.AddEmptySlide(presentation.Slides[0].LayoutSlide);
newSlide.Background.Type = BackgroundType.OwnBackground;
newSlide.Background.FillFormat.FillType = FillType.Solid;
newSlide.Background.FillFormat.SolidFillColor.Color = Color.Indigo;
newSlide.SlideShowTransition.Type = TransitionType.Push;
}
```
Aspose.Slides also supports text animations. In this example, we animate paragraphs on objects so that they appear one after the other, with a one-second delay between them:
```c#
using System.Collections.Generic;
using Aspose.Slides.Export;
using Aspose.Slides;
using FFMpegCore;
using Aspose.Slides.Animation;
using (Presentation presentation = new Presentation())
{
ISlide slide = presentation.Slides[0];
// Add text and animations.
IAutoShape autoShape = slide.Shapes.AddAutoShape(ShapeType.Rectangle, 210, 120, 300, 300);
Paragraph para1 = new Paragraph();
para1.Portions.Add(new Portion("Aspose Slides for .NET"));
Paragraph para2 = new Paragraph();
para2.Portions.Add(new Portion("Convert a PowerPoint presentation with text to video"));
Paragraph para3 = new Paragraph();
para3.Portions.Add(new Portion("paragraph by paragraph"));
autoShape.TextFrame.Paragraphs.Add(para1);
autoShape.TextFrame.Paragraphs.Add(para2);
autoShape.TextFrame.Paragraphs.Add(para3);
autoShape.TextFrame.Paragraphs.Add(new Paragraph());
IEffect effect1 = slide.Timeline.MainSequence.AddEffect(
para1, EffectType.Appear, EffectSubtype.None, EffectTriggerType.AfterPrevious);
IEffect effect2 = slide.Timeline.MainSequence.AddEffect(
para2, EffectType.Appear, EffectSubtype.None, EffectTriggerType.AfterPrevious);
IEffect effect3 = slide.Timeline.MainSequence.AddEffect(
para3, EffectType.Appear, EffectSubtype.None, EffectTriggerType.AfterPrevious);
IEffect effect4 = slide.Timeline.MainSequence.AddEffect(
para3, EffectType.Appear, EffectSubtype.None, EffectTriggerType.AfterPrevious);
effect1.Timing.TriggerDelayTime = 1f;
effect2.Timing.TriggerDelayTime = 1f;
effect3.Timing.TriggerDelayTime = 1f;
effect4.Timing.TriggerDelayTime = 1f;
const int Fps = 33;
List frames = new List();
using (var animationsGenerator = new PresentationAnimationsGenerator(presentation))
using (var player = new PresentationPlayer(animationsGenerator, Fps))
{
player.FrameTick += (sender, args) =>
{
string frame = $"frame_{(sender.FrameIndex):D4}.png";
args.GetFrame().Save(frame);
frames.Add(frame);
};
animationsGenerator.Run(presentation.Slides);
}
// Configure the ffmpeg binaries folder. See this page: https://github.com/rosenbjerg/FFMpegCore#installation
GlobalFFOptions.Configure(new FFOptions { BinaryFolder = @"c:\tools\ffmpeg\bin" });
// Convert the frames to a webm video.
FFMpeg.JoinImageSequence("text_animation.webm", Fps, frames.Select(frame => ImageInfo.FromPath(frame)).ToArray());
}
```
## **Video Conversion Classes**
To enable PowerPoint to video conversion tasks, Aspose.Slides for .NET provides the [PresentationAnimationsGenerator](https://reference.aspose.com/slides/net/aspose.slides.export/presentationanimationsgenerator/) and [PresentationPlayer](https://reference.aspose.com/slides/net/aspose.slides.export/presentationplayer/) classes.
`PresentationAnimationsGenerator` allows you to set the frame size for the video (which will be created later) and the FPS (frames per second) value through its constructor. If you pass an instance of a presentation, its `Presentation.SlideSize` will be used and it generates animations that [PresentationPlayer](https://reference.aspose.com/slides/net/aspose.slides.export/presentationplayer/) uses.
When animations are generated, a `NewAnimation` event is triggered for each subsequent animation, which includes an [IPresentationAnimationPlayer](https://reference.aspose.com/slides/net/aspose.slides.export/ipresentationanimationplayer/) parameter. This class represents a player for an individual animation.
[](https://docs.aspose.com/slides/net/convert-powerpoint-to-video/visual-convert-powerpoint-to-video-f34cee01f867.svg)
*The animation workflow produces frames; a separate encoder writes the video file. Coordinate its image-sequence input and output rates with rendering to preserve intended pacing. Frame APIs and output formats vary by platform.*
To work with [IPresentationAnimationPlayer](https://reference.aspose.com/slides/net/aspose.slides.export/ipresentationanimationplayer/), you use the [Duration](https://reference.aspose.com/slides/net/aspose.slides.export/ipresentationanimationplayer/duration/) property (which gives the full duration of the animation) and the [SetTimePosition](https://reference.aspose.com/slides/net/aspose.slides.export/ipresentationanimationplayer/settimeposition/) method. Each animation position is set within the *0 to duration* range, and the `GetFrame` method then returns a Bitmap representing the animation state at that point in time.
```c#
using Aspose.Slides;
using Aspose.Slides.Animation;
using Aspose.Slides.Export;
using (Presentation presentation = new Presentation())
{
ISlide slide = presentation.Slides[0];
// Add a smile shape and animate it.
IAutoShape smile = slide.Shapes.AddAutoShape(ShapeType.SmileyFace, 110, 20, 500, 500);
IEffect effectIn = slide.Timeline.MainSequence.AddEffect(
smile, EffectType.Fly, EffectSubtype.TopLeft, EffectTriggerType.AfterPrevious);
IEffect effectOut = slide.Timeline.MainSequence.AddEffect(
smile, EffectType.Fly, EffectSubtype.BottomRight, EffectTriggerType.AfterPrevious);
effectIn.Timing.Duration = 2f;
effectOut.PresetClassType = EffectPresetClassType.Exit;
using (var animationsGenerator = new PresentationAnimationsGenerator(presentation))
{
animationsGenerator.NewAnimation += animationPlayer =>
{
Console.WriteLine($"Total animation duration: {animationPlayer.Duration}");
animationPlayer.SetTimePosition(0); // The initial animation state.
IImage image = animationPlayer.GetFrame(); // The initial animation state image.
animationPlayer.SetTimePosition(animationPlayer.Duration); // The final state of the animation.
IImage lastImage = animationPlayer.GetFrame(); // The last frame of the animation.
lastImage.Save("last.png");
};
}
}
```
To make all animations in a presentation play at once, the [PresentationPlayer](https://reference.aspose.com/slides/net/aspose.slides.export/presentationplayer/) class is used. This class takes a [PresentationAnimationsGenerator](https://reference.aspose.com/slides/net/aspose.slides.export/presentationanimationsgenerator/) instance and an FPS value for effects in its constructor, and then calls the `FrameTick` event for all animations to play them:
```c#
using Aspose.Slides;
using Aspose.Slides.Export;
using (Presentation presentation = new Presentation("animated.pptx"))
{
using (var animationsGenerator = new PresentationAnimationsGenerator(presentation))
using (var player = new PresentationPlayer(animationsGenerator, 33))
{
player.FrameTick += (sender, args) =>
{
args.GetFrame().Save($"frame_{sender.FrameIndex}.png");
};
animationsGenerator.Run(presentation.Slides);
}
}
```
Then the generated frames can be compiled to produce a video. See the [Convert a PowerPoint Presentation to Video](https://docs.aspose.com/slides/net/convert-powerpoint-to-video/#convert-a-powerpoint-presentation-to-video) section.
## **Supported Animations and Effects**
When converting a PowerPoint presentation to video using Aspose.Slides for .NET, it's important to understand which animations and effects are supported in the output. Aspose.Slides supports a wide range of common entrance, exit, and emphasis effects such as fade, fly in, zoom, and spin. However, some advanced or custom animations may not be fully preserved or may appear differently in the final video. This section outlines the supported animations and effects.
**Entrance**:
| Animation Type | Aspose.Slides | PowerPoint |
|---|---|---|
| **Appear** |  |  |
| **Fade** |  |  |
| **Fly In** |  |  |
| **Float In** |  |  |
| **Split** |  |  |
| **Wipe** |  |  |
| **Shape** |  |  |
| **Wheel** |  |  |
| **Random Bars** |  |  |
| **Grow & Turn** |  |  |
| **Zoom** |  |  |
| **Swivel** |  |  |
| **Bounce** |  |  |
**Emphasis**:
| Animation Type | Aspose.Slides | PowerPoint |
|---|---|---|
| **Pulse** |  |  |
| **Color Pulse** |  |  |
| **Teeter** |  |  |
| **Spin** |  |  |
| **Grow/Shrink** |  |  |
| **Desaturate** |  |  |
| **Darken** |  |  |
| **Lighten** |  |  |
| **Transparency** |  |  |
| **Object Color** |  |  |
| **Complementary Color** |  |  |
| **Line Color** |  |  |
| **Fill Color** |  |  |
**Exit**:
| Animation Type | Aspose.Slides | PowerPoint |
|---|---|---|
| **Disappear** |  |  |
| **Fade** |  |  |
| **Fly Out** |  |  |
| **Float Out** |  |  |
| **Split** |  |  |
| **Wipe** |  |  |
| **Shape** |  |  |
| **Random Bars** |  |  |
| **Shrink & Turn** |  |  |
| **Zoom** |  |  |
| **Swivel** |  |  |
| **Bounce** |  |  |
**Motion Paths:**
| Animation Type | Aspose.Slides | PowerPoint |
|---|---|---|
| **Lines** |  |  |
| **Arcs** |  |  |
| **Turns** |  |  |
| **Shapes** |  |  |
| **Loops** |  |  |
| **Custom Path** |  |  |
## **Supported Slide Transition Effects**
Slide transition effects play an important role in creating smooth and visually appealing changes between slides in a video. Aspose.Slides for .NET supports a variety of commonly used transition effects to help preserve the flow and style of your original presentation. This section highlights which transition effects are supported during the conversion process.
**Subtle**:
| Animation Type | Aspose.Slides | PowerPoint |
|---|---|---|
| **Morph** |  |  |
| **Fade** |  |  |
| **Push** |  |  |
| **Pull** |  |  |
| **Wipe** |  |  |
| **Split** |  |  |
| **Reveal** |  |  |
| **Random Bars** |  |  |
| **Shape** |  |  |
| **Uncover** |  |  |
| **Cover** |  |  |
| **Flash** |  |  |
| **Strips** |  |  |
**Exciting**:
| Animation Type | Aspose.Slides | PowerPoint |
|---|---|---|
| **Fall Over** |  |  |
| **Drape** |  |  |
| **Curtains** |  |  |
| **Wind** |  |  |
| **Prestige** |  |  |
| **Fracture** |  |  |
| **Crush** |  |  |
| **Peel Off** |  |  |
| **Page Curl** |  |  |
| **Airplane** |  |  |
| **Origami** |  |  |
| **Dissolve** |  |  |
| **Checkerboard** |  |  |
| **Blinds** |  |  |
| **Clock** |  |  |
| **Ripple** |  |  |
| **Honeycomb** |  |  |
| **Glitter** |  |  |
| **Vortex** |  |  |
| **Shred** |  |  |
| **Switch** |  |  |
| **Flip** |  |  |
| **Gallery** |  |  |
| **Cube** |  |  |
| **Doors** |  |  |
| **Box** |  |  |
| **Comb** |  |  |
| **Zoom** |  |  |
| **Random** |  |  |
**Dynamic Content**:
| Animation Type | Aspose.Slides | PowerPoint |
|---|---|---|
| **Pan** |  |  |
| **Ferris Wheel** |  |  |
| **Conveyor** |  |  |
| **Rotate** |  |  |
| **Orbit** |  |  |
| **Fly Through** |  |  |
## **FAQ**
### Is it possible to convert presentations that are password protected?
Yes, Aspose.Slides for .NET allows working with password-protected presentations. When processing such files, you need to provide the correct password so that the library can access the content of the presentation.
### Does Aspose.Slides for .NET support usage in cloud solutions?
Yes, Aspose.Slides for .NET can be integrated into cloud applications and services. The library is designed to work in server environments, ensuring high performance and scalability for batch processing of files.
### Are there any size limitations for presentations during conversion?
Aspose.Slides for .NET is capable of handling presentations of virtually any size. However, when working with very large files, additional system resources may be required, and it is sometimes recommended to optimize the presentation to improve performance.
## Related features
- [Render animation frames](https://docs.aspose.com/slides/features/animation-frames/)
# Convert PowerPoint Presentations to Word Documents in .NET
> Convert PowerPoint PPT and PPTX slides to editable Word documents in C# using Aspose.Slides for .NET with precise layout, images and formatting preserved.
Source: https://docs.aspose.com/slides/net/convert-powerpoint-to-word/
Updated: 2026-08-13
## **Overview**
This article provides a solution for developers on converting PowerPoint and OpenDocument presentations to Word documents using Aspose.Slides for .NET and Aspose.Words for .NET. The step-by-step guide walks you through every stage of the conversion process.
## **Convert a Presentation to a Word Document**
Follow the instructions below to convert a PowerPoint or OpenDocument presentation to a Word document:
1. Instantiate the [Presentation](https://reference.aspose.com/slides/net/aspose.slides/presentation/) class and load a presentation file.
2. Instantiate the [Document](https://reference.aspose.com/words/net/aspose.words/document/) and [DocumentBuilder](https://reference.aspose.com/words/net/aspose.words/documentbuilder/) classes to generate a Word document.
3. Set the page size for the Word document to match that of the presentation using the [DocumentBuilder.PageSetup](https://reference.aspose.com/words/net/aspose.words/documentbuilder/pagesetup/) property.
4. Set margins in the Word document using the [DocumentBuilder.PageSetup](https://reference.aspose.com/words/net/aspose.words/documentbuilder/pagesetup/) property.
5. Go through all the presentation slides using the [Presentation.Slides](https://reference.aspose.com/slides/net/aspose.slides/presentation/slides/) property.
- Generate a slide image using the `GetImage` method from the [ISlide](https://reference.aspose.com/slides/net/aspose.slides/islide/) interface and save it to a memory stream.
- Add the slide image to the Word document using the `InsertImage` method from the [DocumentBuilder](https://reference.aspose.com/words/net/aspose.words/documentbuilder/) class.
6. Save the Word document to a file.
Let's say we have a presentation "sample.pptx" that looks like this:
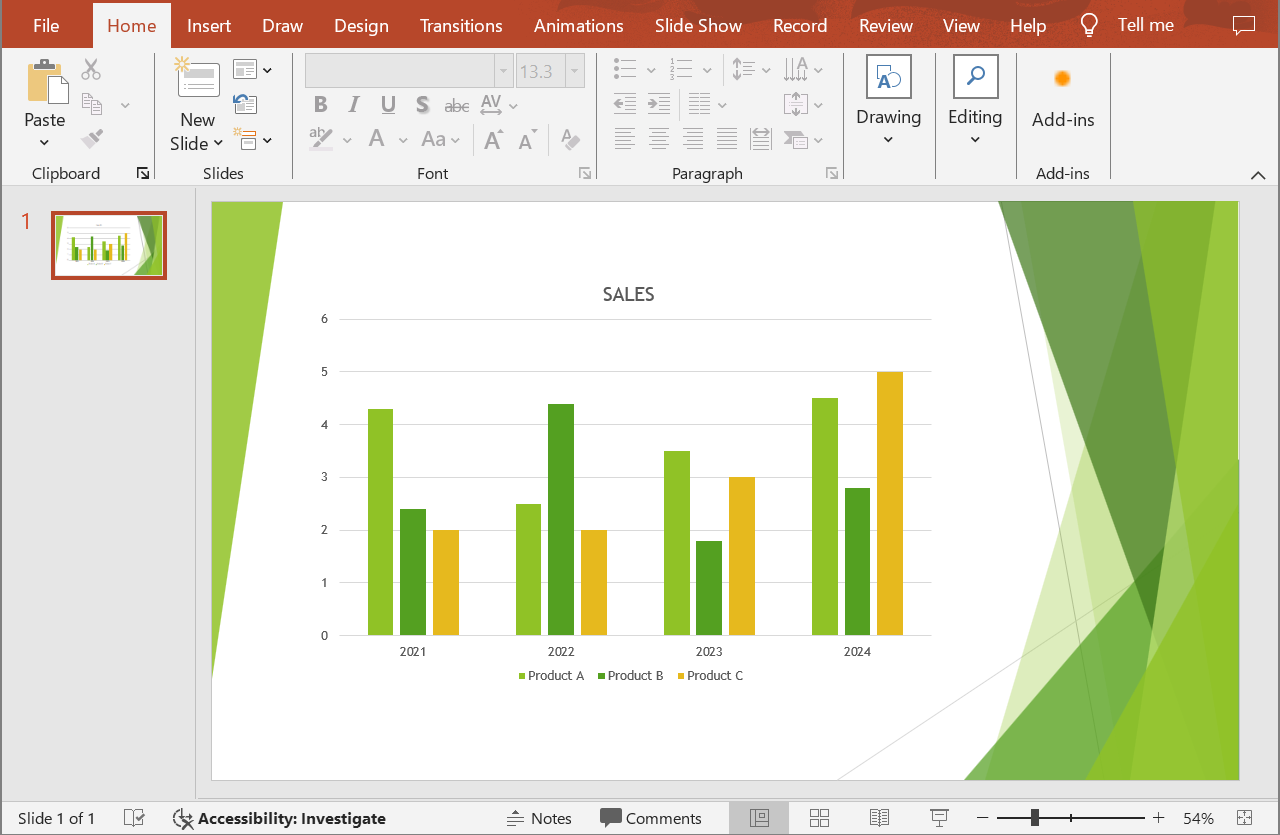
The following C# code example demonstrates how to convert the PowerPoint presentation to a Word document:
```cs
using Aspose.Slides;
using Aspose.Words;
// Load a presentation file.
using var presentation = new Presentation("sample.pptx");
// Create Document and DocumentBuilder objects.
var document = new Document();
var builder = new DocumentBuilder(document);
// Set the page size in the Word document.
var slideSize = presentation.SlideSize.Size;
builder.PageSetup.PageWidth = slideSize.Width;
builder.PageSetup.PageHeight = slideSize.Height;
// Set margins in the Word document.
builder.PageSetup.LeftMargin = 0;
builder.PageSetup.RightMargin = 0;
builder.PageSetup.TopMargin = 0;
builder.PageSetup.BottomMargin = 0;
const float scaleX = 2, scaleY = 2;
// Go through all the presentation slides.
foreach (var slide in presentation.Slides)
{
// Generate a slide image and save it to a memory stream.
using var image = slide.GetImage(scaleX, scaleY);
using var imageStream = new MemoryStream();
image.Save(imageStream, ImageFormat.Png);
// Add the slide image to the Word document.
imageStream.Seek(0, SeekOrigin.Begin);
builder.InsertImage(imageStream.ToArray(), builder.PageSetup.PageWidth, builder.PageSetup.PageHeight);
builder.InsertBreak(BreakType.PageBreak);
}
// Save the Word document to a file.
document.Save("output.docx");
```
The result:
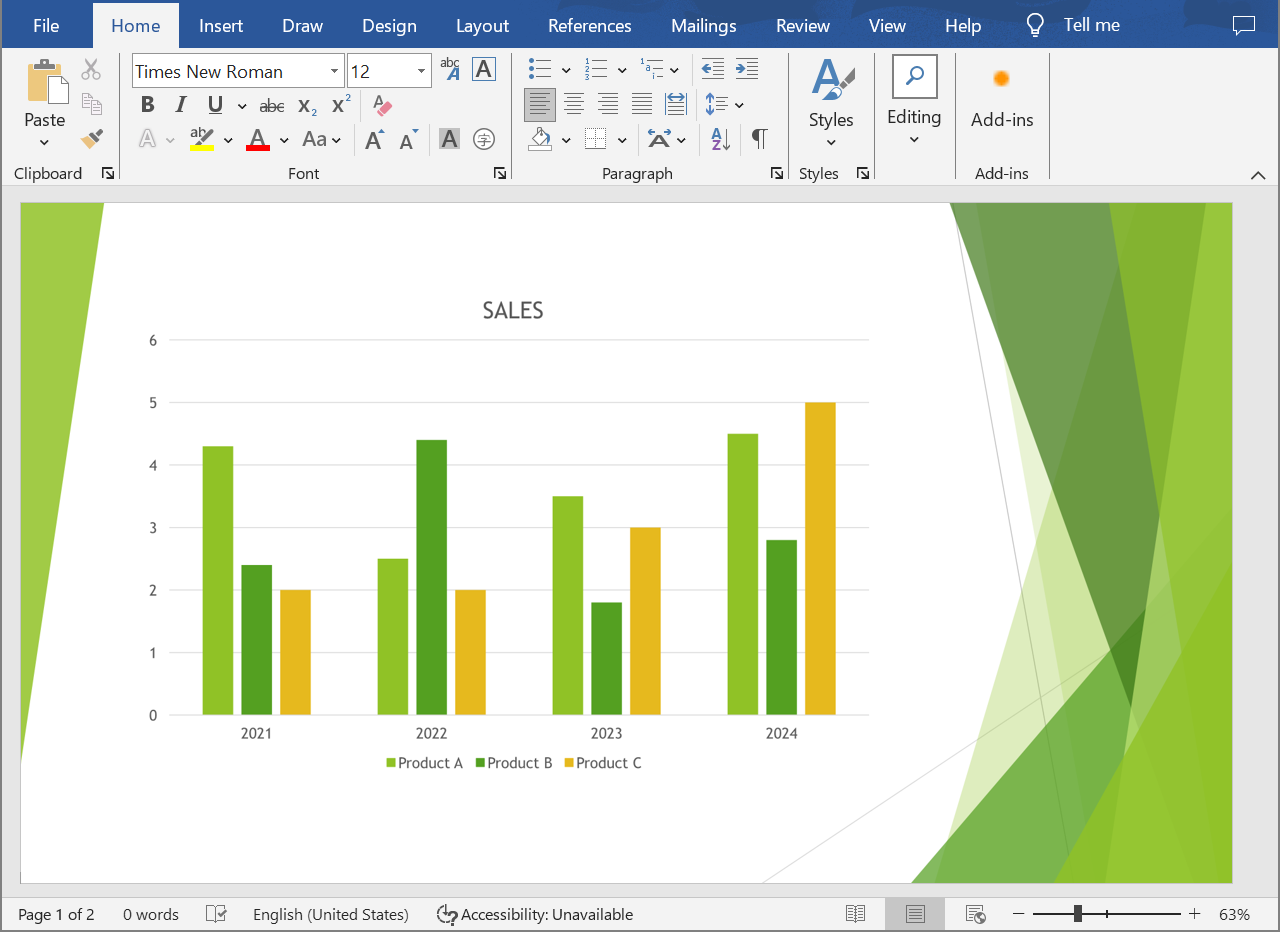
Try our [**Online PPT to Word Converter**](https://products.aspose.app/slides/conversion/ppt-to-word) to see what you could gain from converting PowerPoint and OpenDocument presentations to Word documents.
## **FAQ**
### What components need to be installed to convert PowerPoint and OpenDocument presentations to Word documents?
You only need to add the respective NuGet packages for [Aspose.Slides for .NET](https://www.nuget.org/packages/Aspose.Slides.NET) and [Aspose.Words for .NET](https://www.nuget.org/packages/Aspose.Words/) to your C# project. Both libraries operate as standalone APIs, and there is no requirement for Microsoft Office to be installed.
### Are all PowerPoint and OpenDocument presentation formats supported?
Aspose.Slides for .NET [supports all presentation formats](https://docs.aspose.com/slides/net/supported-file-formats/), including PPT, PPTX, ODP, and other common file types. This ensures that you can work with presentations created in various versions of Microsoft PowerPoint.
# Convert PowerPoint Presentations to XML in .NET
> Convert PowerPoint and OpenDocument presentations to PowerPoint XML files or streams in C# with Aspose.Slides for .NET.
Source: https://docs.aspose.com/slides/net/convert-powerpoint-to-xml/
Updated: 2026-09-28
## **Overview**
Aspose.Slides for .NET can convert PowerPoint presentations to the PowerPoint XML Presentation format. XML output is useful when you need a text-based representation for inspecting presentation structure, troubleshooting generated documents, comparing output in automated tests, or integrating with a workflow that consumes XML instead of a presentation package.
Use the [Presentation.Save](https://reference.aspose.com/slides/net/aspose.slides/presentation/save/) method with the `Xml` value from the [SaveFormat](https://reference.aspose.com/slides/net/aspose.slides.export/saveformat/) enumeration. You can write the result directly to a file or to a stream.
`SaveFormat.Xml` creates a PowerPoint XML Presentation. It does not extract the individual Office Open XML parts stored inside a PPTX package. If you need the exact PPTX package parts, such as `ppt/presentation.xml` or individual slide XML files, inspect the PPTX package itself.
## **Convert a Presentation to an XML File**
Load a source presentation with the [Presentation](https://reference.aspose.com/slides/net/aspose.slides/presentation/) class, and then pass the output path and `SaveFormat.Xml` to [Presentation.Save](https://reference.aspose.com/slides/net/aspose.slides/presentation/save/). The source can be any presentation format supported for loading, such as PPT, PPTX, or ODP.
The following example converts a PPTX presentation to an XML file:
```csharp
using Aspose.Slides;
using Aspose.Slides.Export;
using var presentation = new Presentation("presentation.pptx");
presentation.Save("presentation.xml", SaveFormat.Xml);
```
## **Write the XML Output to a Stream**
Use the stream overload of [Presentation.Save](https://reference.aspose.com/slides/net/aspose.slides/presentation/save/) when the XML must remain in memory or be passed to another component, such as a web service, storage provider, or XML processing pipeline. The following example writes the result to a [MemoryStream](https://learn.microsoft.com/en-us/dotnet/api/system.io.memorystream?view=net-10.0) and rewinds it for subsequent reading:
```csharp
using System.IO;
using Aspose.Slides;
using Aspose.Slides.Export;
using var presentation = new Presentation("presentation.pptx");
using var xmlStream = new MemoryStream();
presentation.Save(xmlStream, SaveFormat.Xml);
xmlStream.Position = 0;
// Pass xmlStream to the next component in the workflow.
```
## **Compare XML with Presentation and Export Formats**
Choose the output format according to how the result will be used:
| Format | Output | Typical use |
| --- | --- | --- |
| PowerPoint XML (`.xml`) | A PowerPoint XML Presentation | Inspecting structure, troubleshooting, comparing generated output, and XML-based integration |
| PPT (`.ppt`) | A legacy binary presentation file | Compatibility with older PowerPoint workflows |
| PPTX (`.pptx`) | An Office Open XML package containing multiple parts | Regular PowerPoint editing and presentation exchange |
| PDF or TIFF | Fixed-layout pages or TIFF images | Viewing, printing, and archiving |
| PNG, JPEG, or SVG | A rendered representation of an individual slide | Thumbnails, previews, and image assets |
| HTML or HTML5 | Web-oriented presentation output | Browser viewing and web publishing |
Unlike PPT and PPTX, XML output is primarily intended for inspection and data-oriented workflows. Unlike PDF, TIFF, HTML, and slide image formats, it represents presentation data rather than rendering slides as pages or visual assets. The [supported file formats](https://docs.aspose.com/slides/net/supported-file-formats/) table lists every format that Aspose.Slides can load, import, save, or render.
## **FAQ**
**Is `SaveFormat.Xml` the same as saving a PPTX file?**
No. PPTX is a package containing multiple Office Open XML parts, whereas `SaveFormat.Xml` creates a PowerPoint XML Presentation file.
**Can I save the XML output without creating a file on disk?**
Yes. Pass a writable stream to [Presentation.Save](https://reference.aspose.com/slides/net/aspose.slides/presentation/save/). For example, use a [MemoryStream](https://learn.microsoft.com/en-us/dotnet/api/system.io.memorystream?view=net-10.0) for in-memory processing.
**Can Aspose.Slides load the exported XML file again?**
Yes. Pass the XML file or a stream to the [Presentation](https://reference.aspose.com/slides/net/aspose.slides/presentation/presentation/) constructor. [Presentation.SourceFormat](https://reference.aspose.com/slides/net/aspose.slides/presentation/sourceformat/) then returns `SourceFormat.Xml`. [PresentationFactory.GetPresentationInfo](https://reference.aspose.com/slides/net/aspose.slides/presentationfactory/getpresentationinfo/) reports `LoadFormat.Unknown` for this format, so do not use it to decide whether an XML file can be opened.
**Does XML conversion render each slide as a page or image?**
No. XML conversion writes structured presentation data. Use PDF or TIFF for page-oriented output, or PNG, JPEG, and SVG for individual slide images.
# Convert PowerPoint Presentations to XPS in .NET
> Convert PowerPoint PPT/PPTX to high-quality, platform-independent XPS in .NET using Aspose.Slides. Get step-by-step guide and sample C# code.
Source: https://docs.aspose.com/slides/net/convert-powerpoint-to-xps/
Updated: 2026-08-13
## **Overview**
Aspose.Slides allows you to convert PowerPoint presentations to XPS by saving a PPT or PPTX file in the XPS format. This article explains when the XPS format may be useful and shows how to perform the conversion with Aspose.Slides using either default settings or custom [XpsOptions](https://reference.aspose.com/slides/net/aspose.slides.export/xpsoptions/) settings.
## **About XPS**
Microsoft developed [XPS](https://docs.fileformat.com/page-description-language/xps/) as an alternative to [PDF](https://docs.fileformat.com/pdf/). It allows you to print content by outputting a file very similar to a PDF. The XPS format is based on XML. The layout or structure of an XPS file remains the same on all operating systems and printers.
## **When to Use Microsoft XPS Format**
To see how Aspose.Slides converts PPT or PPTX presentation to the XPS format, you can check out [this free online converter app](https://products.aspose.app/slides/conversion).
If you want to cut down on storage costs, you can convert your Microsoft PowerPoint presentation to the XPS format. This way, you will find it easier to save, share, and print your documents.
Microsoft continues to implement strong support for XPS in Windows (even in Windows 10), so you may want to consider saving files to this format. If you are dealing with Windows 8.1, Windows 8, Windows 7, and Windows Vista, then XPS might actually be your best option for certain operations.
- **Windows 8** uses the OXPS (Open XPS) format for XPS files. OXPS is a standardized version of the original XPS format. Windows 8 provides better support for XPS files than it does for PDF files.
- **XPS:** Built-in XPS viewer/reader and printing to XPS feature available.
- **PDF**: PDF reader available but no printing to PDF feature.
- **Windows 7 and Windows Vista** use the original XPS format. These operating systems also provide better support for XPS files than they do for PDFs.
- **XPS**: Built-in XPS viewer and printing to XPS feature available.
- **PDF**: No PDF reader. No printing to PDF feature.
|**Input PPT(X):
**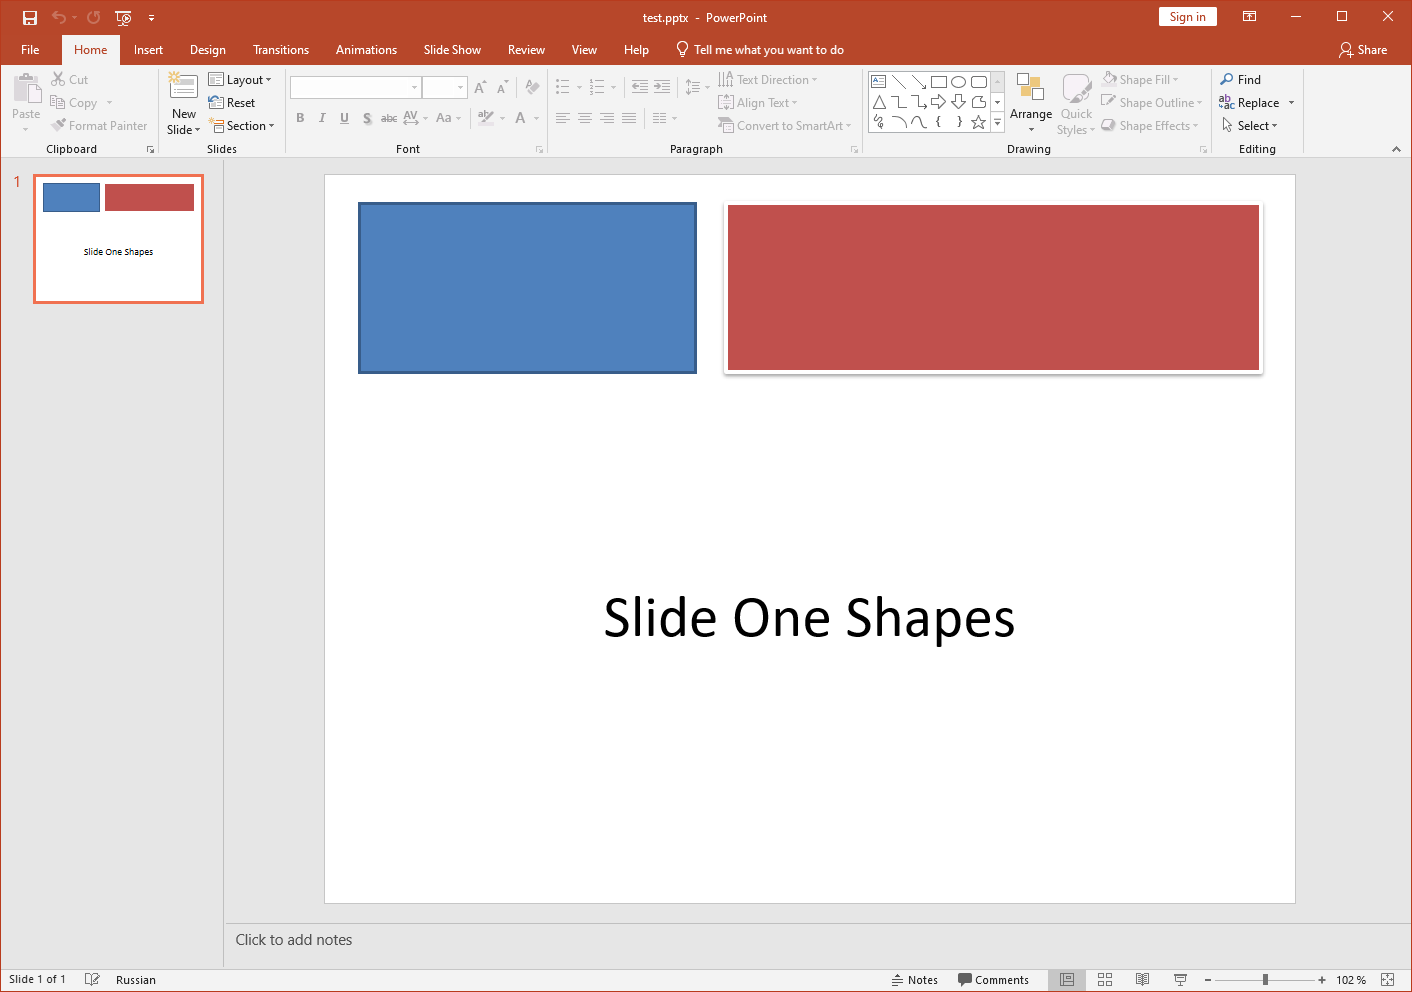**
|**Output XPS:
**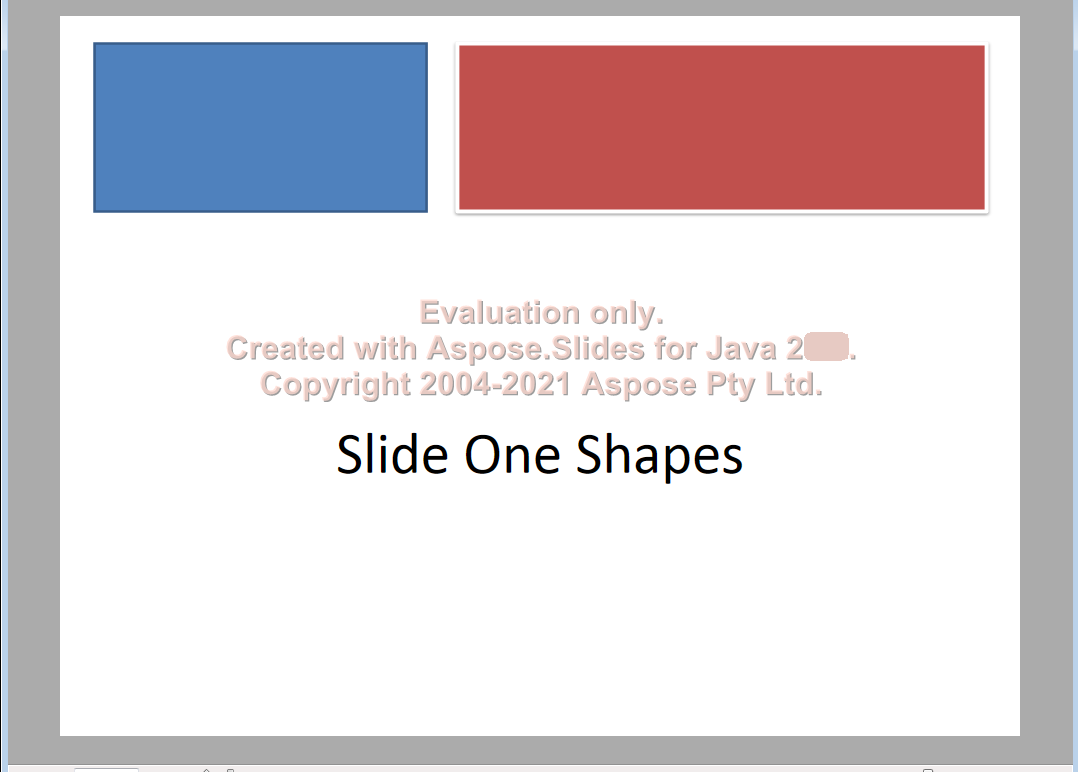**
|
| :- | :- |
Microsoft eventually implemented support for printing operations in PDF through the Print to PDF feature in Windows 10. Previously, users were expected to print documents through the XPS format.
## **XPS Conversion with Aspose.Slides**
In [**Aspose.Slides**](https://products.aspose.com/slides/net/) for .NET, you can use the [**Save**](https://reference.aspose.com/slides/net/aspose.slides/presentation/methods/save/index) method exposed by the [Presentation](https://reference.aspose.com/slides/net/aspose.slides/presentation) class to convert the entire presentation into an XPS document.
When converting a presentation to XPS, you have to save the presentation using either of these settings:
- Default settings (without [**XPSOptions**](https://reference.aspose.com/slides/net/aspose.slides.export/xpsoptions))
- Custom settings (with [**XPSOptions**](https://reference.aspose.com/slides/net/aspose.slides.export/xpsoptions))
### **Convert Presentations to XPS Using Default Settings**
This sample code in C# shows you how to convert a presentation to an XPS document using standard settings:
```c#
using Aspose.Slides;
using Aspose.Slides.Export;
// Instantiate a Presentation object that represents a presentation file
using (Presentation pres = new Presentation("Convert_XPS.pptx"))
{
// Saving the presentation to XPS document
pres.Save("XPS_Output_Without_XPSOption_out.xps", SaveFormat.Xps);
}
```
### **Convert Presentations to XPS Using Custom Settings**
This sample code shows you how to convert a presentation to an XPS document using custom settings in C#:
```c#
using Aspose.Slides;
using Aspose.Slides.Export;
// Instantiate a Presentation object that represents a presentation file
using (Presentation pres = new Presentation("Convert_XPS_Options.pptx"))
{
// Instantiate the TiffOptions class
XpsOptions options = new XpsOptions();
// Save MetaFiles as PNG
options.SaveMetafilesAsPng = true;
// Save the presentation to XPS document
pres.Save("XPS_With_Options_out.xps", SaveFormat.Xps, options);
}
```
## **FAQ**
### Can I save to XPS into a stream instead of a file?
Yes—Aspose.Slides lets you export directly to a stream, which is ideal for web APIs, server-side pipelines, or any scenario where you want to send the XPS without touching the file system.
### Are hidden slides carried over to XPS, and can I exclude them?
By default, only regular (visible) slides are rendered. You can [include or exclude hidden slides](https://reference.aspose.com/slides/net/aspose.slides.export/xpsoptions/showhiddenslides/) through [export settings](https://reference.aspose.com/slides/net/aspose.slides.export/xpsoptions/) before saving to XPS, ensuring the output contains exactly the pages you intend.
## Related features
- [Export presentations to XPS](https://docs.aspose.com/slides/features/xps-export/)
## Related articles
- [Conversion to XPS](https://docs.aspose.com/slides/net/conversion-to-xps/)
# Convert PowerPoint Presentations in .NET | HTML, PNG, PDF, Word, TIFF
> Convert PowerPoint presentations to other formats using Aspose.Slides for .NET. Fast, accurate, and seamless PPT and PPTX conversion.
Source: https://docs.aspose.com/slides/net/convert-powerpoint/
Updated: 2025-11-12
---
lastmod: 2025-11-12T10:36:00+04:00
title: Convert PowerPoint Presentations in .NET | HTML, PNG, PDF, Word, TIFF
linktitle: Convert PowerPoint
type: docs
weight: 20
url: /net/convert-powerpoint/
keywords:
- convert PowerPoint
- convert presentation
- convert slide
- convert PPT
- convert PPTX
- export PowerPoint
- export presentation
- export slide
- export PPT
- export PPTX
- .NET
- C#
- Aspose.Slides
description: "Convert PowerPoint presentations to other formats using Aspose.Slides for .NET. Fast, accurate, and seamless PPT and PPTX conversion."
---
## Related articles
- [Convert OpenDocument Presentations in .NET](https://docs.aspose.com/slides/net/convert-openoffice-odp/)
- [Convert PPTX to PPT in .NET](https://docs.aspose.com/slides/net/convert-pptx-to-ppt/)
# Convert PPT to PPTX in .NET
> Convert legacy PPT files to PPTX in .NET with Aspose.Slides. Includes C# examples for single-file and batch conversion, error handling, and fidelity notes.
Source: https://docs.aspose.com/slides/net/convert-ppt-to-pptx/
Updated: 2026-08-20
## **Overview**
PPT is the legacy binary PowerPoint format, while PPTX is the newer Open XML format. Aspose.Slides for .NET can load a PPT file and save it as PPTX without Microsoft PowerPoint. This article shows how to convert one file or a directory of files and explains what to verify after conversion.
## **Convert a PPT File to PPTX**
Load the source file with the [Presentation](https://reference.aspose.com/slides/net/aspose.slides/presentation/) class, then call [IPresentation.Save](https://reference.aspose.com/slides/net/aspose.slides/ipresentation/save/) with [SaveFormat.Pptx](https://reference.aspose.com/slides/net/aspose.slides.export/saveformat/). The `using` declaration disposes the presentation and releases its resources when the scope ends.
```csharp
using Aspose.Slides;
using Aspose.Slides.Export;
// Load the legacy PPT presentation.
using var presentation = new Presentation("presentation.ppt");
// Save the presentation in PPTX format.
presentation.Save("presentation.pptx", SaveFormat.Pptx);
```
The file extension does not select the output format by itself; the [SaveFormat.Pptx](https://reference.aspose.com/slides/net/aspose.slides.export/saveformat/) argument does. Keep the input and output paths different if you need to retain the original PPT file.
## **Convert Multiple PPT Files**
The following example converts every `.ppt` file in one directory. Each file is processed independently, so one failed conversion does not stop the rest of the batch.
```csharp
using System;
using System.IO;
using Aspose.Slides;
using Aspose.Slides.Export;
var inputDirectory = "input";
var outputDirectory = "output";
Directory.CreateDirectory(outputDirectory);
foreach (var inputPath in Directory.EnumerateFiles(inputDirectory, "*.ppt", SearchOption.TopDirectoryOnly))
{
var outputFileName = Path.GetFileNameWithoutExtension(inputPath) + ".pptx";
var outputPath = Path.Combine(outputDirectory, outputFileName);
try
{
using var presentation = new Presentation(inputPath);
presentation.Save(outputPath, SaveFormat.Pptx);
Console.WriteLine($"Converted: {inputPath}");
}
catch (Exception exception)
{
Console.Error.WriteLine($"Failed: {inputPath} ({exception.Message})");
}
}
```
For production workloads, log the complete exception, decide whether an existing output file may be overwritten, and write failed file names to a retry or review queue. Corrupt files, password-protected files opened without the required password, inaccessible paths, and unsupported content can all cause a conversion to fail. See [Password-Protected Presentations](https://docs.aspose.com/slides/net/password-protected-presentation/) for loading encrypted files.
## **Fidelity and Legacy Features**
Conversion normally preserves slides, masters, layouts, text, shapes, images, tables, and charts. However, PPT and PPTX do not represent every feature in exactly the same way. A legacy feature that has no PPTX equivalent, or is not supported by the library, may be normalized, omitted, or displayed differently.
Check the converted file when it contains animations, transitions, embedded or linked OLE objects, ActiveX controls, embedded media, uncommon fonts, or VBA macros. A plain PPTX file is not a macro-enabled format, so use an appropriate macro-enabled workflow when VBA must remain available. Also verify that required fonts and external resources are present in the environment where the converted presentation will be opened or rendered.
For important documents, reopen the generated PPTX programmatically and inspect key slide counts and content, then compare its appearance and slide-show behavior in the intended viewer. Do not treat a successful [IPresentation.Save](https://reference.aspose.com/slides/net/aspose.slides/ipresentation/save/) call as proof that every legacy feature has an exact PPTX representation.
## **When to Use PPTX**
Use PPTX when the presentation will be edited in current PowerPoint versions, exchanged with systems that work with Open XML packages, or stored in a format that is easier to inspect and recover than legacy binary PPT. Keep the original PPT as an archival or rollback copy until the converted presentation has passed your fidelity checks.
If you need PDF, HTML, images, XPS, or another output type instead, use the format-specific guidance in [Convert Presentations to Multiple Formats](https://docs.aspose.com/slides/net/convert-presentation/) rather than assuming that all targets preserve editable PowerPoint features.
## **Online Converter**
For an occasional file or a quick comparison, you can use the [online PPT to PPTX converter](https://products.aspose.app/slides/conversion/ppt-to-pptx). For repeatable conversions, batch processing, or application-level error handling, use the .NET API.
## **Related Articles**
- [PPT vs PPTX](https://docs.aspose.com/slides/net/ppt-vs-pptx/)
- [Save Presentations in .NET](https://docs.aspose.com/slides/net/save-presentation/)
- [Supported File Formats](https://docs.aspose.com/slides/net/supported-file-formats/)
- [Open Presentations in .NET](https://docs.aspose.com/slides/net/open-presentation/)
## **FAQ**
**Can I convert PPT to PPTX without Microsoft PowerPoint installed?**
Yes. Aspose.Slides for .NET loads and saves presentation files without requiring Microsoft PowerPoint.
**Will PPT-to-PPTX conversion preserve all content exactly?**
It preserves common presentation content, but exact fidelity is not guaranteed for every legacy or unsupported feature. Review the generated file when it contains macros, OLE or ActiveX objects, media, specialized animations, or uncommon fonts.
**Can I convert a password-protected PPT file?**
Yes, if you supply the correct password when loading the file. A missing or incorrect password causes the load operation to fail.
**Should I delete the PPT file after conversion?**
Keep the original until you have verified the PPTX in the viewers and workflows that matter to you. This provides a rollback copy if a legacy feature converts differently.
## Related articles
- [Convert PPTX to PPT in .NET](https://docs.aspose.com/slides/net/convert-pptx-to-ppt/)
# Convert PPTX to PPT in .NET
> Easily convert PPTX to PPT with Aspose.Slides for .NET—ensure seamless compatibility with PowerPoint formats while preserving your presentation’s layout and quality.
Source: https://docs.aspose.com/slides/net/convert-pptx-to-ppt/
Updated: 2026-08-05
## **Overview**
This article explains how to convert PowerPoint Presentation in PPTX format into PPT format using C#. The following topic is covered.
- Convert PPTX to PPT in C#
## **Convert PPTX to PPT in .NET**
For C# sample code to convert PPTX to PPT, please see the section below i.e. [Convert PPTX to PPT](https://docs.aspose.com/slides/net/convert-pptx-to-ppt/#convert-pptx-to-ppt). It just loads the PPTX file and saves in PPT format. By specifiying different save formats, you can also save PPTX file into many other formats like PDF, XPS, ODP, HTML etc. as disscussed in these articles.
- [Convert PPTX to PDF in .NET](https://docs.aspose.com/slides/net/convert-powerpoint-to-pdf/)
- [Convert PPTX to XPS in .NET](https://docs.aspose.com/slides/net/convert-powerpoint-to-xps/)
- [Convert PPTX to HTML in .NET](https://docs.aspose.com/slides/net/convert-powerpoint-to-html/)
- [Convert PPTX to ODP in .NET](https://docs.aspose.com/slides/net/save-presentation/)
- [Convert PPTX to PNG in .NET](https://docs.aspose.com/slides/net/convert-powerpoint-to-png/)
## **Convert PPTX to PPT**
To convert a PPTX to PPT simply pass the file name and save format to the [**Save**](https://reference.aspose.com/slides/net/aspose.slides/presentation/save/) method of [**Presentation**](https://reference.aspose.com/slides/net/aspose.slides/presentation/) class. The C# code sample below converts a Presentation from PPTX to PPT using default options.
```c#
using Aspose.Slides;
using Aspose.Slides.Export;
// Instantiate a Presentation object that represents a PPTX file
Presentation pres = new Presentation("presentation.pptx");
// Saving the PPTX presentation to PPT format
pres.Save("presentation.ppt", SaveFormat.Ppt);
```
## **FAQ**
### Do all PPTX effects and features survive when saving to the legacy PPT (97–2003) format?
Not always. The PPT format lacks some newer capabilities (e.g., certain effects, objects, and behaviors), so features may be simplified or rasterized during conversion.
### Can I convert only selected slides to PPT instead of the entire presentation?
Direct saving targets the whole presentation. To convert specific slides, create a new presentation with just those slides and save it as PPT; alternatively, use a service/API that supports per-slide conversion parameters.
### Are password-protected presentations supported?
Yes. You can detect whether a file is protected, open it with a password, and also [configure protection/encryption settings](https://docs.aspose.com/slides/net/password-protected-presentation/) for the saved PPT.
## Related features
- [Save presentations as legacy PPT](https://docs.aspose.com/slides/features/write-ppt/)
## Related articles
- [Convert PPT to PPTX in .NET](https://docs.aspose.com/slides/net/convert-ppt-to-pptx/)
- [Convert PowerPoint Presentations in .NET | HTML, PNG, PDF, Word, TIFF](https://docs.aspose.com/slides/net/convert-powerpoint/)
# Convert Presentation to HTML
>
Source: https://docs.aspose.com/slides/net/convert-presentation-to-html/
Updated: 2026-08-13
**HTML** is one of several widely used format for exchanging data. **Aspose.Slides for .NET** provides support for converting a presentation to HTML. Below is code snippet that shows you how.
## **Example**
```
//Instantiate a Presentation object that represents a presentation file
Presentation pres = new Presentation("Conversion.ppt");
HtmlOptions htmlOpt = new HtmlOptions();
htmlOpt.HtmlFormatter = HtmlFormatter.CreateDocumentFormatter("", false);
//Saving the presentation to HTML
pres.Save("Converted.html", Aspose.Slides.Export.SaveFormat.Html, htmlOpt);
```
## **Download Running Example**
- [GitHub](https://github.com/aspose-slides/Aspose.Slides-for-.NET/tree/master/Plugins/Aspose.Slides%20Vs%20VSTO%20Presentations/Aspose.Slides%20Features%20missing%20in%20VSTO/Converting%20to%20HTML)
## **Download Sample Code**
- [GitHub](https://github.com/aspose-slides/Aspose.Slides-for-.NET/releases/tag/Aspose.SlidesFeaturesmissingInVSTOv1.1)
For more details, visit [Convert PowerPoint Presentations to HTML in .NET](https://docs.aspose.com/slides/net/convert-powerpoint-to-html/).
## Related articles
- [Export Media files to HTML file](https://docs.aspose.com/slides/net/export-media-files-to-html-file/)
- [Export media files into HTML file](https://docs.aspose.com/slides/net/export-media-files-into-html-file/)
- [Convert Presentation to Tiff with Notes](https://docs.aspose.com/slides/net/convert-presentation-to-tiff-with-notes/)
# Convert Presentation to Tiff with Notes
>
Source: https://docs.aspose.com/slides/net/convert-presentation-to-tiff-with-notes/
Updated: 2026-08-13
TIFF is one of several widely used image formats that Aspose.Slides for .NET supports for converting a presentation with notes to images. You can also generate slide thumbnails in the Notes Slide view. Below are two code snippets that shows how to generate TIFF images of a presentation in Notes Slide view.
The [Save](https://reference.aspose.com/slides/net/aspose.slides/presentation/methods/save) method exposed by [Presentation](https://reference.aspose.com/slides/net/aspose.slides/presentation) class can be used to convert the whole presentation in Notes Slide view to TIFF. You can also generate a slide thumbnail in Notes Slide view for individual slides.
## **Example**
```
//Instantiate a Presentation object that represents a presentation file
Presentation pres = new Presentation("Conversion.pptx");
//Saving the presentation to TIFF notes
pres.Save("ConvertedwithNotes.tiff", SaveFormat.TiffNotes);
```
## **Download Running Example**
- [GitHub](https://github.com/aspose-slides/Aspose.Slides-for-.NET/tree/master/Plugins/Aspose.Slides%20Vs%20VSTO%20Presentations/Aspose.Slides%20Features%20missing%20in%20VSTO/Tiff%20conversion%20with%20note)
## **Download Sample Code**
- [GitHub](https://github.com/aspose-slides/Aspose.Slides-for-.NET/releases/tag/Aspose.SlidesFeaturesmissingInVSTOv1.1)
For more details, visit [Convert PowerPoint Presentations to TIFF with Notes in .NET](https://docs.aspose.com/slides/net/convert-powerpoint-to-tiff-with-notes/).
## Related articles
- [Conversion to Tiff with Notes](https://docs.aspose.com/slides/net/conversion-to-tiff-with-notes/)
- [Convert Presentation to HTML](https://docs.aspose.com/slides/net/convert-presentation-to-html/)
- [Generate Slide Thumbnail as JPEG](https://docs.aspose.com/slides/net/generate-slide-thumbnail-as-jpeg/)
# Convert Presentation to XPS
>
Source: https://docs.aspose.com/slides/net/convert-presentation-to-xps/
Updated: 2026-08-13
**XPS** format is also widely used for exchange of data. Aspose.Slides for .NET takes care of its importance and provides the built-in support for converting a presentation into XPS document.
The **Save** method exposed by Presentation class can be used to convert the whole presentation into **XPS** document. Further, **XpsOptions** class exposes **SaveMetafileAsPng** property that can be set to true or false as per requirement.
## **Example**
```
//Instantiate a Presentation object that represents a presentation file
Presentation pres = new Presentation("Conversion.ppt");
//Saving the presentation to TIFF document
pres.Save("converted.xps", Aspose.Slides.Export.SaveFormat.Xps);
```
## **Download Running Example**
- [GitHub](https://github.com/aspose-slides/Aspose.Slides-for-.NET/tree/master/Plugins/Aspose.Slides%20Vs%20VSTO%20Presentations/Aspose.Slides%20Features%20missing%20in%20VSTO/Converting%20to%20XPS)
## **Download Sample Code**
- [GitHub](https://github.com/aspose-slides/Aspose.Slides-for-.NET/releases/tag/Aspose.SlidesFeaturesmissingInVSTOv1.1)
For more details, visit [Convert PowerPoint Presentations to XPS in .NET](https://docs.aspose.com/slides/net/convert-powerpoint-to-xps/).
## Related articles
- [Conversion to XPS](https://docs.aspose.com/slides/net/conversion-to-xps/)
- [Convert Presentation to HTML](https://docs.aspose.com/slides/net/convert-presentation-to-html/)
- [Convert Presentation to Tiff with Notes](https://docs.aspose.com/slides/net/convert-presentation-to-tiff-with-notes/)
# Convert Presentations to Multiple Formats in .NET
> Convert PowerPoint and OpenDocument presentations to PPTX, PDF, HTML, images, XPS, TIFF, and more with Aspose.Slides for .NET.
Source: https://docs.aspose.com/slides/net/convert-presentation/
Updated: 2026-09-01
## **Overview**
Aspose.Slides for .NET can load PowerPoint and OpenDocument presentations and save or render them to many other formats without Microsoft PowerPoint, OpenOffice, or LibreOffice. You can convert legacy PPT files to modern PPTX, export presentations to fixed-layout documents such as PDF and XPS, publish slides as HTML, or render slides as image files for previews, thumbnails, and archives.
Most document conversions use the same general workflow: load the source file, choose the required output format, and apply format-specific options when needed. For image formats, each slide is rendered separately and then saved as a raster or vector image. The dedicated articles linked below provide the implementation details for each case.
## **Choose a Conversion Scenario**
Use the articles below for complete C# examples and format-specific options.
| Scenario | Use it when you need to | Article |
| --- | --- | --- |
| PPT/PPTX/ODP to PPTX | Modernize legacy PPT files, normalize existing PPTX files, or convert OpenDocument presentations to PowerPoint PPTX. | [Convert PPT to PPTX](https://docs.aspose.com/slides/net/convert-ppt-to-pptx/), [Convert ODP to PPTX](https://docs.aspose.com/slides/net/convert-odp-to-pptx/), [Save Presentations](https://docs.aspose.com/slides/net/save-presentation/) |
| PPTX to PPT | Save a modern PowerPoint presentation to the older binary PPT format for compatibility with older workflows. | [Convert PPTX to PPT](https://docs.aspose.com/slides/net/convert-pptx-to-ppt/) |
| PPT/PPTX/ODP to PDF | Create portable, searchable, fixed-layout documents for sharing, printing, or archiving. | [Convert PowerPoint to PDF](https://docs.aspose.com/slides/net/convert-powerpoint-to-pdf/) |
| PPT/PPTX/ODP to PDF with notes | Export speaker notes together with slide content. | [Convert PowerPoint to PDF with Notes](https://docs.aspose.com/slides/net/convert-powerpoint-to-pdf-with-notes/) |
| PPT/PPTX/ODP to HTML | Publish presentations as HTML pages and control images, fonts, notes, and responsive layout options. | [Convert PowerPoint to HTML](https://docs.aspose.com/slides/net/convert-powerpoint-to-html/) |
| PPT/PPTX/ODP to HTML5 | Export slides to HTML5 for browser-based viewing with preserved formatting and interactivity. | [Convert Presentations to HTML5](https://docs.aspose.com/slides/net/export-to-html5/) |
| PPT/PPTX/ODP to PNG | Render each slide to a PNG image for previews, thumbnails, or web output. | [Convert PowerPoint to PNG](https://docs.aspose.com/slides/net/convert-powerpoint-to-png/) |
| PPT/PPTX/ODP to JPG | Render slides to JPG images and control image dimensions and quality. | [Convert PowerPoint to JPG](https://docs.aspose.com/slides/net/convert-powerpoint-to-jpg/) |
| Slide to SVG | Export individual slides as scalable vector graphics. | [Render Slide as SVG](https://docs.aspose.com/slides/net/render-a-slide-as-an-svg-image/) |
| PPT/PPTX/ODP to XPS | Generate fixed-layout XPS documents. | [Convert PowerPoint to XPS](https://docs.aspose.com/slides/net/convert-powerpoint-to-xps/) |
| PPT/PPTX/ODP to TIFF | Save a presentation as a multi-page TIFF file for printing, scanning, fax, or archival workflows. | [Convert PowerPoint to TIFF](https://docs.aspose.com/slides/net/convert-powerpoint-to-tiff/) |
| PPT/PPTX/ODP to TIFF with notes | Save slides with speaker notes to TIFF. | [Convert PowerPoint to TIFF with Notes](https://docs.aspose.com/slides/net/convert-powerpoint-to-tiff-with-notes/) |
| PPT/PPTX to Word | Convert slides to a Word document when you need document-style output. | [Convert PowerPoint to Word](https://docs.aspose.com/slides/net/convert-powerpoint-to-word/) |
| PPT/PPTX to Markdown | Extract presentation content into Markdown for documentation and text-based workflows. | [Convert PowerPoint to Markdown](https://docs.aspose.com/slides/net/convert-powerpoint-to-markdown/) |
| PPT/PPTX/ODP to XML | Create a text-based PowerPoint XML Presentation for inspection, comparison, troubleshooting, or XML-based workflows. | [Convert PowerPoint to XML](https://docs.aspose.com/slides/net/convert-powerpoint-to-xml/) |
| PPT/PPTX to animated GIF | Create an animated GIF from slides. | [Convert PowerPoint to Animated GIF](https://docs.aspose.com/slides/net/convert-powerpoint-to-animated-gif/) |
| PPT/PPTX to video | Build a video export workflow from presentation slides. | [Convert PowerPoint to Video](https://docs.aspose.com/slides/net/convert-powerpoint-to-video/) |
| Presentation to XAML | Export slides to XAML for .NET UI scenarios. | [Export Presentations to XAML](https://docs.aspose.com/slides/net/export-to-xaml/) |
For a broader list of input and output formats, see [Supported File Formats](https://docs.aspose.com/slides/net/supported-file-formats/).
## **PowerPoint and OpenDocument Conversion**
Aspose.Slides for .NET supports conversion from commonly used presentation formats such as PPT, PPTX, PPS, PPSX, POT, POTX, and ODP. The same conversion API is used for PowerPoint and OpenDocument files, so a workflow that saves a PPTX file to PDF can usually be applied to an ODP file by changing only the input file.
When converting ODP files, remember that PowerPoint and OpenDocument applications do not support every layout and formatting feature in exactly the same way. If an ODP file was created in LibreOffice or OpenOffice Impress, review the output and use the options described in [Convert OpenDocument Presentations](https://docs.aspose.com/slides/net/convert-openoffice-odp/) when you need format-specific guidance.
## **PPT to PPTX Conversion**
PPT is the older binary PowerPoint format, while PPTX is the modern Office Open XML format. Aspose.Slides for .NET supports high-fidelity PPT to PPTX conversion while preserving complex presentation structures such as masters, layouts, slides, charts, grouped shapes, placeholders, text frames, textures, and picture fills.
For details, see [Convert PPT to PPTX](https://docs.aspose.com/slides/net/convert-ppt-to-pptx/) and [PPT vs PPTX](https://docs.aspose.com/slides/net/ppt-vs-pptx/).
## **Fixed-Layout Export**
PDF, XPS, and TIFF are useful when the output should look the same across devices and should not be edited as a presentation. Use [PdfOptions](https://reference.aspose.com/slides/net/aspose.slides.export/pdfoptions/), [XpsOptions](https://reference.aspose.com/slides/net/aspose.slides.export/xpsoptions/), and [TiffOptions](https://reference.aspose.com/slides/net/aspose.slides.export/tiffoptions/) to control compliance, hidden slides, notes, image quality, compression, pixel format, and output size.
## **HTML and Image Export**
HTML and HTML5 export are useful for browser viewing, web publishing, and lightweight sharing. Image export is useful when each slide must become a separate preview, thumbnail, or raster asset. Use the PNG, JPG, and SVG articles for format-specific rendering guidance.
## **FAQ**
**Do I need Microsoft PowerPoint to convert presentations?**
No. Aspose.Slides for .NET is a standalone library and does not require Microsoft PowerPoint or Office automation.
**Can I batch convert many presentations?**
Yes. Load each presentation, save it to the required format, and dispose of the `Presentation` object after processing. For parallel processing, use separate presentation instances and follow the [multithreading](https://docs.aspose.com/slides/net/multithreading/) guidance.
**Can I export only selected slides?**
Yes. Several export methods allow you to pass slide indexes or render individual slides, depending on the output format. See the dedicated article for the target format.
**Can I include hidden slides when exporting to PDF or XPS?**
Yes. Use the `ShowHiddenSlides` property in [PdfOptions](https://reference.aspose.com/slides/net/aspose.slides.export/pdfoptions/) or [XpsOptions](https://reference.aspose.com/slides/net/aspose.slides.export/xpsoptions/).
**Can I create PDF/A output?**
Yes. PDF compliance settings are available through [PdfOptions.Compliance](https://reference.aspose.com/slides/net/aspose.slides.export/pdfoptions/compliance/) and [PdfCompliance](https://reference.aspose.com/slides/net/aspose.slides.export/pdfcompliance/).
**How are fonts handled during conversion?**
Aspose.Slides can use embedded fonts, font fallback, and font substitution settings. See [Embedded Font](https://docs.aspose.com/slides/net/embedded-font/), [Fallback Font](https://docs.aspose.com/slides/net/fallback-font/), and [Font Substitution](https://docs.aspose.com/slides/net/font-substitution/).
## Related articles
- [Convert OpenDocument Presentations in .NET](https://docs.aspose.com/slides/net/convert-openoffice-odp/)
- [Supported File Formats](https://docs.aspose.com/slides/net/supported-file-formats/)
# Convert Presentation Slides to Images in .NET
> Convert slides from PPT, PPTX, and ODP presentations to PNG, JPEG, GIF, TIFF, EMF, and other image formats in C# with Aspose.Slides for .NET.
Source: https://docs.aspose.com/slides/net/convert-slide/
Updated: 2026-10-26
## **Introduction**
Aspose.Slides for .NET can render individual slides from PowerPoint and OpenDocument presentations as PNG, JPEG, GIF, TIFF, and other image formats.
To convert a slide into an image, follow these steps:
1. Load the presentation with the [Presentation](https://reference.aspose.com/slides/net/aspose.slides/presentation/) class.
2. Select the slide that you want to render.
3. If necessary, configure rendering with the [RenderingOptions](https://reference.aspose.com/slides/net/aspose.slides.export/renderingoptions/) or [TiffOptions](https://reference.aspose.com/slides/net/aspose.slides.export/tiffoptions/) class.
4. Call the [GetImage](https://reference.aspose.com/slides/net/aspose.slides/islide/getimage/) method. It returns an [IImage](https://reference.aspose.com/slides/net/aspose.slides/iimage/) object.
5. Call the [IImage.Save](https://reference.aspose.com/slides/net/aspose.slides/iimage/save/) method and specify the output format with an [ImageFormat](https://reference.aspose.com/slides/net/aspose.slides/imageformat/) value.
## **Convert a Slide to a PNG Image**
The simplest conversion uses the default rendering settings. The resulting [IImage](https://reference.aspose.com/slides/net/aspose.slides/iimage/) object can be processed in memory or saved to a file.
The following C# example renders the first slide and saves it as a PNG image:
```cs
using Aspose.Slides;
using var presentation = new Presentation("Presentation.pptx");
var slide = presentation.Slides[0];
using var image = slide.GetImage();
image.Save("Slide_0.png", ImageFormat.Png);
```
## **Convert Slides to Images with Custom Sizes**
Use the [GetImage](https://reference.aspose.com/slides/net/aspose.slides/islide/getimage/) overload that accepts a [Size](https://learn.microsoft.com/en-us/dotnet/api/system.drawing.size) value to render a slide with exact pixel dimensions.
The following example creates a 1820 × 1040 JPEG image:
```cs
using System.Drawing;
using Aspose.Slides;
var imageSize = new Size(1820, 1040);
using var presentation = new Presentation("Presentation.pptx");
var slide = presentation.Slides[0];
using var image = slide.GetImage(imageSize);
image.Save("Slide_0.jpg", ImageFormat.Jpeg);
```
## **Convert Slides with Notes and Comments to Images**
By default, slide images do not include notes or comments. Assign a [NotesCommentsLayoutingOptions](https://reference.aspose.com/slides/net/aspose.slides.export/notescommentslayoutingoptions/) object to the [RenderingOptions.SlidesLayoutOptions](https://reference.aspose.com/slides/net/aspose.slides.export/renderingoptions/slideslayoutoptions/) property to control where notes and comments appear.
The following example places truncated notes below the slide and comments to its right:
```cs
using System.Drawing;
using Aspose.Slides;
using Aspose.Slides.Export;
var scaleX = 2f;
var scaleY = scaleX;
var layoutOptions = new NotesCommentsLayoutingOptions
{
NotesPosition = NotesPositions.BottomTruncated,
CommentsPosition = CommentsPositions.Right,
CommentsAreaWidth = 500,
CommentsAreaColor = Color.AntiqueWhite
};
var renderingOptions = new RenderingOptions { SlidesLayoutOptions = layoutOptions };
using var presentation = new Presentation("Presentation_with_notes_and_comments.pptx");
var slide = presentation.Slides[0];
using var image = slide.GetImage(renderingOptions, scaleX, scaleY);
image.Save("Image_with_notes_and_comments_0.gif", ImageFormat.Gif);
```
For slide-to-image conversion, do not set the [NotesPosition](https://reference.aspose.com/slides/net/aspose.slides.export/inotescommentslayoutingoptions/notesposition/) property to [BottomFull](https://reference.aspose.com/slides/net/aspose.slides.export/notespositions/). Notes can contain more text than the fixed image size can accommodate. Use [BottomTruncated](https://reference.aspose.com/slides/net/aspose.slides.export/notespositions/) instead.
## **Convert Slides to Images Using TIFF Options**
The [TiffOptions](https://reference.aspose.com/slides/net/aspose.slides.export/tiffoptions/) class lets you control the size, resolution, and other properties of the rendered TIFF image.
The following example renders the first slide as a 2160 × 2880 TIFF image at 300 DPI:
```cs
using System.Drawing;
using Aspose.Slides;
using Aspose.Slides.Export;
var tiffOptions = new TiffOptions
{
ImageSize = new Size(2160, 2880),
DpiX = 300,
DpiY = 300
};
using var presentation = new Presentation("sample.pptx");
var slide = presentation.Slides[0];
using var image = slide.GetImage(tiffOptions);
image.Save("output.tiff", ImageFormat.Tiff);
```
## **Convert All Slides to Images**
Iterate through the slide collection to convert the entire presentation into a series of images. Hidden slides are included unless you explicitly skip them.
The following example renders every slide as a JPEG image with horizontal and vertical scale factors of 2:
```cs
using Aspose.Slides;
var scaleX = 2f;
var scaleY = scaleX;
using var presentation = new Presentation("Presentation.pptx");
var slideCount = presentation.Slides.Count;
for (var index = 0; index < slideCount; index++)
{
var slide = presentation.Slides[index];
using var image = slide.GetImage(scaleX, scaleY);
image.Save($"Slide_{index}.jpg", ImageFormat.Jpeg);
}
```
## **Create Enhanced Metafile Output**
Enhanced Metafile (EMF) is useful when vector-based graphics must be exchanged with Microsoft Office or other Windows applications that support Windows metafiles. Unlike a pixel-based image, an EMF can retain vector drawing operations that scale without the same loss of sharpness. However, EMF is primarily a compatibility format for applications with Windows metafile support, not a universal interchange format. In addition, complex slide content, such as bitmap images and some effects, may be stored as rasterized elements inside the vector metafile container.
### **Export a Slide to EMF**
The [ISlide.WriteAsEmf](https://reference.aspose.com/slides/net/aspose.slides/islide/writeasemf/) method writes an [ISlide](https://reference.aspose.com/slides/net/aspose.slides/islide/) to a target stream in EMF format. The following example loads a presentation, selects the first slide, and writes it to an EMF file stream:
```cs
using System.IO;
using Aspose.Slides;
using var presentation = new Presentation("Presentation.pptx");
var slide = presentation.Slides[0];
using var emfStream = File.Create("Slide_0.emf");
slide.WriteAsEmf(emfStream);
```
The caller owns the stream passed to [ISlide.WriteAsEmf](https://reference.aspose.com/slides/net/aspose.slides/islide/writeasemf/) and must close or dispose it. Aspose.Slides writes at the stream's current position and leaves the stream open.
### **Convert an SVG Image to EMF and Add It to a Presentation**
Use [ISvgImage.WriteAsEmf](https://reference.aspose.com/slides/net/aspose.slides/isvgimage/writeasemf/) to convert SVG content to EMF. The resulting bytes can be added to the presentation through [IImageCollection.AddImage](https://reference.aspose.com/slides/net/aspose.slides/iimagecollection/addimage/) and placed on a slide with [IShapeCollection.AddPictureFrame](https://reference.aspose.com/slides/net/aspose.slides/ishapecollection/addpictureframe/).
The following example creates an [SvgImage](https://reference.aspose.com/slides/net/aspose.slides/svgimage/) from SVG markup, converts it to an in-memory EMF, inserts the metafile on the first slide, and saves the presentation:
```cs
using System.IO;
using Aspose.Slides;
using Aspose.Slides.Export;
var svgContent = "("rId2");
slidePart1.Slide = new Slide(
new CommonSlideData(
new ShapeTree(
new P.NonVisualGroupShapeProperties(
new P.NonVisualDrawingProperties() { Id = (UInt32Value)1U, Name = "" },
new P.NonVisualGroupShapeDrawingProperties(),
new ApplicationNonVisualDrawingProperties()),
new GroupShapeProperties(new TransformGroup()),
new P.Shape(
new P.NonVisualShapeProperties(
new P.NonVisualDrawingProperties() { Id = (UInt32Value)2U, Name = "Title 1" },
new P.NonVisualShapeDrawingProperties(new ShapeLocks() { NoGrouping = true }),
new ApplicationNonVisualDrawingProperties(new PlaceholderShape())),
new P.ShapeProperties(),
new P.TextBody(
new BodyProperties(),
new ListStyle(),
new Paragraph(new EndParagraphRunProperties() { Language = "en-US" }))))),
new ColorMapOverride(new MasterColorMapping()));
return slidePart1;
}
private static SlideLayoutPart CreateSlideLayoutPart(SlidePart slidePart1)
{
SlideLayoutPart slideLayoutPart1 = slidePart1.AddNewPart("rId1");
SlideLayout slideLayout = new SlideLayout(
new CommonSlideData(new ShapeTree(
new P.NonVisualGroupShapeProperties(
new P.NonVisualDrawingProperties() { Id = (UInt32Value)1U, Name = "" },
new P.NonVisualGroupShapeDrawingProperties(),
new ApplicationNonVisualDrawingProperties()),
new GroupShapeProperties(new TransformGroup()),
new P.Shape(
new P.NonVisualShapeProperties(
new P.NonVisualDrawingProperties() { Id = (UInt32Value)2U, Name = "" },
new P.NonVisualShapeDrawingProperties(new ShapeLocks() { NoGrouping = true }),
new ApplicationNonVisualDrawingProperties(new PlaceholderShape())),
new P.ShapeProperties(),
new P.TextBody(
new BodyProperties(),
new ListStyle(),
new Paragraph(new EndParagraphRunProperties()))))),
new ColorMapOverride(new MasterColorMapping()));
slideLayoutPart1.SlideLayout = slideLayout;
return slideLayoutPart1;
}
private static SlideMasterPart CreateSlideMasterPart(SlideLayoutPart slideLayoutPart1)
{
SlideMasterPart slideMasterPart1 = slideLayoutPart1.AddNewPart("rId1");
SlideMaster slideMaster = new SlideMaster(
new CommonSlideData(new ShapeTree(
new P.NonVisualGroupShapeProperties(
new P.NonVisualDrawingProperties() { Id = (UInt32Value)1U, Name = "" },
new P.NonVisualGroupShapeDrawingProperties(),
new ApplicationNonVisualDrawingProperties()),
new GroupShapeProperties(new TransformGroup()),
new P.Shape(
new P.NonVisualShapeProperties(
new P.NonVisualDrawingProperties() { Id = (UInt32Value)2U, Name = "Title Placeholder 1" },
new P.NonVisualShapeDrawingProperties(new ShapeLocks() { NoGrouping = true }),
new ApplicationNonVisualDrawingProperties(new PlaceholderShape() { Type = PlaceholderValues.Title })),
new P.ShapeProperties(),
new P.TextBody(
new BodyProperties(),
new ListStyle(),
new Paragraph())))),
new P.ColorMap() { Background1 = D.ColorSchemeIndexValues.Light1, Text1 = D.ColorSchemeIndexValues.Dark1, Background2 = D.ColorSchemeIndexValues.Light2, Text2 = D.ColorSchemeIndexValues.Dark2, Accent1 = D.ColorSchemeIndexValues.Accent1, Accent2 = D.ColorSchemeIndexValues.Accent2, Accent3 = D.ColorSchemeIndexValues.Accent3, Accent4 = D.ColorSchemeIndexValues.Accent4, Accent5 = D.ColorSchemeIndexValues.Accent5, Accent6 = D.ColorSchemeIndexValues.Accent6, Hyperlink = D.ColorSchemeIndexValues.Hyperlink, FollowedHyperlink = D.ColorSchemeIndexValues.FollowedHyperlink },
new SlideLayoutIdList(new SlideLayoutId() { Id = (UInt32Value)2147483649U, RelationshipId = "rId1" }),
new TextStyles(new TitleStyle(), new BodyStyle(), new OtherStyle()));
slideMasterPart1.SlideMaster = slideMaster;
return slideMasterPart1;
}
private static ThemePart CreateTheme(SlideMasterPart slideMasterPart1)
{
ThemePart themePart1 = slideMasterPart1.AddNewPart("rId5");
D.Theme theme1 = new D.Theme() { Name = "Office Theme" };
D.ThemeElements themeElements1 = new D.ThemeElements(
new D.ColorScheme(
new D.Dark1Color(new D.SystemColor() { Val = D.SystemColorValues.WindowText, LastColor = "000000" }),
new D.Light1Color(new D.SystemColor() { Val = D.SystemColorValues.Window, LastColor = "FFFFFF" }),
new D.Dark2Color(new D.RgbColorModelHex() { Val = "1F497D" }),
new D.Light2Color(new D.RgbColorModelHex() { Val = "EEECE1" }),
new D.Accent1Color(new D.RgbColorModelHex() { Val = "4F81BD" }),
new D.Accent2Color(new D.RgbColorModelHex() { Val = "C0504D" }),
new D.Accent3Color(new D.RgbColorModelHex() { Val = "9BBB59" }),
new D.Accent4Color(new D.RgbColorModelHex() { Val = "8064A2" }),
new D.Accent5Color(new D.RgbColorModelHex() { Val = "4BACC6" }),
new D.Accent6Color(new D.RgbColorModelHex() { Val = "F79646" }),
new D.Hyperlink(new D.RgbColorModelHex() { Val = "0000FF" }),
new D.FollowedHyperlinkColor(new D.RgbColorModelHex() { Val = "800080" })) { Name = "Office" },
new D.FontScheme(
new D.MajorFont(
new D.LatinFont() { Typeface = "Calibri" },
new D.EastAsianFont() { Typeface = "" },
new D.ComplexScriptFont() { Typeface = "" }),
new D.MinorFont(
new D.LatinFont() { Typeface = "Calibri" },
new D.EastAsianFont() { Typeface = "" },
new D.ComplexScriptFont() { Typeface = "" })) { Name = "Office" },
new D.FormatScheme(
new D.FillStyleList(
new D.SolidFill(new D.SchemeColor() { Val = D.SchemeColorValues.PhColor }),
new D.GradientFill(
new D.GradientStopList(
new D.GradientStop(new D.SchemeColor(new D.Tint() { Val = 50000 },
new D.SaturationModulation() { Val = 300000 }) { Val = D.SchemeColorValues.PhColor }) { Position = 0 },
new D.GradientStop(new D.SchemeColor(new D.Tint() { Val = 37000 },
new D.SaturationModulation() { Val = 300000 }) { Val = D.SchemeColorValues.PhColor }) { Position = 35000 },
new D.GradientStop(new D.SchemeColor(new D.Tint() { Val = 15000 },
new D.SaturationModulation() { Val = 350000 }) { Val = D.SchemeColorValues.PhColor }) { Position = 100000 }
),
new D.LinearGradientFill() { Angle = 16200000, Scaled = true }),
new D.NoFill(),
new D.PatternFill(),
new D.GroupFill()),
new D.LineStyleList(
new D.Outline(
new D.SolidFill(
new D.SchemeColor(
new D.Shade() { Val = 95000 },
new D.SaturationModulation() { Val = 105000 }) { Val = D.SchemeColorValues.PhColor }),
new D.PresetDash() { Val = D.PresetLineDashValues.Solid })
{
Width = 9525,
CapType = D.LineCapValues.Flat,
CompoundLineType = D.CompoundLineValues.Single,
Alignment = D.PenAlignmentValues.Center
},
new D.Outline(
new D.SolidFill(
new D.SchemeColor(
new D.Shade() { Val = 95000 },
new D.SaturationModulation() { Val = 105000 }) { Val = D.SchemeColorValues.PhColor }),
new D.PresetDash() { Val = D.PresetLineDashValues.Solid })
{
Width = 9525,
CapType = D.LineCapValues.Flat,
CompoundLineType = D.CompoundLineValues.Single,
Alignment = D.PenAlignmentValues.Center
},
new D.Outline(
new D.SolidFill(
new D.SchemeColor(
new D.Shade() { Val = 95000 },
new D.SaturationModulation() { Val = 105000 }) { Val = D.SchemeColorValues.PhColor }),
new D.PresetDash() { Val = D.PresetLineDashValues.Solid })
{
Width = 9525,
CapType = D.LineCapValues.Flat,
CompoundLineType = D.CompoundLineValues.Single,
Alignment = D.PenAlignmentValues.Center
}),
new D.EffectStyleList(
new D.EffectStyle(
new D.EffectList(
new D.OuterShadow(
new D.RgbColorModelHex(
new D.Alpha() { Val = 38000 }) { Val = "000000" }) { BlurRadius = 40000L, Distance = 20000L, Direction = 5400000, RotateWithShape = false })),
new D.EffectStyle(
new D.EffectList(
new D.OuterShadow(
new D.RgbColorModelHex(
new D.Alpha() { Val = 38000 }) { Val = "000000" }) { BlurRadius = 40000L, Distance = 20000L, Direction = 5400000, RotateWithShape = false })),
new D.EffectStyle(
new D.EffectList(
new D.OuterShadow(
new D.RgbColorModelHex(
new D.Alpha() { Val = 38000 }) { Val = "000000" }) { BlurRadius = 40000L, Distance = 20000L, Direction = 5400000, RotateWithShape = false }))),
new D.BackgroundFillStyleList(
new D.SolidFill(new D.SchemeColor() { Val = D.SchemeColorValues.PhColor }),
new D.GradientFill(
new D.GradientStopList(
new D.GradientStop(
new D.SchemeColor(new D.Tint() { Val = 50000 },
new D.SaturationModulation() { Val = 300000 }) { Val = D.SchemeColorValues.PhColor }) { Position = 0 },
new D.GradientStop(
new D.SchemeColor(new D.Tint() { Val = 50000 },
new D.SaturationModulation() { Val = 300000 }) { Val = D.SchemeColorValues.PhColor }) { Position = 0 },
new D.GradientStop(
new D.SchemeColor(new D.Tint() { Val = 50000 },
new D.SaturationModulation() { Val = 300000 }) { Val = D.SchemeColorValues.PhColor }) { Position = 0 }),
new D.LinearGradientFill() { Angle = 16200000, Scaled = true }),
new D.GradientFill(
new D.GradientStopList(
new D.GradientStop(
new D.SchemeColor(new D.Tint() { Val = 50000 },
new D.SaturationModulation() { Val = 300000 }) { Val = D.SchemeColorValues.PhColor }) { Position = 0 },
new D.GradientStop(
new D.SchemeColor(new D.Tint() { Val = 50000 },
new D.SaturationModulation() { Val = 300000 }) { Val = D.SchemeColorValues.PhColor }) { Position = 0 }),
new D.LinearGradientFill() { Angle = 16200000, Scaled = true }))) { Name = "Office" });
theme1.Append(themeElements1);
theme1.Append(new D.ObjectDefaults());
theme1.Append(new D.ExtraColorSchemeList());
themePart1.Theme = theme1;
return themePart1;
}
```
## **Aspose.Slides**
``` csharp
using Aspose.Slides;
using Aspose.Slides.Export;
string filePath = @"..\..\..\..\Sample Files\";
string fileName = filePath + "Create a presentation document.pptx";
//Instantiate a Presentation object that represents a PPTX file
using (Presentation pres = new Presentation())
{
//Get the collection of slides
ISlideCollection slds = pres.Slides;
//Add an empty slide to the collection
slds.AddEmptySlide(pres.LayoutSlides[0]);
//Save your presentation to a file
pres.Save(fileName, SaveFormat.Pptx);
}
```
## **Download Sample Code**
- [GitHub](https://github.com/aspose-slides/Aspose.Slides-for-.NET/releases/tag/AsposeSlidesVsOpenXML1.1)
- [Sourceforge](https://sourceforge.net/projects/asposeopenxml/files/Aspose.Slides%20Vs%20OpenXML/Create%20a%20presentation%20document%20%28Aspose.Slides%29.zip/download)
- [Bitbucket](https://bitbucket.org/asposemarketplace/aspose-for-openxml/src/master/Aspose.Slides%20Vs%20OpenXML/Create%20a%20presentation%20document/)
# Create and Embed Excel Charts as OLE Objects Using VSTO and Aspose.Slides for .NET
> Migrate from Microsoft Office automation to Aspose.Slides for .NET and embed Excel charts as OLE objects into PowerPoint (PPT, PPTX) slides in C#.
Source: https://docs.aspose.com/slides/net/create-and-embed-an-excel-chart-as-an-ole-object-into-a-microsoft-powerpoint-slide/
Updated: 2026-08-13
Charts are visual representations of your data and widely used in presentation slides. This article will show you the code to create and embed an Excel Chart as an OLE Object in the PowerPoint Slide programmatically by using [VSTO](https://docs.aspose.com/slides/net/create-and-embed-an-excel-chart-as-an-ole-object-into-a-microsoft-powerpoint-slide/) and [Aspose.Slides for .NET](https://docs.aspose.com/slides/net/create-and-embed-an-excel-chart-as-an-ole-object-into-a-microsoft-powerpoint-slide/).
## **Creating and Embedding an Excel Chart**
The two code examples below are long and detailed because the task they're describing is involved. You create a Microsoft Excel workbook, create a chart and then create the Microsoft PowerPoint presentation that you'll embed the chart into. OLE objects contain links to the original document so a user that double-clicks the embedded file will launch the file and it's application.
## **VSTO Example**
Using VSTO, the following steps are performed:
1. Create an instance of the Microsoft Excel ApplicationClass object.
1. Create a new workbook with one sheet in it.
1. Add chart to the sheet.
1. Save the workbook.
1. Open the Excel workbook containing the worksheet with the chart data.
1. Get the ChartObjects collection for the sheet.
1. Get the chart to copy.
1. Create a Microsoft PowerPoint presentation.
1. Add a blank slide to the presentation.
1. Copy the chart from the Excel worksheet to the clipboard.
1. Paste the chart into the PowerPoint presentation.
1. Position the chart on the slide.
1. Save the presentation.
```c#
CreateNewChartInExcel();
UseCopyPaste();
```
```c#
static void SetCellValue(xlNS.Worksheet targetSheet, string Cell, object Value)
{
targetSheet.get_Range(Cell, Cell).set_Value(xlNS.XlRangeValueDataType.xlRangeValueDefault, Value);
}
```
```c#
static void CreateNewChartInExcel()
{
// Declare a variable for the Excel ApplicationClass instance.
Microsoft.Office.Interop.Excel.ApplicationClass excelApplication = null;
// Declare variables for the Workbooks.Open method parameters.
string paramWorkbookPath = Application.StartupPath + @"\ChartData.xlsx";
object paramMissing = Type.Missing;
// Declare variables for the Chart.ChartWizard method.
object paramChartFormat = 1;
object paramCategoryLabels = 0;
object paramSeriesLabels = 0;
bool paramHasLegend = true;
object paramTitle = "Sales by Quarter";
object paramCategoryTitle = "Fiscal Quarter";
object paramValueTitle = "Billions";
try
{
// Create an instance of the Excel ApplicationClass object.
excelApplication = new Microsoft.Office.Interop.Excel.ApplicationClass();
// Create a new workbook with 1 sheet in it.
xlNS.Workbook newWorkbook = excelApplication.Workbooks.Add(xlNS.XlWBATemplate.xlWBATWorksheet);
// Change the name of the sheet.
xlNS.Worksheet targetSheet = (xlNS.Worksheet)(newWorkbook.Worksheets[1]);
targetSheet.Name = "Quarterly Sales";
// Insert some data for the chart into the sheet.
// A B C D E
// 1 Q1 Q2 Q3 Q4
// 2 N. America 1.5 2 1.5 2.5
// 3 S. America 2 1.75 2 2
// 4 Europe 2.25 2 2.5 2
// 5 Asia 2.5 2.5 2 2.75
SetCellValue(targetSheet, "A2", "N. America");
SetCellValue(targetSheet, "A3", "S. America");
SetCellValue(targetSheet, "A4", "Europe");
SetCellValue(targetSheet, "A5", "Asia");
SetCellValue(targetSheet, "B1", "Q1");
SetCellValue(targetSheet, "B2", 1.5);
SetCellValue(targetSheet, "B3", 2);
SetCellValue(targetSheet, "B4", 2.25);
SetCellValue(targetSheet, "B5", 2.5);
SetCellValue(targetSheet, "C1", "Q2");
SetCellValue(targetSheet, "C2", 2);
SetCellValue(targetSheet, "C3", 1.75);
SetCellValue(targetSheet, "C4", 2);
SetCellValue(targetSheet, "C5", 2.5);
SetCellValue(targetSheet, "D1", "Q3");
SetCellValue(targetSheet, "D2", 1.5);
SetCellValue(targetSheet, "D3", 2);
SetCellValue(targetSheet, "D4", 2.5);
SetCellValue(targetSheet, "D5", 2);
SetCellValue(targetSheet, "E1", "Q4");
SetCellValue(targetSheet, "E2", 2.5);
SetCellValue(targetSheet, "E3", 2);
SetCellValue(targetSheet, "E4", 2);
SetCellValue(targetSheet, "E5", 2.75);
// Get the range holding the chart data.
xlNS.Range dataRange = targetSheet.get_Range("A1", "E5");
// Get the ChartObjects collection for the sheet.
xlNS.ChartObjects chartObjects = (xlNS.ChartObjects)(targetSheet.ChartObjects(paramMissing));
// Add a Chart to the collection.
xlNS.ChartObject newChartObject = chartObjects.Add(0, 100, 600, 300);
newChartObject.Name = "Sales Chart";
// Create a new chart of the data.
newChartObject.Chart.ChartWizard(dataRange, xlNS.XlChartType.xl3DColumn, paramChartFormat, xlNS.XlRowCol.xlRows,
paramCategoryLabels, paramSeriesLabels, paramHasLegend, paramTitle, paramCategoryTitle, paramValueTitle, paramMissing);
// Save the workbook.
newWorkbook.SaveAs(paramWorkbookPath, paramMissing, paramMissing, paramMissing, paramMissing,
paramMissing, xlNS.XlSaveAsAccessMode.xlNoChange, paramMissing, paramMissing, paramMissing, paramMissing, paramMissing);
}
catch (Exception ex)
{
Console.WriteLine(ex.Message);
}
finally
{
if (excelApplication != null)
{
// Close Excel.
excelApplication.Quit();
}
}
}
```
```c#
static void UseCopyPaste()
{
// Declare variables to hold references to PowerPoint objects.
pptNS.ApplicationClass powerpointApplication = null;
pptNS.Presentation pptPresentation = null;
pptNS.Slide pptSlide = null;
pptNS.ShapeRange shapeRange = null;
// Declare variables to hold references to Excel objects.
xlNS.ApplicationClass excelApplication = null;
xlNS.Workbook excelWorkBook = null;
xlNS.Worksheet targetSheet = null;
xlNS.ChartObjects chartObjects = null;
xlNS.ChartObject existingChartObject = null;
string paramPresentationPath = Application.StartupPath + @"\ChartTest.pptx";
string paramWorkbookPath = Application.StartupPath + @"\ChartData.xlsx";
object paramMissing = Type.Missing;
try
{
// Create an instance of PowerPoint.
powerpointApplication = new pptNS.ApplicationClass();
// Create an instance Excel.
excelApplication = new xlNS.ApplicationClass();
// Open the Excel workbook containing the worksheet with the chart data.
excelWorkBook = excelApplication.Workbooks.Open(paramWorkbookPath,
paramMissing, paramMissing, paramMissing, paramMissing, paramMissing,
paramMissing, paramMissing, paramMissing, paramMissing, paramMissing,
paramMissing, paramMissing, paramMissing, paramMissing);
// Get the worksheet that contains the chart.
targetSheet =
(xlNS.Worksheet)(excelWorkBook.Worksheets["Quarterly Sales"]);
// Get the ChartObjects collection for the sheet.
chartObjects =
(xlNS.ChartObjects)(targetSheet.ChartObjects(paramMissing));
// Get the chart to copy.
existingChartObject =
(xlNS.ChartObject)(chartObjects.Item("Sales Chart"));
// Create a PowerPoint presentation.
pptPresentation =
powerpointApplication.Presentations.Add(
Microsoft.Office.Core.MsoTriState.msoTrue);
// Add a blank slide to the presentation.
pptSlide =
pptPresentation.Slides.Add(1, pptNS.PpSlideLayout.ppLayoutBlank);
// Copy the chart from the Excel worksheet to the clipboard.
existingChartObject.Copy();
// Paste the chart into the PowerPoint presentation.
shapeRange = pptSlide.Shapes.Paste();
// Position the chart on the slide.
shapeRange.Left = 60;
shapeRange.Top = 100;
// Save the presentation.
pptPresentation.SaveAs(paramPresentationPath, pptNS.PpSaveAsFileType.ppSaveAsOpenXMLPresentation, Microsoft.Office.Core.MsoTriState.msoTrue);
}
catch (Exception ex)
{
Console.WriteLine(ex.Message);
}
finally
{
// Release the PowerPoint slide object.
shapeRange = null;
pptSlide = null;
// Close and release the Presentation object.
if (pptPresentation != null)
{
pptPresentation.Close();
pptPresentation = null;
}
// Quit PowerPoint and release the ApplicationClass object.
if (powerpointApplication != null)
{
powerpointApplication.Quit();
powerpointApplication = null;
}
// Release the Excel objects.
targetSheet = null;
chartObjects = null;
existingChartObject = null;
// Close and release the Excel Workbook object.
if (excelWorkBook != null)
{
excelWorkBook.Close(false, paramMissing, paramMissing);
excelWorkBook = null;
}
// Quit Excel and release the ApplicationClass object.
if (excelApplication != null)
{
excelApplication.Quit();
excelApplication = null;
}
GC.Collect();
GC.WaitForPendingFinalizers();
GC.Collect();
GC.WaitForPendingFinalizers();
}
}
```
## **Aspose.Slides for .NET Example**
Using Aspose.Slides for .NET, the following steps are performed:
1. Create a workbook using Aspose.Cells for .NET.
1. Create a Microsoft Excel chart.
1. Set the OLE size of the Excel Chart.
1. Get an image of the chart.
1. Embed the Excel chart as an OLE Object inside PPTX presentation using Aspose.Slides for .NET.
1. Replace the object changed image with the image obtained in step 3 to cater for the object changed issue.
1. Write the output presentation to disk in PPTX format.
```c#
using System.Drawing;
using Aspose.Slides;
//Step - 1: Create an excel chart using Aspose.Cells
//--------------------------------------------------
//Create a workbook
Aspose.Cells.Workbook wb = new Aspose.Cells.Workbook();
//Add an excel chart
int chartRows = 55;
int chartCols = 25;
int chartSheetIndex = AddExcelChartInWorkbook(wb, chartRows, chartCols);
//Step - 2: Set the OLE size of the chart. using Aspose.Cells
//-----------------------------------------------------------
wb.Worksheets.SetOleSize(0, chartRows, 0, chartCols);
//Step - 3: Get the image of the chart with Aspose.Cells
//-----------------------------------------------------------
MemoryStream chartImageStream = new MemoryStream();
wb.Worksheets[chartSheetIndex].Charts[0].ToImage(chartImageStream, Aspose.Cells.Drawing.ImageType.Png);
chartImageStream.Position = 0;
Bitmap imgChart = new Bitmap(chartImageStream);
//Save the workbook to stream
MemoryStream wbStream = wb.SaveToStream();
//Step - 4 AND 5
//-----------------------------------------------------------
//Step - 4: Embed the chart as an OLE object inside .ppt presentation using Aspose.Slides
//-----------------------------------------------------------
//Step - 5: Replace the object changed image with the image obtained in step 3 to cater Object Changed Issue
//-----------------------------------------------------------
//Create a presentation
Presentation pres = new Presentation();
ISlide sld = pres.Slides[0];
//Add the workbook on slide
AddExcelChartInPresentation(pres, sld, wbStream, imgChart);
//Step - 6: Write the output presentation on disk
//-----------------------------------------------------------
pres.Save("OutputChart.pptx", Aspose.Slides.Export.SaveFormat.Pptx);
```
```c#
using System.Drawing;
using Aspose.Slides;
using Aspose.Slides.DOM.Ole;
static void AddExcelChartInPresentation(Presentation presentation, ISlide slide, Stream workbookStream, Bitmap chartImage)
{
float oleWidth = presentation.SlideSize.Size.Width;
float oleHeight = presentation.SlideSize.Size.Height;
byte[] chartOleData = new byte[workbookStream.Length];
workbookStream.Position = 0;
workbookStream.Read(chartOleData, 0, chartOleData.Length);
OleEmbeddedDataInfo dataInfo = new OleEmbeddedDataInfo(chartOleData, "xls");
IOleObjectFrame oleFrame = slide.Shapes.AddOleObjectFrame(0, 0, oleWidth, oleHeight, dataInfo);
using (MemoryStream imageStream = new MemoryStream())
{
chartImage.Save(imageStream, System.Drawing.Imaging.ImageFormat.Png);
imageStream.Position = 0;
IPPImage image = presentation.Images.AddImage(imageStream);
oleFrame.SubstitutePictureFormat.Picture.Image = image;
}
}
```
```c#
static int AddExcelChartInWorkbook(Aspose.Cells.Workbook wb, int chartRows, int chartCols)
{
//Array of cell names
string[] cellsName = new string[]
{
"A1", "A2", "A3", "A4",
"B1", "B2", "B3", "B4",
"C1", "C2", "C3", "C4",
"D1", "D2", "D3", "D4",
"E1", "E2", "E3", "E4"
};
//Array of cell data
int[] cellsValue = new int[]
{
67,86,68,91,
44,64,89,48,
46,97,78,60,
43,29,69,26,
24,40,38,25
};
//Add a new worksheet to populate cells with data
int dataSheetIdx = wb.Worksheets.Add();
Aspose.Cells.Worksheet dataSheet = wb.Worksheets[dataSheetIdx];
string sheetName = "DataSheet";
dataSheet.Name = sheetName;
//Populate DataSheet with data
for (int i = 0; i < cellsName.Length; i++)
{
string cellName = cellsName[i];
int cellValue = cellsValue[i];
dataSheet.Cells[cellName].PutValue(cellValue);
}
//Add a chart sheet
int chartSheetIdx = wb.Worksheets.Add(Aspose.Cells.SheetType.Chart);
Aspose.Cells.Worksheet chartSheet = wb.Worksheets[chartSheetIdx];
chartSheet.Name = "ChartSheet";
//Add a chart in ChartSheet with data series from DataSheet
int chartIdx = chartSheet.Charts.Add(Aspose.Cells.Charts.ChartType.Column, 0, chartRows, 0, chartCols);
Aspose.Cells.Charts.Chart chart = chartSheet.Charts[chartIdx];
chart.NSeries.Add(sheetName + "!A1:E1", false);
chart.NSeries.Add(sheetName + "!A2:E2", false);
chart.NSeries.Add(sheetName + "!A3:E3", false);
chart.NSeries.Add(sheetName + "!A4:E4", false);
//Set ChartSheet an active sheet
wb.Worksheets.ActiveSheetIndex = chartSheetIdx;
return chartSheetIdx;
}
```
## Related articles
- [Create and Embed an Excel Chart as an OLE Object](https://docs.aspose.com/slides/net/create-and-embed-an-excel-chart-as-an-ole-object/)
- [Adding Text Dynamically Using VSTO and Aspose.Slides for .NET](https://docs.aspose.com/slides/net/adding-text-dynamically-using-vsto-and-aspose-slides-for-net/)
- [Creating Tables Using VSTO and Aspose.Slides for .NET](https://docs.aspose.com/slides/net/creating-a-table-on-powerpoint-slide/)
# Create and Embed an Excel Chart as an OLE Object
>
Source: https://docs.aspose.com/slides/net/create-and-embed-an-excel-chart-as-an-ole-object/
Updated: 2026-08-05
The two code examples below are long and detailed because the task they're describing is involved. You create a Microsoft Excel workbook, create a chart and then create the Microsoft PowerPoint presentation that you'll embed the chart into. OLE objects contain links to the original document so a user that double-clicks the embedded file will launch the file and it's application.
## **VSTO**
Using VSTO, the following steps are performed:
1. Create an instance of the Microsoft Excel ApplicationClass object.
1. Create a new workbook with one sheet in it.
1. Add chart to the sheet.
1. Save the workbook.
1. Open the Excel workbook containing the worksheet with the chart data.
1. Get the ChartObjects collection for the sheet.
1. Get the chart to copy.
1. Create a Microsoft PowerPoint presentation.
1. Add a blank slide to the presentation.
1. Copy the chart from the Excel worksheet to the clipboard.
1. Paste the chart into the PowerPoint presentation.
1. Position the chart on the slide.
1. Save the presentation.
``` csharp
public void SetCellValue(xlNS.Worksheet targetSheet, string Cell, object Value)
{
targetSheet.get_Range(Cell, Cell).set_Value(xlNS.XlRangeValueDataType.xlRangeValueDefault, Value);
}
public void CreateNewChartInExcel()
{
// Declare a variable for the Excel ApplicationClass instance.
Microsoft.Office.Interop.Excel.Application excelApplication = new xlNS.Application() ;//new Microsoft.Office.Interop.Excel.ApplicationClass();
// Declare variables for the Workbooks.Open method parameters.
string paramWorkbookPath = System.Windows.Forms.Application.StartupPath+@"\ChartData.xlsx";
object paramMissing = Type.Missing;
// Declare variables for the Chart.ChartWizard method.
object paramChartFormat = 1;
object paramCategoryLabels = 0;
object paramSeriesLabels = 0;
bool paramHasLegend = true;
object paramTitle = "Sales by Quarter";
object paramCategoryTitle = "Fiscal Quarter";
object paramValueTitle = "Billions";
try
{
// Create an instance of the Excel ApplicationClass object.
// excelApplication = new Microsoft.Office.Interop.Excel.ApplicationClass();
// Create a new workbook with 1 sheet in it.
xlNS.Workbook newWorkbook = excelApplication.Workbooks.Add(xlNS.XlWBATemplate.xlWBATWorksheet);
// Change the name of the sheet.
xlNS.Worksheet targetSheet = (xlNS.Worksheet)(newWorkbook.Worksheets[1]);
targetSheet.Name = "Quarterly Sales";
// Insert some data for the chart into the sheet.
// A B C D E
// 1 Q1 Q2 Q3 Q4
// 2 N. America 1.5 2 1.5 2.5
// 3 S. America 2 1.75 2 2
// 4 Europe 2.25 2 2.5 2
// 5 Asia 2.5 2.5 2 2.75
SetCellValue(targetSheet, "A2", "N. America");
SetCellValue(targetSheet, "A3", "S. America");
SetCellValue(targetSheet, "A4", "Europe");
SetCellValue(targetSheet, "A5", "Asia");
SetCellValue(targetSheet, "B1", "Q1");
SetCellValue(targetSheet, "B2", 1.5);
SetCellValue(targetSheet, "B3", 2);
SetCellValue(targetSheet, "B4", 2.25);
SetCellValue(targetSheet, "B5", 2.5);
SetCellValue(targetSheet, "C1", "Q2");
SetCellValue(targetSheet, "C2", 2);
SetCellValue(targetSheet, "C3", 1.75);
SetCellValue(targetSheet, "C4", 2);
SetCellValue(targetSheet, "C5", 2.5);
SetCellValue(targetSheet, "D1", "Q3");
SetCellValue(targetSheet, "D2", 1.5);
SetCellValue(targetSheet, "D3", 2);
SetCellValue(targetSheet, "D4", 2.5);
SetCellValue(targetSheet, "D5", 2);
SetCellValue(targetSheet, "E1", "Q4");
SetCellValue(targetSheet, "E2", 2.5);
SetCellValue(targetSheet, "E3", 2);
SetCellValue(targetSheet, "E4", 2);
SetCellValue(targetSheet, "E5", 2.75);
// Get the range holding the chart data.
xlNS.Range dataRange = targetSheet.get_Range("A1", "E5");
// Get the ChartObjects collection for the sheet.
xlNS.ChartObjects chartObjects = (xlNS.ChartObjects)(targetSheet.ChartObjects(paramMissing));
// Add a Chart to the collection.
xlNS.ChartObject newChartObject = chartObjects.Add(0, 100, 600, 300);
newChartObject.Name = "Sales Chart";
// Create a new chart of the data.
newChartObject.Chart.ChartWizard(dataRange, xlNS.XlChartType.xl3DColumn, paramChartFormat, xlNS.XlRowCol.xlRows,
paramCategoryLabels, paramSeriesLabels, paramHasLegend, paramTitle, paramCategoryTitle, paramValueTitle, paramMissing);
// Save the workbook.
newWorkbook.SaveAs(paramWorkbookPath, paramMissing, paramMissing, paramMissing, paramMissing,
paramMissing, xlNS.XlSaveAsAccessMode.xlNoChange, paramMissing, paramMissing, paramMissing, paramMissing, paramMissing);
}
catch (Exception ex)
{
Console.WriteLine(ex.Message);
}
finally
{
if (excelApplication != null)
{
// Close Excel.
excelApplication.Quit();
}
}
}
public void UseCopyPaste()
{
// Declare variables to hold references to PowerPoint objects.
pptNS.Application powerpointApplication = null;
pptNS.Presentation pptPresentation = null;
pptNS.Slide pptSlide = null;
pptNS.ShapeRange shapeRange = null;
// Declare variables to hold references to Excel objects.
xlNS.Application excelApplication = null;
xlNS.Workbook excelWorkBook = null;
xlNS.Worksheet targetSheet = null;
xlNS.ChartObjects chartObjects = null;
xlNS.ChartObject existingChartObject = null;
string paramPresentationPath = System.Windows.Forms.Application.StartupPath + @"\ChartTest.pptx";
string paramWorkbookPath = System.Windows.Forms.Application.StartupPath + @"\ChartData.xlsx";
object paramMissing = Type.Missing;
try
{
// Create an instance of PowerPoint.
powerpointApplication =new pptNS.Application();
// Create an instance Excel.
excelApplication = new xlNS.Application();
// Open the Excel workbook containing the worksheet with the chart data.
excelWorkBook = excelApplication.Workbooks.Open(paramWorkbookPath,
paramMissing, paramMissing, paramMissing, paramMissing, paramMissing,
paramMissing, paramMissing, paramMissing, paramMissing, paramMissing,
paramMissing, paramMissing, paramMissing, paramMissing);
// Get the worksheet that contains the chart.
targetSheet =
(xlNS.Worksheet)(excelWorkBook.Worksheets["Quarterly Sales"]);
// Get the ChartObjects collection for the sheet.
chartObjects =
(xlNS.ChartObjects)(targetSheet.ChartObjects(paramMissing));
// Get the chart to copy.
existingChartObject =
(xlNS.ChartObject)(chartObjects.Item("Sales Chart"));
// Create a PowerPoint presentation.
pptPresentation =
powerpointApplication.Presentations.Add(
Microsoft.Office.Core.MsoTriState.msoTrue);
// Add a blank slide to the presentation.
pptSlide =
pptPresentation.Slides.Add(1, pptNS.PpSlideLayout.ppLayoutBlank);
// Copy the chart from the Excel worksheet to the clipboard.
existingChartObject.Copy();
// Paste the chart into the PowerPoint presentation.
shapeRange = pptSlide.Shapes.Paste();
// Position the chart on the slide.
shapeRange.Left = 60;
shapeRange.Top = 100;
// Save the presentation.
pptPresentation.SaveAs(paramPresentationPath, pptNS.PpSaveAsFileType.ppSaveAsOpenXMLPresentation, Microsoft.Office.Core.MsoTriState.msoTrue);
}
catch (Exception ex)
{
Console.WriteLine(ex.Message);
}
finally
{
// Release the PowerPoint slide object.
shapeRange = null;
pptSlide = null;
// Close and release the Presentation object.
if (pptPresentation != null)
{
pptPresentation.Close();
pptPresentation = null;
}
// Quit PowerPoint and release the ApplicationClass object.
if (powerpointApplication != null)
{
powerpointApplication.Quit();
powerpointApplication = null;
}
// Release the Excel objects.
targetSheet = null;
chartObjects = null;
existingChartObject = null;
// Close and release the Excel Workbook object.
if (excelWorkBook != null)
{
excelWorkBook.Close(false, paramMissing, paramMissing);
excelWorkBook = null;
}
// Quit Excel and release the ApplicationClass object.
if (excelApplication != null)
{
excelApplication.Quit();
excelApplication = null;
}
GC.Collect();
GC.WaitForPendingFinalizers();
GC.Collect();
GC.WaitForPendingFinalizers();
}
}
private void ThisAddIn_Startup(object sender, System.EventArgs e)
{
CreateNewChartInExcel();
UseCopyPaste();
}
```
## **Aspose.Slides**
Using Aspose.Slides for .NET, the following steps are performed:
1. Create a workbook using Aspose.Cells for .NET.
1. Create a Microsoft Excel chart.
1. Set the OLE size of the Excel Chart.
1. Get an image of the chart.
1. Embed the Excel chart as an OLE Object inside PPTX presentation using Aspose.Slides for .NET.
1. Replace the object changed image with the image obtained in step 3 to cater for the object changed issue.
1. Write the output presentation to disk in PPTX format.
``` csharp
using System.IO;
using System.Drawing;
using Aspose.Slides;
using Aspose.Slides.DOM.Ole;
using Aspose.Slides.Export;
static void Main(string[] args)
{
//Create a workbook
Aspose.Cells.Workbook wb = new Aspose.Cells.Workbook();
//Add an excel chart
int chartSheetIndex = AddExcelChartInWorkbook(wb);
wb.Worksheets.SetOleSize(0, 5, 0, 5);
MemoryStream chartStream = new MemoryStream();
wb.Worksheets[chartSheetIndex].Charts[0].ToImage(chartStream, Aspose.Cells.Drawing.ImageType.Png);
Bitmap imgChart = new Bitmap(chartStream);
//Save the workbook to stream
MemoryStream wbStream = wb.SaveToStream();
//Create a presentation
using (Presentation pres = new Presentation())
{
ISlide sld = pres.Slides[0];
//Add the workbook on slide
AddExcelChartInPresentation(pres, sld, wbStream, imgChart);
//Write the output presentation on disk
pres.Save("chart.pptx", SaveFormat.Pptx);
}
}
static int AddExcelChartInWorkbook(Aspose.Cells.Workbook wb)
{
//Add a new worksheet to populate cells with data
int dataSheetIdx = wb.Worksheets.Add();
Aspose.Cells.Worksheet dataSheet = wb.Worksheets[dataSheetIdx];
string sheetName = "DataSheet";
dataSheet.Name = sheetName;
//Populate DataSheet with data
dataSheet.Cells["A2"].PutValue("N. America");
dataSheet.Cells["A3"].PutValue("S. America");
dataSheet.Cells["A4"].PutValue("Europe");
dataSheet.Cells["A5"].PutValue("Asia");
dataSheet.Cells["B1"].PutValue("Q1");
dataSheet.Cells["B2"].PutValue(1.5);
dataSheet.Cells["B3"].PutValue(2);
dataSheet.Cells["B4"].PutValue(2.25);
dataSheet.Cells["B5"].PutValue(2.5);
dataSheet.Cells["C1"].PutValue("Q2");
dataSheet.Cells["C2"].PutValue(2);
dataSheet.Cells["C3"].PutValue(1.75);
dataSheet.Cells["C4"].PutValue(2);
dataSheet.Cells["C5"].PutValue(2.5);
dataSheet.Cells["D1"].PutValue("Q3");
dataSheet.Cells["D2"].PutValue(1.5);
dataSheet.Cells["D3"].PutValue(2);
dataSheet.Cells["D4"].PutValue(2.5);
dataSheet.Cells["D5"].PutValue(2);
dataSheet.Cells["E1"].PutValue("Q4");
dataSheet.Cells["E2"].PutValue(2.5);
dataSheet.Cells["E3"].PutValue(2);
dataSheet.Cells["E4"].PutValue(2);
dataSheet.Cells["E5"].PutValue(2.75);
//Add a chart sheet
int chartSheetIdx = wb.Worksheets.Add(Aspose.Cells.SheetType.Chart);
Aspose.Cells.Worksheet chartSheet = wb.Worksheets[chartSheetIdx];
chartSheet.Name = "ChartSheet";
//Add a chart in ChartSheet with data series from DataSheet
int chartIdx = chartSheet.Charts.Add(Aspose.Cells.Charts.ChartType.Column3DClustered, 0, 5, 0, 5);
Aspose.Cells.Charts.Chart chart = chartSheet.Charts[chartIdx];
chart.NSeries.Add(sheetName + "!A1:E5", false);
//Setting Chart's Title
chart.Title.Text = "Sales by Quarter";
//Setting the foreground color of the plot area
chart.PlotArea.Area.ForegroundColor = Color.White;
//Setting the background color of the plot area
chart.PlotArea.Area.BackgroundColor = Color.White;
//Setting the foreground color of the chart area
chart.ChartArea.Area.BackgroundColor = Color.White;
chart.Title.TextFont.Size = 16;
//Setting the title of category axis of the chart
chart.CategoryAxis.Title.Text = "Fiscal Quarter";
//Setting the title of value axis of the chart
chart.ValueAxis.Title.Text = "Billions";
//Set ChartSheet an active sheet
wb.Worksheets.ActiveSheetIndex = chartSheetIdx;
return chartSheetIdx;
}
private static void AddExcelChartInPresentation(IPresentation pres, ISlide sld, Stream wbStream, Bitmap imgChart)
{
float oleWidth = pres.SlideSize.Size.Width;
float oleHeight = pres.SlideSize.Size.Height;
int x = 0;
byte[] chartOleData = new byte[wbStream.Length];
wbStream.Position = 0;
wbStream.Read(chartOleData, 0, chartOleData.Length);
IOleEmbeddedDataInfo dataInfo = new OleEmbeddedDataInfo(chartOleData, "xls");
IOleObjectFrame oof = sld.Shapes.AddOleObjectFrame(x, 0, oleWidth, oleHeight, dataInfo);
using (MemoryStream imageStream = new MemoryStream())
{
imgChart.Save(imageStream, System.Drawing.Imaging.ImageFormat.Png);
imageStream.Position = 0;
IPPImage ppImage = pres.Images.AddImage(imageStream);
oof.SubstitutePictureFormat.Picture.Image = ppImage;
}
}
```
## **Download Sample Code**
- [Github](https://github.com/aspose-slides/Aspose.Slides-for-.NET/releases/download/AsposeSlidesVsVSTOv1.1/Create.and.Embed.an.Excel.Chart.as.an.OLE.Object.Aspose.Slides.zip)
- [Sourceforge](https://sourceforge.net/projects/asposevsto/files/Aspose.Slides%20Vs%20VSTO%20Slides/Create%20and%20Embed%20an%20Excel%20Chart%20as%20an%20OLE%20Object%20%28Aspose.Slides%29.zip/download)
- [Bitbucket](https://bitbucket.org/asposemarketplace/aspose-for-vsto/src/master/Aspose.Slides%20Vs%20VSTO%20Slides/Create%20and%20Embed%20an%20Excel%20Chart%20as%20an%20OLE%20Object/)
## Related articles
- [Create and Embed Excel Charts as OLE Objects Using VSTO and Aspose.Slides for .NET](https://docs.aspose.com/slides/net/create-and-embed-an-excel-chart-as-an-ole-object-into-a-microsoft-powerpoint-slide/)
- [Create Excel Charts and Embed Them in Presentations as OLE Objects](https://docs.aspose.com/slides/net/creating-excel-chart-and-embedding-it-in-presentation-as-ole-object/)
- [Create a Chart](https://docs.aspose.com/slides/net/create-a-chart/)
# Create or Update PowerPoint Presentation Charts in .NET
> Create and customize charts in PowerPoint presentations using Aspose.Slides for .NET. Add, format, and edit charts with practical code examples in C#.
Source: https://docs.aspose.com/slides/net/create-chart/
Updated: 2026-11-18
## **Overview**
This article provides a comprehensive guide on how to create and customize charts using Aspose.Slides for .NET. You will learn how to programmatically add a chart to a slide, populate it with data, and apply various formatting options to match your specific design requirements. Throughout the article, detailed code examples illustrate each step, from initializing the presentation and chart object to configuring series, axes, and legends. By following this guide, you'll gain a solid understanding of how to integrate dynamic chart generation into your .NET applications, streamlining the process of creating data-driven presentations.
## **Create a Chart**
Charts help people quickly visualize data and gain insights that may not be immediately obvious from a table or spreadsheet.
**Why Create Charts?**
Using charts, you can:
* aggregate, condense, or summarize large amounts of data on a single slide in a presentation;
* expose patterns and trends in data;
* deduce the direction and momentum of data over time or with respect to a specific unit of measurement;
* spot outliers, aberrations, deviations, errors, and nonsensical data;
* communicate or present complex data.
In PowerPoint, you can create charts through the *Insert* function, which provides templates for designing many types of charts. Using Aspose.Slides, you can create both regular charts (based on popular chart types) and custom charts.
Use the [ChartType](https://reference.aspose.com/slides/net/aspose.slides.charts/charttype/) enumeration under the [Aspose.Slides.Charts](https://reference.aspose.com/slides/net/aspose.slides.charts/) namespace. The values in this enumeration correspond to different chart types.
### **Create Clustered Column Charts**
This example uses [AddChart](https://reference.aspose.com/slides/net/aspose.slides/ishapecollection/addchart/) to create a clustered column chart that compares two series across three categories. The series use red and green fills, and individual labels demonstrate category names, series names, and values. Worksheet index 0 refers to the first sheet in the embedded chart workbook.
```csharp
using System.Drawing;
using Aspose.Slides;
using Aspose.Slides.Charts;
using Aspose.Slides.Export;
using var presentation = new Presentation();
var slide = presentation.Slides[0];
var chart = slide.Shapes.AddChart(ChartType.ClusteredColumn, 20, 20, 500, 300);
chart.ChartTitle.AddTextFrameForOverriding("Sample Title");
chart.ChartTitle.TextFrameForOverriding.TextFrameFormat.CenterText = NullableBool.True;
chart.ChartTitle.Height = 20;
chart.HasTitle = true;
var workbook = chart.ChartData.ChartDataWorkbook;
var worksheetIndex = 0;
chart.ChartData.Series.Clear();
chart.ChartData.Categories.Clear();
var seriesNameCell = workbook.GetCell(worksheetIndex, 0, 1, "Series 1");
chart.ChartData.Series.Add(seriesNameCell, chart.Type);
seriesNameCell = workbook.GetCell(worksheetIndex, 0, 2, "Series 2");
chart.ChartData.Series.Add(seriesNameCell, chart.Type);
var categoryCell = workbook.GetCell(worksheetIndex, 1, 0, "Category 1");
chart.ChartData.Categories.Add(categoryCell);
categoryCell = workbook.GetCell(worksheetIndex, 2, 0, "Category 2");
chart.ChartData.Categories.Add(categoryCell);
categoryCell = workbook.GetCell(worksheetIndex, 3, 0, "Category 3");
chart.ChartData.Categories.Add(categoryCell);
var series = chart.ChartData.Series[0];
var valueCell = workbook.GetCell(worksheetIndex, 1, 1, 20);
series.DataPoints.AddDataPointForBarSeries(valueCell);
valueCell = workbook.GetCell(worksheetIndex, 2, 1, 50);
series.DataPoints.AddDataPointForBarSeries(valueCell);
valueCell = workbook.GetCell(worksheetIndex, 3, 1, 30);
series.DataPoints.AddDataPointForBarSeries(valueCell);
series.Format.Fill.FillType = FillType.Solid;
series.Format.Fill.SolidFillColor.Color = Color.Red;
series = chart.ChartData.Series[1];
valueCell = workbook.GetCell(worksheetIndex, 1, 2, 30);
series.DataPoints.AddDataPointForBarSeries(valueCell);
valueCell = workbook.GetCell(worksheetIndex, 2, 2, 10);
series.DataPoints.AddDataPointForBarSeries(valueCell);
valueCell = workbook.GetCell(worksheetIndex, 3, 2, 60);
series.DataPoints.AddDataPointForBarSeries(valueCell);
series.Format.Fill.FillType = FillType.Solid;
series.Format.Fill.SolidFillColor.Color = Color.Green;
var label = series.DataPoints[0].Label;
label.DataLabelFormat.ShowCategoryName = true;
label = series.DataPoints[1].Label;
label.DataLabelFormat.ShowSeriesName = true;
label = series.DataPoints[2].Label;
label.DataLabelFormat.ShowValue = true;
label.DataLabelFormat.ShowSeriesName = true;
label.DataLabelFormat.Separator = "/";
presentation.Save("AsposeChart.pptx", SaveFormat.Pptx);
```
The result:

### **Create Scatter Charts**
Scatter charts (also known as scatter plots or x-y graphs) are often used to check for patterns or demonstrate correlations between two variables.
Use a scatter chart when:
* You have paired numerical data.
* You have two variables that pair well together.
* You want to determine whether the two variables are related.
* You have an independent variable that has multiple values for a dependent variable.
This example plots two sets of x-y values. The first series uses straight lines with star markers, while the second uses smooth lines with circle markers; both use a [Size](https://reference.aspose.com/slides/net/aspose.slides.charts/imarker/size/) of 10. The [Symbol](https://reference.aspose.com/slides/net/aspose.slides.charts/imarker/symbol/) property controls the marker shape.
```csharp
using Aspose.Slides;
using Aspose.Slides.Charts;
using Aspose.Slides.Export;
using var presentation = new Presentation();
var slide = presentation.Slides[0];
var chart = slide.Shapes.AddChart(ChartType.ScatterWithSmoothLines, 20, 20, 500, 300);
var workbook = chart.ChartData.ChartDataWorkbook;
var worksheetIndex = 0;
chart.ChartData.Series.Clear();
var seriesNameCell = workbook.GetCell(worksheetIndex, 1, 1, "Series 1");
chart.ChartData.Series.Add(seriesNameCell, chart.Type);
seriesNameCell = workbook.GetCell(worksheetIndex, 1, 3, "Series 2");
chart.ChartData.Series.Add(seriesNameCell, chart.Type);
var series = chart.ChartData.Series[0];
var xValueCell = workbook.GetCell(worksheetIndex, 2, 1, 1);
var yValueCell = workbook.GetCell(worksheetIndex, 2, 2, 3);
series.DataPoints.AddDataPointForScatterSeries(xValueCell, yValueCell);
xValueCell = workbook.GetCell(worksheetIndex, 3, 1, 2);
yValueCell = workbook.GetCell(worksheetIndex, 3, 2, 10);
series.DataPoints.AddDataPointForScatterSeries(xValueCell, yValueCell);
series.Type = ChartType.ScatterWithStraightLinesAndMarkers;
series.Marker.Size = 10;
series.Marker.Symbol = MarkerStyleType.Star;
series = chart.ChartData.Series[1];
xValueCell = workbook.GetCell(worksheetIndex, 2, 3, 5);
yValueCell = workbook.GetCell(worksheetIndex, 2, 4, 2);
series.DataPoints.AddDataPointForScatterSeries(xValueCell, yValueCell);
xValueCell = workbook.GetCell(worksheetIndex, 3, 3, 3);
yValueCell = workbook.GetCell(worksheetIndex, 3, 4, 1);
series.DataPoints.AddDataPointForScatterSeries(xValueCell, yValueCell);
xValueCell = workbook.GetCell(worksheetIndex, 4, 3, 2);
yValueCell = workbook.GetCell(worksheetIndex, 4, 4, 2);
series.DataPoints.AddDataPointForScatterSeries(xValueCell, yValueCell);
xValueCell = workbook.GetCell(worksheetIndex, 5, 3, 5);
yValueCell = workbook.GetCell(worksheetIndex, 5, 4, 1);
series.DataPoints.AddDataPointForScatterSeries(xValueCell, yValueCell);
series.Marker.Size = 10;
series.Marker.Symbol = MarkerStyleType.Circle;
presentation.Save("AsposeChart.pptx", SaveFormat.Pptx);
```
The result:

### **Create Pie Charts**
Pie charts are best used to show the part-to-whole relationship in data, especially when the data contains categorical labels with numeric values. However, if your data contains many parts or labels, you might want to consider using a bar chart instead.
This example creates a pie chart with three quarterly values. Each slice has a custom fill and border, and the labels display different combinations of values, percentages, and series information. The [FirstSliceAngle](https://reference.aspose.com/slides/net/aspose.slides.charts/ichartseriesgroup/firstsliceangle/) property sets the first slice to start at 180 degrees.
```csharp
using System.Drawing;
using Aspose.Slides;
using Aspose.Slides.Charts;
using Aspose.Slides.Export;
using var presentation = new Presentation();
var slide = presentation.Slides[0];
var chart = slide.Shapes.AddChart(ChartType.Pie, 20, 20, 500, 300);
chart.ChartTitle.AddTextFrameForOverriding("Sample Title");
chart.ChartTitle.TextFrameForOverriding.TextFrameFormat.CenterText = NullableBool.True;
chart.ChartTitle.Height = 20;
chart.HasTitle = true;
chart.ChartData.Series[0].Labels.DefaultDataLabelFormat.ShowValue = true;
var workbook = chart.ChartData.ChartDataWorkbook;
var worksheetIndex = 0;
chart.ChartData.Series.Clear();
chart.ChartData.Categories.Clear();
var categoryCell = workbook.GetCell(0, 1, 0, "1st Qtr");
chart.ChartData.Categories.Add(categoryCell);
categoryCell = workbook.GetCell(0, 2, 0, "2nd Qtr");
chart.ChartData.Categories.Add(categoryCell);
categoryCell = workbook.GetCell(0, 3, 0, "3rd Qtr");
chart.ChartData.Categories.Add(categoryCell);
var seriesNameCell = workbook.GetCell(0, 0, 1, "Series 1");
var series = chart.ChartData.Series.Add(seriesNameCell, chart.Type);
var valueCell = workbook.GetCell(worksheetIndex, 1, 1, 20);
series.DataPoints.AddDataPointForPieSeries(valueCell);
valueCell = workbook.GetCell(worksheetIndex, 2, 1, 50);
series.DataPoints.AddDataPointForPieSeries(valueCell);
valueCell = workbook.GetCell(worksheetIndex, 3, 1, 30);
series.DataPoints.AddDataPointForPieSeries(valueCell);
chart.ChartData.SeriesGroups[0].IsColorVaried = true;
var firstSlice = series.DataPoints[0];
firstSlice.Format.Fill.FillType = FillType.Solid;
firstSlice.Format.Fill.SolidFillColor.Color = Color.Cyan;
firstSlice.Format.Line.FillFormat.FillType = FillType.Solid;
firstSlice.Format.Line.FillFormat.SolidFillColor.Color = Color.Gray;
firstSlice.Format.Line.Width = 3.0;
firstSlice.Format.Line.Style = LineStyle.ThinThick;
firstSlice.Format.Line.DashStyle = LineDashStyle.LargeDash;
var secondSlice = series.DataPoints[1];
secondSlice.Format.Fill.FillType = FillType.Solid;
secondSlice.Format.Fill.SolidFillColor.Color = Color.Brown;
secondSlice.Format.Line.FillFormat.FillType = FillType.Solid;
secondSlice.Format.Line.FillFormat.SolidFillColor.Color = Color.Blue;
secondSlice.Format.Line.Width = 3.0;
secondSlice.Format.Line.Style = LineStyle.Single;
secondSlice.Format.Line.DashStyle = LineDashStyle.LargeDashDot;
var thirdSlice = series.DataPoints[2];
thirdSlice.Format.Fill.FillType = FillType.Solid;
thirdSlice.Format.Fill.SolidFillColor.Color = Color.Coral;
thirdSlice.Format.Line.FillFormat.FillType = FillType.Solid;
thirdSlice.Format.Line.FillFormat.SolidFillColor.Color = Color.Red;
thirdSlice.Format.Line.Width = 2.0;
thirdSlice.Format.Line.Style = LineStyle.ThinThin;
thirdSlice.Format.Line.DashStyle = LineDashStyle.LargeDashDotDot;
var firstLabel = series.DataPoints[0].Label;
firstLabel.DataLabelFormat.ShowValue = true;
var secondLabel = series.DataPoints[1].Label;
secondLabel.DataLabelFormat.ShowValue = true;
secondLabel.DataLabelFormat.ShowLegendKey = true;
secondLabel.DataLabelFormat.ShowPercentage = true;
var thirdLabel = series.DataPoints[2].Label;
thirdLabel.DataLabelFormat.ShowSeriesName = true;
thirdLabel.DataLabelFormat.ShowPercentage = true;
series.Labels.DefaultDataLabelFormat.ShowLeaderLines = true;
chart.ChartData.SeriesGroups[0].FirstSliceAngle = 180;
presentation.Save("PieChart.pptx", SaveFormat.Pptx);
```
The result:

To improve the readability of labels outside the pie, see [Format Leader Lines](https://docs.aspose.com/slides/net/chart-data-label/#format-leader-lines) for an example that positions labels and customizes the lines' color, width, transparency, and dash style.
### **Create Line Charts**
Line charts (also known as line graphs) are best used in situations where you want to demonstrate changes in value over time. Using a line chart, you can compare a large amount of data at once, track changes and trends over time, highlight anomalies in data series, and more.
This example uses [AddChart](https://reference.aspose.com/slides/net/aspose.slides/ishapecollection/addchart/) to create a line chart with the default series and categories, then saves the presentation as PPTX.
```csharp
using Aspose.Slides;
using Aspose.Slides.Charts;
using Aspose.Slides.Export;
using var presentation = new Presentation();
var slide = presentation.Slides[0];
var lineChart = slide.Shapes.AddChart(ChartType.Line, 20, 20, 500, 300);
presentation.Save("lineChart.pptx", SaveFormat.Pptx);
```
By default, points on a line chart are joined by straight continuous lines. If you want the points to be joined by dashes instead, set [DashStyle](https://reference.aspose.com/slides/net/aspose.slides/ilineformat/dashstyle/) to a value from [LineDashStyle](https://reference.aspose.com/slides/net/aspose.slides/linedashstyle/):
```csharp
using Aspose.Slides;
using Aspose.Slides.Charts;
using var presentation = new Presentation();
var slide = presentation.Slides[0];
var lineChart = slide.Shapes.AddChart(ChartType.Line, 20, 20, 500, 300);
foreach (var series in lineChart.ChartData.Series)
{
series.Format.Line.DashStyle = LineDashStyle.Dash;
}
```
The result:

### **Create Tree Map Charts**
Tree map charts are best used for sales data when you want to show the relative size of data categories and quickly draw attention to items that are large contributors within each category.
This example creates a tree map with eight leaves grouped into four stems and two branches. The [SetGroupingItem](https://reference.aspose.com/slides/net/aspose.slides.charts/ichartcategorylevelsmanager/setgroupingitem/) method assigns stems at grouping level 1 and branches at level 2. Values determine the relative rectangle sizes, while category labels and overlapping parent labels identify the hierarchy.
```csharp
using Aspose.Slides;
using Aspose.Slides.Charts;
using Aspose.Slides.Export;
using var presentation = new Presentation();
var slide = presentation.Slides[0];
var chart = slide.Shapes.AddChart(ChartType.Treemap, 20, 20, 500, 300);
chart.ChartData.Categories.Clear();
chart.ChartData.Series.Clear();
var workbook = chart.ChartData.ChartDataWorkbook;
workbook.Clear(0);
// Branch 1
var categoryCell = workbook.GetCell(0, "C1", "Leaf1");
var leaf = chart.ChartData.Categories.Add(categoryCell);
leaf.GroupingLevels.SetGroupingItem(1, "Stem1");
leaf.GroupingLevels.SetGroupingItem(2, "Branch1");
categoryCell = workbook.GetCell(0, "C2", "Leaf2");
chart.ChartData.Categories.Add(categoryCell);
categoryCell = workbook.GetCell(0, "C3", "Leaf3");
leaf = chart.ChartData.Categories.Add(categoryCell);
leaf.GroupingLevels.SetGroupingItem(1, "Stem2");
categoryCell = workbook.GetCell(0, "C4", "Leaf4");
chart.ChartData.Categories.Add(categoryCell);
// Branch 2
categoryCell = workbook.GetCell(0, "C5", "Leaf5");
leaf = chart.ChartData.Categories.Add(categoryCell);
leaf.GroupingLevels.SetGroupingItem(1, "Stem3");
leaf.GroupingLevels.SetGroupingItem(2, "Branch2");
categoryCell = workbook.GetCell(0, "C6", "Leaf6");
chart.ChartData.Categories.Add(categoryCell);
categoryCell = workbook.GetCell(0, "C7", "Leaf7");
leaf = chart.ChartData.Categories.Add(categoryCell);
leaf.GroupingLevels.SetGroupingItem(1, "Stem4");
categoryCell = workbook.GetCell(0, "C8", "Leaf8");
chart.ChartData.Categories.Add(categoryCell);
var series = chart.ChartData.Series.Add(ChartType.Treemap);
series.Labels.DefaultDataLabelFormat.ShowCategoryName = true;
var valueCell = workbook.GetCell(0, "D1", 4);
series.DataPoints.AddDataPointForTreemapSeries(valueCell);
valueCell = workbook.GetCell(0, "D2", 5);
series.DataPoints.AddDataPointForTreemapSeries(valueCell);
valueCell = workbook.GetCell(0, "D3", 3);
series.DataPoints.AddDataPointForTreemapSeries(valueCell);
valueCell = workbook.GetCell(0, "D4", 6);
series.DataPoints.AddDataPointForTreemapSeries(valueCell);
valueCell = workbook.GetCell(0, "D5", 9);
series.DataPoints.AddDataPointForTreemapSeries(valueCell);
valueCell = workbook.GetCell(0, "D6", 9);
series.DataPoints.AddDataPointForTreemapSeries(valueCell);
valueCell = workbook.GetCell(0, "D7", 4);
series.DataPoints.AddDataPointForTreemapSeries(valueCell);
valueCell = workbook.GetCell(0, "D8", 3);
series.DataPoints.AddDataPointForTreemapSeries(valueCell);
series.ParentLabelLayout = ParentLabelLayoutType.Overlapping;
presentation.Save("Treemap.pptx", SaveFormat.Pptx);
```
The result:

### **Create Waterfall Charts**
A waterfall chart shows how positive and negative changes contribute to a final value. For example, a profit breakdown can start with revenue, subtract costs, and add other income. Change columns float between the previous and new running values, while total columns extend from zero to the accumulated value.
The following example uses amounts in thousands of US dollars:
| Category | Workbook value | Column type |
| --- | ---: | --- |
| Revenue | 1000 | Increase |
| Cost of sales | -400 | Decrease |
| Gross profit | 600 | Intermediate total |
| Operating expenses | -200 | Decrease |
| Other income | 50 | Increase |
| Net profit | 450 | Final total |
To mark a point as an intermediate or final total, set its [SetAsTotal](https://reference.aspose.com/slides/net/aspose.slides.charts/chartdatapoint/setastotal/) property to `true`. Supply the actual accumulated amount in that point's workbook cell: `600` for gross profit (`1000 - 400`) and `450` for net profit (`600 - 200 + 50`). The property marks the column as a total; it does not calculate or populate the cell value. Do not use zero as a placeholder or supply another change for a total point. A total column displays the accumulated value without adding it again to the running value.
This complete C# example creates a chart using the `Waterfall` member of [ChartType](https://reference.aspose.com/slides/net/aspose.slides.charts/charttype/), clears the default data, and fills the embedded workbook. Worksheet index `0` selects the first worksheet; column A contains category names and column B contains values. Each value cell is added with [AddDataPointForWaterfallSeries](https://reference.aspose.com/slides/net/aspose.slides.charts/ichartdatapointcollection/adddatapointforwaterfallseries/). The zero-based point indices `2` and `5` identify the intermediate and final totals. Enabling [ShowValue](https://reference.aspose.com/slides/net/aspose.slides.charts/idatalabelformat/showvalue/) displays the amounts on the columns. No input presentation or workbook is required.
```csharp
using Aspose.Slides;
using Aspose.Slides.Charts;
using Aspose.Slides.Export;
using var presentation = new Presentation();
var slide = presentation.Slides[0];
var chart = slide.Shapes.AddChart(ChartType.Waterfall, 20, 20, 680, 200);
chart.HasTitle = true;
chart.ChartTitle.AddTextFrameForOverriding("Profit breakdown (USD thousands)");
chart.ChartTitle.Overlay = false;
chart.HasLegend = false;
chart.ChartData.Series.Clear();
chart.ChartData.Categories.Clear();
var workbook = chart.ChartData.ChartDataWorkbook;
var worksheetIndex = 0;
workbook.Clear(worksheetIndex);
var seriesNameCell = workbook.GetCell(worksheetIndex, 0, 1, "Profit");
var series = chart.ChartData.Series.Add(seriesNameCell, ChartType.Waterfall);
var categories = new[] { "Revenue", "Cost of sales", "Gross profit", "Operating expenses", "Other income", "Net profit" };
var values = new double[] { 1000, -400, 600, -200, 50, 450 };
for (var i = 0; i < categories.Length; i++)
{
var categoryCell = workbook.GetCell(worksheetIndex, i + 1, 0, categories[i]);
chart.ChartData.Categories.Add(categoryCell);
var valueCell = workbook.GetCell(worksheetIndex, i + 1, 1, values[i]);
series.DataPoints.AddDataPointForWaterfallSeries(valueCell);
}
// The third and sixth points represent totals, not additional changes.
series.DataPoints[2].SetAsTotal = true;
series.DataPoints[5].SetAsTotal = true;
series.ShowConnectorLines = true;
series.Labels.DefaultDataLabelFormat.ShowValue = true;
presentation.Save("WaterfallChart.pptx", SaveFormat.Pptx);
```
Set the series-level [ShowConnectorLines](https://reference.aspose.com/slides/net/aspose.slides.charts/chartseries/showconnectorlines/) property to `true` to show lines linking consecutive columns and make the running value easier to follow. To hide these lines, replace the assignment in the example with `series.ShowConnectorLines = false;` before saving. This changes only the line visibility, not the data or totals.
The saved presentation shows gross profit of 600 and net profit of 450, with both totals drawn from zero:
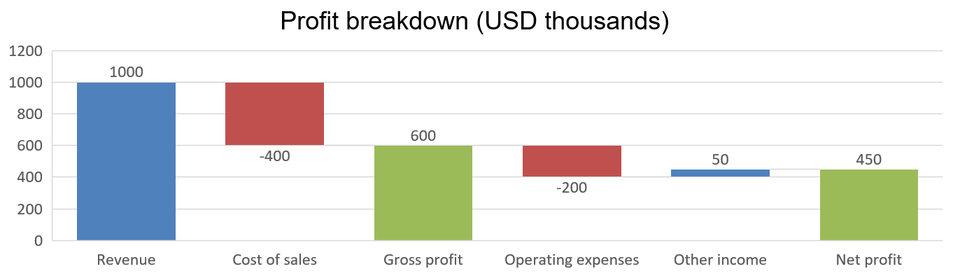
### **Create Stock Charts**
Stock charts are used to display financial data such as open, high, low, and close prices, helping analyze market trends and volatility. They offer essential insights into stock performance, aiding investors and analysts in making informed decisions.
This example creates an open-high-low-close chart with four series in that order and three categories. The [HasUpDownBars](https://reference.aspose.com/slides/net/aspose.slides.charts/iupdownbarsmanager/hasupdownbars/) property enables up/down bars, and [HiLowLinesFormat](https://reference.aspose.com/slides/net/aspose.slides.charts/ichartseriesgroup/hilowlinesformat/) controls the high-low lines that show the price ranges, while the individual series lines and minor horizontal gridlines are hidden.
The [UpDownBars](https://reference.aspose.com/slides/net/aspose.slides.charts/ichartseriesgroup/updownbars/) manager exposes separate [UpBarsFormat](https://reference.aspose.com/slides/net/aspose.slides.charts/iupdownbarsmanager/upbarsformat/) and [DownBarsFormat](https://reference.aspose.com/slides/net/aspose.slides.charts/iupdownbarsmanager/downbarsformat/) objects. Use each object's [Fill](https://reference.aspose.com/slides/net/aspose.slides.charts/iformat/fill/) and [Line](https://reference.aspose.com/slides/net/aspose.slides.charts/iformat/line/) properties to set its fill and outline independently. This example uses green bars with dark-green outlines for rising intervals and orange-red bars with dark-red outlines for falling intervals.
Provide numeric values for all four series at each category, with High and Low enclosing Open and Close. The bars compare Close with Open **within the same category**, not with the previous category: A falls from 72 to 25, while B rises from 25 to 38 and C rises from 38 to 50. Equal Open and Close values produce no visible filled interval. Up/down bars span Open–Close; high-low lines span Low–High. These bars belong to the series group and are not ordinary bar-chart series.
This formatting also works with [Line and LineWithMarkers](https://reference.aspose.com/slides/net/aspose.slides.charts/charttype/) charts containing at least two series in the same group and corresponding numeric values for each category. For these non-stacked line charts, up/down bars compare the first and last series: a higher last value produces an up bar, and a lower last value produces a down bar. Reversing those series reverses the classification. The example below uses [OpenHighLowClose](https://reference.aspose.com/slides/net/aspose.slides.charts/charttype/); do not assume that other stock, stacked-line, or 3D variants use the same data arrangement or interval interpretation.
```csharp
using System.Drawing;
using Aspose.Slides;
using Aspose.Slides.Charts;
using Aspose.Slides.Export;
using var presentation = new Presentation();
var slide = presentation.Slides[0];
var chart = slide.Shapes.AddChart(ChartType.OpenHighLowClose, 20, 20, 500, 150, false);
var workbook = chart.ChartData.ChartDataWorkbook;
var categoryCell = workbook.GetCell(0, 1, 0, "A");
chart.ChartData.Categories.Add(categoryCell);
categoryCell = workbook.GetCell(0, 2, 0, "B");
chart.ChartData.Categories.Add(categoryCell);
categoryCell = workbook.GetCell(0, 3, 0, "C");
chart.ChartData.Categories.Add(categoryCell);
var seriesNameCell = workbook.GetCell(0, 0, 1, "Open");
chart.ChartData.Series.Add(seriesNameCell, ChartType.OpenHighLowClose);
seriesNameCell = workbook.GetCell(0, 0, 2, "High");
chart.ChartData.Series.Add(seriesNameCell, ChartType.OpenHighLowClose);
seriesNameCell = workbook.GetCell(0, 0, 3, "Low");
chart.ChartData.Series.Add(seriesNameCell, ChartType.OpenHighLowClose);
seriesNameCell = workbook.GetCell(0, 0, 4, "Close");
chart.ChartData.Series.Add(seriesNameCell, ChartType.OpenHighLowClose);
var series = chart.ChartData.Series[0];
var valueCell = workbook.GetCell(0, 1, 1, 72);
series.DataPoints.AddDataPointForStockSeries(valueCell);
valueCell = workbook.GetCell(0, 2, 1, 25);
series.DataPoints.AddDataPointForStockSeries(valueCell);
valueCell = workbook.GetCell(0, 3, 1, 38);
series.DataPoints.AddDataPointForStockSeries(valueCell);
series = chart.ChartData.Series[1];
valueCell = workbook.GetCell(0, 1, 2, 172);
series.DataPoints.AddDataPointForStockSeries(valueCell);
valueCell = workbook.GetCell(0, 2, 2, 57);
series.DataPoints.AddDataPointForStockSeries(valueCell);
valueCell = workbook.GetCell(0, 3, 2, 57);
series.DataPoints.AddDataPointForStockSeries(valueCell);
series = chart.ChartData.Series[2];
valueCell = workbook.GetCell(0, 1, 3, 12);
series.DataPoints.AddDataPointForStockSeries(valueCell);
valueCell = workbook.GetCell(0, 2, 3, 12);
series.DataPoints.AddDataPointForStockSeries(valueCell);
valueCell = workbook.GetCell(0, 3, 3, 13);
series.DataPoints.AddDataPointForStockSeries(valueCell);
series = chart.ChartData.Series[3];
valueCell = workbook.GetCell(0, 1, 4, 25);
series.DataPoints.AddDataPointForStockSeries(valueCell);
valueCell = workbook.GetCell(0, 2, 4, 38);
series.DataPoints.AddDataPointForStockSeries(valueCell);
valueCell = workbook.GetCell(0, 3, 4, 50);
series.DataPoints.AddDataPointForStockSeries(valueCell);
var upDownBars = chart.ChartData.SeriesGroups[0].UpDownBars;
upDownBars.HasUpDownBars = true;
upDownBars.UpBarsFormat.Fill.FillType = FillType.Solid;
upDownBars.UpBarsFormat.Fill.SolidFillColor.Color = Color.LimeGreen;
upDownBars.UpBarsFormat.Line.FillFormat.FillType = FillType.Solid;
upDownBars.UpBarsFormat.Line.FillFormat.SolidFillColor.Color = Color.DarkGreen;
upDownBars.UpBarsFormat.Line.Width = 2;
upDownBars.DownBarsFormat.Fill.FillType = FillType.Solid;
upDownBars.DownBarsFormat.Fill.SolidFillColor.Color = Color.OrangeRed;
upDownBars.DownBarsFormat.Line.FillFormat.FillType = FillType.Solid;
upDownBars.DownBarsFormat.Line.FillFormat.SolidFillColor.Color = Color.DarkRed;
upDownBars.DownBarsFormat.Line.Width = 2;
chart.ChartData.SeriesGroups[0].HiLowLinesFormat.Line.FillFormat.FillType = FillType.Solid;
foreach (var stockSeries in chart.ChartData.Series)
{
stockSeries.Format.Line.FillFormat.FillType = FillType.NoFill;
}
chart.Axes.VerticalAxis.MinorGridLinesFormat.Line.FillFormat.FillType = FillType.NoFill;
presentation.Save("Stock-chart.pptx", SaveFormat.Pptx);
```
The result, exported from PowerPoint:

### **Create Box and Whisker Charts**
Box and whisker charts are used to display the distribution of data by summarizing key statistical measures, such as the median, quartiles, and potential outliers. They are particularly useful in exploratory data analysis and statistical studies to quickly understand data variability and identify any anomalies.
This example creates a box and whisker chart from six values. The [QuartileMethod](https://reference.aspose.com/slides/net/aspose.slides.charts/ichartseries/quartilemethod/) property selects the exclusive quartile calculation. The example also enables mean lines, mean markers, inner points, and outlier points.
```csharp
using Aspose.Slides;
using Aspose.Slides.Charts;
using Aspose.Slides.Export;
using var presentation = new Presentation();
var slide = presentation.Slides[0];
var chart = slide.Shapes.AddChart(ChartType.BoxAndWhisker, 20, 20, 500, 300);
chart.ChartData.Categories.Clear();
chart.ChartData.Series.Clear();
var workbook = chart.ChartData.ChartDataWorkbook;
workbook.Clear(0);
var categoryCell = workbook.GetCell(0, "A1", "Category 1");
chart.ChartData.Categories.Add(categoryCell);
categoryCell = workbook.GetCell(0, "A2", "Category 2");
chart.ChartData.Categories.Add(categoryCell);
categoryCell = workbook.GetCell(0, "A3", "Category 3");
chart.ChartData.Categories.Add(categoryCell);
categoryCell = workbook.GetCell(0, "A4", "Category 4");
chart.ChartData.Categories.Add(categoryCell);
categoryCell = workbook.GetCell(0, "A5", "Category 5");
chart.ChartData.Categories.Add(categoryCell);
categoryCell = workbook.GetCell(0, "A6", "Category 6");
chart.ChartData.Categories.Add(categoryCell);
var series = chart.ChartData.Series.Add(ChartType.BoxAndWhisker);
series.QuartileMethod = QuartileMethodType.Exclusive;
series.ShowMeanLine = true;
series.ShowMeanMarkers = true;
series.ShowInnerPoints = true;
series.ShowOutlierPoints = true;
var valueCell = workbook.GetCell(0, "B1", 15);
series.DataPoints.AddDataPointForBoxAndWhiskerSeries(valueCell);
valueCell = workbook.GetCell(0, "B2", 41);
series.DataPoints.AddDataPointForBoxAndWhiskerSeries(valueCell);
valueCell = workbook.GetCell(0, "B3", 16);
series.DataPoints.AddDataPointForBoxAndWhiskerSeries(valueCell);
valueCell = workbook.GetCell(0, "B4", 10);
series.DataPoints.AddDataPointForBoxAndWhiskerSeries(valueCell);
valueCell = workbook.GetCell(0, "B5", 23);
series.DataPoints.AddDataPointForBoxAndWhiskerSeries(valueCell);
valueCell = workbook.GetCell(0, "B6", 16);
series.DataPoints.AddDataPointForBoxAndWhiskerSeries(valueCell);
presentation.Save("BoxAndWhisker.pptx", SaveFormat.Pptx);
```
### **Create Funnel Charts**
Funnel charts are used to visualize processes that involve sequential stages, where the volume of data decreases as it progresses from one step to the next. They are especially helpful for analyzing conversion rates, identifying bottlenecks, and tracking the efficiency of sales or marketing processes.
This example uses [AddChart](https://reference.aspose.com/slides/net/aspose.slides/ishapecollection/addchart/) to add a funnel chart to the first slide of an existing presentation. It replaces the default data with six categories and values ranging from 50 to 500, then saves the updated presentation. The input presentation must contain at least one slide.
```csharp
using Aspose.Slides;
using Aspose.Slides.Charts;
using Aspose.Slides.Export;
using var presentation = new Presentation("test.pptx");
var slide = presentation.Slides[0];
var chart = slide.Shapes.AddChart(ChartType.Funnel, 50, 50, 500, 400);
chart.ChartData.Categories.Clear();
chart.ChartData.Series.Clear();
var workbook = chart.ChartData.ChartDataWorkbook;
workbook.Clear(0);
var categoryCell = workbook.GetCell(0, "A1", "Category 1");
chart.ChartData.Categories.Add(categoryCell);
categoryCell = workbook.GetCell(0, "A2", "Category 2");
chart.ChartData.Categories.Add(categoryCell);
categoryCell = workbook.GetCell(0, "A3", "Category 3");
chart.ChartData.Categories.Add(categoryCell);
categoryCell = workbook.GetCell(0, "A4", "Category 4");
chart.ChartData.Categories.Add(categoryCell);
categoryCell = workbook.GetCell(0, "A5", "Category 5");
chart.ChartData.Categories.Add(categoryCell);
categoryCell = workbook.GetCell(0, "A6", "Category 6");
chart.ChartData.Categories.Add(categoryCell);
var series = chart.ChartData.Series.Add(ChartType.Funnel);
var valueCell = workbook.GetCell(0, "B1", 50);
series.DataPoints.AddDataPointForFunnelSeries(valueCell);
valueCell = workbook.GetCell(0, "B2", 100);
series.DataPoints.AddDataPointForFunnelSeries(valueCell);
valueCell = workbook.GetCell(0, "B3", 200);
series.DataPoints.AddDataPointForFunnelSeries(valueCell);
valueCell = workbook.GetCell(0, "B4", 300);
series.DataPoints.AddDataPointForFunnelSeries(valueCell);
valueCell = workbook.GetCell(0, "B5", 400);
series.DataPoints.AddDataPointForFunnelSeries(valueCell);
valueCell = workbook.GetCell(0, "B6", 500);
series.DataPoints.AddDataPointForFunnelSeries(valueCell);
presentation.Save("Funnel.pptx", SaveFormat.Pptx);
```
The result:

### **Create Sunburst Charts**
Sunburst charts are used to visualize hierarchical data, displaying levels as concentric rings. They help illustrate part-to-whole relationships and are ideal for representing nested categories and subcategories in a clear, compact format.
This example creates a sunburst chart with eight leaves grouped into four stems and two branches. The [SetGroupingItem](https://reference.aspose.com/slides/net/aspose.slides.charts/ichartcategorylevelsmanager/setgroupingitem/) method assigns stems at grouping level 1 and branches at level 2. Category labels identify the segments, and the values determine their relative sizes.
```csharp
using Aspose.Slides;
using Aspose.Slides.Charts;
using Aspose.Slides.Export;
using var presentation = new Presentation();
var slide = presentation.Slides[0];
var chart = slide.Shapes.AddChart(ChartType.Sunburst, 20, 20, 500, 300);
chart.ChartData.Categories.Clear();
chart.ChartData.Series.Clear();
var workbook = chart.ChartData.ChartDataWorkbook;
workbook.Clear(0);
// Branch 1
var categoryCell = workbook.GetCell(0, "C1", "Leaf1");
var leaf = chart.ChartData.Categories.Add(categoryCell);
leaf.GroupingLevels.SetGroupingItem(1, "Stem1");
leaf.GroupingLevels.SetGroupingItem(2, "Branch1");
categoryCell = workbook.GetCell(0, "C2", "Leaf2");
chart.ChartData.Categories.Add(categoryCell);
categoryCell = workbook.GetCell(0, "C3", "Leaf3");
leaf = chart.ChartData.Categories.Add(categoryCell);
leaf.GroupingLevels.SetGroupingItem(1, "Stem2");
categoryCell = workbook.GetCell(0, "C4", "Leaf4");
chart.ChartData.Categories.Add(categoryCell);
// Branch 2
categoryCell = workbook.GetCell(0, "C5", "Leaf5");
leaf = chart.ChartData.Categories.Add(categoryCell);
leaf.GroupingLevels.SetGroupingItem(1, "Stem3");
leaf.GroupingLevels.SetGroupingItem(2, "Branch2");
categoryCell = workbook.GetCell(0, "C6", "Leaf6");
chart.ChartData.Categories.Add(categoryCell);
categoryCell = workbook.GetCell(0, "C7", "Leaf7");
leaf = chart.ChartData.Categories.Add(categoryCell);
leaf.GroupingLevels.SetGroupingItem(1, "Stem4");
categoryCell = workbook.GetCell(0, "C8", "Leaf8");
chart.ChartData.Categories.Add(categoryCell);
var series = chart.ChartData.Series.Add(ChartType.Sunburst);
series.Labels.DefaultDataLabelFormat.ShowCategoryName = true;
var valueCell = workbook.GetCell(0, "D1", 4);
series.DataPoints.AddDataPointForSunburstSeries(valueCell);
valueCell = workbook.GetCell(0, "D2", 5);
series.DataPoints.AddDataPointForSunburstSeries(valueCell);
valueCell = workbook.GetCell(0, "D3", 3);
series.DataPoints.AddDataPointForSunburstSeries(valueCell);
valueCell = workbook.GetCell(0, "D4", 6);
series.DataPoints.AddDataPointForSunburstSeries(valueCell);
valueCell = workbook.GetCell(0, "D5", 9);
series.DataPoints.AddDataPointForSunburstSeries(valueCell);
valueCell = workbook.GetCell(0, "D6", 9);
series.DataPoints.AddDataPointForSunburstSeries(valueCell);
valueCell = workbook.GetCell(0, "D7", 4);
series.DataPoints.AddDataPointForSunburstSeries(valueCell);
valueCell = workbook.GetCell(0, "D8", 3);
series.DataPoints.AddDataPointForSunburstSeries(valueCell);
presentation.Save("Sunburst.pptx", SaveFormat.Pptx);
```
The result:

### **Create Histogram Charts**
Histogram charts show how numerical values are distributed across intervals (bins). For monthly reports on order processing times, use the same bin width and thresholds to keep intervals consistent and make distributions easier to compare.
Set the horizontal axis [AggregationType](https://reference.aspose.com/slides/net/aspose.slides.charts/axis/aggregationtype/) to a mode from [AxisAggregationType](https://reference.aspose.com/slides/net/aspose.slides.charts/axisaggregationtype/). [BinWidth](https://reference.aspose.com/slides/net/aspose.slides.charts/axis/binwidth/) applies only to `ByBinWidth`; [NumberOfBins](https://reference.aspose.com/slides/net/aspose.slides.charts/axis/numberofbins/) applies only to `ByNumberOfBins`. Use `Automatic` to let the chart choose the bins.
#### **Use a Fixed Bin Width**
This example groups processing times into 10-minute intervals, with separate bins for times at or below 10 minutes and above 40 minutes. Enable these bins with [IsUnderflowBin](https://reference.aspose.com/slides/net/aspose.slides.charts/axis/isunderflowbin/) and [IsOverflowBin](https://reference.aspose.com/slides/net/aspose.slides.charts/axis/isoverflowbin/). When supplying explicit [UnderflowBin](https://reference.aspose.com/slides/net/aspose.slides.charts/axis/underflowbin/) and [OverflowBin](https://reference.aspose.com/slides/net/aspose.slides.charts/axis/overflowbin/) thresholds, set [IsAutomaticUnderflowBin](https://reference.aspose.com/slides/net/aspose.slides.charts/axis/isautomaticunderflowbin/) and [IsAutomaticOverflowBin](https://reference.aspose.com/slides/net/aspose.slides.charts/axis/isautomaticoverflowbin/) to `false`.
```csharp
using Aspose.Slides;
using Aspose.Slides.Charts;
using Aspose.Slides.Export;
using var presentation = new Presentation();
var slide = presentation.Slides[0];
var chart = slide.Shapes.AddChart(ChartType.Histogram, 20, 20, 680, 200);
chart.HasLegend = false;
chart.HasTitle = false;
chart.ChartData.Categories.Clear();
chart.ChartData.Series.Clear();
var workbook = chart.ChartData.ChartDataWorkbook;
workbook.Clear(0);
var series = chart.ChartData.Series.Add(ChartType.Histogram);
double[] values = { 5, 10, 10, 11, 15, 20, 20, 21, 25, 30, 30, 31, 35, 40, 40, 41, 50 };
for (var i = 0; i < values.Length; i++)
{
var valueCell = workbook.GetCell(0, i, 0, values[i]);
series.DataPoints.AddDataPointForHistogramSeries(valueCell);
}
var axis = chart.Axes.HorizontalAxis;
axis.AggregationType = AxisAggregationType.ByBinWidth;
axis.BinWidth = 10;
axis.IsUnderflowBin = true;
axis.IsAutomaticUnderflowBin = false;
axis.UnderflowBin = 10;
axis.IsOverflowBin = true;
axis.IsAutomaticOverflowBin = false;
axis.OverflowBin = 40;
presentation.Save("Histogram-bin-width.pptx", SaveFormat.Pptx);
```
The presentation displayed in PowerPoint shows bin counts of **3, 4, 4, 4, and 2**. The underflow bin includes `5, 10, 10`, so its threshold is inclusive. The overflow bin includes only `41, 50`, so its threshold is exclusive; both values equal to `40` remain in the preceding interval. The interior bins contain values greater than their lower boundary and less than or equal to their upper boundary.
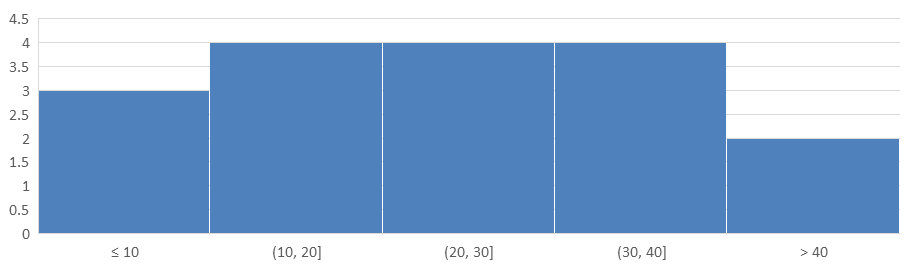
#### **Specify the Number of Bins**
For a fixed level of detail instead of fixed intervals, request five bins for the same data. This example leaves underflow and overflow bins disabled. The chart determines the width from the data range, so boundaries can change between reports.
```csharp
using Aspose.Slides;
using Aspose.Slides.Charts;
using Aspose.Slides.Export;
using var presentation = new Presentation();
var slide = presentation.Slides[0];
var chart = slide.Shapes.AddChart(ChartType.Histogram, 20, 20, 680, 200);
chart.HasLegend = false;
chart.HasTitle = false;
chart.ChartData.Categories.Clear();
chart.ChartData.Series.Clear();
var workbook = chart.ChartData.ChartDataWorkbook;
workbook.Clear(0);
var series = chart.ChartData.Series.Add(ChartType.Histogram);
double[] values = { 5, 10, 10, 11, 15, 20, 20, 21, 25, 30, 30, 31, 35, 40, 40, 41, 50 };
for (var i = 0; i < values.Length; i++)
{
var valueCell = workbook.GetCell(0, i, 0, values[i]);
series.DataPoints.AddDataPointForHistogramSeries(valueCell);
}
var axis = chart.Axes.HorizontalAxis;
axis.AggregationType = AxisAggregationType.ByNumberOfBins;
axis.NumberOfBins = 5;
presentation.Save("Histogram-bin-count.pptx", SaveFormat.Pptx);
```
The five bins have counts of **4, 4, 4, 4, and 1**. Compare this distribution with the fixed-width result above: the input values are identical, but the boundaries differ.

### **Create Radar Charts**
Radar charts are used to display multivariate data in a two-dimensional format, allowing for easy comparison of several variables simultaneously. They are particularly useful for identifying patterns, strengths, and weaknesses across multiple performance metrics or attributes.
This example uses [AddChart](https://reference.aspose.com/slides/net/aspose.slides/ishapecollection/addchart/) to create a radar chart with the default series and categories, then saves the presentation as PPTX.
```csharp
using Aspose.Slides;
using Aspose.Slides.Charts;
using Aspose.Slides.Export;
using var presentation = new Presentation();
var slide = presentation.Slides[0];
slide.Shapes.AddChart(ChartType.Radar, 20, 20, 500, 300);
presentation.Save("Radar-chart.pptx", SaveFormat.Pptx);
```
The result:

### **Create Multi-Category Charts**
Multi-category charts are used to display data that involves more than one categorical grouping, allowing you to compare values across multiple dimensions simultaneously. They are particularly helpful when you need to analyze trends and relationships within complex, multi-layered datasets.
This example creates a clustered column chart with eight categories arranged in four pairs. The [SetGroupingItem](https://reference.aspose.com/slides/net/aspose.slides.charts/ichartcategorylevelsmanager/setgroupingitem/) method gives each pair a shared label at grouping level 1, producing a category axis with both individual and group labels.
```csharp
using Aspose.Slides;
using Aspose.Slides.Charts;
using Aspose.Slides.Export;
using var presentation = new Presentation();
var slide = presentation.Slides[0];
var chart = slide.Shapes.AddChart(ChartType.ClusteredColumn, 20, 20, 500, 300);
chart.ChartData.Series.Clear();
chart.ChartData.Categories.Clear();
var workbook = chart.ChartData.ChartDataWorkbook;
workbook.Clear(0);
var worksheetIndex = 0;
var categoryCell = workbook.GetCell(0, "c2", "A");
var category = chart.ChartData.Categories.Add(categoryCell);
category.GroupingLevels.SetGroupingItem(1, "Group1");
categoryCell = workbook.GetCell(0, "c3", "B");
category = chart.ChartData.Categories.Add(categoryCell);
categoryCell = workbook.GetCell(0, "c4", "C");
category = chart.ChartData.Categories.Add(categoryCell);
category.GroupingLevels.SetGroupingItem(1, "Group2");
categoryCell = workbook.GetCell(0, "c5", "D");
category = chart.ChartData.Categories.Add(categoryCell);
categoryCell = workbook.GetCell(0, "c6", "E");
category = chart.ChartData.Categories.Add(categoryCell);
category.GroupingLevels.SetGroupingItem(1, "Group3");
categoryCell = workbook.GetCell(0, "c7", "F");
category = chart.ChartData.Categories.Add(categoryCell);
categoryCell = workbook.GetCell(0, "c8", "G");
category = chart.ChartData.Categories.Add(categoryCell);
category.GroupingLevels.SetGroupingItem(1, "Group4");
categoryCell = workbook.GetCell(0, "c9", "H");
category = chart.ChartData.Categories.Add(categoryCell);
var seriesNameCell = workbook.GetCell(0, "D1", "Series 1");
var series = chart.ChartData.Series.Add(seriesNameCell, ChartType.ClusteredColumn);
var valueCell = workbook.GetCell(worksheetIndex, "D2", 10);
series.DataPoints.AddDataPointForBarSeries(valueCell);
valueCell = workbook.GetCell(worksheetIndex, "D3", 20);
series.DataPoints.AddDataPointForBarSeries(valueCell);
valueCell = workbook.GetCell(worksheetIndex, "D4", 30);
series.DataPoints.AddDataPointForBarSeries(valueCell);
valueCell = workbook.GetCell(worksheetIndex, "D5", 40);
series.DataPoints.AddDataPointForBarSeries(valueCell);
valueCell = workbook.GetCell(worksheetIndex, "D6", 50);
series.DataPoints.AddDataPointForBarSeries(valueCell);
valueCell = workbook.GetCell(worksheetIndex, "D7", 60);
series.DataPoints.AddDataPointForBarSeries(valueCell);
valueCell = workbook.GetCell(worksheetIndex, "D8", 70);
series.DataPoints.AddDataPointForBarSeries(valueCell);
valueCell = workbook.GetCell(worksheetIndex, "D9", 80);
series.DataPoints.AddDataPointForBarSeries(valueCell);
presentation.Save("AsposeChart.pptx", SaveFormat.Pptx);
```
The result:

#### **Remove a Quarter Label**
Download [quarters.pptx](https://docs.aspose.com/slides/net/create-chart/quarters.pptx) and place it in the working directory. Its chart shows nine months and a single sales series with values from 10 through 18. The category axis has three quarter labels: Q1 spans Jan–Mar, Q2 spans Apr–Jun, and Q3 spans Jul–Sep.
April is the fourth category and the one on which Q2 was explicitly set. Call [DeleteGroupingItem](https://reference.aspose.com/slides/net/aspose.slides.charts/ichartcategorylevelsmanager/deletegroupingitem/) on April's [GroupingLevels](https://reference.aspose.com/slides/net/aspose.slides.charts/ichartcategory/groupinglevels/) collection. The level is relative to April: level 1 is its quarter, and level 0 is the month itself. The method cannot remove the leaf category at level 0.
```csharp
using System;
using System.Linq;
using Aspose.Slides;
using Aspose.Slides.Charts;
using Aspose.Slides.Export;
using (var presentation = new Presentation("quarters.pptx"))
{
var chart = (IChart)presentation.Slides[0].Shapes[0];
var april = chart.ChartData.Categories[3];
april.GroupingLevels.DeleteGroupingItem(1);
presentation.Save("quarters-updated.pptx", SaveFormat.Pptx);
}
using var reopened = new Presentation("quarters-updated.pptx");
var updatedChart = (IChart)reopened.Slides[0].Shapes[0];
var data = updatedChart.ChartData;
Console.WriteLine(string.Join(", ", data.Categories.Select(month => month.AsCell.Value)));
Console.WriteLine(string.Join(", ", data.Series[0].DataPoints.Select(point => point.Value.Data)));
```
The reopened chart prints the original months (`Jan, Feb, Mar, Apr, May, Jun, Jul, Aug, Sep`) and sales values (`10, 11, 12, 13, 14, 15, 16, 17, 18`) in the same order. Open `quarters-updated.pptx` in PowerPoint to compare the axis labels. The Q2 label and the group boundary before April disappear, so Q1 spans January through June. Q3 still begins in July.

### **Create Map Charts**
Map charts are used to visualize geographical data by mapping information to specific locations such as countries, states, or cities. They are particularly useful for analyzing regional trends, demographic data, and spatial distributions in a clear, visually engaging manner.
This example uses [AddChart](https://reference.aspose.com/slides/net/aspose.slides/ishapecollection/addchart/) to create a map chart with the default geographical data and saves it for viewing in PowerPoint.
```csharp
using Aspose.Slides;
using Aspose.Slides.Charts;
using Aspose.Slides.Export;
using var presentation = new Presentation();
var slide = presentation.Slides[0];
var chart = slide.Shapes.AddChart(ChartType.Map, 20, 20, 500, 300);
presentation.Save("mapChart.pptx", SaveFormat.Pptx);
```
The result:

The picture above shows the saved presentation opened in PowerPoint. Aspose.Slides writes the map chart and its data correctly, but it does not draw map charts itself: when a slide holding one is rendered to an image or converted to PDF or SVG, the chart area comes out blank. Other shapes on the same slide are unaffected.
### **Create Combination Charts**
A combination chart (or combo chart) combines two or more chart types in a single graph. This chart lets you highlight, compare, or examine differences between two or more data sets, helping you identify relationships between them.

This example combines two clustered column series with a line series across four categories. The columns use the primary vertical axis, while [PlotOnSecondAxis](https://reference.aspose.com/slides/net/aspose.slides.charts/ichartseries/plotonsecondaxis/) places the line on a secondary vertical axis on the right. The helper functions configure the title, legend, axis labels, and gridlines.
```csharp
using System.Drawing;
using Aspose.Slides;
using Aspose.Slides.Charts;
using Aspose.Slides.Export;
CreateComboChart();
static void CreateComboChart()
{
using var presentation = new Presentation();
var chart = CreateChartWithFirstSeries(presentation.Slides[0]);
AddSecondSeriesToChart(chart);
AddThirdSeriesToChart(chart);
SetPrimaryAxesFormat(chart);
SetSecondaryAxesFormat(chart);
presentation.Save("combo-chart.pptx", SaveFormat.Pptx);
}
static IChart CreateChartWithFirstSeries(ISlide slide)
{
var chart = slide.Shapes.AddChart(ChartType.ClusteredColumn, 50, 50, 600, 400);
chart.HasTitle = true;
chart.ChartTitle.AddTextFrameForOverriding("Chart Title");
chart.ChartTitle.Overlay = false;
var portionFormat = chart.ChartTitle.TextFrameForOverriding.Paragraphs[0].ParagraphFormat.DefaultPortionFormat;
portionFormat.FontBold = NullableBool.False;
portionFormat.FontHeight = 18f;
chart.Legend.Position = LegendPositionType.Bottom;
chart.Legend.TextFormat.PortionFormat.FontHeight = 12f;
chart.ChartData.Series.Clear();
chart.ChartData.Categories.Clear();
var workbook = chart.ChartData.ChartDataWorkbook;
var worksheetIndex = 0;
var categoryCell = workbook.GetCell(worksheetIndex, 1, 0, "Category 1");
chart.ChartData.Categories.Add(categoryCell);
categoryCell = workbook.GetCell(worksheetIndex, 2, 0, "Category 2");
chart.ChartData.Categories.Add(categoryCell);
categoryCell = workbook.GetCell(worksheetIndex, 3, 0, "Category 3");
chart.ChartData.Categories.Add(categoryCell);
categoryCell = workbook.GetCell(worksheetIndex, 4, 0, "Category 4");
chart.ChartData.Categories.Add(categoryCell);
var seriesNameCell = workbook.GetCell(worksheetIndex, 0, 1, "Series 1");
var series = chart.ChartData.Series.Add(seriesNameCell, chart.Type);
series.ParentSeriesGroup.Overlap = -25;
series.ParentSeriesGroup.GapWidth = 220;
var valueCell = workbook.GetCell(worksheetIndex, 1, 1, 4.3);
series.DataPoints.AddDataPointForBarSeries(valueCell);
valueCell = workbook.GetCell(worksheetIndex, 2, 1, 2.5);
series.DataPoints.AddDataPointForBarSeries(valueCell);
valueCell = workbook.GetCell(worksheetIndex, 3, 1, 3.5);
series.DataPoints.AddDataPointForBarSeries(valueCell);
valueCell = workbook.GetCell(worksheetIndex, 4, 1, 4.5);
series.DataPoints.AddDataPointForBarSeries(valueCell);
return chart;
}
static void AddSecondSeriesToChart(IChart chart)
{
var workbook = chart.ChartData.ChartDataWorkbook;
const int worksheetIndex = 0;
var seriesNameCell = workbook.GetCell(worksheetIndex, 0, 2, "Series 2");
var series = chart.ChartData.Series.Add(seriesNameCell, ChartType.ClusteredColumn);
series.ParentSeriesGroup.Overlap = -25;
series.ParentSeriesGroup.GapWidth = 220;
var valueCell = workbook.GetCell(worksheetIndex, 1, 2, 2.4);
series.DataPoints.AddDataPointForBarSeries(valueCell);
valueCell = workbook.GetCell(worksheetIndex, 2, 2, 4.4);
series.DataPoints.AddDataPointForBarSeries(valueCell);
valueCell = workbook.GetCell(worksheetIndex, 3, 2, 1.8);
series.DataPoints.AddDataPointForBarSeries(valueCell);
valueCell = workbook.GetCell(worksheetIndex, 4, 2, 2.8);
series.DataPoints.AddDataPointForBarSeries(valueCell);
}
static void AddThirdSeriesToChart(IChart chart)
{
var workbook = chart.ChartData.ChartDataWorkbook;
const int worksheetIndex = 0;
var seriesNameCell = workbook.GetCell(worksheetIndex, 0, 3, "Series 3");
var series = chart.ChartData.Series.Add(seriesNameCell, ChartType.Line);
var valueCell = workbook.GetCell(worksheetIndex, 1, 3, 2.0);
series.DataPoints.AddDataPointForLineSeries(valueCell);
valueCell = workbook.GetCell(worksheetIndex, 2, 3, 2.0);
series.DataPoints.AddDataPointForLineSeries(valueCell);
valueCell = workbook.GetCell(worksheetIndex, 3, 3, 3.0);
series.DataPoints.AddDataPointForLineSeries(valueCell);
valueCell = workbook.GetCell(worksheetIndex, 4, 3, 5.0);
series.DataPoints.AddDataPointForLineSeries(valueCell);
series.PlotOnSecondAxis = true;
}
static void SetPrimaryAxesFormat(IChart chart)
{
var horizontalAxis = chart.Axes.HorizontalAxis;
horizontalAxis.TextFormat.PortionFormat.FontHeight = 12f;
horizontalAxis.Format.Line.FillFormat.FillType = FillType.NoFill;
SetAxisTitle(horizontalAxis, "X Axis");
var verticalAxis = chart.Axes.VerticalAxis;
verticalAxis.TextFormat.PortionFormat.FontHeight = 12f;
verticalAxis.Format.Line.FillFormat.FillType = FillType.NoFill;
SetAxisTitle(verticalAxis, "Y Axis 1");
var majorGridLinesFormat = verticalAxis.MajorGridLinesFormat.Line.FillFormat;
majorGridLinesFormat.FillType = FillType.Solid;
majorGridLinesFormat.SolidFillColor.Color = Color.FromArgb(217, 217, 217);
}
static void SetSecondaryAxesFormat(IChart chart)
{
var secondaryHorizontalAxis = chart.Axes.SecondaryHorizontalAxis;
secondaryHorizontalAxis.Position = AxisPositionType.Bottom;
secondaryHorizontalAxis.CrossType = CrossesType.Maximum;
secondaryHorizontalAxis.IsVisible = false;
secondaryHorizontalAxis.MajorGridLinesFormat.Line.FillFormat.FillType = FillType.NoFill;
secondaryHorizontalAxis.MinorGridLinesFormat.Line.FillFormat.FillType = FillType.NoFill;
var secondaryVerticalAxis = chart.Axes.SecondaryVerticalAxis;
secondaryVerticalAxis.Position = AxisPositionType.Right;
secondaryVerticalAxis.TextFormat.PortionFormat.FontHeight = 12f;
secondaryVerticalAxis.Format.Line.FillFormat.FillType = FillType.NoFill;
secondaryVerticalAxis.MajorGridLinesFormat.Line.FillFormat.FillType = FillType.NoFill;
secondaryVerticalAxis.MinorGridLinesFormat.Line.FillFormat.FillType = FillType.NoFill;
SetAxisTitle(secondaryVerticalAxis, "Y Axis 2");
}
static void SetAxisTitle(IAxis axis, string axisTitle)
{
axis.HasTitle = true;
axis.Title.Overlay = false;
var titlePortionFormat = axis.Title.AddTextFrameForOverriding(axisTitle).Paragraphs[0].ParagraphFormat.DefaultPortionFormat;
titlePortionFormat.FontBold = NullableBool.False;
titlePortionFormat.FontHeight = 12f;
}
```
## **Update Charts**
Aspose.Slides for .NET enables you to update PowerPoint charts by modifying chart data, formatting, and styling. This functionality simplifies the process of keeping presentations up-to-date with dynamic content and ensures that charts accurately reflect current data and visual standards.
This example updates the chart named "My chart" on the first slide of an existing presentation. It requires two column series with three data points each, with category labels in column A and series names in the first row of the first worksheet. The example uses [GetCell](https://reference.aspose.com/slides/net/aspose.slides.charts/ichartdataworkbook/getcell/) to change workbook cells, updates series values, adds a third series, and changes the chart to clustered cylinders through [Type](https://reference.aspose.com/slides/net/aspose.slides.charts/ichart/type/).
```csharp
using Aspose.Slides;
using Aspose.Slides.Charts;
using Aspose.Slides.Export;
const string chartName = "My chart";
using var presentation = new Presentation("ExistingChart.pptx");
var slide = presentation.Slides[0];
foreach (IShape shape in slide.Shapes)
{
if (shape is IChart chart && chart.Name == chartName)
{
var worksheetIndex = 0;
var workbook = chart.ChartData.ChartDataWorkbook;
workbook.GetCell(worksheetIndex, 1, 0, "Modified Category 1");
workbook.GetCell(worksheetIndex, 2, 0, "Modified Category 2");
var series = chart.ChartData.Series[0];
workbook.GetCell(worksheetIndex, 0, 1, "New_Series 1");
series.DataPoints[0].Value.Data = 90;
series.DataPoints[1].Value.Data = 123;
series.DataPoints[2].Value.Data = 44;
series = chart.ChartData.Series[1];
workbook.GetCell(worksheetIndex, 0, 2, "New_Series 2");
series.DataPoints[0].Value.Data = 23;
series.DataPoints[1].Value.Data = 67;
series.DataPoints[2].Value.Data = 99;
var seriesNameCell = workbook.GetCell(worksheetIndex, 0, 3, "Series 3");
series = chart.ChartData.Series.Add(seriesNameCell, chart.Type);
var valueCell = workbook.GetCell(worksheetIndex, 1, 3, 20);
series.DataPoints.AddDataPointForBarSeries(valueCell);
valueCell = workbook.GetCell(worksheetIndex, 2, 3, 50);
series.DataPoints.AddDataPointForBarSeries(valueCell);
valueCell = workbook.GetCell(worksheetIndex, 3, 3, 30);
series.DataPoints.AddDataPointForBarSeries(valueCell);
chart.Type = ChartType.ClusteredCylinder;
}
}
presentation.Save("AsposeChartModified.pptx", SaveFormat.Pptx);
```
## **Set Data Range for a Chart**
To inspect the range already used by an existing chart, see [Retrieve a Chart's Data Range](https://docs.aspose.com/slides/net/chart-workbook/#retrieve-a-charts-data-range).
Aspose.Slides for .NET provides the flexibility to define a specific data range from a worksheet as the source for your chartРІР‚в„ўs data. This means you can directly map a portion of your worksheet to the chart, allowing you to control which cells contribute to the chart's series and categories. As a result, you can easily update and synchronize your charts with the latest data changes in your worksheet, ensuring that your PowerPoint presentations reflect current and accurate information.
This example uses [SetRange](https://reference.aspose.com/slides/net/aspose.slides.charts/ichartdata/setrange/) to set the data source of the chart named "My chart" on the first slide of an existing presentation to `Sheet1!A1:B4`. The chart workbook must contain that worksheet and a populated range with a series heading in the first row, category labels in column A, and three values in column B.
```csharp
using Aspose.Slides;
using Aspose.Slides.Charts;
using Aspose.Slides.Export;
const string chartName = "My chart";
using var presentation = new Presentation("ExistingChart.pptx");
var slide = presentation.Slides[0];
foreach (IShape shape in slide.Shapes)
{
if (shape is IChart chart && chart.Name == chartName)
{
chart.ChartData.SetRange("Sheet1!A1:B4");
}
}
presentation.Save("SetDataRange.pptx", SaveFormat.Pptx);
```
## **Use Default Markers in Charts**
When you use default markers in charts, each chart series gets a different default marker symbol automatically.
This example uses [AddChart](https://reference.aspose.com/slides/net/aspose.slides/ishapecollection/addchart/) to create a chart with two line series and a legend. The [Marker](https://reference.aspose.com/slides/net/aspose.slides.charts/ichartseries/marker/) settings retain the automatically assigned marker symbols. The first series includes a negative value and a missing value, represented by `null`, while the second has a value for every category.
```csharp
using Aspose.Slides;
using Aspose.Slides.Charts;
using Aspose.Slides.Export;
using var presentation = new Presentation();
var slide = presentation.Slides[0];
var chart = slide.Shapes.AddChart(ChartType.LineWithMarkers, 10, 10, 400, 400);
chart.ChartData.Series.Clear();
chart.ChartData.Categories.Clear();
var workbook = chart.ChartData.ChartDataWorkbook;
var seriesNameCell = workbook.GetCell(0, 0, 1, "Series 1");
var series = chart.ChartData.Series.Add(seriesNameCell, chart.Type);
var categoryCell = workbook.GetCell(0, 1, 0, "C1");
chart.ChartData.Categories.Add(categoryCell);
var valueCell = workbook.GetCell(0, 1, 1, 24);
series.DataPoints.AddDataPointForLineSeries(valueCell);
categoryCell = workbook.GetCell(0, 2, 0, "C2");
chart.ChartData.Categories.Add(categoryCell);
valueCell = workbook.GetCell(0, 2, 1, 23);
series.DataPoints.AddDataPointForLineSeries(valueCell);
categoryCell = workbook.GetCell(0, 3, 0, "C3");
chart.ChartData.Categories.Add(categoryCell);
valueCell = workbook.GetCell(0, 3, 1, -10);
series.DataPoints.AddDataPointForLineSeries(valueCell);
categoryCell = workbook.GetCell(0, 4, 0, "C4");
chart.ChartData.Categories.Add(categoryCell);
valueCell = workbook.GetCell(0, 4, 1, null);
series.DataPoints.AddDataPointForLineSeries(valueCell);
seriesNameCell = workbook.GetCell(0, 0, 2, "Series 2");
var secondSeries = chart.ChartData.Series.Add(seriesNameCell, chart.Type);
valueCell = workbook.GetCell(0, 1, 2, 30);
secondSeries.DataPoints.AddDataPointForLineSeries(valueCell);
valueCell = workbook.GetCell(0, 2, 2, 10);
secondSeries.DataPoints.AddDataPointForLineSeries(valueCell);
valueCell = workbook.GetCell(0, 3, 2, 60);
secondSeries.DataPoints.AddDataPointForLineSeries(valueCell);
valueCell = workbook.GetCell(0, 4, 2, 40);
secondSeries.DataPoints.AddDataPointForLineSeries(valueCell);
chart.HasLegend = true;
chart.Legend.Overlay = false;
presentation.Save("DefaultMarkersInChart.pptx", SaveFormat.Pptx);
```
## **FAQ**
**What chart types are supported by Aspose.Slides for .NET?**
Aspose.Slides for .NET supports a wide range of chart types, including bar, line, pie, area, scatter, histogram, radar, and many more. This flexibility allows you to choose the most appropriate chart type for your data visualization needs.
**How do I add a new chart to a slide?**
To add a chart, you first create an instance of the [Presentation](https://reference.aspose.com/slides/net/aspose.slides/presentation) class, retrieve the desired slide using its index, and then call the method to add a chart, specifying the chart type and initial data. This process integrates the chart directly into your presentation.
**How can I update the data displayed in a chart?**
You can update a chartРІР‚в„ўs data by accessing its data workbook ([IChartDataWorkbook](https://reference.aspose.com/slides/net/aspose.slides.charts/ichartdataworkbook/)), clearing any default series and categories, and then adding your custom data. This allows you to programmatically refresh the chart to reflect the latest data.
**Is it possible to customize the appearance of the chart?**
Yes, Aspose.Slides for .NET provides extensive customization options. You can modify colors, fonts, labels, legends, and other formatting elements to tailor the chartРІР‚в„ўs appearance to your specific design requirements.
Related feature: [Create editable charts](https://docs.aspose.com/slides/features/create-charts/).
## Related articles
- [Create Charts Using VSTO and Aspose.Slides for .NET](https://docs.aspose.com/slides/net/create-a-chart-in-a-microsoft-powerpoint-presentation/)
# Specify Fallback Fonts for Presentations in .NET
> Master Aspose.Slides for .NET to set fallback fonts in PPT, PPTX and ODP files, safeguarding consistent text display on any device or OS.
Source: https://docs.aspose.com/slides/net/create-fallback-font/
Updated: 2026-08-13
## **Overview**
Aspose.Slides allows you to specify fallback fonts for presentation rendering and export operations. Fallback fonts are used when the primary font does not contain glyphs for particular characters.
Fallback behavior is configured through fallback rules. Each rule associates a Unicode range with one or more fonts that may contain the required glyphs. You can define rules for different character ranges, add or remove fallback fonts from existing rules, and organize multiple rules in a fallback font rules collection.
Fallback rules are runtime rendering settings. They do not modify the presentation file itself and are not stored inside the PPTX file.
## **Fallback Rules**
Aspose.Slides supports [IFontFallBackRule](https://reference.aspose.com/slides/net/aspose.slides/iFontFallBackRule) interface and [FontFallBackRule](https://reference.aspose.com/slides/net/aspose.slides/FontFallBackRule) class to specify the rules to apply a fallback font. [FontFallBackRule](https://reference.aspose.com/slides/net/aspose.slides/FontFallBackRule) class represents an association between the specified Unicode range, used for searching missed glyphs, and a list of fonts that may contain proper glyphs:
```c#
using Aspose.Slides;
uint startUnicodeIndex = 0x0B80;
uint endUnicodeIndex = 0x0BFF;
IFontFallBackRule firstRule = new FontFallBackRule(startUnicodeIndex, endUnicodeIndex, "Vijaya");
IFontFallBackRule secondRule = new FontFallBackRule(0x3040, 0x309F, "MS Mincho, MS Gothic");
//Using multiple ways you can add fonts list:
string[] fontNames = new string[] { "Segoe UI Emoji, Segoe UI Symbol", "Arial" };
IFontFallBackRule thirdRule = new FontFallBackRule(0x1F300, 0x1F64F, fontNames);
```
It is also possible to [Remove()](https://reference.aspose.com/slides/net/aspose.slides/ifontfallbackrule/methods/remove) fallback font or [AddFallBackFonts()](https://reference.aspose.com/slides/net/aspose.slides/fontfallbackrule/methods/addfallbackfonts) into existing [FontFallBackRule](https://reference.aspose.com/slides/net/aspose.slides/FontFallBackRule) object.
[FontFallBackRulesCollection](https://reference.aspose.com/slides/net/aspose.slides/fontfallbackrulescollection)[ ](https://reference.aspose.com/slides/net/aspose.slides/fontfallbackrulescollection)can be used to organize a list of [FontFallBackRule](https://reference.aspose.com/slides/net/aspose.slides/FontFallBackRule) objects, when there is a need to specify fallback font replacement rules for multiple Unicode ranges.
- [Create Fallback Fonts Collection](https://docs.aspose.com/slides/net/create-fallback-fonts-collection/)
## **FAQ**
### What is the difference between a fallback font, font substitution, and font embedding?
A fallback font is used only for characters missing in the primary font. [Font substitution](https://docs.aspose.com/slides/net/font-substitution/) replaces the entire specified font with another font. [Font embedding](https://docs.aspose.com/slides/net/embedded-font/) packages the fonts inside the output file so recipients can view the text as intended.
### Are fallback fonts applied during exports like PDF, PNG, or SVG, or only on-screen rendering?
Yes. Fallback affects all [rendering and export operations](https://docs.aspose.com/slides/net/convert-presentation/) where characters must be drawn but are absent in the source font.
### Does configuring fallback change the presentation file itself, and will the setting persist for future openings?
No. Fallback rules are runtime rendering settings in your code; they are not stored inside the .pptx and won’t appear in PowerPoint.
### Does the operating system (Windows/Linux/macOS) and the set of font directories affect fallback selection?
Yes. The engine resolves fonts from available system folders and any [additional paths](https://docs.aspose.com/slides/net/custom-font/) you provide. If a font isn’t physically available, a rule referencing it cannot take effect.
### Does fallback work for WordArt, SmartArt, and charts?
Yes. When these objects contain text, the same glyph-substitution mechanism applies to render missing characters.
## Related articles
- [Manage Fallback Fonts for Presentations in .NET](https://docs.aspose.com/slides/net/fallback-font/)
- [Configure Fallback Font Collections in .NET](https://docs.aspose.com/slides/net/create-fallback-fonts-collection/)
- [Render Presentations with Fallback Fonts in .NET](https://docs.aspose.com/slides/net/render-presentation-with-fallback-font/)
# Configure Fallback Font Collections in .NET
> Set up a fallback fonts collection in Aspose.Slides for .NET to keep text consistent and crisp in PowerPoint and OpenDocument presentations.
Source: https://docs.aspose.com/slides/net/create-fallback-fonts-collection/
Updated: 2026-08-13
## **Overview**
Aspose.Slides allows you to configure a collection of fallback font rules for a presentation. Each fallback rule is represented by the `FontFallBackRule` class and can be added to a `FontFallBackRulesCollection`, which implements the `IFontFallBackRulesCollection` interface.
After creating the collection, you can assign it to the `FontFallBackRulesCollection` property of the presentation’s `FontsManager`. The `FontsManager` controls fonts across the presentation, and each `Presentation` instance has its own `FontsManager`.
Once the `FontsManager` is initialized with the fallback font collection, the specified fallback fonts are applied during presentation rendering.
## **Apply Fallback Rules**
Instances of [FontFallBackRule](https://reference.aspose.com/slides/net/aspose.slides/FontFallBackRule) class can be organized into [FontFallBackRulesCollection](https://reference.aspose.com/slides/net/aspose.slides/fontfallbackrulescollection), that implements [IFontFallBackRulesCollection](https://reference.aspose.com/slides/net/aspose.slides/ifontfallbackrulescollection) interface. It is possible to add or remove rules from the collection.
Then this collection may be assigned to [FontFallBackRulesCollection ](https://reference.aspose.com/slides/net/aspose.slides/fontsmanager/properties/fontfallbackrulescollection)property of the [FontsManager](https://reference.aspose.com/slides/net/aspose.slides/fontsmanager) class. FontsManager controls fonts across the presentation.
Each [Presentation ](https://reference.aspose.com/slides/net/aspose.slides/presentation)has a [FontsManager ](https://reference.aspose.com/slides/net/aspose.slides/presentation/properties/fontsmanager)property with its own instance of the FontsManager class.
Here is an examples how to create fallback fonts rules collection and assign in into the FontsManager of a certain presentation:
```c#
using Aspose.Slides;
using (Presentation presentation = new Presentation())
{
IFontFallBackRulesCollection userRulesList = new FontFallBackRulesCollection();
userRulesList.Add(new FontFallBackRule(0x0B80, 0x0BFF, "Vijaya"));
userRulesList.Add(new FontFallBackRule(0x3040, 0x309F, "MS Mincho, MS Gothic"));
presentation.FontsManager.FontFallBackRulesCollection = userRulesList;
}
```
After FontsManager is initialised with fallback fonts collection, the fallback fonts are applied during presentation rendering.
Read more how to [Render Presentation with Fallback Font](https://docs.aspose.com/slides/net/render-presentation-with-fallback-font/).
## **FAQ**
### Will my fallback rules be embedded into the PPTX file and visible in PowerPoint after saving?
No. Fallback rules are runtime rendering settings; they are not serialized into PPTX and will not appear in PowerPoint's UI.
### Does fallback apply to text inside SmartArt, WordArt, charts, and tables?
Yes. The same glyph-substitution mechanism is used for any text in these objects.
### Does Aspose distribute any fonts with the library?
No. You add and use fonts on your side and under your own responsibility.
### Can replacement/substitution for missing fonts and fallback for missing glyphs be used together?
Yes. They are independent stages of the same font-resolution pipeline: first the engine resolves font availability ([replacement](https://docs.aspose.com/slides/net/font-replacement/)/[substitution](https://docs.aspose.com/slides/net/font-substitution/)), then fallback fills gaps for missing glyphs in available fonts.
## Related articles
- [Render Presentations with Fallback Fonts in .NET](https://docs.aspose.com/slides/net/render-presentation-with-fallback-font/)
- [Manage Fallback Fonts for Presentations in .NET](https://docs.aspose.com/slides/net/fallback-font/)
- [Specify Fallback Fonts for Presentations in .NET](https://docs.aspose.com/slides/net/create-fallback-font/)
# Create Presentations in .NET
> Create presentations in .NET with Aspose.Slides—produce PPT, PPTX, and ODP files, benefit from OpenDocument support, and save them programmatically for reliable results.
Source: https://docs.aspose.com/slides/net/create-presentation/
Updated: 2026-09-26
## **Overview**
This article shows how to create a presentation in Aspose.Slides, add a text box to its first slide, and save the result as a file. It also shows how to create and save an empty presentation, and how to open an existing presentation in a supported format and save it in another format. A short FAQ at the end covers common questions about formats, templates, slide sizing, units, memory usage, threading, licensing, digital signatures, and VBA support.
Before you begin, add Aspose.Slides to your project from NuGet. See [Installation](https://docs.aspose.com/slides/net/installation/) for the package to use on Windows, Linux, and macOS.
## **Create a PowerPoint Presentation**
To create a presentation and put a text box on its first slide, follow these steps:
1. Create an instance of the [Presentation](https://reference.aspose.com/slides/net/aspose.slides/presentation/) class. A new presentation already contains one empty slide.
1. Get that slide from the [Slides](https://reference.aspose.com/slides/net/aspose.slides/presentation/slides/) collection by its index, 0.
1. Add a rectangle with the [AddAutoShape](https://reference.aspose.com/slides/net/aspose.slides/ishapecollection/addautoshape/) method and set its [text](https://reference.aspose.com/slides/net/aspose.slides/itextframe/text/).
1. Save the presentation as a PPTX file with the [Save](https://reference.aspose.com/slides/net/aspose.slides/presentation/save/) method.
```c#
using Aspose.Slides;
using Aspose.Slides.Export;
using var presentation = new Presentation();
var slide = presentation.Slides[0];
var shape = slide.Shapes.AddAutoShape(ShapeType.Rectangle, 50, 50, 400, 100);
shape.TextFrame.Text = "Hello, Aspose.Slides!";
presentation.Save("hello.pptx", SaveFormat.Pptx);
```
The rectangle's top-left corner is 50 points from the left edge and 50 points from the top edge of the slide, and the rectangle is 400 points wide and 100 points high. The saved file contains one slide with that rectangle and its text. Without a license, Aspose.Slides also adds an evaluation watermark to every slide it saves; see [Licensing](https://docs.aspose.com/slides/net/licensing/).
## **Create and Save a Presentation**
(), MotionPathPointsType.None, false);
motion.Path = path;
effect.Behaviors.Add(motion);
presentation.Save("motion.pptx", SaveFormat.Pptx);
```
`motion.pptx` contains one motion behavior with three path commands. The following file-editing examples use this known structure.
### **Compare Absolute and Relative Coordinates**
These two path objects describe the same route. The absolute command ends at (0.3, 0.1); the relative command adds (0.1, 0.1) to the current position, (0.2, 0).
Both paths start at the same position. For the relative line, add its X and Y offsets to the current position to obtain the endpoint; for the absolute line, read the endpoint directly. Switching the flag without converting the coordinates would describe a different route.
```csharp
using System.Drawing;
using Aspose.Slides.Animation;
var absolutePath = new MotionPath();
absolutePath.Add(MotionCommandPathType.MoveTo, new[] { new PointF(0.2f, 0) }, MotionPathPointsType.Auto, false);
absolutePath.Add(MotionCommandPathType.LineTo, new[] { new PointF(0.3f, 0.1f) }, MotionPathPointsType.Corner, false);
var relativePath = new MotionPath();
relativePath.Add(MotionCommandPathType.MoveTo, new[] { new PointF(0.2f, 0) }, MotionPathPointsType.Auto, false);
relativePath.Add(MotionCommandPathType.LineTo, new[] { new PointF(0.1f, 0.1f) }, MotionPathPointsType.Corner, true);
```
Assign either path to a motion behavior to use it in a presentation. The final Boolean argument selects relative coordinates for that command.
[](https://docs.aspose.com/slides/net/custom-animation/visual-custom-animation-2b5c03cbaedf.svg)
*Both path commands end at (0.3, 0.1). The absolute command specifies that endpoint; the relative command adds (0.1, 0.1) to the current position (0.2, 0). The diagrams show path-coordinate arithmetic, not measured slide pixels.*
### **Replace a Line with a Curve**
Open `motion.pptx` and replace its line command with a cubic curve. Supply the two control points first, followed by the endpoint.
The starting position is supplied by the preceding command. The first two points shape the curve, while the third is its destination; they are not three successive destinations. Updating the command type, point-editing type, and point array together keeps the segment consistent with its new geometry.
```csharp
using System.Drawing;
using Aspose.Slides;
using Aspose.Slides.Animation;
using Aspose.Slides.Export;
using var presentation = new Presentation("motion.pptx");
var effect = presentation.Slides[0].Timeline.MainSequence[0];
var motion = (IMotionEffect)effect.Behaviors[0];
var path = motion.Path;
path[1].CommandType = MotionCommandPathType.CurveTo;
path[1].PointsType = MotionPathPointsType.CurveSmooth;
path[1].Points = new[] { new PointF(0.1f, 0), new PointF(0.2f, 0.1f), new PointF(0.3f, 0.1f) };
presentation.Save("curve.pptx", SaveFormat.Pptx);
```
The path in `curve.pptx` still has three commands; its middle command now defines a curve.
## **Inspect and Edit a Saved Path**
Each [IMotionCmdPath](https://reference.aspose.com/slides/net/aspose.slides.animation/imotioncmdpath/) exposes [Points](https://reference.aspose.com/slides/net/aspose.slides.animation/imotioncmdpath/points/), [CommandType](https://reference.aspose.com/slides/net/aspose.slides.animation/imotioncmdpath/commandtype/), [PointsType](https://reference.aspose.com/slides/net/aspose.slides.animation/imotioncmdpath/pointstype/), and [IsRelative](https://reference.aspose.com/slides/net/aspose.slides.animation/imotioncmdpath/isrelative/). The following examples use the known three-command path in `motion.pptx`. For arbitrary input, locate the intended effect and check command types and point counts before editing by index.
### **Read Commands and Coordinates**
Read the path without changing it. End and close-loop commands need no points, so allow for a null point array.
The output pairs each command with its relative-coordinate flag before listing its points. This lets you distinguish an endpoint from an offset before modifying the path. A curve would list three points, whereas the straight line in this file lists only one.
```csharp
using System;
using Aspose.Slides;
using Aspose.Slides.Animation;
using var presentation = new Presentation("motion.pptx");
var effect = presentation.Slides[0].Timeline.MainSequence[0];
var motion = (IMotionEffect)effect.Behaviors[0];
var path = motion.Path;
foreach (var segment in path)
{
Console.WriteLine($"{segment.CommandType}, relative: {segment.IsRelative}");
if (segment.Points != null)
foreach (var point in segment.Points)
Console.WriteLine($"X={point.X}, Y={point.Y}");
}
```
The listing contains a starting point, an absolute line ending at (0.25, 0), and an end command.
### **Change an Endpoint**
Open `motion.pptx` and replace the line's point array to move its endpoint.
In the input file, index 0 is the starting command and index 1 is the line. Replacing the line's single point changes its destination without changing its command type, timing, or position in the collection. Because the command uses absolute coordinates, the new pair specifies a position rather than an added offset.
```csharp
using System.Drawing;
using Aspose.Slides;
using Aspose.Slides.Animation;
using Aspose.Slides.Export;
using var presentation = new Presentation("motion.pptx");
var effect = presentation.Slides[0].Timeline.MainSequence[0];
var motion = (IMotionEffect)effect.Behaviors[0];
motion.Path[1].Points = new[] { new PointF(0.4f, 0.1f) };
presentation.Save("motion-endpoint.pptx", SaveFormat.Pptx);
```
The line in `motion-endpoint.pptx` ends at (0.4, 0.1); the original file is unchanged.
### **Replace a Segment**
Use [Insert](https://reference.aspose.com/slides/net/aspose.slides.animation/imotionpath/insert/) and [RemoveAt](https://reference.aspose.com/slides/net/aspose.slides.animation/imotionpath/removeat/) to replace the line in `motion.pptx`. Inserting shifts the old line to index 2.
This demonstrates replacing a command object rather than editing its existing coordinates. After insertion, the collection temporarily contains the starting command, the new line, the old line, and the end command. Removing index 2 discards the old line and leaves the new route in place.
```csharp
using System.Drawing;
using Aspose.Slides;
using Aspose.Slides.Animation;
using Aspose.Slides.Export;
using var presentation = new Presentation("motion.pptx");
var effect = presentation.Slides[0].Timeline.MainSequence[0];
var motion = (IMotionEffect)effect.Behaviors[0];
var path = motion.Path;
path.Insert(1, MotionCommandPathType.LineTo, new[] { new PointF(0.2f, 0.1f) }, MotionPathPointsType.Corner, false);
path.RemoveAt(2);
presentation.Save("motion-edited.pptx", SaveFormat.Pptx);
```
The saved path still has three commands, with the new line ending at (0.2, 0.1) and the end command last.
## **Modify and Verify an Existing Behavior**
When the behavior's index is unknown, select it by type. This example opens `rotation.pptx`, finds its [IRotationEffect](https://reference.aspose.com/slides/net/aspose.slides.animation/irotationeffect/), changes the angle, and checks the saved value after reopening.
The type check allows the loop to skip behaviors that are not rotations. The second load reads the saved file into a separate presentation object, so the comparison checks persisted data rather than the value still held in memory. This example still assumes the known effect is first in the main sequence; selecting a behavior by type does not locate the correct effect in an arbitrary presentation.
```csharp
using System;
using Aspose.Slides;
using Aspose.Slides.Animation;
using Aspose.Slides.Export;
using var presentation = new Presentation("rotation.pptx");
var effect = presentation.Slides[0].Timeline.MainSequence[0];
foreach (var behavior in effect.Behaviors)
{
if (behavior is IRotationEffect rotation)
rotation.By = 180f;
}
presentation.Save("rotation-edited.pptx", SaveFormat.Pptx);
using var reopened = new Presentation("rotation-edited.pptx");
var savedEffect = reopened.Slides[0].Timeline.MainSequence[0];
foreach (var behavior in savedEffect.Behaviors)
{
if (behavior is IRotationEffect rotation)
Console.WriteLine($"Rotation preserved: {Math.Abs(rotation.By - 180f) < 0.001f}");
}
```
The output is `Rotation preserved: True`. Apply the same type-checking pattern to other behaviors. For a complete preservation check, compare the target shape, effect, behavior types and order, timing, and path commands. Use a numeric tolerance for floating-point values. For a presentation with an unknown animation layout, see [Read Shape Animations](https://docs.aspose.com/slides/net/shape-animation/#read-shape-animations) for traversal of main and interactive sequences.
## **Behavior Order, Presets, and Playback**
The order in [IBehaviorCollection](https://reference.aspose.com/slides/net/aspose.slides.animation/ibehaviorcollection/) is the stored order of an effect's operations. It is not a playlist in which every behavior automatically waits for the preceding one. Timing and the enclosing effect determine scheduling. Behaviors can overlap, and operations on the same property may interact through [Additive](https://reference.aspose.com/slides/net/aspose.slides.animation/ibehavior/additive/) and [Accumulate](https://reference.aspose.com/slides/net/aspose.slides.animation/ibehavior/accumulate/). Do not use collection reordering alone to schedule “move, then rotate”; use explicit timing or separate effects as described in [Shape Animation](https://docs.aspose.com/slides/net/shape-animation/).
The effect's [Type](https://reference.aspose.com/slides/net/aspose.slides.animation/ieffect/type/) and [Subtype](https://reference.aspose.com/slides/net/aspose.slides.animation/ieffect/subtype/) describe its preset. They are not a complete description of an edited behavior tree. Choose the preset and subtype before customizing behaviors: changing the preset can rebuild the collection and discard your custom operations. For example, changing a customized Spin effect to Fade can replace its rotation behavior with set and filter behaviors. Inspect the collection again after changing a preset or subtype. Clearing preset behaviors can also remove visibility or initialization operations that the preset needs. The examples deliberately use visible shapes and replace the behaviors; they do not reconstruct every preset's implementation.
## **Format Compatibility**
A preserved behavior tree does not guarantee identical playback in every viewer or export renderer. Check the saved data and the rendered output separately.
| Format or output | What to verify |
| --- | --- |
| PPTX | Use as the primary format for these examples. Reopen it to verify the editable behavior tree, then check playback in the intended PowerPoint version. |
| PPT | Legacy binary representation can differ from PPTX. Test a separate save-and-reopen cycle and playback; do not infer support for every custom combination from successful PPTX output. |
| PDF, PNG, JPEG, and other static slide images | Contain a static slide representation, not a playable behavior timeline or a guaranteed final animation frame. |
| [HTML5](https://docs.aspose.com/slides/net/export-to-html5/) | Can play supported animations when shape animation is enabled in the export options. Test custom combinations in the browser. |
| [Animated GIF](https://docs.aspose.com/slides/net/convert-powerpoint-to-animated-gif/) | Stores rendered frames, not editable behaviors or click-triggered interaction. Check the actual rendered motion. |
| [Video](https://docs.aspose.com/slides/net/convert-powerpoint-to-video/) | Render animation frames and encode them as video. Support is limited to the renderer's [supported animations and effects](https://docs.aspose.com/slides/net/convert-powerpoint-to-video/#supported-animations-and-effects); commands and interactive events do not become an editable timeline. |
## **FAQ**
**Why does my effect contain behaviors before I add any?**
Creating a predefined effect can create its underlying operations. Inspect them before deciding whether to extend the preset or replace its behaviors.
**Does moving a behavior to the beginning make it play first?**
Not necessarily. Collection order is not a substitute for timing. Check delays, durations, and interactions between operations on the same property.
**Why does an end command have no points?**
It marks the end of the path and needs no coordinates. Check for a null point array when inspecting a path read from a file.
**Is a successful round trip sufficient to confirm playback?**
No. Reopening confirms preservation of the properties you checked. Test the slideshow player or animated export separately to confirm its visual behavior.
# Customize PowerPoint Fonts in .NET
> Customize fonts in PowerPoint slides with Aspose.Slides for .NET to keep your presentations sharp and consistent across any device.
Source: https://docs.aspose.com/slides/net/custom-font/
Updated: 2026-11-07
## **Overview**
Aspose.Slides allows you to use custom fonts in presentations without installing them on the operating system. You can load fonts from custom folders, provide fonts for a specific presentation through document-level font sources, or load external fonts directly from binary data.
Loaded fonts are used when a presentation is rendered or exported, for example to PDF, images, and other supported formats. This helps keep the presentation output consistent across different environments. The article also explains how to inspect the font folders used by Aspose.Slides and how to clear the font cache after working with external fonts.
Registering custom fonts for rendering is separate from embedding fonts into a PPTX file. If a font must be stored inside the presentation itself, use the font embedding features explicitly.
A presentation theme can reference different font families for individual writing systems. These mappings store font names but do not install or load the font files. See [Script-Specific Theme Fonts](https://docs.aspose.com/slides/net/script-specific-font-mappings/) to manage the mappings, and use the loading options below to make the referenced fonts available for consistent rendering.
Aspose Slides allows you to load these fonts using the [FontsLoader.LoadExternalFonts](https://reference.aspose.com/slides/net/aspose.slides/fontsloader/loadexternalfonts/) method:
* TrueType (.ttf) and TrueType Collection (.ttc) fonts. See [TrueType](https://en.wikipedia.org/wiki/TrueType).
* OpenType (.otf) fonts. See [OpenType](https://en.wikipedia.org/wiki/OpenType).
## **Load Custom Fonts**
Aspose.Slides allows you to load fonts used in a presentation without installing them on the system. This affects export output—such as PDF, images, and other supported formats—so the resulting documents look consistent across environments. Fonts are loaded from custom directories.
1. Specify one or more folders that contain the font files.
2. Call the static [FontsLoader.LoadExternalFonts](https://reference.aspose.com/slides/net/aspose.slides/fontsloader/loadexternalfonts/) method to load fonts from those folders.
3. Load and render/export the presentation.
4. Call [FontsLoader.ClearCache](https://reference.aspose.com/slides/net/aspose.slides/fontsloader/clearcache/) to clear the font cache.
The following code example demonstrates the font loading process:
```cs
using Aspose.Slides;
using Aspose.Slides.Export;
// Define folders that contain custom font files.
string[] fontFolders = { @"C:\MyFonts", @"D:\Fonts" };
// Load custom fonts from the specified folders.
FontsLoader.LoadExternalFonts(fontFolders);
using Presentation presentation = new Presentation("sample.pptx");
// Render/export the presentation (e.g., to PDF, images, or other formats) using the loaded fonts.
presentation.Save("output.pdf", SaveFormat.Pdf);
// Clear the font cache after the work is finished.
FontsLoader.ClearCache();
```
[FontsLoader.LoadExternalFonts](https://reference.aspose.com/slides/net/aspose.slides/fontsloader/loadexternalfonts/) adds additional folders to the font search paths, but it does not change the font initialization order.
Fonts are initialized in this order:
1. The default operating system font path.
1. The paths loaded via [FontsLoader](https://reference.aspose.com/slides/net/aspose.slides/fontsloader/).
## **Get Custom Font Folders**
Aspose.Slides provides the [GetFontFolders](https://reference.aspose.com/slides/net/aspose.slides/fontsloader/getfontfolders/) method to allow you to find font folders. This method returns folders added through the `LoadExternalFonts` method and system font folders.
This C# code shows you how to use [GetFontFolders](https://reference.aspose.com/slides/net/aspose.slides/fontsloader/getfontfolders/):
```c#
using Aspose.Slides;
// This line outputs the folders that are checked for font files.
// Those are folders added through the LoadExternalFonts method and system font folders.
string[] fontFolders = FontsLoader.GetFontFolders();
```
## **Specify Custom Fonts Used with a Presentation**
Aspose.Slides provides the [DocumentLevelFontSources](https://reference.aspose.com/slides/net/aspose.slides/loadoptions/documentlevelfontsources/) property to allow you to specify external fonts that will be used with the presentation.
This C# code shows you how to use the [DocumentLevelFontSources](https://reference.aspose.com/slides/net/aspose.slides/loadoptions/documentlevelfontsources/) property:
```c#
using Aspose.Slides;
byte[] memoryFont1 = File.ReadAllBytes("customfonts\\CustomFont1.ttf");
byte[] memoryFont2 = File.ReadAllBytes("customfonts\\CustomFont2.ttf");
LoadOptions loadOptions = new LoadOptions();
loadOptions.DocumentLevelFontSources.FontFolders = new string[] { "assets\\fonts", "global\\fonts" };
loadOptions.DocumentLevelFontSources.MemoryFonts = new byte[][] { memoryFont1, memoryFont2 };
using (IPresentation presentation = new Presentation("MyPresentation.pptx", loadOptions))
{
// Work with the presentation
// CustomFont1, CustomFont2, and fonts from assets\fonts & global\fonts folders and their subfolders are available to the presentation
}
```
## **Manage Fonts Externally**
Aspose.Slides provides the [LoadExternalFont](https://reference.aspose.com/slides/net/aspose.slides/fontsloader/loadexternalfont/)(byte[] data) method to allow you to load external fonts from binary data.
This C# code demonstrates the byte array font loading process:
```c#
using Aspose.Slides;
FontsLoader.LoadExternalFont(File.ReadAllBytes("ARIALN.TTF"));
FontsLoader.LoadExternalFont(File.ReadAllBytes("ARIALNBI.TTF"));
FontsLoader.LoadExternalFont(File.ReadAllBytes("ARIALNI.TTF"));
try
{
using (Presentation pres = new Presentation(""))
{
// external font loaded during the presentation lifetime
}
}
finally
{
FontsLoader.ClearCache();
}
```
To let a matching registered font take priority during export without removing the embedded font, see [Prefer Registered Fonts over Embedded Fonts](https://docs.aspose.com/slides/net/font-selection-sequence/#prefer-registered-fonts-over-embedded-fonts) (.NET 26.11 or later).
## **FAQ**
**Do custom fonts affect export to all formats (PDF, PNG, SVG, HTML)?**
Yes. Connected fonts are used by the renderer across all export formats.
**Are custom fonts automatically embedded into the resulting PPTX?**
No. Registering a font for rendering is not the same as embedding it into a PPTX. If you need the font carried inside the presentation file, you must use the explicit [embedding features](https://docs.aspose.com/slides/net/embedded-font/).
**Can I control fallback behavior when a custom font lacks certain glyphs?**
Yes. Configure [font substitution](https://docs.aspose.com/slides/net/font-substitution/), [replacement rules](https://docs.aspose.com/slides/net/font-replacement/), and [fallback sets](https://docs.aspose.com/slides/net/fallback-font/) to define exactly which font is used when the requested glyph is missing.
**Can I use fonts in Linux/Docker containers without installing them system-wide?**
Yes. Point to your own font folders or load fonts from byte arrays. This removes any dependency on system font directories in the container image.
> **Note for Linux/Docker**: When calling `FontsLoader.LoadExternalFonts`, ensure that every entry in the `directories` array contains a non-empty path to an existing directory. If an environment variable used to construct a font path is undefined or empty, Aspose.Slides may attempt to resolve the empty value as a full path, resulting in `System.ArgumentException`.
**What about licensing—can I embed any custom font without restrictions?**
You are responsible for font licensing compliance. Terms vary; some licenses prohibit embedding or commercial use. Always review the font’s EULA before distributing outputs.
## Related features
- [Load fonts from a folder](https://docs.aspose.com/slides/features/custom-fonts/)
# Customize Presentation Shapes in .NET
> Create and customize shapes in PowerPoint presentations with Aspose.Slides for .NET: geometry paths, curved corners, composite shapes.
Source: https://docs.aspose.com/slides/net/custom-shape/
Updated: 2026-10-22
## **Overview**
This article explains how to customize presentation shapes in Aspose.Slides by editing shape geometry through edit points and geometry paths. It shows how to work with [GeometryPath](https://reference.aspose.com/slides/net/aspose.slides/geometrypath/) and [IGeometryPath](https://reference.aspose.com/slides/net/aspose.slides/igeometrypath/) to modify existing shapes, perform basic path editing operations, add or remove points, and apply updated geometry back to a shape.
It also demonstrates how to create custom and composite shapes, build shapes with curved corners, determine whether a shape geometry is closed, and use the legacy conversion between [GeometryPath](https://reference.aspose.com/slides/net/aspose.slides/geometrypath/) and [GraphicsPath](https://learn.microsoft.com/en-us/dotnet/api/system.drawing.drawing2d.graphicspath) for additional geometry customization scenarios.
## **Change a Shape Using Edit Points**
In PowerPoint, you can use **Edit Points** to modify a square:
* Move a corner inward or outward.
* Adjust the curvature at a point.
* Add new points.
Editing points lets you modify a shape’s outline or use an existing shape as the basis for a new one.
## **Shape Editing Tips**
When editing PowerPoint shapes, keep these concepts in mind:
* A shape (or its path) can either be closed or open.
* A shape’s path consists of anchor points connected by segments.
* A segment can be straight or curved. Anchor points and control handles determine its shape.
* Anchor points exist as corner points, straight points, or smooth points:
* At a corner point, adjoining segments can meet at an angle.
* At a smooth point, the two control handles are aligned and equally distant from the anchor point.
* At a straight point, the two control handles are aligned but can be different distances from the anchor point.
* Moving anchor points or adjusting their handles changes the shape’s outline.
To edit PowerPoint shapes through edit points, **Aspose.Slides** provides the [GeometryPath](https://reference.aspose.com/slides/net/aspose.slides/geometrypath/) class and [IGeometryPath](https://reference.aspose.com/slides/net/aspose.slides/igeometrypath/) interface.
* A [GeometryPath](https://reference.aspose.com/slides/net/aspose.slides/geometrypath/) instance represents a geometry path of the [IGeometryShape](https://reference.aspose.com/slides/net/aspose.slides/igeometryshape/) object.
* To retrieve the [GeometryPath](https://reference.aspose.com/slides/net/aspose.slides/geometrypath/) from the [IGeometryShape](https://reference.aspose.com/slides/net/aspose.slides/igeometryshape/) instance, you can use the [IGeometryShape.GetGeometryPaths](https://reference.aspose.com/slides/net/aspose.slides/igeometryshape/getgeometrypaths/) method.
* To set the [GeometryPath](https://reference.aspose.com/slides/net/aspose.slides/geometrypath/) for a shape, you can use these methods: [IGeometryShape.SetGeometryPath](https://reference.aspose.com/slides/net/aspose.slides/igeometryshape/setgeometrypath/) for shapes with a single path and [IGeometryShape.SetGeometryPaths](https://reference.aspose.com/slides/net/aspose.slides/igeometryshape/setgeometrypaths/) for shapes with multiple paths.
* To add segments, you can use the methods under [IGeometryPath](https://reference.aspose.com/slides/net/aspose.slides/igeometrypath/).
* Using the [IGeometryPath.Stroke](https://reference.aspose.com/slides/net/aspose.slides/igeometrypath/stroke/) and [IGeometryPath.FillMode](https://reference.aspose.com/slides/net/aspose.slides/igeometrypath/fillmode/) properties, you can set the appearance for a geometry path.
* Using the [IGeometryPath.PathData](https://reference.aspose.com/slides/net/aspose.slides/igeometrypath/pathdata/) property, you can retrieve the geometry path of a [GeometryShape](https://reference.aspose.com/slides/net/aspose.slides/geometryshape/) as an array of path segments.
* In legacy versions that support the conversion methods below, you can convert [GeometryPath](https://reference.aspose.com/slides/net/aspose.slides/geometrypath/) to [GraphicsPath](https://learn.microsoft.com/en-us/dotnet/api/system.drawing.drawing2d.graphicspath).
* Use [GeometryPathToGraphicsPath](https://reference.aspose.com/slides/net/aspose.slides.util/shapeutil/geometrypathtographicspath/) and [GraphicsPathToGeometryPath](https://reference.aspose.com/slides/net/aspose.slides.util/shapeutil/graphicspathtogeometrypath/) methods (from the [ShapeUtil](https://reference.aspose.com/slides/net/aspose.slides.util/shapeutil/) class) to convert between [GeometryPath](https://reference.aspose.com/slides/net/aspose.slides/geometrypath/) and [GraphicsPath](https://learn.microsoft.com/en-us/dotnet/api/system.drawing.drawing2d.graphicspath).
## **Simple Editing Operations**
Use the following methods to edit a geometry path. Overloads that accept an index insert a segment at that zero-based position in the path’s segment array.
| Operation | Method |
| --- | --- |
| Append or insert a straight line. | [GeometryPath.LineTo](https://reference.aspose.com/slides/net/aspose.slides/geometrypath/lineto/) |
| Append or insert a cubic Bézier curve with two control points and an endpoint. | [GeometryPath.CubicBezierTo](https://reference.aspose.com/slides/net/aspose.slides/geometrypath/cubicbezierto/) |
| Append or insert a quadratic Bézier curve with one control point and an endpoint. | [GeometryPath.QuadraticBezierTo](https://reference.aspose.com/slides/net/aspose.slides/geometrypath/quadraticbezierto/) |
| Append an elliptical arc with the specified dimensions and angles in degrees. | [GeometryPath.ArcTo](https://reference.aspose.com/slides/net/aspose.slides/geometrypath/arcto/) |
| Close the current figure by connecting its endpoint to its starting point. | [GeometryPath.CloseFigure](https://reference.aspose.com/slides/net/aspose.slides/geometrypath/closefigure/) |
| Set the starting point of a figure. | [GeometryPath.MoveTo](https://reference.aspose.com/slides/net/aspose.slides/geometrypath/moveto/) |
| Remove a segment at a zero-based index. | [GeometryPath.RemoveAt](https://reference.aspose.com/slides/net/aspose.slides/geometrypath/removeat/) |
## **Add Custom Points to a Shape**
This example inserts two points into a rectangular shape using [GeometryPath.LineTo](https://reference.aspose.com/slides/net/aspose.slides/geometrypath/lineto/) and applies the edited path with [IGeometryShape.SetGeometryPath](https://reference.aspose.com/slides/net/aspose.slides/igeometryshape/setgeometrypath/). The coordinates are local to the shape: both new points are at its center, 100 points from the left and 50 points from the top. Segment indices 1 and 4 place them on the top and bottom edges, pulling those edges inward.
```csharp
using Aspose.Slides;
using var presentation = new Presentation();
var slide = presentation.Slides[0];
var shape = slide.Shapes.AddAutoShape(ShapeType.Rectangle, 100, 100, 200, 100);
var geometryPath = shape.GetGeometryPaths()[0];
geometryPath.LineTo(100, 50, 1);
geometryPath.LineTo(100, 50, 4);
shape.SetGeometryPath(geometryPath);
```

## **Remove Points from a Shape**
This example changes a heart-shaped outline by removing the segment at zero-based index 2 with [GeometryPath.RemoveAt](https://reference.aspose.com/slides/net/aspose.slides/geometrypath/removeat/). Applying the modified path with [IGeometryShape.SetGeometryPath](https://reference.aspose.com/slides/net/aspose.slides/igeometryshape/setgeometrypath/) updates the shape’s contour.
```csharp
using Aspose.Slides;
using var presentation = new Presentation();
var slide = presentation.Slides[0];
var shape = slide.Shapes.AddAutoShape(ShapeType.Heart, 100, 100, 300, 300);
var path = shape.GetGeometryPaths()[0];
path.RemoveAt(2);
shape.SetGeometryPath(path);
```

## **Create a Custom Shape**
This example builds a five-pointed star with [GeometryPath](https://reference.aspose.com/slides/net/aspose.slides/geometrypath/). Alternating outer and inner radii of 100 and 50 points define the tips and indentations; a 72-degree step spaces the five tips evenly. The path is closed with [GeometryPath.CloseFigure](https://reference.aspose.com/slides/net/aspose.slides/geometrypath/closefigure/) and applied to a rectangular shape using [IGeometryShape.SetGeometryPath](https://reference.aspose.com/slides/net/aspose.slides/igeometryshape/setgeometrypath/), replacing its outline.
```csharp
using System;
using System.Collections.Generic;
using System.Drawing;
using Aspose.Slides;
var points = new List();
var outerRadius = 100f;
var innerRadius = 50f;
var angleStep = 72;
for (var angle = -90; angle < 270; angle += angleStep)
{
var radians = angle * (Math.PI / 180f);
var x = outerRadius * Math.Cos(radians);
var y = outerRadius * Math.Sin(radians);
points.Add(new PointF((float)x + outerRadius, (float)y + outerRadius));
radians = Math.PI * (angle + angleStep / 2) / 180.0;
x = innerRadius * Math.Cos(radians);
y = innerRadius * Math.Sin(radians);
points.Add(new PointF((float)x + outerRadius, (float)y + outerRadius));
}
var starPath = new GeometryPath();
starPath.MoveTo(points[0]);
for (var i = 1; i < points.Count; i++)
{
starPath.LineTo(points[i]);
}
starPath.CloseFigure();
using var presentation = new Presentation();
var slide = presentation.Slides[0];
var shape = slide.Shapes.AddAutoShape(ShapeType.Rectangle, 100, 100, outerRadius * 2, outerRadius * 2);
shape.SetGeometryPath(starPath);
```

## **Create a Composite Custom Shape**
This example defines two closed [GeometryPath](https://reference.aspose.com/slides/net/aspose.slides/geometrypath/) objects for the top and bottom thirds of a shape. Applying both paths with [IGeometryShape.SetGeometryPaths](https://reference.aspose.com/slides/net/aspose.slides/igeometryshape/setgeometrypaths/) creates a single composite shape with a gap across its middle third.
```csharp
using Aspose.Slides;
using var presentation = new Presentation();
var slide = presentation.Slides[0];
var shape = slide.Shapes.AddAutoShape(ShapeType.Rectangle, 100, 100, 200, 100);
var topPath = new GeometryPath();
topPath.MoveTo(0, 0);
topPath.LineTo(shape.Width, 0);
topPath.LineTo(shape.Width, shape.Height / 3);
topPath.LineTo(0, shape.Height / 3);
topPath.CloseFigure();
var bottomPath = new GeometryPath();
bottomPath.MoveTo(0, shape.Height / 3 * 2);
bottomPath.LineTo(shape.Width, shape.Height / 3 * 2);
bottomPath.LineTo(shape.Width, shape.Height);
bottomPath.LineTo(0, shape.Height);
bottomPath.CloseFigure();
shape.SetGeometryPaths(new GeometryPath[] { topPath, bottomPath });
```

## **Create a Custom Shape with Curved Corners**
This example combines straight segments with [GeometryPath.ArcTo](https://reference.aspose.com/slides/net/aspose.slides/geometrypath/arcto/) to create a shape with inward-curved corners. Each corner size sets the arc’s width and height in points, and the -90-degree sweep draws a counterclockwise quarter ellipse. The completed path is applied with [IGeometryShape.SetGeometryPath](https://reference.aspose.com/slides/net/aspose.slides/igeometryshape/setgeometrypath/), and the presentation is saved in PPTX format.
```csharp
using System.Drawing;
using Aspose.Slides;
using Aspose.Slides.Export;
var shapeX = 20f;
var shapeY = 20f;
var shapeWidth = 300f;
var shapeHeight = 200f;
var leftTopSize = 50f;
var rightTopSize = 20f;
var rightBottomSize = 40f;
var leftBottomSize = 10f;
using var presentation = new Presentation();
var slide = presentation.Slides[0];
var topLeft = new PointF(leftTopSize, 0);
var topRight = new PointF(shapeWidth - rightTopSize, 0);
var rightBottom = new PointF(shapeWidth, shapeHeight - rightBottomSize);
var bottomLeft = new PointF(leftBottomSize, shapeHeight);
var leftTop = new PointF(0, leftTopSize);
var geometryPath = new GeometryPath();
geometryPath.MoveTo(topLeft);
geometryPath.LineTo(topRight);
geometryPath.ArcTo(rightTopSize, rightTopSize, 180, -90);
geometryPath.LineTo(rightBottom);
geometryPath.ArcTo(rightBottomSize, rightBottomSize, -90, -90);
geometryPath.LineTo(bottomLeft);
geometryPath.ArcTo(leftBottomSize, leftBottomSize, 0, -90);
geometryPath.LineTo(leftTop);
geometryPath.ArcTo(leftTopSize, leftTopSize, 90, -90);
geometryPath.CloseFigure();
var shape = slide.Shapes.AddAutoShape(ShapeType.Custom, shapeX, shapeY, shapeWidth, shapeHeight);
shape.SetGeometryPath(geometryPath);
presentation.Save("output.pptx", SaveFormat.Pptx);
```
## **Find Out If a Shape Geometry Is Closed**
The following helper checks whether every nonempty geometry path ends with a closing segment. It reads [IGeometryPath.PathData](https://reference.aspose.com/slides/net/aspose.slides/igeometrypath/pathdata/) and compares the final segment’s [IPathSegment.PathCommand](https://reference.aspose.com/slides/net/aspose.slides/ipathsegment/pathcommand/) with [PathCommandType.Close](https://reference.aspose.com/slides/net/aspose.slides/pathcommandtype/). It returns false when there are no nonempty paths. This checks the final command of each path; it does not inspect every subfigure within a path. The example prints `True` for a rectangle.
```csharp
using System;
using Aspose.Slides;
using var presentation = new Presentation();
var slide = presentation.Slides[0];
var shape = slide.Shapes.AddAutoShape(ShapeType.Rectangle, 100, 100, 200, 100);
Console.WriteLine(IsGeometryClosed(shape));
bool IsGeometryClosed(IGeometryShape geometryShape)
{
var hasNonemptyPath = false;
foreach (var geometryPath in geometryShape.GetGeometryPaths())
{
var segments = geometryPath.PathData;
if (segments.Length == 0)
{
continue;
}
hasNonemptyPath = true;
var lastSegment = segments[segments.Length - 1];
if (lastSegment.PathCommand != PathCommandType.Close)
{
return false;
}
}
return hasNonemptyPath;
}
```
## **Extract and Inspect Shape Elements**
Use [IGeometryShape.CreateShapeElements](https://reference.aspose.com/slides/net/aspose.slides/igeometryshape/createshapeelements/) to inspect an existing shape as elements containing path points and point types. Cast each returned [IShapeElement](https://reference.aspose.com/slides/net/aspose.slides/ishapeelement/) to [ShapeElement](https://reference.aspose.com/slides/net/aspose.slides/shapeelement/) to read its [PathPoints](https://reference.aspose.com/slides/net/aspose.slides/shapeelement/pathpoints/) and [PathTypes](https://reference.aspose.com/slides/net/aspose.slides/shapeelement/pathtypes/) arrays. This representation is useful for contour analysis or passing geometry to custom drawing tools.
The example opens a presentation, finds the first geometry shape directly on the first slide, and prints its path segments. Use a presentation containing a shape with straight and curved segments to see both kinds of output. It does not search inside groups.
```csharp
using System;
using System.Linq;
using Aspose.Slides;
using var presentation = new Presentation("input.pptx");
var slide = presentation.Slides[0];
var shape = slide.Shapes.OfType().FirstOrDefault();
if (shape == null)
{
Console.WriteLine("No geometry shape found on the first slide.");
return;
}
foreach (IShapeElement element in shape.CreateShapeElements())
{
var shapeElement = (ShapeElement)element;
var points = shapeElement.PathPoints;
var types = shapeElement.PathTypes;
Console.WriteLine("Shape element:");
for (var i = 0; i < points.Length; i++)
{
var pointType = types[i] & 0x07; // Keep the segment type, excluding flags.
switch (pointType)
{
case 0:
Console.WriteLine($"Start figure at {points[i]}");
break;
case 1:
Console.WriteLine($"Line to {points[i]}");
break;
case 3:
Console.WriteLine($"Cubic Bezier: controls {points[i]}, {points[i + 1]}; end {points[i + 2]}");
i += 2; // Consume both control points and the endpoint.
break;
}
if ((types[i] & 0x80) != 0)
{
Console.WriteLine("Close subpath back to its starting point.");
}
}
}
```
The arrays correspond by index: `points[i]` is a point and `types[i]` describes its role. Type `0` starts a figure, and type `1` draws a line from the previous point to the current point. A cubic Bézier segment starts at the previous endpoint and uses three consecutive type-`3` entries: two control points followed by the new endpoint. The loop consumes these three entries together and checks the endpoint for closure.
Point types also contain flags. Mask with `0x07` to identify the segment type, and test `0x80` separately to detect a closed subpath. For example, `129` (`0x81`) means a line endpoint that closes a subpath, and `131` (`0x83`) means a Bézier endpoint that closes one. Comparing the raw value only with `1` or `3` would miss these cases. Other flags, such as dash (`0x10`) and marker (`0x20`), do not change the base segment type.
**Coordinates and transformations.** Points are measured in points (1/72 inch), with X increasing to the right and Y increasing downward. For an ungrouped shape, the extracted coordinates already include its [X](https://reference.aspose.com/slides/net/aspose.slides/shape/x/) and [Y](https://reference.aspose.com/slides/net/aspose.slides/shape/y/) position and reflect its current width and height. For example, an unrotated rectangle at `(100, 200)` with size `120 × 80` has contour bounds `(100, 200)`–`(220, 280)`. Do not add the shape's position again. Subtract its X and Y to obtain coordinates relative to its unrotated frame.
The extracted points do not apply the shape's [Rotation](https://reference.aspose.com/slides/net/aspose.slides/shape/rotation/) or horizontal and vertical flips. To reproduce the displayed contour, apply those transformations around the shape's center. For grouped shapes, also account for the group coordinate mapping and transformations; do not assume that the extracted points are the final rendered slide coordinates or apply a translation or scale twice if it is already reflected in the child's frame.
**Inspection versus editing.** Extracted arrays describe the contour; changing them does not update the original shape. Choose this approach when your analysis or drawing code needs point/type arrays. Use [GetGeometryPaths](https://reference.aspose.com/slides/net/aspose.slides/igeometryshape/getgeometrypaths/) when you need geometry commands in the shape's local coordinate system or want to edit its geometry. Apply edited paths through [SetGeometryPath](https://reference.aspose.com/slides/net/aspose.slides/igeometryshape/setgeometrypath/) or [SetGeometryPaths](https://reference.aspose.com/slides/net/aspose.slides/igeometryshape/setgeometrypaths/).
## **Convert GeometryPath to GraphicsPath (System.Drawing.Drawing2D)**
The following example requires a legacy Aspose.Slides for .NET assembly that supports [ShapeUtil.GraphicsPathToGeometryPath](https://reference.aspose.com/slides/net/aspose.slides.util/shapeutil/graphicspathtogeometrypath/), such as version 25.10, and a Windows environment with `System.Drawing.Common`. The conversion methods were removed in [version 25.11](https://releases.aspose.com/slides/net/release-notes/2025/aspose-slides-for-net-25-11-release-notes/).
This example combines a rectangular outline with text converted to geometry. The outline’s [IGeometryPath.FillMode](https://reference.aspose.com/slides/net/aspose.slides/igeometrypath/fillmode/) is set to disable its fill. A [GraphicsPath](https://learn.microsoft.com/en-us/dotnet/api/system.drawing.drawing2d.graphicspath) stores the text outline, which [ShapeUtil.GraphicsPathToGeometryPath](https://reference.aspose.com/slides/net/aspose.slides.util/shapeutil/graphicspathtogeometrypath/) converts to a filled geometry path. Applying both paths with [IGeometryShape.SetGeometryPaths](https://reference.aspose.com/slides/net/aspose.slides/igeometryshape/setgeometrypaths/) produces a single shape containing the rectangle and text. For conversion in the opposite direction, use [ShapeUtil.GeometryPathToGraphicsPath](https://reference.aspose.com/slides/net/aspose.slides.util/shapeutil/geometrypathtographicspath/).
```csharp
using System.Drawing;
using System.Drawing.Drawing2D;
using Aspose.Slides;
using Aspose.Slides.Util;
using var presentation = new Presentation();
var slide = presentation.Slides[0];
var shape = slide.Shapes.AddAutoShape(ShapeType.Rectangle, 100, 100, 300, 100);
var originalPath = shape.GetGeometryPaths()[0];
originalPath.FillMode = PathFillModeType.None;
using var graphicsPath = new GraphicsPath();
using var fontFamily = new FontFamily("Arial");
using var stringFormat = StringFormat.GenericDefault;
graphicsPath.AddString("Text in shape", fontFamily, (int)FontStyle.Bold, 40, new PointF(10, 10), stringFormat);
var textPath = ShapeUtil.GraphicsPathToGeometryPath(graphicsPath);
textPath.FillMode = PathFillModeType.Normal;
shape.SetGeometryPaths(new[] { originalPath, textPath });
```

## **FAQ**
**What will happen to the fill and outline after replacing the geometry?**
The style remains with the shape; only the contour changes. The fill and outline are automatically applied to the new geometry.
**How do I correctly rotate a custom shape along with its geometry?**
Use the shape’s [Rotation](https://reference.aspose.com/slides/net/aspose.slides/shape/rotation/) property; the geometry rotates with the shape because it’s bound to the shape’s own coordinate system.
**Can I convert a custom shape to an image to "lock in" the result?**
Yes. Export the required [slide](https://docs.aspose.com/slides/net/convert-powerpoint-to-png/) area or the [shape](https://docs.aspose.com/slides/net/create-shape-thumbnails/) itself to a raster format; this simplifies further work with complex geometries.
## Related features
- [Edit shape geometry](https://docs.aspose.com/slides/features/shape-geometry/)
# Customize Data Points in Treemap and Sunburst Charts in .NET
> Learn how to create hierarchical data and customize levels, labels, and colors in Treemap and Sunburst charts with Aspose.Slides for .NET.
Source: https://docs.aspose.com/slides/net/data-points-of-treemap-and-sunburst-chart/
Updated: 2026-08-05
## **Overview**
Treemap and Sunburst charts display the same kind of hierarchical data, but they use different layouts. A Treemap draws the hierarchy as nested rectangles whose areas represent leaf values. A Sunburst draws it as concentric rings: top-level groups are near the center, and leaf categories are on the outer ring.
In Aspose.Slides for .NET, each numeric value is an [IChartDataPoint](https://reference.aspose.com/slides/net/aspose.slides.charts/ichartdatapoint/). Its [IChartDataPoint.DataPointLevels](https://reference.aspose.com/slides/net/aspose.slides.charts/ichartdatapoint/datapointlevels/) collection provides access to the leaf and its parent groups. This article explains that mapping and shows how to create and format both chart types from the same sample data.


## **Understand Categories, Data Points, and Levels**
The sample used below has three category levels and one numeric series:
| Branch | Stem | Leaf | Revenue |
| --- | --- | --- | ---: |
| Consumer | Computers | Laptops | 12 |
| Consumer | Computers | Desktops | 8 |
| Consumer | Mobile | Phones | 15 |
| Consumer | Mobile | Tablets | 6 |
| Business | Services | Consulting | 10 |
| Business | Services | Support | 7 |
| Business | Software | Licenses | 11 |
| Business | Software | Subscriptions | 14 |
Each row creates one leaf category and one data point. The category grouping levels describe the path from that leaf to its parents. For the first row, the path is `Consumer > Computers > Laptops`.
The indexes in [IChartDataPoint.DataPointLevels](https://reference.aspose.com/slides/net/aspose.slides.charts/ichartdatapoint/datapointlevels/) run from the leaf upward:
| `DataPointLevels` index | Logical level | Treemap representation | Sunburst representation |
| ---: | --- | --- | --- |
| `0` | Leaf | Value rectangle | Outer-ring segment |
| `1` | Stem | Parent rectangle or header | Middle-ring segment |
| `2` | Branch | Top-level rectangle or header | Inner-ring segment |
This order is the same for both chart types even though their visual layouts differ. A parent segment is shared by several leaves. To format it, use the corresponding level of the first data point in that group. For example, the `Consumer` branch starts with the `Laptops` point, while the `Software` stem starts with the `Licenses` point. Keeping references to those points is clearer and safer than using unexplained expressions such as `dataPoints[0]` or `dataPoints[6]`.
## **Create and Customize Both Chart Types**
The following complete example creates a Treemap on the first slide and a Sunburst on the second slide. It builds the hierarchy, displays the value for `Tablets`, applies fixed colors to selected levels, formats a branch label, and saves the presentation.
```csharp
using System.Drawing;
using Aspose.Slides;
using Aspose.Slides.Charts;
using Aspose.Slides.Export;
using var presentation = new Presentation();
var treemapSlide = presentation.Slides[0];
AddHierarchyChart(treemapSlide, ChartType.Treemap);
var layoutSlide = presentation.LayoutSlides[0];
var sunburstSlide = presentation.Slides.AddEmptySlide(layoutSlide);
AddHierarchyChart(sunburstSlide, ChartType.Sunburst);
presentation.Save("hierarchical-charts.pptx", SaveFormat.Pptx);
static void AddHierarchyChart(ISlide slide, ChartType chartType)
{
const int worksheetIndex = 0;
const int leafLevelIndex = 0;
const int stemLevelIndex = 1;
const int branchLevelIndex = 2;
var chart = slide.Shapes.AddChart(chartType, 40, 40, 640, 440);
chart.HasTitle = false;
chart.HasLegend = false;
chart.ChartData.Categories.Clear();
chart.ChartData.Series.Clear();
var workbook = chart.ChartData.ChartDataWorkbook;
workbook.Clear(worksheetIndex);
// Add the leaf categories. A grouping item is set only when a new group begins;
// the following categories remain in that group until another item is set.
var laptopsCategory = AddCategory(1, "Laptops");
laptopsCategory.GroupingLevels.SetGroupingItem(stemLevelIndex, "Computers");
laptopsCategory.GroupingLevels.SetGroupingItem(branchLevelIndex, "Consumer");
AddCategory(2, "Desktops");
var phonesCategory = AddCategory(3, "Phones");
phonesCategory.GroupingLevels.SetGroupingItem(stemLevelIndex, "Mobile");
AddCategory(4, "Tablets");
var consultingCategory = AddCategory(5, "Consulting");
consultingCategory.GroupingLevels.SetGroupingItem(stemLevelIndex, "Services");
consultingCategory.GroupingLevels.SetGroupingItem(branchLevelIndex, "Business");
AddCategory(6, "Support");
var licensesCategory = AddCategory(7, "Licenses");
licensesCategory.GroupingLevels.SetGroupingItem(stemLevelIndex, "Software");
AddCategory(8, "Subscriptions");
var seriesNameCell = workbook.GetCell(worksheetIndex, 0, 3, "Revenue");
var series = chart.ChartData.Series.Add(seriesNameCell, chartType);
series.Labels.DefaultDataLabelFormat.ShowCategoryName = true;
var laptopsDataPoint = AddDataPoint(1, 12);
AddDataPoint(2, 8);
AddDataPoint(3, 15);
var tabletsDataPoint = AddDataPoint(4, 6);
AddDataPoint(5, 10);
AddDataPoint(6, 7);
var licensesDataPoint = AddDataPoint(7, 11);
AddDataPoint(8, 14);
// Show the category and value on the Tablets leaf.
var tabletsLabelFormat = tabletsDataPoint.DataPointLevels[leafLevelIndex]
.Label.DataLabelFormat;
tabletsLabelFormat.ShowCategoryName = true;
tabletsLabelFormat.ShowValue = true;
tabletsLabelFormat.Separator = "\n";
tabletsLabelFormat.NumberFormat = "$0";
// Format the Consumer branch through the first leaf in that branch.
var consumerBranchLevel = laptopsDataPoint.DataPointLevels[branchLevelIndex];
var consumerBranchFill = consumerBranchLevel.Format.Fill;
var consumerBranchColor = Color.FromArgb(31, 78, 121);
SetSolidFill(consumerBranchFill, consumerBranchColor);
var consumerLabelFormat = consumerBranchLevel.Label.DataLabelFormat;
consumerLabelFormat.ShowCategoryName = true;
consumerLabelFormat.ShowSeriesName = false;
var consumerLabelTextFill = consumerLabelFormat.TextFormat.PortionFormat.FillFormat;
SetSolidFill(consumerLabelTextFill, Color.White);
// Format the Software stem through the first leaf in that stem.
var softwareStemLevel = licensesDataPoint.DataPointLevels[stemLevelIndex];
var softwareStemFill = softwareStemLevel.Format.Fill;
var softwareStemColor = Color.FromArgb(112, 173, 71);
SetSolidFill(softwareStemFill, softwareStemColor);
// ParentLabelLayout affects Treemap parent labels; Sunburst uses ring segments.
if (chartType == ChartType.Treemap)
{
series.ParentLabelLayout = ParentLabelLayoutType.Overlapping;
}
IChartCategory AddCategory(int rowIndex, string leafName)
{
var categoryCell = workbook.GetCell(worksheetIndex, rowIndex, 2, leafName);
return chart.ChartData.Categories.Add(categoryCell);
}
IChartDataPoint AddDataPoint(int rowIndex, double value)
{
var valueCell = workbook.GetCell(worksheetIndex, rowIndex, 3, value);
if (chartType == ChartType.Treemap)
{
return series.DataPoints.AddDataPointForTreemapSeries(valueCell);
}
return series.DataPoints.AddDataPointForSunburstSeries(valueCell);
}
static void SetSolidFill(IFillFormat fillFormat, Color color)
{
fillFormat.FillType = FillType.Solid;
fillFormat.SolidFillColor.Color = color;
}
}
```
The category cells and value cells use the same worksheet row, so their collection positions remain aligned. When you work with an existing chart rather than creating one, inspect the category rows first and store named references to the data points and levels you intend to format.
## **Behavior and Practical Considerations**
### **Treemap and Sunburst Differences**
- A Treemap uses area to communicate value and nested rectangles to communicate hierarchy. The [IChartSeries.ParentLabelLayout](https://reference.aspose.com/slides/net/aspose.slides.charts/ichartseries/parentlabellayout/) property controls how parent labels appear in this chart type.
- A Sunburst uses angle to communicate value and ring depth to communicate hierarchy. [IChartSeries.ParentLabelLayout](https://reference.aspose.com/slides/net/aspose.slides.charts/ichartseries/parentlabellayout/) does not control its ring labels.
- Both chart types use the same category grouping levels and the same leaf-to-parent order in `DataPointLevels`, so the data-building and level-formatting code can be shared.
- Parent values are calculated from their descendant leaves. Do not add separate numeric points for branches or stems.
### **Sorting and Segment Order**
The chart layout engine determines the final placement of rectangles and ring segments. Arrange related category rows together before adding them, but do not rely on a specific rectangle position or start angle. If sequence carries meaning, include it in the labels or use a chart type with an explicit category axis.
### **Theme and Fixed Colors**
Unformatted chart levels inherit colors from the presentation theme. The example uses explicit RGB fills for predictable output. If the chart should follow theme changes, use scheme colors instead of fixed RGB values and avoid overriding every level. Also check label contrast after changing a branch or stem fill.
### **Labels and Available Space**
PowerPoint may hide or truncate labels when a segment is too small. Increasing the chart size, shortening category names, or showing fewer label fields usually produces a clearer result. A label can combine the category name, series name, and value through [IDataLabelFormat](https://reference.aspose.com/slides/net/aspose.slides.charts/idatalabelformat/), but enabling every field often makes hierarchical charts difficult to read.
### **Export and Rendering**
Saving to PPTX keeps the chart editable. When Aspose.Slides renders the presentation to PDF or an image, the supported fills and label settings are rendered with the chart. Font substitution and small differences in available layout space can change line wrapping or label visibility, so install the required fonts and verify important export targets.
## **FAQ**
**Why does changing a parent level affect several leaves?**
A branch or stem is a shared visual segment. Its [IChartDataPointLevel](https://reference.aspose.com/slides/net/aspose.slides.charts/ichartdatapointlevel/) can be reached through a descendant leaf, but the formatting belongs to the shared parent segment rather than only to that leaf.
**Why is a data label missing?**
First enable the required fields on the label's [IDataLabelFormat](https://reference.aspose.com/slides/net/aspose.slides.charts/idatalabelformat/) object. Then check whether the segment has enough space. Treemap parent-label layout, chart dimensions, label length, font size, and the number of enabled fields all affect whether a label can be displayed.
**Can I set the exact order or coordinates of segments?**
You can control the source-row order and keep each group contiguous, but you cannot assign exact Treemap rectangles or Sunburst angles. The chart layout engine calculates them from the hierarchy, values, and available space.
**Why do colors change after the presentation theme changes?**
Theme-based fills are designed to follow the presentation palette. Apply explicit RGB colors to the levels that must remain fixed, or keep scheme colors when adapting to a new theme is preferred.
**Will custom formatting be preserved in PDF and image exports?**
Yes, supported chart fills and label settings are included during rendering. For consistent results across systems, make the required fonts available and test the final export size because label fitting is layout-dependent.
## **See Also**
- [Create Treemap charts](https://docs.aspose.com/slides/net/create-chart/#create-tree-map-charts)
- [Create Sunburst charts](https://docs.aspose.com/slides/net/create-chart/#create-sunburst-charts)
- [Export presentation charts](https://docs.aspose.com/slides/net/export-chart/)
- [Manage presentation themes](https://docs.aspose.com/slides/net/presentation-theme/)
# Trust Level Requirements
> Which code access security trust level Aspose.Slides for .NET needs: full trust on .NET Framework, and no trust setting on .NET 6 and later.
Source: https://docs.aspose.com/slides/net/declaration/
Updated: 2026-09-28
## **Overview**
Code access security (CAS) trust levels exist only in .NET Framework. This article explains what they mean for Aspose.Slides for .NET: the library needs full trust on .NET Framework, and on .NET 6 and later there is no trust level to configure.
## **.NET Framework**
Aspose.Slides requires full trust on .NET Framework. It does not run under partial trust, such as an ASP.NET application configured for Medium Trust (`())
{
if (customShow.SlideList != null)
{
// Declare a link list of slide list entries.
LinkedList slideListEntries = new LinkedList();
foreach (SlideListEntry slideListEntry in customShow.SlideList.Elements())
{
// Find the slide reference to remove from the custom show.
if (slideListEntry.Id != null && slideListEntry.Id == slideRelId)
{
slideListEntries.AddLast(slideListEntry);
}
}
// Remove all references to the slide from the custom show.
foreach (SlideListEntry slideListEntry in slideListEntries)
{
customShow.SlideList.RemoveChild(slideListEntry);
}
}
}
}
// Save the modified presentation.
presentation.Save();
// Get the slide part for the specified slide.
SlidePart slidePart = presentationPart.GetPartById(slideRelId) as SlidePart;
// Remove the slide part.
presentationPart.DeletePart(slidePart);
}
// Get the presentation object and pass it to the next CountSlides method.
public static int CountSlides(string presentationFile)
{
// Open the presentation as read-only.
using (PresentationDocument presentationDocument = PresentationDocument.Open(presentationFile, false))
{
// Pass the presentation to the next CountSlide method
// and return the slide count.
return CountSlides(presentationDocument);
}
}
// Count the slides in the presentation.
public static int CountSlides(PresentationDocument presentationDocument)
{
// Check for a null document object.
if (presentationDocument == null)
{
throw new ArgumentNullException("presentationDocument");
}
int slidesCount = 0;
// Get the presentation part of document.
PresentationPart presentationPart = presentationDocument.PresentationPart;
// Get the slide count from the SlideParts.
if (presentationPart != null)
{
slidesCount = presentationPart.SlideParts.Count();
}
// Return the slide count to the previous method.
return slidesCount;
}
```
## **Aspose.Slides**
``` csharp
using Aspose.Slides;
using Aspose.Slides.Export;
string FilePath = @"..\..\..\..\Sample Files\";
string FileName = FilePath + "Delete a slide.pptx";
DeleteSlide(FileName, 1);
// Delete the slide with the specified index from the presentation.
static void DeleteSlide(string presentationFile, int slideIndex)
{
// Instantiate a Presentation object that represents a PPTX file
using (Presentation pres = new Presentation(presentationFile))
{
// Accessing a slide using its index in the slides collection
ISlide slide = pres.Slides[slideIndex];
// Removing a slide using its reference
pres.Slides.Remove(slide);
// Writing the presentation as a PPTX file
pres.Save(presentationFile, SaveFormat.Pptx);
}
}
```
## **Download Sample Code**
- [GitHub](https://github.com/aspose-slides/Aspose.Slides-for-.NET/releases/tag/AsposeSlidesVsOpenXML1.1)
- [Sourceforge](https://sourceforge.net/projects/asposeopenxml/files/Aspose.Slides%20Vs%20OpenXML/Delete%20a%20slide%20%28Aspose.Slides%29.zip/download)
- [Bitbucket](https://bitbucket.org/asposemarketplace/aspose-for-openxml/src/master/Aspose.Slides%20Vs%20OpenXML/Delete%20a%20slide/)
# Delete all the comments by an author
>
Source: https://docs.aspose.com/slides/net/delete-all-the-comments-by-an-author/
Updated: 2026-08-05
## **OpenXML SDK**
``` csharp
string FilePath = @"..\..\..\..\Sample Files\";
string FileName = FilePath + "Delete all the comments by an author.pptx";
string author = "Zeeshan Shafqat";
DeleteCommentsByAuthorInPresentation(FileName, author);
// Remove all the comments in the slides by a certain author.
public static void DeleteCommentsByAuthorInPresentation(string fileName, string author)
{
if (String.IsNullOrEmpty(fileName) || String.IsNullOrEmpty(author))
throw new ArgumentNullException("File name or author name is NULL!");
using (PresentationDocument doc = PresentationDocument.Open(fileName, true))
{
// Get the specifed comment author.
IEnumerable commentAuthors =
doc.PresentationPart.CommentAuthorsPart.CommentAuthorList.Elements()
.Where(e => e.Name.Value.Equals(author));
// Iterate through all the matching authors.
foreach (CommentAuthor commentAuthor in commentAuthors)
{
UInt32Value authorId = commentAuthor.Id;
// Iterate through all the slides and get the slide parts.
foreach (SlidePart slide in doc.PresentationPart.SlideParts)
{
SlideCommentsPart slideCommentsPart = slide.SlideCommentsPart;
// Get the list of comments.
if (slideCommentsPart != null && slide.SlideCommentsPart.CommentList != null)
{
IEnumerable commentList =
slideCommentsPart.CommentList.Elements().Where(e => e.AuthorId == authorId.Value);
List comments = new List();
comments = commentList.ToList();
foreach (Comment comm in comments)
{
// Delete all the comments by the specified author.
slideCommentsPart.CommentList.RemoveChild(comm);
}
// If the commentPart has no existing comment.
if (slideCommentsPart.CommentList.ChildElements.Count == 0)
// Delete this part.
slide.DeletePart(slideCommentsPart);
}
}
// Delete the comment author from the comment authors part.
doc.PresentationPart.CommentAuthorsPart.CommentAuthorList.RemoveChild(commentAuthor);
}
}
}
```
## **Aspose.Slides**
``` csharp
using Aspose.Slides;
using Aspose.Slides.Export;
string filePath = @"..\..\..\..\Sample Files\";
string fileName = filePath + "Delete all the comments by an author.pptx";
string author = "MZ";
// Instantiate a Presentation object that represents a PPTX file
using (Presentation pres = new Presentation(fileName))
{
// Remove all the comments in the slides by a certain author.
ICommentAuthor[] authors = pres.CommentAuthors.FindByName(author);
foreach (ICommentAuthor commentAuthor in authors)
{
for (int i = commentAuthor.Comments.Count - 1; i >= 0; i--)
{
commentAuthor.Comments.RemoveAt(i);
}
}
pres.Save(fileName, SaveFormat.Pptx);
}
```
## **Download Sample Code**
- [GitHub](https://github.com/aspose-slides/Aspose.Slides-for-.NET/releases/tag/AsposeSlidesVsOpenXML1.1)
- [Sourceforge](https://sourceforge.net/projects/asposeopenxml/files/Aspose.Slides%20Vs%20OpenXML/Delete%20all%20the%20comments%20by%20an%20author%20%28Aspose.Slides%29.zip/download)
- [Bitbucket](https://bitbucket.org/asposemarketplace/aspose-for-openxml/src/master/Aspose.Slides%20Vs%20OpenXML/Delete%20all%20the%20comments%20by%20an%20author/)
# Deploy Fonts for Aspose.Slides on Linux and in Docker
> Deploy fonts for Aspose.Slides for .NET on Linux servers and in Docker containers: check which fonts are substituted, install font packages on Debian, Ubuntu, and Alpine, add your own font files, and set a default font.
Source: https://docs.aspose.com/slides/net/deploy-fonts/
Updated: 2026-09-28
## **Overview**
Aspose.Slides draws text with the fonts that are available to it when it renders a presentation, for example when it converts slides to PDF or to images. A Windows desktop usually has the fonts that presentations use. Linux servers and containers usually have few fonts or none, so Aspose.Slides draws the text with a substitute font. A substitute has different letter shapes and widths, so lines can wrap differently and text can overflow its shape, and characters that the substitute lacks are not drawn correctly. If no font is installed at all, the conversion stops with an error.
This article shows how to check which fonts Aspose.Slides substitutes, how to install fonts on Debian, Ubuntu, and Alpine Linux, how to add your own font files, and how to set the font that is used when a font is missing. The examples run in Docker on the official .NET images, as in [Run Aspose.Slides for .NET in Docker](https://docs.aspose.com/slides/net/how-to-run-aspose-slides-in-docker/). The package commands are Dockerfile instructions; on a Linux server, run the same commands as root.
For the font API itself, such as embedding fonts in a presentation and fallback and replacement rules, see [PowerPoint Fonts](https://docs.aspose.com/slides/net/powerpoint-fonts/).
## **Check Which Fonts Are Substituted**
The following console application reports the fonts that Aspose.Slides substitutes in the current environment. Create a folder named *FontCheck* and add the files below to it.
*FontCheck.csproj* references [Aspose.Slides.NET6.CrossPlatform](https://www.nuget.org/packages/Aspose.Slides.NET6.CrossPlatform/), the package for Debian and Ubuntu. It also copies the files of an optional *fonts* folder to the application output; the [Load Fonts from the Application Folder](https://docs.aspose.com/slides/net/deploy-fonts/#load-fonts-from-the-application-folder) section uses it.
```xml
Exe
net10.0
enable
enable
```
*Program.cs* adds one text box per font name to a slide and assigns the font through the [LatinFont](https://reference.aspose.com/slides/net/aspose.slides/baseportionformat/latinfont/) property. The font names come from the command line; without arguments, the application checks Calibri, Arial, and Times New Roman. It prints the folders in which Aspose.Slides looks for fonts ([FontsLoader.GetFontFolders](https://reference.aspose.com/slides/net/aspose.slides/fontsloader/getfontfolders/)), renders the slide to *output/fonts.pdf*, and prints the substitutions reported by [IFontsManager.GetSubstitutions](https://reference.aspose.com/slides/net/aspose.slides/ifontsmanager/getsubstitutions/). The two optional steps at the start, loading a *fonts* folder and reading a `DEFAULT_FONT` variable, are explained later in this article.
```c#
using System;
using System.IO;
using System.Linq;
using Aspose.Slides;
using Aspose.Slides.Export;
// The fonts to check: the command-line arguments, or three common Office fonts.
var fontNames = args.Length > 0 ? args : new[] { "Calibri", "Arial", "Times New Roman" };
// Load the font files from the fonts folder next to the application, if there is one.
var appFontFolder = Path.Combine(AppContext.BaseDirectory, "fonts");
if (Directory.Exists(appFontFolder))
{
FontsLoader.LoadExternalFonts(new[] { appFontFolder });
}
// Use the font named in the DEFAULT_FONT environment variable, if it is set, for text whose font is missing.
var loadOptions = new LoadOptions();
var defaultFont = Environment.GetEnvironmentVariable("DEFAULT_FONT");
if (!string.IsNullOrEmpty(defaultFont))
{
loadOptions.DefaultRegularFont = defaultFont;
}
var fontFolders = FontsLoader.GetFontFolders().Distinct();
Console.WriteLine($"Font folders: {string.Join(", ", fontFolders)}");
using var presentation = new Presentation(loadOptions);
var slide = presentation.Slides[0];
for (var i = 0; i < fontNames.Length; i++)
{
var shape = slide.Shapes.AddAutoShape(ShapeType.Rectangle, 50, 50 + i * 80, 600, 60);
shape.TextFrame.Text = $"This text is set in {fontNames[i]}.";
shape.TextFrame.Paragraphs[0].Portions[0].PortionFormat.LatinFont = new FontData(fontNames[i]);
}
Directory.CreateDirectory("output");
presentation.Save(Path.Combine("output", "fonts.pdf"), SaveFormat.Pdf);
var substitutions = presentation.FontsManager.GetSubstitutions().ToList();
if (substitutions.Count == 0)
{
Console.WriteLine("No font substitutions.");
}
else
{
Console.WriteLine("Font substitutions:");
foreach (var substitution in substitutions)
{
Console.WriteLine($" {substitution.OriginalFontName} -> {substitution.SubstitutedFontName}");
}
}
```
*.dockerignore* keeps local build results out of the build context:
```text
bin/
obj/
output/
```
*Dockerfile* builds the application with the .NET SDK image and runs it on the .NET runtime image. The runtime stage installs `libfontconfig1`, which Aspose.Slides.NET6.CrossPlatform requires, and the DejaVu fonts. [Run Aspose.Slides for .NET in Docker](https://docs.aspose.com/slides/net/how-to-run-aspose-slides-in-docker/) explains each instruction.
```dockerfile
FROM mcr.microsoft.com/dotnet/sdk:10.0 AS build
WORKDIR /src
COPY FontCheck.csproj .
RUN dotnet restore
COPY . .
RUN dotnet publish --no-restore -c Release -o /app
FROM mcr.microsoft.com/dotnet/runtime:10.0
RUN apt-get update \
&& apt-get install -y --no-install-recommends libfontconfig1 fonts-dejavu-core \
&& rm -rf /var/lib/apt/lists/*
WORKDIR /app
COPY --from=build /app .
RUN mkdir output && chown $APP_UID output
USER $APP_UID
ENTRYPOINT ["dotnet", "FontCheck.dll"]
```
Build the image and run the check:
```bash
docker build -t font-check .
docker run --rm font-check
```
The image has only the DejaVu fonts, so all three fonts are replaced with DejaVu Sans:
```text
Font folders: /usr/share/fonts, /usr/local/share/fonts, .local/share/fonts, /app/.fonts
Font substitutions:
Calibri -> DejaVu Sans
Arial -> DejaVu Sans
Times New Roman -> DejaVu Sans
```
To check the fonts of your own presentations, pass their names as arguments, for example `docker run --rm font-check "Segoe UI" Consolas`. To copy *output/fonts.pdf* out of the container, use the commands in [Copy the Output to Your Machine](https://docs.aspose.com/slides/net/how-to-run-aspose-slides-in-docker/#copy-the-output-to-your-machine).
## **Install Fonts on Debian and Ubuntu**
### **Microsoft Core Fonts**
The `ttf-mscorefonts-installer` package downloads and installs Microsoft's core fonts for the web, among them Arial, Times New Roman, Courier New, Verdana, Georgia, and Trebuchet MS. The fonts are licensed under Microsoft's end-user license agreement (EULA), and the package installs them only after the EULA is accepted. A Docker build cannot answer the prompt, so the installer declines the EULA and installs no fonts, while `apt-get install` still reports success. Accept the EULA with `debconf-set-selections` **before** the package is installed.
In the *Dockerfile*, replace the `RUN` instruction that installs the packages in the runtime stage with:
```dockerfile
RUN echo "ttf-mscorefonts-installer msttcorefonts/accepted-mscorefonts-eula select true" | debconf-set-selections \
&& apt-get update \
&& apt-get install -y --no-install-recommends libfontconfig1 fonts-dejavu-core ttf-mscorefonts-installer \
&& rm -rf /var/lib/apt/lists/*
```
Build the image and run the check again with the same two commands. Arial and Times New Roman are now installed:
```text
Font folders: /usr/share/fonts, /usr/local/share/fonts, .local/share/fonts, /app/.fonts
Font substitutions:
Calibri -> Arial
```
Calibri, the default font of a presentation that Aspose.Slides creates, is not one of the core fonts, so it is still replaced. See [Set a Default Font for Missing Fonts](https://docs.aspose.com/slides/net/deploy-fonts/#set-a-default-font-for-missing-fonts).
On Debian, the package is in the `contrib` repository component, which the Debian images do not enable; the default .NET 8 and .NET 9 images are based on Debian 12. Enable `contrib` in the same instruction:
```dockerfile
RUN sed -i 's/^Components: main$/Components: main contrib/' /etc/apt/sources.list.d/debian.sources \
&& echo "ttf-mscorefonts-installer msttcorefonts/accepted-mscorefonts-eula select true" | debconf-set-selections \
&& apt-get update \
&& apt-get install -y --no-install-recommends libfontconfig1 fonts-dejavu-core ttf-mscorefonts-installer \
&& rm -rf /var/lib/apt/lists/*
```
The Ubuntu-based .NET 10 images already enable `multiverse`, the Ubuntu component that contains the package.
### **Other Font Packages**
Debian and Ubuntu also package freely licensed fonts, for example:
| Package | Fonts |
|---|---|
| `fonts-dejavu-core` | DejaVu Sans, DejaVu Serif, DejaVu Sans Mono |
| `fonts-liberation` | Liberation Sans, Serif, and Mono, with the same metrics as Arial, Times New Roman, and Courier New |
| `fonts-crosextra-carlito` | Carlito, with the same metrics as Calibri |
| `fonts-crosextra-caladea` | Caladea, with the same metrics as Cambria |
Install them with `apt-get install` in the same `RUN` instruction. Aspose.Slides.NET6.CrossPlatform does not apply the font aliases of the Linux font configuration: with `fonts-liberation` installed, text in Arial is still drawn with the general substitute font, not with Liberation Sans. To use a metric-compatible font in place of a missing one, set it as the [default font](https://docs.aspose.com/slides/net/deploy-fonts/#set-a-default-font-for-missing-fonts) or add a [font substitution rule](https://docs.aspose.com/slides/net/font-substitution/).
## **Add Your Own Font Files**
Fonts that the distributions do not package, such as your organization's fonts or other fonts that you are licensed to use on the server, can be added as font files. Put the font files, for example *.ttf* files, in a folder named *fonts* inside the *FontCheck* folder. The examples below use the files of Carlito, a font with the same metrics as Calibri, which you can download from [Google Fonts](https://fonts.google.com/specimen/Carlito).
### **Install the Fonts in a System Font Folder**
Aspose.Slides reads the fonts in the folders printed on the `Font folders` line. To install your fonts for every application in the image, copy them into */usr/local/share/fonts*, the folder for locally installed fonts. Add this instruction to the runtime stage of the *Dockerfile*, after the `RUN` instruction that installs the packages:
```dockerfile
COPY fonts/ /usr/local/share/fonts/
```
### **Load Fonts from the Application Folder**
Instead of installing the fonts in the image, you can ship them with the application and load them with [FontsLoader.LoadExternalFonts](https://reference.aspose.com/slides/net/aspose.slides/fontsloader/loadexternalfonts/). The fonts are then available to Aspose.Slides only, and they are deployed together with the application. *FontCheck* does this: *FontCheck.csproj* copies the *fonts* folder to the application output, and *Program.cs* passes that folder to `LoadExternalFonts` before it creates the presentation. [Custom Font](https://docs.aspose.com/slides/net/custom-font/) describes the other ways to supply fonts, such as loading them from memory.
Rebuild the image, then check Calibri and Carlito:
```bash
docker build -t font-check .
docker run --rm font-check Calibri Carlito
```
The application folder now appears among the font folders, and Carlito is no longer substituted:
```text
Font folders: /app/fonts, /usr/share/fonts, /usr/local/share/fonts, .local/share/fonts, /app/.fonts
Font substitutions:
Calibri -> Arial
```
## **Set a Default Font for Missing Fonts**
When a font is missing, Aspose.Slides uses a substitute that it chooses itself. To choose it yourself, set the [DefaultRegularFont](https://reference.aspose.com/slides/net/aspose.slides/loadoptions/defaultregularfont/) property of [LoadOptions](https://reference.aspose.com/slides/net/aspose.slides/loadoptions/) and pass the options to the [Presentation](https://reference.aspose.com/slides/net/aspose.slides/presentation/) constructor. *FontCheck* reads the font name from the `DEFAULT_FONT` environment variable. With Carlito loaded, use it for missing fonts:
```bash
docker run --rm -e DEFAULT_FONT=Carlito font-check
```
Calibri is now drawn with Carlito, whose characters have the same widths as those of Calibri, so the text keeps its line breaks:
```text
Font folders: /app/fonts, /usr/share/fonts, /usr/local/share/fonts, .local/share/fonts, /app/.fonts
Font substitutions:
Calibri -> Carlito
```
The default font replaces every missing font. To map individual fonts, for example Arial to Liberation Sans and Calibri to Carlito, use [font substitution rules](https://docs.aspose.com/slides/net/font-substitution/). Rules change the rendered output, but `GetSubstitutions` does not reflect them, so check the fonts in the output file instead. For Asian text, also set [DefaultAsianFont](https://reference.aspose.com/slides/net/aspose.slides/loadoptions/defaultasianfont/); see [Default Font](https://docs.aspose.com/slides/net/default-font/).
## **Install Fonts on Alpine Linux**
On Alpine Linux, use the Aspose.Slides.NET package; [Run on Alpine Linux](https://docs.aspose.com/slides/net/how-to-run-aspose-slides-in-docker/#run-on-alpine-linux) lists the changes to the project. Make the same changes to *FontCheck*: replace the package reference, add the `SetSwitch` statement to *Program.cs*, and use this runtime stage, which also installs the Microsoft core fonts:
```dockerfile
FROM mcr.microsoft.com/dotnet/runtime:10.0-alpine
ENV DOTNET_SYSTEM_GLOBALIZATION_INVARIANT=false
RUN apk add --no-cache icu-libs libgdiplus font-dejavu msttcorefonts-installer \
&& update-ms-fonts \
&& fc-cache -f
WORKDIR /app
COPY --from=build /app .
RUN mkdir output && chown $APP_UID output
USER $APP_UID
ENTRYPOINT ["dotnet", "FontCheck.dll"]
```
`update-ms-fonts` downloads and installs the same Microsoft core fonts as the Debian and Ubuntu package, and their EULA applies in the same way. `fc-cache` updates the font cache.
With Aspose.Slides.NET on Linux, the font configuration library (fontconfig) chooses the substitute for a missing font, and `GetSubstitutions` does not report it, so *FontCheck* prints `No font substitutions.` To see which font is used for a font name, ask fontconfig in the container:
```bash
docker run --rm --entrypoint fc-match font-check Arial
```
With the Microsoft core fonts installed, Arial is used for Arial:
```text
Arial.ttf: "Arial" "Regular"
```
Without them, when the `RUN` instruction installs only `icu-libs libgdiplus font-dejavu`, the same command prints:
```text
DejaVuSans.ttf: "DejaVu Sans" "Book"
```
## **FAQ**
**Why does a presentation look different when it is converted on a server?**
The server does not have the fonts that the presentation uses, so Aspose.Slides draws the text with a substitute font whose letters have other widths. Run *FontCheck* with the presentation's font names to see which fonts are substituted, then install those fonts or load them from the application folder.
**The build installed ttf-mscorefonts-installer, but Arial is still substituted. Why?**
The EULA was not accepted before the package was installed, so the installer skipped the fonts. Add the `debconf-set-selections` command before `apt-get install`, as shown in [Microsoft Core Fonts](https://docs.aspose.com/slides/net/deploy-fonts/#microsoft-core-fonts), and rebuild the image.
**Does the computer that opens the PDF need the fonts?**
No. In these examples, the PDF contains the fonts that were used to draw the text, so it looks the same on any computer. The fonts are needed only where Aspose.Slides renders the presentation.
# Determine the Original Presentation Format in .NET
> Read the original format of a loaded presentation in C# with Aspose.Slides for .NET, compare detection APIs, and handle files, streams, and legacy formats.
Source: https://docs.aspose.com/slides/net/detect-presentation-source-format/
Updated: 2026-09-22
## **Overview**
After loading a presentation, read the read-only [Presentation.SourceFormat](https://reference.aspose.com/slides/net/aspose.slides/presentation/sourceformat/) property to determine its original format. The property is also available through [IPresentation.SourceFormat](https://reference.aspose.com/slides/net/aspose.slides/ipresentation/sourceformat/). Use it when subsequent processing depends on the format from which the current instance was loaded.
The source format is distinct from the [SaveFormat](https://reference.aspose.com/slides/net/aspose.slides.export/saveformat/) selected for an output file. Saving to another format does not change the source format of the existing instance.
## **Read the Source Format of a File**
This example requires an existing `sample.pptx` file. It loads the file and selects an application processing policy using [Presentation.SourceFormat](https://reference.aspose.com/slides/net/aspose.slides/presentation/sourceformat/), rather than the filename. Change the input path to try other formats. The example prints the selected policy; replace the messages with your application logic.
```csharp
using System;
using Aspose.Slides;
using var presentation = new Presentation("sample.pptx");
switch (presentation.SourceFormat)
{
case SourceFormat.Ppt:
case SourceFormat.Pps:
case SourceFormat.Pot:
Console.WriteLine("Use the legacy PowerPoint processing policy.");
break;
case SourceFormat.Pptx:
Console.WriteLine("Use the standard PPTX processing policy.");
break;
default:
Console.WriteLine($"Use the general policy for {presentation.SourceFormat}.");
break;
}
```
## **Recognize the Supported Values**
The [SourceFormat](https://reference.aspose.com/slides/net/aspose.slides/sourceformat/) enumeration distinguishes the following presentation formats. The extensions below are conventional extensions, not a reconstruction of the original filename.
| SourceFormat value | Extension | Format |
| --- | --- | --- |
| `Ppt` | `.ppt` | PowerPoint 97–2003 presentation |
| `Pptx` | `.pptx` | Office Open XML presentation |
| `Pptm` | `.pptm` | Macro-enabled Office Open XML presentation |
| `Pps` | `.pps` | PowerPoint 97–2003 slide show |
| `Ppsx` | `.ppsx` | Office Open XML slide show |
| `Ppsm` | `.ppsm` | Macro-enabled Office Open XML slide show |
| `Pot` | `.pot` | PowerPoint 97–2003 template |
| `Potx` | `.potx` | Office Open XML template |
| `Potm` | `.potm` | Macro-enabled Office Open XML template |
| `Odp` | `.odp` | OpenDocument presentation |
| `Otp` | `.otp` | OpenDocument presentation template |
| `Fodp` | `.fodp` | Flat XML ODF presentation |
| `Xml` | `.xml` | PowerPoint XML presentation |
## **Read the Source Format of a Stream**
This example requires an existing `sample.pps` file. Reading its bytes into a memory stream models input received without a filename, such as a database value or an uploaded byte array. The [Presentation](https://reference.aspose.com/slides/net/aspose.slides/presentation/) constructor receives only the stream.
```csharp
using System;
using System.IO;
using Aspose.Slides;
var bytes = File.ReadAllBytes("sample.pps");
using var stream = new MemoryStream(bytes);
using var presentation = new Presentation(stream);
Console.WriteLine($"Source format: {presentation.SourceFormat}");
```
PPT, PPS, and POT use the same underlying binary format. When loading by file path, the extension can help distinguish a slide show or template. Without a filename, legacy PPS and POT content may be reported as `SourceFormat.Ppt`; the PPS example above reports `Ppt`.
If your application must preserve the distinction, keep the original filename or subtype metadata separately. An extension is a useful hint for these legacy subtypes, but should not be the only basis for identifying arbitrary presentation content.
## **Compare Detection Before and After Loading**
Use [PresentationFactory.GetPresentationInfo](https://reference.aspose.com/slides/net/aspose.slides/presentationfactory/getpresentationinfo/) and [IPresentationInfo.LoadFormat](https://reference.aspose.com/slides/net/aspose.slides/ipresentationinfo/loadformat/) when you need to inspect a file before loading its complete presentation object model. Use [Presentation.SourceFormat](https://reference.aspose.com/slides/net/aspose.slides/presentation/sourceformat/) when the instance already exists.
This example requires `sample.pptx` and prints `Pptx` for both checks. In production, choose the API appropriate to your processing stage; an already loaded presentation does not need a second inspection solely to obtain its source format.
```csharp
using System;
using Aspose.Slides;
var path = "sample.pptx";
var information = PresentationFactory.Instance.GetPresentationInfo(path);
Console.WriteLine($"Before loading: {information.LoadFormat}");
using var presentation = new Presentation(path);
Console.WriteLine($"After loading: {presentation.SourceFormat}");
```
The results have different enumeration types: [LoadFormat](https://reference.aspose.com/slides/net/aspose.slides/loadformat/) and [SourceFormat](https://reference.aspose.com/slides/net/aspose.slides/sourceformat/). Do not compare them by casting their numeric values or assume that every format has identical detection results. In the save-and-reopen check described below, PowerPoint XML was reported as `LoadFormat.Unknown` before loading and `SourceFormat.Xml` after loading.
## **Keep Source and Output Formats Separate**
This example requires `sample.pptx` and writes `converted.odp`. It prints `Pptx` both before and after saving the original instance. Only the new instance loaded from the ODP output reports `Odp`.
```csharp
using System;
using Aspose.Slides;
using Aspose.Slides.Export;
using var presentation = new Presentation("sample.pptx");
Console.WriteLine($"Before saving: {presentation.SourceFormat}");
presentation.Save("converted.odp", SaveFormat.Odp);
Console.WriteLine($"After saving: {presentation.SourceFormat}");
using var reopened = new Presentation("converted.odp");
Console.WriteLine($"Reopened output: {reopened.SourceFormat}");
```
A presentation created from scratch with `new Presentation()` reports `SourceFormat.Pptx`. It has no input file: this is the default value for a newly created instance, not evidence that a PPTX file was loaded. Track whether your application created or loaded the instance separately if that distinction matters.
## **Map a Source Format to an Extension**
The following example requires `sample.pptx`. It maps every currently supported [SourceFormat](https://reference.aspose.com/slides/net/aspose.slides/sourceformat/) value to a conventional extension, without parsing the input filename. The fallback avoids silently assigning an extension to an unrecognized value.
```csharp
using System;
using Aspose.Slides;
using var presentation = new Presentation("sample.pptx");
var extension = presentation.SourceFormat switch
{
SourceFormat.Ppt => ".ppt",
SourceFormat.Pptx => ".pptx",
SourceFormat.Pptm => ".pptm",
SourceFormat.Pps => ".pps",
SourceFormat.Ppsx => ".ppsx",
SourceFormat.Ppsm => ".ppsm",
SourceFormat.Pot => ".pot",
SourceFormat.Potx => ".potx",
SourceFormat.Potm => ".potm",
SourceFormat.Odp => ".odp",
SourceFormat.Otp => ".otp",
SourceFormat.Fodp => ".fodp",
SourceFormat.Xml => ".xml",
_ => null
};
Console.WriteLine(extension ?? "No extension mapping is available.");
```
This mapping does not convert a file or recover a legacy PPS/POT subtype lost during stream loading. For actual saving, select a [SaveFormat](https://reference.aspose.com/slides/net/aspose.slides.export/saveformat/) explicitly, or use the conversion shown in [Save Presentations in Their Original Format](https://docs.aspose.com/slides/net/save-presentation/#save-presentations-in-their-original-format).
## **Verify Formats by Saving and Reopening**
This self-contained example creates a presentation and writes three files in the working directory, overwriting files with the same names. It reopens each output both by path and through a memory stream. For PPTX and ODP, both routes report the saved format. For PPS, loading by path reports `Pps`, while loading the same bytes without a filename reports `Ppt`.
```csharp
using System;
using System.IO;
using Aspose.Slides;
using Aspose.Slides.Export;
using var presentation = new Presentation();
var formats = new[] { SaveFormat.Pptx, SaveFormat.Odp, SaveFormat.Pps };
foreach (var format in formats)
{
var path = $"roundtrip.{format.ToString().ToLowerInvariant()}";
presentation.Save(path, format);
using var fromFile = new Presentation(path);
var bytes = File.ReadAllBytes(path);
using var stream = new MemoryStream(bytes);
using var fromStream = new Presentation(stream);
Console.WriteLine($"{format}: file={fromFile.SourceFormat}, stream={fromStream.SourceFormat}");
}
```
The same check with all the formats listed above produced these results for generated presentations with matching extensions:
| Saved format | SourceFormat from a file path | SourceFormat from a nameless stream |
| --- | --- | --- |
| PPT | `Ppt` | `Ppt` |
| PPTX, PPTM | `Pptx`, `Pptm` respectively | Same as file path |
| PPS | `Pps` | `Ppt` |
| PPSX, PPSM | `Ppsx`, `Ppsm` respectively | Same as file path |
| POT | `Pot` | `Ppt` |
| POTX, POTM | `Potx`, `Potm` respectively | Same as file path |
| ODP, OTP | `Odp`, `Otp` respectively | Same as file path |
| FODP | `Fodp` | `Fodp` |
| PowerPoint XML | `Xml` | `Xml` |
In these checks, the only source-format normalization was PPS/POT to `Ppt` for nameless streams. The table describes format identification, not preservation of every presentation feature during conversion.
## **FAQ**
**Does saving to ODP change the source format of a presentation loaded from PPTX?**
No. The existing instance still reports `Pptx`. An instance loaded from the saved ODP file reports `Odp`.
**Can a stream always distinguish a legacy presentation, slide show, and template?**
No. PPT, PPS, and POT share the binary format. Keep filename or subtype metadata separately when that distinction is required.
**Which API should I use if the presentation is already loaded?**
Read [Presentation.SourceFormat](https://reference.aspose.com/slides/net/aspose.slides/presentation/sourceformat/). Use [PresentationFactory.GetPresentationInfo](https://reference.aspose.com/slides/net/aspose.slides/presentationfactory/getpresentationinfo/) for inspection before loading.
# Developer Guide
> Discover the Aspose.Slides for .NET Developer Guide for step-by-step APIs to build, edit, and convert PPT, PPTX and ODP presentations with ease.
Source: https://docs.aspose.com/slides/net/developer-guide/
Updated: 2025-11-14
---
lastmod: 2025-11-14T18:26:19+04:00
title: Developer Guide
type: docs
weight: 20
url: /net/developer-guide/
keywords:
- developer guide
- manage presentation
- presentation design
- professional presentation
- create presentation
- presentation viewer
- presentation security
- presentation properties
- view properties
- presentation comments
- presentation notes
- animation
- 3D presentation
- VBA project
- image processing
- PowerPoint
- OpenDocument
- presentation
- .NET
- C#
- Aspose.Slides
description: "Discover the Aspose.Slides for .NET Developer Guide for step-by-step APIs to build, edit, and convert PPT, PPTX and ODP presentations with ease."
---
# Add Digital Signatures to Presentations in .NET
> Learn how to sign existing PPTX presentations with PFX certificates and use Aspose.Slides for .NET to validate or remove digital signatures.
Source: https://docs.aspose.com/slides/net/digital-signature-in-powerpoint/
Updated: 2026-08-25
## **Overview**
A digital signature helps a recipient determine who signed a presentation and whether the signed content has changed. Three related security concepts are important here:
- A **digital certificate** is an electronic credential that associates an identity with a public key. A trusted certificate authority (CA) can issue a certificate, or an organization can use a self-signed certificate for internal workflows.
- A **digital signature** is created from the presentation content and the certificate holder's private key. The certificate's public key can then be used to verify the signature. A signature provides evidence of origin and integrity; it does not encrypt the presentation.
- **Password protection** controls whether a user can open or modify a presentation. It is separate from digital signing and is described in [Password-Protected Presentations](https://docs.aspose.com/slides/net/password-protected-presentation/).
PowerPoint provides the **Add a Digital Signature** command under **File > Info > Protect Presentation**.

After a signed presentation is opened, PowerPoint can display a signature-status notification.

Aspose.Slides exposes signatures through [IPresentation.DigitalSignatures](https://reference.aspose.com/slides/net/aspose.slides/ipresentation/digitalsignatures/), an [IDigitalSignatureCollection](https://reference.aspose.com/slides/net/aspose.slides/idigitalsignaturecollection/) whose items implement [IDigitalSignature](https://reference.aspose.com/slides/net/aspose.slides/idigitalsignature/). A presentation can contain multiple signatures.
## **Understand PFX Certificates and Passwords**
A PFX file, also known as a PKCS#12 file and commonly given a `.pfx` or `.p12` extension, can contain an X.509 certificate, its private key, and the certificate chain. The private key is what allows the holder to create a signature. A certificate without an accessible private key cannot be used to sign a presentation.
The PFX password protects the certificate package and private key. It is **not** a password for opening or editing the presentation. Do not commit PFX files or their passwords to source control. In production, limit access to the certificate file and obtain its password from a secret store or another protected configuration source. The examples below use an environment variable only to avoid embedding the password in code.
## **Add a Digital Signature to a Presentation**
To sign a real presentation workflow, load an existing PPTX file, create a [DigitalSignature](https://reference.aspose.com/slides/net/aspose.slides/digitalsignature/) from a PFX certificate and its password, add the signature to the presentation's collection, and save to a PPTX file.
```csharp
using System;
using Aspose.Slides;
using Aspose.Slides.Export;
var certificatePassword = Environment.GetEnvironmentVariable("PFX_PASSWORD")
?? throw new InvalidOperationException("Set the PFX_PASSWORD environment variable.");
using var presentation = new Presentation("InputPresentation.pptx");
var signature = new DigitalSignature("signing-certificate.pfx", certificatePassword)
{
Comments = "Approved for release."
};
presentation.DigitalSignatures.Add(signature);
presentation.Save("InputPresentation-signed.pptx", SaveFormat.Pptx);
```
Saving the result under a new name preserves the unsigned source file. The [DigitalSignature.Comments](https://reference.aspose.com/slides/net/aspose.slides/digitalsignature/comments/) value describes the purpose of the signature; it is not a security control.
## **Validate Digital Signatures**
When you load a signed PPTX file, inspect every item in [IPresentation.DigitalSignatures](https://reference.aspose.com/slides/net/aspose.slides/ipresentation/digitalsignatures/). The [IDigitalSignature.IsValid](https://reference.aspose.com/slides/net/aspose.slides/idigitalsignature/isvalid/) property indicates whether the embedded signature is valid for the current presentation content.
```csharp
using System;
using Aspose.Slides;
using var presentation = new Presentation("InputPresentation-signed.pptx");
var signatureCount = presentation.DigitalSignatures.Count;
if (signatureCount == 0)
{
Console.WriteLine("The presentation does not contain digital signatures.");
}
else
{
var allSignaturesAreValid = true;
foreach (var signature in presentation.DigitalSignatures)
{
var signatureStatus = signature.IsValid ? "VALID" : "INVALID";
var signerName = signature.Certificate.SubjectName.Name;
Console.WriteLine(
$"{signerName}, {signature.SignTime:yyyy-MM-dd HH:mm:ss} -- {signatureStatus}");
allSignaturesAreValid &= signature.IsValid;
}
Console.WriteLine(allSignaturesAreValid
? "All embedded signatures are valid for the current presentation."
: "At least one embedded signature is invalid.");
}
```
An invalid result commonly means that the signed presentation content or signature data changed after signing, or that the file is damaged. Removing every signature produces an unsigned presentation, so checking only the validity of items is not enough: a security-sensitive workflow must also verify that the expected number of signatures and expected signer identities are present.
This validity result should not be treated as a complete certificate-trust decision. Depending on your security policy, your application may also need to build and validate the X.509 certificate chain, check certificate validity dates and revocation status, confirm the expected subject or thumbprint, verify key usage, and evaluate a trusted timestamp. The [IDigitalSignature.SignTime](https://reference.aspose.com/slides/net/aspose.slides/idigitalsignature/signtime/) value by itself is not proof from a trusted timestamp authority.
## **Remove Digital Signatures**
Removing signatures changes the presentation's security state. The following example loads a signed PPTX file, removes all signatures with [IDigitalSignatureCollection.Clear](https://reference.aspose.com/slides/net/aspose.slides/idigitalsignaturecollection/clear/), and saves an unsigned copy.
```csharp
using Aspose.Slides;
using Aspose.Slides.Export;
using var presentation = new Presentation("InputPresentation-signed.pptx");
presentation.DigitalSignatures.Clear();
presentation.Save("InputPresentation-unsigned.pptx", SaveFormat.Pptx);
```
To remove only one signature, call [IDigitalSignatureCollection.RemoveAt](https://reference.aspose.com/slides/net/aspose.slides/idigitalsignaturecollection/removeat/) with its zero-based index. Save to a new file unless overwriting the signed original is an explicit part of your workflow.
## **Editing and Format Considerations**
- A signature does not make a presentation read-only. Users and applications can still edit the file, but changes to signed content normally invalidate the existing signature.
- Complete all intended edits before signing. If a presentation must be changed, save the revised presentation and sign that revision again.
- Keep the final output in PPTX format. Converting a signed presentation to another format does not transfer the original PPTX signature as a valid signature for the converted file.
- Treat the certificate's private key as sensitive. Anyone who obtains the private key and its password may be able to create signatures that appear to come from that certificate holder.
- Retain the unsigned source or another controlled copy when your document-retention policy requires it.
## **FAQ**
**Does a digital signature encrypt the presentation?**
No. A digital signature provides evidence about origin and integrity, but presentation content remains readable unless separate encryption is applied. Use [password protection](https://docs.aspose.com/slides/net/password-protected-presentation/) when access to the content must be restricted.
**Is the PFX password the same as a presentation password?**
No. The PFX password unlocks the private key stored in the certificate package. It does not control who can open or edit the PPTX file.
**Can I use a self-signed certificate?**
Technically, a self-signed certificate can be used when it includes an accessible private key. Recipients will not automatically trust it, however, unless that certificate has been explicitly added to their trusted environment. Public or cross-organization workflows generally use a certificate issued by a trusted CA.
**What makes a signature invalid?**
Changing signed presentation content or the signature data after signing can invalidate the signature. File corruption can also cause validation to fail. If all signatures are removed, the presentation is unsigned rather than a file containing an invalid signature.
**Does a valid signature mean that I should trust the signer?**
Not by itself. Signature integrity and signer trust are separate decisions. A production validation policy should also check the certificate chain, validity period, revocation status, expected identity, key usage, and any trusted timestamp requirements.
**What happens when the certificate expires?**
Certificate expiration does not alter the presentation bytes, but it affects certificate-trust evaluation. Whether a signature remains acceptable depends on your policy and on whether a valid trusted timestamp proves that signing occurred while the certificate was valid. Do not rely on the displayed signing time alone as a trusted timestamp.
**Can a signed presentation still be edited?**
Yes. Signing does not lock the file. Editing signed content generally makes the existing signature invalid, so finish the presentation first and sign the final revision.
**Can a presentation contain more than one signature?**
Yes. Add each signature to [IPresentation.DigitalSignatures](https://reference.aspose.com/slides/net/aspose.slides/ipresentation/digitalsignatures/) before saving. During validation, inspect every signature and confirm that all required signers are present.
**Which presentation formats support these operations?**
Aspose.Slides supports the digital-signature operations described here only for PPTX. PPT and OpenDocument presentation formats are not supported by this API workflow.
**Can I remove a signature without affecting the slides?**
Yes. You can remove one signature or clear the entire collection and then save the presentation. The slide content remains available, but the saved file no longer carries the removed signature evidence.
## Related features
- [Sign presentations digitally](https://docs.aspose.com/slides/features/digital-signatures/)
- [Check presentation signatures](https://docs.aspose.com/slides/features/check-signatures/)
# Customize Doughnut Charts in Presentations in .NET
> Discover how to create and customize doughnut charts in Aspose.Slides for .NET, supporting PowerPoint formats for dynamic presentations.
Source: https://docs.aspose.com/slides/net/doughnut-chart/
Updated: 2026-08-05
## **Overview**
This article shows how to work with a doughnut chart in Aspose.Slides by adding the chart to a slide, setting the size of its center hole, and saving the presentation. It focuses on the `DoughnutHoleSize` setting and demonstrates the basic steps required to customize this chart type in code.
It also includes a short FAQ covering related doughnut-chart scenarios, such as using multiple series to create multiple rings, working with exploded doughnut charts, and exporting a chart as a raster image or SVG.
## **Specify the Center Gap in a Doughnut Chart**
In order to specify the size of the hole in a doughnut chart. Please follow the steps below:
- Instantiate [Presentation](https://reference.aspose.com/slides/net/aspose.slides/presentation) class.
- Add doughnut chart on the slide.
- Specify the size of the hole in a doughnut chart.
- Write presentation to disk.
In the example given below, we have set the size of the hole in a doughnut chart.
```c#
using Aspose.Slides;
using Aspose.Slides.Charts;
using Aspose.Slides.Export;
// Create an instance of Presentation class
Presentation presentation = new Presentation();
IChart chart = presentation.Slides[0].Shapes.AddChart(ChartType.Doughnut, 50, 50, 400, 400);
chart.ChartData.SeriesGroups[0].DoughnutHoleSize = 90;
// Write presentation to disk
presentation.Save("DoughnutHoleSize_out.pptx", SaveFormat.Pptx);
```
## **FAQ**
### Can I create a multi-level doughnut with multiple rings?
Yes. Add multiple series to a single doughnut chart—each series becomes a separate ring. The ring order is determined by the order of the series in the collection.
### Is an "exploded" doughnut (separated slices) supported?
Yes. There is an Exploded Doughnut [chart type](https://reference.aspose.com/slides/net/aspose.slides.charts/charttype/) and an explosion property on data points; you can separate individual slices.
### How can I get an image of a doughnut chart (PNG/SVG) for a report?
A chart is a shape; you can render it to a [raster image](https://reference.aspose.com/slides/net/aspose.slides/shape/getimage/) or export the chart to an [SVG image](https://reference.aspose.com/slides/net/aspose.slides/shape/writeassvg/).
# Manage Drawing Guides in Presentations in .NET
> Add, access, and clear horizontal and vertical drawing guides in PowerPoint presentations using Aspose.Slides for .NET.
Source: https://docs.aspose.com/slides/net/drawing-guides/
Updated: 2026-08-21
## **Overview**
Drawing guides are adjustable horizontal and vertical lines that help users align shapes consistently while editing a presentation in PowerPoint. They are especially useful when an application generates a presentation that will later be refined manually: the application can save the same alignment aids that authors should follow when adding or moving content.
Drawing guides are editing aids, not slide content. They do not appear in a slide show or rendered output. Aspose.Slides for .NET exposes them through the [IDrawingGuidesCollection](https://reference.aspose.com/slides/net/aspose.slides/idrawingguidescollection/) interface. A guide is represented by [IDrawingGuide](https://reference.aspose.com/slides/net/aspose.slides/idrawingguide/) and has an orientation, a position, and a color.
The position is measured in points from the top-left corner of the relevant slide or master. A vertical guide uses a horizontal coordinate, typically between zero and the slide width. A horizontal guide uses a vertical coordinate, typically between zero and the slide height.
## **Add Guides to the Slide View**
Use [ICommonSlideViewProperties.DrawingGuides](https://reference.aspose.com/slides/net/aspose.slides/icommonslideviewproperties/drawingguides/) to manage guides displayed while editing normal slides. Call [IDrawingGuidesCollection.Add](https://reference.aspose.com/slides/net/aspose.slides/idrawingguidescollection/add/) with an [Orientation](https://reference.aspose.com/slides/net/aspose.slides/orientation/) value and a position in points.
The following example adds one vertical guide to the right of the slide center and one horizontal guide below it:
```csharp
using Aspose.Slides;
using Aspose.Slides.Export;
using var presentation = new Presentation();
var slideSize = presentation.SlideSize.Size;
var guides = presentation.ViewProperties.SlideViewProperties.DrawingGuides;
guides.Add(Orientation.Vertical, slideSize.Width / 2 + 12.5f);
guides.Add(Orientation.Horizontal, slideSize.Height / 2 + 12.5f);
presentation.Save("drawing-guides.pptx", SaveFormat.Pptx);
```
## **Access Drawing Guides**
The [IDrawingGuidesCollection.Count](https://reference.aspose.com/slides/net/aspose.slides/idrawingguidescollection/count/) property and indexer provide access to existing guides. The [IDrawingGuide.Orientation](https://reference.aspose.com/slides/net/aspose.slides/idrawingguide/orientation/), [IDrawingGuide.Position](https://reference.aspose.com/slides/net/aspose.slides/idrawingguide/position/), and [IDrawingGuide.Color](https://reference.aspose.com/slides/net/aspose.slides/idrawingguide/color/) properties can be read or changed.
The following example reads the slide-view guides from the presentation created above:
```csharp
using Aspose.Slides;
using var presentation = new Presentation("drawing-guides.pptx");
var guides = presentation.ViewProperties.SlideViewProperties.DrawingGuides;
for (var index = 0; index < guides.Count; index++)
{
var guide = guides[index];
Console.WriteLine($"Guide {index}: orientation = {guide.Orientation}, position = {guide.Position}, color = {guide.Color}");
}
```
## **Add Guides to Master and Layout Slides**
A slide master and each of its layout slides can have their own drawing-guide collections. Use [IMasterSlide.DrawingGuides](https://reference.aspose.com/slides/net/aspose.slides/imasterslide/drawingguides/) for a master slide and [ILayoutSlide.DrawingGuides](https://reference.aspose.com/slides/net/aspose.slides/ilayoutslide/drawingguides/) for a layout slide.
The following example adds a vertical guide to the first master slide and a horizontal guide to the first layout slide:
```csharp
using Aspose.Slides;
using Aspose.Slides.Export;
using var presentation = new Presentation();
var slideSize = presentation.SlideSize.Size;
var masterGuides = presentation.Masters[0].DrawingGuides;
var layoutGuides = presentation.LayoutSlides[0].DrawingGuides;
masterGuides.Add(Orientation.Vertical, slideSize.Width / 2 - 20f);
layoutGuides.Add(Orientation.Horizontal, slideSize.Height / 2 + 20f);
presentation.Save("master-layout-drawing-guides.pptx", SaveFormat.Pptx);
```
## **Add Guides to Notes and Handout Masters**
Notes masters and handout masters also support drawing guides. Use [IMasterNotesSlide.DrawingGuides](https://reference.aspose.com/slides/net/aspose.slides/imasternotesslide/drawingguides/) and [IMasterHandoutSlide.DrawingGuides](https://reference.aspose.com/slides/net/aspose.slides/imasterhandoutslide/drawingguides/) to access their collections. If a presentation does not contain one of these masters, [IMasterNotesSlideManager.SetDefaultMasterNotesSlide](https://reference.aspose.com/slides/net/aspose.slides/imasternotesslidemanager/setdefaultmasternotesslide/) or [IMasterHandoutSlideManager.SetDefaultMasterHandoutSlide](https://reference.aspose.com/slides/net/aspose.slides/imasterhandoutslidemanager/setdefaultmasterhandoutslide/) creates the default master and returns it.
The following example adds a horizontal guide to a notes master and a vertical guide to a handout master:
```csharp
using Aspose.Slides;
using Aspose.Slides.Export;
using var presentation = new Presentation();
var notesSize = presentation.NotesSize.Size;
var notesMaster = presentation.MasterNotesSlideManager.SetDefaultMasterNotesSlide();
var handoutMaster = presentation.MasterHandoutSlideManager.SetDefaultMasterHandoutSlide();
notesMaster.DrawingGuides.Add(Orientation.Horizontal, notesSize.Height / 2 + 50f);
handoutMaster.DrawingGuides.Add(Orientation.Vertical, notesSize.Width / 2 - 50f);
presentation.Save("notes-handout-drawing-guides.pptx", SaveFormat.Pptx);
```
## **Clear Drawing Guides**
Call [IDrawingGuidesCollection.Clear](https://reference.aspose.com/slides/net/aspose.slides/idrawingguidescollection/clear/) to remove every guide from a particular collection. Clearing one collection does not affect guides stored in another scope.
The following example clears the slide-view guides and all guides on slide masters, layout slides, the notes master, and the handout master without creating missing masters:
```csharp
using Aspose.Slides;
using Aspose.Slides.Export;
using var presentation = new Presentation("presentation-with-guides.pptx");
presentation.ViewProperties.SlideViewProperties.DrawingGuides.Clear();
foreach (var masterSlide in presentation.Masters)
{
masterSlide.DrawingGuides.Clear();
}
foreach (var layoutSlide in presentation.LayoutSlides)
{
layoutSlide.DrawingGuides.Clear();
}
var notesMaster = presentation.MasterNotesSlideManager.MasterNotesSlide;
if (notesMaster != null)
{
notesMaster.DrawingGuides.Clear();
}
var handoutMaster = presentation.MasterHandoutSlideManager.MasterHandoutSlide;
if (handoutMaster != null)
{
handoutMaster.DrawingGuides.Clear();
}
presentation.Save("presentation-without-guides.pptx", SaveFormat.Pptx);
```
## **FAQ**
**Do drawing guides appear in a slide show or exported images?**
No. Drawing guides are alignment aids for editing and are not rendered as presentation content.
**Can a drawing guide be added directly to an individual normal slide?**
Normal-slide editing guides are stored in the presentation's slide-view properties. Separate guide collections are available for slide masters, layout slides, notes masters, and handout masters.
**Which units are used for guide positions?**
Positions are specified in points, where 72 points equal one inch. Vertical positions are measured from the left edge, and horizontal positions are measured from the top edge.
**Does clearing drawing guides remove shapes or change slide content?**
No. The `Clear` method removes only the guides in the selected collection. Shapes and other slide content remain unchanged.
# Edit PDF Documents in .NET
> Edit PDF documents in C# by importing them into Aspose.Slides, replacing text, and saving the modified presentation back to PDF.
Source: https://docs.aspose.com/slides/net/edit-pdf/
Updated: 2026-09-21
## **Overview**
Aspose.Slides for .NET lets you edit PDF content by importing its pages as slides, modifying the presentation, and exporting it back to PDF. This article shows a simple text replacement. The presentation stays in memory, so saving an intermediate PPTX file is optional.
## **Replace Text in a PDF**
Use [AddFromPdf](https://reference.aspose.com/slides/net/aspose.slides/slidecollection/addfrompdf/) to import the pages, [ReplaceText](https://reference.aspose.com/slides/net/aspose.slides/presentation/replacetext/) to update the text, and [Save](https://reference.aspose.com/slides/net/aspose.slides/presentation/save/) to export the result.
The following example expects `input.pdf` to contain the word "Draft" as editable text after import. It replaces that word with "Final" and writes `edited.pdf`. Clearing the initial slide before import prevents an extra blank page in the output. The search matches whole words with the same letter case; `null` means no result callback is needed.
```csharp
using Aspose.Slides;
using Aspose.Slides.Export;
using var presentation = new Presentation();
presentation.Slides.RemoveAt(0);
presentation.Slides.AddFromPdf("input.pdf");
var searchOptions = new TextSearchOptions
{
WholeWordsOnly = true,
CaseSensitive = true
};
presentation.ReplaceText("Draft", "Final", searchOptions, null);
presentation.Save("edited.pdf", SaveFormat.Pdf);
```
For more options, see [Search and Replace Text](https://docs.aspose.com/slides/net/search-and-replace-text/) and [Convert PowerPoint to PDF](https://docs.aspose.com/slides/net/convert-powerpoint-to-pdf/).
Text replacement works on imported text, not text inside scanned images. The conversion can affect layout and formatting, so review the output, especially when the replacement text is longer than the original.
## **FAQ**
**Do I need to save a PPTX file before exporting the PDF?**
No. You can edit and export the same presentation in memory. Save a PPTX copy only if you also want to continue editing it in PowerPoint; see [Save Presentations](https://docs.aspose.com/slides/net/save-presentation/).
**Why might some text remain unchanged?**
The example matches the whole word "Draft" with exact case. Text imported as an image or split across separate text frames will not necessarily match the search. Check the imported content and adjust the search for your document.
# Add Ellipses to Presentations in .NET
> Learn how to create, format, and manipulate ellipse shapes in Aspose.Slides for .NET across PPT and PPTX presentations—C# code examples included.
Source: https://docs.aspose.com/slides/net/ellipse/
Updated: 2026-08-05
## **Overview**
This article shows how to add ellipse shapes to PowerPoint slides by using Aspose.Slides. It covers creating a simple ellipse, creating a formatted ellipse, and saving the updated presentation as a PPTX file. It also touches on related questions such as working with ellipse position and size, controlling stacking order, and applying animation effects.
## **Create an Ellipse**
To add a simple ellipse to a selected slide of the presentation, please follow the steps below:
1. Create an instance of [Presentation ](https://reference.aspose.com/slides/net/aspose.slides/presentation)class
1. Obtain the reference of a slide by using its Index
1. Add an AutoShape of Ellipse type using AddAutoShape method exposed by IShapes object
1. Write the modified presentation as a PPTX file
In the example given below, we have added an ellipse to the first slide.
```c#
using Aspose.Slides;
using Aspose.Slides.Export;
// Instantiate Prseetation class that represents the PPTX
using (Presentation pres = new Presentation())
{
// Get the first slide
ISlide sld = pres.Slides[0];
// Add autoshape of ellipse type
sld.Shapes.AddAutoShape(ShapeType.Ellipse, 50, 150, 150, 50);
//Write the PPTX file to disk
pres.Save("EllipseShp1_out.pptx", SaveFormat.Pptx);
}
```
## **Create a Formatted Ellipse**
To add a better formatted ellipse to a slide, please follow the steps below:
1. Create an instance of [Presentation ](https://reference.aspose.com/slides/net/aspose.slides/presentation)class.
1. Obtain the reference of a slide by using its Index.
1. Add an AutoShape of Ellipse type using AddAutoShape method exposed by IShapes object.
1. Set the Fill Type of the Ellipse to Solid.
1. Set the Color of the Ellipse using SolidFillColor.Color property as exposed by FillFormat object associated with the IShape object.
1. Set the Color of the lines of the Ellipse.
1. Set the Width of the lines of the Ellipse.
1. Write the modified presentation as a PPTX file.
In the example given below, we have added a formatted ellipse to the first slide of the presentation.
```c#
using System.Drawing;
using Aspose.Slides;
using Aspose.Slides.Export;
// Instantiate Prseetation class that represents the PPTX
using (Presentation pres = new Presentation())
{
// Get the first slide
ISlide sld = pres.Slides[0];
// Add autoshape of ellipse type
IShape shp = sld.Shapes.AddAutoShape(ShapeType.Ellipse, 50, 150, 150, 50);
// Apply some formatting to ellipse shape
shp.FillFormat.FillType = FillType.Solid;
shp.FillFormat.SolidFillColor.Color = Color.Chocolate;
// Apply some formatting to the line of Ellipse
shp.LineFormat.FillFormat.FillType = FillType.Solid;
shp.LineFormat.FillFormat.SolidFillColor.Color = Color.Black;
shp.LineFormat.Width = 5;
//Write the PPTX file to disk
pres.Save("EllipseShp2_out.pptx", SaveFormat.Pptx);
}
```
## **FAQ**
### How do I set the exact position and size of an ellipse with respect to the slide's units?
Coordinates and sizes are typically specified **in points**. For predictable results, base your calculations on the slide size and convert required millimeters or inches to points before assigning values.
### How can I place an ellipse above or below other objects (control stacking order)?
Adjust the drawing order of the object by bringing it to front or sending it to back. This lets the ellipse overlap other objects or reveal those beneath it.
### How do I animate the appearance or emphasis of an ellipse?
[Apply](https://docs.aspose.com/slides/net/shape-animation/) entrance, emphasis, or exit effects to the shape, and configure triggers and timing to orchestrate when and how the animation plays.
## Related articles
- [Add Rectangles to Presentations in .NET](https://docs.aspose.com/slides/net/rectangle/)
# Embed Fonts in Presentations in .NET
> Manage embedded fonts in PowerPoint with Aspose.Slides for .NET. Use C# to add, retrieve, remove, and compress fonts to preserve text appearance and reduce file size.
Source: https://docs.aspose.com/slides/net/embedded-font/
Updated: 2026-11-07
## **Introduction**
Embedding fonts stores font data inside a PowerPoint presentation. When a viewer supports embedded fonts, it can display text using those fonts even if they are not installed on the target system. This helps preserve line breaks, text spacing, and slide layout.
Aspose.Slides for .NET lets you retrieve, add, and remove embedded fonts through the [FontsManager](https://reference.aspose.com/slides/net/aspose.slides/presentation/fontsmanager/) property of a [Presentation](https://reference.aspose.com/slides/net/aspose.slides/presentation/). You can also reduce the size of embedded font data by removing characters that the presentation does not use.
The examples below work with PPTX files. Before embedding a font, make sure its font data is available to Aspose.Slides and its license permits embedding.
## **Get and Remove Embedded Fonts**
Use [GetEmbeddedFonts](https://reference.aspose.com/slides/net/aspose.slides/fontsmanager/getembeddedfonts/) to list the fonts stored in a presentation. To remove one, pass a font from that list to [RemoveEmbeddedFont](https://reference.aspose.com/slides/net/aspose.slides/fontsmanager/removeembeddedfont/), then save the presentation.
The following example lists the embedded fonts in `EmbeddedFonts.pptx` and removes Calibri if it is present:
```csharp
using System;
using Aspose.Slides;
using Aspose.Slides.Export;
using var presentation = new Presentation("EmbeddedFonts.pptx");
var fontsManager = presentation.FontsManager;
var embeddedFonts = fontsManager.GetEmbeddedFonts();
foreach (var font in embeddedFonts)
{
Console.WriteLine(font.FontName);
}
var fontToRemove = Array.Find(embeddedFonts, font => string.Equals(font.FontName, "Calibri", StringComparison.OrdinalIgnoreCase));
if (fontToRemove != null)
{
fontsManager.RemoveEmbeddedFont(fontToRemove);
presentation.Save("WithoutEmbeddedCalibri.pptx", SaveFormat.Pptx);
}
else
{
Console.WriteLine("Calibri is not embedded. No output file was created.");
}
```
Removing an embedded font removes its stored font data; it does not change the font assigned to the text. If the font is installed on the target system, the text can still use it. Otherwise, rendering may require [font substitution](https://docs.aspose.com/slides/net/font-substitution/), which can affect the layout.
## **Inspect Font Data and Embedding Permissions**
Use the [IFontsManager](https://reference.aspose.com/slides/net/aspose.slides/ifontsmanager/) interface to inspect fonts before embedding them. Call [IFontsManager.GetFonts](https://reference.aspose.com/slides/net/aspose.slides/ifontsmanager/getfonts/) to retrieve the fonts used in the presentation. For each font, pass an [IFontData](https://reference.aspose.com/slides/net/aspose.slides/ifontdata/) object and the required [FontStyleType](https://reference.aspose.com/slides/net/aspose.slides/fontstyletype/) value to [IFontsManager.GetFontBytes](https://reference.aspose.com/slides/net/aspose.slides/ifontsmanager/getfontbytes/). The method returns the binary data for that font style, or `null` when the requested font or style is unavailable. Do not pass a `null` result to [IFontsManager.GetFontEmbeddingLevel](https://reference.aspose.com/slides/net/aspose.slides/ifontsmanager/getfontembeddinglevel/), because that method requires a byte array.
[EmbeddingLevel](https://reference.aspose.com/slides/net/aspose.slides/embeddinglevel/) is a flags enumeration that reports the embedding restrictions stored in the font:
- `Installable` permits embedding and permanent installation on another system, subject to the font license.
- `Restricted` prohibits embedding unless permission is obtained from the font's legal owner when it is the only usage-permission flag.
- `PreviewPrint` permits temporary use for viewing and printing; a document containing the font must be read-only.
- `Editable` permits temporary use and allows the document to be edited and saved.
- `NoSubsetting` is an additional restriction that prohibits embedding only a subset of the glyphs. Embed all characters when this flag is present.
- `BitmapOnly` is an additional restriction that permits only bitmap strikes to be embedded, not outline data. If the font has no bitmap strikes, it cannot be embedded.
The first four values describe usage permission, while `NoSubsetting` and `BitmapOnly` can be combined with them. Check the modifiers with bitwise operations. Because `Installable` is zero, do not use `HasFlag` to detect it; mask the usage-permission bits and compare the result with `Installable`. Current fonts should set at most one usage-permission bit. For compatibility with older fonts that set more than one, the helper below selects the least restrictive permission: `Editable`, then `PreviewPrint`, then `Restricted`.
The following example audits the regular, bold, italic, and bold-italic data available for every font returned by `GetFonts`. It skips unavailable styles, restricted fonts, bitmap-only fonts, fonts limited to preview and print because the output remains editable, and fonts that are already embedded. If any available style has `NoSubsetting`, it embeds all characters for that font family.
```csharp
using System;
using System.Collections.Generic;
using Aspose.Slides;
using Aspose.Slides.Export;
static EmbeddingLevel GetUsagePermission(EmbeddingLevel level)
{
const EmbeddingLevel permissionMask = EmbeddingLevel.Restricted | EmbeddingLevel.PreviewPrint | EmbeddingLevel.Editable;
var permissions = level & permissionMask;
if ((permissions & EmbeddingLevel.Editable) != 0)
{
return EmbeddingLevel.Editable;
}
if ((permissions & EmbeddingLevel.PreviewPrint) != 0)
{
return EmbeddingLevel.PreviewPrint;
}
if ((permissions & EmbeddingLevel.Restricted) != 0)
{
return EmbeddingLevel.Restricted;
}
return EmbeddingLevel.Installable;
}
using var presentation = new Presentation("Fonts.pptx");
var fontsManager = presentation.FontsManager;
var fontStyles = new[]
{
FontStyleType.Regular,
FontStyleType.Bold,
FontStyleType.Italic,
FontStyleType.Bold | FontStyleType.Italic
};
var embeddedFontNames = new HashSet(StringComparer.OrdinalIgnoreCase);
foreach (var embeddedFont in fontsManager.GetEmbeddedFonts())
{
embeddedFontNames.Add(embeddedFont.FontName);
}
var embeddingPlan = new List<(IFontData Font, EmbedFontCharacters Rule)>();
foreach (var font in fontsManager.GetFonts())
{
if (embeddedFontNames.Contains(font.FontName))
{
Console.WriteLine($"{font.FontName}: already embedded.");
continue;
}
var hasAvailableData = false;
var allAvailableStylesCanBeEmbedded = true;
var previewPrintOnly = false;
var requiresFullFont = false;
foreach (var fontStyle in fontStyles)
{
var fontBytes = fontsManager.GetFontBytes(font, fontStyle);
if (fontBytes == null)
{
Console.WriteLine($"{font.FontName} ({fontStyle}): font data is unavailable.");
continue;
}
hasAvailableData = true;
var embeddingLevel = fontsManager.GetFontEmbeddingLevel(fontBytes, font.FontName);
var usagePermission = GetUsagePermission(embeddingLevel);
var noSubsetting = (embeddingLevel & EmbeddingLevel.NoSubsetting) != 0;
var bitmapOnly = (embeddingLevel & EmbeddingLevel.BitmapOnly) != 0;
requiresFullFont |= noSubsetting;
previewPrintOnly |= usagePermission == EmbeddingLevel.PreviewPrint;
allAvailableStylesCanBeEmbedded &= usagePermission != EmbeddingLevel.Restricted && !bitmapOnly;
Console.WriteLine($"{font.FontName} ({fontStyle}): {embeddingLevel}.");
}
if (!hasAvailableData)
{
Console.WriteLine($"{font.FontName}: skipped because no requested style is available.");
}
else if (!allAvailableStylesCanBeEmbedded)
{
Console.WriteLine($"{font.FontName}: skipped because at least one available style does not permit outline embedding.");
}
else if (previewPrintOnly)
{
Console.WriteLine($"{font.FontName}: skipped because this example produces an editable presentation.");
}
else
{
var rule = requiresFullFont ? EmbedFontCharacters.All : EmbedFontCharacters.OnlyUsed;
embeddingPlan.Add((font, rule));
}
}
foreach (var item in embeddingPlan)
{
fontsManager.AddEmbeddedFont(item.Font, item.Rule);
}
presentation.Save("WithAuditedFonts.pptx", SaveFormat.Pptx);
```
This inspection reports the restrictions encoded in each font file. It does not grant a license, prove that you obtained the font legally, or replace checking the font's license agreement before distributing an embedded copy.
## **Add Embedded Fonts**
Use [AddEmbeddedFont](https://reference.aspose.com/slides/net/aspose.slides/fontsmanager/addembeddedfont/) to embed a font. Its overloads accept either an [IFontData](https://reference.aspose.com/slides/net/aspose.slides/ifontdata/) object or a byte array containing the font data. The [EmbedFontCharacters](https://reference.aspose.com/slides/net/aspose.slides.export/embedfontcharacters/) enumeration controls which characters are included:
- [All](https://reference.aspose.com/slides/net/aspose.slides.export/embedfontcharacters/) embeds all characters in the font. Use this option when recipients need to edit the presentation and enter new text.
- [OnlyUsed](https://reference.aspose.com/slides/net/aspose.slides.export/embedfontcharacters/) embeds only the characters used in the presentation to reduce file size. Choose this option for a finished presentation that is primarily intended for viewing.
The following example uses [GetFonts](https://reference.aspose.com/slides/net/aspose.slides/fontsmanager/getfonts/) to retrieve the fonts used in `Fonts.pptx` and embeds those that are not already embedded. The fonts to add must be available on the machine running the code. Existing embedded fonts retain their current character sets.
```csharp
using System;
using System.Collections.Generic;
using System.Linq;
using Aspose.Slides;
using Aspose.Slides.Export;
using var presentation = new Presentation("Fonts.pptx");
var fontsManager = presentation.FontsManager;
var allFonts = fontsManager.GetFonts();
var embeddedFonts = fontsManager.GetEmbeddedFonts();
var embeddedFontNames = embeddedFonts.Select(font => font.FontName);
var embeddedNames = new HashSet(embeddedFontNames, StringComparer.OrdinalIgnoreCase);
foreach (var font in allFonts)
{
if (!embeddedNames.Contains(font.FontName))
{
fontsManager.AddEmbeddedFont(font, EmbedFontCharacters.All);
embeddedNames.Add(font.FontName);
}
}
presentation.Save("WithEmbeddedFonts.pptx", SaveFormat.Pptx);
```
## **Compress Embedded Fonts**
[CompressEmbeddedFonts](https://reference.aspose.com/slides/net/aspose.slides.lowcode/compress/compressembeddedfonts/) reduces embedded font data by removing unused characters. It operates on fonts that are already embedded, so the size reduction depends on how much unused font data the presentation contains.
The following example compresses the fonts in `EmbeddedFonts.pptx` and saves the result as a separate file:
```csharp
using Aspose.Slides;
using Aspose.Slides.Export;
using Aspose.Slides.LowCode;
using var presentation = new Presentation("EmbeddedFonts.pptx");
Compress.CompressEmbeddedFonts(presentation);
presentation.Save("CompressedEmbeddedFonts.pptx", SaveFormat.Pptx);
```
Keep the original file if recipients may need to add text later. Characters removed during compression are no longer available from the embedded font, even if you originally embedded all characters.
To let a matching registered font take priority during export without removing the embedded font, see [Prefer Registered Fonts over Embedded Fonts](https://docs.aspose.com/slides/net/font-selection-sequence/#prefer-registered-fonts-over-embedded-fonts) (.NET 26.11 or later).
## **FAQ**
**How can I check whether an embedded font will still be substituted during rendering?**
Call [GetSubstitutions](https://reference.aspose.com/slides/net/aspose.slides/fontsmanager/getsubstitutions/) in the environment where you render the presentation to see which fonts Aspose.Slides will replace. Also check [font substitution](https://docs.aspose.com/slides/net/font-substitution/) settings and [font fallback](https://docs.aspose.com/slides/net/fallback-font/) rules. Fallback handles missing characters, so embedding a font does not resolve characters that the font itself does not contain.
**Should I embed common fonts such as Arial and Calibri?**
Base the decision on the target environment. If the required fonts are available on every machine that opens or renders the presentation, embedding them may add unnecessary file size. If recipients or servers may lack those fonts, embedding them can help preserve the intended appearance, provided their licenses allow it.
## Related features
- [Embed fonts in presentations](https://docs.aspose.com/slides/features/embed-fonts/)
- [List embedded fonts](https://docs.aspose.com/slides/features/list-embedded-fonts/)
# Customize Error Bars in Presentation Charts in .NET
> Learn how to add and customize error bars in charts with Aspose.Slides for .NET—optimize data visuals in PowerPoint presentations.
Source: https://docs.aspose.com/slides/net/error-bar/
Updated: 2026-08-05
## **Overview**
This article explains how to work with error bars in presentation charts by using Aspose.Slides. It shows how to add error bars to a chart series, configure X and Y error bar settings, and apply different value types such as fixed, percentage, and custom values.
It also demonstrates how to assign custom error bar values for individual data points in a series by using the corresponding data point collection. In addition, the article includes brief notes about how error bars behave during export, their compatibility with markers and data labels, and where to find the related API reference classes and enums.
## **Add Error Bars**
Aspose.Slides for .NET provides a simple API for managing error bar values. The sample code applies when using a custom value type. To specify a value, use the **ErrorBarCustomValues** property of a specific data point in the **DataPoints** collection of series:
1. Create an instance of the [Presentation](https://reference.aspose.com/slides/net/aspose.slides/presentation) class.
1. Add a bubble chart on desired slide.
1. Access the first chart series and set the error bar X format.
1. Access the first chart series and set the error bar Y format.
1. Setting bars values and format.
1. Write the modified presentation to a PPTX file.
```c#
using Aspose.Slides;
using Aspose.Slides.Charts;
using Aspose.Slides.Export;
// Creating empty presentation
using (Presentation presentation = new Presentation())
{
// Creating a bubble chart
IChart chart = presentation.Slides[0].Shapes.AddChart(ChartType.Bubble, 50, 50, 400, 300, true);
// Adding Error bars and setting its format
IErrorBarsFormat errBarX = chart.ChartData.Series[0].ErrorBarsXFormat;
IErrorBarsFormat errBarY = chart.ChartData.Series[0].ErrorBarsYFormat;
errBarX.IsVisible = true;
errBarY.IsVisible = true;
errBarX.ValueType = ErrorBarValueType.Fixed;
errBarX.Value = 0.1f;
errBarY.ValueType = ErrorBarValueType.Percentage;
errBarY.Value = 5;
errBarX.Type = ErrorBarType.Plus;
errBarY.Format.Line.Width = 2;
errBarX.HasEndCap = true;
// Saving presentation
presentation.Save("ErrorBars_out.pptx", SaveFormat.Pptx);
}
```
## **Add Custom Error Bar Values**
Aspose.Slides for .NET provides a simple API for managing custom error bar values. The sample code applies when the **IErrorBarsFormat.ValueType** property is equal to **Custom**. To specify a value, use the **ErrorBarCustomValues** property of a specific data point in the **DataPoints** collection of series:
1. Create an instance of the [Presentation](https://reference.aspose.com/slides/net/aspose.slides/presentation) class.
1. Add a bubble chart on desired slide.
1. Access the first chart series and set the error bar X format.
1. Access the first chart series and set the error bar Y format.
1. Access the chart series individual data points and setting the Error Bar values for individual series data point.
1. Setting bars values and format.
1. Write the modified presentation to a PPTX file.
```c#
using Aspose.Slides;
using Aspose.Slides.Charts;
using Aspose.Slides.Export;
// Creating empty presentation
using (Presentation presentation = new Presentation())
{
// Creating a bubble chart
IChart chart = presentation.Slides[0].Shapes.AddChart(ChartType.Bubble, 50, 50, 400, 300, true);
// Adding custom Error bars and setting its format
IChartSeries series = chart.ChartData.Series[0];
IErrorBarsFormat errBarX = series.ErrorBarsXFormat;
IErrorBarsFormat errBarY = series.ErrorBarsYFormat;
errBarX.IsVisible = true;
errBarY.IsVisible = true;
errBarX.ValueType = ErrorBarValueType.Custom;
errBarY.ValueType = ErrorBarValueType.Custom;
// Accessing chart series data point and setting error bars values for individual point
IChartDataPointCollection points = series.DataPoints;
points.DataSourceTypeForErrorBarsCustomValues.DataSourceTypeForXPlusValues = DataSourceType.DoubleLiterals;
points.DataSourceTypeForErrorBarsCustomValues.DataSourceTypeForXMinusValues = DataSourceType.DoubleLiterals;
points.DataSourceTypeForErrorBarsCustomValues.DataSourceTypeForYPlusValues = DataSourceType.DoubleLiterals;
points.DataSourceTypeForErrorBarsCustomValues.DataSourceTypeForYMinusValues = DataSourceType.DoubleLiterals;
// Setting error bars for chart series points
for (int i = 0; i < points.Count; i++)
{
points[i].ErrorBarsCustomValues.XMinus.AsLiteralDouble = i + 1;
points[i].ErrorBarsCustomValues.XPlus.AsLiteralDouble = i + 1;
points[i].ErrorBarsCustomValues.YMinus.AsLiteralDouble = i + 1;
points[i].ErrorBarsCustomValues.YPlus.AsLiteralDouble = i + 1;
}
// Saving presentation
presentation.Save("ErrorBarsCustomValues_out.pptx", SaveFormat.Pptx);
}
```
## **FAQ**
### What happens to error bars when exporting a presentation to PDF or images?
They are rendered as part of the chart and preserved during conversion along with the rest of the chart formatting, assuming a compatible version or renderer.
### Can error bars be combined with markers and data labels?
Yes. Error bars are a separate element and are compatible with markers and data labels; if elements overlap, you may need to adjust formatting.
### Where can I find the list of properties and enums for working with error bars in the API?
In the API reference: the [ErrorBarsFormat](https://reference.aspose.com/slides/net/aspose.slides.charts/errorbarsformat/) class and the related enums [ErrorBarType](https://reference.aspose.com/slides/net/aspose.slides.charts/errorbartype/) and [ErrorBarValueType](https://reference.aspose.com/slides/net/aspose.slides.charts/errorbarvaluetype/).
## Related features
- [Add chart error bars](https://docs.aspose.com/slides/features/chart-error-bars/)
# Evaluate Aspose.Slides
> Evaluate Aspose.Slides for .NET and explore API features for PowerPoint (PPT, PPTX) and OpenDocument (ODP) presentations—start your free trial.
Source: https://docs.aspose.com/slides/net/evaluate-aspose-slides/
Updated: 2026-09-28
## **Aspose.Slides Evaluation**
You can download Aspose.Slides for evaluation. The evaluation package is the same as the purchased package; it becomes licensed after you add a few lines of code to apply the license.
Without a license, Aspose.Slides provides its full functionality in evaluation mode, with two limitations: it adds an evaluation watermark text box to every slide of each presentation it saves, and text that your code reads from a presentation is truncated to its first few characters, followed by a notice about the evaluation limitation. Text that your code writes is saved in full.

If you want to test Aspose.Slides without evaluation version limitations, you can request a **30 Day Temporary License**. Please refer to [How to get a Temporary License?](https://purchase.aspose.com/temporary-license) for more information.
## **Install the Evaluation Package**
```bash
dotnet add package Aspose.Slides.NET
```
On Linux and macOS, you can use the Aspose.Slides.NET6.CrossPlatform package instead; see [Installation](https://docs.aspose.com/slides/net/installation/).
## **Apply a License**
These are the "few lines of code" that turn the evaluation package into a licensed one. Apply the
license once at application start-up, before any `Presentation` object is created — a presentation
constructed earlier keeps the evaluation watermark.
```csharp
using Aspose.Slides;
var license = new License();
license.SetLicense("Aspose.Slides.NET.lic");
```
`SetLicense` also accepts a `Stream`, which is the better option when the license ships as an embedded
resource rather than a file on disk. If the path is wrong or the file has expired the call throws, so
failures surface immediately at start-up instead of silently reverting to evaluation mode.
Once the license is applied, saved presentations no longer carry the watermark, and text is read in full.
## **FAQ**
### Can I test multiple presentations in parallel across different threads in evaluation mode?
Yes. You can process different documents in parallel; you should not share the same presentation object [across threads](https://docs.aspose.com/slides/net/multithreading/). Evaluation mode does not affect this.
### Do I need to install Microsoft PowerPoint to evaluate the library on a server or in CI?
No. Aspose.Slides is a standalone engine and does not require PowerPoint installed for either evaluation or production.
### Can I fully test conversion of PPT/PPTX to PDF and images in evaluation mode?
Yes. The [converters](https://docs.aspose.com/slides/net/convert-presentation/) work; the output will include a watermark.
### Can I use a temporary license for load testing without a watermark?
Yes. A 30-day temporary license removes evaluation-mode limitations and allows testing without a watermark.
## Related articles
- [Licensing](https://docs.aspose.com/slides/net/licensing/)
# Retrieve and Update Presentation Information in .NET
> Explore slides, structure and metadata in PowerPoint and OpenDocument presentations using .NET for faster insights and smarter content audits.
Source: https://docs.aspose.com/slides/net/examine-presentation/
Updated: 2026-09-22
## **Overview**
Aspose.Slides can identify a presentation's format and read its document metadata without creating a complete presentation object model. This is useful when you need to classify files, build an inventory, or inspect properties before deciding whether to load and process the presentation content.
This article demonstrates lightweight inspection through [PresentationFactory](https://reference.aspose.com/slides/net/aspose.slides/presentationfactory/) and [IPresentationInfo](https://reference.aspose.com/slides/net/aspose.slides/ipresentationinfo/), as well as targeted updates through [IDocumentProperties](https://reference.aspose.com/slides/net/aspose.slides/idocumentproperties/).
## **Check a Presentation Format**
If you already have a loaded presentation, see [Determine the Original Presentation Format](https://docs.aspose.com/slides/net/detect-presentation-source-format/) for detection after loading and the limitations of legacy PPT, PPS, and POT streams.
Use [PresentationFactory.GetPresentationInfo](https://reference.aspose.com/slides/net/aspose.slides/presentationfactory/getpresentationinfo/) to inspect a file without creating a [Presentation](https://reference.aspose.com/slides/net/aspose.slides/presentation/) instance. The [IPresentationInfo.LoadFormat](https://reference.aspose.com/slides/net/aspose.slides/ipresentationinfo/loadformat/) property reports the detected format, such as PPTX, PPT, or ODP.
```csharp
using System;
using Aspose.Slides;
var fileNames = new[] { "pres.pptx", "pres.ppt", "pres.odp" };
foreach (var fileName in fileNames)
{
var presentationInfo = PresentationFactory.Instance.GetPresentationInfo(fileName);
Console.WriteLine($"{fileName}: {presentationInfo.LoadFormat}");
}
```
## **Build a Lightweight Presentation Inventory**
When you process many presentation files, you may need a compact inventory for validation, indexing, or a document-management system. In this scenario, use [PresentationFactory.GetPresentationInfo](https://reference.aspose.com/slides/net/aspose.slides/presentationfactory/getpresentationinfo/) to obtain an [IPresentationInfo](https://reference.aspose.com/slides/net/aspose.slides/ipresentationinfo/) object, and then call [IPresentationInfo.ReadDocumentProperties](https://reference.aspose.com/slides/net/aspose.slides/ipresentationinfo/readdocumentproperties/) to read the document metadata. This approach does not create a [Presentation](https://reference.aspose.com/slides/net/aspose.slides/presentation/) instance or require you to traverse the complete presentation object model.
The extended properties exposed by [IDocumentProperties](https://reference.aspose.com/slides/net/aspose.slides/idocumentproperties/) provide the following inventory values:
| Property | Inventory value |
| --- | --- |
| [Slides](https://reference.aspose.com/slides/net/aspose.slides/idocumentproperties/slides/) | Total number of slides. |
| [HiddenSlides](https://reference.aspose.com/slides/net/aspose.slides/idocumentproperties/hiddenslides/) | Number of hidden slides. |
| [Notes](https://reference.aspose.com/slides/net/aspose.slides/idocumentproperties/notes/) | Number of slides that contain notes. |
| [Paragraphs](https://reference.aspose.com/slides/net/aspose.slides/idocumentproperties/paragraphs/) | Total number of paragraphs, when available. |
| [Words](https://reference.aspose.com/slides/net/aspose.slides/idocumentproperties/words/) | Total number of words. |
| [MultimediaClips](https://reference.aspose.com/slides/net/aspose.slides/idocumentproperties/multimediaclips/) | Total number of audio and video clips. |
The following example reads these values without creating a [Presentation](https://reference.aspose.com/slides/net/aspose.slides/presentation/) object and prints a compact inventory. It also combines [HeadingPairs](https://reference.aspose.com/slides/net/aspose.slides/idocumentproperties/headingpairs/) with [TitlesOfParts](https://reference.aspose.com/slides/net/aspose.slides/idocumentproperties/titlesofparts/) to display content groups such as fonts, themes, and slide titles.
```csharp
using System;
using System.IO;
using Aspose.Slides;
var filePath = "sample.pptx";
var presentationInfo = PresentationFactory.Instance.GetPresentationInfo(filePath);
var documentProperties = presentationInfo.ReadDocumentProperties();
Console.WriteLine($"File: {Path.GetFileName(filePath)}");
Console.WriteLine($"Format: {presentationInfo.LoadFormat}");
Console.WriteLine($"Title: {documentProperties.Title}");
Console.WriteLine($"Author: {documentProperties.Author}");
Console.WriteLine("Statistics:");
Console.WriteLine($" Slides: {documentProperties.Slides}");
Console.WriteLine($" Hidden slides: {documentProperties.HiddenSlides}");
Console.WriteLine($" Slides with notes: {documentProperties.Notes}");
Console.WriteLine($" Paragraphs: {documentProperties.Paragraphs}");
Console.WriteLine($" Words: {documentProperties.Words}");
Console.WriteLine($" Multimedia clips: {documentProperties.MultimediaClips}");
var headingPairs = documentProperties.HeadingPairs ?? Array.Empty();
var titlesOfParts = documentProperties.TitlesOfParts ?? Array.Empty();
var partIndex = 0;
if (headingPairs.Length == 0 || titlesOfParts.Length == 0)
{
Console.WriteLine("Content groups: not available");
}
else
{
Console.WriteLine("Content groups:");
foreach (var headingPair in headingPairs)
{
Console.WriteLine($" {headingPair.Name} ({headingPair.Count})");
for (var partOffset = 0; partOffset < headingPair.Count && partIndex < titlesOfParts.Length; partOffset++)
{
Console.WriteLine($" - {titlesOfParts[partIndex]}");
partIndex++;
}
}
if (partIndex < titlesOfParts.Length)
{
Console.WriteLine(" Other parts:");
while (partIndex < titlesOfParts.Length)
{
Console.WriteLine($" - {titlesOfParts[partIndex]}");
partIndex++;
}
}
}
```
Each [IHeadingPair](https://reference.aspose.com/slides/net/aspose.slides/iheadingpair/) supplies a group name and the number of items in that group. [IDocumentProperties.TitlesOfParts](https://reference.aspose.com/slides/net/aspose.slides/idocumentproperties/titlesofparts/) is a flat, ordered array, so consume the number of consecutive titles specified by each heading pair.
### **Stored Metadata and Format Limitations**
The inventory properties returned by [IPresentationInfo.ReadDocumentProperties](https://reference.aspose.com/slides/net/aspose.slides/ipresentationinfo/readdocumentproperties/) reflect metadata available in the source document. Aspose.Slides does not load and traverse the presentation object model to recalculate these values for this call. Missing properties are represented by default values, and stored values may be stale if the application that last saved the file did not update its document properties.
- **PPTX:** The format provides extended document properties for slide, note, hidden-slide, paragraph, word, and multimedia counts, as well as heading pairs and part titles. Availability depends on which properties were written by the document producer.
- **PPT:** The binary format can store corresponding document-summary properties. If a property is absent or was not refreshed by the document producer, Aspose.Slides returns its stored or default value rather than calculating it from the slides.
- **ODP:** OpenDocument metadata provides general document statistics, such as page, paragraph, and word counts, but these values do not map to every PowerPoint-specific extended property. Hidden-slide, notes-slide, multimedia, heading-pair, and part-title metadata may be unavailable, and the inventory properties may return default values. Do not treat a zero value or an empty array as authoritative proof that the corresponding content is absent.
Use the lightweight metadata approach for inventories and preliminary checks. Load the presentation and inspect its live object model when the result must reflect in-memory changes or when you need to verify the actual presentation content.
## **Update Presentation Properties**
The properties returned by [IPresentationInfo.ReadDocumentProperties](https://reference.aspose.com/slides/net/aspose.slides/ipresentationinfo/readdocumentproperties/) can also be changed without creating a [Presentation](https://reference.aspose.com/slides/net/aspose.slides/presentation/) instance. Apply the changes with [IPresentationInfo.UpdateDocumentProperties](https://reference.aspose.com/slides/net/aspose.slides/ipresentationinfo/updatedocumentproperties/), and then write the bound presentation with [IPresentationInfo.WriteBindedPresentation](https://reference.aspose.com/slides/net/aspose.slides/ipresentationinfo/writebindedpresentation/).
The following image shows the original document properties.

The following example changes the title and last-saved time and writes the result to a new file:
```csharp
using System;
using System.IO;
using Aspose.Slides;
var sourceFile = "sample.pptx";
var outputFile = "sample_with_updated_properties.pptx";
var presentationInfo = PresentationFactory.Instance.GetPresentationInfo(sourceFile);
var documentProperties = presentationInfo.ReadDocumentProperties();
documentProperties.Title = "Quarterly sales report";
documentProperties.LastSavedTime = DateTime.UtcNow;
presentationInfo.UpdateDocumentProperties(documentProperties);
using var outputStream = File.Create(outputFile);
presentationInfo.WriteBindedPresentation(outputStream);
```
The following image shows the updated document properties.

## **Useful Links**
For related security checks and protection settings, see the following articles:
- [Password-Protect Presentations](https://docs.aspose.com/slides/net/password-protected-presentation/)
- [Write-Protect Presentations](https://docs.aspose.com/slides/net/write-protected-presentation/)
## **FAQ**
**How can I check whether fonts are embedded and which ones they are?**
Load the presentation and use [Presentation.FontsManager](https://reference.aspose.com/slides/net/aspose.slides/presentation/fontsmanager/). Call [FontsManager.GetEmbeddedFonts](https://reference.aspose.com/slides/net/aspose.slides/fontsmanager/getembeddedfonts/) to obtain the embedded fonts and [FontsManager.GetFonts](https://reference.aspose.com/slides/net/aspose.slides/fontsmanager/getfonts/) to obtain the fonts used by the presentation. Compare the two results to find fonts that are required for rendering but are not embedded.
**How can I quickly tell if the file has hidden slides and how many?**
When stored document metadata is sufficient, read [IDocumentProperties.HiddenSlides](https://reference.aspose.com/slides/net/aspose.slides/idocumentproperties/hiddenslides/) through [PresentationFactory.GetPresentationInfo](https://reference.aspose.com/slides/net/aspose.slides/presentationfactory/getpresentationinfo/) and [IPresentationInfo.ReadDocumentProperties](https://reference.aspose.com/slides/net/aspose.slides/ipresentationinfo/readdocumentproperties/). This is suitable for a lightweight inventory. If the presentation has been modified in memory, the stored metadata may be missing or stale, or you need to verify live values, iterate through [Presentation.Slides](https://reference.aspose.com/slides/net/aspose.slides/presentation/slides/) and inspect each slide's [Slide.Hidden](https://reference.aspose.com/slides/net/aspose.slides/slide/hidden/) property instead.
**Can I detect whether custom slide size and orientation are used, and whether they differ from the defaults?**
Yes. Load the presentation and read [Presentation.SlideSize](https://reference.aspose.com/slides/net/aspose.slides/presentation/slidesize/). Inspect [ISlideSize.Type](https://reference.aspose.com/slides/net/aspose.slides/islidesize/type/), [ISlideSize.Size](https://reference.aspose.com/slides/net/aspose.slides/islidesize/size/), and [ISlideSize.Orientation](https://reference.aspose.com/slides/net/aspose.slides/islidesize/orientation/) to compare the current settings with the expected preset and dimensions.
**Is there a quick way to see if charts reference external data sources?**
Yes. Locate each [Chart](https://reference.aspose.com/slides/net/aspose.slides.charts/chart/) and inspect [ChartData.DataSourceType](https://reference.aspose.com/slides/net/aspose.slides.charts/chartdata/datasourcetype/). For an external workbook, read [ChartData.ExternalWorkbookPath](https://reference.aspose.com/slides/net/aspose.slides.charts/chartdata/externalworkbookpath/). The data source type and path identify an external reference, but verifying whether the target is available requires a separate resource check.
**How can I assess 'heavy' slides that may slow rendering or PDF export?**
There is no single complexity property. Traverse [Presentation.Slides](https://reference.aspose.com/slides/net/aspose.slides/presentation/slides/) and each slide's [IBaseSlide.Shapes](https://reference.aspose.com/slides/net/aspose.slides/ibaseslide/shapes/) collection. Use shape counts and the presence of large images, effects, animations, or multimedia as screening signals, and measure a representative render or export before treating a slide as a confirmed performance bottleneck.
# Examples
> Explore runnable C# examples for presentation elements, conversion, templates, extraction, fonts, protection, batch processing, AI and application integration.
Source: https://docs.aspose.com/slides/net/examples/
Updated: 2026-10-31
Start with [Run the .NET Examples](https://docs.aspose.com/slides/net/examples/getting-started/) for SDKs, IDE steps, native dependencies, evaluation mode and troubleshooting. Each article includes a complete project download.
Choose a presentation task and run its C# examples. Start with Elements for individual presentation objects, or use the task sections for complete runnable projects.
| Section | Examples |
|---|---|
| [Elements](https://docs.aspose.com/slides/net/examples/elements/) | Slides, shapes, text, charts, tables, media, notes and other objects. |
| [Presentations](https://docs.aspose.com/slides/net/examples/presentations/) | Create, open, save, combine and split presentation files. |
| [Conversion & Rendering](https://docs.aspose.com/slides/net/examples/conversion-rendering/) | Export documents, render previews and configure output. |
| [Templates & Data](https://docs.aspose.com/slides/net/examples/templates-data/) | Fill templates with text, images, charts and tables from data. |
| [Content Extraction](https://docs.aspose.com/slides/net/examples/content-extraction/) | Extract text, notes, images, media and structured data. |
| [Fonts & Text Processing](https://docs.aspose.com/slides/net/examples/fonts-text/) | Process text across a deck and manage fonts and multilingual content. |
| [Protection & Signatures](https://docs.aspose.com/slides/net/examples/protection-signatures/) | Use passwords, edit restrictions and digital signatures. |
| [Optimization & Batch Processing](https://docs.aspose.com/slides/net/examples/optimization-batch/) | Reduce size, handle large media and process files in batches. |
| [Complete Workflows](https://docs.aspose.com/slides/net/examples/complete-workflows/) | Run complete report, proposal, gallery and distribution projects. |
| [AI](https://docs.aspose.com/slides/net/examples/ai/) | Generate and translate slides with real AI model providers. |
| [Application Integration](https://docs.aspose.com/slides/net/examples/application-integration/) | Build an API, background worker or Docker converter. |
# AI
> Run C# examples for presentation generation, translation, design reuse and model-provider configuration.
Source: https://docs.aspose.com/slides/net/examples/ai/
Updated: 2026-10-30
Use model services with Aspose.Slides for .NET to create and translate editable presentations. Each example includes a complete project and explains its model, license and input requirements.
# Generate a Presentation with AI
> Runnable C# example to generate a presentation with ai, with a complete project, real model calls and editable PowerPoint output.
Source: https://docs.aspose.com/slides/net/examples/ai/generate/
Updated: 2026-11-03
Generate an editable water-cycle presentation through the default Aspose AI client. The program saves and reopens the deck, checks that the requested topic has useful text, and renders a preview. It makes a genuine network call; generated wording and slide count vary.
A representative first slide from one execution follows. Generated wording and design may vary.

## **Prerequisites and input**
Use a current supported .NET10 SDK/runtime and the supplied flexible SDK settings; no exact patch is required.
The example uses only synthetic prompts and creates its input presentation where needed. Generation and translation contact the selected model service.
## **Complete C# example**
Copy a C# block into `Program.cs` in a .NET project with `Aspose.Slides.NET6.CrossPlatform` installed. Each block is a complete program. Run one block at a time. The ZIP contains the IDE-ready project and its verification checks.
Set `ASPOSE_LICENSE_PATH` and run `dotnet run -- --mode licensed --allow-network` to make the model call. Configure the provider as described on this page.
The copied program writes its files under `example-output` by default.
The copied program requires an authorized Aspose.Slides license in `ASPOSE_LICENSE_PATH` and explicit `--allow-network` consent. Missing either prevents all model requests. Set `SLIDES_AI_TIMEOUT_SECONDS` to change the 180-second timeout. Run the copied file with `dotnet run -- --allow-network`; generation requires service access and may take time. The program reports error types without printing credentials.
```csharp
using System;
using System.IO;
using System.Linq;
using System.Drawing;
using System.Net.Http;
using System.Text;
using System.Threading.Tasks;
using Aspose.Slides;
using Aspose.Slides.AI;
using Aspose.Slides.Export;
internal static class Program
{
private static async Task Main(string[] args)
{
var licensePath = Environment.GetEnvironmentVariable("ASPOSE_LICENSE_PATH");
if (string.IsNullOrWhiteSpace(licensePath) || !args.Contains("--allow-network"))
{
Console.Error.WriteLine("Set ASPOSE_LICENSE_PATH to an authorized license and pass --allow-network. No request was sent.");
return 2;
}
var timeoutSeconds = 180.0;
var timeoutSetting = Environment.GetEnvironmentVariable("SLIDES_AI_TIMEOUT_SECONDS");
if (timeoutSetting != null && (!double.TryParse(timeoutSetting, System.Globalization.NumberStyles.Float, System.Globalization.CultureInfo.InvariantCulture, out timeoutSeconds) || !double.IsFinite(timeoutSeconds) || timeoutSeconds <= 0))
{
Console.Error.WriteLine("SLIDES_AI_TIMEOUT_SECONDS must be a finite positive number.");
return 2;
}
try
{
var license = new License();
license.SetLicense(licensePath);
if (!license.IsLicensed())
{
Console.Error.WriteLine("The license was not applied. No request was sent.");
return 2;
}
Directory.CreateDirectory("example-output");
using var http = new HttpClient
{
Timeout = TimeSpan.FromSeconds(timeoutSeconds)
};
using var client = new AsposeAIWebClient(http);
var agent = new SlidesAIAgent(client);
using var generatedPresentation = await agent.GeneratePresentationAsync(Prompt, PresentationContentAmountType.Brief);
if (!SaveEditablePresentation(generatedPresentation, "example-output/generated.pptx"))
return 1;
return 0;
}
catch (OperationCanceledException)
{
Console.Error.WriteLine("The AI request timed out or was cancelled.");
return 4;
}
catch (HttpRequestException)
{
Console.Error.WriteLine("The AI service rejected the request or could not be reached. Check provider settings and authorization.");
return 3;
}
catch (Exception error)
{
Console.Error.WriteLine("AI operation failed: " + error.GetType().Name + ". Check the license and service configuration.");
return 2;
}
}
private const string Prompt = "Create a short English presentation about the water cycle. Cover evaporation, condensation and precipitation. Use ordinary text slides with a title and a short paragraph. No charts, tables or images. For every section in the JSON, use the integer 0 for its type field instead of a type name. Return raw JSON without Markdown code fences or commentary.";
private static string ReadPresentationText(IPresentation deck)
{
var text = new StringBuilder();
void Read(IShapeCollection shapes)
{
foreach (IShape shape in shapes)
{
if (shape is IAutoShape auto && auto.TextFrame != null)
text.AppendLine(auto.TextFrame.Text);
if (shape is IGroupShape group)
Read(group.Shapes);
if (shape is ITable table)
for (int row = 0; row < table.Rows.Count; row++)
for (int column = 0; column < table.Columns.Count; column++)
text.AppendLine(table[column, row].TextFrame.Text);
}
}
foreach (ISlide slide in deck.Slides)
Read(slide.Shapes);
return text.ToString();
}
private static bool SaveEditablePresentation(IPresentation generated, string outputPath)
{
var generatedText = ReadPresentationText(generated);
generated.Save(outputPath, SaveFormat.Pptx);
using var reopened = new Presentation(outputPath);
if (reopened.Slides.Count == 0 || ReadPresentationText(reopened) != generatedText)
{
Console.Error.WriteLine("The generated text was not retained after reopening.");
return false;
}
using var preview = reopened.Slides[0].GetImage(new Size(640, 360));
preview.Save(Path.ChangeExtension(outputPath, ".png"), Aspose.Slides.ImageFormat.Png);
Console.WriteLine($"Saved editable presentation: {outputPath}, {reopened.Slides.Count} slides.");
return true;
}
}
```
## **Run and inspect the downloaded project**
```text
dotnet run --project Example.csproj --configuration Release
```
The program writes "generated.pptx", "generated.png" and a result.json summary in the current directory. Open the PPTX files to edit their text and review the PNG previews at normal size. The source and the generated output are kept separate. Wording varies between model responses; successful execution checks structure and saved text, not a byte-identical deck.
## **Limitations**
A configured AI service processes the prompt. The default Aspose client avoids hard-coding a model name in this example. Review the generated text and layout before using it. This workflow does not generate images.
Continue with the [detailed guide](https://docs.aspose.com/slides/net/ai/generator/).
## **Download, prerequisites and run**
[Download the complete project](https://docs.aspose.com/slides/net/examples/ai/generate/example.zip) and open `Example.sln`. The stable
net8.0/C#12 project accepts compatible installed release SDKs and explicitly runs
on the current .NET10 runtime. No exact SDK patch or locked restore is required.
Bundled Noto Sans fonts include their redistribution notice. See
[setup and supported environments](https://docs.aspose.com/slides/net/examples/getting-started/).
The bootstrap prints the separate output workspace. Explicit `--mode evaluation`
ignores all license settings; `--mode licensed` accepts your authorized license
through `--license PATH` or ASPOSE_LICENSE_PATH. No license or credential is included.
Default evaluation performs no model request and reports the missing prerequisite
with exit2. To execute the real generation/translation, opt in explicitly:
```text
dotnet run --project Example.csproj -- --mode licensed --allow-network
```
Configured providers also need their endpoint, real model identifier and API key.
A prerequisite diagnostic never counts as a generated or translated presentation.
# Configure an AI Provider
> Runnable C# example to configure an ai provider, with a complete project, real model calls and editable PowerPoint output.
Source: https://docs.aspose.com/slides/net/examples/ai/providers/
Updated: 2026-11-03
Run the same generation request through the default Aspose client and a caller-configured OpenAI-compatible endpoint. The complete project reads the endpoint, model identifier, API key and timeout from environment variables and saves separate editable results.
## **Prerequisites and input**
Use a current supported .NET10 SDK/runtime and the supplied flexible SDK settings; no exact patch is required.
The example uses only synthetic prompts and creates its input presentation where needed. Generation and translation contact the selected model service. Set `SLIDES_AI_BASE_URL`, `SLIDES_AI_MODEL` and `SLIDES_AI_API_KEY` for your compatible service. Optional `SLIDES_AI_TIMEOUT_SECONDS` controls the HTTP timeout. Use `--configured-only` after `--` when running only that provider.
## **Complete C# example**
Copy a C# block into `Program.cs` in a .NET project with `Aspose.Slides.NET6.CrossPlatform` installed. Each block is a complete program. Run one block at a time. The ZIP contains the IDE-ready project and its verification checks.
Set `ASPOSE_LICENSE_PATH` and run `dotnet run -- --mode licensed --allow-network` to make the model call. Configure the provider as described on this page.
The copied program writes its files under `example-output` by default.
The copied program requires an authorized Aspose.Slides license in `ASPOSE_LICENSE_PATH` and explicit `--allow-network` consent. Missing either prevents all model requests. Set `SLIDES_AI_TIMEOUT_SECONDS` to change the 180-second timeout. Run the copied file with `dotnet run -- --allow-network`; generation requires service access and may take time. The program reports error types without printing credentials. Set `SLIDES_AI_BASE_URL`, `SLIDES_AI_MODEL`, and `SLIDES_AI_API_KEY` for your OpenAI-compatible service. `dotnet run -- --allow-network` runs the default and configured providers; add `--configured-only` to call only your configured provider.
```csharp
using System;
using System.IO;
using System.Linq;
using System.Drawing;
using System.Net.Http;
using System.Text;
using System.Threading.Tasks;
using Aspose.Slides;
using Aspose.Slides.AI;
using Aspose.Slides.Export;
internal static class Program
{
private static async Task Main(string[] args)
{
var licensePath = Environment.GetEnvironmentVariable("ASPOSE_LICENSE_PATH");
if (string.IsNullOrWhiteSpace(licensePath) || !args.Contains("--allow-network"))
{
Console.Error.WriteLine("Set ASPOSE_LICENSE_PATH to an authorized license and pass --allow-network. No request was sent.");
return 2;
}
var timeoutSeconds = 180.0;
var timeoutSetting = Environment.GetEnvironmentVariable("SLIDES_AI_TIMEOUT_SECONDS");
if (timeoutSetting != null && (!double.TryParse(timeoutSetting, System.Globalization.NumberStyles.Float, System.Globalization.CultureInfo.InvariantCulture, out timeoutSeconds) || !double.IsFinite(timeoutSeconds) || timeoutSeconds <= 0))
{
Console.Error.WriteLine("SLIDES_AI_TIMEOUT_SECONDS must be a finite positive number.");
return 2;
}
try
{
var license = new License();
license.SetLicense(licensePath);
if (!license.IsLicensed())
{
Console.Error.WriteLine("The license was not applied. No request was sent.");
return 2;
}
Directory.CreateDirectory("example-output");
using var http = new HttpClient
{
Timeout = TimeSpan.FromSeconds(timeoutSeconds)
};
var configuredOnly = args.Contains("--configured-only");
var baseUrl = Environment.GetEnvironmentVariable("SLIDES_AI_BASE_URL");
var model = Environment.GetEnvironmentVariable("SLIDES_AI_MODEL");
var apiKey = Environment.GetEnvironmentVariable("SLIDES_AI_API_KEY");
if (string.IsNullOrWhiteSpace(baseUrl) || string.IsNullOrWhiteSpace(model) || string.IsNullOrWhiteSpace(apiKey))
{
Console.Error.WriteLine("Set SLIDES_AI_BASE_URL, SLIDES_AI_MODEL, and SLIDES_AI_API_KEY. No request was sent.");
return 2;
}
if (!configuredOnly)
{
using var defaultHttp = new HttpClient
{
Timeout = http.Timeout
};
using var defaultProvider = new AsposeAIWebClient(defaultHttp);
var defaultAgent = new SlidesAIAgent(defaultProvider);
using var defaultPresentation = await defaultAgent.GeneratePresentationAsync(Prompt, PresentationContentAmountType.Brief);
if (!SaveEditablePresentation(defaultPresentation, "example-output/default-generated.pptx"))
return 1;
}
using var configuredProvider = new OpenAICompatibleWebClient(model, apiKey, baseUrl, http);
var configuredAgent = new SlidesAIAgent(configuredProvider);
using var configuredPresentation = await configuredAgent.GeneratePresentationAsync(Prompt, PresentationContentAmountType.Brief);
if (!SaveEditablePresentation(configuredPresentation, "example-output/configured-generated.pptx"))
return 1;
return 0;
}
catch (OperationCanceledException)
{
Console.Error.WriteLine("The AI request timed out or was cancelled.");
return 4;
}
catch (HttpRequestException)
{
Console.Error.WriteLine("The AI service rejected the request or could not be reached. Check provider settings and authorization.");
return 3;
}
catch (Exception error)
{
Console.Error.WriteLine("AI operation failed: " + error.GetType().Name + ". Check the license and service configuration.");
return 2;
}
}
private const string Prompt = "Create a short English presentation about the water cycle. Cover evaporation, condensation and precipitation. Use ordinary text slides with a title and a short paragraph. No charts, tables or images. For every section in the JSON, use the integer 0 for its type field instead of a type name. Return raw JSON without Markdown code fences or commentary.";
private static string ReadPresentationText(IPresentation deck)
{
var text = new StringBuilder();
void Read(IShapeCollection shapes)
{
foreach (IShape shape in shapes)
{
if (shape is IAutoShape auto && auto.TextFrame != null)
text.AppendLine(auto.TextFrame.Text);
if (shape is IGroupShape group)
Read(group.Shapes);
if (shape is ITable table)
for (int row = 0; row < table.Rows.Count; row++)
for (int column = 0; column < table.Columns.Count; column++)
text.AppendLine(table[column, row].TextFrame.Text);
}
}
foreach (ISlide slide in deck.Slides)
Read(slide.Shapes);
return text.ToString();
}
private static bool SaveEditablePresentation(IPresentation generated, string outputPath)
{
var generatedText = ReadPresentationText(generated);
generated.Save(outputPath, SaveFormat.Pptx);
using var reopened = new Presentation(outputPath);
if (reopened.Slides.Count == 0 || ReadPresentationText(reopened) != generatedText)
{
Console.Error.WriteLine("The generated text was not retained after reopening.");
return false;
}
using var preview = reopened.Slides[0].GetImage(new Size(640, 360));
preview.Save(Path.ChangeExtension(outputPath, ".png"), Aspose.Slides.ImageFormat.Png);
Console.WriteLine($"Saved editable presentation: {outputPath}, {reopened.Slides.Count} slides.");
return true;
}
}
```
## **Run and inspect the downloaded project**
```text
dotnet run --project Example.csproj --configuration Release
```
The program writes "default-generated.pptx", "default-generated.png", "configured-generated.pptx", "configured-generated.png" and a result.json summary in the current directory. Open the PPTX files to edit their text and review the PNG previews at normal size. The source and the generated output are kept separate. Wording varies between model responses; successful execution checks structure and saved text, not a byte-identical deck.
## **Limitations**
Provide a compatible service you are authorized to use and its real model identifier. The compatible client is an adapter, not a bundled AI model. Service authentication, request limits and model fees belong to the chosen provider. The program reports configuration, HTTP and cancellation failures without printing keys; --configured-only skips the default-service demonstration.
Continue with the [detailed guide](https://docs.aspose.com/slides/net/ai/generator/).
## **Download, prerequisites and run**
[Download the complete project](https://docs.aspose.com/slides/net/examples/ai/providers/example.zip) and open `Example.sln`. The stable
net8.0/C#12 project accepts compatible installed release SDKs and explicitly runs
on the current .NET10 runtime. No exact SDK patch or locked restore is required.
Bundled Noto Sans fonts include their redistribution notice. See
[setup and supported environments](https://docs.aspose.com/slides/net/examples/getting-started/).
The bootstrap prints the separate output workspace. Explicit `--mode evaluation`
ignores all license settings; `--mode licensed` accepts your authorized license
through `--license PATH` or ASPOSE_LICENSE_PATH. No license or credential is included.
Default evaluation performs no model request and reports the missing prerequisite
with exit2. To execute the real generation/translation, opt in explicitly:
```text
dotnet run --project Example.csproj -- --mode licensed --allow-network
```
Configured providers also need their endpoint, real model identifier and API key.
A prerequisite diagnostic never counts as a generated or translated presentation.
# Generate with a Template or Existing Style
> Runnable C# example to generate with a template or existing style, with a complete project, real model calls and editable PowerPoint output.
Source: https://docs.aspose.com/slides/net/examples/ai/templates-style/
Updated: 2026-11-03
Compare generation from a reusable POTX template and from an existing PPTX style source. Both original designs are created visibly in code, passed through freshly loaded instances, and kept on disk for reuse.
## **Prerequisites and input**
Use a current supported .NET10 SDK/runtime and the supplied flexible SDK settings; no exact patch is required.
The example uses only synthetic prompts and creates its input presentation where needed. Generation and translation contact the selected model service.
## **Complete C# example**
Copy a C# block into `Program.cs` in a .NET project with `Aspose.Slides.NET6.CrossPlatform` installed. Each block is a complete program. Run one block at a time. The ZIP contains the IDE-ready project and its verification checks.
Set `ASPOSE_LICENSE_PATH` and run `dotnet run -- --mode licensed --allow-network` to make the model call. Configure the provider as described on this page.
The copied program writes its files under `example-output` by default.
The copied program requires an authorized Aspose.Slides license in `ASPOSE_LICENSE_PATH` and explicit `--allow-network` consent. Missing either prevents all model requests. Set `SLIDES_AI_TIMEOUT_SECONDS` to change the 180-second timeout. Run the copied file with `dotnet run -- --allow-network`; generation requires service access and may take time. The program reports error types without printing credentials. Install Noto Sans to render the generated previews with the demonstrated font. Both design files are generated locally and remain separate from their outputs.
```csharp
using System;
using System.IO;
using System.Linq;
using System.Drawing;
using System.Net.Http;
using System.Text;
using System.Threading.Tasks;
using Aspose.Slides;
using Aspose.Slides.AI;
using Aspose.Slides.Export;
internal static class Program
{
private static async Task Main(string[] args)
{
var licensePath = Environment.GetEnvironmentVariable("ASPOSE_LICENSE_PATH");
if (string.IsNullOrWhiteSpace(licensePath) || !args.Contains("--allow-network"))
{
Console.Error.WriteLine("Set ASPOSE_LICENSE_PATH to an authorized license and pass --allow-network. No request was sent.");
return 2;
}
var timeoutSeconds = 180.0;
var timeoutSetting = Environment.GetEnvironmentVariable("SLIDES_AI_TIMEOUT_SECONDS");
if (timeoutSetting != null && (!double.TryParse(timeoutSetting, System.Globalization.NumberStyles.Float, System.Globalization.CultureInfo.InvariantCulture, out timeoutSeconds) || !double.IsFinite(timeoutSeconds) || timeoutSeconds <= 0))
{
Console.Error.WriteLine("SLIDES_AI_TIMEOUT_SECONDS must be a finite positive number.");
return 2;
}
try
{
var license = new License();
license.SetLicense(licensePath);
if (!license.IsLicensed())
{
Console.Error.WriteLine("The license was not applied. No request was sent.");
return 2;
}
Directory.CreateDirectory("example-output");
using var http = new HttpClient
{
Timeout = TimeSpan.FromSeconds(timeoutSeconds)
};
CreateDesign("example-output/template.potx", true);
CreateDesign("example-output/style-source.pptx", false);
using var template = new Presentation("example-output/template.potx");
using var existingStyle = new Presentation("example-output/style-source.pptx");
using var client = new AsposeAIWebClient(http);
var agent = new SlidesAIAgent(client);
// A POTX template and an existing PPTX design serve as separate style inputs.
using var fromTemplate = await agent.GeneratePresentationAsync(Prompt, PresentationContentAmountType.Brief, template);
using var fromExistingStyle = await agent.GeneratePresentationAsync(Prompt, PresentationContentAmountType.Brief, existingStyle);
if (!SaveEditablePresentation(fromTemplate, "example-output/template-generated.pptx"))
return 1;
if (!SaveEditablePresentation(fromExistingStyle, "example-output/existing-style-generated.pptx"))
return 1;
return 0;
}
catch (OperationCanceledException)
{
Console.Error.WriteLine("The AI request timed out or was cancelled.");
return 4;
}
catch (HttpRequestException)
{
Console.Error.WriteLine("The AI service rejected the request or could not be reached. Check provider settings and authorization.");
return 3;
}
catch (Exception error)
{
Console.Error.WriteLine("AI operation failed: " + error.GetType().Name + ". Check the license and service configuration.");
return 2;
}
}
private const string Prompt = "Create a short English presentation about the water cycle. Cover evaporation, condensation and precipitation. Use ordinary text slides with a title and a short paragraph. No charts, tables or images. For every section in the JSON, use the integer 0 for its type field instead of a type name. Return raw JSON without Markdown code fences or commentary.";
private static void CreateDesign(string path, bool isTemplate)
{
using var design = new Presentation();
design.MasterTheme.ColorScheme.Accent1.Color = isTemplate ? Color.FromArgb(12, 110, 120) : Color.FromArgb(106, 43, 130);
design.MasterTheme.FontScheme.Major.LatinFont = new FontData("Noto Sans");
design.MasterTheme.FontScheme.Minor.LatinFont = new FontData("Noto Sans");
design.Masters[0].Background.Type = BackgroundType.OwnBackground;
design.Masters[0].Background.FillFormat.FillType = FillType.Solid;
design.Masters[0].Background.FillFormat.SolidFillColor.Color = Color.FromArgb(240, 246, 248);
if (!isTemplate)
{
var titleLayout = design.LayoutSlides.GetByType(SlideLayoutType.Title);
design.Slides.AddEmptySlide(titleLayout);
design.Slides.RemoveAt(0);
foreach (var placeholder in design.Slides[0].Shapes.OfType())
{
if (placeholder.Placeholder != null && placeholder.TextFrame != null)
placeholder.TextFrame.Text = "Existing report design";
}
}
design.Save(path, isTemplate ? SaveFormat.Potx : SaveFormat.Pptx);
}
private static string ReadPresentationText(IPresentation deck)
{
var text = new StringBuilder();
void Read(IShapeCollection shapes)
{
foreach (IShape shape in shapes)
{
if (shape is IAutoShape auto && auto.TextFrame != null)
text.AppendLine(auto.TextFrame.Text);
if (shape is IGroupShape group)
Read(group.Shapes);
if (shape is ITable table)
for (int row = 0; row < table.Rows.Count; row++)
for (int column = 0; column < table.Columns.Count; column++)
text.AppendLine(table[column, row].TextFrame.Text);
}
}
foreach (ISlide slide in deck.Slides)
Read(slide.Shapes);
return text.ToString();
}
private static bool SaveEditablePresentation(IPresentation generated, string outputPath)
{
var generatedText = ReadPresentationText(generated);
generated.Save(outputPath, SaveFormat.Pptx);
using var reopened = new Presentation(outputPath);
if (reopened.Slides.Count == 0 || ReadPresentationText(reopened) != generatedText)
{
Console.Error.WriteLine("The generated text was not retained after reopening.");
return false;
}
using var preview = reopened.Slides[0].GetImage(new Size(640, 360));
preview.Save(Path.ChangeExtension(outputPath, ".png"), Aspose.Slides.ImageFormat.Png);
Console.WriteLine($"Saved editable presentation: {outputPath}, {reopened.Slides.Count} slides.");
return true;
}
}
```
## **Run and inspect the downloaded project**
```text
dotnet run --project Example.csproj --configuration Release
```
The program writes "template.potx", "style-source.pptx", "template-generated.pptx", "template-generated.png", "existing-style-generated.pptx", "existing-style-generated.png" and a result.json summary in the current directory. Open the PPTX files to edit their text and review the PNG previews at normal size. The source and the generated output are kept separate. Wording varies between model responses; successful execution checks structure and saved text, not a byte-identical deck.
## **Limitations**
The theme, fonts, masters and available layouts supply a design starting point. Generation may modify the in-memory template instance, so load a fresh copy per request. Design reuse does not promise an exact visual replica or fixed text positioning.
Continue with the [detailed guide](https://docs.aspose.com/slides/net/ai/generator/).
## **Download, prerequisites and run**
[Download the complete project](https://docs.aspose.com/slides/net/examples/ai/templates-style/example.zip) and open `Example.sln`. The stable
net8.0/C#12 project accepts compatible installed release SDKs and explicitly runs
on the current .NET10 runtime. No exact SDK patch or locked restore is required.
Bundled Noto Sans fonts include their redistribution notice. See
[setup and supported environments](https://docs.aspose.com/slides/net/examples/getting-started/).
The bootstrap prints the separate output workspace. Explicit `--mode evaluation`
ignores all license settings; `--mode licensed` accepts your authorized license
through `--license PATH` or ASPOSE_LICENSE_PATH. No license or credential is included.
Default evaluation performs no model request and reports the missing prerequisite
with exit2. To execute the real generation/translation, opt in explicitly:
```text
dotnet run --project Example.csproj -- --mode licensed --allow-network
```
Configured providers also need their endpoint, real model identifier and API key.
A prerequisite diagnostic never counts as a generated or translated presentation.
# Translate Presentation Text with AI
> Runnable C# example to translate presentation text with ai, with a complete project, real model calls and editable PowerPoint output.
Source: https://docs.aspose.com/slides/net/examples/ai/translate/
Updated: 2026-11-03
Create a small English deck with ordinary shape text, grouped text and a table cell, translate it to Spanish, and save a separate copy. The program verifies the changed text and retained source, then renders before/after previews.
## **Prerequisites and input**
Use a current supported .NET10 SDK/runtime and the supplied flexible SDK settings; no exact patch is required.
The example uses only synthetic prompts and creates its input presentation where needed. Generation and translation contact the selected model service.
## **Complete C# example**
Copy a C# block into `Program.cs` in a .NET project with `Aspose.Slides.NET6.CrossPlatform` installed. Each block is a complete program. Run one block at a time. The ZIP contains the IDE-ready project and its verification checks.
Set `ASPOSE_LICENSE_PATH` and run `dotnet run -- --mode licensed --allow-network` to make the model call. Configure the provider as described on this page.
The copied program writes its files under `example-output` by default.
The copied program requires an authorized Aspose.Slides license in `ASPOSE_LICENSE_PATH` and explicit `--allow-network` consent. Missing either prevents all model requests. Set `SLIDES_AI_TIMEOUT_SECONDS` to change the 180-second timeout. Run the copied file with `dotnet run -- --allow-network`; generation requires service access and may take time. The program reports error types without printing credentials. The fixture includes ordinary shape, grouped-shape, and table-cell text. The source remains unchanged; the target is saved separately with editable translated text.
```csharp
using System;
using System.IO;
using System.Linq;
using System.Drawing;
using System.Net.Http;
using System.Text;
using System.Threading.Tasks;
using Aspose.Slides;
using Aspose.Slides.AI;
using Aspose.Slides.Export;
internal static class Program
{
private static async Task Main(string[] args)
{
var licensePath = Environment.GetEnvironmentVariable("ASPOSE_LICENSE_PATH");
if (string.IsNullOrWhiteSpace(licensePath) || !args.Contains("--allow-network"))
{
Console.Error.WriteLine("Set ASPOSE_LICENSE_PATH to an authorized license and pass --allow-network. No request was sent.");
return 2;
}
var timeoutSeconds = 180.0;
var timeoutSetting = Environment.GetEnvironmentVariable("SLIDES_AI_TIMEOUT_SECONDS");
if (timeoutSetting != null && (!double.TryParse(timeoutSetting, System.Globalization.NumberStyles.Float, System.Globalization.CultureInfo.InvariantCulture, out timeoutSeconds) || !double.IsFinite(timeoutSeconds) || timeoutSeconds <= 0))
{
Console.Error.WriteLine("SLIDES_AI_TIMEOUT_SECONDS must be a finite positive number.");
return 2;
}
try
{
var license = new License();
license.SetLicense(licensePath);
if (!license.IsLicensed())
{
Console.Error.WriteLine("The license was not applied. No request was sent.");
return 2;
}
Directory.CreateDirectory("example-output");
using var http = new HttpClient
{
Timeout = TimeSpan.FromSeconds(timeoutSeconds)
};
CreateSourcePresentation();
const string targetLanguage = "Spanish";
using var targetPresentation = new Presentation("example-output/original.pptx");
using var client = new AsposeAIWebClient(http);
var agent = new SlidesAIAgent(client);
await agent.TranslateAsync(targetPresentation, targetLanguage);
if (!SaveEditablePresentation(targetPresentation, "example-output/translated.pptx"))
return 1;
Console.WriteLine(ReadPresentationText(targetPresentation));
return 0;
}
catch (OperationCanceledException)
{
Console.Error.WriteLine("The AI request timed out or was cancelled.");
return 4;
}
catch (HttpRequestException)
{
Console.Error.WriteLine("The AI service rejected the request or could not be reached. Check provider settings and authorization.");
return 3;
}
catch (Exception error)
{
Console.Error.WriteLine("AI operation failed: " + error.GetType().Name + ". Check the license and service configuration.");
return 2;
}
}
private static void CreateSourcePresentation()
{
using (var original = new Presentation())
{
original.SlideSize.SetSize(640, 360, SlideSizeScaleType.DoNotScale);
var shape = original.Slides[0].Shapes.AddAutoShape(ShapeType.Rectangle, 40, 30, 550, 65);
shape.TextFrame.Text = "Hello world";
var group = original.Slides[0].Shapes.AddGroupShape();
group.Shapes.AddAutoShape(ShapeType.Rectangle, 40, 130, 550, 65).TextFrame.Text = "Good morning";
var table = original.Slides[0].Shapes.AddTable(40, 230, new double[] { 550 }, new double[] { 65 });
table[0, 0].TextFrame.Text = "Thank you";
original.Save("example-output/original.pptx", SaveFormat.Pptx);
using var image = original.Slides[0].GetImage(new Size(640, 360));
image.Save("example-output/original.png", Aspose.Slides.ImageFormat.Png);
}
}
private static string ReadPresentationText(IPresentation deck)
{
var text = new StringBuilder();
void Read(IShapeCollection shapes)
{
foreach (IShape shape in shapes)
{
if (shape is IAutoShape auto && auto.TextFrame != null)
text.AppendLine(auto.TextFrame.Text);
if (shape is IGroupShape group)
Read(group.Shapes);
if (shape is ITable table)
for (int row = 0; row < table.Rows.Count; row++)
for (int column = 0; column < table.Columns.Count; column++)
text.AppendLine(table[column, row].TextFrame.Text);
}
}
foreach (ISlide slide in deck.Slides)
Read(slide.Shapes);
return text.ToString();
}
private static bool SaveEditablePresentation(IPresentation generated, string outputPath)
{
var generatedText = ReadPresentationText(generated);
generated.Save(outputPath, SaveFormat.Pptx);
using var reopened = new Presentation(outputPath);
if (reopened.Slides.Count == 0 || ReadPresentationText(reopened) != generatedText)
{
Console.Error.WriteLine("The generated text was not retained after reopening.");
return false;
}
using var preview = reopened.Slides[0].GetImage(new Size(640, 360));
preview.Save(Path.ChangeExtension(outputPath, ".png"), Aspose.Slides.ImageFormat.Png);
Console.WriteLine($"Saved editable presentation: {outputPath}, {reopened.Slides.Count} slides.");
return true;
}
}
```
## **Run and inspect the downloaded project**
```text
dotnet run --project Example.csproj --configuration Release
```
The program writes "original.pptx", "original.png", "translated.pptx", "translated.png" and a result.json summary in the current directory. Open the PPTX files to edit their text and review the PNG previews at normal size. The source and the generated output are kept separate. Wording varies between model responses; successful execution checks structure and saved text, not a byte-identical deck.
## **Limitations**
This fixture has no charts or speaker notes. Speaker notes are outside this workflow, and charts can prevent translation. Review language quality and text expansion; retained shape coordinates do not guarantee that every translated paragraph fits.
Continue with the [detailed guide](https://docs.aspose.com/slides/net/ai/translator/).
## **Download, prerequisites and run**
[Download the complete project](https://docs.aspose.com/slides/net/examples/ai/translate/example.zip) and open `Example.sln`. The stable
net8.0/C#12 project accepts compatible installed release SDKs and explicitly runs
on the current .NET10 runtime. No exact SDK patch or locked restore is required.
Bundled Noto Sans fonts include their redistribution notice. See
[setup and supported environments](https://docs.aspose.com/slides/net/examples/getting-started/).
The bootstrap prints the separate output workspace. Explicit `--mode evaluation`
ignores all license settings; `--mode licensed` accepts your authorized license
through `--license PATH` or ASPOSE_LICENSE_PATH. No license or credential is included.
Default evaluation performs no model request and reports the missing prerequisite
with exit2. To execute the real generation/translation, opt in explicitly:
```text
dotnet run --project Example.csproj -- --mode licensed --allow-network
```
Configured providers also need their endpoint, real model identifier and API key.
A prerequisite diagnostic never counts as a generated or translated presentation.
# Application Integration
> Complete .NET examples for a presentation conversion endpoint, bounded worker and Linux Docker converter.
Source: https://docs.aspose.com/slides/net/examples/application-integration/
Updated: 2026-10-30
Connect Aspose.Slides to a local application host. These complete projects show request/job boundaries, resource cleanup and runtime dependencies, with executable verification modes.
# Process Presentations in a Background Worker
> Complete runnable C# application for process presentations in a background worker, with real host execution and reproducible input.
Source: https://docs.aspose.com/slides/net/examples/application-integration/background-worker/
Updated: 2026-11-03
The .NET Worker Service snapshots an input folder of PPTX files and queues jobs through a bounded channel. Two consumers each own and dispose a presentation. Every input receives a succeeded, failed or cancelled entry in the final manifest; a corrupt file does not stop later jobs. The loader explicitly requires PPTX rather than treating an arbitrary text file as another supported input format.
## **Prerequisites**
Use a current supported .NET10 SDK/runtime and the supplied flexible SDK settings; no exact patch is required.
## **Complete application**
Copy a C# block into `Program.cs` in a .NET project with `Aspose.Slides.NET6.CrossPlatform` installed. Each block is a complete program. Run one block at a time. The ZIP contains the IDE-ready project and its verification checks.
Use an ASP.NET Core project, or add a framework reference to `Microsoft.AspNetCore.App`.
The copied program writes its files under `example-output` by default.
Add the `Microsoft.Extensions.Hosting` package alongside Aspose.Slides. Run without arguments for three valid generated inputs and one corrupt input, or use `dotnet run -- INPUT_FOLDER OUTPUT_FOLDER`. Press Ctrl+C for graceful shutdown. The bounded queue has two consumers; a separate gate serializes native SDK conversion. A validated temporary PDF is atomically moved to its final path.
```csharp
using System;
using System.IO;
using System.Linq;
using System.Collections.Concurrent;
using System.Collections.Generic;
using System.Text.Json;
using System.Threading;
using System.Threading.Channels;
using System.Threading.Tasks;
using Aspose.Slides;
using Aspose.Slides.Export;
using Microsoft.Extensions.DependencyInjection;
using Microsoft.Extensions.Hosting;
internal static class Program
{
private static async Task Main(string[] args)
{
var licensePath = Environment.GetEnvironmentVariable("ASPOSE_LICENSE_PATH");
if (!string.IsNullOrWhiteSpace(licensePath))
new License().SetLicense(licensePath);
var inputDirectory = Path.GetFullPath(args.Length > 0 ? args[0] : "example-output/input");
var outputDirectory = Path.GetFullPath(args.Length > 1 ? args[1] : "example-output/output");
if (args.Length == 0)
CreateSampleInputs(inputDirectory);
if (!Directory.Exists(inputDirectory))
{
Console.Error.WriteLine("Pass an existing PPTX input folder, or omit arguments to generate sample inputs.");
return;
}
Directory.CreateDirectory(outputDirectory);
var builder = Host.CreateApplicationBuilder();
builder.Services.AddSingleton(new WorkSettings(inputDirectory, outputDirectory));
builder.Services.AddHostedService();
using var host = builder.Build();
await host.RunAsync();
Console.WriteLine("Job outcomes: " + Path.Combine(outputDirectory, "manifest.json"));
}
private sealed record WorkSettings(string Input, string Output);
private sealed record JobResult(string Name, string State, string? Error);
private sealed class ConversionWorker(WorkSettings settings, IHostApplicationLifetime lifetime) : BackgroundService
{
// Two queue consumers may be active; only one enters the native SDK at a time.
private static readonly SemaphoreSlim SdkGate = new(1);
protected override async Task ExecuteAsync(CancellationToken stoppingToken)
{
var paths = Directory.GetFiles(settings.Input, "*.pptx").OrderBy(path => path, StringComparer.Ordinal).ToArray();
var results = new ConcurrentDictionary(paths.Select(path => new KeyValuePair(path, new(Path.GetFileName(path), "pending", null))));
var queue = Channel.CreateBounded(new BoundedChannelOptions(2) { FullMode = BoundedChannelFullMode.Wait, SingleWriter = true, SingleReader = false });
async Task Consume()
{
try
{
await foreach (var path in queue.Reader.ReadAllAsync(stoppingToken))
results[path] = await ConvertOne(path, stoppingToken);
}
catch (OperationCanceledException)
{
}
}
var consumers = new[]
{
Consume(),
Consume()
};
try
{
foreach (var path in paths)
await queue.Writer.WriteAsync(path, stoppingToken);
}
catch (OperationCanceledException)
{
}
finally
{
queue.Writer.TryComplete();
}
await Task.WhenAll(consumers);
// Shutdown must also account for inputs never taken from the queue.
foreach (var path in paths)
if (results[path].State == "pending")
results[path] = new(Path.GetFileName(path), "cancelled", "not_started_before_shutdown");
var manifest = JsonSerializer.Serialize(results.Values.OrderBy(result => result.Name), new JsonSerializerOptions { WriteIndented = true });
await File.WriteAllTextAsync(Path.Combine(settings.Output, "manifest.json"), manifest, CancellationToken.None);
lifetime.StopApplication();
}
private async Task ConvertOne(string sourcePath, CancellationToken cancellation)
{
var name = Path.GetFileName(sourcePath);
var destination = Path.Combine(settings.Output, Path.GetFileNameWithoutExtension(sourcePath) + ".pdf");
var temporaryPath = destination + "." + Guid.NewGuid().ToString("N") + ".partial";
var interruption = new InterruptionTokenSource();
using var registration = cancellation.Register(interruption.Interrupt);
try
{
await SdkGate.WaitAsync(cancellation);
try
{
if (PresentationFactory.Instance.GetPresentationInfo(sourcePath).LoadFormat != LoadFormat.Pptx)
return new(name, "failed", "Expected PPTX content.");
await Task.Run(() =>
{
using var presentation = new Presentation(sourcePath, new LoadOptions { LoadFormat = LoadFormat.Pptx, InterruptionToken = interruption.Token });
presentation.Save(temporaryPath, SaveFormat.Pdf);
});
}
finally
{
SdkGate.Release();
}
cancellation.ThrowIfCancellationRequested();
using (var pdf = File.OpenRead(temporaryPath))
{
var header = new byte[5];
if (pdf.Length <= 500 || pdf.Read(header, 0, header.Length) != 5 || !header.AsSpan().SequenceEqual("%PDF-"u8))
return new(name, "failed", "Conversion did not produce a valid PDF.");
}
cancellation.ThrowIfCancellationRequested();
File.Move(temporaryPath, destination, overwrite: true);
return new(name, "succeeded", null);
}
catch (Exception) when (cancellation.IsCancellationRequested)
{
return new(name, "cancelled", null);
}
catch (Exception error)
{
return new(name, "failed", error.GetType().Name);
}
finally
{
if (File.Exists(temporaryPath))
File.Delete(temporaryPath);
}
}
}
private static void CreateSampleInputs(string directory)
{
Directory.CreateDirectory(directory);
foreach (var name in new[]
{
"01-first",
"02-second",
"04-after-error"
}
)
{
using var presentation = new Presentation();
presentation.Slides[0].Shapes.AddAutoShape(ShapeType.Rectangle, 40, 40, 600, 80).TextFrame.Text = name;
presentation.Save(Path.Combine(directory, name + ".pptx"), SaveFormat.Pptx);
}
File.WriteAllText(Path.Combine(directory, "03-corrupt.pptx"), "This is not a presentation.");
}
}
```
## **Run and verify**
```text
dotnet run --project Example.csproj --configuration Release -- --self-test
```
Pass input and output folder paths to run your own batch. Add --self-test to generate three valid decks and one corrupt file, process them through a real Generic Host, then start a second host and request graceful shutdown after the first completed item. A third host interrupts a120-slide conversion while processing and proves that a cancelled job retains no PDF. Inspect normal-output and shutdown-output manifests. This local queue is held in memory; the manifest identifies unstarted/cancelled jobs for an application-managed retry. It is not a durable message broker.
The verification run writes result.json plus "normal-output/manifest.json", "normal-output/metrics.json", "normal-output/1-valid.pdf", "normal-output/2-valid.pdf", "normal-output/3-valid.pdf", "shutdown-output/manifest.json", "shutdown-output/metrics.json". Inspect the returned PDF files and the manifest or image preview. Exit 0 requires the named assertions to pass; an invalid input is reported explicitly.
Read the [detailed Docker guide](https://docs.aspose.com/slides/net/how-to-run-aspose-slides-in-docker/) for package and native-library choices when adapting Linux hosting.
## **Download, prerequisites and run**
[Download the complete project](https://docs.aspose.com/slides/net/examples/application-integration/background-worker/example.zip) and open `Example.sln`. The stable
net8.0/C#12 project accepts compatible installed release SDKs and explicitly runs
on the current .NET10 runtime. No exact SDK patch or locked restore is required.
Bundled Noto Sans fonts include their redistribution notice. See
[setup and supported environments](https://docs.aspose.com/slides/net/examples/getting-started/).
The bootstrap prints the separate output workspace. Explicit `--mode evaluation`
ignores all license settings; `--mode licensed` accepts your authorized license
through `--license PATH` or ASPOSE_LICENSE_PATH. No license or credential is included.
Default Run/F5 processes a synthetic local batch through the real host. Use `--self-test` for the full shutdown/cancellation checks, or pass your input/output folders.
# Run a Converter in Docker
> Complete runnable C# application for run a converter in docker, with real host execution and reproducible input.
Source: https://docs.aspose.com/slides/net/examples/application-integration/docker/
Updated: 2026-11-03
Build and run a complete Linux converter using the pinned Aspose.Slides.NET6.CrossPlatform package. The multi-stage image contains fontconfig and DejaVu fonts. Input is mounted read-only, output has its own mount, and a file license is supplied only at runtime.
## **Prerequisites**
Use a current supported .NET10 SDK/runtime and the supplied flexible SDK settings; no exact patch is required.
## **Complete application**
Copy a C# block into `Program.cs` in a .NET project with `Aspose.Slides.NET6.CrossPlatform` installed. Each block is a complete program. Run one block at a time. The ZIP contains the IDE-ready project and its verification checks.
Start a Linux Docker engine before running this example. The program creates the container build files.
The copied program writes its files under `example-output` by default.
Start a Linux Docker engine and allow registry/package access for the image build. Save this entire program as `Program.cs` and keep it in the project folder: the host copies it into a temporary build context. Run `dotnet run` for a generated two-slide input, or `dotnet run -- --input PATH --output FOLDER`. Optional `ASPOSE_LICENSE_PATH` is mounted read-only at runtime; license bytes never enter the build context. Conversion runs with container networking disabled.
```csharp
using System;
using System.IO;
using System.Linq;
using System.Drawing;
using System.Collections.Generic;
using System.Diagnostics;
using System.Threading.Tasks;
using Aspose.Slides;
using Aspose.Slides.Export;
internal static class Program
{
private static async Task Main(string[] args)
{
var outputDirectory = Path.GetFullPath(Value(args, "--output") ?? "example-output");
var inputPath = Value(args, "--input");
var licenseSetting = Environment.GetEnvironmentVariable("ASPOSE_LICENSE_PATH");
var licensePath = string.IsNullOrWhiteSpace(licenseSetting) ? null : Path.GetFullPath(licenseSetting);
if (licensePath != null)
{
if (!File.Exists(licensePath))
{
Console.Error.WriteLine("ASPOSE_LICENSE_PATH must name a readable license file.");
return 2;
}
new License().SetLicense(licensePath);
}
Directory.CreateDirectory(outputDirectory);
if (args.Contains("--in-container"))
return ConvertInsideContainer(inputPath, outputDirectory);
// Host orchestration: the pasted source remains on disk for the build context.
var programPath = Path.GetFullPath("Program.cs");
if (!File.Exists(programPath))
{
Console.Error.WriteLine("Run from the project folder containing the pasted Program.cs.");
return 2;
}
var engineType = await RunProcess("docker", "info", "--format", "{{.OSType}}");
if (!string.Equals(engineType?.Trim(), "linux", StringComparison.OrdinalIgnoreCase))
{
Console.Error.WriteLine("Start a Linux Docker engine, or switch Docker Desktop to Linux containers, then retry.");
return 2;
}
if (inputPath == null)
{
inputPath = Path.Combine(outputDirectory, "source.pptx");
CreateInput(inputPath);
}
inputPath = Path.GetFullPath(inputPath);
if (!File.Exists(inputPath))
{
Console.Error.WriteLine("Pass an existing PPTX using --input PATH.");
return 2;
}
const string imageName = "slides-standalone-converter:26.10.0";
var buildContext = CreateBuildContext(programPath);
try
{
if (await RunProcess("docker", "build", "--tag", imageName, buildContext.FullName) == null)
return 1;
}
finally
{
buildContext.Delete(recursive: true);
}
var dockerArguments = new List
{
"run",
"--rm",
"--network",
"none",
"--mount",
"type=bind,source=" + inputPath + ",target=/input/source.pptx,readonly",
"--mount",
"type=bind,source=" + outputDirectory + ",target=/output"
};
if (OperatingSystem.IsLinux())
{
var userId = (await RunProcess("id", "-u"))?.Trim();
var groupId = (await RunProcess("id", "-g"))?.Trim();
if (!uint.TryParse(userId, out _) || !uint.TryParse(groupId, out _))
return 2;
dockerArguments.AddRange(new[] { "--user", userId + ":" + groupId, "--env", "HOME=/tmp", "--env", "XDG_CACHE_HOME=/tmp/example-cache" });
}
if (licensePath != null)
{
dockerArguments.AddRange(new[] { "--mount", "type=bind,source=" + licensePath + ",target=/run/license/slides.lic,readonly", "--env", "ASPOSE_LICENSE_PATH=/run/license/slides.lic" });
}
dockerArguments.AddRange(new[] { imageName, "--in-container", "--input", "/input/source.pptx", "--output", "/output" });
if (await RunProcess("docker", dockerArguments.ToArray()) == null)
return 1;
using var reopened = new Presentation(Path.Combine(outputDirectory, "converted.pptx"));
var pdfBytes = File.ReadAllBytes(Path.Combine(outputDirectory, "converted.pdf"));
if (reopened.Slides.Count == 0 || pdfBytes.Length < 5 || !pdfBytes.AsSpan(0, 5).SequenceEqual("%PDF-"u8))
{
Console.Error.WriteLine("The container did not produce usable presentation/PDF output.");
return 1;
}
Console.WriteLine($"Container output: {outputDirectory}; {reopened.Slides.Count} slides.");
return 0;
}
private static int ConvertInsideContainer(string? inputPath, string outputDirectory)
{
if (inputPath == null || !File.Exists(inputPath))
{
Console.Error.WriteLine("Mount a PPTX and pass its path with --input.");
return 2;
}
using var presentation = new Presentation(inputPath);
if (presentation.Slides.Count == 0)
{
Console.Error.WriteLine("The input must contain a slide for its preview.");
return 2;
}
presentation.Save(Path.Combine(outputDirectory, "converted.pptx"), SaveFormat.Pptx);
presentation.Save(Path.Combine(outputDirectory, "converted.pdf"), SaveFormat.Pdf);
using var preview = presentation.Slides[0].GetImage(new Size(640, 360));
preview.Save(Path.Combine(outputDirectory, "preview.png"), Aspose.Slides.ImageFormat.Png);
return 0;
}
private static void CreateInput(string path)
{
using var presentation = new Presentation();
for (var index = 0; index < 2; index++)
{
var slide = index == 0 ? presentation.Slides[0] : presentation.Slides.AddEmptySlide(presentation.LayoutSlides[0]);
slide.Shapes.AddAutoShape(ShapeType.Rectangle, 40, 40, 550, 100).TextFrame.Text = index == 0 ? "Alpha" : "Bravo";
}
presentation.Save(path, SaveFormat.Pptx);
}
private static async Task RunProcess(string executable, params string[] arguments)
{
var start = new ProcessStartInfo(executable)
{
RedirectStandardOutput = true,
RedirectStandardError = true,
UseShellExecute = false,
CreateNoWindow = true
};
foreach (var argument in arguments)
start.ArgumentList.Add(argument);
try
{
using var process = Process.Start(start);
if (process == null)
return null;
var outputTask = process.StandardOutput.ReadToEndAsync();
var errorTask = process.StandardError.ReadToEndAsync();
await process.WaitForExitAsync();
var output = await outputTask;
var error = await errorTask;
if (process.ExitCode != 0)
{
Console.Error.WriteLine($"{executable} failed ({process.ExitCode}). Check the engine, registry access, and build output.");
Console.Error.WriteLine(error);
return null;
}
Console.WriteLine(output);
return output;
}
catch (System.ComponentModel.Win32Exception)
{
Console.Error.WriteLine("Install Docker Desktop or a compatible Linux engine and make its CLI available.");
return null;
}
}
private static DirectoryInfo CreateBuildContext(string sourcePath)
{
var build = Directory.CreateTempSubdirectory("slides-docker-");
File.Copy(sourcePath, Path.Combine(build.FullName, "Program.cs"));
File.WriteAllText(Path.Combine(build.FullName, "Example.csproj"), """
Exe
net8.0
Major
enable
""");
File.WriteAllText(Path.Combine(build.FullName, "Dockerfile"), """
FROM mcr.microsoft.com/dotnet/sdk:10.0.403-noble AS build
WORKDIR /src
COPY Example.csproj ./
RUN dotnet restore Example.csproj
COPY Program.cs ./
RUN dotnet publish Example.csproj --no-restore --configuration Release --output /app /p:UseAppHost=false
FROM mcr.microsoft.com/dotnet/runtime:10.0.14-noble
RUN apt-get update && apt-get install -y --no-install-recommends libfontconfig1 fonts-dejavu-core libicu74 && rm -rf /var/lib/apt/lists/*
WORKDIR /app
COPY --from=build /app ./
USER $APP_UID
ENTRYPOINT ["dotnet", "Example.dll"]
""");
return build;
}
private static string? Value(string[] args, string name)
{
int i = Array.IndexOf(args, name);
return i >= 0 && i + 1 < args.Length ? args[i + 1] : null;
}
}
```
## **Dockerfile**
```dockerfile
FROM mcr.microsoft.com/dotnet/sdk:10.0.403-noble AS build
WORKDIR /src
COPY Example.csproj global.json ./
RUN dotnet restore Example.csproj
COPY *.cs example-manifest.json ./
COPY Fonts ./Fonts
RUN dotnet publish Example.csproj --no-restore --configuration Release --output /app /p:UseAppHost=false
FROM mcr.microsoft.com/dotnet/runtime:10.0.14-noble
RUN apt-get update \
&& apt-get install -y --no-install-recommends libfontconfig1 fonts-dejavu-core libicu74 \
&& rm -rf /var/lib/apt/lists/* \
&& mkdir -p /output && chown "$APP_UID:$APP_UID" /output
WORKDIR /app
COPY --from=build /app ./
USER $APP_UID
ENTRYPOINT ["dotnet", "Example.dll"]
CMD ["--input", "/input/source.pptx", "--output", "/output"]
```
## **Run and verify**
```text
dotnet run --project Example.csproj --configuration Release -- --verify-container
```
Docker Desktop or a Linux Docker engine must be available. Run the project with --verify-container on the host: it generates two input slides, builds the actual image, runs conversion with container networking disabled, and verifies saved text and an unchanged input. It also inspects the application image for copied license files. The Dockerfile uses fixed official .NET10 image versions. Consumer SDK selection is flexible and ordinary restore does not require a dependency lock. Linux font availability still affects rendering; inspect the returned substitution list and preview. No license is copied during image build.
The verification run writes result.json plus "container-output/converted.pptx", "container-output/converted.pdf", "container-output/preview.png", "container-output/result.json", "image-history.txt". Inspect the returned PDF files and the manifest or image preview. Exit 0 requires the named assertions to pass; an invalid input is reported explicitly.
Read the [detailed Docker guide](https://docs.aspose.com/slides/net/how-to-run-aspose-slides-in-docker/) for package and native-library choices when adapting Linux hosting.
## **Download, prerequisites and run**
[Download the complete project](https://docs.aspose.com/slides/net/examples/application-integration/docker/example.zip) and open `Example.sln`. The stable
net8.0/C#12 project accepts compatible installed release SDKs and explicitly runs
on the current .NET10 runtime. No exact SDK patch or locked restore is required.
Bundled Noto Sans fonts include their redistribution notice. See
[setup and supported environments](https://docs.aspose.com/slides/net/examples/getting-started/).
The bootstrap prints the separate output workspace. Explicit `--mode evaluation`
ignores all license settings; `--mode licensed` accepts your authorized license
through `--license PATH` or ASPOSE_LICENSE_PATH. No license or credential is included.
Default Run/F5 or `--verify-container` builds and runs the real Linux image. Docker must be running. Container conversion has no network; input and any license are read-only mounts, with a separate writable output mount.
# Build a Presentation Conversion Endpoint
> Complete runnable C# application for build a presentation conversion endpoint, with real host execution and reproducible input.
Source: https://docs.aspose.com/slides/net/examples/application-integration/web-api/
Updated: 2026-11-03
The complete ASP.NET Core application accepts a PPTX presentation as the raw POST body at /convert and returns application/pdf. It limits uploads to 8 MiB, bounds active HTTP processing to two requests and serializes SDK conversion within each process, uses a unique temporary directory per request, and connects request cancellation to the library interruption token.
## **Prerequisites**
Use a current supported .NET10 SDK/runtime and the supplied flexible SDK settings; no exact patch is required.
## **Complete application**
Copy a C# block into `Program.cs` in a .NET project with `Aspose.Slides.NET6.CrossPlatform` installed. Each block is a complete program. Run one block at a time. The ZIP contains the IDE-ready project and its verification checks.
Use an ASP.NET Core project, or add a framework reference to `Microsoft.AspNetCore.App`.
The copied program writes its files under `example-output` by default.
Use a .NET web project (or add the `Microsoft.AspNetCore.App` framework reference). The loopback endpoint accepts raw PPTX bytes, with an 8 MiB limit enforced for both Content-Length and streaming bodies. Start it with `dotnet run`, then POST a PPTX to `http://127.0.0.1:5088/convert`. The download includes the HTTP self-test.
```csharp
using System;
using System.IO;
using System.Linq;
using System.Threading;
using System.Threading.Tasks;
using Aspose.Slides;
using Aspose.Slides.Export;
using Microsoft.AspNetCore.Builder;
using Microsoft.AspNetCore.Hosting;
using Microsoft.AspNetCore.Http;
internal static class Program
{
private static async Task Main(string[] args)
{
var licensePath = Environment.GetEnvironmentVariable("ASPOSE_LICENSE_PATH");
if (!string.IsNullOrWhiteSpace(licensePath))
new License().SetLicense(licensePath);
var builder = WebApplication.CreateBuilder(args);
builder.WebHost.UseUrls("http://127.0.0.1:5088");
// The handler checks both declared and streamed sizes and returns its own 413 response.
builder.WebHost.ConfigureKestrel(options => options.Limits.MaxRequestBodySize = null);
await using var app = builder.Build();
app.MapPost("/convert", (Func>)ConvertPresentation);
await app.RunAsync();
}
private const int MaximumInputBytes = 8 * 1024 * 1024;
private static readonly SemaphoreSlim RequestSlots = new(2); // Bound admitted requests and buffers.
private static readonly SemaphoreSlim SdkGate = new(1); // Serialize native SDK conversion.
private static async Task ConvertPresentation(HttpContext context)
{
if (context.Request.ContentLength > MaximumInputBytes)
return Results.Json(new { error = "request_too_large" }, statusCode: 413);
var admitted = false;
string? workspace = null;
try
{
await RequestSlots.WaitAsync(context.RequestAborted);
admitted = true;
var inputBytes = await ReadBoundedBody(context);
if (inputBytes == null)
return Results.Json(new { error = "request_too_large" }, statusCode: 413);
if (inputBytes.Length == 0)
return Results.Json(new { error = "empty_presentation" }, statusCode: 400);
workspace = Directory.CreateTempSubdirectory("slides-api-").FullName;
var pdfBytes = await ConvertPptx(inputBytes, workspace, context.RequestAborted);
return pdfBytes == null ? Results.Json(new { error = "invalid_presentation" }, statusCode: 400) : Results.File(pdfBytes, "application/pdf", "presentation.pdf");
}
catch (Exception) when (context.RequestAborted.IsCancellationRequested)
{
return Results.Json(new { error = "request_cancelled" }, statusCode: 499);
}
catch (Exception)
{
return Results.Json(new { error = "invalid_presentation" }, statusCode: 400);
}
finally
{
try
{
if (workspace != null)
Directory.Delete(workspace, recursive: true);
}
finally
{
if (admitted)
RequestSlots.Release();
}
}
}
private static async Task ReadBoundedBody(HttpContext context)
{
using var input = new MemoryStream();
var buffer = new byte[81920];
while (true)
{
var read = await context.Request.Body.ReadAsync(buffer, context.RequestAborted);
if (read == 0)
return input.ToArray();
if (input.Length + read > MaximumInputBytes)
return null;
await input.WriteAsync(buffer.AsMemory(0, read), context.RequestAborted);
}
}
private static async Task ConvertPptx(byte[] inputBytes, string workspace, CancellationToken cancellation)
{
var interruption = new InterruptionTokenSource();
using var registration = cancellation.Register(interruption.Interrupt);
await SdkGate.WaitAsync(cancellation);
try
{
using var input = new MemoryStream(inputBytes);
if (PresentationFactory.Instance.GetPresentationInfo(input).LoadFormat != LoadFormat.Pptx)
return null;
var outputPath = Path.Combine(workspace, "result.pdf");
await Task.Run(() =>
{
input.Position = 0;
using var presentation = new Presentation(input, new LoadOptions { LoadFormat = LoadFormat.Pptx, InterruptionToken = interruption.Token });
presentation.Save(outputPath, SaveFormat.Pdf);
});
cancellation.ThrowIfCancellationRequested();
var pdfBytes = await File.ReadAllBytesAsync(outputPath, cancellation);
return pdfBytes.Length > 500 && pdfBytes.AsSpan(0, 5).SequenceEqual("%PDF-"u8) ? pdfBytes : null;
}
finally
{
SdkGate.Release();
}
}
}
```
## **Run and verify**
```text
dotnet run --project Example.csproj --configuration Release -- --self-test
```
Run normally to listen on http://127.0.0.1:5088. POST the file bytes with your HTTP client. Add --self-test to start a real ephemeral local server, upload valid/invalid/oversized files concurrently, cancel an active job, and verify temporary-directory cleanup. The sample uses loopback hosting and stable error codes. Add authentication, operational limits and deployment configuration appropriate to your own application before exposing it.
The verification run writes result.json plus "input.pptx", "response-0.pdf", "response-1.pdf", "response-2.pdf". Inspect the returned PDF files and the manifest or image preview. Exit 0 requires the named assertions to pass; an invalid input is reported explicitly.
Read the [detailed Docker guide](https://docs.aspose.com/slides/net/how-to-run-aspose-slides-in-docker/) for package and native-library choices when adapting Linux hosting.
## **Download, prerequisites and run**
[Download the complete project](https://docs.aspose.com/slides/net/examples/application-integration/web-api/example.zip) and open `Example.sln`. The stable
net8.0/C#12 project accepts compatible installed release SDKs and explicitly runs
on the current .NET10 runtime. No exact SDK patch or locked restore is required.
Bundled Noto Sans fonts include their redistribution notice. See
[setup and supported environments](https://docs.aspose.com/slides/net/examples/getting-started/).
The bootstrap prints the separate output workspace. Explicit `--mode evaluation`
ignores all license settings; `--mode licensed` accepts your authorized license
through `--license PATH` or ASPOSE_LICENSE_PATH. No license or credential is included.
Default Run/F5 starts the real loopback API. Use `--self-test` for the finite genuine HTTP/cancellation checks; startup alone does not claim those checks passed.
HTTP request processing is bounded to two active requests. Recognition, presentation loading, PDF saving and disposal are serialized in one SDK critical section per process. This is a mitigation for an observed intermittent native fontconfig crash, not a proven vendor fix. For parallel SDK conversions, use separate worker processes; see [the official multithreading guidance](https://docs.aspose.com/slides/net/multithreading/).
# Complete Workflows
> Complete C# projects for reports, proposals, preview galleries and distribution copies.
Source: https://docs.aspose.com/slides/net/examples/complete-workflows/
Updated: 2026-10-30
Combine presentation operations into a finished output. Each workflow includes original inputs, complete source and expected results.
# Assemble a Customer Proposal
> Complete runnable C# project to assemble a customer proposal using Aspose.Slides for .NET.
Source: https://docs.aspose.com/slides/net/examples/complete-workflows/customer-proposal/
Updated: 2026-11-03
Assemble a customer proposal from a synthetic product catalog and a JSON selection. The complete project creates a cover, copies the chosen product slides in request order, and saves an editable deck and a PDF. The original catalog remains unchanged.
## **Download and run**
Download [the complete project](https://docs.aspose.com/slides/net/examples/complete-workflows/customer-proposal/example.zip) and open **Example.sln** in a compatible IDE. Automatic NuGet restore should run when it opens. The project accepts supported installed release SDKs instead of requiring one exact patch. [Setup and supported environments](https://docs.aspose.com/slides/net/examples/getting-started/) explains native libraries, fonts and the SDK/runtime distinction.
```text
dotnet run --project Example.csproj -- --mode evaluation
```
Evaluation mode needs no license and retains the SDK watermark/text limits. For full licensed checks, set ASPOSE_LICENSE_PATH to your authorized license and use --mode licensed. Fonts and synthetic fixtures needed by this recipe are included or acquired as documented. The supplied bootstrap prepares a separate output workspace and prints its absolute path. The complete download includes the bootstrap, solution and editor profiles.
## **Inputs and execution**
[Download the complete project](https://docs.aspose.com/slides/net/examples/complete-workflows/customer-proposal/example.zip), including its original inputs, all source and pinned dependencies. The project uses bundled Noto Sans and the flexible SDK policy described in the setup guide. Set `ASPOSE_LICENSE_PATH` to your license file; unrestricted content checks require a valid license. See [licensing](https://docs.aspose.com/slides/net/licensing/). No PowerPoint installation is required.
```text
dotnet run --project Example.csproj --configuration Release
```
The program generates its own original presentation/template fixture. JSON inputs, when present, are included in the download. All output files are separate from those inputs.
## **Complete project source**
Copy a C# block into `Program.cs` in a .NET project with `Aspose.Slides.NET6.CrossPlatform` installed. Each block is a complete program. Run one block at a time. The ZIP contains the IDE-ready project and its verification checks.
The copied program writes its files under `example-output` by default.
This program creates a three-product catalog and assembles a proposal for Contoso. Zero-based selections `2, 0` preserve the requested order: Reporting, then Analytics. The download also supports the equivalent `customer.json` request fixture.
```csharp
using System;
using System.IO;
using System.Linq;
using System.Drawing;
using Aspose.Slides;
using Aspose.Slides.Export;
internal static class Program
{
private static void Main()
{
var licensePath = Environment.GetEnvironmentVariable("ASPOSE_LICENSE_PATH");
if (!string.IsNullOrWhiteSpace(licensePath))
new License().SetLicense(licensePath);
var outputDirectory = Directory.CreateDirectory("example-output").FullName;
var customerName = "Contoso";
var selectedProductIndices = new[]
{
2,
0
};
using (var catalog = CreateDeck("Analytics", "Planning", "Reporting"))
catalog.Save("example-output/catalog.pptx", SaveFormat.Pptx);
using var sourceCatalog = new Presentation("example-output/catalog.pptx");
if (selectedProductIndices.Any(index => index < 0 || index >= sourceCatalog.Slides.Count))
{
Console.Error.WriteLine("A selected product does not exist in the catalog.");
return;
}
using var proposal = CreateDeck("Proposal for " + customerName);
foreach (var productIndex in selectedProductIndices)
proposal.Slides.AddClone(sourceCatalog.Slides[productIndex]);
proposal.Save("example-output/proposal.pptx", SaveFormat.Pptx);
proposal.Save("example-output/proposal.pdf", SaveFormat.Pdf);
using var reopenedProposal = new Presentation("example-output/proposal.pptx");
Preview(reopenedProposal, "example-output/preview.png");
Console.WriteLine($"Saved proposal: {reopenedProposal.Slides.Count} slides, with Reporting then Analytics after the cover.");
Console.WriteLine("Output: " + outputDirectory);
}
private static Presentation CreateDeck(params string[] titles)
{
var deck = new Presentation();
deck.SlideSize.SetSize(960, 540, SlideSizeScaleType.DoNotScale);
var layout = deck.LayoutSlides.GetByType(SlideLayoutType.Blank);
for (int i = 0; i < titles.Length; i++)
{
var slide = i == 0 ? deck.Slides[0] : deck.Slides.AddEmptySlide(layout);
AddLabel(slide, titles[i], "Title", 40, 30, 880, 80);
}
return deck;
}
private static IAutoShape AddLabel(ISlide slide, string value, string name, float x, float y, float w, float h)
{
var shape = slide.Shapes.AddAutoShape(ShapeType.Rectangle, x, y, w, h);
shape.Name = name;
shape.FillFormat.FillType = FillType.Solid;
shape.FillFormat.SolidFillColor.Color = Color.AliceBlue;
shape.LineFormat.FillFormat.FillType = FillType.NoFill;
shape.TextFrame.Text = value;
shape.TextFrame.TextFrameFormat.AutofitType = TextAutofitType.Normal;
foreach (var paragraph in shape.TextFrame.Paragraphs)
foreach (var portion in paragraph.Portions)
{
portion.PortionFormat.FontHeight = 24;
portion.PortionFormat.LatinFont = new FontData("Noto Sans");
portion.PortionFormat.FillFormat.FillType = FillType.Solid;
portion.PortionFormat.FillFormat.SolidFillColor.Color = Color.Black;
}
return shape;
}
private static void Preview(Presentation deck, string path)
{
using var image = deck.Slides[0].GetImage(new Size(640, 360));
image.Save(path, Aspose.Slides.ImageFormat.Png);
}
}
```
## **Expected outputs**
The project writes proposal.pptx, proposal.pdf, preview.png and result.json. Reopen the PPTX/PDF or gallery and inspect its content before adapting the code to a real dataset. Production applications should validate external inputs and choose their own output paths and credentials.
See also [Templates and Data](https://docs.aspose.com/slides/net/examples/templates-data/), [Presentations](https://docs.aspose.com/slides/net/examples/presentations/) and [Conversion and Rendering](https://docs.aspose.com/slides/net/examples/conversion-rendering/).
# Prepare a Distribution Copy
> Complete runnable C# project to prepare a distribution copy using Aspose.Slides for .NET.
Source: https://docs.aspose.com/slides/net/examples/complete-workflows/distribution-copy/
Updated: 2026-11-03
Prepare a separate distribution copy with an explicit removal list: speaker notes, comments, author/custom metadata and the VBA project. Add a visual watermark and a password-protected PDF. The synthetic original stays unchanged. This is not forensic sanitization: hyperlinks, embedded files, hidden objects and other properties require their own review.
## **Download and run**
Download [the complete project](https://docs.aspose.com/slides/net/examples/complete-workflows/distribution-copy/example.zip) and open **Example.sln** in a compatible IDE. Automatic NuGet restore should run when it opens. The project accepts supported installed release SDKs instead of requiring one exact patch. [Setup and supported environments](https://docs.aspose.com/slides/net/examples/getting-started/) explains native libraries, fonts and the SDK/runtime distinction.
```text
dotnet run --project Example.csproj -- --mode evaluation
```
Evaluation mode needs no license and retains the SDK watermark/text limits. For full licensed checks, set ASPOSE_LICENSE_PATH to your authorized license and use --mode licensed. Fonts and synthetic fixtures needed by this recipe are included or acquired as documented. The supplied bootstrap prepares a separate output workspace and prints its absolute path. The complete download includes the bootstrap, solution and editor profiles.
## **Inputs and execution**
[Download the complete project](https://docs.aspose.com/slides/net/examples/complete-workflows/distribution-copy/example.zip), including its original inputs, all source and pinned dependencies. The project uses bundled Noto Sans and the flexible SDK policy described in the setup guide. Set `ASPOSE_LICENSE_PATH` to your license file; unrestricted content checks require a valid license. See [licensing](https://docs.aspose.com/slides/net/licensing/). No PowerPoint installation is required.
```text
dotnet run --project Example.csproj --configuration Release
```
The program generates its own original presentation/template fixture. JSON inputs, when present, are included in the download. All output files are separate from those inputs.
## **Complete project source**
Copy a C# block into `Program.cs` in a .NET project with `Aspose.Slides.NET6.CrossPlatform` installed. Each block is a complete program. Run one block at a time. The ZIP contains the IDE-ready project and its verification checks.
The copied program writes its files under `example-output` by default.
Set `OUTPUT_PDF_PASSWORD` for a real distribution password. The fallback `demonstration-only` is deliberately a demo credential. The generated `original.pptm` includes synthetic private notes, comments, a macro and a custom property.
```csharp
using System;
using System.IO;
using System.Linq;
using System.Drawing;
using Aspose.Slides;
using Aspose.Slides.Export;
using Aspose.Slides.Vba;
internal static class Program
{
private static void Main()
{
var licensePath = Environment.GetEnvironmentVariable("ASPOSE_LICENSE_PATH");
if (!string.IsNullOrWhiteSpace(licensePath))
new License().SetLicense(licensePath);
var outputDirectory = Directory.CreateDirectory("example-output").FullName;
CreatePrivateSource();
using var distributionCopy = new Presentation("example-output/original.pptm");
foreach (var slide in distributionCopy.Slides)
{
if (slide.NotesSlideManager.NotesSlide != null)
slide.NotesSlideManager.RemoveNotesSlide();
AddLabel(slide, "DISTRIBUTION COPY", "DistributionWatermark", 520, 450, 400, 55);
}
foreach (var reviewer in distributionCopy.CommentAuthors)
reviewer.Comments.Clear();
distributionCopy.CommentAuthors.Clear();
distributionCopy.VbaProject = null;
distributionCopy.DocumentProperties.Author = "";
distributionCopy.DocumentProperties.ClearCustomProperties();
distributionCopy.Save("example-output/distribution.pptx", SaveFormat.Pptx);
string password = Environment.GetEnvironmentVariable("OUTPUT_PDF_PASSWORD") ?? "demonstration-only";
distributionCopy.Save("example-output/distribution.pdf", SaveFormat.Pdf, new PdfOptions { Password = password });
using var reopened = new Presentation("example-output/distribution.pptx");
var sanitized = reopened.VbaProject == null && reopened.CommentAuthors.Count == 0 && reopened.DocumentProperties.CountOfCustomProperties == 0 && reopened.Slides.All(slide => slide.NotesSlideManager.NotesSlide == null);
if (!sanitized)
{
Console.Error.WriteLine("The reopened distribution copy still contains private content.");
return;
}
Preview(reopened, "example-output/preview.png");
Console.WriteLine("Distribution copy reopened without notes, comments, VBA, or custom properties.");
Console.WriteLine("Output: " + outputDirectory);
}
private static Presentation CreateDeck(params string[] titles)
{
var deck = new Presentation();
deck.SlideSize.SetSize(960, 540, SlideSizeScaleType.DoNotScale);
var layout = deck.LayoutSlides.GetByType(SlideLayoutType.Blank);
for (int i = 0; i < titles.Length; i++)
{
var slide = i == 0 ? deck.Slides[0] : deck.Slides.AddEmptySlide(layout);
AddLabel(slide, titles[i], "Title", 40, 30, 880, 80);
}
return deck;
}
private static IAutoShape AddLabel(ISlide slide, string value, string name, float x, float y, float w, float h)
{
var shape = slide.Shapes.AddAutoShape(ShapeType.Rectangle, x, y, w, h);
shape.Name = name;
shape.FillFormat.FillType = FillType.Solid;
shape.FillFormat.SolidFillColor.Color = Color.AliceBlue;
shape.LineFormat.FillFormat.FillType = FillType.NoFill;
shape.TextFrame.Text = value;
shape.TextFrame.TextFrameFormat.AutofitType = TextAutofitType.Normal;
foreach (var paragraph in shape.TextFrame.Paragraphs)
foreach (var portion in paragraph.Portions)
{
portion.PortionFormat.FontHeight = 24;
portion.PortionFormat.LatinFont = new FontData("Noto Sans");
portion.PortionFormat.FillFormat.FillType = FillType.Solid;
portion.PortionFormat.FillFormat.SolidFillColor.Color = Color.Black;
}
return shape;
}
private static void Preview(Presentation deck, string path)
{
using var image = deck.Slides[0].GetImage(new Size(640, 360));
image.Save(path, Aspose.Slides.ImageFormat.Png);
}
private static void CreatePrivateSource()
{
using (var input = CreateDeck("Quarterly update", "Public summary"))
{
input.DocumentProperties.Author = "Example internal author";
input.DocumentProperties.SetCustomPropertyValue("ReviewStatus", "Draft");
input.Slides[0].NotesSlideManager.AddNotesSlide().NotesTextFrame.Text = "Private example note";
var author = input.CommentAuthors.AddAuthor("Example reviewer", "ER");
author.Comments.AddComment("Example review", input.Slides[0], new PointF(10, 10), DateTime.UtcNow);
input.VbaProject = new VbaProject();
input.VbaProject.Modules.AddEmptyModule("SampleModule").SourceCode = "Sub Example()\nEnd Sub";
input.Save("example-output/original.pptm", SaveFormat.Pptm);
}
}
}
```
## **Expected outputs**
The project writes distribution.pptx, distribution.pdf, preview.png and result.json. Reopen the PPTX/PDF or gallery and inspect its content before adapting the code to a real dataset. Production applications should validate external inputs and choose their own output paths and credentials.
See also [Templates and Data](https://docs.aspose.com/slides/net/examples/templates-data/), [Presentations](https://docs.aspose.com/slides/net/examples/presentations/) and [Conversion and Rendering](https://docs.aspose.com/slides/net/examples/conversion-rendering/).
# Generate a Monthly Report
> Complete runnable C# project to generate a monthly report using Aspose.Slides for .NET.
Source: https://docs.aspose.com/slides/net/examples/complete-workflows/monthly-report/
Updated: 2026-11-03
Build a monthly report from a small JSON dataset and an original branded template. The project populates an editable chart/table, repeats a detail slide for every product and delivers PPTX plus PDF. It checks that chart totals reconcile to the source and preserves the template.
## **Download and run**
Download [the complete project](https://docs.aspose.com/slides/net/examples/complete-workflows/monthly-report/example.zip) and open **Example.sln** in a compatible IDE. Automatic NuGet restore should run when it opens. The project accepts supported installed release SDKs instead of requiring one exact patch. [Setup and supported environments](https://docs.aspose.com/slides/net/examples/getting-started/) explains native libraries, fonts and the SDK/runtime distinction.
```text
dotnet run --project Example.csproj -- --mode evaluation
```
Evaluation mode needs no license and retains the SDK watermark/text limits. For full licensed checks, set ASPOSE_LICENSE_PATH to your authorized license and use --mode licensed. Fonts and synthetic fixtures needed by this recipe are included or acquired as documented. The supplied bootstrap prepares a separate output workspace and prints its absolute path. The complete download includes the bootstrap, solution and editor profiles.
## **Inputs and execution**
[Download the complete project](https://docs.aspose.com/slides/net/examples/complete-workflows/monthly-report/example.zip), including its original inputs, all source and pinned dependencies. The project uses bundled Noto Sans and the flexible SDK policy described in the setup guide. Set `ASPOSE_LICENSE_PATH` to your license file; unrestricted content checks require a valid license. See [licensing](https://docs.aspose.com/slides/net/licensing/). No PowerPoint installation is required.
```text
dotnet run --project Example.csproj --configuration Release
```
The program generates its own original presentation/template fixture. JSON inputs, when present, are included in the download. All output files are separate from those inputs.
## **Complete project source**
Copy a C# block into `Program.cs` in a .NET project with `Aspose.Slides.NET6.CrossPlatform` installed. Each block is a complete program. Run one block at a time. The ZIP contains the IDE-ready project and its verification checks.
The copied program writes its files under `example-output` by default.
The complete program embeds its three sales records and generates its template. It creates a summary chart and table from the same product data, then clones one detail slide per product. Negative units stop the program before report assembly.
```csharp
using System;
using System.IO;
using System.Linq;
using System.Drawing;
using System.Text.Json;
using Aspose.Slides;
using Aspose.Slides.Export;
using Aspose.Slides.Charts;
internal static class Program
{
private static void Main()
{
var licensePath = Environment.GetEnvironmentVariable("ASPOSE_LICENSE_PATH");
if (!string.IsNullOrWhiteSpace(licensePath))
new License().SetLicense(licensePath);
var outputDirectory = Directory.CreateDirectory("example-output").FullName;
const string salesJson = """[{"product":"Pens","units":12},{"product":"Notebooks","units":8},{"product":"Folders","units":5}]""";
using var salesDocument = JsonDocument.Parse(salesJson);
var sales = salesDocument.RootElement.EnumerateArray().Select(row => new ProductSales(row.GetProperty("product").GetString()!, row.GetProperty("units").GetDouble())).ToArray();
if (sales.Any(row => row.Units < 0))
{
Console.Error.WriteLine("Units must be nonnegative.");
return;
}
var totalUnits = sales.Sum(row => row.Units);
CreateTemplate();
using var report = new Presentation("example-output/template.pptx");
var searchOptions = new TextSearchOptions
{
CaseSensitive = true
};
foreach (var shape in report.Slides[0].Shapes.OfType())
{
shape.TextFrame.ReplaceText("{{month}}", "October", searchOptions, null);
shape.TextFrame.ReplaceText("{{total}}", "Total units: " + totalUnits, searchOptions, null);
}
AddSalesChart(report.Slides[0], sales);
AddSummaryTable(report.Slides[0], sales);
AddProductDetails(report, sales, searchOptions);
if (report.Slides.Any(slide => slide.Shapes.OfType().Any(shape => shape.TextFrame.Text.Contains("{{"))))
{
Console.Error.WriteLine("A template placeholder remains unfilled.");
return;
}
report.Save("example-output/monthly-report.pptx", SaveFormat.Pptx);
report.Save("example-output/monthly-report.pdf", SaveFormat.Pdf);
using var savedReport = new Presentation("example-output/monthly-report.pptx");
Preview(savedReport, "example-output/preview.png");
Console.WriteLine($"Saved {savedReport.Slides.Count} slides for {sales.Length} products; total units: {totalUnits}.");
Console.WriteLine("Output: " + outputDirectory);
}
private sealed record ProductSales(string Product, double Units);
private static void CreateTemplate()
{
using var template = CreateReportTemplate("Monthly report: {{month}}", "{{product}}");
AddLabel(template.Slides[0], "{{total}}", "Total", 40, 120, 350, 60);
AddLabel(template.Slides[1], "{{units}}", "Units", 40, 150, 500, 80);
template.Save("example-output/template.pptx", SaveFormat.Pptx);
}
private static void AddSalesChart(ISlide summary, ProductSales[] sales)
{
var chart = summary.Shapes.AddChart(ChartType.ClusteredColumn, 410, 120, 500, 340);
chart.ChartData.Series.Clear();
chart.ChartData.Categories.Clear();
var workbook = chart.ChartData.ChartDataWorkbook;
workbook.Clear(0);
var series = chart.ChartData.Series.Add(workbook.GetCell(0, 0, 1, "Units"), chart.Type);
for (var index = 0; index < sales.Length; index++)
{
chart.ChartData.Categories.Add(workbook.GetCell(0, index + 1, 0, sales[index].Product));
series.DataPoints.AddDataPointForBarSeries(workbook.GetCell(0, index + 1, 1, sales[index].Units));
}
}
private static void AddSummaryTable(ISlide summary, ProductSales[] sales)
{
var rowHeights = Enumerable.Repeat(36.0, sales.Length + 1).ToArray();
var table = summary.Shapes.AddTable(40, 220, new double[] { 210, 120 }, rowHeights);
table[0, 0].TextFrame.Text = "Product";
table[1, 0].TextFrame.Text = "Units";
for (var index = 0; index < sales.Length; index++)
{
table[0, index + 1].TextFrame.Text = sales[index].Product;
table[1, index + 1].TextFrame.Text = sales[index].Units.ToString(System.Globalization.CultureInfo.InvariantCulture);
}
}
private static void AddProductDetails(Presentation report, ProductSales[] sales, TextSearchOptions searchOptions)
{
var detailTemplate = report.Slides[1];
foreach (var product in sales)
{
var detailSlide = report.Slides.AddClone(detailTemplate);
foreach (var shape in detailSlide.Shapes.OfType())
{
shape.TextFrame.ReplaceText("{{product}}", product.Product, searchOptions, null);
shape.TextFrame.ReplaceText("{{units}}", product.Units.ToString(System.Globalization.CultureInfo.InvariantCulture), searchOptions, null);
}
}
// Clone all detail slides before removing their template.
report.Slides.RemoveAt(1);
}
private static Presentation CreateReportTemplate(params string[] titles)
{
var deck = new Presentation();
deck.SlideSize.SetSize(960, 540, SlideSizeScaleType.DoNotScale);
var layout = deck.LayoutSlides.GetByType(SlideLayoutType.Blank);
for (int i = 0; i < titles.Length; i++)
{
var slide = i == 0 ? deck.Slides[0] : deck.Slides.AddEmptySlide(layout);
AddLabel(slide, titles[i], "Title", 40, 30, 880, 80);
}
return deck;
}
private static IAutoShape AddLabel(ISlide slide, string value, string name, float x, float y, float w, float h)
{
var shape = slide.Shapes.AddAutoShape(ShapeType.Rectangle, x, y, w, h);
shape.Name = name;
shape.FillFormat.FillType = FillType.Solid;
shape.FillFormat.SolidFillColor.Color = Color.AliceBlue;
shape.LineFormat.FillFormat.FillType = FillType.NoFill;
shape.TextFrame.Text = value;
shape.TextFrame.TextFrameFormat.AutofitType = TextAutofitType.Normal;
foreach (var paragraph in shape.TextFrame.Paragraphs)
foreach (var portion in paragraph.Portions)
{
portion.PortionFormat.FontHeight = 24;
portion.PortionFormat.LatinFont = new FontData("Noto Sans");
portion.PortionFormat.FillFormat.FillType = FillType.Solid;
portion.PortionFormat.FillFormat.SolidFillColor.Color = Color.Black;
}
return shape;
}
private static void Preview(Presentation deck, string path)
{
using var image = deck.Slides[0].GetImage(new Size(640, 360));
image.Save(path, Aspose.Slides.ImageFormat.Png);
}
}
```
## **Expected outputs**
The project writes monthly-report.pptx, monthly-report.pdf, preview.png and result.json. Reopen the PPTX/PDF or gallery and inspect its content before adapting the code to a real dataset. Production applications should validate external inputs and choose their own output paths and credentials.
See also [Templates and Data](https://docs.aspose.com/slides/net/examples/templates-data/), [Presentations](https://docs.aspose.com/slides/net/examples/presentations/) and [Conversion and Rendering](https://docs.aspose.com/slides/net/examples/conversion-rendering/).
# Build a Presentation Preview Gallery
> Complete runnable C# project to build a presentation preview gallery using Aspose.Slides for .NET.
Source: https://docs.aspose.com/slides/net/examples/complete-workflows/thumbnail-gallery/
Updated: 2026-11-03
Create a preview gallery and JSON index for a presentation. The example uses duplicate titles and a non-ASCII input filename, generates filenames from slide numbers and escapes titles in HTML. Open gallery.html with its three thumbnail files beside it.
## **Download and run**
Download [the complete project](https://docs.aspose.com/slides/net/examples/complete-workflows/thumbnail-gallery/example.zip) and open **Example.sln** in a compatible IDE. Automatic NuGet restore should run when it opens. The project accepts supported installed release SDKs instead of requiring one exact patch. [Setup and supported environments](https://docs.aspose.com/slides/net/examples/getting-started/) explains native libraries, fonts and the SDK/runtime distinction.
```text
dotnet run --project Example.csproj -- --mode evaluation
```
Evaluation mode needs no license and retains the SDK watermark/text limits. For full licensed checks, set ASPOSE_LICENSE_PATH to your authorized license and use --mode licensed. Fonts and synthetic fixtures needed by this recipe are included or acquired as documented. The supplied bootstrap prepares a separate output workspace and prints its absolute path. The complete download includes the bootstrap, solution and editor profiles.
## **Inputs and execution**
[Download the complete project](https://docs.aspose.com/slides/net/examples/complete-workflows/thumbnail-gallery/example.zip), including its original inputs, all source and pinned dependencies. The project uses bundled Noto Sans and the flexible SDK policy described in the setup guide. Set `ASPOSE_LICENSE_PATH` to your license file; unrestricted content checks require a valid license. See [licensing](https://docs.aspose.com/slides/net/licensing/). No PowerPoint installation is required.
```text
dotnet run --project Example.csproj --configuration Release
```
The program generates its own original presentation/template fixture. JSON inputs, when present, are included in the download. All output files are separate from those inputs.
## **Complete project source**
Copy a C# block into `Program.cs` in a .NET project with `Aspose.Slides.NET6.CrossPlatform` installed. Each block is a complete program. Run one block at a time. The ZIP contains the IDE-ready project and its verification checks.
The copied program writes its files under `example-output` by default.
The source includes a Unicode filename and repeated slide labels. Thumbnail filenames use slide numbers, while HTML captions are encoded at interpolation boundaries.
```csharp
using System;
using System.IO;
using System.Linq;
using System.Drawing;
using System.Collections.Generic;
using System.Text;
using System.Text.Json;
using System.Net;
using Aspose.Slides;
using Aspose.Slides.Export;
internal static class Program
{
private static void Main()
{
var licensePath = Environment.GetEnvironmentVariable("ASPOSE_LICENSE_PATH");
if (!string.IsNullOrWhiteSpace(licensePath))
new License().SetLicense(licensePath);
var outputDirectory = Directory.CreateDirectory("example-output").FullName;
const string sourcePath = "example-output/презентация.pptx";
using (var fixture = CreateDeck("", "", "Результаты"))
fixture.Save(sourcePath, SaveFormat.Pptx);
using var source = new Presentation(sourcePath);
var thumbnails = new List();
for (var index = 0; index < source.Slides.Count; index++)
{
var slide = source.Slides[index];
var imagePath = $"slide-{index + 1}.png";
using var image = slide.GetImage(new Size(320, 180));
image.Save(Path.Combine(outputDirectory, imagePath), Aspose.Slides.ImageFormat.Png);
thumbnails.Add(new GalleryItem(index + 1, SlideTitle(slide), imagePath));
}
var html = new StringBuilder("Presentation gallery Presentation gallery ");
foreach (var item in thumbnails)
{
html.Append($"{item.Slide}. {WebUtility.HtmlEncode(item.Title)} ().Where(s => s.Name is "Title" or "Total" or "Units").Select(s => s.TextFrame?.Text));
private sealed record GalleryItem(int Slide, string Title, string Thumbnail);
}
```
## **Expected outputs**
The project writes gallery.html, gallery.json, slide-1.png, slide-2.png, slide-3.png and result.json. Reopen the PPTX/PDF or gallery and inspect its content before adapting the code to a real dataset. Production applications should validate external inputs and choose their own output paths and credentials.
See also [Templates and Data](https://docs.aspose.com/slides/net/examples/templates-data/), [Presentations](https://docs.aspose.com/slides/net/examples/presentations/) and [Conversion and Rendering](https://docs.aspose.com/slides/net/examples/conversion-rendering/).
# Content Extraction
> Runnable C# examples for content extraction with Aspose.Slides for .NET.
Source: https://docs.aspose.com/slides/net/examples/content-extraction/
Updated: 2026-10-30
Choose a task. Each example includes a complete downloadable C# project, synthetic inputs,
expected outputs and meaningful checks. See individual pages for prerequisites and limits.
- [Extract Slide Text and Notes](https://docs.aspose.com/slides/net/examples/content-extraction/text-notes/)
- [Extract Presentation Images](https://docs.aspose.com/slides/net/examples/content-extraction/images/)
- [Extract Media and Embedded Files](https://docs.aspose.com/slides/net/examples/content-extraction/media-embedded-files/)
- [Extract Table Data](https://docs.aspose.com/slides/net/examples/content-extraction/tables/)
- [Extract Chart Data](https://docs.aspose.com/slides/net/examples/content-extraction/chart-data/)
# Extract Chart Data
> Read editable chart categories, series and numeric values, export embedded workbooks, and identify external workbook references.
Source: https://docs.aspose.com/slides/net/examples/content-extraction/chart-data/
Updated: 2026-11-03
Read editable chart categories, series and numeric values, export embedded workbooks, and identify external workbook references.
();
foreach (var point in series.DataPoints)
{
object? value = point.Value.Data;
values.Add(value is null ? null : Convert.ToDouble(value, CultureInfo.InvariantCulture));
}
return new SeriesData(series.Name.ToString(), values.ToArray());
}
private static void ExtractChartData()
{
CreateInput();
using var input = new Presentation("output/input.pptx");
var rows = new List();
int workbooks = 0;
for (int i = 0; i < input.Slides.Count; i++)
{
int embeddedChartNumber = 0;
foreach (var chart in Walk(input.Slides[i].Shapes).OfType())
{
var data = chart.ChartData;
if (data.DataSourceType == ChartDataSourceType.ExternalWorkbook)
{
// Reading categories, series or a workbook stream could open the link.
rows.Add(new ChartData(i + 1, chart.Name, "external_not_read", data.ExternalWorkbookPath, [], []));
continue;
}
string[] categories = data.Categories.Select(category => category.Value?.ToString() ?? "").ToArray();
SeriesData[] series = data.Series.Select(ReadSeries).ToArray();
embeddedChartNumber++;
string workbookName = $"workbook-{i + 1}-{embeddedChartNumber}.xlsx";
string workbookPath = Path.Combine("output", workbookName);
using var workbook = data.ReadWorkbookStream();
using var file = File.Create(workbookPath);
workbook.CopyTo(file);
workbooks++;
rows.Add(new ChartData(i + 1, chart.Name, "embedded", null, categories, series, workbookName));
}
}
Json("output/chart-data.json", rows);
Console.WriteLine("Results: " + Path.GetFullPath("output"));
}
private static void CreateInput()
{
using var presentation = new Presentation();
var embedded = presentation.Slides[0].Shapes.AddChart(ChartType.ClusteredColumn, 40, 60, 600, 350);
embedded.Name = "Internal chart";
SetChartData(embedded);
var linkedSlide = presentation.Slides.AddEmptySlide(presentation.LayoutSlides[0]);
var linked = linkedSlide.Shapes.AddChart(ChartType.ClusteredColumn, 40, 60, 600, 350);
linked.Name = "External chart";
linked.ChartData.SetExternalWorkbook("https://example.invalid/unfetched.xlsx", false);
presentation.Save("output/input.pptx", SaveFormat.Pptx);
}
private static void SetChartData(IChart chart)
{
var data = chart.ChartData;
var workbook = data.ChartDataWorkbook;
data.Series.Clear();
data.Categories.Clear();
workbook.Clear(0);
string[] categories = ["Jan", "Feb"];
string[] names = ["North", "South"];
double[][] values = [[125.5, 80], [50, 75.25]];
for (int row = 0; row < categories.Length; row++)
data.Categories.Add(workbook.GetCell(0, row + 1, 0, categories[row]));
for (int column = 0; column < names.Length; column++)
{
var series = data.Series.Add(workbook.GetCell(0, 0, column + 1, names[column]), ChartType.ClusteredColumn);
for (int row = 0; row < categories.Length; row++)
series.DataPoints.AddDataPointForBarSeries(workbook.GetCell(0, row + 1, column + 1, values[column][row]));
}
}
private static IEnumerable Walk(IShapeCollection shapes)
{
foreach (var shape in shapes)
{
yield return shape;
if (shape is IGroupShape group)
{
foreach (var child in Walk(group.Shapes))
yield return child;
}
}
}
private static void Json(string path, object value)
{
string json = JsonSerializer.Serialize(value, new JsonSerializerOptions { WriteIndented = true });
File.WriteAllText(path, json, new UTF8Encoding(false));
}
}
```
## **Expected result and checks**
`output/chart-data.json` contains Jan/Feb categories and North/South values from the embedded chart. Its `Workbook` field points to `workbook-1-1.xlsx`; the second number is an embedded-chart ordinal, preventing collisions on the same slide. Missing point values remain JSON null. The linked workbook URL is recorded without reading or refreshing it.
The downloaded project writes its verification checks to `output/result.json`. The following values describe the ZIP’s checks; the copied program does not write this report:
```json
{
"charts": 2,
"embedded_workbooks": 1,
"external_links": 1,
"all_numeric_values_checked": true,
"external_data_not_refreshed": true
}
```
Embedded values are preserved as numbers or null. For external workbooks the JSON records the link and the explicit external_not_read state, with empty category/series arrays. Reading linked workbook cells can cause a download, so this offline example does not inspect them. Missing values remain null; the example does not invent external data or turn chart images into editable data.
## **Learn more**
- [Manage Chart Workbooks in Presentations in .NET](https://docs.aspose.com/slides/net/chart-workbook/)
- [Manage Chart Data Series in Presentations in .NET](https://docs.aspose.com/slides/net/chart-series/)
## **Open and run the complete project**
[Download the complete project](https://docs.aspose.com/slides/net/examples/content-extraction/chart-data/example.zip), extract it and open `Example.sln`, or run:
```text
dotnet restore Example.sln
dotnet run --project Example.csproj --configuration Release -- --mode evaluation
```
Use the current supported .NET 10 SDK/runtime. The project keeps a stable `net8.0`
target and accepts compatible stable SDKs; no exact SDK patch is required.
Evaluation runs without a license and explicitly ignores license environment settings.
It uses bounded fixtures and checks valid output while allowing the evaluation watermark
and documented read-back text truncation. For unrestricted checks, use `--mode licensed`
with your authorized `ASPOSE_LICENSE_PATH`. No license is included.
Inputs are copied from `Fixtures` into a separate output workspace. The program prints
the absolute output path; `execution.json` records the actual runtime and verified action.
See [setup and prerequisites](https://docs.aspose.com/slides/net/examples/getting-started/) for native libraries,
fonts, IDE settings and the .NET 8/9 runtime support boundary of 2026-11-10.
# Extract Presentation Images
> Extract original embedded picture bytes once per content hash, with references back to the slides and shapes using them.
Source: https://docs.aspose.com/slides/net/examples/content-extraction/images/
Updated: 2026-11-03
Extract original embedded picture bytes once per content hash, with references back to the slides and shapes using them.
();
var refs = new List();
var links = new List();
for (int i = 0; i < input.Slides.Count; i++)
{
int slideNumber = i + 1;
foreach (var frame in Walk(input.Slides[i].Shapes).OfType())
{
var picture = frame.PictureFormat.Picture;
if (!string.IsNullOrWhiteSpace(picture.LinkPathLong))
{
links.Add(new { slide = slideNumber, shape = frame.Name, url = picture.LinkPathLong });
continue;
}
byte[] bytes = picture.Image.BinaryData;
string hash = Hash(bytes);
string filename = hash + ImageExtension(picture.Image.ContentType);
string relativePath = "images/" + filename;
if (seen.Add(hash))
{
string? outputPath = SafeOutput(imageRoot, filename);
if (outputPath is null)
return;
File.WriteAllBytes(outputPath, bytes);
}
refs.Add(new ImageRef(slideNumber, frame.Name, relativePath, hash));
}
}
Json("output/images.json", new { images = refs, external_links = links });
Console.WriteLine("Results: " + Path.GetFullPath("output"));
}
private static void CreateInput()
{
// Original blue and orange PNG fixtures, including a white ellipse.
byte[] blue = Convert.FromBase64String("iVBORw0KGgoAAAANSUhEUgAAAAwAAAAICAYAAADN5B7xAAAAI0lEQVR4nGNImfr2PymYgWoaQIAoDdgATg34AHVsIMsPhDAAMPMqpQBAkJ0AAAAASUVORK5CYII=");
byte[] orange = Convert.FromBase64String("iVBORw0KGgoAAAANSUhEUgAAAAgAAAAMCAYAAABfnvydAAAAJElEQVR4nGP4v5ThPz7MQAMFIIBTATIgXQE2QGUriPIFOQEFAOHGFsu+FDRbAAAAAElFTkSuQmCC");
using var presentation = new Presentation();
var shared = presentation.Images.AddImage(blue);
var firstSlide = presentation.Slides[0];
firstSlide.Shapes.AddPictureFrame(ShapeType.Rectangle, 20, 20, 120, 80, shared).Name = "First";
firstSlide.Shapes.AddPictureFrame(ShapeType.Rectangle, 160, 20, 120, 80, shared).Name = "Duplicate";
var secondSlide = presentation.Slides.AddEmptySlide(presentation.LayoutSlides[0]);
var secondImage = presentation.Images.AddImage(orange);
secondSlide.Shapes.AddPictureFrame(ShapeType.Rectangle, 20, 20, 80, 120, secondImage).Name = "Second image";
var linked = secondSlide.Shapes.AddPictureFrame(ShapeType.Rectangle, 150, 20, 80, 80, shared);
linked.Name = "External";
linked.PictureFormat.Picture.LinkPathLong = "https://example.invalid/unfetched.png";
presentation.Save("output/input.pptx", SaveFormat.Pptx);
}
private static IEnumerable Walk(IShapeCollection shapes)
{
foreach (var shape in shapes)
{
yield return shape;
if (shape is IGroupShape group)
{
foreach (var child in Walk(group.Shapes))
yield return child;
}
}
}
private static void Json(string path, object value)
{
string json = JsonSerializer.Serialize(value, new JsonSerializerOptions { WriteIndented = true });
File.WriteAllText(path, json, new UTF8Encoding(false));
}
private static string Hash(byte[] data) => Convert.ToHexString(SHA256.HashData(data)).ToLowerInvariant();
private static string? SafeOutput(string folder, string filename)
{
string root = Path.GetFullPath(folder) + Path.DirectorySeparatorChar;
string path = Path.GetFullPath(Path.Combine(folder, filename));
if (!path.StartsWith(root, StringComparison.OrdinalIgnoreCase))
{
Console.Error.WriteLine("Output filename must stay inside its directory.");
return null;
}
return path;
}
}
```
## **Expected result and checks**
`output/images.json` maps three embedded image references to two distinct files under `output/images`. Raw image bytes keep an extension based on their media type, with `.bin` for unknown types. SHA-256 names deduplicate repeated images. The linked image is reported without a request to its URL.
The downloaded project writes its verification checks to `output/result.json`. The following values describe the ZIP’s checks; the copied program does not write this report:
```json
{
"image_references": 3,
"unique_images": 2,
"external_links_reported": 1,
"original_bytes_checked": true,
"no_network_fetch": true
}
```
The sample deduplicates bytes rather than filenames. External picture links are reported and are never fetched. This extracts picture-frame resources; rendering a slide is a different operation, and other image uses such as background fills require extending the traversal.
## **Learn more**
- [Extract Images from Presentation Shapes in .NET](https://docs.aspose.com/slides/net/extracting-images-from-presentation-shapes/)
- [Optimize Image Management in Presentations in .NET](https://docs.aspose.com/slides/net/image/)
## **Open and run the complete project**
[Download the complete project](https://docs.aspose.com/slides/net/examples/content-extraction/images/example.zip), extract it and open `Example.sln`, or run:
```text
dotnet restore Example.sln
dotnet run --project Example.csproj --configuration Release -- --mode evaluation
```
Use the current supported .NET 10 SDK/runtime. The project keeps a stable `net8.0`
target and accepts compatible stable SDKs; no exact SDK patch is required.
Evaluation runs without a license and explicitly ignores license environment settings.
It uses bounded fixtures and checks valid output while allowing the evaluation watermark
and documented read-back text truncation. For unrestricted checks, use `--mode licensed`
with your authorized `ASPOSE_LICENSE_PATH`. No license is included.
Inputs are copied from `Fixtures` into a separate output workspace. The program prints
the absolute output path; `execution.json` records the actual runtime and verified action.
See [setup and prerequisites](https://docs.aspose.com/slides/net/examples/getting-started/) for native libraries,
fonts, IDE settings and the .NET 8/9 runtime support boundary of 2026-11-10.
# Extract Media and Embedded Files
> Extract embedded audio, video and OLE file data, record SHA-256 hashes, and list external media links without opening them.
Source: https://docs.aspose.com/slides/net/examples/content-extraction/media-embedded-files/
Updated: 2026-11-03
Extract embedded audio, video and OLE file data, record SHA-256 hashes, and list external media links without opening them.
();
var links = new List();
void Save(int slide, IShape shape, string kind, string extension, byte[] data)
{
string hash = Hash(data);
string filename = $"{kind}-{hash}.{SafeExtension(extension)}";
string? outputPath = SafeOutput(outputDirectory, filename);
if (outputPath is null)
return;
File.WriteAllBytes(outputPath, data);
rows.Add(new Payload(slide, shape.Name, kind, "extracted/" + filename, hash));
}
for (int i = 0; i < input.Slides.Count; i++)
{
foreach (var shape in Walk(input.Slides[i].Shapes))
{
switch (shape)
{
case IAudioFrame audioFrame:
if (audioFrame.EmbeddedAudio is { } embeddedAudio)
Save(i + 1, shape, "audio", Extension(embeddedAudio.ContentType), embeddedAudio.BinaryData);
else
links.Add(new ExternalLink(i + 1, shape.Name, audioFrame.LinkPathLong));
break;
case IVideoFrame videoFrame:
if (videoFrame.EmbeddedVideo is { } embeddedVideo)
Save(i + 1, shape, "video", Extension(embeddedVideo.ContentType), embeddedVideo.BinaryData);
else
links.Add(new ExternalLink(i + 1, shape.Name, videoFrame.LinkPathLong));
break;
case IOleObjectFrame embeddedObject:
if (embeddedObject.IsObjectLink)
links.Add(new ExternalLink(i + 1, shape.Name, embeddedObject.LinkPathLong));
else
Save(i + 1, shape, "ole", embeddedObject.EmbeddedData.EmbeddedFileExtension, embeddedObject.EmbeddedData.EmbeddedFileData);
break;
}
}
}
Json("output/manifest.json", new { payloads = rows, external_links = links });
Console.WriteLine("Results: " + Path.GetFullPath("output"));
}
private static void CreateInput()
{
// Original fixtures: 0.1-second silent PCM WAV, one 8x8 RGB AVI frame, and UTF-8 text.
byte[] silentWav = CreateSilentWav();
byte[] grayAvi = Convert.FromBase64String("UklGRqABAABBVkkgTElTVMAAAABoZHJsYXZpaDgAAABAQg8AwAAAAAAAAAAQAAAAAQAAAAAAAAABAAAAwAAAAAgAAAAIAAAAAAAAAAAAAAAAAAAAAAAAAExJU1R0AAAAc3RybHN0cmg4AAAAdmlkc0RJQiAAAAAAAAAAAAAAAAABAAAAAQAAAAAAAAABAAAAwAAAAP////8AAAAAAAAAAAgACABzdHJmKAAAACgAAAAIAAAACAAAAAEAGAAAAAAAwAAAAAAAAAAAAAAAAAAAAAAAAABMSVNUzAAAAG1vdmkwMGRiwAAAAFBQUFBQUFBQUFBQUFBQUFBQUFBQUFBQUFBQUFBQUFBQUFBQUFBQUFBQUFBQUFBQUFBQUFBQUFBQUFBQUFBQUFBQUFBQUFBQUFBQUFBQUFBQUFBQUFBQUFBQUFBQUFBQUFBQUFBQUFBQUFBQUFBQUFBQUFBQUFBQUFBQUFBQUFBQUFBQUFBQUFBQUFBQUFBQUFBQUFBQUFBQUFBQUFBQUFBQUFBQUFBQUFBQUFBQUFBQUFBQUFBQUFBQUFBQUFBQUA==");
byte[] note = Encoding.UTF8.GetBytes("Original embedded note – no executable content.\n");
using var presentation = new Presentation();
var shapes = presentation.Slides[0].Shapes;
using var audioStream = new MemoryStream(silentWav);
shapes.AddAudioFrameEmbedded(20, 20, 60, 60, audioStream).Name = "../audio";
var video = presentation.Videos.AddVideo(grayAvi);
shapes.AddVideoFrame(100, 20, 100, 80, video).Name = "Video";
var data = new OleEmbeddedDataInfo(note, "txt");
shapes.AddOleObjectFrame(220, 20, 80, 80, data).Name = "../note";
shapes.AddVideoFrame(320, 20, 100, 80, "https://example.invalid/unfetched.mp4").Name = "Linked video";
shapes.AddAudioFrameLinked(430, 20, 60, 60, "https://example.invalid/unfetched.wav").Name = "Linked audio";
presentation.Save("output/input.pptx", SaveFormat.Pptx);
}
private static byte[] CreateSilentWav()
{
// PCM: mono, 8000 samples/second, 16 bits/sample, 800 silent samples.
byte[] header = Convert.FromBase64String("UklGRmQGAABXQVZFZm10IBAAAAABAAEAQB8AAIA+AAACABAAZGF0YUAGAAA=");
return header.Concat(new byte[1600]).ToArray();
}
private static IEnumerable Walk(IShapeCollection shapes)
{
foreach (var shape in shapes)
{
yield return shape;
if (shape is IGroupShape group)
{
foreach (var child in Walk(group.Shapes))
yield return child;
}
}
}
private static void Json(string path, object value)
{
string json = JsonSerializer.Serialize(value, new JsonSerializerOptions { WriteIndented = true });
File.WriteAllText(path, json, new UTF8Encoding(false));
}
private static string Hash(byte[] data) => Convert.ToHexString(SHA256.HashData(data)).ToLowerInvariant();
private static string? SafeOutput(string folder, string filename)
{
string root = Path.GetFullPath(folder) + Path.DirectorySeparatorChar;
string path = Path.GetFullPath(Path.Combine(folder, filename));
if (!path.StartsWith(root, StringComparison.OrdinalIgnoreCase))
{
Console.Error.WriteLine("Output filename must stay inside its directory.");
return null;
}
return path;
}
}
```
## **Expected result and checks**
`output/manifest.json` maps embedded WAV, AVI and text payloads to content-hash filenames under `output/extracted`. It lists linked audio/video URLs without fetching them. Shape names such as `../audio` never become file paths. Unknown media types use `.bin`.
The downloaded project writes its verification checks to `output/result.json`. The following values describe the ZIP’s checks; the copied program does not write this report:
```json
{
"embedded_payloads": 3,
"external_links": 2,
"payload_hashes_checked": true,
"path_escape_rejected": true,
"no_external_fetch": true,
"no_payload_execution": true
}
```
The sample creates original synthetic WAV, uncompressed AVI and text payloads. It uses generated content-based filenames inside a checked output directory. It never executes extracted files or downloads external links. Shape names are metadata only, even when they contain path separators. Codec playback is outside this extraction example.
## **Learn more**
- [Manage Audio Frames in Presentations in .NET](https://docs.aspose.com/slides/net/audio-frame/)
- [Manage Video Frames in Presentations in .NET](https://docs.aspose.com/slides/net/video-frame/)
- [Manage OLE Objects in Presentations in .NET](https://docs.aspose.com/slides/net/manage-ole/)
## **Open and run the complete project**
[Download the complete project](https://docs.aspose.com/slides/net/examples/content-extraction/media-embedded-files/example.zip), extract it and open `Example.sln`, or run:
```text
dotnet restore Example.sln
dotnet run --project Example.csproj --configuration Release -- --mode evaluation
```
Use the current supported .NET 10 SDK/runtime. The project keeps a stable `net8.0`
target and accepts compatible stable SDKs; no exact SDK patch is required.
Evaluation runs without a license and explicitly ignores license environment settings.
It uses bounded fixtures and checks valid output while allowing the evaluation watermark
and documented read-back text truncation. For unrestricted checks, use `--mode licensed`
with your authorized `ASPOSE_LICENSE_PATH`. No license is included.
Inputs are copied from `Fixtures` into a separate output workspace. The program prints
the absolute output path; `execution.json` records the actual runtime and verified action.
See [setup and prerequisites](https://docs.aspose.com/slides/net/examples/getting-started/) for native libraries,
fonts, IDE settings and the .NET 8/9 runtime support boundary of 2026-11-10.
# Extract Table Data
> Extract table grids from slides and nested groups as JSON and CSV, preserving identifiers, Unicode and merged-cell coordinates.
Source: https://docs.aspose.com/slides/net/examples/content-extraction/tables/
Updated: 2026-11-03
Extract table grids from slides and nested groups as JSON and CSV, preserving identifiers, Unicode and merged-cell coordinates.
();
var csv = new StringBuilder("Slide,Shape,Row,Column,Text\n");
for (int slideIndex = 0; slideIndex < input.Slides.Count; slideIndex++)
{
foreach (var table in Walk(input.Slides[slideIndex].Shapes).OfType())
{
var cells = new List();
for (int row = 0; row < table.Rows.Count; row++)
{
for (int column = 0; column < table.Columns.Count; column++)
{
var cell = table[column, row]; // Aspose indexes column first, then row.
string? text = IsMergedAnchor(cell, row, column) ? cell.TextFrame.Text : null;
var record = new Cell(row, column, cell.FirstRowIndex, cell.FirstColumnIndex, cell.RowSpan, cell.ColSpan, cell.IsMergedCell, text);
cells.Add(record);
csv.AppendLine(string.Join(",", slideIndex + 1, CsvCell(table.Name), record.Row, record.Column, CsvCell(record.Text ?? "")));
}
}
tables.Add(new TableData(slideIndex + 1, table.Name, cells.ToArray()));
}
}
Json("output/tables.json", tables);
File.WriteAllText("output/tables.csv", csv.ToString(), new UTF8Encoding(false));
Console.WriteLine("Results: " + Path.GetFullPath("output"));
}
private static void CreateInput()
{
using var presentation = new Presentation();
var group = presentation.Slides[0].Shapes.AddGroupShape();
var table = group.Shapes.AddTable(30, 30, [200, 160, 200], [45, 45, 45]);
table.Name = "Source table";
table[0, 0].TextFrame.Text = "Name";
table[1, 0].TextFrame.Text = "Info";
table.MergeCells(table[1, 0], table[2, 0], false);
table[0, 1].TextFrame.Text = "A,β";
table[1, 1].TextFrame.Text = "東京";
table[2, 1].TextFrame.Text = "\"Q\"";
table[0, 2].TextFrame.Text = "é";
presentation.Save("output/input.pptx", SaveFormat.Pptx);
}
private static IEnumerable Walk(IShapeCollection shapes)
{
foreach (var shape in shapes)
{
yield return shape;
if (shape is IGroupShape group)
{
foreach (var child in Walk(group.Shapes))
yield return child;
}
}
}
private static void Json(string path, object value)
{
string json = JsonSerializer.Serialize(value, new JsonSerializerOptions { WriteIndented = true });
File.WriteAllText(path, json, new UTF8Encoding(false));
}
private static string CsvCell(string text) => "\"" + text.Replace("\"", "\"\"") + "\"";
}
```
## **Expected result and checks**
`output/tables.json` retains all nine zero-based grid coordinates. The merged anchor has a column span of two; its covered cell has JSON null text, represented as a blank CSV field in `output/tables.csv`. CSV fields quote commas, quotes and Unicode correctly.
The downloaded project writes its verification checks to `output/result.json`. The following values describe the ZIP’s checks; the copied program does not write this report:
```json
{
"tables": 1,
"grid_cells": 9,
"merged_coverage_explicit": true,
"unicode_and_csv_quoting_checked": true,
"group_traversal_checked": true
}
```
Rows and columns in each table are zero-based; slide numbers are one-based. JSON records every grid position and the anchor/extent of merged regions. Covered cells use null text, preventing duplicated merged-cell content. CSV uses blank text for those covered positions; consult JSON for merge structure.
## **Learn more**
- [Manage Presentation Tables in .NET](https://docs.aspose.com/slides/net/manage-table/)
- [Manage Table Cells in Presentations in .NET](https://docs.aspose.com/slides/net/manage-cells/)
## **Open and run the complete project**
[Download the complete project](https://docs.aspose.com/slides/net/examples/content-extraction/tables/example.zip), extract it and open `Example.sln`, or run:
```text
dotnet restore Example.sln
dotnet run --project Example.csproj --configuration Release -- --mode evaluation
```
Use the current supported .NET 10 SDK/runtime. The project keeps a stable `net8.0`
target and accepts compatible stable SDKs; no exact SDK patch is required.
Evaluation runs without a license and explicitly ignores license environment settings.
It uses bounded fixtures and checks valid output while allowing the evaluation watermark
and documented read-back text truncation. For unrestricted checks, use `--mode licensed`
with your authorized `ASPOSE_LICENSE_PATH`. No license is included.
Inputs are copied from `Fixtures` into a separate output workspace. The program prints
the absolute output path; `execution.json` records the actual runtime and verified action.
See [setup and prerequisites](https://docs.aspose.com/slides/net/examples/getting-started/) for native libraries,
fonts, IDE settings and the .NET 8/9 runtime support boundary of 2026-11-10.
# Extract Slide Text and Notes
> Extract slide text and speaker notes to JSON with one-based slide numbers and an explicit hidden-slide policy.
Source: https://docs.aspose.com/slides/net/examples/content-extraction/text-notes/
Updated: 2026-11-03
Extract slide text and speaker notes to JSON with one-based slide numbers and an explicit hidden-slide policy.
();
for (int i = 0; i < presentation.Slides.Count; i++)
{
var slide = presentation.Slides[i];
int originalSlideNumber = i + 1;
if (!includeHidden && slide.Hidden)
continue;
var textItems = new List();
foreach (var shape in Walk(slide.Shapes).OfType())
textItems.Add(new TextItem(shape.Name, shape.TextFrame.Text));
string notes = slide.NotesSlideManager.NotesSlide?.NotesTextFrame.Text ?? "";
slides.Add(new SlideText(originalSlideNumber, slide.Hidden, textItems.ToArray(), notes));
}
return slides.ToArray();
}
private static void ExtractTextAndNotes()
{
CreateInput();
using var input = new Presentation("output/input.pptx");
var all = Extract(input, includeHidden: true); // Change to false for visible slides only.
var visible = Extract(input, includeHidden: false);
Json("output/text.json", new { include_hidden = true, slides = all });
Console.WriteLine("Results: " + Path.GetFullPath("output"));
}
private static void CreateInput()
{
using var presentation = new Presentation();
var slide = presentation.Slides[0];
AddText(slide.Shapes, "Title", "東京 β");
var group = slide.Shapes.AddGroupShape();
AddText(group.Shapes, "Group text", "α");
var nested = group.Shapes.AddGroupShape();
AddText(nested.Shapes, "Nested text", "β");
AddText(slide.Shapes, "Empty", "");
slide.NotesSlideManager.AddNotesSlide().NotesTextFrame.Text = "✓";
var hidden = presentation.Slides.AddEmptySlide(presentation.LayoutSlides[0]);
hidden.Hidden = true;
AddText(hidden.Shapes, "Hidden text", "Hide");
presentation.Save("output/input.pptx", SaveFormat.Pptx);
}
private static IEnumerable Walk(IShapeCollection shapes)
{
foreach (var shape in shapes)
{
yield return shape;
if (shape is IGroupShape group)
{
foreach (var child in Walk(group.Shapes))
yield return child;
}
}
}
private static void Json(string path, object value)
{
string json = JsonSerializer.Serialize(value, new JsonSerializerOptions { WriteIndented = true });
File.WriteAllText(path, json, new UTF8Encoding(false));
}
private static IAutoShape AddText(IShapeCollection shapes, string name, string text)
{
var shape = shapes.AddAutoShape(ShapeType.Rectangle, 35, 35, 600, 70);
shape.Name = name;
shape.TextFrame.Text = text;
return shape;
}
}
```
## **Expected result and checks**
`output/text.json` includes both slides, including the hidden slide, with their original one-based numbers. It retains nested group text, Unicode and empty text frames. A slide without notes has an empty notes string. Set `includeHidden` to false to omit hidden slides without renumbering.
The downloaded project writes its verification checks to `output/result.json`. The following values describe the ZIP’s checks; the copied program does not write this report:
```json
{
"slides_including_hidden": 2,
"visible_slides": 1,
"unicode_groups_empty_and_notes_checked": true,
"one_based_numbering": true
}
```
The includeHidden argument controls whether hidden slides appear. Traversal includes nested groups and preserves empty text frames. Shape order is a storage/traversal order, not a promise of human reading order. This is text extraction, not OCR; images are not converted into text.
## **Learn more**
- [Advanced Text Extraction from Presentations in .NET](https://docs.aspose.com/slides/net/extract-text-from-presentation/)
- [Manage Presentation Notes in .NET](https://docs.aspose.com/slides/net/presentation-notes/)
## **Open and run the complete project**
[Download the complete project](https://docs.aspose.com/slides/net/examples/content-extraction/text-notes/example.zip), extract it and open `Example.sln`, or run:
```text
dotnet restore Example.sln
dotnet run --project Example.csproj --configuration Release -- --mode evaluation
```
Use the current supported .NET 10 SDK/runtime. The project keeps a stable `net8.0`
target and accepts compatible stable SDKs; no exact SDK patch is required.
Evaluation runs without a license and explicitly ignores license environment settings.
It uses bounded fixtures and checks valid output while allowing the evaluation watermark
and documented read-back text truncation. For unrestricted checks, use `--mode licensed`
with your authorized `ASPOSE_LICENSE_PATH`. No license is included.
Inputs are copied from `Fixtures` into a separate output workspace. The program prints
the absolute output path; `execution.json` records the actual runtime and verified action.
See [setup and prerequisites](https://docs.aspose.com/slides/net/examples/getting-started/) for native libraries,
fonts, IDE settings and the .NET 8/9 runtime support boundary of 2026-11-10.
# Conversion & Rendering
> Runnable C# examples for converting presentations, rendering slide previews and configuring export output.
Source: https://docs.aspose.com/slides/net/examples/conversion-rendering/
Updated: 2026-10-30
Convert whole presentations or selected slides and inspect the result. Each recipe supplies a complete project and generates its own input.
# Export an Animated GIF
> Runnable C# example for export an animated gif using Aspose.Slides for .NET, with input generation, outputs and a complete project.
Source: https://docs.aspose.com/slides/net/examples/conversion-rendering/animated-gif/
Updated: 2026-11-03
Export the fixture as an animated GIF with a chosen frame size, slide delay and transition frame rate. GIF is a rendered animation, so its text and shapes are not editable. Inspect decoded frames and timing; supported transition rendering does not imply that every PowerPoint effect or interactive trigger is reproduced.
().Single(shape => shape.Name == "RecipeTitle");
slide.Timeline.MainSequence.AddEffect(title, EffectType.Fade, EffectSubtype.None, EffectTriggerType.OnClick);
slide.SlideShowTransition.Type = TransitionType.Fade;
}
var html5Options = new Html5Options
{
AnimateShapes = true,
AnimateTransitions = true,
EmbedImages = false
};
visibleSlides.Save("slides.html", SaveFormat.Html5, html5Options);
Console.WriteLine("Open classic.html or slides.html with its generated assets.");
}
private static Presentation CreateSource()
{
var presentation = new Presentation();
presentation.SlideSize.SetSize(640, 360, SlideSizeScaleType.DoNotScale);
var blank = presentation.LayoutSlides.GetByType(SlideLayoutType.Blank);
string[] labels = ["Alpha", "Bravo", "C", "Hide"];
for (int i = 0; i < labels.Length; i++)
{
var slide = i == 0 ? presentation.Slides[0] : presentation.Slides.AddEmptySlide(blank);
AddTitle(slide, labels[i]);
slide.Hidden = i == labels.Length - 1;
}
var table = presentation.Slides[0].Shapes.AddTable(30, 100, [140, 100], [35, 35]);
table[0, 0].TextFrame.Text = "Item";
table[1, 0].TextFrame.Text = "Units";
table[0, 1].TextFrame.Text = "Pens";
table[1, 1].TextFrame.Text = "12";
byte[] imageBytes = SampleImage();
var image = presentation.Images.AddImage(imageBytes);
presentation.Slides[2].Shapes.AddPictureFrame(ShapeType.Rectangle, 50, 120, 200, 120, image);
return presentation;
}
private static IAutoShape AddTitle(ISlide slide, string text)
{
var title = slide.Shapes.AddAutoShape(ShapeType.Rectangle, 30, 20, 580, 55);
title.Name = "RecipeTitle";
title.TextFrame.Text = text;
title.TextFrame.Paragraphs[0].Portions[0].PortionFormat.FontHeight = 26;
return title;
}
// Original blue-and-white fixture; no image library or download is needed.
private static byte[] SampleImage() => Convert.FromBase64String("iVBORw0KGgoAAAANSUhEUgAAAAwAAAAICAYAAADN5B7xAAAAI0lEQVR4nGNImfr2PymYgWoaQIAoDdgATg34AHVsIMsPhDAAMPMqpQBAkJ0AAAAASUVORK5CYII=");
}
```
## **Expected result**
Open `classic.html` for the responsive export, or `slides.html` for three visible slides with click-triggered title fades and slide transitions. Keep its generated image, script and style resources together. The HTML5 viewer also uses its documented CDN resources, so browser playback requires access to those URLs.
Continue with the [detailed guide](https://docs.aspose.com/slides/net/convert-powerpoint-to-html/).
## **Open and run the complete project**
[Download the complete project](https://docs.aspose.com/slides/net/examples/conversion-rendering/html/example.zip), extract it and open `Example.sln`, or run:
```text
dotnet restore Example.sln
dotnet run --project Example.csproj --configuration Release -- --mode evaluation
```
Use the current supported .NET 10 SDK/runtime. The project keeps a stable `net8.0`
target and accepts compatible stable SDKs; no exact SDK patch is required.
Evaluation runs without a license and explicitly ignores license environment settings.
It uses bounded fixtures and checks valid output while allowing the evaluation watermark
and documented read-back text truncation. For unrestricted checks, use `--mode licensed`
with your authorized `ASPOSE_LICENSE_PATH`. No license is included.
Inputs are copied from `Fixtures` into a separate output workspace. The program prints
the absolute output path; `execution.json` records the actual runtime and verified action.
See [setup and prerequisites](https://docs.aspose.com/slides/net/examples/getting-started/) for native libraries,
fonts, IDE settings and the .NET 8/9 runtime support boundary of 2026-11-10.
# Render Slides as Images
> Runnable C# example for render slides as images using Aspose.Slides for .NET, with input generation, outputs and a complete project.
Source: https://docs.aspose.com/slides/net/examples/conversion-rendering/images/
Updated: 2026-11-03
Render PNG/JPEG images and small previews at explicit pixel dimensions. The source is 16:9 and the requested sizes use the same ratio. Choose matching dimensions to avoid distortion; preserve or pad the aspect ratio in your application when a fixed container has a different shape. This explicit loop also renders the hidden slide.
().Count(shape => !string.IsNullOrWhiteSpace(shape.TextFrame?.Text)));
Console.WriteLine($"Imported {imported.Slides.Count} pages; {editableTextShapes} nonempty text shapes.");
}
private static void CreatePdfInput()
{
using var source = CreateSource();
source.Save("source.pptx", SaveFormat.Pptx);
source.Save("input.pdf", SaveFormat.Pdf);
}
private static Presentation CreateSource()
{
var presentation = new Presentation();
presentation.SlideSize.SetSize(640, 360, SlideSizeScaleType.DoNotScale);
var blank = presentation.LayoutSlides.GetByType(SlideLayoutType.Blank);
string[] labels = ["Alpha", "C"];
for (int i = 0; i < labels.Length; i++)
{
var slide = i == 0 ? presentation.Slides[0] : presentation.Slides.AddEmptySlide(blank);
AddTitle(slide, labels[i]);
}
return presentation;
}
private static IAutoShape AddTitle(ISlide slide, string text)
{
var title = slide.Shapes.AddAutoShape(ShapeType.Rectangle, 30, 20, 580, 55);
title.Name = "RecipeTitle";
title.TextFrame.Text = text;
title.TextFrame.Paragraphs[0].Portions[0].PortionFormat.FontHeight = 26;
return title;
}
}
```
## **Expected result**
`input.pdf` contains Alpha then C. `imported.pptx` contains the two reconstructed slides without a leading blank slide; `imported-1.png` and `imported-2.png` show their order. Recoverable text is editable for this fixture; PDF import does not promise the original PowerPoint structure.
Continue with the [detailed guide](https://docs.aspose.com/slides/net/import-presentation/).
## **Open and run the complete project**
[Download the complete project](https://docs.aspose.com/slides/net/examples/conversion-rendering/pdf-import/example.zip), extract it and open `Example.sln`, or run:
```text
dotnet restore Example.sln
dotnet run --project Example.csproj --configuration Release -- --mode evaluation
```
Use the current supported .NET 10 SDK/runtime. The project keeps a stable `net8.0`
target and accepts compatible stable SDKs; no exact SDK patch is required.
Evaluation runs without a license and explicitly ignores license environment settings.
It uses bounded fixtures and checks valid output while allowing the evaluation watermark
and documented read-back text truncation. For unrestricted checks, use `--mode licensed`
with your authorized `ASPOSE_LICENSE_PATH`. No license is included.
Inputs are copied from `Fixtures` into a separate output workspace. The program prints
the absolute output path; `execution.json` records the actual runtime and verified action.
See [setup and prerequisites](https://docs.aspose.com/slides/net/examples/getting-started/) for native libraries,
fonts, IDE settings and the .NET 8/9 runtime support boundary of 2026-11-10.
# Export Presentations to PDF
> Runnable C# example for export presentations to pdf using Aspose.Slides for .NET, with input generation, outputs and a complete project.
Source: https://docs.aspose.com/slides/net/examples/conversion-rendering/pdf/
Updated: 2026-11-03
Export visible slides, include hidden slides deliberately, or specify one-based slide positions in the desired order. JPEG quality and resolution influence images; they do not guarantee a particular file size. The copied fixture uses distinct slide labels and an original 600×360 raster image.
().First();
Console.WriteLine(firstAudio.EmbeddedAudio.BinaryData.Length);
presentation.Save("audio-02.pptx", SaveFormat.Pptx);
```
## **Remove an Audio Frame**
Delete a previously added audio frame.
```csharp
using System;
using System.IO;
using Aspose.Slides.Export;
using Aspose.Slides;
using var presentation = new Presentation();
var slide = presentation.Slides[0];
// Small PCM WAV fixture; no audio file is required.
const string wavBase64 =
"UklGRnQAAABXQVZFZm10IBAAAAABAAEAQB8AAEAfAAABAAgAZGF0YVAAAACAmK6+x8e/sJuCalRD" +
"OjlAT2N7lKq8xsjBs5+HblhGOzg+TF93kKe5xMjDtqOLc1tJPDg8SVtzi6O2w8jEuaeQd19MPjg7" +
"Rlhuh5+zwcjGvA==";
var wavData = Convert.FromBase64String(wavBase64);
using var audioStream = new MemoryStream(wavData);
var audioFrame = slide.Shapes.AddAudioFrameEmbedded(50, 50, 100, 100, audioStream);
// Remove the audio frame.
slide.Shapes.Remove(audioFrame);
presentation.Save("audio-03.pptx", SaveFormat.Pptx);
```
## **Set Audio Playback**
Configure the audio frame to play automatically when the slide appears.
```csharp
using System;
using System.IO;
using Aspose.Slides.Export;
using Aspose.Slides;
using var presentation = new Presentation();
var slide = presentation.Slides[0];
// Small PCM WAV fixture; no audio file is required.
const string wavBase64 =
"UklGRnQAAABXQVZFZm10IBAAAAABAAEAQB8AAEAfAAABAAgAZGF0YVAAAACAmK6+x8e/sJuCalRD" +
"OjlAT2N7lKq8xsjBs5+HblhGOzg+TF93kKe5xMjDtqOLc1tJPDg8SVtzi6O2w8jEuaeQd19MPjg7" +
"Rlhuh5+zwcjGvA==";
var wavData = Convert.FromBase64String(wavBase64);
using var audioStream = new MemoryStream(wavData);
var audioFrame = slide.Shapes.AddAudioFrameEmbedded(50, 50, 100, 100, audioStream);
// Play automatically when the slide appears.
audioFrame.PlayMode = AudioPlayModePreset.Auto;
presentation.Save("audio-04.pptx", SaveFormat.Pptx);
```
## Related articles
- [Video](https://docs.aspose.com/slides/net/examples/elements/video/)
- [Manage Audio Frames in Presentations in .NET](https://docs.aspose.com/slides/net/audio-frame/)
- [Manage Media Files in .NET](https://docs.aspose.com/slides/net/manage-media-files/)
# Chart
> Add, access, remove, and title PowerPoint charts with Aspose.Slides for .NET C# examples.
Source: https://docs.aspose.com/slides/net/examples/elements/chart/
Updated: 2026-11-03
Add, access, remove, and title charts with **Aspose.Slides for .NET**. Each copied program creates its own presentation and uses its first slide. The download passes a slide to each case method.
Copy a C# block into `Program.cs` in a .NET project with `Aspose.Slides.NET6.CrossPlatform` installed. Each block is a complete program. Run one block at a time. The ZIP contains the IDE-ready project and its verification checks. The copied code runs in evaluation mode. For licensed output, apply your license before creating a presentation, as described in the [licensing guide](https://docs.aspose.com/slides/net/licensing/).
## **Download and run**
[Download the complete project](https://docs.aspose.com/slides/net/examples/elements/chart/example.zip), extract it, and open `Example.sln` or run:
```console
dotnet restore Example.sln
dotnet run --project Example.csproj -- --mode evaluation
```
The download includes every case below, its fixture helpers and inputs. `Program.cs` runs all cases; use `--action block-001` to run one independently. Outputs and an action report are written to the printed output directory. No previous example or working-directory setup is required. Evaluation adds a watermark and can truncate read-back text; the short fixtures still have explicit structural checks. For full text and no watermark, use `--mode licensed --license PATH` with your own valid license. See the [setup guide](https://docs.aspose.com/slides/net/examples/getting-started/) for supported SDKs and native prerequisites.
## **Add a Chart**
Add an Area chart to the first slide.
```csharp
using Aspose.Slides.Export;
using Aspose.Slides;
using Aspose.Slides.Charts;
using var presentation = new Presentation();
var slide = presentation.Slides[0];
slide.Shapes.AddChart(ChartType.Area, 50, 50, 400, 300);
presentation.Save("chart-01.pptx", SaveFormat.Pptx);
```
## **Access a Chart**
After creating a chart, you can retrieve it through the shape collection.
```csharp
using System;
using Aspose.Slides.Export;
using System.Linq;
using Aspose.Slides;
using Aspose.Slides.Charts;
using var presentation = new Presentation();
var slide = presentation.Slides[0];
slide.Shapes.AddChart(ChartType.Line, 50, 50, 400, 300);
var firstChart = slide.Shapes.OfType().First();
Console.WriteLine(firstChart.Type);
presentation.Save("chart-02.pptx", SaveFormat.Pptx);
```
## **Remove a Chart**
The following code removes a chart from a slide.
```csharp
using Aspose.Slides.Export;
using Aspose.Slides;
using Aspose.Slides.Charts;
using var presentation = new Presentation();
var slide = presentation.Slides[0];
var chart = slide.Shapes.AddChart(ChartType.Pie, 50, 50, 400, 300);
slide.Shapes.Remove(chart);
presentation.Save("chart-03.pptx", SaveFormat.Pptx);
```
().First();
Console.WriteLine(connector.ShapeType);
presentation.Save("connector-02.pptx", SaveFormat.Pptx);
```
## **Remove a Connector**
Delete a connector from the slide.
```csharp
using Aspose.Slides.Export;
using Aspose.Slides;
using var presentation = new Presentation();
var slide = presentation.Slides[0];
var connector = slide.Shapes.AddConnector(ShapeType.BentConnector2, 0, 0, 100, 100);
slide.Shapes.Remove(connector);
presentation.Save("connector-03.pptx", SaveFormat.Pptx);
```
## **Reconnect Shapes**
Attach a connector to two shapes by assigning start and end targets.
```csharp
using Aspose.Slides.Export;
using Aspose.Slides;
using var presentation = new Presentation();
var slide = presentation.Slides[0];
var startShape = slide.Shapes.AddAutoShape(ShapeType.Rectangle, 0, 0, 50, 50);
var endShape = slide.Shapes.AddAutoShape(ShapeType.Rectangle, 100, 100, 50, 50);
var connector = slide.Shapes.AddConnector(ShapeType.BentConnector2, 0, 0, 100, 100);
connector.StartShapeConnectedTo = startShape;
connector.EndShapeConnectedTo = endShape;
presentation.Save("connector-04.pptx", SaveFormat.Pptx);
```
## Related articles
- [Shape Types in Aspose.Slides for .NET](https://docs.aspose.com/slides/net/shape-types/)
# Group Shape
> Create, access and remove shape groups, and move a shape out of its group with Aspose.Slides for .NET C# examples.
Source: https://docs.aspose.com/slides/net/examples/elements/group-shape/
Updated: 2026-11-03
Create, access and remove shape groups with **Aspose.Slides for .NET**. Move an individual shape out of its group.
Copy a C# block into `Program.cs` in a .NET project with `Aspose.Slides.NET6.CrossPlatform` installed. Each block is a complete program. Run one block at a time. The ZIP contains the IDE-ready project and its verification checks. The copied code runs in evaluation mode. For licensed output, apply your license before creating a presentation, as described in the [licensing guide](https://docs.aspose.com/slides/net/licensing/).
## **Download and run**
[Download the complete project](https://docs.aspose.com/slides/net/examples/elements/group-shape/example.zip), extract it, and open `Example.sln` or run:
```console
dotnet restore Example.sln
dotnet run --project Example.csproj -- --mode evaluation
```
The download includes every case below, its fixture helpers and inputs. `Program.cs` runs all cases; use `--action block-001` to run one independently. Outputs and an action report are written to the printed output directory. No previous example or working-directory setup is required. Evaluation adds a watermark and can truncate read-back text; the short fixtures still have explicit structural checks. For full text and no watermark, use `--mode licensed --license PATH` with your own valid license. See the [setup guide](https://docs.aspose.com/slides/net/examples/getting-started/) for supported SDKs and native prerequisites.
## **Add a Group Shape**
Create a group containing two basic shapes.
```csharp
using Aspose.Slides.Export;
using Aspose.Slides;
using var presentation = new Presentation();
var slide = presentation.Slides[0];
var group = slide.Shapes.AddGroupShape();
group.Shapes.AddAutoShape(ShapeType.Rectangle, 0, 0, 50, 50);
group.Shapes.AddAutoShape(ShapeType.Ellipse, 60, 0, 50, 50);
presentation.Save("group-shape-01.pptx", SaveFormat.Pptx);
```
## **Access a Group Shape**
Retrieve the first group shape from a slide.
```csharp
using System;
using Aspose.Slides.Export;
using System.Linq;
using Aspose.Slides;
using var presentation = new Presentation();
var slide = presentation.Slides[0];
var group = slide.Shapes.AddGroupShape();
group.Shapes.AddAutoShape(ShapeType.Rectangle, 0, 0, 50, 50);
var firstGroup = slide.Shapes.OfType().First();
Console.WriteLine(firstGroup.Shapes.Count);
presentation.Save("group-shape-02.pptx", SaveFormat.Pptx);
```
## **Remove a Group Shape**
Delete a group shape from the slide.
```csharp
using Aspose.Slides.Export;
using Aspose.Slides;
using var presentation = new Presentation();
var slide = presentation.Slides[0];
var group = slide.Shapes.AddGroupShape();
group.Shapes.AddAutoShape(ShapeType.Rectangle, 0, 0, 50, 50);
slide.Shapes.Remove(group);
presentation.Save("group-shape-03.pptx", SaveFormat.Pptx);
```
");
return;
}
using var presentation = new Presentation(args[0]);
var slide = presentation.Slides[0];
var inkShape = slide.Shapes.OfType().FirstOrDefault();
if (inkShape == null)
{
Console.WriteLine("No ink shape was found on the first slide.");
return;
}
var tags = inkShape.CustomData.Tags;
tags["kind"] = "Ink";
Console.WriteLine($"kind: {tags["kind"]}");
presentation.Save("ink-01.pptx", SaveFormat.Pptx);
```
## **Remove Ink**
Delete the first ink shape while preserving other shapes. If no ink exists on the first slide, print a message and exit without saving.
Pass a PPTX with ink on its first slide, such as the [sample input](https://docs.aspose.com/slides/net/examples/elements/ink/Fixtures/ink.pptx), using `dotnet run -- ink.pptx`.
```csharp
using System;
using Aspose.Slides.Export;
using System.Linq;
using Aspose.Slides;
using Aspose.Slides.Ink;
// Pass the path to a PPTX file with ink on its first slide as the first argument.
if (args.Length != 1)
{
Console.WriteLine("Usage: dotnet run -- ");
return;
}
using var presentation = new Presentation(args[0]);
var slide = presentation.Slides[0];
var inkShape = slide.Shapes.OfType().FirstOrDefault();
if (inkShape == null)
{
Console.WriteLine("No ink shape was found on the first slide.");
return;
}
slide.Shapes.Remove(inkShape);
presentation.Save("ink-02.pptx", SaveFormat.Pptx);
```
## Related articles
- [Manage Presentation Content in .NET](https://docs.aspose.com/slides/net/presentation-content/)
- [Manage Presentation Ink Objects in .NET](https://docs.aspose.com/slides/net/manage-ink/)
# Layout Slide
> Master layout slides in Aspose.Slides for .NET: choose, apply, and customize slide layouts, placeholders, and masters with C# examples for PPT, PPTX, and ODP presentations.
Source: https://docs.aspose.com/slides/net/examples/elements/layout-slide/
Updated: 2026-11-03
This article demonstrates how to work with **Layout Slides** in Aspose.Slides for .NET. A layout slide defines the design and formatting inherited by normal slides. You can add, access, clone, and remove layout slides, as well as clean up unused ones to reduce presentation size.
Copy a C# block into `Program.cs` in a .NET project with `Aspose.Slides.NET6.CrossPlatform` installed. Each block is a complete program. Run one block at a time. The ZIP contains the IDE-ready project and its verification checks. The copied code runs in evaluation mode. For licensed output, apply your license before creating a presentation, as described in the [licensing guide](https://docs.aspose.com/slides/net/licensing/).
## **Download and run**
[Download the complete project](https://docs.aspose.com/slides/net/examples/elements/layout-slide/example.zip), extract it, and open `Example.sln` or run:
```console
dotnet restore Example.sln
dotnet run --project Example.csproj -- --mode evaluation
```
The download includes every case below, its fixture helpers and inputs. `Program.cs` runs all cases; use `--action block-001` to run one independently. Outputs and an action report are written to the printed output directory. No previous example or working-directory setup is required. Evaluation adds a watermark and can truncate read-back text; the short fixtures still have explicit structural checks. For full text and no watermark, use `--mode licensed --license PATH` with your own valid license. See the [setup guide](https://docs.aspose.com/slides/net/examples/getting-started/) for supported SDKs and native prerequisites.
## **Add a Layout Slide**
You can create a custom layout slide to define reusable formatting. For example, you might add a text box that appears on all slides using this layout.
```csharp
using Aspose.Slides.Export;
using Aspose.Slides;
using var presentation = new Presentation();
var masterSlide = presentation.Masters[0];
// Create a layout slide with a blank layout type and a custom name.
var layoutSlide = presentation.LayoutSlides.Add(masterSlide, SlideLayoutType.Blank, "Main layout");
// Add a text box to the layout slide.
var layoutTextBox = layoutSlide.Shapes.AddAutoShape(ShapeType.Rectangle, x: 75, y: 75, width: 150, height: 150);
layoutTextBox.TextFrame.Text = "Base";
// Add two slides using this layout; both will inherit the text from the layout.
presentation.Slides.AddEmptySlide(layoutSlide);
presentation.Slides.AddEmptySlide(layoutSlide);
presentation.Save("layout-slide-01.pptx", SaveFormat.Pptx);
```
The two added slides inherit the text box from Main layout, as shown below. The default first slide keeps its original layout.
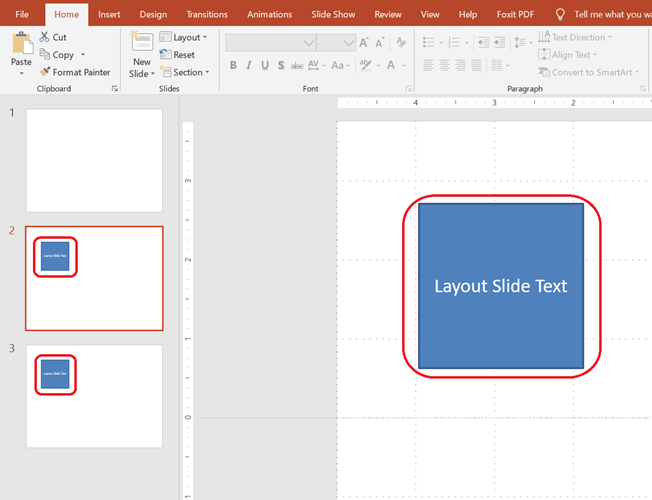
## **Access a Layout Slide**
Layout slides can be accessed by index or by layout type (e.g., `Blank`, `Title`, `SectionHeader`, etc.).
```csharp
using System;
using Aspose.Slides.Export;
using Aspose.Slides;
using var presentation = new Presentation();
// Access a layout slide by index.
var firstLayoutSlide = presentation.LayoutSlides[0];
Console.WriteLine($"Index 0: {firstLayoutSlide.Name}");
// Access a layout slide by type.
var blankLayoutSlide = presentation.LayoutSlides.GetByType(SlideLayoutType.Blank);
Console.WriteLine($"Blank layout: {blankLayoutSlide.Name}");
presentation.Save("layout-slide-02.pptx", SaveFormat.Pptx);
```
## **Remove a Layout Slide**
Create and remove an unused layout. It is safe to remove because no normal slide references it.
```csharp
using Aspose.Slides.Export;
using Aspose.Slides;
using var presentation = new Presentation();
// This new layout is safe to remove because no slide uses it.
var unusedLayout = presentation.LayoutSlides.Add(presentation.Masters[0], SlideLayoutType.Blank, "Unused");
presentation.LayoutSlides.Remove(unusedLayout);
presentation.Save("layout-slide-03.pptx", SaveFormat.Pptx);
```
## **Remove Unused Layout Slides**
Keep the first slide’s active layout, add a named unused layout, then remove layouts that no normal slide references.
```csharp
using Aspose.Slides.Export;
using Aspose.Slides;
using var presentation = new Presentation();
var activeLayout = presentation.Slides[0].LayoutSlide;
activeLayout.Name = "Active layout";
presentation.LayoutSlides.Add(presentation.Masters[0], SlideLayoutType.Blank, "Unused layout");
// Keep the referenced active layout and remove unreferenced layouts.
presentation.LayoutSlides.RemoveUnused();
presentation.Save("layout-slide-04.pptx", SaveFormat.Pptx);
```
## **Clone a Layout Slide**
You can duplicate a layout slide using the `AddClone` method.
```csharp
using Aspose.Slides.Export;
using Aspose.Slides;
using var presentation = new Presentation();
// Get an existing layout slide by type.
var blankLayoutSlide = presentation.LayoutSlides.GetByType(SlideLayoutType.Blank);
// Clone the layout slide to the end of the layout slide collection.
var clonedLayoutSlide = presentation.LayoutSlides.AddClone(blankLayoutSlide);
clonedLayoutSlide.Name = "Clone";
presentation.Save("layout-slide-05.pptx", SaveFormat.Pptx);
```
> ✅ **Summary:** Layout slides are powerful tools for managing consistent formatting across slides. Aspose.Slides allows full control over creating, managing, and optimizing layout slides.
## Related articles
- [Master Slide](https://docs.aspose.com/slides/net/examples/elements/master-slide/)
- [Manage Presentation Slide Masters in .NET](https://docs.aspose.com/slides/net/slide-master/)
- [Apply or Change Slide Layouts in .NET](https://docs.aspose.com/slides/net/slide-layout/)
# Master Slide
> Explore Aspose.Slides for .NET master slide examples: create, edit, and style masters, placeholders, and themes in PPT, PPTX, and ODP with clear C# code.
Source: https://docs.aspose.com/slides/net/examples/elements/master-slide/
Updated: 2026-11-03
Master slides form the top level of the slide inheritance hierarchy in PowerPoint. A **master slide** defines common design elements such as backgrounds, logos, and text formatting. **Layout slides** inherit from master slides, and **normal slides** inherit from layout slides.
This article demonstrates how to create, modify, and manage master slides using Aspose.Slides for .NET.
Copy a C# block into `Program.cs` in a .NET project with `Aspose.Slides.NET6.CrossPlatform` installed. Each block is a complete program. Run one block at a time. The ZIP contains the IDE-ready project and its verification checks. The copied code runs in evaluation mode. For licensed output, apply your license before creating a presentation, as described in the [licensing guide](https://docs.aspose.com/slides/net/licensing/).
## **Download and run**
[Download the complete project](https://docs.aspose.com/slides/net/examples/elements/master-slide/example.zip), extract it, and open `Example.sln` or run:
```console
dotnet restore Example.sln
dotnet run --project Example.csproj -- --mode evaluation
```
The download includes every case below, its fixture helpers and inputs. `Program.cs` runs all cases; use `--action block-001` to run one independently. Outputs and an action report are written to the printed output directory. No previous example or working-directory setup is required. Evaluation adds a watermark and can truncate read-back text; the short fixtures still have explicit structural checks. For full text and no watermark, use `--mode licensed --license PATH` with your own valid license. See the [setup guide](https://docs.aspose.com/slides/net/examples/getting-started/) for supported SDKs and native prerequisites.
## **Add a Master Slide**
This example shows how to create a new master slide by cloning the default one. It adds an Acme banner to the cloned master, assigns that master to a layout, and applies the layout to the first slide.
```csharp
using Aspose.Slides.Export;
using Aspose.Slides;
using System.Drawing;
using var presentation = new Presentation();
// Clone the default master slide.
var defaultMasterSlide = presentation.Masters[0];
var newMasterSlide = presentation.Masters.AddClone(defaultMasterSlide);
// Add a banner with company name to the top of the master slide.
var banner = newMasterSlide.Shapes.AddAutoShape(ShapeType.Rectangle, x: 0, y: 0, width: 720, height: 25);
banner.TextFrame.Text = "Acme";
var textFill = banner.TextFrame.Paragraphs[0].ParagraphFormat.DefaultPortionFormat.FillFormat;
textFill.FillType = FillType.Solid;
textFill.SolidFillColor.Color = Color.Black;
banner.FillFormat.FillType = FillType.NoFill;
// Assign the new master slide to a layout slide.
var layoutSlide = presentation.LayoutSlides[0];
layoutSlide.MasterSlide = newMasterSlide;
// Assign the layout slide to the first slide in the presentation.
presentation.Slides[0].LayoutSlide = layoutSlide;
presentation.Save("master-slide-01.pptx", SaveFormat.Pptx);
```
> 💡 **Note 1:** Master slides provide a way to apply consistent branding or shared design elements across all slides. Any changes made to the master will automatically reflect on dependent layout and normal slides.
> 💡 **Note 2:** Any shapes or formatting added to a master slide are inherited by layout slides and, in turn, all normal slides using those layouts.
> The image below illustrates how a text box added on a master slide is automatically rendered on the final slide.

## **Access a Master Slide**
You can access master slides using the [Presentation.Masters](https://reference.aspose.com/slides/net/aspose.slides/presentation/masters/) collection. This program reports the first master’s index and layout count, then edits its background type:
```csharp
using System;
using Aspose.Slides.Export;
using Aspose.Slides;
using var presentation = new Presentation();
// Access the first master slide.
var firstMasterSlide = presentation.Masters[0];
Console.WriteLine($"Master index: 0; layouts: {firstMasterSlide.LayoutSlides.Count}");
// Change the background type.
firstMasterSlide.Background.Type = BackgroundType.OwnBackground;
presentation.Save("master-slide-02.pptx", SaveFormat.Pptx);
```
## **Remove a Master Slide**
Master slides can be removed either by index or by reference.
```csharp
using Aspose.Slides.Export;
using Aspose.Slides;
using var presentation = new Presentation();
using var donor = new Presentation();
donor.Masters[0].Name = "Unused1";
presentation.Masters.AddClone(donor.Masters[0]);
donor.Masters[0].Name = "Unused2";
var secondUnusedMaster = presentation.Masters.AddClone(donor.Masters[0]);
// Remove the first explicitly unused master by index.
presentation.Masters.RemoveAt(1);
// Remove a master slide by reference.
presentation.Masters.Remove(secondUnusedMaster);
presentation.Save("master-slide-03.pptx", SaveFormat.Pptx);
```
## **Remove Unused Master Slides**
Remove masters that no slide uses. Setting ignorePreserveField to true also removes unused masters marked Preserve; it does not remove the master used by the first slide.
```csharp
using Aspose.Slides.Export;
using Aspose.Slides;
using var presentation = new Presentation();
presentation.Masters.AddClone(presentation.Masters[0]).Name = "Unused";
// Remove all unused master slides (even those marked as Preserve).
presentation.Masters.RemoveUnused(ignorePreserveField: true);
presentation.Save("master-slide-04.pptx", SaveFormat.Pptx);
```
## Related articles
- [Layout Slide](https://docs.aspose.com/slides/net/examples/elements/layout-slide/)
- [Manage Presentation Slide Masters in .NET](https://docs.aspose.com/slides/net/slide-master/)
# Math Text
> Explore Aspose.Slides for .NET MathematicalText examples: create and format equations, fractions, matrices, and symbols with C# in PPT, PPTX, and ODP presentations.
Source: https://docs.aspose.com/slides/net/examples/elements/math-text/
Updated: 2026-11-03
This article demonstrates working with mathematical text shapes and formatting equations using **Aspose.Slides for .NET**.
Copy a C# block into `Program.cs` in a .NET project with `Aspose.Slides.NET6.CrossPlatform` installed. Each block is a complete program. Run one block at a time. The ZIP contains the IDE-ready project and its verification checks. The copied code runs in evaluation mode. For licensed output, apply your license before creating a presentation, as described in the [licensing guide](https://docs.aspose.com/slides/net/licensing/).
## **Download and run**
[Download the complete project](https://docs.aspose.com/slides/net/examples/elements/math-text/example.zip), extract it, and open `Example.sln` or run:
```console
dotnet restore Example.sln
dotnet run --project Example.csproj -- --mode evaluation
```
The download includes every case below, its fixture helpers and inputs. `Program.cs` runs all cases; use `--action block-001` to run one independently. Outputs and an action report are written to the printed output directory. No previous example or working-directory setup is required. Evaluation adds a watermark and can truncate read-back text; the short fixtures still have explicit structural checks. For full text and no watermark, use `--mode licensed --license PATH` with your own valid license. See the [setup guide](https://docs.aspose.com/slides/net/examples/getting-started/) for supported SDKs and native prerequisites.
## **Add Math Text**
Create a math shape containing a fraction and the Pythagorean formula.
```csharp
using Aspose.Slides.Export;
using Aspose.Slides;
using Aspose.Slides.MathText;
using var presentation = new Presentation();
var slide = presentation.Slides[0];
// Add a Math shape to the slide.
var mathShape = slide.Shapes.AddMathShape(0, 0, 720, 150);
// Access the math paragraph.
var mathParagraph = ((MathPortion)mathShape.TextFrame.Paragraphs[0].Portions[0]).MathParagraph;
// Add a simple fraction: x / y
var fraction = new MathematicalText("x").Divide("y");
mathParagraph.Add(new MathBlock(fraction));
// Add equation: c² = a² + b²
var pythagoreanEquation = new MathematicalText("c")
.SetSuperscript("2")
.Join("=")
.Join(new MathematicalText("a").SetSuperscript("2"))
.Join("+")
.Join(new MathematicalText("b").SetSuperscript("2"));
mathParagraph.Add(pythagoreanEquation);
presentation.Save("math-text-01.pptx", SaveFormat.Pptx);
```
## **Access Math Text**
Locate a shape that contains a math paragraph on the slide.
```csharp
using System;
using Aspose.Slides.Export;
using System.Linq;
using Aspose.Slides;
using Aspose.Slides.MathText;
using var presentation = new Presentation();
var slide = presentation.Slides[0];
// Seed a fraction before searching all shapes and text portions.
var mathShape = slide.Shapes.AddMathShape(50, 50, 200, 80);
var fractionPortion = (MathPortion)mathShape.TextFrame.Paragraphs[0].Portions[0];
fractionPortion.MathParagraph.Add(new MathBlock(new MathematicalText("x").Divide("y")));
// Read the first math portion from the slide.
var mathPortion = slide.Shapes.OfType()
.SelectMany(textShape => textShape.TextFrame.Paragraphs)
.SelectMany(paragraph => paragraph.Portions)
.OfType()
.First();
Console.WriteLine(mathPortion.MathParagraph.Count);
presentation.Save("math-text-02.pptx", SaveFormat.Pptx);
```
## **Remove Math Text**
Delete a math shape from the slide.
```csharp
using Aspose.Slides.Export;
using Aspose.Slides;
using Aspose.Slides.MathText;
using var presentation = new Presentation();
var slide = presentation.Slides[0];
var mathShape = slide.Shapes.AddMathShape(50, 50, 100, 50);
var mathParagraph = ((MathPortion)mathShape.TextFrame.Paragraphs[0].Portions[0]).MathParagraph;
var fraction = new MathematicalText("x").Divide("y");
mathParagraph.Add(new MathBlock(fraction));
slide.Shapes.Remove(mathShape);
presentation.Save("math-text-03.pptx", SaveFormat.Pptx);
```
## **Format Math Text**
Set font properties for a math portion.
```csharp
using Aspose.Slides.Export;
using Aspose.Slides;
using Aspose.Slides.MathText;
using var presentation = new Presentation();
var slide = presentation.Slides[0];
var mathShape = slide.Shapes.AddMathShape(50, 50, 100, 50);
var paragraph = mathShape.TextFrame.Paragraphs[0];
var mathParagraph = ((MathPortion)paragraph.Portions[0]).MathParagraph;
var fraction = new MathematicalText("x").Divide("y");
mathParagraph.Add(new MathBlock(fraction));
// The paragraph default is persisted for its mathematical content.
paragraph.ParagraphFormat.DefaultPortionFormat.FontHeight = 20;
presentation.Save("math-text-04.pptx", SaveFormat.Pptx);
```
## Related articles
- [Add Math Equations to PowerPoint Presentations in .NET](https://docs.aspose.com/slides/net/powerpoint-math-equations/)
# Note
> Work with slide notes in Aspose.Slides for .NET: add, read, edit, and export speaker notes in PPT, PPTX, and ODP using clear C# examples.
Source: https://docs.aspose.com/slides/net/examples/elements/note/
Updated: 2026-11-03
This article demonstrates how to add, read, remove, and update notes slides using **Aspose.Slides for .NET**.
Copy a C# block into `Program.cs` in a .NET project with `Aspose.Slides.NET6.CrossPlatform` installed. Each block is a complete program. Run one block at a time. The ZIP contains the IDE-ready project and its verification checks. The copied code runs in evaluation mode. For licensed output, apply your license before creating a presentation, as described in the [licensing guide](https://docs.aspose.com/slides/net/licensing/).
## **Download and run**
[Download the complete project](https://docs.aspose.com/slides/net/examples/elements/note/example.zip), extract it, and open `Example.sln` or run:
```console
dotnet restore Example.sln
dotnet run --project Example.csproj -- --mode evaluation
```
The download includes every case below, its fixture helpers and inputs. `Program.cs` runs all cases; use `--action block-001` to run one independently. Outputs and an action report are written to the printed output directory. No previous example or working-directory setup is required. Evaluation adds a watermark and can truncate read-back text; the short fixtures still have explicit structural checks. For full text and no watermark, use `--mode licensed --license PATH` with your own valid license. See the [setup guide](https://docs.aspose.com/slides/net/examples/getting-started/) for supported SDKs and native prerequisites.
## **Add a Notes Slide**
Create a notes slide and assign text to it.
```csharp
using Aspose.Slides.Export;
using Aspose.Slides;
using var presentation = new Presentation();
var slide = presentation.Slides[0];
var notesSlide = slide.NotesSlideManager.AddNotesSlide();
notesSlide.NotesTextFrame.Text = "Note";
presentation.Save("note-01.pptx", SaveFormat.Pptx);
```
## **Access a Notes Slide**
Create known notes, then retrieve them through the slide’s notes manager.
```csharp
using System;
using Aspose.Slides.Export;
using Aspose.Slides;
using var presentation = new Presentation();
var slide = presentation.Slides[0];
var notesSlide = slide.NotesSlideManager.AddNotesSlide();
notesSlide.NotesTextFrame.Text = "Note";
// Retrieve the seeded notes through the slide manager.
var existingNotes = slide.NotesSlideManager.NotesSlide;
var notes = existingNotes.NotesTextFrame.Text;
Console.WriteLine(notes);
presentation.Save("note-02.pptx", SaveFormat.Pptx);
```
## **Remove a Notes Slide**
Remove the notes slide associated with a slide.
```csharp
using Aspose.Slides.Export;
using Aspose.Slides;
using var presentation = new Presentation();
var slide = presentation.Slides[0];
slide.NotesSlideManager.AddNotesSlide();
slide.NotesSlideManager.RemoveNotesSlide();
presentation.Save("note-03.pptx", SaveFormat.Pptx);
```
## **Update Notes Text**
Change the text of a notes slide.
```csharp
using Aspose.Slides.Export;
using Aspose.Slides;
using var presentation = new Presentation();
var slide = presentation.Slides[0];
var notesSlide = slide.NotesSlideManager.AddNotesSlide();
notesSlide.NotesTextFrame.Text = "Old";
notesSlide.NotesTextFrame.Text = "New";
presentation.Save("note-04.pptx", SaveFormat.Pptx);
```
## Related articles
- [Convert PowerPoint Presentations to PDF with Notes in .NET](https://docs.aspose.com/slides/net/convert-powerpoint-to-pdf-with-notes/)
- [Create and Customize PowerPoint Charts in .NET](https://docs.aspose.com/slides/net/powerpoint-charts/)
- [Chart](https://docs.aspose.com/slides/net/examples/elements/chart/)
# OLE Object
> Handle OLE objects in Aspose.Slides for .NET: insert, link, update, and extract embedded content with C# in PPT, PPTX, and ODP presentations.
Source: https://docs.aspose.com/slides/net/examples/elements/ole-object/
Updated: 2026-11-03
This article demonstrates embedding a file as an OLE object and updating its data using **Aspose.Slides for .NET**.
Copy a C# block into `Program.cs` in a .NET project with `Aspose.Slides.NET6.CrossPlatform` installed. Each block is a complete program. Run one block at a time. The ZIP contains the IDE-ready project and its verification checks. The copied code runs in evaluation mode. For licensed output, apply your license before creating a presentation, as described in the [licensing guide](https://docs.aspose.com/slides/net/licensing/).
## **Download and run**
[Download the complete project](https://docs.aspose.com/slides/net/examples/elements/ole-object/example.zip), extract it, and open `Example.sln` or run:
```console
dotnet restore Example.sln
dotnet run --project Example.csproj -- --mode evaluation
```
The download includes every case below, its fixture helpers and inputs. `Program.cs` runs all cases; use `--action block-001` to run one independently. Outputs and an action report are written to the printed output directory. No previous example or working-directory setup is required. Evaluation adds a watermark and can truncate read-back text; the short fixtures still have explicit structural checks. For full text and no watermark, use `--mode licensed --license PATH` with your own valid license. See the [setup guide](https://docs.aspose.com/slides/net/examples/getting-started/) for supported SDKs and native prerequisites.
## **Add an OLE Object**
Generate a PDF payload in memory from the blank presentation, then embed it in an OLE frame. No PDF file is required.
```csharp
using System.IO;
using Aspose.Slides.Export;
using Aspose.Slides;
using Aspose.Slides.DOM.Ole;
using var presentation = new Presentation();
var slide = presentation.Slides[0];
// Create the PDF payload in memory from the blank presentation.
using var pdfStream = new MemoryStream();
presentation.Save(pdfStream, SaveFormat.Pdf);
var pdfData = pdfStream.ToArray();
var dataInfo = new OleEmbeddedDataInfo(pdfData, "pdf");
slide.Shapes.AddOleObjectFrame(20, 20, 50, 50, dataInfo);
presentation.Save("ole-object-01.pptx", SaveFormat.Pptx);
```
## **Access an OLE Object**
Generate a PDF payload in memory, embed it, then retrieve the first OLE frame and print its file extension. No input file is required.
```csharp
using System;
using System.IO;
using Aspose.Slides.Export;
using System.Linq;
using Aspose.Slides;
using Aspose.Slides.DOM.Ole;
using var presentation = new Presentation();
var slide = presentation.Slides[0];
// Create the PDF payload in memory from the blank presentation.
using var pdfStream = new MemoryStream();
presentation.Save(pdfStream, SaveFormat.Pdf);
var pdfData = pdfStream.ToArray();
var dataInfo = new OleEmbeddedDataInfo(pdfData, "pdf");
slide.Shapes.AddOleObjectFrame(20, 20, 50, 50, dataInfo);
var firstOleFrame = slide.Shapes.OfType().First();
Console.WriteLine(firstOleFrame.EmbeddedData.EmbeddedFileExtension);
presentation.Save("ole-object-02.pptx", SaveFormat.Pptx);
```
## **Remove an OLE Object**
Generate and embed a PDF payload in memory, then remove its OLE frame. No input file is required.
```csharp
using System.IO;
using Aspose.Slides.Export;
using Aspose.Slides;
using Aspose.Slides.DOM.Ole;
using var presentation = new Presentation();
var slide = presentation.Slides[0];
// Create the PDF payload in memory from the blank presentation.
using var pdfStream = new MemoryStream();
presentation.Save(pdfStream, SaveFormat.Pdf);
var pdfData = pdfStream.ToArray();
var dataInfo = new OleEmbeddedDataInfo(pdfData, "pdf");
var oleFrame = slide.Shapes.AddOleObjectFrame(20, 20, 50, 50, dataInfo);
slide.Shapes.Remove(oleFrame);
presentation.Save("ole-object-03.pptx", SaveFormat.Pptx);
```
## **Update OLE Object Data**
Generate and embed a PDF payload in memory, then replace its data with the included small PNG. Both payloads are created by the program; no input files are required.
```csharp
using System;
using System.IO;
using Aspose.Slides.Export;
using Aspose.Slides;
using Aspose.Slides.DOM.Ole;
using var presentation = new Presentation();
var slide = presentation.Slides[0];
// Create the PDF payload in memory from the blank presentation.
using var pdfStream = new MemoryStream();
presentation.Save(pdfStream, SaveFormat.Pdf);
var pdfData = pdfStream.ToArray();
var dataInfo = new OleEmbeddedDataInfo(pdfData, "pdf");
var oleFrame = slide.Shapes.AddOleObjectFrame(20, 20, 50, 50, dataInfo);
// Replace the PDF payload with a small PNG.
var pngData = Convert.FromBase64String(
"iVBORw0KGgoAAAANSUhEUgAAACgAAAAoCAIAAAADnC86AAAAMElEQVR4nO3NQQkAAAgEsItoJiOa" +
"yBKCn8H+S02/iFgsFovFYrFYLBaLxWKxWHxnAfyWQZeVYs/3AAAAAElFTkSuQmCC");
var newDataInfo = new OleEmbeddedDataInfo(pngData, "png");
oleFrame.SetEmbeddedData(newDataInfo);
presentation.Save("ole-object-04.pptx", SaveFormat.Pptx);
```
## Related articles
- [Manage OLE Objects in Presentations in .NET](https://docs.aspose.com/slides/net/manage-ole/)
- [Create Excel Charts and Embed Them in Presentations as OLE Objects](https://docs.aspose.com/slides/net/creating-excel-chart-and-embedding-it-in-presentation-as-ole-object/)
# Picture
> Work with pictures in Aspose.Slides for .NET: insert, crop, compress, recolor, and export images with C# examples for PPT, PPTX, and ODP presentations.
Source: https://docs.aspose.com/slides/net/examples/elements/picture/
Updated: 2026-11-03
This article demonstrates how to insert and access pictures from in-memory images using **Aspose.Slides for .NET**. The examples below create an image in memory, place it on a slide, and then retrieve it.
Copy a C# block into `Program.cs` in a .NET project with `Aspose.Slides.NET6.CrossPlatform` installed. Each block is a complete program. Run one block at a time. The ZIP contains the IDE-ready project and its verification checks. The copied code runs in evaluation mode. For licensed output, apply your license before creating a presentation, as described in the [licensing guide](https://docs.aspose.com/slides/net/licensing/).
## **Download and run**
[Download the complete project](https://docs.aspose.com/slides/net/examples/elements/picture/example.zip), extract it, and open `Example.sln` or run:
```console
dotnet restore Example.sln
dotnet run --project Example.csproj -- --mode evaluation
```
The download includes every case below, its fixture helpers and inputs. `Program.cs` runs all cases; use `--action block-001` to run one independently. Outputs and an action report are written to the printed output directory. No previous example or working-directory setup is required. Evaluation adds a watermark and can truncate read-back text; the short fixtures still have explicit structural checks. For full text and no watermark, use `--mode licensed --license PATH` with your own valid license. See the [setup guide](https://docs.aspose.com/slides/net/examples/getting-started/) for supported SDKs and native prerequisites.
## **Add a Picture**
This code decodes the small authored PNG into a byte array and inserts it as a picture frame on the first slide.
```csharp
using System;
using Aspose.Slides.Export;
using Aspose.Slides;
using var presentation = new Presentation();
var slide = presentation.Slides[0];
// Load the small authored PNG into memory without platform-specific drawing.
var pngData = Convert.FromBase64String(
"iVBORw0KGgoAAAANSUhEUgAAACgAAAAoCAIAAAADnC86AAAAMElEQVR4nO3NQQkAAAgEsItoJiOa" +
"yBKCn8H+S02/iFgsFovFYrFYLBaLxWKxWHxnAfyWQZeVYs/3AAAAAElFTkSuQmCC");
// Add the image to the presentation.
var image = presentation.Images.AddImage(pngData);
// Insert a picture frame showing the image on the first slide.
slide.Shapes.AddPictureFrame(ShapeType.Rectangle,
x: 50, y: 50, width: 40, height: 40, image);
presentation.Save("picture.pptx", SaveFormat.Pptx);
```
## **Access a Picture**
This example ensures a slide contains a picture frame and then accesses the first one it finds.
```csharp
using System;
using Aspose.Slides.Export;
using System.Linq;
using Aspose.Slides;
using var presentation = new Presentation();
var slide = presentation.Slides[0];
// Use a small PNG as the example image.
var pngData = Convert.FromBase64String(
"iVBORw0KGgoAAAANSUhEUgAAACgAAAAoCAIAAAADnC86AAAAMElEQVR4nO3NQQkAAAgEsItoJiOa" +
"yBKCn8H+S02/iFgsFovFYrFYLBaLxWKxWHxnAfyWQZeVYs/3AAAAAElFTkSuQmCC");
// Add the image to the presentation.
var image = presentation.Images.AddImage(pngData);
slide.Shapes.AddPictureFrame(ShapeType.Rectangle, 0, 0, 40, 40, image);
// Access the first picture frame on the slide.
var pictureFrame = slide.Shapes.OfType().First();
Console.WriteLine(pictureFrame.Width);
presentation.Save("picture-02.pptx", SaveFormat.Pptx);
```
# Section
> Manage slide sections in Aspose.Slides for .NET: create, rename, reorder, and group slides with C# examples for PPT, PPTX, and ODP.
Source: https://docs.aspose.com/slides/net/examples/elements/section/
Updated: 2026-11-03
Examples for managing presentation sections—add, access, remove, and rename them programmatically using **Aspose.Slides for .NET**.
Copy a C# block into `Program.cs` in a .NET project with `Aspose.Slides.NET6.CrossPlatform` installed. Each block is a complete program. Run one block at a time. The ZIP contains the IDE-ready project and its verification checks. The copied code runs in evaluation mode. For licensed output, apply your license before creating a presentation, as described in the [licensing guide](https://docs.aspose.com/slides/net/licensing/).
## **Download and run**
[Download the complete project](https://docs.aspose.com/slides/net/examples/elements/section/example.zip), extract it, and open `Example.sln` or run:
```console
dotnet restore Example.sln
dotnet run --project Example.csproj -- --mode evaluation
```
The download includes every case below, its fixture helpers and inputs. `Program.cs` runs all cases; use `--action block-001` to run one independently. Outputs and an action report are written to the printed output directory. No previous example or working-directory setup is required. Evaluation adds a watermark and can truncate read-back text; the short fixtures still have explicit structural checks. For full text and no watermark, use `--mode licensed --license PATH` with your own valid license. See the [setup guide](https://docs.aspose.com/slides/net/examples/getting-started/) for supported SDKs and native prerequisites.
## **Add a Section**
Create a section that starts at a specific slide.
```csharp
using Aspose.Slides.Export;
using Aspose.Slides;
using var presentation = new Presentation();
var slide = presentation.Slides[0];
// Specify the slide that marks the beginning of the section.
presentation.Sections.AddSection("New Section", slide);
presentation.Save("section-01.pptx", SaveFormat.Pptx);
```
## **Access a Section**
Read section information from a presentation.
```csharp
using System;
using Aspose.Slides.Export;
using Aspose.Slides;
using var presentation = new Presentation();
var slide = presentation.Slides[0];
presentation.Sections.AddSection("My Section", slide);
// Access a section by index.
var section = presentation.Sections[0];
Console.WriteLine(section.Name);
presentation.Save("section-02.pptx", SaveFormat.Pptx);
```
## **Remove a Section**
Remove the section returned when it was added, while keeping its starting slide.
```csharp
using Aspose.Slides.Export;
using Aspose.Slides;
using var presentation = new Presentation();
var slide = presentation.Slides[0];
var section = presentation.Sections.AddSection("Temporary Section", slide);
// Remove the section returned when it was added; keep its slide.
presentation.Sections.RemoveSection(section);
presentation.Save("section-03.pptx", SaveFormat.Pptx);
```
## **Rename a Section**
Change the name of an existing section.
```csharp
using Aspose.Slides.Export;
using Aspose.Slides;
using var presentation = new Presentation();
var slide = presentation.Slides[0];
var section = presentation.Sections.AddSection("Old Name", slide);
section.Name = "New Name";
presentation.Save("section-04.pptx", SaveFormat.Pptx);
```
## Related articles
- [Manage Slide Sections in Presentations in .NET](https://docs.aspose.com/slides/net/slide-section/)
# Slide Transition
> Add, read and remove slide transitions, and set slide advance timing with Aspose.Slides for .NET C# examples.
Source: https://docs.aspose.com/slides/net/examples/elements/slide-transition/
Updated: 2026-11-03
This article demonstrates applying slide transition effects and timings with **Aspose.Slides for .NET**.
Copy a C# block into `Program.cs` in a .NET project with `Aspose.Slides.NET6.CrossPlatform` installed. Each block is a complete program. Run one block at a time. The ZIP contains the IDE-ready project and its verification checks. The copied code runs in evaluation mode. For licensed output, apply your license before creating a presentation, as described in the [licensing guide](https://docs.aspose.com/slides/net/licensing/).
## **Download and run**
[Download the complete project](https://docs.aspose.com/slides/net/examples/elements/slide-transition/example.zip), extract it, and open `Example.sln` or run:
```console
dotnet restore Example.sln
dotnet run --project Example.csproj -- --mode evaluation
```
The download includes every case below, its fixture helpers and inputs. `Program.cs` runs all cases; use `--action block-001` to run one independently. Outputs and an action report are written to the printed output directory. No previous example or working-directory setup is required. Evaluation adds a watermark and can truncate read-back text; the short fixtures still have explicit structural checks. For full text and no watermark, use `--mode licensed --license PATH` with your own valid license. See the [setup guide](https://docs.aspose.com/slides/net/examples/getting-started/) for supported SDKs and native prerequisites.
## **Add a Slide Transition**
Apply a fade transition effect to the first slide.
```csharp
using Aspose.Slides.Export;
using Aspose.Slides;
using Aspose.Slides.SlideShow;
using var presentation = new Presentation();
var slide = presentation.Slides[0];
slide.SlideShowTransition.Type = TransitionType.Fade;
presentation.Save("slide-transition-01.pptx", SaveFormat.Pptx);
```
## **Access a Slide Transition**
Read the transition type currently assigned to a slide.
```csharp
using System;
using Aspose.Slides.Export;
using Aspose.Slides;
using Aspose.Slides.SlideShow;
using var presentation = new Presentation();
var slide = presentation.Slides[0];
slide.SlideShowTransition.Type = TransitionType.Push;
// Access the transition type.
var type = slide.SlideShowTransition.Type;
Console.WriteLine($"Transition: {type}");
presentation.Save("slide-transition-02.pptx", SaveFormat.Pptx);
```
## **Remove a Slide Transition**
Clear any transition effect by setting the type to `None`.
```csharp
using Aspose.Slides.Export;
using Aspose.Slides;
using Aspose.Slides.SlideShow;
using var presentation = new Presentation();
var slide = presentation.Slides[0];
slide.SlideShowTransition.Type = TransitionType.Fade;
slide.SlideShowTransition.Type = TransitionType.None;
presentation.Save("slide-transition-03.pptx", SaveFormat.Pptx);
```
().First();
Console.WriteLine($"Node count: {firstSmartArt.AllNodes.Count}");
presentation.Save("smart-art-02.pptx", SaveFormat.Pptx);
```
## **Remove SmartArt**
Delete a SmartArt shape from the slide.
```csharp
using Aspose.Slides.Export;
using Aspose.Slides;
using Aspose.Slides.SmartArt;
using var presentation = new Presentation();
var slide = presentation.Slides[0];
var smartArt = slide.Shapes.AddSmartArt(50, 50, 400, 300, SmartArtLayoutType.BasicProcess);
slide.Shapes.Remove(smartArt);
presentation.Save("smart-art-03.pptx", SaveFormat.Pptx);
```
## **Change SmartArt Layout**
Update the layout type of an existing SmartArt graphic.
```csharp
using Aspose.Slides.Export;
using Aspose.Slides;
using Aspose.Slides.SmartArt;
using var presentation = new Presentation();
var slide = presentation.Slides[0];
var smartArt = slide.Shapes.AddSmartArt(50, 50, 400, 300, SmartArtLayoutType.BasicBlockList);
smartArt.Layout = SmartArtLayoutType.VerticalPictureList;
presentation.Save("smart-art-04.pptx", SaveFormat.Pptx);
```
## Related articles
- [Create and Customize PowerPoint SmartArt in .NET](https://docs.aspose.com/slides/net/powerpoint-smartart/)
- [Manage SmartArt Graphics in Presentations in .NET](https://docs.aspose.com/slides/net/manage-smartart-shape/)
- [Manage SmartArt in PowerPoint Presentations in .NET](https://docs.aspose.com/slides/net/manage-smartart/)
# Table
> Work with tables in Aspose.Slides for .NET: create, format, merge cells, apply styles, import data, and export with C# examples for PPT, PPTX, and ODP.
Source: https://docs.aspose.com/slides/net/examples/elements/table/
Updated: 2026-11-03
Examples for adding tables, accessing them, removing them, and merging cells using **Aspose.Slides for .NET**.
Copy a C# block into `Program.cs` in a .NET project with `Aspose.Slides.NET6.CrossPlatform` installed. Each block is a complete program. Run one block at a time. The ZIP contains the IDE-ready project and its verification checks. The copied code runs in evaluation mode. For licensed output, apply your license before creating a presentation, as described in the [licensing guide](https://docs.aspose.com/slides/net/licensing/).
## **Download and run**
[Download the complete project](https://docs.aspose.com/slides/net/examples/elements/table/example.zip), extract it, and open `Example.sln` or run:
```console
dotnet restore Example.sln
dotnet run --project Example.csproj -- --mode evaluation
```
The download includes every case below, its fixture helpers and inputs. `Program.cs` runs all cases; use `--action block-001` to run one independently. Outputs and an action report are written to the printed output directory. No previous example or working-directory setup is required. Evaluation adds a watermark and can truncate read-back text; the short fixtures still have explicit structural checks. For full text and no watermark, use `--mode licensed --license PATH` with your own valid license. See the [setup guide](https://docs.aspose.com/slides/net/examples/getting-started/) for supported SDKs and native prerequisites.
## **Add a Table**
Create a simple table with two rows and two columns.
```csharp
using Aspose.Slides.Export;
using Aspose.Slides;
using var presentation = new Presentation();
var slide = presentation.Slides[0];
double[] columnWidths = { 80, 80 };
double[] rowHeights = { 30, 30 };
slide.Shapes.AddTable(50, 50, columnWidths, rowHeights);
presentation.Save("table-01.pptx", SaveFormat.Pptx);
```
## **Access a Table**
Retrieve the first table shape on the slide.
```csharp
using System;
using Aspose.Slides.Export;
using System.Linq;
using Aspose.Slides;
using var presentation = new Presentation();
var slide = presentation.Slides[0];
double[] columnWidths = { 80, 80 };
double[] rowHeights = { 30, 30 };
slide.Shapes.AddTable(50, 50, columnWidths, rowHeights);
// Access first table on slide.
var firstTable = slide.Shapes.OfType().First();
Console.WriteLine(firstTable.Rows.Count);
presentation.Save("table-02.pptx", SaveFormat.Pptx);
```
## **Remove a Table**
Delete a table from a slide.
```csharp
using Aspose.Slides.Export;
using Aspose.Slides;
using var presentation = new Presentation();
var slide = presentation.Slides[0];
double[] columnWidths = { 80, 80 };
double[] rowHeights = { 30, 30 };
var table = slide.Shapes.AddTable(50, 50, columnWidths, rowHeights);
slide.Shapes.Remove(table);
presentation.Save("table-03.pptx", SaveFormat.Pptx);
```
## **Merge Table Cells**
Merge the rectangle from the top-left to the bottom-right cell, covering all four cells. These fixture cells are empty. The false flag disallows splitting cells; it is not a text-retention option.
```csharp
using Aspose.Slides.Export;
using Aspose.Slides;
using var presentation = new Presentation();
var slide = presentation.Slides[0];
double[] columnWidths = { 80, 80 };
double[] rowHeights = { 30, 30 };
var table = slide.Shapes.AddTable(50, 50, columnWidths, rowHeights);
var topLeftCell = table[0, 0];
var bottomRightCell = table[1, 1];
// Merge the full 2-by-2 rectangle without splitting any cells.
table.MergeCells(topLeftCell, bottomRightCell, allowSplitting: false);
presentation.Save("table-04.pptx", SaveFormat.Pptx);
```
## Related articles
- [Create and Customize PowerPoint Tables in .NET](https://docs.aspose.com/slides/net/powerpoint-table/)
- [Manage Table Cells in Presentations in .NET](https://docs.aspose.com/slides/net/manage-cells/)
# Text Box
> Work with text boxes in Aspose.Slides for .NET: add, format, align, wrap, autofit, and style text using C# for PPT, PPTX, and ODP presentations.
Source: https://docs.aspose.com/slides/net/examples/elements/text-box/
Updated: 2026-11-03
In Aspose.Slides, a **text box** is represented by an `AutoShape`. Nearly any shape can contain text, but a typical text box has no fill or border and displays only text.
This guide explains how to add, access, and remove text boxes programmatically.
Copy a C# block into `Program.cs` in a .NET project with `Aspose.Slides.NET6.CrossPlatform` installed. Each block is a complete program. Run one block at a time. The ZIP contains the IDE-ready project and its verification checks. The copied code runs in evaluation mode. For licensed output, apply your license before creating a presentation, as described in the [licensing guide](https://docs.aspose.com/slides/net/licensing/).
## **Download and run**
[Download the complete project](https://docs.aspose.com/slides/net/examples/elements/text-box/example.zip), extract it, and open `Example.sln` or run:
```console
dotnet restore Example.sln
dotnet run --project Example.csproj -- --mode evaluation
```
The download includes every case below, its fixture helpers and inputs. `Program.cs` runs all cases; use `--action block-001` to run one independently. Outputs and an action report are written to the printed output directory. No previous example or working-directory setup is required. Evaluation adds a watermark and can truncate read-back text; the short fixtures still have explicit structural checks. For full text and no watermark, use `--mode licensed --license PATH` with your own valid license. See the [setup guide](https://docs.aspose.com/slides/net/examples/getting-started/) for supported SDKs and native prerequisites.
## **Add a Text Box**
A text box is simply an `AutoShape` with no fill or border and some formatted text. Here's how to create one:
```csharp
using Aspose.Slides.Export;
using Aspose.Slides;
using System.Drawing;
using var presentation = new Presentation();
var slide = presentation.Slides[0];
// Create a rectangle shape (defaults to filled with border and no text).
var textBox = slide.Shapes.AddAutoShape(ShapeType.Rectangle, x: 50, y: 75, width: 150, height: 100);
// Remove fill and border to make it look like a typical text box.
textBox.FillFormat.FillType = FillType.NoFill;
textBox.LineFormat.FillFormat.FillType = FillType.NoFill;
// Set text formatting.
var paragraph = textBox.TextFrame.Paragraphs[0];
var textFill = paragraph.ParagraphFormat.DefaultPortionFormat.FillFormat;
textFill.FillType = FillType.Solid;
textFill.SolidFillColor.Color = Color.Black;
// Assign the actual text content.
textBox.TextFrame.Text = "Text";
presentation.Save("text-box-01.pptx", SaveFormat.Pptx);
```
> 💡 **Note:** Any `AutoShape` that contains a non-empty `TextFrame` can function as a text box.
## **Access Text Boxes by Content**
Find text-bearing auto shapes whose text contains Slide, using a case-sensitive ordinal comparison. The fixture includes matching text, unrelated text, and a connector.
```csharp
using System.Linq;
using System;
using Aspose.Slides.Export;
using Aspose.Slides;
using var presentation = new Presentation();
var slide = presentation.Slides[0];
// Seed matching and unrelated text, plus a shape with no text frame.
var matchingText = slide.Shapes.AddAutoShape(ShapeType.Rectangle, 50, 50, 150, 50);
matchingText.Name = "DemoText";
matchingText.TextFrame.Text = "Slide";
var unrelatedText = slide.Shapes.AddAutoShape(ShapeType.Rectangle, 50, 120, 150, 50);
unrelatedText.TextFrame.Text = "Other";
slide.Shapes.AddConnector(ShapeType.Line, 50, 190, 150, 0);
const string keyword = "Slide";
foreach (var textShape in slide.Shapes.OfType())
{
if (textShape.TextFrame?.Text.Contains(keyword, StringComparison.Ordinal) == true)
{
Console.WriteLine(textShape.TextFrame.Text);
}
}
presentation.Save("text-box-02.pptx", SaveFormat.Pptx);
```
## **Remove Text Boxes by Content**
Delete all text-bearing auto shapes on the first slide whose text contains Slide, using a case-sensitive ordinal comparison. Unrelated text and the connector remain.
```csharp
using System;
using Aspose.Slides.Export;
using System.Linq;
using Aspose.Slides;
using var presentation = new Presentation();
var slide = presentation.Slides[0];
// Seed matching and unrelated text, plus a shape with no text frame.
var matchingText = slide.Shapes.AddAutoShape(ShapeType.Rectangle, 50, 50, 150, 50);
matchingText.Name = "DemoText";
matchingText.TextFrame.Text = "Slide";
var unrelatedText = slide.Shapes.AddAutoShape(ShapeType.Rectangle, 50, 120, 150, 50);
unrelatedText.TextFrame.Text = "Other";
slide.Shapes.AddConnector(ShapeType.Line, 50, 190, 150, 0);
const string keyword = "Slide";
var matchingShapes = slide.Shapes.OfType()
.Where(textShape => textShape.TextFrame?.Text.Contains(keyword, StringComparison.Ordinal) == true)
.ToList();
// Snapshot the matches before changing the slide's shape collection.
foreach (var textShape in matchingShapes)
{
slide.Shapes.Remove(textShape);
}
presentation.Save("text-box-03.pptx", SaveFormat.Pptx);
```
> 💡 **Tip:** Snapshot the matching shapes before removing them, so iteration does not modify the collection being enumerated.
# VBA Macro
> Automate presentations with Aspose.Slides for .NET: create, run, import, and secure VBA macros in PPT, PPTX, and ODP using clear C# examples.
Source: https://docs.aspose.com/slides/net/examples/elements/vba-macro/
Updated: 2026-11-03
This article demonstrates how to add, access, and remove VBA macros using **Aspose.Slides for .NET**.
The checks verify VBA source and macro-enabled presentation storage. Executing VBA requires a compatible application and its macro security permissions.
Copy a C# block into `Program.cs` in a .NET project with `Aspose.Slides.NET6.CrossPlatform` installed. Each block is a complete program. Run one block at a time. The ZIP contains the IDE-ready project and its verification checks. The copied code runs in evaluation mode. For licensed output, apply your license before creating a presentation, as described in the [licensing guide](https://docs.aspose.com/slides/net/licensing/).
## **Download and run**
[Download the complete project](https://docs.aspose.com/slides/net/examples/elements/vba-macro/example.zip), extract it, and open `Example.sln` or run:
```console
dotnet restore Example.sln
dotnet run --project Example.csproj -- --mode evaluation
```
The download includes every case below, its fixture helpers and inputs. `Program.cs` runs all cases; use `--action block-001` to run one independently. Outputs and an action report are written to the printed output directory. No previous example or working-directory setup is required. Evaluation adds a watermark and can truncate read-back text; the short fixtures still have explicit structural checks. For full text and no watermark, use `--mode licensed --license PATH` with your own valid license. See the [setup guide](https://docs.aspose.com/slides/net/examples/getting-started/) for supported SDKs and native prerequisites.
## **Add a VBA Macro**
Create a presentation with a VBA project and a simple macro module.
```csharp
using Aspose.Slides.Export;
using Aspose.Slides;
using Aspose.Slides.Vba;
using var presentation = new Presentation();
presentation.VbaProject = new VbaProject();
var module = presentation.VbaProject.Modules.AddEmptyModule("Module");
module.SourceCode = """
Sub Test()
MsgBox "Hi"
End Sub
""";
presentation.Save("vba-macro-01.pptm", SaveFormat.Pptm);
```
## **Access a VBA Macro**
Retrieve the first module from the VBA project.
```csharp
using System;
using Aspose.Slides.Export;
using Aspose.Slides;
using Aspose.Slides.Vba;
using var presentation = new Presentation();
presentation.VbaProject = new VbaProject();
var module = presentation.VbaProject.Modules.AddEmptyModule("Module");
module.SourceCode = """
Sub Test()
MsgBox "Hi"
End Sub
""";
var firstModule = presentation.VbaProject.Modules[0];
Console.WriteLine($"Module: {firstModule.Name}");
presentation.Save("vba-macro-02.pptm", SaveFormat.Pptm);
```
## **Remove a VBA Macro**
Delete a module from the VBA project.
```csharp
using Aspose.Slides.Export;
using Aspose.Slides;
using Aspose.Slides.Vba;
using var presentation = new Presentation();
presentation.VbaProject = new VbaProject();
var module = presentation.VbaProject.Modules.AddEmptyModule("Module");
module.SourceCode = """
Sub Test()
MsgBox "Hi"
End Sub
""";
presentation.VbaProject.Modules.Remove(module);
presentation.Save("vba-macro-03.pptm", SaveFormat.Pptm);
```
## Related articles
- [Manage VBA Projects in Presentations in .NET](https://docs.aspose.com/slides/net/presentation-via-vba/)
# Video
> Add and control videos with Aspose.Slides for .NET: insert, play, trim, set poster frames, and export with C# examples for PPT, PPTX, and ODP presentations.
Source: https://docs.aspose.com/slides/net/examples/elements/video/
Updated: 2026-11-03
This article demonstrates how to embed video frames and set playback options using **Aspose.Slides for .NET**.
The checks verify embedded MP4 bytes and playback settings. Actual playback also depends on the presentation application's codec and security support.
For the copied blocks, pass an MP4 file as the first argument, for example `dotnet run -- video.mp4`. You can use your own MP4 or the [sample video](https://docs.aspose.com/slides/net/examples/elements/video/Fixtures/video.mp4).
Copy a C# block into `Program.cs` in a .NET project with `Aspose.Slides.NET6.CrossPlatform` installed. Each block is a complete program. Run one block at a time. The ZIP contains the IDE-ready project and its verification checks. The copied code runs in evaluation mode. For licensed output, apply your license before creating a presentation, as described in the [licensing guide](https://docs.aspose.com/slides/net/licensing/).
## **Download and run**
[Download the complete project](https://docs.aspose.com/slides/net/examples/elements/video/example.zip), extract it, and open `Example.sln` or run:
```console
dotnet restore Example.sln
dotnet run --project Example.csproj -- --mode evaluation
```
The download includes every case below, its fixture helpers and inputs. `Program.cs` runs all cases; use `--action block-001` to run one independently. Outputs and an action report are written to the printed output directory. No previous example or working-directory setup is required. Evaluation adds a watermark and can truncate read-back text; the short fixtures still have explicit structural checks. For full text and no watermark, use `--mode licensed --license PATH` with your own valid license. See the [setup guide](https://docs.aspose.com/slides/net/examples/getting-started/) for supported SDKs and native prerequisites.
## **Add a Video Frame**
Embed the supplied MP4 in a video frame. Pass its path as the program argument; a missing file produces a readable message.
Use `dotnet run -- video.mp4` with the [sample MP4](https://docs.aspose.com/slides/net/examples/elements/video/Fixtures/video.mp4) or your own file.
```csharp
using System;
using System.IO;
using Aspose.Slides.Export;
using Aspose.Slides;
// Pass the path to an MP4 file as the first argument.
if (args.Length != 1)
{
Console.WriteLine("Usage: dotnet run -- ");
return;
}
var videoPath = args[0];
if (!File.Exists(videoPath))
{
Console.WriteLine($"Video file not found: {videoPath}");
return;
}
using var presentation = new Presentation();
var slide = presentation.Slides[0];
// Add a video.
var videoData = File.ReadAllBytes(videoPath);
var video = presentation.Videos.AddVideo(videoData);
slide.Shapes.AddVideoFrame(50, 50, 320, 240, video);
presentation.Save("video-01.pptx", SaveFormat.Pptx);
```
## **Access a Video Frame**
Retrieve the first video frame added to a slide.
Use `dotnet run -- video.mp4` with the [sample MP4](https://docs.aspose.com/slides/net/examples/elements/video/Fixtures/video.mp4) or your own file.
```csharp
using System;
using System.IO;
using Aspose.Slides.Export;
using System.Linq;
using Aspose.Slides;
// Pass the path to an MP4 file as the first argument.
if (args.Length != 1)
{
Console.WriteLine("Usage: dotnet run -- ");
return;
}
var videoPath = args[0];
if (!File.Exists(videoPath))
{
Console.WriteLine($"Video file not found: {videoPath}");
return;
}
using var presentation = new Presentation();
var slide = presentation.Slides[0];
var videoData = File.ReadAllBytes(videoPath);
var video = presentation.Videos.AddVideo(videoData);
slide.Shapes.AddVideoFrame(50, 50, 320, 240, video);
// Access the first video frame on the slide.
var firstVideo = slide.Shapes.OfType().First();
Console.WriteLine(firstVideo.EmbeddedVideo.BinaryData.Length);
presentation.Save("video-02.pptx", SaveFormat.Pptx);
```
## **Remove a Video Frame**
Delete a video frame from the slide.
Use `dotnet run -- video.mp4` with the [sample MP4](https://docs.aspose.com/slides/net/examples/elements/video/Fixtures/video.mp4) or your own file.
```csharp
using System;
using System.IO;
using Aspose.Slides.Export;
using Aspose.Slides;
// Pass the path to an MP4 file as the first argument.
if (args.Length != 1)
{
Console.WriteLine("Usage: dotnet run -- ");
return;
}
var videoPath = args[0];
if (!File.Exists(videoPath))
{
Console.WriteLine($"Video file not found: {videoPath}");
return;
}
using var presentation = new Presentation();
var slide = presentation.Slides[0];
var videoData = File.ReadAllBytes(videoPath);
var video = presentation.Videos.AddVideo(videoData);
var videoFrame = slide.Shapes.AddVideoFrame(50, 50, 320, 240, video);
// Remove the video frame.
slide.Shapes.Remove(videoFrame);
presentation.Save("video-03.pptx", SaveFormat.Pptx);
```
## **Set Video Playback**
Configure the video to play automatically when the slide is displayed.
Use `dotnet run -- video.mp4` with the [sample MP4](https://docs.aspose.com/slides/net/examples/elements/video/Fixtures/video.mp4) or your own file.
```csharp
using System;
using System.IO;
using Aspose.Slides.Export;
using Aspose.Slides;
// Pass the path to an MP4 file as the first argument.
if (args.Length != 1)
{
Console.WriteLine("Usage: dotnet run -- ");
return;
}
var videoPath = args[0];
if (!File.Exists(videoPath))
{
Console.WriteLine($"Video file not found: {videoPath}");
return;
}
using var presentation = new Presentation();
var slide = presentation.Slides[0];
var videoData = File.ReadAllBytes(videoPath);
var video = presentation.Videos.AddVideo(videoData);
var videoFrame = slide.Shapes.AddVideoFrame(50, 50, 320, 240, video);
// Configure the video to play automatically.
videoFrame.PlayMode = VideoPlayModePreset.Auto;
presentation.Save("video-04.pptx", SaveFormat.Pptx);
```
## Related articles
- [Audio](https://docs.aspose.com/slides/net/examples/elements/audio/)
- [Manage Video Frames in Presentations in .NET](https://docs.aspose.com/slides/net/video-frame/)
# Fonts & Text Processing
> Runnable C# examples for fonts & text processing with Aspose.Slides for .NET.
Source: https://docs.aspose.com/slides/net/examples/fonts-text/
Updated: 2026-10-30
Choose a task below. Each example includes a complete project, reproducible input, and checks of its saved result.
- [Find and Replace Text Across a Deck](https://docs.aspose.com/slides/net/examples/fonts-text/find-replace/): Replace literal and regular-expression matches across slides, groups, tables, masters and notes.
- [Replace Presentation Fonts](https://docs.aspose.com/slides/net/examples/fonts-text/replace-fonts/): Replace an explicit font reference across a presentation and inspect the saved result.
- [Load Fonts and Configure Fallback](https://docs.aspose.com/slides/net/examples/fonts-text/custom-fonts/): Load application-managed fonts, configure substitution and character-range fallback, and collect export warnings.
- [Embed Fonts in a Presentation](https://docs.aspose.com/slides/net/examples/fonts-text/embed-fonts/): Embed a permitted font in full or with used characters, then reopen and render without its external folder.
- [Process Multilingual Text](https://docs.aspose.com/slides/net/examples/fonts-text/multilingual-text/): Render Arabic, mixed-direction text and wrapped Chinese text with explicit script-appropriate fonts.
# Load Fonts and Configure Fallback
> Load application-managed fonts, configure substitution and character-range fallback, and collect export warnings.
Source: https://docs.aspose.com/slides/net/examples/fonts-text/custom-fonts/
Updated: 2026-11-03
Load application-managed fonts, configure substitution and character-range fallback, and collect export warnings.
## **Download and run**
Download [the complete project](https://docs.aspose.com/slides/net/examples/fonts-text/custom-fonts/example.zip) and open **Example.sln** in a compatible IDE. Automatic NuGet restore should run when it opens. The project accepts supported installed release SDKs instead of requiring one exact patch. [Setup and supported environments](https://docs.aspose.com/slides/net/examples/getting-started/) explains native libraries, fonts and the SDK/runtime distinction.
```text
dotnet run --project Example.csproj -- --mode evaluation
```
Evaluation mode needs no license and retains the SDK watermark/text limits. For full licensed checks, set ASPOSE_LICENSE_PATH to your authorized license and use --mode licensed. Fonts and synthetic fixtures needed by this recipe are included or acquired as documented. The supplied bootstrap prepares a separate output workspace and prints its absolute path. The complete download includes the bootstrap, solution and editor profiles.
## **Input and prerequisites**
Use a supported .NET SDK with the supplied project. Evaluation mode runs without a license; licensed mode requires your own authorized license covering this release. No license is distributed.
The project download includes the regular Noto Sans font and its OFL notice and checks the font hash before use. That project also uses Arabic and CJK faces. It acquires them from the pinned official URLs in the code on first use, which requires internet access. For an offline first run, place those exact files in the project Fonts directory before building; the same hashes are validated. Fonts are not installed system-wide. See the [Noto font license](https://github.com/notofonts/noto-fonts/blob/ffebf8c1ee449e544955a7e813c54f9b73848eac/LICENSE) and [Noto CJK license](https://github.com/notofonts/noto-cjk/blob/f8d157532fbfaeda587e826d4cd5b21a49186f7c/Sans/LICENSE). Preserve their notices when redistributing fonts.
## **Example**
The source uses a deliberately missing Latin font plus Arabic and Chinese text. It first exports without a replacement rule to collect a real missing-font warning. Then it supplies a substitution rule and Unicode-range fallback fonts from the verified application folder and exports again.
Copy a C# block into `Program.cs` in a .NET project with `Aspose.Slides.NET6.CrossPlatform` installed. Each block is a complete program. Run one block at a time. The ZIP contains the IDE-ready project and its verification checks.
The copied program writes its files under `example-output` by default.
The program needs Noto Sans (`NotoSans-Regular.ttf`), Noto Naskh Arabic (`NotoNaskhArabic-Regular.ttf`), and Noto Sans CJK SC (`NotoSansCJKsc-Regular.otf`). It downloads pinned font files with a two-minute timeout and checks SHA-256 before use. Exact cached files in `example-output/fonts` work offline. These fonts are under the SIL Open Font License; the download includes its notice.
```csharp
using System;
using System.IO;
using System.Linq;
using System.Drawing;
using System.Collections.Generic;
using System.Net.Http;
using System.Security.Cryptography;
using Aspose.Slides;
using Aspose.Slides.Export;
using Aspose.Slides.Warnings;
internal static class Program
{
private static void Main()
{
var licensePath = Environment.GetEnvironmentVariable("ASPOSE_LICENSE_PATH");
if (!string.IsNullOrWhiteSpace(licensePath))
new License().SetLicense(licensePath);
var outputDirectory = Directory.CreateDirectory("example-output").FullName;
if (!LoadVerifiedFonts("NotoSans-Regular.ttf", "NotoNaskhArabic-Regular.ttf", "NotoSansCJKsc-Regular.otf"))
return;
try
{
using (var source = new Presentation())
{
source.SlideSize.SetSize(640, 360, SlideSizeScaleType.DoNotScale);
var text = Label(source.Slides[0], "Latin مرحبا 中文");
text.TextFrame.Paragraphs[0].Portions[0].PortionFormat.LatinFont = new FontData("Missing Example Font 42");
source.Save("example-output/input.pptx", SaveFormat.Pptx);
}
var log = new WarningLog();
using var presentation = new Presentation("example-output/input.pptx", new LoadOptions { WarningCallback = log });
// Observe the initial missing-font warning before applying the replacement rules.
presentation.Save("example-output/missing-font.pdf", SaveFormat.Pdf, new PdfOptions { WarningCallback = log });
var substitutions = new FontSubstRuleCollection();
substitutions.Add(new FontSubstRule(new FontData("Missing Example Font 42"), new FontData("Noto Sans"), FontSubstCondition.WhenInaccessible));
presentation.FontsManager.FontSubstRuleList = substitutions;
var fallback = new FontFallBackRulesCollection();
fallback.Add(new FontFallBackRule(0x0600, 0x06FF, "Noto Naskh Arabic"));
fallback.Add(new FontFallBackRule(0x4E00, 0x9FFF, "Noto Sans CJK SC"));
presentation.FontsManager.FontFallBackRulesCollection = fallback;
presentation.Save("example-output/fallback.pdf", SaveFormat.Pdf, new PdfOptions { WarningCallback = log });
Render(presentation.Slides[0], "example-output/preview.png");
File.WriteAllText("example-output/warnings.txt", string.Join(Environment.NewLine, log.Messages));
foreach (var warning in log.Messages)
Console.WriteLine(warning);
}
finally
{
FontsLoader.ClearCache();
}
Console.WriteLine("Output: " + outputDirectory);
}
private static bool LoadVerifiedFonts(params string[] requiredFontFiles)
{
try
{
Directory.CreateDirectory("example-output/fonts");
using var client = new HttpClient
{
Timeout = TimeSpan.FromMinutes(2)
};
var fonts = new (string Name, string Url, string Hash)[]
{
("NotoSans-Regular.ttf", "https://raw.githubusercontent.com/notofonts/noto-fonts/ffebf8c1ee449e544955a7e813c54f9b73848eac/hinted/ttf/NotoSans/NotoSans-Regular.ttf", "b85c38ecea8a7cfb39c24e395a4007474fa5a4fc864f6ee33309eb4948d232d5"),
("NotoNaskhArabic-Regular.ttf", "https://raw.githubusercontent.com/notofonts/noto-fonts/ffebf8c1ee449e544955a7e813c54f9b73848eac/hinted/ttf/NotoNaskhArabic/NotoNaskhArabic-Regular.ttf", "2f4b88e6ee50fa82c617e2d1d4ba18281cb1c6cd71c3af3ec64970c23995db4b"),
("NotoSansCJKsc-Regular.otf", "https://raw.githubusercontent.com/notofonts/noto-cjk/f8d157532fbfaeda587e826d4cd5b21a49186f7c/Sans/OTF/SimplifiedChinese/NotoSansCJKsc-Regular.otf", "2c76254f6fc379fddfce0a7e84fb5385bb135d3e399294f6eeb6680d0365b74b"),
};
foreach (var font in fonts.Where(font => requiredFontFiles.Contains(font.Name)))
{
string path = Path.Combine("example-output/fonts", font.Name);
if (!File.Exists(path) || Hash(path) != font.Hash)
{
string bundled = Path.Combine(AppContext.BaseDirectory, "Fonts", font.Name);
byte[] bytes = File.Exists(bundled) ? File.ReadAllBytes(bundled) : client.GetByteArrayAsync(font.Url).GetAwaiter().GetResult();
if (Convert.ToHexString(SHA256.HashData(bytes)).ToLowerInvariant() != font.Hash)
{
Console.Error.WriteLine("Font checksum mismatch: " + font.Name);
return false;
}
File.WriteAllBytes(path, bytes);
}
}
FontsLoader.ClearCache();
FontsLoader.LoadExternalFonts(new[] { Path.GetFullPath("example-output/fonts") });
return true;
}
catch (Exception error) when (error is HttpRequestException || error is IOException || error is OperationCanceledException)
{
Console.Error.WriteLine("Font setup failed. Cache the documented font files under example-output/fonts and retry. " + error.GetType().Name);
return false;
}
}
private static string Hash(string path) => Convert.ToHexString(SHA256.HashData(File.ReadAllBytes(path))).ToLowerInvariant();
private static IAutoShape Label(IBaseSlide slide, string text, float y = 50)
{
var shape = slide.Shapes.AddAutoShape(ShapeType.Rectangle, 40, y, 560, 90);
shape.TextFrame.Text = text;
shape.TextFrame.Paragraphs[0].Portions[0].PortionFormat.FontHeight = 24;
return shape;
}
private static void Render(ISlide slide, string output)
{
using var image = slide.GetImage(new Size(640, 360));
image.Save(output, Aspose.Slides.ImageFormat.Png);
}
private sealed class WarningLog : IWarningCallback
{
public List Messages { get; } = new List();
public ReturnAction Warning(IWarningInfo warning)
{
Messages.Add(warning.Description);
return ReturnAction.Continue;
}
}
}
```
## **Run and inspect the result**
Extract the download into an empty directory and run:
```text
dotnet restore Example.sln
dotnet run --project Example.csproj --configuration Release --no-restore -- --mode evaluation
```
The code writes "input.pptx", "missing-font.pdf", "fallback.pdf", "preview.png", plus "result.json". Checks stop execution on an unexpected result; inspect visual outputs as well as the recorded data.
## **Practical limits**
LoadExternalFonts adds search folders; it does not remove system fonts or override their initialization priority. The Noto families used here were not installed in the test environment. Each sample runs in its own process and clears the global font cache in a finally block. Warning wording can vary by version and rendering backend; collect the actual warnings rather than assuming an exact message.
Read the [detailed guide](https://docs.aspose.com/slides/net/custom-font/) for the full API and platform requirements.
# Embed Fonts in a Presentation
> Embed a permitted font in full or with used characters, then reopen and render without its external folder.
Source: https://docs.aspose.com/slides/net/examples/fonts-text/embed-fonts/
Updated: 2026-11-03
Embed a permitted font in full or with used characters, then reopen and render without its external folder.
## **Download and run**
Download [the complete project](https://docs.aspose.com/slides/net/examples/fonts-text/embed-fonts/example.zip) and open **Example.sln** in a compatible IDE. Automatic NuGet restore should run when it opens. The project accepts supported installed release SDKs instead of requiring one exact patch. [Setup and supported environments](https://docs.aspose.com/slides/net/examples/getting-started/) explains native libraries, fonts and the SDK/runtime distinction.
```text
dotnet run --project Example.csproj -- --mode evaluation
```
Evaluation mode needs no license and retains the SDK watermark/text limits. For full licensed checks, set ASPOSE_LICENSE_PATH to your authorized license and use --mode licensed. Fonts and synthetic fixtures needed by this recipe are included or acquired as documented. The supplied bootstrap prepares a separate output workspace and prints its absolute path. The complete download includes the bootstrap, solution and editor profiles.
## **Input and prerequisites**
Use a supported .NET SDK with the supplied project. Evaluation mode runs without a license; licensed mode requires your own authorized license covering this release. No license is distributed.
The project download includes the regular Noto Sans font and its OFL notice and checks the font hash before use. That project runs offline after package restore. The copied program has its own font setup, described below. Fonts are not installed system-wide. See the [Noto font license](https://github.com/notofonts/noto-fonts/blob/ffebf8c1ee449e544955a7e813c54f9b73848eac/LICENSE) and [Noto CJK license](https://github.com/notofonts/noto-cjk/blob/f8d157532fbfaeda587e826d4cd5b21a49186f7c/Sans/LICENSE). Preserve their notices when redistributing fonts.
## **Example**
The copied program downloads and verifies the regular Noto Sans font. It writes full-font and used-character copies, lists the embedded font family after reopening, clears the loaded font state, and renders both copies. It retains the verified font file for later offline runs.
Copy a C# block into `Program.cs` in a .NET project with `Aspose.Slides.NET6.CrossPlatform` installed. Each block is a complete program. Run one block at a time. The ZIP contains the IDE-ready project and its verification checks.
The copied program writes its files under `example-output` by default.
The required Noto Sans font (`NotoSans-Regular.ttf`, SIL Open Font License) is downloaded from a pinned source and SHA-256 checked, with a two-minute timeout. A valid cached file in `example-output/fonts` works offline. The download includes the font and its redistribution notice.
```csharp
using System;
using System.IO;
using System.Linq;
using System.Drawing;
using System.Net.Http;
using System.Security.Cryptography;
using Aspose.Slides;
using Aspose.Slides.Export;
internal static class Program
{
private static void Main()
{
var licensePath = Environment.GetEnvironmentVariable("ASPOSE_LICENSE_PATH");
if (!string.IsNullOrWhiteSpace(licensePath))
new License().SetLicense(licensePath);
var outputDirectory = Directory.CreateDirectory("example-output").FullName;
if (!LoadVerifiedFonts("NotoSans-Regular.ttf"))
return;
try
{
var fontBytes = File.ReadAllBytes("example-output/fonts/NotoSans-Regular.ttf");
SaveEmbeddedCopy(fontBytes, EmbedFontCharacters.All, "example-output/full.pptx");
SaveEmbeddedCopy(fontBytes, EmbedFontCharacters.OnlyUsed, "example-output/used.pptx");
FontsLoader.ClearCache();
foreach (var path in new[]
{
"example-output/full.pptx",
"example-output/used.pptx"
}
)
{
using var presentation = new Presentation(path);
Console.WriteLine($"{path}: {string.Join(", ", presentation.FontsManager.GetEmbeddedFonts().Select(font => font.FontName))}");
Render(presentation.Slides[0], Path.ChangeExtension(path, ".png"));
}
}
finally
{
FontsLoader.ClearCache();
}
Console.WriteLine("Output: " + outputDirectory);
}
private static bool LoadVerifiedFonts(params string[] requiredFontFiles)
{
try
{
Directory.CreateDirectory("example-output/fonts");
using var client = new HttpClient
{
Timeout = TimeSpan.FromMinutes(2)
};
var fonts = new (string Name, string Url, string Hash)[]
{
("NotoSans-Regular.ttf", "https://raw.githubusercontent.com/notofonts/noto-fonts/ffebf8c1ee449e544955a7e813c54f9b73848eac/hinted/ttf/NotoSans/NotoSans-Regular.ttf", "b85c38ecea8a7cfb39c24e395a4007474fa5a4fc864f6ee33309eb4948d232d5"),
("NotoNaskhArabic-Regular.ttf", "https://raw.githubusercontent.com/notofonts/noto-fonts/ffebf8c1ee449e544955a7e813c54f9b73848eac/hinted/ttf/NotoNaskhArabic/NotoNaskhArabic-Regular.ttf", "2f4b88e6ee50fa82c617e2d1d4ba18281cb1c6cd71c3af3ec64970c23995db4b"),
("NotoSansCJKsc-Regular.otf", "https://raw.githubusercontent.com/notofonts/noto-cjk/f8d157532fbfaeda587e826d4cd5b21a49186f7c/Sans/OTF/SimplifiedChinese/NotoSansCJKsc-Regular.otf", "2c76254f6fc379fddfce0a7e84fb5385bb135d3e399294f6eeb6680d0365b74b"),
};
foreach (var font in fonts.Where(font => requiredFontFiles.Contains(font.Name)))
{
string path = Path.Combine("example-output/fonts", font.Name);
if (!File.Exists(path) || Hash(path) != font.Hash)
{
string bundled = Path.Combine(AppContext.BaseDirectory, "Fonts", font.Name);
byte[] bytes = File.Exists(bundled) ? File.ReadAllBytes(bundled) : client.GetByteArrayAsync(font.Url).GetAwaiter().GetResult();
if (Convert.ToHexString(SHA256.HashData(bytes)).ToLowerInvariant() != font.Hash)
{
Console.Error.WriteLine("Font checksum mismatch: " + font.Name);
return false;
}
File.WriteAllBytes(path, bytes);
}
}
FontsLoader.ClearCache();
FontsLoader.LoadExternalFonts(new[] { Path.GetFullPath("example-output/fonts") });
return true;
}
catch (Exception error) when (error is HttpRequestException || error is IOException || error is OperationCanceledException)
{
Console.Error.WriteLine("Font setup failed. Cache the documented font files under example-output/fonts and retry. " + error.GetType().Name);
return false;
}
}
private static string Hash(string path) => Convert.ToHexString(SHA256.HashData(File.ReadAllBytes(path))).ToLowerInvariant();
private static IAutoShape Label(IBaseSlide slide, string text, float y = 50)
{
var shape = slide.Shapes.AddAutoShape(ShapeType.Rectangle, 40, y, 560, 90);
shape.TextFrame.Text = text;
shape.TextFrame.Paragraphs[0].Portions[0].PortionFormat.FontHeight = 24;
return shape;
}
private static void Render(ISlide slide, string output)
{
using var image = slide.GetImage(new Size(640, 360));
image.Save(output, Aspose.Slides.ImageFormat.Png);
}
private static void SaveEmbeddedCopy(byte[] fontBytes, EmbedFontCharacters characters, string outputPath)
{
using var presentation = new Presentation();
presentation.SlideSize.SetSize(640, 360, SlideSizeScaleType.DoNotScale);
var text = Label(presentation.Slides[0], "Embedded Noto Sans");
text.TextFrame.Paragraphs[0].Portions[0].PortionFormat.LatinFont = new FontData("Noto Sans");
presentation.FontsManager.AddEmbeddedFont(fontBytes, characters);
presentation.Save(outputPath, SaveFormat.Pptx);
}
}
```
## **Run and inspect the result**
Extract the download into an empty directory and run:
```text
dotnet restore Example.sln
dotnet run --project Example.csproj --configuration Release --no-restore -- --mode evaluation
```
The code writes "full.pptx", "used.pptx", "preview.png", plus "result.json". Checks stop execution on an unexpected result; inspect visual outputs as well as the recorded data.
## **Practical limits**
Font availability and legal embedding permission are different checks. Preserve the font license and respect embedding restrictions for every font you use. Used-character embedding can require replacement fonts when later edits introduce new characters. PowerPoint and other readers may handle embedded fonts differently; inspect the intended reader.
Read the [detailed guide](https://docs.aspose.com/slides/net/embedded-font/) for the full API and platform requirements.
# Find and Replace Text Across a Deck
> Replace literal and regular-expression matches across slides, groups, tables, masters and notes.
Source: https://docs.aspose.com/slides/net/examples/fonts-text/find-replace/
Updated: 2026-11-03
Replace literal and regular-expression matches across slides, groups, tables, masters and notes.
## **Download and run**
Download [the complete project](https://docs.aspose.com/slides/net/examples/fonts-text/find-replace/example.zip) and open **Example.sln** in a compatible IDE. Automatic NuGet restore should run when it opens. The project accepts supported installed release SDKs instead of requiring one exact patch. [Setup and supported environments](https://docs.aspose.com/slides/net/examples/getting-started/) explains native libraries, fonts and the SDK/runtime distinction.
```text
dotnet run --project Example.csproj -- --mode evaluation
```
Evaluation mode needs no license and retains the SDK watermark/text limits. For full licensed checks, set ASPOSE_LICENSE_PATH to your authorized license and use --mode licensed. Fonts and synthetic fixtures needed by this recipe are included or acquired as documented. The supplied bootstrap prepares a separate output workspace and prints its absolute path. The complete download includes the bootstrap, solution and editor profiles.
## **Input and prerequisites**
Use a supported .NET SDK with the supplied project. Evaluation mode runs without a license; licensed mode requires your own authorized license covering this release. No license is distributed.
All presentation input is created by the code from original synthetic data.
## **Example**
An application-owned traversal selects the text frames to process. Replacement operates on each full frame, so a literal match can span text runs. This fixture includes a run-spanning match, grouped shape, table cell, master text, speaker notes and unrelated styled text. Notes are explicitly included.
Copy a C# block into `Program.cs` in a .NET project with `Aspose.Slides.NET6.CrossPlatform` installed. Each block is a complete program. Run one block at a time. The ZIP contains the IDE-ready project and its verification checks.
The copied program writes its files under `example-output` by default.
The generated fixture includes a literal split across text portions, a grouped shape, a table cell, slide notes, and master text. Literal matching is case-sensitive; one compiled regex matches the year in every location. Evaluation mode may shorten read-back text.
```csharp
using System;
using System.IO;
using System.Drawing;
using System.Collections.Generic;
using System.Text.RegularExpressions;
using Aspose.Slides;
using Aspose.Slides.Export;
internal static class Program
{
private static void Main()
{
var licensePath = Environment.GetEnvironmentVariable("ASPOSE_LICENSE_PATH");
if (!string.IsNullOrWhiteSpace(licensePath))
new License().SetLicense(licensePath);
var outputDirectory = Directory.CreateDirectory("example-output").FullName;
CreateInput();
using (var presentation = new Presentation("example-output/input.pptx"))
{
var literalOptions = new TextSearchOptions
{
CaseSensitive = true
};
var yearPattern = new Regex(@"\b2025\b", RegexOptions.Compiled);
foreach (var textFrame in SlideNotesAndMasterText(presentation))
{
textFrame.ReplaceText("OLD", "NEW", literalOptions, null);
textFrame.ReplaceRegex(yearPattern, "2026", null);
}
presentation.Save("example-output/output.pptx", SaveFormat.Pptx);
}
using var reopened = new Presentation("example-output/output.pptx");
Render(reopened.Slides[0], "example-output/preview.png");
foreach (var textFrame in SlideNotesAndMasterText(reopened))
Console.WriteLine(textFrame.Text);
Console.WriteLine("Output: " + outputDirectory);
}
private static IEnumerable ShapeTextFrames(IShapeCollection shapes)
{
foreach (var shape in shapes)
{
if (shape is IAutoShape auto && auto.TextFrame != null)
yield return auto.TextFrame;
if (shape is IGroupShape group)
foreach (var frame in ShapeTextFrames(group.Shapes))
yield return frame;
if (shape is ITable table)
for (int row = 0; row < table.Rows.Count; row++)
for (int column = 0; column < table.Columns.Count; column++)
yield return table[column, row].TextFrame;
}
}
private static IEnumerable SlideNotesAndMasterText(Presentation presentation)
{
foreach (var slide in presentation.Slides)
{
foreach (var frame in ShapeTextFrames(slide.Shapes))
yield return frame;
if (slide.NotesSlideManager.NotesSlide?.NotesTextFrame is ITextFrame notes)
yield return notes;
}
foreach (var master in presentation.Masters)
foreach (var frame in ShapeTextFrames(master.Shapes))
yield return frame;
}
private static void CreateInput()
{
using (var source = new Presentation())
{
source.SlideSize.SetSize(640, 360, SlideSizeScaleType.DoNotScale);
var split = Label(source.Slides[0], "");
split.TextFrame.Paragraphs.Clear();
var paragraph = new Paragraph();
paragraph.Portions.Add(new Portion("OL"));
paragraph.Portions.Add(new Portion("D 2025"));
paragraph.Portions[0].PortionFormat.FontBold = NullableBool.True;
split.TextFrame.Paragraphs.Add(paragraph);
var group = source.Slides[0].Shapes.AddGroupShape();
var grouped = group.Shapes.AddAutoShape(ShapeType.Rectangle, 40, 155, 200, 40);
grouped.TextFrame.Text = "OLD 2025";
var table = source.Slides[0].Shapes.AddTable(300, 155, new[] { 250.0 }, new[] { 40.0 });
table[0, 0].TextFrame.Text = "OLD 2025";
var masterText = Label(source.Masters[0], "OLD 2025", 310);
masterText.Height = 40;
source.Slides[0].NotesSlideManager.AddNotesSlide().NotesTextFrame.Text = "OLD 2025";
var keep = Label(source.Slides[0], "Keep this", 210);
keep.Name = "keep";
keep.TextFrame.Paragraphs[0].Portions[0].PortionFormat.FontBold = NullableBool.True;
source.Save("example-output/input.pptx", SaveFormat.Pptx);
}
}
private static IAutoShape Label(IBaseSlide slide, string text, float y = 50)
{
var shape = slide.Shapes.AddAutoShape(ShapeType.Rectangle, 40, y, 560, 90);
shape.TextFrame.Text = text;
shape.TextFrame.Paragraphs[0].Portions[0].PortionFormat.FontHeight = 24;
return shape;
}
private static void Render(ISlide slide, string output)
{
using var image = slide.GetImage(new Size(640, 360));
image.Save(output, Aspose.Slides.ImageFormat.Png);
}
}
```
## **Run and inspect the result**
Extract the download into an empty directory and run:
```text
dotnet restore Example.sln
dotnet run --project Example.csproj --configuration Release --no-restore -- --mode evaluation
```
The code writes "input.pptx", "output.pptx", "preview.png", plus "result.json". Checks stop execution on an unexpected result; inspect visual outputs as well as the recorded data.
## **Practical limits**
The traversal below covers the demonstrated shapes, groups, tables, masters and notes. Additional object types such as SmartArt require their own text traversal. Choose note/master participation deliberately. A match spanning differently formatted runs may inherit formatting from part of the original; inspect the result when formatting boundaries matter.
Read the [detailed guide](https://docs.aspose.com/slides/net/search-and-replace-text/) for the full API and platform requirements.
# Process Multilingual Text
> Render Arabic, mixed-direction text and wrapped Chinese text with explicit script-appropriate fonts.
Source: https://docs.aspose.com/slides/net/examples/fonts-text/multilingual-text/
Updated: 2026-11-03
Render Arabic, mixed-direction text and wrapped Chinese text with explicit script-appropriate fonts.
## **Download and run**
Download [the complete project](https://docs.aspose.com/slides/net/examples/fonts-text/multilingual-text/example.zip) and open **Example.sln** in a compatible IDE. Automatic NuGet restore should run when it opens. The project accepts supported installed release SDKs instead of requiring one exact patch. [Setup and supported environments](https://docs.aspose.com/slides/net/examples/getting-started/) explains native libraries, fonts and the SDK/runtime distinction.
```text
dotnet run --project Example.csproj -- --mode evaluation
```
Evaluation mode needs no license and retains the SDK watermark/text limits. For full licensed checks, set ASPOSE_LICENSE_PATH to your authorized license and use --mode licensed. Fonts and synthetic fixtures needed by this recipe are included or acquired as documented. The supplied bootstrap prepares a separate output workspace and prints its absolute path. The complete download includes the bootstrap, solution and editor profiles.
## **Input and prerequisites**
Use a supported .NET SDK with the supplied project. Evaluation mode runs without a license; licensed mode requires your own authorized license covering this release. No license is distributed.
The project download includes the regular Noto Sans font and its OFL notice and checks the font hash before use. That project also uses Arabic and CJK faces. It acquires them from the pinned official URLs in the code on first use, which requires internet access. For an offline first run, place those exact files in the project Fonts directory before building; the same hashes are validated. Fonts are not installed system-wide. See the [Noto font license](https://github.com/notofonts/noto-fonts/blob/ffebf8c1ee449e544955a7e813c54f9b73848eac/LICENSE) and [Noto CJK license](https://github.com/notofonts/noto-cjk/blob/f8d157532fbfaeda587e826d4cd5b21a49186f7c/Sans/LICENSE). Preserve their notices when redistributing fonts.
## **Example**
The fixture uses separate Arabic, mixed-direction and Chinese text frames. RightToLeft controls the Arabic paragraphs; explicit font families supply the glyphs. Chinese text wraps in a narrow frame and uses normal autofit. The example checks saved Unicode strings and the measured paragraph width and height, then produces a preview for visual review.
Copy a C# block into `Program.cs` in a .NET project with `Aspose.Slides.NET6.CrossPlatform` installed. Each block is a complete program. Run one block at a time. The ZIP contains the IDE-ready project and its verification checks.
The copied program writes its files under `example-output` by default.
The program needs Noto Sans (`NotoSans-Regular.ttf`), Noto Naskh Arabic (`NotoNaskhArabic-Regular.ttf`), and Noto Sans CJK SC (`NotoSansCJKsc-Regular.otf`). It downloads pinned font files with a two-minute timeout and checks SHA-256 before use. Exact cached files in `example-output/fonts` work offline. These fonts are under the SIL Open Font License; the download includes its notice.
```csharp
using System;
using System.IO;
using System.Linq;
using System.Drawing;
using System.Net.Http;
using System.Security.Cryptography;
using Aspose.Slides;
using Aspose.Slides.Export;
internal static class Program
{
private static void Main()
{
var licensePath = Environment.GetEnvironmentVariable("ASPOSE_LICENSE_PATH");
if (!string.IsNullOrWhiteSpace(licensePath))
new License().SetLicense(licensePath);
var outputDirectory = Directory.CreateDirectory("example-output").FullName;
if (!LoadVerifiedFonts("NotoSans-Regular.ttf", "NotoNaskhArabic-Regular.ttf", "NotoSansCJKsc-Regular.otf"))
return;
try
{
const string arabic = "مرحبا بالعالم";
const string mixed = "النتائج 2026 (ABC)";
const string chinese = "中文演示文稿自动换行测试。保留全部文字并检查布局。";
using (var presentation = new Presentation())
{
presentation.SlideSize.SetSize(640, 360, SlideSizeScaleType.DoNotScale);
var arabicParagraph = Label(presentation.Slides[0], arabic, 20);
arabicParagraph.Name = "arabic";
arabicParagraph.Height = 75;
var mixedParagraph = Label(presentation.Slides[0], mixed, 110);
mixedParagraph.Name = "mixed";
mixedParagraph.Height = 75;
foreach (var shape in new[]
{
arabicParagraph,
mixedParagraph
}
)
{
var paragraph = shape.TextFrame.Paragraphs[0];
paragraph.ParagraphFormat.RightToLeft = NullableBool.True;
paragraph.Portions[0].PortionFormat.LatinFont = new FontData("Noto Naskh Arabic");
paragraph.Portions[0].PortionFormat.ComplexScriptFont = new FontData("Noto Naskh Arabic");
}
var chineseParagraph = Label(presentation.Slides[0], chinese, 210);
chineseParagraph.Name = "chinese";
chineseParagraph.Width = 330;
chineseParagraph.Height = 120;
chineseParagraph.TextFrame.TextFrameFormat.WrapText = NullableBool.True;
chineseParagraph.TextFrame.TextFrameFormat.AutofitType = TextAutofitType.Normal;
chineseParagraph.TextFrame.Paragraphs[0].Portions[0].PortionFormat.LatinFont = new FontData("Noto Sans CJK SC");
chineseParagraph.TextFrame.Paragraphs[0].Portions[0].PortionFormat.EastAsianFont = new FontData("Noto Sans CJK SC");
presentation.Save("example-output/output.pptx", SaveFormat.Pptx);
}
using var result = new Presentation("example-output/output.pptx");
var shapes = result.Slides[0].Shapes.OfType().ToDictionary(s => s.Name);
Render(result.Slides[0], "example-output/preview.png");
foreach (var shape in new[]
{
shapes["arabic"],
shapes["mixed"],
shapes["chinese"]
}
)
{
var bounds = shape.TextFrame.Paragraphs[0].GetRect();
Console.WriteLine($"{shape.Name}: {bounds.Width:F1} × {bounds.Height:F1} points");
}
}
finally
{
FontsLoader.ClearCache();
}
Console.WriteLine("Output: " + outputDirectory);
}
private static bool LoadVerifiedFonts(params string[] requiredFontFiles)
{
try
{
Directory.CreateDirectory("example-output/fonts");
using var client = new HttpClient
{
Timeout = TimeSpan.FromMinutes(2)
};
var fonts = new (string Name, string Url, string Hash)[]
{
("NotoSans-Regular.ttf", "https://raw.githubusercontent.com/notofonts/noto-fonts/ffebf8c1ee449e544955a7e813c54f9b73848eac/hinted/ttf/NotoSans/NotoSans-Regular.ttf", "b85c38ecea8a7cfb39c24e395a4007474fa5a4fc864f6ee33309eb4948d232d5"),
("NotoNaskhArabic-Regular.ttf", "https://raw.githubusercontent.com/notofonts/noto-fonts/ffebf8c1ee449e544955a7e813c54f9b73848eac/hinted/ttf/NotoNaskhArabic/NotoNaskhArabic-Regular.ttf", "2f4b88e6ee50fa82c617e2d1d4ba18281cb1c6cd71c3af3ec64970c23995db4b"),
("NotoSansCJKsc-Regular.otf", "https://raw.githubusercontent.com/notofonts/noto-cjk/f8d157532fbfaeda587e826d4cd5b21a49186f7c/Sans/OTF/SimplifiedChinese/NotoSansCJKsc-Regular.otf", "2c76254f6fc379fddfce0a7e84fb5385bb135d3e399294f6eeb6680d0365b74b"),
};
foreach (var font in fonts.Where(font => requiredFontFiles.Contains(font.Name)))
{
string path = Path.Combine("example-output/fonts", font.Name);
if (!File.Exists(path) || Hash(path) != font.Hash)
{
string bundled = Path.Combine(AppContext.BaseDirectory, "Fonts", font.Name);
byte[] bytes = File.Exists(bundled) ? File.ReadAllBytes(bundled) : client.GetByteArrayAsync(font.Url).GetAwaiter().GetResult();
if (Convert.ToHexString(SHA256.HashData(bytes)).ToLowerInvariant() != font.Hash)
{
Console.Error.WriteLine("Font checksum mismatch: " + font.Name);
return false;
}
File.WriteAllBytes(path, bytes);
}
}
FontsLoader.ClearCache();
FontsLoader.LoadExternalFonts(new[] { Path.GetFullPath("example-output/fonts") });
return true;
}
catch (Exception error) when (error is HttpRequestException || error is IOException || error is OperationCanceledException)
{
Console.Error.WriteLine("Font setup failed. Cache the documented font files under example-output/fonts and retry. " + error.GetType().Name);
return false;
}
}
private static string Hash(string path) => Convert.ToHexString(SHA256.HashData(File.ReadAllBytes(path))).ToLowerInvariant();
private static IAutoShape Label(IBaseSlide slide, string text, float y = 50)
{
var shape = slide.Shapes.AddAutoShape(ShapeType.Rectangle, 40, y, 560, 90);
shape.TextFrame.Text = text;
shape.TextFrame.Paragraphs[0].Portions[0].PortionFormat.FontHeight = 24;
return shape;
}
private static void Render(ISlide slide, string output)
{
using var image = slide.GetImage(new Size(640, 360));
image.Save(output, Aspose.Slides.ImageFormat.Png);
}
}
```
## **Run and inspect the result**
Extract the download into an empty directory and run:
```text
dotnet restore Example.sln
dotnet run --project Example.csproj --configuration Release --no-restore -- --mode evaluation
```
The code writes "output.pptx", "preview.png", plus "result.json". Checks stop execution on an unexpected result; inspect visual outputs as well as the recorded data.
## **Practical limits**
A successful save does not prove correct shaping or fit. Inspect punctuation, numbers, glyphs, line breaks and output at the intended size. Autofit can reduce text size; use an application-specific minimum size or redesign the layout when content expands. Fallback and rendering can vary with the font environment.
Read the [detailed guide](https://docs.aspose.com/slides/net/text-formatting/) for the full API and platform requirements.
# Replace Presentation Fonts
> Replace an explicit font reference across a presentation and inspect the saved result.
Source: https://docs.aspose.com/slides/net/examples/fonts-text/replace-fonts/
Updated: 2026-11-03
Replace an explicit font reference across a presentation and inspect the saved result.
## **Download and run**
Download [the complete project](https://docs.aspose.com/slides/net/examples/fonts-text/replace-fonts/example.zip) and open **Example.sln** in a compatible IDE. Automatic NuGet restore should run when it opens. The project accepts supported installed release SDKs instead of requiring one exact patch. [Setup and supported environments](https://docs.aspose.com/slides/net/examples/getting-started/) explains native libraries, fonts and the SDK/runtime distinction.
```text
dotnet run --project Example.csproj -- --mode evaluation
```
Evaluation mode needs no license and retains the SDK watermark/text limits. For full licensed checks, set ASPOSE_LICENSE_PATH to your authorized license and use --mode licensed. Fonts and synthetic fixtures needed by this recipe are included or acquired as documented. The supplied bootstrap prepares a separate output workspace and prints its absolute path. The complete download includes the bootstrap, solution and editor profiles.
## **Input and prerequisites**
Use a supported .NET SDK with the supplied project. Evaluation mode runs without a license; licensed mode requires your own authorized license covering this release. No license is distributed.
The project download includes the regular Noto Sans font and its OFL notice and checks the font hash before use. That project runs offline after package restore. The copied program has its own font setup, described below. Fonts are not installed system-wide. See the [Noto font license](https://github.com/notofonts/noto-fonts/blob/ffebf8c1ee449e544955a7e813c54f9b73848eac/LICENSE) and [Noto CJK license](https://github.com/notofonts/noto-cjk/blob/f8d157532fbfaeda587e826d4cd5b21a49186f7c/Sans/LICENSE). Preserve their notices when redistributing fonts.
## **Example**
The fixture has explicit Arial text and a paragraph-default Arial font. ReplaceFont changes the font references to the application-loaded Noto Sans family. The program reopens the file and inspects both kinds of formatting before rendering it.
Copy a C# block into `Program.cs` in a .NET project with `Aspose.Slides.NET6.CrossPlatform` installed. Each block is a complete program. Run one block at a time. The ZIP contains the IDE-ready project and its verification checks.
The copied program writes its files under `example-output` by default.
The required Noto Sans font (`NotoSans-Regular.ttf`, SIL Open Font License) is downloaded from a pinned source and SHA-256 checked, with a two-minute timeout. A valid cached file in `example-output/fonts` works offline. The download includes the font and its redistribution notice. The old family is Arial: install a legitimately licensed copy for an accurate before preview; the program does not download or redistribute Arial. The replacement family is Noto Sans.
```csharp
using System;
using System.IO;
using System.Linq;
using System.Drawing;
using System.Net.Http;
using System.Security.Cryptography;
using Aspose.Slides;
using Aspose.Slides.Export;
internal static class Program
{
private static void Main()
{
var licensePath = Environment.GetEnvironmentVariable("ASPOSE_LICENSE_PATH");
if (!string.IsNullOrWhiteSpace(licensePath))
new License().SetLicense(licensePath);
var outputDirectory = Directory.CreateDirectory("example-output").FullName;
const string originalFont = "Arial";
const string replacementFont = "Noto Sans";
if (!LoadVerifiedFonts("NotoSans-Regular.ttf"))
return;
try
{
using (var source = new Presentation())
{
source.SlideSize.SetSize(640, 360, SlideSizeScaleType.DoNotScale);
var explicitText = Label(source.Slides[0], "Explicit font");
explicitText.Name = "explicit";
explicitText.TextFrame.Paragraphs[0].Portions[0].PortionFormat.LatinFont = new FontData(originalFont);
var defaultText = Label(source.Slides[0], "Paragraph default", 175);
defaultText.Name = "default";
defaultText.TextFrame.Paragraphs[0].ParagraphFormat.DefaultPortionFormat.LatinFont = new FontData(originalFont);
source.Save("example-output/input.pptx", SaveFormat.Pptx);
}
using (var editable = new Presentation("example-output/input.pptx"))
{
Render(editable.Slides[0], "example-output/before.png");
editable.FontsManager.ReplaceFont(new FontData(originalFont), new FontData(replacementFont));
editable.Save("example-output/output.pptx", SaveFormat.Pptx);
}
using (var result = new Presentation("example-output/output.pptx"))
{
var a = result.Slides[0].Shapes.OfType().Single(s => s.Name == "explicit");
var b = result.Slides[0].Shapes.OfType().Single(s => s.Name == "default");
Render(result.Slides[0], "example-output/after.png");
Console.WriteLine($"Replacement family: {a.TextFrame.Paragraphs[0].Portions[0].PortionFormat.LatinFont.FontName}");
}
}
finally
{
FontsLoader.ClearCache();
}
Console.WriteLine("Output: " + outputDirectory);
}
private static bool LoadVerifiedFonts(params string[] requiredFontFiles)
{
try
{
Directory.CreateDirectory("example-output/fonts");
using var client = new HttpClient
{
Timeout = TimeSpan.FromMinutes(2)
};
var fonts = new (string Name, string Url, string Hash)[]
{
("NotoSans-Regular.ttf", "https://raw.githubusercontent.com/notofonts/noto-fonts/ffebf8c1ee449e544955a7e813c54f9b73848eac/hinted/ttf/NotoSans/NotoSans-Regular.ttf", "b85c38ecea8a7cfb39c24e395a4007474fa5a4fc864f6ee33309eb4948d232d5"),
("NotoNaskhArabic-Regular.ttf", "https://raw.githubusercontent.com/notofonts/noto-fonts/ffebf8c1ee449e544955a7e813c54f9b73848eac/hinted/ttf/NotoNaskhArabic/NotoNaskhArabic-Regular.ttf", "2f4b88e6ee50fa82c617e2d1d4ba18281cb1c6cd71c3af3ec64970c23995db4b"),
("NotoSansCJKsc-Regular.otf", "https://raw.githubusercontent.com/notofonts/noto-cjk/f8d157532fbfaeda587e826d4cd5b21a49186f7c/Sans/OTF/SimplifiedChinese/NotoSansCJKsc-Regular.otf", "2c76254f6fc379fddfce0a7e84fb5385bb135d3e399294f6eeb6680d0365b74b"),
};
foreach (var font in fonts.Where(font => requiredFontFiles.Contains(font.Name)))
{
string path = Path.Combine("example-output/fonts", font.Name);
if (!File.Exists(path) || Hash(path) != font.Hash)
{
string bundled = Path.Combine(AppContext.BaseDirectory, "Fonts", font.Name);
byte[] bytes = File.Exists(bundled) ? File.ReadAllBytes(bundled) : client.GetByteArrayAsync(font.Url).GetAwaiter().GetResult();
if (Convert.ToHexString(SHA256.HashData(bytes)).ToLowerInvariant() != font.Hash)
{
Console.Error.WriteLine("Font checksum mismatch: " + font.Name);
return false;
}
File.WriteAllBytes(path, bytes);
}
}
FontsLoader.ClearCache();
FontsLoader.LoadExternalFonts(new[] { Path.GetFullPath("example-output/fonts") });
return true;
}
catch (Exception error) when (error is HttpRequestException || error is IOException || error is OperationCanceledException)
{
Console.Error.WriteLine("Font setup failed. Cache the documented font files under example-output/fonts and retry. " + error.GetType().Name);
return false;
}
}
private static string Hash(string path) => Convert.ToHexString(SHA256.HashData(File.ReadAllBytes(path))).ToLowerInvariant();
private static IAutoShape Label(IBaseSlide slide, string text, float y = 50)
{
var shape = slide.Shapes.AddAutoShape(ShapeType.Rectangle, 40, y, 560, 90);
shape.TextFrame.Text = text;
shape.TextFrame.Paragraphs[0].Portions[0].PortionFormat.FontHeight = 24;
return shape;
}
private static void Render(ISlide slide, string output)
{
using var image = slide.GetImage(new Size(640, 360));
image.Save(output, Aspose.Slides.ImageFormat.Png);
}
}
```
## **Run and inspect the result**
Extract the download into an empty directory and run:
```text
dotnet restore Example.sln
dotnet run --project Example.csproj --configuration Release --no-restore -- --mode evaluation
```
The code writes "input.pptx", "output.pptx", "preview.png", plus "result.json". Checks stop execution on an unexpected result; inspect visual outputs as well as the recorded data.
## **Practical limits**
Fonts can also come from theme major/minor settings, defaults and script-specific formatting. Inspect effective formatting and adjust a theme deliberately when that is the intended design change. Replacing a font does not guarantee identical character widths, wrapping or appearance.
Read the [detailed guide](https://docs.aspose.com/slides/net/font-replacement/) for the full API and platform requirements.
# Run the .NET Examples
> Download, restore, build and run complete Aspose.Slides for .NET example projects in Rider, Visual Studio, VS Code or the .NET CLI.
Source: https://docs.aspose.com/slides/net/examples/getting-started/
Updated: 2026-11-03
Each [example](https://docs.aspose.com/slides/net/examples/) has a complete project download, including the examples in **Elements**. Extract the whole ZIP into a writable directory. Keep the included configuration, source, fixtures and fonts together.
## **Copy a C# example**
Create a console project and install the same Aspose.Slides package used by the downloads.
```text
dotnet new console -n SlidesExample
cd SlidesExample
dotnet add package Aspose.Slides.NET6.CrossPlatform --version 26.10.0
```
Replace the contents of `Program.cs` with one copied block, then run `dotnet run`. Each block has its own entry point. The API and worker examples also use the ASP.NET Core shared framework. Follow the article for any input file, service, or runtime configuration the example uses.
Use the ZIP when you want the solution, IDE profiles, and the additional checks that run with the download.
## **Install a supported SDK**
Install the current [.NET 10 LTS SDK](https://dotnet.microsoft.com/download/dotnet/10.0) for your operating system and processor. An SDK includes the build tools and runtime; a runtime alone cannot build a project. Use an IDE version that supports your installed SDK.
These projects target `net8.0` with C# 12. The included `global.json` accepts stable SDKs from 8.0.100 onward; it does not require that exact SDK. Explicit major runtime roll-forward allows the application to run on .NET 10 when .NET 8 is absent. The target remains the same whichever SDK builds it. .NET 8 and 9 reach end of support on **November 10, 2026**; use .NET 10 for new installations. See Microsoft's [support policy](https://dotnet.microsoft.com/platform/support/policy) and [.NET 10 operating systems](https://github.com/dotnet/core/blob/main/release-notes/10.0/supported-os.md).
## **Open and run**
| Environment | Steps |
| --- | --- |
| Rider | Open `Example.sln`, allow NuGet restore to finish, then run the `Example` project. The default restore and MSBuild restore both need a compatible installed SDK. |
| Visual Studio | Open `Example.sln` in a version supporting your SDK, wait for package restore, then start `Example`. Visual Studio 2022 can use its supported .NET 8 toolchain; a newer SDK may require a newer Visual Studio. |
| VS Code | Open the extracted folder and install Microsoft's **C#** extension. Select the included **Run example (evaluation)** debug configuration. Its build task restores packages before building. C# Dev Kit is optional. |
| Terminal | Run the commands below from the directory containing `Example.sln`. |
```text
dotnet restore Example.sln
dotnet build Example.sln -c Release --no-restore
dotnet run --project Example.csproj -c Release --no-build -- --mode evaluation
```
An ordinary `dotnet run --project Example.csproj -c Release` also restores and builds automatically. A direct MSBuild **Build** operation does not necessarily restore. For direct MSBuild, use separate **Restore** and **Build** operations with the same toolchain.
The initial restore needs HTTPS access to NuGet.org. The project-local `NuGet.Config` selects that public source so unrelated machine feeds do not block the examples. Package versions are specified in the project; consumer restore is not locked. Offline runs are possible after packages and any separately documented resources have been acquired.
## **Native dependencies and fonts**
The downloads use **Aspose.Slides.NET6.CrossPlatform 26.10.0**. This package does not require PowerPoint or `libgdiplus`. Its platform requirements and the chosen .NET runtime's OS requirements both apply. See [Aspose.Slides system requirements](https://docs.aspose.com/slides/net/system-requirements/) and the [cross-platform package guide](https://docs.aspose.com/slides/net/net6/).
| Platform | Prerequisites |
| --- | --- |
| Windows x64 | A supported Windows version and the Microsoft Visual C++ runtime required by the package. Use x64 SDKs for these downloads. |
| Linux x64 | glibc 2.23 or newer, fontconfig, usable fonts and ICU. Ubuntu 24.04 is a reference environment. |
| Linux ARM64 | glibc 2.39 or newer, fontconfig, usable fonts and ICU. Ubuntu 24.04 ARM64 meets the glibc minimum. |
| macOS x64 or ARM64 | A macOS version supported by the installed .NET runtime, plus fontconfig. For .NET 10, use macOS 15 or later. With Homebrew, install it using `brew install fontconfig`. |
On Ubuntu 24.04, install rendering dependencies using:
```text
sudo apt-get update
sudo apt-get install -y libfontconfig1 fonts-dejavu-core libicu74
```
Alpine/musl, native Windows ARM64 and older glibc environments require a different, separately validated package profile. Windows x86 is outside the verified download configuration.
Noto Sans and its OFL license are included and loaded by the example. Arabic/CJK font examples document their additional downloads. The Docker example supplies its own Linux dependency setup. Use each article's prerequisites for AI, certificates and host services.
## **Evaluation and licensed runs**
The downloaded projects use evaluation mode when no license is configured. They produce real output with the SDK's evaluation watermark and text restrictions. Their checks account for these restrictions. Follow each article's expected output when reading evaluation results.
Copied programs use the license setup shown in their own code. A program that reads `ASPOSE_LICENSE_PATH` applies the license from that path. The short Elements programs use evaluation mode by default. To adapt them for licensed output, apply your license before creating a presentation. See the [licensing guide](https://docs.aspose.com/slides/net/licensing/).
For unrestricted operations, supply an authorized license covering the package release through `ASPOSE_LICENSE_PATH`, or use:
```text
dotnet run --project Example.csproj -c Release -- --mode licensed --license /path/to/Aspose.Slides.NET.lic
```
Explicit `--mode evaluation` ignores license settings. Do not add licenses, API credentials or certificate private keys to the downloaded project. AI examples require their documented licensed mode, model configuration and explicit network opt-in. An actionable missing-prerequisite message does not count as an AI operation passing.
## **Outputs and results**
The downloaded application prints its absolute output directory. By default it uses an `output` workspace beside the built application. Supply `--output DIRECTORY` to select another location. Fixtures are copied into this workspace. Repeated runs can replace files in that selected output directory. Copied programs use the paths shown in their code and article.
`execution.json` records the actions, semantic checks, evaluation/licensed mode and actual runtime used. Exit code **0** means the selected functional checks passed, **1** means a failure, and **2** means an unmet prerequisite. Elements projects run every displayed recipe in sequence; the source for each recipe is included separately.
Application integration examples have additional entry points. Follow their article commands for API self-tests, background-worker self-tests and container verification. Starting a service alone does not prove a request or conversion succeeded.
## **Troubleshoot the first build**
| Symptom | Resolution |
| --- | --- |
| `NETSDK1004`, missing `project.assets.json` | Restore `Example.sln` with the same compatible toolchain used for the build. Check the restore output first; the missing file is usually a consequence of a failed or omitted restore. |
| SDK not found | Install a supported SDK and check `dotnet --list-sdks`. In Rider, check the selected .NET CLI/MSBuild toolset. In Visual Studio, use a version supporting that SDK. |
| `NU1301` or download failure | Check HTTPS access to NuGet.org, your proxy and certificate settings. Keep the project-local NuGet configuration. |
| Native library/font error | Install the platform dependencies above and confirm the process architecture matches the SDK and native package. |
| Wrong font or missing glyph | Keep the supplied `Fonts` folder and acquire any additional fonts required by that article. |
| Exit code 2 | Read the named prerequisite in the console and `execution.json`; supply it and rerun that action. |
The repository's [.NET example workflow](https://github.com/aspose-slides/Aspose.Slides-Documentation/actions/workflows/examples-net.yml) compiles each copied block in its own project. It also restores, builds and runs fresh evaluation downloads on native Windows, Linux x64/ARM64 and macOS x64/ARM64 runners. Its results distinguish functional passes from expected prerequisite diagnostics for AI configuration or an unavailable Docker engine; a diagnostic does not verify that operation. It does not upload private licenses or AI credentials.
# Optimization & Batch Processing
> Runnable C# examples for optimization & batch processing with Aspose.Slides for .NET.
Source: https://docs.aspose.com/slides/net/examples/optimization-batch/
Updated: 2026-10-30
Choose a task. Each example includes a complete downloadable C# project, synthetic inputs,
expected outputs and meaningful checks. See individual pages for prerequisites and limits.
- [Reduce Presentation Size](https://docs.aspose.com/slides/net/examples/optimization-batch/compression/)
- [Remove Unused Presentation Resources](https://docs.aspose.com/slides/net/examples/optimization-batch/cleanup/)
- [Process Presentations with Large Media](https://docs.aspose.com/slides/net/examples/optimization-batch/large-media/)
- [Convert Multiple Presentations](https://docs.aspose.com/slides/net/examples/optimization-batch/batch-conversion/)
- [Track Progress and Cancel Processing](https://docs.aspose.com/slides/net/examples/optimization-batch/progress-cancellation/)
- [Collect Rendering and Export Warnings](https://docs.aspose.com/slides/net/examples/optimization-batch/warnings/)
# Convert Multiple Presentations
> Convert mixed valid, corrupt and encrypted presentations sequentially and with at most two independent workers.
Source: https://docs.aspose.com/slides/net/examples/optimization-batch/batch-conversion/
Updated: 2026-11-03
Convert mixed valid, corrupt and encrypted presentations sequentially and with at most two independent workers.
ConvertBatch(string[] inputs, string inputDirectory, string outputDirectory, int workerLimit)
{
Directory.CreateDirectory(outputDirectory);
var results = new ConcurrentBag();
var options = new ParallelOptions
{
MaxDegreeOfParallelism = workerLimit
};
await Parallel.ForEachAsync(inputs, options, (source, cancellation) =>
{
results.Add(ConvertOne(source, inputDirectory, outputDirectory));
return ValueTask.CompletedTask;
});
return results.OrderBy(result => result.Source, StringComparer.Ordinal).ToArray();
}
private static ConversionResult ConvertOne(string source, string inputDirectory, string outputDirectory)
{
var relativePath = Path.GetRelativePath(inputDirectory, source);
var pathBytes = Encoding.UTF8.GetBytes(relativePath);
var identity = Convert.ToHexString(SHA256.HashData(pathBytes))[..12];
var destination = Path.Combine(outputDirectory, Path.GetFileNameWithoutExtension(source) + "-" + identity + ".pdf");
try
{
if (PresentationFactory.Instance.GetPresentationInfo(source).LoadFormat != LoadFormat.Pptx)
return new(source, destination, false, "Expected PPTX content.");
using var presentation = new Presentation(source, new LoadOptions { LoadFormat = LoadFormat.Pptx });
presentation.Save(destination, SaveFormat.Pdf);
var pdfBytes = File.ReadAllBytes(destination);
if (pdfBytes.Length < 5 || !pdfBytes.AsSpan(0, 5).SequenceEqual("%PDF-"u8))
{
File.Delete(destination);
return new(source, destination, false, "The exported file has no PDF header.");
}
return new(source, destination, true, null);
}
catch (Exception error)
{
if (File.Exists(destination))
File.Delete(destination);
return new(source, destination, false, error.GetType().Name);
}
}
private static void CreateBatchInputs()
{
Directory.CreateDirectory("example-output/inputs");
foreach (var name in new[]
{
"01-first",
"02-second",
"05-after-failure"
}
)
{
using var presentation = new Presentation();
var title = presentation.Slides[0].Shapes.AddAutoShape(ShapeType.Rectangle, 40, 40, 600, 80);
title.TextFrame.Text = name;
presentation.Save(Path.Combine("example-output/inputs", name + ".pptx"), SaveFormat.Pptx);
}
File.WriteAllText("example-output/inputs/03-corrupt.pptx", "This is not a presentation.");
using var protectedInput = new Presentation();
protectedInput.ProtectionManager.Encrypt("fixture-only");
protectedInput.Save("example-output/inputs/04-protected.pptx", SaveFormat.Pptx);
}
}
```
## **Expected result and checks**
Each of `example-output/sequential` and `example-output/parallel` contains three PDFs. Corrupt and password-protected inputs report failures without stopping later jobs. The download additionally measures peak workers.
## **Learn more**
- [Convert PPT and PPTX to PDF in .NET [Advanced Features Included]](https://docs.aspose.com/slides/net/convert-powerpoint-to-pdf/)
- [Multithreading in Aspose.Slides for .NET](https://docs.aspose.com/slides/net/multithreading/)
## **Open and run the complete project**
[Download the complete project](https://docs.aspose.com/slides/net/examples/optimization-batch/batch-conversion/example.zip), extract it and open `Example.sln`, or run:
```text
dotnet restore Example.sln
dotnet run --project Example.csproj --configuration Release -- --mode evaluation
```
Use the current supported .NET 10 SDK/runtime. The project keeps a stable `net8.0`
target and accepts compatible stable SDKs; no exact SDK patch is required.
Evaluation runs without a license and explicitly ignores license environment settings.
It uses bounded fixtures and checks valid output while allowing the evaluation watermark
and documented read-back text truncation. For unrestricted checks, use `--mode licensed`
with your authorized `ASPOSE_LICENSE_PATH`. No license is included.
Inputs are copied from `Fixtures` into a separate output workspace. The program prints
the absolute output path; `execution.json` records the actual runtime and verified action.
See [setup and prerequisites](https://docs.aspose.com/slides/net/examples/getting-started/) for native libraries,
fonts, IDE settings and the .NET 8/9 runtime support boundary of 2026-11-10.
# Remove Unused Presentation Resources
> Remove unused layouts and masters, then remove a nominated unreferenced image part while preserving the retained slide content.
Source: https://docs.aspose.com/slides/net/examples/optimization-batch/cleanup/
Updated: 2026-11-03
Remove unused layouts and masters, then remove a nominated unreferenced image part while preserving the retained slide content.
().Single();
var compressed = picture.PictureFormat.CompressImage(true, PicturesCompression.Dpi96);
presentation.Save("example-output/compressed.pptx", SaveFormat.Pptx);
Console.WriteLine("Image compression applied: " + compressed);
}
using var reopened = new Presentation("example-output/compressed.pptx");
SavePreview(reopened, "example-output/after.png");
var outputBytes = new FileInfo("example-output/compressed.pptx").Length;
Console.WriteLine($"Presentation size: {inputBytes:N0} to {outputBytes:N0} bytes");
Console.WriteLine("Output: " + outputDirectory);
}
private static void CreateImagePresentation()
{
// Render an original geometric fixture at high resolution; no PNG codec is needed.
using (var imageSource = new Presentation())
{
imageSource.SlideSize.SetSize(1000, 600, SlideSizeScaleType.DoNotScale);
for (var column = 0; column < 20; column++)
{
var stripe = imageSource.Slides[0].Shapes.AddAutoShape(ShapeType.Rectangle, column * 50, 0, 50, 600);
stripe.FillFormat.FillType = FillType.Solid;
stripe.FillFormat.SolidFillColor.Color = Color.FromArgb(20 + column * 8, 100, 140);
stripe.LineFormat.FillFormat.FillType = FillType.NoFill;
}
using var raster = imageSource.Slides[0].GetImage(new Size(4000, 2400));
raster.Save("example-output/large-image.png", Aspose.Slides.ImageFormat.Png);
}
using var presentation = new Presentation();
var imageBytes = File.ReadAllBytes("example-output/large-image.png");
var picture = presentation.Images.AddImage(imageBytes);
presentation.Slides[0].Shapes.AddPictureFrame(ShapeType.Rectangle, 80, 110, 500, 300, picture);
presentation.Save("example-output/input.pptx", SaveFormat.Pptx);
}
private static void SavePreview(Presentation presentation, string path)
{
using var image = presentation.Slides[0].GetImage(new Size(640, 360));
image.Save(path, Aspose.Slides.ImageFormat.Png);
}
}
```
## **Expected result and checks**
`example-output` contains the unchanged `input.pptx`, smaller `compressed.pptx`, and `before.png`/`after.png`. Size changes are printed. The download retains independent image bounds and pixel-difference checks.
## **Learn more**
- [Optimize Image Management in Presentations in .NET](https://docs.aspose.com/slides/net/image/)
- [Save Presentations in .NET](https://docs.aspose.com/slides/net/save-presentation/)
## **Open and run the complete project**
[Download the complete project](https://docs.aspose.com/slides/net/examples/optimization-batch/compression/example.zip), extract it and open `Example.sln`, or run:
```text
dotnet restore Example.sln
dotnet run --project Example.csproj --configuration Release -- --mode evaluation
```
Use the current supported .NET 10 SDK/runtime. The project keeps a stable `net8.0`
target and accepts compatible stable SDKs; no exact SDK patch is required.
Evaluation runs without a license and explicitly ignores license environment settings.
It uses bounded fixtures and checks valid output while allowing the evaluation watermark
and documented read-back text truncation. For unrestricted checks, use `--mode licensed`
with your authorized `ASPOSE_LICENSE_PATH`. No license is included.
Inputs are copied from `Fixtures` into a separate output workspace. The program prints
the absolute output path; `execution.json` records the actual runtime and verified action.
See [setup and prerequisites](https://docs.aspose.com/slides/net/examples/getting-started/) for native libraries,
fonts, IDE settings and the .NET 8/9 runtime support boundary of 2026-11-10.
# Process Presentations with Large Media
> Process a reproducibly generated large audio presentation with explicit BLOB storage options, disposal and memory measurements.
Source: https://docs.aspose.com/slides/net/examples/optimization-batch/large-media/
Updated: 2026-11-03
Process a reproducibly generated large audio presentation with explicit BLOB storage options, disposal and memory measurements.
().Single().EmbeddedAudio.BinaryData;
var originalAudio = File.ReadAllBytes("example-output/original.wav");
var audioPreserved = SHA256.HashData(savedAudio).SequenceEqual(SHA256.HashData(originalAudio));
Console.WriteLine($"Audio bytes: {savedAudio.Length}; unchanged: {audioPreserved}; remaining BLOB files: {temporaryFiles}");
Console.WriteLine($"{RuntimeInformation.FrameworkDescription}; elapsed: {stopwatch.ElapsedMilliseconds} ms");
Console.WriteLine($"Observed baseline: {baselineBytes}; process lifetime peak: {Process.GetCurrentProcess().PeakWorkingSet64} bytes");
if (!audioPreserved || temporaryFiles != 0)
Console.Error.WriteLine("Media preservation or BLOB cleanup failed.");
Console.WriteLine("Output: " + outputDirectory);
}
private static void WriteAudioFixture(string path)
{
const int channels = 1;
const int sampleRate = 44100;
const int bitsPerSample = 16;
const int sampleCount = 4 * 1024 * 1024;
const int bytesPerSample = bitsPerSample / 8;
const int dataLength = sampleCount * channels * bytesPerSample;
using var writer = new BinaryWriter(File.Create(path));
writer.Write(Encoding.ASCII.GetBytes("RIFF"));
writer.Write(36 + dataLength);
writer.Write(Encoding.ASCII.GetBytes("WAVEfmt "));
writer.Write(16);
writer.Write((short)1); // PCM format.
writer.Write((short)channels);
writer.Write(sampleRate);
writer.Write(sampleRate * channels * bytesPerSample);
writer.Write((short)(channels * bytesPerSample));
writer.Write((short)bitsPerSample);
writer.Write(Encoding.ASCII.GetBytes("data"));
writer.Write(dataLength);
for (var index = 0; index < sampleCount; index++)
writer.Write((short)(Math.Sin(index * 2 * Math.PI * 440 / sampleRate) * 10000));
}
}
```
## **Expected result and checks**
The output deck preserves the 8 MiB audio payload. After the conversion is disposed, an exclusive input open succeeds and the BLOB directory is empty. Console output records hashes via their equality verdict, runtime, elapsed time, and memory observations.
## **Learn more**
- [Manage Presentation BLOBs in .NET for Efficient Memory Use](https://docs.aspose.com/slides/net/manage-blob/)
## **Open and run the complete project**
[Download the complete project](https://docs.aspose.com/slides/net/examples/optimization-batch/large-media/example.zip), extract it and open `Example.sln`, or run:
```text
dotnet restore Example.sln
dotnet run --project Example.csproj --configuration Release -- --mode evaluation
```
Use the current supported .NET 10 SDK/runtime. The project keeps a stable `net8.0`
target and accepts compatible stable SDKs; no exact SDK patch is required.
Evaluation runs without a license and explicitly ignores license environment settings.
It uses bounded fixtures and checks valid output while allowing the evaluation watermark
and documented read-back text truncation. For unrestricted checks, use `--mode licensed`
with your authorized `ASPOSE_LICENSE_PATH`. No license is included.
Inputs are copied from `Fixtures` into a separate output workspace. The program prints
the absolute output path; `execution.json` records the actual runtime and verified action.
See [setup and prerequisites](https://docs.aspose.com/slides/net/examples/getting-started/) for native libraries,
fonts, IDE settings and the .NET 8/9 runtime support boundary of 2026-11-10.
# Track Progress and Cancel Processing
> Observe PDF export progress, request an SDK interruption during another export, and confirm that the operation stops before completion.
Source: https://docs.aspose.com/slides/net/examples/optimization-batch/progress-cancellation/
Updated: 2026-11-03
Observe PDF export progress, request an SDK interruption during another export, and confirm that the operation stops before completion.
Items { get; } = new();
public ReturnAction Warning(IWarningInfo warning)
{
Items.Add(new ExportWarning(warning.WarningType.ToString(), warning.Description));
return ReturnAction.Continue;
}
}
}
```
## **Expected result and checks**
`example-output/with-warning.pdf` remains available despite font warnings. The failed control leaves no PDF. The downloaded project additionally checks the callback and failure report.
## **Learn more**
- [Handle Presentation Warnings in .NET](https://docs.aspose.com/slides/net/presentation-warnings/)
- [Configure Font Substitution in Presentations in .NET](https://docs.aspose.com/slides/net/font-substitution/)
## **Open and run the complete project**
[Download the complete project](https://docs.aspose.com/slides/net/examples/optimization-batch/warnings/example.zip), extract it and open `Example.sln`, or run:
```text
dotnet restore Example.sln
dotnet run --project Example.csproj --configuration Release -- --mode evaluation
```
Use the current supported .NET 10 SDK/runtime. The project keeps a stable `net8.0`
target and accepts compatible stable SDKs; no exact SDK patch is required.
Evaluation runs without a license and explicitly ignores license environment settings.
It uses bounded fixtures and checks valid output while allowing the evaluation watermark
and documented read-back text truncation. For unrestricted checks, use `--mode licensed`
with your authorized `ASPOSE_LICENSE_PATH`. No license is included.
Inputs are copied from `Fixtures` into a separate output workspace. The program prints
the absolute output path; `execution.json` records the actual runtime and verified action.
See [setup and prerequisites](https://docs.aspose.com/slides/net/examples/getting-started/) for native libraries,
fonts, IDE settings and the .NET 8/9 runtime support boundary of 2026-11-10.
# Presentations
> Run C# examples for creating, opening, merging, splitting and updating complete presentations with Aspose.Slides for .NET.
Source: https://docs.aspose.com/slides/net/examples/presentations/
Updated: 2026-10-30
These examples work with complete presentation files and streams. Each recipe supplies a runnable C# project, generated input, and checks of the saved result.
- [Create, Open, and Save Presentations](https://docs.aspose.com/slides/net/examples/presentations/create-open-save/): Create a presentation, edit a saved copy, and verify that the original file is unchanged.
- [Work with Presentation Streams](https://docs.aspose.com/slides/net/examples/presentations/streams/): Load and save presentation streams while controlling their positions and lifetimes.
- [Merge Presentations](https://docs.aspose.com/slides/net/examples/presentations/merge/): Merge complete decks or selected slides and choose between source design and a destination layout.
- [Split Presentations](https://docs.aspose.com/slides/net/examples/presentations/split/): Save individual slides, a selected range, or named sections to separate presentation files.
- [Read and Update Presentation Properties](https://docs.aspose.com/slides/net/examples/presentations/properties/): Read file information, update metadata, and retain the presentation content and unrelated properties.
- [Add Presentation Watermarks](https://docs.aspose.com/slides/net/examples/presentations/watermarks/): Apply text and image watermarks to slides, then remove only the shapes identified by your application.
For operations on a single slide, shape, chart or other object, browse [Elements](https://docs.aspose.com/slides/net/examples/elements/).
# Create, Open, and Save Presentations
> Create a presentation, edit a saved copy, and verify that the original file is unchanged.
Source: https://docs.aspose.com/slides/net/examples/presentations/create-open-save/
Updated: 2026-11-03
Create a presentation, edit a saved copy, and verify that the original file is unchanged.
## **Input and prerequisites**
The copied program generates its own input. See the [setup guide](https://docs.aspose.com/slides/net/examples/getting-started/) for supported SDKs and native dependencies. Evaluation output includes the SDK watermark and text limits.
## **Example**
The first using block saves the original. The second opens that file, changes its editable text, and saves to a different name. The final block reopens the edited copy and prints its text. The download also checks that the original file is unchanged.
Copy a C# block into `Program.cs` in a .NET project with `Aspose.Slides.NET6.CrossPlatform` installed. Each block is a complete program. Run one block at a time. The ZIP contains the IDE-ready project and its verification checks.
The copied program writes its files in the current working directory.
```csharp
using System;
using System.Linq;
using Aspose.Slides;
using Aspose.Slides.Export;
internal static class Program
{
private static void Main()
{
string? licensePath = Environment.GetEnvironmentVariable("ASPOSE_LICENSE_PATH");
if (!string.IsNullOrWhiteSpace(licensePath))
new License().SetLicense(licensePath);
const string originalPath = "original.pptx";
const string editedPath = "edited.pptx";
const string titleName = "ReportTitle";
using (var created = new Presentation())
{
var title = created.Slides[0].Shapes.AddAutoShape(ShapeType.Rectangle, 50, 80, 540, 100);
title.Name = titleName;
title.TextFrame.Text = "Input";
created.Save(originalPath, SaveFormat.Pptx);
}
using (var editable = new Presentation(originalPath))
{
var title = editable.Slides[0].Shapes.OfType().Single(shape => shape.Name == titleName);
title.TextFrame.Text = "Edit";
editable.Save(editedPath, SaveFormat.Pptx);
}
using (var result = new Presentation(editedPath))
{
var title = result.Slides[0].Shapes.OfType().Single(shape => shape.Name == titleName);
Console.WriteLine($"{editedPath}: {title.TextFrame.Text}");
}
}
}
```
();
for (int i = 0; i < input.Sections.Count; i++)
{
var section = input.Sections[i];
int[] indices = section.GetSlidesListOfSection().Select(slide => input.Slides.IndexOf(slide)).ToArray();
string filename = Path.Combine(outputDirectory, $"section-{i + 1:D2}-{SafeName(section.Name)}.pptx");
SaveSelection(input, indices, filename);
sectionPaths.Add(filename); // Numeric prefix prevents duplicate/sanitized-name collisions.
}
Console.WriteLine("Split files: " + outputDirectory);
}
private static string SafeName(string value)
{
char[] invalid = Path.GetInvalidFileNameChars();
string clean = new string (value.Select(c => invalid.Contains(c) || c == '/' || c == '\\' ? '_' : c).ToArray()).Trim().TrimEnd('.');
return string.IsNullOrWhiteSpace(clean) ? "section" : clean;
}
private static bool SaveSelection(Presentation input, int[] indices, string output)
{
if (indices.Length == 0 || indices.Any(index => index < 0 || index >= input.Slides.Count))
{
Console.Error.WriteLine("Select at least one slide and use valid zero-based indices.");
return false;
}
using var result = new Presentation();
result.Slides.RemoveAt(0);
foreach (int index in indices)
result.Slides.AddClone(input.Slides[index]);
result.Save(output, SaveFormat.Pptx);
return true;
}
private static IAutoShape AddTitle(ISlide slide, string text)
{
var title = slide.Shapes.AddAutoShape(ShapeType.Rectangle, 30, 20, 580, 55);
title.Name = "RecipeTitle";
title.TextFrame.Text = text;
title.TextFrame.Paragraphs[0].Portions[0].PortionFormat.FontHeight = 26;
return title;
}
}
```
>(json);
if (values is null)
{
Console.Error.WriteLine("Customer JSON contains no data.");
return;
}
using var presentation = CreateTemplate();
presentation.Save("template.pptx", SaveFormat.Pptx);
if (!Bind(presentation.Slides[0], values))
return;
var title = FindNamed(presentation.Slides[0], "Customer");
if (title is null || !FitText(title))
return;
presentation.Save("filled.pptx", SaveFormat.Pptx);
SavePreview(presentation, "preview.png");
Console.WriteLine("Created filled.pptx and preview.png.");
}
private static bool Bind(ISlide slide, Dictionary values)
{
if (!values.TryGetValue("Customer", out string? customer) || string.IsNullOrWhiteSpace(customer))
{
Console.Error.WriteLine("Customer is required.");
return false;
}
string optional = values.GetValueOrDefault("Optional", "");
var frames = Walk(slide.Shapes).OfType().Select(shape => shape.TextFrame).ToArray();
var search = new TextSearchOptions
{
CaseSensitive = true
};
foreach (var frame in frames)
{
frame.ReplaceText("{{Customer}}", customer, search, null);
frame.ReplaceText("{{Optional}}", optional, search, null);
frame.TextFrameFormat.AutofitType = TextAutofitType.Normal;
}
if (frames.Any(frame => frame.Text.Contains("{{")))
{
Console.Error.WriteLine("An unresolved template marker remains.");
return false;
}
return true;
}
private static bool FitText(IAutoShape shape)
{
shape.TextFrame.TextFrameFormat.AutofitType = TextAutofitType.None;
for (float size = 24; size >= 10; size--)
{
foreach (var paragraph in shape.TextFrame.Paragraphs)
{
foreach (var portion in paragraph.Portions)
portion.PortionFormat.FontHeight = size;
}
double textHeight = shape.TextFrame.Paragraphs.Sum(paragraph => paragraph.GetRect().Height);
if (textHeight <= shape.Height - 12)
return true;
}
Console.Error.WriteLine("Text does not fit at the minimum font size.");
return false;
}
private static Presentation CreateTemplate()
{
var presentation = new Presentation();
var title = presentation.Slides[0].Shapes.AddAutoShape(ShapeType.Rectangle, 35, 35, 600, 100);
title.Name = "Customer";
var paragraph = title.TextFrame.Paragraphs[0];
paragraph.Portions.Clear();
var prefix = new Portion("Customer: ");
prefix.PortionFormat.FontBold = NullableBool.True;
paragraph.Portions.Add(prefix);
paragraph.Portions.Add(new Portion("{{Cus"));
paragraph.Portions.Add(new Portion("tomer}}"));
foreach (var portion in paragraph.Portions)
portion.PortionFormat.FontHeight = 24;
var optional = presentation.Slides[0].Shapes.AddAutoShape(ShapeType.Rectangle, 35, 180, 600, 60);
optional.TextFrame.Text = "{{Optional}}";
return presentation;
}
private static IEnumerable Walk(IShapeCollection shapes)
{
foreach (var shape in shapes)
{
yield return shape;
if (shape is IGroupShape group)
{
foreach (var child in Walk(group.Shapes))
yield return child;
}
}
}
private static T? FindNamed(ISlide slide, string name)
where T : class, IShape
{
var matches = Walk(slide.Shapes).Where(shape => shape.Name == name).ToArray();
if (matches.Length == 1 && matches[0] is T result)
return result;
Console.Error.WriteLine("Expected exactly one named shape: " + name);
return null;
}
private static void SavePreview(Presentation presentation, string path)
{
using var image = presentation.Slides[0].GetImage(new Size(800, 450));
image.Save(path, Aspose.Slides.ImageFormat.Png);
}
}
```
## **Expected result and checks**
`filled.pptx` replaces the marker split across two text portions, retaining the bold Customer prefix. The absent optional value clears its marker. `preview.png` shows the result; `template.pptx` remains the input. Fitting stops at 10 points and reports an error if the text still overflows. The ZIP also checks missing values, unresolved markers and saved formatting.
The downloaded project writes its verification checks to `output/result.json`. The following values describe the ZIP’s checks; the copied program does not write this report:
```json
{
"marker_replaced": true,
"format_retained": true,
"missing_required_rejected": true,
"long_text_checked": true,
"input_unchanged": true
}
```
Required values are checked before replacement. Optional values default to empty strings. The ZIP’s additional long-name case applies a bounded font-size reduction, checks paragraph height and creates a separate preview for visual review. Mixed styles within a replaced marker need their own design decision; this example preserves the surrounding prefix.
## **Learn more**
- [Manage Presentation Placeholders in .NET](https://docs.aspose.com/slides/net/manage-placeholder/)
- [Search and Replace Text in PowerPoint Presentations in .NET](https://docs.aspose.com/slides/net/search-and-replace-text/)
- [Enhance Your Presentations with AutoFit in .NET](https://docs.aspose.com/slides/net/manage-autofit-settings/)
## **Open and run the complete project**
[Download the complete project](https://docs.aspose.com/slides/net/examples/templates-data/fill-placeholders/example.zip), extract it and open `Example.sln`, or run:
```text
dotnet restore Example.sln
dotnet run --project Example.csproj --configuration Release -- --mode evaluation
```
Use the current supported .NET 10 SDK/runtime. The project keeps a stable `net8.0`
target and accepts compatible stable SDKs; no exact SDK patch is required.
Evaluation runs without a license and explicitly ignores license environment settings.
It uses bounded fixtures and checks valid output while allowing the evaluation watermark
and documented read-back text truncation. For unrestricted checks, use `--mode licensed`
with your authorized `ASPOSE_LICENSE_PATH`. No license is included.
Inputs are copied from `Fixtures` into a separate output workspace. The program prints
the absolute output path; `execution.json` records the actual runtime and verified action.
See [setup and prerequisites](https://docs.aspose.com/slides/net/examples/getting-started/) for native libraries,
fonts, IDE settings and the .NET 8/9 runtime support boundary of 2026-11-10.
# Populate Charts from Data
> Create an editable chart from inline JSON sales data. The download demonstrates updating a template chart and checks its embedded workbook.
Source: https://docs.aspose.com/slides/net/examples/templates-data/populate-charts/
Updated: 2026-11-03
Create an editable chart from inline JSON sales data. The download demonstrates updating a template chart and checks its embedded workbook.
## **Example**
Worksheet column zero stores category labels; row zero stores series names.
The copied program creates a chart, clears its default data and links each new data point to a workbook cell. [Program.cs](https://docs.aspose.com/slides/net/examples/templates-data/populate-charts/Program.cs) contains the chart update. [Example.cs](https://docs.aspose.com/slides/net/examples/templates-data/populate-charts/Example.cs)
creates the synthetic template and verifies the saved report.
Copy a C# block into `Program.cs` in a .NET project with `Aspose.Slides.NET6.CrossPlatform` installed. Each block is a complete program. Run one block at a time. The ZIP contains the IDE-ready project and its verification checks.
```csharp
using System;
using System.Text.Json;
using Aspose.Slides;
using Aspose.Slides.Charts;
using Aspose.Slides.Export;
const string json = """
{
"Categories": ["Jan", "Feb", "Mar"],
"Series": ["Pens", "Paper"],
"Values": [[12, 18, 15], [9, 14, 17]]
}
""";
var sales = JsonSerializer.Deserialize(json);
if (sales is null)
{
Console.Error.WriteLine("Sales data is missing.");
return;
}
using var presentation = new Presentation();
var chart = presentation.Slides[0].Shapes.AddChart(ChartType.ClusteredColumn, 50, 50, 560, 320);
var data = chart.ChartData;
var workbook = data.ChartDataWorkbook;
const int worksheet = 0;
data.Series.Clear();
data.Categories.Clear();
workbook.Clear(worksheet);
for (int row = 0; row < sales.Categories.Length; row++)
data.Categories.Add(workbook.GetCell(worksheet, row + 1, 0, sales.Categories[row]));
for (int column = 0; column < sales.Series.Length; column++)
{
var name = workbook.GetCell(worksheet, 0, column + 1, sales.Series[column]);
var series = data.Series.Add(name, ChartType.ClusteredColumn);
for (int row = 0; row < sales.Categories.Length; row++)
{
var value = workbook.GetCell(worksheet, row + 1, column + 1, sales.Values[column][row]);
series.DataPoints.AddDataPointForBarSeries(value);
}
}
presentation.Save("report.pptx", SaveFormat.Pptx);
Console.WriteLine("Saved report.pptx");
internal sealed record SalesData(string[] Categories, string[] Series, double[][] Values);
```
## **Expected result and checks**
The copied program writes `report.pptx` with three categories (Jan, Feb, Mar), two series (Pens, Paper), and all six inline values. The downloaded project writes its semantic checks to `output/result.json` and throws if a required
result differs. Expected check values for the download’s two-category fixture are:
```json
{
"series_count": 2,
"category_count": 2,
"all_values_checked": true,
"embedded_workbook_checked": true
}
```
Both versions update the category labels, series names, and chart data points. The downloaded project reads sales data from a JSON fixture, checks the saved chart and workbook, and exports the workbook for inspection.
## **Learn more**
- [Create or Update PowerPoint Presentation Charts in .NET](https://docs.aspose.com/slides/net/create-chart/)
- [Manage Chart Workbooks in Presentations in .NET](https://docs.aspose.com/slides/net/chart-workbook/)
- [Manage Chart Data Series in Presentations in .NET](https://docs.aspose.com/slides/net/chart-series/)
## **Open and run the complete project**
[Download the complete project](https://docs.aspose.com/slides/net/examples/templates-data/populate-charts/example.zip), extract it and open `Example.sln`, or run:
```text
dotnet restore Example.sln
dotnet run --project Example.csproj --configuration Release -- --mode evaluation
```
Use the current supported .NET 10 SDK/runtime. The project keeps a stable `net8.0`
target and accepts compatible stable SDKs; no exact SDK patch is required.
Evaluation runs without a license and explicitly ignores license environment settings.
It uses bounded fixtures and checks valid output while allowing the evaluation watermark
and documented read-back text truncation. For unrestricted checks, use `--mode licensed`
with your authorized `ASPOSE_LICENSE_PATH`. No license is included.
Inputs are copied from `Fixtures` into a separate output workspace. The program prints
the absolute output path; `execution.json` records the actual runtime and verified action.
See [setup and prerequisites](https://docs.aspose.com/slides/net/examples/getting-started/) for native libraries,
fonts, IDE settings and the .NET 8/9 runtime support boundary of 2026-11-10.
# Populate Tables from Data
> Read CSV records with quoted commas and Unicode, reuse a formatted row, and produce a table with explicit number and date formatting.
Source: https://docs.aspose.com/slides/net/examples/templates-data/populate-tables/
Updated: 2026-11-03
Read CSV records with quoted commas and Unicode, reuse a formatted row, and produce a table with explicit number and date formatting.
? ReadRows(string text)
{
using var parser = new Microsoft.VisualBasic.FileIO.TextFieldParser(new StringReader(text));
parser.SetDelimiters(",");
parser.HasFieldsEnclosedInQuotes = true;
parser.TrimWhiteSpace = false;
string[]? header = parser.ReadFields();
if (header is null || !header.SequenceEqual(new[] { "Customer", "Amount", "Date" }))
{
Console.Error.WriteLine("Expected Customer,Amount,Date header.");
return null;
}
var rows = new List();
while (!parser.EndOfData)
{
string[]? fields = parser.ReadFields();
if (fields is null || fields.Length != 3 || string.IsNullOrWhiteSpace(fields[0]) || !decimal.TryParse(fields[1], NumberStyles.Number, CultureInfo.InvariantCulture, out decimal amount) || !DateTime.TryParseExact(fields[2], "yyyy-MM-dd", CultureInfo.InvariantCulture, DateTimeStyles.None, out DateTime date))
{
Console.Error.WriteLine("Each row needs Customer, Amount and a yyyy-MM-dd Date.");
return null;
}
rows.Add(new Row(fields[0], amount, date));
}
return rows;
}
private static void Fill(ITable table, List rows)
{
const int customerColumn = 0;
const int amountColumn = 1;
const int dateColumn = 2;
if (rows.Count == 0)
{
table.Rows.RemoveAt(1, false); // Keep only the header.
return;
}
for (int i = 0; i < rows.Count; i++)
{
if (i > 0)
table.Rows.AddClone(table.Rows[1], false);
var record = rows[i];
table[customerColumn, i + 1].TextFrame.Text = record.Customer;
table[amountColumn, i + 1].TextFrame.Text = record.Amount.ToString("0.00", CultureInfo.InvariantCulture);
table[dateColumn, i + 1].TextFrame.Text = record.Date.ToString("yyyy-MM-dd", CultureInfo.InvariantCulture);
}
}
private static void SavePreview(Presentation presentation, string path)
{
using var image = presentation.Slides[0].GetImage(new Size(800, 450));
image.Save(path, Aspose.Slides.ImageFormat.Png);
}
}
```
## **Expected result and checks**
`report.pptx` has a bold header and two data rows with a quoted comma, Unicode, invariant amounts and ISO dates. `preview.png` shows the table. Header-only CSV keeps only the header. In evaluation mode, long text may be truncated when reopened; the download checks dates with that limitation in mind.
The downloaded project writes its verification checks to `output/result.json`. The following values describe the ZIP’s checks; the copied program does not write this report:
```json
{
"data_rows": 2,
"quoted_comma_and_unicode_checked": true,
"invariant_numbers_checked": true,
"empty_keeps_header": true,
"missing_field_rejected": true,
"header_format_retained": true
}
```
CSV parsing uses the .NET TextFieldParser and invariant number/date conversion. An empty dataset keeps only the header. A malformed row with a missing field is rejected. Every cell is assigned after cloning so data does not leak from the previous row.
## **Learn more**
- [Manage Presentation Tables in .NET](https://docs.aspose.com/slides/net/manage-table/)
- [Manage Rows and Columns in PowerPoint Tables in .NET](https://docs.aspose.com/slides/net/manage-rows-and-columns/)
- [Manage Table Cells in Presentations in .NET](https://docs.aspose.com/slides/net/manage-cells/)
## **Open and run the complete project**
[Download the complete project](https://docs.aspose.com/slides/net/examples/templates-data/populate-tables/example.zip), extract it and open `Example.sln`, or run:
```text
dotnet restore Example.sln
dotnet run --project Example.csproj --configuration Release -- --mode evaluation
```
Use the current supported .NET 10 SDK/runtime. The project keeps a stable `net8.0`
target and accepts compatible stable SDKs; no exact SDK patch is required.
Evaluation runs without a license and explicitly ignores license environment settings.
It uses bounded fixtures and checks valid output while allowing the evaluation watermark
and documented read-back text truncation. For unrestricted checks, use `--mode licensed`
with your authorized `ASPOSE_LICENSE_PATH`. No license is included.
Inputs are copied from `Fixtures` into a separate output workspace. The program prints
the absolute output path; `execution.json` records the actual runtime and verified action.
See [setup and prerequisites](https://docs.aspose.com/slides/net/examples/getting-started/) for native libraries,
fonts, IDE settings and the .NET 8/9 runtime support boundary of 2026-11-10.
# Repeat a Template Slide for Each Record
> Clone one template slide per customer, then fill its text, chart and picture. The copied program uses inline records; the download reads its records from JSON.
Source: https://docs.aspose.com/slides/net/examples/templates-data/repeat-slides/
Updated: 2026-11-03
Clone one template slide per customer, then fill its text, chart and picture. The copied program uses inline records; the download reads its records from JSON.
(slide, "Customer");
var chart = FindNamed(slide, "Sales");
var logo = FindNamed(slide, "Logo");
if (title is null || chart is null || logo is null)
return false;
title.TextFrame.ReplaceText("{{Customer}}", customer.Name, new TextSearchOptions(), null);
SetSales(chart, customer.Name, customer.Amount);
byte[] logoBytes = Convert.FromBase64String(customer.Logo);
logo.PictureFormat.Picture.Image = presentation.Images.AddImage(logoBytes);
}
presentation.Slides.Remove(template);
presentation.Save(path, SaveFormat.Pptx);
SavePreview(presentation, path + ".png");
Console.WriteLine($"{path}: {presentation.Slides.Count} slides");
return true;
}
private static void SetSales(IChart chart, string customer, double amount)
{
var data = chart.ChartData;
var workbook = data.ChartDataWorkbook;
data.Series.Clear();
data.Categories.Clear();
workbook.Clear(0);
data.Categories.Add(workbook.GetCell(0, 1, 0, "Sales"));
var series = data.Series.Add(workbook.GetCell(0, 0, 1, customer), ChartType.ClusteredColumn);
series.DataPoints.AddDataPointForBarSeries(workbook.GetCell(0, 1, 1, amount));
}
private static IEnumerable Walk(IShapeCollection shapes)
{
foreach (var shape in shapes)
{
yield return shape;
if (shape is IGroupShape group)
{
foreach (var child in Walk(group.Shapes))
yield return child;
}
}
}
private static T? FindNamed(ISlide slide, string name)
where T : class, IShape
{
var matches = Walk(slide.Shapes).Where(shape => shape.Name == name).ToArray();
if (matches.Length == 1 && matches[0] is T result)
return result;
Console.Error.WriteLine("Expected exactly one named shape: " + name);
return null;
}
private static void SavePreview(Presentation presentation, string path)
{
using var image = presentation.Slides[0].GetImage(new Size(800, 450));
image.Save(path, Aspose.Slides.ImageFormat.Png);
}
}
```
## **Expected result and checks**
`report.pptx` contains two slides, Acme then 東京, with separate chart values and blue/orange logos. The template slide is removed. `report.pptx.png` previews the first slide. An empty customer array writes no deck; duplicate required shape names stop generation with a diagnostic.
The downloaded project writes its verification checks to `output/result.json`. The following values describe the ZIP’s checks; the copied program does not write this report:
```json
{
"slide_count": 2,
"order_preserved": true,
"no_template_slide": true,
"no_state_leak": true,
"semantic_repeatability": true,
"duplicate_name_rejected": true
}
```
The original template slide is removed deliberately. Output order matches the data order. The checks compare repeatable content, not identical ZIP bytes or timestamps. Shape names must be unique within the relevant slide; duplicate names are rejected. An empty dataset returns no report slides.
## **Learn more**
- [Clone Presentation Slides in .NET](https://docs.aspose.com/slides/net/clone-slides/)
- [Manage Presentation Placeholders in .NET](https://docs.aspose.com/slides/net/manage-placeholder/)
## **Open and run the complete project**
[Download the complete project](https://docs.aspose.com/slides/net/examples/templates-data/repeat-slides/example.zip), extract it and open `Example.sln`, or run:
```text
dotnet restore Example.sln
dotnet run --project Example.csproj --configuration Release -- --mode evaluation
```
Use the current supported .NET 10 SDK/runtime. The project keeps a stable `net8.0`
target and accepts compatible stable SDKs; no exact SDK patch is required.
Evaluation runs without a license and explicitly ignores license environment settings.
It uses bounded fixtures and checks valid output while allowing the evaluation watermark
and documented read-back text truncation. For unrestricted checks, use `--mode licensed`
with your authorized `ASPOSE_LICENSE_PATH`. No license is included.
Inputs are copied from `Fixtures` into a separate output workspace. The program prints
the absolute output path; `execution.json` records the actual runtime and verified action.
See [setup and prerequisites](https://docs.aspose.com/slides/net/examples/getting-started/) for native libraries,
fonts, IDE settings and the .NET 8/9 runtime support boundary of 2026-11-10.
# Replace Template Images
> Replace two named pictures using contain and crop choices while retaining the original picture frames. Both portrait and landscape replacements are tested.
Source: https://docs.aspose.com/slides/net/examples/templates-data/replace-images/
Updated: 2026-11-08
Replace two named pictures using contain and crop choices while retaining the original picture frames. Both portrait and landscape replacements are tested.
(presentation.Slides[0], target.Name);
if (frame is null)
return;
byte[] fitted = FittedBitmap(fixture.Width, fixture.Height, fixture.Color, 500, 400, target.Crop);
frame.PictureFormat.Picture.Image = presentation.Images.AddImage(fitted);
}
presentation.Save(fixture.Name + ".pptx", SaveFormat.Pptx);
SavePreview(presentation, fixture.Name + "-preview.png");
}
Console.WriteLine("Created portrait and landscape presentations and previews.");
}
private static byte[] FittedBitmap(int sourceWidth, int sourceHeight, Color color, int width, int height, bool crop)
{
double horizontalScale = (double)width / sourceWidth;
double verticalScale = (double)height / sourceHeight;
double scale = crop ? Math.Max(horizontalScale, verticalScale) : Math.Min(horizontalScale, verticalScale);
double left = (width - sourceWidth * scale) / 2;
double top = (height - sourceHeight * scale) / 2;
int stride = (width * 3 + 3) & ~3;
// A bounded 24-bit BMP writer for our original synthetic pixels, not an image decoder.
using var stream = new MemoryStream();
using var writer = new BinaryWriter(stream);
writer.Write((ushort)0x4D42);
writer.Write(54 + stride * height);
writer.Write(0);
writer.Write(54);
writer.Write(40);
writer.Write(width);
writer.Write(height);
writer.Write((ushort)1);
writer.Write((ushort)24);
writer.Write(0);
writer.Write(stride * height);
writer.Write(new byte[16]);
for (int y = height - 1; y >= 0; y--)
{
for (int x = 0; x < width; x++)
{
int sourceX = (int)Math.Floor((x - left) / scale);
int sourceY = (int)Math.Floor((y - top) / scale);
var pixel = Color.White;
if (sourceX >= 0 && sourceX < sourceWidth && sourceY >= 0 && sourceY < sourceHeight)
{
double dx = (sourceX - sourceWidth / 2.0) / (sourceWidth / 4.0);
double dy = (sourceY - sourceHeight / 2.0) / (sourceHeight / 4.0);
pixel = dx * dx + dy * dy <= 1 ? Color.White : color;
}
writer.Write(pixel.B);
writer.Write(pixel.G);
writer.Write(pixel.R);
}
writer.Write(new byte[stride - width * 3]);
}
return stream.ToArray();
}
private static IEnumerable Walk(IShapeCollection shapes)
{
foreach (var shape in shapes)
{
yield return shape;
if (shape is IGroupShape group)
{
foreach (var child in Walk(group.Shapes))
yield return child;
}
}
}
private static T? FindNamed(ISlide slide, string name)
where T : class, IShape
{
var matches = Walk(slide.Shapes).Where(shape => shape.Name == name).ToArray();
if (matches.Length == 1 && matches[0] is T result)
return result;
Console.Error.WriteLine("Expected exactly one named shape: " + name);
return null;
}
private static void SavePreview(Presentation presentation, string path)
{
using var image = presentation.Slides[0].GetImage(new Size(800, 450));
image.Save(path, Aspose.Slides.ImageFormat.Png);
}
}
```
## **Expected result and checks**
`portrait-preview.png` and `landscape-preview.png` compare contain (left) with crop (right). Contain shows the whole image with white padding; crop fills the frame and clips its edges. `portrait.pptx` and `landscape.pptx` retain both original frame positions and sizes. The bounded bitmap helper generates original pixels directly for these two fixtures; adapting it to real images requires an image-loading route.
[](https://docs.aspose.com/slides/net/examples/templates-data/replace-images/visual-examples-templates-data-replace-images-0575aaf5bf89.svg)
*In the example previews, Contain shows the whole image with white padding. Crop fills the same frame and clips the image edges.*
The downloaded project writes its verification checks to `output/result.json`. The following values describe the ZIP’s checks; the copied program does not write this report:
```json
{
"frame_geometry_preserved": true,
"portrait_and_landscape_checked": true
}
```
The contain/crop helper creates a 24-bit BMP from the original synthetic pixels, matching the existing frame's aspect ratio. The replacement updates the picture data while retaining the frame's position and dimensions.
## **Learn more**
- [Manage Picture Frames in Presentations in .NET](https://docs.aspose.com/slides/net/picture-frame/)
- [Optimize Image Management in Presentations in .NET](https://docs.aspose.com/slides/net/image/)
## **Open and run the complete project**
[Download the complete project](https://docs.aspose.com/slides/net/examples/templates-data/replace-images/example.zip), extract it and open `Example.sln`, or run:
```text
dotnet restore Example.sln
dotnet run --project Example.csproj --configuration Release -- --mode evaluation
```
Use the current supported .NET 10 SDK/runtime. The project keeps a stable `net8.0`
target and accepts compatible stable SDKs; no exact SDK patch is required.
Evaluation runs without a license and explicitly ignores license environment settings.
It uses bounded fixtures and checks valid output while allowing the evaluation watermark
and documented read-back text truncation. For unrestricted checks, use `--mode licensed`
with your authorized `ASPOSE_LICENSE_PATH`. No license is included.
Inputs are copied from `Fixtures` into a separate output workspace. The program prints
the absolute output path; `execution.json` records the actual runtime and verified action.
See [setup and prerequisites](https://docs.aspose.com/slides/net/examples/getting-started/) for native libraries,
fonts, IDE settings and the .NET 8/9 runtime support boundary of 2026-11-10.
# Integrate Excel Data into PowerPoint Presentations
> Read data from Excel workbooks in Aspose.Slides using the ExcelDataWorkbook API. Load sheets and cells and use values to generate data-driven PowerPoint presentations.
Source: https://docs.aspose.com/slides/net/excel-integration/
Updated: 2026-08-05
## **Introduction**
PowerPoint presentations are a powerful way to display and communicate information. They are often used in conjunction with Excel workbooks, where Excel serves as an excellent source of structured data and PowerPoint excels at visualizing that data for an audience.
There are many practical scenarios where combining Excel and PowerPoint is essential: mail merges, populating data tables, generating one slide per data record (batch slide generation), creating training materials, and consolidating multiple Excel reports into a single presentation, to name a few.
Until now, implementing such features with the Aspose.Slides API required relying on third-party solutions like Aspose.Cells. While these tools are robust, they can be overly complex and costly for users who only need basic data integration functionality.
## **How It Works**
To make working with Excel data easier and more streamlined, Aspose.Slides has introduced new classes for reading data from Excel workbooks and importing content into a presentation. This feature opens up powerful new possibilities for API users who want to leverage Excel as a data source within their presentation workflows.
The new functionality is designed for general-purpose data access and is not integrated into the Presentation Document Object Model (DOM). That means *it does not allow editing or saving Excel files* — its sole purpose is to open workbooks and navigate through their content to retrieve cell data.
At the core of this feature is the new [ExcelDataWorkbook](https://reference.aspose.com/slides/net/aspose.slides.excel/exceldataworkbook/) class. This class allows you to load an Excel workbook from a local file or a stream. Once loaded, it provides several overloads of the [GetCell](https://reference.aspose.com/slides/net/aspose.slides.excel/exceldataworkbook/getcell/) method, which you can use to retrieve specific cells by their position (e.g., row and column indices or named ranges).
Each call to [GetCell](https://reference.aspose.com/slides/net/aspose.slides.excel/exceldataworkbook/getcell/) returns an instance of the [ExcelDataCell](https://reference.aspose.com/slides/net/aspose.slides.excel/exceldatacell/) class. This object represents a single cell in the Excel workbook and gives you access to its value in a simple and intuitive way.
#### **Import an Excel Chart**
The next step to extend functionality is the [ExcelWorkbookImporter](https://reference.aspose.com/slides/net/aspose.slides.import/excelworkbookimporter/) class. This utility class provides functionality for importing content from an Excel workbook into a presentation. It contains several overloads of the [AddChartFromWorkbook](https://reference.aspose.com/slides/net/aspose.slides.import/excelworkbookimporter/addchartfromworkbook/) method, which help you to retrieve the selected chart from the specified Excel workbook and add it to the end of the given shape collection at the specified coordinates.
#### **Import an Excel Table**
The [ExcelWorkbookImporter](https://reference.aspose.com/slides/net/aspose.slides.import/excelworkbookimporter/) class also contains several overloads of the [AddTableFromWorkbook](https://reference.aspose.com/slides/net/aspose.slides.import/excelworkbookimporter/addtablefromworkbook/) method. These methods allow you to import a specified cell range from a specified worksheet and add it as a table to the end of the given shape collection at the specified coordinates.
In short, it's a lightweight and straightforward API for reading Excel data — exactly what many developers need without the overhead of a full spreadsheet processing library.
## **Let's Code**
### **Mail Merge Scenario Example**
In the following example, we'll implement a simple Mail Merge scenario by generating multiple presentations based on data stored in an Excel workbook.
To get started, we need two things:
1. An Excel workbook containing the data

2. PowerPoint presentation template

```csharp
using Aspose.Slides;
using Aspose.Slides.Excel;
using Aspose.Slides.Export;
// Load the Excel workbook with employee data.
ExcelDataWorkbook workbook = new ExcelDataWorkbook("TemplateData.xlsx");
int worksheetIndex = 0;
// Load the presentation template.
using Presentation templatePresentation = new Presentation("PresentationTemplate.pptx");
// Loop through Excel rows (excluding header at row 0).
for (int rowIndex = 1; rowIndex <= 4; rowIndex++)
{
// Create a new presentation for each employee record.
using Presentation employeePresentation = new Presentation();
// Remove the default blank slide.
employeePresentation.Slides.RemoveAt(0);
// Clone the template slide into the new presentation.
ISlide slide = employeePresentation.Slides.AddClone(templatePresentation.Slides[0]);
// Get paragraphs from the target shape (assumes shape index 1 is used).
IParagraphCollection paragraphs = (slide.Shapes[1] as IAutoShape).TextFrame.Paragraphs;
// Replace the placeholders with data from Excel.
string employeeName = workbook.GetCell(worksheetIndex, rowIndex, 0).Value.ToString();
IPortion namePortion = paragraphs[0].Portions[0];
namePortion.Text = namePortion.Text.Replace("{{EmployeeName}}", employeeName);
string department = workbook.GetCell(worksheetIndex, rowIndex, 1).Value.ToString();
IPortion departmentPortion = paragraphs[1].Portions[0];
departmentPortion.Text = departmentPortion.Text.Replace("{{Department}}", department);
string yearsOfService = workbook.GetCell(worksheetIndex, rowIndex, 2).Value.ToString();
IPortion yearsPortion = paragraphs[2].Portions[0];
yearsPortion.Text = yearsPortion.Text.Replace("{{YearsOfService}}", yearsOfService);
// Save the personalized presentation to a separate file.
employeePresentation.Save($"{employeeName} Report.pptx", SaveFormat.Pptx);
}
```

### **Excel Table Example**
In the second example, we simply copy data from an Excel table and display it on a PowerPoint slide in a more visually appealing format.
In this example, we reuse the same Excel workbook from the first example, which contains a simple employee table.
```csharp
using Aspose.Slides;
using Aspose.Slides.Excel;
using Aspose.Slides.Export;
// Load the Excel workbook containing the employee data.
ExcelDataWorkbook workbook = new ExcelDataWorkbook("TemplateData.xlsx");
int worksheetIndex = 0;
// Create a new PowerPoint presentation.
using Presentation presentation = new Presentation();
// Add a table shape to the first slide.
ITable table = presentation.Slides[0].Shapes.AddTable(
50, 200,
new double[] { 200, 200, 200 },
new double[] { 30, 30, 30, 30, 30 }
);
// Fill the PowerPoint table with data from the Excel workbook.
for (int rowIndex = 0; rowIndex < 5; rowIndex++)
{
for (int columnIndex = 0; columnIndex < 3; columnIndex++)
{
string cellValue = workbook.GetCell(worksheetIndex, rowIndex, columnIndex).Value.ToString();
table[columnIndex, rowIndex].TextFrame.Text = cellValue;
}
}
// Save the resulting presentation to a file.
presentation.Save("Table.pptx", SaveFormat.Pptx);
```

### **Import an Excel Chart Example**
In this example, we import a chart from the first worksheet of the Excel workbook used in the previous example. The chart will link to the external workbook in the resulting presentation.
First, we add a Pie chart to the Excel workbook based on the employees table.

```csharp
using Aspose.Slides;
using Aspose.Slides.Export;
using Aspose.Slides.Import;
// Create a new PowerPoint presentation.
using Presentation presentation = new Presentation();
// Get the shapes collection of the first slide.
IShapeCollection shapes = presentation.Slides[0].Shapes;
// Import the chart named "Chart 1" from the first sheet of the workbook and add it to the shapes collection.
ExcelWorkbookImporter.AddChartFromWorkbook(shapes, 10, 10, "TemplateData.xlsx", "Sheet1", "Chart 1", false);
// Save the resulting presentation to a file.
presentation.Save("Chart.pptx", SaveFormat.Pptx);
```

### **Import All Excel Charts Example**
Let's imagine you have an Excel workbook full of charts and you need to import them all into a presentation. Each chart should be placed on a new slide.
The following code iterates through all worksheets in the source Excel file, extracts the charts from each worksheet, and adds each chart to a separate slide using a blank slide layout. In the resulting presentation, only the chart data will be embedded, not the entire workbook.
```csharp
using Aspose.Slides;
using Aspose.Slides.Excel;
using Aspose.Slides.Export;
using Aspose.Slides.Import;
// Load the Excel workbook containing the employee data.
ExcelDataWorkbook workbook = new ExcelDataWorkbook("ExcelWithCharts.xlsx");
// Create a new PowerPoint presentation.
using Presentation presentation = new Presentation();
// Retrieve the blank slide layout.
ILayoutSlide blankLayout = presentation.LayoutSlides.GetByType(SlideLayoutType.Blank);
// Get the names of all worksheets contained in the Excel workbook.
IList worksheetNames = workbook.GetWorksheetNames();
foreach (var name in worksheetNames)
{
// Retrieve a dictionary that maps chart indexes to chart names for the worksheet.
IDictionary worksheetCharts = workbook.GetChartsFromWorksheet(name);
foreach (var chart in worksheetCharts)
{
// Add a new slide using the blank layout.
ISlide slide = presentation.Slides.AddEmptySlide(blankLayout);
// Import the specified chart from the Excel workbook into the slide's shapes collection.
ExcelWorkbookImporter.AddChartFromWorkbook(slide.Shapes, 10, 10, workbook, name, chart.Key, false);
}
}
// Save the resulting presentation to a file.
presentation.Save("Charts.pptx", SaveFormat.Pptx);
```
### **Import an Excel Table Example**
In this example, we import a formatted table from an Excel worksheet directly into a PowerPoint presentation.
The source Excel worksheet contains a formatted table with employee data:

```csharp
using Aspose.Slides;
using Aspose.Slides.Export;
using Aspose.Slides.Import;
// Create a new PowerPoint presentation.
using Presentation presentation = new Presentation();
// Get the shapes collection of the first slide.
IShapeCollection shapes = presentation.Slides[0].Shapes;
// Import the table from the first sheet of the workbook and add it to the shapes collection.
ExcelWorkbookImporter.AddTableFromWorkbook(shapes, 10, 10, "TemplateData.xlsx", "Sheet1", "A1:C5");
// Save the resulting presentation to a file.
presentation.Save("FormattedTable.pptx", SaveFormat.Pptx);
```

## **Summary**
This mechanism, available directly in Aspose.Slides, combines working with Excel data and presentations in one place. It allows you to create slides with visual charts and data presented as Excel tables - without any additional libraries or complex integrations.
# Export Presentation Charts in .NET
> Learn how to export presentation charts with Aspose.Slides for .NET, supporting PPT and PPTX formats, and streamline reporting into any workflow.
Source: https://docs.aspose.com/slides/net/export-chart/
Updated: 2026-08-05
## **Overview**
Aspose.Slides allows you to export a chart from a presentation as an image. This article shows how to get an image from a chart and save it, which is useful when you need to reuse chart visuals outside a PowerPoint presentation.
In addition to the basic image export workflow, the article also addresses common export-related questions, including saving chart content to SVG, controlling output size through rendering options, loading fonts to preserve label and legend appearance, and keeping the original presentation formatting such as themes, styles, fills, and effects during rendering.
## **Get a Chart Image**
Aspose.Slides for .NET provides support for extracting image of specific chart. Below sample example is given.
```c#
using Aspose.Slides;
using Aspose.Slides.Charts;
using (Presentation presentation = new Presentation("test.pptx"))
{
ISlide slide = presentation.Slides[0];
IChart chart = slide.Shapes.AddChart(ChartType.ClusteredColumn, 50, 50, 600, 400);
using (IImage image = chart.GetImage())
{
image.Save("image.png", ImageFormat.Png);
}
}
```
## **FAQ**
### Can I export a chart as a vector (SVG) instead of a raster image?
Yes. A chart is a shape, and its contents can be saved to SVG using the [shape-to-SVG saving method](https://reference.aspose.com/slides/net/aspose.slides/shape/writeassvg/).
### How can I set the exact size of the exported chart in pixels?
Use the image-rendering overloads that let you specify size or scale—the library supports rendering objects with given dimensions/scale.
### What should I do if fonts in labels and the legend look wrong after export?
[Load the required fonts](https://docs.aspose.com/slides/net/custom-font/) via [FontsLoader](https://reference.aspose.com/slides/net/aspose.slides/fontsloader/) so the chart rendering preserves metrics and text appearance.
### Does export honor the PowerPoint theme, styles, and effects?
Yes. Aspose.Slides’ renderer follows the presentation’s formatting (themes, styles, fills, effects), so the chart’s appearance is preserved.
### Where can I find available rendering/export capabilities beyond chart images?
See the export section of the [API](https://reference.aspose.com/slides/net/aspose.slides.export/)/[documentation](https://docs.aspose.com/slides/net/convert-powerpoint/) for output targets ([PDF](https://docs.aspose.com/slides/net/convert-powerpoint-to-pdf/), [SVG](https://docs.aspose.com/slides/net/render-a-slide-as-an-svg-image/), [XPS](https://docs.aspose.com/slides/net/convert-powerpoint-to-xps/), [HTML](https://docs.aspose.com/slides/net/convert-powerpoint-to-html/), etc.) and related rendering options.
# Export media files into HTML file
>
Source: https://docs.aspose.com/slides/net/export-media-files-into-html-file/
Updated: 2026-01-19
In order to export media files to HTML. Please follow the steps below:
- Create an instance of Presentation class
- Get reference of the slide
- Setting the transition effect
- Write the presentation as a PPTX file
In the example given below, we have exported the media files to HTML.
## **Example**
```
//Loading a presentation
using (Presentation pres = new Presentation("example.pptx"))
{
const string path = "path";
const string fileName = "video.html";
const string baseUri = "http://www.example.com/";
VideoPlayerHtmlController controller = new VideoPlayerHtmlController(path: path, fileName: fileName, baseUri: baseUri);
//Setting HTML options
HtmlOptions htmlOptions = new HtmlOptions(controller);
SVGOptions svgOptions = new SVGOptions(controller);
htmlOptions.HtmlFormatter = HtmlFormatter.CreateCustomFormatter(controller);
htmlOptions.SlideImageFormat = SlideImageFormat.Svg(svgOptions);
//Saving the file
pres.Save(path + fileName, SaveFormat.Html, htmlOptions);
}
```
## **Download Running Example**
- [Github](https://github.com/aspose-slides/Aspose.Slides-for-.NET/tree/master/Plugins/Aspose.Slides%20Vs%20VSTO%20Presentations/Aspose.Slides%20Features%20missing%20in%20VSTO/Export%20media%20files%20into%20html)
## **Download Sample Code**
- [GitHub](https://github.com/aspose-slides/Aspose.Slides-for-.NET/releases/tag/Aspose.SlidesFeaturesmissingInVSTOv1.1)
## Related articles
- [Export Media files to HTML file](https://docs.aspose.com/slides/net/export-media-files-to-html-file/)
- [Convert Presentation to HTML](https://docs.aspose.com/slides/net/convert-presentation-to-html/)
- [Adding Shapes to Presentation](https://docs.aspose.com/slides/net/adding-shapes-to-presentation/)
# Export Media files to HTML file
>
Source: https://docs.aspose.com/slides/net/export-media-files-to-html-file/
Updated: 2026-08-13
In order to export media files to HTML. Please follow the steps below:
- Create an instance of Presentation class
- Get reference of the slide
- Setting the transition effect
- Write the presentation as a PPTX file
In the example given below, we have exported the media files to HTML.
## **Example**
``` csharp
using Aspose.Slides;
using Aspose.Slides.Export;
string FilePath = @"..\..\..\Sample Files\";
string srcFileName = FilePath + "Conversion.pptx";
string destFileName = "video.html";
//Loading a presentation
using (Presentation pres = new Presentation(srcFileName))
{
const string baseUri = "http://www.example.com/";
VideoPlayerHtmlController controller = new VideoPlayerHtmlController(path: FilePath, fileName: destFileName, baseUri: baseUri);
//Setting HTML options
HtmlOptions htmlOptions = new HtmlOptions(controller);
SVGOptions svgOptions = new SVGOptions(controller);
htmlOptions.HtmlFormatter = HtmlFormatter.CreateCustomFormatter(controller);
htmlOptions.SlideImageFormat = SlideImageFormat.Svg(svgOptions);
//Saving the file
pres.Save(destFileName, SaveFormat.Html, htmlOptions);
}
```
## **Download Sample Code**
- [Github](https://github.com/aspose-slides/Aspose.Slides-for-.NET/releases/tag/MissingFeaturesAsposeSlidesForOpenXMLv1.1)
## **Download Running Example**
- [Github](https://github.com/aspose-slides/Aspose.Slides-for-.NET/tree/master/Plugins/OpenXML/Missing%20Features/Export%20media%20files%20into%20html)
For more details, visit [Exporting media files into html file](https://docs.aspose.com/slides/net/cloning-commenting-and-manipulating-slides/#extracting-video-from-a-slide).
## Related articles
- [Export media files into HTML file](https://docs.aspose.com/slides/net/export-media-files-into-html-file/)
- [Convert Presentation to HTML](https://docs.aspose.com/slides/net/convert-presentation-to-html/)
- [Add Layout Slides to Presentation](https://docs.aspose.com/slides/net/add-layout-slides-to-presentation/)
# Convert Presentations to HTML5 in .NET
> Export PowerPoint & OpenDocument presentations to responsive HTML5 with Aspose.Slides for .NET. Preserve formatting, animations, and interactivity.
Source: https://docs.aspose.com/slides/net/export-to-html5/
Updated: 2026-10-05
## **Overview**
This article explains how to convert PowerPoint presentations to HTML5 using Aspose.Slides for .NET. It covers basic export, control of shape animations and slide transitions, and comment layout. It also compares HTML5 output with the SVG-based output of standard HTML export.
## **Export PowerPoint to HTML5**
The following example loads a presentation from the working directory and saves it in HTML5 format. It uses the default export settings; the next example shows how to control animation playback explicitly. Replace the input path with the path to your presentation.
```cs
using Aspose.Slides;
using Aspose.Slides.Export;
using var presentation = new Presentation("pres.pptx");
presentation.Save("pres.html", SaveFormat.Html5);
```
Besides the HTML document, the export writes supporting CSS and JavaScript files for slide styling, animations, effects, and navigation. Keep these files with the HTML document when moving or publishing the output. The generated page also loads jQuery and Anime.js from public CDNs; without them, slide navigation and animations do not run.
To export without playing shape animations or slide transitions, set [AnimateShapes](https://reference.aspose.com/slides/net/aspose.slides.export/html5options/animateshapes/) and [AnimateTransitions](https://reference.aspose.com/slides/net/aspose.slides.export/html5options/animatetransitions/) to `false` in [Html5Options](https://reference.aspose.com/slides/net/aspose.slides.export/html5options/). These settings are independent, so you can enable one while disabling the other. The example exports the presentation with both types of animation disabled in the generated page.
```cs
using Aspose.Slides;
using Aspose.Slides.Export;
var html5Options = new Html5Options
{
AnimateShapes = false,
AnimateTransitions = false
};
using var presentation = new Presentation("pres.pptx");
presentation.Save("pres5.html", SaveFormat.Html5, html5Options);
```
## **Export PowerPoint to HTML**
The standard HTML export uses a different rendering approach: slide content is represented by SVG inside an HTML page. The following example converts a presentation to an HTML document using this rendering approach.
```cs
using Aspose.Slides;
using Aspose.Slides.Export;
using var presentation = new Presentation("pres.pptx");
presentation.Save("pres.html", SaveFormat.Html);
```
The simplified markup below illustrates the structure of the generated page. The SVG element contains the rendered slide content; the placeholder text represents that content and is not literal export output.
```html
THE SLIDE CONTENT GOES HERE
```
The SVG-based export does not expose PowerPoint shapes as individual HTML elements. Use HTML5 export when you need the shape-animation and slide-transition options demonstrated in this article.
## **Export PowerPoint to HTML5 Slide View**
HTML5 export produces a page for viewing and navigating the presentation slides in a browser. This example enables both [AnimateShapes](https://reference.aspose.com/slides/net/aspose.slides.export/html5options/animateshapes/) and [AnimateTransitions](https://reference.aspose.com/slides/net/aspose.slides.export/html5options/animatetransitions/) so that the exported slide view can play effects from the source presentation.
Use a presentation that already contains shape animations and slide transitions to see the effect of these settings. Enabling them does not add new effects to slides that have none. After export, open the generated HTML5 document in a browser with its supporting files available.
```cs
using Aspose.Slides;
using Aspose.Slides.Export;
var html5Options = new Html5Options
{
AnimateShapes = true,
AnimateTransitions = true
};
using var presentation = new Presentation("pres.pptx");
presentation.Save("HTML5-slide-view.html", SaveFormat.Html5, html5Options);
```
## **Convert a Presentation to an HTML5 Document with Comments**
You can include existing slide comments in HTML5 output so that readers can see feedback alongside the slide content. The example in this section expects the source presentation to contain comments, as illustrated below. It exports those comments; it does not create new ones.
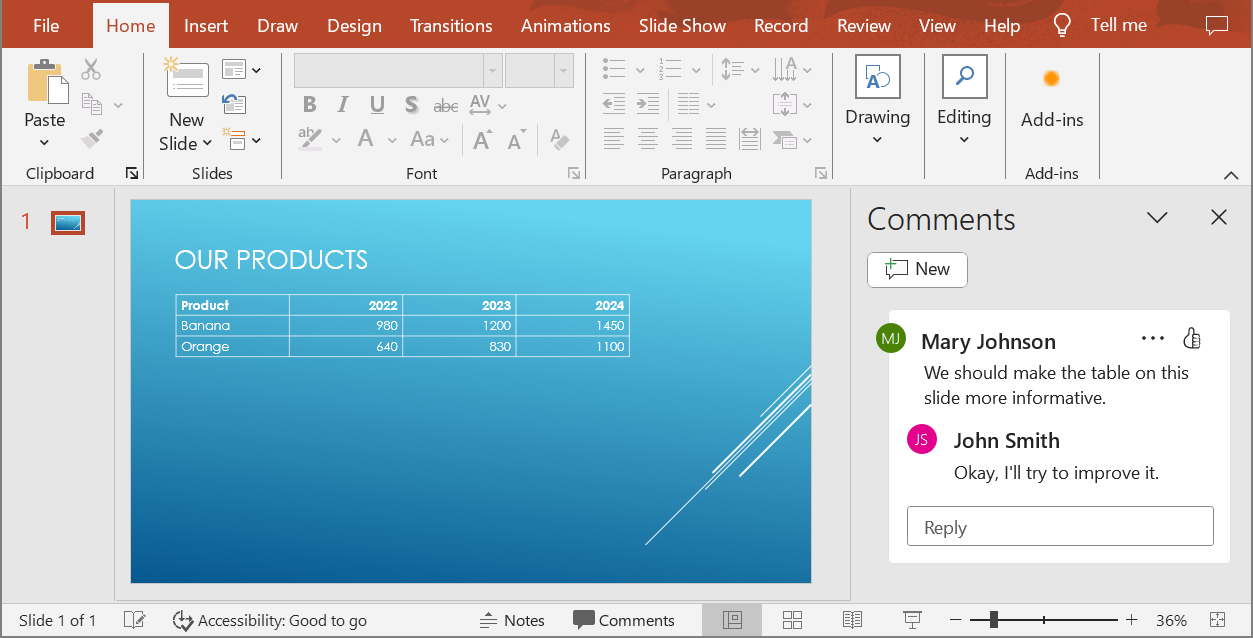
Assign a [NotesCommentsLayoutingOptions](https://reference.aspose.com/slides/net/aspose.slides.export/notescommentslayoutingoptions/) object to the [SlidesLayoutOptions](https://reference.aspose.com/slides/net/aspose.slides.export/html5options/slideslayoutoptions/) property of [Html5Options](https://reference.aspose.com/slides/net/aspose.slides.export/html5options/). Set [CommentsPosition](https://reference.aspose.com/slides/net/aspose.slides.export/notescommentslayoutingoptions/commentsposition/) to `Right` from the [CommentsPositions](https://reference.aspose.com/slides/net/aspose.slides.export/commentspositions/) enumeration to place the comments to the right of each slide.
The following example exports the presentation to HTML5 with this comment layout. A presentation without comments will have no comment text to display.
```cs
using Aspose.Slides;
using Aspose.Slides.Export;
var layoutOptions = new NotesCommentsLayoutingOptions
{
CommentsPosition = CommentsPositions.Right
};
var html5Options = new Html5Options
{
SlidesLayoutOptions = layoutOptions
};
using var presentation = new Presentation("sample.pptx");
presentation.Save("output.html", SaveFormat.Html5, html5Options);
```
The image below shows the exported HTML5 document with the comments displayed beside the slide.
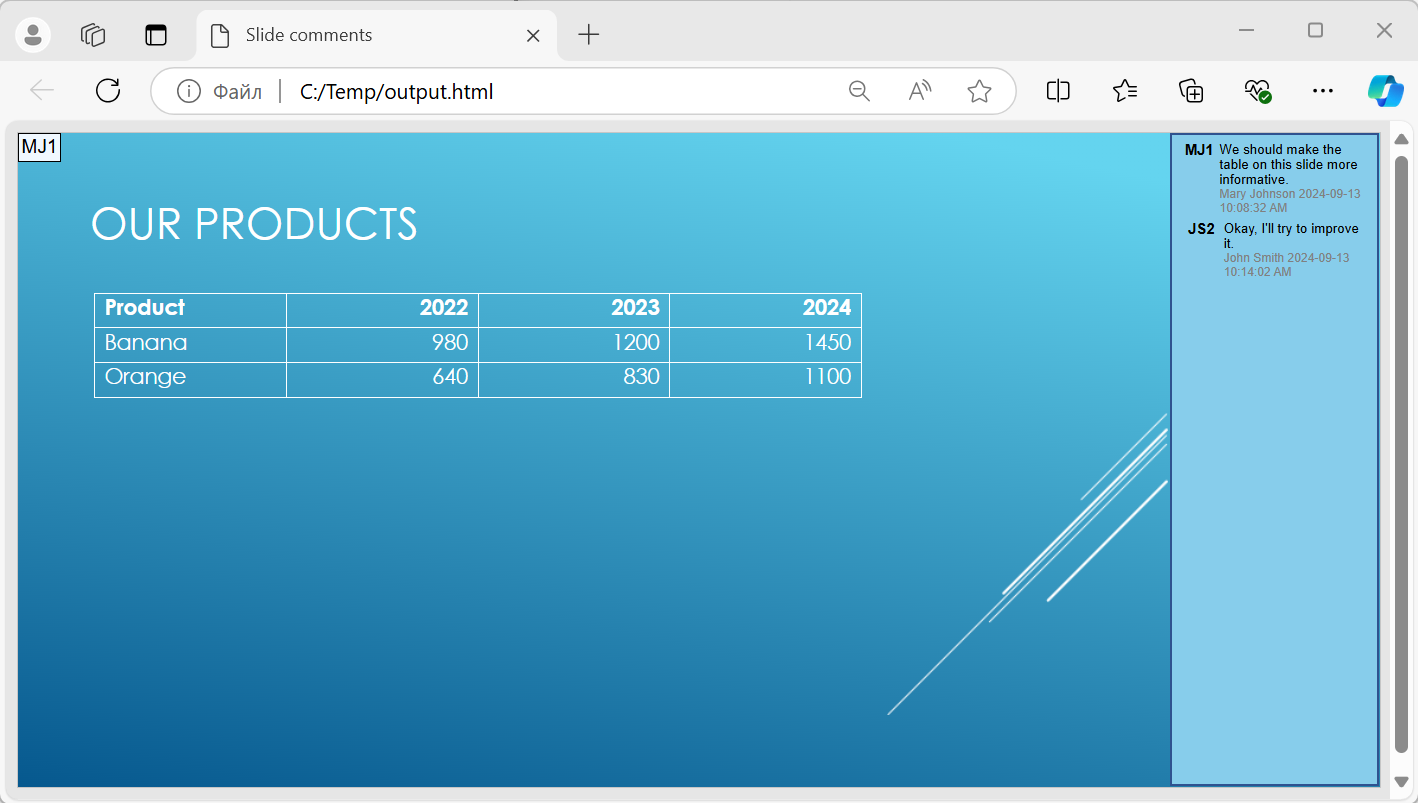
## **Exclude JavaScript Hyperlinks During Export**
Suppose `hyperlinks.pptx` contains linked text with a `javascript:alert('Hello')` target and an ordinary `https://example.com/` link. To exclude the JavaScript hyperlink during export, set [SaveOptions.SkipJavaScriptLinks](https://reference.aspose.com/slides/net/aspose.slides.export/saveoptions/skipjavascriptlinks/) to `true`. The default is `false`, so these links are not filtered unless you enable the option.
The following example loads the presentation from the working directory and exports it using [Html5Options](https://reference.aspose.com/slides/net/aspose.slides.export/html5options/):
```cs
using Aspose.Slides;
using Aspose.Slides.Export;
var html5Options = new Html5Options { SkipJavaScriptLinks = true };
using var presentation = new Presentation("hyperlinks.pptx");
presentation.Save("filtered-html5.html", SaveFormat.Html5, html5Options);
```
The exported file omits the JavaScript hyperlink while retaining its text and the ordinary HTTPS link. The source presentation is unchanged.
This option filters JavaScript hyperlinks; it does not remove all scripts or other active content, nor does it guarantee CSP compliance. For example, HTML5 output still includes scripts for slide navigation and animations.
## **FAQ**
**Can I control whether object animations and slide transitions will play in HTML5?**
Yes, HTML5 export provides separate options to enable or disable [shape animations](https://reference.aspose.com/slides/net/aspose.slides.export/html5options/animateshapes/) and [slide transitions](https://reference.aspose.com/slides/net/aspose.slides.export/html5options/animatetransitions/).
**Are comments supported, and where can they be placed relative to the slide?**
Yes, existing comments can be included in HTML5 output and positioned (for example, to the right of the slide) through [layout settings](https://reference.aspose.com/slides/net/aspose.slides.export/html5options/slideslayoutoptions/) for notes and comments.
**Can I skip links that invoke JavaScript for security or CSP reasons?**
Yes, the [SkipJavaScriptLinks](https://reference.aspose.com/slides/net/aspose.slides.export/saveoptions/skipjavascriptlinks/) setting allows you to skip hyperlinks with JavaScript calls during saving. The default is `false`. See [Exclude JavaScript Hyperlinks During Export](https://docs.aspose.com/slides/net/export-to-html5/#exclude-javascript-hyperlinks-during-export) for a simple HTML, HTML5, and PDF export example and the scope of the filter. This setting does not remove the JavaScript used by the HTML5 viewer for navigation and animations.
## Related features
- [Export presentations to HTML5](https://docs.aspose.com/slides/features/html5-export/)
- [Save HTML styles in separate CSS files](https://docs.aspose.com/slides/features/separate-css/)
# Export Presentations to XAML in .NET
> Convert PowerPoint and OpenDocument slides to XAML in .NET using Aspose.Slides—quick, Office-free solution that keeps your layout intact.
Source: https://docs.aspose.com/slides/net/export-to-xaml/
Updated: 2026-09-16
## **Overview**
This article explains how to export PowerPoint presentations to XAML using Aspose.Slides. It includes a brief introduction to XAML, shows how to save a presentation to XAML with default settings, and demonstrates how to customize the export through [XamlOptions](https://reference.aspose.com/slides/net/aspose.slides.export.xaml/xamloptions/), including exporting hidden slides. The article also answers a few common questions related to fallback fonts, XAML stack compatibility, and hidden slide export behavior.
## **About XAML**
XAML is an XML-based markup language used to describe user interfaces in frameworks such as WPF (Windows Presentation Foundation), UWP (Universal Windows Platform), and Xamarin.Forms.
You can work with XAML files in a visual designer or write and edit the markup directly.
## **Export Presentations to XAML With Default Options**
The following C# example shows how to export a presentation to XAML with default settings:
```csharp
using Aspose.Slides;
using Aspose.Slides.Export.Xaml;
using var presentation = new Presentation("pres.pptx");
var xamlOptions = new XamlOptions();
presentation.Save(xamlOptions);
```
By default, the exported slides are saved in a `pres` subfolder of the process's current working directory, as returned by [Directory.GetCurrentDirectory](https://learn.microsoft.com/en-us/dotnet/api/system.io.directory.getcurrentdirectory). The folder is created automatically, and any required images are saved there as well.
The output folder name is taken from the source file name without its extension. For `pres.pptx`, the output files are named `pres/Slide_1.xaml`, `pres/Slide_2.xaml`, and so on. Even if you pass an absolute path to the input presentation, the output folder is created relative to the current working directory, rather than alongside the input file.
## **Export Presentations to XAML With Custom Options**
Use the [IXamlOptions](https://reference.aspose.com/slides/net/aspose.slides.export.xaml/ixamloptions/) interface to control how Aspose.Slides exports a presentation to XAML.
To save the output to a custom location, implement [IXamlOutputSaver](https://reference.aspose.com/slides/net/aspose.slides.export.xaml/ixamloutputsaver/) and assign an instance of your implementation to the [OutputSaver](https://reference.aspose.com/slides/net/aspose.slides.export.xaml/xamloptions/outputsaver/) property of [XamlOptions](https://reference.aspose.com/slides/net/aspose.slides.export.xaml/xamloptions/).
To include hidden slides in the XAML output, set the [ExportHiddenSlides](https://reference.aspose.com/slides/net/aspose.slides.export.xaml/xamloptions/exporthiddenslides/) property to `true`, as shown in the following C# example:
```csharp
using Aspose.Slides;
using Aspose.Slides.Export.Xaml;
using var presentation = new Presentation("pres.pptx");
var xamlOptions = new XamlOptions { ExportHiddenSlides = true };
presentation.Save(xamlOptions);
```
## **Capture All Generated XAML Artifacts**
A XAML export can produce a XAML document for each exported slide plus separate images and supporting resources. Assign a custom [IXamlOutputSaver](https://reference.aspose.com/slides/net/aspose.slides.export.xaml/ixamloutputsaver/) to [XamlOptions.OutputSaver](https://reference.aspose.com/slides/net/aspose.slides.export.xaml/xamloptions/outputsaver/) to receive these artifacts instead of using the default file-system saver. Start the export with the XAML-specific [Presentation.Save](https://reference.aspose.com/slides/net/aspose.slides/presentation/save/) overload that accepts XAML options.
### **Understand the Callback Lifecycle**
The exporter calls [IXamlOutputSaver.Save](https://reference.aspose.com/slides/net/aspose.slides.export.xaml/ixamloutputsaver/save/) separately for each generated artifact:
- `path` identifies the artifact and may include relative directories. Retain this information because XAML may reference resources using relative paths.
- `data` contains the artifact's bytes. Images and other binary resources must not be decoded as text.
- The saver is responsible for retaining or persisting the data before returning. The examples copy each byte array into application-owned memory.
- Treat export as successful only when the presentation save operation returns and every callback has completed successfully. Do not swallow storage errors or start unobserved background writes. If persistence happens afterward, report overall success only after that step also succeeds.
[XamlOptions.ExportHiddenSlides](https://reference.aspose.com/slides/net/aspose.slides.export.xaml/xamloptions/exporthiddenslides/) also applies to a custom saver. Its default value, `false`, excludes hidden-slide XAML documents. Setting it to `true` includes them and any resources required for their export. Resource counts depend on the presentation; do not assume one callback per slide or a fixed callback order.
### **Export to Memory and Inspect the Artifacts**
This complete example loads `pres.pptx`, collects every artifact in a [Dictionary](https://learn.microsoft.com/en-us/dotnet/api/system.collections.generic.dictionary-2), and prints its name, type, and byte count. It preserves the supplied names exactly. Duplicate names cause collection to fail instead of silently overwriting an artifact.
```csharp
using System;
using System.Collections.Generic;
using System.IO;
using System.Text;
using Aspose.Slides;
using Aspose.Slides.Export.Xaml;
public static class InMemoryXamlExample
{
public static void Run()
{
var saver = new MemoryXamlSaver();
using var presentation = new Presentation("pres.pptx");
var options = new XamlOptions { OutputSaver = saver, ExportHiddenSlides = true };
presentation.Save(options);
bool inspectXamlText = false;
foreach (var artifact in saver.Artifacts)
{
var extension = Path.GetExtension(artifact.Key).ToLowerInvariant();
bool isXaml = extension == ".xaml";
bool isImage = extension is ".png" or ".jpg" or ".jpeg" or ".gif" or ".bmp" or ".tif" or ".tiff" or ".svg";
var kind = isXaml ? "slide XAML" : isImage ? "image" : "supporting resource";
Console.WriteLine($"{artifact.Key}: {artifact.Value.Length} bytes ({kind})");
// Decode only XAML, and only when textual inspection is needed.
if (isXaml && inspectXamlText)
{
var markup = Encoding.UTF8.GetString(artifact.Value);
Console.WriteLine(markup);
}
}
}
private sealed class MemoryXamlSaver : IXamlOutputSaver
{
public Dictionary Artifacts { get; } = new Dictionary(StringComparer.Ordinal);
public void Save(string path, byte[] data)
{
var retainedData = (byte[])data.Clone();
Artifacts.Add(path, retainedData);
}
}
}
```
Call `InMemoryXamlExample.Run` from your application. Extension checks are useful for inspection; retain all artifacts, including unfamiliar resource types. Leave the bytes unchanged when storing or transmitting them. Use [Encoding.UTF8.GetString](https://learn.microsoft.com/en-us/dotnet/api/system.text.encoding.getstring) only for XAML that needs textual processing.
### **Package Collected Artifacts in a ZIP Archive**
This independent example collects the export, validates its names, and writes the original bytes into a ZIP archive. A unique archive name separates concurrent export jobs. ZIP entries use forward slashes and retain relative directories. Unsafe names or names that collide after normalization reject the entire package before it is written.
```csharp
using System;
using System.Collections.Generic;
using System.IO;
using System.IO.Compression;
using Aspose.Slides;
using Aspose.Slides.Export.Xaml;
public static class ZipXamlExample
{
public static void Run()
{
var saver = new CollectedXamlSaver();
using var presentation = new Presentation("pres.pptx");
var options = new XamlOptions { OutputSaver = saver, ExportHiddenSlides = false };
presentation.Save(options);
var entries = new Dictionary(StringComparer.OrdinalIgnoreCase);
foreach (var artifact in saver.Artifacts)
{
var entryName = artifact.Key.Replace('\\', '/');
var segments = entryName.Split('/');
bool unsafeName = entryName.StartsWith("/", StringComparison.Ordinal) || entryName.Contains(':');
foreach (var segment in segments)
{
unsafeName |= string.IsNullOrWhiteSpace(segment) || segment == "." || segment == "..";
}
if (unsafeName || !entries.TryAdd(entryName, artifact.Value))
{
Console.WriteLine($"Export rejected: unsafe or duplicate artifact name: {artifact.Key}");
return;
}
}
var archivePath = $"xaml-{Guid.NewGuid():N}.zip";
using (var output = new FileStream(archivePath, FileMode.CreateNew, FileAccess.Write))
using (var archive = new ZipArchive(output, ZipArchiveMode.Create))
{
foreach (var artifact in entries)
{
var entry = archive.CreateEntry(artifact.Key, CompressionLevel.Optimal);
using var entryStream = entry.Open();
entryStream.Write(artifact.Value, 0, artifact.Value.Length);
}
}
// The ZIP directory has been finalized by disposal before reporting success.
Console.WriteLine($"Saved {entries.Count} artifacts to {archivePath}");
}
private sealed class CollectedXamlSaver : IXamlOutputSaver
{
public Dictionary Artifacts { get; } = new Dictionary(StringComparer.Ordinal);
public void Save(string path, byte[] data)
{
var retainedData = (byte[])data.Clone();
Artifacts.Add(path, retainedData);
}
}
}
```
Call `ZipXamlExample.Run` from your application. The example uses [ZipArchive](https://learn.microsoft.com/en-us/dotnet/api/system.io.compression.ziparchive) to write one local archive; the exporter itself does not write loose XAML or image files. For remote storage, replace the archive-writing stage with uploads of the collected byte arrays. Use an export-job identifier plus the full relative artifact name as a blob key, or store the job identifier, relative name, and binary data in a database row. Publish the job only after all uploads complete or the database transaction commits. Clean up partial output if persistence fails.
For large presentations, a custom saver can persist each artifact directly to application storage to avoid keeping an additional copy of the entire export in application memory. The exporter still collects all generated artifacts in memory before calling the saver. Keep each callback synchronous from the exporter's perspective: return only after the destination has accepted the bytes, and allow failures to reach the caller.
### **Preserve Resource Names and Verify References**
- Normalize path separators when the destination requires it, but preserve relative directories. Do not use only [Path.GetFileName](https://learn.microsoft.com/en-us/dotnet/api/system.io.path.getfilename) unless every generated name is known to be unique and resource references remain valid.
- Apply destination-specific name validation. When writing loose files, reject rooted paths and traversal segments, resolve the destination with [Path.GetFullPath](https://learn.microsoft.com/en-us/dotnet/api/system.io.path.getfullpath), and verify it stays beneath the intended export directory, including the directory separator in the containment check. Use an application-controlled directory without symbolic links that could redirect writes.
- Use a separate saver and storage namespace for each export job. Detect collisions after separator normalization and according to the destination's case-sensitivity rules.
- Before publishing, parse each XAML document as XML and inspect its file-based resource references, such as image `Source` or `ImageSource` attributes. Resolve each relative URI against the containing XAML artifact's directory, normalize the resulting storage name, and confirm that the corresponding dictionary key, ZIP entry, or stored object exists. Treat external URIs and XAML markup expressions separately from relative file names.
For example, if `pres/Slide_1.xaml` references `images/image1.png`, the stored resource must be available as `pres/images/image1.png`. Keeping just `image1.png` would break that relationship. For object storage, preserve the same layout beneath the job prefix and make those resource URLs accessible to the XAML consumer. Reopen the completed ZIP to verify entry names and resource bytes, and load representative slides in the target XAML environment to confirm that images resolve correctly.
## **FAQ**
**How can I ensure predictable fonts if the original font is not available on the machine?**
Set [DefaultRegularFont](https://reference.aspose.com/slides/net/aspose.slides.export/saveoptions/defaultregularfont/) in [XamlOptions](https://reference.aspose.com/slides/net/aspose.slides.export.xaml/xamloptions/) — it is used as a fallback font during export when the original is missing. This does not guarantee that the generated XAML references the fallback font or that the font is available on the target machine. Ensure that the fonts referenced by the XAML are available in the environment where it is displayed.
**Is the exported XAML intended only for WPF, or can it be used in other XAML stacks as well?**
Aspose.Slides exports WPF XAML through its public API. Compatibility with other XAML stacks, such as UWP and Xamarin.Forms, is not guaranteed. Test the generated markup in your target environment.
**Are hidden slides supported, and how can I prevent them from being exported by default?**
By default, hidden slides are not included. You can control this behavior via [ExportHiddenSlides](https://reference.aspose.com/slides/net/aspose.slides.export.xaml/xamloptions/exporthiddenslides/) in [XamlOptions](https://reference.aspose.com/slides/net/aspose.slides.export.xaml/xamloptions/) — keep it disabled if you do not need to export them.
# Export Math Equations from Presentations in .NET
> Export math equations from PowerPoint presentations to LaTeX or MathML directly with Aspose.Slides for .NET.
Source: https://docs.aspose.com/slides/net/exporting-math-equations/
Updated: 2026-08-13
## **Introduction**
Aspose.Slides for .NET allows you to export math equations from presentations. For example, you may need to extract the mathematical equations on slides (from a specific presentation) and use them in another program or platform.
You can export equations directly to LaTeX or to MathML, a popular standard for mathematical content used on the web and in many applications.
## **Export Math Equations to LaTeX**
Aspose.Slides can convert a PowerPoint math equation directly to LaTeX; an intermediate MathML file and an external converter are not required. A math equation is stored in a text frame as a [MathPortion](https://reference.aspose.com/slides/net/aspose.slides.mathtext/mathportion/). Use [MathPortion.MathParagraph](https://reference.aspose.com/slides/net/aspose.slides.mathtext/mathportion/mathparagraph/) to get an [IMathParagraph](https://reference.aspose.com/slides/net/aspose.slides.mathtext/imathparagraph/), and then call [IMathParagraph.ToLatex](https://reference.aspose.com/slides/net/aspose.slides.mathtext/imathparagraph/tolatex/). The method returns a string that you can save, display, send to another application, or process further.
The following example examines every text frame on every slide, finds all math portions, and writes each equation to a separate `.tex` file:
```csharp
using Aspose.Slides;
using Aspose.Slides.MathText;
using Aspose.Slides.Util;
using var presentation = new Presentation("equations.pptx");
for (var slideIndex = 0; slideIndex < presentation.Slides.Count; slideIndex++)
{
var slide = presentation.Slides[slideIndex];
var slideNumber = slideIndex + 1;
var equationNumber = 1;
var textFrames = SlideUtil.GetAllTextBoxes(slide);
foreach (var textFrame in textFrames)
{
foreach (var paragraph in textFrame.Paragraphs)
{
foreach (var portion in paragraph.Portions)
{
if (portion is not MathPortion mathPortion)
continue;
IMathParagraph mathParagraph = mathPortion.MathParagraph;
var latexPath = $"slide_{slideNumber}_equation_{equationNumber}.tex";
var latexText = mathParagraph.ToLatex();
File.WriteAllText(latexPath, latexText);
equationNumber++;
}
}
}
}
```
[SlideUtil.GetAllTextBoxes](https://reference.aspose.com/slides/net/aspose.slides.util/slideutil/getalltextboxes/) returns all text frames found on a slide. The [MathPortion](https://reference.aspose.com/slides/net/aspose.slides.mathtext/mathportion/) type check separates genuine editable equations from ordinary text and images.
LaTeX engines and document templates do not all support the same commands, packages, or Unicode characters. Test the returned string with the LaTeX engine used by your application. If a symbol or Office Math element has no suitable representation in that environment, replace it in the returned string with a project-specific command or skip the equation and record the issue for review.
## **Save Math Equations as MathML**
While humans easily write the code for some equation formats like LaTeX, they struggle to write the code for MathML because the latter is meant to be generated automatically by apps. Programs read and parse MathML easily because its code is in XML, so MathML is commonly used as an output and printing format in many fields.
This sample code shows you how to export a math equation from a presentation to MathML:
```c#
using Aspose.Slides;
using Aspose.Slides.MathText;
using (Presentation pres = new Presentation())
{
var autoShape = pres.Slides[0].Shapes.AddMathShape(0, 0, 500, 50);
var mathParagraph = ((MathPortion)autoShape.TextFrame.Paragraphs[0].Portions[0]).MathParagraph;
mathParagraph.Add(new MathematicalText("a").SetSuperscript("2").Join("+").Join(new MathematicalText("b").SetSuperscript("2")).Join("=").Join(new MathematicalText("c").SetSuperscript("2")));
using (Stream stream = new FileStream("mathml.xml", FileMode.Create))
mathParagraph.WriteAsMathMl(stream);
}
```
## **FAQ**
**What exactly is exported to MathML—a paragraph or an individual formula block?**
You can export either an entire math paragraph ([MathParagraph](https://reference.aspose.com/slides/net/aspose.slides.mathtext/mathparagraph/)) or an individual block ([MathBlock](https://reference.aspose.com/slides/net/aspose.slides.mathtext/mathblock/)) to MathML. Both types provide a method to write to MathML.
**How can I tell that an object on a slide is a math formula rather than regular text or an image?**
A formula lives in a [MathPortion](https://reference.aspose.com/slides/net/aspose.slides.mathtext/mathportion/) and has a [MathParagraph](https://reference.aspose.com/slides/net/aspose.slides.mathtext/mathparagraph/). Images and regular text portions without a [MathParagraph](https://reference.aspose.com/slides/net/aspose.slides.mathtext/mathparagraph/) are not exportable formulas.
**Where does the MathML come from in a presentation—is it PowerPoint-specific or a standard?**
The export targets standard MathML (XML). Aspose uses Presentation MathML—the presentation subset of the standard—which is widely used across applications and the web.
**Is exporting formulas inside tables, SmartArt, groups, etc., supported?**
Yes, if those objects contain text portions with a [MathParagraph](https://reference.aspose.com/slides/net/aspose.slides.mathtext/mathparagraph/) (i.e., genuine PowerPoint formulas), they are exported. If a formula is embedded as an image, it is not.
**Does exporting to MathML modify the original presentation?**
No. Writing MathML is a serialization of the formula’s content; it does not modify the presentation file.
## Related articles
- [Add Math Equations to PowerPoint Presentations in .NET](https://docs.aspose.com/slides/net/powerpoint-math-equations/)
# Export Presentations to HTML with Externally Linked Images
> Export PowerPoint and OpenDocument presentations to HTML in .NET using Aspose.Slides with images and other resources saved as external linked files.
Source: https://docs.aspose.com/slides/net/exporting-presentations-to-html-with-externally-linked-images/
Updated: 2026-08-02
## **Overview**
By default, Aspose.Slides exports a presentation to a self-contained HTML file. Images and other resources are written directly into the HTML, usually as Base64 data. This is convenient when you need one portable file, but it is not always the best format for a website, a CMS, or a server-side conversion pipeline.
Use externally linked resources when you want to:
- reduce the size of the HTML document;
- cache images, fonts, audio, or video separately in a browser or CDN;
- inspect, replace, compress, or post-process generated resources after export;
- keep the output structure closer to what a web application expects.
For the general HTML conversion workflow, see [Convert PowerPoint Presentations to HTML](https://docs.aspose.com/slides/net/convert-powerpoint-to-html/). This article focuses on the resource-linking part of the export.
## **How Linked Resource Export Works**
[ILinkEmbedController](https://reference.aspose.com/slides/net/aspose.slides.export/ilinkembedcontroller/) lets your application decide, resource by resource, whether the exporter embeds the data in the HTML or saves it externally and writes a link.
The interface has three methods:
- [ILinkEmbedController.GetObjectStoringLocation](https://reference.aspose.com/slides/net/aspose.slides.export/ilinkembedcontroller/getobjectstoringlocation/) decides whether a resource should be linked or embedded.
- [ILinkEmbedController.GetUrl](https://reference.aspose.com/slides/net/aspose.slides.export/ilinkembedcontroller/geturl/) returns the URL that will be written to the generated HTML or to another linked resource.
- [ILinkEmbedController.SaveExternal](https://reference.aspose.com/slides/net/aspose.slides.export/ilinkembedcontroller/saveexternal/) writes the linked resource data to disk or to another storage target.
The file system path and the browser URL are separate concerns. For example, the sample below writes resource files to `html-output/assets` on disk, while the HTML contains relative URLs such as `assets/resource-1.svg`. A browser resolves those URLs relative to the file that contains the link. Therefore, a link from `presentation.html` to an SVG file uses `assets/resource-1.svg`, while a link from that SVG file to an image saved in the same `assets` folder uses `resource-4.jpg`.
## **Export HTML with Linked Resources**
The following C# example creates an output directory, saves the HTML file there, and stores linked resources in an `assets` subdirectory. The controller links common image, font, audio, video, and CSS resources when Aspose.Slides provides or can infer a safe file extension. Resources that are not recognized remain embedded.
```csharp
using Aspose.Slides;
using Aspose.Slides.Export;
using System;
using System.Collections.Generic;
using System.IO;
var inputFilePath = "presentation.pptx";
var outputDirectory = "html-output";
var assetDirectoryName = "assets";
var assetDirectory = Path.Combine(outputDirectory, assetDirectoryName);
Directory.CreateDirectory(outputDirectory);
Directory.CreateDirectory(assetDirectory);
var assetUrlPrefix = assetDirectoryName + "/";
var controller = new ExternalResourceController(assetDirectory, assetUrlPrefix);
var svgOptions = new SVGOptions(controller);
var slideImageFormat = SlideImageFormat.Svg(svgOptions);
var htmlOptions = new HtmlOptions(controller)
{
HtmlFormatter = HtmlFormatter.CreateDocumentFormatter(string.Empty, false),
SlideImageFormat = slideImageFormat
};
using var presentation = new Presentation(inputFilePath);
var htmlFilePath = Path.Combine(outputDirectory, "presentation.html");
presentation.Save(htmlFilePath, SaveFormat.Html, htmlOptions);
public sealed class ExternalResourceController : ILinkEmbedController
{
private static readonly Dictionary ExtensionsByContentType = new(StringComparer.OrdinalIgnoreCase)
{
["image/jpeg"] = ".jpg",
["image/png"] = ".png",
["image/gif"] = ".gif",
["image/bmp"] = ".bmp",
["image/svg+xml"] = ".svg",
["image/tiff"] = ".tiff",
["image/x-emf"] = ".emf",
["image/x-wmf"] = ".wmf",
["font/woff"] = ".woff",
["font/woff2"] = ".woff2",
["font/ttf"] = ".ttf",
["application/font-woff"] = ".woff",
["application/vnd.ms-fontobject"] = ".eot",
["application/x-font-ttf"] = ".ttf",
["text/css"] = ".css",
["audio/mpeg"] = ".mp3",
["audio/mp4"] = ".m4a",
["audio/wav"] = ".wav",
["video/mp4"] = ".mp4",
["video/webm"] = ".webm"
};
private readonly string assetDirectory;
private readonly string assetUrlPrefix;
private readonly Dictionary fileNamesByResourceId = new();
public ExternalResourceController(string assetDirectory, string assetUrlPrefix)
{
if (string.IsNullOrWhiteSpace(assetDirectory))
{
throw new ArgumentException("The asset output directory must not be empty.", nameof(assetDirectory));
}
this.assetDirectory = assetDirectory;
this.assetUrlPrefix = NormalizeUrlPrefix(assetUrlPrefix);
}
public LinkEmbedDecision GetObjectStoringLocation(
int resourceId,
byte[] entityData,
string semanticName,
string contentType,
string recommendedExtension)
{
var extension = ResolveExtension(contentType, recommendedExtension);
if (extension == null)
{
return LinkEmbedDecision.Embed;
}
fileNamesByResourceId[resourceId] = $"resource-{resourceId}{extension}";
return LinkEmbedDecision.Link;
}
public string GetUrl(int resourceId, int referrer)
{
if (!fileNamesByResourceId.TryGetValue(resourceId, out var fileName))
{
return null;
}
if (fileNamesByResourceId.ContainsKey(referrer))
{
return fileName;
}
return assetUrlPrefix + fileName;
}
public void SaveExternal(int resourceId, byte[] entityData)
{
if (!fileNamesByResourceId.TryGetValue(resourceId, out var fileName))
{
throw new InvalidOperationException(
$"Resource {resourceId} was not registered for external storage.");
}
if (entityData == null || entityData.Length == 0)
{
throw new InvalidOperationException(
$"Resource {resourceId} contains no data and cannot be saved.");
}
Directory.CreateDirectory(assetDirectory);
var filePath = Path.Combine(assetDirectory, fileName);
File.WriteAllBytes(filePath, entityData);
}
private static string ResolveExtension(string contentType, string recommendedExtension)
{
if (!string.IsNullOrWhiteSpace(contentType) &&
ExtensionsByContentType.TryGetValue(contentType, out var mappedExtension))
{
return mappedExtension;
}
if (!IsSupportedContentType(contentType))
{
return null;
}
return NormalizeExtension(recommendedExtension);
}
private static bool IsSupportedContentType(string contentType)
{
return contentType != null &&
(contentType.StartsWith("image/", StringComparison.OrdinalIgnoreCase) ||
contentType.StartsWith("font/", StringComparison.OrdinalIgnoreCase) ||
contentType.StartsWith("audio/", StringComparison.OrdinalIgnoreCase) ||
contentType.StartsWith("video/", StringComparison.OrdinalIgnoreCase));
}
private static string NormalizeExtension(string extension)
{
if (string.IsNullOrWhiteSpace(extension))
{
return null;
}
var extensionCharacters = extension.Trim().TrimStart('.');
foreach (var character in extensionCharacters)
{
if (!char.IsLetterOrDigit(character))
{
return null;
}
}
return "." + extensionCharacters.ToLowerInvariant();
}
private static string NormalizeUrlPrefix(string urlPrefix)
{
if (string.IsNullOrEmpty(urlPrefix))
{
return string.Empty;
}
var normalizedUrlPrefix = urlPrefix.Replace('\\', '/');
return normalizedUrlPrefix.EndsWith("/")
? normalizedUrlPrefix
: normalizedUrlPrefix + "/";
}
}
```
After the export, the output folder has this structure:
```text
html-output/
presentation.html
assets/
resource-1.svg
resource-2.svg
resource-3.svg
resource-4.jpg
resource-5.png
```
The exact files depend on the presentation content and export options. For example, raster images are commonly exported as JPEG or PNG. Aspose.Slides may choose a different image codec than the one used in the source presentation when that produces a smaller or more suitable file. Images with transparency are exported as PNG.
## **Choosing URLs for Deployment**
The sample uses a relative URL prefix: `assets/`. If `presentation.html` is opened from `html-output/presentation.html`, the browser loads `html-output/assets/resource-1.svg`.
When one linked resource refers to another linked resource, the sample uses the `referrer` parameter in [ILinkEmbedController.GetUrl](https://reference.aspose.com/slides/net/aspose.slides.export/ilinkembedcontroller/geturl/) and returns only the file name. For example, if `resource-1.svg` and `resource-4.jpg` are both in the `assets` folder, the SVG file should refer to `resource-4.jpg`, not to `assets/resource-4.jpg`.
Use a different URL prefix when the files are deployed elsewhere:
- Use `assets/` when the asset directory is next to the HTML file.
- Use `../assets/` when the asset directory is one level above the HTML file.
- Use `https://cdn.example.com/presentations/job-123/assets/` when the files are uploaded to a CDN or static file server.
The URL returned by [ILinkEmbedController.GetUrl](https://reference.aspose.com/slides/net/aspose.slides.export/ilinkembedcontroller/geturl/) must match the final deployed location of the file written by [ILinkEmbedController.SaveExternal](https://reference.aspose.com/slides/net/aspose.slides.export/ilinkembedcontroller/saveexternal/). In server applications, use a unique output directory or object-storage prefix for each conversion job to avoid overwriting files from another export.
## **When to Embed Instead**
Embedded Base64 HTML is still useful when the output must be a single file, such as an email attachment, an offline preview, or a document that will be moved without a supporting asset folder. Linked resources are a better fit when the HTML will be served by a web application, stored in a CMS, optimized by a build pipeline, or cached by browsers independently from the HTML.
## **FAQ**
### Can I externalize only images and keep other resources embedded?
Yes. In [ILinkEmbedController.GetObjectStoringLocation](https://reference.aspose.com/slides/net/aspose.slides.export/ilinkembedcontroller/getobjectstoringlocation/), return `LinkEmbedDecision.Link` only for the content types you want to save as separate files, and return `LinkEmbedDecision.Embed` for everything else.
### Why does the exported image extension differ from the source presentation?
Aspose.Slides may re-encode raster images during HTML export to improve size or browser compatibility. For example, an image from the source file may be written as JPEG or PNG depending on the rendered result.
### Do relative URLs work after I move the HTML file?
Relative URLs work only when the same relative folder structure is preserved. If the HTML references `assets/resource-1.png`, the `assets` folder must stay next to the HTML file unless you generate a different URL prefix.
### Should server applications reuse the same output folder?
No. Use a unique output directory or storage prefix for each conversion job. This avoids filename collisions and prevents one export from overwriting resources generated by another export.
## Related articles
- [Convert PowerPoint Presentations to HTML in .NET](https://docs.aspose.com/slides/net/convert-powerpoint-to-html/)
# Advanced Text Extraction from Presentations in .NET
> Quickly extract text from PowerPoint and OpenDocument presentations using Aspose.Slides for .NET. Follow our simple, step-by-step guide to save time.
Source: https://docs.aspose.com/slides/net/extract-text-from-presentation/
Updated: 2026-08-05
## **Overview**
Extracting text from presentations is a common yet essential task for developers working with slide content. Whether you're dealing with Microsoft PowerPoint files in PPT or PPTX format, or OpenDocument presentations (ODP), accessing and retrieving textual data can be critical for analysis, automation, indexing, or content migration purposes.
This article provides a comprehensive guide on how to efficiently extract text from various presentation formats, including PPT, PPTX, and ODP, using Aspose.Slides for .NET. You'll learn how to systematically iterate through presentation elements to accurately retrieve the text content you need.
## **Extract Text from a Slide**
Aspose.Slides for .NET provides the [Aspose.Slides.Util](https://reference.aspose.com/slides/net/aspose.slides.util/) namespace, which includes the [SlideUtil](https://reference.aspose.com/slides/net/aspose.slides.util/slideutil/) class. This class exposes several overloaded static methods for extracting all text from a presentation or slide. To extract text from a slide in a presentation, use the [GetAllTextBoxes](https://reference.aspose.com/slides/net/aspose.slides.util/slideutil/getalltextboxes/) method. This method accepts an object of type [IBaseSlide](https://reference.aspose.com/slides/net/aspose.slides/ibaseslide/) as a parameter. When executed, the method scans the entire slide for text and returns an array of objects of type [ITextFrame](https://reference.aspose.com/slides/net/aspose.slides/itextframe/), preserving any text formatting.
The following code snippet extracts all the text from the first slide of the presentation:
```cs
using Aspose.Slides;
int slideIndex = 0;
using var presentation = new Presentation("demo.pptx");
var slide = presentation.Slides[slideIndex];
var textFrames = Aspose.Slides.Util.SlideUtil.GetAllTextBoxes(slide);
foreach (var textFrame in textFrames)
{
foreach (var paragraph in textFrame.Paragraphs)
{
foreach (var portion in paragraph.Portions)
{
var portionText = portion.Text;
Console.WriteLine(portionText);
var portionFormat = portion.PortionFormat;
var fontHeight = portionFormat.FontHeight;
Console.WriteLine(fontHeight);
var latinFont = portionFormat.LatinFont;
if (latinFont != null)
{
var fontName = latinFont.FontName;
Console.WriteLine(fontName);
}
}
}
}
```
## **Extract Text from a Presentation**
To scan text from the entire presentation, use the [GetAllTextFrames](https://reference.aspose.com/slides/net/aspose.slides.util/slideutil/getalltextframes/) static method exposed by the [SlideUtil](https://reference.aspose.com/slides/net/aspose.slides.util/slideutil/) class. It accepts two parameters:
1. First, an [IPresentation](https://reference.aspose.com/slides/net/aspose.slides/ipresentation/) object representing a PowerPoint or OpenDocument presentation from which text will be extracted.
1. Second, a `Boolean` value indicating whether the master slides should be included when scanning text from the presentation.
The method returns an array of objects of type [ITextFrame](https://reference.aspose.com/slides/net/aspose.slides/itextframe/), including text formatting information. The code below scans the text and formatting details from a presentation, including the master slides.
```cs
using Aspose.Slides;
using var presentation = new Presentation("demo.pptx");
var includeMasterSlides = true;
var textFrames = Aspose.Slides.Util.SlideUtil.GetAllTextFrames(presentation, includeMasterSlides);
foreach (var textFrame in textFrames)
{
foreach (var paragraph in textFrame.Paragraphs)
{
foreach (var portion in paragraph.Portions)
{
var portionText = portion.Text;
Console.WriteLine(portionText);
var portionFormat = portion.PortionFormat;
var fontHeight = portionFormat.FontHeight;
Console.WriteLine(fontHeight);
var latinFont = portionFormat.LatinFont;
if (latinFont != null)
{
var fontName = latinFont.FontName;
Console.WriteLine(fontName);
}
}
}
}
```
## **Categorized and Fast Text Extraction**
The [PresentationFactory](https://reference.aspose.com/slides/net/aspose.slides/presentationfactory/) class also provides methods for extracting all text from presentations:
``` cs
using Aspose.Slides;
IPresentationText GetPresentationText(string file, TextExtractionArrangingMode mode);
IPresentationText GetPresentationText(Stream stream, TextExtractionArrangingMode mode);
IPresentationText GetPresentationText(Stream stream, TextExtractionArrangingMode mode, ILoadOptions options);
```
The [TextExtractionArrangingMode](https://reference.aspose.com/slides/net/aspose.slides/textextractionarrangingmode/) enum argument indicates the mode for organizing the text extraction result and can be set to the following values:
- `Unarranged` - The raw text without regard to its position on the slide.
- `Arranged` - The text is arranged in the same order as on the slide.
The unarranged mode can be used when speed is critical; it's faster than the arranged mode.
[IPresentationText](https://reference.aspose.com/slides/net/aspose.slides/ipresentationtext/) represents the raw text extracted from the presentation. Its `SlidesText` property returns an array of objects of type [ISlideText](https://reference.aspose.com/slides/net/aspose.slides/islidetext/). Each object represents the text on the corresponding slide. The object of type [ISlideText](https://reference.aspose.com/slides/net/aspose.slides/islidetext/) has the following properties:
- `Text` - The text within the slide's shapes.
- `MasterText` - The text within the master slide's shapes associated with this slide.
- `LayoutText` - The text within the layout slide's shapes associated with this slide.
- `NotesText` - The text within the notes slide's shapes associated with this slide.
- `CommentsText` - The text within comments associated with this slide.
```cs
using Aspose.Slides;
var presentationPath = "presentation.ppt";
var arrangingMode = TextExtractionArrangingMode.Unarranged;
var presentationText = PresentationFactory.Instance.GetPresentationText(presentationPath, arrangingMode);
var firstSlideText = presentationText.SlidesText[0];
Console.WriteLine(firstSlideText.Text);
Console.WriteLine(firstSlideText.LayoutText);
Console.WriteLine(firstSlideText.MasterText);
Console.WriteLine(firstSlideText.NotesText);
Console.WriteLine(firstSlideText.CommentsText);
```
## **FAQ**
### How fast does Aspose.Slides process large presentations during text extraction?
Aspose.Slides is optimized for high performance and can process even [large presentations](https://docs.aspose.com/slides/net/open-presentation/), making it suitable for real-time or bulk processing scenarios.
### Can Aspose.Slides extract text from tables and charts within presentations?
Yes. Aspose.Slides can extract text from many slide elements, including tables and chart-related objects, so you can access and analyze textual content in common presentation structures.
### Do I need a special Aspose.Slides license to extract text from presentations?
You can extract text using the free trial version of Aspose.Slides, although it will have [certain limitations](https://docs.aspose.com/slides/net/licensing/), such as processing only a limited number of slides. For unrestricted use and to handle larger presentations, purchasing a full license is recommended.
## Related features
- [Extract text from presentations](https://docs.aspose.com/slides/features/extract-text/)
# Extract Images from Presentation Shapes in .NET
> Extract images from shapes in PowerPoint and OpenDocument presentations with Aspose.Slides for .NET - quick, code-friendly solution.
Source: https://docs.aspose.com/slides/net/extracting-images-from-presentation-shapes/
Updated: 2026-08-13
## **Overview**
Images in a presentation can appear in several shape types: as ordinary picture frames, as picture fills applied to shapes, as OLE object preview images, as video or audio frame thumbnails, as zoom images, or as images nested inside table, chart, and SmartArt shapes. Aspose.Slides stores those images in the presentation image collection, exposed through [ImageCollection](https://reference.aspose.com/slides/net/aspose.slides/imagecollection/) and [IPPImage](https://reference.aspose.com/slides/net/aspose.slides/ippimage/) objects.
If you only need to export every image resource embedded in a presentation, iterate through `presentation.Images`. This article focuses on a different task: traversing shapes to find where images are used on slides, so the saved files can keep useful context such as the slide number, shape position, and source type (picture frame, fill image, media preview, OLE preview, or zoom image).
Use [IPPImage.BinaryData](https://reference.aspose.com/slides/net/aspose.slides/ippimage/) to preserve the original encoded image data and file type. Use [IPPImage.Image](https://reference.aspose.com/slides/net/aspose.slides/ippimage/) with [IImage.Save](https://reference.aspose.com/slides/net/aspose.slides/iimage/) when you want to normalize the output to a specific format such as PNG.
## **Shared Helper Methods**
The helper methods below keep the examples short. `SaveOriginalImage` writes the original embedded bytes, chooses a safe extension from the MIME type, and skips duplicate image binaries by SHA-256 hash.
```c#
using Aspose.Slides;
using System;
using System.Collections.Generic;
using System.IO;
using System.Security.Cryptography;
private static bool SaveOriginalImage(
IPPImage image,
string outputDirectory,
string fileNameBase,
ISet savedImageHashes)
{
byte[] imageData = image.BinaryData;
string imageHash = GetSha256Hash(imageData);
if (!savedImageHashes.Add(imageHash))
{
return false;
}
string extension = GetExtensionFromContentType(image.ContentType);
string fileName = $"{fileNameBase}.{extension}";
string outputPath = Path.Combine(outputDirectory, fileName);
File.WriteAllBytes(outputPath, imageData);
return true;
}
private static void SaveImageAsPng(IPPImage image, string outputDirectory, string fileNameBase)
{
string fileName = $"{fileNameBase}.png";
string outputPath = Path.Combine(outputDirectory, fileName);
using (IImage outputImage = image.Image)
{
outputImage.Save(outputPath, ImageFormat.Png);
}
}
private static IPPImage GetPictureFillImage(IFillFormat fillFormat)
{
if (fillFormat == null || fillFormat.FillType != FillType.Picture)
{
return null;
}
return fillFormat.PictureFillFormat.Picture.Image;
}
private static IEnumerable<(IShape Shape, string NamePart)> EnumerateShapes(
IShapeCollection shapes,
string prefix,
bool includeGroupedShapes)
{
int shapeCount = shapes.Count;
for (int shapeIndex = 0; shapeIndex < shapeCount; shapeIndex++)
{
IShape shape = shapes[shapeIndex];
int displayIndex = shapeIndex + 1;
string shapeNamePart = $"{prefix}_shape_{displayIndex}";
yield return (shape, shapeNamePart);
if (includeGroupedShapes && shape is IGroupShape groupShape)
{
foreach ((IShape Shape, string NamePart) childShape in EnumerateShapes(
groupShape.Shapes,
shapeNamePart,
includeGroupedShapes))
{
yield return childShape;
}
}
}
}
private static string GetSha256Hash(byte[] data)
{
using (SHA256 sha256 = SHA256.Create())
{
byte[] hash = sha256.ComputeHash(data);
return BitConverter.ToString(hash).Replace("-", "").ToLowerInvariant();
}
}
private static string GetExtensionFromContentType(string contentType)
{
if (string.IsNullOrWhiteSpace(contentType))
{
return "bin";
}
string mediaType = contentType.Split(';')[0].Trim().ToLowerInvariant();
switch (mediaType)
{
case "image/jpeg":
return "jpg";
case "image/png":
return "png";
case "image/gif":
return "gif";
case "image/bmp":
return "bmp";
case "image/tiff":
return "tiff";
case "image/x-emf":
case "image/emf":
return "emf";
case "image/x-wmf":
case "image/wmf":
return "wmf";
case "image/svg+xml":
return "svg";
default:
if (mediaType.StartsWith("image/"))
{
string extension = mediaType.Substring("image/".Length);
return MakeSafeFileNamePart(extension);
}
return "bin";
}
}
private static string MakeSafeFileNamePart(string value)
{
foreach (char invalidCharacter in Path.GetInvalidFileNameChars())
{
value = value.Replace(invalidCharacter, '_');
}
return value;
}
```
## **Extract Images from Picture Frames**
Use this approach for pictures inserted as standalone objects. An [IPictureFrame](https://reference.aspose.com/slides/net/aspose.slides/ipictureframe/) stores its picture in `PictureFormat.Picture.Image`, which returns an [IPPImage](https://reference.aspose.com/slides/net/aspose.slides/ippimage/) object.
```c#
using Aspose.Slides;
string inputPath = "sample.pptx";
string outputDirectory = Path.Combine(Environment.CurrentDirectory, "extracted-images");
Directory.CreateDirectory(outputDirectory);
var savedImageHashes = new HashSet(StringComparer.Ordinal);
using (Presentation presentation = new Presentation(inputPath))
{
foreach (ISlide slide in presentation.Slides)
{
string slidePrefix = $"slide_{slide.SlideNumber}";
foreach ((IShape Shape, string NamePart) item in EnumerateShapes(
slide.Shapes,
slidePrefix,
includeGroupedShapes: false))
{
if (item.Shape is IPictureFrame pictureFrame)
{
IPPImage image = pictureFrame.PictureFormat.Picture.Image;
SaveOriginalImage(image, outputDirectory, item.NamePart, savedImageHashes);
}
}
}
}
```
## **Extract Images from Picture-Filled Shapes**
Shapes can use a picture as their fill. Check the shape's fill type first: if it is not [FillType.Picture](https://reference.aspose.com/slides/net/aspose.slides/filltype/), there is no picture to extract from that fill. The example below handles [IAutoShape](https://reference.aspose.com/slides/net/aspose.slides/iautoshape/) objects and saves each image as PNG through [IPPImage.Image](https://reference.aspose.com/slides/net/aspose.slides/ippimage/).
```c#
using Aspose.Slides;
string inputPath = "sample.pptx";
string outputDirectory = Path.Combine(Environment.CurrentDirectory, "shape-fill-images");
Directory.CreateDirectory(outputDirectory);
using (Presentation presentation = new Presentation(inputPath))
{
foreach (ISlide slide in presentation.Slides)
{
string slidePrefix = $"slide_{slide.SlideNumber}";
foreach ((IShape Shape, string NamePart) item in EnumerateShapes(
slide.Shapes,
slidePrefix,
includeGroupedShapes: false))
{
if (item.Shape is IAutoShape autoShape)
{
IPPImage image = GetPictureFillImage(autoShape.FillFormat);
if (image != null)
{
SaveImageAsPng(image, outputDirectory, item.NamePart);
}
}
}
}
}
```
## **Extract Preview Images from OLE Object Frames**
An [IOleObjectFrame](https://reference.aspose.com/slides/net/aspose.slides/ioleobjectframe/) can have a substitute picture that PowerPoint uses as the object's preview on a slide. This image is available through `SubstitutePictureFormat.Picture.Image`. Extracting this picture gives you the preview image, not the embedded OLE package contents.
```c#
using Aspose.Slides;
string inputPath = "sample.pptx";
string outputDirectory = Path.Combine(Environment.CurrentDirectory, "ole-preview-images");
Directory.CreateDirectory(outputDirectory);
var savedImageHashes = new HashSet(StringComparer.Ordinal);
using (Presentation presentation = new Presentation(inputPath))
{
foreach (ISlide slide in presentation.Slides)
{
string slidePrefix = $"slide_{slide.SlideNumber}";
foreach ((IShape Shape, string NamePart) item in EnumerateShapes(
slide.Shapes,
slidePrefix,
includeGroupedShapes: false))
{
if (item.Shape is IOleObjectFrame oleObjectFrame)
{
IPPImage image = oleObjectFrame.SubstitutePictureFormat.Picture.Image;
if (image != null)
{
string fileNameBase = $"{item.NamePart}_ole_preview";
SaveOriginalImage(image, outputDirectory, fileNameBase, savedImageHashes);
}
}
}
}
}
```
## **Extract Preview Images from Video Frames**
An [IVideoFrame](https://reference.aspose.com/slides/net/aspose.slides/ivideoframe/) can also store a preview image in `PictureFormat.Picture.Image`. This is the poster or thumbnail shown on the slide, not a frame decoded from the video stream.
```c#
using Aspose.Slides;
string inputPath = "sample.pptx";
string outputDirectory = Path.Combine(Environment.CurrentDirectory, "video-preview-images");
Directory.CreateDirectory(outputDirectory);
var savedImageHashes = new HashSet(StringComparer.Ordinal);
using (Presentation presentation = new Presentation(inputPath))
{
foreach (ISlide slide in presentation.Slides)
{
string slidePrefix = $"slide_{slide.SlideNumber}";
foreach ((IShape Shape, string NamePart) item in EnumerateShapes(
slide.Shapes,
slidePrefix,
includeGroupedShapes: false))
{
if (item.Shape is IVideoFrame videoFrame)
{
IPPImage image = videoFrame.PictureFormat.Picture.Image;
if (image != null)
{
string fileNameBase = $"{item.NamePart}_video_preview";
SaveOriginalImage(image, outputDirectory, fileNameBase, savedImageHashes);
}
}
}
}
}
```
## **Extract Preview Images from Audio Frames**
An [IAudioFrame](https://reference.aspose.com/slides/net/aspose.slides/iaudioframe/) can store a thumbnail in `PictureFormat.Picture.Image`. This is the image shown for the audio object on the slide.
```c#
using Aspose.Slides;
string inputPath = "sample.pptx";
string outputDirectory = Path.Combine(Environment.CurrentDirectory, "audio-preview-images");
Directory.CreateDirectory(outputDirectory);
var savedImageHashes = new HashSet(StringComparer.Ordinal);
using (Presentation presentation = new Presentation(inputPath))
{
foreach (ISlide slide in presentation.Slides)
{
string slidePrefix = $"slide_{slide.SlideNumber}";
foreach ((IShape Shape, string NamePart) item in EnumerateShapes(
slide.Shapes,
slidePrefix,
includeGroupedShapes: false))
{
if (item.Shape is IAudioFrame audioFrame)
{
IPPImage image = audioFrame.PictureFormat.Picture.Image;
if (image != null)
{
string fileNameBase = $"{item.NamePart}_audio_preview";
SaveOriginalImage(image, outputDirectory, fileNameBase, savedImageHashes);
}
}
}
}
}
```
## **Extract Images from Zoom Objects**
[IZoomFrame](https://reference.aspose.com/slides/net/aspose.slides/izoomframe/) and [ISectionZoomFrame](https://reference.aspose.com/slides/net/aspose.slides/isectionzoomframe/) shapes can use custom images. Read `ZoomImage` from the zoom frame.
```c#
using Aspose.Slides;
string inputPath = "sample.pptx";
string outputDirectory = Path.Combine(Environment.CurrentDirectory, "zoom-images");
Directory.CreateDirectory(outputDirectory);
var savedImageHashes = new HashSet(StringComparer.Ordinal);
using (Presentation presentation = new Presentation(inputPath))
{
foreach (ISlide slide in presentation.Slides)
{
string slidePrefix = $"slide_{slide.SlideNumber}";
foreach ((IShape Shape, string NamePart) item in EnumerateShapes(
slide.Shapes,
slidePrefix,
includeGroupedShapes: false))
{
if (item.Shape is IZoomFrame zoomFrame && zoomFrame.ZoomImage != null)
{
string fileNameBase = $"{item.NamePart}_zoom";
SaveOriginalImage(zoomFrame.ZoomImage, outputDirectory, fileNameBase, savedImageHashes);
continue;
}
if (item.Shape is ISectionZoomFrame sectionZoomFrame && sectionZoomFrame.ZoomImage != null)
{
string fileNameBase = $"{item.NamePart}_section_zoom";
SaveOriginalImage(sectionZoomFrame.ZoomImage, outputDirectory, fileNameBase, savedImageHashes);
continue;
}
}
}
}
```
## **Extract Images from Summary Zoom Frames**
An [ISummaryZoomFrame](https://reference.aspose.com/slides/net/aspose.slides/isummaryzoomframe/) is also a shape. Its section items can use custom images, exposed through each summary zoom section's `ZoomImage` property.
```c#
using Aspose.Slides;
string inputPath = "sample.pptx";
string outputDirectory = Path.Combine(Environment.CurrentDirectory, "summary-zoom-images");
Directory.CreateDirectory(outputDirectory);
var savedImageHashes = new HashSet(StringComparer.Ordinal);
using (Presentation presentation = new Presentation(inputPath))
{
foreach (ISlide slide in presentation.Slides)
{
string slidePrefix = $"slide_{slide.SlideNumber}";
foreach ((IShape Shape, string NamePart) item in EnumerateShapes(
slide.Shapes,
slidePrefix,
includeGroupedShapes: false))
{
if (item.Shape is ISummaryZoomFrame summaryZoomFrame)
{
int sectionCount = summaryZoomFrame.SummaryZoomCollection.Count;
for (int sectionIndex = 0; sectionIndex < sectionCount; sectionIndex++)
{
ISummaryZoomSection section = summaryZoomFrame.SummaryZoomCollection[sectionIndex];
if (section.ZoomImage != null)
{
int displayIndex = sectionIndex + 1;
string fileNameBase = $"{item.NamePart}_summary_zoom_{displayIndex}";
SaveOriginalImage(section.ZoomImage, outputDirectory, fileNameBase, savedImageHashes);
}
}
}
}
}
}
```
## **Extract Images from Table Shapes**
An [ITable](https://reference.aspose.com/slides/net/aspose.slides/itable/) is a shape. Images in a table are usually stored as picture fills in table cells.
```c#
using Aspose.Slides;
string inputPath = "sample.pptx";
string outputDirectory = Path.Combine(Environment.CurrentDirectory, "table-images");
Directory.CreateDirectory(outputDirectory);
var savedImageHashes = new HashSet(StringComparer.Ordinal);
using (Presentation presentation = new Presentation(inputPath))
{
foreach (ISlide slide in presentation.Slides)
{
string slidePrefix = $"slide_{slide.SlideNumber}";
foreach ((IShape Shape, string NamePart) item in EnumerateShapes(
slide.Shapes,
slidePrefix,
includeGroupedShapes: true))
{
if (item.Shape is ITable table)
{
int rowCount = table.Rows.Count;
int columnCount = table.Columns.Count;
for (int rowIndex = 0; rowIndex < rowCount; rowIndex++)
{
for (int columnIndex = 0; columnIndex < columnCount; columnIndex++)
{
ICell cell = table[columnIndex, rowIndex];
IPPImage image = GetPictureFillImage(cell.CellFormat.FillFormat);
if (image != null)
{
string fileNameBase = $"{item.NamePart}_cell_{rowIndex + 1}_{columnIndex + 1}";
SaveOriginalImage(image, outputDirectory, fileNameBase, savedImageHashes);
}
}
}
}
}
}
}
```
## **Extract Images from Chart Shapes**
An [IChart](https://reference.aspose.com/slides/net/aspose.slides.charts/ichart/) is a shape. The example below extracts an image from the chart area's picture fill.
```c#
using Aspose.Slides;
string inputPath = "sample.pptx";
string outputDirectory = Path.Combine(Environment.CurrentDirectory, "chart-images");
Directory.CreateDirectory(outputDirectory);
var savedImageHashes = new HashSet(StringComparer.Ordinal);
using (Presentation presentation = new Presentation(inputPath))
{
foreach (ISlide slide in presentation.Slides)
{
string slidePrefix = $"slide_{slide.SlideNumber}";
foreach ((IShape Shape, string NamePart) item in EnumerateShapes(
slide.Shapes,
slidePrefix,
includeGroupedShapes: true))
{
if (item.Shape is Aspose.Slides.Charts.IChart chart)
{
IFillFormat fillFormat = chart.FillFormat;
IPPImage image = GetPictureFillImage(fillFormat);
if (image != null)
{
string fileNameBase = $"{item.NamePart}_chart_area";
SaveOriginalImage(image, outputDirectory, fileNameBase, savedImageHashes);
}
}
}
}
}
```
## **Extract Images from SmartArt Shapes**
An [ISmartArt](https://reference.aspose.com/slides/net/aspose.slides.smartart/ismartart/) object is a shape. Depending on the SmartArt layout, images may be stored in node bullet fills or in the fill formats of node shapes.
```c#
using Aspose.Slides;
string inputPath = "sample.pptx";
string outputDirectory = Path.Combine(Environment.CurrentDirectory, "smartart-images");
Directory.CreateDirectory(outputDirectory);
var savedImageHashes = new HashSet(StringComparer.Ordinal);
using (Presentation presentation = new Presentation(inputPath))
{
foreach (ISlide slide in presentation.Slides)
{
string slidePrefix = $"slide_{slide.SlideNumber}";
foreach ((IShape Shape, string NamePart) item in EnumerateShapes(
slide.Shapes,
slidePrefix,
includeGroupedShapes: true))
{
if (item.Shape is Aspose.Slides.SmartArt.ISmartArt smartArt)
{
int nodeCount = smartArt.AllNodes.Count;
for (int nodeIndex = 0; nodeIndex < nodeCount; nodeIndex++)
{
Aspose.Slides.SmartArt.ISmartArtNode node = smartArt.AllNodes[nodeIndex];
IPPImage bulletImage = GetPictureFillImage(node.BulletFillFormat);
if (bulletImage != null)
{
string fileNameBase = $"{item.NamePart}_smartart_node_{nodeIndex + 1}_bullet";
SaveOriginalImage(bulletImage, outputDirectory, fileNameBase, savedImageHashes);
}
int nodeShapeCount = node.Shapes.Count;
for (int nodeShapeIndex = 0; nodeShapeIndex < nodeShapeCount; nodeShapeIndex++)
{
var nodeShape = node.Shapes[nodeShapeIndex];
IPPImage image = GetPictureFillImage(nodeShape.FillFormat);
if (image != null)
{
string fileNameBase = $"{item.NamePart}_smartart_node_{nodeIndex + 1}_shape_{nodeShapeIndex + 1}";
SaveOriginalImage(image, outputDirectory, fileNameBase, savedImageHashes);
}
}
}
}
}
}
}
```
## **Include Images Inside Grouped Shapes**
Grouped shapes contain their own shape collections. The shared `EnumerateShapes` helper has an `includeGroupedShapes` option. Set it to `true` when you want to inspect shapes inside [IGroupShape](https://reference.aspose.com/slides/net/aspose.slides/igroupshape/) objects. The example below extracts images from picture frames, picture-filled shapes, OLE object previews, video frame thumbnails, and audio frame thumbnails. To include table, chart, SmartArt, and summary zoom images as well, reuse the specialized extraction logic from the previous sections while keeping the same recursive shape traversal.
```c#
using Aspose.Slides;
string inputPath = "sample.pptx";
string outputDirectory = Path.Combine(Environment.CurrentDirectory, "all-shape-images");
Directory.CreateDirectory(outputDirectory);
var savedImageHashes = new HashSet(StringComparer.Ordinal);
using (Presentation presentation = new Presentation(inputPath))
{
foreach (ISlide slide in presentation.Slides)
{
string slidePrefix = $"slide_{slide.SlideNumber}";
foreach ((IShape Shape, string NamePart) item in EnumerateShapes(
slide.Shapes,
slidePrefix,
includeGroupedShapes: true))
{
if (item.Shape is IPictureFrame pictureFrame)
{
IPPImage image = pictureFrame.PictureFormat.Picture.Image;
SaveOriginalImage(image, outputDirectory, item.NamePart, savedImageHashes);
continue;
}
if (item.Shape is IAutoShape autoShape)
{
IPPImage image = GetPictureFillImage(autoShape.FillFormat);
if (image != null)
{
SaveOriginalImage(image, outputDirectory, item.NamePart, savedImageHashes);
}
continue;
}
if (item.Shape is IOleObjectFrame oleObjectFrame)
{
IPPImage image = oleObjectFrame.SubstitutePictureFormat.Picture.Image;
if (image != null)
{
string fileNameBase = $"{item.NamePart}_ole_preview";
SaveOriginalImage(image, outputDirectory, fileNameBase, savedImageHashes);
}
continue;
}
if (item.Shape is IVideoFrame videoFrame)
{
IPPImage image = videoFrame.PictureFormat.Picture.Image;
if (image != null)
{
string fileNameBase = $"{item.NamePart}_video_preview";
SaveOriginalImage(image, outputDirectory, fileNameBase, savedImageHashes);
}
continue;
}
if (item.Shape is IAudioFrame audioFrame)
{
IPPImage image = audioFrame.PictureFormat.Picture.Image;
if (image != null)
{
string fileNameBase = $"{item.NamePart}_audio_preview";
SaveOriginalImage(image, outputDirectory, fileNameBase, savedImageHashes);
}
}
}
}
}
```
## **Edge Cases and Practical Notes**
- **Duplicate images:** Multiple shapes may reference the same image or separate images with identical bytes. Hash [IPPImage.BinaryData](https://reference.aspose.com/slides/net/aspose.slides/ippimage/) before writing files if you want one output file per unique image.
- **Original data vs. converted output:** Saving [IPPImage.BinaryData](https://reference.aspose.com/slides/net/aspose.slides/ippimage/) preserves the embedded JPEG, PNG, GIF, SVG, EMF, or WMF data. Saving [IPPImage.Image](https://reference.aspose.com/slides/net/aspose.slides/ippimage/) through [IImage.Save](https://reference.aspose.com/slides/net/aspose.slides/iimage/) is useful when you want a consistent output format.
- **Unsupported fill types:** Solid, gradient, pattern, and no-fill shapes do not contain a picture fill. Check [FillType](https://reference.aspose.com/slides/net/aspose.slides/filltype/) before reading `PictureFillFormat`.
- **Grouped shapes:** The top-level slide shape collection does not flatten groups. Recursively inspect [IGroupShape.Shapes](https://reference.aspose.com/slides/net/aspose.slides/igroupshape/) when grouped content matters.
- **OLE object previews:** An [IOleObjectFrame](https://reference.aspose.com/slides/net/aspose.slides/ioleobjectframe/) may expose a preview image through `SubstitutePictureFormat`, but that image is only the slide preview. It is not the embedded file inside the OLE object.
- **Video frame thumbnails:** An [IVideoFrame](https://reference.aspose.com/slides/net/aspose.slides/ivideoframe/) may expose a preview image through `PictureFormat`, but that image is only the poster shown on the slide. It is not extracted from the video stream.
- **Audio frame thumbnails:** An [IAudioFrame](https://reference.aspose.com/slides/net/aspose.slides/iaudioframe/) may expose an icon or thumbnail through `PictureFormat`; it is not the embedded audio data.
- **Zoom images:** Slide zoom, section zoom, and summary zoom shapes may use custom [IPPImage](https://reference.aspose.com/slides/net/aspose.slides/ippimage/) objects through `ZoomImage`.
- **Nested shape models:** Table, chart, and SmartArt objects implement [IShape](https://reference.aspose.com/slides/net/aspose.slides/ishape/), but their images are often stored in nested table cell, chart element, or SmartArt node formatting objects.
- **Cropped or transformed pictures:** Accessing [IPPImage](https://reference.aspose.com/slides/net/aspose.slides/ippimage/) gives you the stored image resource. It does not render cropping, transparency, recoloring, rotation, or other visual effects applied by the shape.
## **FAQ**
### Can I extract the original image without cropping, effects, or shape transformations?
Yes. Access the [IPPImage](https://reference.aspose.com/slides/net/aspose.slides/ippimage/) object and write [IPPImage.BinaryData](https://reference.aspose.com/slides/net/aspose.slides/ippimage/) to disk. This preserves the original encoded image stored in the presentation, not the way the image is rendered on the slide.
### Can I export every extracted image as PNG?
Yes. Use [IPPImage.Image](https://reference.aspose.com/slides/net/aspose.slides/ippimage/) to get an [IImage](https://reference.aspose.com/slides/net/aspose.slides/iimage/) object, and then call [IImage.Save](https://reference.aspose.com/slides/net/aspose.slides/iimage/) with [ImageFormat.Png](https://reference.aspose.com/slides/net/aspose.slides/imageformat/). This converts the output and may not preserve the original file type or vector data.
### How do I avoid saving the same image more than once?
Use a hash of [IPPImage.BinaryData](https://reference.aspose.com/slides/net/aspose.slides/ippimage/) and keep the hashes in a set. If a new image has a hash that already exists, skip it or record another reference to the existing output file.
### Why do some shapes not produce an image?
Picture frames, picture-filled shapes, OLE object frames, media frames, zoom frames, tables, charts, and SmartArt objects can reference images. Some shape types expose images through nested formatting objects, so a simple `PictureFormat` or shape `FillFormat` check is not always enough.
### Can I extract the thumbnail shown for a video frame?
Yes. Use [IVideoFrame.PictureFormat](https://reference.aspose.com/slides/net/aspose.slides/ivideoframe/) and read `PictureFormat.Picture.Image`. This extracts the poster image stored with the video frame, not a frame generated from the video file.
### How can I determine which shapes use a specific image from the presentation image collection?
Aspose.Slides does not store reverse links from [IPPImage](https://reference.aspose.com/slides/net/aspose.slides/ippimage/) to shapes. Build a mapping during traversal: whenever you find an image reference, record the slide number, shape path, and image hash or collection item.
### Can I extract images embedded inside OLE objects, such as attached documents?
You can extract the OLE object's slide preview from [IOleObjectFrame.SubstitutePictureFormat](https://reference.aspose.com/slides/net/aspose.slides/ioleobjectframe/). However, that preview is not the embedded document itself. To extract images from inside the embedded file, extract the OLE data and inspect it with tools for that file type.
# Extracting Text from PPT, PPTX, ODP
> Learn essential ways to extract and process slide text from PPT, PPTX and ODP on major cloud platforms, using .NET tools to power search, analytics, and automation.
Source: https://docs.aspose.com/slides/net/extracting-text-from-ppt-pptx-odp-on-cloud-platforms/
Updated: 2025-11-14
---
lastmod: 2025-11-14T18:26:19+04:00
title: Extracting Text from PPT, PPTX, ODP
type: docs
weight: 40
url: /net/extracting-text-from-ppt-pptx-odp-on-cloud-platforms/
keywords:
- cloud platforms
- cloud integration
- extract text
- text extraction
- PPT
- PPTX
- ODP
- Open XML SDK
- PowerPoint
- OpenDocument
- presentation
- .NET
- C#
- Aspose.Slides
description: "Learn essential ways to extract and process slide text from PPT, PPTX and ODP on major cloud platforms, using .NET tools to power search, analytics, and automation."
---
## Related articles
- [Slides on Cloud Platforms](https://docs.aspose.com/slides/net/slides-on-cloud-platforms/)
- [How to Extract Text from PPT, PPTX, and ODP Files Using Open XML SDK in .NET](https://docs.aspose.com/slides/net/extracting-text-on-cloud-platforms-using-open-xml-sdk/)
- [Slide Text Extraction: PPT, PPTX, ODP Essentials](https://docs.aspose.com/slides/net/slide-text-extraction-ppt-pptx-odp-essentials/)
# How to Extract Text from PPT, PPTX, and ODP with Aspose.Slides
> Extract text from presentations on popular cloud platforms using Aspose.Slides APIs, automating search, analysis, and export for PPT, PPTX and ODP.
Source: https://docs.aspose.com/slides/net/extracting-text-on-cloud-platforms-using-aspose-slides/
Updated: 2026-08-05
## **Introduction**
Aspose.Slides provides a **powerful, high-level API** for extracting text from presentation files, including **PPT, PPTX, and ODP**. Unlike the Open XML SDK—which only supports PPTX and involves complex XML parsing—Aspose.Slides simplifies text extraction, allowing you to focus on integrating the extracted content into your workflows.
## **Fast Text Extraction with PresentationFactory.Instance.GetPresentationText**
To extract text from a presentation, the **Aspose.Slides API** offers the static method `PresentationFactory.Instance.GetPresentationText`. It includes multiple overloads for working with a presentation file or a data stream, capturing text from **slides, master slides, layouts, notes, and comments**. The extracted text is accessed via the `IPresentationText` interface.
Example usage:
```csharp
using Aspose.Slides;
string filePath = "presentation.pptx";
TextExtractionArrangingMode mode = TextExtractionArrangingMode.Unarranged;
IPresentationText presentationText = PresentationFactory.Instance.GetPresentationText(filePath, mode);
ISlideText[] slideTexts = presentationText.SlidesText;
foreach (var slideText in slideTexts)
{
Console.WriteLine("Slide Text: " + slideText.Text);
Console.WriteLine("Notes Text: " + slideText.NotesText);
Console.WriteLine("Comments Text: " + slideText.CommentsText);
}
```
## **Modes of Operation for GetPresentationText**
The `GetPresentationText` method in `PresentationFactory` lets you fine-tune text extraction using the `TextExtractionArrangingMode` parameter, which controls how text is organized in the output.
### **Available Modes**
- **TextExtractionArrangingMode.Unarranged** – Extracts text in a freeform manner, disregarding the original slide layout.
- **TextExtractionArrangingMode.Arranged** – Preserves text order according to its placement on each slide.
Usage example:
```csharp
using Aspose.Slides;
TextExtractionArrangingMode mode = TextExtractionArrangingMode.Arranged;
IPresentationText presentationText = PresentationFactory.Instance.GetPresentationText("presentation.pptx", mode);
ISlideText[] slideTexts = presentationText.SlidesText;
foreach (var slideText in slideTexts)
{
Console.WriteLine("Slide Text (preserving order): " + slideText.Text);
}
```
## **Key Advantages of PresentationFactory Methods**
- **No Need to Load Entire Presentations**: Minimizes memory consumption and boosts processing speed.
- **Optimized for Large Files**: Efficiently handles even substantial presentations, extracting text swiftly.
- **Retrieves Notes and Comments**: Includes user annotations for comprehensive content coverage.
- **Ideal for Indexing and Content Analysis**: Perfect for corporate systems requiring automated processing and data enrichment.
- **Office-Independent**: Functions without Microsoft PowerPoint installed, offering a truly standalone solution.
- **Multi-Format Support**: Works seamlessly with **PPT, PPTX, and ODP**.
- **Flexible, Powerful API**: Provides versatile methods for structured text extraction.
- **Complete Slide Coverage**: Extracts text from **layouts, master slides, standard slides, backgrounds, speaker notes, and comments**.
- **Cross-Platform Compatibility**: Operates on **Windows, Linux, macOS**, and in cloud environments.
- **High Performance and Scalability**: Suited for **SaaS applications** and large-scale enterprise deployments.
## **Supported Operating Systems**
Aspose.Slides runs on a variety of operating systems:
- **Windows** (e.g., Windows 7, 8, 10, 11, and Server editions)
- **Linux** (various distributions, including Ubuntu, Debian, Fedora, CentOS, etc.)
- **macOS** (including modern versions such as 10.15 Catalina and later)
## **Supported Programming Languages**
Aspose.Slides integrates with multiple platforms and languages:
- **C#** – Primarily supported via Aspose.Slides for .NET.
- **Java** – Full-featured API available with Aspose.Slides for Java.
- **C++** – Leverage Aspose.Slides for performance-critical C++ applications.
- **Python via .NET** – Incorporate Aspose.Slides functionality using .NET interoperability.
- **Other .NET-Compatible Languages** – Utilize the library in any environment supported by .NET.
## **Conclusion**
Aspose.Slides delivers **comprehensive text extraction** for PowerPoint and OpenDocument presentations, supporting **varied file formats, intuitive text structuring, and straightforward implementation** when compared to the Open XML SDK. From **slides and notes to template content**, **Aspose.Slides** is a high-efficiency, feature-rich solution for extracting and managing presentation text.
## Related articles
- [How to Extract Text from PPT, PPTX, and ODP Files Using Open XML SDK in .NET](https://docs.aspose.com/slides/net/extracting-text-on-cloud-platforms-using-open-xml-sdk/)
- [Slide Text Extraction: PPT, PPTX, ODP Essentials](https://docs.aspose.com/slides/net/slide-text-extraction-ppt-pptx-odp-essentials/)
- [Extracting Text from PPT, PPTX, ODP](https://docs.aspose.com/slides/net/extracting-text-from-ppt-pptx-odp-on-cloud-platforms/)
# How to Extract Text from PPT, PPTX, and ODP Files Using Open XML SDK in .NET
> Learn how to extract text from PPT, PPTX and ODP in .NET using Open XML SDK, with XML-based access, performance tips, and conversion workarounds for cloud apps.
Source: https://docs.aspose.com/slides/net/extracting-text-on-cloud-platforms-using-open-xml-sdk/
Updated: 2026-04-29
## **Overview**
This article explains how to extract text from presentation files using the Open XML SDK in .NET. It focuses on direct XML access for PPTX files, where text can be retrieved from structured slide elements without rendering slides or requiring Microsoft PowerPoint. The article also describes performance benefits such as faster processing and lower memory usage.
For PPT and ODP files, the article explains that text cannot be extracted directly with the Open XML SDK. Instead, these formats must first be converted to PPTX, after which the text can be extracted from the resulting file.
## **Open XML SDK**
The **Open XML SDK** provides a highly structured and efficient method for extracting text from presentation files—especially **PPTX**, which adheres to the Open XML standard. By offering direct access to the underlying XML, this SDK enables faster and more flexible handling of slide content compared to traditional methods.
## **Direct XML Access**
- **Analyze Text Directly**: The Open XML SDK lets you extract text from XML parts without rendering slides.
- **Structured Elements**: Because text is stored in well-defined XML tags, it’s simpler to retrieve and process.
### **Example: Extracting Text Directly from Slide XML Content**
```csharp
using (PresentationDocument presentation = PresentationDocument.Open("presentation.pptx", false))
{
var slidePart = presentation.PresentationPart.SlideParts.FirstOrDefault();
if (slidePart != null)
{
var textElements = slidePart.Slide.Descendants();
foreach (var text in textElements)
{
Console.WriteLine(text.Text);
}
}
}
```
## **Performance Advantages**
- **Faster Extraction**: Bypasses the overhead of opening PowerPoint or other high-level APIs.
- **Lower Memory Usage**: Only relevant XML parts are accessed, reducing resource consumption.
- **No Microsoft PowerPoint Needed**: Frees you from extra installation requirements.
### **Example: Efficiently Extracting Text Without Loading the Entire Presentation**
```csharp
using (PresentationDocument presentation = PresentationDocument.Open("presentation.pptx", false))
{
foreach (var slidePart in presentation.PresentationPart.SlideParts)
{
var texts = slidePart.Slide.Descendants().Select(t => t.Text);
Console.WriteLine(string.Join(" ", texts));
}
}
```
## **Identifying Text Elements**
### **Specifics of Extracting Text from Presentations**
When extracting text from presentations, consider these factors:
- **Text May Reside in Different Sections**: Regular slides, master slides, layouts, or speaker notes.
- **Default Placeholders**: Master slides and layouts can include placeholders (e.g., “Click to edit Master title style”) that aren’t actual presentation content.
- **Filtering Empty or Hidden Text**: Some elements might be empty or not intended for display.
### **Tags Containing Text**
In a **PPTX** file, text is generally stored in:
- `` elements inside `` (paragraphs)
- `` elements (text segments within paragraphs)
### **Example: Extracting All Text Elements from a Slide**
```csharp
var textElements = slidePart.Slide.Descendants();
foreach (var text in textElements)
{
Console.WriteLine(text.Text);
}
```
## **ODP and PPT**
### **Inability to Extract Text Directly**
- Unlike **PPTX**, **PPT** (binary format) and **ODP** (OpenDocument Presentation) **are not supported** by Open XML SDK.
- **PPT** stores content in a closed binary format, complicating text extraction.
- **ODP** relies on **OpenDocument XML**, which differs structurally from PPTX.
### **Workaround: Converting to PPTX**
To extract text from **PPT** or **ODP**, the recommended approach is:
1. **Convert PPT → PPTX** using PowerPoint or a third-party tool.
2. **Convert ODP → PPTX** via LibreOffice or PowerPoint.
3. **Extract text** from the new PPTX using Open XML SDK.
### **Example: Converting ODP to PPTX via LibreOffice Command Line**
```sh
soffice --headless --convert-to pptx presentation.odp
```
## **Supported Platforms and Frameworks**
- **Windows**: .NET Framework 4.6.1 and above, .NET Core 2.1+, .NET 5/6/7.
- **Linux/macOS**: .NET Core 2.1+, .NET 5/6/7.
- **Cloud Environments**: Microsoft Azure Functions, AWS Lambda (.NET Core), Docker containers.
- **Compatibility with Office Applications**: No Microsoft Office installation required.
- **Supported Programming Languages**: Open XML SDK can be used with **C#**, **VB.NET**, **F#**, and other .NET-supported languages.
## **Conclusion**
Leveraging the **Open XML SDK** for **PPTX text extraction** offers both efficiency and clarity, whereas **PPT and ODP** demand an initial conversion step for smooth processing. Adopting this approach ensures **high performance**, **flexibility**, and **broad compatibility** with modern .NET applications.
## Related articles
- [How to Extract Text from PPT, PPTX, and ODP with Aspose.Slides](https://docs.aspose.com/slides/net/extracting-text-on-cloud-platforms-using-aspose-slides/)
- [Extracting Text from PPT, PPTX, ODP](https://docs.aspose.com/slides/net/extracting-text-from-ppt-pptx-odp-on-cloud-platforms/)
- [Slide Text Extraction: PPT, PPTX, ODP Essentials](https://docs.aspose.com/slides/net/slide-text-extraction-ppt-pptx-odp-essentials/)
# Manage Fallback Fonts for Presentations in .NET
> See how Aspose.Slides for .NET uses fallback fonts to keep text readable in PowerPoint and OpenDocument presentations when original fonts aren’t available.
Source: https://docs.aspose.com/slides/net/fallback-font/
Updated: 2026-08-02
## **Introduction**
Fallback fonts are used when the font specified for text is available in the system but does not contain a required glyph. In this case, Aspose.Slides can use one of the specified fallback fonts to replace the missing glyph.
## **Fallback Font**
Aspose.Slides allows to create fallback fonts, add them to fallback fonts collection, set fallback font collection for a certain presentation, remove fallback fonts from presentation, specify the rules to apply fallback fonts and others.
To get familiar with these features, use the following links:
- [Create Fallback Font](https://docs.aspose.com/slides/net/create-fallback-font)
- [Create Fallback Fonts Collection](https://docs.aspose.com/slides/net/create-fallback-fonts-collection)
- [Render Presentation with Fallback Font](https://docs.aspose.com/slides/net/render-presentation-with-fallback-font)
## **FAQ**
### How do fallback fonts differ from font substitution?
Fallback is applied per character or per range of Unicode when the primary font lacks specific glyphs; it fills just the missing characters. [Substitution](https://docs.aspose.com/slides/net/font-substitution/) replaces a missing or unavailable font for an entire run or text portion with another font. They can be combined, but their scope and selection logic are different.
### Are fallback settings saved inside the presentation file?
No. Fallback configuration lives at processing/rendering time in the library and is not serialized into the PPTX. The presentation does not store your fallback rules.
### Does fallback affect elements created by PowerPoint objects (SmartArt, charts, WordArt)?
Yes. Text inside these objects goes through the same rendering pipeline, so the same fallback rules apply to it as to regular text.
## Related features
- [Configure font fallback](https://docs.aspose.com/slides/features/font-fallback/)
## Related articles
- [Specify Fallback Fonts for Presentations in .NET](https://docs.aspose.com/slides/net/create-fallback-font/)
- [Configure Fallback Font Collections in .NET](https://docs.aspose.com/slides/net/create-fallback-fonts-collection/)
- [Render Presentations with Fallback Fonts in .NET](https://docs.aspose.com/slides/net/render-presentation-with-fallback-font/)
# FAQ
> Get answers to FAQ on Aspose.Slides for .NET, covering PowerPoint and OpenDocument support, installation guidance, licensing, troubleshooting.
Source: https://docs.aspose.com/slides/net/faqs/
Updated: 2026-08-05
## **Overview**
This FAQ provides answers to common questions about Aspose.Slides. It covers supported file formats, handling exceptions when working with large presentations, changing slide sizes, previewing slides, retrieving text from presentations, formatting table borders, placing pictures, and resolving font-related issues when converting presentations to PDF or images.
## **Supported File Formats**
### Q: What file formats does Aspose.Slides for .NET support?
**A**: Aspose.Slides for .NET supports the file formats described in [Supported File Formats](https://docs.aspose.com/slides/net/supported-file-formats/).
## **Exceptions**
### Q: I am getting an OutOfMemoryException while loading a large PPT file with images. Is there a limitation in Aspose.Slides regarding file size?
**A**: There is no specific formula for calculating the presentation size supported by Aspose.Slides. There should be enough space to accommodate the whole presentation structure and images in memory. Normally, images in the memory occupy more space than the hard disk, especially when images have additional effects.
In general, Aspose.Slides for .NET can easily handle presentation files of around 300 MB on a server with 4 GB RAM.
## **Working with Slides**
### Q: Can I change the size of the slides in a presentation?
**A**: You can use the `SlideSize` property exposed by the [Presentation](https://reference.aspose.com/slides/net/aspose.slides/presentation/) class to define the size of the slides in a presentation.
### Q: Is there a way to define slides of different size in a presentation?
**A**: Since the size of slides is defined at presentation level in Microsoft PowerPoint documents, there is no way to do this.
### Q: Does Aspose.Slides for .NET support previewing a slide before saving?
**A**: You can render the presentation slides to images and can use these images for previewing the slides.
## **Working with Text**
### Q: Is it possible to retrieve all the text from a presentation?
**A**: Aspose.Slides for .NET provides the [SlideUtil](https://reference.aspose.com/slides/net/aspose.slides.util/slideutil/) class under the `Aspose.Slides.Util` namespace that provides various methods for retrieving whole text from the presentations.
### Q: Why are paragraph sizes different on Windows and Linux operating systems?
**A**: The calculation of paragraph sizes is based on the calculation of the text size representing the given paragraph. The text size calculation is based on the metrics of the font specified in the PowerPoint presentation. If the specified font is missing, it is replaced with the most similar font, but this font has metrics different from the original ones. As a result, the calculation of paragraph sizes in different systems will lead to different results depending on the set of installed fonts. To achieve the same result on different operating systems, you need to install the same fonts on the systems or load them at runtime as [external fonts](https://docs.aspose.com/slides/net/custom-font/).
## **Formatting and Images**
### Q: How can I set the color of a table border?
**A**: You can change the color of all table borders or just the border around the entire table. For changing all borders, please use the `CellFormat` property from the [ICell](https://reference.aspose.com/slides/net/aspose.slides/icell/) interface. For the border of the entire table, you should iterate cells and change the color of the outer borders.
### Q: What measure does Aspose.Slides for .NET use to place pictures?
**A**: The coordinates and sizes of all shapes on the slides are measured in points (72 dpi).
## **Working with Fonts**
### Q: When converting PPT to PDF or images, why are the fonts different in the output documents?
**A**: This issue might indicate that the fonts used in the presentation are missing from the operating system on which the code was executed. You should install the fonts on the operating system or load them as external fonts using the [FontsLoader](https://reference.aspose.com/slides/net/aspose.slides/fontsloader/) class as shown below:
```cs
using Aspose.Slides;
var folders = new string[] { "path_to_a_folder_with_fonts" };
FontsLoader.LoadExternalFonts(folders);
```
# Features Overview
> Review what Aspose.Slides for .NET covers before you evaluate it: supported platforms, file formats, slide rendering, and the content you can create and edit.
Source: https://docs.aspose.com/slides/net/features-overview/
Updated: 2026-10-27
Browse the [features and support catalogue](https://docs.aspose.com/slides/features/) for short descriptions and links to the relevant guides.
## **Overview**
Aspose.Slides for .NET is a class library for creating, reading, editing, converting, and rendering PowerPoint and OpenDocument presentations. It has no user interface of its own and does not require Microsoft PowerPoint or Office, so you can use it in console applications, desktop applications such as Windows Forms, web applications, and web services. This article summarizes what the library covers and links to the articles that describe each area.
## **Supported Platforms**
Aspose.Slides for .NET is distributed as two NuGet packages with the same API:
|**Package**|**Builds in the package**|**Operating systems**|
| :- | :- | :- |
|[Aspose.Slides.NET](https://www.nuget.org/packages/Aspose.Slides.NET/)|.NET Framework 4.6.2, .NET Standard 2.0, and .NET 6. Use it with .NET Framework 4.6.2 or later, or with .NET 6 or later.|Windows. Linux and macOS with the `libgdiplus` library and the `System.Drawing.EnableUnixSupport` switch.|
|[Aspose.Slides.NET6.CrossPlatform](https://www.nuget.org/packages/Aspose.Slides.NET6.CrossPlatform/)|.NET 6. Use it with .NET 6 or later.|Windows (x86, x64), Linux (x64 with glibc 2.23 or later, ARM64 with glibc 2.39 or later), and macOS (x64, ARM64).|
[Installation](https://docs.aspose.com/slides/net/installation/) explains which package to choose and what each one needs on Linux. [System Requirements](https://docs.aspose.com/slides/net/system-requirements/) lists the supported platforms in detail.
## **File Formats and Conversions**
Aspose.Slides opens and saves PPT, PPTX, PPS, POT, PPSX, POTX, PPTM, PPSM, POTM, ODP, OTP, FODP, and PowerPoint XML presentations. It imports PDF and HTML content into slides, and it saves presentations as PDF, XPS, HTML, HTML5, TIFF, animated GIF, SWF, Markdown, and XAML. [Supported File Formats](https://docs.aspose.com/slides/net/supported-file-formats/) lists every format with the API that reads or writes it.
|**Feature**|**Description**|
| :- | :- |
|[PPT and PPTX](https://docs.aspose.com/slides/net/ppt-vs-pptx/)|Read and write both the binary PowerPoint 97-2003 format and the Office Open XML format.|
|[PPT to PPTX conversion](https://docs.aspose.com/slides/net/convert-ppt-to-pptx/)|Convert legacy PPT presentations to PPTX.|
|[Portable Document Format (PDF)](https://docs.aspose.com/slides/net/convert-powerpoint-to-pdf/)|Export presentations to PDF, including PDF/A and PDF/UA documents.|
|[XML Paper Specification (XPS)](https://docs.aspose.com/slides/net/convert-powerpoint-to-xps/)|Export presentations to XPS documents.|
|[Tagged Image File Format (TIFF)](https://docs.aspose.com/slides/net/convert-powerpoint-to-tiff/)|Export presentations to TIFF images.|
|[HTML](https://docs.aspose.com/slides/net/convert-powerpoint-to-html/)|Export presentations to HTML and HTML5.|
|[PDF and HTML import](https://docs.aspose.com/slides/net/import-presentation/)|Create slides from PDF pages and HTML content.|
## **Presentation Rendering**
Aspose.Slides renders slides and individual shapes as PNG, JPEG, BMP, GIF, TIFF, and SVG images, and slides as EMF metafiles. See [Convert Presentation Slides to Images](https://docs.aspose.com/slides/net/convert-slide/), [Render a Slide as an SVG Image](https://docs.aspose.com/slides/net/render-a-slide-as-an-svg-image/), and [Create Shape Thumbnails](https://docs.aspose.com/slides/net/create-shape-thumbnails/).
## **Content Features**
Aspose.Slides lets you create, read, and modify almost all the content of a presentation:
|**Area**|**What you can do**|
| :- | :- |
|[Slides](https://docs.aspose.com/slides/net/presentation-slide/)|Add, clone, reorder, and remove slides; apply layouts and masters; organize slides into sections; change the slide size.|
|[Design](https://docs.aspose.com/slides/net/presentation-design/)|Set backgrounds, theme colors, headers and footers, and fonts.|
|[Text](https://docs.aspose.com/slides/net/manage-text/)|Create and edit text frames, paragraphs, and portions; set fonts, colors, bullets, and alignment; find and replace text.|
|[Shapes](https://docs.aspose.com/slides/net/powerpoint-shapes/)|Create AutoShapes, lines, connectors, group shapes, and picture frames; set position, size, line, and solid, gradient, or pattern fill; find a shape by its alternative text.|
|[Tables](https://docs.aspose.com/slides/net/powerpoint-table/), [charts](https://docs.aspose.com/slides/net/powerpoint-charts/), and [SmartArt](https://docs.aspose.com/slides/net/powerpoint-smartart/)|Create and edit tables, Microsoft Office charts, and SmartArt diagrams.|
|[Media](https://docs.aspose.com/slides/net/manage-media-files/), [OLE objects](https://docs.aspose.com/slides/net/manage-ole/), and [ActiveX controls](https://docs.aspose.com/slides/net/activex/)|Add embedded or linked audio and video frames, embed OLE objects, and add, modify, or remove ActiveX controls.|
|[Notes](https://docs.aspose.com/slides/net/presentation-notes/) and [comments](https://docs.aspose.com/slides/net/presentation-comments/)|Add, read, and edit speaker notes and review comments.|
|[Animation](https://docs.aspose.com/slides/net/powerpoint-animation/) and [transitions](https://docs.aspose.com/slides/net/slide-transition/)|Apply animation effects to shapes, set slide transitions, and configure slide show settings.|
|[Security](https://docs.aspose.com/slides/net/presentation-security/)|Encrypt presentations with a password, set write protection, and work with digital signatures.|
|[VBA macros](https://docs.aspose.com/slides/net/presentation-via-vba/)|Add, extract, and remove VBA modules in macro-enabled presentations.|
|[Properties](https://docs.aspose.com/slides/net/presentation-properties/)|Read and edit document properties.|
## **FAQ**
**Do I need to install Microsoft PowerPoint on the server or PC for the library to work?**
No. PowerPoint is not required; Aspose.Slides is a standalone engine for creating, editing, converting, and rendering presentations.
**How does multithreading work? Can processing be parallelized?**
It is safe to process different documents in different threads; the same [Presentation](https://reference.aspose.com/slides/net/aspose.slides/presentation/) object must not be used by [multiple threads](https://docs.aspose.com/slides/net/multithreading/) at the same time.
**Are file passwords and encryption supported?**
Yes. [You can](https://docs.aspose.com/slides/net/password-protected-presentation/) open encrypted presentations, set or remove an open and write password, and check the protection status.
**Do I need to care about fonts in Linux containers?**
Yes. The fonts used in your presentations, or suitable substitutes, must be installed on the system for text to render correctly. You can also [specify font directories](https://docs.aspose.com/slides/net/custom-font/) in your application. [Installation](https://docs.aspose.com/slides/net/installation/) lists the Linux prerequisites of each package.
**Are there limitations in the evaluation version?**
Yes. Without a [license](https://docs.aspose.com/slides/net/licensing/), Aspose.Slides adds an evaluation watermark to every slide it saves and truncates text read from presentations. A [30-day temporary license](https://purchase.aspose.com/temporary-license/) is available for full-feature testing.
**Is importing external formats into a presentation (PDF or HTML to PPTX) supported?**
Yes. You can add [PDF pages and HTML content](https://docs.aspose.com/slides/net/import-presentation/) to a presentation, turning them into slides.
## Related articles
- [Product Overview](https://docs.aspose.com/slides/net/product-overview/)
# Find and Replace in Presentation
>
Source: https://docs.aspose.com/slides/net/find-and-replace-in-presentation/
Updated: 2026-08-05
Following are the steps to follow:
1. Open a presentation.
1. Search the text.
1. Replace the text.
1. Write the presentation.
``` csharp
using Aspose.Slides;
using Aspose.Slides.Export;
using Aspose.Slides.Util;
string filePath = @"..\..\..\Sample Files\";
string strToFind = "old text";
string strToReplaceWith = "new text";
//Open the presentation
using (Presentation pres = new Presentation(filePath + "Find and Replace.pptx"))
{
//Get all text boxes in the first slide
ITextFrame[] textFrames = SlideUtil.GetAllTextBoxes(pres.Slides[0]);
foreach (ITextFrame textFrame in textFrames)
foreach (IParagraph para in textFrame.Paragraphs)
foreach (IPortion port in para.Portions)
{
//Find the text to be replaced
int idx = port.Text.IndexOf(strToFind);
if (idx < 0)
continue;
//Replace the existing text with the new text
string str = port.Text;
string strStartText = str.Substring(0, idx);
string strEndText = str.Substring(idx + strToFind.Length);
port.Text = strStartText + strToReplaceWith + strEndText;
}
pres.Save(filePath + "Find and Replace.pptx", SaveFormat.Pptx);
}
```
## **Download Sample Code**
- [Github](https://github.com/aspose-slides/Aspose.Slides-for-.NET/releases/tag/MissingFeaturesAsposeSlidesForOpenXMLv1.1)
- [Bitbucket](https://bitbucket.org/asposemarketplace/aspose-for-openxml/downloads/Find%20and%20Replace%20%28Aspose.Slides%29.zip)
# Find and Replace Text without Losing Format in Presentation
>
Source: https://docs.aspose.com/slides/net/find-and-replace-text-without-losing-format-in-presentation/
Updated: 2026-08-05
Both methods follow these steps:
- Open a presentation.
- Search the text.
- Replace the text.
- Write the presentation.
## **VSTO**
``` csharp
private void findReplaceText(string strToFind, string strToReplaceWith)
{
//Open the presentation
PowerPoint.Presentation pres = null;
pres = Globals.ThisAddIn.Application.Presentations.Open("mytextone.ppt",
Microsoft.Office.Core.MsoTriState.msoFalse,
Microsoft.Office.Core.MsoTriState.msoFalse,
Microsoft.Office.Core.MsoTriState.msoFalse);
//Loop through slides
foreach (PowerPoint.Slide sld in pres.Slides)
//Loop through all shapes in slide
foreach (PowerPoint.Shape shp in sld.Shapes)
{
//Access text in the shape
string str = shp.TextFrame.TextRange.Text;
//Find text to replace
if (str.Contains(strToFind))
//Replace exisitng text with the new text
{
int idx = str.IndexOf(strToFind);
string strStartText = str.Substring(0, idx);
string strEndText = str.Substring(idx + strToFind.Length, str.Length - 1 - (idx + strToFind.Length - 1));
shp.TextFrame.TextRange.Text = strStartText + strToReplaceWith + strEndText;
}
pres.SaveAs("MyTextOne___.ppt",
PowerPoint.PpSaveAsFileType.ppSaveAsPresentation,
Microsoft.Office.Core.MsoTriState.msoFalse);
}
```
## **Aspose.Slides**
``` csharp
using Aspose.Slides;
using Aspose.Slides.Export;
using Aspose.Slides.Util;
static void findReplaceText(string strToFind, string strToReplaceWith)
{
//Open the presentation
using Presentation pres = new Presentation("mytextone.ppt");
//Get all text frames in the presentation
ITextFrame[] textFrames = SlideUtil.GetAllTextFrames(pres, false);
for (int i = 0; i < textFrames.Length; i++)
foreach (IParagraph para in textFrames[i].Paragraphs)
foreach (IPortion port in para.Portions)
{
string str = port.Text;
int idx = str.IndexOf(strToFind);
//Find text to be replaced
if (idx >= 0)
//Replace exisitng text with the new text, the portion formatting is kept
{
string strStartText = str.Substring(0, idx);
string strEndText = str.Substring(idx + strToFind.Length);
port.Text = strStartText + strToReplaceWith + strEndText;
}
}
pres.Save("myTextOneAspose.ppt", SaveFormat.Ppt);
}
```
## **Download Sample Code**
- [Github](https://github.com/aspose-slides/Aspose.Slides-for-.NET/releases/download/AsposeSlidesVsVSTOv1.1/Find.and.Replace.Text.without.Losing.Format.Aspose.Slides.zip)
- [Sourceforge](https://sourceforge.net/projects/asposevsto/files/Aspose.Slides%20Vs%20VSTO%20Slides/Find%20and%20Replace%20Text%20without%20Losing%20Format%20%28Aspose.Slides%29.zip/download)
- [Bitbucket](https://bitbucket.org/asposemarketplace/aspose-for-vsto/src/master/Aspose.Slides%20Vs%20VSTO%20Slides/Find%20and%20Replace%20Text%20without%20Losing%20Format/)
## Related articles
- [Creating a Table on PowerPoint Slide in VSTO and Aspose.Slides](https://docs.aspose.com/slides/net/creating-a-table-on-powerpoint-slide-in-vsto-and-aspose-slides/)
- [Code Comparison for common features with VSTO](https://docs.aspose.com/slides/net/code-comparison-for-common-features-with-vsto/)
- [Adding Picture Frame with Animation in VSTO and Aspose.Slides](https://docs.aspose.com/slides/net/adding-picture-frame-with-animation-in-vsto-and-aspose-slides/)
# Extract Flash Objects from Presentations in .NET
> Learn how to extract Flash objects from PowerPoint and OpenDocument slides in .NET with Aspose.Slides, complete C# code samples and best practices.
Source: https://docs.aspose.com/slides/net/flash/
Updated: 2026-08-05
## **Overview**
This article explains how to extract Flash objects from presentations by using Aspose.Slides. It shows how to find a Flash control by name in a slide’s controls collection and work with the embedded SWF object data.
## **Extract Flash Objects from Presentations**
Aspose.Slides for .NET provides a facility for extracting flash objects from presentation. You can access the flash control by name and extract it from presentation and including store SWF object data.
```c#
using Aspose.Slides;
using (Presentation pres = new Presentation("withFlash.pptm"))
{
IControlCollection controls = pres.Slides[0].Controls;
Control flashControl = null;
foreach (IControl control in controls)
{
if (control.Name == "ShockwaveFlash1")
{
flashControl = (Control)control;
}
}
}
```
## **FAQ**
### What presentation formats are supported when extracting Flash content?
[Aspose.Slides supports](https://docs.aspose.com/slides/net/supported-file-formats/) the main PowerPoint formats such as PPT and PPTX, since it can load these containers and access their controls, including Flash-related ActiveX elements.
### Can I convert a presentation with Flash to HTML5 and preserve Flash interactivity?
No. Aspose.Slides does not execute SWF content or convert its interactivity. While export to [HTML](https://docs.aspose.com/slides/net/convert-powerpoint-to-html/)/[HTML5](https://docs.aspose.com/slides/net/export-to-html5/) is supported, Flash will not play in modern browsers due to end of support. The recommended path is to replace Flash with alternatives such as video or HTML5 animations before export.
### From a security perspective, does Aspose.Slides execute SWF files while reading a presentation?
No. Aspose.Slides treats Flash as binary data embedded in the file and does not execute SWF content during processing.
### How should I handle presentations that include Flash along with other embedded files via OLE?
Aspose.Slides supports [extracting embedded OLE objects](https://docs.aspose.com/slides/net/manage-ole/), so you can process all related embedded content in one pass, handling Flash controls and other OLE-embedded documents together.
## Related articles
- [Convert PowerPoint Presentations to SWF Flash in .NET](https://docs.aspose.com/slides/net/convert-powerpoint-to-swf-flash/)
- [Manage Media Files in .NET](https://docs.aspose.com/slides/net/manage-media-files/)
# Streamline Font Replacement in Presentations in .NET
> Seamlessly replace fonts in Aspose.Slides for .NET to ensure consistent typography in PowerPoint and OpenDocument presentations.
Source: https://docs.aspose.com/slides/net/font-replacement/
Updated: 2026-08-05
## **Overview**
Aspose.Slides allows you to replace one font with another throughout a presentation. When a font is replaced, all instances of the original font are changed to the new font.
To perform font replacement, load the presentation, define the source font and the replacement font, call the font replacement method, and save the modified presentation as a PPTX file. This approach is useful when you intentionally want to switch from one font family to another across the presentation.
## **Replace Fonts**
If you change your mind about using a font, you can replace that font with another font. All instances of the old font will be replaced by the new font.
Aspose.Slides allows you to replace a font this way:
1. Load the relevant presentation.
2. Load the font that will be replaced.
3. Load the new font.
4. Replace the font.
5. Write the modified presentation as a PPTX file.
This C# code demonstrates font replacement:
```c#
using Aspose.Slides;
using Aspose.Slides.Export;
// Loads a presentation
Presentation presentation = new Presentation("Fonts.pptx");
// Loads the source font that will be replaced
IFontData sourceFont = new FontData("Arial");
// Loads the new font
IFontData destFont = new FontData("Times New Roman");
// Replaces the fonts
presentation.FontsManager.ReplaceFont(sourceFont, destFont);
// Saves the presentation
presentation.Save("UpdatedFont_out.pptx", SaveFormat.Pptx);
```
To set rules that determine what happens in certain conditions (if a font cannot be accessed, for example), see [**Font Substitution**](https://docs.aspose.com/slides/net/font-substitution/).
## **FAQ**
### What is the difference between "font replacement", "font substitution", and "fallback fonts"?
Replacement is an intentional switch from one family to another across the whole document. [Substitution](https://docs.aspose.com/slides/net/font-substitution/) is a rule like "if the font is unavailable, use X." [Fallback](https://docs.aspose.com/slides/net/fallback-font/) is applied surgically for individual missing glyphs when the base font is installed but does not contain the required characters.
### Does replacement apply to master slides, layouts, notes, and comments?
Yes. Replacement affects all presentation objects that use the original font, including master slides and notes; comments are also part of the document and are taken into account by the font engine.
### Will the font change inside embedded OLE objects (for example, Excel)?
No. [OLE content](https://docs.aspose.com/slides/net/manage-ole/) is controlled by its own application. Replacement in the presentation does not reformat the internal OLE data; it may be displayed as an image or as externally editable content.
### Can I replace a font only in part of the presentation (by slides or regions)?
Targeted replacement is possible if you change the font at the level of the required objects/ranges rather than applying a global replacement to the entire document. The overall font selection logic during rendering remains the same.
### How can I determine in advance which fonts the presentation uses at all?
Use the presentation’s [font manager](https://reference.aspose.com/slides/net/aspose.slides/fontsmanager/): it provides a list of the [families in use](https://reference.aspose.com/slides/net/aspose.slides/fontsmanager/getfonts/) and information about [substitutions/"unknown" fonts](https://reference.aspose.com/slides/net/aspose.slides/fontsmanager/getsubstitutions/), which helps plan the replacement.
### Does font replacement work when converting to PDF/images?
Yes. During export, Aspose.Slides applies the same [font selection/substitution sequence](https://docs.aspose.com/slides/net/font-selection-sequence/), so a replacement performed in advance will be honored during conversion.
### Do I need to install the target font in the system, or can I attach a fonts folder?
Installation is not required: the library allows [loading external fonts](https://docs.aspose.com/slides/net/custom-font/) from user folders for use during [rendering and export](https://docs.aspose.com/slides/net/convert-powerpoint/).
### Will replacement fix "tofu" (squares) instead of characters?
Only if the target font actually contains the required glyphs. If not, [configure fallback](https://docs.aspose.com/slides/net/fallback-font/) to cover the missing characters.
## Related articles
- [Font Selection Sequence in Aspose.Slides for .NET](https://docs.aspose.com/slides/net/font-selection-sequence/)
- [Configure Font Substitution in Presentations in .NET](https://docs.aspose.com/slides/net/font-substitution/)
- [Manage Fallback Fonts for Presentations in .NET](https://docs.aspose.com/slides/net/fallback-font/)
# Font Selection Sequence in Aspose.Slides for .NET
> Discover how Aspose.Slides for .NET selects fonts, ensuring crisp, consistent presentation of PPT, PPTX and ODP files—improve your slides now.
Source: https://docs.aspose.com/slides/net/font-selection-sequence/
Updated: 2026-11-08
## **Overview**
When a presentation is loaded, rendered, or converted to another format, Aspose.Slides considers its embedded fonts and the fonts available to the application. If a required font is unavailable, Aspose.Slides selects a replacement font that is as close as possible to the one PowerPoint would use.
Available fonts can include system fonts, fonts loaded by the application and fonts embedded in the presentation. For a matching embedded and registered font, the .NET 26.11 preference described below controls which takes priority. Font substitution rules defined through [FontSubstRule](https://reference.aspose.com/slides/net/aspose.slides/fontsubstrule/) are a separate mechanism.
You can also add fonts at application runtime, use embedded fonts from a presentation, or load external fonts for output documents such as PDF files.
## **Font Selection**
Text can reference a theme font, such as `+mn-lt`, rather than an explicit family name. See [Resolve Theme Font References](https://docs.aspose.com/slides/net/presentation-theme/#resolve-theme-font-references) to obtain the family specified by the applicable theme. Resolving that reference is separate from checking font availability and applying rendering-time substitution or glyph fallback; it does not identify the font file ultimately used to render the text.
When rendering slides or converting a presentation, check that the requested fonts are embedded or available from registered sources. Missing fonts can require replacement or substitution; see [**Font Replacement**](https://docs.aspose.com/slides/net/font-replacement/) and [**Font Substitution**](https://docs.aspose.com/slides/net/font-substitution/).
When investigating font selection:
1. Resolve the requested family and style, including any theme reference.
2. Check embedded fonts and registered sources, including system fonts and fonts loaded by the application. Use the preference below when matching embedded and registered versions compete.
3. Review [font substitution rules](https://reference.aspose.com/slides/net/aspose.slides/fontsubstrule/) and glyph fallback if the requested font or characters are unavailable.
Aspose.Slides allows you to add fonts to application runtime and then use those fonts. See [**Custom fonts**](https://docs.aspose.com/slides/net/custom-font/).
When additional fonts are placed within a presentation, they are called [**Embedded fonts**](https://docs.aspose.com/slides/net/embedded-font/).
Aspose.Slides allows you to add fonts that are applied to *only* output documents. For example, if a presentation you are looking to convert to PDF contains fonts missing from your system and embedded fonts, you can add or load the needed fonts as **external fonts**.
We do not distribute any fonts, either paid or free. Our API allows you to load external fonts and embed them in documents, but you do so with fonts at your discretion and responsibility.
[](https://docs.aspose.com/slides/net/font-selection-sequence/visual-font-selection-sequence-c58594a31127.svg)
*The embedded-font preference applies when both embedded and registered sources match. Missing families and missing glyphs have separate remedies.*
## **Prefer Registered Fonts over Embedded Fonts**
Starting with .NET 26.11, [IFontsManager.PreferRegisteredFontsOverEmbedded](https://reference.aspose.com/slides/net/aspose.slides/ifontsmanager/preferregisteredfontsoverembedded/) lets a matching registered font take priority over an embedded font during export. The default is `false`. Matching uses the font name and style; a different family name is not a replacement match. Registered fonts can come from the system or [explicitly loaded font sources](https://docs.aspose.com/slides/net/custom-font/).
The following example uses the **Aspose.Slides.NET6.CrossPlatform 26.11** package on .NET 8. Follow the [installation guide](https://docs.aspose.com/slides/net/installation/) for your environment. Provide `embedded-fonts.pptx` with an embedded font and `preferred.ttf` with the same family name and style. The two font files should differ visibly if you want to compare the output.
```csharp
using System.IO;
using Aspose.Slides;
using Aspose.Slides.Export;
var fontBytes = File.ReadAllBytes("preferred.ttf");
FontsLoader.LoadExternalFont(fontBytes);
using var presentation = new Presentation("embedded-fonts.pptx");
presentation.FontsManager.PreferRegisteredFontsOverEmbedded = false;
presentation.Save("embedded-preference.pdf", SaveFormat.Pdf);
presentation.FontsManager.PreferRegisteredFontsOverEmbedded = true;
presentation.Save("registered-preference.pdf", SaveFormat.Pdf);
presentation.FontsManager.PreferRegisteredFontsOverEmbedded = false;
presentation.Save("restored-preference.pdf", SaveFormat.Pdf);
```
This setting changes font precedence during the export; it does not rename the text's font, remove embedded font data or re-embed the registered file. It is a runtime setting: set it again after reopening a presentation. If no matching registered font is available, enabling the preference does not supply one; verify the resulting font and layout in your target environment.
PNG and PDF output with explicitly loaded regular fonts were checked for the configuration above. Check your own font files, styles, SDK build and output formats before depending on identical results. Font metrics can change line breaks and positioning. Use [font replacement](https://docs.aspose.com/slides/net/font-replacement/) or [substitution](https://docs.aspose.com/slides/net/font-substitution/) when you need a different family, and [embedded-font operations](https://docs.aspose.com/slides/net/embedded-font/) when you need to change the fonts stored in the presentation.
## **FAQ**
**How can I determine which fonts are actually used in a presentation before conversion?**
Aspose.Slides lets you inspect the fonts used via the [font manager](https://reference.aspose.com/slides/net/aspose.slides/presentation/fontsmanager/), so you can decide whether to [embed](https://docs.aspose.com/slides/net/embedded-font/), [replace](https://docs.aspose.com/slides/net/font-replacement/), or add [external sources](https://docs.aspose.com/slides/net/custom-font/). This helps you prevent unwanted substitutions during rendering and export.
**Can I add extra font directories without installing them on the operating system?**
Yes. You can register [external font sources](https://docs.aspose.com/slides/net/custom-font/) such as folders or in-memory streams for rendering and export. This removes dependency on host system fonts and keeps layout predictable.
**How do I prevent a silent fallback to an unsuitable font when a glyph is missing?**
Define explicit [font replacement](https://docs.aspose.com/slides/net/font-replacement/) and font [fallback rules](https://docs.aspose.com/slides/net/fallback-font/) in advance. By analyzing used fonts and setting a controlled priority for substitutes, you ensure consistent typography and avoid unexpected results.
## Related articles
- [Configure Font Substitution in Presentations in .NET](https://docs.aspose.com/slides/net/font-substitution/)
- [Streamline Font Replacement in Presentations in .NET](https://docs.aspose.com/slides/net/font-replacement/)
- [Master PowerPoint Fonts in .NET](https://docs.aspose.com/slides/net/powerpoint-fonts/)
# Configure Font Substitution in Presentations in .NET
> Configure font substitution rules and inspect substituted fonts in Aspose.Slides for .NET when rendering or converting PowerPoint and OpenDocument presentations.
Source: https://docs.aspose.com/slides/net/font-substitution/
Updated: 2026-10-08
## **Overview**
Font substitution allows Aspose.Slides to use an available font in place of a font that cannot be accessed when a presentation is rendered or converted. The substitution affects the rendered output; it does not change the font assigned to the presentation content.
You can define the font to use when a particular font is unavailable, and you can inspect the substitutions that Aspose.Slides will make during rendering. This helps keep output consistent across environments with different installed fonts.
If a font is available but has no dedicated bold typeface, see [Handle Fonts Without a Dedicated Bold Typeface](https://docs.aspose.com/slides/net/convert-powerpoint-to-pdf/#handle-fonts-without-a-dedicated-bold-typeface). That section explains how to rasterize the affected text during PDF export and the consequences for text selection, searching, and scaling.
## **Get Font Substitutions**
Use the [IFontsManager.GetSubstitutions](https://reference.aspose.com/slides/net/aspose.slides/ifontsmanager/getsubstitutions/) method to determine which fonts will be substituted when the presentation is rendered. The method returns [FontSubstitutionInfo](https://reference.aspose.com/slides/net/aspose.slides/fontsubstitutioninfo/) objects that identify the original and substituted font names.
The following C# example lists all font substitutions for a presentation:
```csharp
using System;
using Aspose.Slides;
using var presentation = new Presentation("Presentation.pptx");
foreach (var substitution in presentation.FontsManager.GetSubstitutions())
{
Console.WriteLine($"{substitution.OriginalFontName} -> {substitution.SubstitutedFontName}");
}
```
## **Get Font Substitutions for Selected Slides**
Use the [IFontsManager.GetSubstitutions](https://reference.aspose.com/slides/net/aspose.slides/ifontsmanager/getsubstitutions/) overload with an `int[] slides` argument to inspect only the substitutions required to render specific slides. This is useful when you are rendering or exporting part of a presentation, checking a large presentation incrementally, locating slides that depend on unavailable fonts, preparing a minimal font package for a server or container, or diagnosing rendering differences without processing unrelated slides.
The `slides` array contains one-based slide indexes: `1` identifies the first slide. By contrast, the [Presentation.Slides](https://reference.aspose.com/slides/net/aspose.slides/presentation/slides/) collection indexer is zero-based, so that same slide is accessed as `presentation.Slides[0]`. Keep this difference in mind when building the array to avoid off-by-one errors.
Call the overload through the [Presentation.FontsManager](https://reference.aspose.com/slides/net/aspose.slides/presentation/fontsmanager/) property. It returns only the substitutions determined while rendering the selected slides. Each result is a [FontSubstitutionInfo](https://reference.aspose.com/slides/net/aspose.slides/fontsubstitutioninfo/) object containing the original and substituted font names. The result reflects the current font environment and [externally loaded fonts](https://docs.aspose.com/slides/net/custom-font/). Substitution rules stored in an [IFontSubstRuleCollection](https://reference.aspose.com/slides/net/aspose.slides/ifontsubstrulecollection/) change the rendered output but are not reflected in the result.
The same substitution can be required by more than one selected slide. Deduplicate the results when you create a font inventory or preflight report. The following example reports every returned substitution and then creates a sorted list of unique font mappings:
```csharp
using System;
using System.Linq;
using Aspose.Slides;
using var presentation = new Presentation("Presentation.pptx");
int[] selectedSlides = { 1, 3, 5 };
var substitutions = presentation.FontsManager.GetSubstitutions(selectedSlides).ToList();
Console.WriteLine("Substitutions for the selected slides:");
foreach (var substitution in substitutions)
{
Console.WriteLine($"{substitution.OriginalFontName} -> {substitution.SubstitutedFontName}");
}
var preflightEntries = substitutions.Select(substitution => $"{substitution.OriginalFontName} -> {substitution.SubstitutedFontName}");
var uniquePreflightEntries = preflightEntries.Distinct(StringComparer.OrdinalIgnoreCase);
var sortedPreflightEntries = uniquePreflightEntries.OrderBy(entry => entry, StringComparer.OrdinalIgnoreCase).ToList();
Console.WriteLine("Deduplicated font preflight report:");
foreach (var entry in sortedPreflightEntries)
{
Console.WriteLine(entry);
}
```
The [IFontsManager](https://reference.aspose.com/slides/net/aspose.slides/ifontsmanager/) interface provides both overloads. Choose one according to the scope of the rendering operation:
| Overload | Use it when |
|---|---|
| [GetSubstitutions](https://reference.aspose.com/slides/net/aspose.slides/ifontsmanager/getsubstitutions/) with no arguments | You need substitutions for the entire presentation. |
| [GetSubstitutions](https://reference.aspose.com/slides/net/aspose.slides/ifontsmanager/getsubstitutions/) with `int[] slides` | You need substitutions for a selected range, incremental check, or partial export. |
## **Set Font Substitution Rules**
To specify the font that Aspose.Slides should use when a source font is unavailable:
1. Load the presentation.
2. Create font definitions for the source and substitute fonts.
3. Create a [FontSubstRule](https://reference.aspose.com/slides/net/aspose.slides/fontsubstrule/) with the [WhenInaccessible](https://reference.aspose.com/slides/net/aspose.slides/fontsubstcondition/) condition.
4. Add the rule to a [FontSubstRuleCollection](https://reference.aspose.com/slides/net/aspose.slides/fontsubstrulecollection/).
5. Assign the collection to the [FontsManager.FontSubstRuleList](https://reference.aspose.com/slides/net/aspose.slides/fontsmanager/fontsubstrulelist/) property.
6. Render or convert the presentation.
The following C# example substitutes `Arial` for `SomeRareFont` when `SomeRareFont` is unavailable, and then renders the first slide to verify the result. The substitute font must be available to Aspose.Slides.
```csharp
using Aspose.Slides;
using var presentation = new Presentation("Fonts.pptx");
var sourceFont = new FontData("SomeRareFont");
var substituteFont = new FontData("Arial");
var substitutionRule = new FontSubstRule(sourceFont, substituteFont, FontSubstCondition.WhenInaccessible);
var substitutionRules = new FontSubstRuleCollection();
substitutionRules.Add(substitutionRule);
presentation.FontsManager.FontSubstRuleList = substitutionRules;
using var image = presentation.Slides[0].GetImage(1f, 1f);
image.Save("slide.jpg", ImageFormat.Jpeg);
```
For an unconditional change to the fonts used throughout a presentation, see [Font Replacement](https://docs.aspose.com/slides/net/font-replacement/).
## **Limitations for Math Equation Fonts**
Font substitution rules are part of the standard font selection process used during rendering and conversion. They work for regular text when Aspose.Slides can replace an inaccessible font with the available font specified by a rule.
Office Math equations have an additional requirement. If an equation uses **Cambria Math**, Aspose.Slides may need that exact font to calculate and render the equation layout. A rule that substitutes another math font, such as **STIX Two Math**, cannot replace **Cambria Math** for this purpose, and rendering may still report that **Cambria Math** is required.
To render or convert such a presentation, make **Cambria Math** available to Aspose.Slides. Install it in the operating system or load it as an [external font](https://docs.aspose.com/slides/net/custom-font/).
This limitation applies to equation layout. The substitution rules described above still apply to regular presentation text.
## **FAQ**
**What is the difference between font replacement and font substitution?**
[Font replacement](https://docs.aspose.com/slides/net/font-replacement/) intentionally changes one font to another throughout the presentation. Font substitution selects a font for rendered output when the configured condition is met, such as when the original font is unavailable.
**When are substitution rules applied?**
The rules participate in the [font selection sequence](https://docs.aspose.com/slides/net/font-selection-sequence/) during rendering and conversion. With `WhenInaccessible`, a rule is used only when Aspose.Slides cannot access the source font.
**What happens when a font is missing and no substitution rule is configured?**
Aspose.Slides selects the closest available font according to its font selection process. The result depends on the fonts available in the runtime environment.
**Can I load external fonts to avoid substitution?**
Yes. You can [load external fonts](https://docs.aspose.com/slides/net/custom-font/) so Aspose.Slides can use them during rendering and conversion.
**Does Aspose distribute fonts with the library?**
No. You are responsible for providing fonts and complying with their licenses.
**Can substitution results differ between Windows, Linux, and macOS?**
Yes. Installed fonts and font search locations differ by operating system, so a font available on one machine may require substitution on another.
**How can I make font selection consistent in batch conversions?**
Use the same font files and versions on every machine or container, [load required external fonts](https://docs.aspose.com/slides/net/custom-font/), and [embed fonts](https://docs.aspose.com/slides/net/embedded-font/) when licensing permits. You can also call [IFontsManager.GetSubstitutions](https://reference.aspose.com/slides/net/aspose.slides/ifontsmanager/getsubstitutions/) before export to identify unexpected substitutions.
## Related features
- [Set font substitution rules](https://docs.aspose.com/slides/features/font-substitution/)
## Related articles
- [Font Selection Sequence in Aspose.Slides for .NET](https://docs.aspose.com/slides/net/font-selection-sequence/)
- [Streamline Font Replacement in Presentations in .NET](https://docs.aspose.com/slides/net/font-replacement/)
- [Manage Fallback Fonts for Presentations in .NET](https://docs.aspose.com/slides/net/fallback-font/)
# Format Text Using VSTO and Aspose.Slides for .NET
> Migrate from Microsoft Office automation to Aspose.Slides for .NET and format text in PowerPoint (PPT, PPTX) presentations with precise control.
Source: https://docs.aspose.com/slides/net/format-text-using-vsto-and-aspose-slides-and-net/
Updated: 2026-08-13
Sometimes, you need to format the text on slides programmatically. This article shows how to read a sample presentation with some text on the first slide using either [VSTO](https://docs.aspose.com/slides/net/format-text-using-vsto-and-aspose-slides-and-net/) and [Aspose.Slides for .NET](https://docs.aspose.com/slides/net/format-text-using-vsto-and-aspose-slides-and-net/). The code formats the text in the third textbox on the slide to look like the text in the last textbox.
## **Formatting Text**
Both the VSTO and Aspose.Slides methods take the following steps:
1. Open the source presentation.
1. Access the first slide.
1. Access the third text box.
1. Change the formatting of the text in the third text box.
1. Save the presentation to disk.
The screenshots below show the sample slide before and after the execution of the VSTO and Aspose.Slides for .NET code.
**The input presentation**

### **VSTO Code Example**
The code below shows how to reformat text on a slide using VSTO.
**The text reformatted with VSTO**

```c#
//Note: PowerPoint is a namespace which has been defined above like this
//using PowerPoint = Microsoft.Office.Interop.PowerPoint;
PowerPoint.Presentation pres = null;
//Open the presentation
pres = Globals.ThisAddIn.Application.Presentations.Open("c:\\source.ppt",
Microsoft.Office.Core.MsoTriState.msoFalse,
Microsoft.Office.Core.MsoTriState.msoFalse,
Microsoft.Office.Core.MsoTriState.msoTrue);
//Access the first slide
PowerPoint.Slide slide = pres.Slides[1];
//Access the third shape
PowerPoint.Shape shp = slide.Shapes[3];
//Change its text's font to Verdana and height to 32
PowerPoint.TextRange txtRange = shp.TextFrame.TextRange;
txtRange.Font.Name = "Verdana";
txtRange.Font.Size = 32;
//Bolden it
txtRange.Font.Bold = Microsoft.Office.Core.MsoTriState.msoCTrue;
//Italicize it
txtRange.Font.Italic = Microsoft.Office.Core.MsoTriState.msoCTrue;
//Change text color
txtRange.Font.Color.RGB = 0x00CC3333;
//Change shape background color
shp.Fill.ForeColor.RGB = 0x00FFCCCC;
//Reposition it horizontally
shp.Left -= 70;
//Write the output to disk
pres.SaveAs("c:\\outVSTO.ppt",
PowerPoint.PpSaveAsFileType.ppSaveAsPresentation,
Microsoft.Office.Core.MsoTriState.msoFalse);
```
### **Aspose.Slides for .NET Example**
To format text with Aspose.Slides, add the font before formatting the text.
**The output presentation created with Aspose.Slides**

```c#
using System.Drawing;
using Aspose.Slides;
using Aspose.Slides.Export;
//Open the presentation
Presentation pres = new Presentation("source.ppt");
//Access the first slide
ISlide slide = pres.Slides[0];
//Access the third shape
IShape shp = slide.Shapes[2];
//Change its text's font to Verdana and height to 32
ITextFrame tf = ((IAutoShape)shp).TextFrame;
IParagraph para = tf.Paragraphs[0];
IPortion port = para.Portions[0];
port.PortionFormat.LatinFont = new FontData("Verdana");
port.PortionFormat.FontHeight = 32;
//Bolden it
port.PortionFormat.FontBold = NullableBool.True;
//Italicize it
port.PortionFormat.FontItalic = NullableBool.True;
//Change text color
//Set font color
port.PortionFormat.FillFormat.FillType = FillType.Solid;
port.PortionFormat.FillFormat.SolidFillColor.Color = Color.FromArgb(0x33, 0x33, 0xCC);
//Change shape background color
shp.FillFormat.FillType = FillType.Solid;
shp.FillFormat.SolidFillColor.Color = Color.FromArgb(0xCC, 0xCC, 0xFF);
//Write the output to disk
pres.Save("outAspose.ppt", SaveFormat.Ppt);
```
## Related articles
- [Creating Tables Using VSTO and Aspose.Slides for .NET](https://docs.aspose.com/slides/net/creating-a-table-on-powerpoint-slide/)
- [Adding Picture Frames with Animation Using VSTO and Aspose.Slides for .NET](https://docs.aspose.com/slides/net/adding-picture-frame-with-animation/)
- [Adding Text Dynamically Using VSTO and Aspose.Slides for .NET](https://docs.aspose.com/slides/net/adding-text-dynamically-using-vsto-and-aspose-slides-for-net/)
# Format Text
>
Source: https://docs.aspose.com/slides/net/format-text/
Updated: 2026-08-05
Both the VSTO and Aspose.Slides methods take the following steps:
- Open the source presentation.
- Access the first slide.
- Access the third text box.
- Change the formatting of the text in the third text box.
- Save the presentation to disk.
## **VSTO**
``` csharp
using System.Drawing;
using Aspose.Slides;
using Aspose.Slides.Export;
//Open the presentation
using (Presentation pres = new Presentation("source.ppt"))
{
//Access the first slide
ISlide slide = pres.Slides[0];
//Access the third shape
IAutoShape shp = (IAutoShape)slide.Shapes[2];
//Change its text's font to Verdana and height to 32
IPortionFormat portionFormat = shp.TextFrame.Paragraphs[0].Portions[0].PortionFormat;
portionFormat.LatinFont = new FontData("Verdana");
portionFormat.FontHeight = 32;
//Bolden it
portionFormat.FontBold = NullableBool.True;
//Italicize it
portionFormat.FontItalic = NullableBool.True;
//Change text color
portionFormat.FillFormat.FillType = FillType.Solid;
portionFormat.FillFormat.SolidFillColor.Color = Color.FromArgb(0x33, 0x33, 0xCC);
//Change shape background color
shp.FillFormat.FillType = FillType.Solid;
shp.FillFormat.SolidFillColor.Color = Color.FromArgb(0xCC, 0xCC, 0xFF);
//Write the output to disk
pres.Save("outAspose.ppt", SaveFormat.Ppt);
}
```
## **Aspose.Slides**
``` csharp
PowerPoint.Presentation pres = null;
//Open the presentation
pres = Globals.ThisAddIn.Application.Presentations.Open("source.ppt",
Microsoft.Office.Core.MsoTriState.msoFalse,
Microsoft.Office.Core.MsoTriState.msoFalse,
Microsoft.Office.Core.MsoTriState.msoTrue);
//Access the first slide
PowerPoint.Slide slide = pres.Slides[1];
//Access the third shape
PowerPoint.Shape shp = slide.Shapes[3];
//Change its text's font to Verdana and height to 32
PowerPoint.TextRange txtRange = shp.TextFrame.TextRange;
txtRange.Font.Name = "Verdana";
txtRange.Font.Size = 32;
//Bolden it
txtRange.Font.Bold = Microsoft.Office.Core.MsoTriState.msoCTrue;
//Italicize it
txtRange.Font.Italic = Microsoft.Office.Core.MsoTriState.msoCTrue;
//Change text color
txtRange.Font.Color.RGB = 0x00CC3333;
//Change shape background color
shp.Fill.ForeColor.RGB = 0x00FFCCCC;
//Reposition it horizontally
shp.Left -= 70;
//Write the output to disk
pres.SaveAs("outVSTO.ppt",
PowerPoint.PpSaveAsFileType.ppSaveAsPresentation,
Microsoft.Office.Core.MsoTriState.msoFalse);
```
## **Download Sample Code**
- [Github](https://github.com/aspose-slides/Aspose.Slides-for-.NET/releases/download/AsposeSlidesVsVSTOv1.1/Format.Text.using.VSTO.and.Aspose.Slides.Aspose.Slides.zip)
- [Sourceforge](https://sourceforge.net/projects/asposevsto/files/Aspose.Slides%20Vs%20VSTO%20Slides/Format%20Text%20using%20VSTO%20and%20Aspose.Slides%20%28Aspose.Slides%29.zip/download)
- [Bitbucket](https://bitbucket.org/asposemarketplace/aspose-for-vsto/src/master/Aspose.Slides%20Vs%20VSTO%20Slides/Format%20Text%20using%20VSTO%20and%20Aspose.Slides/)
# Generate Slide Thumbnail as JPEG
>
Source: https://docs.aspose.com/slides/net/generate-slide-thumbnail-as-jpeg/
Updated: 2026-08-13
To generate the thumbnail of any desired slide using Aspose.Slides for .NET:
- Create an instance of the Presentation class.
- Obtain the reference of any desired slide by using its ID or index.
- Get the thumbnail image of the referenced slide on a specified scale.
- Save the thumbnail image in any desired image format.
## **Example**
```cs
using Aspose.Slides;
//Instantiate the Presentation class that represents the presentation file
using (Presentation pres = new Presentation("Slides Test Presentation.pptx"))
{
//Access the first slide
ISlide sld = pres.Slides[0];
//Create a full scale image
using (IImage image = sld.GetImage(1f, 1f))
{
//Save the image to disk in JPEG format
image.Save("Test Thumbnail.jpg", ImageFormat.Jpeg);
}
}
```
## **Download Running Example**
- [GitHub](https://github.com/aspose-slides/Aspose.Slides-for-.NET/tree/master/Plugins/Aspose.Slides%20Vs%20VSTO%20Presentations/Aspose.Slides%20Features%20missing%20in%20VSTO/Slide%20Thumbnail%20to%20JPEG)
## **Download Sample Code**
- [GitHub](https://github.com/aspose-slides/Aspose.Slides-for-.NET/releases/tag/Aspose.SlidesFeaturesmissingInVSTOv1.1)
For more details, visit [Convert PPT and PPTX to JPG in .NET](https://docs.aspose.com/slides/net/convert-powerpoint-to-jpg/).
## Related articles
- [Render Slide as Thumbnail to JPEG](https://docs.aspose.com/slides/net/render-slide-as-thumbnail-to-jpeg/)
- [Render Slide as Thumbnail to JPEG by User Defined Values](https://docs.aspose.com/slides/net/render-slide-as-thumbnail-to-jpeg-by-user-defined-values/)
- [Generating a Thumbnail from a Slide with User Defined Dimensions](https://docs.aspose.com/slides/net/generating-a-thumbnail-from-a-slide-with-user-defined-dimensions/)
# Generating a Thumbnail from a Slide with User Defined Dimensions
>
Source: https://docs.aspose.com/slides/net/generating-a-thumbnail-from-a-slide-with-user-defined-dimensions/
Updated: 2026-08-13
To generate the thumbnail of any desired slide using Aspose.Slides for .NET:
- Create an instance of the Presentation class.
- Obtain the reference of any desired slide by using its ID or index.
- Get the X and Y scaling factors based on user defined X and Y dimensions.
- Get the thumbnail image of the referenced slide on a specified scale.
- Save the thumbnail image in any desired image format.
## **Example**
```cs
using Aspose.Slides;
//Instantiate the Presentation class that represents the presentation file
using (Presentation pres = new Presentation("TestPresentation.pptx"))
{
//Access the first slide
ISlide sld = pres.Slides[0];
//User defined dimension
int desiredX = 1200;
int desiredY = 800;
//Getting scaled value of X and Y
float scaleX = (float)(1.0 / pres.SlideSize.Size.Width) * desiredX;
float scaleY = (float)(1.0 / pres.SlideSize.Size.Height) * desiredY;
//Create a full scale image
using (IImage image = sld.GetImage(scaleX, scaleY))
{
//Save the image to disk in JPEG format
image.Save("Thumbnail2.jpg", ImageFormat.Jpeg);
}
}
```
## **Download Running Example**
- [GitHub](https://github.com/aspose-slides/Aspose.Slides-for-.NET/tree/master/Plugins/Aspose.Slides%20Vs%20VSTO%20Presentations/Aspose.Slides%20Features%20missing%20in%20VSTO/User%20Defined%20Thumbnail)
## **Download Sample Code**
- [GitHub](https://github.com/aspose-slides/Aspose.Slides-for-.NET/releases/tag/Aspose.SlidesFeaturesmissingInVSTOv1.1)
For more details, visit [Convert Slide](https://docs.aspose.com/slides/net/convert-slide/).
## Related articles
- [Render Slide as Thumbnail to JPEG by User Defined Values](https://docs.aspose.com/slides/net/render-slide-as-thumbnail-to-jpeg-by-user-defined-values/)
- [Generate Slide Thumbnail as JPEG](https://docs.aspose.com/slides/net/generate-slide-thumbnail-as-jpeg/)
- [Render Slide as Thumbnail to JPEG](https://docs.aspose.com/slides/net/render-slide-as-thumbnail-to-jpeg/)
# Get all the external hyperlinks in a presentation
>
Source: https://docs.aspose.com/slides/net/get-all-the-external-hyperlinks-in-a-presentation/
Updated: 2026-08-05
## **OpenXML Presentation**
``` csharp
string FilePath = @"..\..\..\..\Sample Files\";
string FileName = FilePath + "Get all the External Eyperlinks.pptx";
foreach (string s in GetAllExternalHyperlinksInPresentation(FileName))
Console.WriteLine(s);
// Returns all the external hyperlinks in the slides of a presentation.
public static IEnumerable GetAllExternalHyperlinksInPresentation(string fileName)
{
// Declare a list of strings.
List ret = new List();
// Open the presentation file as read-only.
using (PresentationDocument document = PresentationDocument.Open(fileName, false))
{
// Iterate through all the slide parts in the presentation part.
foreach (SlidePart slidePart in document.PresentationPart.SlideParts)
{
IEnumerable links = slidePart.Slide.Descendants();
// Iterate through all the links in the slide part.
foreach (Drawing.HyperlinkType link in links)
{
// Iterate through all the external relationships in the slide part.
foreach (HyperlinkRelationship relation in slidePart.HyperlinkRelationships)
{
// If the relationship ID matches the link ID...
if (relation.Id.Equals(link.Id))
{
// Add the URI of the external relationship to the list of strings.
ret.Add(relation.Uri.AbsoluteUri);
}
}
}
}
}
// Return the list of strings.
return ret;
}
```
## **Aspose.Slides**
Aspose.Slides for .NET allows developers to manage the hyperlinks in presentation on the presentation, slide and text frame level.The **IHyperlinkQueries** class helps to manage hyperlinks in a presentation.
``` csharp
using Aspose.Slides;
string FilePath = @"..\..\..\..\Sample Files\";
string FileName = FilePath + "Get all the External Eyperlinks.pptx";
//Instantiate a Presentation object that represents a PPTX file
Presentation pres = new Presentation(FileName);
//Get the hyperlinks from presentation
IList links = pres.HyperlinkQueries.GetAnyHyperlinks();
foreach (IHyperlinkContainer link in links)
Console.WriteLine(link.HyperlinkClick.ExternalUrl);
```
## **Download Running Code Example**
- [GitHub](https://github.com/aspose-slides/Aspose.Slides-for-.NET/releases/tag/AsposeSlidesVsOpenXML1.1)
## **Sample Code**
- [GitHub](https://github.com/aspose-slides/Aspose.Slides-for-.NET/tree/master/Plugins/OpenXML/Common%20Features/Get%20all%20the%20External%20Hyperlinks)
# Get all the text in a slide
>
Source: https://docs.aspose.com/slides/net/get-all-the-text-in-a-slide/
Updated: 2026-08-05
## **OpenXML SDK**
``` csharp
string FilePath = @"..\..\..\..\Sample Files\";
string FileName = FilePath + "Get all the text in a slide.pptx";
foreach (string s in GetAllTextInSlide(FileName, 0))
Console.WriteLine(s);
Console.ReadKey();
// Get all the text in a slide.
public static string[] GetAllTextInSlide(string presentationFile, int slideIndex)
{
// Open the presentation as read-only.
using (PresentationDocument presentationDocument = PresentationDocument.Open(presentationFile, false))
{
// Pass the presentation and the slide index
// to the next GetAllTextInSlide method, and
// then return the array of strings it returns.
return GetAllTextInSlide(presentationDocument, slideIndex);
}
}
public static string[] GetAllTextInSlide(PresentationDocument presentationDocument, int slideIndex)
{
// Verify that the presentation document exists.
if (presentationDocument == null)
{
throw new ArgumentNullException("presentationDocument");
}
// Verify that the slide index is not out of range.
if (slideIndex < 0)
{
throw new ArgumentOutOfRangeException("slideIndex");
}
// Get the presentation part of the presentation document.
PresentationPart presentationPart = presentationDocument.PresentationPart;
// Verify that the presentation part and presentation exist.
if (presentationPart != null && presentationPart.Presentation != null)
{
// Get the Presentation object from the presentation part.
Presentation presentation = presentationPart.Presentation;
// Verify that the slide ID list exists.
if (presentation.SlideIdList != null)
{
// Get the collection of slide IDs from the slide ID list.
DocumentFormat.OpenXml.OpenXmlElementList slideIds =
presentation.SlideIdList.ChildElements;
// If the slide ID is in range...
if (slideIndex < slideIds.Count)
{
// Get the relationship ID of the slide.
string slidePartRelationshipId = (slideIds[slideIndex] as SlideId).RelationshipId;
// Get the specified slide part from the relationship ID.
SlidePart slidePart =
(SlidePart)presentationPart.GetPartById(slidePartRelationshipId);
// Pass the slide part to the next method, and
// then return the array of strings that method
// returns to the previous method.
return GetAllTextInSlide(slidePart);
}
}
}
// Else, return null.
return null;
}
public static string[] GetAllTextInSlide(SlidePart slidePart)
{
// Verify that the slide part exists.
if (slidePart == null)
{
throw new ArgumentNullException("slidePart");
}
// Create a new linked list of strings.
LinkedList texts = new LinkedList();
// If the slide exists...
if (slidePart.Slide != null)
{
// Iterate through all the paragraphs in the slide.
foreach (DocumentFormat.OpenXml.Drawing.Paragraph paragraph in
slidePart.Slide.Descendants())
{
// Create a new string builder.
StringBuilder paragraphText = new StringBuilder();
// Iterate through the lines of the paragraph.
foreach (DocumentFormat.OpenXml.Drawing.Text text in
paragraph.Descendants())
{
// Append each line to the previous lines.
paragraphText.Append(text.Text);
}
if (paragraphText.Length > 0)
{
// Add each paragraph to the linked list.
texts.AddLast(paragraphText.ToString());
}
}
}
if (texts.Count > 0)
{
// Return an array of strings.
return texts.ToArray();
}
else
{
return null;
}
}
```
## **Aspose.Slides**
``` csharp
using Aspose.Slides;
string filePath = @"..\..\..\..\Sample Files\";
string fileName = filePath + "Get all the text in a slide.pptx";
foreach (string text in GetAllTextInSlide(fileName, 0))
{
Console.WriteLine(text);
}
// Get all the text in a slide.
static List GetAllTextInSlide(string presentationFile, int slideIndex)
{
// Create a new list of strings.
List texts = new List();
// Instantiate the Presentation class that represents a PPTX file.
using (Presentation presentation = new Presentation(presentationFile))
{
// Access the slide.
ISlide slide = presentation.Slides[slideIndex];
// Iterate through the shapes to find the placeholders.
foreach (IShape shape in slide.Shapes)
{
if (shape.Placeholder != null && shape is IAutoShape autoShape)
{
// Get the text of each placeholder.
texts.Add(autoShape.TextFrame.Text);
}
}
}
return texts;
}
```
## **Download Sample Code**
- [GitHub](https://github.com/aspose-slides/Aspose.Slides-for-.NET/releases/tag/AsposeSlidesVsOpenXML1.1)
- [Sourceforge](https://sourceforge.net/projects/asposeopenxml/files/Aspose.Slides%20Vs%20OpenXML/Get%20all%20the%20text%20in%20a%20slide%20%28Aspose.Slides%29.zip/download)
- [Bitbucket](https://bitbucket.org/asposemarketplace/aspose-for-openxml/src/master/Aspose.Slides%20Vs%20OpenXML/Get%20all%20the%20text%20in%20a%20slide/)
# Get all the text in all the slides
>
Source: https://docs.aspose.com/slides/net/get-all-the-text-in-all-the-slides/
Updated: 2026-08-05
## **OpenXML SDK**
``` csharp
string FilePath = @"..\..\..\..\Sample Files\";
string FileName = FilePath + "Get all the text in a slide.pptx";
int numberOfSlides = CountSlides(FileName);
System.Console.WriteLine("Number of slides = {0}", numberOfSlides);
string slideText;
for (int i = 0; i < numberOfSlides; i++)
{
GetSlideIdAndText(out slideText, FileName, i);
System.Console.WriteLine("Slide #{0} contains: {1}", i + 1, slideText);
}
System.Console.ReadKey();
public static int CountSlides(string presentationFile)
{
// Open the presentation as read-only.
using (PresentationDocument presentationDocument = PresentationDocument.Open(presentationFile, false))
{
// Pass the presentation to the next CountSlides method
// and return the slide count.
return CountSlides(presentationDocument);
}
}
// Count the slides in the presentation.
public static int CountSlides(PresentationDocument presentationDocument)
{
// Check for a null document object.
if (presentationDocument == null)
{
throw new ArgumentNullException("presentationDocument");
}
int slidesCount = 0;
// Get the presentation part of document.
PresentationPart presentationPart = presentationDocument.PresentationPart;
// Get the slide count from the SlideParts.
if (presentationPart != null)
{
slidesCount = presentationPart.SlideParts.Count();
}
// Return the slide count to the previous method.
return slidesCount;
}
public static void GetSlideIdAndText(out string sldText, string docName, int index)
{
using (PresentationDocument ppt = PresentationDocument.Open(docName, false))
{
// Get the relationship ID of the first slide.
PresentationPart part = ppt.PresentationPart;
OpenXmlElementList slideIds = part.Presentation.SlideIdList.ChildElements;
string relId = (slideIds[index] as SlideId).RelationshipId;
// Get the slide part from the relationship ID.
SlidePart slide = (SlidePart)part.GetPartById(relId);
// Build a StringBuilder object.
StringBuilder paragraphText = new StringBuilder();
// Get the inner text of the slide:
IEnumerable texts = slide.Slide.Descendants();
foreach (A.Text text in texts)
{
paragraphText.Append(text.Text);
}
sldText = paragraphText.ToString();
}
}
```
## **Aspose.Slides**
``` csharp
using System;
using Aspose.Slides;
class Program
{
static void Main()
{
string filePath = @"..\..\..\..\Sample Files\";
string fileName = filePath + "Get all the text in a slide.pptx";
int numberOfSlides = CountSlides(fileName);
Console.WriteLine("Number of slides = {0}", numberOfSlides);
for (int i = 0; i < numberOfSlides; i++)
{
string slideText = GetSlideText(fileName, i);
Console.WriteLine("Slide #{0} contains: {1}", i + 1, slideText);
}
}
static int CountSlides(string presentationFile)
{
//Instantiate the Presentation class that represents a PPTX file
using (Presentation pres = new Presentation(presentationFile))
{
return pres.Slides.Count;
}
}
static string GetSlideText(string docName, int index)
{
string sldText = "";
//Instantiate the Presentation class that represents a PPTX file
using (Presentation pres = new Presentation(docName))
{
//Access the slide
ISlide sld = pres.Slides[index];
//Iterate through the shapes to find the placeholders
foreach (IShape shp in sld.Shapes)
{
if (shp.Placeholder != null && shp is IAutoShape autoShape)
{
//Get the text of each placeholder
sldText += autoShape.TextFrame.Text;
}
}
}
return sldText;
}
}
```
## **Download Sample Code**
- [GitHub](https://github.com/aspose-slides/Aspose.Slides-for-.NET/releases/tag/AsposeSlidesVsOpenXML1.1)
- [Sourceforge](https://sourceforge.net/projects/asposeopenxml/files/Aspose.Slides%20Vs%20OpenXML/Get%20all%20the%20text%20in%20all%20slides%20%28Aspose.Slides%29.zip/download)
- [Bitbucket](https://bitbucket.org/asposemarketplace/aspose-for-openxml/src/master/Aspose.Slides%20Vs%20OpenXML/Get%20all%20the%20text%20in%20all%20slides/)
# Get the Entire Slide Background from a Presentation as an Image
> Extract full slide backgrounds as images from PowerPoint and OpenDocument presentations using Aspose.Slides for .NET, streamlining visual workflows.
Source: https://docs.aspose.com/slides/net/get-the-entire-presentation-slide-background-as-an-image/
Updated: 2026-08-05
## **Overview**
In PowerPoint presentations, a slide background may be formed from multiple elements, including the slide background image, presentation theme, color scheme, and objects placed on the master slide or layout slide.
This article shows how to extract the entire slide background as an image using Aspose.Slides for .NET. Since there is no single method for this task, the approach involves cloning the selected slide into a temporary presentation, removing the slide shapes, and then converting the resulting slide background to an image.
## **Get the Entire Slide Background**
Aspose.Slides for .NET does not provide a simple method to extract the entire presentation slide background as an image, but you can follow the steps below to do this:
1. Load the presentation using the [Presentation](https://reference.aspose.com/slides/net/aspose.slides/presentation/) class.
1. Get the slide size from the presentation.
1. Select a slide.
1. Create a temporary presentation.
1. Set the same slide size in the temporary presentation.
1. Clone the selected slide into the temporary presentation.
1. Delete the shapes from the cloned slide.
1. Convert the cloned slide to an image.
The following code example extracts the entire presentation slide background as an image.
```cs
using Aspose.Slides;
var slideIndex = 0;
var imageScale = 1;
using var presentation = new Presentation("sample.pptx");
var slideSize = presentation.SlideSize.Size;
var slide = presentation.Slides[slideIndex];
using var tempPresentation = new Presentation();
tempPresentation.SlideSize.SetSize(slideSize.Width, slideSize.Height, SlideSizeScaleType.DoNotScale);
var clonedSlide = tempPresentation.Slides.AddClone(slide);
clonedSlide.Shapes.Clear();
using var background = clonedSlide.GetImage(imageScale, imageScale);
background.Save("output.png", ImageFormat.Png);
```
## **FAQ**
### Will complex gradients, textures, or picture fills from a master slide be preserved in the resulting background image?
Yes. Aspose.Slides renders gradient, picture, and texture fills defined on the slide, layout, or master. If you need to isolate the look from inherited masters, [set an own background](https://docs.aspose.com/slides/net/presentation-background/) on the current slide before exporting.
### Can I add a watermark to the resulting background image before saving it?
Yes. You can [add a watermark](https://docs.aspose.com/slides/net/watermark/) shape or image on a working [copy of the slide](https://docs.aspose.com/slides/net/clone-slides/) (placed behind other content) and then export. This lets you generate a background image with the watermark baked in.
### Can I get the background for a specific layout or master without tying it to an existing slide?
Yes. Access the desired master or layout, apply it to a [temporary slide](https://docs.aspose.com/slides/net/clone-slides/) with the required size, and export that slide to obtain the background derived from that layout or master.
### Are there licensing limitations that affect image export?
Rendering features are fully available with a [valid license](https://docs.aspose.com/slides/net/licensing/). In evaluation mode, output may include limitations such as a watermark. Activate the license once per process before running batch exports.
# Get the File Format of Presentation
>
Source: https://docs.aspose.com/slides/net/get-the-file-format-of-presentation/
Updated: 2026-08-05
In order to get the file format. Please follow the steps below:
- Create an instance of **IPresentationInfo** class
- Get information about the presentation
In the example given below, we have got the file format.
## **Example**
``` csharp
using Aspose.Slides;
string FilePath = @"..\..\..\Sample Files\";
string FileName = FilePath + "Getting the format of a file.pptx";
IPresentationInfo info;
info = PresentationFactory.Instance.GetPresentationInfo(FileName);
switch (info.LoadFormat)
{
case LoadFormat.Pptx:
{
break;
}
case LoadFormat.Unknown:
{
break;
}
}
```
## **Download Sample Code**
- [Github](https://github.com/aspose-slides/Aspose.Slides-for-.NET/releases/tag/MissingFeaturesAsposeSlidesForOpenXMLv1.1)
## **Download Running Example**
- [Github](https://github.com/aspose-slides/Aspose.Slides-for-.NET/tree/master/Plugins/OpenXML/Missing%20Features/Getting%20the%20format%20of%20a%20file)
# Get the titles of all the slides
>
Source: https://docs.aspose.com/slides/net/get-the-titles-of-all-the-slides/
Updated: 2026-08-05
## **OpenXML SDK**
``` csharp
string FilePath = @"..\..\..\..\Sample Files\";
string FileName = FilePath + "Get the titles of all the slides.pptx";
foreach (string s in GetSlideTitles(FileName))
Console.WriteLine(s);
Console.ReadKey();
// Get a list of the titles of all the slides in the presentation.
public static IList GetSlideTitles(string presentationFile)
{
// Open the presentation as read-only.
using (PresentationDocument presentationDocument =
PresentationDocument.Open(presentationFile, false))
{
return GetSlideTitles(presentationDocument);
}
}
// Get a list of the titles of all the slides in the presentation.
public static IList GetSlideTitles(PresentationDocument presentationDocument)
{
if (presentationDocument == null)
{
throw new ArgumentNullException("presentationDocument");
}
// Get a PresentationPart object from the PresentationDocument object.
PresentationPart presentationPart = presentationDocument.PresentationPart;
if (presentationPart != null &&
presentationPart.Presentation != null)
{
// Get a Presentation object from the PresentationPart object.
Presentation presentation = presentationPart.Presentation;
if (presentation.SlideIdList != null)
{
List titlesList = new List();
// Get the title of each slide in the slide order.
foreach (var slideId in presentation.SlideIdList.Elements())
{
SlidePart slidePart = presentationPart.GetPartById(slideId.RelationshipId) as SlidePart;
// Get the slide title.
string title = GetSlideTitle(slidePart);
// An empty title can also be added.
titlesList.Add(title);
}
return titlesList;
}
}
return null;
}
// Get the title string of the slide.
public static string GetSlideTitle(SlidePart slidePart)
{
if (slidePart == null)
{
throw new ArgumentNullException("presentationDocument");
}
// Declare a paragraph separator.
string paragraphSeparator = null;
if (slidePart.Slide != null)
{
// Find all the title shapes.
var shapes = from shape in slidePart.Slide.Descendants()
where IsTitleShape(shape)
select shape;
StringBuilder paragraphText = new StringBuilder();
foreach (var shape in shapes)
{
// Get the text in each paragraph in this shape.
foreach (var paragraph in shape.TextBody.Descendants())
{
// Add a line break.
paragraphText.Append(paragraphSeparator);
foreach (var text in paragraph.Descendants())
{
paragraphText.Append(text.Text);
}
paragraphSeparator = "\n";
}
}
return paragraphText.ToString();
}
return string.Empty;
}
// Determines whether the shape is a title shape.
private static bool IsTitleShape(Shape shape)
{
var placeholderShape = shape.NonVisualShapeProperties.ApplicationNonVisualDrawingProperties.GetFirstChild();
if (placeholderShape != null && placeholderShape.Type != null && placeholderShape.Type.HasValue)
{
switch ((PlaceholderValues)placeholderShape.Type)
{
// Any title shape.
case PlaceholderValues.Title:
// A centered title.
case PlaceholderValues.CenteredTitle:
return true;
default:
return false;
}
}
return false;
}
```
## **Aspose.Slides**
``` csharp
using System;
using Aspose.Slides;
// Open the presentation.
using (Presentation presentation = new Presentation("Get the titles of all the slides.pptx"))
{
// Get the title of each slide in the slide order.
foreach (ISlide slide in presentation.Slides)
{
string title = null;
foreach (IShape shape in slide.Shapes)
{
// Only a title placeholder holds the slide title.
IPlaceholder placeholder = shape.Placeholder;
if (placeholder == null)
continue;
if (placeholder.Type != PlaceholderType.Title &&
placeholder.Type != PlaceholderType.CenteredTitle)
continue;
// Get the text of the title shape.
IAutoShape autoShape = shape as IAutoShape;
if (autoShape != null && autoShape.TextFrame != null)
title = autoShape.TextFrame.Text;
}
// An empty title is also reported.
Console.WriteLine("Slide #{0}: {1}", slide.SlideNumber, title);
}
}
```
## **Download Sample Code**
- [GitHub](https://github.com/aspose-slides/Aspose.Slides-for-.NET/releases/tag/AsposeSlidesVsOpenXML1.1)
- [Sourceforge](https://sourceforge.net/projects/asposeopenxml/files/Aspose.Slides%20Vs%20OpenXML/Get%20the%20titles%20of%20all%20the%20slides%20%28Aspose.Slides%29.zip/download)
- [Bitbucket](https://bitbucket.org/asposemarketplace/aspose-for-openxml/src/master/Aspose.Slides%20Vs%20OpenXML/Get%20the%20titles%20of%20all%20the%20slides/)
# Getting Started
> The path from a new .NET project to a first saved presentation with Aspose.Slides: check the requirements, install the package, run a first program, and continue with common tasks.
Source: https://docs.aspose.com/slides/net/getting-started/
Updated: 2026-10-07
## **Overview**
Work through the four steps below in order. Each step names what to do and links the article with the details. Evaluation, licensing, and support are covered after the steps.
## **Step 1: Check the System Requirements**
[Aspose.Slides for .NET](https://products.aspose.com/slides/net/) runs on Windows, Linux, and macOS. [System Requirements](https://docs.aspose.com/slides/net/system-requirements/) lists the operating systems and .NET versions that each package supports, and the libraries that Linux needs in addition.
## **Step 2: Install the Package**
Aspose.Slides for .NET is distributed through NuGet as two packages that provide the same classes. Add one of them to your project:
- On Windows: `dotnet add package Aspose.Slides.NET`
- On Linux and macOS: `dotnet add package Aspose.Slides.NET6.CrossPlatform`. On Linux, install the `fontconfig` library first.
- On Alpine Linux, and on Linux systems whose glibc is older than 2.23 (x64) or 2.39 (ARM64): Aspose.Slides.NET, with the `libgdiplus` library installed.
[Installation](https://docs.aspose.com/slides/net/installation/) gives the Linux commands, the extra startup setting that Aspose.Slides.NET needs on Linux, and the steps for Visual Studio.
## **Step 3: Create Your First Presentation**
The [quick start on the Aspose.Slides for .NET home page](https://docs.aspose.com/slides/net/#your-first-presentation) is a complete console program: it adds a text box to a slide and saves the presentation as a PPTX file. [Create Presentations](https://docs.aspose.com/slides/net/create-presentation/) explains the same steps in more detail and shows how to open an existing presentation and save it in another format.
## **Step 4: Continue with Common Tasks**
- [Open a presentation](https://docs.aspose.com/slides/net/open-presentation/)
- [Save a presentation](https://docs.aspose.com/slides/net/save-presentation/)
- [Convert a presentation to PDF](https://docs.aspose.com/slides/net/convert-powerpoint-to-pdf/)
- [Render slides as images](https://docs.aspose.com/slides/net/convert-slide/)
- [Edit presentation text](https://docs.aspose.com/slides/net/manage-text/)
- [Examples by slide element](https://docs.aspose.com/slides/net/examples/)
## **Evaluate and License**
Without a license, Aspose.Slides runs in evaluation mode: it adds a watermark to every slide it saves and truncates text read from presentations.
- [Evaluate Aspose.Slides](https://docs.aspose.com/slides/net/evaluate-aspose-slides/) describes the evaluation limitations and how to request a temporary license.
- [Licensing](https://docs.aspose.com/slides/net/licensing/) shows how to apply a license from a file, a stream, or an embedded resource.
- [Metered Licensing](https://docs.aspose.com/slides/net/metered-licensing/) covers licensing that is billed by usage.
- [Supported File Formats](https://docs.aspose.com/slides/net/supported-file-formats/) lists the formats that Aspose.Slides can load and save.
## **Get Help**
[Product Support](https://docs.aspose.com/slides/net/product-support/) explains how to ask a question on the [free support forum](https://forum.aspose.com/c/slides/11) and what to include when you report a problem.
## **FAQ**
**Do I need Microsoft PowerPoint installed?**
No. Aspose.Slides reads and writes presentation files itself and does not use PowerPoint, so it also runs on servers and on Linux.
**Which package should I use for a .NET Framework application?**
Aspose.Slides.NET. It includes builds for .NET Framework 4.6.2 and later, .NET 6 and later, and .NET Standard 2.0. Aspose.Slides.NET6.CrossPlatform requires .NET 6 or later.
# Group Presentation Shapes in .NET
> Learn to group and ungroup shapes in PowerPoint decks using Aspose.Slides for .NET—fast, step-by-step guide with free C# code.
Source: https://docs.aspose.com/slides/net/group/
Updated: 2026-08-05
## **Overview**
This article explains how to work with group shapes in Aspose.Slides. It shows how to add a group shape to a slide, place shapes inside it, and save the updated presentation. It also demonstrates how to access shapes stored inside a group and read their `AlternativeText` values. In addition, the article briefly covers related group-shape capabilities such as nested groups, z-order, and locking options.
## **Add a Group Shape**
Aspose.Slides support working with group shapes on slides. This feature helps developers support richer presentations. Aspose.Slides for .NET supports adding or accessing group shapes. It is possible to add shapes to an added group shape to populate it or access any property of group shape. To add a group shape to a slide using Aspose.Slides for .NET:
1. Create an instance of the [Presentation](https://reference.aspose.com/slides/net/aspose.slides/presentation) class.
1. Obtain the reference of a slide by using its Index
1. Add a group shape to the slide.
1. Add the shapes to the added group shape.
1. Save the modified presentation as a PPTX file.
The example below adds a group shape to a slide.
```c#
using Aspose.Slides;
using Aspose.Slides.Export;
// Instantiate Prseetation class
using (Presentation pres = new Presentation())
{
// Get the first slide
ISlide sld = pres.Slides[0];
// Accessing the shape collection of slides
IShapeCollection slideShapes = sld.Shapes;
// Adding a group shape to the slide
IGroupShape groupShape = slideShapes.AddGroupShape();
// Adding shapes inside added group shape
groupShape.Shapes.AddAutoShape(ShapeType.Rectangle, 300, 100, 100, 100);
groupShape.Shapes.AddAutoShape(ShapeType.Rectangle, 500, 100, 100, 100);
groupShape.Shapes.AddAutoShape(ShapeType.Rectangle, 300, 300, 100, 100);
groupShape.Shapes.AddAutoShape(ShapeType.Rectangle, 500, 300, 100, 100);
// Adding group shape frame
groupShape.Frame = new ShapeFrame(100, 300, 500, 40, NullableBool.False, NullableBool.False, 0);
// Write the PPTX file to disk
pres.Save("GroupShape_out.pptx", SaveFormat.Pptx);
}
```
## **Access the AltText Property**
This topic shows simple steps, complete with code examples, for adding a group shape and accessing AltText property of group shapes on slides. To access AltText of a group shape in a slide using Aspose.Slides for .NET:
1. Instantiate `Presentation` class that represents PPTX file.
1. Obtain the reference of a slide by using its Index.
1. Accessing the shape collection of slides.
1. Accessing the group shape.
1. Accessing the AltText property.
The example below accesses alternative text of group shape.
```c#
using Aspose.Slides;
// Instantiate Presentation class that represents PPTX file
Presentation pres = new Presentation("AltText.pptx");
// Get the first slide
ISlide sld = pres.Slides[0];
for (int i = 0; i < sld.Shapes.Count; i++)
{
// Accessing the shape collection of slides
IShape shape = sld.Shapes[i];
if (shape is GroupShape)
{
// Accessing the group shape.
IGroupShape grphShape = (IGroupShape)shape;
for (int j = 0; j < grphShape.Shapes.Count; j++)
{
IShape shape2 = grphShape.Shapes[j];
// Accessing the AltText property
Console.WriteLine(shape2.AlternativeText);
}
}
}
```
## **FAQ**
### Is nested grouping (a group inside a group) supported?
Yes. [GroupShape](https://reference.aspose.com/slides/net/aspose.slides/groupshape/) has a [ParentGroup](https://reference.aspose.com/slides/net/aspose.slides/shape/parentgroup/) property, which directly indicates hierarchy support (a group can be a child of another group).
### How do I control the group’s z-order relative to other objects on the slide?
Use the [GroupShape](https://reference.aspose.com/slides/net/aspose.slides/groupshape/)’s [ZOrderPosition](https://reference.aspose.com/slides/net/aspose.slides/shape/zorderposition/) property to inspect its position in the display stack.
### Can I prevent moving/editing/ungrouping?
Yes. The group’s lock section is exposed via [GroupShapeLock](https://reference.aspose.com/slides/net/aspose.slides/groupshape/groupshapelock/), which lets you restrict operations on the object.
## Related features
- [Group shapes](https://docs.aspose.com/slides/features/shape-groups/)
## Related articles
- [Group Shape](https://docs.aspose.com/slides/net/examples/elements/group-shape/)
# High level Programming with Presentation Document Object Model
>
Source: https://docs.aspose.com/slides/net/high-level-programming-with-presentation-document-object-model/
Updated: 2024-11-01
This section includes the following topics
- [Assemble Slides](https://docs.aspose.com/slides/net/assemble-slides/)
- [Find and Replace in Presentation](https://docs.aspose.com/slides/net/find-and-replace-in-presentation/)
# How to Add Headers & Footers to Presentations in .NET
> Learn how to add headers and footers in PowerPoint PPT, PPTX and ODP presentations in .NET using both legacy and modern Aspose.Slides APIs.
Source: https://docs.aspose.com/slides/net/how-to-add-header-footer-in-a-presentation/
Updated: 2026-08-13
A new [Aspose.Slides for .NET API](https://docs.aspose.com/slides/net/) has been released and now this single product supports the capability to generate PowerPoint documents from scratch and editing the existing ones.
## **Support for Legacy Code**
In order to use the legacy code developed with Aspose.Slides for .NET versions earlier to 13.x, you need to make some minor changes in your code and the code will work as earlier. All the classes that were present in old Aspose.Slides for .NET under Aspose.Slide and Aspose.Slides.Pptx namespaces are now merged in single Aspose.Slides namespace. Please take a look over the following simple code snippet for adding header footer in presentation in legacy Aspose.Slides API and follow the steps describing how to migrate to new merged API.
## **Legacy Aspose.Slides for .NET Approach**
```c#
PresentationEx sourcePres = new PresentationEx();
//Setting Header Footer visibility properties
sourcePres.UpdateSlideNumberFields = true;
//Update the Date Time Fields
sourcePres.UpdateDateTimeFields = true;
//Show date time placeholder
sourcePres.HeaderFooterManager.IsDateTimeVisible = true;
//Show the footer place holder
sourcePres.HeaderFooterManager.IsFooterVisible = true;
//Show Slide Number
sourcePres.HeaderFooterManager.IsSlideNumberVisible = true;
//Set the header footer visibility on Title Slide
sourcePres.HeaderFooterManager.SetVisibilityOnTitleSlide(true);
//Write the presentation to the disk
sourcePres.Write("NewSource.pptx");
```
```c#
using Aspose.Slides;
//Create the presentation
Presentation pres = new Presentation();
//Get first slide
Slide sld = pres.GetSlideByPosition(1);
//Access the Header / Footer of the slide
HeaderFooter hf = sld.HeaderFooter;
//Set Page Number Visibility
hf.PageNumberVisible = true;
//Set Footer Visibility
hf.FooterVisible = true;
//Set Header Visibility
hf.HeaderVisible = true;
//Set Date Time Visibility
hf.DateTimeVisible = true;
//Set Date Time format
hf.DateTimeFormat = DateTimeFormat.DateTime_dMMMMyyyy;
//Set Header Text
hf.HeaderText = "Header Text";
//Set Footer Text
hf.FooterText = "Footer Text";
//Write the presentation to the disk
pres.Write("HeadFoot.ppt");
```
## **New Aspose.Slides for .NET 13.x Approach**
``` csharp
using Aspose.Slides;
using Aspose.Slides.Export;
using (Presentation sourcePres = new Presentation())
{
//Setting Header Footer visibility properties
sourcePres.HeaderFooterManager.SetAllSlideNumbersVisibility(true);
//Update the Date Time Fields
sourcePres.HeaderFooterManager.SetAllDateTimesVisibility(true);
//Show date time placeholder
sourcePres.HeaderFooterManager.SetAllDateTimesVisibility(true);
//Show the footer place holder
sourcePres.HeaderFooterManager.SetAllFootersVisibility(true);
//Set the header footer visibility on Title Slide
sourcePres.HeaderFooterManager.SetVisibilityOnAllTitleSlides(true);
//Write the presentation to the disk
sourcePres.Save("NewSource.pptx", SaveFormat.Pptx);
}
```
## Related articles
- [How to Create Charts in Presentations in .NET](https://docs.aspose.com/slides/net/how-to-create-charts-in-a-presentation/)
- [How to Create Hello World Presentations in .NET](https://docs.aspose.com/slides/net/how-to-create-hello-world-presentation-document/)
- [Header Footer](https://docs.aspose.com/slides/net/examples/elements/header-footer/)
# How to Create Charts in Presentations in .NET
> Learn how to create charts in PowerPoint PPT, PPTX and ODP presentations in .NET with Aspose.Slides using both legacy and modern chart APIs.
Source: https://docs.aspose.com/slides/net/how-to-create-charts-in-a-presentation/
Updated: 2026-08-13
A new [Aspose.Slides for .NET API](https://docs.aspose.com/slides/net/) has been released and now this single product supports the capability to generate PowerPoint documents from scratch and editing the existing ones.
## **Support for Legacy Code**
In order to use the legacy code developed with Aspose.Slides for .NET versions earlier to 13.x, you need to make some minor changes in your code and the code will work as earlier. All the classes that were present in old Aspose.Slides for .NET under Aspose.Slide and Aspose.Slides.Pptx namespaces are now merged in single Aspose.Slides namespace. Please take a look over the following simple code snippet for creating a normal chart from scratch in presentation using legacy Aspose.Slides API and follow the steps describing how to migrate to new merged API.
## **Legacy Aspose.Slides for .NET Approach**
```c#
using System.Drawing;
//Instantiate PresentationEx class that represents PPTX file
using (PresentationEx pres = new PresentationEx())
{
//Access first slide
SlideEx sld = pres.Slides[0];
// Add chart with default data
ChartEx chart = sld.Shapes.AddChart(ChartTypeEx.ClusteredColumn, 0, 0, 500, 500);
//Setting chart Title
chart.ChartTitle.Text.Text = "Sample Title";
chart.ChartTitle.Text.CenterText = true;
chart.ChartTitle.Height = 20;
chart.HasTitle = true;
//Set first series to Show Values
chart.ChartData.Series[0].Labels.ShowValue = true;
//Setting the index of chart data sheet
int defaultWorksheetIndex = 0;
//Getting the chart data worksheet
ChartDataCellFactory fact = chart.ChartData.ChartDataCellFactory;
//Delete default generated series and categories
chart.ChartData.Series.Clear();
chart.ChartData.Categories.Clear();
int s = chart.ChartData.Series.Count;
s = chart.ChartData.Categories.Count;
//Adding new series
chart.ChartData.Series.Add(fact.GetCell(defaultWorksheetIndex, 0, 1, "Series 1"), chart.Type);
chart.ChartData.Series.Add(fact.GetCell(defaultWorksheetIndex, 0, 2, "Series 2"), chart.Type);
//Adding new categories
chart.ChartData.Categories.Add(fact.GetCell(defaultWorksheetIndex, 1, 0, "Caetegoty 1"));
chart.ChartData.Categories.Add(fact.GetCell(defaultWorksheetIndex, 2, 0, "Caetegoty 2"));
chart.ChartData.Categories.Add(fact.GetCell(defaultWorksheetIndex, 3, 0, "Caetegoty 3"));
//Take first chart series
ChartSeriesEx series = chart.ChartData.Series[0];
//Now populating series data
series.Values.Add(fact.GetCell(defaultWorksheetIndex, 1, 1, 20));
series.Values.Add(fact.GetCell(defaultWorksheetIndex, 2, 1, 50));
series.Values.Add(fact.GetCell(defaultWorksheetIndex, 3, 1, 30));
//Setting fill color for series
series.Format.Fill.FillType = FillTypeEx.Solid;
series.Format.Fill.SolidFillColor.Color = Color.Red;
//Take second chart series
series = chart.ChartData.Series[1];
//Now populating series data
series.Values.Add(fact.GetCell(defaultWorksheetIndex, 1, 2, 30));
series.Values.Add(fact.GetCell(defaultWorksheetIndex, 2, 2, 10));
series.Values.Add(fact.GetCell(defaultWorksheetIndex, 3, 2, 60));
//Setting fill color for series
series.Format.Fill.FillType = FillTypeEx.Solid;
series.Format.Fill.SolidFillColor.Color = Color.Green;
//create custom labels for each of categories for new series
//first label will be show Category name
DataLabelEx lbl = new DataLabelEx(series);
lbl.ShowCategoryName = true;
lbl.Id = 0;
series.Labels.Add(lbl);
//Show series name for second label
lbl = new DataLabelEx(series);
lbl.ShowSeriesName = true;
lbl.Id = 1;
series.Labels.Add(lbl);
//Show value for third label
lbl = new DataLabelEx(series);
lbl.ShowValue = true;
lbl.ShowSeriesName = true;
lbl.Separator = "/";
lbl.Id = 2;
series.Labels.Add(lbl);
//Show value and custom text
lbl = new DataLabelEx(series);
lbl.TextFrame.Text = "My text";
lbl.Id = 3;
series.Labels.Add(lbl);
//Save presentation with chart
pres.Write(@"D:\AsposeChart.pptx");
}
```
## **New Aspose.Slides for .NET 13.x Approach**
``` csharp
using System.Drawing;
using Aspose.Slides;
using Aspose.Slides.Charts;
using Aspose.Slides.Export;
//Instantiate Presentation class that represents PPTX file//Instantiate Presentation class that represents PPTX file
Presentation pres = new Presentation();
//Access first slide
ISlide sld = pres.Slides[0];
// Add chart with default data
IChart chart = sld.Shapes.AddChart(ChartType.ClusteredColumn, 0, 0, 500, 500);
//Setting chart Title
//chart.ChartTitle.TextFrameForOverriding.Text = "Sample Title";
chart.ChartTitle.AddTextFrameForOverriding("Sample Title");
chart.ChartTitle.TextFrameForOverriding.TextFrameFormat.CenterText = NullableBool.True;
chart.ChartTitle.Height = 20;
chart.HasTitle = true;
//Setting the index of chart data sheet
int defaultWorksheetIndex = 0;
//Getting the chart data worksheet
IChartDataWorkbook fact = chart.ChartData.ChartDataWorkbook;
//Delete default generated series and categories
chart.ChartData.Series.Clear();
chart.ChartData.Categories.Clear();
int s = chart.ChartData.Series.Count;
s = chart.ChartData.Categories.Count;
//Adding new series
chart.ChartData.Series.Add(fact.GetCell(defaultWorksheetIndex, 0, 1, "Series 1"), chart.Type);
chart.ChartData.Series.Add(fact.GetCell(defaultWorksheetIndex, 0, 2, "Series 2"), chart.Type);
//Set first series to Show Values
chart.ChartData.Series[0].Labels.DefaultDataLabelFormat.ShowValue = true;
//Adding new categories
chart.ChartData.Categories.Add(fact.GetCell(defaultWorksheetIndex, 1, 0, "Caetegoty 1"));
chart.ChartData.Categories.Add(fact.GetCell(defaultWorksheetIndex, 2, 0, "Caetegoty 2"));
chart.ChartData.Categories.Add(fact.GetCell(defaultWorksheetIndex, 3, 0, "Caetegoty 3"));
//Take first chart series
IChartSeries series = chart.ChartData.Series[0];
//Now populating series data
series.DataPoints.AddDataPointForBarSeries(fact.GetCell(defaultWorksheetIndex, 1, 1, 20));
series.DataPoints.AddDataPointForBarSeries(fact.GetCell(defaultWorksheetIndex, 2, 1, 50));
series.DataPoints.AddDataPointForBarSeries(fact.GetCell(defaultWorksheetIndex, 3, 1, 30));
//Setting fill color for series
series.Format.Fill.FillType = FillType.Solid;
series.Format.Fill.SolidFillColor.Color = Color.Red;
//Take second chart series
series = chart.ChartData.Series[1];
//Now populating series data
series.DataPoints.AddDataPointForBarSeries(fact.GetCell(defaultWorksheetIndex, 1, 2, 30));
series.DataPoints.AddDataPointForBarSeries(fact.GetCell(defaultWorksheetIndex, 2, 2, 10));
series.DataPoints.AddDataPointForBarSeries(fact.GetCell(defaultWorksheetIndex, 3, 2, 60));
//Setting fill color for series
series.Format.Fill.FillType = FillType.Solid;
series.Format.Fill.SolidFillColor.Color = Color.Green;
//create custom labels for each of categories for new series
//first label will be show Category name
IDataLabel lbl = series.DataPoints[0].Label;
lbl.DataLabelFormat.ShowCategoryName = true;
lbl = series.DataPoints[1].Label;
lbl.DataLabelFormat.ShowSeriesName = true;
//Show value for third label
lbl = series.DataPoints[2].Label;
lbl.DataLabelFormat.ShowValue = true;
lbl.DataLabelFormat.ShowSeriesName = true;
lbl.DataLabelFormat.Separator = "/";
//Save presentation with chart
pres.Save("AsposeChart.pptx", SaveFormat.Pptx);
```
Please take a look over the following simple code snippet for creating a scatterd chart from scratch in presentation using legacy Aspose.Slides API and how to achieve it with new merged API.
## **Legacy Aspose.Slides for .NET Approach**
```c#
using (PresentationEx pres = new PresentationEx())
{
SlideEx slide = pres.Slides[0];
//Creating the default chart
ChartEx chart = slide.Shapes.AddChart(ChartTypeEx.ScatterWithSmoothLines, 0, 0, 400, 400);
//Getting the default chart data worksheet index
int defaultWorksheetIndex = 0;
//Accessing the chart data worksheet
ChartDataCellFactory fact = chart.ChartData.ChartDataCellFactory;
//Delete demo series
chart.ChartData.Series.Clear();
//Add new series
chart.ChartData.Series.Add(fact.GetCell(defaultWorksheetIndex, 1, 1, "Series 1"), chart.Type);
chart.ChartData.Series.Add(fact.GetCell(defaultWorksheetIndex, 1, 3, "Series 2"), chart.Type);
//Take first chart series
ChartSeriesEx series = chart.ChartData.Series[0];
//Add new point (1:3) there.
series.XValues.Add(fact.GetCell(defaultWorksheetIndex, 2, 1, 1));
series.YValues.Add(fact.GetCell(defaultWorksheetIndex, 2, 2, 3));
//Add new point (2:10)
series.XValues.Add(fact.GetCell(defaultWorksheetIndex, 3, 1, 2));
series.YValues.Add(fact.GetCell(defaultWorksheetIndex, 3, 2, 10));
//Edit the type of series
series.Type = ChartTypeEx.ScatterWithStraightLinesAndMarkers;
//Changing the chart series marker
series.MarkerSize = 10;
series.MarkerSymbol = MarkerStyleTypeEx.Star;
//Take second chart series
series = chart.ChartData.Series[1];
//Add new point (5:2) there.
series.XValues.Add(fact.GetCell(defaultWorksheetIndex, 2, 3, 5));
series.YValues.Add(fact.GetCell(defaultWorksheetIndex, 2, 4, 2));
//Add new point (3:1)
series.XValues.Add(fact.GetCell(defaultWorksheetIndex, 3, 3, 3));
series.YValues.Add(fact.GetCell(defaultWorksheetIndex, 3, 4, 1));
//Add new point (2:2)
series.XValues.Add(fact.GetCell(defaultWorksheetIndex, 4, 3, 2));
series.YValues.Add(fact.GetCell(defaultWorksheetIndex, 4, 4, 2));
//Add new point (5:1)
series.XValues.Add(fact.GetCell(defaultWorksheetIndex, 5, 3, 5));
series.YValues.Add(fact.GetCell(defaultWorksheetIndex, 5, 4, 1));
//Changing the chart series marker
series.MarkerSize = 10;
series.MarkerSymbol = MarkerStyleTypeEx.Circle;
pres.Write("D:\\AsposeSeriesChart.pptx");
}
```
## **New Aspose.Slides for .NET 13.x Approach**
``` csharp
using Aspose.Slides;
using Aspose.Slides.Charts;
using Aspose.Slides.Export;
Presentation pres = new Presentation();
ISlide slide = pres.Slides[0];
//Creating the default chart
IChart chart = slide.Shapes.AddChart(ChartType.ScatterWithSmoothLines, 0, 0, 400, 400);
//Getting the default chart data worksheet index
int defaultWorksheetIndex = 0;
//Accessing the chart data worksheet
IChartDataWorkbook fact = chart.ChartData.ChartDataWorkbook;
//Delete demo series
chart.ChartData.Series.Clear();
//Add new series
chart.ChartData.Series.Add(fact.GetCell(defaultWorksheetIndex, 1, 1, "Series 1"), chart.Type);
chart.ChartData.Series.Add(fact.GetCell(defaultWorksheetIndex, 1, 3, "Series 2"), chart.Type);
//Take first chart series
IChartSeries series = chart.ChartData.Series[0];
//Add new point (1:3) there.
series.DataPoints.AddDataPointForScatterSeries(fact.GetCell(defaultWorksheetIndex, 2, 1, 1), fact.GetCell(defaultWorksheetIndex, 2, 2, 3));
//Add new point (2:10)
series.DataPoints.AddDataPointForScatterSeries(fact.GetCell(defaultWorksheetIndex, 3, 1, 2), fact.GetCell(defaultWorksheetIndex, 3, 2, 10));
//Edit the type of series
series.Type = ChartType.ScatterWithStraightLinesAndMarkers;
//Changing the chart series marker
series.Marker.Size = 10;
series.Marker.Symbol = MarkerStyleType.Star;
//Take second chart series
series = chart.ChartData.Series[1];
//Add new point (5:2) there.
series.DataPoints.AddDataPointForScatterSeries(fact.GetCell(defaultWorksheetIndex, 2, 3, 5), fact.GetCell(defaultWorksheetIndex, 2, 4, 2));
//Add new point (3:1)
series.DataPoints.AddDataPointForScatterSeries(fact.GetCell(defaultWorksheetIndex, 3, 3, 3), fact.GetCell(defaultWorksheetIndex, 3, 4, 1));
//Add new point (2:2)
series.DataPoints.AddDataPointForScatterSeries(fact.GetCell(defaultWorksheetIndex, 4, 3, 2), fact.GetCell(defaultWorksheetIndex, 4, 4, 2));
//Add new point (5:1)
series.DataPoints.AddDataPointForScatterSeries(fact.GetCell(defaultWorksheetIndex, 5, 3, 5), fact.GetCell(defaultWorksheetIndex, 5, 4, 1));
//Changing the chart series marker
series.Marker.Size = 10;
series.Marker.Symbol = MarkerStyleType.Circle;
pres.Save("AsposeScatterChart.pptx", SaveFormat.Pptx);
```
## Related articles
- [How to Add Headers & Footers to Presentations in .NET](https://docs.aspose.com/slides/net/how-to-add-header-footer-in-a-presentation/)
- [How to Create Hello World Presentations in .NET](https://docs.aspose.com/slides/net/how-to-create-hello-world-presentation-document/)
- [Migration from Earlier Versions](https://docs.aspose.com/slides/net/migration-from-earlier-versions-of-aspose-slides-for-net/)
# How to Create Hello World Presentations in .NET
> Create a Hello World PowerPoint PPT, PPTX and ODP presentation in .NET with Aspose.Slides using both legacy and modern APIs in one simple guide.
Source: https://docs.aspose.com/slides/net/how-to-create-hello-world-presentation-document/
Updated: 2026-09-26
A new [Aspose.Slides for .NET API](https://docs.aspose.com/slides/net/) has been released and now this single product supports the capability to generate PowerPoint documents from scratch and editing the existing ones.
## **Support for Legacy Code**
In order to use the legacy code developed with Aspose.Slides for .NET versions earlier to 13.x, you need to make some minor changes in your code and the code will work as earlier. All the classes that were present in old Aspose.Slides for .NET under Aspose.Slide and Aspose.Slides.Pptx namespaces are now merged in single Aspose.Slides namespace. Please take a look over the following simple code snippet for creating a Hello World Presentation document in legacy Aspose.Slides API and follow the steps describing how to migrate to new merged API.
## **Legacy Aspose.Slides for .NET Approach**
```c#
using System.Drawing;
using Aspose.Slides;
//Instantiate a Presentation object that represents a PPT file
Presentation pres = new Presentation();
//Create a License object
License license = new License();
//Set the license of Aspose.Slides for .NET to avoid the evaluation limitations
license.SetLicense("Aspose.Slides.lic");
//Adding an empty slide to the presentation and getting the reference of
//that empty slide
Slide slide = pres.AddEmptySlide();
//Adding a rectangle (X=2400, Y=1800, Width=1000 & Height=500) to the slide
Aspose.Slides.Rectangle rect = slide.Shapes.AddRectangle(2400, 1800, 1000, 500);
//Hiding the lines of rectangle
rect.LineFormat.ShowLines = false;
//Adding a text frame to the rectangle with "Hello World" as a default text
rect.AddTextFrame("Hello World");
//Removing the first slide of the presentation which is always added by
//Aspose.Slides for .NET by default while creating the presentation
pres.Slides.RemoveAt(0);
//Writing the presentation as a PPT file
pres.Write("C:\\hello.ppt");
```
## **New Aspose.Slides for .NET 13.x Approach**
```c#
using System.Drawing;
using Aspose.Slides;
using Aspose.Slides.Export;
// Instantiate Presentation
Presentation pres = new Presentation();
// Get the first slide
ISlide sld = (ISlide)pres.Slides[0];
// Add an AutoShape of Rectangle type
IAutoShape ashp = sld.Shapes.AddAutoShape(ShapeType.Rectangle, 150, 75, 150, 50);
// Add ITextFrame to the Rectangle
ashp.AddTextFrame("Hello World");
// Change the text color to Black (which is White by default)
ashp.TextFrame.Paragraphs[0].Portions[0].PortionFormat.FillFormat.FillType = FillType.Solid;
ashp.TextFrame.Paragraphs[0].Portions[0].PortionFormat.FillFormat.SolidFillColor.Color = Color.Black;
// Change the line color of the rectangle to White
ashp.ShapeStyle.LineColor.Color = Color.White;
// Remove any fill formatting in the shape
ashp.FillFormat.FillType = FillType.NoFill;
// Save the presentation to disk
pres.Save("HelloWorld.pptx", SaveFormat.Pptx);
```
## Related articles
- [How to Create Charts in Presentations in .NET](https://docs.aspose.com/slides/net/how-to-create-charts-in-a-presentation/)
- [How to Add Headers & Footers to Presentations in .NET](https://docs.aspose.com/slides/net/how-to-add-header-footer-in-a-presentation/)
- [Migration from Earlier Versions](https://docs.aspose.com/slides/net/migration-from-earlier-versions-of-aspose-slides-for-net/)
# Run Aspose.Slides for .NET in Docker
> Build and run an Aspose.Slides for .NET console application in Docker: a multi-stage Dockerfile on the official .NET images, the Linux libraries and fonts it needs, and how to copy the generated files to your machine.
Source: https://docs.aspose.com/slides/net/how-to-run-aspose-slides-in-docker/
Updated: 2026-09-28
## **Overview**
This article shows how to run Aspose.Slides for .NET in a Docker container. You build a small console application that creates a presentation with a text box and converts it to PDF, package it with a multi-stage Dockerfile on Microsoft's official .NET images, run it, and copy the generated files to your machine. The article also lists the Linux libraries and fonts that Aspose.Slides needs in the container and ends with a variant for Alpine Linux.
You only need Docker on your machine. The .NET SDK is part of the build image, so you do not have to install it. To install Docker, see [Get Docker](https://docs.docker.com/get-started/get-docker/).
## **Choose the Package and the Base Image**
The default .NET 10 container images are based on Ubuntu 24.04. On these images, use the [Aspose.Slides.NET6.CrossPlatform](https://www.nuget.org/packages/Aspose.Slides.NET6.CrossPlatform/) package. It requires the `fontconfig` library, and the .NET runtime image contains neither that library nor any fonts, so the Dockerfile in this article installs both.
Aspose.Slides.NET6.CrossPlatform does not run on Alpine Linux. For Alpine-based images, use the [Aspose.Slides.NET](https://www.nuget.org/packages/Aspose.Slides.NET/) package with `libgdiplus`, as described in [Run on Alpine Linux](https://docs.aspose.com/slides/net/how-to-run-aspose-slides-in-docker/#run-on-alpine-linux). [Installation](https://docs.aspose.com/slides/net/installation/) compares the two packages.
## **Create the Project**
Create a folder named *HelloSlidesDocker* and add the following three files to it.
*HelloSlidesDocker.csproj* describes a console application for .NET 10, the version of the container images used below, and references Aspose.Slides.NET6.CrossPlatform. Set the package version to the latest one listed on [NuGet](https://www.nuget.org/packages/Aspose.Slides.NET6.CrossPlatform/).
```xml
Exe
net10.0
enable
enable
```
*Program.cs* creates a [Presentation](https://reference.aspose.com/slides/net/aspose.slides/presentation/), adds a rectangle with text to its first slide, and saves the presentation twice with the [Save](https://reference.aspose.com/slides/net/aspose.slides/presentation/save/) method: as PPTX and as PDF. Both files go to the *output* folder under the working directory. The application then lists the fonts that were replaced while the PDF was rendered, using [IFontsManager.GetSubstitutions](https://reference.aspose.com/slides/net/aspose.slides/ifontsmanager/getsubstitutions/), so you can see whether the container has the fonts the presentation uses.
```c#
using System;
using System.IO;
using Aspose.Slides;
using Aspose.Slides.Export;
var outputFolder = "output";
Directory.CreateDirectory(outputFolder);
using var presentation = new Presentation();
var slide = presentation.Slides[0];
var shape = slide.Shapes.AddAutoShape(ShapeType.Rectangle, 50, 50, 400, 100);
shape.TextFrame.Text = "Hello from a Docker container!";
var pptxPath = Path.Combine(outputFolder, "hello.pptx");
var pdfPath = Path.Combine(outputFolder, "hello.pdf");
presentation.Save(pptxPath, SaveFormat.Pptx);
presentation.Save(pdfPath, SaveFormat.Pdf);
foreach (var substitution in presentation.FontsManager.GetSubstitutions())
{
Console.WriteLine($"Font substitution: {substitution.OriginalFontName} -> {substitution.SubstitutedFontName}");
}
Console.WriteLine($"Saved {pptxPath} and {pdfPath}");
```
*.dockerignore* keeps the *bin* and *obj* folders of a local build, and the output of earlier runs, out of the Docker build context, so the image is built from the source files only.
```text
bin/
obj/
output/
```
## **Write the Dockerfile**
Add a file named *Dockerfile* to the same folder:
```dockerfile
FROM mcr.microsoft.com/dotnet/sdk:10.0 AS build
WORKDIR /src
COPY HelloSlidesDocker.csproj .
RUN dotnet restore
COPY . .
RUN dotnet publish --no-restore -c Release -o /app
FROM mcr.microsoft.com/dotnet/runtime:10.0
RUN apt-get update \
&& apt-get install -y --no-install-recommends libfontconfig1 fonts-dejavu-core \
&& rm -rf /var/lib/apt/lists/*
WORKDIR /app
COPY --from=build /app .
RUN mkdir output && chown $APP_UID output
USER $APP_UID
ENTRYPOINT ["dotnet", "HelloSlidesDocker.dll"]
```
The file has two stages:
- **The build stage** starts from the .NET SDK image. It copies the project file and restores the NuGet packages first, so Docker reuses that layer as long as the project file does not change. It then copies the source code and publishes the application to */app*.
- **The runtime stage** starts from the smaller .NET runtime image, which has no SDK, and copies in only the published application. It installs two packages:
- `libfontconfig1`: Aspose.Slides.NET6.CrossPlatform loads this library when it starts. Without it, the application stops with a `DllNotFoundException` that names `libfontconfig.so.1`.
- `fonts-dejavu-core`: the runtime image contains no fonts, and Aspose.Slides needs at least one installed font to draw text; without any, the conversion stops with `InvalidOperationException: Cannot find any fonts installed on the system.` Text in fonts that are not installed is drawn with a substitute font. The DejaVu fonts are a small set that makes text render; to render presentations with the fonts they were designed with, see [Deploy Fonts](https://docs.aspose.com/slides/net/deploy-fonts/).
`--no-install-recommends` and the removal of the package lists keep the image small. The last lines create the *output* folder, give it to the non-root `app` user that the official .NET images define (its user ID is in the `APP_UID` variable), and run the application as that user.
For an ASP.NET Core application, start the runtime stage from `mcr.microsoft.com/dotnet/aspnet:10.0` instead. It is based on the same Ubuntu image, so the same packages are needed.
## **Build and Run the Container**
Open a terminal in the *HelloSlidesDocker* folder. Build the image, then run a container from it:
```bash
docker build -t hello-slides .
docker run --name hello-slides-run hello-slides
```
The first build downloads the base images and the NuGet packages, so it takes longer than later builds. The container runs the application and stops. It prints:
```text
Font substitution: Calibri -> DejaVu Sans
Saved output/hello.pptx and output/hello.pdf
```
The first line shows that the text uses Calibri, the default font of a new presentation, and that Calibri is not installed in the image, so Aspose.Slides drew the text with DejaVu Sans. The text in the PDF is real, selectable text in that font. Without a license, Aspose.Slides also adds an evaluation watermark to every slide it saves; see [Licensing](https://docs.aspose.com/slides/net/licensing/).
## **Copy the Output to Your Machine**
The files are in the */app/output* folder of the stopped container. Copy them to an *output* folder on your machine, then remove the container:
```bash
docker cp hello-slides-run:/app/output/. ./output
docker rm hello-slides-run
```
These two commands work the same way in Bash, PowerShell, and the Windows Command Prompt.
On Linux, you can instead mount a folder of your machine into the container, so the application writes its files there directly:
```bash
mkdir -p output
docker run --rm --user "$(id -u):$(id -g)" -v "$(pwd)/output:/app/output" hello-slides
```
The `--user` option runs the application with your user and group IDs, so it can write to the folder you created and the files belong to you. `--rm` removes the container when it stops.
## **Run on Alpine Linux**
To run the application in an Alpine-based image, switch to the Aspose.Slides.NET package and change the runtime stage. The build stage stays the same.
1. In *HelloSlidesDocker.csproj*, replace the package reference:
```xml
().FirstOrDefault();
if (pictureFrame != null)
{
var imageTransform = pictureFrame.PictureFormat.Picture.ImageTransform;
for (var index = 0; index < imageTransform.Count; index++)
{
var operation = imageTransform[index];
Console.WriteLine(index + ": " + operation.GetType().Name);
switch (operation)
{
case IBrightnessContrast brightnessContrast:
var brightnessContrastData = brightnessContrast.GetEffective();
Console.WriteLine(" Brightness: " + brightnessContrastData.Brightness);
Console.WriteLine(" Contrast: " + brightnessContrastData.Contrast);
break;
case ILuminance luminance:
var luminanceData = luminance.GetEffective();
Console.WriteLine(" Brightness: " + luminanceData.Brightness);
Console.WriteLine(" Contrast: " + luminanceData.Contrast);
break;
case IDuotone duotone:
var duotoneData = duotone.GetEffective();
Console.WriteLine(" Dark color: " + duotoneData.Color1);
Console.WriteLine(" Light color: " + duotoneData.Color2);
break;
case IColorReplace colorReplace:
var colorReplaceData = colorReplace.GetEffective();
Console.WriteLine(" Replacement color: " + colorReplaceData.Color);
break;
case IHSL hsl:
var hslData = hsl.GetEffective();
Console.WriteLine(" HSL: " + hslData.Hue + ", " + hslData.Saturation + ", " + hslData.Luminance);
break;
case ITint tint:
var tintData = tint.GetEffective();
Console.WriteLine(" Tint: " + tintData.Hue + ", " + tintData.Amount);
break;
case IBlur blur:
var blurData = blur.GetEffective();
Console.WriteLine(" Blur radius: " + blurData.Radius + " pt");
break;
case IAlphaModulateFixed alphaModulate:
var alphaData = alphaModulate.GetEffective();
Console.WriteLine(" Alpha amount: " + alphaData.Amount + "%");
break;
case IAlphaReplace alphaReplace:
var alphaReplaceData = alphaReplace.GetEffective();
Console.WriteLine(" Replacement alpha: " + alphaReplaceData.Alpha + "%");
break;
case IAlphaBiLevel alphaBiLevel:
var alphaBiLevelData = alphaBiLevel.GetEffective();
Console.WriteLine(" Alpha threshold: " + alphaBiLevelData.Threshold + "%");
break;
}
}
}
```
Parameter-free effects such as grayscale, alpha ceiling, and alpha inverse still have an effective-data object, but there are no scalar settings to print. Their presence and position in the collection are the important information.
## **Remove or Clear Image Transforms**
Use [IImageTransformOperationCollection.RemoveAt](https://reference.aspose.com/slides/net/aspose.slides.effects/iimagetransformoperationcollection/removeat/) to remove one operation by index. Because indexes shift after removal, search for the target first and remove it after enumeration. Use `Clear()` to remove the entire chain.
```csharp
using System;
using System.Linq;
using Aspose.Slides;
using Aspose.Slides.Effects;
using Aspose.Slides.Export;
using var presentation = new Presentation("image-transform-chain.pptx");
var pictureFrame = presentation.Slides[0].Shapes.OfType().FirstOrDefault();
if (pictureFrame != null)
{
var imageTransform = pictureFrame.PictureFormat.Picture.ImageTransform;
var blurIndex = -1;
for (var index = 0; index < imageTransform.Count; index++)
{
if (imageTransform[index] is IBlur)
{
blurIndex = index;
break;
}
}
if (blurIndex >= 0)
{
imageTransform.RemoveAt(blurIndex);
Console.WriteLine("The blur operation was removed.");
}
imageTransform.Clear();
Console.WriteLine("Remaining operations: " + imageTransform.Count);
presentation.Save("image-transforms-cleared.pptx", SaveFormat.Pptx);
}
```
Removing or clearing transforms changes only the picture formatting. It does not delete, recompress, or otherwise alter the reused [IPPImage](https://reference.aspose.com/slides/net/aspose.slides/ippimage/) resource.
## **Consider Presentation Formats and Export Targets**
Image transforms originate in DrawingML, so PPTX is the preferred editable format for effect chains. Even with PPTX, not every operation has identical portability:
- Standard DrawingML operations such as luminance, grayscale, duotone, tint, HSL, blur, and common alpha operations have the best chance of surviving a PPTX round trip. Always reopen the generated file and inspect the collection when preservation is a requirement.
- [BrightnessContrast](https://reference.aspose.com/slides/net/aspose.slides.effects/brightnesscontrast/) is an Office 2010 extension rather than the standard DrawingML luminance operation. It can be used for in-memory rendering, but it is not guaranteed to remain as an editable [IBrightnessContrast](https://reference.aspose.com/slides/net/aspose.slides.effects/ibrightnesscontrast/) after saving and reopening PPTX. Prefer [AddLuminanceEffect](https://reference.aspose.com/slides/net/aspose.slides.effects/iimagetransformoperationcollection/addluminanceeffect/) for persistent brightness and contrast adjustments.
- The binary PPT format predates the full DrawingML effect model. Saving to PPT can omit unsupported operations, reduce a chain to a supported subset, or approximate the appearance. Do not use PPT as the verification format for a complex editable chain.
- Rendering to PNG, JPEG, TIFF, PDF, SVG, HTML, or other visual output applies the supported chain to the rendered appearance. Those outputs do not contain an editable `IImageTransformOperationCollection`; raster formats flatten the result into pixels, and document/vector exports store their own rendering representation.
- Effects do not make a linked image self-contained. Rendering a linked picture still depends on the linked resource being available when the presentation is loaded.
Different presentation consumers may render edge cases differently, especially when several alpha or color-quantizing operations are combined. For critical output, test both the editable round trip and the final export format with the same Aspose.Slides version used in production.
## **FAQ**
**Do image transform effects modify the embedded image data?**
No. The operations belong to the `ISlidesPicture` used by the picture fill. The underlying `IPPImage` bytes remain unchanged.
**Will two picture frames that reuse the same image share their effects?**
No. Reusing an `IPPImage` avoids duplicate image data, but each picture frame normally has a separate `ISlidesPicture` and image transform collection.
**Can color, blur, and alpha effects be combined?**
Yes. The collection accepts them in one ordered chain. Consider what each operation does to the output of the previous one because replacement and threshold operations may discard earlier color or alpha detail.
**Why are effective values read-only?**
Effective data represents calculated values used for rendering, including resolved colors. Edit the operation stored in the transform collection where writable members exist; otherwise remove it and add a replacement with new creation parameters.
**Which format should I use to preserve a transform chain?**
Use PPTX and verify the file by reopening it. Legacy PPT cannot represent the full DrawingML effect model, and rendered export formats preserve appearance rather than editable transform operations.
# Optimize Image Management in Presentations in .NET
> Learn how to add, reuse, link, replace, and manage raster and SVG images in PowerPoint and OpenDocument presentations with Aspose.Slides for .NET.
Source: https://docs.aspose.com/slides/net/image/
Updated: 2026-08-19
## **Introduction**
Aspose.Slides for .NET provides several ways to work with images, and each one serves a different purpose. You can store an image in a presentation, display it in a picture frame, use it as a slide background, link to an external image, replace a shared image resource, or convert SVG content into editable shapes.
This article focuses on image resources and how they are used across a presentation. For cropping, transparency, effects, stretching, and other formatting applied to an individual picture frame, see [Picture Frame](https://docs.aspose.com/slides/net/picture-frame/).
## **Understand the Image Model**
The following API concepts are closely related but not interchangeable:
- The [presentation image collection](https://reference.aspose.com/slides/net/aspose.slides/iimagecollection/) stores image resources used by the presentation. Use [ImageCollection.AddImage](https://reference.aspose.com/slides/net/aspose.slides/imagecollection/addimage/) to add image data and obtain an [IPPImage](https://reference.aspose.com/slides/net/aspose.slides/ippimage/) resource.
- A [picture frame](https://reference.aspose.com/slides/net/aspose.slides/ipictureframe/) is a shape that displays an image on a slide, layout, or master. Use [IShapeCollection.AddPictureFrame](https://reference.aspose.com/slides/net/aspose.slides/ishapecollection/addpictureframe/) to place an image resource on a slide.
- A slide background uses an image as part of the slide fill rather than as a shape. It therefore does not behave like a picture frame.
- [IPPImage.ReplaceImage](https://reference.aspose.com/slides/net/aspose.slides/ippimage/replaceimage/) replaces an image resource. If several presentation elements use that resource, they all use the replacement.
- Converting an SVG to shapes creates editable slide shapes. After conversion, the content is no longer managed as one picture resource.
A typical workflow is therefore: add image data to the image collection, receive an [IPPImage](https://reference.aspose.com/slides/net/aspose.slides/ippimage/), and then use that resource in one or more picture frames or fills.
## **Add an Embedded Image**
To insert a local image, read the file, add its data to the image collection, and create a picture frame that uses the returned `IPPImage`.
```csharp
using System.IO;
using Aspose.Slides;
using Aspose.Slides.Export;
using var presentation = new Presentation();
var imageData = File.ReadAllBytes("photo.png");
var image = presentation.Images.AddImage(imageData);
var slide = presentation.Slides[0];
slide.Shapes.AddPictureFrame(ShapeType.Rectangle, 20, 20, 320, 180, image);
presentation.Save("presentation.pptx", SaveFormat.Pptx);
```
The image added this way is embedded in the presentation, so the resulting file does not depend on the original image file remaining available.
### **Add an Image from the Web**
When an image is available through HTTP or HTTPS, download its bytes with `HttpClient`, add them to the presentation image collection, and use the returned image resource in the same way as a local image.
```csharp
using System;
using System.Net.Http;
using Aspose.Slides;
using Aspose.Slides.Export;
var imageUri = new Uri("https://example.com/image.png");
using var httpClient = new HttpClient();
var imageData = await httpClient.GetByteArrayAsync(imageUri);
using var presentation = new Presentation();
var image = presentation.Images.AddImage(imageData);
var slide = presentation.Slides[0];
slide.Shapes.AddPictureFrame(ShapeType.Rectangle, 20, 20, 320, 180, image);
presentation.Save("presentation-from-web.pptx", SaveFormat.Pptx);
```
In long-running applications, reuse `HttpClient` rather than creating a new instance for every request. Also validate remote URLs, response sizes, and content types when the source is not trusted.
## **Reuse Images Across Slides**
If the same image is needed more than once, add it to the presentation once and reuse the returned [IPPImage](https://reference.aspose.com/slides/net/aspose.slides/ippimage/) when creating additional picture frames. This avoids repeatedly loading the same source data and makes the relationship between the shared image resource and its uses explicit.
For graphics that should appear automatically on many slides, such as a company logo, consider placing the picture frame on a [slide master](https://docs.aspose.com/slides/net/slide-master/) or layout instead of adding an equivalent shape to every slide.
## **Use an Image as a Slide Background**
A background image is assigned to the slide fill; it is not added as a picture-frame shape. This is useful when the picture should cover the slide background and should not be manipulated as a normal slide object.
```csharp
using System.IO;
using Aspose.Slides;
using Aspose.Slides.Export;
using var presentation = new Presentation();
var slide = presentation.Slides[0];
var imageData = File.ReadAllBytes("background.jpg");
var image = presentation.Images.AddImage(imageData);
slide.Background.Type = BackgroundType.OwnBackground;
slide.Background.FillFormat.FillType = FillType.Picture;
slide.Background.FillFormat.PictureFillFormat.PictureFillMode = PictureFillMode.Stretch;
slide.Background.FillFormat.PictureFillFormat.Picture.Image = image;
presentation.Save("background-image.pptx", SaveFormat.Pptx);
```
For additional background options, including master and layout backgrounds, see [Presentation Background](https://docs.aspose.com/slides/net/presentation-background/).
## **Embedded Images and Linked Images**
Embedded and linked images have different portability and file-size tradeoffs:
- **Embedded image:** the image data is stored inside the presentation. The presentation is self-contained, but the file size includes the image data.
- **Linked image:** the presentation stores a path or URL to an external image. This can reduce the presentation size, but the external resource must remain accessible when the presentation is opened or rendered.
A linked picture can be created by assigning the external path or URL through [ISlidesPicture.LinkPathLong](https://reference.aspose.com/slides/net/aspose.slides/islidespicture/linkpathlong/) rather than embedding the image data.
```csharp
using Aspose.Slides;
using Aspose.Slides.Export;
using var presentation = new Presentation();
var slide = presentation.Slides[0];
var pictureFrame = slide.Shapes.AddPictureFrame(ShapeType.Rectangle, 20, 20, 320, 180, null);
pictureFrame.PictureFormat.Picture.LinkPathLong = "https://example.com/image.png";
presentation.Save("linked-image.pptx", SaveFormat.Pptx);
```
Use linked images only when the deployment environment can reliably access the external resource. For presentations that must work offline or be moved between systems, embedded images are usually safer.
## **Work with SVG Images**
SVG is a vector format, so it can be useful for icons, diagrams, and other graphics that should scale without the same loss of detail as raster images. Aspose.Slides supports SVG both as an image resource and as a source for editable slide shapes.
### **Add an SVG as an Image**
Create an [SvgImage](https://reference.aspose.com/slides/net/aspose.slides/svgimage/), add it to the image collection, and place the resulting image resource in a picture frame.
```csharp
using System.IO;
using Aspose.Slides;
using Aspose.Slides.Export;
var svgContent = File.ReadAllText("icon.svg");
var svgImage = new SvgImage(svgContent);
using var presentation = new Presentation();
var image = presentation.Images.AddImage(svgImage);
var slide = presentation.Slides[0];
slide.Shapes.AddPictureFrame(ShapeType.Rectangle, 20, 20, 200, 200, image);
presentation.Save("svg-image.pptx", SaveFormat.Pptx);
```
### **SVG Files with External Resources**
An SVG can reference external images, stylesheets, or fonts. For these cases, [SvgImage](https://reference.aspose.com/slides/net/aspose.slides/svgimage/) provides constructors that accept an [IExternalResourceResolver](https://reference.aspose.com/slides/net/aspose.slides.import/iexternalresourceresolver/) and a base URI. The resolver can map a relative URI to an allowed absolute URI and return a stream for the requested resource.
The resolver makes external resources available while Aspose.Slides processes the SVG, but it does not rewrite the SVG into a self-contained document. If the SVG must remain portable, embed its required resources in the SVG itself, for example by using `data:` URIs for linked images.
When SVG files come from untrusted sources, restrict the schemes, file locations, and hosts that the resolver can access. Network resolvers should also apply timeouts, response-size limits, and content validation.
### **Convert SVG to Editable Shapes**
Aspose.Slides can convert an SVG into a group of editable slide shapes, similar to the corresponding PowerPoint command.
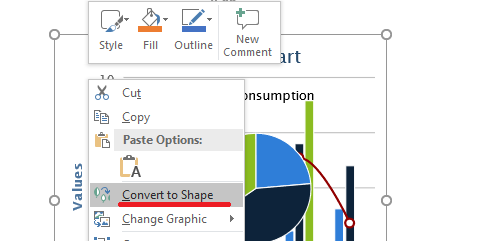
Use the [IShapeCollection.AddGroupShape](https://reference.aspose.com/slides/net/aspose.slides/ishapecollection/addgroupshape/) overload that accepts an [ISvgImage](https://reference.aspose.com/slides/net/aspose.slides/isvgimage/) to perform the conversion.
```csharp
using System.IO;
using Aspose.Slides;
using Aspose.Slides.Export;
var svgContent = File.ReadAllText("diagram.svg");
var svgImage = new SvgImage(svgContent);
using var presentation = new Presentation();
var slideSize = presentation.SlideSize.Size;
var slide = presentation.Slides[0];
slide.Shapes.AddGroupShape(svgImage, 0, 0, slideSize.Width, slideSize.Height);
presentation.Save("editable-svg-shapes.pptx", SaveFormat.Pptx);
```
Use SVG-to-shapes conversion when individual vector elements need to be edited as PowerPoint shapes. If the SVG only needs to be displayed, keeping it as an image is simpler and avoids creating many separate shapes.
## **Replace an Existing Image Resource**
Use [IPPImage.ReplaceImage](https://reference.aspose.com/slides/net/aspose.slides/ippimage/replaceimage/) when you want to replace an existing image resource. This is especially useful for shared graphics such as logos.
```csharp
using System.IO;
using Aspose.Slides;
using Aspose.Slides.Export;
using var presentation = new Presentation("input.pptx");
var imageToReplace = presentation.Images[0];
imageToReplace.ReplaceImage(File.ReadAllBytes("new-logo.png"));
presentation.Save("output.pptx", SaveFormat.Pptx);
```
If multiple picture frames, backgrounds, masters, or layouts use the same image resource, replacing that resource updates all of those uses. If only one picture frame should change, assign a different image to that frame instead of replacing the shared resource.
`ReplaceImage` also provides overloads that accept an [IImage](https://reference.aspose.com/slides/net/aspose.slides/iimage/) or another [IPPImage](https://reference.aspose.com/slides/net/aspose.slides/ippimage/).
## **Practical Image Management Guidance**
### **Control Presentation Size**
Large raster images can make a presentation unnecessarily large. Use source images with dimensions appropriate for their intended display size, reuse shared image resources where possible, and avoid embedding repeated copies of the same full-resolution graphic.
For raster pictures that have already been placed in picture frames, [IPictureFillFormat.CompressImage](https://reference.aspose.com/slides/net/aspose.slides/ipicturefillformat/compressimage/) can reduce image data according to the selected resolution and crop settings. This is picture-frame processing rather than image-collection management, so see [Picture Frame](https://docs.aspose.com/slides/net/picture-frame/) for related formatting operations.
### **Choose Between Embedded and Linked Content**
Embedding makes the presentation portable because all required image data travels with the file. Linking can reduce file size, but it introduces an external dependency. Use links only when that dependency is acceptable and stable.
### **Reuse Shared Branding**
For repeated logos, watermarks, or decorative graphics, use one image resource and reuse it. If the graphic belongs to the presentation design rather than slide content, place it on a master or layout so it is inherited by the appropriate slides.
### **Keep SVG Resources Portable**
A self-contained SVG is easier to move and render consistently than an SVG that depends on external files or network resources. When possible, embed required resources before importing the SVG. Convert SVG to shapes only when the individual vector elements need to be edited.
### **Use the Modern Cross-Platform Image API**
For new .NET code, use the Aspose.Slides [IImage](https://reference.aspose.com/slides/net/aspose.slides/iimage/) and [Images](https://reference.aspose.com/slides/net/aspose.slides/images/) APIs instead of relying on `System.Drawing.Image` or `Bitmap`. See [Modern API](https://docs.aspose.com/slides/net/modern-api/) for migration guidance.
WMF and EMF require special consideration. When these formats are passed through an [IImage](https://reference.aspose.com/slides/net/aspose.slides/iimage/), [ImageCollection.AddImage](https://reference.aspose.com/slides/net/aspose.slides/imagecollection/addimage/) converts the metafile to a raster PNG representation before insertion. If preserving the metafile data is important, use a stream-based [ImageCollection.AddImage](https://reference.aspose.com/slides/net/aspose.slides/imagecollection/addimage/) overload instead. Generating EMF content from spreadsheets or other products is a separate integration workflow and is outside the scope of this article.
## **FAQ**
**What is the difference between the image collection and a picture frame?**
The image collection stores reusable image resources. A picture frame is a slide shape that displays one of those resources and provides picture-specific formatting such as cropping and effects.
**What is the best way to replace the same logo everywhere?**
If the logo is already shared as one image resource, replace that resource with [IPPImage.ReplaceImage](https://reference.aspose.com/slides/net/aspose.slides/ippimage/replaceimage/). For presentation-wide branding, placing the logo on a master or layout can also reduce duplicated slide content.
**Why does a linked image disappear on another computer?**
A linked picture depends on its external file or URL. If that resource cannot be reached from the other computer, the linked image may be unavailable. Embed the image when the presentation must be self-contained.
**Can an inserted SVG be edited as PowerPoint shapes?**
Yes. Convert the SVG with [IShapeCollection.AddGroupShape](https://reference.aspose.com/slides/net/aspose.slides/ishapecollection/addgroupshape/); the resulting group contains editable slide shapes rather than one SVG picture.
**How can I keep presentations with many images smaller?**
Reuse shared image resources, avoid unnecessarily large raster sources, compress suitable raster pictures when appropriate, keep repeated branding on masters or layouts, and use linked images only when an external dependency is acceptable.
## Related features
- [Compress presentations](https://docs.aspose.com/slides/features/compress-presentations/)
- [Add SVG graphics](https://docs.aspose.com/slides/features/svg-shapes/)
# Import Presentations from PDF or HTML in .NET
> Learn how to import PDF and HTML content into PowerPoint presentations in C# with Aspose.Slides for .NET and save the results as PPTX files.
Source: https://docs.aspose.com/slides/net/import-presentation/
Updated: 2026-11-08
## **Introduction**
Aspose.Slides for .NET can turn PDF pages or HTML content into PowerPoint slides without Microsoft PowerPoint. The [SlideCollection](https://reference.aspose.com/slides/net/aspose.slides/slidecollection/) class provides [AddFromPdf](https://reference.aspose.com/slides/net/aspose.slides/slidecollection/addfrompdf/) and [AddFromHtml](https://reference.aspose.com/slides/net/aspose.slides/slidecollection/addfromhtml/) for appending imported content to a presentation.
For more control over HTML placement, [SlideCollection.InsertFromHtml](https://reference.aspose.com/slides/net/aspose.slides/slidecollection/insertfromhtml/) can insert generated slides at a collection index or begin filling available space on an existing slide. Long HTML is paginated across additional slides automatically, the source can be supplied as a string or stream, and external assets can be loaded through [IExternalResourceResolver](https://reference.aspose.com/slides/net/aspose.slides.import/iexternalresourceresolver/) with a base URI. The returned [ISlide](https://reference.aspose.com/slides/net/aspose.slides/islide/) array identifies the affected and newly created slides.
## **Import from PDF**
To convert a PDF document to a PowerPoint presentation, import its content into the slide collection and save the result as a PPTX file.
Quarterly update This content is inserted before the slide that was at index 1. ";
var insertedSlides = presentation.Slides.InsertFromHtml(insertIndex, html, useSlideWithIndexAsStart: false);
foreach (var slide in insertedSlides)
{
Console.WriteLine($"Inserted slide index: {presentation.Slides.IndexOf(slide)}");
}
presentation.Save("presentation-with-inserted-html.pptx", SaveFormat.Pptx);
```
### **Start on an Existing Slide**
The next example supplies the HTML through a stream. It keeps a header shape on the existing template slide, starts importing below the occupied area, and lets the long body continue onto new slides.
The HTML also contains a relative image URL. An [IExternalResourceResolver](https://reference.aspose.com/slides/net/aspose.slides.import/iexternalresourceresolver/) obtains the resource, while the base URI tells the importer how to resolve `images/logo.png`. In this example, that file is expected at `html-assets/images/logo.png`.
```csharp
using System;
using System.IO;
using System.Text;
using Aspose.Slides;
using Aspose.Slides.Export;
using Aspose.Slides.Import;
using var presentation = new Presentation();
var templateSlide = presentation.Slides[0];
var header = templateSlide.Shapes.AddAutoShape(ShapeType.Rectangle, 20, 20, 680, 60);
header.TextFrame.Text = "Product roadmap";
var htmlBuilder = new StringBuilder("Roadmap details ");
for (var itemIndex = 1; itemIndex <= 60; itemIndex++)
{
htmlBuilder.Append($"Roadmap item {itemIndex}: detailed implementation notes. ");
}
htmlBuilder.Append("");
var html = htmlBuilder.ToString();
var htmlData = Encoding.UTF8.GetBytes(html);
using var htmlStream = new MemoryStream(htmlData);
var resolver = new ExternalResourceResolver();
var basePath = Path.GetFullPath("html-assets") + Path.DirectorySeparatorChar;
var baseUri = new Uri(basePath).AbsoluteUri;
var affectedSlides = presentation.Slides.InsertFromHtml(0, htmlStream, resolver, baseUri, useSlideWithIndexAsStart: true);
foreach (var slide in affectedSlides)
{
Console.WriteLine($"Affected slide index: {presentation.Slides.IndexOf(slide)}");
}
presentation.Save("presentation-with-html-overflow.pptx", SaveFormat.Pptx);
```
An unrestricted external resource resolver can read local or network resources referenced by the HTML. For untrusted input, implement [IExternalResourceResolver](https://reference.aspose.com/slides/net/aspose.slides.import/iexternalresourceresolver/) with an allowlist for permitted schemes, directories, and hosts, and reject all other URIs.
[](https://docs.aspose.com/slides/net/import-presentation/visual-import-presentation-2c09b3d2f9f0.svg)
*Crops from one .NET import with an existing target between two neighboring slides. The header survives, the relative logo and body start below it, and overflow creates six continuation slides before Summary.*
## **FAQ**
**Can Aspose.Slides detect tables when importing a PDF?**
Yes. Create a [PdfImportOptions](https://reference.aspose.com/slides/net/aspose.slides.import/pdfimportoptions/) object, set its [DetectTables](https://reference.aspose.com/slides/net/aspose.slides.import/pdfimportoptions/detecttables/) property to `true`, and pass the options to [AddFromPdf](https://reference.aspose.com/slides/net/aspose.slides/slidecollection/addfrompdf/). The quality of table recognition depends on the structure and complexity of the source PDF.
You can also use Aspose.Slides to convert HTML content to other formats:
- [HTML to image](https://products.aspose.com/slides/net/conversion/html-to-image/)
- [HTML to JPG](https://products.aspose.com/slides/net/conversion/html-to-jpg/)
- [HTML to XML](https://products.aspose.com/slides/net/conversion/html-to-xml/)
- [HTML to TIFF](https://products.aspose.com/slides/net/conversion/html-to-tiff/)
## Related features
- [Import PDF pages into a presentation](https://docs.aspose.com/slides/features/import-pdf/)
- [Add HTML content to slides](https://docs.aspose.com/slides/features/import-html/)
# Installation
> Install Aspose.Slides for .NET from NuGet on Windows, Linux, and macOS: choose between the two packages, add one with the .NET CLI or Visual Studio, and install the Linux prerequisites.
Source: https://docs.aspose.com/slides/net/installation/
Updated: 2026-09-26
## **Overview**
This article explains how to add Aspose.Slides for .NET to a project on Windows, Linux, and macOS. Aspose.Slides is distributed through NuGet. You can add it with the .NET CLI on any operating system, or with the NuGet Package Manager or the Package Manager Console in Visual Studio on Windows. The article also explains which of the two NuGet packages to choose and what Linux needs in addition.
Before installation, review the supported operating systems, .NET implementations, and additional dependencies in [System Requirements](https://docs.aspose.com/slides/net/system-requirements/).
## **Choose a Package**
Aspose.Slides for .NET is published as two NuGet packages. Both provide the same Aspose.Slides namespaces and classes, so your code does not change when you switch between them; only the package reference and the platform requirements differ.
| Package | Use it for | Additional requirements |
|---|---|---|
| [Aspose.Slides.NET](https://www.nuget.org/packages/Aspose.Slides.NET/) | Windows, and .NET Framework applications | On Linux and macOS: the `libgdiplus` library, and the `System.Drawing.EnableUnixSupport` switch enabled at application startup |
| [Aspose.Slides.NET6.CrossPlatform](https://www.nuget.org/packages/Aspose.Slides.NET6.CrossPlatform/) | .NET 6 or later on Windows, Linux, and macOS | On Linux: the `fontconfig` library, if it is not already installed |
If you are unsure, use Aspose.Slides.NET on Windows and Aspose.Slides.NET6.CrossPlatform on Linux and macOS. On Alpine Linux, and on Linux systems whose glibc is older than 2.23 (x64) or 2.39 (ARM64), use Aspose.Slides.NET instead. [System Requirements](https://docs.aspose.com/slides/net/system-requirements/) lists the supported platforms of each package.
## **Install with the .NET CLI**
These steps work on Windows, Linux, and macOS with the .NET SDK 6 or later. Create a console application:
```bash
dotnet new console -n HelloSlides
cd HelloSlides
```
Then add the package for your platform. Add only one of the two packages to a project.
- On Windows: `dotnet add package Aspose.Slides.NET`
- On Linux and macOS: `dotnet add package Aspose.Slides.NET6.CrossPlatform` (on Linux, install its prerequisite first; see [Linux](https://docs.aspose.com/slides/net/installation/#linux))
To check that the package works, replace the contents of *Program.cs* with the first example in [Create Presentations](https://docs.aspose.com/slides/net/create-presentation/) and run `dotnet run`. It saves *hello.pptx* in the project folder.
## **Windows**
### **Method 1: Install or Update Aspose.Slides from the NuGet Package Manager**
1. Open Microsoft Visual Studio.
2. Create a console app or open an existing project.
3. In **Solution Explorer**, right-click the project and select **Manage NuGet Packages** (or go to **Project** > **Manage NuGet Packages**).
4. Under **Browse**, search for *Aspose.Slides*.
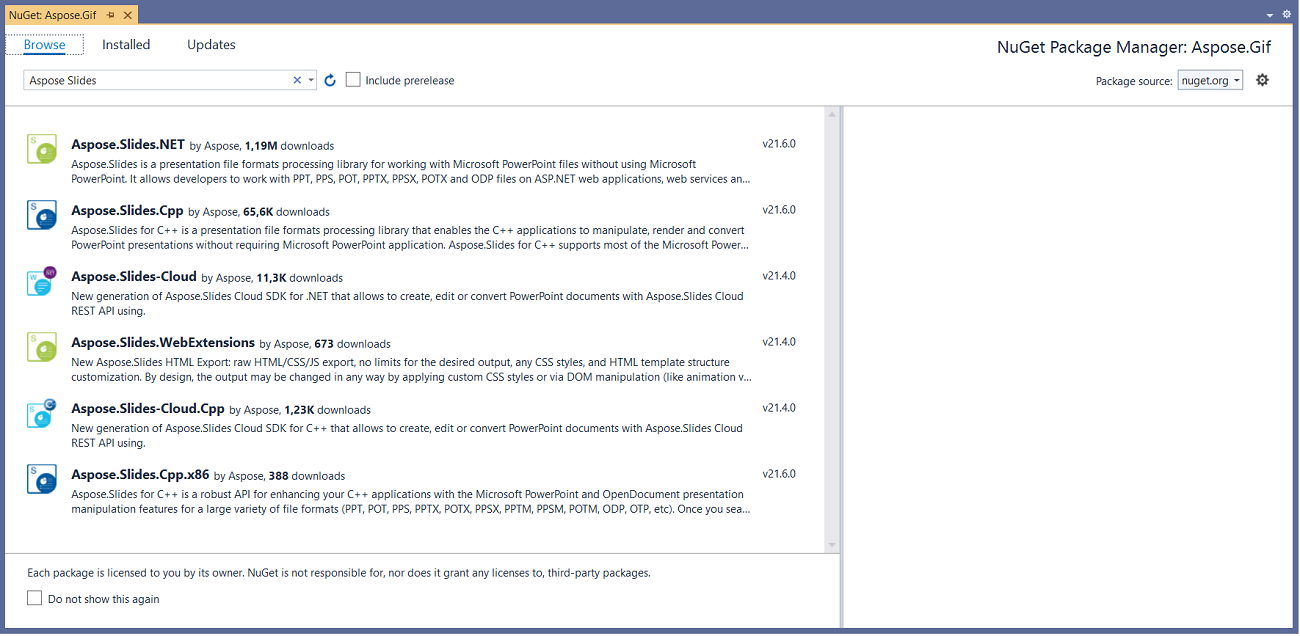
5. Click **Aspose.Slides.NET** and then click **Install**.
* If you already installed Aspose.Slides and want to update it, click **Update** instead.
The package is downloaded and referenced in your project.
### **Method 2: Install or Update Aspose.Slides Through the Package Manager Console**
This is how you reference the [Aspose.Slides.NET](https://www.nuget.org/packages/Aspose.Slides.NET/) package through the Package Manager Console:
1. Open Microsoft Visual Studio.
2. Create a console app or open an existing project.
3. Go to **Tools** > **NuGet Package Manager** > **Package Manager Console**.
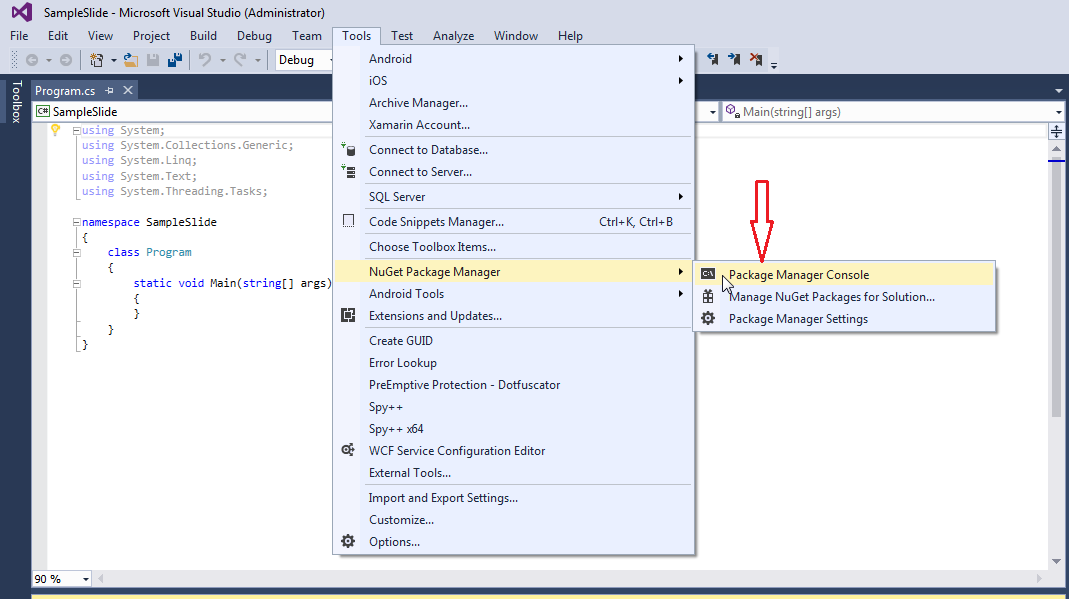
4. Run this command: `Install-Package Aspose.Slides.NET`
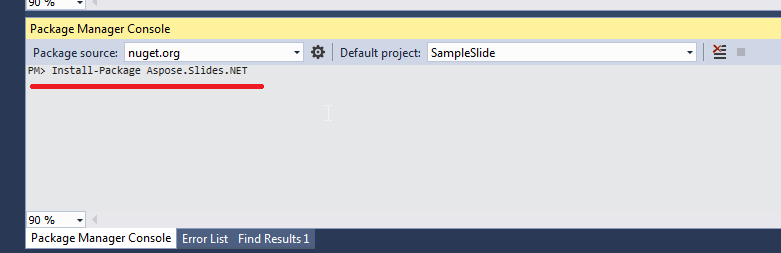
The latest release is installed in your project.
The **Installing Aspose.Slides.NET** message appears near the bottom of the window.
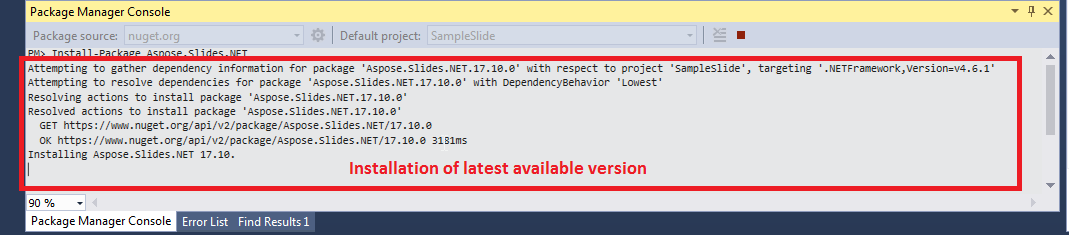
When the download completes, confirmation messages appear. The package is distributed under the [Aspose EULA](https://about.aspose.com/legal/eula).
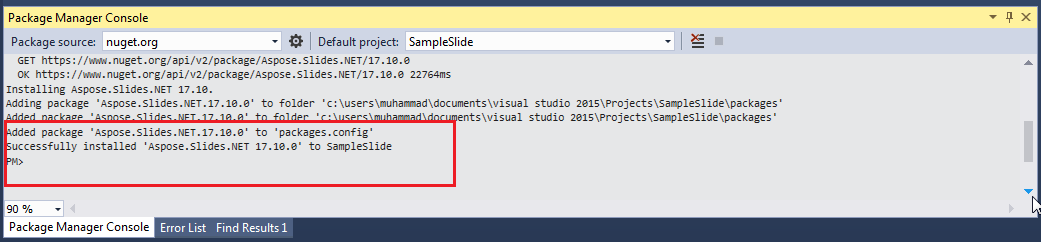
Aspose.Slides is now added to your project and referenced.
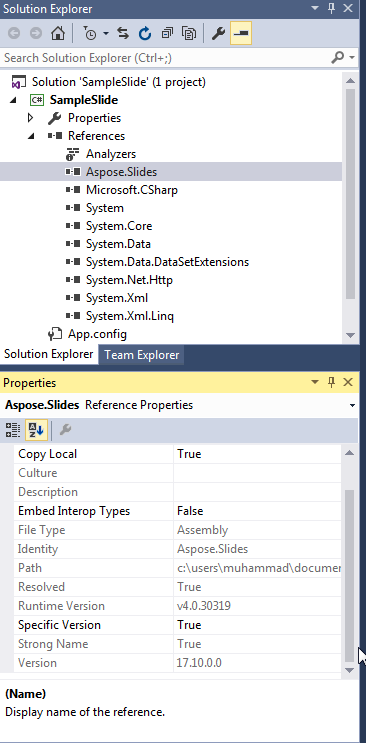
To update the package, run `Update-Package Aspose.Slides.NET` in the Package Manager Console.
## **Linux**
Use the .NET CLI steps above. Choose the package and install its prerequisite with your distribution's package manager. On Debian and Ubuntu:
- **Aspose.Slides.NET6.CrossPlatform**: install `fontconfig`.
```bash
sudo apt-get update && sudo apt-get install -y libfontconfig1
dotnet add package Aspose.Slides.NET6.CrossPlatform
```
- **Aspose.Slides.NET**: install `libgdiplus`, and enable Unix support for System.Drawing before your application uses Aspose.Slides.
```bash
sudo apt-get update && sudo apt-get install -y libgdiplus
dotnet add package Aspose.Slides.NET
```
Add this statement at the start of your application, before any Aspose.Slides call. In a *Program.cs* with top-level statements, put it after the `using` directives:
```c#
System.AppContext.SetSwitch("System.Drawing.EnableUnixSupport", true);
```
Use this package on Alpine Linux, and on systems whose glibc is too old for Aspose.Slides.NET6.CrossPlatform.
The fonts used in your presentations, or suitable substitutes, must be installed on the system for text to render correctly. [System Requirements](https://docs.aspose.com/slides/net/system-requirements/) describes the packages Aspose.Slides.NET needs on Alpine Linux, including fonts.
## **macOS**
Use the .NET CLI steps above with the **Aspose.Slides.NET6.CrossPlatform** package, which supports both Intel (x86_64) and Apple silicon (ARM64) Macs:
```bash
dotnet add package Aspose.Slides.NET6.CrossPlatform
```
## **FAQ**
**Is there a free version or trial limitation?**
Yes. Without a license, Aspose.Slides runs in evaluation mode: it adds an evaluation watermark to every slide it saves and truncates text read from presentations. To remove these limitations, apply a valid [license](https://docs.aspose.com/slides/net/licensing/).
## Related features
- [Run Slides on your own servers](https://docs.aspose.com/slides/features/run-on-own-servers/)
- [Use Slides from .NET](https://docs.aspose.com/slides/features/dotnet-api/)
## Related articles
- [Declaration](https://docs.aspose.com/slides/net/declaration/)
- [System Requirements](https://docs.aspose.com/slides/net/system-requirements/)
- [How to Run Aspose.Slides in Docker](https://docs.aspose.com/slides/net/how-to-run-aspose-slides-in-docker/)
# Integrating Aspose.Slides with Google Slides
> Connect Aspose.Slides with Google Slides to import, sync, and convert presentations, automate workflows, and keep PowerPoint and OpenDocument in one pipeline.
Source: https://docs.aspose.com/slides/net/integrating-aspose-slides-with-google-slides/
Updated: 2026-08-05
## **Introduction**
Aspose.Slides now provides integration with Google Slides and Google Drive through its [SaaS Integration API](https://www.nuget.org/packages/Aspose.Slides.SaaSIntegrations). This integration enables .NET apps to convert, edit, download, and upload Google Slides presentations.
## **What Is Google Slides?**
[Google Slides](https://workspace.google.com/products/slides/) is a free, web-based presentation software developed by Google. It lets users create, edit, and share slide presentations online, similar to Microsoft PowerPoint. It supports real-time collaboration, cloud storage, and works on any device with internet access.
## **Google API**
Before starting to work with your Google Slides presentation via Aspose.Slides you have to create a Google API project and create a [Google Cloud project](https://developers.google.com/workspace/guides/create-project), then enable the desired APIs.
Then you have to choose a way you are going to access Google API - [Aspose.SlideS Google Integration](https://www.nuget.org/packages/Aspose.Slides.SaaSIntegrations) supports two ways to access Google API:
- `Google Service Account`
- `OAuth 2.0` with user interaction via a browser.
### **Google Service Account**
A service account is a special Google account used by applications or servers to access Google APIs programmatically without user interaction. It’s commonly used for backend systems or automated tasks. Service accounts are authenticated using a JSON key file and have their own email address. They can be assigned specific permissions through [Google Cloud IAM](https://cloud.google.com/iam/docs/overview) and are often used with APIs like Google Drive, Sheets, or BigQuery for secure, automated access to resources.
### **OAuth 2.0**
Another common way to access Google APIs is through OAuth 2.0 with user interaction via a browser. In this flow, the user is redirected to a Google sign-in page where they grant permission to the app. After approval, the app receives an authorization code, which it exchanges for an access token and a refresh token.
The access token allows temporary access to Google APIs, while the refresh token can be stored and reused to obtain new access tokens without requiring the user to log in again. This means browser interaction is required only once, making subsequent API access fully automated. This method is typically used for apps that need to access a user's data (like Gmail, Calendar, or Drive) with the user's consent.
## **Let's Code**
First, add the [Aspose.Slides SaaS Integration NuGet package](https://www.nuget.org/packages/Aspose.Slides.SaaSIntegrations) to your project:
```
dotnet add package Aspose.Slides.SaaSIntegrations
```
### **Example 1**
In the following example, we will download a Google Slides presentation from Google Drive and save it to the local disk as a PDF file. We will use a Google Service Account for authorization, assuming the service account JSON file with credentials has already been downloaded.
```csharp
using System.Net.Http;
using Aspose.Slides;
using Aspose.Slides.Export;
using Aspose.Slides.SaaSIntegrations;
using Aspose.Slides.SaaSIntegrations.GoogleExtension;
// Create externally managed HttpClient
HttpClient httpClient = new HttpClient();
// Create an authorization provider using a service account JSON file
IGoogleAuthorizationProvider account = new GoogleServiceAccountAuthProvider(@"service_account_json_file.json", httpClient);
// Initialize Google Slides integration service with the authorization provider
GoogleSlidesIntegration googleSlidesIntegration = new GoogleSlidesIntegration(account, httpClient);
// Load a presentation from Google Drive by its file ID into an Aspose.Slides IPresentation instance
using IPresentation pres = await googleSlidesIntegration.LoadPresentationAsync("1A2B3C4D5E6F7G8H9I0J");
// Modify the presentation if needed (e.g., remove the second slide)
pres.Slides.RemoveAt(1);
// Save the presentation locally as a PDF file
pres.Save(@"GoogleDriveDownload.pdf", SaveFormat.Pdf);
```
For convenience, Aspose.Slides SaaS Integration provides a method to list all files available to the user. The returned data includes the file name, MIME type, and file ID.
```csharp
using System.Net.Http;
using Aspose.Slides.SaaSIntegrations;
using Aspose.Slides.SaaSIntegrations.GoogleExtension;
// Create externally managed HttpClient
HttpClient httpClient = new HttpClient();
// Create an authorization provider using a service account JSON file
IGoogleAuthorizationProvider account = new GoogleServiceAccountAuthProvider(@"service_account_json_file.json", httpClient);
// Initialize Google Slides integration service with the authorization provider
GoogleSlidesIntegration googleSlidesIntegration = new GoogleSlidesIntegration(account, httpClient);
// Get the list of files available to the provided service account
var availableFiles = await googleSlidesIntegration.GetGoogleDriveFileInfosAsync();
foreach (GoogleDriveFileInfo googleDriveFileInfo in availableFiles)
{
Console.WriteLine($"File name: {googleDriveFileInfo.Name}, File ID: {googleDriveFileInfo.Id}, MIME type: {googleDriveFileInfo.MimeType}");
}
```
Another way to find the file ID is to open the presentation in the Google Slides web app and locate it in the URL.
For example, in the following URL:
```
https://docs.google.com/presentation/d/1A2B3C4D5E6F7G8H9I0J/edit
```
The file ID is:
```
1A2B3C4D5E6F7G8H9I0J
```
## **Example 2**
In the next example, we will create a PowerPoint presentation from scratch and upload it to Google Drive in Google Slides format. For authorization, we will use OAuth 2.0.
```csharp
using System.Net.Http;
using Aspose.Slides;
using Aspose.Slides.SaaSIntegrations;
using Aspose.Slides.SaaSIntegrations.GoogleExtension;
// Create externally managed HttpClient
HttpClient httpClient = new HttpClient();
// Create an authorization provider using OAuth with client ID and client secret
IGoogleAuthorizationProvider account = new GoogleOAuthProvider("clientId", "clientSecret", httpClient);
// Initialize the Google Slides integration service with the authorization provider
GoogleSlidesIntegration googleSlidesIntegration = new GoogleSlidesIntegration(account, httpClient);
// Create a sample presentation
using (var presentation = new Presentation())
{
var shape = presentation.Slides[0].Shapes.AddAutoShape(ShapeType.Rectangle, 100, 100, 300, 200);
shape.TextFrame.Text = "Hello from Google Drive!";
// Save the presentation to Google Drive root folder in Google Slides format
// You can also choose any other export format supported by Aspose.Slides
var newFileId = await googleSlidesIntegration.SavePresentationAsync(presentation, "New presentation", GoogleSaveFormatType.GoogleSlides);
Console.WriteLine($"Uploaded file ID: {newFileId}");
}
```
If you use this type of authorization in your app, `interaction with the browser is required`. You will need to select your account and confirm that you allow the app to access your Google Drive API. That’s it—this operation is only required on the first run.
### **Example 3**
In the following example we will use preobtained access token. `GoogleAccessTokenAuthProvider` is an implementation of the `IGoogleAuthorizationProvider` interface that uses an existing OAuth 2.0 access token to authorize requests to Google APIs. Unlike providers that initiate or manage the OAuth flow, this class relies on the caller to supply a valid access token.
This provider is useful in systems where the access token is obtained externally—typically by a frontend application or another service—and passed to the backend. It is especially suitable for distributed environments where managing refresh tokens server-side introduces complexity or risk of token invalidation due to concurrent refresh attempts.
This example demonstrates how to replace a file and update its name on Google Drive while preserving its file ID.
```csharp
using System.Net.Http;
using Aspose.Slides;
using Aspose.Slides.Export;
using Aspose.Slides.SaaSIntegrations;
using Aspose.Slides.SaaSIntegrations.GoogleExtension;
// Create an HTTP client for making requests
using HttpClient httpClient = new HttpClient();
// Set up Google Drive authentication using an access token
GoogleAccessTokenAuthProvider accessTokenAuthProvider = new GoogleAccessTokenAuthProvider("access_token");
// Initialize integration with Google Slides/Drive using the authentication and HTTP client
GoogleSlidesIntegration googleSlidesIntegration =
new GoogleSlidesIntegration(accessTokenAuthProvider, httpClient);
// Create a sample presentation using Aspose.Slides
using (var presentation = new Presentation())
{
// Add a rectangle shape to the first slide and set its text
var shape = presentation.Slides[0].Shapes.AddAutoShape(ShapeType.Rectangle, 100, 100, 300, 200);
shape.TextFrame.Text = "Hello from Google Drive!";
// Define PDF save options with specific quality and compliance settings
ISaveOptions saveOptions = new PdfOptions()
{
JpegQuality = 50,
Compliance = PdfCompliance.PdfA1b
};
// Save (replace) the existing file on Google Drive by file ID, update its name, and export as PDF
await googleSlidesIntegration.SavePresentationToExistingFileAsync(
presentation,
"1A2B3C4D5E6F7G8H9I0J", // ID of the existing file on Google Drive
GoogleSaveFormatType.Pdf, // Desired format to save as
saveOptions,
"NewFileName.pdf" // New name to assign to the file
);
}
```
## **Summary**
Aspose.Slides now supports an additional file format for management, simplifying the automation of cloud-based workflows for creating, sharing, and editing presentations.
This article covered the basic features. You can also save files to subfolders, replace existing files, and export to Google Drive in various formats—not limited to Google Slides presentations.
Aspose.Slides SaaS Integration will continue to expand support for presentation SaaS platforms, so check back for future updates.
## **FAQ**
### Do I need a Google Workspace account to use this integration?
No. You can use either a free Google account or a Google Workspace account. The required access depends on your Google Drive and Slides permissions.
### Which authentication method should I choose—Service Account or OAuth 2.0?
Use a **Service Account** for backend or automated workflows without user interaction.
Use **OAuth 2.0** if you need to access a specific user's Google Slides or Drive files with their consent.
### Can I work with formats other than Google Slides?
Yes. Aspose.Slides allows saving presentations to various formats (e.g., PDF, PPTX, HTML) before uploading them to Google Drive.
### How can I get the file ID of a Google Slides presentation?
You can retrieve it using the `GetGoogleDriveFileInfosAsync()` method or by copying it from the presentation's URL in Google Slides.
### Does the integration support replacing an existing file on Google Drive?
Yes. Use the `SavePresentationToExistingFileAsync` method to update a file while preserving its file ID.
### Is browser interaction required every time when using OAuth 2.0?
No. Browser interaction is required only during the first authorization. After that, stored refresh tokens allow automated access.
## Related articles
- [Slides on Cloud Platforms](https://docs.aspose.com/slides/net/slides-on-cloud-platforms/)
# Known Issues in Aspose.Slides for .NET 14.1.0 (Historical)
> Historical: the known issues published with Aspose.Slides for .NET 14.1.0 in 2014, kept for reference. It is not a list of issues in the current version.
Source: https://docs.aspose.com/slides/net/known-issues-in-aspose-slides-for-net-14-1-0/
Updated: 2026-09-28
This is a historical page. It lists the known issues published with Aspose.Slides for .NET 14.1.0, released in 2014, and does not describe the current version. For the changes in each version, see the [release notes](https://releases.aspose.com/slides/net/release-notes/).
The following are the Known Issues and Limitations in Aspose.Slides for .NET 14.1.0.
1. Some shapes have wrong geometry in serialized PPT documents (Call outs).
1. Not all PPTX text formatting features are supported in PPT serialization (tabulation, indentation and paragraph formatting limitations).
1. Info about text language and spelling settings is not present in serialized PPT documents.
1. Not all PPTX themes’ features are supported in PPT serialization (only serialization of fill formats, line formats and font).
1. There are known issues in OLE/ActiveX PPT serialization to PPT.
## Related articles
- [Known Issues](https://docs.aspose.com/slides/net/known-issues/)
# Known Issues and Behavior Notes
> A by-design note on OLE object previews and a historical known-issues list from version 14.1.0, with links to the current release notes and support.
Source: https://docs.aspose.com/slides/net/known-issues/
Updated: 2026-09-28
## **Overview**
This section does not contain a list of open issues in the current version. It contains two pages:
- [Object Preview Placeholder When Adding OleObjectFrame](https://docs.aspose.com/slides/net/object-preview-issue-when-adding-oleobjectframe/) explains why an OLE object added with Aspose.Slides shows an "EMBEDDED OLE OBJECT" image until its preview is updated, and how to set your own preview image. This is by-design behavior of the current version.
- [Known Issues in Aspose.Slides for .NET 14.1.0 (Historical)](https://docs.aspose.com/slides/net/known-issues-in-aspose-slides-for-net-14-1-0/) is a list published with version 14.1.0 in 2014, kept for reference.
For the changes and fixes in each version, see the [release notes](https://releases.aspose.com/slides/net/release-notes/). The metadata fields that Aspose.Slides writes with fixed values are described in [Output Metadata Limitations](https://docs.aspose.com/slides/net/api-limitations/). To check whether a problem is already known, or to report one, use the [support forum](https://forum.aspose.com/c/slides/11).
## Related articles
- [Known Issues in Aspose.Slides for .NET 14.1.0](https://docs.aspose.com/slides/net/known-issues-in-aspose-slides-for-net-14-1-0/)
# Licensing
> Apply, manage, and troubleshoot licenses in Aspose.Slides for .NET. Ensure uninterrupted access to full features with our step-by-step licensing guide.
Source: https://docs.aspose.com/slides/net/licensing/
Updated: 2026-09-26
## **Overview**
Aspose.Slides can be used in evaluation mode or with a valid license. The evaluation version provides the same functionality as the licensed version, but it adds an evaluation watermark to every slide of each presentation it saves and truncates text that your code reads from presentations.
This article explains how licensing works in Aspose.Slides and how to apply a license before using the library. A license can be loaded from a file, stream, or embedded resource by using the `License` class. The article also shows how to validate whether a license has been applied correctly.
## **Evaluate Aspose.Slides**
You can download an evaluation version of **Aspose.Slides for .NET** from [its NuGet download page](https://www.nuget.org/packages/Aspose.Slides.NET/). The evaluation version provides the same functionalities as the licensed version of the product. The evaluation package is the same as the purchased package. The evaluation version simply becomes licensed after you add a few lines of code to it (to apply the license).
Once you are happy with your evaluation of **Aspose.Slides**, you can [purchase a license](https://purchase.aspose.com/pricing/slides/net/). We recommend you go through the different subscription types. If you have questions, contact the Aspose sales team.
Every Aspose license comes with a one-year subscription for free upgrades to new versions or fixes released within the subscription period. Users with licensed products or even evaluation versions get free and unlimited technical support.
**Evaluation version limitations**
* The evaluation version (without a license specified) provides full product functionality, but it adds an evaluation watermark text box to every slide of each presentation it saves.
* Text that your code reads from a presentation is truncated to its first few characters, followed by a notice about the evaluation limitation. Text that your code writes is saved in full.
To test Aspose.Slides without limitations, you can ask for a **30-Day Temporary License**. See the [How to get a Temporary License](https://purchase.aspose.com/temporary-license) page for more information.
## **Licensing in Aspose.Slides**
* An evaluation version becomes licensed after you purchase a license and add a couple of lines of code to it (to apply the license).
* The license is a plain-text XML file that contains details such as the product name, number of developers it is licensed to, subscription expiry date, and so on.
* The license file is digitally signed, so you must not modify the file. Even an inadvertent addition of an extra line break to the contents of the file will invalidate it.
* Aspose.Slides for .NET typically tries to find the license in these locations:
* An explicit path
* The folder containing the dll of the component (included in Aspose.Slides)
* The folder containing the assembly that called the dll of the component (included in Aspose.Slides)
* The folder containing the entry assembly (your .exe)
* An embedded resource in the assembly that called the dll of the component (included in Aspose.Slides).
* To avoid the limitations associated with the evaluation version, you need to set a license before using Aspose.Slides. You only have to set a license once per application or process.
You may want to see [Metered Licensing](https://docs.aspose.com/slides/net/metered-licensing/).
## **Apply a License**
A license can be loaded from a **file**, **stream**, or **embedded resource**.
Aspose.Slides provides the [License](https://reference.aspose.com/slides/net/aspose.slides/license) class for licensing operations.
New licenses can activate Aspose.Slides only with version 21.4 or later. Earlier versions use a different licensing system and will not recognize these licenses.
### **File**
The easiest method of setting a license requires you to place the license file in the same folder containing the component's DLL (included in Aspose.Slides) and specify only the file name without its path.
This C# code shows you how to set a license file:
``` csharp
// Instantiates the License class
Aspose.Slides.License license = new Aspose.Slides.License();
// Sets the license file path
license.SetLicense("Aspose.Slides.lic");
```
If you place the license file in a different directory, when you call the [SetLicense](https://reference.aspose.com/slides/net/aspose.slides/license/setlicense/#setlicense_1) method, the license file name at the end of the specified path must be the same as your license file name.
For example, you can change the license file name to *Aspose.Slides.lic.xml*. Then, in your code, you have to pass the path to the file (ending with *Aspose.Slides.lic.xml*) to the [SetLicense](https://reference.aspose.com/slides/net/aspose.slides/license/setlicense/#setlicense_1) method.
### **Stream**
You can load a license from a stream. This C# code shows you how to apply a license from a stream:
``` csharp
// Instantiates the License class
Aspose.Slides.License license = new Aspose.Slides.License();
// Opens the license file as a stream
using FileStream licenseStream = File.OpenRead("Aspose.Slides.lic");
// Sets the license through a stream
license.SetLicense(licenseStream);
```
### **Embedded Resource**
You can package the license with your application (to avoid losing it) by adding the license as an embedded resource into one of the assemblies that call the component's DLL (included in Aspose.Slides).
This is how you add a license file as an embedded resource:
1. In Visual Studio, add the license (.lic) file to the project this way: Go through **File** > **Add Existing Item** > **Add**.
2. Select the file in the **Solution Explorer**.
3. On the **Properties** window, set the **Build Action** to **Embedded Resource**.
4. To access the license embedded in the assembly, add the license file as an embedded resource to the project, and then pass the license file name to the `SetLicense` method.
The `License` class automatically finds the license file in the embedded resources. You do not need to call the `GetExecutingAssembly` and `GetManifestResourceStream` methods of the `System.Reflection.Assembly` class in the Microsoft .NET Framework.
This C# code shows you how to set a license as an embedded resource:
``` csharp
// Instantiates the License class
Aspose.Slides.License license = new Aspose.Slides.License();
// Passes the license file name embedded in the assembly
license.SetLicense("Aspose.Slides.lic");
```
## **Validate a License**
To check whether a license has been set properly, you can validate it. This C# code shows you how to validate a license:
```c#
Aspose.Slides.License license = new Aspose.Slides.License();
license.SetLicense("Aspose.Slides.lic");
if (license.IsLicensed())
{
Console.WriteLine("License is good!");
Console.Read();
}
```
## **Thread Safety**
The [license.SetLicense](https://reference.aspose.com/slides/net/aspose.slides/license/setlicense/) method is not thread-safe. If this method has to be called simultaneously from many threads, you may want to use synchronization primitives (like a lock) to avoid issues.
## **FAQ**
### Can I apply the license in a completely offline environment (no internet access)?
Yes. License validation is performed locally using the license file; no internet connection is required.
### What happens after the one-year subscription expires? Will the library stop working?
No. The license is perpetual: you can continue using versions released before your subscription end date; you just won’t be eligible to use newer releases without renewing.
## Related features
- [Install and license Slides on an isolated network](https://docs.aspose.com/slides/features/air-gapped-installation/)
## Related articles
- [Evaluate Aspose.Slides](https://docs.aspose.com/slides/net/evaluate-aspose-slides/)
# Add Line Shapes to Presentations in .NET
> Learn to manipulate line formatting in PowerPoint presentations with Aspose.Slides for .NET. Discover properties, methods, and examples.
Source: https://docs.aspose.com/slides/net/line/
Updated: 2026-08-05
## **Overview**
Aspose.Slides allows you to add line shapes to PowerPoint slides programmatically. This article shows how to create a simple line and how to customize a line so it appears as an arrow.
You will learn how to add a line shape to a slide, adjust its visual appearance, and save the updated presentation. The examples focus on practical line formatting settings such as style, width, dash pattern, arrowhead options, and fill color.
## **Create a Plain Line**
To add a simple plain line to a selected slide of the presentation, please follow the steps below:
- Create an instance of [Presentation ](https://reference.aspose.com/slides/net/aspose.slides/presentation)class.
- Obtain the reference of a slide by using its Index.
- Add an AutoShape of Line type using [AddAutoShape](https://reference.aspose.com/slides/net/aspose.slides/ishapecollection/methods/addautoshape/index) method exposed by Shapes object.
- Write the modified presentation as a PPTX file.
In the example given below, we have added a line to the first slide of the presentation.
```c#
using Aspose.Slides;
using Aspose.Slides.Export;
// Instantiate PresentationEx class that represents the PPTX file
using (Presentation pres = new Presentation())
{
// Get the first slide
ISlide sld = pres.Slides[0];
// Add an autoshape of type line
sld.Shapes.AddAutoShape(ShapeType.Line, 50, 150, 300, 0);
//Write the PPTX to Disk
pres.Save("LineShape1_out.pptx", SaveFormat.Pptx);
}
```
## **Create an Arrow-Shaped Line**
Aspose.Slides for .NET also allows developers to configure some properties of the line to make it look more appealing. Let's try to configure few properties of a line to make it look like an arrow. Please follow the steps below to do so:
- Create an instance of [Presentation ](https://reference.aspose.com/slides/net/aspose.slides/presentation)class[](http://www.aspose.com/api/net/slides/aspose.slides/)[](http://www.aspose.com/api/net/slides/aspose.slides/).
- Obtain the reference of a slide by using its Index.
- Add an AutoShape of Line type using AddAutoShape method exposed by Shapes object.
- Set the Line Style to one of the styles as offered by Aspose.Slides for .NET.
- Set the Width of the line.
- Set the [Dash Style](https://reference.aspose.com/slides/net/aspose.slides/linedashstyle) of the line to one of the styles offered by Aspose.Slides for .NET.
- Set the [Arrow Head Style](https://reference.aspose.com/slides/net/aspose.slides/linearrowheadstyle) and Length of the start point of the line.
- Set the Arrow Head Style and Length of the end point of the line.
- Write the modified presentation as a PPTX file.
```c#
using System.Drawing;
using Aspose.Slides;
using Aspose.Slides.Export;
// Instantiate PresentationEx class that represents the PPTX file
using (Presentation pres = new Presentation())
{
// Get the first slide
ISlide sld = pres.Slides[0];
// Add an autoshape of type line
IAutoShape shp = sld.Shapes.AddAutoShape(ShapeType.Line, 50, 150, 300, 0);
// Apply some formatting on the line
shp.LineFormat.Style = LineStyle.ThickBetweenThin;
shp.LineFormat.Width = 10;
shp.LineFormat.DashStyle = LineDashStyle.DashDot;
shp.LineFormat.BeginArrowheadLength = LineArrowheadLength.Short;
shp.LineFormat.BeginArrowheadStyle = LineArrowheadStyle.Oval;
shp.LineFormat.EndArrowheadLength = LineArrowheadLength.Long;
shp.LineFormat.EndArrowheadStyle = LineArrowheadStyle.Triangle;
shp.LineFormat.FillFormat.FillType = FillType.Solid;
shp.LineFormat.FillFormat.SolidFillColor.Color = Color.Maroon;
//Write the PPTX to Disk
pres.Save("LineShape2_out.pptx", SaveFormat.Pptx);
}
```
## **FAQ**
### Can I convert a regular line into a connector so it "snaps" to shapes?
No. A regular line (an [AutoShape](https://reference.aspose.com/slides/net/aspose.slides/autoshape/) of type [Line](https://reference.aspose.com/slides/net/aspose.slides/shapetype/)) does not automatically become a connector. To make it snap to shapes, use the dedicated [Connector](https://reference.aspose.com/slides/net/aspose.slides/connector/) type and the [corresponding APIs](https://docs.aspose.com/slides/net/connector/) for connections.
### What should I do if a line’s properties are inherited from the theme and it’s hard to determine the final values?
[Read the effective properties](https://docs.aspose.com/slides/net/shape-effective-properties/) through the [ILineFormatEffectiveData](https://reference.aspose.com/slides/net/aspose.slides/ilineformateffectivedata/)/[ILineFillFormatEffectiveData](https://reference.aspose.com/slides/net/aspose.slides/ilinefillformateffectivedata/) interfaces—these already account for inheritance and theme styles.
### Can I lock a line against editing (moving, resizing)?
Yes. Shapes provide [lock objects](https://reference.aspose.com/slides/net/aspose.slides/autoshape/autoshapelock/) that let you [disallow editing operations](https://docs.aspose.com/slides/net/applying-protection-to-presentation/).
## Related articles
- [Adding Shapes to Presentation](https://docs.aspose.com/slides/net/adding-shapes-to-presentation/)
# Low-Code Presentation Operations in .NET
> Use the Aspose.Slides low-code API in .NET to convert and merge presentations, iterate through content, collect shapes, and reduce presentation size.
Source: https://docs.aspose.com/slides/net/low-code-presentation-operations/
Updated: 2026-11-07
## **Overview**
The [Aspose.Slides.LowCode](https://reference.aspose.com/slides/net/aspose.slides.lowcode/) namespace provides static helper classes for common presentation operations. These helpers wrap frequently used object-model workflows in focused methods, so you can convert or merge files, process presentation elements, collect shapes, and remove unused content with less code.
Low-code helpers are most useful when the operation applies to an entire file or presentation and the default workflow matches your requirements. Use the full [Aspose.Slides object model](https://reference.aspose.com/slides/net/aspose.slides/) when you need fine-grained control over individual slides, masters, layouts, shapes, export settings, or relationships between presentation elements.
The following table summarizes the available helpers:
| Helper | Use it for |
| --- | --- |
| [Convert](https://reference.aspose.com/slides/net/aspose.slides.lowcode/convert/) | Converting a presentation to another format with a direct file-to-file call. |
| [Merger](https://reference.aspose.com/slides/net/aspose.slides.lowcode/merger/) | Combining complete presentation files of the same format. |
| [ForEach](https://reference.aspose.com/slides/net/aspose.slides.lowcode/foreach/) | Running an action for every slide, shape, paragraph, or text portion. |
| [Collect](https://reference.aspose.com/slides/net/aspose.slides.lowcode/collect/) | Retrieving shapes from the entire presentation for repeated processing or analysis. |
| [Compress](https://reference.aspose.com/slides/net/aspose.slides.lowcode/compress/) | Removing unused masters/layouts, reducing embedded font data and compressing pictures. |
## **Convert a Presentation**
Use [Convert.AutoByExtension](https://reference.aspose.com/slides/net/aspose.slides.lowcode/convert/autobyextension/) when the output file extension is sufficient to select the export format. The method opens the source presentation, determines the required format from the output path, and writes the result.
```csharp
using Aspose.Slides.LowCode;
Convert.AutoByExtension("input.pptx", "output.pdf");
```
The [Convert](https://reference.aspose.com/slides/net/aspose.slides.lowcode/convert/) class also provides dedicated methods for PDF, SVG, JPEG, PNG, and TIFF output. Use the full object model when you need to inspect or modify the presentation before export or configure an export option that is not exposed by the selected helper. See [Convert Presentation](https://docs.aspose.com/slides/net/convert-presentation/) for format-specific workflows and options.
## **Merge Presentations**
Use [Merger.Process](https://reference.aspose.com/slides/net/aspose.slides.lowcode/merger/process/) to combine complete presentation files with one call. The input presentations must have the same file format.
```csharp
using Aspose.Slides.LowCode;
var inputFiles = new[] { "part-1.pptx", "part-2.pptx" };
Merger.Process(inputFiles, "merged.pptx");
```
The helper is appropriate when all slides should be appended to one result without selecting or remapping them individually. Use the full object model when you need to merge selected slides, apply a destination master or layout, preserve sections explicitly, or reconcile different slide sizes. See [Merge Presentations](https://docs.aspose.com/slides/net/merge-presentation/) for those scenarios.
## **Iterate Through Presentation Elements**
The [ForEach](https://reference.aspose.com/slides/net/aspose.slides.lowcode/foreach/) class invokes a callback for each requested type of presentation element. It avoids nested collection loops and is convenient for presentation-wide inspection or formatting changes.
The following example uses [ForEach.Slide](https://reference.aspose.com/slides/net/aspose.slides.lowcode/foreach/slide/), [ForEach.Shape](https://reference.aspose.com/slides/net/aspose.slides.lowcode/foreach/shape/), [ForEach.Paragraph](https://reference.aspose.com/slides/net/aspose.slides.lowcode/foreach/paragraph/), and [ForEach.Portion](https://reference.aspose.com/slides/net/aspose.slides.lowcode/foreach/portion/) to inspect the corresponding elements:
```csharp
using System;
using Aspose.Slides;
using Aspose.Slides.LowCode;
using var presentation = new Presentation("input.pptx");
ForEach.Slide(presentation, (slide, index) =>
{
Console.WriteLine($"Slide {index}: {slide.Shapes.Count} shapes");
});
ForEach.Shape(presentation, (shape, slide, index) =>
{
Console.WriteLine($"Shape {index} on {slide.GetType().Name}: {shape.Name}");
});
ForEach.Paragraph(presentation, (paragraph, slide, index) =>
{
Console.WriteLine($"Paragraph {index} on {slide.GetType().Name}: {paragraph.Text}");
});
ForEach.Portion(presentation, (portion, paragraph, slide, index) =>
{
Console.WriteLine($"Portion {index} on {slide.GetType().Name}: {portion.Text}");
});
```
By default, presentation-wide shape and text traversal includes normal, master, and layout slides. Overloads with an `includeNotes` parameter can also process notes slides. Use direct collection loops when traversal order, early exit, filtering before callback invocation, or detailed parent-child control is important.
## **Collect Shapes**
Use [Collect.Shapes](https://reference.aspose.com/slides/net/aspose.slides.lowcode/collect/shapes/) when you need a collection of all shapes in a presentation rather than a callback for each shape. This is useful when the same set will be filtered, counted, or processed more than once.
```csharp
using System;
using Aspose.Slides;
using Aspose.Slides.LowCode;
using var presentation = new Presentation("input.pptx");
var shapes = Collect.Shapes(presentation);
foreach (var shape in shapes)
{
Console.WriteLine($"{shape.Name}: {shape.GetType().Name}");
}
```
Use [ForEach.Shape](https://reference.aspose.com/slides/net/aspose.slides.lowcode/foreach/shape/) instead when each shape can be handled immediately and you do not need to retain the collected result.
## **Compress Presentation Content**
The [Compress](https://reference.aspose.com/slides/net/aspose.slides.lowcode/compress/) class can remove unused structural elements and reduce embedded font data:
- [Compress.RemoveUnusedLayoutSlides](https://reference.aspose.com/slides/net/aspose.slides.lowcode/compress/removeunusedlayoutslides/) removes layout slides that no normal slide references.
- [Compress.RemoveUnusedMasterSlides](https://reference.aspose.com/slides/net/aspose.slides.lowcode/compress/removeunusedmasterslides/) removes master slides that are no longer used.
- [Compress.CompressEmbeddedFonts](https://reference.aspose.com/slides/net/aspose.slides.lowcode/compress/compressembeddedfonts/) removes unused characters from embedded fonts.
```csharp
using Aspose.Slides;
using Aspose.Slides.Export;
using Aspose.Slides.LowCode;
using var presentation = new Presentation("input.pptx");
Compress.RemoveUnusedLayoutSlides(presentation);
Compress.RemoveUnusedMasterSlides(presentation);
Compress.CompressEmbeddedFonts(presentation);
presentation.Save("compressed.pptx", SaveFormat.Pptx);
```
Remove unused layouts before unused masters so a master that becomes unreferenced after layout cleanup can also be removed. Save the optimized presentation to a new file if you may need the original masters, layouts, or complete embedded font data later. For more detail, see [Slide Master](https://docs.aspose.com/slides/net/slide-master/) and [Embedded Font](https://docs.aspose.com/slides/net/embedded-font/).
### **Compress the Whole Presentation**
Aspose.Slides for .NET 26.11 adds [Compress.CompressPresentation](https://reference.aspose.com/slides/net/aspose.slides.lowcode/compress/compresspresentation/). It combines removal of unused layout/master slides, subsetting of embedded fonts to used characters, and picture compression at 150 DPI. Use the individual operations above when you need to control which changes are applied.
Install [Aspose.Slides for .NET](https://docs.aspose.com/slides/net/installation/) 26.11 or later and provide `input.pptx`. Save to a separate file: removed layouts, font characters and cropped picture pixels may be needed for later editing.
```csharp
using Aspose.Slides;
using Aspose.Slides.Export;
using Aspose.Slides.LowCode;
using var presentation = new Presentation("input.pptx");
Compress.CompressPresentation(presentation);
presentation.Save("compressed.pptx", SaveFormat.Pptx);
```
### **Compress Images at a Chosen Resolution**
Use [Compress.CompressImages](https://reference.aspose.com/slides/net/aspose.slides.lowcode/compress/compressimages/) to process eligible pictures without also removing layouts or subsetting fonts. This example uses 96 DPI; select another [PicturesCompression](https://reference.aspose.com/slides/net/aspose.slides.export/picturescompression/) value for your output needs.
```csharp
using Aspose.Slides;
using Aspose.Slides.Export;
using Aspose.Slides.LowCode;
using var presentation = new Presentation("input.pptx");
Compress.CompressImages(presentation, PicturesCompression.Dpi96);
presentation.Save("compressed-images.pptx", SaveFormat.Pptx);
```
Both helpers use the following picture-processing scope:
| Content | Treatment |
| --- | --- |
| Raster pictures and shape picture fills on normal, master and layout slides, including grouped shapes | Eligible for compression. |
| Pictures already at or below the requested resolution | Not upscaled. Cropped areas can still be removed. |
| Cropped picture areas | Hidden pixels are permanently removed and crop offsets are reset. |
| Slide backgrounds and table-cell fills | Not processed by these helpers. |
| Chart/SmartArt internals, GIF and vector formats such as SVG, EMF and WMF | Outside the documented image-compression scope. |
In 26.11, [PicturesCompression.DocumentResolution](https://reference.aspose.com/slides/net/aspose.slides.export/picturescompression/) avoids resolution-based downsampling of an uncropped picture, but **does not preserve cropped pixels**. A cropped picture can still be rewritten with its hidden areas removed. Neither helper exposes a preserve-crop option. For individual control, see the [per-picture compression example](https://docs.aspose.com/slides/net/examples/optimization-batch/compression/).
Compare the output's appearance and file size before replacing the original. Savings depend on the source pictures, their displayed size and unused content; compression does not guarantee a smaller file. See [Embedded Fonts](https://docs.aspose.com/slides/net/embedded-font/) for the implications of font subsetting.
## **FAQ**
**When should I use the low-code API instead of the full object model?**
Use low-code helpers when a standard operation applies to a complete file or presentation and does not require detailed control over individual elements. Use the full object model when you need to select specific slides, control master and layout relationships, inspect intermediate state, or configure behavior that the helper does not expose.
**Can Merger combine presentations in different file formats?**
No. [Merger.Process](https://reference.aspose.com/slides/net/aspose.slides.lowcode/merger/process/) requires input presentations in the same format. Convert the input files to a common format first, for example with [Convert.AutoByExtension](https://reference.aspose.com/slides/net/aspose.slides.lowcode/convert/autobyextension/), and then merge the converted files.
**Does ForEach process master, layout, and notes slides?**
[ForEach.Slide](https://reference.aspose.com/slides/net/aspose.slides.lowcode/foreach/slide/) iterates through normal presentation slides. Presentation-wide [ForEach.Shape](https://reference.aspose.com/slides/net/aspose.slides.lowcode/foreach/shape/), [ForEach.Paragraph](https://reference.aspose.com/slides/net/aspose.slides.lowcode/foreach/paragraph/), and [ForEach.Portion](https://reference.aspose.com/slides/net/aspose.slides.lowcode/foreach/portion/) operations include normal, master, and layout slides by default. Use their overloads with `includeNotes` set to `true` to include notes slides.
**What is the difference between ForEach.Shape and Collect.Shapes?**
Use [ForEach.Shape](https://reference.aspose.com/slides/net/aspose.slides.lowcode/foreach/shape/) to process each shape immediately through a callback. Use [Collect.Shapes](https://reference.aspose.com/slides/net/aspose.slides.lowcode/collect/shapes/) when you need an enumerable result that can be retained, filtered, counted, or traversed multiple times.
**Does Compress always make the presentation file smaller?**
Not necessarily. Savings depend on unused layouts/masters, embedded fonts with unused characters, and pictures that benefit from compression. The [Compress](https://reference.aspose.com/slides/net/aspose.slides.lowcode/compress/) helpers may leave the size unchanged or produce a larger file for some inputs. Compare both size and rendered quality, and keep the original.
**Are changes made by ForEach or Compress saved automatically?**
No. These helpers operate on the loaded [Presentation](https://reference.aspose.com/slides/net/aspose.slides/presentation/) object in memory. After changing elements in a [ForEach](https://reference.aspose.com/slides/net/aspose.slides.lowcode/foreach/) callback or running [Compress](https://reference.aspose.com/slides/net/aspose.slides.lowcode/compress/), call [Presentation.Save](https://reference.aspose.com/slides/net/aspose.slides/presentation/save/) to write the result.
## **Related Articles**
- [Convert Presentation](https://docs.aspose.com/slides/net/convert-presentation/)
- [Merge Presentations](https://docs.aspose.com/slides/net/merge-presentation/)
- [Slide Master](https://docs.aspose.com/slides/net/slide-master/)
- [Manage Text Box](https://docs.aspose.com/slides/net/manage-textbox/)
- [Embedded Font](https://docs.aspose.com/slides/net/embedded-font/)
## Related features
- [Compress presentations](https://docs.aspose.com/slides/features/compress-presentations/)
- [Process multiple presentations in a loop](https://docs.aspose.com/slides/features/process-multiple-files/)
# Enhance Your Presentations with AutoFit in .NET
> Learn how to manage AutoFit settings in Aspose.Slides for .NET to optimize text display in your PowerPoint and OpenDocument presentations and improve content readability.
Source: https://docs.aspose.com/slides/net/manage-autofit-settings/
Updated: 2026-08-05
## **Introduction**
By default, when you add a textbox, Microsoft PowerPoint uses the **Resize shape to fit text** setting for the textbox—it automatically resizes the textbox to ensure its text always fits into it.
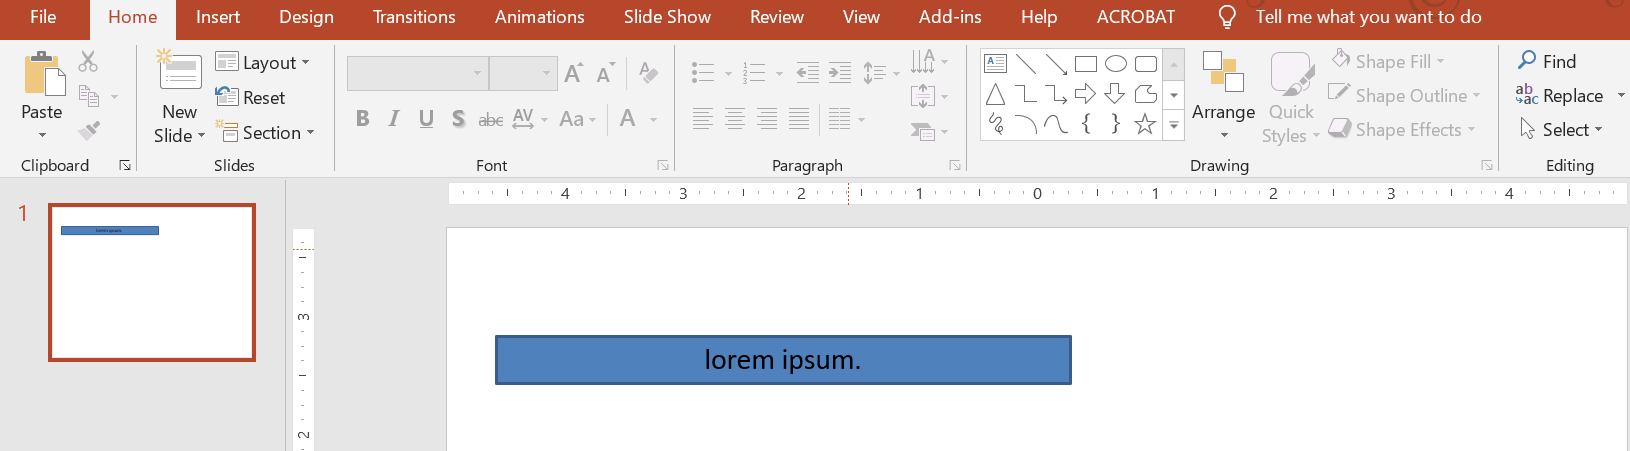
* When the text in the textbox becomes longer or bigger, PowerPoint automatically enlarges the textbox—increasing its height—to allow it to hold more text.
* When the text in the textbox becomes shorter or smaller, PowerPoint automatically reduces the textbox—decreasing its height—to clear redundant space.
In PowerPoint, these are the four important parameters or options that control the autofit behavior for a textbox:
* **Do not Autofit**
* **Shrink text on overflow**
* **Resize shape to fit text**
* **Wrap text in shape**
Aspose.Slides for .NET provides similar options—properties under the [TextFrameFormat](https://reference.aspose.com/slides/net/aspose.slides/textframeformat) class—that allow you to control the autofit behavior for textboxes in presentations.
## **Resize a Shape to Fit Text**
If you want the text in a box to always fit into that box after changes are made to the text, you have to use the **Resize shape to fit text** option. To specify this setting, set the `AutofitType` property from the [TextFrameFormat](https://reference.aspose.com/slides/net/aspose.slides/textframeformat) class to `Shape`.

This C# code shows how to specify that text must always fit into its box in a PowerPoint presentation:
```c#
using System.Drawing;
using Aspose.Slides;
using Aspose.Slides.Export;
using (Presentation presentation = new Presentation())
{
ISlide slide = presentation.Slides[0];
IAutoShape autoShape = slide.Shapes.AddAutoShape(ShapeType.Rectangle, 30, 30, 350, 100);
Portion portion = new Portion("lorem ipsum...");
portion.PortionFormat.FillFormat.SolidFillColor.Color = Color.Black;
portion.PortionFormat.FillFormat.FillType = FillType.Solid;
autoShape.TextFrame.Paragraphs[0].Portions.Add(portion);
ITextFrameFormat textFrameFormat = autoShape.TextFrame.TextFrameFormat;
textFrameFormat.AutofitType = TextAutofitType.Shape;
presentation.Save("output_presentation.pptx", SaveFormat.Pptx);
}
```
If the text becomes longer or bigger, the textbox will be automatically resized (increased in height) to ensure all the text fits into it. If the text becomes shorter, the reverse occurs.
## **Do Not Autofit**
If you want a textbox or shape to retain its dimensions no matter the changes made to the text it contains, you have to use the **Do not Autofit** option. To specify this setting, set the `AutofitType` property from the [TextFrameFormat](https://reference.aspose.com/slides/net/aspose.slides/textframeformat) class to `None`.

This C# code shows how to specify that a textbox must always retain its dimensions in a PowerPoint presentation:
```c#
using System.Drawing;
using Aspose.Slides;
using Aspose.Slides.Export;
using (Presentation presentation = new Presentation())
{
ISlide slide = presentation.Slides[0];
IAutoShape autoShape = slide.Shapes.AddAutoShape(ShapeType.Rectangle, 30, 30, 350, 100);
Portion portion = new Portion("lorem ipsum...");
portion.PortionFormat.FillFormat.SolidFillColor.Color = Color.Black;
portion.PortionFormat.FillFormat.FillType = FillType.Solid;
autoShape.TextFrame.Paragraphs[0].Portions.Add(portion);
ITextFrameFormat textFrameFormat = autoShape.TextFrame.TextFrameFormat;
textFrameFormat.AutofitType = TextAutofitType.None;
presentation.Save("output_presentation.pptx", SaveFormat.Pptx);
}
```
When the text becomes too long for its box, it spills out.
## **Shrink Text on Overflow**
If the text becomes too long for its box, through the **Shrink text on overflow** option, you can specify that the text's size and spacing must be reduced to make it fit into its box. To specify this setting, set the `AutofitType` property from the [TextFrameFormat](https://reference.aspose.com/slides/net/aspose.slides/textframeformat) class to `Normal`.

This C# code shows how to specify that text must be shrunk on overflow in a PowerPoint presentation:
```c#
using System.Drawing;
using Aspose.Slides;
using Aspose.Slides.Export;
using (Presentation presentation = new Presentation())
{
ISlide slide = presentation.Slides[0];
IAutoShape autoShape = slide.Shapes.AddAutoShape(ShapeType.Rectangle, 30, 30, 350, 100);
Portion portion = new Portion("lorem ipsum...");
portion.PortionFormat.FillFormat.SolidFillColor.Color = Color.Black;
portion.PortionFormat.FillFormat.FillType = FillType.Solid;
autoShape.TextFrame.Paragraphs[0].Portions.Add(portion);
ITextFrameFormat textFrameFormat = autoShape.TextFrame.TextFrameFormat;
textFrameFormat.AutofitType = TextAutofitType.Normal;
presentation.Save("output_presentation.pptx", SaveFormat.Pptx);
}
```
When the **Shrink text on overflow** option is used, the setting is applied only when the text becomes too long for its box.
## **Wrap Text**
If you want the text in a shape to be wrapped inside that shape when the text goes beyond the shape's border (width only), you have to use the **Wrap text in shape** parameter. To specify this setting, you have to set the `WrapText` property from the [TextFrameFormat](https://reference.aspose.com/slides/net/aspose.slides/textframeformat) class to `NullableBool.True`.
This C# code shows how to use the Wrap Text setting in a PowerPoint presentation:
```c#
using System.Drawing;
using Aspose.Slides;
using Aspose.Slides.Export;
using (Presentation presentation = new Presentation())
{
ISlide slide = presentation.Slides[0];
IAutoShape autoShape = slide.Shapes.AddAutoShape(ShapeType.Rectangle, 30, 30, 350, 100);
Portion portion = new Portion("lorem ipsum...");
portion.PortionFormat.FillFormat.SolidFillColor.Color = Color.Black;
portion.PortionFormat.FillFormat.FillType = FillType.Solid;
autoShape.TextFrame.Paragraphs[0].Portions.Add(portion);
ITextFrameFormat textFrameFormat = autoShape.TextFrame.TextFrameFormat;
textFrameFormat.WrapText = NullableBool.True;
presentation.Save("output_presentation.pptx", SaveFormat.Pptx);
}
```
If you set the `WrapText` property to `NullableBool.False` for a shape, when the text inside the shape becomes longer than the shape's width, the text extends beyond the shape's borders along a single line.
## **FAQ**
### Do the text frame’s internal margins affect AutoFit?
Yes. Padding (internal margins) reduces the usable area for text, so AutoFit will kick in earlier—shrinking the font or resizing the shape sooner. Check and adjust margins before tuning AutoFit.
### How does AutoFit interact with manual and soft line breaks?
Forced breaks remain in place, and AutoFit adapts font size and spacing around them. Removing unnecessary breaks often reduces how aggressively AutoFit needs to shrink the text.
### Does changing the theme font or triggering font substitution affect AutoFit results?
Yes. Substituting to a font with different glyph metrics changes text width/height, which can alter final font size and line wrapping. After any font change or substitution, re-check the slides.
## Related features
- [Fit text in a shape](https://docs.aspose.com/slides/features/text-autofit/)
# Manage Presentation BLOBs in .NET for Efficient Memory Use
> Manage BLOB data in Aspose.Slides for .NET to streamline PowerPoint and OpenDocument file operations for efficient presentation handling.
Source: https://docs.aspose.com/slides/net/manage-blob/
Updated: 2026-08-05
## **Overview**
Aspose.Slides provides BLOB-based handling for large binary data in presentations to help reduce memory consumption when working with large images, audio, video, and presentation files.
This article shows how to use BLOB-based processing to add large media to a presentation, export large media from a presentation, and load large presentations more efficiently. It also explains how temporary files can be used during processing and how to change the folder used to store them.
## **About BLOB**
**BLOB** (**Binary Large Object**) is usually a large item (photo, presentation, document, or media) saved in binary formats.
Aspose.Slides for .NET allows you to use BLOBs for objects in a way that reduces memory consumption when large files are involved.
## **Use BLOB to Reduce Memory Consumption**
### **Add a Large File through BLOB to a Presentation**
[Aspose.Slides](https://docs.aspose.com/slides/net/) for .NET allows you to add large files (in this case, a large video file) through a process involving BLOBs to reduce memory consumption.
This C# shows you how to add a large video file through the BLOB process to a presentation:
```c#
using Aspose.Slides;
using Aspose.Slides.Export;
const string pathToVeryLargeVideo = "veryLargeVideo.avi";
// Creates a new presentation to which the video will be added
using (Presentation pres = new Presentation())
{
using (FileStream fileStream = new FileStream(pathToVeryLargeVideo, FileMode.Open))
{
// Let's add the video to the presentation - we chose the KeepLocked behavior because we do
//not intend to access the "veryLargeVideo.avi" file.
IVideo video = pres.Videos.AddVideo(fileStream, LoadingStreamBehavior.KeepLocked);
pres.Slides[0].Shapes.AddVideoFrame(0, 0, 480, 270, video);
// Saves the presentation. While a large presentation gets outputted, the memory consumption
// stays low through the pres object's lifecycle
pres.Save("presentationWithLargeVideo.pptx", SaveFormat.Pptx);
}
}
```
### **Export a Large File through BLOB from Presentation**
Aspose.Slides for .NET allows you to export large files (in this case, an audio or video file) through a process involving BLOBs from presentations. For example, you may need to extract a large media file from a presentation but do not want the file to be loaded into your computer's memory. By exporting the file through the BLOB process, you get to keep memory consumption low.
This code in C# demonstrates the described operation:
```c#
using Aspose.Slides;
const string hugePresentationWithAudiosAndVideosFile = @"Large Video File Test1.pptx";
LoadOptions loadOptions = new LoadOptions
{
BlobManagementOptions = {
// Locks the source file and does NOT load it into memory
PresentationLockingBehavior = PresentationLockingBehavior.KeepLocked,
}
};
// Creates a Presentation's instance, locks the "hugePresentationWithAudiosAndVideos.pptx" file.
using (Presentation pres = new Presentation(hugePresentationWithAudiosAndVideosFile, loadOptions))
{
// Let's save each video to a file. To prevent high memory usage, we need a buffer that will be used
// to transfer the data from the presentation's video stream to a stream for a newly created video file.
byte[] buffer = new byte[8 * 1024];
// Iterates through the videos
for (var index = 0; index < pres.Videos.Count; index++)
{
IVideo video = pres.Videos[index];
// Opens the presentation video stream. Please, note that we intentionally avoided accessing properties
// like video.BinaryData - because this property returns a byte array containing a full video, which then
// causes bytes to be loaded into memory. We use video.GetStream, which will return Stream - and does NOT
// require us to load the whole video into the memory.
using (Stream presVideoStream = video.GetStream())
{
using (FileStream outputFileStream = File.OpenWrite($"video{index}.avi"))
{
int bytesRead;
while ((bytesRead = presVideoStream.Read(buffer, 0, buffer.Length)) > 0)
{
outputFileStream.Write(buffer, 0, bytesRead);
}
}
}
// Memory consumption will remain low regardless of the size of the video or presentation,
}
// If necessary, you can apply the same steps for audio files.
}
```
### **Add an Image as BLOB to a Presentation**
With methods from the [**IImageCollection**](https://reference.aspose.com/slides/net/aspose.slides/iimagecollection) interface and [**ImageCollection** ](https://reference.aspose.com/slides/net/aspose.slides/imagecollection)class, you can add a large image as a stream to get it treated as a BLOB.
This C# code shows you how to add a large image through the BLOB process:
```c#
using Aspose.Slides;
using Aspose.Slides.Export;
string pathToLargeImage = "large_image.jpg";
// creates a new presentation to which the image will be added.
using (Presentation pres = new Presentation())
{
using (FileStream fileStream = new FileStream(pathToLargeImage, FileMode.Open))
{
// Let's add the image to the presentation - we choose KeepLocked behavior because we do
// NOT intend to access the "largeImage.png" file.
IPPImage img = pres.Images.AddImage(fileStream, LoadingStreamBehavior.KeepLocked);
pres.Slides[0].Shapes.AddPictureFrame(ShapeType.Rectangle, 0, 0, 300, 200, img);
// Saves the presentation. While a large presentation gets outputted, the memory consumption
// stays low through the pres object's lifecycle
pres.Save("presentationWithLargeImage.pptx", SaveFormat.Pptx);
}
}
```
## **Memory and Large Presentations**
Typically, to load a large presentation, computers require a lot of temporary memory. All the presentation's content is loaded into the memory and the file (from which the presentation was loaded) stops being used.
Consider a large PowerPoint presentation (large.pptx) that contains a 1.5 GB video file. The standard method for loading the presentation is described in this C# code:
```c#
using Aspose.Slides;
using Aspose.Slides.Export;
using (Presentation pres = new Presentation("large.pptx"))
{
pres.Save("large.pdf", SaveFormat.Pdf);
}
```
But this method consumes around 1.6 GB of temporary memory.
### **Load a Large Presentation as BLOB**
Through the process involving a BLOB, you can load up a large presentation while using little memory. This C# code describes the implementation where the BLOB process is used to load up a large presentation file (large.pptx):
```c#
using Aspose.Slides;
using Aspose.Slides.Export;
LoadOptions loadOptions = new LoadOptions
{
BlobManagementOptions = new BlobManagementOptions
{
PresentationLockingBehavior = PresentationLockingBehavior.KeepLocked,
IsTemporaryFilesAllowed = true
}
};
using (Presentation pres = new Presentation("large.pptx", loadOptions))
{
pres.Save("large.pdf", SaveFormat.Pdf);
}
```
### **Change the Folder for Temporary Files**
When the BLOB process is used, your computer creates temporary files in the default folder for temporary files. If you want the temporary files to be kept in a different folder, you can change the settings for storage using `TempFilesRootPath`:
```c#
using Aspose.Slides;
LoadOptions loadOptions = new LoadOptions
{
BlobManagementOptions = new BlobManagementOptions
{
PresentationLockingBehavior = PresentationLockingBehavior.KeepLocked,
IsTemporaryFilesAllowed = true,
TempFilesRootPath = "temp"
}
};
```
When you use `TempFilesRootPath`, Aspose.Slides does not automatically create a folder to store temporary files. You have to create the folder manually.
### **Dispose Presentation Objects to Release Memory**
When processing large presentations, ensure that the [Presentation](https://reference.aspose.com/slides/net/aspose.slides/presentation/) instance is properly disposed so that the memory it occupied is released. The recommended way is to use a `using` statement or declaration as shown in the examples above; it automatically disposes the presentation and frees unmanaged resources when the block exits.
If you create a presentation without a `using` block, explicitly call `Dispose()` after you have finished using it.
```cs
using Aspose.Slides;
using Aspose.Slides.Export;
Presentation presentation = new Presentation("large.pptx");
// ...process the presentation...
presentation.Save("large.pdf", SaveFormat.Pdf);
// Explicitly release resources.
presentation.Dispose();
```
## **FAQ**
### What data in an Aspose.Slides presentation is treated as BLOB and controlled by BLOB options?
Large binary objects such as images, audio, and video are treated as BLOB. The whole presentation file also involves BLOB handling when it’s loaded or saved. These objects are governed by BLOB policies that let you manage memory usage and spill to temporary files when needed.
### Where do I configure BLOB handling rules during presentation loading?
Use [LoadOptions](https://reference.aspose.com/slides/net/aspose.slides/loadoptions/) with [BlobManagementOptions](https://reference.aspose.com/slides/net/aspose.slides/blobmanagementoptions/). There you set the in-memory limit for BLOB, allow or disallow temporary files, choose the root path for temp files, and select source locking behavior.
### Do BLOB settings affect performance, and how do I balance speed vs memory?
Yes. Keeping BLOB in memory maximizes speed but increases RAM consumption; lowering the memory limit shifts more work to temporary files, reducing RAM at the cost of additional I/O. Tune the [MaxBlobsBytesInMemory](https://reference.aspose.com/slides/net/aspose.slides/blobmanagementoptions/maxblobsbytesinmemory/) threshold to reach the right balance for your workload and environment.
### Do BLOB options help when opening extremely large presentations (e.g., gigabytes)?
Yes. [BlobManagementOptions](https://reference.aspose.com/slides/net/aspose.slides/blobmanagementoptions/) are designed for such scenarios: enabling temporary files and using source locking can significantly reduce peak RAM use and stabilize processing for very large decks.
### Can I use BLOB policies when loading from streams instead of disk files?
Yes. The same rules apply to streams: the presentation instance can own and lock the input stream (depending on the chosen locking mode), and temporary files are used when allowed, keeping memory usage predictable during processing.
## Related features
- [Stream large media while processing presentations](https://docs.aspose.com/slides/features/stream-media/)
- [Control memory used by embedded media](https://docs.aspose.com/slides/features/memory-management/)
- [Work with large presentations](https://docs.aspose.com/slides/features/large-presentations/)
# Manage Table Cells in Presentations in .NET
> Manage PowerPoint table cells in C#: identify merged cells, remove borders, split cells, and set background colors and images with Aspose.Slides for .NET.
Source: https://docs.aspose.com/slides/net/manage-cells/
Updated: 2026-11-17
## **Overview**
Aspose.Slides allows you to access and modify table cells in PowerPoint presentations. This article explains how to identify merged table cells, remove cell borders, work with cell numbering after merging or splitting cells, change a cell’s background color, and add an image inside a table cell. The examples show how to create or open a presentation, get a table from a slide, update cell formatting through cell properties, and save the modified presentation as a PPTX file.
Aspose.Slides uses zero-based indices to access table cells in the order `(column, row)`.
## **Identify a Merged Table Cell**
The example opens an existing presentation and accesses the first shape on the first slide as a table. It assumes that the slide and shape exist and that the shape is a table. It then iterates through all rows and columns and uses [IsMergedCell](https://reference.aspose.com/slides/net/aspose.slides/icell/ismergedcell/) to identify cells in merged regions. For each match, it prints the cell coordinates in `row;column` order, [RowSpan](https://reference.aspose.com/slides/net/aspose.slides/icell/rowspan/), [ColSpan](https://reference.aspose.com/slides/net/aspose.slides/icell/colspan/), and the region's starting coordinates, [FirstRowIndex](https://reference.aspose.com/slides/net/aspose.slides/icell/firstrowindex/) and [FirstColumnIndex](https://reference.aspose.com/slides/net/aspose.slides/icell/firstcolumnindex/).
```csharp
using System;
using Aspose.Slides;
using var presentation = new Presentation("presentation_with_table.pptx");
var slide = presentation.Slides[0];
var table = (ITable) slide.Shapes[0];
var rowCount = table.Rows.Count;
for (var rowIndex = 0; rowIndex < rowCount; rowIndex++)
{
var columnCount = table.Columns.Count;
for (var columnIndex = 0; columnIndex < columnCount; columnIndex++)
{
var cell = table[columnIndex, rowIndex];
if (cell.IsMergedCell)
{
Console.WriteLine($"Cell {rowIndex};{columnIndex} belongs to a merged region with RowSpan={cell.RowSpan} and ColSpan={cell.ColSpan} starting at {cell.FirstRowIndex};{cell.FirstColumnIndex}.");
}
}
}
```
## **Remove Table Cell Borders**
Create a [Presentation](https://reference.aspose.com/slides/net/aspose.slides/presentation/) and add a table to its first slide with [AddTable](https://reference.aspose.com/slides/net/aspose.slides/ishapecollection/addtable/). Column widths, row heights, and the table position are specified in points. The example sets all four cell borders to [FillType.NoFill](https://reference.aspose.com/slides/net/aspose.slides/filltype/), making them invisible.
```csharp
using Aspose.Slides;
using var presentation = new Presentation();
var slide = presentation.Slides[0];
double[] columnWidths = { 50, 50, 50, 50 };
double[] rowHeights = { 50, 30, 30, 30, 30 };
var table = slide.Shapes.AddTable(100, 50, columnWidths, rowHeights);
foreach (var row in table.Rows)
foreach (var cell in row)
{
cell.CellFormat.BorderTop.FillFormat.FillType = FillType.NoFill;
cell.CellFormat.BorderBottom.FillFormat.FillType = FillType.NoFill;
cell.CellFormat.BorderLeft.FillFormat.FillType = FillType.NoFill;
cell.CellFormat.BorderRight.FillFormat.FillType = FillType.NoFill;
}
presentation.Save("table.pptx", SaveFormat.Pptx);
```
## **Add Diagonal Cell Borders**
Use [BorderDiagonalDown](https://reference.aspose.com/slides/net/aspose.slides/icellformat/borderdiagonaldown/) to draw a line from the top-left corner to the bottom-right, and [BorderDiagonalUp](https://reference.aspose.com/slides/net/aspose.slides/icellformat/borderdiagonalup/) to draw a line from the bottom-left corner to the top-right. A diagonal can mark a corner header; both diagonals can form an X to mark a cell as not applicable.
Each diagonal is an [ILineFormat](https://reference.aspose.com/slides/net/aspose.slides/ilineformat/). In its [FillFormat](https://reference.aspose.com/slides/net/aspose.slides/ilineformat/fillformat/), set [FillType](https://reference.aspose.com/slides/net/aspose.slides/ifillformat/filltype/) to [FillType.Solid](https://reference.aspose.com/slides/net/aspose.slides/filltype/) and choose a [SolidFillColor](https://reference.aspose.com/slides/net/aspose.slides/ifillformat/solidfillcolor/). Set the line's [Width](https://reference.aspose.com/slides/net/aspose.slides/ilineformat/width/) in points.
The example creates three cells in one row: a red downward diagonal, a blue upward diagonal, and both diagonals. It leaves the top, bottom, left, and right cell borders unchanged.
```csharp
using System.Drawing;
using Aspose.Slides;
using Aspose.Slides.Export;
using var presentation = new Presentation();
var slide = presentation.Slides[0];
double[] columnWidths = { 210, 210, 210 };
double[] rowHeights = { 160 };
var table = slide.Shapes.AddTable(45, 130, columnWidths, rowHeights);
var downwardBorder = table[0, 0].CellFormat.BorderDiagonalDown;
downwardBorder.FillFormat.FillType = FillType.Solid;
downwardBorder.FillFormat.SolidFillColor.Color = Color.Red;
downwardBorder.Width = 3;
var upwardBorder = table[1, 0].CellFormat.BorderDiagonalUp;
upwardBorder.FillFormat.FillType = FillType.Solid;
upwardBorder.FillFormat.SolidFillColor.Color = Color.Blue;
upwardBorder.Width = 5;
var crossDownwardBorder = table[2, 0].CellFormat.BorderDiagonalDown;
crossDownwardBorder.FillFormat.FillType = FillType.Solid;
crossDownwardBorder.FillFormat.SolidFillColor.Color = Color.Red;
crossDownwardBorder.Width = 3;
var crossUpwardBorder = table[2, 0].CellFormat.BorderDiagonalUp;
crossUpwardBorder.FillFormat.FillType = FillType.Solid;
crossUpwardBorder.FillFormat.SolidFillColor.Color = Color.Blue;
crossUpwardBorder.Width = 5;
presentation.Save("diagonal_cell_borders.pptx", SaveFormat.Pptx);
```
A diagonal is a formatting property, not a cell split. Each cell retains a single [TextFrame](https://reference.aspose.com/slides/net/aspose.slides/icell/textframe/); the regions on either side of a diagonal cannot be edited independently.
The saved table, rendered in Microsoft PowerPoint:

*Left to right: downward diagonal (red, 3 pt), upward diagonal (blue, 5 pt), and both diagonals.*
## **Merge Table Cells**
Use [MergeCells](https://reference.aspose.com/slides/net/aspose.slides/itable/mergecells/) to combine a rectangular range of table cells into one cell. Specify the cells at the top-left and bottom-right corners of the range. The final argument controls whether the merge may include cells outside the specified range; `false` keeps the merge within that range.
The example creates a 4-by-4 table with 70-point columns and rows, then merges the four central cells from `(1, 1)` through `(2, 2)`. The resulting cell spans two columns and two rows, while the table's underlying grid retains four columns and four rows. To access the merged cell's content or formatting, use its top-left position: `table[1, 1]` in this example. The other positions in the merged range remain part of the table grid, so the indices of cells outside the range do not change.
```csharp
using Aspose.Slides;
using Aspose.Slides.Export;
using var presentation = new Presentation();
var slide = presentation.Slides[0];
double[] columnWidths = { 70, 70, 70, 70 };
double[] rowHeights = { 70, 70, 70, 70 };
var table = slide.Shapes.AddTable(100, 50, columnWidths, rowHeights);
table.MergeCells(table[1, 1], table[2, 2], false);
presentation.Save("merged_cells.pptx", SaveFormat.Pptx);
```
## **Split Table Cells**
Merging cells in the previous example preserves the table's grid. Splitting a cell can introduce a new grid column and change the column indices of cells to its right. Aspose.Slides follows PowerPoint's table grid model.
This example creates a 4-by-4 table with 70-point columns and rows and calls [SplitByWidth](https://reference.aspose.com/slides/net/aspose.slides/icell/splitbywidth/) on cell `(1, 1)`. Half of the cell's 70-point width is passed to create two equal-width cells.
After this split, the two halves are accessed as `table[1, 1]` and `table[2, 1]`. The table grid now has five columns: cells originally in columns 2 and 3 move to columns 3 and 4, respectively. Row indices remain unchanged. Use these updated column indices when accessing cells after the split.
```csharp
using System.Drawing;
using Aspose.Slides;
using Aspose.Slides.Export;
using var presentation = new Presentation();
var slide = presentation.Slides[0];
double[] columnWidths = { 70, 70, 70, 70 };
double[] rowHeights = { 70, 70, 70, 70 };
var table = slide.Shapes.AddTable(100, 50, columnWidths, rowHeights);
table[1, 1].SplitByWidth(table[1, 1].Width / 2);
presentation.Save("split_cells.pptx", SaveFormat.Pptx);
```
### **Split Merged Cells by Row or Column Span**
To prepare merged template cells for data population, use [SplitByRowSpan](https://reference.aspose.com/slides/net/aspose.slides/icell/splitbyrowspan/) to split along an existing row boundary, or [SplitByColSpan](https://reference.aspose.com/slides/net/aspose.slides/icell/splitbycolspan/) to split along a column boundary.
The `index` argument counts rows in the upper part or columns in the left part of the split; it is relative to the merged region:
- Row split: `0 < index <` [RowSpan](https://reference.aspose.com/slides/net/aspose.slides/icell/rowspan/).
- Column split: `0 < index <` [ColSpan](https://reference.aspose.com/slides/net/aspose.slides/icell/colspan/).
The example expects a presentation to have a table as the first shape on the first slide, with `(1, 2)` and `(1, 3)` merged vertically. Starting from the lower position, it uses [FirstColumnIndex](https://reference.aspose.com/slides/net/aspose.slides/icell/firstcolumnindex/) and [FirstRowIndex](https://reference.aspose.com/slides/net/aspose.slides/icell/firstrowindex/) to locate the origin and checks both spans. `SplitByRowSpan(1)` then separates rows 2 and 3 for product names. For a horizontal two-column merge, use `SplitByColSpan(1)` instead.
```csharp
using System;
using Aspose.Slides;
using Aspose.Slides.Export;
using var presentation = new Presentation("table_template.pptx");
var slide = presentation.Slides[0];
var table = (ITable) slide.Shapes[0];
var selectedCell = table[1, 3];
var firstColumnIndex = selectedCell.FirstColumnIndex;
var firstRowIndex = selectedCell.FirstRowIndex;
var mergedCell = table[firstColumnIndex, firstRowIndex];
if (mergedCell.IsMergedCell && mergedCell.RowSpan == 2 && mergedCell.ColSpan == 1)
{
mergedCell.SplitByRowSpan(1);
// Retrieve the resulting cells from the table after splitting.
var upperCell = table[firstColumnIndex, firstRowIndex];
var lowerCell = table[firstColumnIndex, firstRowIndex + 1];
Console.WriteLine($"Upper cell merged: {upperCell.IsMergedCell}");
Console.WriteLine($"Lower cell merged: {lowerCell.IsMergedCell}");
upperCell.TextFrame.Text = "Product A";
lowerCell.TextFrame.Text = "Product B";
presentation.Save("split_template.pptx", SaveFormat.Pptx);
}
else
{
Console.WriteLine("Select a merged region spanning exactly two rows and one column.");
}
```
The table grid and surrounding cell indices stay unchanged. Retrieve the resulting cells by their coordinates; here, both have spans of 1 and [IsMergedCell](https://reference.aspose.com/slides/net/aspose.slides/icell/ismergedcell/) prints `False`. Larger regions can remain partly merged after one split.
The original text and its formatting remain in the upper (or left) cell; the new cell is empty but inherits cell formatting such as fill, borders, and margins. Populate the cells after splitting and set any required text formatting explicitly.
The saved presentation contains separate "Product A" and "Product B" cells with the template's cell formatting retained. See the [Cell API Reference](https://reference.aspose.com/slides/net/aspose.slides/cell/) for details.
[](https://docs.aspose.com/slides/net/manage-cells/visual-manage-cells-62c80896698e.svg)
*The row-span split uses the existing boundary. Product A and Product B occupy (1, 2) and (1, 3), respectively.*
### **Split a Cell at a Specific Height**
[SplitByHeight](https://reference.aspose.com/slides/net/aspose.slides/icell/splitbyheight/) takes the height of the upper part in points. [SplitByRowSpan](https://reference.aspose.com/slides/net/aspose.slides/icell/splitbyrowspan/) takes the number of existing grid rows in the upper part. To center a 40-point cell in the right column, subtract 40 from the cell’s actual height and divide the remaining space equally above and below it.
```csharp
using Aspose.Slides;
using Aspose.Slides.Export;
using var presentation = new Presentation();
var slide = presentation.Slides[0];
double[] columnWidths = { 160, 160 };
double[] rowHeights = { 140 };
var table = slide.Shapes.AddTable(50, 50, columnWidths, rowHeights);
table[0, 0].TextFrame.Text = "Left";
var height = table[1, 0].Height;
var margin = (height - 40) / 2;
table[1, 0].SplitByHeight(margin);
table[1, 1].SplitByHeight(40);
table[1, 1].TextFrame.Text = "Middle";
presentation.Save("split_by_height.pptx", SaveFormat.Pptx);
```
The first split adds a grid row, leaving the lower 90 points at `[1, 1]`. The second split targets that cell and adds another row below it. The right column now contains `[1, 0]` at 50 points (`margin`), `[1, 1]` at 40 points, and `[1, 2]` at 50 points (`margin`). The left cell spans all three rows at its original height of 140 points.
## **Change the Table Cell Background Color**
This example creates a table with 150-point columns and 50-point rows. It sets [FillType](https://reference.aspose.com/slides/net/aspose.slides/ifillformat/filltype/) to solid and [SolidFillColor](https://reference.aspose.com/slides/net/aspose.slides/ifillformat/solidfillcolor/) to red for cell `(2, 3)`, in the third column and fourth row.
```csharp
using System.Drawing;
using Aspose.Slides;
using Aspose.Slides.Export;
using var presentation = new Presentation();
var slide = presentation.Slides[0];
double[] columnWidths = { 150, 150, 150, 150 };
double[] rowHeights = { 50, 50, 50, 50, 50 };
var table = slide.Shapes.AddTable(50, 50, columnWidths, rowHeights);
var cell = table[2, 3];
cell.CellFormat.FillFormat.FillType = FillType.Solid;
cell.CellFormat.FillFormat.SolidFillColor.Color = Color.Red;
presentation.Save("cell_background_color.pptx", SaveFormat.Pptx);
```
## **Add an Image Inside a Table Cell**
Place the input image in the working directory before running this example. It loads the image with [Images.FromFile](https://reference.aspose.com/slides/net/aspose.slides/images/fromfile/) and adds it to the presentation's image collection with [AddImage](https://reference.aspose.com/slides/net/aspose.slides/iimagecollection/addimage/). It then assigns the image to the picture fill of cell `(0, 0)`, the first cell in the table.
[PictureFillMode.Stretch](https://reference.aspose.com/slides/net/aspose.slides/picturefillmode/) stretches the image to fill the cell, which may change its aspect ratio. Column widths and row heights are in points. The loaded image is disposed automatically by its using declaration.
```csharp
using Aspose.Slides;
using Aspose.Slides.Export;
using var presentation = new Presentation();
var slide = presentation.Slides[0];
double[] columnWidths = { 150, 150, 150, 150 };
double[] rowHeights = { 100, 100, 100, 100, 90 };
var table = slide.Shapes.AddTable(50, 50, columnWidths, rowHeights);
using var image = Images.FromFile("aspose_logo.jpg");
var ppImage = presentation.Images.AddImage(image);
table[0, 0].CellFormat.FillFormat.FillType = FillType.Picture;
table[0, 0].CellFormat.FillFormat.PictureFillFormat.PictureFillMode = PictureFillMode.Stretch;
table[0, 0].CellFormat.FillFormat.PictureFillFormat.Picture.Image = ppImage;
presentation.Save("table_cell_with_image.pptx", SaveFormat.Pptx);
```
## **FAQ**
**Can I set different line thicknesses and styles for different sides of a single cell?**
Yes. The [top](https://reference.aspose.com/slides/net/aspose.slides/cellformat/bordertop/)/[bottom](https://reference.aspose.com/slides/net/aspose.slides/cellformat/borderbottom/)/[left](https://reference.aspose.com/slides/net/aspose.slides/cellformat/borderleft/)/[right](https://reference.aspose.com/slides/net/aspose.slides/cellformat/borderright/) borders have separate properties, so the thickness and style of each side can differ.
**What happens to the image if I change the column/row size after setting a picture as the cell’s background?**
The behavior depends on the [fill mode](https://reference.aspose.com/slides/net/aspose.slides/picturefillmode/) (stretch/tile). With stretching, the image adjusts to the new cell; with tiling, the tiles are recalculated.
**Can I assign a hyperlink to all the content of a cell?**
[Hyperlinks](https://docs.aspose.com/slides/net/manage-hyperlinks/) are set at the text (portion) level inside the cell’s text frame or at the level of the entire table/shape. In practice, you assign the link to a portion or to all the text in the cell.
**Can I set different fonts within a single cell?**
Yes. A cell’s text frame supports [portions](https://reference.aspose.com/slides/net/aspose.slides/portion/) (runs) with independent formatting—font family, style, size, and color.
## Related features
- [Merge table cells](https://docs.aspose.com/slides/features/merge-table-cells/)
- [Format table cells](https://docs.aspose.com/slides/features/format-table-cells/)
- [Add pictures to table cells](https://docs.aspose.com/slides/features/table-cell-images/)
## Related articles
- [Create and Customize PowerPoint Tables in .NET](https://docs.aspose.com/slides/net/powerpoint-table/)
- [Manage Presentation Tables in .NET](https://docs.aspose.com/slides/net/manage-table/)
- [Table](https://docs.aspose.com/slides/net/examples/elements/table/)
# Manage Presentation Hyperlinks in .NET
> Add, format, update, and remove hyperlinks in PowerPoint and OpenDocument presentations with Aspose.Slides for .NET, using C# examples.
Source: https://docs.aspose.com/slides/net/manage-hyperlinks/
Updated: 2026-11-02
## **Introduction**
A hyperlink connects presentation content to a website or a location within the presentation. In PowerPoint, hyperlinks commonly serve two purposes:
* Open a website from text, a shape, or a media frame.
* Navigate to another slide, for example, from a table of contents.
Aspose.Slides for .NET lets you add these links, control their appearance and sound, update their properties, and remove them. The examples below show how to work with hyperlinks on individual elements and how to access hyperlinks at the presentation, slide, or text-frame level.
You can also edit presentations with the [free online Aspose PowerPoint editor](https://products.aspose.app/slides/editor).
## **Add URL Hyperlinks**
You can assign a website URL to text, a shape, or a media frame. The element to which you assign the hyperlink determines the clickable area: a text portion links the selected text, while a shape or frame links the slide object.
For presentations containing relative hyperlinks, see [Manage the Hyperlink Base](https://docs.aspose.com/slides/net/presentation-properties/#manage-the-hyperlink-base) to read, change, or clear the document-level base.
### **Add URL Hyperlinks to Text**
To link text to a website, assign a [Hyperlink](https://reference.aspose.com/slides/net/aspose.slides/hyperlink/) to the text portion's [HyperlinkClick](https://reference.aspose.com/slides/net/aspose.slides/portionformat/hyperlinkclick/) property, as shown below. Only that portion of text becomes clickable.
```csharp
using Aspose.Slides;
using Aspose.Slides.Export;
using var presentation = new Presentation();
var textShape = presentation.Slides[0].Shapes.AddAutoShape(ShapeType.Rectangle, 100, 100, 600, 50, false);
textShape.AddTextFrame("Aspose: File Format APIs");
var portionFormat = textShape.TextFrame.Paragraphs[0].Portions[0].PortionFormat;
portionFormat.HyperlinkClick = new Hyperlink("https://www.aspose.com/");
portionFormat.HyperlinkClick.Tooltip = "Explore Aspose file format APIs";
portionFormat.FontHeight = 32;
presentation.Save("presentation-out.pptx", SaveFormat.Pptx);
```
### **Add URL Hyperlinks to Shapes and Media Frames**
To make a shape or frame clickable, set its [HyperlinkClick](https://reference.aspose.com/slides/net/aspose.slides/shape/hyperlinkclick/) property. The hyperlink belongs to the object itself rather than to a text portion inside it.
The same approach applies to picture, audio, and video frames: assign the hyperlink to the frame and set the link's [Tooltip](https://reference.aspose.com/slides/net/aspose.slides/ihyperlink/tooltip/) if needed.
The following example makes a rectangle clickable:
```csharp
using Aspose.Slides;
using Aspose.Slides.Export;
using var presentation = new Presentation();
var shape = presentation.Slides[0].Shapes.AddAutoShape(ShapeType.Rectangle, 100, 100, 600, 50);
shape.HyperlinkClick = new Hyperlink("https://www.aspose.com/");
shape.HyperlinkClick.Tooltip = "Explore Aspose file format APIs";
presentation.Save("presentation-out.pptx", SaveFormat.Pptx);
```
## **Use Hyperlinks to Create a Table of Contents**
Internal hyperlinks let readers jump from a table of contents to a specific slide. The following example uses [SetInternalHyperlinkClick](https://reference.aspose.com/slides/net/aspose.slides/ihyperlinkmanager/setinternalhyperlinkclick/) to link the “Page 2” text on the first slide to the second slide.
```csharp
using System.Drawing;
using Aspose.Slides;
using Aspose.Slides.Export;
using var presentation = new Presentation();
var firstSlide = presentation.Slides[0];
var secondSlide = presentation.Slides.AddEmptySlide(firstSlide.LayoutSlide);
var tableOfContents = firstSlide.Shapes.AddAutoShape(ShapeType.Rectangle, 40, 40, 300, 100);
tableOfContents.FillFormat.FillType = FillType.NoFill;
tableOfContents.LineFormat.FillFormat.FillType = FillType.NoFill;
tableOfContents.TextFrame.Paragraphs.Clear();
var paragraph = new Paragraph();
paragraph.ParagraphFormat.DefaultPortionFormat.FillFormat.FillType = FillType.Solid;
paragraph.ParagraphFormat.DefaultPortionFormat.FillFormat.SolidFillColor.Color = Color.Black;
paragraph.Text = "Title of slide 2 .......... ";
var linkPortion = new Portion();
linkPortion.Text = "Page 2";
linkPortion.PortionFormat.HyperlinkManager.SetInternalHyperlinkClick(secondSlide);
paragraph.Portions.Add(linkPortion);
tableOfContents.TextFrame.Paragraphs.Add(paragraph);
presentation.Save("link_to_slide.pptx", SaveFormat.Pptx);
```
## **Format Hyperlinks**
### **Color**
The [ColorSource](https://reference.aspose.com/slides/net/aspose.slides/ihyperlink/colorsource/) property of [IHyperlink](https://reference.aspose.com/slides/net/aspose.slides/ihyperlink/) determines whether a hyperlink uses the presentation's hyperlink color or the text portion's formatting. To apply a custom text color, select [HyperlinkColorSource.PortionFormat](https://reference.aspose.com/slides/net/aspose.slides/hyperlinkcolorsource/) and set the portion's fill color. This feature was introduced in PowerPoint 2019; older versions do not apply this setting.
The following example adds two text hyperlinks to the same slide. The first uses a red text fill, while the second retains the default hyperlink color.
```csharp
using System.Drawing;
using Aspose.Slides;
using Aspose.Slides.Export;
using var presentation = new Presentation();
var coloredShape = presentation.Slides[0].Shapes.AddAutoShape(ShapeType.Rectangle, 100, 100, 450, 50, false);
coloredShape.AddTextFrame("This hyperlink uses a custom color.");
var coloredPortionFormat = coloredShape.TextFrame.Paragraphs[0].Portions[0].PortionFormat;
coloredPortionFormat.HyperlinkClick = new Hyperlink("https://www.aspose.com/");
coloredPortionFormat.HyperlinkClick.ColorSource = HyperlinkColorSource.PortionFormat;
coloredPortionFormat.FillFormat.FillType = FillType.Solid;
coloredPortionFormat.FillFormat.SolidFillColor.Color = Color.Red;
var defaultShape = presentation.Slides[0].Shapes.AddAutoShape(ShapeType.Rectangle, 100, 200, 450, 50, false);
defaultShape.AddTextFrame("This hyperlink uses the default color.");
defaultShape.TextFrame.Paragraphs[0].Portions[0].PortionFormat.HyperlinkClick = new Hyperlink("https://www.aspose.com/");
presentation.Save("presentation-out-hyperlink.pptx", SaveFormat.Pptx);
```
### **Sound**
A hyperlink can play a sound when activated or stop a sound that is already playing. Use the following properties to configure these behaviors:
- [IHyperlink.Sound](https://reference.aspose.com/slides/net/aspose.slides/ihyperlink/sound/) specifies the audio associated with the hyperlink.
- [IHyperlink.StopSoundOnClick](https://reference.aspose.com/slides/net/aspose.slides/ihyperlink/stopsoundonclick/) controls whether activating the hyperlink stops the previous sound.
#### **Add a Hyperlink Sound**
The following example loads `sampleaudio.wav` and associates it with a button on the first slide. Clicking the button plays the sound and navigates to the next slide. A second shape on that slide stops the previous sound when clicked, without performing a navigation action.
```csharp
using System.IO;
using Aspose.Slides;
using Aspose.Slides.Export;
using var presentation = new Presentation();
var audioData = File.ReadAllBytes("sampleaudio.wav");
var hyperlinkSound = presentation.Audios.AddAudio(audioData);
var firstSlide = presentation.Slides[0];
var playButton = firstSlide.Shapes.AddAutoShape(ShapeType.SoundButton, 100, 100, 100, 50);
playButton.HyperlinkClick = Hyperlink.NextSlide;
if (!playButton.HyperlinkClick.StopSoundOnClick && playButton.HyperlinkClick.Sound == null)
{
playButton.HyperlinkClick.Sound = hyperlinkSound;
}
var secondSlide = presentation.Slides.AddEmptySlide(firstSlide.LayoutSlide);
var stopButton = secondSlide.Shapes.AddAutoShape(ShapeType.Rectangle, 100, 100, 100, 50);
stopButton.HyperlinkClick = Hyperlink.NoAction;
stopButton.HyperlinkClick.StopSoundOnClick = true;
presentation.Save("hyperlink-sound.pptx", SaveFormat.Pptx);
```
#### **Extract a Hyperlink Sound**
The following example opens the presentation created above and reads the first shape's hyperlink audio into memory through [Sound](https://reference.aspose.com/slides/net/aspose.slides/ihyperlink/sound/) and [BinaryData](https://reference.aspose.com/slides/net/aspose.slides/iaudio/binarydata/).
```csharp
using System;
using Aspose.Slides;
using var presentation = new Presentation("hyperlink-sound.pptx");
if (presentation.Slides.Count > 0 && presentation.Slides[0].Shapes.Count > 0)
{
var hyperlink = presentation.Slides[0].Shapes[0].HyperlinkClick;
var sound = hyperlink?.Sound;
if (sound != null)
{
var audioData = sound.BinaryData;
Console.WriteLine($"Extracted {audioData.Length} bytes of hyperlink audio.");
}
else
{
Console.WriteLine("The first shape has no hyperlink sound.");
}
}
else
{
Console.WriteLine("The presentation has no first slide or shape to inspect.");
}
```
### **Tooltip and Interaction Settings**
You can update the following [IHyperlink](https://reference.aspose.com/slides/net/aspose.slides/ihyperlink/) properties after assigning a hyperlink to text or a shape:
- [Tooltip](https://reference.aspose.com/slides/net/aspose.slides/ihyperlink/tooltip/) sets the text that a viewer can display as a hint for the link.
- [TargetFrame](https://reference.aspose.com/slides/net/aspose.slides/ihyperlink/targetframe/) specifies the target frame within a parent HTML frameset, when applicable.
- [History](https://reference.aspose.com/slides/net/aspose.slides/ihyperlink/history/) controls whether activating the link adds its destination to the list of viewed hyperlinks.
- [HighlightClick](https://reference.aspose.com/slides/net/aspose.slides/ihyperlink/highlightclick/) controls whether the hyperlink is highlighted when clicked.
## **Remove Hyperlinks from Presentations**
Use [GetAnyHyperlinks](https://reference.aspose.com/slides/net/aspose.slides/ihyperlinkqueries/getanyhyperlinks/) to collect hyperlink containers, including text-portion links, before changing them. The following example removes both activation types from the first slide. To remove only one type, call only [RemoveHyperlinkClick](https://reference.aspose.com/slides/net/aspose.slides/ihyperlinkmanager/removehyperlinkclick/) or [RemoveHyperlinkMouseOver](https://reference.aspose.com/slides/net/aspose.slides/ihyperlinkmanager/removehyperlinkmouseover/); removing a click action does not remove its mouse-over counterpart.
```csharp
using System;
using System.Linq;
using Aspose.Slides;
using Aspose.Slides.Export;
using var presentation = new Presentation("pres.pptx");
if (presentation.Slides.Count > 0)
{
var containers = presentation.Slides[0].HyperlinkQueries.GetAnyHyperlinks().ToList();
foreach (var container in containers)
{
container.HyperlinkManager.RemoveHyperlinkClick();
container.HyperlinkManager.RemoveHyperlinkMouseOver();
}
presentation.Save("pres-removed-hyperlinks.pptx", SaveFormat.Pptx);
}
else
{
Console.WriteLine("The presentation has no slides to process.");
}
```
For unconditional removal, [RemoveAllHyperlinks](https://reference.aspose.com/slides/net/aspose.slides/ihyperlinkqueries/removeallhyperlinks/) removes both activation types in the selected scope in one call. For selective cleanup and coverage of masters, layouts, and notes, see [Report, Sanitize, and Verify Hyperlinks](https://docs.aspose.com/slides/net/manage-hyperlinks/#report-sanitize-and-verify-hyperlinks).
## **Build a Complete Hyperlink Inventory**
Before distributing a presentation, inventory its interactive actions as well as its web links. [GetAnyHyperlinks](https://reference.aspose.com/slides/net/aspose.slides/ihyperlinkqueries/getanyhyperlinks/) returns [IHyperlinkContainer](https://reference.aspose.com/slides/net/aspose.slides/ihyperlinkcontainer/) objects, not a flat list of URL strings. Inspect both [HyperlinkClick](https://reference.aspose.com/slides/net/aspose.slides/ihyperlinkcontainer/hyperlinkclick/) and [HyperlinkMouseOver](https://reference.aspose.com/slides/net/aspose.slides/ihyperlinkcontainer/hyperlinkmouseover/) on each container. They are independent: the same container can expose both actions, so a complete report needs up to two rows per container.
Scanning only shape-level hyperlinks can miss links attached to text portions. Query the appropriate scope instead, and retain the returned containers so that you can later update or remove their actions.
### **Query Presentation, Slide, and Text-Frame Scopes**
The [IHyperlinkQueries](https://reference.aspose.com/slides/net/aspose.slides/ihyperlinkqueries/) interface is available through [IPresentation.HyperlinkQueries](https://reference.aspose.com/slides/net/aspose.slides/ipresentation/hyperlinkqueries/), [IBaseSlide.HyperlinkQueries](https://reference.aspose.com/slides/net/aspose.slides/ibaseslide/hyperlinkqueries/), and [ITextFrame.HyperlinkQueries](https://reference.aspose.com/slides/net/aspose.slides/itextframe/hyperlinkqueries/). Each scope supports the same queries:
- [GetHyperlinkClicks](https://reference.aspose.com/slides/net/aspose.slides/ihyperlinkqueries/gethyperlinkclicks/) returns containers with a click action.
- [GetHyperlinkMouseOvers](https://reference.aspose.com/slides/net/aspose.slides/ihyperlinkqueries/gethyperlinkmouseovers/) returns containers with a mouse-over action.
- [GetAnyHyperlinks](https://reference.aspose.com/slides/net/aspose.slides/ihyperlinkqueries/getanyhyperlinks/) returns containers with either or both actions.
The following example creates `hyperlink-audit-input.pptx` with an external click link, a file mouse-over link, internal slide navigation, a text mouse-over link, and a macro action. It does not execute any of these actions. The same three queries work at every scope; the counts describe containers, not action totals. The text-frame scope excludes the enclosing shape's own links.
```csharp
using System;
using Aspose.Slides;
using Aspose.Slides.Export;
using var presentation = new Presentation();
var slide = presentation.Slides[0];
var destination = presentation.Slides.AddEmptySlide(slide.LayoutSlide);
var shape = slide.Shapes.AddAutoShape(ShapeType.Rectangle, 20, 20, 400, 60);
shape.TextFrame.Text = "Click the text to go to slide 2";
shape.HyperlinkManager.SetExternalHyperlinkClick("https://example.com/");
shape.HyperlinkClick.Tooltip = "Public website";
shape.HyperlinkManager.SetExternalHyperlinkMouseOver("file:///C:/private/report.xlsx");
var portionFormat = shape.TextFrame.Paragraphs[0].Portions[0].PortionFormat;
portionFormat.HyperlinkManager.SetInternalHyperlinkClick(destination);
portionFormat.HyperlinkManager.SetExternalHyperlinkMouseOver("https://example.com/help");
var macroButton = slide.Shapes.AddAutoShape(ShapeType.Rectangle, 20, 120, 200, 60);
macroButton.HyperlinkManager.SetMacroHyperlinkClick("ReviewPresentation");
PrintCounts("Presentation", presentation.HyperlinkQueries);
PrintCounts("Slide 1", slide.HyperlinkQueries);
PrintCounts("Text frame", shape.TextFrame.HyperlinkQueries);
presentation.Save("hyperlink-audit-input.pptx", SaveFormat.Pptx);
static void PrintCounts(string scope, IHyperlinkQueries queries)
{
var clickContainers = queries.GetHyperlinkClicks();
var mouseOverContainers = queries.GetHyperlinkMouseOvers();
var allContainers = queries.GetAnyHyperlinks();
Console.WriteLine($"{scope}: click={clickContainers.Count}, mouse-over={mouseOverContainers.Count}, any={allContainers.Count}");
}
```
For this example, presentation and slide queries each report three click containers, two mouse-over containers, and three containers with either action. The text-frame query reports one container in each category.
### **Classify Actions and Destinations**
Use [IHyperlink.ActionType](https://reference.aspose.com/slides/net/aspose.slides/ihyperlink/actiontype/) to interpret an action before interpreting its destination. The [HyperlinkActionType](https://reference.aspose.com/slides/net/aspose.slides/hyperlinkactiontype/) values cover more than web navigation:
| Values | Meaning for an audit |
| --- | --- |
| `Hyperlink` | External hyperlink; inspect the URL and its scheme. |
| `JumpSpecificSlide` | Internal navigation to a particular slide. |
| `JumpFirstSlide`, `JumpPreviousSlide`, `JumpNextSlide`, `JumpLastSlide`, `JumpLastViewedSlide` | Built-in slideshow navigation, resolved in slideshow context. |
| `JumpEndShow`, `StartCustomSlideShow` | End the current show or start a custom show. |
| `StartMacro` | Execute a macro. |
| `StartProgram` | Launch a program. |
| `OpenFile`, `OpenPresentation` | Open a file or another presentation; review separately from web URLs. |
| `StartStopMedia` | Start or stop media playback. |
| `NoAction`, `Unknown` | No navigation action, or an unrecognized action requiring review. |
Read external destinations from [ExternalUrl](https://reference.aspose.com/slides/net/aspose.slides/ihyperlink/externalurl/) and specific internal destinations from [TargetSlide](https://reference.aspose.com/slides/net/aspose.slides/ihyperlink/targetslide/). Internal actions and built-in commands may have no external URL; an empty URL does not mean that the container has no action. Preserve [ExternalUrlOriginal](https://reference.aspose.com/slides/net/aspose.slides/ihyperlink/externalurloriginal/) when it differs from the normalized URL, and include the [Tooltip](https://reference.aspose.com/slides/net/aspose.slides/ihyperlink/tooltip/) when available.
### **Report, Sanitize, and Verify Hyperlinks**
The following .NET 6+ example reads an existing presentation (use the file created above), writes `hyperlink-audit.json`, applies a policy, saves `hyperlink-sanitized.pptx`, and reopens it to check both activation types again. It collects containers before changing them and uses reference equality to avoid processing the same container twice. Presentation queries cover ordinary slides; for a package-wide inventory, it also explicitly queries masters, layouts, notes, and the notes and handout masters when present.
The report records a one-based slide index and [SlideId](https://reference.aspose.com/slides/net/aspose.slides/ibaseslide/slideid/) where available. [ISlideComponent.Slide](https://reference.aspose.com/slides/net/aspose.slides/islidecomponent/slide/) supplies the owning slide for supported containers. Masters, layouts, and notes have no ordinary slide index and are identified by their scope. Shape containers and text-portion formatting containers are labeled separately; other container types retain their runtime type name. Each container gets a report-local ID so its two actions can be correlated.
This deliberately restrictive application policy allows only absolute HTTPS URLs and valid internal slide targets. It rejects macros, programs, file actions, other slideshow actions, unknown actions, and other URL schemes. These rejections are policy decisions, not an Aspose.Slides safety verdict. HTTPS alone does not establish trust: add host allowlists and other checks for your application. Both original and normalized external URLs are checked. The example audits metadata without following links or running actions.
For remediation, the container's [HyperlinkManager](https://reference.aspose.com/slides/net/aspose.slides/ihyperlinkcontainer/hyperlinkmanager/) supports [SetExternalHyperlinkClick](https://reference.aspose.com/slides/net/aspose.slides/ihyperlinkmanager/setexternalhyperlinkclick/), [RemoveHyperlinkClick](https://reference.aspose.com/slides/net/aspose.slides/ihyperlinkmanager/removehyperlinkclick/), and [RemoveHyperlinkMouseOver](https://reference.aspose.com/slides/net/aspose.slides/ihyperlinkmanager/removehyperlinkmouseover/). Here, prohibited external click links are replaced with a fixed HTTPS landing page; other prohibited clicks and prohibited mouse-over actions are removed independently. Set `replaceExternalClicks` to `false` to remove all policy violations instead. Choose an application-owned replacement page before deployment.
The report's export flag uses a conservative PDF review policy: flag mouse-over actions and anything other than an external link or specific slide jump as potentially unsupported. It is a review hint, not a capability test or a guarantee that unflagged links will survive export. Supported [PDF](https://docs.aspose.com/slides/net/convert-powerpoint-to-pdf/) and [HTML](https://docs.aspose.com/slides/net/convert-powerpoint-to-html/) exports may preserve hyperlinks, depending on the action, export options, and viewer. Raster [images](https://docs.aspose.com/slides/net/convert-powerpoint-to-png/) and [video](https://docs.aspose.com/slides/net/convert-powerpoint-to-video/) cannot preserve interactive hyperlinks; flag every action when auditing for those outputs.
```csharp
using System;
using System.Collections.Generic;
using System.IO;
using System.Linq;
using System.Text.Json;
using Aspose.Slides;
using Aspose.Slides.Export;
const bool replaceExternalClicks = true;
const string replacementUrl = "https://example.com/blocked-link";
using var presentation = new Presentation("hyperlink-audit-input.pptx");
var containers = CollectContainers(presentation);
var rows = new List();
for (var index = 0; index < containers.Count; index++)
{
var container = containers[index];
AddRow(container.HyperlinkClick, "click", container, index + 1);
AddRow(container.HyperlinkMouseOver, "mouse-over", container, index + 1);
}
var jsonOptions = new JsonSerializerOptions { WriteIndented = true };
var json = JsonSerializer.Serialize(rows, jsonOptions);
File.WriteAllText("hyperlink-audit.json", json);
foreach (var container in containers)
{
var click = container.HyperlinkClick;
if (PolicyViolation(click) != null)
{
if (replaceExternalClicks && click.ActionType == HyperlinkActionType.Hyperlink)
{
container.HyperlinkManager.SetExternalHyperlinkClick(replacementUrl);
}
else
{
container.HyperlinkManager.RemoveHyperlinkClick();
}
}
if (PolicyViolation(container.HyperlinkMouseOver) != null)
{
container.HyperlinkManager.RemoveHyperlinkMouseOver();
}
}
presentation.Save("hyperlink-sanitized.pptx", SaveFormat.Pptx);
using var reopened = new Presentation("hyperlink-sanitized.pptx");
var remainingContainers = CollectContainers(reopened);
var violations = 0;
foreach (var container in remainingContainers)
{
if (PolicyViolation(container.HyperlinkClick) != null) violations++;
if (PolicyViolation(container.HyperlinkMouseOver) != null) violations++;
}
Console.WriteLine($"Audit rows: {rows.Count}; prohibited actions after reopening: {violations}");
if (violations != 0)
{
Console.WriteLine("Verification failed: do not distribute the saved presentation.");
Environment.ExitCode = 1;
}
void AddRow(IHyperlink? link, string activation, IHyperlinkContainer container, int containerId)
{
if (link == null) return;
var ownerSlide = (container as ISlideComponent)?.Slide;
var targetSlide = link.TargetSlide;
var violation = PolicyViolation(link);
var ownerType = container is IShape ? "Shape" : container is IPortionFormat ? "Text portion" : container.GetType().Name;
var ordinaryAction = link.ActionType == HyperlinkActionType.Hyperlink || link.ActionType == HyperlinkActionType.JumpSpecificSlide;
rows.Add(new
{
ContainerId = containerId,
SlideIndex = SlideIndex(presentation, ownerSlide),
SlideId = ownerSlide?.SlideId,
Scope = ownerSlide?.GetType().Name,
OwnerType = ownerType,
Activation = activation,
ActionType = link.ActionType.ToString(),
ExternalUrl = link.ExternalUrl,
TargetSlideIndex = SlideIndex(presentation, targetSlide),
TargetSlideId = targetSlide?.SlideId,
Tooltip = link.Tooltip,
OriginalExternalUrl = link.ExternalUrlOriginal != link.ExternalUrl ? link.ExternalUrlOriginal : null,
PotentiallyUnsafe = violation != null,
PolicyViolation = violation,
TargetExport = "PDF",
PotentiallyUnsupportedByExport = activation == "mouse-over" || !ordinaryAction
});
}
static int? SlideIndex(IPresentation presentation, IBaseSlide? slide)
{
for (var index = 0; index < presentation.Slides.Count; index++)
{
if (ReferenceEquals(presentation.Slides[index], slide)) return index + 1;
}
return null;
}
static string? PolicyViolation(IHyperlink? link)
{
if (link == null) return null;
if (link.ActionType == HyperlinkActionType.JumpSpecificSlide)
{
return link.TargetSlide == null ? "Missing target slide" : null;
}
if (link.ActionType != HyperlinkActionType.Hyperlink) return "Action is not allowed";
if (!IsHttps(link.ExternalUrl)) return "Normalized URL is not absolute HTTPS";
var original = link.ExternalUrlOriginal;
if (!string.IsNullOrEmpty(original) && !IsHttps(original)) return "Original URL is not absolute HTTPS";
return null;
}
static bool IsHttps(string? value)
{
return Uri.TryCreate(value, UriKind.Absolute, out var uri) && uri.Scheme == Uri.UriSchemeHttps;
}
static List CollectContainers(IPresentation presentation)
{
var found = new List();
found.AddRange(presentation.HyperlinkQueries.GetAnyHyperlinks());
foreach (var master in presentation.Masters) AddScope(master);
foreach (var layout in presentation.LayoutSlides) AddScope(layout);
foreach (var slide in presentation.Slides) AddScope(slide.NotesSlideManager.NotesSlide);
AddScope(presentation.MasterNotesSlideManager.MasterNotesSlide);
AddScope(presentation.MasterHandoutSlideManager.MasterHandoutSlide);
return found.Distinct(ReferenceEqualityComparer.Instance).ToList();
void AddScope(IBaseSlide? slide)
{
if (slide != null) found.AddRange(slide.HyperlinkQueries.GetAnyHyperlinks());
}
}
```
With the input created above, the report contains five action rows. The file mouse-over link and macro click are removed, while the HTTPS links and internal slide navigation remain. The verification prints zero prohibited actions. An input containing a prohibited external click URL also exercises the replacement branch. A container with an allowed click and a prohibited mouse-over keeps its click action.
This selective cleanup differs from [RemoveAllHyperlinks](https://reference.aspose.com/slides/net/aspose.slides/ihyperlinkqueries/removeallhyperlinks/), which removes both activation types throughout the selected scope regardless of policy. Verification here checks hyperlink actions only; it does not remove embedded VBA projects, OLE objects, or other active content, and it does not validate an exported PDF or HTML file.
## **FAQ**
**How can I link to a section or its first slide?**
Sections in PowerPoint group slides, but an internal hyperlink targets an individual slide. To create navigation to a section, link to the first slide in that section.
**Can I attach a hyperlink to master slide elements so it works on all slides?**
Yes. Master slide and layout elements support hyperlinks. Links on these elements are available during the slide show on slides that use the corresponding master or layout.
**Will hyperlinks be preserved when exporting to PDF, HTML, images, or video?**
Supported PDF and HTML exports may preserve hyperlinks; raster images and video cannot. See the export considerations in [Report, Sanitize, and Verify Hyperlinks](https://docs.aspose.com/slides/net/manage-hyperlinks/#report-sanitize-and-verify-hyperlinks).
## Related features
- [Add hyperlinks](https://docs.aspose.com/slides/features/hyperlinks/)
## Related articles
- [Hyperlink](https://docs.aspose.com/slides/net/examples/elements/hyperlink/)
# Manage Presentation Ink Objects in .NET
> Manage PowerPoint ink objects, edit traces and brush properties, and control ink appearance during PDF, HTML, SVG, TIFF, and image export with Aspose.Slides for .NET.
Source: https://docs.aspose.com/slides/net/manage-ink/
Updated: 2026-08-10
## **Introduction**
PowerPoint provides an ink feature that allows you to draw freeform strokes. Ink can be used to highlight other objects, show connections and processes, and draw attention to specific items on a slide.
The [Aspose.Slides.Ink](https://reference.aspose.com/slides/net/aspose.slides.ink/) namespace contains the classes and interfaces needed to work with ink objects. For example, the [IInk](https://reference.aspose.com/slides/net/aspose.slides.ink/iink/) interface represents an ink object on a slide.
## **Differences between Regular Objects and Ink Objects**
Objects on a PowerPoint slide are typically represented by shape objects. In its simplest form, a shape is a container that defines the area of the object itself (its frame) along with properties such as the container size, shape, and background. For more information, see [Shape Layout Format](https://docs.aspose.com/slides/net/shape-manipulations/#access-layout-formats-for-shape).
However, when PowerPoint handles an ink object, it ignores all properties of the object frame (container) except its size. The size of the container area is determined by the standard [IShape.Width](https://reference.aspose.com/slides/net/aspose.slides/ishape/width/) and [IShape.Height](https://reference.aspose.com/slides/net/aspose.slides/ishape/height/) properties:

## **Ink Traces**
An ink trace is a basic element used to record the trajectory of a pen as a user writes digital ink. A trace stores a sequence of connected points.
The simplest form of encoding specifies the X and Y coordinates of each sample point. When all connected points are rendered, they produce an image like this:

## **Brush Properties for Drawing**
A brush is used to draw lines that connect the points of an ink trace. The brush has its own color and size, represented by the [IInkBrush.Color](https://reference.aspose.com/slides/net/aspose.slides.ink/iinkbrush/color/) and [IInkBrush.Size](https://reference.aspose.com/slides/net/aspose.slides.ink/iinkbrush/size/) properties.
### **Set Ink Brush Color**
This C# code shows how to set the color of an ink brush:
```c#
using System.Drawing;
using Aspose.Slides;
using Aspose.Slides.Ink;
using var presentation = new Presentation("pres.pptx");
var ink = (IInk)presentation.Slides[0].Shapes[0];
var brush = ink.Traces[0].Brush;
brush.Color = Color.Red;
```
### **Set Ink Brush Size**
This C# code shows how to set the size of an ink brush:
```c#
using System.Drawing;
using Aspose.Slides;
using Aspose.Slides.Ink;
using var presentation = new Presentation("pres.pptx");
var ink = (IInk)presentation.Slides[0].Shapes[0];
var brush = ink.Traces[0].Brush;
brush.Size = new SizeF(5f, 10f);
```
Generally, a brush's width and height do not match, so PowerPoint does not display the brush size (the corresponding data section is grayed out). When the brush width and height match, PowerPoint displays its size this way:

For clarity, let's increase the height of the ink object and review the important dimensions:

The container (frame) does not account for the size of the brushes—it always assumes that the line thickness is zero (see the previous image).
Therefore, to determine the visible area of the entire ink object, the brush size of its traces must be taken into account. Here, the target object (the handwritten text trace) has been scaled to the size of the container (frame). When the size of the container changes, the brush size remains constant, and vice versa.

PowerPoint uses similar behavior for text objects:

## **Control Ink Appearance During Export and Rendering**
Aspose.Slides provides the [IInkOptions](https://reference.aspose.com/slides/net/aspose.slides.export/iinkoptions/) interface to control how ink objects appear in exported or rendered output. You can use its properties to hide ink completely or change how ink brush mask operations are interpreted.
Ink options are available through the export or rendering options for several output types:
| Output | Ink options property |
| --- | --- |
| PDF | [`PdfOptions.InkOptions`](https://reference.aspose.com/slides/net/aspose.slides.export/pdfoptions/inkoptions/) |
| HTML | [`HtmlOptions.InkOptions`](https://reference.aspose.com/slides/net/aspose.slides.export/htmloptions/inkoptions/) |
| SVG | [`SVGOptions.InkOptions`](https://reference.aspose.com/slides/net/aspose.slides.export/svgoptions/inkoptions/) |
| TIFF | [`TiffOptions.InkOptions`](https://reference.aspose.com/slides/net/aspose.slides.export/tiffoptions/inkoptions/) |
| Slide image | [`RenderingOptions.InkOptions`](https://reference.aspose.com/slides/net/aspose.slides.export/renderingoptions/inkoptions/) |
The same two settings are available through these properties:
- [`HideInk`](https://reference.aspose.com/slides/net/aspose.slides.export/iinkoptions/hideink/) determines whether ink objects are included in the output. Its default value is `false`.
- [`InterpretMaskOpAsOpacity`](https://reference.aspose.com/slides/net/aspose.slides.export/iinkoptions/interpretmaskopasopacity/) determines whether a mask operation is interpreted as opacity when rendering an ink brush. Its default value is `true`; set it to `false` to use the ROP operation instead.
### **Hide Ink Objects in PDF Output**
By default, ink objects remain visible during export. Set [IInkOptions.HideInk](https://reference.aspose.com/slides/net/aspose.slides.export/iinkoptions/hideink/) to `true` when you need a clean output without handwritten annotations or other ink content.
The following C# example exports a presentation to PDF while hiding all ink objects:
```c#
using Aspose.Slides;
using Aspose.Slides.Export;
using var presentation = new Presentation("presentation.pptx");
var pdfOptions = new PdfOptions();
pdfOptions.InkOptions.HideInk = true;
presentation.Save("presentation_without_ink.pdf", SaveFormat.Pdf, pdfOptions);
```
### **Hide Ink Objects When Rendering a Slide as an Image**
To hide ink objects when rendering slides as bitmap images, configure [RenderingOptions.InkOptions](https://reference.aspose.com/slides/net/aspose.slides.export/renderingoptions/inkoptions/) and pass the rendering options to the [ISlide.GetImage](https://reference.aspose.com/slides/net/aspose.slides/islide/getimage/) method.
The following C# example renders the first slide as a PNG image without ink objects:
```c#
using Aspose.Slides;
using Aspose.Slides.Export;
using var presentation = new Presentation("presentation.pptx");
var renderingOptions = new RenderingOptions();
renderingOptions.InkOptions.HideInk = true;
using var image = presentation.Slides[0].GetImage(renderingOptions);
image.Save("slide_without_ink.png", ImageFormat.Png);
```
### **Control Ink Mask Rendering**
The [IInkOptions.InterpretMaskOpAsOpacity](https://reference.aspose.com/slides/net/aspose.slides.export/iinkoptions/interpretmaskopasopacity/) property controls how mask operations are interpreted when rendering ink brushes. The default value is `true`, which uses opacity. Set the property to `false` to use the ROP operation instead.
The following C# example exports a slide to SVG and uses ROP-based rendering for ink mask operations:
```c#
using System.IO;
using Aspose.Slides;
using Aspose.Slides.Export;
using var presentation = new Presentation("presentation.pptx");
var svgOptions = new SVGOptions();
svgOptions.InkOptions.InterpretMaskOpAsOpacity = false;
using var stream = File.Create("slide.svg");
presentation.Slides[0].WriteAsSvg(stream, svgOptions);
```
The same setting can be applied through [TiffOptions.InkOptions](https://reference.aspose.com/slides/net/aspose.slides.export/tiffoptions/inkoptions/) when exporting a presentation or rendering a slide to TIFF.
### **Choose Whether to Hide or Preserve Ink**
Use [IInkOptions.HideInk](https://reference.aspose.com/slides/net/aspose.slides.export/iinkoptions/hideink/) set to `true` when the exported file should be a clean version of an annotated presentation, for example, a final copy intended for distribution without review marks.
Leave [IInkOptions.HideInk](https://reference.aspose.com/slides/net/aspose.slides.export/iinkoptions/hideink/) at its default value of `false` when ink annotations are part of the intended content, such as review comments, handwritten notes, highlights, or drawings that should remain visible in the exported result. This allows applications to generate separate review and final outputs from the same presentation without modifying the source ink objects.
## **FAQ**
**Can I change the color or size of an existing ink stroke?**
Yes. Get the trace from [IInk.Traces](https://reference.aspose.com/slides/net/aspose.slides.ink/iink/traces/), then change its [IInkTrace.Brush](https://reference.aspose.com/slides/net/aspose.slides.ink/iinktrace/brush/). You can set the brush's [IInkBrush.Color](https://reference.aspose.com/slides/net/aspose.slides.ink/iinkbrush/color/) and [IInkBrush.Size](https://reference.aspose.com/slides/net/aspose.slides.ink/iinkbrush/size/) properties.
**Does hiding ink change the source presentation?**
No. [IInkOptions.HideInk](https://reference.aspose.com/slides/net/aspose.slides.export/iinkoptions/hideink/) affects only the rendered or exported result; it does not remove or modify ink objects in the source presentation.
**Which export formats support ink options?**
You can configure ink options for PDF, HTML, SVG, TIFF, and bitmap slide images through the corresponding export or rendering options shown above.
**Further reading**
* To read about shapes in general, see the [PowerPoint Shapes](https://docs.aspose.com/slides/net/powerpoint-shapes/) section.
* For more information on effective values, see [Shape Effective Properties](https://docs.aspose.com/slides/net/shape-effective-properties/#get-effective-font-height-value).
* For details on PDF export, see [Convert PPT and PPTX to PDF](https://docs.aspose.com/slides/net/convert-powerpoint-to-pdf/).
* For details on HTML export, see [Convert PowerPoint Presentations to HTML](https://docs.aspose.com/slides/net/convert-powerpoint-to-html/).
* For details on SVG export, see [Render Presentation Slides as SVG Images](https://docs.aspose.com/slides/net/render-a-slide-as-an-svg-image/).
* For details on TIFF export, see [Convert PowerPoint Presentations to TIFF](https://docs.aspose.com/slides/net/convert-powerpoint-to-tiff/).
* For details on slide-to-image rendering, see [Convert Presentation Slides to Images](https://docs.aspose.com/slides/net/convert-slide/).
## Related features
- [Work with digital ink](https://docs.aspose.com/slides/features/digital-ink/)
## Related articles
- [Ink](https://docs.aspose.com/slides/net/examples/elements/ink/)
# Manage Bulleted and Numbered Lists in Presentations in .NET
> Learn how to create and format bulleted, picture, multilevel, and numbered lists in PowerPoint and OpenDocument presentations using Aspose.Slides for .NET.
Source: https://docs.aspose.com/slides/net/manage-lists/
Updated: 2026-11-02
## **Overview**
Aspose.Slides for .NET lets you create and format bulleted and numbered lists in PowerPoint and OpenDocument presentations. A list item is a paragraph whose bullet settings are controlled through its paragraph format.
Use the [IParagraph.ParagraphFormat](https://reference.aspose.com/slides/net/aspose.slides/iparagraph/paragraphformat/) property to access paragraph-level list settings. The main entry point is [IParagraphFormat.Bullet](https://reference.aspose.com/slides/net/aspose.slides/iparagraphformat/bullet/), which returns an [IBulletFormat](https://reference.aspose.com/slides/net/aspose.slides/ibulletformat/) object. With this object, you can set the bullet type, symbol, picture, color, size, numbering style, and starting number.
This article shows how to:
- create a bulleted list with a custom symbol
- create a picture bullet
- create a multilevel list by setting paragraph depth
- create a numbered list
- inspect and change list formatting in an existing presentation
- read actual list markers and numbers alongside paragraph text
## **Create a Bulleted List**
To create a bulleted list, add [IParagraph](https://reference.aspose.com/slides/net/aspose.slides/iparagraph/) objects to an [ITextFrame](https://reference.aspose.com/slides/net/aspose.slides/itextframe/) and set [IBulletFormat.Type](https://reference.aspose.com/slides/net/aspose.slides/ibulletformat/type/) to [BulletType.Symbol](https://reference.aspose.com/slides/net/aspose.slides/bullettype/). You can then set [IBulletFormat.Char](https://reference.aspose.com/slides/net/aspose.slides/ibulletformat/char/), [IBulletFormat.Color](https://reference.aspose.com/slides/net/aspose.slides/ibulletformat/color/), and [IBulletFormat.Height](https://reference.aspose.com/slides/net/aspose.slides/ibulletformat/height/) to control the bullet appearance.
The following C# code demonstrates how to create a bulleted list in a slide:
```csharp
using System.Drawing;
using Aspose.Slides;
using Aspose.Slides.Export;
static Paragraph CreateParagraph(string text)
{
var paragraph = new Paragraph();
paragraph.ParagraphFormat.Bullet.Type = BulletType.Symbol;
paragraph.ParagraphFormat.Bullet.Char = '*';
paragraph.ParagraphFormat.Indent = 15;
paragraph.ParagraphFormat.Bullet.IsBulletHardColor = NullableBool.True;
paragraph.ParagraphFormat.Bullet.Color.Color = Color.IndianRed;
paragraph.ParagraphFormat.Bullet.Height = 100;
paragraph.Text = text;
return paragraph;
}
using var presentation = new Presentation();
var slide = presentation.Slides[0];
var autoShape = slide.Shapes.AddAutoShape(ShapeType.Rectangle, 20, 20, 200, 50);
var textFrame = autoShape.TextFrame;
textFrame.Paragraphs.Clear();
var paragraph1 = CreateParagraph("The first paragraph");
textFrame.Paragraphs.Add(paragraph1);
var paragraph2 = CreateParagraph("The second paragraph");
textFrame.Paragraphs.Add(paragraph2);
presentation.Save("symbol_bullets.pptx", SaveFormat.Pptx);
```
The result:

## **Create a Numbered List**
Use numbered lists when the order of items matters. Set [IBulletFormat.Type](https://reference.aspose.com/slides/net/aspose.slides/ibulletformat/type/) to [BulletType.Numbered](https://reference.aspose.com/slides/net/aspose.slides/bullettype/). You can also choose a numbering format with [IBulletFormat.NumberedBulletStyle](https://reference.aspose.com/slides/net/aspose.slides/ibulletformat/numberedbulletstyle/) or set [IBulletFormat.NumberedBulletStartWith](https://reference.aspose.com/slides/net/aspose.slides/ibulletformat/numberedbulletstartwith/) when the list should start from a value other than 1.
The following C# code shows how to create a numbered list in a slide:
```csharp
using Aspose.Slides;
using Aspose.Slides.Export;
using var presentation = new Presentation();
var slide = presentation.Slides[0];
var autoShape = slide.Shapes.AddAutoShape(ShapeType.Rectangle, 20, 20, 90, 80);
var textFrame = autoShape.TextFrame;
textFrame.Paragraphs.Clear();
var paragraph1 = new Paragraph();
paragraph1.ParagraphFormat.Bullet.Type = BulletType.Numbered;
paragraph1.Text = "Apple";
textFrame.Paragraphs.Add(paragraph1);
var paragraph2 = new Paragraph();
paragraph2.ParagraphFormat.Bullet.Type = BulletType.Numbered;
paragraph2.Text = "Orange";
textFrame.Paragraphs.Add(paragraph2);
var paragraph3 = new Paragraph();
paragraph3.ParagraphFormat.Bullet.Type = BulletType.Numbered;
paragraph3.Text = "Banana";
textFrame.Paragraphs.Add(paragraph3);
presentation.Save("numbered_bullets.pptx", SaveFormat.Pptx);
```
The result:
## **Create a Picture Bullet**
Aspose.Slides allows you to replace a regular bullet symbol with an image. Picture bullets work best with simple images that remain readable at a small size, such as icons or small transparent PNG files.
Ideally, if you plan to replace the regular bullet symbol with an image, it's best to choose a simple graphic with a transparent background. Such images work well as custom bullet symbols.
Keep in mind that the image will be scaled down to a very small size. For that reason, we strongly recommend selecting an image that remains clear and visually effective when used as a bullet in a list.
To create a picture bullet, add an image to [Presentation.Images](https://reference.aspose.com/slides/net/aspose.slides/presentation/images/) and assign the returned image object to [IBulletFormat.Picture](https://reference.aspose.com/slides/net/aspose.slides/ibulletformat/picture/). Set [IBulletFormat.Type](https://reference.aspose.com/slides/net/aspose.slides/ibulletformat/type/) to [BulletType.Picture](https://reference.aspose.com/slides/net/aspose.slides/bullettype/) before assigning the image.
Let's say we have an "image.png":

The following C# code shows how to create picture bullets in a slide:
```csharp
using Aspose.Slides;
using Aspose.Slides.Export;
static Paragraph CreateParagraph(string text, IPPImage image)
{
var paragraph = new Paragraph();
paragraph.ParagraphFormat.Bullet.Type = BulletType.Picture;
paragraph.ParagraphFormat.Bullet.Picture.Image = image;
paragraph.ParagraphFormat.Indent = 15;
paragraph.ParagraphFormat.Bullet.Height = 100;
paragraph.Text = text;
return paragraph;
}
using var presentation = new Presentation();
var slide = presentation.Slides[0];
var autoShape = slide.Shapes.AddAutoShape(ShapeType.Rectangle, 20, 20, 200, 50);
var textFrame = autoShape.TextFrame;
textFrame.Paragraphs.Clear();
var imageBytes = File.ReadAllBytes("image.png");
var bulletImage = presentation.Images.AddImage(imageBytes);
var paragraph1 = CreateParagraph("The first paragraph", bulletImage);
textFrame.Paragraphs.Add(paragraph1);
var paragraph2 = CreateParagraph("The second paragraph", bulletImage);
textFrame.Paragraphs.Add(paragraph2);
presentation.Save("picture_bullets.pptx", SaveFormat.Pptx);
```
The result:

## **Create a Multilevel List**
Use [IParagraphFormat.Depth](https://reference.aspose.com/slides/net/aspose.slides/iparagraphformat/depth/) to place list items on different levels. Level 0 is the top level, level 1 is nested below it, and so on.
The following C# code shows how to create a multilevel bulleted list:
```csharp
using Aspose.Slides;
using Aspose.Slides.Export;
using var presentation = new Presentation();
var slide = presentation.Slides[0];
var autoShape = slide.Shapes.AddAutoShape(ShapeType.Rectangle, 20, 20, 260, 110);
var textFrame = autoShape.TextFrame;
textFrame.Paragraphs.Clear();
var paragraph1 = new Paragraph();
paragraph1.ParagraphFormat.Depth = 0;
paragraph1.Text = "My text - Depth 0";
textFrame.Paragraphs.Add(paragraph1);
var paragraph2 = new Paragraph();
paragraph2.ParagraphFormat.Depth = 1;
paragraph2.Text = "My text - Depth 1";
textFrame.Paragraphs.Add(paragraph2);
var paragraph3 = new Paragraph();
paragraph3.ParagraphFormat.Depth = 2;
paragraph3.Text = "My text - Depth 2";
textFrame.Paragraphs.Add(paragraph3);
var paragraph4 = new Paragraph();
paragraph4.ParagraphFormat.Depth = 3;
paragraph4.Text = "My text - Depth 3";
textFrame.Paragraphs.Add(paragraph4);
presentation.Save("multilevel_bullets.pptx", SaveFormat.Pptx);
```
The result:

## **Change an Existing List**
To change list formatting in an existing presentation, access the target paragraph and update its [IParagraphFormat.Bullet](https://reference.aspose.com/slides/net/aspose.slides/iparagraphformat/bullet/) settings. The same properties used to create lists can be used to inspect or modify lists loaded from a PPT, PPTX, or ODP file.
The following C# code changes the first paragraph in a text frame to use a numbered list style:
```csharp
using Aspose.Slides;
using Aspose.Slides.Export;
using var presentation = new Presentation("input.pptx");
var slide = presentation.Slides[0];
var autoShape = (IAutoShape)slide.Shapes[0];
var paragraph = autoShape.TextFrame.Paragraphs[0];
paragraph.ParagraphFormat.Bullet.Type = BulletType.Numbered;
paragraph.ParagraphFormat.Bullet.NumberedBulletStyle = NumberedBulletStyle.BulletRomanUCPeriod;
paragraph.ParagraphFormat.Bullet.NumberedBulletStartWith = 1;
paragraph.ParagraphFormat.MarginLeft = 30;
paragraph.ParagraphFormat.Indent = -20;
presentation.Save("updated_list.pptx", SaveFormat.Pptx);
```
## **Read Actual Bullet Values**
When extracting presentation content, keep list markers alongside paragraph text. Call [IParagraphFormat.GetEffective](https://reference.aspose.com/slides/net/aspose.slides/iparagraphformat/geteffective/) and access [IParagraphFormatEffectiveData.Bullet](https://reference.aspose.com/slides/net/aspose.slides/iparagraphformateffectivedata/bullet/) to obtain the effective bullet format. Check its [Type](https://reference.aspose.com/slides/net/aspose.slides/ibulletformateffectivedata/type/) before reading [ActualBulletValue](https://reference.aspose.com/slides/net/aspose.slides/ibulletformateffectivedata/actualbulletvalue/).
For numbered lists, distinguish these three values:
- [NumberedBulletStyle](https://reference.aspose.com/slides/net/aspose.slides/ibulletformateffectivedata/numberedbulletstyle/) determines the format, such as Arabic numbers followed by a period or lowercase letters followed by a period.
- [NumberedBulletStartWith](https://reference.aspose.com/slides/net/aspose.slides/ibulletformateffectivedata/numberedbulletstartwith/) specifies the starting number for a group of numbered paragraphs.
- [ActualBulletValue](https://reference.aspose.com/slides/net/aspose.slides/ibulletformateffectivedata/actualbulletvalue/) returns the formatted marker for a particular paragraph. For example, the second item in a list starting at 5 returns `6.`.
Preserve [Depth](https://reference.aspose.com/slides/net/aspose.slides/iparagraphformat/depth/) with each paragraph to retain its nesting level. The actual marker does not encode the full hierarchy: a nested item can return `c.` rather than a combined label such as `6.c.`.
The following self-contained example creates lists, saves them to a presentation, and reloads the presentation to report each paragraph's text, depth, bullet type, and actual value. The small blue picture marker is created from inline SVG.
```csharp
using System;
using System.Drawing;
using Aspose.Slides;
using Aspose.Slides.Export;
using (var presentation = new Presentation())
{
presentation.SlideSize.SetSize(720, 440, SlideSizeScaleType.DoNotScale);
var slide = presentation.Slides[0];
var shape = slide.Shapes.AddAutoShape(ShapeType.Rectangle, 30, 20, 660, 400);
shape.FillFormat.FillType = FillType.NoFill;
shape.LineFormat.FillFormat.FillType = FillType.NoFill;
var textFrame = shape.TextFrame;
textFrame.Paragraphs.Clear();
// Create a picture marker without an external image file.
var svg = new SvgImage("Status: Ready Next steps
");
var options = new TextToHtmlConversionOptions { AddClipboardFragmentHeader = false };
var html = paragraphs.ExportToHtml(0, paragraphs.Count, options);
options.AddClipboardFragmentHeader = true;
var clipboardHtml = paragraphs.ExportToHtml(0, paragraphs.Count, options);
```
### **Render a Paragraph as an Image**
[IParagraph.GetImage](https://reference.aspose.com/slides/net/aspose.slides/iparagraph/getimage/) renders an individual paragraph directly and returns an [IImage](https://reference.aspose.com/slides/net/aspose.slides/iimage/). Save the result to a file or stream with [IImage.Save](https://reference.aspose.com/slides/net/aspose.slides/iimage/save/). You do not need to render the containing shape or crop a bitmap manually.
[IParagraph.GetImage](https://reference.aspose.com/slides/net/aspose.slides/iparagraph/getimage/) can return `null` if the paragraph cannot be found in its parent collection, has no valid rendering bounds, or cannot be rendered. Check the result before saving it and dispose of the returned image after use.
#### **Render a Paragraph at the Default Scale**
The example uses a presentation with one slide whose first shape is a text box containing three paragraphs.
The following example selects the second paragraph at index 1 and calls [IParagraph.GetImage](https://reference.aspose.com/slides/net/aspose.slides/iparagraph/getimage/) without scale parameters. It checks that the shape contains the required paragraph and that rendering returns an image before calling [IImage.Save](https://reference.aspose.com/slides/net/aspose.slides/iimage/save/) to save it in PNG format. The `using` declaration disposes of the image after use.
```csharp
using System;
using Aspose.Slides;
using var presentation = new Presentation("sample.pptx");
var shape = presentation.Slides[0].Shapes[0];
if (shape is IAutoShape textShape &&
textShape.TextFrame != null &&
textShape.TextFrame.Paragraphs.Count > 1)
{
var paragraph = textShape.TextFrame.Paragraphs[1];
using var paragraphImage = paragraph.GetImage();
if (paragraphImage != null)
{
paragraphImage.Save("paragraph.png", ImageFormat.Png);
}
else
{
Console.WriteLine("The paragraph could not be rendered.");
}
}
else
{
Console.WriteLine("The expected text shape or paragraph was not found.");
}
```
The result:

#### **Render a Paragraph in a Table Cell with Scaling**
Use the [IParagraph.GetImage](https://reference.aspose.com/slides/net/aspose.slides/iparagraph/getimage/) overload that accepts `float scaleX` and `float scaleY` parameters to set the horizontal and vertical scale factors. The following example creates a table, renders the paragraph in its first cell at twice its default width and height, and saves the result as a PNG image.
```csharp
using System;
using Aspose.Slides;
var scaleX = 2f;
var scaleY = 2f;
using var presentation = new Presentation();
var slide = presentation.Slides[0];
var table = slide.Shapes.AddTable(50, 50, new[] { 300d }, new[] { 80d });
var paragraph = table[0, 0].TextFrame.Paragraphs[0];
paragraph.Text = "Text in a table cell";
using var paragraphImage = paragraph.GetImage(scaleX, scaleY);
if (paragraphImage != null)
{
paragraphImage.Save("table_paragraph.png", ImageFormat.Png);
}
else
{
Console.WriteLine("The paragraph could not be rendered.");
}
```
A scale factor of `1` keeps that axis at its default pixel size. For example, `2` for both factors produces an image whose width and height are approximately twice the default dimensions, resulting in four times as many pixels. Larger factors generally produce sharper text for zooming or high-resolution output, but they also increase memory use and file size. Factors below `1` produce smaller images with less detail. Use equal factors to preserve the paragraph's aspect ratio; different horizontal and vertical factors stretch the output independently.
Rendering a whole shape with [IShape.GetImage](https://reference.aspose.com/slides/net/aspose.slides/ishape/getimage/) remains useful when the output must include the shape's fill, border, or other visual context. For a paragraph-only image, use [IParagraph.GetImage](https://reference.aspose.com/slides/net/aspose.slides/iparagraph/getimage/).
## **FAQ**
**Can I completely disable line wrapping inside a text frame?**
Yes. Set [ITextFrameFormat.WrapText](https://reference.aspose.com/slides/net/aspose.slides/itextframeformat/wraptext/) to disable wrapping so lines do not break at the text frame's edges.
**How can I get the exact on-slide bounds of a specific paragraph?**
Use [IParagraph.GetRect](https://reference.aspose.com/slides/net/aspose.slides/iparagraph/getrect/) to retrieve the paragraph's bounding rectangle. [IPortion.GetRect](https://reference.aspose.com/slides/net/aspose.slides/iportion/getrect/) provides the bounds of an individual portion.
**Where is paragraph alignment (left, right, center, or justify) controlled?**
[IParagraphFormat.Alignment](https://reference.aspose.com/slides/net/aspose.slides/iparagraphformat/alignment/) is a paragraph-level setting and applies to the whole paragraph regardless of individual portion formatting.
To vertically align portions of different font sizes within each line, see [Align Fonts Within a Line](https://docs.aspose.com/slides/net/text-formatting/#align-fonts-within-a-line).
**Can I set the proofing language for part of a paragraph?**
Yes. Set [IBasePortionFormat.LanguageId](https://reference.aspose.com/slides/net/aspose.slides/ibaseportionformat/languageid/) for individual portions, so one paragraph can contain text in multiple languages.
## Related features
- [Format paragraphs](https://docs.aspose.com/slides/features/paragraphs/)
## Related articles
- [Manage Bulleted and Numbered Lists in Presentations in .NET](https://docs.aspose.com/slides/net/manage-lists/)
# Manage Presentation Placeholders in .NET
> Learn how to inspect and edit text, picture, chart, and content placeholders and understand placeholder inheritance with Aspose.Slides for .NET.
Source: https://docs.aspose.com/slides/net/manage-placeholder/
Updated: 2026-11-08
## **Overview**
A placeholder is a shape that reserves a position for a particular kind of content in a presentation template. Common examples are title, body, picture, chart, and general-purpose content placeholders. Unlike an ordinary shape, a placeholder can inherit its position, size, formatting, and other settings from a layout slide or master slide.
Aspose.Slides exposes placeholder information through the [IShape.Placeholder](https://reference.aspose.com/slides/net/aspose.slides/ishape/placeholder/) property. The property returns an [IPlaceholder](https://reference.aspose.com/slides/net/aspose.slides/iplaceholder/) object or `null` for a normal shape. Use [IPlaceholder.Type](https://reference.aspose.com/slides/net/aspose.slides/iplaceholder/type/) to determine what the placeholder is intended to contain.
The shape interface still matters after you know the placeholder type:
- An empty text, picture, chart, or content placeholder is commonly represented by an [IAutoShape](https://reference.aspose.com/slides/net/aspose.slides/iautoshape/).
- A populated picture placeholder can be represented by an [IPictureFrame](https://reference.aspose.com/slides/net/aspose.slides/ipictureframe/).
- A populated chart placeholder can be represented by an [IChart](https://reference.aspose.com/slides/net/aspose.slides.charts/ichart/).
- A content placeholder can contain several kinds of content. Check both [IPlaceholder.Type](https://reference.aspose.com/slides/net/aspose.slides/iplaceholder/type/) and the runtime shape interface instead of assuming that every placeholder is an [IAutoShape](https://reference.aspose.com/slides/net/aspose.slides/iautoshape/).
[IPlaceholder.Type](https://reference.aspose.com/slides/net/aspose.slides/iplaceholder/type/) describes a placeholder's role; it does not guarantee the shape's runtime type. Always use a type check before accessing text, picture, chart, table, or media-specific members.
## **Understand Placeholder Inheritance**
Placeholders form a hierarchy:
1. A master slide defines reusable styles and, in some cases, master-level placeholders.
2. A layout slide defines the arrangement used by one or more normal slides and can inherit from the master.
3. A normal slide contains the placeholders for that slide and can inherit from its layout.
Call [IShape.GetBasePlaceholder](https://reference.aspose.com/slides/net/aspose.slides/ishape/getbaseplaceholder/) to move one level up this hierarchy. A slide placeholder normally returns its layout placeholder; a layout placeholder can return its master placeholder. The method returns `null` when the shape has no base placeholder.
The following example lists placeholders on the first slide and reports their base placeholders:
```csharp
using System;
using Aspose.Slides;
using var presentation = new Presentation("template.pptx");
var slide = presentation.Slides[0];
foreach (var shape in slide.Shapes)
{
if (shape.Placeholder == null)
{
continue;
}
var placeholderType = shape.Placeholder.Type;
var typeName = shape.GetType().Name;
Console.WriteLine($"Slide placeholder: {placeholderType}; shape interface: {typeName}");
var layoutPlaceholder = shape.GetBasePlaceholder();
if (layoutPlaceholder != null)
{
var layoutPlaceholderType = layoutPlaceholder.Placeholder?.Type;
Console.WriteLine($" Layout placeholder: {layoutPlaceholderType}");
var masterPlaceholder = layoutPlaceholder.GetBasePlaceholder();
if (masterPlaceholder != null)
{
var masterPlaceholderType = masterPlaceholder.Placeholder?.Type;
Console.WriteLine($" Master placeholder: {masterPlaceholderType}");
}
}
}
```
Editing a placeholder on a normal slide creates or changes a local override for that slide. Editing the related layout or master can affect all slides that still inherit that setting. A local ordinary shape has no base placeholder and does not begin inheriting merely because it occupies the same coordinates.
[](https://docs.aspose.com/slides/net/manage-placeholder/visual-placeholder-inheritance-0b0d255d34fd.svg)
*A slide placeholder can inherit from a layout placeholder, which may inherit from a master placeholder. A base may be absent. Local formatting overrides that setting on the slide; an ordinary shape has no base link merely because it shares the same coordinates.*
## **Remove Placeholder Status**
When adapting a template, use [IShape.RemovePlaceholder](https://reference.aspose.com/slides/net/aspose.slides/ishape/removeplaceholder/) to keep an existing object as an ordinary shape. Its [Placeholder](https://reference.aspose.com/slides/net/aspose.slides/ishape/placeholder/) property becomes `null`, but the shape remains in the slide's collection. In contrast, [IShapeCollection.Remove](https://reference.aspose.com/slides/net/aspose.slides/ishapecollection/remove/) deletes the shape from that collection.
The following example requires `template.pptx` with at least one slide and a nonempty text placeholder on the first slide. Use a placeholder with formatting inherited from its layout or master to see the effect of removing that relationship. The example checks that the same shape remains, calls the method again on the now ordinary shape, and saves the result.
Removing placeholder status does not automatically preserve inherited appearance settings. The example below deliberately leaves those settings unchanged, so the output may look different. A shape whose position and size are entirely inherited can have zero coordinates and dimensions after the call and become invisible even though it remains in the collection.
```csharp
using System;
using Aspose.Slides;
using Aspose.Slides.Export;
using var presentation = new Presentation("template.pptx");
var slide = presentation.Slides[0];
var found = false;
for (var index = 0; index < slide.Shapes.Count; index++)
{
if (slide.Shapes[index] is not IAutoShape shape ||
shape.Placeholder == null ||
string.IsNullOrEmpty(shape.TextFrame?.Text))
{
continue;
}
var shapeCount = slide.Shapes.Count;
shape.RemovePlaceholder();
Console.WriteLine($"Placeholder removed: {shape.Placeholder == null}");
Console.WriteLine($"Same shape retained: {ReferenceEquals(slide.Shapes[index], shape)}");
Console.WriteLine($"Shape count unchanged: {slide.Shapes.Count == shapeCount}");
// Calling the method on an ordinary shape has no effect.
shape.RemovePlaceholder();
found = true;
break;
}
if (found)
{
presentation.Save("placeholder-status-removed.pptx", SaveFormat.Pptx);
}
else
{
Console.WriteLine("No nonempty text placeholder was found on the first slide.");
}
```
For a matching placeholder, all three checks print `True`. The text remains, but inherited position, size, rotation, font, paragraph alignment, text-frame margins, vertical anchoring, fill, and line settings can change when the placeholder relationship is removed. For example, inherited title formatting can fall back to ordinary text formatting. See [Slide Layout](https://docs.aspose.com/slides/net/slide-layout/) for more about layouts.
To preserve the intended appearance, capture the resolved position, size, and rotation before the call, and copy the required effective formatting values into separate variables. Retrieve those values through [IPortionFormat.GetEffective](https://reference.aspose.com/slides/net/aspose.slides/iportionformat/geteffective/), [IParagraphFormat.GetEffective](https://reference.aspose.com/slides/net/aspose.slides/iparagraphformat/geteffective/), [ITextFrameFormat.GetEffective](https://reference.aspose.com/slides/net/aspose.slides/itextframeformat/geteffective/), [IFillFormat.GetEffective](https://reference.aspose.com/slides/net/aspose.slides/ifillformat/geteffective/), and [ILineFormat.GetEffective](https://reference.aspose.com/slides/net/aspose.slides/ilineformat/geteffective/). Do not rely on retaining only the effective-format objects, because their text-formatting values can change after the relationship is removed. Explicitly apply the captured values to the ordinary shape afterward, including the font family, size, style, color, paragraph settings, text-frame settings, fill, and line used by your template.
Inherited shape geometry may also need to be assigned explicitly through [IGeometryShape.ShapeType](https://reference.aspose.com/slides/net/aspose.slides/igeometryshape/shapetype/). For a rectangular text placeholder, this means assigning [ShapeType.Rectangle](https://reference.aspose.com/slides/net/aspose.slides/shapetype/); restoring only the fill and line may not restore the visible rectangle. Templates with additional effects or more complex formatting require those settings to be handled as well.
## **Change Text in a Placeholder**
Title, centered-title, subtitle, body, and text placeholders normally support text. Check for [IAutoShape](https://reference.aspose.com/slides/net/aspose.slides/iautoshape/) before using its [TextFrame](https://reference.aspose.com/slides/net/aspose.slides/iautoshape/textframe/) property.
This example updates the first title placeholder on the first slide and saves the result:
```csharp
using System;
using Aspose.Slides;
using Aspose.Slides.Export;
using var presentation = new Presentation("template.pptx");
var slide = presentation.Slides[0];
IAutoShape? titleShape = null;
foreach (var shape in slide.Shapes)
{
if (shape is not IAutoShape autoShape || autoShape.Placeholder == null)
{
continue;
}
var placeholderType = autoShape.Placeholder.Type;
if (placeholderType == PlaceholderType.Title || placeholderType == PlaceholderType.CenteredTitle)
{
titleShape = autoShape;
break;
}
}
if (titleShape == null)
{
throw new InvalidOperationException("The first slide does not contain a title placeholder.");
}
titleShape.TextFrame.Text = "Quarterly Business Review";
presentation.Save("title-placeholder-updated.pptx", SaveFormat.Pptx);
```
This pattern avoids casting picture, chart, table, or media placeholders to [IAutoShape](https://reference.aspose.com/slides/net/aspose.slides/iautoshape/). It also identifies the placeholder by purpose instead of relying on a fragile shape index.
## **Set Prompt Text on a Layout**
Prompt text is the design-time instruction displayed in an empty placeholder, such as *Click to add title*. Set custom prompt text on the layout placeholder rather than trying to reach it through a normal slide's shape collection. Access the layout through [ISlide.LayoutSlide](https://reference.aspose.com/slides/net/aspose.slides/islide/layoutslide/) and iterate over [ILayoutSlide.Shapes](https://reference.aspose.com/slides/net/aspose.slides/ibaseslide/shapes/).
The following example changes the title and subtitle prompts on the layout used by the first slide:
```csharp
using System;
using Aspose.Slides;
using Aspose.Slides.Export;
using var presentation = new Presentation("template.pptx");
var layoutSlide = presentation.Slides[0].LayoutSlide;
foreach (var shape in layoutSlide.Shapes)
{
if (shape is not IAutoShape autoShape || autoShape.Placeholder == null)
{
continue;
}
switch (autoShape.Placeholder.Type)
{
case PlaceholderType.Title:
case PlaceholderType.CenteredTitle:
autoShape.TextFrame.Text = "Enter a concise slide title";
break;
case PlaceholderType.Subtitle:
autoShape.TextFrame.Text = "Enter a subtitle or reporting period";
break;
}
}
presentation.Save("custom-placeholder-prompts.pptx", SaveFormat.Pptx);
```
Prompt text is not normal slide content. It is intended for empty placeholders in editing applications such as PowerPoint. Once a user or program supplies real content, the prompt is no longer displayed. Changing a prompt also does not replace existing text on slides that use the layout.
## **Update a Picture Placeholder**
There are two cases to handle:
- If the picture placeholder is already populated and represented by an [IPictureFrame](https://reference.aspose.com/slides/net/aspose.slides/ipictureframe/), replace the image through [IPictureFillFormat.Picture](https://reference.aspose.com/slides/net/aspose.slides/ipicturefillformat/picture/) and [ISlidesPicture.Image](https://reference.aspose.com/slides/net/aspose.slides/islidespicture/image/).
- If it is still an empty placeholder, add a picture frame at the placeholder's coordinates with [IShapeCollection.AddPictureFrame](https://reference.aspose.com/slides/net/aspose.slides/ishapecollection/addpictureframe/) and remove the empty placeholder.
The next example supports both cases and saves the presentation:
```csharp
using System;
using System.IO;
using Aspose.Slides;
using Aspose.Slides.Export;
using var presentation = new Presentation("picture-template.pptx");
var slide = presentation.Slides[0];
IShape? picturePlaceholder = null;
foreach (var shape in slide.Shapes)
{
if (shape.Placeholder?.Type == PlaceholderType.Picture)
{
picturePlaceholder = shape;
break;
}
}
if (picturePlaceholder == null)
{
throw new InvalidOperationException("The first slide does not contain a picture placeholder.");
}
var imageBytes = File.ReadAllBytes("replacement.png");
var image = presentation.Images.AddImage(imageBytes);
if (picturePlaceholder is IPictureFrame pictureFrame)
{
pictureFrame.PictureFormat.Picture.Image = image;
}
else
{
slide.Shapes.AddPictureFrame(ShapeType.Rectangle, picturePlaceholder.X, picturePlaceholder.Y, picturePlaceholder.Width, picturePlaceholder.Height, image);
slide.Shapes.Remove(picturePlaceholder);
}
presentation.Save("picture-placeholder-updated.pptx", SaveFormat.Pptx);
```
The replacement created for an empty placeholder is a local picture frame, not a new placeholder, because [IShape.Placeholder](https://reference.aspose.com/slides/net/aspose.slides/ishape/placeholder/) is read-only. It keeps the reserved position but no longer inherits placeholder-specific behavior. If retaining the placeholder relationship is essential, prepare and populate the placeholder in PowerPoint first, then update the resulting [IPictureFrame](https://reference.aspose.com/slides/net/aspose.slides/ipictureframe/) with Aspose.Slides.
For image transparency, cropping, and other picture-specific effects, see [Manage Picture Frames](https://docs.aspose.com/slides/net/picture-frame/). Those operations belong to the picture frame or picture fill, not to placeholder metadata.
## **Work with Chart and Content Placeholders**
A populated chart placeholder can be represented by an [IChart](https://reference.aspose.com/slides/net/aspose.slides.charts/ichart/). This example finds such a chart by both placeholder type and runtime interface, changes its title, and saves the file:
```csharp
using System;
using Aspose.Slides;
using Aspose.Slides.Charts;
using Aspose.Slides.Export;
using var presentation = new Presentation("chart-template.pptx");
var slide = presentation.Slides[0];
IChart? placeholderChart = null;
foreach (var shape in slide.Shapes)
{
if (shape is IChart chart && shape.Placeholder?.Type == PlaceholderType.Chart)
{
placeholderChart = chart;
break;
}
}
if (placeholderChart == null)
{
throw new InvalidOperationException("The first slide does not contain a populated chart placeholder.");
}
placeholderChart.HasTitle = true;
placeholderChart.ChartTitle.AddTextFrameForOverriding("Quarterly Revenue");
presentation.Save("chart-placeholder-updated.pptx", SaveFormat.Pptx);
```
A general content placeholder usually has [PlaceholderType.Object](https://reference.aspose.com/slides/net/aspose.slides/placeholdertype/). In PowerPoint it acts as a launcher for several content types, including charts, tables, diagrams, pictures, and media. After it has been populated, inspect the actual shape interface to learn what it contains. Specialized layouts can also expose [PlaceholderType.Chart](https://reference.aspose.com/slides/net/aspose.slides/placeholdertype/), [PlaceholderType.Table](https://reference.aspose.com/slides/net/aspose.slides/placeholdertype/), [PlaceholderType.Picture](https://reference.aspose.com/slides/net/aspose.slides/placeholdertype/), [PlaceholderType.Media](https://reference.aspose.com/slides/net/aspose.slides/placeholdertype/), or [PlaceholderType.Diagram](https://reference.aspose.com/slides/net/aspose.slides/placeholdertype/).
Aspose.Slides does not convert an empty [IAutoShape](https://reference.aspose.com/slides/net/aspose.slides/iautoshape/) placeholder into an [IChart](https://reference.aspose.com/slides/net/aspose.slides.charts/ichart/) merely by changing [IPlaceholder.Type](https://reference.aspose.com/slides/net/aspose.slides/iplaceholder/type/); the type is read-only. To fill an empty chart or content area programmatically, add the required object at the placeholder's coordinates and then remove the empty placeholder. The following example does that for a chart:
```csharp
using System;
using Aspose.Slides;
using Aspose.Slides.Charts;
using Aspose.Slides.Export;
using var presentation = new Presentation("content-template.pptx");
var slide = presentation.Slides[0];
IShape? targetPlaceholder = null;
foreach (var shape in slide.Shapes)
{
if (shape.Placeholder?.Type is PlaceholderType.Chart or PlaceholderType.Object)
{
targetPlaceholder = shape;
break;
}
}
if (targetPlaceholder == null)
{
throw new InvalidOperationException("The first slide does not contain a chart or content placeholder.");
}
var chart = slide.Shapes.AddChart(ChartType.ClusteredColumn, targetPlaceholder.X, targetPlaceholder.Y, targetPlaceholder.Width, targetPlaceholder.Height);
chart.HasTitle = true;
chart.ChartTitle.AddTextFrameForOverriding("Quarterly Revenue");
slide.Shapes.Remove(targetPlaceholder);
presentation.Save("content-placeholder-replaced-with-chart.pptx", SaveFormat.Pptx);
```
The added chart is an ordinary local chart. It occupies the placeholder's area but does not inherit from the layout placeholder. Use the dedicated [chart management articles](https://docs.aspose.com/slides/net/powerpoint-charts/) when you need to replace its categories, series, or workbook data.
## **Complete Example: Update Text or Image Content**
The following end-to-end example opens a template, searches the first slide for either a title or picture placeholder, checks the placeholder and shape types, updates the appropriate content, and saves the output. The example deliberately avoids assuming a shape index or casting every placeholder to the same interface.
```csharp
using System;
using System.IO;
using Aspose.Slides;
using Aspose.Slides.Export;
using var presentation = new Presentation("template.pptx");
var slide = presentation.Slides[0];
var updated = false;
foreach (var shape in slide.Shapes)
{
if (shape.Placeholder == null)
{
continue;
}
var placeholderType = shape.Placeholder.Type;
if ((placeholderType == PlaceholderType.Title || placeholderType == PlaceholderType.CenteredTitle) && shape is IAutoShape titleShape)
{
titleShape.TextFrame.Text = "Quarterly Business Review";
updated = true;
break;
}
if (placeholderType == PlaceholderType.Picture)
{
var imageBytes = File.ReadAllBytes("replacement.png");
var image = presentation.Images.AddImage(imageBytes);
if (shape is IPictureFrame pictureFrame)
{
pictureFrame.PictureFormat.Picture.Image = image;
}
else
{
slide.Shapes.AddPictureFrame(ShapeType.Rectangle, shape.X, shape.Y, shape.Width, shape.Height, image);
slide.Shapes.Remove(shape);
}
updated = true;
break;
}
}
if (!updated)
{
throw new InvalidOperationException("No supported title or picture placeholder was found on the first slide.");
}
presentation.Save("placeholder-content-updated.pptx", SaveFormat.Pptx);
```
## **FAQ**
**What is a base placeholder?**
A base placeholder is the corresponding shape on the layout or master from which another placeholder inherits. Use [IShape.GetBasePlaceholder](https://reference.aspose.com/slides/net/aspose.slides/ishape/getbaseplaceholder/) to retrieve it. An ordinary local shape returns `null` because it is not part of the placeholder hierarchy.
**Can I change all slide titles by editing a layout placeholder?**
You can change inherited formatting or prompt text through a layout, but existing title content is stored on the normal slides. To replace actual title text across a presentation, iterate over the slides and update each title placeholder.
**How do I manage date, slide-number, header, and footer placeholders?**
Use the header and footer managers at the appropriate slide, layout, master, notes, or handout scope. See [Manage Presentation Header and Footer](https://docs.aspose.com/slides/net/presentation-header-and-footer/) for complete examples.
## Related features
- [Work with placeholders](https://docs.aspose.com/slides/features/placeholders/)
## Related articles
- [Manage Presentation Headers and Footers in .NET](https://docs.aspose.com/slides/net/presentation-header-and-footer/)
# Manage Presentations in .NET
> Manage PowerPoint PPT, PPTX and ODP presentations in .NET with Aspose.Slides: create, load, edit, clone slides and control content programmatically.
Source: https://docs.aspose.com/slides/net/manage-presentation/
Updated: 2025-11-12
---
lastmod: 2025-11-12T10:36:00+04:00
title: Manage Presentations in .NET
linktitle: Manage Presentation
type: docs
weight: 10
url: /net/manage-presentation/
keywords:
- manage presentation
- manage PPT
- manage PPTX
- manage ODP
- create presentation
- open presentation
- examine presentation
- merge presentations
- convert presentation
- save presentation
- manage slide show
- .NET
- C#
- Aspose.Slides
description: "Manage PowerPoint PPT, PPTX and ODP presentations in .NET with Aspose.Slides: create, load, edit, clone slides and control content programmatically."
---
# Manage Rows and Columns in PowerPoint Tables in .NET
> Manage table rows and columns in PowerPoint with Aspose.Slides for .NET and speed up presentation editing and data updates.
Source: https://docs.aspose.com/slides/net/manage-rows-and-columns/
Updated: 2026-11-16
## **Introduction**
Aspose.Slides for .NET lets you manage table structure and formatting in PowerPoint presentations through the [Table](https://reference.aspose.com/slides/net/aspose.slides/table/) class and [ITable](https://reference.aspose.com/slides/net/aspose.slides/itable/) interface. You can designate a header row, clone or remove rows and columns, and apply text formatting to an entire row or column.
This article explains these operations with C# examples. It also shows how to retrieve a table's style preset so you can reuse it. Table row and column indices are zero-based.
## **Control Row Height**
Use [IRow.MinimalHeight](https://reference.aspose.com/slides/net/aspose.slides/irow/minimalheight/) to set a row's minimum height in points. It is a lower bound, not a fixed height. [IRow.Height](https://reference.aspose.com/slides/net/aspose.slides/irow/height/) returns the actual height and is read-only. Access the row through [ITable.Rows](https://reference.aspose.com/slides/net/aspose.slides/itable/rows/).
The example loads [row-height-input.pptx](https://docs.aspose.com/slides/net/manage-rows-and-columns/row-height-input.pptx), which has a table as the first shape on the first slide. Its first row starts at 70 points. The cells use 18-point Arial text, wrapping, and 6-point top and bottom margins; the longer text in the second column wraps onto multiple lines. The example increases the minimum to 100 points, then decreases it to 20 points, prints the actual height after each change, and saves both results.
```csharp
using System;
using Aspose.Slides;
using Aspose.Slides.Export;
using var presentation = new Presentation("row-height-input.pptx");
var table = (ITable)presentation.Slides[0].Shapes[0];
var row = table.Rows[0];
row.MinimalHeight = 100;
Console.WriteLine($"Increased: minimum = {row.MinimalHeight:F1}, actual = {row.Height:F1} pt");
presentation.Save("row-height-increased.pptx", SaveFormat.Pptx);
row.MinimalHeight = 20;
Console.WriteLine($"Decreased: minimum = {row.MinimalHeight:F1}, actual = {row.Height:F1} pt");
presentation.Save("row-height-decreased.pptx", SaveFormat.Pptx);
```
With the supplied presentation, increasing the minimum adds space to the row. Decreasing it removes that extra space, but the actual height remains greater than 20 points because the text and cell margins need more room. Reducing the minimum alone cannot force the row below the space required by its content.
Several factors affect the actual height:
- **Text and font size:** longer text, explicit line breaks, or a larger font can require more vertical space.
- **Wrapping and column width:** with wrapping enabled, a narrower [IColumn.Width](https://reference.aspose.com/slides/net/aspose.slides/icolumn/width/) can produce more lines. A wider column can reduce the space required vertically.
- **Cell margins:** [ICell.MarginTop](https://reference.aspose.com/slides/net/aspose.slides/icell/margintop/) and [ICell.MarginBottom](https://reference.aspose.com/slides/net/aspose.slides/icell/marginbottom/) add vertical space. [ICell.MarginLeft](https://reference.aspose.com/slides/net/aspose.slides/icell/marginleft/) and [ICell.MarginRight](https://reference.aspose.com/slides/net/aspose.slides/icell/marginright/) reduce the width available for text and can cause additional wrapping.
For this table without merged cells, the cell that needs the most vertical space determines the content-driven lower limit for the entire row. To make the row shorter, you may also need to shorten the text, reduce the font size or margins, or widen a column.
The images below show the same table at the same scale. In this run, the actual heights were 70, 100, and 55.2 points: the final row remained taller than its 20-point minimum. Exact text measurements can vary with the fonts available in your environment. Download the saved results: [increased minimum](https://docs.aspose.com/slides/net/manage-rows-and-columns/row-height-increased.pptx) and [decreased minimum](https://docs.aspose.com/slides/net/manage-rows-and-columns/row-height-decreased.pptx).
| Original: minimum 70 pt, actual 70 pt | Increased: minimum 100 pt, actual 100 pt | Decreased: minimum 20 pt, actual 55.2 pt |
| --- | --- | --- |
|  |  |  |
## **Set the First Row as a Header**
Use the [FirstRow](https://reference.aspose.com/slides/net/aspose.slides/itable/firstrow/) property to mark the first row for header formatting. Its appearance depends on the table style applied to the table.
1. Load the presentation with the [Presentation](https://reference.aspose.com/slides/net/aspose.slides/presentation/) class.
2. Access the first slide.
3. Access the table stored as the first shape on the slide.
4. Enable header formatting for its first row.
5. Save the modified presentation.
The example requires `table.pptx` with a table as the first shape on the first slide. It enables header formatting for the first row and saves `First_row_header.pptx`.
```csharp
using Aspose.Slides;
using Aspose.Slides.Export;
using var presentation = new Presentation("table.pptx");
var slide = presentation.Slides[0];
var table = (ITable)slide.Shapes[0];
table.FirstRow = true;
presentation.Save("First_row_header.pptx", SaveFormat.Pptx);
```
## **Clone a Table Row or Column**
Clone rows or columns to reuse their content and formatting. You can append a copy to the end of the table or insert it at a specific position.
1. Load the presentation with the [Presentation](https://reference.aspose.com/slides/net/aspose.slides/presentation/) class.
2. Access the first slide.
3. Define the column widths and row heights.
4. Add a table with the [AddTable](https://reference.aspose.com/slides/net/aspose.slides/ishapecollection/addtable/) method.
5. Clone the required rows.
6. Clone the required columns.
7. Save the modified presentation.
The example requires `Test.pptx` with at least one slide. It creates a table with three columns and five rows, with dimensions specified in points. It appends copies of the first row and column, then inserts copies of the second row and column at index 3 (the fourth position). The resulting table has seven rows and five columns. The `false` argument disables cloning into adjacent merged rows or columns; this table has no merged cells.
```csharp
using Aspose.Slides;
using Aspose.Slides.Export;
using var presentation = new Presentation("Test.pptx");
var slide = presentation.Slides[0];
var columnWidths = new double[] { 50, 50, 50 };
var rowHeights = new double[] { 50, 30, 30, 30, 30 };
var table = slide.Shapes.AddTable(100, 50, columnWidths, rowHeights);
table[0, 0].TextFrame.Text = "Row 1 Cell 1";
table[1, 0].TextFrame.Text = "Row 1 Cell 2";
table.Rows.AddClone(table.Rows[0], false);
table[0, 1].TextFrame.Text = "Row 2 Cell 1";
table[1, 1].TextFrame.Text = "Row 2 Cell 2";
table.Rows.InsertClone(3, table.Rows[1], false);
table.Columns.AddClone(table.Columns[0], false);
table.Columns.InsertClone(3, table.Columns[1], false);
presentation.Save("table_out.pptx", SaveFormat.Pptx);
```
## **Remove a Row or Column from a Table**
Remove rows or columns that are no longer needed in a table. Removing an item shifts the indices of the rows or columns that follow it.
1. Create a presentation with the [Presentation](https://reference.aspose.com/slides/net/aspose.slides/presentation/) class.
2. Access the first slide.
3. Define the column widths and row heights.
4. Add a table with the [AddTable](https://reference.aspose.com/slides/net/aspose.slides/ishapecollection/addtable/) method.
5. Remove the second row and second column.
6. Save the modified presentation.
This example creates a three-by-three table and removes the row and column at index 1, leaving a two-by-two table in `TestTable_out.pptx`. The dimensions are in points. The `false` argument disables removal of adjacent merged rows or columns; this table has no merged cells.
```csharp
using Aspose.Slides;
using Aspose.Slides.Export;
using var presentation = new Presentation();
var slide = presentation.Slides[0];
var columnWidths = new double[] { 100, 50, 30 };
var rowHeights = new double[] { 30, 50, 30 };
var table = slide.Shapes.AddTable(100, 100, columnWidths, rowHeights);
table.Rows.RemoveAt(1, false);
table.Columns.RemoveAt(1, false);
presentation.Save("TestTable_out.pptx", SaveFormat.Pptx);
```
## **Set Text Formatting on the Table Row Level**
Apply text formatting to an entire row to keep its cells consistent. You can set font properties, paragraph formatting, and text direction without formatting each cell individually.
1. Load the presentation with the [Presentation](https://reference.aspose.com/slides/net/aspose.slides/presentation/) class.
2. Access the table on the first slide.
3. Set [FontHeight](https://reference.aspose.com/slides/net/aspose.slides/baseportionformat/fontheight/) for the first row.
4. Set [Alignment](https://reference.aspose.com/slides/net/aspose.slides/iparagraphformat/alignment/) and [MarginRight](https://reference.aspose.com/slides/net/aspose.slides/iparagraphformat/marginright/) for the first row.
5. Set [TextVerticalType](https://reference.aspose.com/slides/net/aspose.slides/textframeformat/textverticaltype/) for the second row.
6. Save the modified presentation.
The example requires `table.pptx` with a table as the first shape on the first slide and at least two rows. It applies 25-point text, right alignment, and a 20-point right paragraph margin to the first row, then sets vertical text in the second row.
```csharp
using Aspose.Slides;
using Aspose.Slides.Export;
using var presentation = new Presentation("table.pptx");
var slide = presentation.Slides[0];
var table = (ITable)slide.Shapes[0];
var portionFormat = new PortionFormat { FontHeight = 25 };
table.Rows[0].SetTextFormat(portionFormat);
var paragraphFormat = new ParagraphFormat { Alignment = TextAlignment.Right, MarginRight = 20 };
table.Rows[0].SetTextFormat(paragraphFormat);
var textFrameFormat = new TextFrameFormat { TextVerticalType = TextVerticalType.Vertical };
table.Rows[1].SetTextFormat(textFrameFormat);
presentation.Save("row_formatting.pptx", SaveFormat.Pptx);
```
## **Set Text Formatting on the Table Column Level**
Apply text formatting to an entire column to keep its cells consistent. You can set font properties, paragraph formatting, and text direction without formatting each cell individually.
1. Load the presentation with the [Presentation](https://reference.aspose.com/slides/net/aspose.slides/presentation/) class.
2. Access the table on the first slide.
3. Set [FontHeight](https://reference.aspose.com/slides/net/aspose.slides/baseportionformat/fontheight/) for the first column.
4. Set [Alignment](https://reference.aspose.com/slides/net/aspose.slides/iparagraphformat/alignment/) and [MarginRight](https://reference.aspose.com/slides/net/aspose.slides/iparagraphformat/marginright/) for the first column.
5. Set [TextVerticalType](https://reference.aspose.com/slides/net/aspose.slides/textframeformat/textverticaltype/) for the second column.
6. Save the modified presentation.
The example requires `table.pptx` with a table as the first shape on the first slide and at least two columns. It applies 25-point text, right alignment, and a 20-point right paragraph margin to the first column, then sets vertical text in the second column.
```csharp
using Aspose.Slides;
using Aspose.Slides.Export;
using var presentation = new Presentation("table.pptx");
var slide = presentation.Slides[0];
var table = (ITable)slide.Shapes[0];
var portionFormat = new PortionFormat { FontHeight = 25 };
table.Columns[0].SetTextFormat(portionFormat);
var paragraphFormat = new ParagraphFormat { Alignment = TextAlignment.Right, MarginRight = 20 };
table.Columns[0].SetTextFormat(paragraphFormat);
var textFrameFormat = new TextFrameFormat { TextVerticalType = TextVerticalType.Vertical };
table.Columns[1].SetTextFormat(textFrameFormat);
presentation.Save("column_formatting.pptx", SaveFormat.Pptx);
```
## **Get Table Style Properties**
Use the [StylePreset](https://reference.aspose.com/slides/net/aspose.slides/itable/stylepreset/) property to retrieve the preset applied to a table and reuse it on another table. This identifies the preset rather than individual cell formatting overrides.
The example creates a table, applies [TableStylePreset.DarkStyle1](https://reference.aspose.com/slides/net/aspose.slides/tablestylepreset/), and reads the preset back. It prints `DarkStyle1` and saves the table in `table.pptx`.
```csharp
using System;
using Aspose.Slides;
using Aspose.Slides.Export;
using var presentation = new Presentation();
var slide = presentation.Slides[0];
var columnWidths = new double[] { 100, 150 };
var rowHeights = new double[] { 5, 5, 5 };
var table = slide.Shapes.AddTable(10, 10, columnWidths, rowHeights);
table.StylePreset = TableStylePreset.DarkStyle1;
Console.WriteLine(table.StylePreset);
presentation.Save("table.pptx", SaveFormat.Pptx);
```
## **Apply Row or Column Banding**
Set [HorizontalBanding](https://reference.aspose.com/slides/net/aspose.slides/itable/horizontalbanding/) to alternate row fills or [VerticalBanding](https://reference.aspose.com/slides/net/aspose.slides/itable/verticalbanding/) to alternate column fills. The table style supplies the band colors. To keep a particular cell the same color in every configuration, set its [FillFormat](https://reference.aspose.com/slides/net/aspose.slides/icellformat/fillformat/) to a solid fill.
The example saves three versions of the same table. Only the two banding flags change between saves.
```csharp
using System.Drawing;
using Aspose.Slides;
using Aspose.Slides.Export;
using var presentation = new Presentation();
var slide = presentation.Slides[0];
var widths = new double[] { 100, 100, 100, 100 };
var heights = new double[] { 50, 50, 50, 50 };
var table = slide.Shapes.AddTable(40, 40, widths, heights);
table.StylePreset = TableStylePreset.MediumStyle2Accent1;
table.FirstRow = false;
table.FirstCol = false;
table.LastRow = false;
table.LastCol = false;
for (int row = 0; row < heights.Length; row++)
{
for (int column = 0; column < widths.Length; column++)
{
table[column, row].TextFrame.Text = $"{row + 1},{column + 1}";
}
}
var fill = table[1, 1].CellFormat.FillFormat;
fill.FillType = FillType.Solid;
fill.SolidFillColor.Color = Color.Orange;
table.HorizontalBanding = true;
table.VerticalBanding = false;
presentation.Save("rows.pptx", SaveFormat.Pptx);
table.HorizontalBanding = false;
table.VerticalBanding = true;
presentation.Save("columns.pptx", SaveFormat.Pptx);
table.VerticalBanding = false;
presentation.Save("off.pptx", SaveFormat.Pptx);
```
In PowerPoint, cell `2,2` stays orange in all three versions. Its neighbors alternate in color by row or by column and share a single fill when both flags are off.
| Row banding | Column banding | Both off |
| --- | --- | --- |
|  |  |  |
## **FAQ**
**Can I apply PowerPoint themes/styles to a table that's already created?**
Yes. The table inherits the slide/layout/master theme, and you can still override fills, borders, and text colors on top of that theme.
**Can I sort table rows like in Excel?**
No, Aspose.Slides tables don't have built-in sorting or filters. Sort your data in memory first, then repopulate the table rows in that order.
**Can I have banded (striped) columns while keeping custom colors on specific cells?**
Yes. Enable banded columns and apply a local fill to the cells you want to highlight. See [Apply Row or Column Banding](https://docs.aspose.com/slides/net/manage-rows-and-columns/#apply-row-or-column-banding).
## Related features
- [Add, remove and resize table rows and columns](https://docs.aspose.com/slides/features/table-rows-columns/)
## Related articles
- [Create and Customize PowerPoint Tables in .NET](https://docs.aspose.com/slides/net/powerpoint-table/)
- [Manage Presentation Tables in .NET](https://docs.aspose.com/slides/net/manage-table/)
- [Removing row or column in Table in VSTO and Aspose.Slides](https://docs.aspose.com/slides/net/removing-row-or-column-in-table-in-vsto-and-aspose-slides/)
# Manage Slide Show in .NET
> Learn how to manage slide shows in Aspose.Slides for .NET. Control slide transitions, timings and more across PPT, PPTX and ODP formats with ease.
Source: https://docs.aspose.com/slides/net/manage-slide-show/
Updated: 2026-08-05
## **Introduction**
In Microsoft PowerPoint, the **Slide Show** settings are a key tool for preparing and delivering professional presentations. One of the most important features in this section is **Set Up Show**, which allows you to tailor your presentation to specific conditions and audiences, ensuring flexibility and convenience. With this feature, you can select the show type (e.g., presented by a speaker, browsed by an individual, or browsed at a kiosk), enable or disable looping, choose specific slides to display, and use timings. This step in preparation is crucial for making your presentation more effective and professional.
`SlideShowSettings` is a property of the [Presentation](https://reference.aspose.com/slides/net/aspose.slides/presentation/) class, of type [SlideShowSettings](https://reference.aspose.com/slides/net/aspose.slides/presentation/slideshowsettings/), which allows you to manage the slide show settings in a PowerPoint presentation. In this article, we will explore how to use this property to configure and control various aspects of slide show settings.
## **Select Show Type**
`SlideShowSettings.SlideShowType` defines the type of slide show, which can be an instance of the following classes: [PresentedBySpeaker](https://reference.aspose.com/slides/net/aspose.slides/presentedbyspeaker/), [BrowsedByIndividual](https://reference.aspose.com/slides/net/aspose.slides/browsedbyindividual/), or [BrowsedAtKiosk](https://reference.aspose.com/slides/net/aspose.slides/browsedatkiosk/). Using this property allows you to adapt the presentation for different usage scenarios, such as automated kiosks or manual presentations.
The code example below creates a new presentation and sets the show type to "Browsed by an individual" without displaying the scrollbar.
```cs
using Aspose.Slides;
using Aspose.Slides.Export;
using var presentation = new Presentation();
var showType = new BrowsedByIndividual
{
ShowScrollbar = false
};
presentation.SlideShowSettings.SlideShowType = showType;
presentation.Save("output.pptx", SaveFormat.Pptx);
```
## **Enable Show Options**
`SlideShowSettings.Loop` determines whether the slide show should repeat in a loop until manually stopped. This is useful for automated presentations that need to run continuously. `SlideShowSettings.ShowNarration` determines whether voice narrations should be played during the slide show. It is useful for automated presentations that contain voice guidance for the audience. `SlideShowSettings.ShowAnimation` determines whether animations added to slide objects should be played. This is useful for providing the full visual effect of the presentation.
The following code example creates a new presentation and loops the slide show.
```cs
using Aspose.Slides;
using Aspose.Slides.Export;
using var presentation = new Presentation();
presentation.SlideShowSettings.Loop = true;
presentation.Save("output.pptx", SaveFormat.Pptx);
```
## **Select Slides to Show**
`SlideShowSettings.Slides` property allows you to select a range of slides to be shown during the presentation. This is useful when you need to show only part of the presentation rather than all slides. The following code example creates a new presentation and sets the slide range to display from slides `2` to `9`.
```cs
using Aspose.Slides;
using Aspose.Slides.Export;
using var presentation = new Presentation();
var slideRange = new SlidesRange
{
Start = 2,
End = 9
};
presentation.SlideShowSettings.Slides = slideRange;
presentation.Save("output.pptx", SaveFormat.Pptx);
```
## **Use Advance Slides**
`SlideShowSettings.UseTimings` property allows you to enable or disable the use of preset timings for each slide. This is useful for automatically showing slides with pre-defined display durations. The code example below creates a new presentation and disables the use of timings.
```cs
using Aspose.Slides;
using Aspose.Slides.Export;
using var presentation = new Presentation();
presentation.SlideShowSettings.UseTimings = false;
presentation.Save("output.pptx", SaveFormat.Pptx);
```
## **Show Media Controls**
`SlideShowSettings.ShowMediaControls` property determines whether media controls (such as play, pause, and stop) should be displayed during the slide show when multimedia content (e.g., video or audio) is played. This is useful when you want to give the presenter control over media playback during the presentation.
The following code example creates a new presentation and enables media controls to be displayed.
```cs
using Aspose.Slides;
using Aspose.Slides.Export;
using var presentation = new Presentation();
presentation.SlideShowSettings.ShowMediaControls = true;
presentation.Save("output.pptx", SaveFormat.Pptx);
```
## **FAQ**
### Can I save a presentation so it opens directly in slide show mode?
Yes. Save the file as PPSX or PPSM; these formats launch directly in slide show when opened in PowerPoint. In Aspose.Slides, choose the corresponding save format [during export](https://docs.aspose.com/slides/net/save-presentation/).
### Can I exclude individual slides from the show without deleting them from the file?
Yes. Mark a slide as [Hidden](https://reference.aspose.com/slides/net/aspose.slides/slide/hidden/). Hidden slides remain in the presentation but are not displayed during the slide show.
### Can Aspose.Slides play a slide show or control a live presentation on screen?
No. Aspose.Slides edits, analyzes, and converts presentation files; the actual playback is handled by a viewer application such as PowerPoint.
# Manage SmartArt Shape Nodes in Presentations in .NET
> Manage SmartArt shape nodes in PPT and PPTX with Aspose.Slides for .NET. Get clear code samples and tips to streamline your presentations.
Source: https://docs.aspose.com/slides/net/manage-smartart-shape-node/
Updated: 2026-11-08
## **Overview**
SmartArt graphics in PowerPoint presentations are organized through nodes that contain text and define the structure of the diagram. Aspose.Slides allows you to work with these SmartArt nodes programmatically: add new nodes and child nodes, insert child nodes at a specific position, access existing nodes, and read their text, level, and position.
This article explains how to manage SmartArt shape nodes. It shows how to remove nodes, work with child nodes by index or position, change an assistant node to a normal node, adjust the position, size, and rotation of SmartArt node shapes, set node fill formats, and generate a thumbnail image for a SmartArt child node.
## **Add a SmartArt Node**
Aspose.Slides for .NET has provided the simplest API to manage the SmartArt shapes in an easiest way. The following sample code will help to add node and child node inside SmartArt shape.
- Create an instance of [Presentation](https://reference.aspose.com/slides/net/aspose.slides/presentation) class and load the presentation with SmartArt Shape.
- Obtain the reference of first slide by using its Index.
- Traverse through every shape inside first slide.
- Check if shape is of SmartArt type and Typecast selected shape to SmartArt if it is SmartArt.
- Add a new Node in SmartArt shape NodeCollection and set the text in TextFrame.
- Now, Add a Child Node in newly added SmartArt Node and set the text in TextFrame.
- Save the Presentation.
```c#
using Aspose.Slides;
// Load the desired the presentation
Presentation pres = new Presentation("AddNodes.pptx");
// Traverse through every shape inside first slide
foreach (IShape shape in pres.Slides[0].Shapes)
{
// Check if shape is of SmartArt type
if (shape is Aspose.Slides.SmartArt.SmartArt)
{
// Typecast shape to SmartArt
Aspose.Slides.SmartArt.SmartArt smart = (Aspose.Slides.SmartArt.SmartArt)shape;
// Adding a new SmartArt Node
Aspose.Slides.SmartArt.SmartArtNode TemNode = (Aspose.Slides.SmartArt.SmartArtNode)smart.AllNodes.AddNode();
// Adding text
TemNode.TextFrame.Text = "Test";
// Adding new child node in parent node. It will be added in the end of collection
Aspose.Slides.SmartArt.SmartArtNode newNode = (Aspose.Slides.SmartArt.SmartArtNode)TemNode.ChildNodes.AddNode();
// Adding text
newNode.TextFrame.Text = "New Node Added";
}
}
// Saving Presentation
pres.Save("AddSmartArtNode_out.pptx", Aspose.Slides.Export.SaveFormat.Pptx);
```
## **Add a SmartArt Node at a Specific Position**
In the following sample code we have explained how to add the child nodes belonging to respective nodes of SmartArt shape at particular position.
- Create an instance of `Presentation` class.
- Obtain the reference of first slide by using its Index.
- Add a StackedList type SmartArt shape in accessed slide.
- Access the first node in added SmartArt shape.
- Now, add the Child Node for selected Node at position 2 and set its text.
- Save the Presentation.
```c#
using Aspose.Slides;
using Aspose.Slides.SmartArt;
// Creating a presentation instance
Presentation pres = new Presentation();
// Access the presentation slide
ISlide slide = pres.Slides[0];
// Add Smart Art IShape
ISmartArt smart = slide.Shapes.AddSmartArt(0, 0, 400, 400, SmartArtLayoutType.StackedList);
// Accessing the SmartArt node at index 0
ISmartArtNode node = smart.AllNodes[0];
// Adding new child node at position 2 in parent node
SmartArtNode chNode = (SmartArtNode)((SmartArtNodeCollection)node.ChildNodes).AddNodeByPosition(2);
// Add Text
chNode.TextFrame.Text = "Sample Text Added";
// Save Presentation
pres.Save("AddSmartArtNodeByPosition_out.pptx", Aspose.Slides.Export.SaveFormat.Pptx);
```
## **Access a SmartArt Node**
The following sample code will help to access nodes inside SmartArt shape. Please note that you cannot change the LayoutType of the SmartArt as it is read only and is set only when the SmartArt shape is added.
- Create an instance of `Presentation` class and load the presentation with SmartArt Shape.
- Obtain the reference of first slide by using its Index.
- Traverse through every shape inside first slide.
- Check if shape is of SmartArt type and Typecast selected shape to SmartArt if it is SmartArt.
- Traverse through all Nodes inside SmartArt Shape.
- Access and display information like SmartArt Node position, level and Text.
```c#
using Aspose.Slides;
// Load the desired the presentation
Presentation pres = new Presentation("AccessSmartArt.pptx");
// Traverse through every shape inside first slide
foreach (IShape shape in pres.Slides[0].Shapes)
{
// Check if shape is of SmartArt type
if (shape is Aspose.Slides.SmartArt.SmartArt)
{
// Typecast shape to SmartArt
Aspose.Slides.SmartArt.SmartArt smart = (Aspose.Slides.SmartArt.SmartArt)shape;
// Traverse through all nodes inside SmartArt
for (int i = 0; i < smart.AllNodes.Count; i++)
{
// Accessing SmartArt node at index i
Aspose.Slides.SmartArt.SmartArtNode node = (Aspose.Slides.SmartArt.SmartArtNode)smart.AllNodes[i];
// Printing the SmartArt node parameters
string outString = string.Format("i = {0}, Text = {1}, Level = {2}, Position = {3}", i, node.TextFrame.Text, node.Level, node.Position);
Console.WriteLine(outString);
}
}
}
```
## **Access a SmartArt Child Node**
The following sample code will help to access the child nodes belonging to respective nodes of SmartArt shape.
- Create an instance of PresentationEx class and load the presentation with SmartArt Shape.
- Obtain the reference of first slide by using its Index.
- Traverse through every shape inside first slide.
- Check if shape is of SmartArt type and Typecast selected shape to SmartArtEx if it is SmartArt.
- Traverse through all Nodes inside SmartArt Shape.
- For every selected SmartArt shape Node, traverse through all Child Nodes inside particular node.
- Access and display information like Child Node position, level and Text.
```c#
using Aspose.Slides;
// Load the desired the presentation
Presentation pres = new Presentation("AccessChildNodes.pptx");
// Traverse through every shape inside first slide
foreach (IShape shape in pres.Slides[0].Shapes)
{
// Check if shape is of SmartArt type
if (shape is Aspose.Slides.SmartArt.SmartArt)
{
// Typecast shape to SmartArt
Aspose.Slides.SmartArt.SmartArt smart = (Aspose.Slides.SmartArt.SmartArt)shape;
// Traverse through all nodes inside SmartArt
for (int i = 0; i < smart.AllNodes.Count; i++)
{
// Accessing SmartArt node at index i
Aspose.Slides.SmartArt.SmartArtNode node0 = (Aspose.Slides.SmartArt.SmartArtNode)smart.AllNodes[i];
// Traversing through the child nodes in SmartArt node at index i
for (int j = 0; j < node0.ChildNodes.Count; j++)
{
// Accessing the child node in SmartArt node
Aspose.Slides.SmartArt.SmartArtNode node = (Aspose.Slides.SmartArt.SmartArtNode)node0.ChildNodes[j];
// Printing the SmartArt child node parameters
string outString = string.Format("j = {0}, Text = {1}, Level = {2}, Position = {3}", j, node.TextFrame.Text, node.Level, node.Position);
Console.WriteLine(outString);
}
}
}
}
```
## **Access a SmartArt Child Node at a Specific Position**
In this example, we will learn to access the child nodes at some particular position belonging to respective nodes of SmartArt shape.
- Create an instance of `Presentation` class.
- Obtain the reference of first slide by using its Index.
- Add a StackedList type SmartArt shape.
- Access the added SmartArt shape.
- Access the node at index 0 for accessed SmartArt shape.
- Now, access the Child Node at position 1 for accessed SmartArt node using GetNodeByPosition() method.
- Access and display information like Child Node position, level and Text.
```c#
using Aspose.Slides;
using Aspose.Slides.SmartArt;
// Instantiate the presentation
Presentation pres = new Presentation();
// Accessing the first slide
ISlide slide = pres.Slides[0];
// Adding the SmartArt shape in first slide
ISmartArt smart = slide.Shapes.AddSmartArt(0, 0, 400, 400, SmartArtLayoutType.StackedList);
// Accessing the SmartArt node at index 0
ISmartArtNode node = smart.AllNodes[0];
// Accessing the child node at position 1 in parent node
int position = 1;
SmartArtNode chNode = (SmartArtNode)node.ChildNodes[position];
// Printing the SmartArt child node parameters
string outString = string.Format("j = {0}, Text = {1}, Level = {2}, Position = {3}", position, chNode.TextFrame.Text, chNode.Level, chNode.Position);
Console.WriteLine(outString);
```
## **Remove a SmartArt Node**
In this example, we will learn to remove the nodes inside SmartArt shape.
- Create an instance of `Presentation` class and load the presentation with SmartArt Shape.
- Obtain the reference of first slide by using its Index.
- Traverse through every shape inside first slide.
- Check if shape is of SmartArt type and Typecast selected shape to SmartArt if it is SmartArt.
- Check if the SmartArt has more than 0 nodes.
- Select the SmartArt node to be deleted.
- Now, remove the selected node using RemoveNode() method* Save the Presentation.
```c#
using Aspose.Slides;
using Aspose.Slides.SmartArt;
// Load the desired the presentation
using (Presentation pres = new Presentation("RemoveNode.pptx"))
{
// Traverse through every shape inside first slide
foreach (IShape shape in pres.Slides[0].Shapes)
{
// Check if shape is of SmartArt type
if (shape is ISmartArt)
{
// Typecast shape to SmartArtEx
ISmartArt smart = (ISmartArt)shape;
if (smart.AllNodes.Count > 0)
{
// Accessing SmartArt node at index 0
ISmartArtNode node = smart.AllNodes[0];
// Removing the selected node
smart.AllNodes.RemoveNode(node);
}
}
}
// Save Presentation
pres.Save("RemoveSmartArtNode_out.pptx", Aspose.Slides.Export.SaveFormat.Pptx);
}
```
## **Remove a SmartArt Node at a Specific Position**
In this example, we will learn to remove the nodes inside SmartArt shape at particular position.
- Create an instance of `Presentation` class and load the presentation with SmartArt Shape.
- Obtain the reference of first slide by using its Index.
- Traverse through every shape inside first slide.
- Check if shape is of SmartArt type and Typecast selected shape to SmartArt if it is SmartArt.
- Select the SmartArt shape node at index 0.
- Now, check if the selected SmartArt node has more than 2 child nodes.
- Now, remove the node at Position 1 using RemoveNodeByPosition() method.
- Save the Presentation.
```c#
using Aspose.Slides;
// Load the desired the presentation
Presentation pres = new Presentation("RemoveNodeSpecificPosition.pptx");
// Traverse through every shape inside first slide
foreach (IShape shape in pres.Slides[0].Shapes)
{
// Check if shape is of SmartArt type
if (shape is Aspose.Slides.SmartArt.SmartArt)
{
// Typecast shape to SmartArt
Aspose.Slides.SmartArt.SmartArt smart = (Aspose.Slides.SmartArt.SmartArt)shape;
if (smart.AllNodes.Count > 0)
{
// Accessing SmartArt node at index 0
Aspose.Slides.SmartArt.ISmartArtNode node = smart.AllNodes[0];
if (node.ChildNodes.Count >= 2)
{
// Removing the child node at position 1
((Aspose.Slides.SmartArt.SmartArtNodeCollection)node.ChildNodes).RemoveNode(1);
}
}
}
}
// Save Presentation
pres.Save("RemoveSmartArtNodeByPosition_out.pptx", Aspose.Slides.Export.SaveFormat.Pptx);
```
## **Set a Custom Position for a Child Node in a SmartArt Object**
Now Aspose.Slides for .NET support for setting SmartArtShape X and Y properties. The code snippet below shows how to set custom SmartArtShape position, size and rotation also please note that adding new nodes causes a recalculation of the positions and sizes of all nodes.
```c#
using Aspose.Slides;
using Aspose.Slides.Export;
using Aspose.Slides.SmartArt;
// Load the desired the presentation
Presentation pres = new Presentation("AccessChildNodes.pptx");
{
ISmartArt smart = pres.Slides[0].Shapes.AddSmartArt(20, 20, 600, 500, SmartArtLayoutType.OrganizationChart);
// Move SmartArt shape to new position
ISmartArtNode node = smart.AllNodes[1];
ISmartArtShape shape = node.Shapes[1];
shape.X += (shape.Width * 2);
shape.Y -= (shape.Height / 2);
// Change SmartArt shape's widths
node = smart.AllNodes[2];
shape = node.Shapes[1];
shape.Width += (shape.Width / 2);
// Change SmartArt shape's height
node = smart.AllNodes[3];
shape = node.Shapes[1];
shape.Height += (shape.Height / 2);
// Change SmartArt shape's rotation
node = smart.AllNodes[4];
shape = node.Shapes[1];
shape.Rotation = 90;
pres.Save("SmartArt.pptx", SaveFormat.Pptx);
}
```
[](https://docs.aspose.com/slides/net/manage-smartart-shape-node/visual-manage-smartart-shape-node-6aa9cdd919ec.svg)
*Illustrative .NET 26.11 renders after the article’s geometry edits, then after a separate added-child check. Adding a node recalculates positions and sizes; inspect the final layout after structural edits. The added child is not part of the article’s code sample.*
## **Check an Assistant Node**
In the following sample code we will investigate how to identify Assistant Nodes in the SmartArt nodes collection and changing them.
- Create an instance of PresentationEx class and load the presentation with SmartArt Shape.
- Obtain the reference of second slide by using its Index.
- Traverse through every shape inside first slide.
- Check if shape is of SmartArt type and Typecast selected shape to SmartArtEx if it is SmartArt.
- Traverse through all nodes inside SmartArt shape and check if they are Assistant Nodes.
- Change the status of Assistant Node to normal node.
- Save the Presentation.
```c#
using Aspose.Slides;
// Creating a presentation instance
using (Presentation pres = new Presentation("AssistantNode.pptx"))
{
// Traverse through every shape inside first slide
foreach (IShape shape in pres.Slides[0].Shapes)
{
// Check if shape is of SmartArt type
if (shape is Aspose.Slides.SmartArt.ISmartArt)
{
// Typecast shape to SmartArtEx
Aspose.Slides.SmartArt.ISmartArt smart = (Aspose.Slides.SmartArt.SmartArt)shape;
// Traversing through all nodes of SmartArt shape
foreach (Aspose.Slides.SmartArt.ISmartArtNode node in smart.AllNodes)
{
String tc = node.TextFrame.Text;
// Check if node is Assitant node
if (node.IsAssistant)
{
// Setting Assitant node to false and making it normal node
node.IsAssistant = false;
}
}
}
}
// Save Presentation
pres.Save("ChangeAssitantNode_out.pptx", Aspose.Slides.Export.SaveFormat.Pptx);
}
```
## **Set a Node's Fill Format**
Aspose.Slides for .NET makes it possible to add custom SmartArt shapes and set their fill formats. This article explains how to create and access SmartArt shapes and set their fill format using Aspose.Slides for .NET.
Please follow the steps below:
- Create an instance of the `Presentation` class.
- Obtain the reference of a slide using its index.
- Add a SmartArt shape by setting its LayoutType.
- Set the FillFormat for the SmartArt shape nodes.
- Write the modified presentation as a PPTX file.
```c#
using System.Drawing;
using Aspose.Slides;
using Aspose.Slides.Export;
using Aspose.Slides.SmartArt;
using (Presentation presentation = new Presentation())
{
// Accessing the slide
ISlide slide = presentation.Slides[0];
// Adding SmartArt shape and nodes
var chevron = slide.Shapes.AddSmartArt(10, 10, 800, 60, SmartArtLayoutType.ClosedChevronProcess);
var node = chevron.AllNodes.AddNode();
node.TextFrame.Text = "Some text";
// Setting node fill color
foreach (var item in node.Shapes)
{
item.FillFormat.FillType = FillType.Solid;
item.FillFormat.SolidFillColor.Color = Color.Red;
}
// Saving Presentation
presentation.Save("FillFormat_SmartArt_ShapeNode_out.pptx", SaveFormat.Pptx);
}
```
## **Generate a Thumbnail of a SmartArt Child Node**
Developers can generate a thumbnail of Child node of a SmartArt by following the steps below:
1. Instantiate `Presentation` class that represents the PPTX file.
1. Add SmartArt of a layout that has child nodes, such as StackedList.
1. Obtain the reference of a child node by using its index.
1. Get the thumbnail image.
1. Save the thumbnail image in any desired image format.
The example below generating a thumbnail of SmartArt child node
```c#
using Aspose.Slides;
using Aspose.Slides.SmartArt;
using (Presentation presentation = new Presentation())
{
ISlide slide = presentation.Slides[0];
ISmartArt smartArt = slide.Shapes.AddSmartArt(10, 10, 400, 300, SmartArtLayoutType.StackedList);
ISmartArtNode node = smartArt.Nodes[0].ChildNodes[0];
using (IImage image = node.Shapes[0].GetImage())
{
image.Save("SmartArt_ChildNote_Thumbnail_out.jpeg", ImageFormat.Jpeg);
}
}
```
## **FAQ**
### Is SmartArt animation supported?
Yes. SmartArt is treated as a regular shape, so you can [apply standard animations](https://docs.aspose.com/slides/net/shape-animation/) (entrance, exit, emphasis, motion paths) and adjust timing. You can also animate shapes inside SmartArt nodes when needed.
### How can I reliably locate a specific SmartArt on a slide if its internal ID is unknown?
Assign and search by [alternative text](https://reference.aspose.com/slides/net/aspose.slides/shape/alternativetext/). Setting a distinctive AltText on the SmartArt lets you find it programmatically without relying on internal identifiers.
### Will the SmartArt appearance be preserved when converting the presentation to PDF?
Yes. Aspose.Slides renders SmartArt with high visual fidelity during [PDF export](https://docs.aspose.com/slides/net/convert-powerpoint-to-pdf/), preserving layout, colors, and effects.
### Can I extract an image of the entire SmartArt (for previews or reports)?
Yes. You can render a SmartArt shape to [raster formats](https://reference.aspose.com/slides/net/aspose.slides/shape/getimage/) or to [SVG](https://reference.aspose.com/slides/net/aspose.slides/shape/writeassvg/) for scalable vector output, making it suitable for thumbnails, reports, or web use.
## Related features
- [Edit SmartArt nodes](https://docs.aspose.com/slides/features/smartart-nodes/)
## Related articles
- [Manage SmartArt Graphics in Presentations in .NET](https://docs.aspose.com/slides/net/manage-smartart-shape/)
- [Manage SmartArt in PowerPoint Presentations in .NET](https://docs.aspose.com/slides/net/manage-smartart/)
- [Create and Customize PowerPoint SmartArt in .NET](https://docs.aspose.com/slides/net/powerpoint-smartart/)
# Manage SmartArt Graphics in Presentations in .NET
> Automate PowerPoint SmartArt creation, editing, and styling in .NET using Aspose.Slides, featuring concise code examples and performance-focused guidance.
Source: https://docs.aspose.com/slides/net/manage-smartart-shape/
Updated: 2026-08-05
## **Overview**
Aspose.Slides allows you to create and manage SmartArt graphics in PowerPoint presentations programmatically. This article explains how to add a SmartArt shape to a slide, access existing SmartArt shapes, find SmartArt by a specific layout type, and update its visual appearance by changing the SmartArt style or color style.
The examples show how to work with SmartArt shapes through the presentation slide’s shape collection, check whether a shape is SmartArt and then modify or inspect its properties.
## **Create a SmartArt Shape**
Aspose.Slides for .NET now facilitates to add custom SmartArt shapes in their slides from scratch. Aspose.Slides for .NET has provided the simplest API to create SmartArt shapes in an easiest way. To create a SmartArt shape in a slide, please follow the steps below:
- Create an instance of [Presentation](https://reference.aspose.com/slides/net/aspose.slides/presentation) class.
- Obtain the reference of a slide by using its Index.
- Add a SmartArt shape by setting it LayoutType.
- Write the modified presentation as a PPTX file.
```c#
using Aspose.Slides;
using Aspose.Slides.SmartArt;
// Instantiate the presentation
using (Presentation pres = new Presentation())
{
// Access the presentation slide
ISlide slide = pres.Slides[0];
// Add Smart Art Shape
ISmartArt smart = slide.Shapes.AddSmartArt(0, 0, 400, 400, SmartArtLayoutType.BasicBlockList);
// Saving presentation
pres.Save("SimpleSmartArt_out.pptx", Aspose.Slides.Export.SaveFormat.Pptx);
}
```
## **Access a SmartArt Shape on a Slide**
The following code will be used to access the SmartArt shapes added in presentation slide. In sample code we will traverse through every shape inside the slide and check if it is a SmartArt shape. If shape is of SmartArt type then we will typecast that to SmartArt instance.
```c#
using Aspose.Slides;
using Aspose.Slides.SmartArt;
// Load the desired the presentation
using (Presentation pres = new Presentation("AccessSmartArtShape.pptx"))
{
// Traverse through every shape inside first slide
foreach (IShape shape in pres.Slides[0].Shapes)
{
// Check if shape is of SmartArt type
if (shape is ISmartArt)
{
// Typecast shape to SmartArtEx
ISmartArt smart = (ISmartArt)shape;
System.Console.WriteLine("Shape Name:" + smart.Name);
}
}
}
```
## **Access a SmartArt Shape with a Particular Layout Type**
The following sample code will help to access the SmartArt shape with particular LayoutType. Please note that you cannot change the LayoutType of the SmartArt as it is read only and is set only when the SmartArt shape is added.
- Create an instance of `Presentation` class and load the presentation with SmartArt Shape.
- Obtain the reference of first slide by using its Index.
- Traverse through every shape inside first slide.
- Check if shape is of SmartArt type and Typecast selected shape to SmartArt if it is SmartArt.
- Check the SmartArt shape with particular LayoutType and perform what is required to be done afterwards.
```c#
using Aspose.Slides;
using Aspose.Slides.SmartArt;
using (Presentation presentation = new Presentation("AccessSmartArtShape.pptx"))
{
// Traverse through every shape inside first slide
foreach (IShape shape in presentation.Slides[0].Shapes)
{
// Check if shape is of SmartArt type
if (shape is ISmartArt)
{
// Typecast shape to SmartArtEx
ISmartArt smart = (ISmartArt) shape;
// Checking SmartArt Layout
if (smart.Layout == SmartArtLayoutType.BasicBlockList)
{
Console.WriteLine("Do some thing here....");
}
}
}
}
```
## **Change a SmartArt Shape Style**
The following sample code will help to access the SmartArt shape with particular LayoutType.
- Create an instance of `Presentation` class and load the presentation with SmartArt Shape.
- Obtain the reference of first slide by using its Index.
- Traverse through every shape inside first slide.
- Check if shape is of SmartArt type and Typecast selected shape to SmartArt if it is SmartArt.
- Find the SmartArt shape with particular Style.
- Set the new Style for the SmartArt shape.
- Save the Presentation.
```c#
using Aspose.Slides;
using Aspose.Slides.Export;
using Aspose.Slides.SmartArt;
using (Presentation presentation = new Presentation("AccessSmartArtShape.pptx"))
{
// Traverse through every shape inside first slide
foreach (IShape shape in presentation.Slides[0].Shapes)
{
// Check if shape is of SmartArt type
if (shape is ISmartArt)
{
// Typecast shape to SmartArtEx
ISmartArt smart = (ISmartArt)shape;
// Checking SmartArt style
if (smart.QuickStyle == SmartArtQuickStyleType.SimpleFill)
{
// Changing SmartArt Style
smart.QuickStyle = SmartArtQuickStyleType.Cartoon;
}
}
}
// Saving Presentation
presentation.Save("ChangeSmartArtStyle_out.pptx", SaveFormat.Pptx);
}
```
## **Change a SmartArt Shape Color Style**
In this example, we will learn to change the color style for any SmartArt shape. In the following sample code will access the SmartArt shape with particular color style and will change its style.
- Create an instance of `Presentation` class and load the presentation with SmartArt Shape.
- Obtain the reference of first slide by using its Index.
- Traverse through every shape inside first slide.
- Check if shape is of SmartArt type and Typecast selected shape to SmartArt if it is SmartArt.
- Find the SmartArt shape with particular Color Style.
- Set the new Color Style for the SmartArt shape.
- Save the Presentation.
```c#
using Aspose.Slides;
using Aspose.Slides.Export;
using Aspose.Slides.SmartArt;
using (Presentation presentation = new Presentation("AccessSmartArtShape.pptx"))
{
// Traverse through every shape inside first slide
foreach (IShape shape in presentation.Slides[0].Shapes)
{
// Check if shape is of SmartArt type
if (shape is ISmartArt)
{
// Typecast shape to SmartArtEx
ISmartArt smart = (ISmartArt)shape;
// Checking SmartArt color type
if (smart.ColorStyle == SmartArtColorType.ColoredFillAccent1)
{
// Changing SmartArt color type
smart.ColorStyle = SmartArtColorType.ColorfulAccentColors;
}
}
}
// Saving Presentation
presentation.Save("ChangeSmartArtColorStyle_out.pptx", SaveFormat.Pptx);
}
```
## **FAQ**
### Can I animate SmartArt as a single object?
Yes. SmartArt is a shape, so you can apply [standard animations](https://docs.aspose.com/slides/net/powerpoint-animation/) via the animations API (entrance, exit, emphasis, motion paths) just like for other shapes.
### How can I find a specific SmartArt on a slide if I don’t know its internal ID?
Set and use the Alternative Text (AltText) and search for the shape by that value—this is a recommended way to locate the target shape.
### Can I group SmartArt with other shapes?
Yes. You can group SmartArt with other shapes (pictures, tables, etc.) and then [manipulate the group](https://docs.aspose.com/slides/net/group/).
### How do I get an image of a specific SmartArt (e.g., for a preview or report)?
Export a thumbnail/image of the shape; the library can [render individual shapes](https://docs.aspose.com/slides/net/create-shape-thumbnails/) to raster files (PNG/JPG/TIFF).
### Will the SmartArt appearance be preserved when converting the whole presentation to PDF?
Yes. The rendering engine targets high fidelity for [PDF export](https://docs.aspose.com/slides/net/convert-powerpoint-to-pdf/), with a range of quality and compatibility options.
## Related articles
- [Manage SmartArt Shape Nodes in Presentations in .NET](https://docs.aspose.com/slides/net/manage-smartart-shape-node/)
- [SmartArt](https://docs.aspose.com/slides/net/examples/elements/smart-art/)
# Manage SmartArt in PowerPoint Presentations in .NET
> Learn to build and edit PowerPoint SmartArt with Aspose.Slides for .NET using clear C# code samples that speed up slide design and automation.
Source: https://docs.aspose.com/slides/net/manage-smartart/
Updated: 2026-11-08
## **Overview**
SmartArt is a PowerPoint diagram made from nodes, node shapes, and a layout. With Aspose.Slides for .NET, you can create SmartArt, read text from its nodes, change its layout, inspect hidden nodes, configure organization chart layouts, and create picture organization charts.
## **Get Text from a SmartArt Object**
A SmartArt node can contain one or more shapes. To read text from the node shapes, iterate through [ISmartArt.AllNodes](https://reference.aspose.com/slides/net/aspose.slides.smartart/ismartart/allnodes/), then read the [ITextFrame](https://reference.aspose.com/slides/net/aspose.slides/itextframe/) returned by [ISmartArtShape.TextFrame](https://reference.aspose.com/slides/net/aspose.slides.smartart/ismartartshape/textframe/).
The example requires a presentation with at least one slide and a SmartArt object as the first shape on that slide. It prints each available text frame to the console.
```csharp
using System;
using Aspose.Slides;
using Aspose.Slides.SmartArt;
using var presentation = new Presentation("sample.pptx");
var slide = presentation.Slides[0];
var smartArt = (ISmartArt) slide.Shapes[0];
foreach (var node in smartArt.AllNodes)
{
foreach (var nodeShape in node.Shapes)
{
if (nodeShape.TextFrame != null)
{
Console.WriteLine(nodeShape.TextFrame.Text);
}
}
}
```
## **Change the Layout Type of a SmartArt Object**
The SmartArt layout controls how nodes are arranged and connected. The following example creates a SmartArt object with the [SmartArtLayoutType](https://reference.aspose.com/slides/net/aspose.slides.smartart/smartartlayouttype/) `BasicBlockList` value, changes it to the `BasicProcess` value, and saves the presentation. The position and size passed to [IShapeCollection.AddSmartArt](https://reference.aspose.com/slides/net/aspose.slides/ishapecollection/addsmartart/) are measured in points. Set [ISmartArt.Layout](https://reference.aspose.com/slides/net/aspose.slides.smartart/ismartart/layout/) to change the layout.
```csharp
using Aspose.Slides;
using Aspose.Slides.Export;
using Aspose.Slides.SmartArt;
using var presentation = new Presentation();
var slide = presentation.Slides[0];
var smartArt = slide.Shapes.AddSmartArt(10, 10, 400, 300, SmartArtLayoutType.BasicBlockList);
smartArt.Layout = SmartArtLayoutType.BasicProcess;
presentation.Save("ChangeSmartArtLayout.pptx", SaveFormat.Pptx);
```
[](https://docs.aspose.com/slides/net/manage-smartart/visual-smartart-layouts-76cc0f963910.svg)
*Illustrative .NET 26.11 fixture using the article’s BasicBlockList → BasicProcess change. The five node labels are unchanged; the layout controls their arrangement and connections.*
## **Check Whether a SmartArt Node Is Hidden**
[ISmartArtNode.IsHidden](https://reference.aspose.com/slides/net/aspose.slides.smartart/ismartartnode/ishidden/) indicates whether the node is hidden in the SmartArt data model. Hidden nodes can exist in the structure even when the selected layout does not display them as visible diagram elements.
The following example adds a node to a SmartArt object that uses the [SmartArtLayoutType](https://reference.aspose.com/slides/net/aspose.slides.smartart/smartartlayouttype/) `RadialCycle` value and checks the added node's hidden state. It prints a message if the node is hidden and saves the diagram.
```csharp
using System;
using Aspose.Slides;
using Aspose.Slides.Export;
using Aspose.Slides.SmartArt;
using var presentation = new Presentation();
var slide = presentation.Slides[0];
var smartArt = slide.Shapes.AddSmartArt(10, 10, 400, 300, SmartArtLayoutType.RadialCycle);
var node = smartArt.AllNodes.AddNode();
var isHidden = node.IsHidden;
if (isHidden)
{
Console.WriteLine("The node is hidden in the SmartArt data model.");
}
presentation.Save("CheckSmartArtHiddenProperty.pptx", SaveFormat.Pptx);
```
## **Get or Set the Organization Chart Layout**
For SmartArt diagrams that use an organization chart layout, [ISmartArtNode.OrganizationChartLayout](https://reference.aspose.com/slides/net/aspose.slides.smartart/ismartartnode/organizationchartlayout/) defines how child nodes are arranged under a parent node. For example, you can set child nodes to hang from the left, right, or both sides, depending on the selected [OrganizationChartLayoutType](https://reference.aspose.com/slides/net/aspose.slides.smartart/organizationchartlayouttype/).
The following example creates an organization chart and sets the layout for the first node to the [OrganizationChartLayoutType](https://reference.aspose.com/slides/net/aspose.slides.smartart/organizationchartlayouttype/) `LeftHanging` value. The zero-based index `0` selects the first top-level node; its child nodes use the selected arrangement. The modified presentation is then saved.
```csharp
using Aspose.Slides;
using Aspose.Slides.Export;
using Aspose.Slides.SmartArt;
using var presentation = new Presentation();
var slide = presentation.Slides[0];
var smartArt = slide.Shapes.AddSmartArt(10, 10, 400, 300, SmartArtLayoutType.OrganizationChart);
var rootNode = smartArt.Nodes[0];
rootNode.OrganizationChartLayout = OrganizationChartLayoutType.LeftHanging;
presentation.Save("OrganizationChartLayout.pptx", SaveFormat.Pptx);
```
## **Create a Picture Organization Chart**
A picture organization chart is a SmartArt layout designed for hierarchy diagrams that include image placeholders. Use the [SmartArtLayoutType](https://reference.aspose.com/slides/net/aspose.slides.smartart/smartartlayouttype/) `PictureOrganizationChart` value when adding the SmartArt object to a slide. This example saves a diagram with image placeholders; it does not populate the placeholders with images.
```csharp
using Aspose.Slides;
using Aspose.Slides.Export;
using Aspose.Slides.SmartArt;
using var presentation = new Presentation();
var slide = presentation.Slides[0];
var smartArt = slide.Shapes.AddSmartArt(0, 0, 400, 400, SmartArtLayoutType.PictureOrganizationChart);
presentation.Save("PictureOrganizationChart.pptx", SaveFormat.Pptx);
```
## **Convert Legacy Diagrams to Groups of Shapes**
When modernizing an existing presentation, you may need to update an organization chart originally created in PowerPoint 97–2003. Aspose.Slides represents these legacy diagrams as [ILegacyDiagram](https://reference.aspose.com/slides/net/aspose.slides/ilegacydiagram/) objects. Use [LegacyDiagram.ConvertToGroupShape](https://reference.aspose.com/slides/net/aspose.slides/legacydiagram/converttogroupshape/) to convert a diagram into a group of shapes so that you can edit individual visual elements. See the [LegacyDiagram API Reference](https://reference.aspose.com/slides/net/aspose.slides/legacydiagram/) for details.
Conversion adds a new group to the shape collection without removing the original diagram. After successful conversion, remove the original with [IShapeCollection.Remove](https://reference.aspose.com/slides/net/aspose.slides/ishapecollection/remove/) to avoid duplicate content. Collect the legacy diagrams into an array before converting them so that adding and removing shapes does not disrupt iteration.
The following example opens a presentation, searches every slide, converts the diagrams to groups of shapes, and saves the updated presentation as PPTX.
```csharp
using System.Linq;
using Aspose.Slides;
using Aspose.Slides.Export;
using var presentation = new Presentation("legacy-diagrams.ppt");
foreach (var slide in presentation.Slides)
{
var legacyDiagrams = slide.Shapes.OfType().ToArray();
foreach (var legacyDiagram in legacyDiagrams)
{
var groupShape = legacyDiagram.ConvertToGroupShape();
if (groupShape != null)
{
slide.Shapes.Remove(legacyDiagram);
}
}
}
presentation.Save("modernized.pptx", SaveFormat.Pptx);
```
The saved presentation contains editable groups of shapes in place of the converted legacy diagrams, with no original diagrams left alongside them. Open the PPTX in PowerPoint to edit individual elements within each group, such as their text, fill, or position.
## **FAQ**
**Does SmartArt support mirroring or reversing for RTL languages?**
Yes. The [IsReversed](https://reference.aspose.com/slides/net/aspose.slides.smartart/smartart/isreversed/) property switches the diagram direction from left-to-right to right-to-left, or back, when the selected SmartArt layout supports reversal.
**How can I copy SmartArt to the same slide or to another presentation while preserving formatting?**
You can [clone the SmartArt shape](https://docs.aspose.com/slides/net/shape-manipulations/) with [ShapeCollection.AddClone](https://reference.aspose.com/slides/net/aspose.slides/shapecollection/addclone/) or [clone the whole slide](https://docs.aspose.com/slides/net/clone-slides/) that contains the SmartArt. Both approaches preserve size, position, and formatting.
**How do I render SmartArt to a raster image for preview or web export?**
[Render the slide](https://docs.aspose.com/slides/net/convert-powerpoint-to-png/) or the whole presentation to PNG or JPEG. SmartArt is rendered as part of the slide.
**How can I find a specific SmartArt object on a slide if there are several?**
Set a distinctive [AlternativeText](https://reference.aspose.com/slides/net/aspose.slides/shape/alternativetext/) or [Name](https://reference.aspose.com/slides/net/aspose.slides/shape/name/) value on the SmartArt shape, search for that value in [Slide.Shapes](https://reference.aspose.com/slides/net/aspose.slides/baseslide/shapes/), and then check that the matching shape is an [ISmartArt](https://reference.aspose.com/slides/net/aspose.slides.smartart/ismartart/).
## Related features
- [Read and add SmartArt](https://docs.aspose.com/slides/features/smartart/)
## Related articles
- [Create and Customize PowerPoint SmartArt in .NET](https://docs.aspose.com/slides/net/powerpoint-smartart/)
- [Manage SmartArt Shape Nodes in Presentations in .NET](https://docs.aspose.com/slides/net/manage-smartart-shape-node/)
- [Public API and Backwards Incompatible Changes in Aspose.Slides for .NET 15.4.0](https://docs.aspose.com/slides/net/public-api-and-backwards-incompatible-changes-in-aspose-slides-for-net-15-4-0/)
# Manage Presentation Tables in .NET
> Create & edit tables in PowerPoint slides with Aspose.Slides for .NET. Discover simple C# code examples to streamline your table workflows.
Source: https://docs.aspose.com/slides/net/manage-table/
Updated: 2026-10-26
## **Introduction**
Tables in PowerPoint organize information into rows and columns, making it easier to read and compare values.
Aspose.Slides provides the [Table](https://reference.aspose.com/slides/net/aspose.slides/table/) class, [ITable](https://reference.aspose.com/slides/net/aspose.slides/itable/) interface, [Cell](https://reference.aspose.com/slides/net/aspose.slides/cell/) class, [ICell](https://reference.aspose.com/slides/net/aspose.slides/icell/) interface, and other types to allow you to create, update, and manage tables in presentations.
## **Create a Table from Scratch**
Create a table by specifying its position, column widths, and row heights. After adding it to a slide, you can format cell borders, merge cells, and insert text.
1. Create an instance of the [Presentation](https://reference.aspose.com/slides/net/aspose.slides/presentation/) class.
2. Get a reference to the slide by its index.
3. Define an array of column widths in points.
4. Define an array of row heights in points.
5. Add an [ITable](https://reference.aspose.com/slides/net/aspose.slides/itable/) object to the slide through the [AddTable](https://reference.aspose.com/slides/net/aspose.slides/ishapecollection/addtable/) method.
6. Iterate through each [ICell](https://reference.aspose.com/slides/net/aspose.slides/icell/) to apply formatting to the top, bottom, right, and left borders.
7. Merge the first two cells of the table's first row.
8. Access the merged cell through its [TextFrame](https://reference.aspose.com/slides/net/aspose.slides/icell/textframe/) property.
9. Set the text in the merged cell.
10. Save the modified presentation.
The example below creates a table with three columns and five rows at (100, 50) points. It applies red borders with a width of 5 points, merges the first two cells in the first row, and saves the result as `table.pptx`.
```csharp
using System.Drawing;
using Aspose.Slides;
using Aspose.Slides.Export;
using var presentation = new Presentation();
var slide = presentation.Slides[0];
var columnWidths = new double[] { 50, 50, 50 };
var rowHeights = new double[] { 50, 30, 30, 30, 30 };
var table = slide.Shapes.AddTable(100, 50, columnWidths, rowHeights);
foreach (var row in table.Rows)
{
foreach (var cell in row)
{
var cellFormat = cell.CellFormat;
cellFormat.BorderTop.FillFormat.FillType = FillType.Solid;
cellFormat.BorderTop.FillFormat.SolidFillColor.Color = Color.Red;
cellFormat.BorderTop.Width = 5;
cellFormat.BorderBottom.FillFormat.FillType = FillType.Solid;
cellFormat.BorderBottom.FillFormat.SolidFillColor.Color = Color.Red;
cellFormat.BorderBottom.Width = 5;
cellFormat.BorderLeft.FillFormat.FillType = FillType.Solid;
cellFormat.BorderLeft.FillFormat.SolidFillColor.Color = Color.Red;
cellFormat.BorderLeft.Width = 5;
cellFormat.BorderRight.FillFormat.FillType = FillType.Solid;
cellFormat.BorderRight.FillFormat.SolidFillColor.Color = Color.Red;
cellFormat.BorderRight.Width = 5;
}
}
table.MergeCells(table[0, 0], table[1, 0], false);
table[0, 0].TextFrame.Text = "Merged Cells";
presentation.Save("table.pptx", SaveFormat.Pptx);
```
## **Numbering in a Standard Table**
In a standard table, cell indices are zero-based and use the order (column, row). The first cell is indexed as (0, 0).
For example, the cells in a table with 4 columns and 4 rows are numbered this way:
| (0, 0) | (1, 0) | (2, 0) | (3, 0) |
| :----- | :----- | :----- | :----- |
| (0, 1) | (1, 1) | (2, 1) | (3, 1) |
| (0, 2) | (1, 2) | (2, 2) | (3, 2) |
| (0, 3) | (1, 3) | (2, 3) | (3, 3) |
This example creates the 4 × 4 table illustrated above, with column widths and row heights of 70 points and red cell borders with a width of 5 points. The coordinates illustrate cell indices; the example leaves the cells empty and saves the table as `StandardTables_out.pptx`.
```csharp
using System.Drawing;
using Aspose.Slides;
using Aspose.Slides.Export;
using var presentation = new Presentation();
var slide = presentation.Slides[0];
var columnWidths = new double[] { 70, 70, 70, 70 };
var rowHeights = new double[] { 70, 70, 70, 70 };
var table = slide.Shapes.AddTable(100, 50, columnWidths, rowHeights);
foreach (var row in table.Rows)
{
foreach (var cell in row)
{
var cellFormat = cell.CellFormat;
cellFormat.BorderTop.FillFormat.FillType = FillType.Solid;
cellFormat.BorderTop.FillFormat.SolidFillColor.Color = Color.Red;
cellFormat.BorderTop.Width = 5;
cellFormat.BorderBottom.FillFormat.FillType = FillType.Solid;
cellFormat.BorderBottom.FillFormat.SolidFillColor.Color = Color.Red;
cellFormat.BorderBottom.Width = 5;
cellFormat.BorderLeft.FillFormat.FillType = FillType.Solid;
cellFormat.BorderLeft.FillFormat.SolidFillColor.Color = Color.Red;
cellFormat.BorderLeft.Width = 5;
cellFormat.BorderRight.FillFormat.FillType = FillType.Solid;
cellFormat.BorderRight.FillFormat.SolidFillColor.Color = Color.Red;
cellFormat.BorderRight.Width = 5;
}
}
presentation.Save("StandardTables_out.pptx", SaveFormat.Pptx);
```
## **Access an Existing Table**
Tables are stored in a slide's shape collection. Iterate through the shapes to locate a table, then use the [ITable](https://reference.aspose.com/slides/net/aspose.slides/itable/) interface to read or update its cells.
1. Load the presentation using the [Presentation](https://reference.aspose.com/slides/net/aspose.slides/presentation/) class.
2. Get a reference to the slide containing the table by its index.
3. Iterate through the [IShape](https://reference.aspose.com/slides/net/aspose.slides/ishape/) objects and stop when a table is found. If the slide contains several tables, use [AlternativeText](https://reference.aspose.com/slides/net/aspose.slides/ishape/alternativetext/) to identify the one you need.
4. Update the text in the target cell.
5. Save the modified presentation.
The example below opens `UpdateExistingTable.pptx` and finds the first table on the first slide. It sets the cell at column 0, row 1 to `New` and saves the result as `table1_out.pptx`. The input must contain at least one slide, and the first table on that slide must have at least one column and two rows.
```csharp
using Aspose.Slides;
using Aspose.Slides.Export;
using var presentation = new Presentation("UpdateExistingTable.pptx");
var slide = presentation.Slides[0];
ITable? table = null;
foreach (var shape in slide.Shapes)
{
if (shape is ITable candidateTable)
{
table = candidateTable;
break;
}
}
table![0, 1].TextFrame.Text = "New";
presentation.Save("table1_out.pptx", SaveFormat.Pptx);
```
To resize a row in an existing table and understand why its actual height can exceed the requested minimum, see [Control Row Height](https://docs.aspose.com/slides/net/manage-rows-and-columns/#control-row-height).
## **Find the Cell That Owns a Text Frame**
When generic text-processing code receives an [ITextFrame](https://reference.aspose.com/slides/net/aspose.slides/itextframe/) from a table, use the [ITextFrame.ParentCell](https://reference.aspose.com/slides/net/aspose.slides/itextframe/parentcell/) property to retrieve the owning [ICell](https://reference.aspose.com/slides/net/aspose.slides/icell/). For a table-cell text frame, [ITextFrame.ParentCell](https://reference.aspose.com/slides/net/aspose.slides/itextframe/parentcell/) is set and [ITextFrame.ParentShape](https://reference.aspose.com/slides/net/aspose.slides/itextframe/parentshape/) is `null`, even though the table itself is a shape.
The cell coordinates are available through the read-only [ICell.FirstColumnIndex](https://reference.aspose.com/slides/net/aspose.slides/icell/firstcolumnindex/) and [ICell.FirstRowIndex](https://reference.aspose.com/slides/net/aspose.slides/icell/firstrowindex/) properties. [ITextFrame.ParentCell](https://reference.aspose.com/slides/net/aspose.slides/itextframe/parentcell/) is also read-only: it provides navigation to the owner but does not change ownership. Always check the returned cell for `null` before using it.
For a complete example that identifies table-cell and shape owners, including shapes associated with SmartArt nodes, see [Search and Replace Text](https://docs.aspose.com/slides/net/search-and-replace-text/).
## **Align Text in a Table**
You can control the vertical anchoring and text direction of individual table cells. The example in this section centers text within the first cell and rotates it by 270 degrees.
1. Create an instance of the [Presentation](https://reference.aspose.com/slides/net/aspose.slides/presentation/) class.
2. Get a reference to the slide by its index.
3. Add an [ITable](https://reference.aspose.com/slides/net/aspose.slides/itable/) object to the slide.
4. Access an [ITextFrame](https://reference.aspose.com/slides/net/aspose.slides/itextframe/) object from the table.
5. Access the first [IParagraph](https://reference.aspose.com/slides/net/aspose.slides/iparagraph/) and set its text and color.
6. Set the cell's [TextAnchorType](https://reference.aspose.com/slides/net/aspose.slides/icell/textanchortype/) and [TextVerticalType](https://reference.aspose.com/slides/net/aspose.slides/icell/textverticaltype/).
7. Save the modified presentation.
This example creates a 4 × 4 table with column widths of 120 points and row heights of 100 points. It formats the text in cell (0, 0), adds values to the remaining cells in the first row, and saves the result as `Vertical_Align_Text_out.pptx`.
```csharp
using System.Drawing;
using Aspose.Slides;
using Aspose.Slides.Export;
using var presentation = new Presentation();
var slide = presentation.Slides[0];
var columnWidths = new double[] { 120, 120, 120, 120 };
var rowHeights = new double[] { 100, 100, 100, 100 };
var table = slide.Shapes.AddTable(100, 50, columnWidths, rowHeights);
table[1, 0].TextFrame.Text = "10";
table[2, 0].TextFrame.Text = "20";
table[3, 0].TextFrame.Text = "30";
var cell = table[0, 0];
var paragraph = cell.TextFrame.Paragraphs[0];
var portion = paragraph.Portions[0];
portion.Text = "Text here";
portion.PortionFormat.FillFormat.FillType = FillType.Solid;
portion.PortionFormat.FillFormat.SolidFillColor.Color = Color.Black;
cell.TextAnchorType = TextAnchorType.Center;
cell.TextVerticalType = TextVerticalType.Vertical270;
presentation.Save("Vertical_Align_Text_out.pptx", SaveFormat.Pptx);
```
## **Set Text Formatting on the Table Level**
Use [SetTextFormat](https://reference.aspose.com/slides/net/aspose.slides/ibulktextformattable/settextformat/) to apply text formatting to all cells in a table. Its overloads accept portion, paragraph, and text frame formatting, so you can set these properties without iterating through individual cells.
1. Load the presentation using the [Presentation](https://reference.aspose.com/slides/net/aspose.slides/presentation/) class.
2. Get a reference to the slide by its index.
3. Access an [ITable](https://reference.aspose.com/slides/net/aspose.slides/itable/) object from the slide.
4. Set the [FontHeight](https://reference.aspose.com/slides/net/aspose.slides/baseportionformat/fontheight/) for the text.
5. Set the [Alignment](https://reference.aspose.com/slides/net/aspose.slides/iparagraphformat/alignment/) and [MarginRight](https://reference.aspose.com/slides/net/aspose.slides/iparagraphformat/marginright/).
6. Set the [TextVerticalType](https://reference.aspose.com/slides/net/aspose.slides/textframeformat/textverticaltype/).
7. Save the modified presentation.
The example below opens `table.pptx`, which must contain at least one slide with a table as its first shape. It sets the font size to 25 points, right-aligns paragraphs with a right margin of 20 points, and makes the text vertical. The formatted presentation is saved as `result.pptx`.
```csharp
using Aspose.Slides;
using Aspose.Slides.Export;
using var presentation = new Presentation("table.pptx");
var slide = presentation.Slides[0];
var table = (ITable)slide.Shapes[0];
var portionFormat = new PortionFormat();
portionFormat.FontHeight = 25;
table.SetTextFormat(portionFormat);
var paragraphFormat = new ParagraphFormat();
paragraphFormat.Alignment = TextAlignment.Right;
paragraphFormat.MarginRight = 20;
table.SetTextFormat(paragraphFormat);
var textFrameFormat = new TextFrameFormat();
textFrameFormat.TextVerticalType = TextVerticalType.Vertical;
table.SetTextFormat(textFrameFormat);
presentation.Save("result.pptx", SaveFormat.Pptx);
```
## **Get Table Style Properties**
Use [StylePreset](https://reference.aspose.com/slides/net/aspose.slides/itable/stylepreset/) to read or assign a table's preset style. This example applies [TableStylePreset.DarkStyle1](https://reference.aspose.com/slides/net/aspose.slides/tablestylepreset/) to one table, prints the preset name, and assigns the same preset to a second table. Both tables are saved in `table-style.pptx`.
```csharp
using System;
using Aspose.Slides;
using Aspose.Slides.Export;
using var presentation = new Presentation();
var slide = presentation.Slides[0];
var columnWidths = new double[] { 100, 150 };
var rowHeights = new double[] { 5, 5, 5 };
var table = slide.Shapes.AddTable(10, 10, columnWidths, rowHeights);
table.StylePreset = TableStylePreset.DarkStyle1;
var stylePreset = table.StylePreset;
Console.WriteLine($"Table style preset: {stylePreset}");
var anotherTable = slide.Shapes.AddTable(10, 100, columnWidths, rowHeights);
anotherTable.StylePreset = stylePreset;
presentation.Save("table-style.pptx", SaveFormat.Pptx);
```
## **Lock Aspect Ratio of a Table**
A table's aspect ratio is the ratio of its width to its height. Use [AspectRatioLocked](https://reference.aspose.com/slides/net/aspose.slides/igraphicalobjectlock/aspectratiolocked/) to lock this ratio for a table.
The example below opens `pres.pptx`, which must contain at least one slide with a table as its first shape. It prints the current lock state, enables the aspect ratio lock, prints the updated state (`True`), and saves the result as `pres-out.pptx`.
```csharp
using System;
using Aspose.Slides;
using Aspose.Slides.Export;
using var presentation = new Presentation("pres.pptx");
var slide = presentation.Slides[0];
var table = (ITable)slide.Shapes[0];
Console.WriteLine($"Lock aspect ratio set: {table.ShapeLock.AspectRatioLocked}");
table.ShapeLock.AspectRatioLocked = true;
Console.WriteLine($"Lock aspect ratio set: {table.ShapeLock.AspectRatioLocked}");
presentation.Save("pres-out.pptx", SaveFormat.Pptx);
```
## **FAQ**
**Can I enable right-to-left (RTL) reading direction for an entire table and the text in its cells?**
Yes. The table exposes a [RightToLeft](https://reference.aspose.com/slides/net/aspose.slides/table/righttoleft/) property, and paragraphs have [ParagraphFormat.RightToLeft](https://reference.aspose.com/slides/net/aspose.slides/paragraphformat/righttoleft/). Using both ensures the correct RTL order and rendering inside cells.
**How can I prevent users from moving or resizing a table in the final file?**
Use [shape locks](https://docs.aspose.com/slides/net/applying-protection-to-presentation/) to disable moving, resizing, selection, etc. These locks apply to tables as well.
**Is inserting an image inside a cell as a background supported?**
Yes. You can set a [picture fill](https://reference.aspose.com/slides/net/aspose.slides/picturefillformat/) for a cell; the image will cover the cell area according to the chosen mode (stretch or tile).
Related feature: [Create tables on slides](https://docs.aspose.com/slides/features/create-tables/).
## Related features
- [Apply table styles](https://docs.aspose.com/slides/features/table-styles/)
## Related articles
- [Manage Rows and Columns in PowerPoint Tables in .NET](https://docs.aspose.com/slides/net/manage-rows-and-columns/)
- [Manage Table Cells in Presentations in .NET](https://docs.aspose.com/slides/net/manage-cells/)
- [Create and Customize PowerPoint Tables in .NET](https://docs.aspose.com/slides/net/powerpoint-table/)
# Manage Presentation Text in .NET
> Learn to manage text in Aspose.Slides for .NET: edit placeholders, fonts, paragraphs, bullets, and more with clear C# code examples for PPT, PPTX, and ODP.
Source: https://docs.aspose.com/slides/net/manage-text/
Updated: 2025-11-12
---
lastmod: 2025-11-12T18:59:28+04:00
title: Manage Presentation Text in .NET
linktitle: Manage Text
type: docs
weight: 50
url: /net/manage-text/
keywords:
- text
- placeholder
- text box
- autofit
- paragraph
- format text
- animate text
- bulleted list
- numbered list
- superscript
- subscript
- text extration
- localization
- WordArt
- PowerPoint
- OpenDocument
- presentation
- .NET
- C#
- Aspose.Slides
description: "Learn to manage text in Aspose.Slides for .NET: edit placeholders, fonts, paragraphs, bullets, and more with clear C# code examples for PPT, PPTX, and ODP."
---
## Related articles
- [Manage Bulleted and Numbered Lists in Presentations in .NET](https://docs.aspose.com/slides/net/manage-lists/)
- [Manage Superscript and Subscript in Presentations in .NET](https://docs.aspose.com/slides/net/superscript-and-subscript/)
# Manage Text Boxes in Presentations in .NET
> Create, identify, format, and update text boxes in PowerPoint and OpenDocument presentations using Aspose.Slides for .NET.
Source: https://docs.aspose.com/slides/net/manage-textbox/
Updated: 2026-11-08
## **Introduction**
In Aspose.Slides for .NET, slide text is stored in text frames that belong to shapes. The [IAutoShape](https://reference.aspose.com/slides/net/aspose.slides/iautoshape/) interface represents the most common text-bearing shape and exposes its text through the [IAutoShape.TextFrame](https://reference.aspose.com/slides/net/aspose.slides/iautoshape/textframe/) property.
Every auto shape implements [IShape](https://reference.aspose.com/slides/net/aspose.slides/ishape/), but not every shape is an auto shape or supports a text frame. When processing an existing presentation, check that a shape implements `IAutoShape` before accessing its text.
## **Create a Text Box on a Slide**
To create a text box, add an auto shape to a slide, add text to its text frame, and save the presentation. The following example creates a rectangular text box:
```csharp
using Aspose.Slides;
using Aspose.Slides.Export;
using var presentation = new Presentation();
var slide = presentation.Slides[0];
var textBox = slide.Shapes.AddAutoShape(ShapeType.Rectangle, 150, 75, 300, 50);
textBox.AddTextFrame("Aspose TextBox");
presentation.Save("TextBox.pptx", SaveFormat.Pptx);
```
The coordinates and dimensions passed to [IShapeCollection.AddAutoShape](https://reference.aspose.com/slides/net/aspose.slides/ishapecollection/addautoshape/) are measured in points. [IAutoShape.AddTextFrame](https://reference.aspose.com/slides/net/aspose.slides/iautoshape/addtextframe/) initializes the text frame with the supplied text.
## **Check for a Text Box Shape**
Use the [AutoShape.IsTextBox](https://reference.aspose.com/slides/net/aspose.slides/autoshape/istextbox/) property to determine whether an auto shape is treated as a text box. This is useful when a presentation contains both text-bearing and purely graphical auto shapes.

The following example inspects every auto shape in a presentation:
```csharp
using System;
using Aspose.Slides;
using var presentation = new Presentation();
var slide = presentation.Slides[0];
var textBox = slide.Shapes.AddAutoShape(ShapeType.Rectangle, 10, 10, 120, 40);
textBox.AddTextFrame("Text box");
slide.Shapes.AddAutoShape(ShapeType.Ellipse, 150, 10, 40, 40);
foreach (var currentSlide in presentation.Slides)
{
foreach (var shape in currentSlide.Shapes)
{
if (shape is IAutoShape autoShape)
{
Console.WriteLine(autoShape.IsTextBox ? "The shape is a text box." : "The shape is not a text box.");
}
}
}
```
A newly added auto shape is not considered a text box until it contains non-empty text. You can supply that text through [IAutoShape.AddTextFrame](https://reference.aspose.com/slides/net/aspose.slides/iautoshape/addtextframe/) or [ITextFrame.Text](https://reference.aspose.com/slides/net/aspose.slides/itextframe/text/). Adding or assigning an empty string leaves `IsTextBox` set to `false`:
```csharp
using System;
using Aspose.Slides;
using var presentation = new Presentation();
var slide = presentation.Slides[0];
var shape1 = slide.Shapes.AddAutoShape(ShapeType.Rectangle, 10, 10, 100, 40);
shape1.AddTextFrame("Shape 1");
Console.WriteLine(shape1.IsTextBox);
var shape2 = slide.Shapes.AddAutoShape(ShapeType.Rectangle, 10, 70, 100, 40);
shape2.TextFrame.Text = "Shape 2";
Console.WriteLine(shape2.IsTextBox);
var shape3 = slide.Shapes.AddAutoShape(ShapeType.Rectangle, 10, 130, 100, 40);
shape3.AddTextFrame("");
Console.WriteLine(shape3.IsTextBox);
var shape4 = slide.Shapes.AddAutoShape(ShapeType.Rectangle, 10, 190, 100, 40);
shape4.TextFrame.Text = "";
Console.WriteLine(shape4.IsTextBox);
```
The first two calls print `True`; the last two print `False`.
## **Find the Shape That Owns a Text Frame**
Generic text-processing code may receive an [ITextFrame](https://reference.aspose.com/slides/net/aspose.slides/itextframe/) without knowing which presentation object contains it. Use the read-only [ITextFrame.ParentShape](https://reference.aspose.com/slides/net/aspose.slides/itextframe/parentshape/) property to navigate back to its owning [IShape](https://reference.aspose.com/slides/net/aspose.slides/ishape/).
For a text frame owned by an auto shape or another text-bearing shape, `ParentShape` contains the owner and [ITextFrame.ParentCell](https://reference.aspose.com/slides/net/aspose.slides/itextframe/parentcell/) is `null`. Check the returned value before accessing it. To identify both shape and table-cell owners, including shapes associated with SmartArt nodes, see [Search and Replace Text](https://docs.aspose.com/slides/net/search-and-replace-text/).
## **Get the Shape's Text Rectangle**
Starting with Aspose.Slides for .NET 26.11, [ITextFrame.GetTextRect](https://reference.aspose.com/slides/net/aspose.slides/itextframe/gettextrect/) returns the text area defined by the parent shape's geometry. Its coordinates and dimensions are in points, relative to that shape's top-left corner. For example, an ellipse has a smaller text rectangle than its outer bounds.
This rectangle describes the shape, not the rendered characters. Changing the text or text-frame margins does not turn it into a measurement of occupied text. Use [paragraph bounds](https://docs.aspose.com/slides/net/paragraph-bounds/) or [portion bounds](https://docs.aspose.com/slides/net/portion-bounds/) for rendered-text measurements.
After [installing Aspose.Slides for .NET](https://docs.aspose.com/slides/net/installation/) 26.11 or later, run this example to draw the geometry text rectangle in red. The shapes are unrotated and ungrouped, so adding their X/Y position is sufficient to place the overlay on the slide.
```csharp
using System;
using System.Drawing;
using Aspose.Slides;
using Aspose.Slides.Export;
using var presentation = new Presentation();
var slide = presentation.Slides[0];
foreach (var shapeType in new[] { ShapeType.Rectangle, ShapeType.Ellipse })
{
var x = shapeType == ShapeType.Rectangle ? 50 : 300;
var shape = slide.Shapes.AddAutoShape(shapeType, x, 200, 200, 100);
shape.AddTextFrame("Text area");
var rectangle = shape.TextFrame.GetTextRect();
Console.WriteLine($"{shapeType}: {rectangle}");
var overlayX = shape.X + rectangle.X;
var overlayY = shape.Y + rectangle.Y;
var outline = slide.Shapes.AddAutoShape(ShapeType.Rectangle, overlayX, overlayY, rectangle.Width, rectangle.Height);
outline.FillFormat.FillType = FillType.NoFill;
outline.LineFormat.FillFormat.FillType = FillType.Solid;
outline.LineFormat.FillFormat.SolidFillColor.Color = Color.Red;
}
presentation.Save("text-rectangles.pptx", SaveFormat.Pptx);
```
For the 200 × 100 point shapes above, the rectangle returns `(0, 0, 200, 100)`; the ellipse returns approximately `(29.289, 14.645, 141.421, 70.711)`. The method also reads a custom geometry's declared text rectangle. It does not apply slide-space rotation or group transforms; account for those separately when positioning an overlay. A text frame without a geometry shape, such as a table-cell text frame, can throw `InvalidOperationException`.
[](https://docs.aspose.com/slides/net/manage-textbox/visual-manage-textbox-23a5da7fcec3.svg)
*The red outlines use shape-local X, Y, width and height in points. The dashed box shows the measured text portion inside the rectangle.*
## **Add Columns to a Text Box**
The [ITextFrameFormat.ColumnCount](https://reference.aspose.com/slides/net/aspose.slides/itextframeformat/columncount/) property divides the text frame into columns, while [ITextFrameFormat.ColumnSpacing](https://reference.aspose.com/slides/net/aspose.slides/itextframeformat/columnspacing/) sets the gap between columns in points. Both settings belong to [ITextFrameFormat](https://reference.aspose.com/slides/net/aspose.slides/itextframeformat/) and can be changed through the text frame of an existing text box. Text reflows between columns inside the same shape; it does not continue into another shape.
The following example creates a three-column text box with 10 points between columns, saves the presentation, and reads the stored settings back from the output file:
```csharp
using System;
using Aspose.Slides;
using Aspose.Slides.Export;
using var presentation = new Presentation();
var slide = presentation.Slides[0];
var textBox = slide.Shapes.AddAutoShape(ShapeType.Rectangle, 100, 100, 300, 200);
textBox.AddTextFrame("This text is distributed automatically across all columns in the text box.");
var textFrameFormat = textBox.TextFrame.TextFrameFormat;
textFrameFormat.ColumnCount = 3;
textFrameFormat.ColumnSpacing = 10;
presentation.Save("TextBoxColumns.pptx", SaveFormat.Pptx);
using var savedPresentation = new Presentation("TextBoxColumns.pptx");
var savedTextBox = (IAutoShape)savedPresentation.Slides[0].Shapes[0];
var savedFormat = savedTextBox.TextFrame.TextFrameFormat;
Console.WriteLine($"Columns: {savedFormat.ColumnCount}; spacing: {savedFormat.ColumnSpacing} points");
```
## **Extract Text from Individual Columns**
Use [TextFrame.SplitTextByColumns](https://reference.aspose.com/slides/net/aspose.slides/textframe/splittextbycolumns/) to retrieve the text assigned to each visual column in an existing text frame. The method returns one string for each column, in column-based reading order. A single-column text frame produces an array with one element, and an empty column is represented by an empty string. The strings contain plain text only; portion-level formatting is not preserved.
This is useful when you need to:
- Extract text while preserving its column-based reading order.
- Index or compare the content of multi-column slides.
- Export each column to a separate file, database field, or other destination.
- Inspect how text is redistributed after changing [ITextFrameFormat.ColumnCount](https://reference.aspose.com/slides/net/aspose.slides/itextframeformat/columncount/), [ITextFrameFormat.ColumnSpacing](https://reference.aspose.com/slides/net/aspose.slides/itextframeformat/columnspacing/), the font, or the text-frame size.
The method reports the text distributed within the current [ITextFrame](https://reference.aspose.com/slides/net/aspose.slides/itextframe/); it does not automatically flow text between separate shapes or text boxes. Column distribution can depend on available fonts and other text-layout settings, so make sure that the required fonts are available when consistent results are important.
The following example loads a presentation, finds the first multi-column auto shape with a text frame, reads its configured column count, and writes the text from every column to a separate file. Shapes that do not provide a text frame are skipped.
```csharp
using System;
using System.IO;
using Aspose.Slides;
using var presentation = new Presentation("MultiColumnText.pptx");
IAutoShape? textBox = null;
foreach (var shape in presentation.Slides[0].Shapes)
{
if (shape is IAutoShape autoShape && autoShape.TextFrame is not null)
{
var columnCount = autoShape.TextFrame.TextFrameFormat.ColumnCount;
if (columnCount > 1)
{
textBox = autoShape;
break;
}
}
}
if (textBox is null)
{
Console.WriteLine("No multi-column text frame was found.");
}
else
{
var textFrame = textBox.TextFrame;
var configuredColumnCount = textFrame.TextFrameFormat.ColumnCount;
var columnTexts = textFrame.SplitTextByColumns();
Console.WriteLine($"Configured columns: {configuredColumnCount}");
for (var columnIndex = 0; columnIndex < columnTexts.Length; columnIndex++)
{
var columnNumber = columnIndex + 1;
var columnText = columnTexts[columnIndex];
Console.WriteLine($"Column {columnNumber}: {columnText}");
File.WriteAllText($"Column-{columnNumber}.txt", columnText);
}
}
```
## **Update Text**
To update text throughout a presentation, iterate through the slides and shapes, select auto shapes, and then edit their text portions. Working at the portion level lets you change both text and character formatting.
The following example replaces every occurrence of `years` with `months` in auto-shape text and makes each affected portion bold:
```csharp
using Aspose.Slides;
using Aspose.Slides.Export;
using var presentation = new Presentation("Text.pptx");
foreach (var slide in presentation.Slides)
{
foreach (var shape in slide.Shapes)
{
if (shape is not IAutoShape autoShape)
{
continue;
}
foreach (var paragraph in autoShape.TextFrame.Paragraphs)
{
foreach (var portion in paragraph.Portions)
{
portion.Text = portion.Text.Replace("years", "months");
portion.PortionFormat.FontBold = NullableBool.True;
}
}
}
}
presentation.Save("TextChanged.pptx", SaveFormat.Pptx);
```
This traversal updates text only in auto shapes. Text stored in tables, charts, SmartArt, or grouped shapes requires traversal of those objects' own collections.
## **Add a Text Box with a Hyperlink**
A hyperlink can be assigned to a specific text portion, so only that text acts as the clickable link. Use [IHyperlinkManager.SetExternalHyperlinkClick](https://reference.aspose.com/slides/net/aspose.slides/ihyperlinkmanager/setexternalhyperlinkclick/) to associate the portion with an external URL.
The following example creates linked text and saves it to a presentation:
```csharp
using Aspose.Slides;
using Aspose.Slides.Export;
using var presentation = new Presentation();
var slide = presentation.Slides[0];
var textBox = slide.Shapes.AddAutoShape(ShapeType.Rectangle, 150, 150, 200, 50);
textBox.AddTextFrame("Aspose.Slides");
var textPortion = textBox.TextFrame.Paragraphs[0].Portions[0];
textPortion.PortionFormat.HyperlinkManager.SetExternalHyperlinkClick("https://www.aspose.com/");
presentation.Save("Hyperlink.pptx", SaveFormat.Pptx);
```
## **FAQ**
**What is the difference between a text box and a text placeholder on a master or layout slide?**
A [placeholder](https://docs.aspose.com/slides/net/manage-placeholder/) can inherit its position and formatting from a [master slide](https://reference.aspose.com/slides/net/aspose.slides/masterslide/) or [layout slide](https://reference.aspose.com/slides/net/aspose.slides/layoutslide/). A regular text box is an independent shape on the slide where it was created and does not acquire placeholder behavior when the layout changes.
**How can I replace text without changing text in charts, tables, or SmartArt?**
Limit the traversal to shapes that implement [IAutoShape](https://reference.aspose.com/slides/net/aspose.slides/iautoshape/), as shown in the Update Text example. Charts, tables, and SmartArt store text in their own object models, so they are not modified by that loop.
## Related features
- [Work with text frames](https://docs.aspose.com/slides/features/text-frames/)
- [Arrange text in columns](https://docs.aspose.com/slides/features/text-columns/)
# Manage Presentation Zoom in .NET
> Create and customize Zoom with Aspose.Slides for .NET — jump between sections, add thumbnails and transitions in PowerPoint presentations.
Source: https://docs.aspose.com/slides/net/manage-zoom/
Updated: 2026-11-09
## **Introduction**
PowerPoint zooms let you navigate between specific slides and sections during a slide show. With Aspose.Slides for .NET, you can create slide, section, and summary zooms and customize their previews, borders, and transitions.

* To summarize an entire presentation on a single slide, use a [Summary Zoom](https://docs.aspose.com/slides/net/manage-zoom/#summary-zoom).
* To show selected slides only, use a [Slide Zoom](https://docs.aspose.com/slides/net/manage-zoom/#slide-zoom).
* To show a single section only, use a [Section Zoom](https://docs.aspose.com/slides/net/manage-zoom/#section-zoom).
## **Slide Zoom**
A slide zoom can make your presentation more dynamic, allowing you to navigate freely between slides in any order you choose without interrupting the flow of your presentation. Slide zooms are great for short presentations without many sections, but you can still use them in different presentation scenarios.
Slide zooms let you explore related information from a single overview slide.

For slide zoom objects, Aspose.Slides provides the [ZoomImageType](https://reference.aspose.com/slides/net/aspose.slides/zoomimagetype/) enumeration, the [IZoomFrame](https://reference.aspose.com/slides/net/aspose.slides/izoomframe/) interface, and methods on the [IShapeCollection](https://reference.aspose.com/slides/net/aspose.slides/ishapecollection/) interface.
### **Create Zoom Frames**
Use [IShapeCollection.AddZoomFrame](https://reference.aspose.com/slides/net/aspose.slides/ishapecollection/addzoomframe/) to place links to individual slides on an overview slide. This example creates two target slides with distinct backgrounds and labels, then adds a preview of each to the first slide and saves the presentation as PPTX. Frame positions and dimensions are specified in points.
```csharp
using System.Drawing;
using Aspose.Slides;
using Aspose.Slides.Export;
using var presentation = new Presentation();
var overviewSlide = presentation.Slides[0];
var secondSlide = presentation.Slides.AddEmptySlide(overviewSlide.LayoutSlide);
var thirdSlide = presentation.Slides.AddEmptySlide(overviewSlide.LayoutSlide);
secondSlide.Background.Type = BackgroundType.OwnBackground;
secondSlide.Background.FillFormat.FillType = FillType.Solid;
secondSlide.Background.FillFormat.SolidFillColor.Color = Color.Cyan;
var textBox = secondSlide.Shapes.AddAutoShape(ShapeType.Rectangle, 100, 200, 500, 200);
textBox.TextFrame.Text = "Second Slide";
thirdSlide.Background.Type = BackgroundType.OwnBackground;
thirdSlide.Background.FillFormat.FillType = FillType.Solid;
thirdSlide.Background.FillFormat.SolidFillColor.Color = Color.DarkKhaki;
textBox = thirdSlide.Shapes.AddAutoShape(ShapeType.Rectangle, 100, 200, 500, 200);
textBox.TextFrame.Text = "Third Slide";
overviewSlide.Shapes.AddZoomFrame(20, 20, 250, 200, secondSlide);
overviewSlide.Shapes.AddZoomFrame(200, 250, 250, 200, thirdSlide);
presentation.Save("presentation.pptx", SaveFormat.Pptx);
```
### **Create Zoom Frames with Custom Images**
Pass a custom image to [IShapeCollection.AddZoomFrame](https://reference.aspose.com/slides/net/aspose.slides/ishapecollection/addzoomframe/) to replace the target slide's default preview. This example requires a local image, loads it with [Images.FromFile](https://reference.aspose.com/slides/net/aspose.slides/images/fromfile/), and adds it to the presentation using [IImageCollection.AddImage](https://reference.aspose.com/slides/net/aspose.slides/iimagecollection/addimage/). The resulting frame displays that image while still linking to the second slide.
```csharp
using System.Drawing;
using Aspose.Slides;
using Aspose.Slides.Export;
using var presentation = new Presentation();
var overviewSlide = presentation.Slides[0];
var slide = presentation.Slides.AddEmptySlide(overviewSlide.LayoutSlide);
slide.Background.Type = BackgroundType.OwnBackground;
slide.Background.FillFormat.FillType = FillType.Solid;
slide.Background.FillFormat.SolidFillColor.Color = Color.Cyan;
var textBox = slide.Shapes.AddAutoShape(ShapeType.Rectangle, 100, 200, 500, 200);
textBox.TextFrame.Text = "Second Slide";
using var image = Images.FromFile("image.png");
var previewImage = presentation.Images.AddImage(image);
overviewSlide.Shapes.AddZoomFrame(20, 20, 300, 200, slide, previewImage);
presentation.Save("presentation.pptx", SaveFormat.Pptx);
```
### **Format Zoom Frames**
This example customizes two slide zoom frames. It assigns a local image to the first frame through [IZoomObject.ZoomImage](https://reference.aspose.com/slides/net/aspose.slides/izoomobject/zoomimage/), and gives the second frame a five-point, dash-dot pink border through [IShape.LineFormat](https://reference.aspose.com/slides/net/aspose.slides/ishape/lineformat/). Setting [IZoomObject.ShowBackground](https://reference.aspose.com/slides/net/aspose.slides/izoomobject/showbackground/) to `false` hides the second frame's background. A local image is required for the custom preview; both frames retain their slide targets in the saved PPTX.
```csharp
using System.Drawing;
using Aspose.Slides;
using Aspose.Slides.Export;
using var presentation = new Presentation();
var overviewSlide = presentation.Slides[0];
var secondSlide = presentation.Slides.AddEmptySlide(overviewSlide.LayoutSlide);
var thirdSlide = presentation.Slides.AddEmptySlide(overviewSlide.LayoutSlide);
secondSlide.Background.Type = BackgroundType.OwnBackground;
secondSlide.Background.FillFormat.FillType = FillType.Solid;
secondSlide.Background.FillFormat.SolidFillColor.Color = Color.Cyan;
var textBox = secondSlide.Shapes.AddAutoShape(ShapeType.Rectangle, 100, 200, 500, 200);
textBox.TextFrame.Text = "Second Slide";
thirdSlide.Background.Type = BackgroundType.OwnBackground;
thirdSlide.Background.FillFormat.FillType = FillType.Solid;
thirdSlide.Background.FillFormat.SolidFillColor.Color = Color.DarkKhaki;
textBox = thirdSlide.Shapes.AddAutoShape(ShapeType.Rectangle, 100, 200, 500, 200);
textBox.TextFrame.Text = "Third Slide";
var firstZoomFrame = overviewSlide.Shapes.AddZoomFrame(20, 20, 250, 200, secondSlide);
var secondZoomFrame = overviewSlide.Shapes.AddZoomFrame(200, 250, 250, 200, thirdSlide);
using var image = Images.FromFile("image.png");
var previewImage = presentation.Images.AddImage(image);
firstZoomFrame.ZoomImage = previewImage;
secondZoomFrame.LineFormat.Width = 5;
secondZoomFrame.LineFormat.FillFormat.FillType = FillType.Solid;
secondZoomFrame.LineFormat.FillFormat.SolidFillColor.Color = Color.HotPink;
secondZoomFrame.LineFormat.DashStyle = LineDashStyle.DashDot;
secondZoomFrame.ShowBackground = false;
presentation.Save("presentation.pptx", SaveFormat.Pptx);
```
## **Section Zoom**
A section zoom links to a section in your presentation. Use it to revisit a topic or show how different parts of the presentation connect.

For section zoom objects, Aspose.Slides provides the [ISectionZoomFrame](https://reference.aspose.com/slides/net/aspose.slides/isectionzoomframe/) interface and methods on the [IShapeCollection](https://reference.aspose.com/slides/net/aspose.slides/ishapecollection/) interface.
### **Create Section Zoom Frames**
Create a section with [ISectionCollection.AddSection](https://reference.aspose.com/slides/net/aspose.slides/isectioncollection/addsection/), then pass the returned section to [IShapeCollection.AddSectionZoomFrame](https://reference.aspose.com/slides/net/aspose.slides/ishapecollection/addsectionzoomframe/). This example places a section zoom on the first slide and links it to a section beginning with a colored slide. The frame's position and dimensions are specified in points, and the presentation is saved as PPTX.
```csharp
using System.Drawing;
using Aspose.Slides;
using Aspose.Slides.Export;
using var presentation = new Presentation();
var overviewSlide = presentation.Slides[0];
var slide = presentation.Slides.AddEmptySlide(overviewSlide.LayoutSlide);
slide.Background.FillFormat.FillType = FillType.Solid;
slide.Background.FillFormat.SolidFillColor.Color = Color.YellowGreen;
slide.Background.Type = BackgroundType.OwnBackground;
var section = presentation.Sections.AddSection("Section 1", slide);
var sectionZoomFrame = overviewSlide.Shapes.AddSectionZoomFrame(20, 20, 300, 200, section);
presentation.Save("presentation.pptx", SaveFormat.Pptx);
```
### **Create Section Zoom Frames with Custom Images**
The image overload of [IShapeCollection.AddSectionZoomFrame](https://reference.aspose.com/slides/net/aspose.slides/ishapecollection/addsectionzoomframe/) lets you display a custom preview without changing the destination section. This example requires a local image, which is loaded with [Images.FromFile](https://reference.aspose.com/slides/net/aspose.slides/images/fromfile/) and added through [IImageCollection.AddImage](https://reference.aspose.com/slides/net/aspose.slides/iimagecollection/addimage/). The saved presentation contains a section zoom on the first slide linked to the newly created section.
```csharp
using System.Drawing;
using Aspose.Slides;
using Aspose.Slides.Export;
using var presentation = new Presentation();
var overviewSlide = presentation.Slides[0];
var slide = presentation.Slides.AddEmptySlide(overviewSlide.LayoutSlide);
slide.Background.FillFormat.FillType = FillType.Solid;
slide.Background.FillFormat.SolidFillColor.Color = Color.YellowGreen;
slide.Background.Type = BackgroundType.OwnBackground;
using var image = Images.FromFile("image.png");
var previewImage = presentation.Images.AddImage(image);
var section = presentation.Sections.AddSection("Section 1", slide);
var sectionZoomFrame = overviewSlide.Shapes.AddSectionZoomFrame(20, 20, 300, 200, section, previewImage);
presentation.Save("presentation.pptx", SaveFormat.Pptx);
```
### **Change a Section Zoom's Target Section**
Use [ISectionZoomFrame.TargetSection](https://reference.aspose.com/slides/net/aspose.slides/isectionzoomframe/targetsection/) to redirect an existing section zoom without recreating it. Choose a populated section from the same presentation's [Sections](https://reference.aspose.com/slides/net/aspose.slides/presentation/sections/) collection. Assigning an empty section leaves the current target unchanged, so check [ISection.GetSlidesListOfSection](https://reference.aspose.com/slides/net/aspose.slides/isection/getslideslistofsection/) before assigning it. See [Manage Slide Sections](https://docs.aspose.com/slides/net/slide-section/) for more about sections.
The following example loads a presentation file, which must contain multiple populated sections, an existing section zoom named `Section navigation`, and a section with the unique name `Results`. It searches all slides for the zoom and finds the destination by name rather than by a collection index that can change when sections are reordered. If names are not unique, use [ISection.SectionId](https://reference.aspose.com/slides/net/aspose.slides/isection/sectionid/) to identify the destination instead.
```csharp
using System;
using System.Linq;
using Aspose.Slides;
using Aspose.Slides.Export;
using var presentation = new Presentation("section-zoom.pptx");
var zoom = presentation.Slides.SelectMany(slide => slide.Shapes).OfType().FirstOrDefault(shape => shape.Name == "Section navigation");
var targetSection = presentation.Sections.FirstOrDefault(section => section.Name == "Results");
if (zoom == null || targetSection == null)
{
Console.WriteLine("The section zoom or destination section was not found.");
}
else if (targetSection.GetSlidesListOfSection().Count == 0)
{
Console.WriteLine("The destination section is empty.");
}
else
{
Console.WriteLine($"Current section: {zoom.TargetSection?.Name}");
zoom.TargetSection = targetSection;
presentation.Save("section-zoom-updated.pptx", SaveFormat.Pptx);
}
```
### **Format Section Zoom Frames**
This example moves and resizes a section zoom to 100 by 75 points, assigns a local image through [IZoomObject.ZoomImage](https://reference.aspose.com/slides/net/aspose.slides/izoomobject/zoomimage/), and applies a 2.5-point, dash-dot brown border. It enables [IZoomObject.ReturnToParent](https://reference.aspose.com/slides/net/aspose.slides/izoomobject/returntoparent/) to return to the originating slide after the section, disables [IZoomObject.ShowBackground](https://reference.aspose.com/slides/net/aspose.slides/izoomobject/showbackground/), and sets [IZoomObject.TransitionDuration](https://reference.aspose.com/slides/net/aspose.slides/izoomobject/transitionduration/) to 1.5 seconds. A local image is required for the custom preview.
```csharp
using System.Drawing;
using Aspose.Slides;
using Aspose.Slides.Export;
using var presentation = new Presentation();
var overviewSlide = presentation.Slides[0];
var slide = presentation.Slides.AddEmptySlide(overviewSlide.LayoutSlide);
slide.Background.FillFormat.FillType = FillType.Solid;
slide.Background.FillFormat.SolidFillColor.Color = Color.YellowGreen;
slide.Background.Type = BackgroundType.OwnBackground;
var section = presentation.Sections.AddSection("Section 1", slide);
var sectionZoomFrame = overviewSlide.Shapes.AddSectionZoomFrame(20, 20, 300, 200, section);
sectionZoomFrame.X = 100;
sectionZoomFrame.Y = 300;
sectionZoomFrame.Width = 100;
sectionZoomFrame.Height = 75;
using var image = Images.FromFile("image.png");
var previewImage = presentation.Images.AddImage(image);
sectionZoomFrame.ZoomImage = previewImage;
sectionZoomFrame.ReturnToParent = true;
sectionZoomFrame.ShowBackground = false;
sectionZoomFrame.LineFormat.FillFormat.FillType = FillType.Solid;
sectionZoomFrame.LineFormat.FillFormat.SolidFillColor.Color = Color.Brown;
sectionZoomFrame.LineFormat.DashStyle = LineDashStyle.DashDot;
sectionZoomFrame.LineFormat.Width = 2.5f;
sectionZoomFrame.TransitionDuration = 1.5f;
presentation.Save("presentation.pptx", SaveFormat.Pptx);
```
## **Summary Zoom**
A summary zoom provides an overview of presentation sections. During a slide show, you can use it to jump to a section, skip ahead, or revisit a topic without following the slide order.

For summary zoom objects, Aspose.Slides provides the [ISummaryZoomFrame](https://reference.aspose.com/slides/net/aspose.slides/isummaryzoomframe/), [ISummaryZoomSection](https://reference.aspose.com/slides/net/aspose.slides/isummaryzoomsection/), and [ISummaryZoomSectionCollection](https://reference.aspose.com/slides/net/aspose.slides/isummaryzoomsectioncollection/) interfaces and methods on the [IShapeCollection](https://reference.aspose.com/slides/net/aspose.slides/ishapecollection/) interface.
### **Create a Summary Zoom**
Use [IShapeCollection.AddSummaryZoomFrame](https://reference.aspose.com/slides/net/aspose.slides/ishapecollection/addsummaryzoomframe/) to create an overview of the presentation's sections. This example creates four sections with distinct slide backgrounds and adds a summary zoom to the first slide. The frame's position and dimensions are specified in points, and the resulting overview is saved in a PPTX presentation.
```csharp
using System.Drawing;
using Aspose.Slides;
using Aspose.Slides.Export;
using var presentation = new Presentation();
var overviewSlide = presentation.Slides[0];
var slide = presentation.Slides.AddEmptySlide(overviewSlide.LayoutSlide);
slide.Background.FillFormat.FillType = FillType.Solid;
slide.Background.FillFormat.SolidFillColor.Color = Color.Brown;
slide.Background.Type = BackgroundType.OwnBackground;
presentation.Sections.AddSection("Section 1", slide);
slide = presentation.Slides.AddEmptySlide(overviewSlide.LayoutSlide);
slide.Background.FillFormat.FillType = FillType.Solid;
slide.Background.FillFormat.SolidFillColor.Color = Color.Aqua;
slide.Background.Type = BackgroundType.OwnBackground;
presentation.Sections.AddSection("Section 2", slide);
slide = presentation.Slides.AddEmptySlide(overviewSlide.LayoutSlide);
slide.Background.FillFormat.FillType = FillType.Solid;
slide.Background.FillFormat.SolidFillColor.Color = Color.Chartreuse;
slide.Background.Type = BackgroundType.OwnBackground;
presentation.Sections.AddSection("Section 3", slide);
slide = presentation.Slides.AddEmptySlide(overviewSlide.LayoutSlide);
slide.Background.FillFormat.FillType = FillType.Solid;
slide.Background.FillFormat.SolidFillColor.Color = Color.DarkGreen;
slide.Background.Type = BackgroundType.OwnBackground;
presentation.Sections.AddSection("Section 4", slide);
var summaryZoomFrame = overviewSlide.Shapes.AddSummaryZoomFrame(150, 50, 300, 200);
presentation.Save("presentation.pptx", SaveFormat.Pptx);
```
### **Add and Remove a Summary Zoom Section**
A summary zoom stores its [ISummaryZoomSection](https://reference.aspose.com/slides/net/aspose.slides/isummaryzoomsection/) objects in [ISummaryZoomFrame.SummaryZoomCollection](https://reference.aspose.com/slides/net/aspose.slides/isummaryzoomframe/summaryzoomcollection/). This example creates an overview of two sections, adds a third section using [ISummaryZoomSectionCollection.AddSummaryZoomSection](https://reference.aspose.com/slides/net/aspose.slides/isummaryzoomsectioncollection/addsummaryzoomsection/), and removes the first section's entry using [ISummaryZoomSectionCollection.RemoveSummaryZoomSection](https://reference.aspose.com/slides/net/aspose.slides/isummaryzoomsectioncollection/removesummaryzoomsection/). Removing the entry leaves the presentation section and its slides intact.
```csharp
using System.Drawing;
using Aspose.Slides;
using Aspose.Slides.Export;
using var presentation = new Presentation();
var overviewSlide = presentation.Slides[0];
var slide = presentation.Slides.AddEmptySlide(overviewSlide.LayoutSlide);
slide.Background.FillFormat.FillType = FillType.Solid;
slide.Background.FillFormat.SolidFillColor.Color = Color.Brown;
slide.Background.Type = BackgroundType.OwnBackground;
var firstSection = presentation.Sections.AddSection("Section 1", slide);
slide = presentation.Slides.AddEmptySlide(overviewSlide.LayoutSlide);
slide.Background.FillFormat.FillType = FillType.Solid;
slide.Background.FillFormat.SolidFillColor.Color = Color.Aqua;
slide.Background.Type = BackgroundType.OwnBackground;
presentation.Sections.AddSection("Section 2", slide);
var summaryZoomFrame = overviewSlide.Shapes.AddSummaryZoomFrame(150, 50, 300, 200);
slide = presentation.Slides.AddEmptySlide(overviewSlide.LayoutSlide);
slide.Background.FillFormat.FillType = FillType.Solid;
slide.Background.FillFormat.SolidFillColor.Color = Color.Chartreuse;
slide.Background.Type = BackgroundType.OwnBackground;
var thirdSection = presentation.Sections.AddSection("Section 3", slide);
summaryZoomFrame.SummaryZoomCollection.AddSummaryZoomSection(thirdSection);
summaryZoomFrame.SummaryZoomCollection.RemoveSummaryZoomSection(firstSection);
presentation.Save("presentation.pptx", SaveFormat.Pptx);
```
### **Format Summary Zoom Sections**
This example formats the first entry in [ISummaryZoomFrame.SummaryZoomCollection](https://reference.aspose.com/slides/net/aspose.slides/isummaryzoomframe/summaryzoomcollection/), using the zero-based index `0`. It requires a local image for [IZoomObject.ZoomImage](https://reference.aspose.com/slides/net/aspose.slides/izoomobject/zoomimage/), applies a 1.5-point, dash-dot black border, and sets [IZoomObject.TransitionDuration](https://reference.aspose.com/slides/net/aspose.slides/izoomobject/transitionduration/) to 1.5 seconds. Setting [IZoomObject.ReturnToParent](https://reference.aspose.com/slides/net/aspose.slides/izoomobject/returntoparent/) to `false` disables the automatic return to the summary slide for this entry.
```csharp
using System.Drawing;
using Aspose.Slides;
using Aspose.Slides.Export;
using var presentation = new Presentation();
var overviewSlide = presentation.Slides[0];
var slide = presentation.Slides.AddEmptySlide(overviewSlide.LayoutSlide);
slide.Background.FillFormat.FillType = FillType.Solid;
slide.Background.FillFormat.SolidFillColor.Color = Color.Brown;
slide.Background.Type = BackgroundType.OwnBackground;
presentation.Sections.AddSection("Section 1", slide);
slide = presentation.Slides.AddEmptySlide(overviewSlide.LayoutSlide);
slide.Background.FillFormat.FillType = FillType.Solid;
slide.Background.FillFormat.SolidFillColor.Color = Color.Aqua;
slide.Background.Type = BackgroundType.OwnBackground;
presentation.Sections.AddSection("Section 2", slide);
var summaryZoomFrame = overviewSlide.Shapes.AddSummaryZoomFrame(150, 50, 300, 200);
var summarySection = summaryZoomFrame.SummaryZoomCollection[0];
using var image = Images.FromFile("image.png");
var previewImage = presentation.Images.AddImage(image);
summarySection.ZoomImage = previewImage;
summarySection.ReturnToParent = false;
summarySection.LineFormat.FillFormat.FillType = FillType.Solid;
summarySection.LineFormat.FillFormat.SolidFillColor.Color = Color.Black;
summarySection.LineFormat.DashStyle = LineDashStyle.DashDot;
summarySection.LineFormat.Width = 1.5f;
summarySection.TransitionDuration = 1.5f;
presentation.Save("presentation.pptx", SaveFormat.Pptx);
```
## **FAQ**
**Can I control returning to the 'parent' slide after showing the target?**
Yes. Set [IZoomObject.ReturnToParent](https://reference.aspose.com/slides/net/aspose.slides/izoomobject/returntoparent/) to `true` to return to the originating slide after the target content is shown.
**Can I adjust the 'speed' or duration of the Zoom transition?**
Yes. Set [IZoomObject.TransitionDuration](https://reference.aspose.com/slides/net/aspose.slides/izoomobject/transitionduration/) to control the transition duration in seconds.
**Are there limits on how many Zoom objects a presentation can contain?**
There is no hard API limit documented. Practical limits depend on overall presentation complexity and the viewer's performance. You can add many Zoom frames, but consider file size and rendering time.
# Manage Tags and Custom Data in Presentations in .NET
> Learn how to manage tags and custom XML data in PowerPoint presentations with Aspose.Slides for .NET, including adding, reading, updating, auditing, and removing custom XML parts.
Source: https://docs.aspose.com/slides/net/managing-tags-and-custom-data/
Updated: 2026-08-13
## **Overview**
This article explains how Aspose.Slides works with tags and custom data in PowerPoint presentations. Presentation-specific data can be stored as tags or custom XML parts. Tags are simple key-value string pairs, while custom XML parts can store structured metadata and application-specific XML payloads.
Aspose.Slides provides APIs for adding, reading, updating, auditing, and removing custom XML parts at the presentation, slide, and shape levels. Custom XML parts are useful for integrations that store information such as document-management identifiers, workflow state, compliance metadata, template-binding data, or other structured application data inside a presentation.
## **Data Storage in Presentation Files**
PPTX files—files with the `.pptx` extension—are stored in the PresentationML format, which is part of the Office Open XML specification. Office Open XML defines the package structure and relationships used to store presentation content and related data.
A presentation contains multiple parts connected by relationships. For example, a slide part contains the content of a single slide and can have explicit relationships to other parts defined by ISO/IEC 29500.
Custom data can be stored as tags ([ITagCollection](https://reference.aspose.com/slides/net/aspose.slides/itagcollection)) or custom XML parts ([ICustomXmlPartCollection](https://reference.aspose.com/slides/net/aspose.slides/icustomxmlpartcollection)). Both are available through the [`ICustomData`](https://reference.aspose.com/slides/net/aspose.slides/icustomdata/) interface.
Tags store simple string key-value pairs. Custom XML parts store structured XML data and can be associated with a presentation, slide, or shape.
## **Work with Custom XML Parts**
The [`ICustomData.CustomXmlParts`](https://reference.aspose.com/slides/net/aspose.slides/icustomdata/customxmlparts/) property returns the collection of custom XML parts associated with a particular presentation object. For example:
- `presentation.CustomData.CustomXmlParts` contains custom XML parts associated with the presentation itself.
- `slide.CustomData.CustomXmlParts` contains custom XML parts associated with a specific slide.
- `shape.CustomData.CustomXmlParts` contains custom XML parts associated with a specific shape.
Use [`Presentation.AllCustomXmlParts`](https://reference.aspose.com/slides/net/aspose.slides/presentation/allcustomxmlparts/) when you need to inspect all custom XML parts in the presentation regardless of where they are associated.
### **Add a Custom XML Part to a Presentation**
Use [`ICustomXmlPartCollection.Add`](https://reference.aspose.com/slides/net/aspose.slides/icustomxmlpartcollection/add/) to add XML data to a custom XML part collection. The XML must be valid and non-empty.
The following example adds structured metadata to the presentation-level custom data collection:
```csharp
using System;
using Aspose.Slides;
var customXmlContent =
"" +
"" +
"DOC-1001 " +
"Draft " +
" ";
using var presentation = new Presentation();
var customXmlPart = presentation.CustomData.CustomXmlParts.Add(customXmlContent);
// Add assigns an identifier automatically. Set a specific GUID only when required.
customXmlPart.ItemId = Guid.NewGuid();
presentation.Save("presentation_with_custom_xml.pptx", SaveFormat.Pptx);
```
The `Add` method can also accept XML as a byte array or stream, which is useful when XML content is already available in binary form.
### **Add a Custom XML Part to a Slide or Shape**
Custom XML data can be associated with a specific slide or shape instead of the whole presentation. This is useful when metadata describes only one object, such as a template key, external record identifier, or binding information.
The following example adds one custom XML part to a slide and another to a shape:
```csharp
using Aspose.Slides;
using var presentation = new Presentation();
var slide = presentation.Slides[0];
slide.CustomData.CustomXmlParts.Add(
"" +
"TitleSlide " +
" ");
var shape = slide.Shapes.AddAutoShape(ShapeType.Rectangle, 50, 50, 250, 80);
shape.TextFrame.Text = "Customer data";
shape.CustomData.CustomXmlParts.Add(
"" +
"CRM-4281 " +
" ");
presentation.Save("object_custom_xml.pptx", SaveFormat.Pptx);
```
The level at which a part is added determines which object's `CustomData.CustomXmlParts` collection contains the relationship to that part. Presentation-level data is appropriate for document-wide metadata, slide-level data for information that belongs to a particular slide, and shape-level data for metadata tied to an individual shape.
### **List and Audit All Custom XML Parts**
Use [`Presentation.AllCustomXmlParts`](https://reference.aspose.com/slides/net/aspose.slides/presentation/allcustomxmlparts/) to retrieve all custom XML parts from a presentation. Each [`ICustomXmlPart`](https://reference.aspose.com/slides/net/aspose.slides/icustomxmlpart/) exposes its identifier, XML content, and associated namespace schemas.
The following example lists all custom XML parts and their namespace schemas:
```csharp
using System;
using Aspose.Slides;
using var presentation = new Presentation("presentation.pptx");
foreach (var customXmlPart in presentation.AllCustomXmlParts)
{
Console.WriteLine("ItemId: " + customXmlPart.ItemId);
Console.WriteLine("XML:");
Console.WriteLine(customXmlPart.XmlAsString);
foreach (var namespaceSchema in customXmlPart.NamespaceSchemas)
{
Console.WriteLine("Namespace schema: " + namespaceSchema);
}
Console.WriteLine();
}
```
[`ICustomXmlPart.NamespaceSchemas`](https://reference.aspose.com/slides/net/aspose.slides/icustomxmlpart/namespaceschemas/) returns the XML schemas associated with the custom XML part. This information can be useful when auditing presentations that contain XML produced by external systems.
### **Read and Update XML Content and ItemId**
Use [`ICustomXmlPart.XmlAsString`](https://reference.aspose.com/slides/net/aspose.slides/icustomxmlpart/xmlasstring/) to work with XML as a UTF-8 string, or [`ICustomXmlPart.XmlData`](https://reference.aspose.com/slides/net/aspose.slides/icustomxmlpart/xmldata/) to work with the raw XML bytes. Both properties can be read and updated.
The [`ICustomXmlPart.ItemId`](https://reference.aspose.com/slides/net/aspose.slides/icustomxmlpart/itemid/) property contains the GUID that identifies the custom XML part in the Office Open XML document. It can also be changed when an integration requires a new identifier.
The following example updates the XML content and the identifier:
```csharp
using System;
using System.Text;
using Aspose.Slides;
using var presentation = new Presentation("presentation.pptx");
var customXmlPart = presentation.AllCustomXmlParts[0];
// Read the current XML as text.
var currentXmlContent = customXmlPart.XmlAsString;
Console.WriteLine(currentXmlContent);
// Update the XML as a UTF-8 string.
customXmlPart.XmlAsString =
"" +
"DOC-1001 " +
"Approved " +
" ";
// XmlData provides the same XML content as raw bytes.
var customXmlData = customXmlPart.XmlData;
Console.WriteLine(Encoding.UTF8.GetString(customXmlData));
// Replace the identifier when required by the integration.
customXmlPart.ItemId = Guid.NewGuid();
presentation.Save("updated_custom_xml.pptx", SaveFormat.Pptx);
```
When assigning `XmlAsString` or `XmlData`, provide valid, non-empty XML. Use one representation or the other depending on whether the application works primarily with strings or byte data.
### **Remove a Custom XML Part**
Aspose.Slides provides several ways to remove custom XML data:
- [`ICustomXmlPart.Remove`](https://reference.aspose.com/slides/net/aspose.slides/icustomxmlpart/remove/) removes the custom XML part from the presentation.
- [`ICustomXmlPartCollection.Remove`](https://reference.aspose.com/slides/net/aspose.slides/icustomxmlpartcollection/remove/) removes a specific part from a custom XML part collection.
- [`ICustomXmlPartCollection.RemoveAt`](https://reference.aspose.com/slides/net/aspose.slides/icustomxmlpartcollection/removeat/) removes the part at a specified collection index.
- [`ICustomXmlPartCollection.Clear`](https://reference.aspose.com/slides/net/aspose.slides/icustomxmlpartcollection/clear/) removes all parts from a specific collection.
The following example removes one presentation-level custom XML part by reference:
```csharp
using Aspose.Slides;
using var presentation = new Presentation("presentation.pptx");
var customXmlParts = presentation.CustomData.CustomXmlParts;
if (customXmlParts.Count > 0)
{
var customXmlPart = customXmlParts[0];
customXmlParts.Remove(customXmlPart);
}
presentation.Save("custom_xml_removed.pptx", SaveFormat.Pptx);
```
If you already have an `ICustomXmlPart` and want to remove that part from the presentation rather than addressing a particular collection, call `customXmlPart.Remove()`.
You can also remove an item by index:
```csharp
presentation.CustomData.CustomXmlParts.RemoveAt(0);
```
### **Clear All Custom XML Parts from a Collection**
Use `Clear` when all custom XML parts associated with a particular presentation object should be removed.
```csharp
using Aspose.Slides;
using var presentation = new Presentation("presentation.pptx");
presentation.Slides[0].CustomData.CustomXmlParts.Clear();
presentation.Save("slide_custom_xml_cleared.pptx", SaveFormat.Pptx);
```
`Clear` affects only the selected collection. For example, clearing a slide's collection does not clear the presentation-level or shape-level collections.
To remove every custom XML part in the presentation, iterate through `AllCustomXmlParts` and remove each part:
```csharp
using Aspose.Slides;
using var presentation = new Presentation("presentation.pptx");
foreach (var customXmlPart in presentation.AllCustomXmlParts)
{
customXmlPart.Remove();
}
presentation.Save("all_custom_xml_removed.pptx", SaveFormat.Pptx);
```
### **Handle Linked or Shared Custom XML Parts**
In an Office Open XML presentation, the same custom XML part can be referenced from more than one presentation object. For example, an existing file can contain relationships from multiple slides or shapes to the same underlying custom XML part.
A shared part should be treated as one data object with multiple references:
- Updating its `XmlAsString`, `XmlData`, or `ItemId` changes the underlying custom XML part, so the change applies wherever that part is referenced.
- `ItemId` can be used to identify the same custom XML part while auditing object-level collections.
- Removing a part from a specific `CustomXmlParts` collection removes it from that collection. Use `ICustomXmlPart.Remove()` when the part itself should be removed from the presentation.
- Before deleting or replacing a shared part, inspect the object-level collections to determine whether other slides or shapes still reference it.
The `Add` overloads create a new custom XML part from XML content; they do not accept an existing `ICustomXmlPart`. Therefore, shared relationships are most commonly encountered when loading presentations that already contain them.
The following example audits presentation-, slide-, and shape-level collections by `ItemId` and reports parts referenced from more than one place:
```csharp
using System;
using System.Collections.Generic;
using Aspose.Slides;
using var presentation = new Presentation("presentation.pptx");
var referencesByItemId = new Dictionary>();
var registerCustomXmlParts = (string ownerName, ICustomXmlPartCollection customXmlParts) =>
{
foreach (var customXmlPart in customXmlParts)
{
if (!referencesByItemId.ContainsKey(customXmlPart.ItemId))
{
referencesByItemId[customXmlPart.ItemId] = new List();
}
referencesByItemId[customXmlPart.ItemId].Add(ownerName);
}
};
registerCustomXmlParts("Presentation", presentation.CustomData.CustomXmlParts);
for (var slideIndex = 0; slideIndex < presentation.Slides.Count; slideIndex++)
{
var slide = presentation.Slides[slideIndex];
registerCustomXmlParts("Slide " + (slideIndex + 1), slide.CustomData.CustomXmlParts);
for (var shapeIndex = 0; shapeIndex < slide.Shapes.Count; shapeIndex++)
{
var shape = slide.Shapes[shapeIndex];
registerCustomXmlParts("Slide " + (slideIndex + 1) + ", shape " + shapeIndex, shape.CustomData.CustomXmlParts);
}
}
foreach (var referenceEntry in referencesByItemId)
{
if (referenceEntry.Value.Count > 1)
{
Console.WriteLine("Shared custom XML part: " + referenceEntry.Key);
foreach (var ownerName in referenceEntry.Value)
{
Console.WriteLine(" Referenced by: " + ownerName);
}
}
}
```
This type of audit is useful before modifying or deleting custom XML data in presentations created by external systems, because the same metadata part may participate in more than one relationship.
## **Get Values of Tags**
In slides, a tag corresponds to the `IDocumentProperties.Keywords` property. This sample code shows how to get a tag value with Aspose.Slides for .NET for [Presentation](https://reference.aspose.com/slides/net/aspose.slides/presentation):
```csharp
using Aspose.Slides;
using var presentation = new Presentation("presentation.pptx");
var keywords = presentation.DocumentProperties.Keywords;
```
## **Add Tags to Presentations**
Aspose.Slides allows you to add tags to presentations. A tag typically consists of two items:
- the name of a custom property, for example, `MyTag`;
- the value of the custom property, for example, `My Tag Value`.
If you need to classify presentations based on a specific rule or property, you can add tags for that purpose. For example, if you want to categorize presentations from North American countries, you can create a North American tag and assign the relevant country as its value.
This sample code shows how to add a tag to a [Presentation](https://reference.aspose.com/slides/net/aspose.slides/presentation) using Aspose.Slides for .NET:
```csharp
using Aspose.Slides;
using var presentation = new Presentation("presentation.pptx");
var tags = presentation.CustomData.Tags;
tags["MyTag"] = "My Tag Value";
```
Tags can also be set for a [Slide](https://reference.aspose.com/slides/net/aspose.slides/slide):
```csharp
using Aspose.Slides;
using var presentation = new Presentation();
var slide = presentation.Slides[0];
slide.CustomData.Tags["tag"] = "value";
```
Or for an individual [Shape](https://reference.aspose.com/slides/net/aspose.slides/shape):
```csharp
using Aspose.Slides;
using var presentation = new Presentation();
var slide = presentation.Slides[0];
var shape = slide.Shapes.AddAutoShape(ShapeType.Rectangle, 10, 10, 100, 50);
shape.TextFrame.Text = "My text";
shape.CustomData.Tags["tag"] = "value";
```
### **Limitations**
Tags added through the `CustomData.Tags` collection are stored only in the PowerPoint file. They are **not** transferred to the PDF tag structure when the presentation is exported to PDF. Consequently, a custom identifier assigned as a tag cannot be retrieved from the tagged PDF.
**Workaround**: You can store a custom identifier in the object's **Alt Text** (for example, `shape.AlternativeText = "MyId"`). After exporting to PDF, the Alt Text may appear in the PDF tag structure.
## **FAQ**
**Can I remove all tags from a presentation, slide, or shape in one operation?**
Yes. The [tag collection](https://reference.aspose.com/slides/net/aspose.slides/tagcollection/) supports a [Clear](https://reference.aspose.com/slides/net/aspose.slides/tagcollection/clear/) operation that deletes all key-value pairs at once.
**How do I delete a single tag by its name without iterating over the whole collection?**
Use [Remove(name)](https://reference.aspose.com/slides/net/aspose.slides/tagcollection/remove/) on [TagCollection](https://reference.aspose.com/slides/net/aspose.slides/tagcollection/) to delete the tag by its key.
**How can I retrieve the complete list of tag names for analytics or filtering?**
Use [GetNamesOfTags](https://reference.aspose.com/slides/net/aspose.slides/tagcollection/getnamesoftags/) on the [tag collection](https://reference.aspose.com/slides/net/aspose.slides/tagcollection/); it returns an array of all tag names.
**How can I find all custom XML parts regardless of where they are stored?**
Use [`Presentation.AllCustomXmlParts`](https://reference.aspose.com/slides/net/aspose.slides/presentation/allcustomxmlparts/) to retrieve all custom XML parts in the presentation.
**Should I use `XmlAsString` or `XmlData` to update a custom XML part?**
Use `XmlAsString` when the application works with UTF-8 XML text. Use `XmlData` when the XML is already available as a byte array or when binary-oriented processing is more convenient. Both properties represent the XML content of the same custom XML part.
## Related features
- [Work with custom XML parts](https://docs.aspose.com/slides/features/custom-xml/)
# Efficiently Merge Presentations in .NET
> Learn how to merge PowerPoint and OpenDocument presentations in .NET by cloning slides, controlling masters and layouts, resizing slide content, preserving sections, and handling protected or large files.
Source: https://docs.aspose.com/slides/net/merge-presentation/
Updated: 2026-11-08
## **Overview**
Aspose.Slides for .NET merges presentations by cloning slides from one [Presentation](https://reference.aspose.com/slides/net/aspose.slides/presentation/) into another. The main operation is [ISlideCollection.AddClone](https://reference.aspose.com/slides/net/aspose.slides/islidecollection/addclone/), which can preserve the source slide's formatting or attach the cloned slide to a master or layout in the destination presentation.
This article covers the most common merging workflows:
- merge all slides while preserving their source formatting;
- merge selected slides;
- apply a master from the destination presentation;
- apply a specific layout from the destination presentation;
- normalize different slide sizes before merging;
- add cloned slides to a section;
- merge several presentations in one end-to-end workflow;
- handle masters, resources, notes, comments, media, fonts, passwords, large files, and multithreading concerns.
## **How Slide Cloning Affects Masters and Layouts**
A slide inherits much of its appearance from its layout and master. For that reason, the cloning overload you choose determines how the merged slide is integrated into the destination presentation.
Use [ISlideCollection.AddClone](https://reference.aspose.com/slides/net/aspose.slides/islidecollection/addclone/) in one of these ways:
- `AddClone(sourceSlide)` — preserve the source slide's layout and formatting. When required, the source master can be cloned into the destination presentation automatically. Aspose.Slides tracks automatically cloned masters so repeated slides that use the same source master do not cause that master to be cloned repeatedly.
- `AddClone(sourceSlide, destinationMaster, allowCloneMissingLayout)` — attach the cloned slide to a specific destination [IMasterSlide](https://reference.aspose.com/slides/net/aspose.slides/imasterslide/). Aspose.Slides looks for a matching layout under that master by layout type or name.
- `AddClone(sourceSlide, destinationLayout)` — attach the cloned slide directly to a specific destination [ILayoutSlide](https://reference.aspose.com/slides/net/aspose.slides/ilayoutslide/).
The master or layout passed to an `AddClone` overload must belong to the **destination** presentation, not the source presentation.
[](https://docs.aspose.com/slides/net/merge-presentation/visual-merge-presentation-9d5f131d779a.svg)
*Illustrative .NET 26.11 fixture comparing source design, a selected destination master with a matching layout, and an explicit destination layout. The panel retains its explicit geometry and looks the same in this fixture. The selected master or layout must belong to the destination; changing inheritance does not redesign every object.*
## **Merge Entire Presentations and Preserve Source Formatting**
The simplest merge copies every slide from the source presentation to the destination presentation. This is the appropriate choice when the imported slides should keep their original theme, master, and layout relationships.
```csharp
using Aspose.Slides;
using Aspose.Slides.Export;
using var destination = new Presentation("destination.pptx");
using var source = new Presentation("source.pptx");
foreach (var slide in source.Slides)
{
destination.Slides.AddClone(slide);
}
destination.Save("merged.pptx", SaveFormat.Pptx);
```
The resulting presentation may contain multiple masters when the source and destination use different designs. This is expected when source formatting is intentionally preserved.
## **Merge Selected Slides**
You do not have to clone every slide. The following example imports only selected slide indexes from the source presentation.
```csharp
using Aspose.Slides;
using Aspose.Slides.Export;
using var destination = new Presentation("destination.pptx");
using var source = new Presentation("source.pptx");
var slideIndexes = new[] { 0, 2, 4 };
foreach (var index in slideIndexes)
{
destination.Slides.AddClone(source.Slides[index]);
}
destination.Save("merged-selected-slides.pptx", SaveFormat.Pptx);
```
Validate slide indexes before cloning when they come from user input or external configuration.
## **Merge Slides Using a Destination Master**
Use the [AddClone(ISlide, IMasterSlide, Boolean)](https://reference.aspose.com/slides/net/aspose.slides/islidecollection/addclone/) overload when imported slides should follow a master that already belongs to the destination presentation.
```csharp
using Aspose.Slides;
using Aspose.Slides.Export;
using var destination = new Presentation("destination.pptx");
using var source = new Presentation("source.pptx");
var destinationMaster = destination.Masters[0];
foreach (var slide in source.Slides)
{
destination.Slides.AddClone(slide, destinationMaster, allowCloneMissingLayout: true);
}
destination.Save("merged-with-destination-master.pptx", SaveFormat.Pptx);
```
Aspose.Slides selects an appropriate layout under the specified master by matching the source layout's type or name. If no suitable layout exists and `allowCloneMissingLayout` is `true`, the source layout is cloned so the slide can be added. If it is `false`, a [PptxEditException](https://reference.aspose.com/slides/net/aspose.slides/pptxeditexception/) is thrown.
Use `false` when you want the merge to fail instead of introducing an additional layout into the destination master.
## **Merge Slides Using a Specific Destination Layout**
Use the [AddClone(ISlide, ILayoutSlide)](https://reference.aspose.com/slides/net/aspose.slides/islidecollection/addclone/) overload when you know exactly which destination layout the imported slides should use.
```csharp
using Aspose.Slides;
using Aspose.Slides.Export;
using var destination = new Presentation("destination.pptx");
using var source = new Presentation("source.pptx");
var destinationLayout = destination.LayoutSlides[0];
foreach (var slide in source.Slides)
{
destination.Slides.AddClone(slide, destinationLayout);
}
destination.Save("merged-with-destination-layout.pptx", SaveFormat.Pptx);
```
Applying a destination layout changes the inherited layout relationship; it does not redesign the source slide content. If the source and destination layouts have different placeholder structures, inspect the result to confirm that the inherited formatting and placeholder behavior are appropriate.
## **Merge Presentations with Different Slide Sizes**
Presentations with different slide dimensions can be merged, but cloning a slide into a presentation with another slide size does not automatically redesign its content for the new canvas. Shapes may therefore appear shifted, scaled unexpectedly, or outside the visible slide area.
A practical approach is to resize the source presentation before cloning. The [SlideSize.SetSize](https://reference.aspose.com/slides/net/aspose.slides/slidesize/setsize/) method can scale existing content while changing the slide dimensions. [SlideSizeScaleType.EnsureFit](https://reference.aspose.com/slides/net/aspose.slides/slidesizescaletype/) scales content to fit within the requested size.
```csharp
using Aspose.Slides;
using Aspose.Slides.Export;
using var destination = new Presentation("destination.pptx");
using var source = new Presentation("source.pptx");
if (source.SlideSize.Size.Width != destination.SlideSize.Size.Width ||
source.SlideSize.Size.Height != destination.SlideSize.Size.Height)
{
source.SlideSize.SetSize(
destination.SlideSize.Size.Width,
destination.SlideSize.Size.Height,
SlideSizeScaleType.EnsureFit);
}
foreach (var slide in source.Slides)
{
destination.Slides.AddClone(slide);
}
destination.Save("merged-same-slide-size.pptx", SaveFormat.Pptx);
```
Resizing changes the source presentation object in memory. If you need the original source presentation unchanged for other operations, open a separate instance for the merge.
## **Merge Slides into a Presentation Section**
The basic slide-cloning loop does not recreate the source presentation's section hierarchy. If sections matter in the output, create or select sections in the destination presentation and clone slides into them explicitly with [AddClone(ISlide, ISection)](https://reference.aspose.com/slides/net/aspose.slides/islidecollection/addclone/).
```csharp
using Aspose.Slides;
using Aspose.Slides.Export;
using var destination = new Presentation("destination.pptx");
using var source = new Presentation("source.pptx");
var importedSection = destination.Sections.AppendEmptySection("Imported slides");
foreach (var slide in source.Slides)
{
destination.Slides.AddClone(slide, importedSection);
}
destination.Save("merged-with-section.pptx", SaveFormat.Pptx);
```
The cloned slides are appended to the specified destination section. To preserve several source sections, enumerate [Presentation.Sections](https://reference.aspose.com/slides/net/aspose.slides/presentation/sections/), retrieve each source section's current slides with [ISection.GetSlidesListOfSection](https://reference.aspose.com/slides/net/aspose.slides/isection/getslideslistofsection/), recreate the sections in the destination, and clone each returned slide into its corresponding destination section. See [Manage Slide Sections](https://docs.aspose.com/slides/net/slide-section/) for a complete section-enumeration example, including empty sections and structural changes.
## **Merge Multiple Presentations Safely**
The following end-to-end example uses the first presentation as the destination, normalizes the slide size of each additional source, keeps each source open only while it is being copied, and saves the final file once.
```csharp
using Aspose.Slides;
using Aspose.Slides.Export;
var inputFiles = new[] { "part1.pptx", "part2.pptx", "part3.pptx" };
using var merged = new Presentation(inputFiles[0]);
for (var fileIndex = 1; fileIndex < inputFiles.Length; fileIndex++)
{
using var source = new Presentation(inputFiles[fileIndex]);
if (source.SlideSize.Size.Width != merged.SlideSize.Size.Width ||
source.SlideSize.Size.Height != merged.SlideSize.Size.Height)
{
source.SlideSize.SetSize(
merged.SlideSize.Size.Width,
merged.SlideSize.Size.Height,
SlideSizeScaleType.EnsureFit);
}
foreach (var slide in source.Slides)
{
merged.Slides.AddClone(slide);
}
}
merged.Save("merged.pptx", SaveFormat.Pptx);
```
This is a useful baseline for preserving the source formatting of imported slides. If your output must use a single destination theme, replace the simple `AddClone(slide)` call with the appropriate destination-master or destination-layout overload shown earlier.
## **Practical Considerations**
### **Masters, Layouts, and Formatting Fidelity**
Default slide cloning can automatically bring a required source master into the destination presentation. Aspose.Slides keeps an internal registry for automatically cloned masters to avoid cloning the same master repeatedly. Manually cloned masters are not tracked by that registry, so avoid pre-cloning masters unless you need explicit control over the master structure.
Do not assume that two masters or layouts with the same name are visually equivalent. If a corporate template must control the final appearance, choose a destination master or layout explicitly and verify the result after merging.
### **Notes and Comments**
Speaker notes and slide comments are associated with slide content and are copied when a slide is cloned. Aspose.Slides also exposes dedicated APIs for [presentation notes](https://docs.aspose.com/slides/net/presentation-notes/) and [presentation comments](https://docs.aspose.com/slides/net/presentation-comments/).
If notes-page formatting is important, verify the merged presentation because notes masters are presentation-level objects and may differ between source files. For review workflows, also verify comment authors and threaded comments after combining files from different authors or templates.
### **Images, Audio, Video, OLE Objects, and External Links**
Slides can reference presentation-level resources such as images, embedded audio, embedded video, and OLE data. Clone the slide itself rather than copying only its visible shapes so Aspose.Slides can maintain the slide's relationships to its resources.
Embedded and linked resources should be treated differently. A linked audio, video, OLE object, or hyperlink remains dependent on its external target; cloning a slide does not turn an external link into embedded content. Test linked-resource paths and URLs in the environment where the merged presentation will be opened.
Aspose.Slides explicitly tracks automatically cloned masters, but this should not be treated as a general guarantee that identical binary resources from unrelated source presentations will always be deduplicated. If output file size is important, inspect the merged package and measure the result instead of relying on implicit deduplication.
### **Embedded Fonts and Font Availability**
Fonts are managed at the presentation level. If typography must remain consistent across machines, do not assume that cloning slides alone guarantees that every required font is available in the destination environment. You can inspect embedded fonts with [FontsManager.GetEmbeddedFonts](https://reference.aspose.com/slides/net/aspose.slides/fontsmanager/getembeddedfonts/) and manage embedding explicitly as described in [Embed Fonts in Presentations](https://docs.aspose.com/slides/net/embedded-font/).
Also verify that you are permitted to embed the fonts used by the source files. Font licenses can restrict embedding.
### **Password-Protected Presentations**
A password-protected source must be opened successfully before its slides can be cloned. Supply the password through [LoadOptions.Password](https://reference.aspose.com/slides/net/aspose.slides/loadoptions/password/).
```csharp
using Aspose.Slides;
var loadOptions = new LoadOptions { Password = "YOUR_PASSWORD" };
using var source = new Presentation("protected.pptx", loadOptions);
```
Opening an encrypted source does not automatically apply the same protection to the destination presentation. Configure output protection separately when required.
### **Large Presentations and Memory Use**
Large presentations containing high-resolution images, audio, video, or other large binary objects can consume significant memory. [LoadOptions.BlobManagementOptions](https://reference.aspose.com/slides/net/aspose.slides/loadoptions/blobmanagementoptions/) provides controls for BLOB handling and temporary-file usage. See [Manage Presentation BLOBs](https://docs.aspose.com/slides/net/manage-blob/) for large-file strategies.
For large files, prefer loading from file paths when possible, dispose each source presentation as soon as it has been merged, and avoid repeatedly saving intermediate results unless the workflow requires checkpoints.
### **Thread Safety**
Do not load, modify, save, or clone the same [Presentation](https://reference.aspose.com/slides/net/aspose.slides/presentation/) instance concurrently from multiple threads. Keep each presentation instance confined to one merge operation. If you parallelize independent jobs, use independent presentation instances and follow the [Aspose.Slides multithreading guidance](https://docs.aspose.com/slides/net/multithreading/).
## **FAQ**
**How do I keep each source presentation's original design?**
Use [AddClone](https://reference.aspose.com/slides/net/aspose.slides/islidecollection/addclone/) without supplying a destination master or layout. Aspose.Slides can automatically clone the source master when it is needed by the imported slide.
**How do I make imported slides use the destination theme?**
Use the overload that accepts a destination master. Pass a master from the destination presentation, not from the source. Aspose.Slides will try to map each source slide to an appropriate layout under that master.
**When should I use a specific destination layout instead of a destination master?**
Use a specific layout when every imported slide should use one known layout. Use a master when you want Aspose.Slides to select among that master's layouts based on the source layout type or name.
**Can presentations with different slide sizes be merged?**
Yes, but slide content is not automatically redesigned for the destination dimensions. Resize the source presentation first when you need predictable placement, for example with [SlideSize.SetSize](https://reference.aspose.com/slides/net/aspose.slides/slidesize/setsize/) and [SlideSizeScaleType.EnsureFit](https://reference.aspose.com/slides/net/aspose.slides/slidesizescaletype/).
**Can I merge PPT, PPTX, and ODP presentations into one file?**
Yes. Load each source presentation, clone the required slides into one destination, and save the destination in a supported output format. Because presentation formats do not support exactly the same feature set, verify complex content after cross-format merges. See [Supported File Formats](https://docs.aspose.com/slides/net/supported-file-formats/).
**Are source sections preserved automatically?**
Not by a basic loop that only clones slides. Recreate the required sections in the destination and use the section overload of [AddClone](https://reference.aspose.com/slides/net/aspose.slides/islidecollection/addclone/) when section structure must be preserved.
**Are speaker notes and comments preserved?**
They are copied with the cloned slide. For workflows that depend on notes-master styling, comment authors, or threaded review data, verify the merged result because those scenarios involve presentation-level structures as well as slide-level content.
**What happens to audio, video, OLE objects, and hyperlinks?**
Embedded content is carried as part of the cloned slide's resource relationships. External links remain external, so their target files or URLs must still be available after the merge.
**Are embedded fonts from every source guaranteed to be available in the merged presentation?**
Do not rely on slide cloning alone for font deployment. Inspect the destination's embedded fonts and explicitly manage font embedding or external font availability when typography is important.
**How do I merge a password-protected file?**
Open it with the correct [LoadOptions.Password](https://reference.aspose.com/slides/net/aspose.slides/loadoptions/password/), then clone its slides normally. Output protection is configured separately.
**How should I handle very large presentations?**
Use BLOB management when large binary objects dominate memory usage, prefer file-path loading for very large files, dispose source presentations promptly, and save the final result only when needed.
**Can I merge slides from multiple threads?**
Do not use one [Presentation](https://reference.aspose.com/slides/net/aspose.slides/presentation/) instance concurrently from multiple threads. Keep each merge operation isolated to its own presentation instances.
## Related features
- [Merge presentations](https://docs.aspose.com/slides/features/merge-presentations/)
# Metered Licensing
> Learn how Aspose.Slides for .NET metered licensing lets you process PowerPoint and OpenDocument files flexibly, paying only for what you use.
Source: https://docs.aspose.com/slides/net/metered-licensing/
Updated: 2026-08-02
## **Introduction**
Metered licensing is a licensing mechanism that can be used alongside existing licensing methods. If you want to be billed based on your usage of Aspose.Slides API features, you choose metered licensing.
## **Apply Metered Keys**
When you purchase a metered license, you get keys (and not a license file). This metered key can be applied using the [Metered](https://reference.aspose.com/slides/net/aspose.slides/metered/) class Aspose provided for metering operations. For more details, see [Metered Licensing FAQ](https://purchase.aspose.com/faqs/licensing/metered).
1. Create an instance of the [Metered](https://reference.aspose.com/slides/net/aspose.slides/metered/) class.
1. Pass your public and private keys to the [SetMeteredKey](https://reference.aspose.com/slides/net/aspose.slides/metered/setmeteredkey/) method.
1. Do some processing (perform tasks).
1. Call the [GetConsumptionQuantity](https://reference.aspose.com/slides/net/aspose.slides/metered/getconsumptionquantity/) method of the `Metered` class.
You should see the amount/quantity of API requests you have consumed so far.
This sample code shows you how to use metered licensing:
```cs
// Creates an instance of the Metered class
Aspose.Slides.Metered metered = new Aspose.Slides.Metered();
// Passes the public and private keys to the Metered object
metered.SetMeteredKey("", "");
// Gets the metered data quantity before API call
decimal amountBefore = Aspose.Slides.Metered.GetConsumptionQuantity();
Console.WriteLine("Amount consumed before: " + amountBefore.ToString());
// Do something with Aspose.Slides API here
// ...
// Gets the metered data amount after API call
decimal amountAfter = Aspose.Slides.Metered.GetConsumptionQuantity();
Console.WriteLine("Amount consumed after: " + amountAfter.ToString());
```
To use metered licensing, you need a stable internet connection because the licensing mechanism uses the internet to constantly interact with our services and perform calculations.
## **FAQ**
### Can I use a metered license together with a regular one (perpetual or temporary) in the same application?
Yes. Metered is an additional licensing mechanism that can be used alongside existing [licensing methods](https://docs.aspose.com/slides/net/licensing/). You choose which mechanism to apply when the application starts.
### What exactly counts as consumption under a metered license: operations or files?
API usage is counted, meaning the number of requests or operations. You can obtain the current consumption via [consumption-tracking methods](https://reference.aspose.com/slides/net/aspose.slides/metered/).
### Is metered suitable for microservices and serverless environments where instances restart frequently?
Yes. Since accounting is done at the API-call level, scenarios with frequent cold starts are compatible, provided there is stable network access for metered calculations.
### Does the library’s functionality differ when using a metered license compared to a perpetual license?
No. This is only about the licensing and billing mechanism; the product’s capabilities are the same.
### How does metered relate to the trial version and the temporary license?
The trial version has limitations and watermarks, the [temporary license](https://purchase.aspose.com/temporary-license/) removes limitations for 30 days, and metered removes limitations and charges based on actual usage.
### Can I control the budget by automatically reacting when a consumption threshold is exceeded?
Yes. A common practice is to periodically read current consumption via [tracking methods](https://reference.aspose.com/slides/net/aspose.slides/metered/) and implement your own limits or alerts at the application or monitoring level.
# Migration from Earlier Versions
> Review public API updates and breaking changes in Aspose.Slides for .NET to smoothly migrate your PowerPoint PPT, PPTX and ODP presentation solutions.
Source: https://docs.aspose.com/slides/net/migration-from-earlier-versions-of-aspose-slides-for-net/
Updated: 2025-11-12
---
lastmod: 2025-11-12T10:36:00+04:00
title: Migration from Earlier Versions
type: docs
weight: 320
url: /net/migration-from-earlier-versions-of-aspose-slides-for-net/
keywords:
- migration
- legacy code
- modern code
- legacy approach
- modern approach
- PowerPoint
- OpenDocument
- presentation
- .NET
- C#
- Aspose.Slides
description: "Review public API updates and breaking changes in Aspose.Slides for .NET to smoothly migrate your PowerPoint PPT, PPTX and ODP presentation solutions."
---
## Related articles
- [Public API and Backwards Incompatible Changes in Aspose.Slides for .NET 15.8.0](https://docs.aspose.com/slides/net/public-api-and-backwards-incompatible-changes-in-aspose-slides-for-net-15-8-0/)
- [Public API and Backwards Incompatible Changes in Aspose.Slides for .NET 15.11.0](https://docs.aspose.com/slides/net/public-api-and-backwards-incompatible-changes-in-aspose-slides-for-net-15-11-0/)
- [Public API and Backwards Incompatible Changes in Aspose.Slides for .NET 16.1.0](https://docs.aspose.com/slides/net/public-api-and-backwards-incompatible-changes-in-aspose-slides-for-net-16-1-0/)
# Migration from Microsoft Office Automation to Aspose.Slides for .NET
> Migrate from Microsoft Office automation to Aspose.Slides for .NET and reliably process PowerPoint (PPT, PPTX) presentations in secure, scalable C# apps.
Source: https://docs.aspose.com/slides/net/migration-from-microsoft-office-automation-to-aspose/
Updated: 2025-11-12
---
lastmod: 2025-11-12T10:36:00+04:00
title: Migration from Microsoft Office Automation to Aspose.Slides for .NET
linktitle: Migration from Office Automation
type: docs
weight: 310
url: /net/migration-from-microsoft-office-automation-to-aspose/
keywords:
- migration
- VSTO
- Office automation
- PowerPoint
- presentation
- .NET
- C#
- Aspose.Slides
description: "Migrate from Microsoft Office automation to Aspose.Slides for .NET and reliably process PowerPoint (PPT, PPTX) presentations in secure, scalable C# apps."
---
## Related articles
- [Creating Tables Using VSTO and Aspose.Slides for .NET](https://docs.aspose.com/slides/net/creating-a-table-on-powerpoint-slide/)
- [Format Text Using VSTO and Aspose.Slides for .NET](https://docs.aspose.com/slides/net/format-text-using-vsto-and-aspose-slides-and-net/)
- [Adding Text Dynamically Using VSTO and Aspose.Slides for .NET](https://docs.aspose.com/slides/net/adding-text-dynamically-using-vsto-and-aspose-slides-for-net/)
# Missing Features in OpenXML
>
Source: https://docs.aspose.com/slides/net/missing-features-in-openxml/
Updated: 2026-08-31
This section includes the following topics
- [Access OpenDocument Presentation](https://docs.aspose.com/slides/net/access-opendocument-presentation/)
- [Add Layout Slides to Presentation](https://docs.aspose.com/slides/net/add-layout-slides-to-presentation/)
- [Conversion from PPT to different formats](https://docs.aspose.com/slides/net/conversion-from-ppt-to-different-formats/)
- [Conversion from PPT to PPTX format in Aspose.Slides](https://docs.aspose.com/slides/net/conversion-from-ppt-to-pptx-format-in-aspose-slides/)
- [Conversion to HTML](https://docs.aspose.com/slides/net/conversion-to-html/)
- [Conversion to PDF](https://docs.aspose.com/slides/net/conversion-to-pdf/)
- [Conversion to XPS](https://docs.aspose.com/slides/net/conversion-to-xps/)
- [Export Media files to HTML file](https://docs.aspose.com/slides/net/export-media-files-to-html-file/)
- [Get the File Format of Presentation](https://docs.aspose.com/slides/net/get-the-file-format-of-presentation/)
- [High level Programming with Presentation Document Object Model](https://docs.aspose.com/slides/net/high-level-programming-with-presentation-document-object-model/)
- [Assemble Slides](https://docs.aspose.com/slides/net/assemble-slides/)
- [Find and Replace in Presentation](https://docs.aspose.com/slides/net/find-and-replace-in-presentation/)
- [Presentation Rendering](https://docs.aspose.com/slides/net/presentation-rendering/)
- [Conversion to Tiff with Notes](https://docs.aspose.com/slides/net/conversion-to-tiff-with-notes/)
- [Rendered As Tiff](https://docs.aspose.com/slides/net/rendered-as-tiff/)
- [Rendered As Tiff By User Defined Dimension](https://docs.aspose.com/slides/net/rendered-as-tiff-by-user-defined-dimension/)
- [Render Slide As SVG Image](https://docs.aspose.com/slides/net/render-slide-as-svg-image/)
- [Render Slide As thumbnail to JPEG](https://docs.aspose.com/slides/net/render-slide-as-thumbnail-to-jpeg/)
- [Render Slide As Thumbnail to JPEG by User defined Values](https://docs.aspose.com/slides/net/render-slide-as-thumbnail-to-jpeg-by-user-defined-values/)
- [Slide Transitions](https://docs.aspose.com/slides/net/slide-transitions/)
- [Working with Size and Layout of Presentation](https://docs.aspose.com/slides/net/working-with-size-and-layout-of-presentation/)
## Related articles
- [Missing Features in VSTO](https://docs.aspose.com/slides/net/missing-features-in-vsto/)
- [Aspose.Slides for OpenXML](https://docs.aspose.com/slides/net/aspose-slides-for-openxml/)
- [Code Comparison for common features with OpenXML](https://docs.aspose.com/slides/net/code-comparison-for-common-features-with-openxml/)
# Missing Features in VSTO
>
Source: https://docs.aspose.com/slides/net/missing-features-in-vsto/
Updated: 2026-01-19
This section includes the following topics
- [Add layout Slide to Presentation](https://docs.aspose.com/slides/net/add-layout-slide-to-presentation/)
- [Conversion from PPT to PPTX format](https://docs.aspose.com/slides/net/conversion-from-ppt-to-pptx-format/)
- [Conversion of OpenOffice Document](https://docs.aspose.com/slides/net/conversion-of-openoffice-document/)
- [Convert Presentation to HTML](https://docs.aspose.com/slides/net/export-media-files-into-html-file/)
- [Convert Presentation to Tiff with Notes](https://docs.aspose.com/slides/net/convert-presentation-to-tiff-with-notes/)
- [Convert Presentation to XPS](https://docs.aspose.com/slides/net/convert-presentation-to-xps/)
- [Create Slide as SVG Image](https://docs.aspose.com/slides/net/create-slide-as-svg-image/)
- [Export media files into HTML file](https://docs.aspose.com/slides/net/export-media-files-into-html-file/)
- [Generate Slide Thumbnail as JPEG](https://docs.aspose.com/slides/net/generate-slide-thumbnail-as-jpeg/)
- [Generating a Thumbnail from a Slide with User Defined Dimensions](https://docs.aspose.com/slides/net/generating-a-thumbnail-from-a-slide-with-user-defined-dimensions/)
- [Presentation Locking](https://docs.aspose.com/slides/net/presentation-locking/)
- [Rendering Shapes on Slide as Images](https://docs.aspose.com/slides/net/rendering-shapes-on-slide-as-images/)
## Related articles
- [Missing Features in OpenXML](https://docs.aspose.com/slides/net/missing-features-in-openxml/)
- [Code Comparison for common features with VSTO](https://docs.aspose.com/slides/net/code-comparison-for-common-features-with-vsto/)
- [Aspose.Slides .NET for VSTO](https://docs.aspose.com/slides/net/aspose-slides-net-for-vsto/)
# Enhance Image Processing with the Modern API
> Modernize slide image processing by replacing deprecated imaging APIs with the .NET Modern API for seamless PowerPoint and OpenDocument automation.
Source: https://docs.aspose.com/slides/net/modern-api/
Updated: 2026-08-05
## **Introduction**
Historically, Aspose Slides has a dependency on System.Drawing and has in the public API the following classes from there:
- [Graphics](https://learn.microsoft.com/en-us/dotnet/api/system.drawing.graphics)
- [Image](https://learn.microsoft.com/en-us/dotnet/api/system.drawing.image)
- [Bitmap](https://learn.microsoft.com/en-us/dotnet/api/system.drawing.bitmap)
- [PrinterSettings](https://learn.microsoft.com/en-us/dotnet/api/system.drawing.printing.printersettings)
As of version 24.4, this public API is declared deprecated.
Since System.Drawing support in versions .NET6 and above is removed for non-Windows versions ([breaking change](https://learn.microsoft.com/en-us/dotnet/core/compatibility/core-libraries/6.0/system-drawing-common-windows-only)), Slides has implemented a two-package approach:
- [Aspose.Slides.NET](https://www.nuget.org/packages/Aspose.Slides.NET) - support for .NET6+ for Windows, .NETStandard for Windows/Linux/MacOS, .NETFramework 2+ (Windows).
- has a dependence on [System.Drawing.Common](https://www.nuget.org/packages/System.Drawing.Common/).
- [Aspose.Slides.NET6.CrossPlatform](https://www.nuget.org/packages/Aspose.Slides.NET6.CrossPlatform) - Windows/Linux/MacOS version without dependencies.
The inconvenience of [Aspose.Slides.NET6.CrossPlatform](https://www.nuget.org/packages/Aspose.Slides.NET6.CrossPlatform) is that it implements its own version of System.Drawing in the same namespace (to support backward compatibility with the public API). Thus, when Aspose.Slides.NET6.CrossPlatform and System.Drawing from .NET Framework or System.Drawing.Common package are used at the same time, a name conflict occurs unless alias is used.
In order to get rid of dependencies on System.Drawing in the main Aspose.Slides.NET package, we added the so-called "Modern API" - i.e. the API that should be used instead of the deprecated one, whose signatures contain dependencies on the following types from System.Drawing: [Image](https://learn.microsoft.com/en-us/dotnet/api/system.drawing.image) and [Bitmap](https://learn.microsoft.com/en-us/dotnet/api/system.drawing.bitmap). [PrinterSettings](https://learn.microsoft.com/en-us/dotnet/api/system.drawing.printing.printersettings) and [Graphics](https://learn.microsoft.com/en-us/dotnet/api/system.drawing.graphics) are declared deprecated and their support is removed from the public Slides API.
In current versions, treat the public API that depends on System.Drawing as legacy/deprecated. Use the Modern API for new code and when migrating existing image-processing workflows.
## **Modern API**
Added the following classes and enums to the public API:
- [Aspose.Slides.IImage](https://reference.aspose.com/slides/net/aspose.slides/iimage/) - represents the raster or vector image.
- [Aspose.Slides.ImageFormat](https://reference.aspose.com/slides/net/aspose.slides/imageformat/) - represents the file format of the image.
- [Aspose.Slides.Images](https://reference.aspose.com/slides/net/aspose.slides/images/) - methods to instantiate and work with the [IImage](https://reference.aspose.com/slides/net/aspose.slides/iimage/) interface.
Please note that [IImage](https://reference.aspose.com/slides/net/aspose.slides/iimage/) is disposable (it implements the [IDisposable](https://learn.microsoft.com/en-us/dotnet/api/system.idisposable) interface and its use should be wrapped in using or disposed in another convenient way).
Use `GetImage` to render a single slide or shape. Use `GetImages` to render several presentation slides. Use [Images](https://reference.aspose.com/slides/net/aspose.slides/images/) methods to load images, `AddImage` with [IImage](https://reference.aspose.com/slides/net/aspose.slides/iimage/) to add them to a presentation, and `ReplaceImage` with [IImage](https://reference.aspose.com/slides/net/aspose.slides/iimage/) to update an existing presentation image.
A typical scenario of using the new API may look as follows:
``` csharp
using System.Drawing;
using Aspose.Slides;
using (Presentation pres = new Presentation())
{
IPPImage ppImage;
// instantiate a disposable instance of IImage from the file on the disk.
using (IImage image = Images.FromFile("image.png"))
{
// create a PowerPoint image by adding an instance of IImage to the presentation's images.
ppImage = pres.Images.AddImage(image);
}
// add a picture shape on the slide #1
pres.Slides[0].Shapes.AddPictureFrame(ShapeType.Rectangle, 10, 10, 100, 100, ppImage);
// get an instance of the IImage representing slide #1.
using (var slideImage = pres.Slides[0].GetImage(new Size(1920, 1080)))
{
// save the image on the disk.
slideImage.Save("slide1.jpeg", ImageFormat.Jpeg);
}
}
```
## **Replacing Old Code with Modern API**
For ease of transition, the interface of the new [IImage](https://reference.aspose.com/slides/net/aspose.slides/iimage/) repeats the separate signatures of the [Image](https://learn.microsoft.com/en-us/dotnet/api/system.drawing.image) and [Bitmap](https://learn.microsoft.com/en-us/dotnet/api/system.drawing.bitmap) classes. In general, you will just need to replace the call to the old method using System.Drawing with the new one.
### **Getting a Slide Thumbnail**
Legacy/deprecated API:
``` csharp
using Aspose.Slides;
using (Presentation pres = new Presentation("pres.pptx"))
{
pres.Slides[0].GetThumbnail().Save("slide1.png");
}
```
Modern API:
``` csharp
using Aspose.Slides;
using (Presentation pres = new Presentation("pres.pptx"))
{
pres.Slides[0].GetImage().Save("slide1.png");
}
```
### **Getting a Shape Thumbnail**
Legacy/deprecated API:
``` csharp
using Aspose.Slides;
using (Presentation pres = new Presentation("pres.pptx"))
{
pres.Slides[0].Shapes[0].GetThumbnail().Save("shape.png");
}
```
Modern API:
``` csharp
using Aspose.Slides;
using (Presentation pres = new Presentation("pres.pptx"))
{
pres.Slides[0].Shapes[0].GetImage().Save("shape.png");
}
```
### **Getting a Presentation Thumbnail**
Legacy/deprecated API:
``` csharp
using System.Drawing;
using Aspose.Slides;
using Aspose.Slides.Export;
using (Presentation pres = new Presentation("pres.pptx"))
{
var bitmaps = pres.GetThumbnails(new RenderingOptions(), new Size(1980, 1028));
try
{
for (var index = 0; index < bitmaps.Length; index++)
{
Bitmap thumbnail = bitmaps[index];
thumbnail.Save($"slide{index}.png", ImageFormat.Png);
}
}
finally
{
foreach (Bitmap bitmap in bitmaps)
{
bitmap.Dispose();
}
}
}
```
Modern API:
``` csharp
using System.Drawing;
using Aspose.Slides;
using Aspose.Slides.Export;
using (Presentation pres = new Presentation("pres.pptx"))
{
var images = pres.GetImages(new RenderingOptions(), new Size(1980, 1028));
try
{
for (var index = 0; index < images.Length; index++)
{
IImage thumbnail = images[index];
thumbnail.Save($"slide{index}.png", ImageFormat.Png);
}
}
finally
{
foreach (IImage image in images)
{
image.Dispose();
}
}
}
```
### **Adding a Picture to a Presentation**
Legacy/deprecated API:
``` csharp
using System.Drawing;
using Aspose.Slides;
using (Presentation pres = new Presentation())
{
IPPImage ppImage;
using (Image image = Image.FromFile("image.png"))
{
ppImage = pres.Images.AddImage(image);
}
pres.Slides[0].Shapes.AddPictureFrame(ShapeType.Rectangle, 10, 10, 100, 100, ppImage);
}
```
Modern API:
``` csharp
using Aspose.Slides;
using (Presentation pres = new Presentation())
{
IPPImage ppImage;
using (IImage image = Aspose.Slides.Images.FromFile("image.png"))
{
ppImage = pres.Images.AddImage(image);
}
pres.Slides[0].Shapes.AddPictureFrame(ShapeType.Rectangle, 10, 10, 100, 100, ppImage);
}
```
## **Deprecated Methods/Properties and Their Replacement in Modern API**
### **Presentation**
| Method Signature | Replacement Method Signature |
|-----------------------------------------------|---------------------------------------------------------|
| public Bitmap[] GetThumbnails(IRenderingOptions options) | [GetImages(IRenderingOptions options)](https://reference.aspose.com/slides/net/aspose.slides/presentation/getimages#getimages) |
| public Bitmap[] GetThumbnails(IRenderingOptions options, int[] slides) | [GetImages(IRenderingOptions options, int[] slides)](https://reference.aspose.com/slides/net/aspose.slides/presentation/getimages#getimages_1) |
| public Bitmap[] GetThumbnails(IRenderingOptions options, float scaleX, float scaleY) | [GetImages(IRenderingOptions options, float scaleX, float scaleY)](https://reference.aspose.com/slides/net/aspose.slides/presentation/getimages#getimages_4) |
| public Bitmap[] GetThumbnails(IRenderingOptions options, int[] slides, float scaleX, float scaleY) | [GetImages(IRenderingOptions options, int[] slides, float scaleX, float scaleY)](https://reference.aspose.com/slides/net/aspose.slides/presentation/getimages#getimages_2) |
| public Bitmap[] GetThumbnails(IRenderingOptions options, Size imageSize) | [GetImages(IRenderingOptions options, Size imageSize)](https://reference.aspose.com/slides/net/aspose.slides/presentation/getimages) |
| public Bitmap[] GetThumbnails(IRenderingOptions options, int[] slides, Size imageSize) | [GetImages(IRenderingOptions options, int[] slides, Size imageSize)](https://reference.aspose.com/slides/net/aspose.slides/presentation/getimages#getimages_3) |
| public void Save(string fname, SaveFormat format, HttpResponse response, bool showInline) | No Modern API replacement |
| public void Save(string fname, SaveFormat format, ISaveOptions options, HttpResponse response, bool showInline) | No Modern API replacement |
| public void Print() | No Modern API replacement |
| public void Print(PrinterSettings printerSettings) | No Modern API replacement |
| public void Print(string printerName) | No Modern API replacement |
| public void Print(PrinterSettings printerSettings, string presName) | No Modern API replacement |
### **Shape**
| Method Signature | Replacement Method Signature |
|----------------------------------------------------------------------|-------------------------------------------------------------------|
| public Bitmap GetThumbnail() | [GetImage](https://reference.aspose.com/slides/net/aspose.slides/shape/getimage#getimage) |
| public Bitmap GetThumbnail(ShapeThumbnailBounds bounds, float scaleX, float scaleY) | [GetImage(ShapeThumbnailBounds bounds, float scaleX, float scaleY)](https://reference.aspose.com/slides/net/aspose.slides/shape/getimage#getimage_1) |
### **Slide**
| Method Signature | Replacement Method Signature |
|----------------------------------------------------------------------|-----------------------------------------------------------------------|
| public Bitmap GetThumbnail(float scaleX, float scaleY) | [GetImage(float scaleX, float scaleY)](https://reference.aspose.com/slides/net/aspose.slides/slide/getimage#getimage_5) |
| public Bitmap GetThumbnail() | [GetImage](https://reference.aspose.com/slides/net/aspose.slides/slide/getimage#getimage) |
| public Bitmap GetThumbnail(IRenderingOptions options) | [GetImage(IRenderingOptions options)](https://reference.aspose.com/slides/net/aspose.slides/slide/getimage#getimage_1) |
| public Bitmap GetThumbnail(Size imageSize) | [GetImage(Size imageSize)](https://reference.aspose.com/slides/net/aspose.slides/slide/getimage#getimage_6) |
| public Bitmap GetThumbnail(ITiffOptions options) | [GetImage(ITiffOptions options)](https://reference.aspose.com/slides/net/aspose.slides/slide/getimage#getimage_4) |
| public Bitmap GetThumbnail(IRenderingOptions options, float scaleX, float scaleY) | [GetImage(IRenderingOptions options, float scaleX, float scaleY)](https://reference.aspose.com/slides/net/aspose.slides/slide/getimage#getimage_2) |
| public Bitmap GetThumbnail(IRenderingOptions options, Size imageSize) | [GetImage(IRenderingOptions options, Size imageSize)](https://reference.aspose.com/slides/net/aspose.slides/slide/getimage#getimage_3) |
| public void RenderToGraphics(IRenderingOptions options, Graphics graphics) | No Modern API replacement |
| public void RenderToGraphics(IRenderingOptions options, Graphics graphics, float scaleX, float scaleY) | No Modern API replacement |
| public void RenderToGraphics(IRenderingOptions options, Graphics graphics, Size renderingSize) | No Modern API replacement |
### **Output**
| Method Signature | Replacement Method Signature |
|-----------------------------------------------------------------|-------------------------------------------------------------|
| public IOutputFile Add(string path, Image image) | [Add(string path, IImage image)](https://reference.aspose.com/slides/net/aspose.slides.export.web/output/add#add_1) |
### **ImageCollection**
| Method Signature | Replacement Method Signature |
|-------------------------------------------|--------------------------------------------|
| IPPImage AddImage(Image image) | [AddImage(IImage image)](https://reference.aspose.com/slides/net/aspose.slides/imagecollection/addimage#addimage) |
### **ImageWrapperFactory**
| Method Signature | Replacement Method Signature |
|----------------------------------------------------------|---------------------------------------------------------|
| IImageWrapper CreateImageWrapper(Image image) | [CreateImageWrapper(IImage image)](https://reference.aspose.com/slides/net/aspose.slides/imagewrapperfactory/createimagewrapper#createimagewrapper) |
### **PPImage**
| Method/Property Signature | Replacement Method Signature |
|--------------------------------------|-----------------------------------------|
| void ReplaceImage(Image newImage) | [ReplaceImage(IImage newImage)](https://reference.aspose.com/slides/net/aspose.slides/ppimage/replaceimage#replaceimage) |
| Image SystemImage { get; } | [IImage Image { get; }](https://reference.aspose.com/slides/net/aspose.slides/ppimage/image) |
### **PatternFormat**
| Method Signature | Replacement Method Signature |
|-----------------------------------------------------------|-----------------------------------------------------|
| Bitmap GetTileImage(Color background, Color foreground) | [GetTile(Color background, Color foreground)](https://reference.aspose.com/slides/net/aspose.slides/patternformat/gettile#gettile_1) |
| Bitmap GetTileImage(Color styleColor) | [GetTile(Color styleColor)](https://reference.aspose.com/slides/net/aspose.slides/patternformat/gettile#gettile) |
### **IPatternFormatEffectiveData**
| Method Signature | Replacement Method Signature |
|-----------------------------------------------------------|-----------------------------------------------------|
| Bitmap GetTileImage(Color background, Color foreground) | [GetTileIImage(SlidesImage image)](https://reference.aspose.com/slides/net/aspose.slides/ipatternformateffectivedata/gettileiimage) |
## **API Support for Graphics and PrinterSettings**
The [Graphics](https://learn.microsoft.com/en-us/dotnet/api/system.drawing.graphics) class is not supported for cross-platform versions of .NET6 and higher. In Aspose Slides, use the Modern API image-rendering methods instead of the API that renders to [Graphics](https://learn.microsoft.com/en-us/dotnet/api/system.drawing.graphics):
[ISlide](https://reference.aspose.com/slides/net/aspose.slides/islide/)
- [public void RenderToGraphics(IRenderingOptions options, Graphics graphics)](https://reference.aspose.com/slides/net/aspose.slides/slide/rendertographics/#rendertographics_3)
- [public void RenderToGraphics(IRenderingOptions options, Graphics graphics, float scaleX, float scaleY)](https://reference.aspose.com/slides/net/aspose.slides/slide/rendertographics/#rendertographics_3)
- [public void RenderToGraphics(IRenderingOptions options, Graphics graphics, Size renderingSize)](https://reference.aspose.com/slides/net/aspose.slides/slide/rendertographics/#rendertographics_5)
Also, the API that is related to printing through [PrinterSettings](https://learn.microsoft.com/en-us/dotnet/api/system.drawing.printing.printersettings) has no direct Modern API replacement:
[IPresentation](https://reference.aspose.com/slides/net/aspose.slides/ipresentation/):
- [public void Presentation.Print](https://reference.aspose.com/slides/net/aspose.slides/presentation/print/#print)
- [public void Print(PrinterSettings printerSettings)](https://reference.aspose.com/slides/net/aspose.slides/presentation/print/#print_1)
- [public void Print(string printerName)](https://reference.aspose.com/slides/net/aspose.slides/presentation/print/#print_3)
- [public void Print(PrinterSettings printerSettings, string presName)](https://reference.aspose.com/slides/net/aspose.slides/presentation/print/#print_2)
## **FAQ**
### Why was [Graphics](https://learn.microsoft.com/en-us/dotnet/api/system.drawing.graphics) dropped?
Support for [Graphics](https://learn.microsoft.com/en-us/dotnet/api/system.drawing.graphics) is deprecated in the public API to unify work with rendering and images, eliminate ties to platform-specific dependencies, and switch to a cross-platform approach with [IImage](https://reference.aspose.com/slides/net/aspose.slides/iimage/). Use `GetImage` or `GetImages` instead of rendering to [Graphics](https://learn.microsoft.com/en-us/dotnet/api/system.drawing.graphics).
### What is the practical benefit of [IImage](https://reference.aspose.com/slides/net/aspose.slides/iimage/) compared to [Image](https://learn.microsoft.com/en-us/dotnet/api/system.drawing.image)/[Bitmap](https://learn.microsoft.com/en-us/dotnet/api/system.drawing.bitmap)?
[IImage](https://reference.aspose.com/slides/net/aspose.slides/iimage/) unifies working with both raster and vector images, simplifies saving to various formats via [ImageFormat](https://reference.aspose.com/slides/net/aspose.slides/imageformat/), reduces dependence on `System.Drawing`, and makes code more portable across environments.
### Will the Modern API affect the performance of generating thumbnails?
Switching from `GetThumbnail` to `GetImage` does not worsen scenarios: the new methods provide the same capabilities for producing images with options and sizes, while retaining support for rendering options. The specific gain or drop depends on the scenario, but functionally the replacements are equivalent.
## Related articles
- [Public API and Backwards Incompatible Changes in Aspose.Slides for .NET 14.3.0](https://docs.aspose.com/slides/net/public-api-and-backwards-incompatible-changes-in-aspose-slides-for-net-14-3-0/)
# Move a paragraph from one presentation to another
>
Source: https://docs.aspose.com/slides/net/move-a-paragraph-from-one-presentation-to-another/
Updated: 2026-08-05
## **OpenXML Presentation**
``` csharp
public static void Main()
{
string FilePath = @"..\..\..\..\Sample Files\";
string FileName = FilePath + "Move a Paragraph from One Presentation to Another 1.pptx";
string DestFileName = FilePath + "Move a Paragraph from One Presentation to Another 2.pptx";
MoveParagraphToPresentation(FileName, DestFileName);
}
// Moves a paragraph range in a TextBody shape in the source document
// to another TextBody shape in the target document.
public static void MoveParagraphToPresentation(string sourceFile, string targetFile)
{
// Open the source file as read/write.
using (PresentationDocument sourceDoc = PresentationDocument.Open(sourceFile, true))
{
// Open the target file as read/write.
using (PresentationDocument targetDoc = PresentationDocument.Open(targetFile, true))
{
// Get the first slide in the source presentation.
SlidePart slide1 = GetFirstSlide(sourceDoc);
// Get the first TextBody shape in it.
TextBody textBody1 = slide1.Slide.Descendants().First();
// Get the first paragraph in the TextBody shape.
// Note: "Drawing" is the alias of namespace DocumentFormat.OpenXml.Drawing
Drawing.Paragraph p1 = textBody1.Elements().First();
// Get the first slide in the target presentation.
SlidePart slide2 = GetFirstSlide(targetDoc);
// Get the first TextBody shape in it.
TextBody textBody2 = slide2.Slide.Descendants().First();
// Clone the source paragraph and insert the cloned. paragraph into the target TextBody shape.
// Passing "true" creates a deep clone, which creates a copy of the
// Paragraph object and everything directly or indirectly referenced by that object.
textBody2.Append(p1.CloneNode(true));
// Remove the source paragraph from the source file.
textBody1.RemoveChild(p1);
// Replace the removed paragraph with a placeholder.
textBody1.AppendChild(new Drawing.Paragraph());
// Save the slide in the source file.
slide1.Slide.Save();
// Save the slide in the target file.
slide2.Slide.Save();
}
}
}
// Get the slide part of the first slide in the presentation document.
public static SlidePart GetFirstSlide(PresentationDocument presentationDocument)
{
// Get relationship ID of the first slide
PresentationPart part = presentationDocument.PresentationPart;
SlideId slideId = part.Presentation.SlideIdList.GetFirstChild();
string relId = slideId.RelationshipId;
// Get the slide part by the relationship ID.
SlidePart slidePart = (SlidePart)part.GetPartById(relId);
return slidePart;
}
```
## **Aspose.Slides**
It's not uncommon that developers need to extract the text from a presentation. To do so, you need to extract text from all the shapes on all the slides in a presentation. This article explains how to extract text from Microsoft PowerPoint PPTX presentations using Aspose.Slides. Whether extracting text from one slide or an entire presentation, Aspose.Slides uses the PresentationScanner Class and the static methods it exposes. They are all packed under the namespace [Aspose.Slides.Util](https://reference.aspose.com/slides/net/aspose.slides.util/slideutil).
``` csharp
using Aspose.Slides;
using Aspose.Slides.Export;
public static void Main()
{
string FilePath = @"..\..\..\..\Sample Files\";
string FileName = FilePath + "Move a Paragraph from One Presentation to Another 1.pptx";
string DestFileName = FilePath + "Move a Paragraph from One Presentation to Another 2.pptx";
MoveParagraphToPresentation(FileName, DestFileName);
}
// Moves a paragraph range in a TextBody shape in the source document
// to another TextBody shape in the target document.
public static void MoveParagraphToPresentation(string sourceFile, string targetFile)
{
string Text = "";
//Instantiate Presentation class that represents PPTX
using (Presentation sourcePres = new Presentation(sourceFile))
using (Presentation destPres = new Presentation(targetFile))
{
//Access first shape in first slide
IShape shp = sourcePres.Slides[0].Shapes[0];
if (shp.Placeholder != null)
{
//Get text from placeholder
Text = ((IAutoShape)shp).TextFrame.Text;
((IAutoShape)shp).TextFrame.Text = "";
}
//Access first shape in first slide of the destination presentation
IShape destshp = destPres.Slides[0].Shapes[0];
if (destshp.Placeholder != null)
{
//Put text into placeholder
((IAutoShape)destshp).TextFrame.Text += Text;
}
sourcePres.Save(sourceFile, SaveFormat.Pptx);
destPres.Save(targetFile, SaveFormat.Pptx);
}
}
```
## **Download Running Code Example**
- [GitHub](https://github.com/aspose-slides/Aspose.Slides-for-.NET/releases/tag/AsposeSlidesVsOpenXML1.1)
## **Sample Code**
- [GitHub](https://github.com/aspose-slides/Aspose.Slides-for-.NET/tree/master/Plugins/OpenXML/Common%20Features/Move%20a%20Paragraph)
## Related articles
- [Change the fill color of a shape in a presentation](https://docs.aspose.com/slides/net/change-the-fill-color-of-a-shape-in-a-presentation/)
- [Code Comparison for common features with OpenXML](https://docs.aspose.com/slides/net/code-comparison-for-common-features-with-openxml/)
- [Adding Shapes to Presentation](https://docs.aspose.com/slides/net/adding-shapes-to-presentation/)
# Move a slide to a new position
>
Source: https://docs.aspose.com/slides/net/move-a-slide-to-a-new-position/
Updated: 2026-08-05
## **OpenXML SDK**
``` csharp
string FilePath = @"..\..\..\..\Sample Files\";
string FileName = FilePath + "Move a slide to a new position.pptx";
MoveSlide(FileName, 1, 2);
// Counting the slides in the presentation.
public static int CountSlides(string presentationFile)
{
// Open the presentation as read-only.
using (PresentationDocument presentationDocument = PresentationDocument.Open(presentationFile, false))
{
// Pass the presentation to the next CountSlides method
// and return the slide count.
return CountSlides(presentationDocument);
}
}
// Count the slides in the presentation.
public static int CountSlides(PresentationDocument presentationDocument)
{
// Check for a null document object.
if (presentationDocument == null)
{
throw new ArgumentNullException("presentationDocument");
}
int slidesCount = 0;
// Get the presentation part of document.
PresentationPart presentationPart = presentationDocument.PresentationPart;
// Get the slide count from the SlideParts.
if (presentationPart != null)
{
slidesCount = presentationPart.SlideParts.Count();
}
// Return the slide count to the previous method.
return slidesCount;
}
// Move a slide to a different position in the slide order in the presentation.
public static void MoveSlide(string presentationFile, int from, int to)
{
using (PresentationDocument presentationDocument = PresentationDocument.Open(presentationFile, true))
{
MoveSlide(presentationDocument, from, to);
}
}
// Move a slide to a different position in the slide order in the presentation.
public static void MoveSlide(PresentationDocument presentationDocument, int from, int to)
{
if (presentationDocument == null)
{
throw new ArgumentNullException("presentationDocument");
}
// Call the CountSlides method to get the number of slides in the presentation.
int slidesCount = CountSlides(presentationDocument);
// Verify that both from and to positions are within range and different from one another.
if (from < 0 || from >= slidesCount)
{
throw new ArgumentOutOfRangeException("from");
}
if (to < 0 || from >= slidesCount || to == from)
{
throw new ArgumentOutOfRangeException("to");
}
// Get the presentation part from the presentation document.
PresentationPart presentationPart = presentationDocument.PresentationPart;
// The slide count is not zero, so the presentation must contain slides.
Presentation presentation = presentationPart.Presentation;
SlideIdList slideIdList = presentation.SlideIdList;
// Get the slide ID of the source slide.
SlideId sourceSlide = slideIdList.ChildElements[from] as SlideId;
SlideId targetSlide = null;
// Identify the position of the target slide after which to move the source slide.
if (to == 0)
{
targetSlide = null;
}
if (from < to)
{
targetSlide = slideIdList.ChildElements[to] as SlideId;
}
else
{
targetSlide = slideIdList.ChildElements[to - 1] as SlideId;
}
// Remove the source slide from its current position.
sourceSlide.Remove();
// Insert the source slide at its new position after the target slide.
slideIdList.InsertAfter(sourceSlide, targetSlide);
// Save the modified presentation.
presentation.Save();
}
```
## **Aspose.Slides**
``` csharp
using Aspose.Slides;
string FilePath = @"..\..\..\..\Sample Files\";
string FileName = FilePath + "Move a slide to a new position.pptx";
int fromIndex = 1;
int toIndex = 2;
//Instantiate the Presentation class to load the source PPTX file
using (Presentation pres = new Presentation(FileName))
{
//Get the slide whose position is to be changed
ISlide sld = pres.Slides[fromIndex];
ISlide sld2 = pres.Slides[toIndex];
//Set the new position for the slide
sld2.SlideNumber = fromIndex;
sld.SlideNumber = toIndex;
//Write the PPTX to disk
pres.Save(FileName, Aspose.Slides.Export.SaveFormat.Pptx);
}
```
## **Download Sample Code**
- [GitHub](https://github.com/aspose-slides/Aspose.Slides-for-.NET/releases/tag/AsposeSlidesVsOpenXML1.1)
- [Sourceforge](https://sourceforge.net/projects/asposeopenxml/files/Aspose.Slides%20Vs%20OpenXML/Move%20a%20slide%20to%20a%20new%20position%20%28Aspose.Slides%29.zip/download)
- [Bitbucket](https://bitbucket.org/asposemarketplace/aspose-for-openxml/src/master/Aspose.Slides%20Vs%20OpenXML/Move%20a%20slide%20to%20a%20new%20position/)
# Multithreading in Aspose.Slides for .NET
> Aspose.Slides for .NET multithreading boosts PowerPoint and OpenDocument processing. Discover best practices for efficient presentation workflows.
Source: https://docs.aspose.com/slides/net/multithreading/
Updated: 2026-08-05
## **Introduction**
While parallel work with presentations is possible (besides parsing/loading/cloning) and everything goes well (most times), there is a small chance you might get incorrect results when you use the library in multiple threads.
We strongly recommend that you do **not** use a single [Presentation](https://reference.aspose.com/slides/net/aspose.slides/presentation) instance in a multi-threading environment because it might result in unpredictable errors or failures that are not easily detected.
It is **not** safe to load, save, and/or clone an instance of a [Presentation](https://reference.aspose.com/slides/net/aspose.slides/presentation) class in multiple threads. Such operations are **not** supported. If you need to perform such tasks, you have to parallel the operations using several single-threaded processes—and each of these processes should use its own presentation instance.
## **Convert Presentation Slides to Images in Parallel**
Let's say we want to convert all the slides from a PowerPoint presentation to PNG images in parallel. Since it is unsafe to use a single `Presentation` instance in multiple threads, we split the presentation slides into separate presentations and convert the slides to images in parallel, using each presentation in a separate thread. The following code example shows how to do this.
```cs
using Aspose.Slides;
var inputFilePath = "sample.pptx";
var outputFilePathTemplate = "slide_{0}.png";
var imageScale = 2;
using var presentation = new Presentation(inputFilePath);
var slideCount = presentation.Slides.Count;
var slideSize = presentation.SlideSize.Size;
var conversionTasks = new List(slideCount);
for (var slideIndex = 0; slideIndex < slideCount; slideIndex++)
{
// Extract slide i into a separate presentation.
var slidePresentation = new Presentation();
slidePresentation.SlideSize.SetSize(slideSize.Width, slideSize.Height, SlideSizeScaleType.DoNotScale);
slidePresentation.Slides.RemoveAt(0);
slidePresentation.Slides.AddClone(presentation.Slides[slideIndex]);
// Convert the slide to an image in a separate task.
var slideNumber = slideIndex + 1;
conversionTasks.Add(Task.Run(() =>
{
try
{
var slide = slidePresentation.Slides[0];
using var image = slide.GetImage(imageScale, imageScale);
var imageFilePath = string.Format(outputFilePathTemplate, slideNumber);
image.Save(imageFilePath, ImageFormat.Png);
}
finally
{
slidePresentation.Dispose();
}
}));
}
await Task.WhenAll(conversionTasks);
```
## **FAQ**
### Do I need to call license setup in every thread?
No. It’s enough to do it once per process/app domain before threads start. If [license setup](https://docs.aspose.com/slides/net/licensing/) might be invoked concurrently (for example, during lazy initialization), synchronize that call because the license setup method itself is not thread-safe.
### Can I pass `Presentation` or `Slide` objects between threads?
Passing "live" presentation objects between threads is not recommended: use independent instances per thread or precreate separate presentations/slide containers for each thread. This approach follows the general recommendation not to share a single presentation instance across threads.
### Is it safe to parallelize export to different formats (PDF, HTML, images) provided each thread has its own `Presentation` instance?
Yes. With independent instances and separate output paths, such tasks typically parallelize correctly; avoid any shared presentation objects and shared I/O streams.
### What should I do with global font settings (folders, substitutions) in multithreading?
Initialize all global font settings before starting the threads and do not change them during parallel work. This eliminates races when accessing shared font resources.
## Related features
- [Process separate presentations in parallel](https://docs.aspose.com/slides/features/parallel-processing/)
# Updates to Supported Target Platforms
> Learn about support for obsolete .NET versions in Aspose.Slides, and upgrade your PowerPoint PPT, PPTX, and ODP presentation projects to modern, compatible versions.
Source: https://docs.aspose.com/slides/net/net2-obsolete/
Updated: 2025-11-12
As part of our ongoing efforts to improve product quality and security, we are planning the following changes in **version 25.11**:
- Assemblies targeting **.NET Framework 2.0**, **3.5**, and **4.0** will be removed from the release package.
- Instead, a new assembly targeting **.NET Framework 4.6.2** will be introduced, offering better support for modern platform features and improved security.
- Support for **.NET Standard 2.1** will be discontinued. Going forward, we will use the more widely compatible **.NET Standard 2.0** assembly instead.
If your projects currently rely on the deprecated platforms, we recommend planning a migration to the supported versions. These changes will allow us to focus on enhancing performance, security, and compatibility with up-to-date platforms.
# Cross-Platform Package for .NET 6 and Later
> Learn when to use the Aspose.Slides.NET6.CrossPlatform package: why it exists, the platforms it runs on, and what it needs on Linux instead of libgdiplus.
Source: https://docs.aspose.com/slides/net/net6/
Updated: 2026-09-28
## **Introduction**
Aspose.Slides for .NET is published as two NuGet packages. [Aspose.Slides.NET](https://www.nuget.org/packages/Aspose.Slides.NET/) draws slides through Microsoft's System.Drawing.Common library. [Aspose.Slides.NET6.CrossPlatform](https://www.nuget.org/packages/Aspose.Slides.NET6.CrossPlatform/) draws them with its own graphics engine instead. This article explains why the second package exists, where it runs, what it needs on Linux, and how it coexists with System.Drawing.Common in one project.
## **Why a Separate Package**
Starting with .NET 6, Microsoft supports System.Drawing.Common [only on Windows](https://learn.microsoft.com/en-us/dotnet/core/compatibility/core-libraries/6.0/system-drawing-common-windows-only). As a result, on Linux Aspose.Slides.NET needs the `System.Drawing.EnableUnixSupport` switch in addition to the `libgdiplus` library, and it fails there if the project references System.Drawing.Common 7 or later. [System Requirements](https://docs.aspose.com/slides/net/system-requirements/) describes these conditions.
Aspose.Slides.NET6.CrossPlatform does not use System.Drawing.Common or `libgdiplus`. Its graphics engine is a native library that the package contains in one build per supported platform. Both packages provide the same Aspose.Slides namespaces and classes, so switching from one to the other changes only the package reference, not your code.
| | Aspose.Slides.NET | Aspose.Slides.NET6.CrossPlatform |
|---|---|---|
| Graphics | System.Drawing.Common | Native graphics engine included in the package |
| Target frameworks | `net462`, `net6.0`, `netstandard2.0` | `net6.0` |
| Linux requirements | `libgdiplus` and the `System.Drawing.EnableUnixSupport` switch | `fontconfig` |
| Alpine Linux | Supported | Not supported |
## **Supported Platforms**
Aspose.Slides.NET6.CrossPlatform works with .NET 6 and later versions on these platforms:
- **Windows**: x86 and x64. The native library uses the Microsoft Visual C++ runtime; see [System Requirements](https://docs.aspose.com/slides/net/system-requirements/).
- **Linux**: x64 with glibc 2.23 or later, and ARM64 with glibc 2.39 or later.
- **macOS**: x64 (Intel) and ARM64 (Apple silicon).
It does not run on Windows on ARM64, on Alpine Linux or other distributions built on musl instead of glibc, or on distributions with an older glibc, such as CentOS 7. Use Aspose.Slides.NET on those systems.
## **Install on Linux**
On Linux, the package requires the `fontconfig` library, but not `libgdiplus`. On Debian and Ubuntu, install `fontconfig` and then add the package to your project:
```bash
sudo apt-get update && sudo apt-get install -y libfontconfig1
dotnet add package Aspose.Slides.NET6.CrossPlatform
```
On Debian and Ubuntu, `libfontconfig1` also installs the DejaVu fonts, so text renders without further font packages. Without `fontconfig`, creating a [Presentation](https://reference.aspose.com/slides/net/aspose.slides/presentation/) fails with a `TypeInitializationException` whose inner `DllNotFoundException` reports that `libfontconfig.so.1` cannot be opened. [System Requirements](https://docs.aspose.com/slides/net/system-requirements/) includes a short program that checks the setup.
## **Cloud and Container Hosts**
Because it does not need `libgdiplus`, Aspose.Slides.NET6.CrossPlatform is the package to use on Linux hosts where you cannot install `libgdiplus`. It still needs `fontconfig` and fonts, which minimal base images may lack. The AWS Lambda base image for .NET 8, for example, contains neither. In a container image built on it, run `dnf install -y fontconfig`, which also installs the Noto Sans fonts.
For guides to specific cloud platforms, see [Aspose.Slides on Cloud Platforms](https://docs.aspose.com/slides/net/slides-on-cloud-platforms/).
## **Using System.Drawing.Common in the Same Project (CS0433)**
A project that uses Aspose.Slides.NET6.CrossPlatform can also reference System.Drawing.Common, directly or through another package. The current version of Aspose.Slides exposes no public types in `System` namespaces, so the two libraries do not conflict, and you can import the `Aspose.Slides` and `System.Drawing` namespaces in the same file.
If the compiler reports error CS0433 because a type such as `Image` or `Graphics` exists in both Aspose.Slides and System.Drawing.Common, your project uses an older version of Aspose.Slides. Update the package to the latest version. Aspose.Slides returns rendered images as [IImage](https://reference.aspose.com/slides/net/aspose.slides/iimage/) objects, which are described in [Modern API](https://docs.aspose.com/slides/net/modern-api/).
## **FAQ**
**Do I need to change my code when I switch from Aspose.Slides.NET to Aspose.Slides.NET6.CrossPlatform?**
No. Both packages provide the same Aspose.Slides namespaces and classes, so you only replace the package reference. Aspose.Slides.NET6.CrossPlatform does not need the `System.Drawing.EnableUnixSupport` switch. Add only one of the two packages to a project.
**Can I use Aspose.Slides.NET6.CrossPlatform in a .NET Framework project?**
No. The package targets only .NET 6 and later. For .NET Framework 4.6.2 and later, use Aspose.Slides.NET.
## Related features
- [Choose a .NET runtime](https://docs.aspose.com/slides/features/dotnet-runtimes/)
## Related articles
- [Aspose.Slides for .NET 6 Cross-Platform (ZIP Package)](https://docs.aspose.com/slides/net/slides-for-net-6-cross-platform-zip-package/)
# Change Notes Page Size and Orientation in .NET
> Read and change notes page dimensions in Aspose.Slides for .NET, switch orientation, verify saved sizes, and export notes or handouts to PDF and images.
Source: https://docs.aspose.com/slides/net/notes-size/
Updated: 2026-11-08
## **Overview**
Use [Presentation.NotesSize](https://reference.aspose.com/slides/net/aspose.slides/presentation/notessize/) to access the presentation's notes page settings. It returns an [INotesSize](https://reference.aspose.com/slides/net/aspose.slides/inotessize/) object whose [Size](https://reference.aspose.com/slides/net/aspose.slides/inotessize/size/) property is writable. Although the settings object itself is read-only, you can assign new dimensions to its size property.
Width and height are specified in **points**, with 72 points per inch. For example, 900 × 600 points is 12.5 × 8⅓ inches. These settings apply to the presentation, rather than to an individual slide's notes.
| Setting | Purpose |
| --- | --- |
| [Presentation.NotesSize](https://reference.aspose.com/slides/net/aspose.slides/presentation/notessize/) | Controls notes page dimensions and the page dimensions used for handout export. |
| [Presentation.SlideSize](https://reference.aspose.com/slides/net/aspose.slides/presentation/slidesize/) | Controls regular presentation slide dimensions through [ISlideSize](https://reference.aspose.com/slides/net/aspose.slides/islidesize/). |
Changing either setting does not automatically change the other. Changing the notes page orientation also does not rotate the regular slides. See [Slide Size](https://docs.aspose.com/slides/net/slide-size/) to resize regular slides.
The examples below use an existing `sample.pptx`. For the export examples, use a presentation with at least one slide containing speaker notes. Each example can be run independently.
[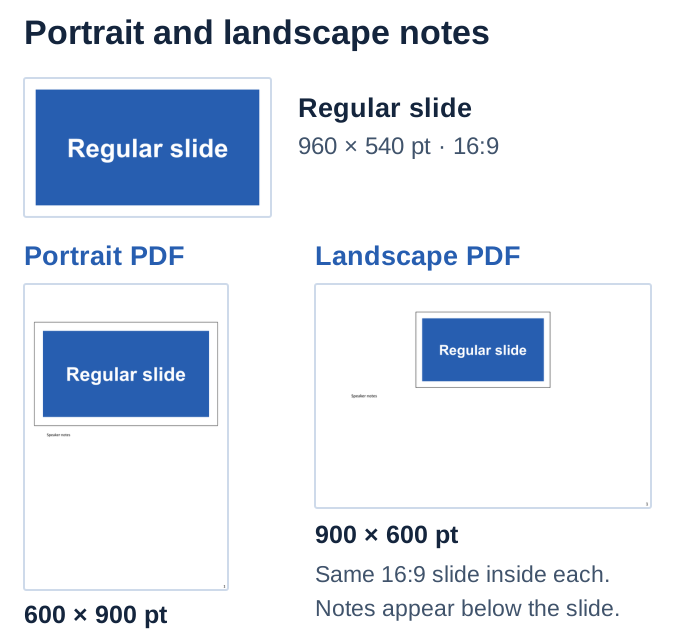](https://docs.aspose.com/slides/net/notes-size/visual-notes-size-dff02bd439bd.svg)
*Swapping the stored notes dimensions gives 600 × 900 and 900 × 600-point PDF pages in this example. The regular slide keeps its 16:9 proportions.*
## **Read the Notes Page Size and Orientation**
Read the width and height and compare them to determine the orientation: a wider page is landscape, a taller page is portrait, and equal dimensions describe a square page. This example prints the actual dimensions in points, without assuming a standard paper size.
```csharp
using System;
using Aspose.Slides;
using var presentation = new Presentation("sample.pptx");
var size = presentation.NotesSize.Size;
var orientation = "Square";
if (size.Width > size.Height)
orientation = "Landscape";
else if (size.Width < size.Height)
orientation = "Portrait";
Console.WriteLine($"Notes page: {size.Width} x {size.Height} points");
Console.WriteLine($"Orientation: {orientation}");
```
## **Switch to Landscape Without Changing the Paper Size**
To change only the orientation, swap the existing width and height. This preserves the lengths of both sides, including those of a custom paper size. The condition below prevents an already-landscape page from being switched back to portrait and leaves a square page unchanged.
```csharp
using System.Drawing;
using Aspose.Slides;
using Aspose.Slides.Export;
using var presentation = new Presentation("sample.pptx");
var size = presentation.NotesSize.Size;
if (size.Width < size.Height)
presentation.NotesSize.Size = new SizeF(size.Height, size.Width);
presentation.Save("landscape-notes.pptx", SaveFormat.Pptx);
```
For portrait orientation, use the same assignment when `size.Width > size.Height`. Do not substitute A4 or Letter dimensions unless you also want to change the paper size.
## **Set and Verify a Custom Notes Page Size**
Assign both dimensions together, then use [Presentation.Save](https://reference.aspose.com/slides/net/aspose.slides/presentation/save/) to write the presentation. This example sets a 900 × 600-point landscape page, saves it as PPTX, and opens the saved file again to check the persisted values. The comparison allows a 0.01-point tolerance for floating-point values; it is not a guarantee of precision for every file format.
```csharp
using System;
using System.Drawing;
using Aspose.Slides;
using Aspose.Slides.Export;
using var presentation = new Presentation("sample.pptx");
var expectedSize = new SizeF(900, 600);
presentation.NotesSize.Size = expectedSize;
presentation.Save("custom-notes.pptx", SaveFormat.Pptx);
using var reopened = new Presentation("custom-notes.pptx");
var actualSize = reopened.NotesSize.Size;
var widthMatches = Math.Abs(actualSize.Width - expectedSize.Width) < 0.01f;
var heightMatches = Math.Abs(actualSize.Height - expectedSize.Height) < 0.01f;
var preserved = widthMatches && heightMatches;
Console.WriteLine($"Stored notes page: {actualSize.Width} x {actualSize.Height} points");
Console.WriteLine($"Size preserved: {preserved}");
```
The expected result is `900 x 600 points` and `Size preserved: True`. Checking a newly opened presentation verifies the saved file, rather than only the in-memory settings.
## **Export Notes and Handouts**
The page dimensions define the available area for notes or handout layouts. They do not enable those layouts by themselves: configure the export options as well. Regular slide export continues to use the slide dimensions.
### **Export Notes to PDF and PNG**
Assign [NotesCommentsLayoutingOptions](https://reference.aspose.com/slides/net/aspose.slides.export/notescommentslayoutingoptions/) to [PdfOptions.SlidesLayoutOptions](https://reference.aspose.com/slides/net/aspose.slides.export/pdfoptions/slideslayoutoptions/) to include notes in the PDF. This example also renders the first slide with notes to PNG using [Slide.GetImage](https://reference.aspose.com/slides/net/aspose.slides/slide/getimage/) and [RenderingOptions](https://reference.aspose.com/slides/net/aspose.slides.export/renderingoptions/).
The [BottomTruncated](https://reference.aspose.com/slides/net/aspose.slides.export/notespositions/) mode keeps the notes on one page; notes that do not fit can be truncated. The PDF uses 900 × 600-point pages. At the image scale of 1 × 1 used below, the PNG is 900 × 600 pixels. Points describe the page geometry; pixels describe the raster output, whose dimensions also depend on the rendering scale.
```csharp
using System.Drawing;
using Aspose.Slides;
using Aspose.Slides.Export;
using var presentation = new Presentation("sample.pptx");
presentation.NotesSize.Size = new SizeF(900, 600);
var layout = new NotesCommentsLayoutingOptions
{
NotesPosition = NotesPositions.BottomTruncated
};
var pdfOptions = new PdfOptions { SlidesLayoutOptions = layout };
presentation.Save("notes.pdf", SaveFormat.Pdf, pdfOptions);
var renderingOptions = new RenderingOptions { SlidesLayoutOptions = layout };
using var image = presentation.Slides[0].GetImage(renderingOptions, 1, 1);
image.Save("first-slide-notes.png", ImageFormat.Png);
```
For PDF export with long notes, [BottomFull](https://reference.aspose.com/slides/net/aspose.slides.export/notespositions/) allows additional pages as needed. Do not use that mode with the single-slide image call above, which does not support it. After resizing, inspect the output for clipped notes and the placement of existing notes-master objects; changing page dimensions alone should not be treated as a guarantee that all content will fit. See [Convert PowerPoint to PDF with Notes](https://docs.aspose.com/slides/net/convert-powerpoint-to-pdf-with-notes/) for more about notes export.
### **Export Handouts to PDF**
Use [HandoutLayoutingOptions](https://reference.aspose.com/slides/net/aspose.slides.export/handoutlayoutingoptions/) for multiple slide thumbnails on one page. The following example sets a 900 × 600-point page and uses [HandoutType.Handouts4Horizontal](https://reference.aspose.com/slides/net/aspose.slides.export/handouttype/) to arrange up to four slides per page. The horizontal preset controls slide ordering; the page orientation comes from its width and height.
```csharp
using System.Drawing;
using Aspose.Slides;
using Aspose.Slides.Export;
using var presentation = new Presentation("sample.pptx");
presentation.NotesSize.Size = new SizeF(900, 600);
var layout = new HandoutLayoutingOptions
{
Handout = HandoutType.Handouts4Horizontal
};
var pdfOptions = new PdfOptions { SlidesLayoutOptions = layout };
presentation.Save("handouts.pdf", SaveFormat.Pdf, pdfOptions);
```
Changing the page size changes the area available for the handout grid without changing the source slides' dimensions. For handout images, use [Presentation.GetImages](https://reference.aspose.com/slides/net/aspose.slides/presentation/getimages/) with the handout layout, rather than an individual slide's image method. In Aspose.Slides, presentation-level handout rendering uses the notes page dimensions, while the individual slide image call does not produce the handout page. See [Handout Mode](https://docs.aspose.com/slides/net/convert-powerpoint-in-handout-mode/) for layout options.
## **Page Size in Viewers, Export, and Printing**
Keep the stored presentation size, the exported page size, and the printed paper size distinct:
- **Presentation viewers:** A viewer can display or print notes using its own layout rules. If another application saves the file, reopen it and check the dimensions again; that application's format conversion may normalize them.
- **Export formats:** The notes and handout PDF examples above use the configured page dimensions. Raster images use integer pixel dimensions and a rendering scale, so fractional point values can be rounded in the image output. Exporting regular slides does not apply the notes page size.
- **Printer drivers:** Paper selection, automatic rotation, and fit-to-page settings can change the physical output without changing the dimensions stored in the presentation or PDF. For a specific paper size, match the printer settings and inspect the print preview.
## **FAQ**
**Can I set the notes size for just one slide?**
The notes page size is a presentation-level setting. Individual slides can have different notes content, but this property does not provide a separate page size for each slide.
**Why did changing notes orientation not change my slides?**
Notes pages and regular slides have independent dimensions. Use the regular slide size settings when you want to resize the slides themselves.
**Why does my saved or printed result have a different size?**
First reopen the saved presentation and compare its notes dimensions. If those changed, check whether saving or converting the file in another application changed the page settings. If they did not, check the export layout, image scale, viewer settings, and printer paper selection.
# Object Preview Placeholder When Adding OleObjectFrame
> Why an OLE object added with Aspose.Slides for .NET shows an EMBEDDED OLE OBJECT placeholder until its preview is updated, and how to set your own preview image.
Source: https://docs.aspose.com/slides/net/object-preview-issue-when-adding-oleobjectframe/
Updated: 2026-09-28
## **Introduction**
Using Aspose.Slides for .NET, when you add [OleObjectFrame](https://reference.aspose.com/slides/net/aspose.slides/oleobjectframe/) to a slide, an "EMBEDDED OLE OBJECT" message is shown on the output slide. This message is intentional and NOT a bug.
For more information on working with OLE objects, see [Manage OLE](https://docs.aspose.com/slides/net/manage-ole/).
## **Explanation and Solution**
Aspose.Slides displays the "EMBEDDED OLE OBJECT" message to notify you that the OLE object has been changed and the preview image has to be updated.
For example, if you add a Microsoft Excel chart as an [OleObjectFrame](https://reference.aspose.com/slides/net/aspose.slides/oleobjectframe/) to a slide (for more details, see the "Manage OLE" article) and then open the presentation in the Microsoft PowerPoint, you will see this image on the slide:

If you want to check and confirm that your OLE object was added to the slide, you have to double-click on the "EMBEDDED OLE OBJECT" message, or you can right-click on it and go through **Object > Edit** option.

PowerPoint then opens the embedded OLE object.

The slide may retain the "EMBEDDED OLE OBJECT" message. Once you click the OLE object, the slide preview gets updated and the "EMBEDDED OLE OBJECT" message is replaced by the actual image for the OLE object.

Now, you may want to save your presentation to ensure the image for the OLE Object gets updated correctly. This way, after saving the presentation, when you open the presentation again, you will NOT see the "EMBEDDED OLE OBJECT" message.
## **Other Solutions**
### **Solution 1: Replace the "Embedded OLE Object" Message with an Image**
If you do not want to remove the "EMBEDDED OLE OBJECT" message by opening the presentation in PowerPoint and then saving it, you can replace the message with your preferred preview image. These lines of code demonstrate the process:
```cs
using Aspose.Slides;
using Aspose.Slides.Export;
using var presentation = new Presentation("embeddedOLE.pptx");
var slide = presentation.Slides[0];
var oleFrame = (IOleObjectFrame)slide.Shapes[0];
// Add an image to presentation resources.
using var imageStream = File.OpenRead("myImage.png");
var oleImage = presentation.Images.AddImage(imageStream);
// Set the image for the OLE object preview.
oleFrame.SubstitutePictureFormat.Picture.Image = oleImage;
oleFrame.IsObjectIcon = false;
presentation.Save("embeddedOLE-newImage.pptx", SaveFormat.Pptx);
```
The slide containing the `OleObjectFrame` then changes to this:

### **Solution 2: Create an Add-On for PowerPoint**
You can also create an add-on for Microsoft PowerPoint that updates all OLE objects when you open presentations in the program.
## Related articles
- [Manage OLE Objects in Presentations in .NET](https://docs.aspose.com/slides/net/manage-ole/)
- [Create Excel Charts and Embed Them in Presentations as OLE Objects](https://docs.aspose.com/slides/net/creating-excel-chart-and-embedding-it-in-presentation-as-ole-object/)
# Open Presentations in .NET
> Learn how to open PowerPoint and OpenDocument presentations in C#, supply opening passwords, control resource loading, and reduce memory use with Aspose.Slides for .NET.
Source: https://docs.aspose.com/slides/net/open-presentation/
Updated: 2026-10-27
## **Introduction**
[Aspose.Slides for .NET](https://products.aspose.com/slides/net/) can load PowerPoint and OpenDocument presentations from files and streams. After a presentation is loaded, you can inspect its structure, edit slides, manage resources, and save it in the original or another supported format.
Loading behavior can be customized through the [LoadOptions](https://reference.aspose.com/slides/net/aspose.slides/loadoptions/) class. For example, you can supply an opening password, keep large binary objects outside managed memory, control external resources, or omit embedded binary data.
## **Open Presentations**
After loading a file or stream, you can [determine its original presentation format](https://docs.aspose.com/slides/net/detect-presentation-source-format/) to choose how your application processes it.
To open an existing presentation, pass its file path to the [Presentation](https://reference.aspose.com/slides/net/aspose.slides/presentation/) constructor. Dispose the presentation after use so that file handles, temporary data, and other resources are released promptly.
The following C# example shows how to open a presentation and get its slide count:
```csharp
using System;
using Aspose.Slides;
using var presentation = new Presentation("sample.pptx");
Console.WriteLine("Slide count: " + presentation.Slides.Count);
```
## **Open Password-Protected Presentations**
An opening password encrypts presentation content. To load the complete presentation, assign the correct password to [LoadOptions.Password](https://reference.aspose.com/slides/net/aspose.slides/loadoptions/password/) and pass the options to the [Presentation](https://reference.aspose.com/slides/net/aspose.slides/presentation/) constructor. Loading fails when the password is missing or incorrect.
```csharp
using System;
using Aspose.Slides;
var loadOptions = new LoadOptions { Password = "open_password" };
using var presentation = new Presentation("encrypted-presentation.pptx", loadOptions);
Console.WriteLine("Slide count: " + presentation.Slides.Count);
```
For password detection, validation, and encryption workflows, see [Password-Protect Presentations](https://docs.aspose.com/slides/net/password-protected-presentation/). If an encrypted presentation was deliberately saved with public document properties, those properties can be read without a password; see [Manage Presentation Properties](https://docs.aspose.com/slides/net/presentation-properties/).
## **Open Large Presentations**
[LoadOptions.BlobManagementOptions](https://reference.aspose.com/slides/net/aspose.slides/loadoptions/blobmanagementoptions/) controls how Aspose.Slides handles binary large objects such as images, audio, and video. You can keep the source file locked, allow temporary files, and limit the amount of BLOB data retained in memory.
The following C# code demonstrates loading a large presentation (for example, 2 GB):
```csharp
using Aspose.Slides;
using Aspose.Slides.Export;
const string filePath = "large-presentation.pptx";
var loadOptions = new LoadOptions
{
BlobManagementOptions =
{
PresentationLockingBehavior = PresentationLockingBehavior.KeepLocked,
IsTemporaryFilesAllowed = true,
MaxBlobsBytesInMemory = 10 * 1024 * 1024
}
};
using var presentation = new Presentation(filePath, loadOptions);
presentation.Slides[0].Name = "Large presentation";
presentation.Save("large-presentation-copy.pptx", SaveFormat.Pptx);
```
With `PresentationLockingBehavior.KeepLocked`, the source file remains locked until the `Presentation` object is disposed. Do not move, overwrite, or delete the source file while that object is alive.
Aspose.Slides may copy the contents of an input stream while loading it. For large presentations, a file path is therefore generally more efficient than a stream. See [Manage BLOBs](https://docs.aspose.com/slides/net/manage-blob/) for additional storage and memory-management options.
## **Control External Resources**
[LoadOptions.ResourceLoadingCallback](https://reference.aspose.com/slides/net/aspose.slides/loadoptions/resourceloadingcallback/) accepts an [IResourceLoadingCallback](https://reference.aspose.com/slides/net/aspose.slides/iresourceloadingcallback/) implementation. The callback can supply replacement data, redirect a resource, use the default loader, or skip the resource. This is useful when presentations contain external images that must be resolved according to application-specific security or storage rules.
```csharp
using System;
using System.IO;
using Aspose.Slides;
internal static class OpenPresentationExample
{
private static void Main()
{
var loadOptions = new LoadOptions
{
ResourceLoadingCallback = new ImageLoadingHandler()
};
using var presentation = new Presentation("presentation-with-external-images.pptx", loadOptions);
Console.WriteLine("Slide count: " + presentation.Slides.Count);
}
private sealed class ImageLoadingHandler : IResourceLoadingCallback
{
public ResourceLoadingAction ResourceLoading(IResourceLoadingArgs args)
{
var isJpeg = args.OriginalUri.EndsWith(".jpg", StringComparison.OrdinalIgnoreCase);
if (!isJpeg || !File.Exists("approved-image.jpg"))
{
return ResourceLoadingAction.Skip;
}
var imageData = File.ReadAllBytes("approved-image.jpg");
args.SetData(imageData);
return ResourceLoadingAction.UserProvided;
}
}
}
```
## **Load Presentations without Embedded Binary Objects**
A presentation may contain embedded binary data that an application does not need or does not want to retain. Examples include:
- VBA projects, available through [IPresentation.VbaProject](https://reference.aspose.com/slides/net/aspose.slides/ipresentation/vbaproject/);
- embedded OLE data, available through [IOleEmbeddedDataInfo.EmbeddedFileData](https://reference.aspose.com/slides/net/aspose.slides/ioleembeddeddatainfo/embeddedfiledata/);
- ActiveX control data, available through [IControl.ActiveXControlBinary](https://reference.aspose.com/slides/net/aspose.slides/icontrol/activexcontrolbinary/).
Set [LoadOptions.DeleteEmbeddedBinaryObjects](https://reference.aspose.com/slides/net/aspose.slides/loadoptions/deleteembeddedbinaryobjects/) to `true` to remove this binary data while loading. Save the loaded presentation to persist the sanitized result.
This option reduces exposure to unwanted embedded payloads, but it is not a complete malware-detection or content-sanitization system.
```csharp
using Aspose.Slides;
using Aspose.Slides.Export;
var loadOptions = new LoadOptions
{
DeleteEmbeddedBinaryObjects = true
};
using var presentation = new Presentation("presentation-with-embedded-data.pptx", loadOptions);
presentation.Save("presentation-without-embedded-data.pptx", SaveFormat.Pptx);
```
## **FAQ**
**How can I tell that a file is corrupted and cannot be opened?**
Aspose.Slides throws a parsing or format exception during loading. Handle that failure separately from an incorrect-password error so that the application can report the cause accurately.
**What happens if required fonts are missing?**
The presentation can still load, but rendering and export may substitute fonts. You can [configure font substitution](https://docs.aspose.com/slides/net/font-substitution/) or [provide custom fonts](https://docs.aspose.com/slides/net/custom-font/) to make output more predictable.
**Does loading a presentation also load its embedded media?**
Embedded audio and video become available through the presentation object model. External resources are resolved according to the configured resource-loading behavior and may be unavailable if their locations cannot be accessed.
Related feature: [Read PPTX presentations](https://docs.aspose.com/slides/features/powerpoint-files/).
## Related features
- [Read legacy PowerPoint presentations](https://docs.aspose.com/slides/features/read-ppt/)
- [Open and edit presentations](https://docs.aspose.com/slides/features/edit-presentations/)
# Opening a Presentation in VSTO and Aspose.Slides
>
Source: https://docs.aspose.com/slides/net/opening-a-presentation-in-vsto-and-aspose-slides/
Updated: 2026-08-05
## **VSTO**
Below is the code snippet for opening presentation:
``` csharp
string FileName = "Open Presentation.pptx";
Application.Presentations.Open(FileName);
```
## **Aspose.Slides**
Aspose.Slides for .NET provides **Presentation** class that is used to open an existing presentation. It offers few overloaded constructors and we can make use of one of the suitable constructors of **Presentation** class to create its object based on an existing presentation.In the example given below, we have passed the name of the presentation file (to be opened) to the constructor of Presentation class. After the file is opened, we get the total number of slides present in the presentation to print on the screen.
``` csharp
using Aspose.Slides;
string FileName = "Open Presentation.pptx";
Presentation MyPresentation = new Presentation(FileName);
```
## **Download Running Code**
- [Github](https://github.com/aspose-slides/Aspose.Slides-for-.NET/releases/tag/AsposeSlidesVsVSTOv1.1)
## **Download Sample Code**
- [Github](https://github.com/aspose-slides/Aspose.Slides-for-.NET/tree/master/Plugins/Aspose.Slides%20Vs%20VSTO%20Presentations/Code%20Comparison%20of%20Common%20Features/Opening%20a%20Presentation)
## Related articles
- [Creating a Table on PowerPoint Slide in VSTO and Aspose.Slides](https://docs.aspose.com/slides/net/creating-a-table-on-powerpoint-slide-in-vsto-and-aspose-slides/)
- [Adding Shapes to Presentation](https://docs.aspose.com/slides/net/adding-shapes-to-presentation/)
- [Removing row or column in Table in VSTO and Aspose.Slides](https://docs.aspose.com/slides/net/removing-row-or-column-in-table-in-vsto-and-aspose-slides/)
# Get Paragraph Bounds from Presentations in .NET
> Learn how to retrieve paragraph bounds in Aspose.Slides for .NET to optimize text positioning in PowerPoint presentations.
Source: https://docs.aspose.com/slides/net/paragraph-bounds/
Updated: 2026-11-08
## **Overview**
This article explains how to get the bounds, size, and coordinates of paragraphs in Aspose.Slides. It shows how to retrieve a paragraph rectangle from an [ITextFrame](https://reference.aspose.com/slides/net/aspose.slides/itextframe/) by using [IParagraph.GetRect](https://reference.aspose.com/slides/net/aspose.slides/iparagraph/getrect/), how to get paragraph coordinates inside a table cell text frame, and highlights important details such as measurement units, the effect of text wrapping on bounds, pixel conversion, and effective paragraph formatting values.
## **Get Rectangular Coordinates of a Paragraph**
Use [IParagraph.GetRect](https://reference.aspose.com/slides/net/aspose.slides/iparagraph/getrect/) to get the bounding rectangle of a paragraph.
```csharp
using Aspose.Slides;
using var presentation = new Presentation("Shapes.pptx");
var slide = presentation.Slides[0];
var shape = (IAutoShape)slide.Shapes[0];
var paragraph = shape.TextFrame.Paragraphs[0];
var rectangle = paragraph.GetRect();
```
## **Get the Size of a Paragraph Inside a Table Cell TextFrame**
To get the size and coordinates of an [IParagraph](https://reference.aspose.com/slides/net/aspose.slides/iparagraph/) in a table cell text frame, use [IParagraph.GetRect](https://reference.aspose.com/slides/net/aspose.slides/iparagraph/getrect/). The returned rectangle is relative to the table cell text frame, so add the table position and cell offset when you need slide-level coordinates.
The following example gets paragraph bounds inside a table cell and draws rectangles on the slide to visualize those bounds:
```csharp
using System.Drawing;
using Aspose.Slides;
using Aspose.Slides.Export;
using var presentation = new Presentation("source.pptx");
var slide = presentation.Slides[0];
var table = (ITable)slide.Shapes[0];
var cell = table.Rows[1][1];
var cellX = table.X + cell.OffsetX;
var cellY = table.Y + cell.OffsetY;
foreach (var paragraph in cell.TextFrame.Paragraphs)
{
if (string.IsNullOrEmpty(paragraph.Text))
continue;
var paragraphRectangle = paragraph.GetRect();
var paragraphRectangleX = paragraphRectangle.X + (float)cellX;
var paragraphRectangleY = paragraphRectangle.Y + (float)cellY;
var paragraphBoundsShape = presentation.Slides[0].Shapes.AddAutoShape(
ShapeType.Rectangle,
paragraphRectangleX,
paragraphRectangleY,
paragraphRectangle.Width,
paragraphRectangle.Height);
paragraphBoundsShape.FillFormat.FillType = FillType.NoFill;
paragraphBoundsShape.LineFormat.FillFormat.SolidFillColor.Color = Color.Yellow;
paragraphBoundsShape.LineFormat.FillFormat.FillType = FillType.Solid;
}
presentation.Save("output.pptx", SaveFormat.Pptx);
```
[](https://docs.aspose.com/slides/net/paragraph-bounds/visual-paragraph-bounds-eca3cd91c283.svg)
*Add the table position and cell offset to the cell-relative paragraph coordinates. The width and height stay the same.*
## **FAQ**
### In what units are paragraph coordinates measured?
They are measured in points, where 1 inch equals 72 points. This applies to all coordinates and dimensions on the slide.
### Does word wrapping affect a paragraph’s bounds?
Yes. If [TextFrameFormat.WrapText](https://reference.aspose.com/slides/net/aspose.slides/textframeformat/wraptext/) is enabled for the [ITextFrame](https://reference.aspose.com/slides/net/aspose.slides/itextframe/), the text breaks to fit the area width, which changes the paragraph’s actual bounds.
### Can paragraph coordinates be reliably mapped to pixels in the exported image?
Yes. Convert points to pixels using this formula: pixels = points × (DPI / 72). The result depends on the DPI chosen for rendering or export.
### How do I get the "effective" paragraph formatting parameters, taking style inheritance into account?
Use the [effective paragraph formatting data structure](https://docs.aspose.com/slides/net/shape-effective-properties/); it returns the final consolidated values for indents, spacing, wrapping, RTL, and more.
## Related articles
- [Get Text Portion Bounds from Presentations in .NET](https://docs.aspose.com/slides/net/portion-bounds/)
# Password-Protect Presentations in .NET
> Encrypt, detect, validate, open, and decrypt password-protected PowerPoint PPT and PPTX presentations in C# with Aspose.Slides for .NET.
Source: https://docs.aspose.com/slides/net/password-protected-presentation/
Updated: 2026-09-04
## **Overview**
An opening password encrypts a presentation. The correct password is required to load and view the presentation content, so this protection provides confidentiality.
An opening password is different from a write-protection password. Write protection restricts modification but does not encrypt the content or prevent the presentation from being loaded. To manage passwords for modifying presentations, see [Write-Protect Presentations](https://docs.aspose.com/slides/net/write-protected-presentation/).
The workflows below apply to both PPT and PPTX presentations. The examples use both formats where their file-based and stream-based behavior is important.
## **Encrypt a Presentation with an Opening Password**
Use [IProtectionManager.Encrypt](https://reference.aspose.com/slides/net/aspose.slides/iprotectionmanager/encrypt/) to assign an opening password. Then use [IPresentation.Save](https://reference.aspose.com/slides/net/aspose.slides/ipresentation/save/) to persist the encrypted presentation.
The following example encrypts a PPTX presentation:
```csharp
using Aspose.Slides;
using Aspose.Slides.Export;
using var presentation = new Presentation("pres.pptx");
presentation.ProtectionManager.Encrypt("open_password");
presentation.Save("encrypted-pres.pptx", SaveFormat.Pptx);
```
## **Keep Document Properties Public**
By default, Aspose.Slides includes document properties in presentation encryption. The [IProtectionManager.EncryptDocumentProperties](https://reference.aspose.com/slides/net/aspose.slides/iprotectionmanager/encryptdocumentproperties/) property controls this behavior independently of slide-content encryption. Set it to `false` before calling [IProtectionManager.Encrypt](https://reference.aspose.com/slides/net/aspose.slides/iprotectionmanager/encrypt/) when an indexing, classification, search, or document-management system must read metadata without the opening password.
The following example creates an encrypted PPTX presentation while leaving its built-in document properties public:
```csharp
using Aspose.Slides;
using Aspose.Slides.Export;
using var presentation = new Presentation();
var properties = presentation.DocumentProperties;
properties.Author = "Contoso Knowledge Management";
properties.Title = "Quarterly Product Roadmap";
properties.Keywords = "roadmap, planning, internal";
presentation.Slides[0].Name = "Encrypted presentation content";
presentation.ProtectionManager.EncryptDocumentProperties = false;
presentation.ProtectionManager.Encrypt("open_password");
presentation.Save("public-properties-encrypted.pptx", SaveFormat.Pptx);
```
Setting `EncryptDocumentProperties` to `false` does not make slides, masters, layouts, shapes, media, or other presentation content public. It affects only document properties. To read those properties without loading the encrypted content, see [Manage Presentation Properties](https://docs.aspose.com/slides/net/presentation-properties/).
## **Load an Encrypted Presentation**
Set [LoadOptions.Password](https://reference.aspose.com/slides/net/aspose.slides/loadoptions/password/) to the opening password and pass the options to [Presentation](https://reference.aspose.com/slides/net/aspose.slides/presentation/) when loading the file. Loading fails when an opening password is required but the supplied password is missing or incorrect.
```csharp
using Aspose.Slides;
var loadOptions = new LoadOptions { Password = "open_password" };
using var presentation = new Presentation("encrypted-pres.pptx", loadOptions);
// Work with the decrypted presentation.
```
## **Remove Encryption from a Presentation**
Load the presentation with its opening password, call [IProtectionManager.RemoveEncryption](https://reference.aspose.com/slides/net/aspose.slides/iprotectionmanager/removeencryption/), and save the result. The saved presentation can then be loaded without a password.
```csharp
using Aspose.Slides;
using Aspose.Slides.Export;
var loadOptions = new LoadOptions { Password = "open_password" };
using var presentation = new Presentation("encrypted-pres.pptx", loadOptions);
presentation.ProtectionManager.RemoveEncryption();
presentation.Save("encryption-removed.pptx", SaveFormat.Pptx);
```
## **Validate an Opening Password Before Loading**
Use [IPresentationFactory.GetPresentationInfo](https://reference.aspose.com/slides/net/aspose.slides/ipresentationfactory/getpresentationinfo/) to obtain [IPresentationInfo](https://reference.aspose.com/slides/net/aspose.slides/ipresentationinfo/) without creating a complete presentation instance. Check [IPresentationInfo.IsPasswordProtected](https://reference.aspose.com/slides/net/aspose.slides/ipresentationinfo/ispasswordprotected/) before requesting or validating a password. When protection is present, validate the supplied value with [IPresentationInfo.CheckPassword](https://reference.aspose.com/slides/net/aspose.slides/ipresentationinfo/checkpassword/).
### **File-Path Workflow**
The following example validates an opening password for a PPTX file, passes the validated value to [LoadOptions.Password](https://reference.aspose.com/slides/net/aspose.slides/loadoptions/password/), and then loads the complete presentation:
```csharp
using System;
using Aspose.Slides;
var filePath = "protected-presentation.pptx";
var password = "open_password";
var presentationInfo = PresentationFactory.Instance.GetPresentationInfo(filePath);
if (!presentationInfo.IsPasswordProtected)
{
Console.WriteLine("The presentation does not have an opening password.");
}
else if (!presentationInfo.CheckPassword(password))
{
Console.WriteLine("The opening password is incorrect.");
}
else
{
var loadOptions = new LoadOptions { Password = password };
using var presentation = new Presentation(filePath, loadOptions);
Console.WriteLine("The presentation was validated and loaded successfully.");
}
```
### **Stream Workflow**
The stream overload of [IPresentationFactory.GetPresentationInfo](https://reference.aspose.com/slides/net/aspose.slides/ipresentationfactory/getpresentationinfo/) provides the same workflow. Reset the position of a seekable stream before loading the complete presentation from that stream.
The following example uses a PPT file:
```csharp
using System;
using System.IO;
using Aspose.Slides;
var password = "open_password";
using var presentationStream = File.OpenRead("protected-presentation.ppt");
var presentationInfo = PresentationFactory.Instance.GetPresentationInfo(presentationStream);
if (!presentationInfo.IsPasswordProtected)
{
Console.WriteLine("The presentation does not have an opening password.");
}
else if (!presentationInfo.CheckPassword(password))
{
Console.WriteLine("The opening password is incorrect.");
}
else
{
presentationStream.Position = 0;
var loadOptions = new LoadOptions { Password = password };
using var presentation = new Presentation(presentationStream, loadOptions);
Console.WriteLine("The presentation was validated and loaded successfully.");
}
```
### **CheckPassword Return Values**
[IPresentationInfo.CheckPassword](https://reference.aspose.com/slides/net/aspose.slides/ipresentationinfo/checkpassword/) returns `true` only when the presentation has an opening password and the supplied password is correct. It returns `false` in each of these cases:
- The password is incorrect.
- The presentation does not have an opening password.
- The supplied password is `null` or empty.
The behavior is the same for PPT and PPTX presentations.
## **Check Whether a Loaded Presentation Is Encrypted**
After loading a presentation with the correct password, inspect [IProtectionManager.IsEncrypted](https://reference.aspose.com/slides/net/aspose.slides/iprotectionmanager/isencrypted/) to confirm that the source presentation was encrypted. To detect opening-password protection before loading, use `IPresentationInfo.IsPasswordProtected` as shown above.
```csharp
using System;
using Aspose.Slides;
var loadOptions = new LoadOptions { Password = "open_password" };
using var presentation = new Presentation("encrypted-pres.pptx", loadOptions);
var isEncrypted = presentation.ProtectionManager.IsEncrypted;
Console.WriteLine("The presentation is encrypted: " + isEncrypted);
```
## **Security Recommendations**
Do not log opening passwords or include them in diagnostic messages. Avoid unnecessary repeated validation attempts, keep passwords in memory only as long as needed, and reuse a successful validation result when immediately loading the presentation.
Public document properties may disclose author names, titles, subjects, keywords, company information, comments, and custom values even though the presentation content is encrypted. Encrypt sensitive metadata together with the presentation. Leaving properties public should be an explicit decision made only when systems must index, classify, search, or manage the file without an opening password.
## **Password-Protect a Presentation Online**
1. Open the [Aspose.Slides Lock](https://products.aspose.app/slides/lock) application.
1. Select or upload the presentation.
1. Enter a password for view protection.
1. Optionally enter a separate password for edit protection.
1. Apply the protection and download the resulting file.
- [Write-Protect Presentations](https://docs.aspose.com/slides/net/write-protected-presentation/)
- [Digital Signature in PowerPoint](https://docs.aspose.com/slides/net/digital-signature-in-powerpoint/)
## **FAQ**
**What is the difference between an opening password and a write-protection password?**
An opening password encrypts the presentation and is required to load its content. A write-protection password restricts modification without encrypting the content.
**Can I validate an opening password without loading all slides?**
Yes. Obtain presentation information, check whether opening-password protection is present, and validate the password before creating a complete presentation instance.
**Can an application read metadata without the opening password?**
Yes, but only when the presentation was encrypted with `EncryptDocumentProperties` set to `false`. The application must then use the document-properties-only loading mode described in [Manage Presentation Properties](https://docs.aspose.com/slides/net/presentation-properties/).
**Do the password-checking workflows support both PPT and PPTX?**
Yes. File-path and stream-based password detection and validation behave the same for PPT and PPTX presentations.
## Related features
- [Protect a presentation with a password](https://docs.aspose.com/slides/features/presentation-password/)
- [Open password-protected presentations](https://docs.aspose.com/slides/features/open-protected-presentations/)
## Related articles
- [Secure Presentations in .NET](https://docs.aspose.com/slides/net/presentation-security/)
# Manage Picture Frames in Presentations in .NET
> Create, format, link, crop, extract, and compress picture frames in presentations with Aspose.Slides for .NET.
Source: https://docs.aspose.com/slides/net/picture-frame/
Updated: 2026-11-08
## **Overview**
A picture frame is a slide shape that displays an image. In Aspose.Slides, the image resource and the shape that displays it are separate objects: a [Presentation](https://reference.aspose.com/slides/net/aspose.slides/presentation/) owns embedded image resources through its [Images](https://reference.aspose.com/slides/net/aspose.slides/presentation/images/) collection, while an [IPictureFrame](https://reference.aspose.com/slides/net/aspose.slides/ipictureframe/) controls the image's position, size, line formatting, rotation, cropping, picture effects, and other frame-level settings.
This separation is useful when the same image is shown more than once. Add the image to the presentation once, keep the returned [IPPImage](https://reference.aspose.com/slides/net/aspose.slides/ippimage/), and use that image resource when creating picture frames.
Picture frames can contain raster images such as PNG or JPEG and vector SVG images. They can also refer to linked images instead of storing the image bytes in the presentation. The choice affects portability, file size, extraction, and export behavior, so it is useful to decide how the image should be stored before applying formatting or optimization.
## **Add and Format an Embedded Image**
For an embedded image, add the image data to the presentation and create a picture frame with [IShapeCollection.AddPictureFrame](https://reference.aspose.com/slides/net/aspose.slides/ishapecollection/addpictureframe/). The image becomes part of the presentation package, so the presentation remains self-contained when it is moved to another computer.
The following example adds a JPEG image, creates a frame at the image's native dimensions, and applies line formatting and rotation:
```csharp
using System.Drawing;
using System.IO;
using Aspose.Slides;
using Aspose.Slides.Export;
using var presentation = new Presentation();
var slide = presentation.Slides[0];
var imageData = File.ReadAllBytes("photo.jpg");
var image = presentation.Images.AddImage(imageData);
var pictureFrame = slide.Shapes.AddPictureFrame(ShapeType.Rectangle, 50, 100, image.Width, image.Height, image);
pictureFrame.LineFormat.FillFormat.FillType = FillType.Solid;
pictureFrame.LineFormat.FillFormat.SolidFillColor.Color = Color.Blue;
pictureFrame.LineFormat.Width = 3;
pictureFrame.Rotation = 15;
presentation.Save("picture-frame.pptx", SaveFormat.Pptx);
```
The picture frame controls the displayed geometry; changing the frame size does not change the original pixel dimensions stored in the embedded image resource. This distinction becomes important when cropping or compressing an image later.
## **Use Relative Scale**
[IPictureFrame](https://reference.aspose.com/slides/net/aspose.slides/ipictureframe/) exposes relative width and height scaling for the frame. A value of `1.0` corresponds to 100% of the original picture size. Relative scale is useful when a workflow needs to preserve a relationship to the source image size instead of calculating final dimensions manually.
```csharp
using System.IO;
using Aspose.Slides;
using Aspose.Slides.Export;
using var presentation = new Presentation();
var slide = presentation.Slides[0];
var imageData = File.ReadAllBytes("photo.jpg");
var image = presentation.Images.AddImage(imageData);
var pictureFrame = slide.Shapes.AddPictureFrame(ShapeType.Rectangle, 50, 50, 100, 100, image);
pictureFrame.RelativeScaleWidth = 1.35f;
pictureFrame.RelativeScaleHeight = 0.8f;
presentation.Save("relative-scale.pptx", SaveFormat.Pptx);
```
Relative scale changes the frame's scale settings; it does not resample or compress the embedded image.
## **Embedded and Linked Images**
An embedded picture stores image data inside the presentation and is therefore the safest choice for portability and predictable rendering. A linked picture stores an external location through the [ISlidesPicture](https://reference.aspose.com/slides/net/aspose.slides/islidespicture/) link path instead of embedding the image data in the same way.
Linked images can reduce the amount of image data stored in the PPTX, but they introduce an external dependency. The linked file must remain accessible to the application that opens or renders the presentation. If the path changes, the file is moved, or the resource is unavailable, the linked picture may not be displayed as expected. For presentations that must be emailed, archived, or rendered in isolated environments, embedded images are usually more reliable.
### **Add a Linked Image**
The following example creates a picture frame and points it to a local image file. It deals only with image linking; video linking is a separate media workflow and is intentionally not mixed into this example.
```csharp
using System.IO;
using Aspose.Slides;
using Aspose.Slides.Export;
using var presentation = new Presentation();
var slide = presentation.Slides[0];
var pictureFrame = slide.Shapes.AddPictureFrame(ShapeType.Rectangle, 50, 50, 320, 180, null);
pictureFrame.PictureFormat.Picture.LinkPathLong = Path.GetFullPath("linked-image.jpg");
presentation.Save("linked-image.pptx", SaveFormat.Pptx);
```
Use links when external file management is intentional. Do not use them merely as a replacement for compression: a small PPTX with broken image dependencies is usually less useful than a larger self-contained presentation.
## **Extract Images from Picture Frames**
Before extracting an image from an existing presentation, check that a shape is actually an [IPictureFrame](https://reference.aspose.com/slides/net/aspose.slides/ipictureframe/) and that it contains an embedded image. Linked picture frames may not contain image bytes that can be extracted in the same way.
### **Extract a Raster Image**
The modern image API uses [IImage](https://reference.aspose.com/slides/net/aspose.slides/iimage/) directly and does not require the older system-image wrapper. The following example finds the first embedded raster picture on a slide and saves it as PNG:
```csharp
using System;
using Aspose.Slides;
using var presentation = new Presentation("sample.pptx");
var slide = presentation.Slides[0];
foreach (var shape in slide.Shapes)
{
if (shape is not IPictureFrame pictureFrame)
{
continue;
}
var embeddedImage = pictureFrame.PictureFormat.Picture.Image;
if (embeddedImage == null || embeddedImage.SvgImage != null)
{
continue;
}
using var rasterImage = embeddedImage.Image;
rasterImage.Save("extracted-image.png", Aspose.Slides.ImageFormat.Png);
break;
}
```
Saving through [IImage](https://reference.aspose.com/slides/net/aspose.slides/iimage/) converts the extracted image to the requested output format. If you need the encoded bytes stored in the presentation rather than a converted raster file, use the image resource's binary data instead.
### **Extract an SVG Image**
For an SVG picture, the [IPPImage](https://reference.aspose.com/slides/net/aspose.slides/ippimage/) exposes an [ISvgImage](https://reference.aspose.com/slides/net/aspose.slides/isvgimage/) object. This lets you retrieve the SVG data directly instead of rasterizing the picture first.
```csharp
using System.IO;
using Aspose.Slides;
using var presentation = new Presentation("sample.pptx");
var slide = presentation.Slides[0];
foreach (var shape in slide.Shapes)
{
if (shape is not IPictureFrame pictureFrame)
{
continue;
}
var embeddedImage = pictureFrame.PictureFormat.Picture.Image;
var svgImage = embeddedImage?.SvgImage;
if (svgImage == null)
{
continue;
}
File.WriteAllBytes("extracted-image.svg", svgImage.SvgData);
break;
}
```
Keeping SVG content as SVG preserves the vector source inside the presentation. Raster exports such as PNG or JPEG necessarily render that vector content to pixels. PDF or SVG slide export is also a rendering operation, so the exported graphics should not be treated as a byte-for-byte copy of the original embedded SVG; use the embedded [ISvgImage](https://reference.aspose.com/slides/net/aspose.slides/isvgimage/) data when the original vector resource itself is required.
## **Crop an Image**
Cropping changes which part of an image is visible inside the frame. The crop values on [IPictureFillFormat](https://reference.aspose.com/slides/net/aspose.slides/ipicturefillformat/) are percentages of the source image dimensions. Cropping does not initially delete the hidden pixels from the embedded image; it only changes the visible region.
The following example finds a picture frame safely and applies crop values:
```csharp
using System.Linq;
using Aspose.Slides;
using Aspose.Slides.Export;
using var presentation = new Presentation("sample.pptx");
var slide = presentation.Slides[0];
var pictureFrame = slide.Shapes.OfType().FirstOrDefault();
if (pictureFrame != null)
{
pictureFrame.PictureFormat.CropLeft = 23.6f;
pictureFrame.PictureFormat.CropRight = 21.5f;
pictureFrame.PictureFormat.CropTop = 3f;
pictureFrame.PictureFormat.CropBottom = 31f;
presentation.Save("cropped-image.pptx", SaveFormat.Pptx);
}
```
Because the hidden image data is still present, the crop can be changed later without losing the original pixels. If file size matters more than reversibility, the cropped regions can be physically removed as described in the next section.
[](https://docs.aspose.com/slides/net/picture-frame/visual-image-crop-and-fit-8fe77bb469cc.svg)
*The sample percentages select a region of the embedded source. The rendered result uses the same frame dimensions.*
## **Remove Cropped Image Data**
[IPictureFillFormat.DeletePictureCroppedAreas](https://reference.aspose.com/slides/net/aspose.slides/ipicturefillformat/deletepicturecroppedareas/) removes image data outside the current crop rectangle and returns the resulting image resource. This can reduce file size, but it is a destructive optimization: after the presentation is saved, the removed pixels are no longer available for a later uncrop operation.
```csharp
using System.Linq;
using Aspose.Slides;
using Aspose.Slides.Export;
using var presentation = new Presentation("cropped-image.pptx");
var slide = presentation.Slides[0];
var pictureFrame = slide.Shapes.OfType().FirstOrDefault();
if (pictureFrame != null)
{
var croppedImage = pictureFrame.PictureFormat.DeletePictureCroppedAreas();
if (croppedImage != null)
{
presentation.Save("cropped-data-removed.pptx", SaveFormat.Pptx);
}
}
```
The method may add a new image resource to the presentation. If the original image is also used by other picture frames, those frames still need their existing resource, so deleting cropped areas does not necessarily reduce the total number of images. Cropping WMF or EMF content with this method rasterizes the cropped result to PNG.
## **Compress Raster Images**
[IPictureFillFormat.CompressImage](https://reference.aspose.com/slides/net/aspose.slides/ipicturefillformat/compressimage/) reduces raster image resolution relative to the size at which the picture is displayed. It can also remove cropped regions in the same operation. The method returns `true` when the image was resized or cropped and `false` when no change was necessary.
Use a predefined [PicturesCompression](https://reference.aspose.com/slides/net/aspose.slides.export/picturescompression/) value when a standard target resolution is sufficient:
```csharp
using System;
using System.Linq;
using Aspose.Slides;
using Aspose.Slides.Export;
using var presentation = new Presentation("sample.pptx");
var slide = presentation.Slides[0];
var pictureFrame = slide.Shapes.OfType().FirstOrDefault();
if (pictureFrame != null)
{
var compressed = pictureFrame.PictureFormat.CompressImage(true, PicturesCompression.Dpi150);
Console.WriteLine(compressed ? "The image was compressed." : "No compression was necessary.");
presentation.Save("compressed-image.pptx", SaveFormat.Pptx);
}
```
A custom positive DPI value can be passed instead of an enum value when a specific target is required.
Compression is intended for raster images. SVG and metafile content is not reduced by this raster compression workflow. Also remember that lower resolution and deleted cropped regions cannot be recovered from the optimized presentation. Choose a target resolution based on the largest size at which the image will actually be viewed or exported rather than applying the lowest DPI globally.
## **Manage Image Transform Effects**
For a complete workflow covering brightness, contrast, color transformations, blur, alpha effects, ordered chains, inspection, removal, and round-trip verification, see [Image Transform Effects](https://docs.aspose.com/slides/net/image-transform-effects/).
## **Lock Picture Frame Geometry**
The [IPictureFrameLock](https://reference.aspose.com/slides/net/aspose.slides/ipictureframelock/) settings control which editing operations are disabled for a picture frame. For example, the aspect-ratio lock preserves the shape's proportions while it is resized.
```csharp
using System.IO;
using Aspose.Slides;
using Aspose.Slides.Export;
using var presentation = new Presentation();
var slide = presentation.Slides[0];
var imageData = File.ReadAllBytes("photo.jpg");
var image = presentation.Images.AddImage(imageData);
var pictureFrame = slide.Shapes.AddPictureFrame(ShapeType.Rectangle, 50, 100, image.Width, image.Height, image);
pictureFrame.PictureFrameLock.AspectRatioLocked = true;
presentation.Save("locked-picture-frame.pptx", SaveFormat.Pptx);
```
The lock applies to the picture frame shape. It does not force the source image to be resampled or permanently changed to the same aspect ratio.
## **Adjust the StretchOffset Values**
When the picture fill mode is stretch, the stretch-offset values on [IPictureFillFormat](https://reference.aspose.com/slides/net/aspose.slides/ipicturefillformat/) define the fill rectangle relative to the picture frame's bounding box. Positive percentages create an inset from an edge, while negative percentages create an outset.
This is different from cropping. Crop values select which part of the source image is visible; stretch offsets change the rectangle into which the visible picture fill is stretched.
```csharp
using System.IO;
using Aspose.Slides;
using Aspose.Slides.Export;
using var presentation = new Presentation();
var slide = presentation.Slides[0];
var imageData = File.ReadAllBytes("photo.png");
var image = presentation.Images.AddImage(imageData);
var pictureFrame = slide.Shapes.AddPictureFrame(ShapeType.Rectangle, 10, 10, 400, 300, image);
pictureFrame.PictureFormat.PictureFillMode = PictureFillMode.Stretch;
pictureFrame.PictureFormat.StretchOffsetLeft = 12f;
pictureFrame.PictureFormat.StretchOffsetRight = 12f;
pictureFrame.PictureFormat.StretchOffsetTop = 8f;
pictureFrame.PictureFormat.StretchOffsetBottom = 8f;
presentation.Save("stretch-offsets.pptx", SaveFormat.Pptx);
```
Use stretch offsets for fill placement. Use crop properties when the goal is to hide source-image edges.
## **Storage, File Size, and Export Considerations**
The main tradeoffs are easier to manage when image storage and picture-frame formatting are treated separately:
- **Embedded images** make the presentation self-contained and are the most reliable for sharing and server-side rendering, but large raster images increase PPTX size and memory use.
- **Linked images** can keep the package smaller, but the presentation depends on external files remaining available at the stored paths or locations.
- **Cropping** is initially non-destructive. The hidden pixels remain embedded until cropped areas are explicitly deleted or removed during compression.
- **Compression** can reduce file size substantially for oversized raster images, but it trades away source resolution. It should be applied after the intended on-slide size is known.
- **SVG images** should remain as SVG when vector preservation is important. Extract the embedded SVG directly when you need the vector resource itself. Raster slide exports always convert the rendered slide to pixels.
- **Repeated images** should reuse an existing [IPPImage](https://reference.aspose.com/slides/net/aspose.slides/ippimage/) resource when possible instead of repeatedly loading the same file into the presentation workflow.
For large presentations, image optimization is usually most effective when performed selectively: keep logos and diagrams as vector content, compress photographs according to their real display size, remove cropped pixels only when later editing is not required, and avoid external links unless dependency management is part of the deployment design.
## **FAQ**
**What is the difference between a picture frame and an image resource?**
An [IPPImage](https://reference.aspose.com/slides/net/aspose.slides/ippimage/) represents an image resource associated with the presentation. An [IPictureFrame](https://reference.aspose.com/slides/net/aspose.slides/ipictureframe/) is a shape on a slide that displays an image and stores frame-level geometry and formatting such as size, rotation, crop values, effects, and locks.
**Should I embed or link images?**
Embed images when the presentation must be portable, archived, or rendered without access to external resources. Link images only when keeping image files outside the PPTX is intentional and the external locations can be maintained reliably.
**Does cropping reduce PPTX file size?**
Not by itself. Normal crop settings hide parts of the source image but keep the underlying pixels. Use [IPictureFillFormat.DeletePictureCroppedAreas](https://reference.aspose.com/slides/net/aspose.slides/ipicturefillformat/deletepicturecroppedareas/) or image compression with cropped-area removal when those pixels can be discarded permanently.
**Can I restore image quality after compression?**
No. Compression can reduce stored raster resolution, and removing cropped regions discards image data. Keep the original source image outside the presentation if later high-resolution editing may be required.
**How should SVG images be handled?**
Keep SVG content as SVG when vector fidelity matters. The embedded [ISvgImage](https://reference.aspose.com/slides/net/aspose.slides/isvgimage/) can be extracted directly. Rendering a slide to a raster format such as PNG or JPEG rasterizes the SVG as part of the slide image.
**How can I avoid unsafe casts when reading existing slides?**
Check the shape type before using picture-frame-specific members. Pattern matching with [IPictureFrame](https://reference.aspose.com/slides/net/aspose.slides/ipictureframe/) or filtering the shape collection by that interface avoids invalid casts and lets the code handle slides that do not contain picture frames.
## Related features
- [Add pictures to slides](https://docs.aspose.com/slides/features/picture-frames/)
- [Crop images](https://docs.aspose.com/slides/features/crop-images/)
- [Insert and fit images from data](https://docs.aspose.com/slides/features/images-from-data/)
# Customize Pie Charts in Presentations in .NET
> Create and customize pie charts in .NET with Aspose.Slides. Configure secondary plots, display data labels, and apply automatic slice colors in PowerPoint.
Source: https://docs.aspose.com/slides/net/pie-chart/
Updated: 2026-10-26
## **Overview**
This article explains how to work with pie charts in Aspose.Slides. It shows how to configure secondary plot options for Pie of Pie and Bar of Pie charts, and how to enable automatic slice coloring for a standard pie chart.
The examples focus on chart customization tasks such as adding a chart to a slide, adjusting series and label settings, replacing default chart data with custom categories and values, and saving the updated presentation.
## **Second Plot Options for Pie of Pie and Bar of Pie Charts**
Aspose.Slides for .NET supports secondary plot options for Pie of Pie and Bar of Pie charts. These options control the size of the secondary plot and how data points are split between the two plots.
The following example creates a Pie of Pie chart in a new presentation and displays data point values as labels. The [SecondPieSize](https://reference.aspose.com/slides/net/aspose.slides.charts/ichartseriesgroup/secondpiesize/) property sets the secondary plot size to 149% of the main plot. [PieSplitBy](https://reference.aspose.com/slides/net/aspose.slides.charts/ichartseriesgroup/piesplitby/) selects percentage-based splitting, and [PieSplitPosition](https://reference.aspose.com/slides/net/aspose.slides.charts/ichartseriesgroup/piesplitposition/) sets the threshold to 53%.
```cs
using Aspose.Slides;
using Aspose.Slides.Charts;
using Aspose.Slides.Export;
using var presentation = new Presentation();
var slide = presentation.Slides[0];
var chart = slide.Shapes.AddChart(ChartType.PieOfPie, 50, 50, 500, 400);
var series = chart.ChartData.Series[0];
// Display values and configure the secondary plot.
series.Labels.DefaultDataLabelFormat.ShowValue = true;
var seriesGroup = series.ParentSeriesGroup;
seriesGroup.SecondPieSize = 149;
seriesGroup.PieSplitBy = PieSplitType.ByPercentage;
seriesGroup.PieSplitPosition = 53;
presentation.Save("pie_of_pie.pptx", SaveFormat.Pptx);
```
To show or hide the lines connecting the main and secondary plots in Pie of Pie and Bar of Pie charts, see [Show or Hide Series Lines](https://docs.aspose.com/slides/net/chart-series/#show-or-hide-series-lines). The setting applies to the entire series group.
### **Select Categories for the Secondary Plot**
Use custom splitting when you want to group specific categories in the secondary plot regardless of their percentage values. For example, a sales report might show Online and Events together so readers can compare these two channels, even though they account for 35% and 10% of total sales.
Set [PieSplitBy](https://reference.aspose.com/slides/net/aspose.slides.charts/chartseriesgroup/piesplitby/) to [PieSplitType.Custom](https://reference.aspose.com/slides/net/aspose.slides.charts/piesplittype/) and select the points through [PieSplitCustomPoints](https://reference.aspose.com/slides/net/aspose.slides.charts/chartseriesgroup/piesplitcustompoints/). The collection's [Add](https://reference.aspose.com/slides/net/aspose.slides.charts/piesplitcustompointcollection/add/) method accepts either a zero-based index in the series or a data point object. In this example, index 1 selects Online, and the point at index 3 selects Events. Partners is also added temporarily, then excluded using [Remove](https://reference.aspose.com/slides/net/aspose.slides.charts/piesplitcustompointcollection/remove/).
```cs
using Aspose.Slides;
using Aspose.Slides.Charts;
using Aspose.Slides.Export;
using var presentation = new Presentation();
var slide = presentation.Slides[0];
var chart = slide.Shapes.AddChart(ChartType.PieOfPie, 50, 50, 600, 200);
// Replace the default data with sales by channel.
var workbook = chart.ChartData.ChartDataWorkbook;
chart.ChartData.Series.Clear();
chart.ChartData.Categories.Clear();
var categoryNames = new[] { "Retail", "Online", "Partners", "Events" };
var values = new[] { 40, 35, 15, 10 };
var seriesNameCell = workbook.GetCell(0, 0, 1, "Sales");
var series = chart.ChartData.Series.Add(seriesNameCell, chart.Type);
for (var i = 0; i < categoryNames.Length; i++)
{
var categoryCell = workbook.GetCell(0, i + 1, 0, categoryNames[i]);
chart.ChartData.Categories.Add(categoryCell);
var valueCell = workbook.GetCell(0, i + 1, 1, values[i]);
series.DataPoints.AddDataPointForPieSeries(valueCell);
}
series.Labels.DefaultDataLabelFormat.ShowValue = true;
var seriesGroup = series.ParentSeriesGroup;
seriesGroup.PieSplitBy = PieSplitType.Custom;
seriesGroup.IsColorVaried = true;
// Select Online by its zero-based index and Events by its data point object.
seriesGroup.PieSplitCustomPoints.Add(1);
seriesGroup.PieSplitCustomPoints.Add(series.DataPoints[3]);
// Exclude Partners from the selection without deleting its source data.
seriesGroup.PieSplitCustomPoints.Add(2);
seriesGroup.PieSplitCustomPoints.Remove(series.DataPoints[2]);
presentation.Save("pie_of_pie_custom.pptx", SaveFormat.Pptx);
```
Online (35) and Events (10) appear as separate slices in the secondary plot. In the primary plot, they are represented by one combined slice with a value of 45, alongside Retail (40) and Partners (15). Removing Partners from the custom selection keeps it in the primary plot; it does not remove the category or its value from the chart's source data.
The following image shows the saved presentation in PowerPoint:

## **Set Automatic Pie Chart Slice Colors**
Aspose.Slides for .NET can automatically assign different colors to pie chart slices. The following example creates a pie chart with a centered title and replaces the default data with three quarterly categories and their values. The [ShowValue](https://reference.aspose.com/slides/net/aspose.slides.charts/idatalabelformat/showvalue/) property displays the values 20, 50, and 30 as labels, while [IsColorVaried](https://reference.aspose.com/slides/net/aspose.slides.charts/ichartseriesgroup/iscolorvaried/) enables a distinct color for each slice.
```cs
using Aspose.Slides;
using Aspose.Slides.Charts;
using Aspose.Slides.Export;
using var presentation = new Presentation();
var slide = presentation.Slides[0];
var chart = slide.Shapes.AddChart(ChartType.Pie, 100, 100, 400, 400);
// Add a centered chart title.
chart.ChartTitle.AddTextFrameForOverriding("Sample Title");
chart.ChartTitle.TextFrameForOverriding.TextFrameFormat.CenterText = NullableBool.True;
chart.ChartTitle.Height = 20;
chart.HasTitle = true;
// Replace the default data using the first worksheet.
var workbook = chart.ChartData.ChartDataWorkbook;
var worksheetIndex = 0;
chart.ChartData.Series.Clear();
chart.ChartData.Categories.Clear();
var categoryNames = new[] { "First Qtr", "2nd Qtr", "3rd Qtr" };
var values = new[] { 20, 50, 30 };
var seriesNameCell = workbook.GetCell(worksheetIndex, 0, 1, "Series 1");
var series = chart.ChartData.Series.Add(seriesNameCell, chart.Type);
for (var i = 0; i < categoryNames.Length; i++)
{
var categoryCell = workbook.GetCell(worksheetIndex, i + 1, 0, categoryNames[i]);
chart.ChartData.Categories.Add(categoryCell);
var valueCell = workbook.GetCell(worksheetIndex, i + 1, 1, values[i]);
series.DataPoints.AddDataPointForPieSeries(valueCell);
}
// Show values and assign different colors to the slices.
series.Labels.DefaultDataLabelFormat.ShowValue = true;
series.ParentSeriesGroup.IsColorVaried = true;
presentation.Save("pie.pptx", SaveFormat.Pptx);
```
## **FAQ**
**Are the Pie of Pie and Bar of Pie variations supported?**
Yes, the library [supports](https://reference.aspose.com/slides/net/aspose.slides.charts/charttype/) a secondary plot for pie charts, including the Pie of Pie and Bar of Pie types.
**Can I export just the chart as an image (for example, PNG)?**
Yes, you can [export the chart itself as an image](https://reference.aspose.com/slides/net/aspose.slides/shape/getimage/) (such as PNG) without exporting the entire presentation.
# Plugins
>
Source: https://docs.aspose.com/slides/net/plugins/
Updated: 2024-11-01
# Get Text Portion Bounds from Presentations in .NET
> Learn how to retrieve text portion bounds in PowerPoint presentations using Aspose.Slides for .NET.
Source: https://docs.aspose.com/slides/net/portion-bounds/
Updated: 2026-08-05
## **Overview**
A text portion represents a specific fragment of text inside a paragraph and allows you to work with that fragment independently from surrounding content. In Aspose.Slides, portions can be used when you need to retrieve the bounds of a text fragment, apply formatting to only part of a paragraph, or control text behavior at a more detailed level.
This article shows how to get the bounding rectangle of a portion by using [IPortion.GetRect](https://reference.aspose.com/slides/net/aspose.slides/iportion/getrect/). It also shows how to get the coordinates of the beginning of a portion by using [IPortion.GetCoordinates](https://reference.aspose.com/slides/net/aspose.slides/iportion/getcoordinates/). In addition, it highlights common portion-related scenarios, such as applying a hyperlink to a single text fragment, understanding how formatting is resolved through portion, paragraph, text frame, and theme inheritance, and handling cases where a specified font is unavailable.
## **Get Bounds of a Text Portion**
Use [IPortion.GetRect](https://reference.aspose.com/slides/net/aspose.slides/iportion/getrect/) to retrieve the bounding rectangle of a text portion:
```csharp
using Aspose.Slides;
using var presentation = new Presentation("Shapes.pptx");
var slide = presentation.Slides[0];
var shape = (IAutoShape)slide.Shapes[0];
foreach (var paragraph in shape.TextFrame.Paragraphs)
{
foreach (var portion in paragraph.Portions)
{
var rectangle = portion.GetRect();
Console.WriteLine($"X = {rectangle.X}; Y = {rectangle.Y}; Width = {rectangle.Width}; Height = {rectangle.Height}");
}
}
```
## **Get Coordinates of a Text Portion**
Use [IPortion.GetCoordinates](https://reference.aspose.com/slides/net/aspose.slides/iportion/getcoordinates/) to retrieve the coordinates of the beginning of a text portion:
```csharp
using Aspose.Slides;
using var presentation = new Presentation("Shapes.pptx");
var slide = presentation.Slides[0];
var shape = (IAutoShape)slide.Shapes[0];
foreach (var paragraph in shape.TextFrame.Paragraphs)
{
foreach (var portion in paragraph.Portions)
{
var point = portion.GetCoordinates();
Console.WriteLine($"X = {point.X}; Y = {point.Y}");
}
}
```
## **FAQ**
### Can I apply a hyperlink to only part of the text within a single paragraph?
Yes, you can [assign a hyperlink](https://docs.aspose.com/slides/net/manage-hyperlinks/) to an individual portion; only that fragment will be clickable, not the entire paragraph.
### How does style inheritance work: what does a portion override, and what is taken from a paragraph or text frame?
Portion-level properties have the highest precedence. If a property is not set on the [IPortion](https://reference.aspose.com/slides/net/aspose.slides/iportion/), Aspose.Slides takes it from the [IParagraph](https://reference.aspose.com/slides/net/aspose.slides/iparagraph/). If it is not set there either, Aspose.Slides uses the [ITextFrame](https://reference.aspose.com/slides/net/aspose.slides/itextframe/) or [theme](https://reference.aspose.com/slides/net/aspose.slides.theme/theme/) style.
### What happens if the font specified for a portion is missing on the target machine or server?
[Font substitution rules](https://docs.aspose.com/slides/net/font-selection-sequence/) apply. The text may reflow: metrics, hyphenation, and width can change, which matters for precise positioning.
### Can I set portion-specific text fill transparency or a gradient independently of the rest of the paragraph?
Yes, text color, fill, and transparency at the [IPortion](https://reference.aspose.com/slides/net/aspose.slides/iportion/) level can differ from neighboring fragments.
## Related articles
- [Get Paragraph Bounds from Presentations in .NET](https://docs.aspose.com/slides/net/paragraph-bounds/)
# Enhance PowerPoint Presentations with Animations in .NET
> Explore the capabilities of Aspose.Slides for .NET in handling PowerPoint animations. This general overview highlights key features and offers insights to enhance your presentations.
Source: https://docs.aspose.com/slides/net/powerpoint-animation/
Updated: 2026-09-18
## **Introduction**
Since presentations are meant to present something, their visual appearance and interactive behavior are always taken into account during creation.
**PowerPoint animation** plays an important role in making a presentation eye-catching and engaging for viewers. Aspose.Slides for .NET provides a wide range of options to add animations to PowerPoint presentations:
- Apply various types of PowerPoint animation effects to shapes, charts, tables, OLE objects, and other presentation elements.
- Use multiple PowerPoint animation effects on a single shape.
- Utilize the animation timeline to control animation effects.
- Create custom animations.
In Aspose.Slides for .NET, various animation effects can be applied to shapes. Since every element on a slide, including text, pictures, OLE objects, and tables, is considered a shape, animation effects can be applied to any element on the slide.
[Aspose.Slides.Animation](https://reference.aspose.com/slides/net/aspose.slides.animation/) namespace provides classes to work with PowerPoint animations.
## **Animation Effects**
Aspose.Slides supports **150+ animation effects**, including basic effects like Bounce, PathFootball, and Zoom, as well as specific effects like OLEObjectShow and OLEObjectOpen. You can find a complete list of animation effects in the [EffectType](https://reference.aspose.com/slides/net/aspose.slides.animation/effecttype) enumeration.
Additionally, these animation effects can be used in combination with the following:
- [ColorEffect](https://reference.aspose.com/slides/net/aspose.slides.animation/coloreffect)
- [CommandEffect](https://reference.aspose.com/slides/net/aspose.slides.animation/commandeffect)
- [FilterEffect](https://reference.aspose.com/slides/net/aspose.slides.animation/filtereffect)
- [MotionEffect](https://reference.aspose.com/slides/net/aspose.slides.animation/motioneffect)
- [PropertyEffect](https://reference.aspose.com/slides/net/aspose.slides.animation/propertyeffect)
- [RotationEffect](https://reference.aspose.com/slides/net/aspose.slides.animation/rotationeffect)
- [ScaleEffect](https://reference.aspose.com/slides/net/aspose.slides.animation/scaleeffect)
- [SetEffect](https://reference.aspose.com/slides/net/aspose.slides.animation/seteffect)
## **Custom Animation**
For complete C# examples that create, inspect, and modify behaviors and editable motion paths, see [Custom Animation](https://docs.aspose.com/slides/net/custom-animation/).
It is possible to create your own **custom animations** in Aspose.Slides. This can be achieved by combining several behaviors together into a new custom animation.
[Behavior](https://reference.aspose.com/slides/net/aspose.slides.animation/behavior) is a building block of a PowerPoint animation effect. Combine behaviors to customize an effect, or add a behavior to extend a predefined effect. Repetition is configured through timing settings rather than a separate repeat behavior.
[Animation Point](https://reference.aspose.com/slides/net/aspose.slides.animation/point) is a point at which a behavior should be applied.
## **Animation Time Line**
[Sequence](https://reference.aspose.com/slides/net/aspose.slides.animation/sequence) is a collection of animation effects that can target different shapes.
[Timeline](https://reference.aspose.com/slides/net/aspose.slides.animation/animationtimeline) is a set of sequences used in a specific slide. It is an animation engine introduced in PowerPoint 2002. In earlier versions of PowerPoint, adding animation effects to presentations was challenging and could only be achieved with various workarounds. The timeline replaces the old AnimationSettings class and provides a clearer object model for PowerPoint animations. A slide can have only one animation timeline.
## **Interactive Animation**
[Trigger](https://reference.aspose.com/slides/net/aspose.slides.animation/effecttriggertype) allows you to define user actions (e.g., a button click) that will initiate a specific animation. Triggers were introduced in the latest version of PowerPoint.
## **Shape Animation**
Aspose.Slides allows you to apply animations to shapes, which can include text, rectangles, lines, frames, OLE objects, and more.
Read more [**About Shape Animation**](https://docs.aspose.com/slides/net/shape-animation/).
## **Animated Charts**
To create animated charts, you should use the same classes as for the shapes. However, PowerPoint animations can only be applied to chart categories or chart series. You can also apply animation effects to a category element or a series element.
Read more [**About Animated Charts**](https://docs.aspose.com/slides/net/animated-charts/).
## **Animated Text**
In addition to animating text, you can apply animation to a paragraph.
Read more [**About Animated Text**](https://docs.aspose.com/slides/net/animated-text/).
## **FAQ**
**Will animations be preserved when exporting to PDF?**
No. PDF is a static format, so animations and [slide transitions](https://docs.aspose.com/slides/net/slide-transition/) don’t play. If you need motion, export to [HTML5](https://docs.aspose.com/slides/net/export-to-html5/), [animated GIF](https://docs.aspose.com/slides/net/convert-powerpoint-to-animated-gif/), or [video](https://docs.aspose.com/slides/net/convert-powerpoint-to-video/) instead.
**Can I turn an animated presentation into a video and control the frame rate and frame size?**
Yes. You can [render the presentation as frames](https://docs.aspose.com/slides/net/convert-powerpoint-to-video/) and encode them into a video (e.g., via ffmpeg), choosing the FPS and resolution. Animations and slide transitions are played during rendering.
**Will animations remain intact when working with ODP (not just PPTX)?**
PPT, PPTX, and ODP are supported for [reading](https://docs.aspose.com/slides/net/open-presentation/) and [writing](https://docs.aspose.com/slides/net/save-presentation/), but this does not guarantee animation preservation. Custom animation data can be lost when converting to ODP. See [Custom Animation](https://docs.aspose.com/slides/net/custom-animation/) for a tested example and format limitations.
## Related features
- [Set animation order and timing](https://docs.aspose.com/slides/features/animation-timing/)
- [Start animations on a click](https://docs.aspose.com/slides/features/animation-triggers/)
## Related articles
- [Animate PowerPoint Charts in .NET](https://docs.aspose.com/slides/net/animated-charts/)
- [Animate PowerPoint Text in .NET](https://docs.aspose.com/slides/net/animated-text/)
- [Animation](https://docs.aspose.com/slides/net/examples/elements/animation/)
# Create and Customize PowerPoint Charts in .NET
> Create and customize PowerPoint charts in C# with Aspose.Slides for .NET—work with data, styles, and chart types in PPT and PPTX using clear code examples.
Source: https://docs.aspose.com/slides/net/powerpoint-charts/
Updated: 2025-11-13
---
lastmod: 2025-11-13T18:56:36+04:00
title: Create and Customize PowerPoint Charts in .NET
linktitle: PowerPoint Charts
type: docs
weight: 70
url: /net/powerpoint-charts/
keywords:
- add chart
- create chart
- update chart
- change chart
- modify chart
- customize chart
- chart type
- chart entities
- format chart
- chart workbook
- animated chart
- export chart
- PowerPoint
- presentation
- .NET
- C#
- Aspose.Slides
description: "Create and customize PowerPoint charts in C# with Aspose.Slides for .NET—work with data, styles, and chart types in PPT and PPTX using clear code examples."
---
## Related articles
- [Chart](https://docs.aspose.com/slides/net/examples/elements/chart/)
- [Customize Presentation Chart Entities in .NET](https://docs.aspose.com/slides/net/chart-entities/)
- [Customize Presentation Charts in .NET](https://docs.aspose.com/slides/net/chart-types/)
# Master PowerPoint Fonts in .NET
> Learn to control PowerPoint fonts in Aspose.Slides for .NET: embed, substitute, load custom fonts, and resolve missing glyphs with concise code.
Source: https://docs.aspose.com/slides/net/powerpoint-fonts/
Updated: 2025-11-13
---
lastmod: 2025-11-13T18:56:36+04:00
title: Master PowerPoint Fonts in .NET
linktitle: PowerPoint Fonts
type: docs
weight: 30
url: /net/powerpoint-fonts/
keywords:
- PowerPoint font
- customize font
- default font
- embed font
- fallback font
- font replacement
- font substitution
- font selection
- PowerPoint
- OpenDocument
- presentation
- .NET
- C#
- Aspose.Slides
description: "Learn to control PowerPoint fonts in Aspose.Slides for .NET: embed, substitute, load custom fonts, and resolve missing glyphs with concise code."
---
## Related articles
- [Manage Fallback Fonts for Presentations in .NET](https://docs.aspose.com/slides/net/fallback-font/)
- [Streamline Font Replacement in Presentations in .NET](https://docs.aspose.com/slides/net/font-replacement/)
- [Font Selection Sequence in Aspose.Slides for .NET](https://docs.aspose.com/slides/net/font-selection-sequence/)
# Add Math Equations to PowerPoint Presentations in .NET
> Insert and edit math equations in PowerPoint PPT and PPTX with Aspose.Slides for .NET, supporting OMML, formatting controls, and clear C# code samples.
Source: https://docs.aspose.com/slides/net/powerpoint-math-equations/
Updated: 2026-11-18
## **Overview**
PowerPoint stores equations as Office Math Markup Language (OMML). With Aspose.Slides for .NET, you can create the same kind of math content programmatically: fractions, radicals, functions, limits, N-ary operators, matrices, arrays, and formatted math blocks.
In PowerPoint, users normally add equations from **Insert > Equation**:
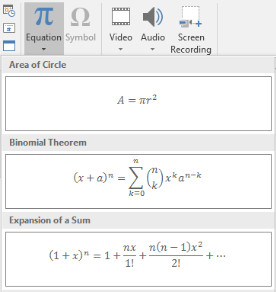
The result is editable math text on the slide:

Aspose.Slides builds that math text through three main objects:
- A math shape, created with [AddMathShape](https://reference.aspose.com/slides/net/aspose.slides/ishapecollection/addmathshape/), is the shape that contains the equation.
- [MathPortion](https://reference.aspose.com/slides/net/aspose.slides.mathtext/mathportion/) stores math content inside the shape text frame.
- [MathParagraph](https://reference.aspose.com/slides/net/aspose.slides.mathtext/mathparagraph/) contains one or more [MathBlock](https://reference.aspose.com/slides/net/aspose.slides.mathtext/mathblock/) objects.
Most examples below use [MathematicalText](https://reference.aspose.com/slides/net/aspose.slides.mathtext/mathematicaltext/) and the fluent methods from [IMathElement](https://reference.aspose.com/slides/net/aspose.slides.mathtext/imathelement/) to keep the code short and readable.
For MathML export scenarios, see [Export Math Equations from Presentations in .NET](https://docs.aspose.com/slides/net/exporting-math-equations/).
## **Create an Equation**
This example uses [AddMathShape](https://reference.aspose.com/slides/net/aspose.slides/ishapecollection/addmathshape/) to create a math shape and adds the Pythagorean theorem:
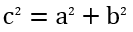
```csharp
using Aspose.Slides;
using Aspose.Slides.Export;
using Aspose.Slides.MathText;
using var presentation = new Presentation();
var slide = presentation.Slides[0];
var mathShape = slide.Shapes.AddMathShape(20, 20, 700, 120);
var mathParagraph = ((MathPortion)mathShape.TextFrame.Paragraphs[0].Portions[0]).MathParagraph;
var equation = new MathematicalText("c")
.SetSuperscript("2")
.Join("=")
.Join(new MathematicalText("a").SetSuperscript("2"))
.Join("+")
.Join(new MathematicalText("b").SetSuperscript("2"));
mathParagraph.Add(equation);
presentation.Save("pythagorean-theorem.pptx", SaveFormat.Pptx);
```
[AddMathShape](https://reference.aspose.com/slides/net/aspose.slides/ishapecollection/addmathshape/) creates a shape that already contains a math paragraph. Access the first [MathPortion](https://reference.aspose.com/slides/net/aspose.slides.mathtext/mathportion/), get its [MathParagraph](https://reference.aspose.com/slides/net/aspose.slides.mathtext/mathportion/mathparagraph/), and add math blocks or math elements to it.
## **Add Fractions**
Use [Divide](https://reference.aspose.com/slides/net/aspose.slides.mathtext/imathelement/divide/) to create a fraction. You can choose a fraction style with [MathFractionTypes](https://reference.aspose.com/slides/net/aspose.slides.mathtext/mathfractiontypes/).

```csharp
using Aspose.Slides;
using Aspose.Slides.Export;
using Aspose.Slides.MathText;
using var presentation = new Presentation();
var slide = presentation.Slides[0];
var mathShape = slide.Shapes.AddMathShape(20, 20, 700, 100);
var mathParagraph = ((MathPortion)mathShape.TextFrame.Paragraphs[0].Portions[0]).MathParagraph;
var fraction = new MathematicalText("1")
.Divide("x", MathFractionTypes.Skewed);
mathParagraph.Add(new MathBlock(fraction));
presentation.Save("fraction.pptx", SaveFormat.Pptx);
```
For a stacked fraction, use [MathFractionTypes.Bar](https://reference.aspose.com/slides/net/aspose.slides.mathtext/mathfractiontypes/):
```csharp
using Aspose.Slides.MathText;
var stackedFraction = new MathematicalText("x + 1").Divide("y - 1", MathFractionTypes.Bar);
```
## **Add Radicals**
Use [Radical](https://reference.aspose.com/slides/net/aspose.slides.mathtext/imathelement/radical/) to create a square root, cube root, or other root. The current element becomes the base, and the argument becomes the degree.

```csharp
using Aspose.Slides;
using Aspose.Slides.Export;
using Aspose.Slides.MathText;
using var presentation = new Presentation();
var slide = presentation.Slides[0];
var mathShape = slide.Shapes.AddMathShape(20, 20, 700, 100);
var mathParagraph = ((MathPortion)mathShape.TextFrame.Paragraphs[0].Portions[0]).MathParagraph;
var radical = new MathematicalText("x")
.Radical("n");
mathParagraph.Add(new MathBlock(radical));
presentation.Save("radical.pptx", SaveFormat.Pptx);
```
### **Show or Hide the Degree of a Square Root**
A square root can display an explicit 2 or use the conventional √x notation. The [HideDegree](https://reference.aspose.com/slides/net/aspose.slides.mathtext/imathradical/hidedegree/) property of [IMathRadical](https://reference.aspose.com/slides/net/aspose.slides.mathtext/imathradical/) controls which form appears. Both forms retain the degree 2 and the radicand x in the editable equation.

The example saves the same square root twice. In `visible-degree.pptx` the 2 is visible. In `hidden-degree.pptx` it is hidden.
```csharp
using Aspose.Slides;
using Aspose.Slides.Export;
using Aspose.Slides.MathText;
using var presentation = new Presentation();
var slide = presentation.Slides[0];
var radical = new MathematicalText("x").Radical("2");
var shape = slide.Shapes.AddMathShape(20, 20, 200, 100);
var portion = (IMathPortion)shape.TextFrame.Paragraphs[0].Portions[0];
portion.MathParagraph.Add(new MathBlock(radical));
radical.HideDegree = false;
presentation.Save("visible-degree.pptx", SaveFormat.Pptx);
radical.HideDegree = true;
presentation.Save("hidden-degree.pptx", SaveFormat.Pptx);
```
## **Add Functions and Limits**
Use [AsArgumentOfFunction](https://reference.aspose.com/slides/net/aspose.slides.mathtext/imathelement/asargumentoffunction/) or [Function](https://reference.aspose.com/slides/net/aspose.slides.mathtext/imathelement/function/) for functions such as `sin(x)`, `log(x)`, or custom function names. For limits, put `lim` in a [MathLimit](https://reference.aspose.com/slides/net/aspose.slides.mathtext/mathlimit/) or use [SetLowerLimit](https://reference.aspose.com/slides/net/aspose.slides.mathtext/imathelement/setlowerlimit/).

```csharp
using Aspose.Slides;
using Aspose.Slides.Export;
using Aspose.Slides.MathText;
using var presentation = new Presentation();
var slide = presentation.Slides[0];
var mathShape = slide.Shapes.AddMathShape(20, 20, 700, 100);
var mathParagraph = ((MathPortion)mathShape.TextFrame.Paragraphs[0].Portions[0]).MathParagraph;
var limit = new MathematicalText("lim")
.SetLowerLimit("x→∞")
.Function("x");
mathParagraph.Add(new MathBlock(limit));
presentation.Save("functions-and-limits.pptx", SaveFormat.Pptx);
```
For a custom function name, make the function name the current element and call [Function](https://reference.aspose.com/slides/net/aspose.slides.mathtext/imathelement/function/) with its argument:
```csharp
using Aspose.Slides.MathText;
var customFunction = new MathematicalText("f").Function("x + 1");
```
## **Add N-ary Operators and Integrals**
Use [Nary](https://reference.aspose.com/slides/net/aspose.slides.mathtext/imathelement/nary/) for summations, unions, intersections, and other large operators. Use [Integral](https://reference.aspose.com/slides/net/aspose.slides.mathtext/imathelement/integral/) for integrals. Both methods let you set lower and upper limits.
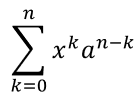
```csharp
using Aspose.Slides;
using Aspose.Slides.Export;
using Aspose.Slides.MathText;
using var presentation = new Presentation();
var slide = presentation.Slides[0];
var mathShape = slide.Shapes.AddMathShape(20, 20, 700, 120);
var mathParagraph = ((MathPortion)mathShape.TextFrame.Paragraphs[0].Portions[0]).MathParagraph;
var summationBase = new MathematicalText("x")
.SetSuperscript("k")
.Join(new MathematicalText("a").SetSuperscript("n-k"));
var summation = summationBase.Nary(MathNaryOperatorTypes.Summation, "k=0", "n");
mathParagraph.Add(new MathBlock(summation));
presentation.Save("nary-operators.pptx", SaveFormat.Pptx);
```
N-ary operators are for large operators with optional limits. Simple operators such as `+`, `-`, and `=` are usually added as [MathematicalText](https://reference.aspose.com/slides/net/aspose.slides.mathtext/mathematicaltext/) and joined into the expression.
For an integral, use [Integral](https://reference.aspose.com/slides/net/aspose.slides.mathtext/imathelement/integral/):
```csharp
using Aspose.Slides.MathText;
var integralBase = new MathematicalText("x").Join(new MathematicalText("dx").ToBox());
var integral = integralBase.Integral(MathIntegralTypes.Simple, "0", "1");
```
## **Add Matrices**
Use [MathMatrix](https://reference.aspose.com/slides/net/aspose.slides.mathtext/mathmatrix/) for rows and columns. Matrices do not include brackets by default, so enclose the matrix when you need parentheses, brackets, or braces.

```csharp
using Aspose.Slides;
using Aspose.Slides.Export;
using Aspose.Slides.MathText;
using var presentation = new Presentation();
var slide = presentation.Slides[0];
var mathShape = slide.Shapes.AddMathShape(20, 20, 700, 120);
var mathParagraph = ((MathPortion)mathShape.TextFrame.Paragraphs[0].Portions[0]).MathParagraph;
var matrix = new MathMatrix(2, 3);
matrix[0, 0] = new MathematicalText("1");
matrix[0, 1] = new MathematicalText("x");
matrix[1, 0] = new MathematicalText("x");
matrix[1, 1] = new MathematicalText("2");
matrix[1, 2] = new MathematicalText("y");
mathParagraph.Add(new MathBlock(matrix));
presentation.Save("matrix.pptx", SaveFormat.Pptx);
```
### **Edit an Existing Matrix**
Suppose a linear algebra lesson starts with the coefficient matrix in `matrix.pptx`, saved by the preceding example. For the next exercise, keep the first equation, replace the second with two new equations, and revise the set of variables. Open the existing matrix through [IMathMatrix](https://reference.aspose.com/slides/net/aspose.slides.mathtext/imathmatrix/) to keep the coefficients that still apply.
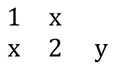
Row and column indices start at zero and refer to the matrix as it stands at each call. Inserting a row before index 1 moves the original second row to index 2. Inserting after index 2 then appends a row. Deleting row 2 removes the original second equation and moves the appended row up one position. Columns shift in the same way.
```csharp
using Aspose.Slides;
using Aspose.Slides.Export;
using Aspose.Slides.MathText;
using var presentation = new Presentation("matrix.pptx");
var shape = (IAutoShape)presentation.Slides[0].Shapes[0];
var portion = (IMathPortion)shape.TextFrame.Paragraphs[0].Portions[0];
var matrix = (IMathMatrix)portion.MathParagraph[0][0];
matrix.InsertRowBefore(1);
matrix.InsertRowAfter(2);
matrix.DeleteRow(2);
matrix.InsertColumnBefore(1);
matrix.InsertColumnAfter(3);
matrix.DeleteColumn(3);
// New cells are initially null. Set the nonzero coefficients first.
matrix[1, 0] = new MathematicalText("12");
matrix[1, 1] = new MathematicalText("1");
matrix[2, 2] = new MathematicalText("10");
matrix[2, 3] = new MathematicalText("1");
for (var row = 0; row < matrix.RowCount; row++)
{
for (var column = 0; column < matrix.ColumnCount; column++)
{
matrix[row, column] ??= new MathematicalText("0");
}
}
matrix.SetColumnAlignment(0, MathHorizontalAlignment.Left);
matrix.SetColumnsAlignment(1, 3, MathHorizontalAlignment.Right);
presentation.Save("updated-matrix.pptx", SaveFormat.Pptx);
```
[SetColumnAlignment](https://reference.aspose.com/slides/net/aspose.slides.mathtext/imathmatrix/setcolumnalignment/) aligns the first column to the left. [SetColumnsAlignment](https://reference.aspose.com/slides/net/aspose.slides.mathtext/imathmatrix/setcolumnsalignment/) aligns three consecutive columns to the right, starting at index 1. In `updated-matrix.pptx`, the matrix has three equations and four variables. The original first-row coefficients `1` and `x` now appear in the first and third columns.

## **Add Equation Arrays**
Use [ToMathArray](https://reference.aspose.com/slides/net/aspose.slides.mathtext/imathelement/tomatharray/) when you need aligned equations or a vertical stack of expressions.

```csharp
using Aspose.Slides;
using Aspose.Slides.Export;
using Aspose.Slides.MathText;
using var presentation = new Presentation();
var slide = presentation.Slides[0];
var mathShape = slide.Shapes.AddMathShape(20, 20, 700, 140);
var mathParagraph = ((MathPortion)mathShape.TextFrame.Paragraphs[0].Portions[0]).MathParagraph;
var equationArray = new MathematicalText("x")
.Join("y")
.ToMathArray();
mathParagraph.Add(new MathBlock(equationArray));
presentation.Save("equation-array.pptx", SaveFormat.Pptx);
```
### **Align an Array with Surrounding Elements**
[IMathArray.BaseJustification](https://reference.aspose.com/slides/net/aspose.slides.mathtext/imatharray/basejustification/) controls the vertical alignment of an array relative to the mathematical elements beside it. The example below compares alignment with the first row, the center of the array, and the last row.
The following example creates three identical arrays, each with three rows and the neighboring elements `A=` and `=B`. All mathematical text uses Cambria Math at 24 points. Only the array alignment changes.
```csharp
using Aspose.Slides;
using Aspose.Slides.Export;
using Aspose.Slides.MathText;
using var presentation = new Presentation();
presentation.SlideSize.SetSize(780, 200, SlideSizeScaleType.DoNotScale);
var slide = presentation.Slides[0];
var alignments = new[] { MathVerticalAlignment.Top, MathVerticalAlignment.Center, MathVerticalAlignment.Bottom };
for (int i = 0; i < alignments.Length; i++)
{
var label = slide.Shapes.AddAutoShape(ShapeType.Rectangle, 20 + i * 260, 10, 240, 30);
label.FillFormat.FillType = FillType.NoFill;
label.LineFormat.FillFormat.FillType = FillType.NoFill;
label.TextFrame.Text = alignments[i].ToString();
var labelFormat = label.TextFrame.Paragraphs[0].Portions[0].PortionFormat;
labelFormat.FontHeight = 16;
labelFormat.FillFormat.FillType = FillType.Solid;
labelFormat.FillFormat.SolidFillColor.Color = System.Drawing.Color.Black;
var mathShape = slide.Shapes.AddMathShape(20 + i * 260, 60, 240, 130);
mathShape.TextFrame.TextFrameFormat.AnchoringType = TextAnchorType.Top;
var mathParagraph = ((IMathPortion)mathShape.TextFrame.Paragraphs[0].Portions[0]).MathParagraph;
mathParagraph.Justification = MathJustification.LeftJustified;
var rows = new IMathElement[] { CreateText("x+y=3"), CreateText("x-y=1"), CreateText("x=2") };
var equationArray = new MathArray(rows);
equationArray.BaseJustification = alignments[i];
var equation = new MathBlock(CreateText("A=")).Join(equationArray).Join(CreateText("=B"));
mathParagraph.Add(equation);
}
presentation.Save("equation-array-alignment.pptx", SaveFormat.Pptx);
MathematicalText CreateText(string value)
{
var text = new MathematicalText(value);
text.Format.FontHeight = 24;
text.Format.LatinFont = new FontData("Cambria Math");
return text;
}
```
The following comparison shows the saved presentation in PowerPoint. Notice the position of `A=` and `=B` beside each array.

### **Configure Row Spacing**
[RowSpacingRule](https://reference.aspose.com/slides/net/aspose.slides.mathtext/imatharray/rowspacingrule/) selects the spacing rule for rows within the array. [RowSpacing](https://reference.aspose.com/slides/net/aspose.slides.mathtext/imatharray/rowspacing/) supplies a numeric value for an explicit spacing rule and is ignored by the preset rules.
For exact spacing, the value is measured in points. For proportional spacing, it is measured in half-lines: the value `3` in the example specifies 1.5 lines. Set both properties when specifying an explicit value; changing the numeric value alone does not select a spacing rule.
The example below saves five presentations with the same equations, alignment, and font settings. The first three use presets; the last two show explicit values.
```csharp
using Aspose.Slides;
using Aspose.Slides.Export;
using Aspose.Slides.MathText;
var settings = new (MathRowSpacingRule Rule, uint Spacing)[]
{
(MathRowSpacingRule.SingleLineGap, 0),
(MathRowSpacingRule.OneAndAHalfLineGap, 0),
(MathRowSpacingRule.TwoLineGap, 0),
(MathRowSpacingRule.Exactly, 20),
(MathRowSpacingRule.Multiple, 3)
};
foreach (var setting in settings)
{
var fileName = $"equation-array-{setting.Rule}.pptx";
using (var presentation = new Presentation())
{
var mathShape = presentation.Slides[0].Shapes.AddMathShape(20, 20, 600, 300);
var paragraph = mathShape.TextFrame.Paragraphs[0];
paragraph.ParagraphFormat.SpaceBefore = 0;
paragraph.ParagraphFormat.SpaceAfter = 0;
var mathParagraph = ((IMathPortion)paragraph.Portions[0]).MathParagraph;
mathParagraph.Justification = MathJustification.LeftJustified;
var rows = new IMathElement[] { CreateText("x+y=3"), CreateText("x-y=1"), CreateText("x=2") };
var equationArray = new MathArray(rows);
equationArray.BaseJustification = MathVerticalAlignment.Center;
equationArray.RowSpacingRule = setting.Rule;
equationArray.RowSpacing = setting.Spacing;
var equation = new MathBlock(CreateText("A=")).Join(equationArray).Join(CreateText("=B"));
mathParagraph.Add(equation);
presentation.Save(fileName, SaveFormat.Pptx);
}
}
MathematicalText CreateText(string value)
{
var text = new MathematicalText(value);
text.Format.FontHeight = 24;
text.Format.LatinFont = new FontData("Cambria Math");
return text;
}
```
Array row spacing is separate from paragraph spacing. [SpaceBefore](https://reference.aspose.com/slides/net/aspose.slides/iparagraphformat/spacebefore/) and [SpaceAfter](https://reference.aspose.com/slides/net/aspose.slides/iparagraphformat/spaceafter/) add space around the containing paragraph, not between array rows. Likewise, [IMathParagraph.Justification](https://reference.aspose.com/slides/net/aspose.slides.mathtext/imathparagraph/justification/) positions the whole math paragraph horizontally; it does not replace the array's vertical alignment setting.
## **Add Trigonometric Functions**
Use [AsArgumentOfFunction](https://reference.aspose.com/slides/net/aspose.slides.mathtext/imathelement/asargumentoffunction/) when the argument is the current element and the function name is known.

```csharp
using Aspose.Slides;
using Aspose.Slides.Export;
using Aspose.Slides.MathText;
using var presentation = new Presentation();
var slide = presentation.Slides[0];
var mathShape = slide.Shapes.AddMathShape(20, 20, 700, 100);
var mathParagraph = ((MathPortion)mathShape.TextFrame.Paragraphs[0].Portions[0]).MathParagraph;
var cosine = new MathematicalText("2x")
.AsArgumentOfFunction(MathFunctionsOfOneArgument.Cos);
mathParagraph.Add(new MathBlock(cosine));
presentation.Save("trigonometric-function.pptx", SaveFormat.Pptx);
```
## **Add Subscripts and Superscripts**
Use the subscript and superscript helpers for indexes and powers. When the indexes must appear on the left side of the base, use [SetSubSuperscriptOnTheLeft](https://reference.aspose.com/slides/net/aspose.slides.mathtext/imathelement/setsubsuperscriptontheleft/).

```csharp
using Aspose.Slides;
using Aspose.Slides.Export;
using Aspose.Slides.MathText;
using var presentation = new Presentation();
var slide = presentation.Slides[0];
var mathShape = slide.Shapes.AddMathShape(20, 20, 700, 100);
var mathParagraph = ((MathPortion)mathShape.TextFrame.Paragraphs[0].Portions[0]).MathParagraph;
var scripts = new MathematicalText("Y")
.SetSubSuperscriptOnTheLeft("1", "n");
mathParagraph.Add(new MathBlock(scripts));
presentation.Save("subscript-superscript.pptx", SaveFormat.Pptx);
```
## **Add Delimiters**
Use [Enclose](https://reference.aspose.com/slides/net/aspose.slides.mathtext/imathelement/enclose/) to put an expression inside delimiters. You can also set a separator character for delimiter expressions that contain several elements.

```csharp
using Aspose.Slides;
using Aspose.Slides.Export;
using Aspose.Slides.MathText;
using var presentation = new Presentation();
var slide = presentation.Slides[0];
var mathShape = slide.Shapes.AddMathShape(20, 20, 700, 100);
var mathParagraph = ((MathPortion)mathShape.TextFrame.Paragraphs[0].Portions[0]).MathParagraph;
var delimiter = new MathematicalText("x")
.Join("y")
.Join("z")
.Enclose('<', '>');
delimiter.SeparatorCharacter = '|';
mathParagraph.Add(new MathBlock(delimiter));
presentation.Save("delimiters.pptx", SaveFormat.Pptx);
```
### **Size and Align Delimiters**
Set [GrowToMatchOperandHeight](https://reference.aspose.com/slides/net/aspose.slides.mathtext/imathdelimiter/growtomatchoperandheight/) to `true` to let the parentheses grow around a tall operand, or to `false` to keep them at their normal size. [DelimiterShape](https://reference.aspose.com/slides/net/aspose.slides.mathtext/imathdelimiter/delimitershape/) takes one of two [MathDelimiterShape](https://reference.aspose.com/slides/net/aspose.slides.mathtext/mathdelimitershape/) values. `Centered` centers the parentheses on the math axis, which runs through the middle of the equals sign. `Match` aligns them with the enclosed content. Both settings affect only the delimiters. The expression inside stays the same.
The example places a fraction in the exponent of `x` so the expression extends farther above the baseline than below it. All four equations use the same parentheses and font settings.
```csharp
using Aspose.Slides;
using Aspose.Slides.Export;
using Aspose.Slides.MathText;
using var presentation = new Presentation();
var slide = presentation.Slides[0];
void AddExpression(float left, float top, bool grow, MathDelimiterShape shape)
{
var fraction = new MathematicalText("a + b").Divide("c + d");
var power = new MathematicalText("x").SetSuperscript(fraction);
var delimiter = power.Enclose('(', ')');
delimiter.GrowToMatchOperandHeight = grow;
delimiter.DelimiterShape = shape;
var mathShape = slide.Shapes.AddMathShape(left, top, 300, 100);
var portion = (MathPortion)mathShape.TextFrame.Paragraphs[0].Portions[0];
portion.PortionFormat.FontHeight = 32;
var equation = new MathematicalText("y = ").Join(delimiter);
portion.MathParagraph.Add(equation);
}
AddExpression(20, 20, true, MathDelimiterShape.Centered);
AddExpression(350, 20, true, MathDelimiterShape.Match);
AddExpression(20, 140, false, MathDelimiterShape.Centered);
AddExpression(350, 140, false, MathDelimiterShape.Match);
presentation.Save("delimiter-sizing.pptx", SaveFormat.Pptx);
```
In PowerPoint, compare the rows to see the effect of growth. In the top row, the parentheses grow to enclose the exponent and look alike for both shapes. In the bottom row, growth is off. The smaller parentheses on the left (`Centered`) align with the equals sign, while those on the right (`Match`) sit higher around the expression.

## **Add a Border Box**
Call [ToBorderBox](https://reference.aspose.com/slides/net/aspose.slides.mathtext/imathelement/toborderbox/) on a fraction to frame the entire expression. The returned [IMathBorderBox](https://reference.aspose.com/slides/net/aspose.slides.mathtext/imathborderbox/) shows all four sides by default. Use [HideTop](https://reference.aspose.com/slides/net/aspose.slides.mathtext/imathborderbox/hidetop/), [HideBottom](https://reference.aspose.com/slides/net/aspose.slides.mathtext/imathborderbox/hidebottom/), [HideLeft](https://reference.aspose.com/slides/net/aspose.slides.mathtext/imathborderbox/hideleft/), and [HideRight](https://reference.aspose.com/slides/net/aspose.slides.mathtext/imathborderbox/hideright/) to remove individual sides.
The example places six copies of the same fraction on one slide. To show cancellation, hide all four sides and set [StrikethroughBottomLeftToTopRight](https://reference.aspose.com/slides/net/aspose.slides.mathtext/imathborderbox/strikethroughbottomlefttotopright/) for a rising diagonal (↗) or [StrikethroughTopLeftToBottomRight](https://reference.aspose.com/slides/net/aspose.slides.mathtext/imathborderbox/strikethroughtoplefttobottomright/) for a falling diagonal (↘). You can also use [StrikethroughHorizontal](https://reference.aspose.com/slides/net/aspose.slides.mathtext/imathborderbox/strikethroughhorizontal/) or [StrikethroughVertical](https://reference.aspose.com/slides/net/aspose.slides.mathtext/imathborderbox/strikethroughvertical/) with any combination of visible sides.
```csharp
using Aspose.Slides;
using Aspose.Slides.Export;
using Aspose.Slides.MathText;
using var presentation = new Presentation();
presentation.SlideSize.SetSize(540, 220, SlideSizeScaleType.DoNotScale);
var slide = presentation.Slides[0];
IMathBorderBox AddFraction(float x, float y, bool hideBorder = false)
{
var fraction = new MathematicalText("x+1").Divide("y+2");
var box = fraction.ToBorderBox();
box.HideTop = box.HideBottom = box.HideLeft = box.HideRight = hideBorder;
var shape = slide.Shapes.AddMathShape(x, y, 160, 90);
var portion = (MathPortion)shape.TextFrame.Paragraphs[0].Portions[0];
portion.PortionFormat.FontHeight = 28;
portion.MathParagraph.Add(new MathBlock(box));
return box;
}
AddFraction(10, 10);
var partial = AddFraction(190, 10);
partial.HideTop = true;
partial.HideRight = true;
AddFraction(370, 10, hideBorder: true).StrikethroughBottomLeftToTopRight = true;
AddFraction(10, 120, hideBorder: true).StrikethroughTopLeftToBottomRight = true;
AddFraction(190, 120, hideBorder: true).StrikethroughHorizontal = true;
AddFraction(370, 120).StrikethroughVertical = true;
presentation.Save("border-box.pptx", SaveFormat.Pptx);
```

On this fraction, the horizontal strike overlaps the fraction bar. The vertical strike crosses both the numerator and the denominator while the surrounding border stays visible. These lines decorate the whole expression. Ordinary text strikethrough applies to characters in a text run. After reopening the presentation in PowerPoint, you can still edit the numerator and denominator independently.
## **Control Visibility and Layout with Phantom Elements**
Wrap an expression in [MathPhantom](https://reference.aspose.com/slides/net/aspose.slides.mathtext/mathphantom/) to control its visibility and the space it contributes to an equation independently. The [IMathPhantom](https://reference.aspose.com/slides/net/aspose.slides.mathtext/imathphantom/) properties control the following:
| Property | Effect |
| --- | --- |
| [Show](https://reference.aspose.com/slides/net/aspose.slides.mathtext/imathphantom/show/) | Set to `false` to hide the expression. Its dimensions still contribute to layout unless the corresponding properties below are `true`. |
| [ZeroWidth](https://reference.aspose.com/slides/net/aspose.slides.mathtext/imathphantom/zerowidth/) | Treat the expression's horizontal width as zero, allowing neighboring elements to move closer together. |
| [ZeroAsc](https://reference.aspose.com/slides/net/aspose.slides.mathtext/imathphantom/zeroasc/) | Treat its ascent, the height above the baseline, as zero. This can reduce the space reserved above neighboring elements. |
| [ZeroDesc](https://reference.aspose.com/slides/net/aspose.slides.mathtext/imathphantom/zerodesc/) | Treat its descent, the depth below the baseline, as zero. This can move a fraction bar or other content below the expression closer to its neighbors. |
The baseline is the reference line on which ordinary mathematical letters sit. Hiding content does not remove its dimensions, and treating a dimension as zero does not delete the expression. The underlying expression remains available through [Base](https://reference.aspose.com/slides/net/aspose.slides.mathtext/imathphantom/base/). Set [Show](https://reference.aspose.com/slides/net/aspose.slides.mathtext/imathphantom/show/) back to `true` to display it again; the dimension settings remain unchanged.
The example below creates five side-by-side variants: a visible fraction, a hidden fraction that reserves space, and three hidden fractions with one dimension treated as zero. Each variant uses the same surrounding expression and Cambria Math at 24 points. All equation shapes have the same top position, marked by the gray guide. Placing the phantom in the numerator of an outer fraction makes the vertical layout changes easier to see.
```csharp
using Aspose.Slides;
using Aspose.Slides.Export;
using Aspose.Slides.MathText;
using var presentation = new Presentation();
presentation.SlideSize.SetSize(1000, 180, SlideSizeScaleType.DoNotScale);
var slide = presentation.Slides[0];
var labels = new[] { "Visible", "Hidden: reserves space", "Hidden: ZeroWidth", "Hidden: ZeroAsc", "Hidden: ZeroDesc" };
var guide = slide.Shapes.AddAutoShape(ShapeType.Line, 10, 60, 980, 0);
guide.LineFormat.FillFormat.FillType = FillType.Solid;
guide.LineFormat.FillFormat.SolidFillColor.Color = System.Drawing.Color.LightGray;
for (var i = 0; i < labels.Length; i++)
{
var left = 10 + i * 200;
var label = slide.Shapes.AddAutoShape(ShapeType.Rectangle, left, 10, 190, 30);
label.FillFormat.FillType = FillType.NoFill;
label.LineFormat.FillFormat.FillType = FillType.NoFill;
label.TextFrame.Text = labels[i];
var labelFormat = label.TextFrame.Paragraphs[0].Portions[0].PortionFormat;
labelFormat.FontHeight = 14;
labelFormat.FillFormat.FillType = FillType.Solid;
labelFormat.FillFormat.SolidFillColor.Color = System.Drawing.Color.Black;
var fraction = new MathFraction(CreateText("a+b"), CreateText("c+d"));
var phantom = new MathPhantom(fraction);
phantom.Show = i == 0;
phantom.ZeroWidth = i == 2;
phantom.ZeroAsc = i == 3;
phantom.ZeroDesc = i == 4;
var numerator = new MathBlock(CreateText("x+")).Join(phantom).Join(CreateText("+y"));
var equation = new MathFraction(numerator, CreateText("z"));
var shape = slide.Shapes.AddMathShape(left, 60, 190, 100);
shape.TextFrame.TextFrameFormat.AnchoringType = TextAnchorType.Top;
var mathParagraph = ((IMathPortion)shape.TextFrame.Paragraphs[0].Portions[0]).MathParagraph;
mathParagraph.Add(new MathBlock(equation));
}
presentation.Save("math-phantom.pptx", SaveFormat.Pptx);
MathematicalText CreateText(string value)
{
var text = new MathematicalText(value);
text.Format.FontHeight = 24;
text.Format.LatinFont = new FontData("Cambria Math");
return text;
}
```

## **Group Terms**
Use [Group](https://reference.aspose.com/slides/net/aspose.slides.mathtext/imathelement/group/) to place a grouping character above or below an expression. Add a limit to label the grouped terms.

```csharp
using Aspose.Slides;
using Aspose.Slides.Export;
using Aspose.Slides.MathText;
using var presentation = new Presentation();
var slide = presentation.Slides[0];
var mathShape = slide.Shapes.AddMathShape(20, 20, 700, 120);
var mathParagraph = ((MathPortion)mathShape.TextFrame.Paragraphs[0].Portions[0]).MathParagraph;
var grouped = new MathematicalText("x + y")
.Group('\u23DF', MathTopBotPositions.Bottom, MathTopBotPositions.Top)
.SetLowerLimit("any text");
mathParagraph.Add(new MathBlock(grouped));
presentation.Save("grouped-terms.pptx", SaveFormat.Pptx);
```
## **Format Math Elements**
Use formatting helpers only where they clarify the formula. For example, [Overbar](https://reference.aspose.com/slides/net/aspose.slides.mathtext/imathelement/overbar/) places a bar above a math element.

```csharp
using Aspose.Slides;
using Aspose.Slides.Export;
using Aspose.Slides.MathText;
using var presentation = new Presentation();
var slide = presentation.Slides[0];
var mathShape = slide.Shapes.AddMathShape(20, 20, 700, 100);
var mathParagraph = ((MathPortion)mathShape.TextFrame.Paragraphs[0].Portions[0]).MathParagraph;
var overbar = new MathematicalText("ABC").Overbar();
mathParagraph.Add(new MathBlock(overbar));
presentation.Save("overbar.pptx", SaveFormat.Pptx);
```
### **Format Text in an Existing Equation**
To format text throughout an existing equation, traverse each math block's element tree. [IMathElement.GetChildren](https://reference.aspose.com/slides/net/aspose.slides.mathtext/imathelement/getchildren/) returns only the immediate children, so call it recursively to reach text inside fractions, scripts, radicals, and other nested structures. Check the current element as well as its children to include the starting element when it is [MathematicalText](https://reference.aspose.com/slides/net/aspose.slides.mathtext/mathematicaltext/).
This example assumes that a presentation contains an equation such as `z = xᵢ / ∛y`, with a fraction containing a subscript in its numerator and a radical in its denominator. Processing only the block's top-level elements would miss the text inside the fraction. The example finds mathematical portions in slide text frames, accesses their blocks through [IMathPortion.MathParagraph](https://reference.aspose.com/slides/net/aspose.slides.mathtext/imathportion/mathparagraph/), and sets [FontHeight](https://reference.aspose.com/slides/net/aspose.slides/baseportionformat/fontheight/) to 28 points through each text element's [Format](https://reference.aspose.com/slides/net/aspose.slides.mathtext/mathematicaltext/format/) property.
```csharp
using Aspose.Slides;
using Aspose.Slides.Export;
using Aspose.Slides.MathText;
using var presentation = new Presentation("input.pptx");
foreach (var slide in presentation.Slides)
{
foreach (var shape in slide.Shapes)
{
if (shape is not IAutoShape autoShape || autoShape.TextFrame == null)
continue;
foreach (var paragraph in autoShape.TextFrame.Paragraphs)
{
foreach (var portion in paragraph.Portions)
{
if (portion is IMathPortion mathPortion)
{
foreach (var block in mathPortion.MathParagraph)
FormatMathText(block);
}
}
}
}
}
presentation.Save("formatted-equations.pptx", SaveFormat.Pptx);
void FormatMathText(IMathElement element)
{
if (element is MathematicalText text)
text.Format.FontHeight = 28;
foreach (var child in element.GetChildren())
FormatMathText(child);
}
```
The saved presentation contains the updated text formatting at every level of each processed equation, while preserving its text content and mathematical structure.
## **Quick Reference**
| Task | Main API |
| --- | --- |
| Create math text | [MathematicalText](https://reference.aspose.com/slides/net/aspose.slides.mathtext/mathematicaltext/) |
| Combine elements | [IMathElement.Join](https://reference.aspose.com/slides/net/aspose.slides.mathtext/imathelement/join/) |
| Create fractions | [IMathElement.Divide](https://reference.aspose.com/slides/net/aspose.slides.mathtext/imathelement/divide/) |
| Add superscript or subscript | [SetSuperscript](https://reference.aspose.com/slides/net/aspose.slides.mathtext/imathelement/setsuperscript/), [SetSubscript](https://reference.aspose.com/slides/net/aspose.slides.mathtext/imathelement/setsubscript/) |
| Add functions | [Function](https://reference.aspose.com/slides/net/aspose.slides.mathtext/imathelement/function/), [AsArgumentOfFunction](https://reference.aspose.com/slides/net/aspose.slides.mathtext/imathelement/asargumentoffunction/) |
| Add radicals | [IMathElement.Radical](https://reference.aspose.com/slides/net/aspose.slides.mathtext/imathelement/radical/) |
| Add limits | [SetLowerLimit](https://reference.aspose.com/slides/net/aspose.slides.mathtext/imathelement/setlowerlimit/), [SetUpperLimit](https://reference.aspose.com/slides/net/aspose.slides.mathtext/imathelement/setupperlimit/) |
| Add left-side scripts | [SetSubSuperscriptOnTheLeft](https://reference.aspose.com/slides/net/aspose.slides.mathtext/imathelement/setsubsuperscriptontheleft/) |
| Add summations and integrals | [Nary](https://reference.aspose.com/slides/net/aspose.slides.mathtext/imathelement/nary/), [Integral](https://reference.aspose.com/slides/net/aspose.slides.mathtext/imathelement/integral/) |
| Add matrices | [MathMatrix](https://reference.aspose.com/slides/net/aspose.slides.mathtext/mathmatrix/) |
| Add equation arrays | [ToMathArray](https://reference.aspose.com/slides/net/aspose.slides.mathtext/imathelement/tomatharray/) |
| Add delimiters | [Enclose](https://reference.aspose.com/slides/net/aspose.slides.mathtext/imathelement/enclose/) |
| Add bars and borders | [Overbar](https://reference.aspose.com/slides/net/aspose.slides.mathtext/imathelement/overbar/), [ToBorderBox](https://reference.aspose.com/slides/net/aspose.slides.mathtext/imathelement/toborderbox/) |
| Group terms | [Group](https://reference.aspose.com/slides/net/aspose.slides.mathtext/imathelement/group/) |
## **FAQ**
**Can I edit an existing PowerPoint equation?**
Yes. Open the presentation, find the shape that contains a [MathPortion](https://reference.aspose.com/slides/net/aspose.slides.mathtext/mathportion/), get its [MathParagraph](https://reference.aspose.com/slides/net/aspose.slides.mathtext/mathportion/mathparagraph/), and update the math blocks in that paragraph.
**Are equations saved as editable PowerPoint math?**
Yes. When you save to PPTX, Aspose.Slides writes the equation as editable Office math content.
**Can I export equations to LaTeX?**
Yes. Get the equation's [IMathParagraph](https://reference.aspose.com/slides/net/aspose.slides.mathtext/imathparagraph/) from its [MathPortion](https://reference.aspose.com/slides/net/aspose.slides.mathtext/mathportion/), and call [IMathParagraph.ToLatex](https://reference.aspose.com/slides/net/aspose.slides.mathtext/imathparagraph/tolatex/) to export it directly. For a complete example, see [Export Math Equations from Presentations in .NET](https://docs.aspose.com/slides/net/exporting-math-equations/#export-math-equations-to-latex).
## Related features
- [Work with mathematical equations](https://docs.aspose.com/slides/features/math-equations/)
## Related articles
- [Math Text](https://docs.aspose.com/slides/net/examples/elements/math-text/)
- [Export Math Equations from Presentations in .NET](https://docs.aspose.com/slides/net/exporting-math-equations/)
# Manage PowerPoint Shapes in .NET
> Learn how to create, edit, format, and manipulate shapes in Aspose.Slides for .NET, with C# code examples for PPT and PPTX presentations.
Source: https://docs.aspose.com/slides/net/powerpoint-shapes/
Updated: 2025-11-13
---
lastmod: 2025-11-13T18:56:36+04:00
title: Manage PowerPoint Shapes in .NET
linktitle: PowerPoint Shapes
type: docs
weight: 90
url: /net/powerpoint-shapes/
keywords:
- shape
- format shape
- shape effect
- manage shape
- effective properties
- animation
- rendering
- ActiveX
- PowerPoint
- presentation
- .NET
- C#
- Aspose.Slides
description: "Learn how to create, edit, format, and manipulate shapes in Aspose.Slides for .NET, with C# code examples for PPT and PPTX presentations."
---
## Related articles
- [ActiveX](https://docs.aspose.com/slides/net/examples/elements/activex/)
- [Animation](https://docs.aspose.com/slides/net/examples/elements/animation/)
# Create and Customize PowerPoint SmartArt in .NET
> Learn how to create and edit PowerPoint SmartArt in .NET via Aspose.Slides API: layouts, nodes, styles, with step-by-step examples to automate slides fast.
Source: https://docs.aspose.com/slides/net/powerpoint-smartart/
Updated: 2026-07-31
---
lastmod: 2026-07-31T17:58:46+04:00
title: Create and Customize PowerPoint SmartArt in .NET
linktitle: PowerPoint SmartArt
type: docs
weight: 100
url: /net/powerpoint-smartart/
aliases:
- /net/examples/elements/smartart/
keywords:
- SmartArt
- manage SmartArt
- SmartArt graphic
- SmartArt node
- PowerPoint
- presentation
- .NET
- C#
- Aspose.Slides
description: "Learn how to create and edit PowerPoint SmartArt in .NET via Aspose.Slides API: layouts, nodes, styles, with step-by-step examples to automate slides fast."
---
## Related articles
- [SmartArt](https://docs.aspose.com/slides/net/examples/elements/smart-art/)
- [Manage SmartArt in PowerPoint Presentations in .NET](https://docs.aspose.com/slides/net/manage-smartart/)
- [Manage SmartArt Shape Nodes in Presentations in .NET](https://docs.aspose.com/slides/net/manage-smartart-shape-node/)
# Create and Customize PowerPoint Tables in .NET
> Create and format tables in PowerPoint PPT and PPTX using Aspose.Slides for .NET with C#—insert rows and columns, merge cells, set borders, import data.
Source: https://docs.aspose.com/slides/net/powerpoint-table/
Updated: 2025-11-13
---
lastmod: 2025-11-13T18:56:36+04:00
title: Create and Customize PowerPoint Tables in .NET
type: docs
weight: 110
url: /net/powerpoint-table/
keywords:
- create table
- add row
- add column
- customize table
- customize row
- customize column
- customize cell
- PowerPoint
- presentation
- .NET
- C#
- Aspose.Slides
description: "Create and format tables in PowerPoint PPT and PPTX using Aspose.Slides for .NET with C#—insert rows and columns, merge cells, set borders, import data."
---
## Related articles
- [Table](https://docs.aspose.com/slides/net/examples/elements/table/)
- [Removing row or column in Table in VSTO and Aspose.Slides](https://docs.aspose.com/slides/net/removing-row-or-column-in-table-in-vsto-and-aspose-slides/)
- [Manage Rows and Columns in PowerPoint Tables in .NET](https://docs.aspose.com/slides/net/manage-rows-and-columns/)
# Understanding the Difference: PPT vs PPTX
> Compare PPT vs PPTX for PowerPoint with Aspose.Slides for .NET, exploring format differences, benefits, compatibility, and conversion tips.
Source: https://docs.aspose.com/slides/net/ppt-vs-pptx/
Updated: 2026-08-13
## **Overview**
This article explains the differences between the PPT and PPTX formats. It describes PPT as the legacy binary format used in PowerPoint 97–2003, while PPTX is presented as the modern Office Open XML-based format that offers greater flexibility and is better suited for extending presentation capabilities. The article also outlines key aspects of converting between these formats, including compatibility considerations, and shows how Aspose.Slides can be used to perform such conversions. In general, PPTX is recommended whenever possible.
## **Understanding PPT: Legacy Format**
[**PPT**](https://docs.fileformat.com/presentation/ppt/) is a binary file format utilized by PowerPoint 97-2003. Due to its binary nature, viewing its content requires specialized tools. Despite its limitations in expandability, the PPT format remains widely used for certain applications.
## **Exploring PPTX: Modern Standard**
[**PPTX**](https://docs.fileformat.com/presentation/pptx/) builds on the Office Open XML standard (ISO 29500:2008-2016, ECMA-376). This XML-based format allows for greater flexibility and is compatible with PowerPoint 2007 and later. PPTX's modularity facilitates easy feature additions, such as new chart or shape types, ensuring backward compatibility without major format changes.
## **PPT vs. PPTX: Key Differences and Conversion Insights**
PPTX offers enhanced functionality compared to the legacy PPT format, yet conversions between these formats are often necessary. Transitioning from PPT to PPTX poses unique challenges due to compatibility issues. PowerPoint may create specific components (MetroBlob) within PPT files to store PPTX-exclusive data, which older versions of PowerPoint cannot display but can restore when opened in newer versions or converted to PPTX.
Aspose.Slides streamlines working with both PPT and PPTX formats, offering seamless conversion capabilities. While full conversion from PPT to PPTX is supported, converting from PPTX to PPT involves limitations. Utilizing PPTX when possible is recommended to optimize functionality and compatibility.
Experience high-quality conversions with the [**Aspose.Slides Conversion tool**](https://products.aspose.app/slides/conversion/).
```csharp
using Aspose.Slides;
using Aspose.Slides.Export;
// Instantiate a Presentation object representing a PPTX file
Presentation pres = new Presentation("PPTtoPPTX.ppt");
// Save PPTX presentation in PPTX format
pres.Save("PPTtoPPTX_out.pptx", SaveFormat.Pptx);
```
Discover more: [**How to Convert Presentations from PPT to PPTX**](https://docs.aspose.com/slides/net/convert-ppt-to-pptx/)
## **FAQ**
### Is there any point in keeping old presentations in PPT if they open without errors?
If a presentation opens reliably and doesn't need collaboration or newer features, you can keep it in PPT. But for future compatibility and extensibility, it's better to [convert to PPTX](https://docs.aspose.com/slides/net/convert-ppt-to-pptx/): the format is based on the open OOXML standard and is more easily supported by modern tools.
### How can I decide which files are critical to convert to PPTX first?
Convert first the presentations that: are edited by multiple people; contain complex [charts](https://docs.aspose.com/slides/net/create-chart/)/[shapes](https://docs.aspose.com/slides/net/shape-manipulations/); are used in external communications; or trigger warnings when [opened](https://docs.aspose.com/slides/net/open-presentation/).
### Will password protection be preserved when converting from PPT to PPTX and back?
The presence of a password carries over only with a correct conversion and encryption support in the tool you use. It's more reliable to [remove protection](https://docs.aspose.com/slides/net/password-protected-presentation/), [convert](https://docs.aspose.com/slides/net/convert-ppt-to-pptx/), then reapply protection according to your security policy.
### Why do some effects disappear or get simplified when converting PPTX back to PPT?
Because PPT doesn't support some newer objects/properties. PowerPoint and tools can store "traces" of this information in special blocks for later restoration, but older versions of PowerPoint won't render them.
# Manage Presentation Accessibility in .NET
> Automate presentation accessibility checks in PPT, PPTX and ODP files with Aspose.Slides for .NET—enhance screen reader experience and boost compliance.
Source: https://docs.aspose.com/slides/net/presentation-accessibility/
Updated: 2026-09-25
## **Introduction**
Alternative text helps people using assistive technologies understand the meaning of images, charts, and other informative shapes. This article explains how to read and update alternative text titles and descriptions with Aspose.Slides for .NET, distinguish accessibility descriptions from shape names used in code, and check whether a shape is marked as decorative.
These features support presentation accessibility, but do not guarantee it. Reading order, color contrast, text readability, and other accessibility requirements also need review.
## **Manage Alternative Text Titles and Descriptions**
Use alternative text to explain the meaning of images, charts, and other informative shapes to people who cannot see them. The following properties serve different purposes:
| Property or content | Purpose |
| --- | --- |
| [AlternativeTextTitle](https://reference.aspose.com/slides/net/aspose.slides/ishape/alternativetexttitle/) | A short title for the alternative description. |
| [AlternativeText](https://reference.aspose.com/slides/net/aspose.slides/ishape/alternativetext/) | A meaningful description of the shape's content or purpose in the context of the slide. |
| [Name](https://reference.aspose.com/slides/net/aspose.slides/ishape/name/) | The shape's name, which code can use to find a specific shape in the presentation. |
| Visible text | Content displayed on the slide, such as a shape's text or a chart's title and labels. Updating alternative text does not change this content. |
When a presentation is reused as a template, code may find a shape by its [Name](https://reference.aspose.com/slides/net/aspose.slides/ishape/name/) before updating it. This name serves a different purpose from alternative text, which explains what the visual communicates to the reader. Searching by name allows authors to improve or translate descriptions without changing how code finds the shape. Names can be edited and are not guaranteed to be unique, so check that the name matches the intended shape; see [Identify and Find Shapes](https://docs.aspose.com/slides/net/shape-manipulations/#identify-and-find-shapes).
The following example requires `input.pptx` with an image of an office entrance as the first shape on the first slide. The image should not be marked as decorative. The example reads and prints its current alternative text title and description, updates both values, and saves the presentation as `output.pptx`. Adapt the wording to the actual image and the information it conveys.
```csharp
using System;
using Aspose.Slides;
using Aspose.Slides.Export;
using var presentation = new Presentation("input.pptx");
var shape = presentation.Slides[0].Shapes[0];
Console.WriteLine($"Alternative text title: {shape.AlternativeTextTitle}");
Console.WriteLine($"Alternative text description: {shape.AlternativeText}");
shape.AlternativeTextTitle = "Office entrance";
shape.AlternativeText = "The office entrance has a wheelchair ramp to the right of the steps.";
presentation.Save("output.pptx", SaveFormat.Pptx);
```
Adding alternative text alone does not guarantee presentation accessibility or compliance with accessibility standards. Review the descriptions for accuracy and relevance, and also check reading order, color contrast, readable text, and other accessibility requirements. Informative visuals should not be marked as decorative; the next section shows how to read [IsDecorative](https://reference.aspose.com/slides/net/aspose.slides/ishape/isdecorative/).
## **Mark as Decorative**
Mark as decorative flags purely ornamental visuals so screen readers skip them, reducing noise and keeping focus on meaningful content. Apply it to backgrounds, flourishes, and spacers—never to charts, icons, or images that convey information. Aspose.Slides exposes this flag for detection and validation, enabling automated accessibility checks and cleanup.
The following code sample shows how to determine whether a shape is marked as decorative.
```cs
using Aspose.Slides;
using var presentation = new Presentation("sample.pptx");
var shape = presentation.Slides[0].Shapes[0];
Console.WriteLine($"Is shape decorative: {shape.IsDecorative}");
```
## **FAQ**
**What should I put in the alternative text title and description?**
Use a short title to identify the subject and a description to explain the information the visual conveys in the context of the slide. For a chart, describe the relevant trend or comparison rather than only saying "chart."
**Should I use alternative text to locate shapes in a template?**
Prefer finding the shape by its [Name](https://reference.aspose.com/slides/net/aspose.slides/ishape/name/) and checking that it is the expected shape. Alternative text may be edited or translated, which can break code that searches for an exact description; see [Identify and Find Shapes](https://docs.aspose.com/slides/net/shape-manipulations/).
**When should a shape be marked as decorative?**
Use the decorative flag for visuals that add no information, such as ornamental flourishes. Images and charts that communicate meaning need an appropriate description instead.
**Does adding alternative text make a presentation fully accessible?**
No. Alternative text addresses only part of accessibility. Also review reading order, color contrast, text readability, and other applicable requirements; setting these properties alone does not establish compliance.
## Related features
- [Create tagged PDF files](https://docs.aspose.com/slides/features/tagged-pdf/)
# Manage Presentation Backgrounds in .NET
> Learn how to set dynamic backgrounds in PowerPoint and OpenDocument files using Aspose.Slides for .NET, with code tips to boost your presentations.
Source: https://docs.aspose.com/slides/net/presentation-background/
Updated: 2026-08-13
## **Introduction**
Solid colors, gradients, and images are commonly used for slide backgrounds. You can set the background for a **normal slide** (a single slide) or a **master slide** (applies to multiple slides at once).

## **Set a Solid Color Background for a Normal Slide**
Aspose.Slides allows you to set a solid color as the background for a specific slide in a presentation—even if the presentation uses a master slide. The change applies only to the selected slide.
1. Create an instance of the [Presentation](https://reference.aspose.com/slides/net/aspose.slides/presentation/) class.
2. Set the slide’s [BackgroundType](https://reference.aspose.com/slides/net/aspose.slides/backgroundtype/) to `OwnBackground`.
3. Set the slide background [FillType](https://reference.aspose.com/slides/net/aspose.slides/filltype/) to `Solid`.
4. Use the [SolidFillColor](https://reference.aspose.com/slides/net/aspose.slides/fillformat/solidfillcolor/) property on [FillFormat](https://reference.aspose.com/slides/net/aspose.slides/fillformat/) to specify the solid background color.
5. Save the modified presentation.
The following C# example shows how to set a blue solid color as the background for a normal slide:
```cs
using System.Drawing;
using Aspose.Slides;
using Aspose.Slides.Export;
// Create an instance of the Presentation class.
using (Presentation presentation = new Presentation())
{
ISlide slide = presentation.Slides[0];
// Set the background color of the slide to blue.
slide.Background.Type = BackgroundType.OwnBackground;
slide.Background.FillFormat.FillType = FillType.Solid;
slide.Background.FillFormat.SolidFillColor.Color = Color.Blue;
// Save the presentation to disk.
presentation.Save("SolidColorBackground.pptx", SaveFormat.Pptx);
}
```
## **Set a Solid Color Background for a Master Slide**
Aspose.Slides allows you to set a solid color as the background for the master slide in a presentation. The master slide acts as a template that controls formatting for all slides, so when you choose a solid color for the master slide’s background, it applies to every slide.
1. Create an instance of the [Presentation](https://reference.aspose.com/slides/net/aspose.slides/presentation/) class.
2. Set the master slide’s [BackgroundType](https://reference.aspose.com/slides/net/aspose.slides/backgroundtype/) (via `masters`) to `OwnBackground`.
3. Set the master slide background [FillType](https://reference.aspose.com/slides/net/aspose.slides/filltype/) to `Solid`.
4. Use the [SolidFillColor](https://reference.aspose.com/slides/net/aspose.slides/fillformat/solidfillcolor/) to specify the solid background color.
5. Save the modified presentation.
The following C# example shows how to set a solid color (forest green) as the background for a master slide:
```cs
using System.Drawing;
using Aspose.Slides;
using Aspose.Slides.Export;
// Create an instance of the Presentation class.
using (Presentation presentation = new Presentation())
{
IMasterSlide masterSlide = presentation.Masters[0];
// Set the background color for the Master slide to Forest Green.
masterSlide.Background.Type = BackgroundType.OwnBackground;
masterSlide.Background.FillFormat.FillType = FillType.Solid;
masterSlide.Background.FillFormat.SolidFillColor.Color = Color.ForestGreen;
// Save the presentation to disk.
presentation.Save("MasterSlideBackground.pptx", SaveFormat.Pptx);
}
```
## **Set a Gradient Background for a Slide**
A gradient is a graphical effect created by a gradual change in color. When used as a slide background, gradients can make presentations look more artistic and professional. Aspose.Slides allows you to set a gradient color as the background for slides.
1. Create an instance of the [Presentation](https://reference.aspose.com/slides/net/aspose.slides/presentation/) class.
2. Set the slide’s [BackgroundType](https://reference.aspose.com/slides/net/aspose.slides/backgroundtype/) to `OwnBackground`.
3. Set the slide background [FillType](https://reference.aspose.com/slides/net/aspose.slides/filltype/) to `Gradient`.
4. Use the [GradientFormat](https://reference.aspose.com/slides/net/aspose.slides/fillformat/gradientformat/) property on [FillFormat](https://reference.aspose.com/slides/net/aspose.slides/fillformat/) to configure your preferred gradient settings.
5. Save the modified presentation.
The following C# example shows how to set a gradient color as the background for a slide:
```cs
using Aspose.Slides;
using Aspose.Slides.Export;
// Create an instance of the Presentation class.
using (Presentation presentation = new Presentation())
{
ISlide slide = presentation.Slides[0];
// Apply a gradient effect to the background.
slide.Background.Type = BackgroundType.OwnBackground;
slide.Background.FillFormat.FillType = FillType.Gradient;
slide.Background.FillFormat.GradientFormat.TileFlip = TileFlip.FlipBoth;
// Save the presentation to disk.
presentation.Save("GradientBackground.pptx", SaveFormat.Pptx);
}
```
## **Set an Image as a Slide Background**
In addition to solid and gradient fills, Aspose.Slides allows you to use images as slide backgrounds.
1. Create an instance of the [Presentation](https://reference.aspose.com/slides/net/aspose.slides/presentation/) class.
2. Set the slide’s [BackgroundType](https://reference.aspose.com/slides/net/aspose.slides/backgroundtype/) to `OwnBackground`.
3. Set the slide background [FillType](https://reference.aspose.com/slides/net/aspose.slides/filltype/) to `Picture`.
4. Load the image you want to use as the slide background.
5. Add the image to the presentation’s image collection.
6. Use the [PictureFillFormat](https://reference.aspose.com/slides/net/aspose.slides/fillformat/picturefillformat/) property on [FillFormat](https://reference.aspose.com/slides/net/aspose.slides/fillformat/) to assign the image as the background.
7. Save the modified presentation.
The following C# example shows how to set an image as the background for a slide:
```c#
using Aspose.Slides;
using Aspose.Slides.Export;
// Create an instance of the Presentation class.
using (Presentation presentation = new Presentation())
{
ISlide slide = presentation.Slides[0];
// Set background image properties.
slide.Background.Type = BackgroundType.OwnBackground;
slide.Background.FillFormat.FillType = FillType.Picture;
slide.Background.FillFormat.PictureFillFormat.PictureFillMode = PictureFillMode.Stretch;
// Load the image.
IImage image = Images.FromFile("Tulips.jpg");
// Add the image to the presentation's image collection.
IPPImage ppImage = presentation.Images.AddImage(image);
image.Dispose();
slide.Background.FillFormat.PictureFillFormat.Picture.Image = ppImage;
// Save the presentation to disk.
presentation.Save("ImageAsBackground.pptx", SaveFormat.Pptx);
}
```
The following code sample shows how to set the background fill type to a tiled picture and modify the tiling properties:
```cs
using Aspose.Slides;
using Aspose.Slides.Export;
using (Presentation presentation = new Presentation())
{
ISlide firstSlide = presentation.Slides[0];
IBackground background = firstSlide.Background;
background.Type = BackgroundType.OwnBackground;
background.FillFormat.FillType = FillType.Picture;
IPPImage ppImage;
using (IImage newImage = Aspose.Slides.Images.FromFile("image.png"))
ppImage = presentation.Images.AddImage(newImage);
// Set the image used for the background fill.
IPictureFillFormat backPictureFillFormat = background.FillFormat.PictureFillFormat;
backPictureFillFormat.Picture.Image = ppImage;
// Set the picture fill mode to Tile and adjust the tile properties.
backPictureFillFormat.PictureFillMode = PictureFillMode.Tile;
backPictureFillFormat.TileOffsetX = 15f;
backPictureFillFormat.TileOffsetY = 15f;
backPictureFillFormat.TileScaleX = 46f;
backPictureFillFormat.TileScaleY = 87f;
backPictureFillFormat.TileAlignment = RectangleAlignment.Center;
backPictureFillFormat.TileFlip = TileFlip.FlipY;
presentation.Save("TileBackground.pptx", SaveFormat.Pptx);
}
```
Read more: [**Tile Picture As Texture**](https://docs.aspose.com/slides/net/shape-formatting/#tile-picture-as-texture).
### **Change the Background Image Transparency**
You may want to adjust the transparency of a slide's background image to make the contents of the slide stand out. The following C# code shows you how to change the transparency for a slide background image:
```cs
using Aspose.Slides;
using Aspose.Slides.Effects;
using Aspose.Slides.Export;
var transparencyValue = 30; // For example.
using (Presentation presentation = new Presentation("ImageAsBackground.pptx"))
{
ISlide slide = presentation.Slides[0];
// Get the collection of picture transform operations.
var imageTransform = slide.Background.FillFormat.PictureFillFormat.Picture.ImageTransform;
// Find an existing fixed-percentage transparency effect.
var transparencyOperation = null as IAlphaModulateFixed;
foreach (var operation in imageTransform)
{
if (operation is IAlphaModulateFixed alphaModulateFixed)
{
transparencyOperation = alphaModulateFixed;
break;
}
}
// Set the new transparency value.
if (transparencyOperation == null)
{
imageTransform.AddAlphaModulateFixedEffect(100 - transparencyValue);
}
else
{
transparencyOperation.Amount = (100 - transparencyValue);
}
presentation.Save("ImageBackgroundTransparency.pptx", SaveFormat.Pptx);
}
```
## **Get the Slide Background Value**
Aspose.Slides provides the [IBackgroundEffectiveData](https://reference.aspose.com/slides/net/aspose.slides/ibackgroundeffectivedata/) interface for retrieving a slide’s effective background values. This interface exposes the effective [FillFormat](https://reference.aspose.com/slides/net/aspose.slides/ibackgroundeffectivedata/fillformat/) and [EffectFormat](https://reference.aspose.com/slides/net/aspose.slides/ibackgroundeffectivedata/effectformat/).
Using the [BaseSlide](https://reference.aspose.com/slides/net/aspose.slides/baseslide/) class’s `background` property, you can obtain the effective background for a slide.
The following C# example shows how to get a slide’s effective background value:
```cs
using Aspose.Slides;
// Create an instance of the Presentation class.
using (Presentation presentation = new Presentation("Sample.pptx"))
{
ISlide slide = presentation.Slides[0];
// Retrieve the effective background, taking into account master, layout, and theme.
IBackgroundEffectiveData effBackground = slide.Background.GetEffective();
if (effBackground.FillFormat.FillType == FillType.Solid)
Console.WriteLine("Fill color: " + effBackground.FillFormat.SolidFillColor);
else
Console.WriteLine("Fill type: " + effBackground.FillFormat.FillType);
}
```
## **FAQ**
### Can I reset a custom background and restore the theme/layout background?
Yes. Remove the slide’s custom fill, and the background will be inherited again from the corresponding [layout](https://docs.aspose.com/slides/net/slide-layout/)/[master](https://docs.aspose.com/slides/net/slide-master/) slide (i.e., the [theme background](https://docs.aspose.com/slides/net/presentation-theme/)).
### What happens to the background if I change the presentation’s theme later?
If a slide has its own fill, it will remain unchanged. If the background is inherited from the [layout](https://docs.aspose.com/slides/net/slide-layout/)/[master](https://docs.aspose.com/slides/net/slide-master/), it will update to match the [new theme](https://docs.aspose.com/slides/net/presentation-theme/).
## Related articles
- [Format PowerPoint Shapes in .NET](https://docs.aspose.com/slides/net/shape-formatting/)
# Manage Presentation Comments in .NET
> Manage presentation comments with Aspose.Slides for .NET: add, read, edit, reply to, and remove comments in PowerPoint presentations quickly and easily.
Source: https://docs.aspose.com/slides/net/presentation-comments/
Updated: 2026-11-08
## **Overview**
This article explains how to manage presentation comments with Aspose.Slides for .NET. It introduces the main comment-related types and demonstrates how to add comments to slides, access existing comments, work with replies and modern comments, and remove comments from a presentation.
The examples cover common review and collaboration scenarios in PowerPoint, such as assigning comments to authors, reading comment text and metadata, building reply chains, and removing selected comments or all comments.
In PowerPoint, comments appear as annotations on slides. Selecting a comment displays its text and related discussion.
To request that comments be shown or hidden when a presentation opens without changing the comments themselves, see [Show or Hide Comments When Opening a Presentation](https://docs.aspose.com/slides/net/presentation-view-properties/).
## **Why Add Comments to Presentations?**
You can use comments to provide feedback and collaborate with colleagues when reviewing presentations.
Aspose.Slides for .NET provides the following APIs for working with comments:
* The [Presentation](https://reference.aspose.com/slides/net/aspose.slides/presentation) class, which provides access to the presentation's comment authors.
* The [ICommentCollection](https://reference.aspose.com/slides/net/aspose.slides/icommentcollection) interface, which represents the comments associated with an individual author.
* The [IComment](https://reference.aspose.com/slides/net/aspose.slides/icomment) interface, which provides information about a comment, including its author, creation time, position, and text.
* The [CommentAuthor](https://reference.aspose.com/slides/net/aspose.slides/commentauthor) class, which provides information about an author, including their name, initials, and associated comments.
## **Add Slide Comments**
The example creates two slides and registers a comment author with [AddAuthor](https://reference.aspose.com/slides/net/aspose.slides/icommentauthorcollection/addauthor/). It uses [AddComment](https://reference.aspose.com/slides/net/aspose.slides/icommentcollection/addcomment/) to place one comment on each slide, then retrieves the first slide's comments for that author with [GetSlideComments](https://reference.aspose.com/slides/net/aspose.slides/islide/getslidecomments/). The console displays the first comment's text twice, demonstrating access through both the slide and the author, and the saved presentation contains both comments.
```csharp
using System;
using System.Drawing;
using Aspose.Slides;
using Aspose.Slides.Export;
using var presentation = new Presentation();
var firstSlide = presentation.Slides[0];
var secondSlide = presentation.Slides.AddEmptySlide(presentation.LayoutSlides[0]);
var author = presentation.CommentAuthors.AddAuthor("Jawad", "MF");
var position = new PointF(0.2f, 0.2f);
var createdTime = DateTime.Now;
author.Comments.AddComment("Hello Jawad, this is a slide comment", firstSlide, position, createdTime);
author.Comments.AddComment("Hello Jawad, this is the second slide comment", secondSlide, position, createdTime);
var comments = firstSlide.GetSlideComments(author);
if (comments.Length > 0)
{
var firstComment = comments[0];
Console.WriteLine(firstComment.Text);
var commentText = firstComment.Author.Comments[0].Text;
Console.WriteLine(commentText);
}
presentation.Save("Comments_out.pptx", SaveFormat.Pptx);
```
## **Find or Create a Comment Author**
When an automated review processes the same presentation repeatedly, search its [CommentAuthors](https://reference.aspose.com/slides/net/aspose.slides/presentation/commentauthors/) collection before adding an author. [FindByNameAndInitials](https://reference.aspose.com/slides/net/aspose.slides/icommentauthorcollection/findbynameandinitials/) matches both the name and initials and returns an array of matching authors, or an empty array if no matches exist. In contrast, [FindByName](https://reference.aspose.com/slides/net/aspose.slides/icommentauthorcollection/findbyname/) searches by name alone, regardless of initials. Calling [AddAuthor](https://reference.aspose.com/slides/net/aspose.slides/icommentauthorcollection/addauthor/) with a name and initials already present in the collection throws an exception.
The example requires a presentation file with at least one slide. On each of two passes, it reuses the first matching author, or creates one only when the result is empty. If there are multiple matches, it selects the first array element without merging or removing the other authors. It then calls [AddComment](https://reference.aspose.com/slides/net/aspose.slides/icommentcollection/addcomment/) for the selected author and saves the presentation. The second pass opens the first pass's output and repeats the operation.
```csharp
using System;
using System.Drawing;
using Aspose.Slides;
using Aspose.Slides.Export;
const string authorName = "Reviewer";
const string authorInitials = "RV";
var inputFile = "input.pptx";
var position = new PointF(20, 20);
for (var pass = 1; pass <= 2; pass++)
{
using var presentation = new Presentation(inputFile);
var matches = presentation.CommentAuthors.FindByNameAndInitials(authorName, authorInitials);
var author = matches.Length > 0 ? matches[0] : presentation.CommentAuthors.AddAuthor(authorName, authorInitials);
author.Comments.AddComment("Please review this slide.", presentation.Slides[0], position, DateTime.Now);
var outputFile = $"review_pass_{pass}.pptx";
presentation.Save(outputFile, SaveFormat.Pptx);
inputFile = outputFile;
}
```
The second pass adds another comment without adding another author or removing existing comments. The final file, `review_pass_2.pptx`, contains both new comments alongside any original comments. Reusing an author does not deduplicate comments: to avoid repeatedly adding the same comment, implement separate duplicate detection before adding it.
## **Access Slide Comments**
The example opens an existing presentation and reads its [CommentAuthors](https://reference.aspose.com/slides/net/aspose.slides/presentation/commentauthors/) collection. For each author, it iterates through [Comments](https://reference.aspose.com/slides/net/aspose.slides/icommentauthor/comments/) and prints the slide number, comment text, author name, and creation time. The input presentation must contain comments to produce console output.
```csharp
using System;
using Aspose.Slides;
using var presentation = new Presentation("Comments1.pptx");
foreach (var author in presentation.CommentAuthors)
{
foreach (var comment in author.Comments)
{
Console.WriteLine($"Slide: {comment.Slide.SlideNumber}");
Console.WriteLine($"Comment: {comment.Text}");
Console.WriteLine($"Author: {comment.Author.Name}");
Console.WriteLine($"Posted at: {comment.CreatedTime}");
Console.WriteLine();
}
}
```
## **Reply to Comments**
A parent comment is the original comment at the top of a reply hierarchy. The [ParentComment](https://reference.aspose.com/slides/net/aspose.slides/icomment/parentcomment/) property of the [IComment](https://reference.aspose.com/slides/net/aspose.slides/icomment) interface lets you get or set the parent of a comment.
The example creates comments from two authors and uses [ParentComment](https://reference.aspose.com/slides/net/aspose.slides/icomment/parentcomment/) to build replies, including a reply to another reply. Passing `null` to [GetSlideComments](https://reference.aspose.com/slides/net/aspose.slides/islide/getslidecomments/) retrieves comments from all authors; the console indents each entry according to its depth in the reply hierarchy. The example saves the complete discussion, calls [Remove](https://reference.aspose.com/slides/net/aspose.slides/icomment/remove/) on the first root comment, and saves a second presentation with that comment and its replies removed.
```csharp
using System;
using System.Drawing;
using Aspose.Slides;
using Aspose.Slides.Export;
using var presentation = new Presentation();
var slide = presentation.Slides[0];
var position = new PointF(10, 10);
var createdTime = DateTime.Now;
var originalAuthor = presentation.CommentAuthors.AddAuthor("Author_1", "A.A.");
var rootComment = originalAuthor.Comments.AddComment("comment 1", slide, position, createdTime);
var reviewer = presentation.CommentAuthors.AddAuthor("Author_2", "B.B.");
var firstReply = reviewer.Comments.AddComment("reply 1 for comment 1", slide, position, createdTime);
firstReply.ParentComment = rootComment;
var secondReply = reviewer.Comments.AddComment("reply 2 for comment 1", slide, position, createdTime);
secondReply.ParentComment = rootComment;
var subReply = originalAuthor.Comments.AddComment("subreply 3 for reply 2", slide, position, createdTime);
subReply.ParentComment = secondReply;
reviewer.Comments.AddComment("comment 2", slide, position, createdTime);
var separateComment = reviewer.Comments.AddComment("comment 3", slide, position, createdTime);
var separateReply = originalAuthor.Comments.AddComment("reply 4 for comment 3", slide, position, createdTime);
separateReply.ParentComment = separateComment;
var comments = slide.GetSlideComments(null);
for (var i = 0; i < comments.Length; i++)
{
var comment = comments[i];
while (comment.ParentComment != null)
{
Console.Write("\t");
comment = comment.ParentComment;
}
Console.WriteLine($"{comments[i].Author.Name}: {comments[i].Text}");
}
presentation.Save("parent_comment.pptx", SaveFormat.Pptx);
rootComment.Remove();
presentation.Save("remove_comment.pptx", SaveFormat.Pptx);
```
* When the [Remove](https://reference.aspose.com/slides/net/aspose.slides/icomment/remove/) method of the [IComment](https://reference.aspose.com/slides/net/aspose.slides/icomment) interface is used to delete a comment, all replies to that comment are also deleted.
* If the [ParentComment](https://reference.aspose.com/slides/net/aspose.slides/icomment/parentcomment/) property creates a circular reference, a [PptxEditException](https://reference.aspose.com/slides/net/aspose.slides/pptxeditexception) is thrown.
## **Add Modern Comments**
Modern comments can be associated with the slide itself, with a specific shape, or with a text range inside an AutoShape. The [ICommentCollection.AddModernComment](https://reference.aspose.com/slides/net/aspose.slides/icommentcollection/addmoderncomment/) method accepts an [IShape](https://reference.aspose.com/slides/net/aspose.slides/ishape/) argument in addition to the slide and comment-marker coordinates.
When `null` is passed for the shape argument, the comment is a slide-level comment. Its marker is positioned by the supplied coordinates, but it is not associated with a particular shape, so [IModernComment.Shape](https://reference.aspose.com/slides/net/aspose.slides/imoderncomment/shape/) returns `null`. When an [IShape](https://reference.aspose.com/slides/net/aspose.slides/ishape/) is supplied, the comment is anchored to that shape. The coordinates still define the position of the comment marker on the slide, while the shape association can be retrieved through [IModernComment.Shape](https://reference.aspose.com/slides/net/aspose.slides/imoderncomment/shape/).
### **Anchor a Modern Comment to a Shape**
The example calls [AddModernComment](https://reference.aspose.com/slides/net/aspose.slides/icommentcollection/addmoderncomment/) twice: once with a `null` shape for a slide-level comment and once with a rectangle as the anchor. Reading [Shape](https://reference.aspose.com/slides/net/aspose.slides/imoderncomment/shape/) prints `True` for the slide-level comment's null check and `Revenue title` for the anchored comment. Both comments are saved with the presentation.
```csharp
using System;
using System.Drawing;
using Aspose.Slides;
using Aspose.Slides.Export;
using var presentation = new Presentation();
var slide = presentation.Slides[0];
var author = presentation.CommentAuthors.AddAuthor("Reviewer", "RV");
var shape = slide.Shapes.AddAutoShape(ShapeType.Rectangle, 50, 50, 300, 80);
shape.Name = "Revenue title";
shape.TextFrame.Text = "Quarterly revenue";
var createdTime = DateTime.Now;
var slideCommentPosition = new PointF(20, 20);
var shapeCommentPosition = new PointF(60, 60);
var slideComment = author.Comments.AddModernComment("Review the overall slide layout.", slide, null, slideCommentPosition, createdTime);
var shapeComment = author.Comments.AddModernComment("Check this title.", slide, shape, shapeCommentPosition, createdTime);
Console.WriteLine(slideComment.Shape == null);
Console.WriteLine(shapeComment.Shape?.Name);
presentation.Save("modern_comments.pptx", SaveFormat.Pptx);
```
### **Anchor Comments to Different Shape Types**
Any slide object that implements [IShape](https://reference.aspose.com/slides/net/aspose.slides/ishape/) can be used as a shape anchor. Common examples include [IAutoShape](https://reference.aspose.com/slides/net/aspose.slides/iautoshape/), [IPictureFrame](https://reference.aspose.com/slides/net/aspose.slides/ipictureframe/), [IGroupShape](https://reference.aspose.com/slides/net/aspose.slides/igroupshape/), [IConnector](https://reference.aspose.com/slides/net/aspose.slides/iconnector/), and [IGraphicalObject](https://reference.aspose.com/slides/net/aspose.slides/igraphicalobject/) instances such as charts.
The example uses [AddModernComment](https://reference.aspose.com/slides/net/aspose.slides/icommentcollection/addmoderncomment/) to associate a comment with each of five shape types: an AutoShape, a picture frame, a group, a connector, and a chart. The picture uses embedded image data, so no external image is required. Each comment has its own marker position, and the saved presentation retains all five shape associations.
```csharp
using System;
using System.Drawing;
using Aspose.Slides;
using Aspose.Slides.Charts;
using Aspose.Slides.Export;
using var presentation = new Presentation();
var slide = presentation.Slides[0];
var author = presentation.CommentAuthors.AddAuthor("Reviewer", "RV");
var createdTime = DateTime.Now;
var autoShape = slide.Shapes.AddAutoShape(ShapeType.Rectangle, 20, 20, 180, 60);
autoShape.TextFrame.Text = "AutoShape";
var autoShapeCommentPosition = new PointF(30, 30);
author.Comments.AddModernComment("Comment on an AutoShape.", slide, autoShape, autoShapeCommentPosition, createdTime);
var imageBase64 = "iVBORw0KGgoAAAANSUhEUgAAAAIAAAACCAIAAAD91JpzAAAAFklEQVR4nGP8//8/AwMDEwMDAwMDAwAkBgMB/DXemwAAAABJRU5ErkJggg==";
var imageData = Convert.FromBase64String(imageBase64);
var image = presentation.Images.AddImage(imageData);
var pictureFrame = slide.Shapes.AddPictureFrame(ShapeType.Rectangle, 220, 20, 120, 80, image);
var pictureCommentPosition = new PointF(230, 30);
author.Comments.AddModernComment("Comment on a picture.", slide, pictureFrame, pictureCommentPosition, createdTime);
var groupShape = slide.Shapes.AddGroupShape();
groupShape.Shapes.AddAutoShape(ShapeType.Rectangle, 0, 0, 80, 40);
groupShape.Shapes.AddAutoShape(ShapeType.Ellipse, 100, 0, 80, 40);
var groupCommentPosition = new PointF(40, 150);
author.Comments.AddModernComment("Comment on a group.", slide, groupShape, groupCommentPosition, createdTime);
var connector = slide.Shapes.AddConnector(ShapeType.StraightConnector1, 220, 150, 140, 40);
var connectorCommentPosition = new PointF(240, 150);
author.Comments.AddModernComment("Comment on a connector.", slide, connector, connectorCommentPosition, createdTime);
var chart = slide.Shapes.AddChart(ChartType.ClusteredColumn, 400, 20, 250, 180);
var chartCommentPosition = new PointF(420, 40);
author.Comments.AddModernComment("Comment on a graphical object.", slide, chart, chartCommentPosition, createdTime);
presentation.Save("modern_comment_shape_types.pptx", SaveFormat.Pptx);
```
### **Anchor a Comment to Text and Set Its Status**
For a modern comment associated with an [IAutoShape](https://reference.aspose.com/slides/net/aspose.slides/iautoshape/), [IModernComment.TextSelectionStart](https://reference.aspose.com/slides/net/aspose.slides/imoderncomment/textselectionstart/) specifies the starting position of the selected text in the shape's text frame, while [IModernComment.TextSelectionLength](https://reference.aspose.com/slides/net/aspose.slides/imoderncomment/textselectionlength/) specifies the length of the selection. Together, these properties associate the comment with a specific text range inside the AutoShape.
The [IModernComment.Status](https://reference.aspose.com/slides/net/aspose.slides/imoderncomment/status/) property can be read or updated with a value from the [ModernCommentStatus](https://reference.aspose.com/slides/net/aspose.slides/moderncommentstatus/) enumeration:
- `NotDefined` — no specific modern-comment status is defined.
- `Active` — the comment is active.
- `Resolved` — the comment has been resolved.
- `Closed` — the comment is closed.
The example anchors a modern comment to the words "quarterly revenue" in a rectangle's text. It calculates the zero-based [TextSelectionStart](https://reference.aspose.com/slides/net/aspose.slides/imoderncomment/textselectionstart/) from the text and sets [TextSelectionLength](https://reference.aspose.com/slides/net/aspose.slides/imoderncomment/textselectionlength/) to the number of selected characters. After setting [Status](https://reference.aspose.com/slides/net/aspose.slides/imoderncomment/status/) to `Resolved`, it saves and reopens the presentation. The four console checks should each print `True`, confirming that the shape anchor, text range, and status were preserved.
```csharp
using System;
using System.Drawing;
using Aspose.Slides;
using Aspose.Slides.Export;
const string outputFile = "modern_comment_text_anchor.pptx";
const string shapeText = "Review the quarterly revenue forecast.";
const string selectedText = "quarterly revenue";
var expectedSelectionStart = shapeText.IndexOf(selectedText, StringComparison.Ordinal);
using var presentation = new Presentation();
var slide = presentation.Slides[0];
var shape = slide.Shapes.AddAutoShape(ShapeType.Rectangle, 50, 50, 400, 100);
shape.Name = "Forecast text";
shape.TextFrame.Text = shapeText;
var author = presentation.CommentAuthors.AddAuthor("Reviewer", "RV");
var commentPosition = new PointF(60, 60);
var comment = author.Comments.AddModernComment("Verify this forecast wording.", slide, shape, commentPosition, DateTime.Now);
comment.TextSelectionStart = expectedSelectionStart;
comment.TextSelectionLength = selectedText.Length;
comment.Status = ModernCommentStatus.Resolved;
presentation.Save(outputFile, SaveFormat.Pptx);
using var reopenedPresentation = new Presentation(outputFile);
var reopenedSlide = reopenedPresentation.Slides[0];
var reopenedComments = reopenedSlide.GetSlideComments(null);
foreach (var reopenedComment in reopenedComments)
{
if (reopenedComment is not IModernComment modernComment)
{
continue;
}
var shapeMatches = modernComment.Shape?.Name == "Forecast text";
var selectionStartMatches = modernComment.TextSelectionStart == expectedSelectionStart;
var selectionLengthMatches = modernComment.TextSelectionLength == selectedText.Length;
var statusMatches = modernComment.Status == ModernCommentStatus.Resolved;
Console.WriteLine($"Shape anchor preserved: {shapeMatches}");
Console.WriteLine($"Text selection start preserved: {selectionStartMatches}");
Console.WriteLine($"Text selection length preserved: {selectionLengthMatches}");
Console.WriteLine($"Resolved status preserved: {statusMatches}");
}
```
[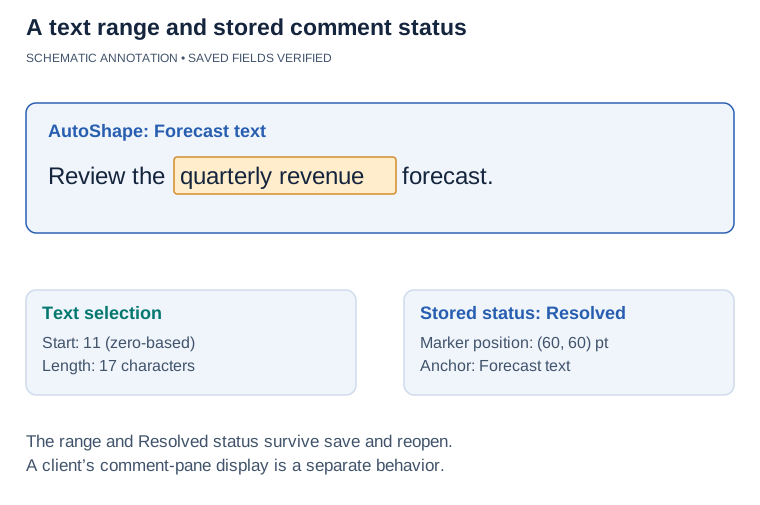](https://docs.aspose.com/slides/net/presentation-comments/visual-presentation-comments-94241d308643.svg)
*Schematic annotation of the example’s text range. A licensed .NET 26.11 save/reopen check retained the Forecast text anchor, start 11, length 17 and Resolved status. Marker coordinates are separate from the anchor; this figure does not depict a client comment pane.*
### **Inspect Existing Modern Comments**
The example requires an existing presentation containing modern comments and prints their text, status, and anchor details. To inspect it, check which comments implement [IModernComment](https://reference.aspose.com/slides/net/aspose.slides/imoderncomment/), then examine [IModernComment.Shape](https://reference.aspose.com/slides/net/aspose.slides/imoderncomment/shape/), [IModernComment.TextSelectionStart](https://reference.aspose.com/slides/net/aspose.slides/imoderncomment/textselectionstart/), [IModernComment.TextSelectionLength](https://reference.aspose.com/slides/net/aspose.slides/imoderncomment/textselectionlength/), and [IModernComment.Status](https://reference.aspose.com/slides/net/aspose.slides/imoderncomment/status/). A `null` shape indicates a slide-level comment. For an [IAutoShape](https://reference.aspose.com/slides/net/aspose.slides/iautoshape/) anchor, the text-selection properties identify the associated range in the shape's text frame.
```csharp
using System;
using Aspose.Slides;
using var presentation = new Presentation("comments.pptx");
foreach (var slide in presentation.Slides)
{
var comments = slide.GetSlideComments(null);
foreach (var comment in comments)
{
if (comment is not IModernComment modernComment)
{
continue;
}
Console.WriteLine($"Slide: {slide.SlideNumber}");
Console.WriteLine($"Text: {modernComment.Text}");
Console.WriteLine($"Status: {modernComment.Status}");
var shape = modernComment.Shape;
if (shape == null)
{
Console.WriteLine("Anchor: slide level");
}
else
{
Console.WriteLine($"Anchor shape: {shape.Name}");
Console.WriteLine($"Anchor type: {shape.GetType().Name}");
if (shape is IAutoShape)
{
Console.WriteLine($"Text selection start: {modernComment.TextSelectionStart}");
Console.WriteLine($"Text selection length: {modernComment.TextSelectionLength}");
}
}
Console.WriteLine();
}
}
```
## **Remove Comments**
Aspose.Slides for .NET lets you remove all comments and their authors from a presentation or delete selected comments while keeping the rest. The following examples demonstrate both approaches and save the updated presentation.
### **Remove All Comments and Comment Authors**
The example opens an existing presentation and calls [ICommentCollection.Clear](https://reference.aspose.com/slides/net/aspose.slides/icommentcollection/clear/) for each author, then calls [ICommentAuthorCollection.Clear](https://reference.aspose.com/slides/net/aspose.slides/icommentauthorcollection/clear/) to remove the authors themselves. The saved presentation contains neither comments nor comment authors. Use a presentation containing comments to observe the removal.
```csharp
using Aspose.Slides;
using Aspose.Slides.Export;
using var presentation = new Presentation("example.pptx");
foreach (var author in presentation.CommentAuthors)
{
author.Comments.Clear();
}
presentation.CommentAuthors.Clear();
presentation.Save("example_out.pptx", SaveFormat.Pptx);
```
### **Remove Specific Comments**
The example creates two comments on one slide and uses [GetSlideComments](https://reference.aspose.com/slides/net/aspose.slides/islide/getslidecomments/) to find comments by each author. It collects comments whose text equals "comment 1" before calling [ICommentCollection.Remove](https://reference.aspose.com/slides/net/aspose.slides/icommentcollection/remove/), avoiding changes to the collection during selection. The saved presentation retains only "comment 2".
```csharp
using System;
using System.Collections.Generic;
using System.Drawing;
using Aspose.Slides;
using Aspose.Slides.Export;
using var presentation = new Presentation();
var slide = presentation.Slides[0];
var author = presentation.CommentAuthors.AddAuthor("Author", "A");
var createdTime = DateTime.Now;
var firstCommentPosition = new PointF(0.2f, 0.2f);
var secondCommentPosition = new PointF(0.3f, 0.2f);
author.Comments.AddComment("comment 1", slide, firstCommentPosition, createdTime);
author.Comments.AddComment("comment 2", slide, secondCommentPosition, createdTime);
foreach (var commentAuthor in presentation.CommentAuthors)
{
var commentsToRemove = new List();
var comments = slide.GetSlideComments(commentAuthor);
foreach (var comment in comments)
{
if (comment.Text == "comment 1")
{
commentsToRemove.Add(comment);
}
}
foreach (var comment in commentsToRemove)
{
commentAuthor.Comments.Remove(comment);
}
}
presentation.Save("pres.pptx", SaveFormat.Pptx);
```
## **FAQ**
**Does Aspose.Slides support a resolved status for modern comments?**
Yes. [IModernComment.Status](https://reference.aspose.com/slides/net/aspose.slides/imoderncomment/status/) can be read and set with a [ModernCommentStatus](https://reference.aspose.com/slides/net/aspose.slides/moderncommentstatus/) value, including `Resolved`. The status is stored in the presentation and can be read again after the file is reopened.
**Are threaded discussions (reply chains) supported, and is there a nesting limit?**
Yes. Each comment can reference its [parent comment](https://reference.aspose.com/slides/net/aspose.slides/comment/parentcomment/), enabling reply chains. The API does not define a specific nesting-depth limit.
**In what coordinate system is a comment marker's position defined on a slide?**
The marker position is defined by floating-point coordinates in the slide coordinate system, allowing you to place it precisely on the slide.
## Related features
- [Render slide comments](https://docs.aspose.com/slides/features/export-comments/)
- [Read slide comments](https://docs.aspose.com/slides/features/read-comments/)
- [Add slide comments and replies](https://docs.aspose.com/slides/features/add-comments/)
- [Work with modern comments](https://docs.aspose.com/slides/features/modern-comments/)
## Related articles
- [Comment](https://docs.aspose.com/slides/net/examples/elements/comment/)
- [Add a comment to a slide](https://docs.aspose.com/slides/net/add-a-comment-to-a-slide/)
# Manage Presentation Content in .NET
> Create, edit, and extract presentation content with Aspose.Slides for .NET—get code examples for text, images, shapes, charts; PPT, PPTX and ODP.
Source: https://docs.aspose.com/slides/net/presentation-content/
Updated: 2026-04-10
---
lastmod: 2026-04-10T19:19:28+06:00
title: Manage Presentation Content in .NET
linktitle: Presentation Content
type: docs
weight: 30
url: /net/presentation-content/
keywords:
- content
- BLOB
- hyperlink
- media
- OLE
- text
- zoom
- chart
- equation
- shape
- ink
- SmartArt
- table
- PowerPoint
- OpenDocument
- presentation
- .NET
- C#
- Aspose.Slides
description: "Create, edit, and extract presentation content with Aspose.Slides for .NET—get code examples for text, images, shapes, charts; PPT, PPTX and ODP."
---
## Related articles
- [Ink](https://docs.aspose.com/slides/net/examples/elements/ink/)
# Design Professional Presentations in .NET
> Boost your slides with Aspose.Slides for .NET—design, automate, and convert PowerPoint and OpenDocument presentations effortlessly. Learn more now!
Source: https://docs.aspose.com/slides/net/presentation-design/
Updated: 2025-11-13
---
lastmod: 2025-11-13T18:56:36+04:00
title: Design Professional Presentations in .NET
linktitle: Presentation Design
type: docs
weight: 40
url: /net/presentation-design/
keywords:
- PowerPoint design
- OpenDocument design
- presentation design
- slide design
- PPT design
- PPTX design
- ODP design
- PowerPoint
- OpenDocument
- presentation
- .NET
- C#
- Aspose.Slides
description: "Boost your slides with Aspose.Slides for .NET—design, automate, and convert PowerPoint and OpenDocument presentations effortlessly. Learn more now!"
---
# Manage Presentation Headers and Footers in .NET
> Learn how to manage footer, date-time, slide-number, and header placeholders on slides, notes pages, and handouts with Aspose.Slides for .NET.
Source: https://docs.aspose.com/slides/net/presentation-header-and-footer/
Updated: 2026-11-08
## **Overview**
PowerPoint uses different header and footer placeholders depending on the page type. Aspose.Slides for .NET lets you control the text and visibility of these placeholders through header/footer manager interfaces.
The available placeholders depend on the scope:
| Scope | Header | Footer | Date/time | Slide/page number |
|---|---|---|---|---|
| Regular slide | No | Yes | Yes | Yes |
| Notes master | Yes | Yes | Yes | Yes |
| Notes slide | Yes | Yes | Yes | Yes |
| Handout master | Yes | Yes | Yes | Yes |
A regular presentation slide does not have a header placeholder. Headers are available on notes pages and handouts. For regular slides, use footer, date/time, and slide-number placeholders instead.
The scope of a change depends on the manager you use. The [`ISlideHeaderFooterManager`](https://reference.aspose.com/slides/net/aspose.slides/islideheaderfootermanager/) interface controls one regular slide. The [`INotesSlideHeaderFooterManager`](https://reference.aspose.com/slides/net/aspose.slides/inotesslideheaderfootermanager/) interface controls one notes slide. Master and layout managers can also propagate settings to dependent slides, while the [`IMasterHandoutSlideHeaderFooterManager`](https://reference.aspose.com/slides/net/aspose.slides/imasterhandoutslideheaderfootermanager/) interface controls the handout master.
## **Update Header, Footer, and Date/Time Text Across a Presentation**
Use [Presentation.HeaderFooterManager](https://reference.aspose.com/slides/net/aspose.slides/presentation/headerfootermanager/), which implements [IPresentationHeaderFooterManager](https://reference.aspose.com/slides/net/aspose.slides/ipresentationheaderfootermanager/), to apply consistent text across a presentation without updating each page or master individually.
| Method | Affected objects |
|---|---|
| [SetAllHeadersText](https://reference.aspose.com/slides/net/aspose.slides/presentationheaderfootermanager/setallheaderstext/) | Existing notes pages, notes master, and handout master |
| [SetAllFootersText](https://reference.aspose.com/slides/net/aspose.slides/presentationheaderfootermanager/setallfooterstext/) | Regular slides, layouts, slide masters, existing notes pages, notes master, and handout master |
| [SetAllDateTimesText](https://reference.aspose.com/slides/net/aspose.slides/presentationheaderfootermanager/setalldatetimestext/) | Regular slides, layouts, slide masters, existing notes pages, notes master, and handout master |
Headers apply only to notes pages and handouts; regular slides do not support header placeholders. Handout settings are updated through the handout master.
Setting text does not make a placeholder visible. First use [SetAllHeadersVisibility](https://reference.aspose.com/slides/net/aspose.slides/presentationheaderfootermanager/setallheadersvisibility/), [SetAllFootersVisibility](https://reference.aspose.com/slides/net/aspose.slides/presentationheaderfootermanager/setallfootersvisibility/), and [SetAllDateTimesVisibility](https://reference.aspose.com/slides/net/aspose.slides/presentationheaderfootermanager/setalldatetimesvisibility/) to enable the corresponding placeholders, then set their text. These visibility methods have the same scope as the corresponding text methods.
The following example assumes that a presentation contains regular slides, notes pages, a notes master, and a handout master. It applies corporate text and a fixed date label, then saves the result.
```csharp
using Aspose.Slides;
using Aspose.Slides.Export;
using var presentation = new Presentation("presentation.pptx");
var manager = presentation.HeaderFooterManager;
manager.SetAllHeadersVisibility(true);
manager.SetAllFootersVisibility(true);
manager.SetAllDateTimesVisibility(true);
manager.SetAllHeadersText("Contoso");
manager.SetAllFootersText("Internal use only");
manager.SetAllDateTimesText("October 2026");
presentation.Save("updated.pptx", SaveFormat.Pptx);
```
The text methods skip missing placeholders. Enabling visibility first creates the required placeholders on existing pages and masters. Neither the text methods nor the visibility methods create missing notes pages, notes masters, or handout masters. The date/time text is a fixed label, not an automatically updating date/time field.
For narrower changes, see the examples for [regular slides](https://docs.aspose.com/slides/net/presentation-header-and-footer/#set-footer-datetime-and-slide-numbers-on-regular-slides), the [notes master](https://docs.aspose.com/slides/net/presentation-header-and-footer/#set-headers-and-footers-on-the-notes-master), an [individual notes page](https://docs.aspose.com/slides/net/presentation-header-and-footer/#set-headers-and-footers-on-an-individual-notes-slide), and the [handout master](https://docs.aspose.com/slides/net/presentation-header-and-footer/#set-headers-and-footers-on-the-handout-master). See [Presentation Notes](https://docs.aspose.com/slides/net/presentation-notes/) for creating and managing notes pages.
## **Set Footer, Date/Time, and Slide Numbers on Regular Slides**
For regular slides, the basic workflow is to access each slide's header/footer manager, set the footer and date/time text, enable the required placeholders, and save the presentation. Slide numbers are generated by the presentation, so you only need to control their visibility.
Use [`SetFooterText`](https://reference.aspose.com/slides/net/aspose.slides/baseslideheaderfootermanager/setfootertext/) and [`SetDateTimeText`](https://reference.aspose.com/slides/net/aspose.slides/baseslideheaderfootermanager/setdatetimetext/) to set text, and use [`SetFooterVisibility`](https://reference.aspose.com/slides/net/aspose.slides/baseslideheaderfootermanager/setfootervisibility/), [`SetDateTimeVisibility`](https://reference.aspose.com/slides/net/aspose.slides/baseslideheaderfootermanager/setdatetimevisibility/), and [`SetSlideNumberVisibility`](https://reference.aspose.com/slides/net/aspose.slides/baseslideheaderfootermanager/setslidenumbervisibility/) to show the corresponding placeholders.
The following end-to-end example applies the same footer, date/time text, and slide-number visibility to all regular slides:
```c#
using Aspose.Slides;
using Aspose.Slides.Export;
using var presentation = new Presentation("presentation.pptx");
foreach (var slide in presentation.Slides)
{
var headerFooterManager = slide.HeaderFooterManager;
headerFooterManager.SetFooterText("Company Confidential");
headerFooterManager.SetFooterVisibility(true);
headerFooterManager.SetDateTimeText("Date and time text");
headerFooterManager.SetDateTimeVisibility(true);
headerFooterManager.SetSlideNumberVisibility(true);
}
presentation.Save("presentation_with_slide_footers.pptx", SaveFormat.Pptx);
```
If you need to update only one slide, access that slide directly through the [`Slides`](https://reference.aspose.com/slides/net/aspose.slides/presentation/slides/) collection instead of iterating through the entire collection.
## **Set Headers and Footers on the Notes Master**
The notes master defines common formatting and placeholder behavior for notes pages. Use the [`IMasterNotesSlideHeaderFooterManager`](https://reference.aspose.com/slides/net/aspose.slides/imasternotesslideheaderfootermanager/) interface when you want to change only the notes master itself.
The following example sets header, footer, and date/time text on the notes master and makes all supported placeholders visible on that master:
```c#
using Aspose.Slides;
using Aspose.Slides.Export;
using var presentation = new Presentation("presentation.pptx");
var masterNotesSlide = presentation.MasterNotesSlideManager.MasterNotesSlide;
if (masterNotesSlide != null)
{
var headerFooterManager = masterNotesSlide.HeaderFooterManager;
headerFooterManager.SetHeaderText("Notes header");
headerFooterManager.SetHeaderVisibility(true);
headerFooterManager.SetFooterText("Notes footer");
headerFooterManager.SetFooterVisibility(true);
headerFooterManager.SetDateTimeText("Date and time text");
headerFooterManager.SetDateTimeVisibility(true);
headerFooterManager.SetSlideNumberVisibility(true);
}
presentation.Save("presentation_with_notes_master_footers.pptx", SaveFormat.Pptx);
```
The [MasterNotesSlide](https://reference.aspose.com/slides/net/aspose.slides/imasternotesslidemanager/masternotesslide/) property returns `null` when the presentation does not contain a notes master. To clean up a template without notes pages, see [Remove an Unused Notes Master](https://docs.aspose.com/slides/net/presentation-notes/#remove-an-unused-notes-master).
## **Apply Notes Master Settings to Child Notes Slides**
A notes master can apply header and footer settings to itself and to all dependent notes slides. Use the dedicated propagation methods on [`IMasterNotesSlideHeaderFooterManager`](https://reference.aspose.com/slides/net/aspose.slides/imasternotesslideheaderfootermanager/) when the same settings should be applied across the notes hierarchy.
For example, [`SetHeaderAndChildHeadersText`](https://reference.aspose.com/slides/net/aspose.slides/masternotesslideheaderfootermanager/setheaderandchildheaderstext/) and [`SetHeaderAndChildHeadersVisibility`](https://reference.aspose.com/slides/net/aspose.slides/masternotesslideheaderfootermanager/setheaderandchildheadersvisibility/) update the notes master header and all child headers. Equivalent methods are available for footers, date/time, and slide numbers.
```c#
using Aspose.Slides;
using Aspose.Slides.Export;
using var presentation = new Presentation("presentation.pptx");
var masterNotesSlide = presentation.MasterNotesSlideManager.MasterNotesSlide;
if (masterNotesSlide != null)
{
var headerFooterManager = masterNotesSlide.HeaderFooterManager;
headerFooterManager.SetHeaderAndChildHeadersText("Notes header");
headerFooterManager.SetHeaderAndChildHeadersVisibility(true);
headerFooterManager.SetFooterAndChildFootersText("Notes footer");
headerFooterManager.SetFooterAndChildFootersVisibility(true);
headerFooterManager.SetDateTimeAndChildDateTimesText("Date and time text");
headerFooterManager.SetDateTimeAndChildDateTimesVisibility(true);
headerFooterManager.SetSlideNumberAndChildSlideNumbersVisibility(true);
}
presentation.Save("presentation_with_child_notes_footers.pptx", SaveFormat.Pptx);
```
The propagation methods used above are [`SetFooterAndChildFootersText`](https://reference.aspose.com/slides/net/aspose.slides/masternotesslideheaderfootermanager/setfooterandchildfooterstext/), [`SetFooterAndChildFootersVisibility`](https://reference.aspose.com/slides/net/aspose.slides/masternotesslideheaderfootermanager/setfooterandchildfootersvisibility/), [`SetDateTimeAndChildDateTimesText`](https://reference.aspose.com/slides/net/aspose.slides/masternotesslideheaderfootermanager/setdatetimeandchilddatetimestext/), [`SetDateTimeAndChildDateTimesVisibility`](https://reference.aspose.com/slides/net/aspose.slides/masternotesslideheaderfootermanager/setdatetimeandchilddatetimesvisibility/), and [`SetSlideNumberAndChildSlideNumbersVisibility`](https://reference.aspose.com/slides/net/aspose.slides/masternotesslideheaderfootermanager/setslidenumberandchildslidenumbersvisibility/).
## **Set Headers and Footers on an Individual Notes Slide**
A notes slide belongs to a specific regular slide. Use its [`INotesSlideHeaderFooterManager`](https://reference.aspose.com/slides/net/aspose.slides/inotesslideheaderfootermanager/) interface when you want to customize only that notes page.
The [`AddNotesSlide`](https://reference.aspose.com/slides/net/aspose.slides/inotesslidemanager/addnotesslide/) method returns the notes slide for the current slide and creates one if it does not already exist. The following example configures the notes page associated with the first presentation slide:
```c#
using Aspose.Slides;
using Aspose.Slides.Export;
using var presentation = new Presentation("presentation.pptx");
var notesSlide = presentation.Slides[0].NotesSlideManager.AddNotesSlide();
var headerFooterManager = notesSlide.HeaderFooterManager;
headerFooterManager.SetHeaderText("Header for the first notes page");
headerFooterManager.SetHeaderVisibility(true);
headerFooterManager.SetFooterText("Footer for the first notes page");
headerFooterManager.SetFooterVisibility(true);
headerFooterManager.SetDateTimeText("Date and time text");
headerFooterManager.SetDateTimeVisibility(true);
headerFooterManager.SetSlideNumberVisibility(true);
presentation.Save("presentation_with_custom_notes_footers.pptx", SaveFormat.Pptx);
```
If you first propagate settings from the notes master and then change an individual notes slide, the later per-slide settings let you customize that notes page independently.
## **Set Headers and Footers on the Handout Master**
Handout pages use the handout master for their header, footer, date/time, and page-number placeholders. Unlike notes pages, handout settings are managed through the handout master rather than through individual handout slides.
Use the [`MasterHandoutSlide`](https://reference.aspose.com/slides/net/aspose.slides/imasterhandoutslidemanager/masterhandoutslide/) property to access the handout master. If it is not present, call [`SetDefaultMasterHandoutSlide`](https://reference.aspose.com/slides/net/aspose.slides/imasterhandoutslidemanager/setdefaultmasterhandoutslide/) to create the default handout master.
```c#
using Aspose.Slides;
using Aspose.Slides.Export;
using var presentation = new Presentation("presentation.pptx");
var masterHandoutSlide = presentation.MasterHandoutSlideManager.MasterHandoutSlide;
if (masterHandoutSlide == null)
{
presentation.MasterHandoutSlideManager.SetDefaultMasterHandoutSlide();
masterHandoutSlide = presentation.MasterHandoutSlideManager.MasterHandoutSlide;
}
if (masterHandoutSlide != null)
{
var headerFooterManager = masterHandoutSlide.HeaderFooterManager;
headerFooterManager.SetHeaderText("Handout header");
headerFooterManager.SetHeaderVisibility(true);
headerFooterManager.SetFooterText("Handout footer");
headerFooterManager.SetFooterVisibility(true);
headerFooterManager.SetDateTimeText("Date and time text");
headerFooterManager.SetDateTimeVisibility(true);
headerFooterManager.SetSlideNumberVisibility(true);
}
presentation.Save("presentation_with_handout_footers.pptx", SaveFormat.Pptx);
```
To remove the entire handout master, including its formatting and placeholders, see [Remove a Handout Master](https://docs.aspose.com/slides/net/presentation-notes/#remove-a-handout-master). If you only need to hide a header or footer, change its visibility instead to preserve the master's other formatting.
## **Understand Scope and Inheritance**
Choose the header/footer manager that matches the scope you want to change:
- [IPresentationHeaderFooterManager](https://reference.aspose.com/slides/net/aspose.slides/ipresentationheaderfootermanager/) updates supported placeholders throughout the presentation, as shown in the [presentation-wide example](https://docs.aspose.com/slides/net/presentation-header-and-footer/#update-header-footer-and-datetime-text-across-a-presentation).
- [`ISlideHeaderFooterManager`](https://reference.aspose.com/slides/net/aspose.slides/islideheaderfootermanager/) changes footer, date/time, and slide-number settings for one regular slide.
- [`ILayoutSlideHeaderFooterManager`](https://reference.aspose.com/slides/net/aspose.slides/ilayoutslideheaderfootermanager/) controls a layout slide and can propagate supported settings to dependent slides.
- [`IMasterSlideHeaderFooterManager`](https://reference.aspose.com/slides/net/aspose.slides/imasterslideheaderfootermanager/) controls a regular slide master and can propagate supported settings to dependent slides.
- [`IMasterNotesSlideHeaderFooterManager`](https://reference.aspose.com/slides/net/aspose.slides/imasternotesslideheaderfootermanager/) controls the notes master and can propagate settings to all dependent notes slides.
- [`INotesSlideHeaderFooterManager`](https://reference.aspose.com/slides/net/aspose.slides/inotesslideheaderfootermanager/) changes one notes slide and supports a header placeholder in addition to footer, date/time, and slide number.
- [`IMasterHandoutSlideHeaderFooterManager`](https://reference.aspose.com/slides/net/aspose.slides/imasterhandoutslideheaderfootermanager/) changes the handout master and supports all four placeholder types.
Use propagation from a master or layout when the same setting should apply throughout its hierarchy. Use an individual slide or notes-slide manager when you need a local setting for one page.
[](https://docs.aspose.com/slides/net/presentation-header-and-footer/visual-presentation-header-and-footer-542f03b4f600.svg)
*Choose a manager for the presentation, a regular master/layout, one regular slide, a notes master/slide or a handout master. Regular slides have no header placeholder. Propagation methods apply supported settings to dependents; individual managers target local settings.*
## **FAQ**
**Can I add a header to a regular slide?**
No. PowerPoint does not define a header placeholder for regular slides. On regular slides, use the footer, date/time, and slide-number placeholders. Header placeholders are available on notes pages and handouts.
**What if a footer, date/time, or slide-number placeholder is not visible?**
Use the corresponding header/footer manager to check its visibility and enable it when needed. For example, [`IsFooterVisible`](https://reference.aspose.com/slides/net/aspose.slides/baseslideheaderfootermanager/isfootervisible/) reports whether a footer placeholder is present, and [`SetFooterVisibility`](https://reference.aspose.com/slides/net/aspose.slides/baseslideheaderfootermanager/setfootervisibility/) changes its visibility.
**How do I start slide numbering from a value other than 1?**
Set the presentation's [`FirstSlideNumber`](https://reference.aspose.com/slides/net/aspose.slides/presentation/firstslidenumber/) property. The slide-number placeholders then use the updated numbering sequence.
**What happens to headers and footers when exporting to PDF, images, or HTML?**
Visible header and footer elements are rendered with the rest of the presentation content in the output format. Their appearance depends on the page type being exported and the corresponding placeholder visibility settings.
## Related features
- [Read and change slide properties](https://docs.aspose.com/slides/features/slide-properties/)
## Related articles
- [Header Footer](https://docs.aspose.com/slides/net/examples/elements/header-footer/)
- [Apply or Change Slide Layouts in .NET](https://docs.aspose.com/slides/net/slide-layout/)
- [How to Add Headers & Footers to Presentations in .NET](https://docs.aspose.com/slides/net/how-to-add-header-footer-in-a-presentation/)
# Automate Presentation Localization in .NET
> Set proofing languages for PowerPoint and OpenDocument presentation text in .NET with Aspose.Slides, including defaults and multilingual paragraphs.
Source: https://docs.aspose.com/slides/net/presentation-localization/
Updated: 2026-08-31
## **Overview**
Aspose.Slides for .NET lets you configure proofing metadata for individual text portions. Use [IBasePortionFormat.LanguageId](https://reference.aspose.com/slides/net/aspose.slides/ibaseportionformat/languageid/) to identify the proofing language, [BasePortionFormat.SpellCheck](https://reference.aspose.com/slides/net/aspose.slides/baseportionformat/spellcheck/) to allow or suppress spelling checks, and [BasePortionFormat.ProofDisabled](https://reference.aspose.com/slides/net/aspose.slides/baseportionformat/proofdisabled/) to control the broader no-proof state. Because these settings are applied at the portion level, one paragraph can contain multiple languages and different proofing rules.
This article explains how to assign a language to specific text, set the default language for new text with [LoadOptions.DefaultTextLanguage](https://reference.aspose.com/slides/net/aspose.slides/loadoptions/defaulttextlanguage/), build multilingual paragraphs, choose between `SpellCheck` and `ProofDisabled`, and preserve the intended settings when using [Presentation.JoinPortionsWithSameFormatting](https://reference.aspose.com/slides/net/aspose.slides/presentation/joinportionswithsameformatting/). These properties store metadata for presentation applications; they do not translate text, perform dictionary-based spell checking, or return misspelled words.
## **Set the Proofing Language for Text**
Create or load a [Presentation](https://reference.aspose.com/slides/net/aspose.slides/presentation/), access the required text portion through [IPortion.PortionFormat](https://reference.aspose.com/slides/net/aspose.slides/iportion/portionformat/), and assign its language identifier. The following example creates a shape, sets British English as the proofing language, and saves the result with [Presentation.Save](https://reference.aspose.com/slides/net/aspose.slides/presentation/save/):
```csharp
using Aspose.Slides;
using Aspose.Slides.Export;
using var presentation = new Presentation();
var slide = presentation.Slides[0];
var shape = slide.Shapes.AddAutoShape(ShapeType.Rectangle, 50, 50, 320, 80);
shape.TextFrame.Text = "Set the proofing language for this text.";
var portion = shape.TextFrame.Paragraphs[0].Portions[0];
portion.PortionFormat.LanguageId = "en-GB";
presentation.Save("proofing_language.pptx", SaveFormat.Pptx);
```
## **Set the Default Language for New Text**
Use [LoadOptions.DefaultTextLanguage](https://reference.aspose.com/slides/net/aspose.slides/loadoptions/defaulttextlanguage/) to specify the proofing language that Aspose.Slides assigns to newly created text. This setting is useful when most or all new text in a presentation uses the same language. It does not change the language metadata of text that already has an explicit language.
The following example creates a presentation whose new text uses German proofing rules:
```csharp
using Aspose.Slides;
using Aspose.Slides.Export;
var loadOptions = new LoadOptions
{
DefaultTextLanguage = "de-DE"
};
using var presentation = new Presentation(loadOptions);
var slide = presentation.Slides[0];
var shape = slide.Shapes.AddAutoShape(ShapeType.Rectangle, 50, 50, 320, 80);
shape.TextFrame.Text = "Willkommen zur Präsentation";
presentation.Save("default_text_language.pptx", SaveFormat.Pptx);
```
## **Use Multiple Languages in One Paragraph**
An [IParagraph](https://reference.aspose.com/slides/net/aspose.slides/iparagraph/) contains a collection of text portions. Create a separate [Portion](https://reference.aspose.com/slides/net/aspose.slides/portion/) for each language and set its `LanguageId` independently.
This example creates one paragraph with English and French portions:
```csharp
using Aspose.Slides;
using Aspose.Slides.Export;
using var presentation = new Presentation();
var slide = presentation.Slides[0];
var shape = slide.Shapes.AddAutoShape(ShapeType.Rectangle, 50, 50, 420, 80);
var paragraph = shape.TextFrame.Paragraphs[0];
paragraph.Portions.Clear();
var englishPortion = new Portion("Welcome");
englishPortion.PortionFormat.LanguageId = "en-US";
paragraph.Portions.Add(englishPortion);
var frenchPortion = new Portion(" — Bienvenue");
frenchPortion.PortionFormat.LanguageId = "fr-FR";
paragraph.Portions.Add(frenchPortion);
presentation.Save("multilingual_text.pptx", SaveFormat.Pptx);
```
## **Enable or Suppress Spell Checking for Individual Portions**
[IPortionFormat](https://reference.aspose.com/slides/net/aspose.slides/iportionformat/) inherits the common text properties defined by [IBasePortionFormat](https://reference.aspose.com/slides/net/aspose.slides/ibaseportionformat/). Access a portion's format through [IPortion.PortionFormat](https://reference.aspose.com/slides/net/aspose.slides/iportion/portionformat/) and set [BasePortionFormat.SpellCheck](https://reference.aspose.com/slides/net/aspose.slides/baseportionformat/spellcheck/) to control whether a presentation application may check spelling for that portion. The default value is `false`: `true` allows spell checking, while `false` suppresses it.
The setting applies to individual text portions. Different portions in the same paragraph can therefore use different values. [BasePortionFormat.LanguageId](https://reference.aspose.com/slides/net/aspose.slides/baseportionformat/languageid/) and `SpellCheck` serve complementary purposes: `LanguageId` identifies the proofing language, while `SpellCheck` determines whether spelling checks are allowed for the portion.
[BasePortionFormat.ProofDisabled](https://reference.aspose.com/slides/net/aspose.slides/baseportionformat/proofdisabled/) also controls proofing, but it represents the broader "do not proof" state as a [NullableBool](https://reference.aspose.com/slides/net/aspose.slides/nullablebool/). Use `SpellCheck` when you need a direct Boolean switch specifically for spelling checks. Use `ProofDisabled` when you need to preserve or explicitly control the presentation's no-proof metadata, including its `NotDefined` state. If you set both properties, keep their values consistent; do not combine `SpellCheck = true` with `ProofDisabled = NullableBool.True`.
These properties configure proofing metadata used by PowerPoint and other presentation applications. Aspose.Slides does not use them to run dictionary-based spell checking or return a list of misspelled words.
The following complete example creates an input presentation, loads it, assigns different spell-check settings and proofing languages to two portions in the same paragraph, saves the result, reopens it, and verifies the stored values:
```csharp
using System;
using Aspose.Slides;
using Aspose.Slides.Export;
const string inputFile = "spell_check_input.pptx";
const string outputFile = "spell_check_settings.pptx";
using (var sourcePresentation = new Presentation())
{
var sourceSlide = sourcePresentation.Slides[0];
var sourceShape = sourceSlide.Shapes.AddAutoShape(ShapeType.Rectangle, 50, 50, 420, 80);
var sourceParagraph = sourceShape.TextFrame.Paragraphs[0];
sourceParagraph.Portions.Clear();
var sourceEnglishPortion = new Portion("Check this text. ");
sourceEnglishPortion.PortionFormat.LanguageId = "en-US";
sourceParagraph.Portions.Add(sourceEnglishPortion);
var sourceFrenchPortion = new Portion("Ignorer ce code : ZX-81.");
sourceFrenchPortion.PortionFormat.LanguageId = "fr-FR";
sourceParagraph.Portions.Add(sourceFrenchPortion);
sourcePresentation.Save(inputFile, SaveFormat.Pptx);
}
using (var presentation = new Presentation(inputFile))
{
var shape = (IAutoShape)presentation.Slides[0].Shapes[0];
var portions = shape.TextFrame.Paragraphs[0].Portions;
var checkedPortion = portions[0];
checkedPortion.PortionFormat.LanguageId = "en-US";
checkedPortion.PortionFormat.SpellCheck = true;
var suppressedPortion = portions[1];
suppressedPortion.PortionFormat.LanguageId = "fr-FR";
suppressedPortion.PortionFormat.SpellCheck = false;
presentation.Save(outputFile, SaveFormat.Pptx);
}
using var reopenedPresentation = new Presentation(outputFile);
var reopenedShape = (IAutoShape)reopenedPresentation.Slides[0].Shapes[0];
var storedPortions = reopenedShape.TextFrame.Paragraphs[0].Portions;
var firstPortionStored = storedPortions.Count == 2 &&
storedPortions[0].PortionFormat.LanguageId == "en-US" &&
storedPortions[0].PortionFormat.SpellCheck;
var secondPortionStored = storedPortions.Count == 2 &&
storedPortions[1].PortionFormat.LanguageId == "fr-FR" &&
!storedPortions[1].PortionFormat.SpellCheck;
if (firstPortionStored && secondPortionStored)
{
Console.WriteLine("The proofing settings were stored correctly.");
}
else
{
Console.WriteLine("The proofing settings could not be verified.");
}
```
[Presentation.JoinPortionsWithSameFormatting](https://reference.aspose.com/slides/net/aspose.slides/presentation/joinportionswithsameformatting/) combines adjacent portions that have the same formatting. A difference in `SpellCheck` alone does not keep such portions separate; after they are joined, the resulting portion retains the `SpellCheck` value of the first portion. If portions need different spell-check settings, call `JoinPortionsWithSameFormatting` before assigning those settings, or inspect the resulting portion boundaries and reapply the settings afterward. Portions with different `LanguageId` values remain separate because their proofing-language formatting differs.
## **FAQ**
**Does a language ID translate the text?**
No. [IBasePortionFormat.LanguageId](https://reference.aspose.com/slides/net/aspose.slides/ibaseportionformat/languageid/) stores proofing metadata for spelling and grammar; it does not alter the text content. Translate the text separately, and then set the appropriate language identifier for each translated portion.
**Does the proofing language control fonts, hyphenation, or line wrapping?**
No. The language identifier is for proofing. Text rendering and layout primarily depend on the available [fonts](https://docs.aspose.com/slides/net/powerpoint-fonts/), the writing system, and the text-frame settings. For reliable rendering, provide the required fonts, configure [font substitution](https://docs.aspose.com/slides/net/font-substitution/), or [embed fonts](https://docs.aspose.com/slides/net/embedded-font/) in the presentation.
**Can one paragraph use several proofing languages?**
Yes. Assign each language to a separate portion, as shown in the multilingual paragraph example.
**Should I use `DefaultTextLanguage` or `LanguageId`?**
Use [LoadOptions.DefaultTextLanguage](https://reference.aspose.com/slides/net/aspose.slides/loadoptions/defaulttextlanguage/) when you want a default for newly created text. Use [IBasePortionFormat.LanguageId](https://reference.aspose.com/slides/net/aspose.slides/ibaseportionformat/languageid/) when a specific portion needs an explicit proofing language or when a paragraph contains multiple languages.
# Presentation Locking
>
Source: https://docs.aspose.com/slides/net/presentation-locking/
Updated: 2026-08-05
## **Presentation Locking**
A common use for **Aspose.Slides** is to create, update and save Microsoft PowerPoint 2007 (PPTX) presentations as part of an automated workflow. Users of the application that uses Aspose.Slides this way get access to the output presentations. Protecting them from editing is a common concern. It is important that auto-generated presentations retain their original formatting and content.
This explains how presentations and slides are constructed and how Aspose.Slides for .NET can apply protection to, and then remove it from a presentation. This feature is unique to Aspose.Slides and, at the time of writing, is not available in Microsoft PowerPoint. It gives developers a way of controlling how the presentations their applications create are used.
## **Composition of a Slide**
A PPTX slide is composed of a number of components like auto shapes, tables, OLE objects, grouped shapes, picture frames, video frames, connectors and the various other elements available to build up a presentation.
In Aspose.Slides for .NET, each element on a slide is turned into a Shape object. In other words, each element on the slide is either a Shape object or an object derived from the Shape object.
The structure of PPTX is complex so unlike PPT, where a generic lock can be used for all type of shapes, there are different types of locks for different shape type. The BaseShapeLock class is the generic PPTX locking class. The following types of locks are supported in Aspose.Slides for .NET for PPTX.
- AutoShapeLock locks auto shapes.
- ConnectorLock locks connecter shapes.
- GraphicalObjectLock locks graphical objects.
- GroupshapeLock locks group shapes.
- PictureFrameLock locks picture frames.
Any action performed on all Shape objects in a Presentation object is applied to the whole presentation.
## **Apply and Remove Protection**
Applying protection ensures that a presentation cannot be edited. It is a useful technique for protecting a presentation's content.
**Applying Protection to PPTX Shapes**
Aspose.Slides for .NET provides the Shape class to handle a shape on the slide.
As mentioned earlier, each shape class has an associated shape lock class for protection. This article focuses on the NoSelect, NoMove and NoResize locks. These locks ensure that shapes cannot be selected (through mouse clicks or other selection methods), and it cannot be moved or resized.
The code samples that follow apply protection to all shapes types in a presentation.
``` csharp
using Aspose.Slides;
//Instatiate Presentation class that represents a PPTX file
using (Presentation pTemplate = new Presentation("Applying Protection.pptx"))
{
//Traversing through all the slides in the presentation
foreach (ISlide slide in pTemplate.Slides)
{
//Travesing through all the shapes in the slides
foreach (IShape shape in slide.Shapes)
{
//if shape is autoshape
if (shape is IAutoShape)
{
//Type casting to Auto shape and getting auto shape lock
IAutoShape Ashp = (IAutoShape)shape;
IAutoShapeLock AutoShapeLock = Ashp.ShapeLock;
//Applying shapes locks
AutoShapeLock.PositionLocked = true;
AutoShapeLock.SelectLocked = true;
AutoShapeLock.SizeLocked = true;
}
//if shape is group shape
else if (shape is IGroupShape)
{
//Type casting to group shape and getting group shape lock
IGroupShape Group = (IGroupShape)shape;
IGroupShapeLock groupShapeLock = Group.ShapeLock;
//Applying shapes locks
groupShapeLock.GroupingLocked = true;
groupShapeLock.PositionLocked = true;
groupShapeLock.SelectLocked = true;
groupShapeLock.SizeLocked = true;
}
//if shape is a connector
else if (shape is IConnector)
{
//Type casting to connector shape and getting connector shape lock
IConnector Conn = (IConnector)shape;
IConnectorLock ConnLock = Conn.ShapeLock;
//Applying shapes locks
ConnLock.PositionMove = true;
ConnLock.SelectLocked = true;
ConnLock.SizeLocked = true;
}
//if shape is picture frame
else if (shape is IPictureFrame)
{
//Type casting to picture frame shape and getting picture frame shape lock
IPictureFrame Pic = (IPictureFrame)shape;
IPictureFrameLock PicLock = Pic.ShapeLock;
//Applying shapes locks
PicLock.PositionLocked = true;
PicLock.SelectLocked = true;
PicLock.SizeLocked = true;
}
//if shape is a graphical object: table, chart, OLE object frame
else if (shape is IGraphicalObject)
{
//Type casting to graphical object and getting graphical object lock
IGraphicalObject Gobj = (IGraphicalObject)shape;
IGraphicalObjectLock GobjLock = Gobj.ShapeLock;
//Applying shapes locks
GobjLock.PositionLocked = true;
GobjLock.SelectLocked = true;
GobjLock.SizeLocked = true;
}
}
}
//Saving the presentation file
pTemplate.Save("ProtectedSample.pptx", Aspose.Slides.Export.SaveFormat.Pptx);
}
```
**Removing Protection**
Protection applied using Aspose.Slides for .NET can only be removed with Aspose.Slides for .NET. To unlock a shape, set the value of the applied lock to false. The code sample that follows shows how to unlock shapes in a locked presentation.
``` csharp
using Aspose.Slides;
//Open the desired presentation
using (Presentation pTemplate = new Presentation("ProtectedSample.pptx"))
{
//Traversing through all the slides in presentation
foreach (ISlide slide in pTemplate.Slides)
{
//Travesing through all the shapes in the slides
foreach (IShape shape in slide.Shapes)
{
//if shape is autoshape
if (shape is IAutoShape)
{
//Type casting to Auto shape and getting auto shape lock
IAutoShape Ashp = (IAutoShape)shape;
IAutoShapeLock AutoShapeLock = Ashp.ShapeLock;
//Applying shapes locks
AutoShapeLock.PositionLocked = false;
AutoShapeLock.SelectLocked = false;
AutoShapeLock.SizeLocked = false;
}
//if shape is group shape
else if (shape is IGroupShape)
{
//Type casting to group shape and getting group shape lock
IGroupShape Group = (IGroupShape)shape;
IGroupShapeLock groupShapeLock = Group.ShapeLock;
//Applying shapes locks
groupShapeLock.GroupingLocked = false;
groupShapeLock.PositionLocked = false;
groupShapeLock.SelectLocked = false;
groupShapeLock.SizeLocked = false;
}
//if shape is Connector shape
else if (shape is IConnector)
{
//Type casting to connector shape and getting connector shape lock
IConnector Conn = (IConnector)shape;
IConnectorLock ConnLock = Conn.ShapeLock;
//Applying shapes locks
ConnLock.PositionMove = false;
ConnLock.SelectLocked = false;
ConnLock.SizeLocked = false;
}
//if shape is picture frame
else if (shape is IPictureFrame)
{
//Type casting to pitcture frame shape and getting picture frame shape lock
IPictureFrame Pic = (IPictureFrame)shape;
IPictureFrameLock PicLock = Pic.ShapeLock;
//Applying shapes locks
PicLock.PositionLocked = false;
PicLock.SelectLocked = false;
PicLock.SizeLocked = false;
}
//if shape is a graphical object: table, chart, OLE object frame
else if (shape is IGraphicalObject)
{
//Type casting to graphical object and getting graphical object lock
IGraphicalObject Gobj = (IGraphicalObject)shape;
IGraphicalObjectLock GobjLock = Gobj.ShapeLock;
//Applying shapes locks
GobjLock.PositionLocked = false;
GobjLock.SelectLocked = false;
GobjLock.SizeLocked = false;
}
}
}
//Saving the presentation file
pTemplate.Save("RemoveProtectionSample.pptx", Aspose.Slides.Export.SaveFormat.Pptx);
}
```
## **Download Sample Code**
- [Bitbucket](https://bitbucket.org/asposemarketplace/aspose-for-vsto/downloads/Presentation%20Locking%20%28Aspose.Slides%29.zip)
## Related articles
- [Prevent Presentation Edits with Shape Locks in .NET](https://docs.aspose.com/slides/net/applying-protection-to-presentation/)
# Manage Presentation Notes in .NET
> Remove slide notes and customize master notes text styles in PowerPoint and OpenDocument presentations with Aspose.Slides for .NET.
Source: https://docs.aspose.com/slides/net/presentation-notes/
Updated: 2026-10-28
## **Overview**
Aspose.Slides for .NET lets you remove notes from individual slides or an entire presentation, customize the text style defined in the master notes slide, and remove notes and handout masters. This article shows how to perform these operations and save the updated presentation.
To read or change notes page dimensions, switch orientation, and check export behavior, see [Notes Page Size](https://docs.aspose.com/slides/net/notes-size/).
## **Remove Notes from a Slide**
To remove notes from a specific slide, use its [NotesSlideManager](https://reference.aspose.com/slides/net/aspose.slides/slide/notesslidemanager/) and call [RemoveNotesSlide](https://reference.aspose.com/slides/net/aspose.slides/notesslidemanager/removenotesslide/). The example loads a presentation containing at least one slide and removes the notes from the first slide, accessed at index zero. Notes on other slides remain unchanged, and the updated presentation is saved in PPTX format.
```csharp
using Aspose.Slides;
using Aspose.Slides.Export;
using var presentation = new Presentation("presentation.pptx");
var notesManager = presentation.Slides[0].NotesSlideManager;
notesManager.RemoveNotesSlide();
presentation.Save("presentation_without_first_slide_notes.pptx", SaveFormat.Pptx);
```
## **Remove Notes from All Slides**
To remove all slide notes, iterate through the presentation's [Slides](https://reference.aspose.com/slides/net/aspose.slides/presentation/slides/) collection and call [RemoveNotesSlide](https://reference.aspose.com/slides/net/aspose.slides/notesslidemanager/removenotesslide/) for each slide. This example processes every slide in an existing presentation and saves a PPTX copy without slide notes.
```csharp
using Aspose.Slides;
using Aspose.Slides.Export;
using var presentation = new Presentation("presentation.pptx");
foreach (var slide in presentation.Slides)
{
slide.NotesSlideManager.RemoveNotesSlide();
}
presentation.Save("presentation_without_notes.pptx", SaveFormat.Pptx);
```
## **Remove Notes and Handout Masters**
Notes and handout masters define shared formatting and placeholders for their respective page types. Removing a master is a separate operation from removing an individual slide's notes with [RemoveNotesSlide](https://reference.aspose.com/slides/net/aspose.slides/notesslidemanager/removenotesslide/).
### **Remove an Unused Notes Master**
When cleaning up a template that has no notes pages, you can remove its unused notes master. Access [MasterNotesSlideManager](https://reference.aspose.com/slides/net/aspose.slides/presentation/masternotesslidemanager/), check [MasterNotesSlide](https://reference.aspose.com/slides/net/aspose.slides/imasternotesslidemanager/masternotesslide/), and call [RemoveMasterNotesSlide](https://reference.aspose.com/slides/net/aspose.slides/imasternotesslidemanager/removemasternotesslide/).
The following example requires a presentation to contain no notes pages. It removes the notes master if one exists, including its formatting and header/footer placeholders, and saves the template.
```csharp
using Aspose.Slides;
using Aspose.Slides.Export;
using var presentation = new Presentation("template_without_notes.pptx");
var manager = presentation.MasterNotesSlideManager;
if (manager.MasterNotesSlide != null)
{
manager.RemoveMasterNotesSlide();
}
presentation.Save("template_without_notes_master.pptx", SaveFormat.Pptx);
```
After removal, [MasterNotesSlide](https://reference.aspose.com/slides/net/aspose.slides/imasternotesslidemanager/masternotesslide/) returns `null`. If the master is already absent, the example skips removal and still saves the presentation.
### **Remove a Handout Master**
To remove a handout master, access [MasterHandoutSlideManager](https://reference.aspose.com/slides/net/aspose.slides/presentation/masterhandoutslidemanager/), check [MasterHandoutSlide](https://reference.aspose.com/slides/net/aspose.slides/imasterhandoutslidemanager/masterhandoutslide/), and call [RemoveMasterHandoutSlide](https://reference.aspose.com/slides/net/aspose.slides/imasterhandoutslidemanager/removemasterhandoutslide/).
For this example, use a presentation containing slide notes and customized notes and handout masters. Give the handout master a visible banner and header/footer text so that the effect of removal is easy to compare in handout output.
```csharp
using Aspose.Slides;
using Aspose.Slides.Export;
using var presentation = new Presentation("presentation_with_custom_masters.pptx");
var manager = presentation.MasterHandoutSlideManager;
if (manager.MasterHandoutSlide != null)
{
manager.RemoveMasterHandoutSlide();
}
presentation.Save("presentation_without_handout_master.pptx", SaveFormat.Pptx);
```
After removal, [MasterHandoutSlide](https://reference.aspose.com/slides/net/aspose.slides/imasterhandoutslidemanager/masterhandoutslide/) returns `null`. Existing slide notes and the notes master remain unchanged. If the handout master is already absent, the example simply saves the presentation.
In handout output, the removed master's banner, formatting, and header, footer, date/time, and page-number placeholders no longer appear. The presentation slides still appear in the handout layout, including any footer or date text on the slides themselves. Slide numbers added by the handout export settings are separate from the master's page-number placeholder.
If you only want to hide handout headers or footers, change the corresponding placeholder visibility through the [handout master's header/footer manager](https://docs.aspose.com/slides/net/presentation-header-and-footer/#set-headers-and-footers-on-the-handout-master) instead. This keeps the master and its other formatting, such as a custom banner.
## **Add a Notes Style**
The [NotesStyle](https://reference.aspose.com/slides/net/aspose.slides/masternotesslide/notesstyle/) property of [IMasterNotesSlide](https://reference.aspose.com/slides/net/aspose.slides/imasternotesslide/) defines the master notes text style. The example accesses the existing [MasterNotesSlide](https://reference.aspose.com/slides/net/aspose.slides/imasternotesslidemanager/masternotesslide/) and uses [GetLevel](https://reference.aspose.com/slides/net/aspose.slides/textstyle/getlevel/) with index zero to select the first paragraph level. It sets the bullet type to [BulletType.Symbol](https://reference.aspose.com/slides/net/aspose.slides/bullettype/) and saves the presentation in PPTX format. The input must contain a master notes slide for the style change to take effect; otherwise, the presentation is saved without changing the notes style.
```csharp
using Aspose.Slides;
using Aspose.Slides.Export;
using var presentation = new Presentation("presentation.pptx");
var notesMaster = presentation.MasterNotesSlideManager.MasterNotesSlide;
if (notesMaster != null)
{
var notesStyle = notesMaster.NotesStyle;
var paragraphFormat = notesStyle.GetLevel(0);
paragraphFormat.Bullet.Type = BulletType.Symbol;
}
presentation.Save("presentation_with_notes_style.pptx", SaveFormat.Pptx);
```
## **FAQ**
**Which API provides access to the notes of a specific slide?**
Use the slide's [NotesSlideManager](https://reference.aspose.com/slides/net/aspose.slides/slide/notesslidemanager/) property. The manager's [NotesSlide](https://reference.aspose.com/slides/net/aspose.slides/notesslidemanager/notesslide/) property returns the notes slide, or `null` if the slide has no notes.
**Does working with notes require Microsoft PowerPoint to be installed?**
No. Aspose.Slides works with notes in PowerPoint and OpenDocument presentations without requiring Microsoft PowerPoint to be installed.
## Related features
- [Read and edit speaker notes](https://docs.aspose.com/slides/features/speaker-notes/)
# Manage Presentation Properties in .NET
> Master presentation properties in Aspose.Slides for .NET and streamline search, branding and workflow in your PowerPoint and OpenDocument files.
Source: https://docs.aspose.com/slides/net/presentation-properties/
Updated: 2026-11-02
## **Introduction**
Aspose.Slides for .NET supports **built-in** and **custom** document properties. Use these properties to read and update presentation metadata, such as the author, title, and user-defined values.
Aspose.Slides allows you to work with presentation document properties through the [IDocumentProperties](https://reference.aspose.com/slides/net/aspose.slides/idocumentproperties/) interface. An instance of this interface is returned by [IPresentation.DocumentProperties](https://reference.aspose.com/slides/net/aspose.slides/ipresentation/documentproperties/). The following examples show how to read, modify, and manage these properties.
Aspose.Slides manages the application and producer metadata when saving presentations; these fields identify the software that created the output.
## **Manage Presentation Properties**
Document properties store descriptive information alongside presentation content. They fall into two categories:
- **Built-in properties** contain standard metadata, such as the title, author, and document statistics.
- **Custom properties** store user-defined name/value pairs.
Aspose.Slides for .NET provides access to both categories. In PowerPoint, select **File → Info → Properties → Advanced Properties** to inspect document metadata. The dialog groups information into tabs such as **Summary**, **Statistics**, **Contents**, and **Custom**. Use the **Custom** tab to manage user-defined properties.
## **Read Public Properties from an Encrypted Presentation**
An opening password normally protects both presentation content and document properties. When a presentation is encrypted with [IProtectionManager.EncryptDocumentProperties](https://reference.aspose.com/slides/net/aspose.slides/iprotectionmanager/encryptdocumentproperties/) set to `false`, its document properties remain public. An application can then set [LoadOptions.OnlyLoadDocumentProperties](https://reference.aspose.com/slides/net/aspose.slides/loadoptions/onlyloaddocumentproperties/) to `true` and read the public metadata without supplying the opening password.
[LoadOptions.OnlyLoadDocumentProperties](https://reference.aspose.com/slides/net/aspose.slides/loadoptions/onlyloaddocumentproperties/) controls what Aspose.Slides loads; it does not decrypt anything. If the properties were included in encryption, loading them without the password fails. If the presentation is not encrypted, the option is ignored and the complete presentation is loaded.
The example requires an encrypted presentation whose document properties were left public. It verifies the loading mode through [IProtectionManager.IsOnlyDocumentPropertiesLoaded](https://reference.aspose.com/slides/net/aspose.slides/iprotectionmanager/isonlydocumentpropertiesloaded/) and then reads built-in properties through [IPresentation.DocumentProperties](https://reference.aspose.com/slides/net/aspose.slides/ipresentation/documentproperties/):
```csharp
using System;
using Aspose.Slides;
var loadOptions = new LoadOptions { OnlyLoadDocumentProperties = true };
using var presentation = new Presentation("public-properties-encrypted.pptx", loadOptions);
if (presentation.ProtectionManager.IsOnlyDocumentPropertiesLoaded)
{
var documentProperties = presentation.DocumentProperties;
Console.WriteLine("Author: " + documentProperties.Author);
Console.WriteLine("Title: " + documentProperties.Title);
Console.WriteLine("Keywords: " + documentProperties.Keywords);
}
else
{
Console.WriteLine("The presentation was not loaded in document-properties-only mode.");
}
```
In this mode, slide content is not loaded. Slides, masters, layouts, shapes, media, and other presentation objects are unavailable. Applications should always check [IProtectionManager.IsOnlyDocumentPropertiesLoaded](https://reference.aspose.com/slides/net/aspose.slides/iprotectionmanager/isonlydocumentpropertiesloaded/) before performing an operation that requires the complete presentation object model.
Public metadata may expose author names, titles, subjects, keywords, company information, comments, and custom values. Encrypt sensitive properties together with the presentation. Leave them public only when indexing, classification, search, or document-management systems have a specific requirement to access them without a password.
## **Update Properties of an Encrypted Presentation**
For an encrypted PPTX file, a presentation loaded with [LoadOptions.OnlyLoadDocumentProperties](https://reference.aspose.com/slides/net/aspose.slides/loadoptions/onlyloaddocumentproperties/) is intended for reading public metadata. Aspose.Slides cannot save changed properties from that metadata-only object because the public properties must remain consistent with the corresponding data inside the encrypted presentation. Updating them therefore requires the correct opening password and a complete load.
The example requires an encrypted PPTX presentation with public document properties and a known opening password. It opens the complete presentation with [LoadOptions.Password](https://reference.aspose.com/slides/net/aspose.slides/loadoptions/password/), updates public built-in properties, and saves the result. It then uses [IPresentationInfo.IsEncrypted](https://reference.aspose.com/slides/net/aspose.slides/ipresentationinfo/isencrypted/) to verify that encryption is preserved and reopens the public metadata without a password to verify the new values:
```csharp
using System;
using Aspose.Slides;
using Aspose.Slides.Export;
const string inputPath = "public-properties-encrypted.pptx";
const string outputPath = "updated-public-properties-encrypted.pptx";
var loadOptions = new LoadOptions { Password = "open_password" };
using var presentation = new Presentation(inputPath, loadOptions);
var documentProperties = presentation.DocumentProperties;
documentProperties.Title = "Updated Product Roadmap";
documentProperties.Keywords = "roadmap, planning, indexed";
presentation.Save(outputPath, SaveFormat.Pptx);
var presentationInfo = PresentationFactory.Instance.GetPresentationInfo(outputPath);
Console.WriteLine("The presentation is encrypted: " + presentationInfo.IsEncrypted);
var metadataLoadOptions = new LoadOptions { OnlyLoadDocumentProperties = true };
using var metadataPresentation = new Presentation(outputPath, metadataLoadOptions);
if (metadataPresentation.ProtectionManager.IsOnlyDocumentPropertiesLoaded)
{
Console.WriteLine("Title: " + metadataPresentation.DocumentProperties.Title);
Console.WriteLine("Keywords: " + metadataPresentation.DocumentProperties.Keywords);
}
else
{
Console.WriteLine("The presentation was not loaded in document-properties-only mode.");
}
```
If an application is not allowed to decrypt or load the presentation content, it must treat public properties of an encrypted PPTX file as read-only.
## **Access Built-in Properties**
The [IDocumentProperties](https://reference.aspose.com/slides/net/aspose.slides/idocumentproperties/) interface exposes built-in metadata through typed properties, including [Author](https://reference.aspose.com/slides/net/aspose.slides/idocumentproperties/author/), [Title](https://reference.aspose.com/slides/net/aspose.slides/idocumentproperties/title/), and [CreatedTime](https://reference.aspose.com/slides/net/aspose.slides/idocumentproperties/createdtime/). This example opens an existing presentation and prints its stored metadata to the console. Values depend on the input presentation; some fields may be empty.
```csharp
using System;
using Aspose.Slides;
using var presentation = new Presentation("AccessBuiltInProperties.pptx");
var documentProperties = presentation.DocumentProperties;
Console.WriteLine("Category: " + documentProperties.Category);
Console.WriteLine("Content status: " + documentProperties.ContentStatus);
Console.WriteLine("Creation date: " + documentProperties.CreatedTime);
Console.WriteLine("Author: " + documentProperties.Author);
Console.WriteLine("Comments: " + documentProperties.Comments);
Console.WriteLine("Keywords: " + documentProperties.Keywords);
Console.WriteLine("Last modified by: " + documentProperties.LastSavedBy);
Console.WriteLine("Manager: " + documentProperties.Manager);
Console.WriteLine("Modified date: " + documentProperties.LastSavedTime);
Console.WriteLine("Presentation format: " + documentProperties.PresentationFormat);
Console.WriteLine("Last print date: " + documentProperties.LastPrinted);
Console.WriteLine("Is shared between producers: " + documentProperties.SharedDoc);
Console.WriteLine("Subject: " + documentProperties.Subject);
Console.WriteLine("Title: " + documentProperties.Title);
```
## **Modify Built-in Properties**
To update built-in metadata, assign values to the writable properties exposed by [IPresentation.DocumentProperties](https://reference.aspose.com/slides/net/aspose.slides/ipresentation/documentproperties/). This example opens an existing presentation, sets [Author](https://reference.aspose.com/slides/net/aspose.slides/idocumentproperties/author/), [Title](https://reference.aspose.com/slides/net/aspose.slides/idocumentproperties/title/), [Subject](https://reference.aspose.com/slides/net/aspose.slides/idocumentproperties/subject/), [Comments](https://reference.aspose.com/slides/net/aspose.slides/idocumentproperties/comments/), and [Manager](https://reference.aspose.com/slides/net/aspose.slides/idocumentproperties/manager/), then saves the updated presentation with [Presentation.Save](https://reference.aspose.com/slides/net/aspose.slides/presentation/save/). The saved PPTX contains the new metadata.
```csharp
using Aspose.Slides;
using Aspose.Slides.Export;
using var presentation = new Presentation("ModifyBuiltInProperties.pptx");
var documentProperties = presentation.DocumentProperties;
documentProperties.Author = "Aspose.Slides for .NET";
documentProperties.Title = "Manage PowerPoint Presentation Properties";
documentProperties.Subject = "Modify Built-in Properties";
documentProperties.Comments = "Aspose description";
documentProperties.Manager = "Aspose manager";
presentation.Save("DocumentProperties_output.pptx", SaveFormat.Pptx);
```
## **Manage the Hyperlink Base**
[IDocumentProperties.HyperlinkBase](https://reference.aspose.com/slides/net/aspose.slides/idocumentproperties/hyperlinkbase/) stores the document-level base for relative hyperlinks. This is useful when moving a presentation and its linked files to another location. It is separate from an individual hyperlink's [IHyperlink.ExternalUrl](https://reference.aspose.com/slides/net/aspose.slides/ihyperlink/externalurl/): changing the base does not rewrite the stored link addresses or change absolute destinations.
The example requires a presentation containing both a relative link, such as `target.html`, and an absolute link, such as `https://example.org/absolute.html`. It reads the existing base, assigns a new base address, and saves and reopens the presentation to check the value. It then clears the base with `string.Empty` and verifies the empty value in a separate saved file. Replace the example base address with the location of your linked files.
```csharp
using System;
using Aspose.Slides;
using Aspose.Slides.Export;
using var presentation = new Presentation("hyperlinks.pptx");
Console.WriteLine("Original base: " + presentation.DocumentProperties.HyperlinkBase);
const string newBase = "https://example.com/new/";
presentation.DocumentProperties.HyperlinkBase = newBase;
presentation.Save("hyperlinks-updated.pptx", SaveFormat.Pptx);
using var updatedPresentation = new Presentation("hyperlinks-updated.pptx");
Console.WriteLine("Base preserved: " + (updatedPresentation.DocumentProperties.HyperlinkBase == newBase));
updatedPresentation.DocumentProperties.HyperlinkBase = string.Empty;
updatedPresentation.Save("hyperlinks-cleared.pptx", SaveFormat.Pptx);
using var clearedPresentation = new Presentation("hyperlinks-cleared.pptx");
Console.WriteLine("Base cleared: " + (clearedPresentation.DocumentProperties.HyperlinkBase == string.Empty));
```
The two verification messages should print `True`. Clearing the base leaves the individual hyperlink addresses intact.
A relative link to `target.pptx` opened `old/target.pptx` when the base pointed to the `old` folder. After changing the base to the `new` folder, saving, and reopening the presentation, the same link opened `new/target.pptx`. An absolute link continued to open the same file. Test your relative links in PowerPoint before and after moving the presentation or changing its base.
## **Add Custom Presentation Properties**
Custom properties store metadata that has no corresponding built-in field. The [IDocumentProperties indexer](https://reference.aspose.com/slides/net/aspose.slides/idocumentproperties/item/) lets you assign a value by property name. This example creates a presentation, adds two text values and an integer version value, and saves the presentation with [Presentation.Save](https://reference.aspose.com/slides/net/aspose.slides/presentation/save/). Assigning a value to an existing name replaces that property’s value.
```csharp
using Aspose.Slides;
using Aspose.Slides.Export;
using var presentation = new Presentation();
var documentProperties = presentation.DocumentProperties;
documentProperties["Reviewed by"] = "John Smith";
documentProperties["Confidentiality level"] = "Internal";
documentProperties["Document version"] = 2;
presentation.Save("CustomDocumentProperties_output.pptx", SaveFormat.Pptx);
```
## **Access and Modify Custom Properties**
This example opens a presentation containing custom properties and uses [CountOfCustomProperties](https://reference.aspose.com/slides/net/aspose.slides/idocumentproperties/countofcustomproperties/) to iterate over them. [GetCustomPropertyName](https://reference.aspose.com/slides/net/aspose.slides/idocumentproperties/getcustompropertyname/) accepts a zero-based index and returns the name used by the [IDocumentProperties indexer](https://reference.aspose.com/slides/net/aspose.slides/idocumentproperties/item/). The example prints each original name and value, replaces every value with a numbered string regardless of its original type, and saves the changes. If there are no custom properties, the loop makes no changes.
```csharp
using System;
using Aspose.Slides;
using Aspose.Slides.Export;
using var presentation = new Presentation("AccessAndModifyProperties.pptx");
var documentProperties = presentation.DocumentProperties;
for (var i = 0; i < documentProperties.CountOfCustomProperties; i++)
{
var propertyName = documentProperties.GetCustomPropertyName(i);
var propertyValue = documentProperties[propertyName];
Console.WriteLine("Custom property name: " + propertyName);
Console.WriteLine("Custom property value: " + propertyValue);
documentProperties[propertyName] = "New Value " + (i + 1);
}
presentation.Save("CustomProperties_output.pptx", SaveFormat.Pptx);
```
## **Live Example**
Try the [**View & Edit PowerPoint Metadata**](https://products.aspose.app/slides/metadata) online app to see how to work with document properties using the Aspose.Slides API:
[](https://products.aspose.app/slides/metadata)
## **FAQ**
**How can I remove a built-in property from a presentation?**
Built-in properties are an integral part of the presentation and cannot be removed entirely. However, you can either change their values or set them to empty if allowed by the specific property.
**What happens if I add a custom property that already exists?**
If you add a custom property that already exists, its existing value will be overwritten with the new one. You do not need to remove or check the property beforehand, as Aspose.Slides automatically updates the property's value.
**Can I access presentation properties without fully loading the presentation?**
Yes. Use [PresentationFactory.GetPresentationInfo](https://reference.aspose.com/slides/net/aspose.slides/presentationfactory/getpresentationinfo/) and then [IPresentationInfo.ReadDocumentProperties](https://reference.aspose.com/slides/net/aspose.slides/ipresentationinfo/readdocumentproperties/) to read stored document metadata without creating a [Presentation](https://reference.aspose.com/slides/net/aspose.slides/presentation/) instance. See [Build a Lightweight Presentation Inventory](https://docs.aspose.com/slides/net/examine-presentation/) for a complete reporting example and format-specific limitations.
**Can I read public properties of an encrypted presentation without its opening password?**
Yes. The presentation must have been encrypted with [IProtectionManager.EncryptDocumentProperties](https://reference.aspose.com/slides/net/aspose.slides/iprotectionmanager/encryptdocumentproperties/) set to `false`, and it must be loaded with [LoadOptions.OnlyLoadDocumentProperties](https://reference.aspose.com/slides/net/aspose.slides/loadoptions/onlyloaddocumentproperties/) set to `true`.
**Can I update an encrypted PPTX file in document-properties-only mode?**
No. Public and encrypted property data must remain consistent, so updating an encrypted PPTX file requires loading the complete presentation with the correct opening password.
## Related features
- [Read and edit document properties](https://docs.aspose.com/slides/features/document-properties/)
- [Add custom document properties](https://docs.aspose.com/slides/features/custom-properties/)
# Presentation Rendering
>
Source: https://docs.aspose.com/slides/net/presentation-rendering/
Updated: 2026-08-31
This section includes the following topics
- [Conversion to Tiff with Notes](https://docs.aspose.com/slides/net/conversion-to-tiff-with-notes/)
- [Rendered As Tiff](https://docs.aspose.com/slides/net/rendered-as-tiff/)
- [Rendered As Tiff By User Defined Dimension](https://docs.aspose.com/slides/net/rendered-as-tiff-by-user-defined-dimension/)
- [Render Slide As SVG Image](https://docs.aspose.com/slides/net/render-slide-as-svg-image/)
- [Render Slide As thumbnail to JPEG](https://docs.aspose.com/slides/net/render-slide-as-thumbnail-to-jpeg/)
- [Render Slide As Thumbnail to JPEG by User defined Values](https://docs.aspose.com/slides/net/render-slide-as-thumbnail-to-jpeg-by-user-defined-values/)
# Secure Presentations in .NET
> Protect PowerPoint PPT, PPTX and ODP presentations in C# with Aspose.Slides for .NET—set passwords, apply encryption, enforce read-only, and remove protection with code.
Source: https://docs.aspose.com/slides/net/presentation-security/
Updated: 2025-11-13
---
lastmod: 2025-11-13T18:56:36+04:00
title: Secure Presentations in .NET
linktitle: Presentation Security
type: docs
weight: 60
url: /net/presentation-security/
keywords:
- presentation security
- digital signature
- password protection
- read only
- watermark
- PowerPoint
- OpenDocument
- presentation
- .NET
- C#
- Aspose.Slides
description: "Protect PowerPoint PPT, PPTX and ODP presentations in C# with Aspose.Slides for .NET—set passwords, apply encryption, enforce read-only, and remove protection with code."
---
## Related articles
- [Secure Presentations with Passwords in .NET](https://docs.aspose.com/slides/net/password-protected-presentation/)
# Manage Presentation Slides in .NET
> Learn how to create, access, and manage slides in PPT, PPTX, and ODP presentations using Aspose.Slides for .NET. Easy-to-follow guide with C# code examples.
Source: https://docs.aspose.com/slides/net/presentation-slide/
Updated: 2025-11-13
---
lastmod: 2025-11-13T18:56:36+04:00
title: Manage Presentation Slides in .NET
linktitle: Presentation Slide
type: docs
weight: 20
url: /net/presentation-slide/
keywords:
- add slide
- access slide
- remove slide
- clone slide
- copy slide
- convert slide
- compare slides
- slide layout
- slide master
- slide size
- slide transition
- slide section
- PowerPoint
- OpenDocument
- presentation
- .NET
- C#
- Aspose.Slides
description: "Learn how to create, access, and manage slides in PPT, PPTX, and ODP presentations using Aspose.Slides for .NET. Easy-to-follow guide with C# code examples."
---
## Related features
- [Read and change slide properties](https://docs.aspose.com/slides/features/slide-properties/)
# Manage Presentation Themes in .NET
> Master presentation themes in Aspose.Slides for .NET to create, customize and convert PowerPoint files with consistent branding.
Source: https://docs.aspose.com/slides/net/presentation-theme/
Updated: 2026-10-27
## **Introduction**
A presentation theme defines a coordinated set of colors, fonts, background styles, fills, lines, and effects. Theme-aware objects refer to these shared definitions instead of storing every visual property as a fixed value, so a theme change can update many objects at once.
In Aspose.Slides, the presentation-level theme is available through the [Presentation.MasterTheme](https://reference.aspose.com/slides/net/aspose.slides/presentation/mastertheme/) property. A presentation can also contain theme overrides at lower levels. A master can override the presentation theme through [MasterThemeManager.OverrideTheme](https://reference.aspose.com/slides/net/aspose.slides.theme/masterthememanager/overridetheme/), a layout can override its inherited theme through [BaseOverrideThemeManager.OverrideTheme](https://reference.aspose.com/slides/net/aspose.slides.theme/baseoverridethememanager/overridetheme/), and an individual slide can do the same. In practice, the effective theme for a slide is resolved through this inheritance chain: presentation theme, master override, layout override, and slide override.
The sections below show the most common theme workflows: inspect a theme, change colors and fonts, copy or apply a theme, update background and effect styles, and read effective values after inheritance and overrides have been resolved.
## **Inspect a Theme**
The [MasterTheme](https://reference.aspose.com/slides/net/aspose.slides.theme/mastertheme/) object exposes the theme's [ColorScheme](https://reference.aspose.com/slides/net/aspose.slides.theme/mastertheme/colorscheme/), [FontScheme](https://reference.aspose.com/slides/net/aspose.slides.theme/mastertheme/fontscheme/), and [FormatScheme](https://reference.aspose.com/slides/net/aspose.slides.theme/mastertheme/formatscheme/). Inspecting these collections before changing them is especially useful when a presentation comes from an external source because the number and content of style entries can vary.
The following example reads the main theme properties and reports how many background, fill, line, and effect styles are stored in the theme:
```csharp
using System;
using Aspose.Slides;
using var presentation = new Presentation("input.pptx");
var theme = presentation.MasterTheme;
Console.WriteLine($"Theme name: {theme.Name}");
Console.WriteLine($"Accent 1: {theme.ColorScheme.Accent1.Color}");
Console.WriteLine($"Major Latin font: {theme.FontScheme.Major.LatinFont.FontName}");
Console.WriteLine($"Minor Latin font: {theme.FontScheme.Minor.LatinFont.FontName}");
Console.WriteLine($"Background fill styles: {theme.FormatScheme.BackgroundFillStyles.Count}");
Console.WriteLine($"Fill styles: {theme.FormatScheme.FillStyles.Count}");
Console.WriteLine($"Line styles: {theme.FormatScheme.LineStyles.Count}");
Console.WriteLine($"Effect styles: {theme.FormatScheme.EffectStyles.Count}");
```
If a file uses multiple masters, do not assume that every slide has the same effective theme. Inspect the master associated with the slide, and use the effective-theme workflow shown later in this article when layout or slide overrides may be present.
## **Change Theme Colors**
Theme-aware fills, lines, and text can refer to a logical color from the [SchemeColor](https://reference.aspose.com/slides/net/aspose.slides/schemecolor/) enumeration. When you change the corresponding entry in the theme's [IColorScheme](https://reference.aspose.com/slides/net/aspose.slides.theme/icolorscheme/), all objects that still reference that theme color are resolved against the new value. Objects that use a direct RGB color are not changed by a theme-color update.
The following end-to-end example creates a shape that uses `Accent4`, changes the theme's `Accent4` color to red, saves the presentation, reopens it, and prints the effective fill color:
```csharp
using System;
using System.Drawing;
using Aspose.Slides;
using Aspose.Slides.Export;
using var presentation = new Presentation();
var slide = presentation.Slides[0];
var shape = slide.Shapes.AddAutoShape(ShapeType.Rectangle, 10, 10, 100, 100);
shape.FillFormat.FillType = FillType.Solid;
shape.FillFormat.SolidFillColor.SchemeColor = SchemeColor.Accent4;
presentation.MasterTheme.ColorScheme.Accent4.Color = Color.Red;
presentation.Save("theme-color.pptx", SaveFormat.Pptx);
using var savedPresentation = new Presentation("theme-color.pptx");
var savedSlide = savedPresentation.Slides[0];
var savedShape = savedSlide.Shapes[0];
var effectiveFill = savedShape.FillFormat.GetEffective();
Console.WriteLine($"Effective fill color: {effectiveFill.SolidFillColor}");
```
Because the rectangle remains linked to `Accent4`, its visible color becomes red after the theme is changed. If you replace the scheme color with a direct color on the shape, later changes to `Accent4` will no longer affect that fill.
### **Use Colors from the Additional Palette**
PowerPoint derives lighter and darker variants from a theme color by applying color transformations. Aspose.Slides exposes these transformations through [ColorTransformOperation](https://reference.aspose.com/slides/net/aspose.slides/colortransformoperation/).
**1** - Main theme colors.
**2** - Lighter and darker variants produced from the main theme colors.
The following example creates six rectangles based on `Accent4`, applies luminance transformations to five of them, and saves the result:
```csharp
using Aspose.Slides;
using Aspose.Slides.Export;
using var presentation = new Presentation();
var slide = presentation.Slides[0];
var shape1 = slide.Shapes.AddAutoShape(ShapeType.Rectangle, 10, 10, 50, 50);
shape1.FillFormat.FillType = FillType.Solid;
shape1.FillFormat.SolidFillColor.SchemeColor = SchemeColor.Accent4;
var shape2 = slide.Shapes.AddAutoShape(ShapeType.Rectangle, 10, 70, 50, 50);
shape2.FillFormat.FillType = FillType.Solid;
shape2.FillFormat.SolidFillColor.SchemeColor = SchemeColor.Accent4;
shape2.FillFormat.SolidFillColor.ColorTransform.Add(ColorTransformOperation.MultiplyLuminance, 0.2f);
shape2.FillFormat.SolidFillColor.ColorTransform.Add(ColorTransformOperation.AddLuminance, 0.8f);
var shape3 = slide.Shapes.AddAutoShape(ShapeType.Rectangle, 10, 130, 50, 50);
shape3.FillFormat.FillType = FillType.Solid;
shape3.FillFormat.SolidFillColor.SchemeColor = SchemeColor.Accent4;
shape3.FillFormat.SolidFillColor.ColorTransform.Add(ColorTransformOperation.MultiplyLuminance, 0.4f);
shape3.FillFormat.SolidFillColor.ColorTransform.Add(ColorTransformOperation.AddLuminance, 0.6f);
var shape4 = slide.Shapes.AddAutoShape(ShapeType.Rectangle, 10, 190, 50, 50);
shape4.FillFormat.FillType = FillType.Solid;
shape4.FillFormat.SolidFillColor.SchemeColor = SchemeColor.Accent4;
shape4.FillFormat.SolidFillColor.ColorTransform.Add(ColorTransformOperation.MultiplyLuminance, 0.6f);
shape4.FillFormat.SolidFillColor.ColorTransform.Add(ColorTransformOperation.AddLuminance, 0.4f);
var shape5 = slide.Shapes.AddAutoShape(ShapeType.Rectangle, 10, 250, 50, 50);
shape5.FillFormat.FillType = FillType.Solid;
shape5.FillFormat.SolidFillColor.SchemeColor = SchemeColor.Accent4;
shape5.FillFormat.SolidFillColor.ColorTransform.Add(ColorTransformOperation.MultiplyLuminance, 0.75f);
var shape6 = slide.Shapes.AddAutoShape(ShapeType.Rectangle, 10, 310, 50, 50);
shape6.FillFormat.FillType = FillType.Solid;
shape6.FillFormat.SolidFillColor.SchemeColor = SchemeColor.Accent4;
shape6.FillFormat.SolidFillColor.ColorTransform.Add(ColorTransformOperation.MultiplyLuminance, 0.5f);
presentation.Save("theme-color-palette.pptx", SaveFormat.Pptx);
```
These variants remain based on the theme color. If `Accent4` changes later, the transformed colors are recalculated from the new `Accent4` value.
### **Map `SchemeColor` Values to `IColorScheme` Slots**
The [SchemeColor](https://reference.aspose.com/slides/net/aspose.slides/schemecolor/) enumeration uses `Text1`, `Background1`, `Text2`, and `Background2`, while [IColorScheme](https://reference.aspose.com/slides/net/aspose.slides.theme/icolorscheme/) exposes the same theme slots as `Dark1`, `Light1`, `Dark2`, and `Light2`. The mapping is fixed:
* `Text1` = `Dark1`
* `Background1` = `Light1`
* `Text2` = `Dark2`
* `Background2` = `Light2`
These are alternate names for the same theme slots; they are not values that are dynamically converted from one form to another.
## **Change Theme Fonts**
A theme font scheme contains a major font set for headings and a minor font set for body text. The [FontScheme.Major](https://reference.aspose.com/slides/net/aspose.slides.theme/fontscheme/major/) and [FontScheme.Minor](https://reference.aspose.com/slides/net/aspose.slides.theme/fontscheme/minor/) properties expose those sets.
PowerPoint-compatible theme font identifiers can be used in text formatting:
* `+mn-lt` - Body Font Latin (Minor Latin Font)
* `+mj-lt` - Heading Font Latin (Major Latin Font)
* `+mn-ea` - Body Font East Asian (Minor East Asian Font)
* `+mj-ea` - Heading Font East Asian (Major East Asian Font)
* `+mn-cs` - Body Font Complex Script (Minor Complex Script Font)
* `+mj-cs` - Heading Font Complex Script (Major Complex Script Font)
The following example creates one heading that uses the major Latin theme font and one body line that uses the minor Latin theme font. It then changes the theme fonts and saves the result:
```csharp
using Aspose.Slides;
using Aspose.Slides.Export;
using var presentation = new Presentation();
var slide = presentation.Slides[0];
var heading = slide.Shapes.AddAutoShape(ShapeType.Rectangle, 40, 40, 500, 60);
heading.TextFrame.Text = "Theme heading";
heading.TextFrame.Paragraphs[0].Portions[0].PortionFormat.LatinFont = new FontData("+mj-lt");
var body = slide.Shapes.AddAutoShape(ShapeType.Rectangle, 40, 120, 500, 60);
body.TextFrame.Text = "Theme body text";
body.TextFrame.Paragraphs[0].Portions[0].PortionFormat.LatinFont = new FontData("+mn-lt");
presentation.MasterTheme.FontScheme.Major.LatinFont = new FontData("Aptos Display");
presentation.MasterTheme.FontScheme.Minor.LatinFont = new FontData("Arial");
presentation.Save("theme-fonts.pptx", SaveFormat.Pptx);
```
The heading follows the major font and the body text follows the minor font. Text that has an explicit font name instead of a theme identifier will not automatically switch when the theme font scheme changes.
The major and minor font collections can also contain font mappings for individual writing systems, such as Cyrillic, Arabic, Japanese, Georgian, and Thaana. To inspect, add, replace, or remove these mappings, see [Script-Specific Theme Fonts](https://docs.aspose.com/slides/net/script-specific-font-mappings/).
For more information about presentation fonts, see [PowerPoint Fonts](https://docs.aspose.com/slides/net/powerpoint-fonts/).
### **Resolve Theme Font References**
When inspecting text, [IFontData.FontName](https://reference.aspose.com/slides/net/aspose.slides/ifontdata/fontname/) can contain a theme reference such as `+mn-lt` instead of a font family name. Call [IFontData.GetFontName](https://reference.aspose.com/slides/net/aspose.slides/ifontdata/getfontname/) with the appropriate [IThemeEffectiveData](https://reference.aspose.com/slides/net/aspose.slides.theme/ithemeeffectivedata/) to resolve that reference. The `+mj` and `+mn` prefixes select the major and minor font sets; the `-lt`, `-ea`, and `-cs` suffixes select their Latin, East Asian, and Complex Script fonts, respectively.
Obtain the effective theme through [IThemeable.CreateThemeEffective](https://reference.aspose.com/slides/net/aspose.slides.theme/ithemeable/createthemeeffective/) on the object whose theme applies to the inspected text. For ordinary text on a slide, use `slide.CreateThemeEffective()` so the context includes that slide's inherited theme and local overrides. When inspecting a layout or master itself, use its own effective theme. Do not assume that the first master's theme applies to every slide.
The following example creates a text portion that explicitly references the minor Latin font. It initializes a slide font scheme through [IOverrideTheme.InitFontSchemeFromInherited](https://reference.aspose.com/slides/net/aspose.slides.theme/ioverridetheme/initfontschemefrominherited/) and sets the major and minor Latin families to `Arial` and `Calibri`, making the result reproducible without an input file.
```csharp
using System;
using Aspose.Slides;
using var presentation = new Presentation();
var slide = presentation.Slides[0];
var theme = slide.ThemeManager.OverrideTheme;
theme.InitFontSchemeFromInherited();
theme.FontScheme.Major.LatinFont = new FontData("Arial");
theme.FontScheme.Minor.LatinFont = new FontData("Calibri");
var shape = slide.Shapes.AddAutoShape(ShapeType.Rectangle, 20, 20, 400, 60);
shape.TextFrame.Text = "Text using the minor theme font";
var portion = shape.TextFrame.Paragraphs[0].Portions[0];
portion.PortionFormat.LatinFont = new FontData("+mn-lt");
var font = portion.PortionFormat.LatinFont;
var effectiveTheme = slide.CreateThemeEffective();
Console.WriteLine($"{font.FontName} -> {font.GetFontName(effectiveTheme)}");
var explicitFont = new FontData("Verdana");
Console.WriteLine($"{explicitFont.FontName} -> {explicitFont.GetFontName(effectiveTheme)}");
```
The output is `+mn-lt -> Calibri` followed by `Verdana -> Verdana`. The stored reference remains unchanged, while an explicit family name is returned as-is. If the portion used `+mj-lt`, it would resolve to `Arial` in this theme.
Resolving a theme reference identifies the font family specified by the theme. It does not check font availability or determine the font file ultimately used after substitution or glyph fallback during rendering. See [Font Selection Sequence](https://docs.aspose.com/slides/net/font-selection-sequence/) and [Font Substitution](https://docs.aspose.com/slides/net/font-substitution/) for those separate steps.
## **Copy or Apply a Theme**
The workflows below solve different theme-related problems.
### **Apply an External Theme to a Master's Dependent Slides**
Use [IMasterSlide.ApplyExternalThemeToDependingSlides](https://reference.aspose.com/slides/net/aspose.slides/imasterslide/applyexternalthemetodependingslides/) when you have a PowerPoint theme file (`.thmx`) and want to restyle every slide that depends on a particular master. Select the master from the [Presentation.Masters](https://reference.aspose.com/slides/net/aspose.slides/presentation/masters/) collection, which implements [IMasterSlideCollection](https://reference.aspose.com/slides/net/aspose.slides/imasterslidecollection/), and pass the theme file path to the method.
The method performs the following operations:
1. Creates a new master slide based on the selected master.
1. Applies the external theme to the new master.
1. Assigns the new master to all slides that previously depended on the selected master.
1. Returns the newly created [IMasterSlide](https://reference.aspose.com/slides/net/aspose.slides/imasterslide/).
The following example applies an external theme to the slides that depend on the first master, saves the presentation, and reopens the result:
```csharp
using System;
using Aspose.Slides;
using Aspose.Slides.Export;
using var presentation = new Presentation("presentation.pptx");
var selectedMaster = presentation.Masters[0];
var themedMaster = selectedMaster.ApplyExternalThemeToDependingSlides("corporate-theme.thmx");
Console.WriteLine($"Created master: {themedMaster.Name}");
presentation.Save("presentation-with-external-theme.pptx", SaveFormat.Pptx);
```
An invalid, corrupted, or unsupported theme can cause [PptxException](https://reference.aspose.com/slides/net/aspose.slides/pptxexception/) or one of its format-related subclasses. Validate paths supplied by users, handle file-system access failures, and save the presentation only after the theme has been applied successfully.
Only the slides that depended on the selected master are reassigned. Slides associated with other masters retain their existing masters and themes. Theme-aware colors, fonts, fills, lines, backgrounds, and effects are resolved against the external theme. Directly assigned colors, fonts, fills, and other explicit formatting may remain unchanged. Layout-level and slide-level overrides can also take precedence over values inherited from the new master.
The theme can reference fonts that are not available in the runtime environment. For consistent rendering and export, install the required fonts, provide them through [custom font sources](https://docs.aspose.com/slides/net/custom-font/), or configure [font substitution](https://docs.aspose.com/slides/net/font-substitution/).
This is a direct master-level workflow: the method accepts a file path to a `.thmx` file and does not require manually creating slide-level or layout-level theme overrides.
### **Apply Different External Themes in a Multi-Master Presentation**
When the relevant master is not known in advance, obtain it from a representative slide through [ISlide.LayoutSlide](https://reference.aspose.com/slides/net/aspose.slides/islide/layoutslide/) and [ILayoutSlide.MasterSlide](https://reference.aspose.com/slides/net/aspose.slides/ilayoutslide/masterslide/). Store the original master references before applying any themes because each call creates another master in the presentation.
The following example uses slides from two sections to locate their masters and applies a different external theme to each group:
```csharp
using System;
using Aspose.Slides;
using Aspose.Slides.Export;
using var presentation = new Presentation("multi-master-presentation.pptx");
if (presentation.Slides.Count < 5)
{
Console.WriteLine("The presentation does not contain the expected representative slides.");
}
else
{
var firstGroupMaster = presentation.Slides[0].LayoutSlide.MasterSlide;
var secondGroupMaster = presentation.Slides[4].LayoutSlide.MasterSlide;
if (ReferenceEquals(firstGroupMaster, secondGroupMaster))
{
Console.WriteLine("The representative slides use the same master.");
}
else
{
var firstThemedMaster = firstGroupMaster.ApplyExternalThemeToDependingSlides("blue-theme.thmx");
var secondThemedMaster = secondGroupMaster.ApplyExternalThemeToDependingSlides("green-theme.thmx");
Console.WriteLine($"First themed master: {firstThemedMaster.Name}");
Console.WriteLine($"Second themed master: {secondThemedMaster.Name}");
presentation.Save("multi-master-with-external-themes.pptx", SaveFormat.Pptx);
}
}
```
The first call affects only slides that depended on `firstGroupMaster`, and the second call affects only slides that depended on `secondGroupMaster`. Slides belonging to any other master are not restyled.
### **Preserve a Source Theme When Moving Slides**
If you want to move a slide to another presentation and preserve its original design, clone the source master into the target presentation with [IMasterSlideCollection.AddClone](https://reference.aspose.com/slides/net/aspose.slides/imasterslidecollection/addclone/), then clone the slide with [ISlideCollection.AddClone](https://reference.aspose.com/slides/net/aspose.slides/islidecollection/addclone/) and the cloned master. This carries the master, its layouts, and the associated theme together.
```csharp
using Aspose.Slides;
using Aspose.Slides.Export;
using var source = new Presentation("source-theme.pptx");
using var target = new Presentation("target.pptx");
var sourceSlide = source.Slides[0];
var sourceMaster = sourceSlide.LayoutSlide.MasterSlide;
var clonedMaster = target.Masters.AddClone(sourceMaster);
target.Slides.AddClone(sourceSlide, clonedMaster, true);
target.Save("theme-preserved.pptx", SaveFormat.Pptx);
```
This is the preferred workflow when the source slide must look the same in the destination. Simply cloning content onto an unrelated destination master can change theme-driven colors, fonts, backgrounds, and effects.
### **Apply Theme Values to an Existing Slide**
If the target slide must stay on its current master and layout, initialize a slide-level override from the source theme. The [OverrideTheme.InitColorSchemeFrom](https://reference.aspose.com/slides/net/aspose.slides.theme/overridetheme/initcolorschemefrom/), [OverrideTheme.InitFontSchemeFrom](https://reference.aspose.com/slides/net/aspose.slides.theme/overridetheme/initfontschemefrom/), and [OverrideTheme.InitFormatSchemeFrom](https://reference.aspose.com/slides/net/aspose.slides.theme/overridetheme/initformatschemefrom/) methods copy the three main theme components into the override.
```csharp
using Aspose.Slides;
using Aspose.Slides.Export;
using var source = new Presentation("source-theme.pptx");
using var target = new Presentation("target.pptx");
var targetSlide = target.Slides[0];
var overrideTheme = targetSlide.ThemeManager.OverrideTheme;
overrideTheme.InitColorSchemeFrom(source.MasterTheme.ColorScheme);
overrideTheme.InitFontSchemeFrom(source.MasterTheme.FontScheme);
overrideTheme.InitFormatSchemeFrom(source.MasterTheme.FormatScheme);
target.Save("theme-applied-to-slide.pptx", SaveFormat.Pptx);
```
This changes the theme used by that slide without changing the theme inherited by other slides. To remove the local override and return to inherited values, call [OverrideTheme.Clear](https://reference.aspose.com/slides/net/aspose.slides.theme/overridetheme/clear/).
### **Apply a Theme Override to a Layout**
A layout-level override applies to slides that use that layout, unless a particular slide has its own override. The same initialization methods can be used through the layout's [LayoutSlideThemeManager](https://reference.aspose.com/slides/net/aspose.slides.theme/layoutslidethememanager/):
```csharp
using Aspose.Slides;
using Aspose.Slides.Export;
using var source = new Presentation("source-theme.pptx");
using var target = new Presentation("target.pptx");
var targetLayout = target.Slides[0].LayoutSlide;
var overrideTheme = targetLayout.ThemeManager.OverrideTheme;
overrideTheme.InitColorSchemeFrom(source.MasterTheme.ColorScheme);
overrideTheme.InitFontSchemeFrom(source.MasterTheme.FontScheme);
overrideTheme.InitFormatSchemeFrom(source.MasterTheme.FormatScheme);
target.Save("theme-applied-to-layout.pptx", SaveFormat.Pptx);
```
Use a master or presentation-level theme when many layouts and slides should share the same base design, a layout override when one layout family needs different styling, and a slide override only for true exceptions. Excessive slide-level overrides make later global theme changes harder to predict.
## **Update Theme Background Styles**
The theme's background fills are stored in [FormatScheme.BackgroundFillStyles](https://reference.aspose.com/slides/net/aspose.slides.theme/formatscheme/backgroundfillstyles/). PowerPoint can present more background choices in its UI than the number of fill definitions physically stored in this collection because the UI can combine theme fills with theme colors and other style references.
Before using a background style, inspect the stored collection and the current [Background.StyleIndex](https://reference.aspose.com/slides/net/aspose.slides/background/styleindex/). `StyleIndex` uses `0` for no themed fill; positive values are theme background-style references. This is different from indexing the .NET collection directly, where `[0]` means the first stored item. Do not assume that every presentation contains the same number of background fill styles.
The following example reports the available background fill count, assigns a themed background reference to the first master, and saves the presentation:
```csharp
using System;
using Aspose.Slides;
using Aspose.Slides.Export;
using var presentation = new Presentation("input.pptx");
var backgroundStyles = presentation.MasterTheme.FormatScheme.BackgroundFillStyles;
Console.WriteLine($"Background fill styles: {backgroundStyles.Count}");
if (backgroundStyles.Count == 0)
{
throw new InvalidOperationException("The presentation theme does not contain background fill styles.");
}
presentation.Masters[0].Background.Type = BackgroundType.Themed;
presentation.Masters[0].Background.StyleIndex = 1;
presentation.Save("theme-background.pptx", SaveFormat.Pptx);
```
The visible result depends on the theme entry referenced by the master and on any background overrides at the layout or slide level. If a slide uses its own background, changing only the master background may not change that slide. Use [Background.GetEffective](https://reference.aspose.com/slides/net/aspose.slides/background/geteffective/) when you need to know the final background after inheritance has been applied.
Do not treat `StyleIndex` as a zero-based collection index. Also avoid hard-coding a style number from one file and assuming it has the same appearance in another file; theme style definitions are presentation-specific.
For direct background formatting and background inheritance, see [Presentation Background](https://docs.aspose.com/slides/net/presentation-background/).
## **Update Theme Effects**
A theme format scheme contains separate [FillStyles](https://reference.aspose.com/slides/net/aspose.slides.theme/formatscheme/fillstyles/), [LineStyles](https://reference.aspose.com/slides/net/aspose.slides.theme/formatscheme/linestyles/), and [EffectStyles](https://reference.aspose.com/slides/net/aspose.slides.theme/formatscheme/effectstyles/) collections. Typical Office themes often contain three principal style entries that correspond visually to subtle, moderate, and intense formatting, but code should inspect each collection instead of assuming a fixed count.

When you access these collections in C#, the collection index is zero-based: `[0]` is the first stored style and `[2]` is the third. A shape's style-reference indexes are a separate concept, exposed through [IShapeStyle](https://reference.aspose.com/slides/net/aspose.slides/ishapestyle/). Modifying a theme style affects shapes that reference that theme style; shapes with direct formatting may remain unchanged.
The following example checks that the required style entries exist, changes the first line style, changes the third fill style, enables an outer shadow in the third effect style, and saves the result:
```csharp
using System;
using System.Drawing;
using Aspose.Slides;
using Aspose.Slides.Export;
using var presentation = new Presentation("Subtle_Moderate_Intense.pptx");
var formatScheme = presentation.MasterTheme.FormatScheme;
if (formatScheme.LineStyles.Count < 1 || formatScheme.FillStyles.Count < 3 || formatScheme.EffectStyles.Count < 3)
{
throw new InvalidOperationException("The theme does not contain the style entries required by this example.");
}
formatScheme.LineStyles[0].FillFormat.FillType = FillType.Solid;
formatScheme.LineStyles[0].FillFormat.SolidFillColor.Color = Color.Red;
formatScheme.FillStyles[2].FillType = FillType.Solid;
formatScheme.FillStyles[2].SolidFillColor.Color = Color.ForestGreen;
formatScheme.EffectStyles[2].EffectFormat.EnableOuterShadowEffect();
formatScheme.EffectStyles[2].EffectFormat.OuterShadowEffect.Distance = 10f;
presentation.Save("theme-effects.pptx", SaveFormat.Pptx);
```
For shapes that reference these slots, the first theme line style becomes red, the third theme fill style becomes solid forest green, and the third effect style gains an outer shadow with a distance of 10 points. The exact visual result still depends on which style slots each shape references and whether direct formatting overrides the theme.

## **Determine Whether an Effective Solid Fill Uses a Theme Color**
A fill can be stored directly on an object or inherited from a paragraph, layout, master, theme style, or another formatting level. Call [IFillFormat.GetEffective](https://reference.aspose.com/slides/net/aspose.slides/ifillformat/geteffective/) to resolve that hierarchy into immutable [IFillFormatEffectiveData](https://reference.aspose.com/slides/net/aspose.slides/ifillformateffectivedata/). First check [IFillFormatEffectiveData.FillType](https://reference.aspose.com/slides/net/aspose.slides/ifillformateffectivedata/filltype/). Only when it is `FillType.Solid` should you read the solid-fill properties.
For a solid fill, [IFillFormatEffectiveData.SolidFillColor](https://reference.aspose.com/slides/net/aspose.slides/ifillformateffectivedata/solidfillcolor/) returns the final rendered RGB value after inheritance, theme lookup, and color transformations are applied. [IFillFormatEffectiveData.SolidFillSchemeColor](https://reference.aspose.com/slides/net/aspose.slides/ifillformateffectivedata/solidfillschemecolor/) returns the corresponding logical [SchemeColor](https://reference.aspose.com/slides/net/aspose.slides/schemecolor/) slot, such as `Text1` or `Accent6`. A value of `SchemeColor.NotDefined` means that the effective solid fill is not based on a scheme color. In a workflow where fills are either theme colors or direct RGB colors, this value identifies a direct RGB fill.
Do not use the local [IColorFormat.SchemeColor](https://reference.aspose.com/slides/net/aspose.slides/icolorformat/schemecolor/) value alone to classify a fill. For example, a text portion can have no locally defined scheme color, so its local value is `NotDefined`, while its effective fill inherits a theme color and resolves to `Text1` or `Accent6`. Conversely, `SolidFillSchemeColor` tells you which logical theme slot produced the effective color, but it does not tell you whether that slot came from the object, paragraph, layout, master, or another level of the formatting hierarchy.
The following example loads a presentation, audits both shape fills and text-portion fills, prints each final RGB value and associated scheme color, and flags solid fills that will not track theme color changes:
```csharp
using System;
using Aspose.Slides;
using var presentation = new Presentation("input.pptx");
var slideCount = presentation.Slides.Count;
for (var slideIndex = 0; slideIndex < slideCount; slideIndex++)
{
var slide = presentation.Slides[slideIndex];
var shapeCount = slide.Shapes.Count;
for (var shapeIndex = 0; shapeIndex < shapeCount; shapeIndex++)
{
var shape = slide.Shapes[shapeIndex];
var shapeName = $"Slide {slideIndex + 1}, shape {shapeIndex + 1}";
AuditFill(shapeName, shape.FillFormat);
if (shape is IAutoShape autoShape)
{
var paragraphCount = autoShape.TextFrame.Paragraphs.Count;
for (var paragraphIndex = 0; paragraphIndex < paragraphCount; paragraphIndex++)
{
var paragraph = autoShape.TextFrame.Paragraphs[paragraphIndex];
var portionCount = paragraph.Portions.Count;
for (var portionIndex = 0; portionIndex < portionCount; portionIndex++)
{
var portion = paragraph.Portions[portionIndex];
var portionName = $"{shapeName}, paragraph {paragraphIndex + 1}, portion {portionIndex + 1}";
AuditFill(portionName, portion.PortionFormat.FillFormat);
}
}
}
}
}
static void AuditFill(string objectName, IFillFormat localFill)
{
var effectiveFill = localFill.GetEffective();
if (effectiveFill.FillType != FillType.Solid)
{
Console.WriteLine($"{objectName}: fill type = {effectiveFill.FillType}; not a solid fill.");
return;
}
var rgb = effectiveFill.SolidFillColor;
var effectiveSchemeColor = effectiveFill.SolidFillSchemeColor;
var localSchemeColor = localFill.SolidFillColor.SchemeColor;
Console.WriteLine($"{objectName}: RGB = #{rgb.R:X2}{rgb.G:X2}{rgb.B:X2}");
Console.WriteLine($"{objectName}: local scheme = {localSchemeColor}, effective scheme = {effectiveSchemeColor}");
if (effectiveSchemeColor == SchemeColor.NotDefined)
{
Console.WriteLine($"{objectName}: direct RGB or another non-scheme fill; audit as theme-independent.");
}
else
{
Console.WriteLine($"{objectName}: theme-dependent through {effectiveSchemeColor}.");
}
}
```
The `NotDefined` branch provides an audit list of solid fills that will not respond to changes in theme color slots. Review those objects when a presentation must follow a new brand palette. The reported RGB value still shows the current appearance, while the scheme value explains whether that appearance is connected to the theme.
Effective-format objects are snapshots. After changing the presentation theme, a theme override, or any inherited formatting, call `GetEffective` again and read a new `IFillFormatEffectiveData` object before comparing or reporting colors.
## **Read Effective Theme Values**
Raw theme objects tell you what is defined at a particular level. Effective values tell you what a slide or shape actually uses after inheritance and local overrides are resolved. For a slide, call [BaseOverrideThemeManager.CreateThemeEffective](https://reference.aspose.com/slides/net/aspose.slides.theme/baseoverridethememanager/createthemeeffective/). For a background, use [Background.GetEffective](https://reference.aspose.com/slides/net/aspose.slides/background/geteffective/), and for a fill, use [FillFormat.GetEffective](https://reference.aspose.com/slides/net/aspose.slides/fillformat/geteffective/).
The following example reads the effective theme, background, and first shape fill from a slide:
```csharp
using System;
using Aspose.Slides;
using var presentation = new Presentation("input.pptx");
var slide = presentation.Slides[0];
var effectiveTheme = slide.ThemeManager.CreateThemeEffective();
var effectiveBackground = slide.Background.GetEffective();
Console.WriteLine($"Effective major Latin font: {effectiveTheme.FontScheme.Major.LatinFont.FontName}");
Console.WriteLine($"Effective minor Latin font: {effectiveTheme.FontScheme.Minor.LatinFont.FontName}");
Console.WriteLine($"Effective background fill type: {effectiveBackground.FillFormat.FillType}");
if (slide.Shapes.Count > 0)
{
var effectiveFill = slide.Shapes[0].FillFormat.GetEffective();
Console.WriteLine($"First shape effective fill type: {effectiveFill.FillType}");
if (effectiveFill.FillType == FillType.Solid)
{
Console.WriteLine($"First shape effective fill color: {effectiveFill.SolidFillColor}");
}
}
```
Use effective data for rendering diagnostics, validation, and comparisons. If you inspect only [Presentation.MasterTheme](https://reference.aspose.com/slides/net/aspose.slides/presentation/mastertheme/), you can miss a master, layout, slide, or shape override that changes the final appearance.
## **FAQ**
**Does applying an external theme affect every slide in the presentation?**
No. [IMasterSlide.ApplyExternalThemeToDependingSlides](https://reference.aspose.com/slides/net/aspose.slides/imasterslide/applyexternalthemetodependingslides/) reassigns only the slides that depend on the selected master. Slides that use other masters retain their existing themes.
**Can I apply a theme to a single slide without changing the master?**
Yes. Use the slide's [SlideThemeManager](https://reference.aspose.com/slides/net/aspose.slides.theme/slidethememanager/) and initialize its override theme. The change remains local to that slide; other slides continue to inherit their existing themes.
**What is the safest way to carry a theme from one presentation to another?**
When moving a slide and preserving its source appearance, clone the source master into the destination and clone the slide with that master using [IMasterSlideCollection.AddClone](https://reference.aspose.com/slides/net/aspose.slides/imasterslidecollection/addclone/) and [ISlideCollection.AddClone](https://reference.aspose.com/slides/net/aspose.slides/islidecollection/addclone/). This keeps the master, layouts, and theme together.
**How can I see the effective values after inheritance and overrides?**
Use [BaseOverrideThemeManager.CreateThemeEffective](https://reference.aspose.com/slides/net/aspose.slides.theme/baseoverridethememanager/createthemeeffective/) for a slide or layout theme and the corresponding effective-data methods for format objects such as [Background.GetEffective](https://reference.aspose.com/slides/net/aspose.slides/background/geteffective/) and [FillFormat.GetEffective](https://reference.aspose.com/slides/net/aspose.slides/fillformat/geteffective/). These APIs return the resolved values after inheritance and overrides are applied.
## Related features
- [Change themes and color schemes](https://docs.aspose.com/slides/features/presentation-themes/)
# Manage VBA Projects in Presentations in .NET
> Discover how to generate and manipulate PowerPoint and OpenDocument presentations via VBA with Aspose.Slides for .NET to streamline your workflow.
Source: https://docs.aspose.com/slides/net/presentation-via-vba/
Updated: 2026-08-13
## **Introduction**
The [Aspose.Slides.Vba](https://reference.aspose.com/slides/net/aspose.slides.vba/) namespace contains classes and interfaces for working with macros and VBA code.
When you convert a presentation containing macros to a different file format (PDF, HTML, etc.), Aspose.Slides ignores all macros (macros are not carried into the resulting file).
When you add macros to a presentation or resave a presentation containing macros, Aspose.Slides simply writes the bytes for the macros.
Aspose.Slides **never** runs the macros in a presentation.
## **Add VBA Macros**
Aspose.Slides provides the [VbaProject](https://reference.aspose.com/slides/net/aspose.slides.vba/vbaproject/) class to allow you to create VBA projects (and project references) and edit existing modules. You can use the [IVbaProject](https://reference.aspose.com/slides/net/aspose.slides.vba/ivbaproject/) interface to manage VBA embedded in a presentation.
1. Create an instance of the [Presentation](https://reference.aspose.com/slides/net/aspose.slides/presentation/) class.
1. Use the [VbaProject](https://reference.aspose.com/slides/net/aspose.slides.vba/vbaproject/vbaproject/#constructor) constructor to add a new VBA project.
1. Add a module to the VbaProject.
1. Set the module source code.
1. Add references to .
1. Add references to **Microsoft Office**.
1. Associate the references with the VBA project.
1. Save the presentation.
This C# code shows you how to add a VBA macro from scratch to a presentation:
```c#
using Aspose.Slides;
using Aspose.Slides.Export;
using Aspose.Slides.Vba;
// Creates an instance of the presentation class
using (Presentation presentation = new Presentation())
{
// Creates a new VBA Project
presentation.VbaProject = new VbaProject();
// Adds an empty module to the VBA project
IVbaModule module = presentation.VbaProject.Modules.AddEmptyModule("Module");
// Sets the module source code
module.SourceCode = @"Sub Test(oShape As Shape) MsgBox ""Test"" End Sub";
// Creates a reference to
VbaReferenceOleTypeLib stdoleReference =
new VbaReferenceOleTypeLib("stdole", "*\\G{00020430-0000-0000-C000-000000000046}#2.0#0#C:\\Windows\\system32\\stdole2.tlb#OLE Automation");
// Creates a reference to Office
VbaReferenceOleTypeLib officeReference =
new VbaReferenceOleTypeLib("Office", "*\\G{2DF8D04C-5BFA-101B-BDE5-00AA0044DE52}#2.0#0#C:\\Program Files\\Common Files\\Microsoft Shared\\OFFICE14\\MSO.DLL#Microsoft Office 14.0 Object Library");
// Adds references to the VBA project
presentation.VbaProject.References.Add(stdoleReference);
presentation.VbaProject.References.Add(officeReference);
// Saves the Presentation
presentation.Save("AddVBAMacros_out.pptm", SaveFormat.Pptm);
}
```
You may want to check out **Aspose** [Macro Remover](https://products.aspose.app/slides/remove-macros), which a free web app used to remove macros from PowerPoint, Excel, and Word documents.
## **Remove VBA Macros**
Using the [VbaProject](https://reference.aspose.com/slides/net/aspose.slides/presentation/vbaproject/) property under the [Presentation](https://reference.aspose.com/slides/net/aspose.slides/presentation/) class, you can remove a VBA macro.
1. Create an instance of the [Presentation](https://reference.aspose.com/slides/net/aspose.slides/presentation/) class and load the presentation containing the macro.
1. Access the Macro module and remove it.
1. Save the modified presentation.
This C# code shows you how to remove a VBA macro:
```c#
using Aspose.Slides;
using Aspose.Slides.Export;
// Loads the presentation containing the macro
using (Presentation presentation = new Presentation("VBA.pptm"))
{
// Accesses the Vba module and removes it
presentation.VbaProject.Modules.Remove(presentation.VbaProject.Modules[0]);
// Saves the Presentation
presentation.Save("RemovedVBAMacros_out.pptm", SaveFormat.Pptm);
}
```
## **Extract VBA Macros**
1. Create an instance of the [Presentation](https://reference.aspose.com/slides/net/aspose.slides/presentation/) class and load the presentation containing the macro.
2. Check if the presentation contains a VBA Project.
3. Loop through all the modules contained in the VBA Project to view the macros.
This C# code shows you how to extract VBA macros from a presentation containing macros:
```c#
using Aspose.Slides;
using Aspose.Slides.Vba;
// Loads the presentation containing the macro
using (Presentation pres = new Presentation("VBA.pptm"))
{
if (pres.VbaProject != null) // Checks whether the Presentation contains a VBA Project
{
foreach (IVbaModule module in pres.VbaProject.Modules)
{
Console.WriteLine(module.Name);
Console.WriteLine(module.SourceCode);
}
}
}
```
## **Check Whether a VBA Project Is Password-Protected**
Using the [IVbaProject.IsPasswordProtected](https://reference.aspose.com/slides/net/aspose.slides.vba/ivbaproject/ispasswordprotected/) property, you can determine whether a project’s properties are password-protected.
1. Create an instance of the [Presentation](https://reference.aspose.com/slides/net/aspose.slides/presentation/) class and load a presentation that contains a macro.
2. Check whether the presentation contains a [VBA project](https://reference.aspose.com/slides/net/aspose.slides.vba/vbaproject/).
3. Check whether the VBA project is password-protected to view its properties.
```cs
using Aspose.Slides;
using (Presentation presentation = new Presentation("VBA.pptm"))
{
if (presentation.VbaProject != null) // Check whether the presentation contains a VBA project.
{
if (presentation.VbaProject.IsPasswordProtected)
{
Console.WriteLine($"The VBA Project '{presentation.VbaProject.Name}' is protected by password to view project properties.");
}
}
}
```
## **FAQ**
### What happens to macros if I save the presentation as PPTX?
Macros will be removed because PPTX does not support VBA. To keep macros, choose PPTM, PPSM, or POTM.
### Can Aspose.Slides run macros inside a presentation to, for example, refresh data?
No. The library never executes VBA code; execution is only possible inside PowerPoint with the appropriate security settings.
### Is working with ActiveX controls linked to VBA code supported?
Yes, you can access existing [ActiveX controls](https://docs.aspose.com/slides/net/activex/), modify their properties, and remove them. This is useful when macros interact with ActiveX.
## Related features
- [Read VBA macros](https://docs.aspose.com/slides/features/read-vba/)
- [Add and edit VBA macros](https://docs.aspose.com/slides/features/edit-vba/)
- [Remove VBA macros](https://docs.aspose.com/slides/features/remove-vba/)
## Related articles
- [VBA Macro](https://docs.aspose.com/slides/net/examples/elements/vba-macro/)
- [Public API and Backwards Incompatible Changes in Aspose.Slides for .NET 14.8.0](https://docs.aspose.com/slides/net/public-api-and-backwards-incompatible-changes-in-aspose-slides-for-net-14-8-0/)
# Retrieve and Update Presentation View Properties in .NET
> Use Aspose.Slides for .NET to configure the normal view layout, slide and notes zoom, grid spacing, and comment visibility in PowerPoint presentations.
Source: https://docs.aspose.com/slides/net/presentation-view-properties/
Updated: 2026-11-16
## **Introduction**
In PowerPoint's normal view, the slide appears between a side pane for thumbnails or an outline and a notes pane below. Aspose.Slides for .NET exposes the presentation's saved editing preferences through [Presentation.ViewProperties](https://reference.aspose.com/slides/net/aspose.slides/presentation/viewproperties/). These include the pane layout, zoom levels, grid spacing, and comment visibility.
## **About INormalViewProperties**
Use [NormalViewProperties](https://reference.aspose.com/slides/net/aspose.slides/iviewproperties/normalviewproperties/) to access the [INormalViewProperties](https://reference.aspose.com/slides/net/aspose.slides/inormalviewproperties/) interface. [ShowOutlineIcons](https://reference.aspose.com/slides/net/aspose.slides/inormalviewproperties/showoutlineicons/) controls whether icons appear beside slide titles in the outline. [SnapVerticalSplitter](https://reference.aspose.com/slides/net/aspose.slides/inormalviewproperties/snapverticalsplitter/) lets the side pane snap to its minimized state when the user narrows it. [PreferSingleView](https://reference.aspose.com/slides/net/aspose.slides/inormalviewproperties/prefersingleview/) indicates a preference for displaying one pane in the full window.
[VerticalBarState](https://reference.aspose.com/slides/net/aspose.slides/inormalviewproperties/verticalbarstate/) controls the divider between the side pane and the slide. [HorizontalBarState](https://reference.aspose.com/slides/net/aspose.slides/inormalviewproperties/horizontalbarstate/) controls the divider above the notes pane. Both accept a [SplitterBarStateType](https://reference.aspose.com/slides/net/aspose.slides/splitterbarstatetype/) value of `Minimized`, `Maximized`, or `Restored`.
## **About Restoring INormalViewProperties**
When a divider is restored, [RestoredLeft](https://reference.aspose.com/slides/net/aspose.slides/inormalviewproperties/restoredleft/) supplies the saved size of the side pane and [RestoredTop](https://reference.aspose.com/slides/net/aspose.slides/inormalviewproperties/restoredtop/) supplies the saved size of the upper slide area. Both expose [INormalViewRestoredProperties](https://reference.aspose.com/slides/net/aspose.slides/inormalviewrestoredproperties/). Its [DimensionSize](https://reference.aspose.com/slides/net/aspose.slides/inormalviewrestoredproperties/dimensionsize/) property accepts a percentage from 0 to 100, and [AutoAdjust](https://reference.aspose.com/slides/net/aspose.slides/inormalviewrestoredproperties/autoadjust/) controls whether the editor adjusts the size when the window is resized.
This example updates an existing presentation. It restores the horizontal divider, sets [RestoredTop](https://reference.aspose.com/slides/net/aspose.slides/inormalviewproperties/restoredtop/) to 80% with automatic adjustment enabled, and maximizes the vertical divider. It also enables [ShowOutlineIcons](https://reference.aspose.com/slides/net/aspose.slides/inormalviewproperties/showoutlineicons/) for outline view.
```csharp
using Aspose.Slides;
using Aspose.Slides.Export;
using var presentation = new Presentation("demo.pptx");
var normalView = presentation.ViewProperties.NormalViewProperties;
normalView.HorizontalBarState = SplitterBarStateType.Restored;
normalView.VerticalBarState = SplitterBarStateType.Maximized;
normalView.RestoredTop.AutoAdjust = true;
normalView.RestoredTop.DimensionSize = 80;
normalView.ShowOutlineIcons = true;
presentation.Save("presentation_normal_view_state.pptx", SaveFormat.Pptx);
```
## **Set the Default Zoom Value**
[SlideViewProperties](https://reference.aspose.com/slides/net/aspose.slides/iviewproperties/slideviewproperties/) and [NotesViewProperties](https://reference.aspose.com/slides/net/aspose.slides/iviewproperties/notesviewproperties/) store independent zoom settings for the editor. These settings do not affect slide dimensions, slide-show playback, or image export resolution.
This example opens an existing presentation and enables [VariableScale](https://reference.aspose.com/slides/net/aspose.slides/icommonslideviewproperties/variablescale/) to fit the slide to the editing window. For the notes page, it disables automatic scaling and sets [Scale](https://reference.aspose.com/slides/net/aspose.slides/icommonslideviewproperties/scale/) to a fixed 80% zoom.
```csharp
using Aspose.Slides;
using Aspose.Slides.Export;
using var presentation = new Presentation("demo.pptx");
var viewProperties = presentation.ViewProperties;
viewProperties.SlideViewProperties.VariableScale = true;
viewProperties.NotesViewProperties.VariableScale = false;
viewProperties.NotesViewProperties.Scale = 80;
presentation.Save("zoom.pptx", SaveFormat.Pptx);
```
## **Set the Grid Spacing**
[GridSpacing](https://reference.aspose.com/slides/net/aspose.slides/iviewproperties/gridspacing/) sets the distance between editing grid lines throughout the presentation. It takes a positive value in points, with 72 points per inch. This example prints the current spacing in an existing presentation and saves a quarter-inch grid by setting the interval to 18 points.
```csharp
using System;
using Aspose.Slides;
using Aspose.Slides.Export;
using var presentation = new Presentation("demo.pptx");
var viewProperties = presentation.ViewProperties;
Console.WriteLine($"Current grid spacing: {viewProperties.GridSpacing} points");
viewProperties.GridSpacing = 18f;
presentation.Save("grid-spacing.pptx", SaveFormat.Pptx);
```
The grid repeats at a fixed interval. [Drawing guides](https://docs.aspose.com/slides/net/drawing-guides/) mark individual horizontal or vertical positions. Both are editing aids and appear only in editors that display them. Slide shows and exports to PDF, images, or SVG omit them.
## **Show or Hide Comments When Opening a Presentation**
[ShowComments](https://reference.aspose.com/slides/net/aspose.slides/iviewproperties/showcomments/) stores a preference that compatible editors use when opening the presentation. For an existing presentation with comments, this example prints the current setting and saves a copy with comments hidden. It also sets [LastView](https://reference.aspose.com/slides/net/aspose.slides/iviewproperties/lastview/) to [ViewType.SlideView](https://reference.aspose.com/slides/net/aspose.slides/viewtype/) so the copy opens in slide view.
```csharp
using System;
using Aspose.Slides;
using Aspose.Slides.Export;
using var presentation = new Presentation("comments.pptx");
var viewProperties = presentation.ViewProperties;
Console.WriteLine($"Current comment visibility: {viewProperties.ShowComments}");
viewProperties.ShowComments = NullableBool.False;
viewProperties.LastView = ViewType.SlideView;
presentation.Save("comments-hidden.pptx", SaveFormat.Pptx);
```
Hiding comments preserves their text, authors, positions, replies, and statuses. To change the comments themselves, see [Presentation Comments](https://docs.aspose.com/slides/net/presentation-comments/). Export settings control whether comments appear in PDF, HTML, images, notes, or handouts.
## **FAQ**
**Why is the grid hidden when I reopen the presentation?**
The presentation stores the grid interval. To see the grid, enable grid visibility in the editor.
**Does clearing drawing guides change the grid spacing?**
No. Adding, moving, or clearing a guide leaves the grid interval unchanged.
**Can different sections of a presentation have different view settings?**
No. [Presentation.ViewProperties](https://reference.aspose.com/slides/net/aspose.slides/presentation/viewproperties/) applies to the entire presentation.
**Can I save different view settings for different users?**
The file stores one set of view properties for everyone. An editor may also apply a user's local preferences.
**Can I save view settings in a template?**
Yes. Presentations created from the template inherit its saved view settings.
# Create a Presentation Viewer in .NET
> Create a custom presentation viewer in .NET using Aspose.Slides. Easily display PowerPoint and OpenDocument files without Microsoft PowerPoint.
Source: https://docs.aspose.com/slides/net/presentation-viewer/
Updated: 2026-08-05
## **Introduction**
Aspose.Slides for .NET is used to create presentation files with slides. These slides can be viewed by opening the presentations in Microsoft PowerPoint, for example. However, developers may sometimes need to view slides as images in their preferred image viewer or use them in a custom presentation viewer. In such cases, Aspose.Slides allows you to export individual slides as images. This article explains how to do that.
## **Generate an SVG Image from a Slide**
To generate an SVG image from a presentation slide using Aspose.Slides, follow the steps below:
1. Create an instance of the [Presentation](https://reference.aspose.com/slides/net/aspose.slides/presentation) class.
1. Get a reference to the slide by its index.
1. Open a file stream.
1. Save the slide as an SVG image to the file stream.
```c#
using Aspose.Slides;
int slideIndex = 0;
using (Presentation presentation = new Presentation("sample.pptx"))
{
ISlide slide = presentation.Slides[slideIndex];
using (FileStream svgStream = File.Create("output.svg"))
{
slide.WriteAsSvg(svgStream);
}
}
```
## **Generate an SVG with a Custom Shape ID**
Aspose.Slides can be used to generate an [SVG](https://docs.fileformat.com/page-description-language/svg/) from a slide with a custom shape `ID`. To achieve this, use the Id property from the [ISvgShape](https://reference.aspose.com/slides/net/aspose.slides.export/isvgshape) interface. The `CustomSvgShapeFormattingController` class can be used to set the shape ID.
```c#
using Aspose.Slides;
using Aspose.Slides.Export;
int slideIndex = 0;
using (Presentation presentation = new Presentation("sample.odp"))
{
ISlide slide = presentation.Slides[slideIndex];
SVGOptions svgOptions = new SVGOptions
{
ShapeFormattingController = new CustomSvgShapeFormattingController()
};
using (FileStream svgStream = File.Create("output.svg"))
{
slide.WriteAsSvg(svgStream, svgOptions);
}
}
```
```c#
using Aspose.Slides;
using Aspose.Slides.Export;
class CustomSvgShapeFormattingController : ISvgShapeFormattingController
{
private int m_shapeIndex;
public CustomSvgShapeFormattingController(int shapeStartIndex = 0)
{
m_shapeIndex = shapeStartIndex;
}
public void FormatShape(ISvgShape svgShape, IShape shape)
{
svgShape.Id = string.Format("shape-{0}", m_shapeIndex++);
}
}
```
## **Create a Slide Thumbnail Image**
Aspose.Slides helps you generate thumbnail images of slides. To generate a thumbnail of a slide using Aspose.Slides, follow the steps below:
1. Create an instance of the [Presentation](https://reference.aspose.com/slides/net/aspose.slides/presentation) class.
1. Get a reference to the slide by its index.
1. Create a thumbnail image of the referenced slide at the desired scale.
1. Save the thumbnail image in your preferred image format.
```c#
using Aspose.Slides;
int slideIndex = 0;
float scaleX = 1;
float scaleY = scaleX;
using (Presentation presentation = new Presentation("sample.pptx"))
{
ISlide slide = presentation.Slides[slideIndex];
using (IImage image = slide.GetImage(scaleX, scaleY))
{
image.Save("output.jpg", ImageFormat.Jpeg);
}
}
```
## **Create a Slide Thumbnail with User Defined Dimensions**
To create a slide thumbnail image with user-defined dimensions, follow the steps below:
1. Create an instance of the [Presentation](https://reference.aspose.com/slides/net/aspose.slides/presentation) class.
1. Get a reference to the slide by its index.
1. Generate a thumbnail image of the referenced slide with the specified dimensions.
1. Save the thumbnail image in your preferred image format.
```c#
using System.Drawing;
using Aspose.Slides;
int slideIndex = 0;
Size slideSize = new Size(1200, 800);
using (Presentation presentation = new Presentation("sample.odp"))
{
ISlide slide = presentation.Slides[slideIndex];
using (IImage image = slide.GetImage(slideSize))
{
image.Save("output.jpg", ImageFormat.Jpeg);
}
}
```
## **Create a Slide Thumbnail with Speaker Notes**
To generate a thumbnail of a slide with speaker notes using Aspose.Slides, follow the steps below:
1. Create an instance of the [RenderingOptions](https://reference.aspose.com/slides/net/aspose.slides.export/renderingoptions/) class.
1. Use the `RenderingOptions.SlidesLayoutOptions` property to set the position of the speaker notes.
1. Create an instance of the [Presentation](https://reference.aspose.com/slides/net/aspose.slides/presentation) class.
1. Get a reference to the slide by its index.
1. Generate a thumbnail image of the referenced slide using the rendering options.
1. Save the thumbnail image in your preferred image format.
```c#
using Aspose.Slides;
using Aspose.Slides.Export;
int slideIndex = 0;
RenderingOptions renderingOptions = new RenderingOptions
{
SlidesLayoutOptions = new NotesCommentsLayoutingOptions
{
NotesPosition = NotesPositions.BottomTruncated
}
};
using (Presentation presentation = new Presentation("sample.pptx"))
{
ISlide slide = presentation.Slides[slideIndex];
using (IImage image = slide.GetImage(renderingOptions))
{
image.Save("output.png", ImageFormat.Png);
}
}
```
## **Live Example**
Try [**Aspose.Slides Viewer**](https://products.aspose.app/slides/viewer/) free app to see what you can implement with Aspose.Slides API:
[](https://products.aspose.app/slides/viewer/)
## **FAQ**
### Can I embed a presentation viewer in an ASP.NET web application?
Yes. You can use Aspose.Slides on the server side to render slides as images or HTML and display them in the browser. Navigation and zoom features can be implemented with JavaScript for an interactive experience.
### What is the best way to display slides inside a custom .NET viewer?
The recommended approach is to render each slide as an image (e.g., PNG or SVG) or convert it to HTML using Aspose.Slides, then display the output inside a picture box (for desktop) or HTML container (for web).
### How do I handle large presentations with many slides?
For large decks, consider lazy-loading or on-demand rendering of slides. This means generating a slide's content only when the user navigates to it, reducing memory and load time.
## Related articles
- [Render Slide as Thumbnail to JPEG](https://docs.aspose.com/slides/net/render-slide-as-thumbnail-to-jpeg/)
- [Generating a Thumbnail from a Slide with User Defined Dimensions](https://docs.aspose.com/slides/net/generating-a-thumbnail-from-a-slide-with-user-defined-dimensions/)
- [Render Slide as Thumbnail to JPEG by User Defined Values](https://docs.aspose.com/slides/net/render-slide-as-thumbnail-to-jpeg-by-user-defined-values/)
# Handle Presentation Warnings in .NET
> Learn how to collect, classify, and act on warnings while loading, rendering, converting, and saving presentations with Aspose.Slides for .NET.
Source: https://docs.aspose.com/slides/net/presentation-warnings/
Updated: 2026-09-03
## **Overview**
Aspose.Slides can report recoverable problems while it loads, renders, converts, or saves a presentation. Examples include damaged source records, content that cannot be preserved, font substitution, and limitations of a target format. A warning callback lets an application record these conditions and decide whether the current operation may continue.
Implement the [IWarningCallback](https://reference.aspose.com/slides/net/aspose.slides.warnings/iwarningcallback/) interface and examine the [WarningType](https://reference.aspose.com/slides/net/aspose.slides.warnings/iwarninginfo/warningtype/) and [Description](https://reference.aspose.com/slides/net/aspose.slides.warnings/iwarninginfo/description/) properties supplied through [IWarningInfo](https://reference.aspose.com/slides/net/aspose.slides.warnings/iwarninginfo/). Return [ReturnAction.Continue](https://reference.aspose.com/slides/net/aspose.slides.warnings/returnaction/) to accept the warning or `ReturnAction.Abort` to stop the operation.
Use [LoadOptions.WarningCallback](https://reference.aspose.com/slides/net/aspose.slides/loadoptions/warningcallback/) for warnings raised while opening a presentation. Rendering and export option classes inherit [SaveOptions.WarningCallback](https://reference.aspose.com/slides/net/aspose.slides.export/saveoptions/warningcallback/), which receives warnings from slide rendering, conversion, and saving. Because the warning itself does not identify the application operation, associate each callback instance with an operation stage when you build a combined report.
## **Warnings and Exceptions**
A warning describes a condition from which Aspose.Slides can recover if the callback returns `ReturnAction.Continue`. An exception means the requested operation cannot complete normally; exceptions are not converted into warnings and cannot be handled by a warning policy.
Returning `ReturnAction.Abort` asks the warning dispatcher to terminate the current operation by raising an exception. The public exception depends on the operation and presentation format. For example, loading can surface a [PptxReadException](https://reference.aspose.com/slides/net/aspose.slides/pptxreadexception/) or [PptReadException](https://reference.aspose.com/slides/net/aspose.slides/pptreadexception/), while saving or exporting can surface a [PptxException](https://reference.aspose.com/slides/net/aspose.slides/pptxexception/). Handle the exception at the boundary of the operation and use the warning report to determine whether the application policy caused the termination instead of relying on one exception subtype or message. The callback records the warning before returning `ReturnAction.Abort`, ensuring that the reason remains available to the application.
## **Warning Categories**
The [WarningType](https://reference.aspose.com/slides/net/aspose.slides.warnings/warningtype/) enumeration provides the following categories:
| Warning type | Meaning | Typical policy |
| --- | --- | --- |
| `SourceFileCorruption` | The source presentation contains corruption that can make a document saved in its original format unusable. | Abort. |
| `DataLoss` | Text, charts, images, or other data may be absent after loading or saving. | Abort. |
| `MajorFormattingLoss` | The presentation may lose important formatting. | Abort in strict validation mode; otherwise record and continue. |
| `MinorFormattingLoss` | A limited formatting difference may occur. | Record for diagnostics and continue. |
| `CompatibilityIssue` | The result may not open or behave correctly in some applications or older versions. | Log and continue unless compatibility is mandatory. |
| `UnexpectedContent` | The source contains unsupported or unrecognized content whose effect may not yet be known. | Record and continue, or treat as an error in a strict policy. |
The category should drive the policy decision. Store `Description` for diagnostics, but do not depend on its wording for application logic because message text can vary between warning scenarios and product versions.
## **Collect and Classify Warnings**
The following example uses one application-level report for the complete processing pipeline. A separate callback instance labels warnings from loading, rendering, PDF conversion, and PPTX saving. The policy aborts on source corruption or data loss, optionally aborts on major formatting loss, and continues for other warnings.
```csharp
using System;
using System.Collections.Generic;
using Aspose.Slides;
using Aspose.Slides.Export;
using Aspose.Slides.Warnings;
internal static class PresentationWarningExample
{
public static void Main()
{
var report = new WarningReport();
var policy = new WarningPolicy(abortOnMajorFormattingLoss: true);
var completed = ProcessPresentation("input.pptx", report, policy);
Console.WriteLine(completed ? "Processing completed." : "Processing stopped.");
foreach (var entry in report.Entries)
{
Console.WriteLine($"[{entry.Stage}] {entry.Type}: {entry.Description}");
}
}
private static bool ProcessPresentation(string inputPath, WarningReport report, WarningPolicy policy)
{
try
{
var loadOptions = new LoadOptions
{
WarningCallback = new ReportingWarningCallback(OperationStage.Loading, report, policy)
};
using var presentation = new Presentation(inputPath, loadOptions);
if (!RenderFirstSlide(presentation, report, policy))
{
return false;
}
if (!ConvertToPdf(presentation, report, policy))
{
return false;
}
return SaveValidatedCopy(presentation, report, policy);
}
catch (Exception exception)
{
Console.Error.WriteLine($"Loading stopped: {exception.Message}");
return false;
}
}
private static bool RenderFirstSlide(Presentation presentation, WarningReport report, WarningPolicy policy)
{
try
{
var options = new RenderingOptions
{
WarningCallback = new ReportingWarningCallback(OperationStage.Rendering, report, policy)
};
using var image = presentation.Slides[0].GetImage(options);
image.Save("slide-1.png", ImageFormat.Png);
return true;
}
catch (Exception exception)
{
Console.Error.WriteLine($"Rendering stopped: {exception.Message}");
return false;
}
}
private static bool ConvertToPdf(Presentation presentation, WarningReport report, WarningPolicy policy)
{
try
{
var options = new PdfOptions
{
WarningCallback = new ReportingWarningCallback(OperationStage.Conversion, report, policy)
};
presentation.Save("converted.pdf", SaveFormat.Pdf, options);
return true;
}
catch (Exception exception)
{
Console.Error.WriteLine($"Conversion stopped: {exception.Message}");
return false;
}
}
private static bool SaveValidatedCopy(Presentation presentation, WarningReport report, WarningPolicy policy)
{
try
{
var options = new PptxOptions
{
WarningCallback = new ReportingWarningCallback(OperationStage.Saving, report, policy)
};
presentation.Save("validated-output.pptx", SaveFormat.Pptx, options);
return true;
}
catch (Exception exception)
{
Console.Error.WriteLine($"Saving stopped: {exception.Message}");
return false;
}
}
private enum OperationStage
{
Loading,
Rendering,
Conversion,
Saving
}
private sealed class WarningEntry
{
public WarningEntry(OperationStage stage, WarningType type, string description)
{
Stage = stage;
Type = type;
Description = description;
}
public OperationStage Stage { get; }
public WarningType Type { get; }
public string Description { get; }
}
private sealed class WarningReport
{
private readonly List _entries = new List();
public IReadOnlyList Entries => _entries;
public void Add(OperationStage stage, IWarningInfo warning)
{
_entries.Add(new WarningEntry(stage, warning.WarningType, warning.Description));
}
}
private sealed class WarningPolicy
{
private readonly bool _abortOnMajorFormattingLoss;
public WarningPolicy(bool abortOnMajorFormattingLoss)
{
_abortOnMajorFormattingLoss = abortOnMajorFormattingLoss;
}
public ReturnAction GetAction(WarningType warningType)
{
if (warningType == WarningType.SourceFileCorruption || warningType == WarningType.DataLoss)
{
return ReturnAction.Abort;
}
if (warningType == WarningType.MajorFormattingLoss && _abortOnMajorFormattingLoss)
{
return ReturnAction.Abort;
}
return ReturnAction.Continue;
}
}
private sealed class ReportingWarningCallback : IWarningCallback
{
private readonly OperationStage _stage;
private readonly WarningReport _report;
private readonly WarningPolicy _policy;
public ReportingWarningCallback(OperationStage stage, WarningReport report, WarningPolicy policy)
{
_stage = stage;
_report = report;
_policy = policy;
}
public ReturnAction Warning(IWarningInfo warning)
{
_report.Add(_stage, warning);
return _policy.GetAction(warning.WarningType);
}
}
}
```
Set `abortOnMajorFormattingLoss` to `false` when major formatting differences are acceptable. Compatibility issues, minor formatting loss, and unexpected content are still retained in the report even when the operation continues. Extend `WarningPolicy.GetAction` if the application must reject any of those categories.
## **Common Warning Scenarios**
Warnings can appear at different stages of a workflow:
- **Digital signatures:** A signed presentation can produce a warning during loading that its signature will be lost during processing. Aspose.Slides reports this `DataLoss` condition through [IPresentationSignedWarningInfo](https://reference.aspose.com/slides/net/aspose.slides.warnings/ipresentationsignedwarninginfo/). A load-stage callback lets the application reject the file or explicitly accept the reported loss.
- **Font substitution:** An unavailable font can be replaced while a slide is rendered or exported. Font substitution warnings are reported as `DataLoss`, so the strict policy above aborts even if the application would consider a particular replacement visually acceptable. To observe this behavior, use an input presentation containing text in a font unavailable to the runtime. The warning description identifies the substitution; configure the required fonts or [font substitution rules](https://docs.aspose.com/slides/net/font-substitution/) before retrying.
- **Unsupported or unexpected content:** A loader can encounter presentation records or features it does not recognize. Such warnings may use `UnexpectedContent`, or a more severe category when data or formatting is known to be affected.
- **Format compatibility:** Saving to another presentation format can omit features or produce a result that behaves differently in some applications. For example, saving a presentation with more than eight horizontal or eight vertical drawing guides to legacy PPT reports a `CompatibilityIssue`. The save-stage callback can record the loss and continue, or reject it if preserving all guides is required.
- **Loading behavior:** Loading options and legacy behaviors can also produce warnings. For example, [IObsoletePresLockingBehaviorWarningInfo](https://reference.aspose.com/slides/net/aspose.slides.warnings/iobsoletepreslockingbehaviorwarninginfo/) identifies use of an obsolete presentation-locking behavior as a `CompatibilityIssue`.
Warnings depend on the source document, target format, operation, and Aspose.Slides version. Do not assume that every file produces a warning or that a scenario always maps to only one category.
## **Safely Handle Aborted Operations**
When a callback returns `ReturnAction.Abort`, do not use an object that failed to load and do not assume that a rendering or save output is complete. The operation can terminate after creating an output file but before finishing it.
Save validated results to a separate path such as `validated-output.pptx`. Replace an existing presentation only after the operation finishes successfully, the warning report satisfies the application policy, and the output can be opened and checked. This avoids overwriting a valid source file with a partial or rejected result.
An empty warning report is not a guarantee that every source feature has been preserved. Apply any additional content and visual checks required by the application. See also [Open Presentations](https://docs.aspose.com/slides/net/open-presentation/) and [Save Presentations](https://docs.aspose.com/slides/net/save-presentation/).
## **FAQ**
**Can a warning callback handle every Aspose.Slides error?**
No. It handles recoverable conditions reported as warnings. Exceptions that occur independently of the callback must be handled by the application around the loading, rendering, conversion, or saving call.
**Does returning `ReturnAction.Continue` guarantee identical output?**
No. It only permits processing to continue. The reported condition can still cause data, formatting, or compatibility differences, so review the collected warning types and descriptions.
**How can an application identify the operation that produced a warning?**
Create a callback instance for each operation and store an application-defined stage together with `WarningType` and `Description`, as shown in the example.
## Related features
- [Handle font substitution warnings while rendering](https://docs.aspose.com/slides/features/font-rendering-warnings/)
- [Record export and rendering warnings](https://docs.aspose.com/slides/features/export-warning-log/)
# Product Overview
> Aspose.Slides for .NET lets you create, edit and convert PowerPoint (PPT, PPTX) and OpenDocument (ODP) presentations without Microsoft Office.
Source: https://docs.aspose.com/slides/net/product-overview/
Updated: 2026-10-26

## **Welcome to the Aspose.Slides for .NET!**
Aspose.Slides is a Microsoft PowerPoint® management API that allows applications to read, write, create, and modify PowerPoint presentations without using Microsoft PowerPoint®. The library supports working with presentations, slides, shapes, tables, text, animations, audio, video, and other presentation elements.
With Aspose.Slides, developers can open presentations from different sources, save them in various PowerPoint formats, export presentations to formats such as PDF, TIFF, XPS, SWF, HTML, and SVG, and save slides as images. The API also provides features for managing document properties, applying protection, previewing slides, editing slide content, working with slide notes, and handling advanced presentation elements such as embedded OLE objects.
## **Why You Should Use Aspose.Slides for .NET**
- Aspose.Slides for .NET is the first and only component that provides the functionalities required to manage PowerPoint® documents.
- Aspose.Slides for .NET offers a lot of key features such as managing texts, shapes, tables & animations, adding audio and video to slides, previewing slides, exporting slides to SVG, PDF, and other formats, and many more capabilities.
- Aspose.Slides for .NET not only lets you open PowerPoint files from different sources but also allows you to save your presentations in a variety of ways. For example, you can save your presentations in PPT; you can also save your slides as images.
- Aspose.Slides for .NET gives you almost all the features you may or may not find in Microsoft PowerPoint. Given the versatility of Aspose.Slides for .NET, besides tables and different kinds of shapes, you get to use it to add different kinds of frames—text, audio, and video frames—to your slides.
- Aspose.Slides for .NET is developed using Managed C#. You can use Aspose.Slides for .NET with any .NET language like C#, VB.NET, J#, etc. Aspose.Slides for .NET can also be used with any kind of application—web or Windows application.
- Aspose.Slides for .NET also provides fully featured demos and working examples to help developers get a better understanding of the API.
## **Aspose.Slides Features**
Aspose.Slides for .NET features can be divided into these groups:
1. Presentation Features.
1. Slides Features.
1. Graphics and Multimedia Features.
1. Table Features.
1. Text & Paragraph Features
1. Advanced Features
### **Presentation Features**
- Opening Microsoft PowerPoint presentations from different sources.
- Saving presentations in different Microsoft PowerPoint formats.
- Creating presentations from scratch.
- Converting presentations to PDF documents without using any other component
- Reading or modifying a presentation's document properties
- Applying protection on presentation
- Exporting presentation to PDF
- Exporting presentation to TIFF
- Exporting presentation to XPS
- Exporting presentation to SWF
- Exporting presentation to PDF Note / Tiff Notes
- Exporting presentation to HTML
### **Slide Features**
- Creating new slides from scratch and adding them to presentations.
- Accessing any slide through its position in a presentation.
- Copying or cloning slides to the same or another presentation.
- Editing and deleting slides.
- Copying masters with slides automatically.
- Previewing slides.
- Getting or setting a slide's name.
- Saving slides as images.
- Exporting slides to SVG format.
- Working with many masters in presentations.
- Filling slides background with any supported style.
- Adding new or managing slide notes.
- Setting new slide masters and styles dynamically.
- Adding or modifying slide show transition.
- Adding Morph Transitions
### **Graphics & Multimedia Features**
- Creating or managing shapes such as lines, rectangles, ellipses, and polylines.
- Managing line styles in shapes.
- Getting a shape's alternative text.
- Rotating flip shapes.
- Filling shapes in different styles—for example, solid, gradient, pattern, texture, and picture.
- Using any of 48 pre-defined patterns and 24 textures.
- Assigning links to shapes.
- Reading, modifying, and adding new animation effects to slides and shapes.
- Adding new pictures to presentations and managing existing ones.
- Adding new picture bullets to presentations and managing existing ones.
- Adding new audio frames to presentations and managing existing ones.
- Adding new video frames to presentations and managing existing ones.
### **Table Features**
- Creating tables from scratch and adding them to slides.
- Resizing and moving tables.
- Accessing any cell in a table.
- Changing the format and borders of any cell.
- Resizing columns and rows.
- Adding and deleting columns and rows.
- Setting border width and color for the whole table.
### **Text & Paragraph Features**
- Getting and setting texts in text placeholders and text frames.
- Getting a placeholder's type.
- Changing the text formatting in a text frame.
- Adding new fonts or managing the fonts already used in a presentation.
- Changing texts and Text Formatting.
- Creating or managing links to the text.
- Supporting tabs and effective tabs.
- Adding new text frames to almost any type of shape.
- Accessing and modifying margins and text wrap settings of text frames.
- Accessing and modifying paragraph indentation.
### **Advanced Features**
- Accessing OLE objects embedded in presentations.
- Locking presentations.
## **Technical support**
Aspose provides unlimited free technical support for all its products. The support is available to all users (including users with evaluation packages). If you need help with Aspose.Slides for .NET, consider the following:
- The main avenue for support is the [Aspose Forums](https://forum.aspose.com/). Post your question in the [Aspose.Slides forum](https://forum.aspose.com/c/slides/11)—and it will be answered within a few hours. Aspose.Slides support team directly answers questions posted on the forum.
- Please note that Aspose does not provide technical support over the phone. Phone support is only available for sales and purchase questions.
- When expecting a reply in the forums, please be patient and make evaluations for time zone differences.
If you have an issue with Aspose.Slides for .NET, follow these guidelines to resolve it in the most efficient manner:
- Check and confirm that you are using the latest Aspose.Slides for .NET version first before reporting the issue. Perhaps, the issue you experienced was already resolved in an update.
See [Aspose.Slides download](https://www.nuget.org/packages/Aspose.Slides.NET/) to get information on the latest product version.
- Before reporting an issue, you may want to go through our forums, this documentation, and the API Reference. Perhaps, the answer to your question was provided already.
- When reporting an issue, please include the original document and (if possible) a fragment of your code pertaining to the problem. If you need to attach multiple files, put them in a ZIP package.
You can safely attach your documents in Aspose.Forums because only you and Aspose developers have access to the attached files.
- Create and use one thread for a specific issue. If you experience another issue, you have to create another thread to report it.
This table lists important Aspose.Slides for .NET technical resources.
|**Resource**|**Description**|
| :- | :- |
|[Aspose.Slides for .NET home page](https://products.aspose.com/slides/net/)|Product home page.|
|[Aspose.Slide blog](https://blog.aspose.com/category/slides/)|Check this page regularly for information on new releases and useful tips on Aspose.Slides.|
|[Aspose.Slides for .NET download](https://www.nuget.org/packages/Aspose.Slides.NET/)|Download the latest version of Aspose.Slides here. We often release new versions.|
|[Aspose.Slides support forum](https://forum.aspose.com/c/slides/11)|Post your questions and issues here for a speedy resolution.|
|[Aspose.Slides for .NET product documentation](https://docs.aspose.com/slides/net/)|Full online documentation that contains this document and the Aspose.Slides API Reference.|
## **Trust Level Requirements**
On .NET Framework, Aspose.Slides requires full trust and does not run under ASP.NET partial trust such as Medium Trust. On .NET 6 and later there is no trust level to configure. See [Trust Level Requirements](https://docs.aspose.com/slides/net/declaration/).
## **FAQ**
### Does it support PDF conformance levels for archiving and accessibility (PDF/A and PDF/UA)?
Yes. You can save to PDF with PDF/A-2a/2b/2u, PDF/A-3a/3b, as well as PDF/UA by configuring [PDF export options](https://reference.aspose.com/slides/net/aspose.slides.export/pdfoptions/).
### Is there a font substitution mechanism and support for custom fonts to ensure correct rendering?
Yes. The library lets you [load custom fonts](https://docs.aspose.com/slides/net/custom-font/) and [define fallback rules](https://docs.aspose.com/slides/net/fallback-font/) so missing glyphs are substituted reliably during conversion and rendering.
### Can I detect whether a file is password-protected without fully opening it?
Yes. You can [inspect a presentation](https://docs.aspose.com/slides/net/examine-presentation/) to determine if it requires a password before loading the full document.
### Is Microsoft PowerPoint required for processing and conversions?
No. Aspose.Slides is a standalone engine; PowerPoint is not needed on the server or workstation.
### Is it safe to process presentations from multiple threads?
Yes, you can process different documents in parallel in separate threads; just avoid using the same presentation instance concurrently [across threads](https://docs.aspose.com/slides/net/multithreading/).
### Are macros preserved and can I manage VBA in PPTM/PPSM files?
Yes. Presentations with macros [are supported](https://docs.aspose.com/slides/net/presentation-via-vba/), and you can [inspect and manage VBA projects](https://reference.aspose.com/slides/net/aspose.slides.vba/) in those files.
### Can I convert PDF or HTML back into PowerPoint slides?
Yes. You can [import PDF pages or HTML content](https://docs.aspose.com/slides/net/import-presentation/) to create or populate slides in a presentation.
### Is XPS export supported, and can I control the quality and content of the XPS output?
Yes. [Export to XPS](https://docs.aspose.com/slides/net/convert-powerpoint-to-xps/) is available, and [save options](https://reference.aspose.com/slides/net/aspose.slides.export/xpsoptions/) allow you to tune output quality and included content.
### Can I convert slides to images and control the output quality?
Yes. Slides can be [rendered to PNG, JPEG, GIF, BMP, TIFF](https://docs.aspose.com/slides/net/convert-powerpoint-to-png/) and other formats with fine-grained control over size and quality.
### Are mathematical formulas supported (MathML/MathText) and can they be exported?
Yes. You can [create and edit mathematical text](https://docs.aspose.com/slides/net/powerpoint-math-equations/) and [export equations](https://docs.aspose.com/slides/net/exporting-math-equations/), including to MathML.
### How does the library handle encryption and passwords (open, set, remove)?
[It supports](https://docs.aspose.com/slides/net/password-protected-presentation/) opening encrypted presentations, setting or removing passwords for opening and modifying, and checking a file’s protection status.
Related feature: [Process presentations without PowerPoint](https://docs.aspose.com/slides/features/without-powerpoint/).
## Related articles
- [Product Support](https://docs.aspose.com/slides/net/product-support/)
- [Declaration](https://docs.aspose.com/slides/net/declaration/)
- [Aspose.Slides for .NET](https://docs.aspose.com/slides/net/)
# Product Support
> Get free, fast Aspose.Slides for .NET product support: forums, docs, updates, code help to fix issues across PowerPoint and OpenDocument workflows.
Source: https://docs.aspose.com/slides/net/product-support/
Updated: 2026-08-13
## **Overview**
This article explains how to get support for Aspose.Slides and how to report issues effectively. It describes the main support channel, provides recommendations for submitting a problem, and points to useful technical resources such as the product page, blog, downloads, support forum, documentation, and API Reference. The article also answers common questions about paid support, issue escalation, and support for older library versions.
## **Technical support**
Aspose provides unlimited free technical support for all its products. The support is available to all users (including users with evaluation packages).
When you need help with Aspose.Slides for .NET, consider the following:
- The main avenue for support is the [Aspose.Forums](https://forum.aspose.com/c/slides/11). Post your question in the Aspose.Slides forum—and it will be answered within a few hours. Aspose.Slides support team directly answers questions posted on the forum.
- Please note that Aspose does not provide technical support over the phone. Phone support is only available for sales and purchase questions.
- When expecting a reply in the forums, please be patient and make evaluations for time zone differences.
When you experience an issue with Aspose.Slides for .NET, follow these guidelines to resolve it in the most efficient manner:
- Check and confirm that you are using the latest Aspose.Slides for .NET version before reporting the issue. Perhaps, the issue you experienced was already resolved in an update.
See Aspose.Slides download to get information on the latest version.
- Before reporting an issue, you may want to go through our forums, this documentation, and the API Reference. Perhaps, the answer to your question was provided already.
- When reporting an issue, please include the original document and (if possible) a fragment of your code pertaining to the problem. If you need to attach multiple files, put them in a ZIP package.
You can safely attach your documents in Aspose.Forums because **only** you and Aspose developers have access to the attached files.
- Create and use one thread for a specific issue. If you experience another issue, you have to create another thread to report it.
## **Resources**
This table list useful Aspose.Slides for .NET technical resources.
|**Resource**|**Description**|
| :- | :- |
|[Aspose.Slides for .NET home page](https://products.aspose.com/slides/net/)|Product home page.|
|[Aspose.Slides blog](https://blog.aspose.com/category/slides/)|Check this section regularly for information on new releases and useful tips on Aspose.Slides.|
|[Aspose.Slides for .NET download](https://www.nuget.org/packages/Aspose.Slides.NET/)|Download the latest version of Aspose.Slides from this page. We often release new versions.|
|[Aspose.Slides support forum](https://forum.aspose.com/c/slides/11)|Post your questions and issues here for a speedy resolution.|
|[Aspose.Slides for .NET product documentation](https://docs.aspose.com/slides/net/)|Full online documentation that contains this document and the Aspose.Slides API Reference.|
## **FAQ**
### What paid support tiers are available and how do they differ?
[Developer, Business, and Enterprise](https://helpdesk.aspose.com/kb/faq/1-Introduction-to-Paid-Support-Services). They differ by the number of incidents included, response priority, and available communication channels.
### Can I escalate a bug directly to the engineering team?
Yes. [Paid support](https://helpdesk.aspose.com/) allows escalation to the developers when an issue requires deeper investigation.
### Are older library versions supported, and do you release fixes for them?
You can use older versions, but fixes are provided for the current release; patches for legacy versions are not issued.
## Related articles
- [Product Overview](https://docs.aspose.com/slides/net/product-overview/)
# Public API and Backwards Incompatible Changes in Aspose.Slides for .NET 14.10.0
> Review public API updates and breaking changes in Aspose.Slides for .NET to smoothly migrate your PowerPoint PPT, PPTX and ODP presentation solutions.
Source: https://docs.aspose.com/slides/net/public-api-and-backwards-incompatible-changes-in-aspose-slides-for-net-14-10-0/
Updated: 2026-08-13
This page lists all [added](https://docs.aspose.com/slides/net/public-api-and-backwards-incompatible-changes-in-aspose-slides-for-net-14-10-0/) or [removed](https://docs.aspose.com/slides/net/public-api-and-backwards-incompatible-changes-in-aspose-slides-for-net-14-10-0/) classes, methods, properties and so on, and other changes introduced with the Aspose.Slides for .NET 14.10.0 API.
## **Public API Chages**
#### **Aspose.Slides.FieldType.Footer Field Type Has Been Added**
The Footer field type has been added for the implementation of the possibility to create fields of this type and for valid presentation serialization.
#### **Enum Element ShapeElementFillSource.Own Has Been Deleted**
Enum element ShapeElementFillSource.Own has been deleted as duplicated. Use ShapeElementFillSource.Shape instead of ShapeElementFillSource.Own.
#### **Methods for Chart Data Points, Categories Removing Have Been Added**
The following methods, which allow to remove chart data point from a chart data point collection have been added:
IChartDataPointCollection.Remove(IChartDataPoint)
IChartDataPoint.Report()
The following method, which allows to remove a chart category from the containing collection has been added:
IChartCategory.Remove()
``` csharp
using Aspose.Slides;
using Aspose.Slides.Charts;
using Aspose.Slides.Export;
using (Presentation pres = new Presentation())
{
IChart chart = pres.Slides[0].Shapes.AddChart(ChartType.ClusteredColumn, 50, 50, 450, 400, true);
chart.ChartData.Categories[0].Remove(); //remove with ChartCategory.Remove()
chart.ChartData.Categories.Remove(chart.ChartData.Categories[0]); //remove with ChartCategoryCollection.Remove()
foreach (var ser in chart.ChartData.Series)
{
ser.DataPoints[0].Remove();//remove with ChartDataPoint.Remove()
ser.DataPoints.Remove(ser.DataPoints[0]);//ChartDataPointCollection.Remove()
}
pres.Save("chart.pptx", SaveFormat.Pptx);
}
```
#### **Obsolete Aspose.Slides.ParagraphFormat Properties Have Been Removed**
The properties BulletChar, BulletColor, BulletColorFormat, BulletFont, BulletHeight, BulletType, IsBulletHardColor, IsBulletHardFont, NumberedBulletStartWith, NumberedBulletStyle have been removed. They were marked as obsolete long time ago.
#### **Unuseful and Obsolete Constructors Have Been Removed**
The following constructors have been removed:
- Aspose.Slides.Effects.AlphaBiLevel(System.Single)
- Aspose.Slides.Effects.AlphaModulateFixed(System.Single)
- Aspose.Slides.Effects.AlphaReplace(System.Single)
- Aspose.Slides.Effects.BiLevel(System.Single)
- Aspose.Slides.Effects.Blur(System.Double,System.Boolean)
- Aspose.Slides.Effects.HSL(System.Single,System.Single,System.Single)
- Aspose.Slides.Effects.ImageTransformOperation(Aspose.Slides.Effects.ImageTransformOperationCollection)
- Aspose.Slides.Effects.Luminance(System.Single,System.Single)
- Aspose.Slides.Effects.Tint(System.Single,System.Single)
- Aspose.Slides.PortionFormat(Aspose.Slides.ParagraphFormat)
- Aspose.Slides.PortionFormat(Aspose.Slides.Portion)
- Aspose.Slides.PortionFormat(Aspose.Slides.PortionFormat)
## Related articles
- [Public API and Backwards Incompatible Changes in Aspose.Slides for .NET 15.11.0](https://docs.aspose.com/slides/net/public-api-and-backwards-incompatible-changes-in-aspose-slides-for-net-15-11-0/)
- [Public API and Backwards Incompatible Changes in Aspose.Slides for .NET 15.8.0](https://docs.aspose.com/slides/net/public-api-and-backwards-incompatible-changes-in-aspose-slides-for-net-15-8-0/)
- [Public API and Backwards Incompatible Changes in Aspose.Slides for .NET 16.1.0](https://docs.aspose.com/slides/net/public-api-and-backwards-incompatible-changes-in-aspose-slides-for-net-16-1-0/)
# Public API and Backwards Incompatible Changes in Aspose.Slides for .NET 14.2.0
> Review public API updates and breaking changes in Aspose.Slides for .NET to smoothly migrate your PowerPoint PPT, PPTX and ODP presentation solutions.
Source: https://docs.aspose.com/slides/net/public-api-and-backwards-incompatible-changes-in-aspose-slides-for-net-14-2-0/
Updated: 2026-08-13
## **Public API and Backwards Incompatible Changes**
We have made some changes in the Aspose.Slides for .NET 14.2.0 API. Some properties and methods have been removed and some have been moved to other namespace.
### **Methods Aspose.Slides.IPresentation.Write(…) Removed**
These methods wrote Presentation objects only to PPTX format file. In the new API, the Presentation class is for working with all formats. It is possible to use the Presentation.Save(…) methods to save the Presentation objects to all supported formats.
### **Classes Related to Theme Styles Moved to the Aspose.Slides.Theme Namespace**
The following classes have been moved from the Aspose.Slides namespace to the Aspose.Slides.Theme namespace.
- Types ColorScheme
- EffectStyle
- EffectStyleCollection
- EffectStyleCollectionEffectiveData
- ExtraColorSchemeCollection
- ExtraColorSchemeCollection
- ExtraColorScheme
- FillFormatCollection
- FillFormatCollectionEffectiveData
- FontScheme
- FontSchemeEffectiveData
- FormatScheme
- IColorScheme
- IEffectStyle
- IEffectStyleCollection
- IEffectStyleCollectionEffectiveData
- IEffectStyleEffectiveData
- IExtraColorScheme
- IExtraColorSchemeCollection
- IFillFormatCollection
- IFillFormatCollectionEffectiveData
- IFontScheme
- IFontSchemeEffectiveData
- IFormatScheme
- ILineFormatCollection
- ILineFormatCollectionEffectiveData
### **Changes from Aspose.Slides for .NET 8.X.0**
Aspose.Slides for .NET 8.4 features are added to Aspose.Slides for .NET 14.2.0
## Related articles
- [Public API and Backwards Incompatible Changes in Aspose.Slides for .NET 15.8.0](https://docs.aspose.com/slides/net/public-api-and-backwards-incompatible-changes-in-aspose-slides-for-net-15-8-0/)
- [Public API and Backwards Incompatible Changes in Aspose.Slides for .NET 15.11.0](https://docs.aspose.com/slides/net/public-api-and-backwards-incompatible-changes-in-aspose-slides-for-net-15-11-0/)
- [Public API and Backwards Incompatible Changes in Aspose.Slides for .NET 16.1.0](https://docs.aspose.com/slides/net/public-api-and-backwards-incompatible-changes-in-aspose-slides-for-net-16-1-0/)
# Public API and Backwards Incompatible Changes in Aspose.Slides for .NET 14.3.0
> Review public API updates and breaking changes in Aspose.Slides for .NET to smoothly migrate your PowerPoint PPT, PPTX and ODP presentation solutions.
Source: https://docs.aspose.com/slides/net/public-api-and-backwards-incompatible-changes-in-aspose-slides-for-net-14-3-0/
Updated: 2026-08-05
## **Public API and Backwards Incompatible Changes**
### **Aspose.Slides.ShapeThumbnailBounds Enumeration and Aspose.Slides.IShape.GetThumbnail() Methods Added**
The methods GetThumbnail() and GetThumbnail(ShapeThumbnailBounds bounds, float scaleX, float scaleY) are used to create a separate shape thumbnail. The ShapeThumbnailBounds enumeration defines the possible shape thumbnail bound types.
### **Property UniqueId Has Been Added to Aspose.Slides.IShape**
The Aspose.Slides.IShape.UniqueId property gets unique in a presentation scope shape identifier. These unique identifiers are stored in shape custom tags.
### **Signature of the SetGroupingItem Method Changed in IChartCategoryLevelsManager**
Signature of the IChartCategoryLevelsManager method
``` csharp
using Aspose.Slides.Charts;
void SetGroupingItem(int level, IChartDataCell value);
```
is obsolete now and replaced with the signature
``` csharp
void SetGroupingItem(int level, object value);
```
Now calls like
``` csharp
.SetGroupingItem(1, workbook.GetCell(0, "A2", "Group 1"));
```
must be changed to calls like
``` csharp
.SetGroupingItem(1, "Group 1");
```
Pass a value like "Group 1" into SetGroupingItem but not a value of type IChartDataCell. Constructing IChartDataCell with a defined worksheet, row and column for category levels must satisfy some requirements and has been encapsulated in the SetGroupingItem(int, object) method.
### **SlideId Property Added to the Aspose.Slides.IBaseSlide Interface**
Property SlideId gets an unique slide identifier.
### **SoundName Property Added to ISlideShowTransition**
Read-write string. Specifies a human readable name for the sound of the transition. The Sound property must be assigned to get or set the sound name. This name appears in the PowerPoint user interface when configuring the transition sound manually. May throw PptxException when the Sound property is not assigned.
### **Type of ChartSeriesGroup.Type Property Changed**
The ChartSeriesGroup.Type property has been changed from the ChartType enumeration to the new CombinableSeriesTypesGroup enumeration. The CombinableSeriesTypesGroup enum represents the groups of combinable series types.
### **Support for Generating Individual Shape Thumbnails Added**
Aspose.Slides.ShapeThumbnailBounds
New members in Aspose.Slides.IShape, Aspose.Slides.Shape:
public Bitmap GetThumbnail()
public Bitmap GetThumbnail(ShapeThumbnailBounds bounds, float scaleX, float scaleY)
## Related articles
- [Public API and Backwards Incompatible Changes in Aspose.Slides for .NET 15.11.0](https://docs.aspose.com/slides/net/public-api-and-backwards-incompatible-changes-in-aspose-slides-for-net-15-11-0/)
- [Public API and Backwards Incompatible Changes in Aspose.Slides for .NET 15.8.0](https://docs.aspose.com/slides/net/public-api-and-backwards-incompatible-changes-in-aspose-slides-for-net-15-8-0/)
- [Public API and Backwards Incompatible Changes in Aspose.Slides for .NET 16.1.0](https://docs.aspose.com/slides/net/public-api-and-backwards-incompatible-changes-in-aspose-slides-for-net-16-1-0/)
# Public API and Backwards Incompatible Changes in Aspose.Slides for .NET 14.4.0
> Review public API updates and breaking changes in Aspose.Slides for .NET to smoothly migrate your PowerPoint PPT, PPTX and ODP presentation solutions.
Source: https://docs.aspose.com/slides/net/public-api-and-backwards-incompatible-changes-in-aspose-slides-for-net-14-4-0/
Updated: 2026-08-05
## **Public API and Backwards Incompatible Changes**
### **Added Interfaces, Classes, Methods and Properties**
#### **Aspose.Slides.ILayoutSlide.HasDependingSlides Property Has Been Added**
The property Aspose.Slides.ILayoutSlide.HasDependingSlides returns true if there exists at least one slide that depends on this layout slide. For example:
``` csharp
using Aspose.Slides;
using (Presentation presentation = new Presentation("sample.pptx"))
{
ILayoutSlide layout = presentation.LayoutSlides[0];
if (!layout.HasDependingSlides)
layout.Remove();
}
```
#### **Aspose.Slides.ILayoutSlide.Remove() Method**
The method Aspose.Slides.ILayoutSlide.Remove() allows you to remove a layout from a presentation with minimum of code. For example:
``` csharp
using Aspose.Slides;
using (Presentation presentation = new Presentation("sample.pptx"))
{
ILayoutSlide layout = presentation.LayoutSlides[0];
if (!layout.HasDependingSlides)
layout.Remove();
}
```
#### **Aspose.Slides.ILayoutSlideCollection.Remove(ILayoutSlide) Method**
The method Aspose.Slides.ILayoutSlideCollection.Remove(ILayoutSlide) allows you to remove a layout from the collection. Code examples:
``` csharp
using Aspose.Slides;
using (Presentation presentation = new Presentation("sample.pptx"))
{
ILayoutSlide layout = presentation.LayoutSlides[0];
if (!layout.HasDependingSlides)
presentation.LayoutSlides.Remove(layout);
}
```
or
``` csharp
using Aspose.Slides;
using (Presentation presentation = new Presentation("sample.pptx"))
{
IMasterSlide masterSlide = presentation.Masters[0];
ILayoutSlide layout = masterSlide.LayoutSlides[0];
if (!layout.HasDependingSlides)
masterSlide.LayoutSlides.Remove(layout);
}
```
#### **Aspose.Slides.ILayoutSlideCollection.RemoveUnused()**
The method Aspose.Slides.ILayoutSlideCollection.RemoveUnused() allows you to remove unused layout slides (layout slides whose HasDependingSlides is false). Code examples:
``` csharp
using Aspose.Slides;
using (Presentation presentation = new Presentation("sample.pptx"))
{
presentation.LayoutSlides.RemoveUnused();
}
```
or
``` csharp
using Aspose.Slides;
using (Presentation presentation = new Presentation("sample.pptx"))
{
IMasterSlide masterSlide = presentation.Masters[0];
masterSlide.LayoutSlides.RemoveUnused();
}
```
#### **Aspose.Slides.IMasterSlide.HasDependingSlides Property**
The property Aspose.Slides.IMasterSlide.HasDependingSlides returns true if there exists at least one slide that depends on this master slide. For example:
``` csharp
using Aspose.Slides;
using (Presentation presentation = new Presentation("sample.pptx"))
{
IMasterSlide masterSlide = presentation.Masters[0];
if (!masterSlide.HasDependingSlides)
presentation.Masters.Remove(masterSlide);
}
```
#### **Aspose.Slides.ISlide.Remove() Method**
The method Aspose.Slides.ISlide.Remove() allows you to remove a slide from a presentation with minimum of code. For example:
``` csharp
using Aspose.Slides;
using (Presentation presentation = new Presentation("sample.pptx"))
{
ISlide slide = presentation.Slides[0];
slide.Remove();
}
```
#### **Aspose.Slides.SmartArt.ISmartArtNode.BulletFillFormat**
The property Aspose.Slides.SmartArt.ISmartArtNode.BulletFillFormat returns IFillFormat for a SmartArt node bullet if the layout provides bullets. It can be used to set the bullet image.
```csharp
// The path to the documents directory.
string dataDir = RunExamples.GetDataDir_SmartArts();
using (Presentation presentation = new Presentation())
{
ISmartArt smart = presentation.Slides[0].Shapes.AddSmartArt(10, 10, 500, 400, SmartArtLayoutType.VerticalPictureList);
ISmartArtNode node = smart.AllNodes[0];
if (node.BulletFillFormat != null)
{
Image img = (Image)new Bitmap(dataDir + "aspose-logo.jpg");
IPPImage image = presentation.Images.AddImage(img);
node.BulletFillFormat.FillType = FillType.Picture;
node.BulletFillFormat.PictureFillFormat.Picture.Image = image;
node.BulletFillFormat.PictureFillFormat.PictureFillMode = PictureFillMode.Stretch;
}
presentation.Save(dataDir +"out.pptx", SaveFormat.Pptx);
}
```
[Source: Examples-CSharp-SmartArts-BulletFillFormat-BulletFillFormat.cs](https://gist.githubusercontent.com/aspose-com-gists/a56eda38c01ad33dc653116c7bae4293/raw/60f36b65dcdc5f7368b2d455fe1ae74076eeae08/Examples-CSharp-SmartArts-BulletFillFormat-BulletFillFormat.cs)
#### **Aspose.Slides.SmartArt.ISmartArtNode.Level Property**
The property Aspose.Slides.SmartArt.ISmartArtNode.Level returns nested level for SmartArt nodes.
``` csharp
using Aspose.Slides;
using Aspose.Slides.SmartArt;
using (Presentation presentation = new Presentation("sample.pptx"))
{
ISmartArt diagram = (ISmartArt)presentation.Slides[0].Shapes[0];
ISmartArtNode node = diagram.AllNodes[0];
if (node.Level == 1)
node.TextFrame.Text = "First level";
}
```
#### **Aspose.Slides.SmartArt.ISmartArtNode.Position Property**
The property Aspose.Slides.SmartArt.ISmartArtNode.Position returns the position of a node among its siblings.
``` csharp
using Aspose.Slides;
using Aspose.Slides.SmartArt;
using (Presentation presentation = new Presentation("sample.pptx"))
{
ISmartArt diagram = (ISmartArt)presentation.Slides[0].Shapes[0];
ISmartArtNode node = diagram.AllNodes[0];
if (node.ChildNodes.Count > 3)
node.ChildNodes[0].Position++;
}
```
#### **Aspose.Slides.SmartArt.ISmartArtNode.Remove() Method Has Been Added**
The Aspose.Slides.SmartArt.ISmartArtNode.Remove() method allows the removal of a node from a diagram.
``` csharp
using Aspose.Slides;
using Aspose.Slides.SmartArt;
using (Presentation presentation = new Presentation("sample.pptx"))
{
ISmartArt diagram = (ISmartArt)presentation.Slides[0].Shapes[0];
ISmartArtNode node = diagram.AllNodes[0];
node.Remove();
}
```
#### **IGlobalLayoutSlideCollection Interface and GlobalLayoutSlideCollection Class**
The IGlobalLayoutSlideCollection interface and the GlobalLayoutSlideCollection class have been added into the Aspose.Slides namespace.
The GlobalLayoutSlideCollection class implements the IGlobalLayoutSlideCollection interface.
The IGlobalLayoutSlideCollection interface represents a collection of all layout slides in a presentation. The IPresentation.LayoutSlides property is of the type IGlobalLayoutSlideCollection. IGlobalLayoutSlideCollection extends the ILayoutSlideCollection interface with methods for adding and cloning layout slides in context of uniting of the individual collections of master's layout slides:
- ILayoutSlide AddClone(ILayoutSlide sourceLayout); – Can be used to add a copy of a specified layout slide to the presentation. This method keeps the source formatting (when cloning a layout between different presentations, the layout's master can be cloned too. The internal registry is used to track automatically cloned masters to prevent the creation of multiple clones of the same master slide.)
- ILayoutSlide AddClone(ILayoutSlide sourceLayout, IMasterSlide destMaster); – Used to add a copy of a specified layout slide to a presentation. The new layout will be linked to the defined master in the destination presentation. This option is analogue to copying or pasting with the **Use Destination Theme** option in Microsoft PowerPoint.
- ILayoutSlide Add(IMasterSlide master, SlideLayoutType layoutType, string layoutName); – Used to add a new layout slide to a presentation. Supported layout types: Title, TitleOnly, Blank, TitleAndObject, VerticalText, VerticalTitleAndText, TwoObjects, SectionHeader, TwoTextAndTwoObjects, TitleObjectAndCaption, PictureAndCaption, Custom. Layout name can be generated atomatically. An added layout of the type SlideLayoutType.Custom contains no placeholders and no shapes. An analogue of this method is the IMasterLayoutSlideCollection.Add(SlideLayoutType, string) method accessed with the IMasterSlide.LayoutSlides property.
#### **Interface IMasterLayoutSlideCollection and Class MasterLayoutSlideCollection**
The IMasterLayoutSlideCollection interface and MasterLayoutSlideCollection class had been added to the Aspose.Slides namespace. The MasterLayoutSlideCollection class implements the IMasterLayoutSlideCollection interface.
The IMasterLayoutSlideCollection interface represents a collections of all layout slides of a defined master slide. It extends the ILayoutSlideCollection interface with methods for adding, inserting, removing or cloning layout slides in the context of the individual collections of a master's layout slides:
``` csharp
using Aspose.Slides;
// Method signature:
// ILayoutSlide AddClone(ILayoutSlide sourceLayout);
// Code example that attaches a copy of the sourceLayout to the destMasterSlide:
using (Presentation presentation = new Presentation("sample.pptx"))
{
ILayoutSlide sourceLayout = presentation.LayoutSlides[0];
IMasterSlide destMasterSlide = presentation.Masters[0];
destMasterSlide.LayoutSlides.AddClone(sourceLayout);
}
```
The method can be used to add a copy of a specified layout slide to the end of the collection. The new layout will be linked with the parent master slide for this layout slides collection. So this is analogue of copying or pasting with the **Use Destination Theme** option in PowerPoint. Analogue of this method is the method IGlobalLayoutSlideCollection.AddClone(ILayoutSlide, IMasterSlide) accessed with the IPresentation.LayoutSlides property.
- ILayoutSlide InsertClone(int index, ILayoutSlide sourceLayout); – Used to insert a copy of a specified layout slide to specified position of the collection. New layout will be linked with parent master slide for this layout slides collection. So this is analogue of copying and pasting with the **Use Destination Theme** option in PowerPoint.
- ILayoutSlide Add(SlideLayoutType layoutType, string layoutName);
- ILayoutSlide Insert(int index, SlideLayoutType layoutType, string layoutName); – Used to add or inserts a new layout slide. Supported layout types: Title, TitleOnly, Blank, TitleAndObject, VerticalText, VerticalTitleAndText, TwoObjects, SectionHeader, TwoTextAndTwoObjects, TitleObjectAndCaption, PictureAndCaption, Custom. The layout name can be generated atomatically. Added layout of the SlideLayoutType.Custom type contains no placeholders and no shapes. Analogue of this method is the IGlobalLayoutSlideCollection.Add(IMasterSlide, SlideLayoutType, string) method accessed with the IPresentation.LayoutSlides property.
- void RemoveAt(int index); – Used to remove the layout at the specified index of the collection.
- void Reorder(int index, ILayoutSlide layoutSlide); – Used to move layout slide from the collection to the specified position.
### **Changed Methods and Properties**
#### **Signature of the Aspose.Slides.ISlideCollection.AddClone(ISlide, IMasterSlide) Method**
The signature of the ISlideCollection method:
ISlide AddClone(ISlide sourceSlide, IMasterSlide destMaster);
is obsolete now and is replaced with signature
ISlide AddClone(ISlide sourceSlide, IMasterSlide destMaster, bool allowCloneMissingLayout)
The allowCloneMissingLayout parameter specifies what to do if there is no appropriate layout in the destMaster for the new (cloned) slide. The appropriate layout is the layout with the same type or name as the layout of the source slide. If there is no appropriate layout in the specified master then the layout of the source slide will be cloned (if allowCloneMissingLayout is true) or a PptxEditException will be thrown (if allowCloneMissingLayout is false).
Call of the obsolete method like
AddClone(sourceSlide, destMaster);
assumes allowCloneMissingLayout is equal to false (that is, PptxEditException will be thrown if there is no appropriate layout). Functionally identical call that uses new signature looks like this:
AddClone(sourceSlide, destMaster, false);
If you want missing layouts to be automatically cloned instead PptxEditException throwing then pass the allowCloneMissingLayout parameter as true.
The same refers to the ISlideCollection method:
ISlide InsertClone(int index, ISlide sourceSlide, IMasterSlide destMaster);
is also obsolete now and is replaced with signature
ISlide InsertClone(int index, ISlide sourceSlide, IMasterSlide destMaster, bool allowCloneMissingLayout);
#### **Type of the Aspose.Slides.IMasterSlide.LayoutSlides Property**
The type of the Aspose.Slides.IMasterSlide.LayoutSlides property has been changed from ILayoutSlideCollection to the new IMasterLayoutSlideCollection interface. The IMasterLayoutSlideCollection interface is a descendant of the ILayoutSlideCollection so existing code needs no adaptations.
#### **Type of the Aspose.Slides.IPresentation.LayoutSlides Property Has Been Changed**
The type of the Aspose.Slides.IPresentation.LayoutSlides property has been changed from ILayoutSlideCollection to the new IGlobalLayoutSlideCollection interface. The IGlobalLayoutSlideCollection interface is a descendant of the ILayoutSlideCollection so existing code needs no adaptations.
## Related articles
- [Public API and Backwards Incompatible Changes in Aspose.Slides for .NET 15.11.0](https://docs.aspose.com/slides/net/public-api-and-backwards-incompatible-changes-in-aspose-slides-for-net-15-11-0/)
- [Public API and Backwards Incompatible Changes in Aspose.Slides for .NET 15.8.0](https://docs.aspose.com/slides/net/public-api-and-backwards-incompatible-changes-in-aspose-slides-for-net-15-8-0/)
- [Public API and Backwards Incompatible Changes in Aspose.Slides for .NET 14.6.0](https://docs.aspose.com/slides/net/public-api-and-backwards-incompatible-changes-in-aspose-slides-for-net-14-6-0/)
# Public API and Backwards Incompatible Changes in Aspose.Slides for .NET 14.5.0
> Review public API updates and breaking changes in Aspose.Slides for .NET to smoothly migrate your PowerPoint PPT, PPTX and ODP presentation solutions.
Source: https://docs.aspose.com/slides/net/public-api-and-backwards-incompatible-changes-in-aspose-slides-for-net-14-5-0/
Updated: 2026-08-13
This page lists all [added](https://docs.aspose.com/slides/net/public-api-and-backwards-incompatible-changes-in-aspose-slides-for-net-14-5-0/) classes, methods, properties and so on, any new [restrictions](https://docs.aspose.com/slides/net/public-api-and-backwards-incompatible-changes-in-aspose-slides-for-net-14-5-0/) and other [changes](https://docs.aspose.com/slides/net/public-api-and-backwards-incompatible-changes-in-aspose-slides-for-net-14-5-0/) introduced with the Aspose.Slides for .NET 14.5.0 API.
## **Public API and Backwards Incompatible Changes**
### **Added Interfaces, Classes, Properties and Methods**
#### **Added the Aspose.Slides.IPresentationInfo Interface and PresentationInfo Class**
Represent info about presentation.
- The Boolean property IsEncrypted gets True if a presentation is encrypted, otherwise gets False.
- The property LoadFormat LoadFormat gets type of a presentation.
#### **Added the Aspose.Slides.IShape.IsGrouped Property**
The property Aspose.Slides.IShape.IsGrouped determines whether a shape is grouped.
#### **Added the Aspose.Slides.IShape.ParentGroup Property**
The property Aspose.Slides.IShape.ParentGroup returns the parent GroupShape object if a shape is grouped. Otherwise it returns null.
#### **Added the Aspose.Slides.IShapeCollection.AddGroupShape() Method**
The method Aspose.Slides.IShapeCollection.AddGroupShape() creates a new GroupShape and adds it to the end of the collection.
The GroupShape frame size and position will be fitted to the content when new shape is added.
#### **Added the Aspose.Slides.IShapeCollection.Clear() Method**
The method Aspose.Slides.IShapeCollection.Clear() removes all shapes from the collection.
#### **Added the Aspose.Slides.IShapeCollection.InsertGroupShape(int) Method**
The method Aspose.Slides.IShapeCollection.InsertGroupShape(int) creates a new GroupShape and inserts it into the collection at the specified index position.
The GroupShape frame size and position will be fitted to content when a new shape is added.
#### **Added the IPresentationFactory.GetPresentationInfo(string file), IPresentatoinFactory.GetPresentationInfo(Stream stream) Methods**
These methods allow to receive information about a presentation file or stream without full loading the presentation.
#### **Added the IPresentationFactory PresentationFactory.Instance Property**
This property allows developers to use the factory functionality without instantiation.
### **Restrictions**
#### **Restrictions to IShape.Frame**
Restrictions have been added for using undefined values for IShape.Frame. Code that attempts to assign an undefined frame to IShape.Frame doesn't make sense in most case (particularly when the parent GroupShape is multiple nested into other {{GroupShape}}s). For example:
``` csharp
using Aspose.Slides;
Presentation presentation = new Presentation();
IShape shape = presentation.Slides[0].Shapes.AddAutoShape(ShapeType.Rectangle, 100, 100, 200, 100);
// Throws ArgumentException: the frame values must be defined.
shape.Frame = new ShapeFrame(float.NaN, float.NaN, float.NaN, float.NaN, NullableBool.NotDefined, NullableBool.NotDefined, float.NaN);
```
or
``` csharp
using Aspose.Slides;
Presentation presentation = new Presentation();
ISlide slide = presentation.Slides[0];
// Throws ArgumentException: x, y, width and height must be defined.
slide.Shapes.AddAutoShape(ShapeType.RoundCornerRectangle, float.NaN, float.NaN, float.NaN, float.NaN);
```
Such code can lead to unclear situations. So restrictions have been added for using undefined values for IShape.Frame. Values of x, y, width, height, flipH, flipV and rotationAngle must be defined (and not set to float.NaN or NullableBool.NotDefined). The example code above now throws an ArgumentException exception.
This applies to these use cases:
``` csharp
using Aspose.Slides;
Presentation presentation = new Presentation();
IShapeCollection shapes = presentation.Slides[0].Shapes;
// The x, y, width and height parameters cannot be float.NaN, and flipH, flipV
// cannot be NullableBool.NotDefined:
IShape shape = shapes.AddAutoShape(ShapeType.Rectangle, 100, 100, 200, 100);
shape.Frame = new ShapeFrame(100, 100, 200, 100, NullableBool.False, NullableBool.False, 0);
// The same restriction applies to every method that creates a shape:
// AddAudioFrameCD, AddAudioFrameEmbedded, AddAudioFrameLinked, AddAutoShape, AddChart,
// AddConnector, AddOleObjectFrame, AddPictureFrame, AddSmartArt, AddTable, AddVideoFrame,
// InsertAudioFrameEmbedded, InsertAudioFrameLinked, InsertAutoShape, InsertChart,
// InsertConnector, InsertOleObjectFrame, InsertPictureFrame, InsertTable, InsertVideoFrame.
```
But IShape.RawFrame frame properties can be undefined. This make sense when a shape is linked to a placeholder. Then the undefined shape frame values are overridden from the parent placeholder shape. If there is no parent placeholder shape, then that shape uses default values when it evaluates effective frame based on its IShape.RawFrame. The default values are 0 and NullableBool.False for x, y, width, height, flipH, flipV and rotationAngle. For example:
``` csharp
using Aspose.Slides;
using (Presentation presentation = new Presentation("sample.pptx"))
{
// The shape is linked to a placeholder
IShape shape = presentation.Slides[0].Shapes[0];
shape.RawFrame = new ShapeFrame(float.NaN, float.NaN, 100, float.NaN, NullableBool.NotDefined, NullableBool.NotDefined, 0);
// now shape inherits x, y, height, flipH, flipV values form placeholder and overrides width=100 and rotationAngle=0.
}
```
### **Changed Properties**
#### **Changed the Aspose.Slides.IShapeCollection.Parent Property Name and Type**
- The Aspose.Slides.IShapeCollection.Parent property's type has been changed from ISlideComponent to the new IGroupShape interface. The IGroupShape interface is a descendant of ISlideComponent so existing code needs no adaptations.
- The name of the Aspose.Slides.IShapeCollection.Parent property has been changed from Parent to ParentGroup.
#### **Changed the Aspose.Slides.IShapeFrame.FlipH, .FlipV Properties Types**
- The Aspose.Slides.IShapeFrame.FlipH property'a type has been changed from bool to NullableBool.
- The IShape.Frame property return an effective instance of IShapeFrame (all of which properties have defined effective values).
- The IShape.RawFrame property return an instance of IShapeFrame of which each property can have undefined value (particularly FlipH or FlipV can have value NullableBool.NotDefined).
## Related articles
- [Public API and Backwards Incompatible Changes in Aspose.Slides for .NET 16.1.0](https://docs.aspose.com/slides/net/public-api-and-backwards-incompatible-changes-in-aspose-slides-for-net-16-1-0/)
- [Public API and Backwards Incompatible Changes in Aspose.Slides for .NET 15.8.0](https://docs.aspose.com/slides/net/public-api-and-backwards-incompatible-changes-in-aspose-slides-for-net-15-8-0/)
- [Public API and Backwards Incompatible Changes in Aspose.Slides for .NET 15.11.0](https://docs.aspose.com/slides/net/public-api-and-backwards-incompatible-changes-in-aspose-slides-for-net-15-11-0/)
# Public API and Backwards Incompatible Changes in Aspose.Slides for .NET 14.6.0
> Review public API updates and breaking changes in Aspose.Slides for .NET to smoothly migrate your PowerPoint PPT, PPTX and ODP presentation solutions.
Source: https://docs.aspose.com/slides/net/public-api-and-backwards-incompatible-changes-in-aspose-slides-for-net-14-6-0/
Updated: 2026-08-13
This page lists all [added](https://docs.aspose.com/slides/net/public-api-and-backwards-incompatible-changes-in-aspose-slides-for-net-14-6-0/) classes, methods, properties and so on, any new [restrictions](https://docs.aspose.com/slides/net/public-api-and-backwards-incompatible-changes-in-aspose-slides-for-net-14-6-0/) and other [changes](https://docs.aspose.com/slides/net/public-api-and-backwards-incompatible-changes-in-aspose-slides-for-net-14-6-0/) introduced with the Aspose.Slides for .NET 14.6.0 API.
## **Public API Changes**
### **Added Interfaces, Methods and Properties**
#### **Added the Aspose.Slides.Charts.IErrorBarsFormat Interface**
This represents error bars of chart series.
In case of custom value type, to specify a value, use the ErrorBarCustomValues property of the specific data point in the DataPoints collection of series.
``` csharp
using Aspose.Slides;
using Aspose.Slides.Charts;
using Aspose.Slides.Export;
using (Presentation pres = new Presentation())
{
IChart chart = pres.Slides[0].Shapes.AddChart(ChartType.Bubble, 50, 50, 400, 300, true);
IErrorBarsFormat errBarX = chart.ChartData.Series[0].ErrorBarsXFormat;
IErrorBarsFormat errBarY = chart.ChartData.Series[0].ErrorBarsYFormat;
errBarX.IsVisible = true;
errBarY.IsVisible = true;
errBarX.ValueType = ErrorBarValueType.Fixed;
errBarX.Value = 0.1f;
errBarY.ValueType = ErrorBarValueType.Percentage;
errBarY.Value = 5;
errBarX.Type = ErrorBarType.Plus;
errBarY.Format.Line.Width = 2;
errBarX.HasEndCap = true;
pres.Save("ErrorBars.pptx", SaveFormat.Pptx);
}
```
#### **Added the Aspose.Slides.Charts.IErrorBarsCustomValues Interface**
When the IErrorBarsFormat.ValueType property is equal to Custom, to specify a value, use the ErrorBarCustomValues property of the specific data point in the DataPoints collection.
``` csharp
using Aspose.Slides;
using Aspose.Slides.Charts;
using Aspose.Slides.Export;
using (Presentation pres = new Presentation())
{
IChart chart = pres.Slides[0].Shapes.AddChart(ChartType.Bubble, 50, 50, 400, 300, true);
IChartSeries series = chart.ChartData.Series[0];
IErrorBarsFormat errBarX = series.ErrorBarsXFormat;
IErrorBarsFormat errBarY = series.ErrorBarsYFormat;
errBarX.IsVisible = true;
errBarY.IsVisible = true;
errBarX.ValueType = ErrorBarValueType.Custom;
errBarY.ValueType = ErrorBarValueType.Custom;
IChartDataPointCollection points = series.DataPoints;
points.DataSourceTypeForErrorBarsCustomValues.DataSourceTypeForXPlusValues = DataSourceType.DoubleLiterals;
points.DataSourceTypeForErrorBarsCustomValues.DataSourceTypeForXMinusValues = DataSourceType.DoubleLiterals;
points.DataSourceTypeForErrorBarsCustomValues.DataSourceTypeForYPlusValues = DataSourceType.DoubleLiterals;
points.DataSourceTypeForErrorBarsCustomValues.DataSourceTypeForYMinusValues = DataSourceType.DoubleLiterals;
for (int i = 0; i < points.Count; i++)
{
points[i].ErrorBarsCustomValues.XMinus.AsLiteralDouble = i + 1;
points[i].ErrorBarsCustomValues.XPlus.AsLiteralDouble = i + 1;
points[i].ErrorBarsCustomValues.YMinus.AsLiteralDouble = i + 1;
points[i].ErrorBarsCustomValues.YPlus.AsLiteralDouble = i + 1;
}
pres.Save("ErrorBarsCustomValues", SaveFormat.Pptx);
}
```
#### **Added the Aspose.Slides.Charts.IDataSourceTypeForErrorBarsCustomValues Interface**
Specifies types of values in the ChartDataPoint.ErrorBarsCustomValues properties list.
``` csharp
using Aspose.Slides;
using Aspose.Slides.Charts;
using Aspose.Slides.Export;
using (Presentation pres = new Presentation())
{
IChart chart = pres.Slides[0].Shapes.AddChart(ChartType.Bubble, 50, 50, 400, 300, true);
IChartSeries series = chart.ChartData.Series[0];
IErrorBarsFormat errBarX = series.ErrorBarsXFormat;
IErrorBarsFormat errBarY = series.ErrorBarsYFormat;
errBarX.IsVisible = true;
errBarY.IsVisible = true;
errBarX.ValueType = ErrorBarValueType.Custom;
errBarY.ValueType = ErrorBarValueType.Custom;
IChartDataPointCollection points = series.DataPoints;
points.DataSourceTypeForErrorBarsCustomValues.DataSourceTypeForXPlusValues = DataSourceType.DoubleLiterals;
points.DataSourceTypeForErrorBarsCustomValues.DataSourceTypeForXMinusValues = DataSourceType.DoubleLiterals;
points.DataSourceTypeForErrorBarsCustomValues.DataSourceTypeForYPlusValues = DataSourceType.DoubleLiterals;
points.DataSourceTypeForErrorBarsCustomValues.DataSourceTypeForYMinusValues = DataSourceType.DoubleLiterals;
for (int i = 0; i < points.Count; i++)
{
points[i].ErrorBarsCustomValues.XMinus.AsLiteralDouble = i + 1;
points[i].ErrorBarsCustomValues.XPlus.AsLiteralDouble = i + 1;
points[i].ErrorBarsCustomValues.YMinus.AsLiteralDouble = i + 1;
points[i].ErrorBarsCustomValues.YPlus.AsLiteralDouble = i + 1;
}
pres.Save("ErrorBarsCustomValues", SaveFormat.Pptx);
}
```
#### **Added the Aspose.Slides.IShapeCollection.AddClone(...), and .InsertClone(...) Methods**
The following methods add/insert a copy of a specified shape into the collection.
- Aspose.Slides.IShapeCollection.AddClone(IShape sourceShape)
- Aspose.Slides.IShapeCollection.AddClone(IShape sourceShape, float x, float y)
- Aspose.Slides.IShapeCollection.AddClone(IShape sourceShape, float x, float y, float width, float height)
- Aspose.Slides.IShapeCollection.InsertClone(int index, IShape sourceShape)
- Aspose.Slides.IShapeCollection.InsertClone(int index, IShape sourceShape, float x, float y)
- Aspose.Slides.IShapeCollection.InsertClone(int index, IShape sourceShape, float x, float y, float width, float height)
``` csharp
using Aspose.Slides;
using (Presentation srcPres = new Presentation("Source Frame.pptx"))
{
IShapeCollection sourceShapes = srcPres.Slides[0].Shapes;
ILayoutSlide blankLayout = srcPres.Masters[0].LayoutSlides.GetByType(SlideLayoutType.Blank);
ISlide destSlide = srcPres.Slides.AddEmptySlide(blankLayout);
IShapeCollection destShapes = destSlide.Shapes;
destShapes.AddClone(sourceShapes[1], 50, 150 + sourceShapes[0].Height);
destShapes.AddClone(sourceShapes[2]);
destShapes.AddClone(sourceShapes[3], 50, 200, 50, 50);
destShapes.AddClone(sourceShapes[4]);
destShapes.AddClone(sourceShapes[5], 300, 300, 50, 200);
destShapes.InsertClone(0, sourceShapes[0], 50, 150);
}
```
#### **Added the ViewType Enum, IViewProperties Interface, ViewProperties Class and IPresentation.ViewProperties Properties**
The IPresentation.ViewProperty allows developers to change the presentation view type and notes visibility when a presentation is opened in PowerPoint.
``` csharp
using Aspose.Slides;
using(Presentation p = new Presentation())
{
p.ViewProperties.LastView = ViewType.SlideMasterView;
}
```
## Related articles
- [Public API and Backwards Incompatible Changes in Aspose.Slides for .NET 15.8.0](https://docs.aspose.com/slides/net/public-api-and-backwards-incompatible-changes-in-aspose-slides-for-net-15-8-0/)
- [Public API and Backwards Incompatible Changes in Aspose.Slides for .NET 15.11.0](https://docs.aspose.com/slides/net/public-api-and-backwards-incompatible-changes-in-aspose-slides-for-net-15-11-0/)
- [Public API and Backwards Incompatible Changes in Aspose.Slides for .NET 16.1.0](https://docs.aspose.com/slides/net/public-api-and-backwards-incompatible-changes-in-aspose-slides-for-net-16-1-0/)
# Public API and Backwards Incompatible Changes in Aspose.Slides for .NET 14.7.0
> Review public API updates and breaking changes in Aspose.Slides for .NET to smoothly migrate your PowerPoint PPT, PPTX and ODP presentation solutions.
Source: https://docs.aspose.com/slides/net/public-api-and-backwards-incompatible-changes-in-aspose-slides-for-net-14-7-0/
Updated: 2026-08-13
This page lists all [added](https://docs.aspose.com/slides/net/public-api-and-backwards-incompatible-changes-in-aspose-slides-for-net-14-7-0/) or [removed](https://docs.aspose.com/slides/net/public-api-and-backwards-incompatible-changes-in-aspose-slides-for-net-14-7-0/) classes, methods, properties and so on, and other changes introduced with the Aspose.Slides for .NET 14.7.0 API.
## **Public API Changes**
### **Removed Constructors and Elements**
#### **Removed Some TransitionValueBase Subtype Constructors and TransitionValueFactory**
The constructors of some TransitionValueBase subtypes (specifically CornerDirectionTransition, EightDirectionTransition, EmptyTransition, InOutTransition, OptionalBlackTransition, OrientationTransition, SideDirectionTransition, SplitTransition, WheelTransition) are useless in the public API and so have been removed.
The related class TransitionValueFactory and its interface ITransitionValueFactory have been removed for the same reason.
#### **Removed the SoundAction Element from the Aspose.Slides.SlideShow.TransitionType Enumeration**
The SoundAction element was incorrect and not used. Sound settings are defined by the SlideShowTransition.SoundMode, .Sound, .SoundLoop, .SoundIsBuiltIn, .SoundName properties.
### **Added Classes and Interfaces**
#### **Added the FlyThroughTransition Class and IFlyThroughTransition Interface**
The Aspose.Slides.SlideShow.FlyThroughTransition class (and its interface Aspose.Slides.SlideShow.IFlyThroughTransition) relates to the Flythrough transition type supported from this release.
#### **Added the GlitterTransition Class, IGlitterTransition Interface and TransitionPattern Enumeration**
The Aspose.Slides.SlideShow.GlitterTransition class (and its interface Aspose.Slides.SlideShow.IGlitterTransition) relates to the Glitter transition type supported from this release.
The Aspose.Slides.SlideShow.TransitionPattern enumeration is used in this class and specifies a geometric pattern that tiles together to fill a larger area.
#### **Added the LeftRightDirectionTransition Class, ILeftRightDirectionTransition Interface and TransitionLeftRightDirectionType Enumeration**
The Aspose.Slides.SlideShow.LeftRightDirectionTransition class (and its interface Aspose.Slides.SlideShow.ILeftRightDirectionTransition) relates to the transition types Conveyor, Ferris, Flip, Gallery and Switch. All are supported from this release.
The Aspose.Slides.SlideShow.TransitionLeftRightDirectionType enumeration is used in this class and specifies a direction, restricted to the values left and right.
#### **Added New Elements to the Aspose.Slides.SlideShow.TransitionType Enumeration**
The Aspose.Slides.SlideShow.TransitionType enumeration has been extended with new elements.
- New elements related to PowerPoint 2010 transitions: Box, Conveyor, Cube, Doors, Ferris, Flash, Flip, Flythrough, Gallery, Glitter, Honeycomb, Orbit, Pan, Reveal, Ripple, Rotate, Shred, Switch, Vortex, Warp, WheelReverse, Window.
- New elements related to new PowerPoint 2013 transitions: Airplane, Crush, Curtains, Drape, FallOver, Fracture, Origami, PageCurlDouble, PageCurlSingle, PeelOff, Prestige, Wind.
#### **Added the RevealTransition Class and IRevealTransition Interface**
The Aspose.Slides.SlideShow.RevealTransition class (and its interface Aspose.Slides.SlideShow.IRevealTransition) relates to the Reveal transition type supported from this release.
#### **Added the RippleTransition Class, IRippleTransition Interface and TransitionCornerAndCenterDirectionType Enumeration**
The Aspose.Slides.SlideShow.RippleTransition class (and its interface Aspose.Slides.SlideShow.IRippleTransition) relates to the Ripple transition type supported from this release.
The Aspose.Slides.SlideShow.TransitionCornerAndCenterDirectionType enumeration is used in this class and specifies a direction, restricted to the corners and center.
## Related articles
- [Public API and Backwards Incompatible Changes in Aspose.Slides for .NET 15.8.0](https://docs.aspose.com/slides/net/public-api-and-backwards-incompatible-changes-in-aspose-slides-for-net-15-8-0/)
- [Public API and Backwards Incompatible Changes in Aspose.Slides for .NET 15.11.0](https://docs.aspose.com/slides/net/public-api-and-backwards-incompatible-changes-in-aspose-slides-for-net-15-11-0/)
- [Public API and Backwards Incompatible Changes in Aspose.Slides for .NET 14.10.0](https://docs.aspose.com/slides/net/public-api-and-backwards-incompatible-changes-in-aspose-slides-for-net-14-10-0/)
# Public API and Backwards Incompatible Changes in Aspose.Slides for .NET 14.8.0
> Review public API updates and breaking changes in Aspose.Slides for .NET to smoothly migrate your PowerPoint PPT, PPTX and ODP presentation solutions.
Source: https://docs.aspose.com/slides/net/public-api-and-backwards-incompatible-changes-in-aspose-slides-for-net-14-8-0/
Updated: 2026-08-13
This page lists all [added](https://docs.aspose.com/slides/net/public-api-and-backwards-incompatible-changes-in-aspose-slides-for-net-14-8-0/) or [removed](https://docs.aspose.com/slides/net/public-api-and-backwards-incompatible-changes-in-aspose-slides-for-net-14-8-0/) classes, methods, properties and so on, and other changes introduced with the Aspose.Slides for .NET 14.8.0 API.
## **Public API Changes**
### **Changed Properties**
#### **Added the IVbaProject Interface, Changed the Presentation.VbaProject Property**
The Presentation class' VbaProject property has been replaced. Instead of h3. Added Interfaces, Properties and Enumeration Options
the VbaProject property's raw byte representation of VBA project, the new IVbaProject interface implementation has been added.
Use the IVbaProject property to manage VBA projects embedded in a presentation. You can add new project references, edit existing modules and create new ones.
Also, you can create a new VBA project using the VbaProject class which implements the IVbaProject interface.
The following example shows the creation of a simple VBA project containing one module and adding two required references to the libraries.
``` csharp
using Aspose.Slides;
using Aspose.Slides.Export;
using Aspose.Slides.Vba;
using (Presentation pres = new Presentation())
{
// Create new VBA Project
pres.VbaProject = new VbaProject();
// Add empty module to the VBA project
IVbaModule module = pres.VbaProject.Modules.AddEmptyModule("Module");
// Set module source code
module.SourceCode =
@"Sub Test(oShape As Shape)
MsgBox ""Test""
End Sub";
// Create reference to
VbaReferenceOleTypeLib stdoleReference =
new VbaReferenceOleTypeLib("stdole", "*\\G{00020430-0000-0000-C000-000000000046}#2.0#0#C:\\Windows\\system32\\stdole2.tlb#OLE Automation");
// Create reference to Office
VbaReferenceOleTypeLib officeReference =
new VbaReferenceOleTypeLib("Office", "*\\G{2DF8D04C-5BFA-101B-BDE5-00AA0044DE52}#2.0#0#C:\\Program Files\\Common Files\\Microsoft Shared\\OFFICE14\\MSO.DLL#Microsoft Office 14.0 Object Library");
// Add references to the VBA project
pres.VbaProject.References.Add(stdoleReference);
pres.VbaProject.References.Add(officeReference);
pres.Save("test.pptm", SaveFormat.Pptm);
}
```
This example shows how to copy a VBA project from an existing presentation to a new one.
``` csharp
using Aspose.Slides;
using Aspose.Slides.Vba;
using (Presentation pres1 = new Presentation("PresentationWithMacroses.pptm"), pres2 = new Presentation())
{
pres2.VbaProject = new VbaProject(pres1.VbaProject.ToBinary());
}
```
### **Added Interfaces, Properties and Enumeration Options**
#### **Added the Aspose.Slides.Charts.IChartSeries.Overlap Property**
The Aspose.Slides.Charts.IChartSeries.Overlap property specifies how much bars and columns shall overlap on 2D charts (ranging from -100 to 100).
This is the property not only of this series but of all series in the parent series group - this is a projection of the appropriate group property. And so this property is read-only.
- Use the ParentSeriesGroup property to access the parent series group.
- Use the ParentSeriesGroup.Overlap read/write property to change value.
``` csharp
using Aspose.Slides;
using Aspose.Slides.Charts;
using (Presentation pres = new Presentation())
{
IChart chart = pres.Slides[0].Shapes.AddChart(ChartType.ClusteredColumn, 50, 50, 600, 400, true);
IChartSeriesCollection series = chart.ChartData.Series;
if (series[0].Overlap == 0)
{
series[0].ParentSeriesGroup.Overlap = -30;
}
}
```
#### **Added the Aspose.Slides.Charts.IChartSeriesGroup.Overlap Property**
The Aspose.Slides.Charts.IChartSeriesGroup.Overlap property specifies how much bars and columns should overlap on 2D charts (from -100 to 100).
``` csharp
using Aspose.Slides;
using Aspose.Slides.Charts;
using (Presentation pres = new Presentation())
{
IChart chart = pres.Slides[0].Shapes.AddChart(ChartType.ClusteredColumn, 50, 50, 600, 400, true);
IChartSeriesCollection series = chart.ChartData.Series;
series[0].ParentSeriesGroup.Overlap = -30;
}
```
#### **Added the ShapeThumbnailBounds.Appearance Enum Value**
This method of shape thumbnail creation allows you to generate a shape thumbnail in the bounds of its appearance. It takes into account all shape effects. The generated shape thumbnail is restricted by slide bounds.
``` csharp
using Aspose.Slides;
using (Presentation p = new Presentation("Presentation.pptx"))
{
using (IImage image = p.Slides[0].Shapes[0].GetImage(ShapeThumbnailBounds.Appearance, 1, 1))
{
image.Save("ShapeThumbnail.png", ImageFormat.Png);
}
}
```
## Related articles
- [Public API and Backwards Incompatible Changes in Aspose.Slides for .NET 15.8.0](https://docs.aspose.com/slides/net/public-api-and-backwards-incompatible-changes-in-aspose-slides-for-net-15-8-0/)
- [Public API and Backwards Incompatible Changes in Aspose.Slides for .NET 15.11.0](https://docs.aspose.com/slides/net/public-api-and-backwards-incompatible-changes-in-aspose-slides-for-net-15-11-0/)
- [Public API and Backwards Incompatible Changes in Aspose.Slides for .NET 16.1.0](https://docs.aspose.com/slides/net/public-api-and-backwards-incompatible-changes-in-aspose-slides-for-net-16-1-0/)
# Public API and Backwards Incompatible Changes in Aspose.Slides for .NET 14.9.0
> Review public API updates and breaking changes in Aspose.Slides for .NET to smoothly migrate your PowerPoint PPT, PPTX and ODP presentation solutions.
Source: https://docs.aspose.com/slides/net/public-api-and-backwards-incompatible-changes-in-aspose-slides-for-net-14-9-0/
Updated: 2026-08-13
This page lists all [added](https://docs.aspose.com/slides/net/public-api-and-backwards-incompatible-changes-in-aspose-slides-for-net-14-9-0/) or [removed](https://docs.aspose.com/slides/net/public-api-and-backwards-incompatible-changes-in-aspose-slides-for-net-14-9-0/) classes, methods, properties and so on, and other changes introduced with the Aspose.Slides for .NET 14.9.0 API.
## **Public API Changes**
#### **Inheritance from ICollection and Generic IEnumerable Interfaces Added to ISmartArtNodeCollection**
The class Aspose.Slides.SmartArt.SmartArtNodeCollection (and the related interface Aspose.Slides.SmartArt.ISmartArtNodeCollection) inherit the generic interface IEnumerable and interface ICollection.
#### **SmartArtLayoutType.Custom Enum Value Added**
The Custom SmartArt layout type represents a diagram with a custom template. Custom diagrams can only be loaded from a presentation file and can't be created via the ShapeCollection.AddSmartArt(x, y, width, height, SmartArtLayoutType.Custom) method.
#### **SmartArtShape Class and ISmartArtShape Interface Added**
The Aspose.Slides.SmartArt.SmartArtShape class (and its interface Aspose.Slides.SmartArt.ISmartArtShape) give access to individual shapes in a SmartArt diagram. SmartArtShape can be used to change FillFormat, LineFormat, adding Hyperlinks and other tasks.
**Note**: SmartArtShape does not support the IShape properties RawFrame, Frame, Rotation, X, Y, Width, Height and throws a System.NotSupportedException when attempting to access them.
Example of usage:
``` csharp
using System.Drawing;
using Aspose.Slides;
using Aspose.Slides.Export;
using Aspose.Slides.SmartArt;
using (Presentation pres = new Presentation())
{
ISmartArt smart = pres.Slides[0].Shapes.AddSmartArt(10, 10, 400, 300, SmartArtLayoutType.BasicBlockList);
ISmartArtNode node = smart.AllNodes[0];
foreach (ISmartArtShape shape in node.Shapes)
{
shape.FillFormat.FillType = FillType.Solid;
shape.FillFormat.SolidFillColor.Color = Color.Red;
}
pres.Save("out.pptx", SaveFormat.Pptx);
}
```
#### **SmartArtShapeCollection Class, ISmartArtShapeCollection Interface and ISmartArtNode.Shapes Property Added**
The Aspose.Slides.SmartArt.SmartArtShapeCollection class (and its interface Aspose.Slides.SmartArt.ISmartArtShapeCollection) add access to individual shapes in a SmartArt diagram. The collection contains shapes associated with SmartArtNode. The SmartArtNode.Shapes property returns collections of all shapes associated with the node.
**Note**: depending on the SmartArtLayoutType one SmartArtShape can be shared between several nodes.
``` csharp
using System.Drawing;
using Aspose.Slides;
using Aspose.Slides.Export;
using Aspose.Slides.SmartArt;
using (Presentation pres = new Presentation())
{
ISmartArt smart = pres.Slides[0].Shapes.AddSmartArt(10, 10, 400, 300, SmartArtLayoutType.BasicBlockList);
ISmartArtNode node = smart.AllNodes[0];
foreach (ISmartArtShape shape in node.Shapes)
{
shape.FillFormat.FillType = FillType.Solid;
shape.FillFormat.SolidFillColor.Color = Color.Red;
}
pres.Save("out.pptx", SaveFormat.Pptx);
}
```
#### **Methods for Saving Slides with Page Numbers Keeping Added**
The following methods have been added:
- void IPresentation.Save(string fname, int[] slides, SaveFormat format);
- void IPresentation.Save(string fname, int[] slides, SaveFormat format, ISaveOption options);
- void IPresentation.Save(Stream stream, int[] slides, SaveFormat format);
- void IPresentation.Save(Stream stream, int[] slides, SaveFormat format, ISaveOption options);
These methods allow developers to save specified presentation slides to PDF, XPS, TIFF, HTML formats. The 'slides' array is used to specify page numbers, starting from 1.
Save(string fname, int[] slides, SaveFormat format);
``` csharp
using Aspose.Slides;
using Aspose.Slides.Export;
using (Presentation presentation = new Presentation("presentation.pptx"))
{
int[] slides = new int[] { 2, 3, 5 }; //Array of slides positions
presentation.Save("output.pdf", slides, SaveFormat.Pdf);
}
```
#### **Methods for Replacing Images Added to PPImage, IPPImage**
New methods added:
- IPPImage.ReplaceImage(byte[] newImageData)
- IPPImage.ReplaceImage(Image newImage)
- IPPImage.ReplaceImage(IPPImage newImage)
``` csharp
using Aspose.Slides;
using Aspose.Slides.Export;
using (Presentation presentation = new Presentation("presentation.pptx"))
{
//First method
byte[] data = File.ReadAllBytes("image0.jpeg");
IPPImage oldImage = presentation.Images[0];
oldImage.ReplaceImage(data);
//Second method
IImage newImage = Images.FromFile("image1.png");
oldImage = presentation.Images[1];
oldImage.ReplaceImage(newImage);
//Third method
oldImage = presentation.Images[2];
oldImage.ReplaceImage(presentation.Images[3]);
presentation.Save("presentation_out.pptx", SaveFormat.Pptx);
}
```
## Related articles
- [Public API and Backwards Incompatible Changes in Aspose.Slides for .NET 15.11.0](https://docs.aspose.com/slides/net/public-api-and-backwards-incompatible-changes-in-aspose-slides-for-net-15-11-0/)
- [Public API and Backwards Incompatible Changes in Aspose.Slides for .NET 15.8.0](https://docs.aspose.com/slides/net/public-api-and-backwards-incompatible-changes-in-aspose-slides-for-net-15-8-0/)
- [Public API and Backwards Incompatible Changes in Aspose.Slides for .NET 16.1.0](https://docs.aspose.com/slides/net/public-api-and-backwards-incompatible-changes-in-aspose-slides-for-net-16-1-0/)
# Public API and Backwards Incompatible Changes in Aspose.Slides for .NET 15.1.0
> Review public API updates and breaking changes in Aspose.Slides for .NET to smoothly migrate your PowerPoint PPT, PPTX and ODP presentation solutions.
Source: https://docs.aspose.com/slides/net/public-api-and-backwards-incompatible-changes-in-aspose-slides-for-net-15-1-0/
Updated: 2026-08-13
This page lists all [added](https://docs.aspose.com/slides/net/public-api-and-backwards-incompatible-changes-in-aspose-slides-for-net-15-1-0/) or [removed](https://docs.aspose.com/slides/net/public-api-and-backwards-incompatible-changes-in-aspose-slides-for-net-15-1-0/) classes, methods, properties and so on, and other changes introduced with the Aspose.Slides for .NET 15.1.0 API.
## **Public API Chages**
#### **Fonts Substitutions Functinality Has Been Added**
Possibility to replace font globally across the presentation and temporary for rendering has been added.
New property "FontsManager" of Presentation class has been introduced. FontsManager class has following members:
**IFontSubstRuleCollection FontSubstRuleList** Property
This collection of IFontSubstRule instances using to substitute fonts during rendering. IFontSubstRule has SourceFont and DestFont properties implementing IFontData interface and ReplaceFontCondition property allowing to choose condition of replacement ("WhenInaccessible" or "Always").
**IFontData[] GetFonts()** Method
Using to retrieve all fonts uisng in the current presentation.
**ReplaceFont** Methods
Using to persistently replace font in the presentation.
The following example shows how to replace font in the presentation:
``` csharp
using Aspose.Slides;
using Aspose.Slides.Export;
Presentation pres = new Presentation("PresContainsArialFont.pptx");
IFontData sourceFont = new FontData("Arial");
IFontData destFont = new FontData("Times New Roman");
pres.FontsManager.ReplaceFont(sourceFont, destFont);
pres.Save("PresContainsTimesNoewRomanFont.pptx", SaveFormat.Pptx);
```
Another example, demonstrates font substitution for rendering when inaccessible:
``` csharp
using Aspose.Slides;
Presentation pres = new Presentation("PresContainsSomeRareFontFont.pptx");
IFontData sourceFont = new FontData("SomeRareFont");
IFontData destFont = new FontData("Arial");
IFontSubstRule fontSubstRule = new FontSubstRule(
sourceFont, destFont, FontSubstCondition.WhenInaccessible);
IFontSubstRuleCollection fontSubstRuleCollection = new FontSubstRuleCollection();
fontSubstRuleCollection.Add(fontSubstRule);
pres.FontsManager.FontSubstRuleList = fontSubstRuleCollection;
// Arial font will be used instead of SomeRareFont when inaccessible
pres.Slides[0].GetImage();
```
## Related articles
- [Public API and Backwards Incompatible Changes in Aspose.Slides for .NET 15.8.0](https://docs.aspose.com/slides/net/public-api-and-backwards-incompatible-changes-in-aspose-slides-for-net-15-8-0/)
- [Public API and Backwards Incompatible Changes in Aspose.Slides for .NET 15.11.0](https://docs.aspose.com/slides/net/public-api-and-backwards-incompatible-changes-in-aspose-slides-for-net-15-11-0/)
- [Public API and Backwards Incompatible Changes in Aspose.Slides for .NET 16.1.0](https://docs.aspose.com/slides/net/public-api-and-backwards-incompatible-changes-in-aspose-slides-for-net-16-1-0/)
# Public API and Backwards Incompatible Changes in Aspose.Slides for .NET 15.10.0
> Review public API updates and breaking changes in Aspose.Slides for .NET to smoothly migrate your PowerPoint PPT, PPTX and ODP presentation solutions.
Source: https://docs.aspose.com/slides/net/public-api-and-backwards-incompatible-changes-in-aspose-slides-for-net-15-10-0/
Updated: 2026-08-13
This page lists all [added](https://docs.aspose.com/slides/net/public-api-and-backwards-incompatible-changes-in-aspose-slides-for-net-15-10-0/) or [removed](https://docs.aspose.com/slides/net/public-api-and-backwards-incompatible-changes-in-aspose-slides-for-net-15-10-0/) classes, methods, properties and so on, and other changes introduced with the Aspose.Slides for .NET 15.10.0 API.
## **Public API Changes**
#### **A New VideoPlayerHtmlController Added to Support Export Media Files to HTML**
The new public class VideoPlayerHtmlController has been added to Aspose.Slides.Export namespace. Using the instance of this class user can export video and audio files into HTML.
VideoPlayerHtmlController contructors accepts the following parameters:
path: The path where video and audio files will be generated
fileName: The name of the HTML file
baseUri: The base URI which will be used to generate links
Usage example:
``` csharp
using Aspose.Slides;
using Aspose.Slides.Export;
using (Presentation pres = new Presentation("example.pptx"))
{
const string path = "path";
const string fileName = "video.html";
const string baseUri = "http://www.example.com/";
VideoPlayerHtmlController controller = new VideoPlayerHtmlController(path: path, fileName: fileName, baseUri: baseUri);
HtmlOptions htmlOptions = new HtmlOptions(controller);
SVGOptions svgOptions = new SVGOptions(controller);
htmlOptions.HtmlFormatter = HtmlFormatter.CreateCustomFormatter(controller);
htmlOptions.SlideImageFormat = SlideImageFormat.Svg(svgOptions);
pres.Save(Path.Combine(path, fileName), SaveFormat.Html, htmlOptions);
}
```
#### **Chart Series Animation API Has Been Added**
The new 2 methods have been added to Aspose.Slides.Animation.ISequence interface.
``` csharp
using Aspose.Slides.Animation;
using Aspose.Slides.Charts;
IEffect AddEffect(IChart chart, EffectChartMajorGroupingType type, int index, EffectType effectType, EffectSubtype subtype, EffectTriggerType triggerType);
IEffect AddEffect(IChart chart, EffectChartMinorGroupingType type, int seriesIndex, int categoriesIndex, EffectType effectType, EffectSubtype subtype, EffectTriggerType triggerType);
```
These methods are intended to support the chart's elements animations:
by series
by categories
by series elements
by categories elements
The two new enums EffectChartMajorGroupingType and EffectChartMinorGroupingType related to the chart's elements animation were introduced.
To add a series animation to the chart the following code may be used:
``` csharp
using Aspose.Slides;
using Aspose.Slides.Animation;
using Aspose.Slides.Charts;
using Aspose.Slides.Export;
string inFileName = "sample.pptx";
string outFileName = "output.pptx";
using (Presentation pres = new Presentation(inFileName))
{
var slide = pres.Slides[0] as Slide;
var shapes = slide.Shapes as ShapeCollection;
var chart = shapes[0] as IChart;
slide.Timeline.MainSequence.AddEffect(chart, EffectType.Fade, EffectSubtype.None,
EffectTriggerType.AfterPrevious);
((Sequence)slide.Timeline.MainSequence).AddEffect(chart,
EffectChartMajorGroupingType.BySeries, 0,
EffectType.Appear, EffectSubtype.None, EffectTriggerType.AfterPrevious);
((Sequence)slide.Timeline.MainSequence).AddEffect(chart,
EffectChartMajorGroupingType.BySeries, 1,
EffectType.Appear, EffectSubtype.None, EffectTriggerType.AfterPrevious);
((Sequence)slide.Timeline.MainSequence).AddEffect(chart,
EffectChartMajorGroupingType.BySeries, 2,
EffectType.Appear, EffectSubtype.None, EffectTriggerType.AfterPrevious);
((Sequence)slide.Timeline.MainSequence).AddEffect(chart,
EffectChartMajorGroupingType.BySeries, 3,
EffectType.Appear, EffectSubtype.None, EffectTriggerType.AfterPrevious);
pres.Save(outFileName, SaveFormat.Pptx);
}
```
Categories animation:
``` csharp
using Aspose.Slides;
using Aspose.Slides.Animation;
using Aspose.Slides.Charts;
using Aspose.Slides.Export;
string inFileName = "sample.pptx";
string outFileName = "output.pptx";
using (Presentation pres = new Presentation(inFileName))
{
var slide = pres.Slides[0] as Slide;
var shapes = slide.Shapes as ShapeCollection;
var chart = shapes[0] as IChart;
slide.Timeline.MainSequence.AddEffect(chart, EffectType.Fade, EffectSubtype.None,
EffectTriggerType.AfterPrevious);
((Sequence)slide.Timeline.MainSequence).AddEffect(chart,
EffectChartMajorGroupingType.ByCategory, 0,
EffectType.Appear, EffectSubtype.None, EffectTriggerType.AfterPrevious);
((Sequence)slide.Timeline.MainSequence).AddEffect(chart,
EffectChartMajorGroupingType.ByCategory, 1,
EffectType.Appear, EffectSubtype.None, EffectTriggerType.AfterPrevious);
((Sequence)slide.Timeline.MainSequence).AddEffect(chart,
EffectChartMajorGroupingType.ByCategory, 2,
EffectType.Appear, EffectSubtype.None, EffectTriggerType.AfterPrevious);
((Sequence)slide.Timeline.MainSequence).AddEffect(chart,
EffectChartMajorGroupingType.ByCategory, 3,
EffectType.Appear, EffectSubtype.None, EffectTriggerType.AfterPrevious);
pres.Save(outFileName, SaveFormat.Pptx);
}
```
Series elements animation:
``` csharp
using Aspose.Slides;
using Aspose.Slides.Animation;
using Aspose.Slides.Charts;
using Aspose.Slides.Export;
string inFileName = "sample.pptx";
string outFileName = "output.pptx";
using (Presentation pres = new Presentation(inFileName))
{
var slide = pres.Slides[0] as Slide;
var shapes = slide.Shapes as ShapeCollection;
var chart = shapes[0] as IChart;
slide.Timeline.MainSequence.AddEffect(chart, EffectType.Fade, EffectSubtype.None,
EffectTriggerType.AfterPrevious);
((Sequence)slide.Timeline.MainSequence).AddEffect(chart,
EffectChartMinorGroupingType.ByElementInSeries, 0, 0,
EffectType.Appear, EffectSubtype.None, EffectTriggerType.AfterPrevious);
((Sequence)slide.Timeline.MainSequence).AddEffect(chart,
EffectChartMinorGroupingType.ByElementInSeries, 0, 1,
EffectType.Appear, EffectSubtype.None, EffectTriggerType.AfterPrevious);
((Sequence)slide.Timeline.MainSequence).AddEffect(chart,
EffectChartMinorGroupingType.ByElementInSeries, 0, 2,
EffectType.Appear, EffectSubtype.None, EffectTriggerType.AfterPrevious);
((Sequence)slide.Timeline.MainSequence).AddEffect(chart,
EffectChartMinorGroupingType.ByElementInSeries, 0, 3,
EffectType.Appear, EffectSubtype.None, EffectTriggerType.AfterPrevious);
((Sequence)slide.Timeline.MainSequence).AddEffect(chart,
EffectChartMinorGroupingType.ByElementInSeries, 1, 0,
EffectType.Appear, EffectSubtype.None, EffectTriggerType.AfterPrevious);
((Sequence)slide.Timeline.MainSequence).AddEffect(chart,
EffectChartMinorGroupingType.ByElementInSeries, 1, 1,
EffectType.Appear, EffectSubtype.None, EffectTriggerType.AfterPrevious);
((Sequence)slide.Timeline.MainSequence).AddEffect(chart,
EffectChartMinorGroupingType.ByElementInSeries, 1, 2,
EffectType.Appear, EffectSubtype.None, EffectTriggerType.AfterPrevious);
((Sequence)slide.Timeline.MainSequence).AddEffect(chart,
EffectChartMinorGroupingType.ByElementInSeries, 1, 3,
EffectType.Appear, EffectSubtype.None, EffectTriggerType.AfterPrevious);
((Sequence)slide.Timeline.MainSequence).AddEffect(chart,
EffectChartMinorGroupingType.ByElementInSeries, 2, 0,
EffectType.Appear, EffectSubtype.None, EffectTriggerType.AfterPrevious);
((Sequence)slide.Timeline.MainSequence).AddEffect(chart,
EffectChartMinorGroupingType.ByElementInSeries, 2, 1,
EffectType.Appear, EffectSubtype.None, EffectTriggerType.AfterPrevious);
((Sequence)slide.Timeline.MainSequence).AddEffect(chart,
EffectChartMinorGroupingType.ByElementInSeries, 2, 2,
EffectType.Appear, EffectSubtype.None, EffectTriggerType.AfterPrevious);
((Sequence)slide.Timeline.MainSequence).AddEffect(chart,
EffectChartMinorGroupingType.ByElementInSeries, 2, 3,
EffectType.Appear, EffectSubtype.None, EffectTriggerType.AfterPrevious);
pres.Save(outFileName, SaveFormat.Pptx);
}
```
Categories elements animation:
``` csharp
using Aspose.Slides;
using Aspose.Slides.Animation;
using Aspose.Slides.Charts;
using Aspose.Slides.Export;
string inFileName = "sample.pptx";
string outFileName = "output.pptx";
using (Presentation pres = new Presentation(inFileName))
{
var slide = pres.Slides[0] as Slide;
var shapes = slide.Shapes as ShapeCollection;
var chart = shapes[0] as IChart;
slide.Timeline.MainSequence.AddEffect(chart, EffectType.Fade, EffectSubtype.None,
EffectTriggerType.AfterPrevious);
((Sequence)slide.Timeline.MainSequence).AddEffect(chart,
EffectChartMinorGroupingType.ByElementInCategory, 0, 0,
EffectType.Appear, EffectSubtype.None, EffectTriggerType.AfterPrevious);
((Sequence)slide.Timeline.MainSequence).AddEffect(chart,
EffectChartMinorGroupingType.ByElementInCategory, 0, 1,
EffectType.Appear, EffectSubtype.None, EffectTriggerType.AfterPrevious);
((Sequence)slide.Timeline.MainSequence).AddEffect(chart,
EffectChartMinorGroupingType.ByElementInCategory, 0, 2,
EffectType.Appear, EffectSubtype.None, EffectTriggerType.AfterPrevious);
((Sequence)slide.Timeline.MainSequence).AddEffect(chart,
EffectChartMinorGroupingType.ByElementInCategory, 0, 3,
EffectType.Appear, EffectSubtype.None, EffectTriggerType.AfterPrevious);
((Sequence)slide.Timeline.MainSequence).AddEffect(chart,
EffectChartMinorGroupingType.ByElementInCategory, 1, 0,
EffectType.Appear, EffectSubtype.None, EffectTriggerType.AfterPrevious);
((Sequence)slide.Timeline.MainSequence).AddEffect(chart,
EffectChartMinorGroupingType.ByElementInCategory, 1, 1,
EffectType.Appear, EffectSubtype.None, EffectTriggerType.AfterPrevious);
((Sequence)slide.Timeline.MainSequence).AddEffect(chart,
EffectChartMinorGroupingType.ByElementInCategory, 1, 2,
EffectType.Appear, EffectSubtype.None, EffectTriggerType.AfterPrevious);
((Sequence)slide.Timeline.MainSequence).AddEffect(chart,
EffectChartMinorGroupingType.ByElementInCategory, 1, 3,
EffectType.Appear, EffectSubtype.None, EffectTriggerType.AfterPrevious);
((Sequence)slide.Timeline.MainSequence).AddEffect(chart,
EffectChartMinorGroupingType.ByElementInCategory, 2, 0,
EffectType.Appear, EffectSubtype.None, EffectTriggerType.AfterPrevious);
((Sequence)slide.Timeline.MainSequence).AddEffect(chart,
EffectChartMinorGroupingType.ByElementInCategory, 2, 1,
EffectType.Appear, EffectSubtype.None, EffectTriggerType.AfterPrevious);
((Sequence)slide.Timeline.MainSequence).AddEffect(chart,
EffectChartMinorGroupingType.ByElementInCategory, 2, 2,
EffectType.Appear, EffectSubtype.None, EffectTriggerType.AfterPrevious);
((Sequence)slide.Timeline.MainSequence).AddEffect(chart,
EffectChartMinorGroupingType.ByElementInCategory, 2, 3,
EffectType.Appear, EffectSubtype.None, EffectTriggerType.AfterPrevious);
pres.Save(outFileName, SaveFormat.Pptx);
}
```
## Related articles
- [Public API and Backwards Incompatible Changes in Aspose.Slides for .NET 15.8.0](https://docs.aspose.com/slides/net/public-api-and-backwards-incompatible-changes-in-aspose-slides-for-net-15-8-0/)
- [Public API and Backwards Incompatible Changes in Aspose.Slides for .NET 15.11.0](https://docs.aspose.com/slides/net/public-api-and-backwards-incompatible-changes-in-aspose-slides-for-net-15-11-0/)
- [Public API and Backwards Incompatible Changes in Aspose.Slides for .NET 14.2.0](https://docs.aspose.com/slides/net/public-api-and-backwards-incompatible-changes-in-aspose-slides-for-net-14-2-0/)
# Public API and Backwards Incompatible Changes in Aspose.Slides for .NET 15.11.0
> Review public API updates and breaking changes in Aspose.Slides for .NET to smoothly migrate your PowerPoint PPT, PPTX and ODP presentation solutions.
Source: https://docs.aspose.com/slides/net/public-api-and-backwards-incompatible-changes-in-aspose-slides-for-net-15-11-0/
Updated: 2026-08-13
This page lists all [added](https://docs.aspose.com/slides/net/public-api-and-backwards-incompatible-changes-in-aspose-slides-for-net-15-11-0/) or [removed](https://docs.aspose.com/slides/net/public-api-and-backwards-incompatible-changes-in-aspose-slides-for-net-15-11-0/) classes, methods, properties and so on, and other changes introduced with the Aspose.Slides for .NET 15.11.0 API.
## **Public API Changes**
#### **Obsolete Properties in DataLabelCollection Class Have Been Deleted**
Obsolete properties in DataLabelCollection class have been deleted:
Aspose.Slides.Charts.DataLabelCollection.Delete
Aspose.Slides.Charts.DataLabelCollection.Format
Aspose.Slides.Charts.DataLabelCollection.LinkedSource
Aspose.Slides.Charts.DataLabelCollection.NumberFormat
Aspose.Slides.Charts.DataLabelCollection.Position
Aspose.Slides.Charts.DataLabelCollection.Separator
Aspose.Slides.Charts.DataLabelCollection.ShowBubbleSize
Aspose.Slides.Charts.DataLabelCollection.ShowCategoryName
Aspose.Slides.Charts.DataLabelCollection.ShowLeaderLines
Aspose.Slides.Charts.DataLabelCollection.ShowLegendKey
Aspose.Slides.Charts.DataLabelCollection.ShowPercentage
Aspose.Slides.Charts.DataLabelCollection.ShowSeriesName
Aspose.Slides.Charts.DataLabelCollection.ShowValue
#### **The New Property FirstSlideNumber Has Been Added to the Presentation Class**
The new property FirstSlideNumber added to Presentation allows to get or to set the number of first slide in a presentation.
When a new FirstSlideNumber value is specified all slide numbers are recalculated.
``` csharp
using Aspose.Slides;
using Aspose.Slides.Export;
string path = "sample.pptx";
string newPath = "output.pptx";
using (var pres = new Presentation(path))
{
int firstSlideNumber = pres.FirstSlideNumber;
pres.FirstSlideNumber = 10;
pres.Save(newPath, SaveFormat.Pptx);
}
```
## Related articles
- [Public API and Backwards Incompatible Changes in Aspose.Slides for .NET 15.8.0](https://docs.aspose.com/slides/net/public-api-and-backwards-incompatible-changes-in-aspose-slides-for-net-15-8-0/)
- [Public API and Backwards Incompatible Changes in Aspose.Slides for .NET 14.10.0](https://docs.aspose.com/slides/net/public-api-and-backwards-incompatible-changes-in-aspose-slides-for-net-14-10-0/)
- [Public API and Backwards Incompatible Changes in Aspose.Slides for .NET 16.1.0](https://docs.aspose.com/slides/net/public-api-and-backwards-incompatible-changes-in-aspose-slides-for-net-16-1-0/)
# Public API and Backwards Incompatible Changes in Aspose.Slides for .NET 15.2.0
> Review public API updates and breaking changes in Aspose.Slides for .NET to smoothly migrate your PowerPoint PPT, PPTX and ODP presentation solutions.
Source: https://docs.aspose.com/slides/net/public-api-and-backwards-incompatible-changes-in-aspose-slides-for-net-15-2-0/
Updated: 2026-08-13
This page lists all [added](https://docs.aspose.com/slides/net/public-api-and-backwards-incompatible-changes-in-aspose-slides-for-net-15-2-0/) or [removed](https://docs.aspose.com/slides/net/public-api-and-backwards-incompatible-changes-in-aspose-slides-for-net-15-2-0/) classes, methods, properties and so on, and other changes introduced with the Aspose.Slides for .NET 15.2.0 API.
## **Public API Changes**
#### **AddDataPointForDoughnutSeries Methods Have Been Added**
The two overloads of IChartDataPointCollection.AddDataPointForDoughnutSeries() method have been added for adding data points into series of Doughnut chart type.
#### **Aspose.Slides.SmartArt.SmartArtShape Class Has Been Inherited from Aspose.Slides.GeometryShape Class**
Aspose.Slides.SmartArt.SmartArtShape class has been inherited from Aspose.Slides.GeometryShape class. This change improves Aspose.Slides object model and adds new features to SmartArtShape class.
#### **Methods for Removing Chart Data Point and Chart Category by Index Has Been Added**
IChartDataPointCollection.RemoveAt(int index) method has been added for removing chart data point by its index.
IChartCategoryCollection.RemoveAt(int index) method has been added for removing chart category by its index.
#### **PptXPptY Value Has Been Added to Aspose.Slides.Animation.PropertyType Enumeration**
PptXPptY value has been added to Aspose.Slides.Animation.PropertyType enumeration in the scope of a serialization issue fix.
#### **System.Drawing.Color GetAutomaticSeriesColor() Method Has Been Added to Aspose.Slides.Charts.IChartSeries**
GetAutomaticSeriesColor method returns an automatic color of series based on series index and chart style. This color is used by default if FillType equals NotDefined.
``` csharp
using Aspose.Slides;
using Aspose.Slides.Charts;
using (Presentation pres = new Presentation())
{
IChart chart = pres.Slides[0].Shapes.AddChart(ChartType.ClusteredColumn, 100, 50, 600, 400);
for (int i = 0; i < chart.ChartData.Series.Count; i++)
{
chart.ChartData.Series[i].GetAutomaticSeriesColor();
}
}
```
## Related articles
- [Public API and Backwards Incompatible Changes in Aspose.Slides for .NET 15.7.0](https://docs.aspose.com/slides/net/public-api-and-backwards-incompatible-changes-in-aspose-slides-for-net-15-7-0/)
- [Public API and Backwards Incompatible Changes in Aspose.Slides for .NET 15.8.0](https://docs.aspose.com/slides/net/public-api-and-backwards-incompatible-changes-in-aspose-slides-for-net-15-8-0/)
- [Public API and Backwards Incompatible Changes in Aspose.Slides for .NET 15.11.0](https://docs.aspose.com/slides/net/public-api-and-backwards-incompatible-changes-in-aspose-slides-for-net-15-11-0/)
# Public API and Backwards Incompatible Changes in Aspose.Slides for .NET 15.4.0
> Review public API updates and breaking changes in Aspose.Slides for .NET to smoothly migrate your PowerPoint PPT, PPTX and ODP presentation solutions.
Source: https://docs.aspose.com/slides/net/public-api-and-backwards-incompatible-changes-in-aspose-slides-for-net-15-4-0/
Updated: 2026-08-13
This page lists all [added](https://docs.aspose.com/slides/net/public-api-and-backwards-incompatible-changes-in-aspose-slides-for-net-15-4-0/) or [removed](https://docs.aspose.com/slides/net/public-api-and-backwards-incompatible-changes-in-aspose-slides-for-net-15-4-0/) classes, methods, properties and so on, and other changes introduced with the Aspose.Slides for .NET 15.4.0 API.
## **Public API Changes**
#### **Enum OrganizationChartLayoutType Has Been Added**
The Aspose.Slides.SmartArt.OrganizationChartLayoutType enum represents formatting type the child nodes in an organization chart.
#### **Method IBulletFormat.ApplyDefaultParagraphIndentsShifts Has Been Added**
Method Aspose.Slides.IBulletFormat.ApplyDefaultParagraphIndentsShifts sets default non-zero shifts for effective paragraph Indent and MarginLeft when bullets is enabled (like PowerPoint do if enable paragraph bullets/numbering in it). If bullets is disabled then just reset paragraph Indent and MarginLeft (like PowerPoint do if disable paragraph bullets/numbering in it).
See examples [here](https://docs.aspose.com/slides/net/adding-and-formatting-text/#managing-paragraph-bullets-in-pptx):
#### **Method IConnector.Reroute Has Been Added**
Method Aspose.Slides.IConnector.Reroute reroutes connector so that it take the shortest possible path between the shapes it connect. To do this, the Reroute() method may change the StartShapeConnectionSiteIndex and EndShapeConnectionSiteIndex.
``` csharp
using Aspose.Slides;
using Aspose.Slides.Export;
using(Presentation input = new Presentation())
{
IShapeCollection shapes = input.Slides[0].Shapes;
IConnector connector = shapes.AddConnector(ShapeType.BentConnector2, 0, 0, 10, 10);
IAutoShape ellipse = shapes.AddAutoShape(ShapeType.Ellipse, 0, 100, 100, 100);
IAutoShape rectangle = shapes.AddAutoShape(ShapeType.Rectangle, 100, 300, 100, 100);
connector.StartShapeConnectedTo = ellipse;
connector.EndShapeConnectedTo = rectangle;
connector.Reroute();
input.Save("output.pptx", SaveFormat.Pptx);
}
```
#### **Method IPresentation.GetSlideById Has Been Added**
Method Aspose.Slides.IPresentation.GetSlideById(System.UInt32) returns a Slide, MasterSlide or LayoutSlide by slide Id.
``` csharp
using System.Diagnostics;
using Aspose.Slides;
using (Presentation presentation = new Presentation())
{
uint id = presentation.Slides[0].SlideId;
IBaseSlide slide = presentation.GetSlideById(id);
Debug.Assert(presentation.Slides[0] == slide);
}
```
#### **Property IShape.ConnectionSiteCount Has Been Added**
Property Aspose.Slides.IShape.ConnectionSiteCount returns the number of connection sites on the shape.
``` csharp
using Aspose.Slides;
using Aspose.Slides.Export;
using(Presentation input = new Presentation())
{
IShapeCollection shapes = input.Slides[0].Shapes;
IConnector connector = shapes.AddConnector(ShapeType.BentConnector2, 0, 0, 10, 10);
IAutoShape ellipse = shapes.AddAutoShape(ShapeType.Ellipse, 0, 100, 100, 100);
IAutoShape rectangle = shapes.AddAutoShape(ShapeType.Rectangle, 100, 200, 100, 100);
connector.StartShapeConnectedTo = ellipse;
connector.EndShapeConnectedTo = rectangle;
uint wantedIndex = 6;
if (ellipse.ConnectionSiteCount > wantedIndex)
{
connector.StartShapeConnectionSiteIndex = wantedIndex;
}
input.Save("output.pptx", SaveFormat.Pptx);
}
```
#### **Property ISmartArt.IsReversed Has Been Added**
Property Aspose.Slides.SmartArt.ISmartArt.IsReversed allows get or sets the state of the SmartArt diagram with regard to (left-to-right) LTR or (right-to-left) RTL, if the diagram supports reversal.
``` csharp
using Aspose.Slides;
using Aspose.Slides.Export;
using Aspose.Slides.SmartArt;
using (Presentation pres = new Presentation())
{
ISmartArt smart = pres.Slides[0].Shapes.AddSmartArt(10, 10, 400, 300, SmartArtLayoutType.BasicProcess);
smart.IsReversed = true;
pres.Save("out.pptx", SaveFormat.Pptx);
}
```
#### **Property ISmartArt.Nodes Has Been Added**
Property Aspose.Slides.SmartArt.ISmartArt.Nodes returns collection of root nodes in SmartArt object.
``` csharp
using Aspose.Slides;
using Aspose.Slides.Export;
using Aspose.Slides.SmartArt;
using (Presentation pres = new Presentation())
{
ISmartArt smart = pres.Slides[0].Shapes.AddSmartArt(10, 10, 400, 300, SmartArtLayoutType.VerticalBulletList);
ISmartArtNode node = smart.Nodes[1]; // select second root node
node.TextFrame.Text = "Second root node";
pres.Save("out.pptx", SaveFormat.Pptx);
}
```
#### **Property ISmartArtNode.IsHidden Has Been Added**
Property Aspose.Slides.SmartArt.ISmartArtNode.IsHidden returns true if this node is a hidden node in the data model.
``` csharp
using Aspose.Slides;
using Aspose.Slides.Export;
using Aspose.Slides.SmartArt;
using (Presentation pres = new Presentation())
{
ISmartArt smart = pres.Slides[0].Shapes.AddSmartArt(10, 10, 400, 300, SmartArtLayoutType.RadialCycle);
ISmartArtNode node = smart.AllNodes.AddNode();
bool hidden = node.IsHidden; //returns true
if(hidden)
{
//do some actions or notifications
}
pres.Save("out.pptx", SaveFormat.Pptx);
}
```
#### **Property ISmartArtNode.OrganizationChartLayout Has Been Added**
Property Aspose.Slides.SmartArt.ISmartArtNode.OrganizationChartLayout allows get or sets organization chart type associated with current node.
``` csharp
using Aspose.Slides;
using Aspose.Slides.Export;
using Aspose.Slides.SmartArt;
using (Presentation pres = new Presentation())
{
ISmartArt smart = pres.Slides[0].Shapes.AddSmartArt(10, 10, 400, 300, SmartArtLayoutType.OrganizationChart);
smart.Nodes[0].OrganizationChartLayout = OrganizationChartLayoutType.LeftHanging;
pres.Save("out.pptx", SaveFormat.Pptx);
}
```
#### **Set Method for Property ISmartArt.Layout Has Been Added**
The set method for property Aspose.Slides.SmartArt.ISmartArt.Layout has been added.It allows change layout type of an existing diagram.
``` csharp
using Aspose.Slides;
using Aspose.Slides.Export;
using Aspose.Slides.SmartArt;
using (Presentation pres = new Presentation())
{
ISmartArt smart = pres.Slides[0].Shapes.AddSmartArt(10, 10, 400, 300, SmartArtLayoutType.BasicBlockList);
smart.Layout = SmartArtLayoutType.BasicProcess;
pres.Save("out.pptx", SaveFormat.Pptx);
}
```
#### **Minor API Changes**
**This Is the List of Minor API Changes:**
|Enum Aspose.Slides.BevelColorMode |deleted, unused enum |
| :- | :- |
|Property ThreeDFormatEffectiveData.BevelColorMode |deleted, unused property |
|Property Aspose.Slides.Charts.ChartSeriesGroup.Chart Results { get; } = new();
public void FoundResult(ITextFrame textFrame, string sourceText, string foundText, int textPosition)
{
var slideNumber = GetSlideNumber(textFrame);
var result = new TextMatch(textFrame, sourceText, foundText, textPosition, slideNumber);
Results.Add(result);
}
private static int? GetSlideNumber(ITextFrame textFrame)
{
var parentSlide = textFrame.ParentShape?.Slide ?? textFrame.ParentCell?.Slide ?? textFrame.Slide;
if (parentSlide is ISlide slide)
{
return slide.SlideNumber;
}
if (parentSlide is INotesSlide notesSlide)
{
return notesSlide.ParentSlide.SlideNumber;
}
return null;
}
}
```
For replacement operations, `FoundText` contains the original matched text, so the callback can record exactly which terms were replaced.
## **Highlight Text**
Use the [ITextFrame.HighlightText](https://reference.aspose.com/slides/net/aspose.slides/itextframe/highlighttext/) method to highlight literal-text matches in a text frame. Pass [TextSearchOptions](https://reference.aspose.com/slides/net/aspose.slides/textsearchoptions/) to control the search and a callback to collect match details.
The code example below highlights all occurrences of the characters **"try"** and then highlights only the complete word **"to"**. Both searches report their matches to the same callback.
```cs
using System;
using System.Drawing;
using Aspose.Slides;
using Aspose.Slides.Export;
using var presentation = new Presentation("sample.pptx");
// Get the first shape from the first slide.
var shape = (IAutoShape)presentation.Slides[0].Shapes[0];
var callback = new TextSearchCallback();
var substringSearchOptions = new TextSearchOptions
{
CaseSensitive = false
};
// Highlight every occurrence of "try" in the text frame.
shape.TextFrame.HighlightText("try", Color.LightBlue, substringSearchOptions, callback);
var wholeWordSearchOptions = new TextSearchOptions
{
WholeWordsOnly = true,
CaseSensitive = false
};
// Highlight only the complete word "to".
shape.TextFrame.HighlightText("to", Color.Violet, wholeWordSearchOptions, callback);
foreach (var result in callback.Results)
{
Console.WriteLine($"Found '{result.FoundText}' at position {result.TextPosition} on slide {result.SlideNumber}.");
}
presentation.Save("highlighted_text.pptx", SaveFormat.Pptx);
```
The result:

## **Highlight Text Using Regular Expressions**
The [ITextFrame.HighlightRegex](https://reference.aspose.com/slides/net/aspose.slides/itextframe/highlightregex/) method highlights text matches found by a regular expression in a text frame.
The following code highlights all words containing seven or more characters and collects each match:
```cs
using System.Drawing;
using System.Text.RegularExpressions;
using Aspose.Slides;
using Aspose.Slides.Export;
using var presentation = new Presentation("sample.pptx");
var shape = (IAutoShape)presentation.Slides[0].Shapes[0];
var callback = new TextSearchCallback();
var regex = new Regex(@"\b[^\s]{7,}\b");
shape.TextFrame.HighlightRegex(regex, Color.Yellow, callback);
presentation.Save("highlighted_text_using_regex.pptx", SaveFormat.Pptx);
```
The result:

## **Highlight Text Across a Presentation**
Use [Presentation.HighlightText](https://reference.aspose.com/slides/net/aspose.slides/presentation/highlighttext/) and [Presentation.HighlightRegex](https://reference.aspose.com/slides/net/aspose.slides/presentation/highlightregex/) to search all applicable text frames in a presentation. The following example highlights a literal term and all email addresses while keeping separate result collections for the two searches.
```cs
using System.Drawing;
using System.Text.RegularExpressions;
using Aspose.Slides;
using Aspose.Slides.Export;
using var presentation = new Presentation("presentation.pptx");
var termCallback = new TextSearchCallback();
var searchOptions = new TextSearchOptions
{
WholeWordsOnly = true,
CaseSensitive = false
};
presentation.HighlightText("confidential", Color.Orange, searchOptions, termCallback);
var emailCallback = new TextSearchCallback();
var emailRegex = new Regex(@"\b[A-Z0-9._%+-]+@[A-Z0-9.-]+\.[A-Z]{2,}\b", RegexOptions.IgnoreCase);
presentation.HighlightRegex(emailRegex, Color.Yellow, emailCallback);
presentation.Save("highlighted_presentation.pptx", SaveFormat.Pptx);
```
## **Replace Text in a Text Frame**
Use [ITextFrame.ReplaceText](https://reference.aspose.com/slides/net/aspose.slides/itextframe/replacetext/) for literal text and [ITextFrame.ReplaceRegex](https://reference.aspose.com/slides/net/aspose.slides/itextframe/replaceregex/) for pattern-based replacement. These methods update matched text within the existing text frame, which retains the surrounding portion formatting instead of rebuilding the text frame from a plain string.
The following example standardizes a spelling variant and then replaces version labels. The same callback records the original terms matched by both operations.
```cs
using System.Text.RegularExpressions;
using Aspose.Slides;
using Aspose.Slides.Export;
using var presentation = new Presentation("presentation.pptx");
var shape = (IAutoShape)presentation.Slides[0].Shapes[0];
var callback = new TextSearchCallback();
var searchOptions = new TextSearchOptions
{
WholeWordsOnly = true,
CaseSensitive = false
};
shape.TextFrame.ReplaceText("colour", "color", searchOptions, callback);
var versionRegex = new Regex(@"\bv\d+(?:\.\d+)*\b", RegexOptions.IgnoreCase);
shape.TextFrame.ReplaceRegex(versionRegex, "current version", callback);
presentation.Save("updated_text_frame.pptx", SaveFormat.Pptx);
```
If one match spans portions with different formatting, review the output to confirm which formatting should apply to the replacement text.
## **Replace Text Across a Presentation**
Use [Presentation.ReplaceText](https://reference.aspose.com/slides/net/aspose.slides/presentation/replacetext/) and [Presentation.ReplaceRegex](https://reference.aspose.com/slides/net/aspose.slides/presentation/replaceregex/) to apply the same operations across the presentation. This is useful for template cleanup, terminology updates, and redaction.
```cs
using System.Text.RegularExpressions;
using Aspose.Slides;
using Aspose.Slides.Export;
using var presentation = new Presentation("presentation.pptx");
var callback = new TextSearchCallback();
var searchOptions = new TextSearchOptions
{
WholeWordsOnly = true,
CaseSensitive = true
};
presentation.ReplaceText("Contoso", "Example Corp", searchOptions, callback);
var accountNumberRegex = new Regex(@"\bACCT-\d{6}\b");
presentation.ReplaceRegex(accountNumberRegex, "ACCT-REDACTED", callback);
presentation.Save("updated_presentation.pptx", SaveFormat.Pptx);
```
## **Group Matches for Reporting**
Because every result stores its slide number and text frame, applications can group matches for audit, reporting, or review workflows. The following example groups the collected results first by slide and then by text frame:
```cs
using System;
using System.Linq;
var matchesBySlide = callback.Results.GroupBy(result => result.SlideNumber);
foreach (var slideGroup in matchesBySlide)
{
var slideLabel = slideGroup.Key.HasValue ? slideGroup.Key.Value.ToString() : "Other";
Console.WriteLine($"Slide: {slideLabel}");
var matchesByTextFrame = slideGroup.GroupBy(result => result.TextFrame);
foreach (var textFrameGroup in matchesByTextFrame)
{
Console.WriteLine($" Text frame: {textFrameGroup.Key.Text}");
foreach (var result in textFrameGroup)
{
Console.WriteLine($" '{result.FoundText}' at position {result.TextPosition}; context: '{result.SourceText}'");
}
}
}
```
## **FAQ**
**How can I search only one text box instead of the entire presentation?**
Get the shape's text frame and call [ITextFrame.HighlightText](https://reference.aspose.com/slides/net/aspose.slides/itextframe/highlighttext/), [ITextFrame.HighlightRegex](https://reference.aspose.com/slides/net/aspose.slides/itextframe/highlightregex/), [ITextFrame.ReplaceText](https://reference.aspose.com/slides/net/aspose.slides/itextframe/replacetext/), or [ITextFrame.ReplaceRegex](https://reference.aspose.com/slides/net/aspose.slides/itextframe/replaceregex/) on that text frame. Presentation-level methods process all applicable text frames instead.
**How can I match complete words with the correct capitalization?**
Set [TextSearchOptions.WholeWordsOnly](https://reference.aspose.com/slides/net/aspose.slides/textsearchoptions/wholewordsonly/) and [TextSearchOptions.CaseSensitive](https://reference.aspose.com/slides/net/aspose.slides/textsearchoptions/casesensitive/) to `true`, and pass the options to a literal-text highlighting or replacement method. For regular expressions, define word boundaries and case sensitivity in the .NET `Regex` itself.
**Can search and replacement include text in slide notes?**
Yes. Set [TextSearchOptions.IncludeNotes](https://reference.aspose.com/slides/net/aspose.slides/textsearchoptions/includenotes/) to `true` when using a presentation-level literal-text operation. The callback implementation shown above maps a match in a notes slide back to its parent slide number.
**How can I create a report without scanning the presentation a second time?**
Pass an [IFindResultCallback](https://reference.aspose.com/slides/net/aspose.slides/ifindresultcallback/) implementation to the highlighting or replacement operation. The callback receives every match while the operation runs, so the application can store the source text, matched text, position, text frame, and derived slide number for later grouping or export.
**Does replacing text preserve its formatting?**
[ITextFrame.ReplaceText](https://reference.aspose.com/slides/net/aspose.slides/itextframe/replacetext/) and [ITextFrame.ReplaceRegex](https://reference.aspose.com/slides/net/aspose.slides/itextframe/replaceregex/) modify matched text within the existing text frame and retain the surrounding portion formatting. If a match spans portions with different formatting, inspect the result to ensure the replacement uses the desired style.
## Related features
- [Find and replace text](https://docs.aspose.com/slides/features/find-replace-text/)
- [Highlight text with regular expressions](https://docs.aspose.com/slides/features/regex-highlighting/)
# Security
> Review how Aspose.Slides for .NET processes presentations, which NuGet packages it depends on for each target framework, and which third-party components it includes.
Source: https://docs.aspose.com/slides/net/security/
Updated: 2026-09-28
## **Security in Aspose.Slides**
Aspose applies best practices when developing its products.
* Aspose.Slides for .NET is used to manipulate presentations and to convert them to other formats. It does not run scripts in presentations. Aspose.Slides parses the presentation structure and lets the end user's code manipulate the object model in a convenient way.
* Aspose.Slides functions as a library that parses and interprets documents without executing remote code. All Aspose products run on your machines. They do not transmit any data to Aspose. The only exception is a [metered license](https://purchase.aspose.com/faqs/licensing/metered): if you use one, only your API usage information is processed.
* Aspose components run in the same user context as regular applications. Therefore, Aspose components do not pose a risk to vital system resources. Furthermore, when an Aspose component opens a document, macros are not run automatically.
* The risks inherent in or associated with the Microsoft Office package do not apply to Aspose components, so Aspose products are very secure.
## **NuGet Dependencies**
Aspose.Slides for .NET depends on packages that Microsoft publishes on NuGet. The dependencies differ by package and target framework:
| Package | Target framework | Dependencies |
|---|---|---|
| Aspose.Slides.NET | `net462` | System.Text.Json |
| Aspose.Slides.NET | `net6.0` | System.Drawing.Common, System.Security.Cryptography.Xml |
| Aspose.Slides.NET | `netstandard2.0` | System.Drawing.Common, System.Security.Cryptography.Xml, System.Text.Encoding.CodePages, System.Text.Json |
| Aspose.Slides.NET6.CrossPlatform | `net6.0` | System.Security.Cryptography.Xml |
The **Dependencies** section of the [Aspose.Slides.NET](https://www.nuget.org/packages/Aspose.Slides.NET/) and [Aspose.Slides.NET6.CrossPlatform](https://www.nuget.org/packages/Aspose.Slides.NET6.CrossPlatform/) pages on NuGet lists the minimum version of each dependency for every release.
When you add Aspose.Slides to a project, NuGet also restores the dependencies of these packages. To list every package that your project restores, including these transitive dependencies, run this command in the project folder:
```bash
dotnet list package --include-transitive
```
To check the same set of packages against known vulnerabilities, run:
```bash
dotnet list package --vulnerable --include-transitive
```
For other ways to audit NuGet packages, see [Auditing package dependencies for security vulnerabilities](https://learn.microsoft.com/en-us/nuget/concepts/auditing-packages).
## **Third-Party Components**
Aspose.Slides includes code from third-party open-source components. They are part of the product, not separate NuGet packages, so tools that read only NuGet dependencies do not list them. Both packages contain the file *thirdpartylicenses.Aspose.Slides.for.NET.pdf*, which lists the components and their licenses:
| Component | License stated in the notice |
|---|---|
| DotNetZip | Microsoft Public License (Ms-PL) |
| ANTLR | BSD License |
| sfntly | Apache License 2.0 |
| Skia | BSD-style license |
| HarfBuzz | "Old MIT" license |
| Boost | Boost Software License 1.0 |
| Double Conversion | BSD-style license |
| ICU (International Components for Unicode) | Unicode copyright and terms of use |
## **FAQ**
**What systems are used to monitor for vulnerabilities in Aspose code?**
We run a static code analysis for every Aspose.Slides release. We can provide security reports that prove Aspose.Slides code passes OWASP Top 10.
**Does Aspose.Slides use external packages?**
Yes. It depends on the Microsoft NuGet packages listed in [NuGet Dependencies](https://docs.aspose.com/slides/net/security/#nuget-dependencies), and it includes the third-party components listed in [Third-Party Components](https://docs.aspose.com/slides/net/security/#third-party-components). Include both in your security review, and use `dotnet list package --vulnerable --include-transitive` to check the NuGet packages that your project restores.
## Related features
- [Process presentations without internet access](https://docs.aspose.com/slides/features/offline-processing/)
# Manage Sensitivity Labels in PowerPoint Presentations in .NET
> Read, add, update, remove, and migrate Microsoft Purview sensitivity labels in PowerPoint PPTX presentations with Aspose.Slides for .NET.
Source: https://docs.aspose.com/slides/net/sensitivity-labels/
Updated: 2026-08-13
## **Overview**
Microsoft Purview sensitivity labels help organizations classify and govern documents. During automated presentation processing, an application may need to preserve an existing label, apply a label selected by a policy, update its state, or migrate label metadata written by an older Microsoft Information Protection (MIP) workflow.
Aspose.Slides exposes modern sensitivity label metadata through [Presentation.SensitivityLabels](https://reference.aspose.com/slides/net/aspose.slides/presentation/sensitivitylabels/). This property returns an [ISensitivityLabelCollection](https://reference.aspose.com/slides/net/aspose.slides/isensitivitylabelcollection/) that can be inspected and modified before the presentation is saved as PPTX.
Sensitivity label identifiers and policy information are defined by your Microsoft Purview configuration. Validate label availability and policy requirements in your environment before adding or migrating metadata. The [ISensitivityLabel.ContentMarkTypes](https://reference.aspose.com/slides/net/aspose.slides/isensitivitylabel/contentmarktypes/) values describe the content markings associated with a label; they do not by themselves add visible text or shapes to slides.
## **Understand Sensitivity Label Properties**
Each [ISensitivityLabel](https://reference.aspose.com/slides/net/aspose.slides/isensitivitylabel/) contains the following metadata:
| Property | Purpose |
| --- | --- |
| [ISensitivityLabel.Id](https://reference.aspose.com/slides/net/aspose.slides/isensitivitylabel/id/) | Identifies the sensitivity label in the Purview policy. |
| [ISensitivityLabel.SiteId](https://reference.aspose.com/slides/net/aspose.slides/isensitivitylabel/siteid/) | Identifies the site associated with the label policy. |
| [ISensitivityLabel.IsEnabled](https://reference.aspose.com/slides/net/aspose.slides/isensitivitylabel/isenabled/) | Indicates whether the label is enabled. |
| [ISensitivityLabel.IsRemoved](https://reference.aspose.com/slides/net/aspose.slides/isensitivitylabel/isremoved/) | Indicates that the label has been removed. Set this property to `true` when the removal state must be retained in the metadata. |
| [ISensitivityLabel.AssignmentMethodType](https://reference.aspose.com/slides/net/aspose.slides/isensitivitylabel/assignmentmethodtype/) | Specifies whether the label was applied automatically or through a user decision. |
| [ISensitivityLabel.ContentMarkTypes](https://reference.aspose.com/slides/net/aspose.slides/isensitivitylabel/contentmarktypes/) | Lists the content marking types associated with the label. |
The [SensitivityLabelAssignmentType](https://reference.aspose.com/slides/net/aspose.slides/sensitivitylabelassignmenttype/) enumeration describes how a label was assigned:
- [SensitivityLabelAssignmentType.Standard](https://reference.aspose.com/slides/net/aspose.slides/sensitivitylabelassignmenttype/) represents a default or automatically applied label.
- [SensitivityLabelAssignmentType.Privileged](https://reference.aspose.com/slides/net/aspose.slides/sensitivitylabelassignmenttype/) represents a label applied through a user decision, including manually applied, recommended, and mandatory labels.
The [SensitivityLabelContentType](https://reference.aspose.com/slides/net/aspose.slides/sensitivitylabelcontenttype/) enumeration identifies the marking associated with a label:
| Value | Meaning |
| --- | --- |
| [SensitivityLabelContentType.None](https://reference.aspose.com/slides/net/aspose.slides/sensitivitylabelcontenttype/) | The label was applied by default or automatically. |
| [SensitivityLabelContentType.Header](https://reference.aspose.com/slides/net/aspose.slides/sensitivitylabelcontenttype/) | Header content marking is associated with the label. |
| [SensitivityLabelContentType.Footer](https://reference.aspose.com/slides/net/aspose.slides/sensitivitylabelcontenttype/) | Footer content marking is associated with the label. |
| [SensitivityLabelContentType.Watermark](https://reference.aspose.com/slides/net/aspose.slides/sensitivitylabelcontenttype/) | Watermark content marking is associated with the label. |
| [SensitivityLabelContentType.Encryption](https://reference.aspose.com/slides/net/aspose.slides/sensitivitylabelcontenttype/) | Encryption protection is associated with the label. |
Multiple marking types can be associated with one label.
## **List Existing Sensitivity Labels**
Read the modern label collection from [Presentation.SensitivityLabels](https://reference.aspose.com/slides/net/aspose.slides/presentation/sensitivitylabels/) and enumerate it. The following example lists every property and content marking stored for each label:
```csharp
using System;
using Aspose.Slides;
using var presentation = new Presentation("presentation.pptx");
var sensitivityLabels = presentation.SensitivityLabels;
foreach (var sensitivityLabel in sensitivityLabels)
{
Console.WriteLine("Label ID: " + sensitivityLabel.Id);
Console.WriteLine("Site ID: " + sensitivityLabel.SiteId);
Console.WriteLine("Enabled: " + sensitivityLabel.IsEnabled);
Console.WriteLine("Removed: " + sensitivityLabel.IsRemoved);
Console.WriteLine("Assignment method: " + sensitivityLabel.AssignmentMethodType);
foreach (var contentMarkType in sensitivityLabel.ContentMarkTypes)
{
Console.WriteLine("Content marking: " + contentMarkType);
}
}
```
## **Add a Sensitivity Label with Content Marking**
Use [ISensitivityLabelCollection.Add](https://reference.aspose.com/slides/net/aspose.slides/isensitivitylabelcollection/add/) with the label identifier, site identifier, enabled state, and assignment method. After the method returns the new [ISensitivityLabel](https://reference.aspose.com/slides/net/aspose.slides/isensitivitylabel/), add the required marking values through [ISensitivityLabel.ContentMarkTypes](https://reference.aspose.com/slides/net/aspose.slides/isensitivitylabel/contentmarktypes/).
The following example adds a manually selected label associated with footer and watermark markings, and then saves the result as PPTX:
```csharp
using System;
using Aspose.Slides;
using Aspose.Slides.Export;
using var presentation = new Presentation("presentation.pptx");
var sensitivityLabels = presentation.SensitivityLabels;
var labelIdentifier = "{11111111-2222-3333-4444-555555555555}";
var siteIdentifier = Guid.Parse("{aaaaaaaa-bbbb-cccc-dddd-eeeeeeeeeeee}");
var isEnabled = true;
var assignmentMethod = SensitivityLabelAssignmentType.Privileged;
var sensitivityLabel = sensitivityLabels.Add(
labelIdentifier,
siteIdentifier,
isEnabled,
assignmentMethod);
sensitivityLabel.ContentMarkTypes.Add(SensitivityLabelContentType.Footer);
sensitivityLabel.ContentMarkTypes.Add(SensitivityLabelContentType.Watermark);
presentation.Save("presentation_with_label.pptx", SaveFormat.Pptx);
```
## **Update a Sensitivity Label**
The [ISensitivityLabel](https://reference.aspose.com/slides/net/aspose.slides/isensitivitylabel/) properties are read/write, except that the collection returned by [ISensitivityLabel.ContentMarkTypes](https://reference.aspose.com/slides/net/aspose.slides/isensitivitylabel/contentmarktypes/) is modified through its list operations. After locating the required label, you can update its identifier, site identifier, enabled state, assignment method, removal state, and content marking types. Save the presentation to persist the changes.
The following example updates the enabled state and assignment method of the first label:
```csharp
using Aspose.Slides;
using Aspose.Slides.Export;
using var presentation = new Presentation("presentation.pptx");
var sensitivityLabels = presentation.SensitivityLabels;
if (sensitivityLabels.Count > 0)
{
var sensitivityLabel = sensitivityLabels[0];
sensitivityLabel.IsEnabled = true;
sensitivityLabel.AssignmentMethodType = SensitivityLabelAssignmentType.Privileged;
}
presentation.Save("presentation_with_updated_label.pptx", SaveFormat.Pptx);
```
## **Mark a Sensitivity Label as Removed**
To preserve the fact that a label was removed, find the label and set [ISensitivityLabel.IsRemoved](https://reference.aspose.com/slides/net/aspose.slides/isensitivitylabel/isremoved/) to `true`. This retains the label entry while recording its removed state. If you instead need to delete an entry from the modern collection, use [ISensitivityLabelCollection.RemoveAt](https://reference.aspose.com/slides/net/aspose.slides/isensitivitylabelcollection/removeat/); use [ISensitivityLabelCollection.Clear](https://reference.aspose.com/slides/net/aspose.slides/isensitivitylabelcollection/clear/) to delete every entry.
The following example marks a specific label as removed and saves the updated presentation:
```csharp
using System;
using Aspose.Slides;
using Aspose.Slides.Export;
using var presentation = new Presentation("presentation.pptx");
var sensitivityLabels = presentation.SensitivityLabels;
var targetLabelIdentifier = "{11111111-2222-3333-4444-555555555555}";
foreach (var sensitivityLabel in sensitivityLabels)
{
var isTargetLabel = string.Equals(
sensitivityLabel.Id,
targetLabelIdentifier,
StringComparison.OrdinalIgnoreCase);
if (isTargetLabel)
{
sensitivityLabel.IsRemoved = true;
break;
}
}
presentation.Save("presentation_with_removed_label.pptx", SaveFormat.Pptx);
```
## **Read and Migrate Legacy MIP Sensitivity Labels**
Older MIP-based workflows can store sensitivity label metadata in custom document properties instead of the modern label collection. Read that metadata with [IDocumentProperties.GetSensitivityLabels](https://reference.aspose.com/slides/net/aspose.slides/idocumentproperties/getsensitivitylabels/). The method parses the legacy custom properties and returns an array of [ISensitivityLabel](https://reference.aspose.com/slides/net/aspose.slides/isensitivitylabel/) objects.
To migrate the metadata, add each returned label to the modern [ISensitivityLabelCollection](https://reference.aspose.com/slides/net/aspose.slides/isensitivitylabelcollection/) through [ISensitivityLabelCollection.Add](https://reference.aspose.com/slides/net/aspose.slides/isensitivitylabelcollection/add/). Because adding a duplicate label identifier raises an exception, the example checks the destination collection before copying each label. You can add further validation to confirm that each legacy label still exists in the current Purview policy.
```csharp
using System;
using Aspose.Slides;
using Aspose.Slides.Export;
using var presentation = new Presentation("presentation_with_legacy_labels.pptx");
var legacySensitivityLabels = presentation.DocumentProperties.GetSensitivityLabels();
var modernSensitivityLabels = presentation.SensitivityLabels;
foreach (var legacySensitivityLabel in legacySensitivityLabels)
{
var labelAlreadyExists = false;
foreach (var modernSensitivityLabel in modernSensitivityLabels)
{
labelAlreadyExists = string.Equals(
modernSensitivityLabel.Id,
legacySensitivityLabel.Id,
StringComparison.OrdinalIgnoreCase);
if (labelAlreadyExists)
{
break;
}
}
if (!labelAlreadyExists)
{
modernSensitivityLabels.Add(legacySensitivityLabel);
}
}
presentation.Save("presentation_with_modern_labels.pptx", SaveFormat.Pptx);
```
The migration copies the parsed label objects into the modern collection. It does not require clearing all custom document properties, so unrelated document metadata remains intact. Use [IPresentation.Save](https://reference.aspose.com/slides/net/aspose.slides/ipresentation/save/) with [SaveFormat.Pptx](https://reference.aspose.com/slides/net/aspose.slides.export/saveformat/) to write the modern label metadata to a PPTX file.
## **FAQ**
**Does adding a content marking type create a visible header, footer, or watermark on slides?**
No. Values added through [ISensitivityLabel.ContentMarkTypes](https://reference.aspose.com/slides/net/aspose.slides/isensitivitylabel/contentmarktypes/) describe the markings associated with the sensitivity label. They do not create visible text or shapes in the presentation. Add the corresponding slide content separately if your workflow must render those markings.
**What is the difference between marking a label as removed and deleting it from the collection?**
Setting [ISensitivityLabel.IsRemoved](https://reference.aspose.com/slides/net/aspose.slides/isensitivitylabel/isremoved/) to `true` keeps the label entry and records its removed state. Calling [ISensitivityLabelCollection.RemoveAt](https://reference.aspose.com/slides/net/aspose.slides/isensitivitylabelcollection/removeat/) deletes the entry from the modern collection. Choose the operation that matches your organization's metadata retention requirements.
**Can a presentation contain both legacy MIP metadata and modern sensitivity labels?**
Yes. Legacy labels can remain in custom document properties while modern labels are available through [Presentation.SensitivityLabels](https://reference.aspose.com/slides/net/aspose.slides/presentation/sensitivitylabels/). Use [IDocumentProperties.GetSensitivityLabels](https://reference.aspose.com/slides/net/aspose.slides/idocumentproperties/getsensitivitylabels/) to read the legacy metadata and migrate only the valid labels that are not already present in the modern collection.
**What happens when a label with the same identifier is added more than once?**
[ISensitivityLabelCollection.Add](https://reference.aspose.com/slides/net/aspose.slides/isensitivitylabelcollection/add/) throws an `ArgumentException` when the collection already contains a label with the same identifier. Check existing [ISensitivityLabel.Id](https://reference.aspose.com/slides/net/aspose.slides/isensitivitylabel/id/) values before adding or migrating labels.
**Which output format should be used to preserve updated sensitivity labels?**
Save the presentation as PPTX by calling [IPresentation.Save](https://reference.aspose.com/slides/net/aspose.slides/ipresentation/save/) with [SaveFormat.Pptx](https://reference.aspose.com/slides/net/aspose.slides.export/saveformat/), as shown in the examples above.
# Setting Background Color of Master Slide
>
Source: https://docs.aspose.com/slides/net/setting-background-color-of-master-slide/
Updated: 2026-08-05
## **VSTO**
``` csharp
PowerPoint.Presentation presentation =
Globals.ThisAddIn.Application.Presentations.Open("Setting Background Color of Master Slide.ppt", Office.MsoTriState.msoFalse, Office.MsoTriState.msoFalse, Office.MsoTriState.msoTrue);
presentation.SlideMaster.Background.Fill.ForeColor.RGB = -654262273;
```
## **Aspose.Slides**
``` csharp
using System.Drawing;
using Aspose.Slides;
using Aspose.Slides.Export;
//Instantiate the Presentation class that represents the presentation file
using (Presentation pres = new Presentation())
{
//Set the background color of the Master ISlide to Forest Green
pres.Masters[0].Background.Type = BackgroundType.OwnBackground;
pres.Masters[0].Background.FillFormat.FillType = FillType.Solid;
pres.Masters[0].Background.FillFormat.SolidFillColor.Color = Color.ForestGreen;
//Write the presentation to disk
pres.Save("Setting Background Color of Master Slide.pptx", SaveFormat.Pptx);
}
```
## **Download Sample Code**
- [Github](https://github.com/aspose-slides/Aspose.Slides-for-.NET/releases/download/AsposeSlidesVsVSTOv1.1/Setting.Background.color.of.Master.Slide.Aspose.Slides.zip)
- [Bitbucket](https://bitbucket.org/asposemarketplace/aspose-for-vsto/src/master/Aspose.Slides%20Vs%20VSTO%20Slides/Setting%20Background%20color%20of%20Master%20Slide/)
# Apply Shape Animations in Presentations in .NET
> Learn how to add, inspect, and customize shape animations, timing, sounds, after-animation behavior, and animated text with Aspose.Slides for .NET.
Source: https://docs.aspose.com/slides/net/shape-animation/
Updated: 2026-10-26
## **Overview**
To work with the individual behaviors inside an effect or edit motion-path segments, see [Custom Animation](https://docs.aspose.com/slides/net/custom-animation/).
Aspose.Slides for .NET represents slide animations as effects in a slide timeline. An effect has a target shape, an animation type and subtype, a trigger, timing settings, and optional properties such as sound or after-animation behavior.
The timeline contains two kinds of sequences:
- The **main sequence** plays as the slide advances.
- An **interactive sequence** starts when its trigger shape is clicked.
Because text boxes, pictures, charts, tables, and other slide objects implement [IShape](https://reference.aspose.com/slides/net/aspose.slides/ishape/), you use the same [ISequence.AddEffect](https://reference.aspose.com/slides/net/aspose.slides.animation/isequence/addeffect/) method for most slide content. The available effects are listed in the [EffectType](https://reference.aspose.com/slides/net/aspose.slides.animation/effecttype/) enumeration.
## **Add Shape Animations**
To add an animation, get the slide's main sequence and call [ISequence.AddEffect](https://reference.aspose.com/slides/net/aspose.slides.animation/isequence/addeffect/) with the target shape, effect type, subtype, and trigger. For an effect that starts when another shape is clicked, create an interactive sequence whose trigger is that other shape.
The following example creates both types of animation and saves the result to `shape-animations.pptx`.
```csharp
using Aspose.Slides;
using Aspose.Slides.Animation;
using Aspose.Slides.Export;
using var presentation = new Presentation();
var slide = presentation.Slides[0];
var targetShape = slide.Shapes.AddAutoShape(ShapeType.RoundCornerRectangle, 120, 100, 320, 80);
targetShape.TextFrame.Text = "Click to animate this shape";
var mainSequence = slide.Timeline.MainSequence;
var entranceEffect = mainSequence.AddEffect(targetShape, EffectType.Fade, EffectSubtype.None, EffectTriggerType.OnClick);
entranceEffect.Timing.Duration = 1.5f;
var triggerShape = slide.Shapes.AddAutoShape(ShapeType.Bevel, 20, 20, 100, 40);
triggerShape.TextFrame.Text = "Move";
var interactiveSequence = slide.Timeline.InteractiveSequences.Add(triggerShape);
interactiveSequence.AddEffect(targetShape, EffectType.PathFootball, EffectSubtype.None, EffectTriggerType.OnClick);
presentation.Save("shape-animations.pptx", SaveFormat.Pptx);
```
The trigger controls when an effect starts:
- [EffectTriggerType.OnClick](https://reference.aspose.com/slides/net/aspose.slides.animation/effecttriggertype/) waits for a click in the main sequence, or for a click on the trigger shape in an interactive sequence.
- [EffectTriggerType.WithPrevious](https://reference.aspose.com/slides/net/aspose.slides.animation/effecttriggertype/) starts with the preceding effect.
- [EffectTriggerType.AfterPrevious](https://reference.aspose.com/slides/net/aspose.slides.animation/effecttriggertype/) starts when the preceding effect finishes.
To animate a picture, chart, or another shape type, pass that object to [ISequence.AddEffect](https://reference.aspose.com/slides/net/aspose.slides.animation/isequence/addeffect/) instead of `targetShape`. For chart-specific grouping options, see [Animated Charts](https://docs.aspose.com/slides/net/animated-charts/).
## **Read Shape Animations**
Use [ISequence.GetEffectsByShape](https://reference.aspose.com/slides/net/aspose.slides.animation/isequence/geteffectsbyshape/) when you know the target shape. To inspect every effect, enumerate the main sequence and every interactive sequence. Enumeration avoids assuming that a sequence contains an effect at index `0`.
The following example creates a shape with main-sequence and interactive effects, gets the effects that target the shape, and then enumerates every sequence on the slide.
```csharp
using System;
using Aspose.Slides;
using Aspose.Slides.Animation;
using var presentation = new Presentation();
var slide = presentation.Slides[0];
var targetShape = slide.Shapes.AddAutoShape(ShapeType.Rectangle, 120, 100, 320, 80);
targetShape.TextFrame.Text = "Animated shape";
var mainSequence = slide.Timeline.MainSequence;
mainSequence.AddEffect(targetShape, EffectType.Fade, EffectSubtype.None, EffectTriggerType.OnClick);
var triggerShape = slide.Shapes.AddAutoShape(ShapeType.Bevel, 20, 20, 100, 40);
triggerShape.TextFrame.Text = "Move";
var interactiveSequence = slide.Timeline.InteractiveSequences.Add(triggerShape);
interactiveSequence.AddEffect(targetShape, EffectType.PathFootball, EffectSubtype.None, EffectTriggerType.OnClick);
var targetEffects = mainSequence.GetEffectsByShape(targetShape);
Console.WriteLine($"The main sequence contains {targetEffects.Length} effect(s) for {targetShape.Name}.");
PrintSequence("Main sequence", mainSequence);
var interactiveIndex = 1;
foreach (var sequence in slide.Timeline.InteractiveSequences)
{
var triggerName = sequence.TriggerShape == null ? "unknown" : sequence.TriggerShape.Name;
var sequenceLabel = $"Interactive sequence {interactiveIndex}, trigger: {triggerName}";
PrintSequence(sequenceLabel, sequence);
interactiveIndex++;
}
static void PrintSequence(string label, ISequence sequence)
{
Console.WriteLine($" {label}: {sequence.Count} effect(s)");
foreach (var effect in sequence)
{
var targetName = effect.TargetShape == null ? "unknown" : effect.TargetShape.Name;
var effectDescription = $"{effect.Type} {effect.Subtype}; target: {targetName}; trigger: {effect.Timing.TriggerType}";
Console.WriteLine($" {effectDescription}");
}
}
```
If you only need the effects for one shape, first identify the shape by name, placeholder type, or another stable property; then call [ISequence.GetEffectsByShape](https://reference.aspose.com/slides/net/aspose.slides.animation/isequence/geteffectsbyshape/). Do not assume that [IShapeCollection.Item](https://reference.aspose.com/slides/net/aspose.slides/ishapecollection/item/) at index `0` is always the intended object.
## **Remove All Animations from a Shape**
Use [ISequence.RemoveByShape](https://reference.aspose.com/slides/net/aspose.slides.animation/isequence/removebyshape/) to remove effects targeting a particular shape. Each call affects only the sequence on which it is invoked. To remove the shape's effects throughout a slide's timeline, call it on [MainSequence](https://reference.aspose.com/slides/net/aspose.slides/ianimationtimeline/mainsequence/) and on every sequence in [InteractiveSequences](https://reference.aspose.com/slides/net/aspose.slides/ianimationtimeline/interactivesequences/).
The example expects a presentation file with two shapes named `Target` and `Other` on the first slide. Both shapes have effects in the main sequence and in an interactive sequence triggered by clicking `Target`. It finds the target by name, removes its effects from all these sequences, and saves the presentation.
```csharp
using System;
using System.Linq;
using Aspose.Slides;
using Aspose.Slides.Export;
using var presentation = new Presentation("animated-shapes.pptx");
var slide = presentation.Slides[0];
var targetShape = slide.Shapes.FirstOrDefault(shape => shape.Name == "Target");
if (targetShape != null)
{
slide.Timeline.MainSequence.RemoveByShape(targetShape);
foreach (var sequence in slide.Timeline.InteractiveSequences)
{
sequence.RemoveByShape(targetShape);
}
presentation.Save("shape-animations-removed.pptx", SaveFormat.Pptx);
}
else
{
Console.WriteLine("The target shape was not found.");
}
```
The `Target` shape remains on the slide, and effects targeting `Other` are preserved in both sequences. An effect's [TargetShape](https://reference.aspose.com/slides/net/aspose.slides.animation/ieffect/targetshape/) is distinct from a sequence's [TriggerShape](https://reference.aspose.com/slides/net/aspose.slides.animation/isequence/triggershape/): removing effects targeting `Target` does not remove every animation triggered by it. In this example, clicking `Target` still starts the interactive effect for `Other`.
## **Work with Inherited Placeholder Effects**
A placeholder on a normal slide can inherit animation behavior from the corresponding placeholder on its layout slide and master slide. [IShape.GetBasePlaceholder](https://reference.aspose.com/slides/net/aspose.slides/ishape/getbaseplaceholder/) returns that parent placeholder, or `null` when no parent exists.
In the following example presentation, the footer has **Random Bars** on the normal slide, **Split** on the layout slide, and **Fly In** on the master slide.


The next example builds the placeholder hierarchy itself. It adds effects to a master placeholder, a layout placeholder, and the corresponding placeholder on a normal slide. Every call to [IShape.GetBasePlaceholder](https://reference.aspose.com/slides/net/aspose.slides/ishape/getbaseplaceholder/) is checked before the returned shape is used.
```csharp
using System;
using Aspose.Slides;
using Aspose.Slides.Animation;
using Aspose.Slides.Export;
using var presentation = new Presentation();
var layoutSlide = presentation.LayoutSlides.GetByType(SlideLayoutType.Blank);
var layoutPlaceholder = layoutSlide.PlaceholderManager.AddTextPlaceholder(100, 100, 400, 80);
layoutSlide.Timeline.MainSequence.AddEffect(layoutPlaceholder, EffectType.Split, EffectSubtype.VerticalIn, EffectTriggerType.OnClick);
var masterPlaceholder = layoutPlaceholder.GetBasePlaceholder();
if (masterPlaceholder != null)
{
var masterSequence = layoutSlide.MasterSlide.Timeline.MainSequence;
masterSequence.AddEffect(masterPlaceholder, EffectType.Fly, EffectSubtype.Bottom, EffectTriggerType.OnClick);
}
var slide = presentation.Slides.AddEmptySlide(layoutSlide);
var slidePlaceholder = FindPlaceholderWithBase(slide);
if (slidePlaceholder == null)
{
throw new InvalidOperationException("The slide does not contain a placeholder linked to its layout slide.");
}
slide.Timeline.MainSequence.AddEffect(slidePlaceholder, EffectType.RandomBars, EffectSubtype.Horizontal, EffectTriggerType.OnClick);
PrintEffects("Normal slide", slide.Timeline.MainSequence.GetEffectsByShape(slidePlaceholder));
var baseLayoutPlaceholder = slidePlaceholder.GetBasePlaceholder();
if (baseLayoutPlaceholder != null)
{
PrintEffects("Layout slide", layoutSlide.Timeline.MainSequence.GetEffectsByShape(baseLayoutPlaceholder));
var baseMasterPlaceholder = baseLayoutPlaceholder.GetBasePlaceholder();
if (baseMasterPlaceholder != null)
{
PrintEffects("Master slide", layoutSlide.MasterSlide.Timeline.MainSequence.GetEffectsByShape(baseMasterPlaceholder));
}
}
presentation.Save("placeholder-animations.pptx", SaveFormat.Pptx);
static IShape FindPlaceholderWithBase(ISlide slide)
{
foreach (var shape in slide.Shapes)
{
if (shape.GetBasePlaceholder() != null)
{
return shape;
}
}
return null;
}
static void PrintEffects(string source, IEffect[] effects)
{
Console.WriteLine($"{source}: {effects.Length} effect(s)");
foreach (var effect in effects)
{
Console.WriteLine($" {effect.Type} {effect.Subtype}");
}
}
```
## **Change Animation Timing**
The PowerPoint **Timing** dialog maps to the properties of [ITiming](https://reference.aspose.com/slides/net/aspose.slides.animation/itiming/).

- **Start** maps to [ITiming.TriggerType](https://reference.aspose.com/slides/net/aspose.slides.animation/itiming/triggertype/).
- **Duration** maps to [ITiming.Duration](https://reference.aspose.com/slides/net/aspose.slides.animation/itiming/duration/), in seconds.
- **Delay** maps to [ITiming.TriggerDelayTime](https://reference.aspose.com/slides/net/aspose.slides.animation/itiming/triggerdelaytime/), in seconds.
- **Repeat** maps to [ITiming.RepeatCount](https://reference.aspose.com/slides/net/aspose.slides.animation/itiming/repeatcount/), [ITiming.RepeatUntilNextClick](https://reference.aspose.com/slides/net/aspose.slides.animation/itiming/repeatuntilnextclick/), or [ITiming.RepeatUntilEndSlide](https://reference.aspose.com/slides/net/aspose.slides.animation/itiming/repeatuntilendslide/).
- **Rewind when done playing** maps to [ITiming.Rewind](https://reference.aspose.com/slides/net/aspose.slides.animation/itiming/rewind/).
This independent example adds an effect, changes its timing through the object returned by [ISequence.AddEffect](https://reference.aspose.com/slides/net/aspose.slides.animation/isequence/addeffect/), and saves the result. Keeping the returned [IEffect](https://reference.aspose.com/slides/net/aspose.slides.animation/ieffect/) reference avoids an unnecessary collection index.
```csharp
using Aspose.Slides;
using Aspose.Slides.Animation;
using Aspose.Slides.Export;
using var presentation = new Presentation();
var slide = presentation.Slides[0];
var shape = slide.Shapes.AddAutoShape(ShapeType.Rectangle, 120, 100, 320, 80);
shape.TextFrame.Text = "Timed animation";
var effect = slide.Timeline.MainSequence.AddEffect(shape, EffectType.Fade, EffectSubtype.None, EffectTriggerType.OnClick);
effect.Timing.TriggerType = EffectTriggerType.OnClick;
effect.Timing.Duration = 2.0f;
effect.Timing.TriggerDelayTime = 0.5f;
effect.Timing.RepeatUntilNextClick = false;
effect.Timing.RepeatUntilEndSlide = false;
effect.Timing.RepeatCount = 2.0f;
effect.Timing.Rewind = true;
presentation.Save("shape-animation-timing.pptx", SaveFormat.Pptx);
```
Use one repeat mode intentionally. Combining a repeat count with an "until" flag can produce confusing results in different viewers. When changing repeat modes, set [ITiming.RepeatUntilNextClick](https://reference.aspose.com/slides/net/aspose.slides.animation/itiming/repeatuntilnextclick/) and [ITiming.RepeatUntilEndSlide](https://reference.aspose.com/slides/net/aspose.slides.animation/itiming/repeatuntilendslide/) before [ITiming.RepeatCount](https://reference.aspose.com/slides/net/aspose.slides.animation/itiming/repeatcount/), because setting either flag also changes the active repeat mode.
## **Add and Extract Animation Sounds**
An animation effect can reference embedded audio through [IEffect.Sound](https://reference.aspose.com/slides/net/aspose.slides.animation/ieffect/sound/). [IEffect.StopPreviousSound](https://reference.aspose.com/slides/net/aspose.slides.animation/ieffect/stopprevioussound/) tells an effect to stop audio started by an earlier effect.
### **Add a Sound to an Effect**
The following example expects a local audio file named `animation-sound.wav`. It creates two effects, embeds that file as the sound for the first effect, and configures the second effect to stop the sound. It uses the objects returned by [ISequence.AddEffect](https://reference.aspose.com/slides/net/aspose.slides.animation/isequence/addeffect/), so no sequence index is required.
```csharp
using System.IO;
using Aspose.Slides;
using Aspose.Slides.Animation;
using Aspose.Slides.Export;
using var presentation = new Presentation();
var slide = presentation.Slides[0];
var firstShape = slide.Shapes.AddAutoShape(ShapeType.Rectangle, 80, 100, 240, 80);
var secondShape = slide.Shapes.AddAutoShape(ShapeType.Rectangle, 400, 100, 240, 80);
firstShape.TextFrame.Text = "Starts sound";
secondShape.TextFrame.Text = "Stops sound";
var sequence = slide.Timeline.MainSequence;
var firstEffect = sequence.AddEffect(firstShape, EffectType.Fade, EffectSubtype.None, EffectTriggerType.OnClick);
var secondEffect = sequence.AddEffect(secondShape, EffectType.Fade, EffectSubtype.None, EffectTriggerType.OnClick);
var audioData = File.ReadAllBytes("animation-sound.wav");
var effectSound = presentation.Audios.AddAudio(audioData);
firstEffect.Sound = effectSound;
secondEffect.StopPreviousSound = true;
presentation.Save("shape-animation-sound.pptx", SaveFormat.Pptx);
```
### **Extract Embedded Effect Sounds**
The following example expects a local presentation named `presentation-with-animation-sounds.pptx`. It scans both main and interactive sequences and writes every embedded effect sound to the `extracted-animation-sounds` directory. The extension is selected from the audio MIME type exposed by [IAudio.ContentType](https://reference.aspose.com/slides/net/aspose.slides/iaudio/contenttype/).
```csharp
using System;
using System.IO;
using Aspose.Slides;
using Aspose.Slides.Animation;
var inputPath = "presentation-with-animation-sounds.pptx";
var outputDirectory = "extracted-animation-sounds";
Directory.CreateDirectory(outputDirectory);
using var presentation = new Presentation(inputPath);
var soundIndex = 1;
foreach (var slide in presentation.Slides)
{
SaveSounds(slide.Timeline.MainSequence, outputDirectory, ref soundIndex);
foreach (var sequence in slide.Timeline.InteractiveSequences)
{
SaveSounds(sequence, outputDirectory, ref soundIndex);
}
}
Console.WriteLine($"Extracted {soundIndex - 1} sound file(s) to {Path.GetFullPath(outputDirectory)}.");
static void SaveSounds(ISequence sequence, string outputDirectory, ref int soundIndex)
{
foreach (var effect in sequence)
{
if (effect.Sound == null)
continue;
var extension = GetAudioExtension(effect.Sound.ContentType);
var outputPath = Path.Combine(outputDirectory, $"effect-sound-{soundIndex}{extension}");
File.WriteAllBytes(outputPath, effect.Sound.BinaryData);
soundIndex++;
}
}
static string GetAudioExtension(string contentType)
{
var normalizedType = contentType == null ? string.Empty : contentType.ToLowerInvariant();
if (normalizedType == "audio/mpeg")
return ".mp3";
if (normalizedType == "audio/mp4")
return ".m4a";
if (normalizedType == "audio/ogg")
return ".ogg";
if (normalizedType == "audio/wav" || normalizedType == "audio/x-wav")
return ".wav";
return ".bin";
}
```
For large audio objects, use [IAudio.GetStream](https://reference.aspose.com/slides/net/aspose.slides/iaudio/getstream/) and copy the stream to a file instead of loading the entire object into a byte array.
## **Set After-Animation Behavior**
The **After animation** option controls what happens to a shape after its effect finishes.

The [AfterAnimationType](https://reference.aspose.com/slides/net/aspose.slides.animation/afteranimationtype/) enumeration supports leaving the shape unchanged, changing its color, hiding it after the animation, or hiding it on the next click. When the type is [AfterAnimationType.Color](https://reference.aspose.com/slides/net/aspose.slides.animation/afteranimationtype/), set [IEffect.AfterAnimationColor](https://reference.aspose.com/slides/net/aspose.slides.animation/ieffect/afteranimationcolor/) as well.
This independent example creates an effect, sets its after-animation behavior through the returned effect object, and saves the result.
```csharp
using System.Drawing;
using Aspose.Slides;
using Aspose.Slides.Animation;
using Aspose.Slides.Export;
using var presentation = new Presentation();
var slide = presentation.Slides[0];
var shape = slide.Shapes.AddAutoShape(ShapeType.Rectangle, 120, 100, 320, 80);
shape.TextFrame.Text = "Dim after animation";
var effect = slide.Timeline.MainSequence.AddEffect(shape, EffectType.Fade, EffectSubtype.None, EffectTriggerType.OnClick);
effect.AfterAnimationType = AfterAnimationType.Color;
effect.AfterAnimationColor.Color = Color.LightGray;
presentation.Save("shape-animation-after-effect.pptx", SaveFormat.Pptx);
```
Changing the type away from [AfterAnimationType.Color](https://reference.aspose.com/slides/net/aspose.slides.animation/afteranimationtype/) clears the after-animation color setting.
## **Animate Text**
Text animation has two related controls:
- [ITextAnimation.BuildType](https://reference.aspose.com/slides/net/aspose.slides.animation/itextanimation/buildtype/) controls whether paragraphs appear together or by paragraph level.
- [IEffect.AnimateTextType](https://reference.aspose.com/slides/net/aspose.slides.animation/ieffect/animatetexttype/) controls whether text appears all at once, by word, or by letter. [IEffect.DelayBetweenTextParts](https://reference.aspose.com/slides/net/aspose.slides.animation/ieffect/delaybetweentextparts/) sets the delay between words or letters. A positive value is a percentage of the effect duration; a negative value is a delay in seconds.
The following independent example animates the words in a text box. [BuildType.AsOneObject](https://reference.aspose.com/slides/net/aspose.slides.animation/buildtype/) disables paragraph-by-paragraph building so that the word setting applies to the entire text frame.
```csharp
using Aspose.Slides;
using Aspose.Slides.Animation;
using Aspose.Slides.Export;
using var presentation = new Presentation();
var slide = presentation.Slides[0];
var textBox = slide.Shapes.AddAutoShape(ShapeType.Rectangle, 80, 80, 560, 100);
textBox.TextFrame.Text = "Aspose.Slides animates this sentence word by word.";
var effect = slide.Timeline.MainSequence.AddEffect(textBox, EffectType.Fade, EffectSubtype.None, EffectTriggerType.OnClick);
effect.TextAnimation.BuildType = BuildType.AsOneObject;
effect.AnimateTextType = AnimateTextType.ByWord;
effect.DelayBetweenTextParts = 20.0f;
presentation.Save("animated-text.pptx", SaveFormat.Pptx);
```
To build a text box by paragraph, set [BuildType.ByLevelParagraphs1](https://reference.aspose.com/slides/net/aspose.slides.animation/buildtype/) (or another paragraph level). To target a single paragraph with its own effect, use the [ISequence.AddEffect](https://reference.aspose.com/slides/net/aspose.slides.animation/isequence/addeffect/) overload that accepts an [IParagraph](https://reference.aspose.com/slides/net/aspose.slides/iparagraph/). See [Animated Text](https://docs.aspose.com/slides/net/animated-text/) for paragraph-level examples.
## **Export and Compatibility Notes**
- Saving to PPT or PPTX preserves the animation model, but the final playback is controlled by the presentation viewer.
- PDF and static images do not play animations. Use [HTML5 export](https://docs.aspose.com/slides/net/export-to-html5/), animated GIF, or [video conversion](https://docs.aspose.com/slides/net/convert-powerpoint-to-video/) when the output must show motion.
- For HTML5, enable [Html5Options.AnimateShapes](https://reference.aspose.com/slides/net/aspose.slides.export/html5options/animateshapes/) and, when needed, [Html5Options.AnimateTransitions](https://reference.aspose.com/slides/net/aspose.slides.export/html5options/animatetransitions/).
- Video rendering supports many common entrance, emphasis, exit, and motion-path effects, but not every PowerPoint effect is supported. Check the current [supported animations and effects](https://docs.aspose.com/slides/net/convert-powerpoint-to-video/#supported-animations-and-effects) and test critical presentations with your target Aspose.Slides version.
- Advanced custom effects and effects imported from other presentation formats may be preserved in the file but render differently in PowerPoint, HTML5, or video. Validate the exported result rather than relying only on the effect name.
## **FAQ**
**Why does an animation appear in PowerPoint but not in a PDF?**
PDF is a static format, so animations and slide transitions do not play. Export to HTML5, animated GIF, or video when motion must be preserved.
**Why does an effect play differently in a video?**
Video export renders animations rather than storing the original PowerPoint behavior. Some advanced effects are unsupported or approximated. Review the supported-effects table and test the actual presentation before production use.
**Does moving a shape forward or backward change its animation order?**
No. Shape z-order controls overlap, while sequence order and triggers control animation playback. Change the timeline if you need a different playback order.
## Related features
- [Animate shapes and text](https://docs.aspose.com/slides/features/animation-effects/)
## Related articles
- [Animate PowerPoint Text in .NET](https://docs.aspose.com/slides/net/animated-text/)
# Apply Shape Effects in Presentations in .NET
> Transform your PPT and PPTX files with advanced shape effects using Aspose.Slides for .NET—create striking, professional slides in seconds.
Source: https://docs.aspose.com/slides/net/shape-effect/
Updated: 2026-11-04
## **Introduction**
While effects in PowerPoint can be used to make a shape stand out, they differ from [fills](https://docs.aspose.com/slides/net/shape-formatting/#gradient-fill) or outlines. Using PowerPoint effects, you can create convincing reflections on a shape, spread a shape's glow, etc.
PowerPoint provides six effects that can be applied to shapes. You can apply one or more effects to a shape.
Some combinations of effects look better than others. For this reason, PowerPoint has options under **Preset**. The Preset options are essentially a known good-looking combination of two or more effects. This way, by selecting a preset, you won't have to waste time testing or combining different effects to find a nice combination.
Aspose.Slides provides properties and methods under the [EffectFormat](https://reference.aspose.com/slides/net/aspose.slides/effectformat/) class that allow you to apply the same effects to shapes in PowerPoint presentations.
## **Apply a Shadow Effect**
Aspose.Slides for .NET supports outer and inner shadows for shapes. You can customize their color, direction, distance, and blur radius to match your presentation's design.
### **Apply an Outer Shadow**
Use an outer shadow to make a card or panel stand out against the slide background. The shadow extends beyond the shape's edges, creating the impression that the shape is raised above the slide. Adjust its color, direction, distance, and blur radius to match the lighting and styling of your template.
This C# code shows how to apply the [outer shadow effect](https://reference.aspose.com/slides/net/aspose.slides/effectformat/outershadoweffect/) to a rectangle:
```c#
using System.Drawing;
using Aspose.Slides;
using Aspose.Slides.Export;
using var presentation = new Presentation();
var slide = presentation.Slides[0];
var shape = slide.Shapes.AddAutoShape(ShapeType.RoundCornerRectangle, 20, 20, 200, 100);
shape.EffectFormat.EnableOuterShadowEffect();
shape.EffectFormat.OuterShadowEffect.ShadowColor.Color = Color.DarkGray;
shape.EffectFormat.OuterShadowEffect.Distance = 10;
shape.EffectFormat.OuterShadowEffect.Direction = 45;
presentation.Save("shadow_effect.pptx", SaveFormat.Pptx);
```

### **Apply an Inner Shadow**
When reproducing a template's visual styling, use an inner shadow to give a card or panel a recessed appearance. An outer shadow extends outside the shape and makes it appear raised, while an inner shadow shades the inside of its edges.
Call [EnableInnerShadowEffect](https://reference.aspose.com/slides/net/aspose.slides/effectformat/enableinnershadoweffect/), then configure [InnerShadowEffect](https://reference.aspose.com/slides/net/aspose.slides/effectformat/innershadoweffect/). Larger values produce softer edges.
This C# example creates a light blue card with a dark gray inner shadow and saves it as a PPTX file:
```csharp
using System.Drawing;
using Aspose.Slides;
using Aspose.Slides.Export;
using var presentation = new Presentation();
var slide = presentation.Slides[0];
var shape = slide.Shapes.AddAutoShape(ShapeType.Rectangle, 20, 20, 200, 100);
shape.FillFormat.FillType = FillType.Solid;
shape.FillFormat.SolidFillColor.Color = Color.LightBlue;
shape.LineFormat.FillFormat.FillType = FillType.NoFill;
shape.EffectFormat.EnableInnerShadowEffect();
var shadow = shape.EffectFormat.InnerShadowEffect;
shadow.ShadowColor.Color = Color.DimGray;
shadow.Direction = 225;
shadow.Distance = 7;
shadow.BlurRadius = 6;
presentation.Save("inner_shadow_effect.pptx", SaveFormat.Pptx);
```

To remove the inner shadow, call [DisableInnerShadowEffect](https://reference.aspose.com/slides/net/aspose.slides/effectformat/disableinnershadoweffect/) on the shape's effect format.
## **Apply a Reflection Effect**
To apply a reflection effect in Aspose.Slides for .NET, you can add a mirror-like reflection to shapes, adjusting parameters such as distance, transparency, and size. This effect enhances the aesthetic of your presentations by giving shapes a more polished and sophisticated look. It’s easy to implement with simple code, enabling quick application across multiple elements for a consistent design.
This C# code shows how to apply the [reflection effect](https://reference.aspose.com/slides/net/aspose.slides/effectformat/reflectioneffect/) to a shape:
```c#
using Aspose.Slides;
using Aspose.Slides.Export;
using var presentation = new Presentation();
var slide = presentation.Slides[0];
var shape = slide.Shapes.AddAutoShape(ShapeType.RoundCornerRectangle, 20, 20, 200, 100);
shape.EffectFormat.EnableReflectionEffect();
shape.EffectFormat.ReflectionEffect.RectangleAlign = RectangleAlignment.Bottom;
shape.EffectFormat.ReflectionEffect.Direction = 90;
shape.EffectFormat.ReflectionEffect.Distance = 40;
shape.EffectFormat.ReflectionEffect.BlurRadius = 2;
presentation.Save("reflection_effect.pptx", SaveFormat.Pptx);
```

## **Apply a Glow Effect**
To apply a glow effect to a shape in Aspose.Slides for .NET, you can add a soft, luminous aura around shapes, adjusting properties like color and size. This effect helps make shapes stand out and adds an attractive, eye-catching visual element to your presentation. It's easy to implement with minimal code, enhancing the overall look of your slides.
This C# code shows how to apply the [glow effect](https://reference.aspose.com/slides/net/aspose.slides/effectformat/gloweffect/) to a shape:
```c#
using System.Drawing;
using Aspose.Slides;
using Aspose.Slides.Export;
using var presentation = new Presentation();
var slide = presentation.Slides[0];
var shape = slide.Shapes.AddAutoShape(ShapeType.RoundCornerRectangle, 20, 20, 200, 100);
shape.EffectFormat.EnableGlowEffect();
shape.EffectFormat.GlowEffect.Color.Color = Color.Magenta;
shape.EffectFormat.GlowEffect.Radius = 15;
presentation.Save("glow_effect.pptx", SaveFormat.Pptx);
```

## **Apply a Soft Edges Effect**
To apply a soft edges effect in Aspose.Slides for .NET, you can create a smooth, blurred transition around the edges of a shape. This effect adds a more subtle and refined look, perfect for designs that need a gentle, softer appearance. You can easily adjust parameters like radius to achieve the desired effect across various shapes in your presentation.
This C# code shows how to apply the [soft edges](https://reference.aspose.com/slides/net/aspose.slides/effectformat/softedgeeffect/) to a shape:
```c#
using Aspose.Slides;
using Aspose.Slides.Export;
using var presentation = new Presentation();
var slide = presentation.Slides[0];
var shape = slide.Shapes.AddAutoShape(ShapeType.RoundCornerRectangle, 20, 20, 200, 150);
shape.EffectFormat.EnableSoftEdgeEffect();
shape.EffectFormat.SoftEdgeEffect.Radius = 8;
presentation.Save("soft_edges_effect.pptx", SaveFormat.Pptx);
```

## **Apply a Blur Effect**
Use shape blur to soften a shape's fill and outline while keeping the shape editable. Call [SetBlurEffect](https://reference.aspose.com/slides/net/aspose.slides/ieffectformat/setblureffect/) on the shape's effect format. The radius is measured in points (1/72 inch): use a nonnegative value, with larger values producing stronger blur. A radius of zero leaves the appearance unchanged.
The [Grow](https://reference.aspose.com/slides/net/aspose.slides.effects/iblur/grow/) setting controls the visible bounds of the effect. With `false`, the blur is clipped to the original painted bounds, including the outline. With `true`, the blur can extend beyond those bounds. Neither setting changes the shape's position or dimensions.
The comparison below uses the same fill, outline, and shape dimensions throughout. The top row uses `grow = false`; the bottom row uses `grow = true`.
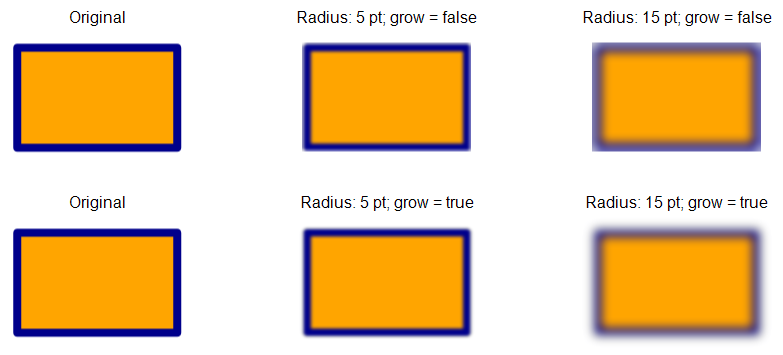
This C# example creates an orange rectangle with a dark blue outline, applies a 5-point blur, and then updates it to a 15-point blur by calling [SetBlurEffect](https://reference.aspose.com/slides/net/aspose.slides/ieffectformat/setblureffect/) again. It saves both blurred states, then calls [DisableBlurEffect](https://reference.aspose.com/slides/net/aspose.slides/ieffectformat/disableblureffect/) and saves the shape without blur.
```csharp
using System.Drawing;
using Aspose.Slides;
using Aspose.Slides.Export;
using var presentation = new Presentation();
var slide = presentation.Slides[0];
var shape = slide.Shapes.AddAutoShape(ShapeType.Rectangle, 100, 80, 160, 100);
shape.FillFormat.FillType = FillType.Solid;
shape.FillFormat.SolidFillColor.Color = Color.Orange;
shape.LineFormat.FillFormat.FillType = FillType.Solid;
shape.LineFormat.FillFormat.SolidFillColor.Color = Color.DarkBlue;
shape.LineFormat.Width = 8;
shape.EffectFormat.SetBlurEffect(5, false);
presentation.Save("shape_blur_5.pptx", SaveFormat.Pptx);
shape.EffectFormat.SetBlurEffect(15, true);
presentation.Save("shape_blur_15.pptx", SaveFormat.Pptx);
shape.EffectFormat.DisableBlurEffect();
presentation.Save("shape_blur_removed.pptx", SaveFormat.Pptx);
```
Shape blur affects the fill and outline together. A soft edges effect fades the shape's edges, while shadow blur softens only the shadow. Image transformation effects operate on image content; this example applies blur directly to the shape's effect format without converting the shape to an image.
## **FAQ**
**Can I apply multiple effects to the same shape?**
Yes, you can combine different effects, such as shadow, reflection, and glow, on a single shape to create a more dynamic appearance.
**What shapes can I apply effects to?**
You can apply effects to various shapes, including autoshapes, charts, tables, pictures, SmartArt objects, OLE objects, and more.
**Can I apply effects to grouped shapes?**
Yes, you can apply effects to grouped shapes. The effect will apply to the entire group.
## Related features
- [Add shadows, glow and reflections](https://docs.aspose.com/slides/features/shape-effects/)
## Related articles
- [Create and Apply WordArt Effects in .NET](https://docs.aspose.com/slides/net/wordart/)
# Get Shape Effective Properties from Presentations in .NET
> Learn how to use Aspose.Slides for .NET to distinguish local, inherited, and effective shape formatting in PowerPoint presentations.
Source: https://docs.aspose.com/slides/net/shape-effective-properties/
Updated: 2026-08-13
## **Understand Local, Inherited, and Effective Properties**
PowerPoint formatting can come from several places. The value stored directly on an object is its **local value**. If that value is not set, PowerPoint looks at parent formatting sources, such as a paragraph default, a text style, a layout or master slide, a theme, or presentation-level defaults. Those values are **inherited values**. The value that remains after the entire hierarchy is resolved is the **effective value**—the value used to render the object.
For example, a text portion may not define its own font height. Its local [FontHeight](https://reference.aspose.com/slides/net/aspose.slides/ibaseportionformat/fontheight/) is then `float.NaN`, which means "not set here." The portion can inherit a height from its paragraph, the presentation's default text style, or another applicable source. Calling [GetEffective](https://reference.aspose.com/slides/net/aspose.slides/iportionformat/geteffective/) on the portion format returns the final resolved height.
Use the two kinds of formatting data for different purposes:
- Read or change a local format object, such as [IPortionFormat](https://reference.aspose.com/slides/net/aspose.slides/iportionformat/), when you need to control where a value is defined.
- Read an effective data object, such as [IPortionFormatEffectiveData](https://reference.aspose.com/slides/net/aspose.slides/iportionformateffectivedata/), when you need the final, rendered result. Effective data is read-only.
## **Compare Local, Inherited, and Effective Values**
The following complete example creates a shape and applies font heights at the presentation, paragraph, and portion levels. Each step prints the values defined at those levels and the resulting effective value for the same text portion. It also demonstrates why effective data must be read again after formatting changes.
```csharp
using System;
using Aspose.Slides;
using Aspose.Slides.Export;
using var presentation = new Presentation();
var slide = presentation.Slides[0];
var shape = slide.Shapes.AddAutoShape(ShapeType.Rectangle, 100, 100, 500, 80, false);
var textFrame = shape.AddTextFrame("Effective formatting");
var paragraph = textFrame.Paragraphs[0];
var portion = paragraph.Portions[0];
// Define inherited values at two different levels.
presentation.DefaultTextStyle.GetLevel(0).DefaultPortionFormat.FontHeight = 20;
paragraph.ParagraphFormat.DefaultPortionFormat.FontHeight = 28;
PrintFontHeights("The portion inherits from the paragraph", presentation, paragraph, portion);
// A local value on the portion overrides both inherited values.
portion.PortionFormat.FontHeight = 36;
PrintFontHeights("A local value overrides inherited values", presentation, paragraph, portion);
// Changing an inherited value does not override an existing local value.
paragraph.ParagraphFormat.DefaultPortionFormat.FontHeight = 30;
PrintFontHeights("The local value still has priority", presentation, paragraph, portion);
// Clear the local value. The portion now inherits from the paragraph again.
portion.PortionFormat.FontHeight = float.NaN;
PrintFontHeights("The local value is cleared", presentation, paragraph, portion);
// Clear the paragraph value. The presentation default now supplies the result.
paragraph.ParagraphFormat.DefaultPortionFormat.FontHeight = float.NaN;
PrintFontHeights("The paragraph value is cleared", presentation, paragraph, portion);
presentation.Save("effective-properties.pptx", SaveFormat.Pptx);
static void PrintFontHeights(string caption, Presentation presentation, IParagraph paragraph, IPortion portion)
{
var presentationValue = presentation.DefaultTextStyle.GetLevel(0).DefaultPortionFormat.FontHeight;
var paragraphValue = paragraph.ParagraphFormat.DefaultPortionFormat.FontHeight;
var localValue = portion.PortionFormat.FontHeight;
// Read effective data after the preceding changes.
var effectiveValue = portion.PortionFormat.GetEffective().FontHeight;
Console.WriteLine(caption);
Console.WriteLine($" Presentation default: {FormatLocalValue(presentationValue)}");
Console.WriteLine($" Paragraph default: {FormatLocalValue(paragraphValue)}");
Console.WriteLine($" Portion local: {FormatLocalValue(localValue)}");
Console.WriteLine($" Portion effective: {effectiveValue}");
}
static string FormatLocalValue(float value) => float.IsNaN(value) ? "" : value.ToString();
```
The priority in this example is portion local formatting, then paragraph formatting, then the presentation default. Other objects can have different inheritance chains, but the principle is the same: a more specific explicit value wins, and [GetEffective](https://reference.aspose.com/slides/net/aspose.slides/iportionformat/geteffective/) returns the final result.
## **Get Effective Text Properties**
Text formatting is split across several objects:
- [ITextFrameFormat.GetEffective()](https://reference.aspose.com/slides/net/aspose.slides/itextframeformat/geteffective/) resolves text-frame properties such as margins, anchoring, autofit, and vertical text direction.
- [ITextStyle.GetEffective()](https://reference.aspose.com/slides/net/aspose.slides/itextstyle/geteffective/) resolves paragraph formatting for each text style level.
- [IParagraphFormat.GetEffective()](https://reference.aspose.com/slides/net/aspose.slides/iparagraphformat/geteffective/) resolves paragraph properties such as alignment, indentation, and bullets.
- [IPortionFormat.GetEffective()](https://reference.aspose.com/slides/net/aspose.slides/iportionformat/geteffective/) resolves character properties such as font height, typeface, color, bold, and italic.
For the next example, `text-formatting.pptx` must contain at least one slide and one [AutoShape](https://reference.aspose.com/slides/net/aspose.slides/autoshape/) with a non-empty text frame. The AutoShape can appear at any position in the shape collection; the code searches for a suitable object and validates it before use.
```csharp
using System;
using System.Linq;
using Aspose.Slides;
using var presentation = new Presentation("text-formatting.pptx");
if (presentation.Slides.Count == 0)
throw new InvalidOperationException("The presentation contains no slides.");
var autoShapes = presentation.Slides[0].Shapes.OfType();
var shape = autoShapes.FirstOrDefault(candidate => HasNonEmptyText(candidate));
if (shape == null)
{
throw new InvalidOperationException("The first slide must contain an AutoShape with non-empty text.");
}
var textFrame = shape.TextFrame;
var paragraph = textFrame.Paragraphs[0];
var portion = paragraph.Portions[0];
var textFrameEffective = textFrame.TextFrameFormat.GetEffective();
var paragraphEffective = paragraph.ParagraphFormat.GetEffective();
var portionEffective = portion.PortionFormat.GetEffective();
Console.WriteLine("Text frame margins:");
Console.WriteLine($" Left: {textFrameEffective.MarginLeft}");
Console.WriteLine($" Top: {textFrameEffective.MarginTop}");
Console.WriteLine($" Right: {textFrameEffective.MarginRight}");
Console.WriteLine($" Bottom: {textFrameEffective.MarginBottom}");
Console.WriteLine($"Paragraph alignment: {paragraphEffective.Alignment}");
Console.WriteLine($"Font height: {portionEffective.FontHeight}");
Console.WriteLine($"Bold: {portionEffective.FontBold}");
var effectiveTextStyle = textFrame.TextFrameFormat.TextStyle.GetEffective();
for (var level = 0; level < 9; level++)
{
var levelEffective = effectiveTextStyle.GetLevel(level);
Console.WriteLine($"Level {level} indent: {levelEffective.Indent}");
}
static bool HasNonEmptyText(IAutoShape shape)
{
if (shape.TextFrame == null)
return false;
if (shape.TextFrame.Paragraphs.Count == 0)
return false;
return shape.TextFrame.Paragraphs[0].Portions.Count > 0;
}
```
## **Get Effective 3D Properties**
[IThreeDFormat.GetEffective()](https://reference.aspose.com/slides/net/aspose.slides/ithreedformat/geteffective/) returns one [IThreeDFormatEffectiveData](https://reference.aspose.com/slides/net/aspose.slides/ithreedformateffectivedata/) object that groups all resolved 3D settings. Its [Camera](https://reference.aspose.com/slides/net/aspose.slides/ithreedformateffectivedata/camera/), [LightRig](https://reference.aspose.com/slides/net/aspose.slides/ithreedformateffectivedata/lightrig/), [BevelTop](https://reference.aspose.com/slides/net/aspose.slides/ithreedformateffectivedata/beveltop/), and [BevelBottom](https://reference.aspose.com/slides/net/aspose.slides/ithreedformateffectivedata/bevelbottom/) properties expose the corresponding effective data. Reading these related settings together makes it easier to understand the final 3D appearance of a shape.
For this example, `shape-3d.pptx` must contain at least one shape on its first slide. Apply 3D camera, lighting, or bevel settings to that shape if you want the output to contain values other than the defaults.
```csharp
using System;
using Aspose.Slides;
using var presentation = new Presentation("shape-3d.pptx");
if (presentation.Slides.Count == 0 || presentation.Slides[0].Shapes.Count == 0)
{
throw new InvalidOperationException("The first slide must contain a shape.");
}
var shape = presentation.Slides[0].Shapes[0];
var threeDEffective = shape.ThreeDFormat.GetEffective();
Console.WriteLine("Camera:");
Console.WriteLine($" Type: {threeDEffective.Camera.CameraType}");
Console.WriteLine($" Field of view: {threeDEffective.Camera.FieldOfViewAngle}");
Console.WriteLine($" Zoom: {threeDEffective.Camera.Zoom}");
Console.WriteLine("Light rig:");
Console.WriteLine($" Type: {threeDEffective.LightRig.LightType}");
Console.WriteLine($" Direction: {threeDEffective.LightRig.Direction}");
Console.WriteLine("Top bevel:");
Console.WriteLine($" Type: {threeDEffective.BevelTop.BevelType}");
Console.WriteLine($" Width: {threeDEffective.BevelTop.Width}");
Console.WriteLine($" Height: {threeDEffective.BevelTop.Height}");
```
## **Get Effective Table Formatting**
Table formatting can come from the table style and from formats applied to the whole table, a column, a row, or an individual cell. For conflicts among explicitly defined fills, the priority is cell, row, column, and then whole table. The effective format of a cell is the final format used to draw that cell.
For this example, `table-formatting.pptx` must contain at least one table on its first slide. The table must have at least one row and one column. The code searches for an [ITable](https://reference.aspose.com/slides/net/aspose.slides/itable/) instead of assuming that `Shapes[0]` is a table.
```csharp
using System;
using System.Linq;
using Aspose.Slides;
using var presentation = new Presentation("table-formatting.pptx");
if (presentation.Slides.Count == 0)
throw new InvalidOperationException("The presentation contains no slides.");
var table = presentation.Slides[0].Shapes.OfType().FirstOrDefault();
if (table == null)
throw new InvalidOperationException("The first slide must contain a table.");
if (table.Rows.Count == 0 || table.Columns.Count == 0)
throw new InvalidOperationException("The table must contain at least one cell.");
var tableEffective = table.TableFormat.GetEffective();
var rowEffective = table.Rows[0].RowFormat.GetEffective();
var columnEffective = table.Columns[0].ColumnFormat.GetEffective();
var cellEffective = table[0, 0].CellFormat.GetEffective();
Console.WriteLine($"Table fill: {tableEffective.FillFormat.FillType}");
Console.WriteLine($"Row fill: {rowEffective.FillFormat.FillType}");
Console.WriteLine($"Column fill: {columnEffective.FillFormat.FillType}");
Console.WriteLine($"Final cell fill: {cellEffective.FillFormat.FillType}");
```
If you need the color rather than only the fill type, first check the effective [FillType](https://reference.aspose.com/slides/net/aspose.slides/ifillformateffectivedata/filltype/), and then read the property that applies to that type—for example, [SolidFillColor](https://reference.aspose.com/slides/net/aspose.slides/ifillformateffectivedata/solidfillcolor/) for a solid fill.
## **Re-read Effective Data After Changes**
Effective data describes the formatting hierarchy at the time it is resolved. Call `GetEffective` again after changing anything that can participate in that hierarchy, including:
- the object's local formatting;
- paragraph or text-frame defaults;
- a table style, table, column, row, or cell format;
- layout or master slide formatting;
- theme data or presentation-level defaults;
- the layout or master assigned to a slide.
Do not keep an effective data object as a permanent snapshot. Aspose.Slides may cache some effective data internally, and a later `GetEffective` call can refresh that data. If you need to compare values before and after a change, copy the scalar values you need—such as a font height, color, alignment, or bevel width—into your own variables before making the change.
To change a value, update the appropriate local format object and then call `GetEffective` to verify the result. Effective data objects themselves are read-only.
## **FAQ**
**How can I tell which level supplied an effective value?**
Effective data contains the final value, not its source. Inspect the applicable local objects from the most specific level outward. For text, this can include the portion, paragraph, text frame, layout, master, theme, and presentation defaults. Undefined values such as `float.NaN` or `null` indicate that the search continues to another level.
**What happens when no level defines a property?**
Aspose.Slides resolves the appropriate PowerPoint or library default. That resolved value appears in the effective data even though no local object explicitly defines it.
**Why does an effective value sometimes equal the local value?**
The local value won the inheritance calculation. This is expected when the property is explicitly set on the object and no more specific rule overrides it.
**When should I use local data instead of effective data?**
Use local data to inspect or edit a specific formatting level. Use effective data when you need the final appearance after inheritance, theme rules, and applicable styles have been resolved. The [complete comparison example](https://docs.aspose.com/slides/net/shape-effective-properties/#compare-local-inherited-and-effective-values) demonstrates both in the same workflow.
# Format PowerPoint Shapes in .NET
> Learn how to format PowerPoint shapes in C# using Aspose.Slides—set fill, line, and effect styles for PPT and PPTX files with precision and full control.
Source: https://docs.aspose.com/slides/net/shape-formatting/
Updated: 2026-11-05
## **Introduction**
Format shapes in PowerPoint by adjusting their outlines, fills, and effects. Aspose.Slides for .NET lets you control these settings programmatically, including transparency, rotation, and 3D formatting.
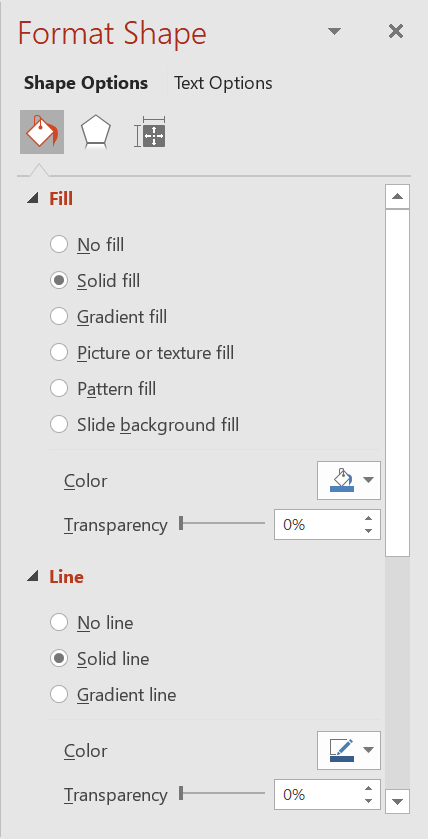
Aspose.Slides for .NET provides interfaces and properties that allow you to format shapes using the same options available in PowerPoint.
## **Format Lines**
Use [IShape.LineFormat](https://reference.aspose.com/slides/net/aspose.slides/ishape/lineformat/) to control a shape’s outline. This example creates an unfilled rectangle with a blue, dashed outline. [ILineFormat.Style](https://reference.aspose.com/slides/net/aspose.slides/ilineformat/style/) selects a thick-thin compound line, while [ILineFormat.Width](https://reference.aspose.com/slides/net/aspose.slides/ilineformat/width/) sets its width to 7 points and [ILineFormat.DashStyle](https://reference.aspose.com/slides/net/aspose.slides/ilineformat/dashstyle/) selects the dash pattern.
```csharp
using System.Drawing;
using Aspose.Slides;
using Aspose.Slides.Export;
using var presentation = new Presentation();
var slide = presentation.Slides[0];
var shape = slide.Shapes.AddAutoShape(ShapeType.Rectangle, 50, 50, 150, 75);
shape.FillFormat.FillType = FillType.NoFill;
shape.LineFormat.Style = LineStyle.ThickThin;
shape.LineFormat.Width = 7;
shape.LineFormat.DashStyle = LineDashStyle.Dash;
shape.LineFormat.FillFormat.FillType = FillType.Solid;
shape.LineFormat.FillFormat.SolidFillColor.Color = Color.Blue;
presentation.Save("formatted_lines.pptx", SaveFormat.Pptx);
```
The result:

### **Set Custom Line Dash Patterns**
Use [ILineFormat.CustomDashPattern](https://reference.aspose.com/slides/net/aspose.slides/ilineformat/customdashpattern/) when predefined line styles do not provide the dash lengths and gaps you need, for example for branded outlines or technical diagrams. Assigning a pattern automatically sets [ILineFormat.DashStyle](https://reference.aspose.com/slides/net/aspose.slides/ilineformat/dashstyle/) to [LineDashStyle.Custom](https://reference.aspose.com/slides/net/aspose.slides/linedashstyle/).
Array entries alternate between dash and gap lengths, starting with a dash. Each value is a multiple of the line width: `{ 4, 2 }` at a width of 3 points produces a 12-point dash followed by a 6-point gap. Use pairs of finite, nonnegative values to define complete dash-and-gap segments. The example uses positive values to keep every dash and gap visible.
This example creates five blue lines with the same length and flat caps. The first three compare patterns at a width of 3 points. The fourth repeats the first pattern at twice the width, doubling both the dash and gap lengths. The fifth switches from a custom pattern to a solid line.
```csharp
using System.Drawing;
using Aspose.Slides;
using Aspose.Slides.Export;
using var presentation = new Presentation();
presentation.SlideSize.SetSize(600, 300, SlideSizeScaleType.DoNotScale);
var slide = presentation.Slides[0];
var patterns = new[]
{
new float[] { 4, 2 },
new float[] { 1, 2 },
new float[] { 6, 2, 1, 2 },
new float[] { 4, 2 },
new float[] { 4, 2 }
};
for (var i = 0; i < patterns.Length; i++)
{
var line = slide.Shapes.AddAutoShape(ShapeType.Line, 50, 50 + i * 50, 500, 0);
line.LineFormat.Width = i == 3 ? 6 : 3;
line.LineFormat.FillFormat.FillType = FillType.Solid;
line.LineFormat.FillFormat.SolidFillColor.Color = Color.DarkBlue;
line.LineFormat.CapStyle = LineCapStyle.Flat;
line.LineFormat.BeginArrowheadStyle = LineArrowheadStyle.None;
line.LineFormat.EndArrowheadStyle = LineArrowheadStyle.None;
line.LineFormat.CustomDashPattern = patterns[i];
}
// Return the last line to a solid style.
slide.Shapes[4].LineFormat.DashStyle = LineDashStyle.Solid;
presentation.Save("custom_dash_patterns.pptx", SaveFormat.Pptx);
```
To return to a predefined dashed style instead, assign [LineDashStyle.Dash](https://reference.aspose.com/slides/net/aspose.slides/linedashstyle/) to [ILineFormat.DashStyle](https://reference.aspose.com/slides/net/aspose.slides/ilineformat/dashstyle/). The selected style controls the line's appearance.
The result in PowerPoint, from top to bottom: **{4, 2}, 3 pt**; **{1, 2}, 3 pt**; **{6, 2, 1, 2}, 3 pt**; **{4, 2}, 6 pt**; and **Solid, 3 pt**.

### **Set Line Caps**
Use [ILineFormat.CapStyle](https://reference.aspose.com/slides/net/aspose.slides/ilineformat/capstyle/) to set the ends of an open line. The [LineCapStyle](https://reference.aspose.com/slides/net/aspose.slides/linecapstyle/) enumeration provides three explicit cap styles:
- `Flat`: The stroke stops at the endpoint.
- `Round`: A semicircular cap extends beyond the endpoint by half the line width.
- `Square`: A square cap extends beyond the endpoint by half the line width.
The enumeration also includes `NotDefined`, which means that no cap style is explicitly assigned.
Caps are different from arrowheads, which add symbols to line ends, and joins, which control corners between line segments. This example disables arrowheads through [ILineFormat.BeginArrowheadStyle](https://reference.aspose.com/slides/net/aspose.slides/ilineformat/beginarrowheadstyle/) and [ILineFormat.EndArrowheadStyle](https://reference.aspose.com/slides/net/aspose.slides/ilineformat/endarrowheadstyle/) so that only the cap shapes are compared.
The following example creates three otherwise identical horizontal lines, 20 points wide. From top to bottom, they use flat, round, and square caps. Their endpoints have the same horizontal coordinates; the round and square caps extend 10 points beyond each endpoint.
```csharp
using System.Drawing;
using Aspose.Slides;
using Aspose.Slides.Export;
using var presentation = new Presentation();
presentation.SlideSize.SetSize(500, 240, SlideSizeScaleType.DoNotScale);
var slide = presentation.Slides[0];
var capStyles = new[] { LineCapStyle.Flat, LineCapStyle.Round, LineCapStyle.Square };
for (var i = 0; i < capStyles.Length; i++)
{
var line = slide.Shapes.AddAutoShape(ShapeType.Line, 100, 50 + i * 70, 300, 0);
line.LineFormat.Width = 20;
line.LineFormat.FillFormat.FillType = FillType.Solid;
line.LineFormat.FillFormat.SolidFillColor.Color = Color.DarkBlue;
line.LineFormat.DashStyle = LineDashStyle.Solid;
line.LineFormat.CapStyle = capStyles[i];
line.LineFormat.BeginArrowheadStyle = LineArrowheadStyle.None;
line.LineFormat.EndArrowheadStyle = LineArrowheadStyle.None;
}
presentation.Save("line_caps.pptx", SaveFormat.Pptx);
```
The result in PowerPoint, from top to bottom: **Flat**, **Round**, and **Square**.

## **Apply Sketch Effects to Shape Lines**
A sketch effect makes a shape line look hand-drawn. Use [IShape.LineFormat](https://reference.aspose.com/slides/net/aspose.slides/ishape/lineformat/) to access the line settings, [ILineFormat.SketchFormat](https://reference.aspose.com/slides/net/aspose.slides/ilineformat/sketchformat/) to access the sketch settings, and [ISketchFormat.SketchType](https://reference.aspose.com/slides/net/aspose.slides/isketchformat/sketchtype/) to select a value from the [LineSketchType](https://reference.aspose.com/slides/net/aspose.slides/linesketchtype/) enumeration.
The following C# code shows how to apply a [LineSketchType.Curved](https://reference.aspose.com/slides/net/aspose.slides/linesketchtype/) effect, read the explicitly assigned value, and remove the effect with [LineSketchType.None](https://reference.aspose.com/slides/net/aspose.slides/linesketchtype/):
```csharp
using System;
using Aspose.Slides;
using var presentation = new Presentation();
var slide = presentation.Slides[0];
var shape = slide.Shapes.AddAutoShape(ShapeType.Rectangle, 50, 50, 200, 100);
var sketchFormat = shape.LineFormat.SketchFormat;
sketchFormat.SketchType = LineSketchType.Curved;
var explicitSketchType = sketchFormat.SketchType;
Console.WriteLine($"Explicit sketch type: {explicitSketchType}");
sketchFormat.SketchType = LineSketchType.None;
```
The value returned by [ISketchFormat.SketchType](https://reference.aspose.com/slides/net/aspose.slides/isketchformat/sketchtype/) represents the setting assigned directly to the shape. If the line formatting can be inherited from a theme, master slide, or layout slide, use [ILineFormat.GetEffective](https://reference.aspose.com/slides/net/aspose.slides/ilineformat/geteffective/), access [ILineFormatEffectiveData.SketchFormat](https://reference.aspose.com/slides/net/aspose.slides/ilineformateffectivedata/sketchformat/), and read [ISketchFormatEffectiveData.SketchType](https://reference.aspose.com/slides/net/aspose.slides/isketchformateffectivedata/sketchtype/). The effective value reflects the formatting that is actually applied after inheritance is resolved. This example requires an existing presentation with at least one shape on its first slide and prints both values:
```csharp
using System;
using Aspose.Slides;
using var presentation = new Presentation("presentation.pptx");
var shape = presentation.Slides[0].Shapes[0];
var lineFormat = shape.LineFormat;
var explicitSketchType = lineFormat.SketchFormat.SketchType;
var effectiveLineFormat = lineFormat.GetEffective();
var effectiveSketchType = effectiveLineFormat.SketchFormat.SketchType;
Console.WriteLine($"Explicit sketch type: {explicitSketchType}");
Console.WriteLine($"Effective sketch type: {effectiveSketchType}");
```
## **Format Join Styles**
Here are the three join type options:
* Round
* Miter
* Bevel
The join style controls how two outline segments meet at a corner. Use **Round** for rounded corners, **Miter** for sharp corners, or **Bevel** for flattened corners.
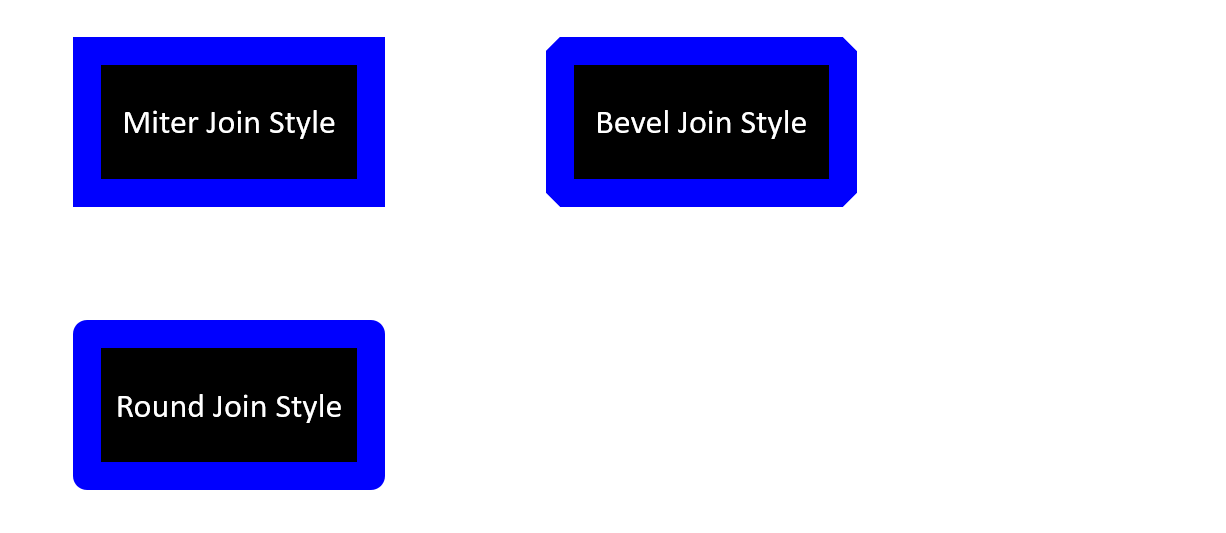
This example creates three black rectangles with blue outlines 15 points wide. It sets [ILineFormat.JoinStyle](https://reference.aspose.com/slides/net/aspose.slides/ilineformat/joinstyle/) to the miter, bevel, and round values of [LineJoinStyle](https://reference.aspose.com/slides/net/aspose.slides/linejoinstyle/), respectively, to compare how the corners are drawn.
```csharp
using System.Drawing;
using Aspose.Slides;
using Aspose.Slides.Export;
using var presentation = new Presentation();
var slide = presentation.Slides[0];
var miterShape = slide.Shapes.AddAutoShape(ShapeType.Rectangle, 20, 20, 150, 75);
var bevelShape = slide.Shapes.AddAutoShape(ShapeType.Rectangle, 210, 20, 150, 75);
var roundShape = slide.Shapes.AddAutoShape(ShapeType.Rectangle, 20, 135, 150, 75);
miterShape.FillFormat.FillType = FillType.Solid;
miterShape.FillFormat.SolidFillColor.Color = Color.Black;
bevelShape.FillFormat.FillType = FillType.Solid;
bevelShape.FillFormat.SolidFillColor.Color = Color.Black;
roundShape.FillFormat.FillType = FillType.Solid;
roundShape.FillFormat.SolidFillColor.Color = Color.Black;
miterShape.LineFormat.Width = 15;
bevelShape.LineFormat.Width = 15;
roundShape.LineFormat.Width = 15;
miterShape.LineFormat.FillFormat.FillType = FillType.Solid;
miterShape.LineFormat.FillFormat.SolidFillColor.Color = Color.Blue;
bevelShape.LineFormat.FillFormat.FillType = FillType.Solid;
bevelShape.LineFormat.FillFormat.SolidFillColor.Color = Color.Blue;
roundShape.LineFormat.FillFormat.FillType = FillType.Solid;
roundShape.LineFormat.FillFormat.SolidFillColor.Color = Color.Blue;
miterShape.LineFormat.JoinStyle = LineJoinStyle.Miter;
bevelShape.LineFormat.JoinStyle = LineJoinStyle.Bevel;
roundShape.LineFormat.JoinStyle = LineJoinStyle.Round;
miterShape.TextFrame.Text = "Miter Join Style";
bevelShape.TextFrame.Text = "Bevel Join Style";
roundShape.TextFrame.Text = "Round Join Style";
presentation.Save("join_styles.pptx", SaveFormat.Pptx);
```
### **Limit Miter Joins at Sharp Corners**
Use [ILineFormat.MiterLimit](https://reference.aspose.com/slides/net/aspose.slides/ilineformat/miterlimit/) with [ILineFormat.JoinStyle](https://reference.aspose.com/slides/net/aspose.slides/ilineformat/joinstyle/) set to [LineJoinStyle.Miter](https://reference.aspose.com/slides/net/aspose.slides/linejoinstyle/) to limit how far a sharp corner can extend.
The limit is a ratio of the distance between the inner and outer corners of the join to the line width. For example, a value of `8` permits a miter length of up to eight times the line width; it is not a measurement in points. If the corner would exceed the limit, PowerPoint uses a beveled join at that corner. A larger limit allows sharper points. The setting affects miter joins only, and changing it has no visible effect when the corner remains within both limits.
This example creates two identical, unfilled triangles with outlines 20 points wide. The left triangle uses a limit of `2`, and the right uses `8`. Each triangle is 80 points wide and 160 points high, giving its top corner a miter-length-to-line-width ratio of approximately `4.12`. Consequently, PowerPoint bevels the left apex and preserves the right apex.
```csharp
using System.Drawing;
using Aspose.Slides;
using Aspose.Slides.Export;
using var presentation = new Presentation();
presentation.SlideSize.SetSize(500, 320, SlideSizeScaleType.DoNotScale);
var slide = presentation.Slides[0];
var miterLimits = new[] { 2f, 8f };
for (var i = 0; i < miterLimits.Length; i++)
{
var triangle = slide.Shapes.AddAutoShape(ShapeType.Triangle, 90 + i * 240, 110, 80, 160);
triangle.FillFormat.FillType = FillType.NoFill;
triangle.LineFormat.Width = 20;
triangle.LineFormat.FillFormat.FillType = FillType.Solid;
triangle.LineFormat.FillFormat.SolidFillColor.Color = Color.DarkBlue;
triangle.LineFormat.JoinStyle = LineJoinStyle.Miter;
triangle.LineFormat.MiterLimit = miterLimits[i];
}
presentation.Save("miter_limits.pptx", SaveFormat.Pptx);
```
The result in PowerPoint: **Miter limit 2** on the left and **miter limit 8** on the right.

## **Gradient Fill**
A gradient fill blends colors across a shape. This example fills an ellipse with a linear gradient at a 45-degree angle from red to purple using [IFillFormat.GradientFormat](https://reference.aspose.com/slides/net/aspose.slides/ifillformat/gradientformat/). The [IGradientStopCollection.Add](https://reference.aspose.com/slides/net/aspose.slides/igradientstopcollection/add/) method places the color stops at 0 and 1, the beginning and end of the gradient. Clearing the existing stops ensures that only these two colors are used.
```csharp
using Aspose.Slides;
using Aspose.Slides.Export;
using var presentation = new Presentation();
var slide = presentation.Slides[0];
var shape = slide.Shapes.AddAutoShape(ShapeType.Ellipse, 50, 50, 150, 75);
shape.FillFormat.FillType = FillType.Gradient;
shape.FillFormat.GradientFormat.GradientShape = GradientShape.Linear;
shape.FillFormat.GradientFormat.LinearGradientAngle = 45;
shape.FillFormat.GradientFormat.GradientStops.Clear();
shape.FillFormat.GradientFormat.GradientStops.Add(1.0f, PresetColor.Purple);
shape.FillFormat.GradientFormat.GradientStops.Add(0.0f, PresetColor.Red);
presentation.Save("gradient_fill.pptx", SaveFormat.Pptx);
```
The result:

If a gradient looks different in an exported image than it does in PowerPoint, see [Choose a Gradient Rendering Style](https://docs.aspose.com/slides/net/convert-powerpoint-to-png/#choose-a-gradient-rendering-style). You can select a rendering style without changing the gradient fill stored in the presentation.
### **Set the Linear Gradient Angle**
Use [IGradientFormat.LinearGradientAngle](https://reference.aspose.com/slides/net/aspose.slides/igradientformat/lineargradientangle/) to control the orientation of a [GradientShape.Linear](https://reference.aspose.com/slides/net/aspose.slides/gradientshape/) fill. The angle is measured in degrees and increases clockwise: `0` runs from left to right, `90` from top to bottom, `180` from right to left, and `270` from bottom to top. Fractional angles are supported. Finite angles outside `[0, 360)` are normalized to one revolution; for example, `-45` becomes `315` and `360` becomes `0`.
This example creates six rectangles with identical red, green, and blue stops at positions `0`, `0.5`, and `1`. Scaling is disabled so that the angle can be compared independently of the rectangles' proportions. The angles, from left to right, are `0`, `45`, and `90` in the first row, and `135`, `180`, and `270` in the second row.
```csharp
using System.Drawing;
using Aspose.Slides;
using Aspose.Slides.Export;
using var presentation = new Presentation();
presentation.SlideSize.SetSize(720, 400, SlideSizeScaleType.DoNotScale);
var slide = presentation.Slides[0];
var angles = new float[] { 0, 45, 90, 135, 180, 270 };
for (var i = 0; i < angles.Length; i++)
{
var x = 30 + (i % 3) * 230;
var y = 30 + (i / 3) * 190;
var shape = slide.Shapes.AddAutoShape(ShapeType.Rectangle, x, y, 200, 150);
shape.LineFormat.FillFormat.FillType = FillType.NoFill;
shape.FillFormat.FillType = FillType.Gradient;
var gradient = shape.FillFormat.GradientFormat;
gradient.GradientShape = GradientShape.Linear;
gradient.GradientStops.Clear();
gradient.GradientStops.Add(0f, Color.Red);
gradient.GradientStops.Add(0.5f, Color.Lime);
gradient.GradientStops.Add(1f, Color.Blue);
gradient.LinearGradientScaled = NullableBool.False;
gradient.LinearGradientAngle = angles[i];
}
presentation.Save("linear_gradient_angles.pptx", SaveFormat.Pptx);
```
The result in PowerPoint:
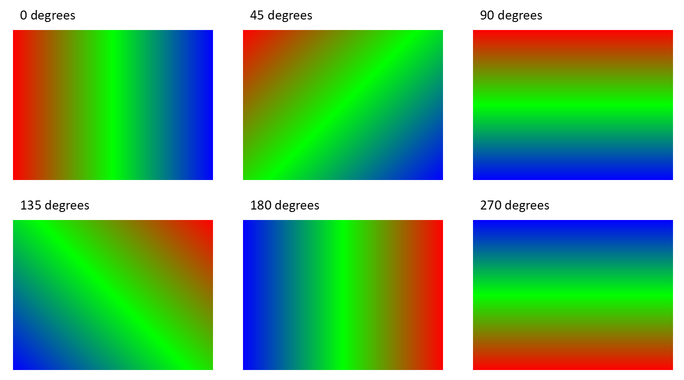
### **Scale a Linear Gradient with the Shape**
[IGradientFormat.LinearGradientScaled](https://reference.aspose.com/slides/net/aspose.slides/igradientformat/lineargradientscaled/) accepts a [NullableBool](https://reference.aspose.com/slides/net/aspose.slides/nullablebool/) value. Set it explicitly to `False` to keep the geometric gradient angle as the shape's proportions change, or to `True` to scale the gradient with the shape's width and height. With scaling enabled, the visible angle can differ from the assigned angle on a non-square shape.
The following example uses a `45`-degree angle and the same color stops as the angle comparison. The left column uses `False`; the right column uses `True`. Each column contains a wide rectangle above a tall rectangle. Both start with the same wide dimensions; changing the second rectangle's width and height demonstrates how the fill responds to resizing without changing its gradient settings.
```csharp
using System.Drawing;
using Aspose.Slides;
using Aspose.Slides.Export;
using var presentation = new Presentation();
presentation.SlideSize.SetSize(720, 460, SlideSizeScaleType.DoNotScale);
var slide = presentation.Slides[0];
var scalingOptions = new[] { NullableBool.False, NullableBool.True };
for (var column = 0; column < scalingOptions.Length; column++)
{
for (var row = 0; row < 2; row++)
{
var x = 30 + column * 360;
var y = row == 0 ? 30 : 150;
var shape = slide.Shapes.AddAutoShape(ShapeType.Rectangle, x, y, 300, 90);
shape.LineFormat.FillFormat.FillType = FillType.NoFill;
shape.FillFormat.FillType = FillType.Gradient;
var gradient = shape.FillFormat.GradientFormat;
gradient.GradientShape = GradientShape.Linear;
gradient.GradientStops.Clear();
gradient.GradientStops.Add(0f, Color.Red);
gradient.GradientStops.Add(0.5f, Color.Lime);
gradient.GradientStops.Add(1f, Color.Blue);
gradient.LinearGradientAngle = 45;
gradient.LinearGradientScaled = scalingOptions[column];
if (row == 1)
{
shape.Width = 90;
shape.Height = 280;
}
}
}
presentation.Save("linear_gradient_scaling.pptx", SaveFormat.Pptx);
```
The result in PowerPoint, with scaling disabled on the left and enabled on the right:
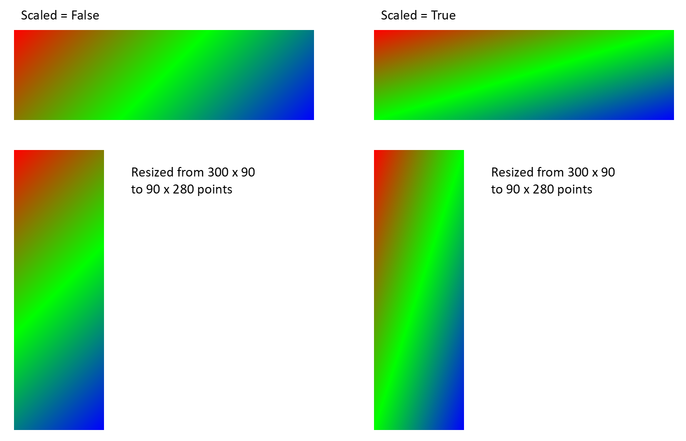
With scaling disabled, the diagonal color bands keep the same orientation in both rectangles. With scaling enabled, the bands stretch with the shape's proportions. This helps reproduce a template's gradient when adapting a shape to a different size. On a square, enabling scaling does not change the appearance of this `45`-degree gradient.
Both the angle and scaling settings apply to linear gradients. They do not control [GradientShape.Radial or GradientShape.Rectangle](https://reference.aspose.com/slides/net/aspose.slides/gradientshape/) fills.
### **Combine the Angle with Gradient Direction**
[IGradientFormat.GradientDirection](https://reference.aspose.com/slides/net/aspose.slides/igradientformat/gradientdirection/) selects a gradient style from the [GradientDirection](https://reference.aspose.com/slides/net/aspose.slides/gradientdirection/) enumeration; it is not a substitute for a numeric angle. For a linear gradient, the corner styles can change the area over which the colors are distributed without changing [LinearGradientAngle](https://reference.aspose.com/slides/net/aspose.slides/igradientformat/lineargradientangle/). Keep the direction unchanged when comparing angles or scaling.
The following example applies the same settings in opposite orders. The two rectangles have the same appearance: assigning the direction before or after the angle does not change the result.
```csharp
using System.Drawing;
using Aspose.Slides;
using Aspose.Slides.Export;
using var presentation = new Presentation();
var slide = presentation.Slides[0];
for (var i = 0; i < 2; i++)
{
var shape = slide.Shapes.AddAutoShape(ShapeType.Rectangle, 30, 30 + i * 140, 320, 100);
shape.LineFormat.FillFormat.FillType = FillType.NoFill;
shape.FillFormat.FillType = FillType.Gradient;
var gradient = shape.FillFormat.GradientFormat;
gradient.GradientShape = GradientShape.Linear;
gradient.GradientStops.Clear();
gradient.GradientStops.Add(0f, Color.Red);
gradient.GradientStops.Add(0.5f, Color.Lime);
gradient.GradientStops.Add(1f, Color.Blue);
gradient.LinearGradientScaled = NullableBool.True;
if (i == 0)
{
gradient.GradientDirection = GradientDirection.FromCorner1;
gradient.LinearGradientAngle = 30;
}
else
{
gradient.LinearGradientAngle = 30;
gradient.GradientDirection = GradientDirection.FromCorner1;
}
}
presentation.Save("linear_gradient_direction.pptx", SaveFormat.Pptx);
```
## **Pattern Fill**
A pattern fill applies a two-color design, such as dots, stripes, or checks. This example uses [IPatternFormat.PatternStyle](https://reference.aspose.com/slides/net/aspose.slides/ipatternformat/patternstyle/) to select a trellis pattern. [IPatternFormat.BackColor](https://reference.aspose.com/slides/net/aspose.slides/ipatternformat/backcolor/) supplies the light gray background, and [IPatternFormat.ForeColor](https://reference.aspose.com/slides/net/aspose.slides/ipatternformat/forecolor/) supplies the yellow pattern color.
```csharp
using System.Drawing;
using Aspose.Slides;
using Aspose.Slides.Export;
using var presentation = new Presentation();
var slide = presentation.Slides[0];
var shape = slide.Shapes.AddAutoShape(ShapeType.Rectangle, 50, 50, 150, 75);
shape.FillFormat.FillType = FillType.Pattern;
shape.FillFormat.PatternFormat.PatternStyle = PatternStyle.Trellis;
shape.FillFormat.PatternFormat.BackColor.Color = Color.LightGray;
shape.FillFormat.PatternFormat.ForeColor.Color = Color.Yellow;
presentation.Save("pattern_fill.pptx", SaveFormat.Pptx);
```
The result:

## **Picture Fill**
A picture fill uses an image inside a shape. This example requires a local image and uses [Images.FromFile](https://reference.aspose.com/slides/net/aspose.slides/images/fromfile/) to load it into the presentation’s image collection. Setting [IPictureFillFormat.PictureFillMode](https://reference.aspose.com/slides/net/aspose.slides/ipicturefillformat/picturefillmode/) to the tiled mode repeats the image within the rectangle. The source image used here is shown below:

```csharp
using Aspose.Slides;
using Aspose.Slides.Export;
using var presentation = new Presentation();
var slide = presentation.Slides[0];
var shape = slide.Shapes.AddAutoShape(ShapeType.Rectangle, 50, 50, 255, 130);
shape.FillFormat.FillType = FillType.Picture;
shape.FillFormat.PictureFillFormat.PictureFillMode = PictureFillMode.Tile;
using var image = Images.FromFile("lotus.png");
var presentationImage = presentation.Images.AddImage(image);
shape.FillFormat.PictureFillFormat.Picture.Image = presentationImage;
presentation.Save("picture_fill.pptx", SaveFormat.Pptx);
```
The result:

### **Tile Picture As Texture**
If you want to set a tiled picture as a texture and customize the tiling behavior, you can use the following properties of the [IPictureFillFormat](https://reference.aspose.com/slides/net/aspose.slides/ipicturefillformat/) interface and [PictureFillFormat](https://reference.aspose.com/slides/net/aspose.slides/picturefillformat/) class:
- [PictureFillMode](https://reference.aspose.com/slides/net/aspose.slides/ipicturefillformat/picturefillmode/): Sets the picture fill mode—either `Tile` or `Stretch`.
- [TileAlignment](https://reference.aspose.com/slides/net/aspose.slides/ipicturefillformat/tilealignment/): Specifies the alignment of the tiles within the shape.
- [TileFlip](https://reference.aspose.com/slides/net/aspose.slides/ipicturefillformat/tileflip/): Controls whether the tile is flipped horizontally, vertically, or both.
- [TileOffsetX](https://reference.aspose.com/slides/net/aspose.slides/ipicturefillformat/tileoffsetx/): Sets the horizontal offset of the tile (in points) from the shape’s origin.
- [TileOffsetY](https://reference.aspose.com/slides/net/aspose.slides/ipicturefillformat/tileoffsety/): Sets the vertical offset of the tile (in points) from the shape’s origin.
- [TileScaleX](https://reference.aspose.com/slides/net/aspose.slides/ipicturefillformat/tilescalex/): Defines the horizontal scale of the tile as a percentage.
- [TileScaleY](https://reference.aspose.com/slides/net/aspose.slides/ipicturefillformat/tilescaley/): Defines the vertical scale of the tile as a percentage.
This example requires a local image and configures [IPictureFillFormat](https://reference.aspose.com/slides/net/aspose.slides/ipicturefillformat/) to repeat it at 50% of its original size. Offsets of −32 points shift the tiles horizontally and vertically; bottom-right alignment and flipping in both directions determine how the repeated texture is arranged.
```csharp
using Aspose.Slides;
using Aspose.Slides.Export;
using var presentation = new Presentation();
var firstSlide = presentation.Slides[0];
var shape = firstSlide.Shapes.AddAutoShape(ShapeType.Rectangle, 50, 50, 190, 95);
shape.FillFormat.FillType = FillType.Picture;
using var sourceImage = Images.FromFile("lotus.png");
var presentationImage = presentation.Images.AddImage(sourceImage);
var pictureFillFormat = shape.FillFormat.PictureFillFormat;
pictureFillFormat.Picture.Image = presentationImage;
pictureFillFormat.PictureFillMode = PictureFillMode.Tile;
pictureFillFormat.TileOffsetX = -32;
pictureFillFormat.TileOffsetY = -32;
pictureFillFormat.TileScaleX = 50;
pictureFillFormat.TileScaleY = 50;
pictureFillFormat.TileAlignment = RectangleAlignment.BottomRight;
pictureFillFormat.TileFlip = TileFlip.FlipBoth;
presentation.Save("tile.pptx", SaveFormat.Pptx);
```
The result:

## **Solid Color Fill**
A solid fill gives a shape a single, uniform color. This example sets [IFillFormat.FillType](https://reference.aspose.com/slides/net/aspose.slides/ifillformat/filltype/) to the solid fill mode and assigns yellow through [IFillFormat.SolidFillColor](https://reference.aspose.com/slides/net/aspose.slides/ifillformat/solidfillcolor/), then saves the rectangle in a presentation.
```csharp
using System.Drawing;
using Aspose.Slides;
using Aspose.Slides.Export;
using var presentation = new Presentation();
var slide = presentation.Slides[0];
var shape = slide.Shapes.AddAutoShape(ShapeType.Rectangle, 50, 50, 150, 75);
shape.FillFormat.FillType = FillType.Solid;
shape.FillFormat.SolidFillColor.Color = Color.Yellow;
presentation.Save("solid_color_fill.pptx", SaveFormat.Pptx);
```
The result:

### **Copy Colors While Preserving Theme References**
Use [IColorFormat.CopyFrom](https://reference.aspose.com/slides/net/aspose.slides/icolorformat/copyfrom/) to copy a color definition, including its color type, theme reference, and transformations. This is useful when transferring a fill color between shapes that should continue to follow the presentation theme. The method copies only the color: it does not copy the fill type, outline, or other shape formatting. Set the destination's [IFillFormat.FillType](https://reference.aspose.com/slides/net/aspose.slides/ifillformat/filltype/) explicitly.
This example creates three rectangles, from left to right: the source, a theme-aware copy, and a fixed RGB copy. The source uses [IColorFormat.SchemeColor](https://reference.aspose.com/slides/net/aspose.slides/icolorformat/schemecolor/) to reference the first accent color and adds a tint through [IColorOperationCollection.Add](https://reference.aspose.com/slides/net/aspose.slides/icoloroperationcollection/add/). The RGB copy uses the source's effective fill color so all three initially look identical. Assigning [IColorFormat.Color](https://reference.aspose.com/slides/net/aspose.slides/icolorformat/color/) sets a fixed RGB value and clears any existing color transformations.
```csharp
using System.Drawing;
using Aspose.Slides;
using Aspose.Slides.Export;
using var presentation = new Presentation();
presentation.SlideSize.SetSize(660, 220, SlideSizeScaleType.DoNotScale);
var slide = presentation.Slides[0];
presentation.MasterTheme.ColorScheme.Accent1.Color = Color.RoyalBlue;
var source = slide.Shapes.AddAutoShape(ShapeType.Rectangle, 30, 40, 180, 140);
var themeCopy = slide.Shapes.AddAutoShape(ShapeType.Rectangle, 240, 40, 180, 140);
var rgbCopy = slide.Shapes.AddAutoShape(ShapeType.Rectangle, 450, 40, 180, 140);
foreach (var shape in new[] { source, themeCopy, rgbCopy })
{
shape.FillFormat.FillType = FillType.Solid;
shape.LineFormat.FillFormat.FillType = FillType.NoFill;
}
var sourceColor = source.FillFormat.SolidFillColor;
sourceColor.SchemeColor = SchemeColor.Accent1;
sourceColor.ColorTransform.Add(ColorTransformOperation.Tint, 0.75f);
themeCopy.FillFormat.SolidFillColor.CopyFrom(sourceColor);
rgbCopy.FillFormat.SolidFillColor.Color = source.FillFormat.GetEffective().SolidFillColor;
using var before = slide.GetImage(1f, 1f);
before.Save("color-copy-before.png", ImageFormat.Png);
// Theme references follow the new accent color; the fixed RGB value does not.
presentation.MasterTheme.ColorScheme.Accent1.Color = Color.OrangeRed;
using var after = slide.GetImage(1f, 1f);
after.Save("color-copy-after.png", ImageFormat.Png);
presentation.Save("copied_colors.pptx", SaveFormat.Pptx);
```
Before the theme change, all three fills match:

After the theme change, the source and the theme-aware copy follow the new accent color and retain their tint. The fixed RGB copy remains blue:

The copied definition is independent of the source. Subsequently changing the source's theme reference, assigning another color, or adding or removing its transformations does not change the destination. A theme change still affects both shapes because each independently refers to the same theme color.
Saving and reopening the PPTX preserves the copied color's [IColorFormat.ColorType](https://reference.aspose.com/slides/net/aspose.slides/icolorformat/colortype/), theme reference, and [IColorFormat.ColorTransform](https://reference.aspose.com/slides/net/aspose.slides/icolorformat/colortransform/) collection; it does not flatten the definition to RGB.
When copying between different theme contexts, such as presentations with different accent palettes, the copied reference resolves against the destination's theme. The same reference and transformations can therefore produce a different visible color. See [Presentation Theme](https://docs.aspose.com/slides/net/presentation-theme/) for more about configuring theme colors.
## **Use the Slide Background as a Shape Fill**
Use [IAutoShape.UseBackgroundFill](https://reference.aspose.com/slides/net/aspose.slides/iautoshape/usebackgroundfill/) when a shape should match the slide background, for example in a presentation template. Set [IFillFormat.FillType](https://reference.aspose.com/slides/net/aspose.slides/ifillformat/filltype/) to [FillType.NotDefined](https://reference.aspose.com/slides/net/aspose.slides/filltype/) first to remove any explicit fill. With this combination, the shape uses the slide background instead of its style fill. Enabling the flag alone does not remove an existing explicit fill.
This differs from [FillType.NoFill](https://reference.aspose.com/slides/net/aspose.slides/filltype/): background fill covers objects behind the shape with the corresponding area of the slide background, while no fill leaves those objects visible. A gradient remains aligned with the slide rather than restarting inside each shape.
The following example creates a master background inherited by the slide and places a magenta band behind three rectangles. The left rectangle uses the background, the middle rectangle has no fill, and the right rectangle switches from background fill to an explicit orange fill.
```csharp
using System.Drawing;
using Aspose.Slides;
using Aspose.Slides.Export;
using var presentation = new Presentation();
presentation.SlideSize.SetSize(720, 400, SlideSizeScaleType.DoNotScale);
var slide = presentation.Slides[0];
// Inherit the gradient from the master.
slide.Background.Type = BackgroundType.NotDefined;
slide.LayoutSlide.Background.Type = BackgroundType.NotDefined;
var background = slide.LayoutSlide.MasterSlide.Background;
background.Type = BackgroundType.OwnBackground;
background.FillFormat.FillType = FillType.Gradient;
var gradient = background.FillFormat.GradientFormat;
gradient.GradientShape = GradientShape.Linear;
gradient.LinearGradientAngle = 0;
gradient.GradientStops.Clear();
gradient.GradientStops.Add(0, Color.DarkBlue);
gradient.GradientStops.Add(1, Color.LightSkyBlue);
// Add this object first so it appears behind the rectangles.
var band = slide.Shapes.AddAutoShape(ShapeType.Rectangle, 25, 150, 670, 100);
band.FillFormat.FillType = FillType.Solid;
band.FillFormat.SolidFillColor.Color = Color.Magenta;
band.LineFormat.FillFormat.FillType = FillType.NoFill;
var backgroundShape = slide.Shapes.AddAutoShape(ShapeType.Rectangle, 50, 100, 160, 200);
backgroundShape.FillFormat.FillType = FillType.NotDefined;
backgroundShape.UseBackgroundFill = true;
var noFillShape = slide.Shapes.AddAutoShape(ShapeType.Rectangle, 280, 100, 160, 200);
noFillShape.FillFormat.FillType = FillType.NoFill;
var explicitShape = slide.Shapes.AddAutoShape(ShapeType.Rectangle, 510, 100, 160, 200);
explicitShape.FillFormat.FillType = FillType.NotDefined;
explicitShape.UseBackgroundFill = true;
// Disable background fill before applying an explicit fill.
explicitShape.UseBackgroundFill = false;
explicitShape.FillFormat.FillType = FillType.Solid;
explicitShape.FillFormat.SolidFillColor.Color = Color.Orange;
presentation.Save("background_fill.pptx", SaveFormat.Pptx);
```
The result, from left to right: **background fill**, **no fill**, and **explicit fill**. The magenta band is hidden by the left and right rectangles but remains visible through the middle rectangle.

The same behavior applies to a background defined directly on the slide or inherited from a layout. The shape uses the slide's resolved background; the example leaves both the slide and layout backgrounds undefined so the master supplies it.
## **Set Transparency**
For a solid fill, the color’s alpha component controls opacity: 0 is fully transparent and 255 is fully opaque. This example uses an alpha value of 128 for a yellow rectangle, making it approximately 50% transparent so the rectangle underneath remains visible. The color is assigned through [IFillFormat.SolidFillColor](https://reference.aspose.com/slides/net/aspose.slides/ifillformat/solidfillcolor/).
```csharp
using System.Drawing;
using Aspose.Slides;
using Aspose.Slides.Export;
const int alpha = 128;
using var presentation = new Presentation();
var slide = presentation.Slides[0];
var solidShape = slide.Shapes.AddAutoShape(ShapeType.Rectangle, 50, 50, 150, 75);
var transparentShape = slide.Shapes.AddAutoShape(ShapeType.Rectangle, 80, 80, 150, 75);
transparentShape.FillFormat.FillType = FillType.Solid;
transparentShape.FillFormat.SolidFillColor.Color = Color.FromArgb(alpha, Color.Yellow);
presentation.Save("shape_transparency.pptx", SaveFormat.Pptx);
```
The result:

## **Rotate Shapes**
Use [IShape.Rotation](https://reference.aspose.com/slides/net/aspose.slides/ishape/rotation/) to rotate a shape in the slide plane. The angle is measured in degrees; this example rotates a rectangle 5 degrees clockwise and saves the presentation.
```csharp
using Aspose.Slides;
using Aspose.Slides.Export;
using var presentation = new Presentation();
var slide = presentation.Slides[0];
var shape = slide.Shapes.AddAutoShape(ShapeType.Rectangle, 50, 50, 150, 75);
shape.Rotation = 5;
presentation.Save("shape_rotation.pptx", SaveFormat.Pptx);
```
The result:

## **Add 3D Bevel Effects**
Use [IShape.ThreeDFormat](https://reference.aspose.com/slides/net/aspose.slides/ishape/threedformat/) to give a shape depth and beveled edges. This example creates a green ellipse with an orange outline, sets [IThreeDFormat.Depth](https://reference.aspose.com/slides/net/aspose.slides/ithreedformat/depth/) to 4 points, and applies a circular top bevel with a width and height of 6 points through [IThreeDFormat.BevelTop](https://reference.aspose.com/slides/net/aspose.slides/ithreedformat/beveltop/). A front-facing orthographic camera and three-point lighting make the bevel visible.
```csharp
using System.Drawing;
using Aspose.Slides;
using Aspose.Slides.Export;
using var presentation = new Presentation();
var slide = presentation.Slides[0];
var shape = slide.Shapes.AddAutoShape(ShapeType.Ellipse, 50, 50, 100, 100);
shape.FillFormat.FillType = FillType.Solid;
shape.FillFormat.SolidFillColor.Color = Color.Green;
shape.LineFormat.FillFormat.FillType = FillType.Solid;
shape.LineFormat.FillFormat.SolidFillColor.Color = Color.Orange;
shape.LineFormat.Width = 2.0;
shape.ThreeDFormat.Depth = 4;
shape.ThreeDFormat.BevelTop.BevelType = BevelPresetType.Circle;
shape.ThreeDFormat.BevelTop.Height = 6;
shape.ThreeDFormat.BevelTop.Width = 6;
shape.ThreeDFormat.Camera.CameraType = CameraPresetType.OrthographicFront;
shape.ThreeDFormat.LightRig.LightType = LightRigPresetType.ThreePt;
shape.ThreeDFormat.LightRig.Direction = LightingDirection.Top;
presentation.Save("3D_bevel_effect.pptx", SaveFormat.Pptx);
```
The result:

## **Add 3D Rotation Effects**
A shape’s 3D view is controlled by its camera settings. This example uses [ICamera.SetRotation](https://reference.aspose.com/slides/net/aspose.slides/icamera/setrotation/) with latitude, longitude, and revolution angles of 40, 35, and 20 degrees, respectively. It selects an isometric camera through [ICamera.CameraType](https://reference.aspose.com/slides/net/aspose.slides/icamera/cameratype/) and balanced lighting through [ILightRig.LightType](https://reference.aspose.com/slides/net/aspose.slides/ilightrig/lighttype/), then saves the formatted rectangle.
```csharp
using Aspose.Slides;
using Aspose.Slides.Export;
using var presentation = new Presentation();
var slide = presentation.Slides[0];
var autoShape = slide.Shapes.AddAutoShape(ShapeType.Rectangle, 50, 50, 150, 75);
autoShape.TextFrame.Text = "Hello, Aspose!";
autoShape.ThreeDFormat.Camera.CameraType = CameraPresetType.IsometricLeftUp;
autoShape.ThreeDFormat.Camera.SetRotation(40, 35, 20);
autoShape.ThreeDFormat.LightRig.LightType = LightRigPresetType.Balanced;
presentation.Save("3D_rotation_effect.pptx", SaveFormat.Pptx);
```
The result:

## **Control Black-and-White Rendering for Shapes**
The [IShape.BlackWhiteMode](https://reference.aspose.com/slides/net/aspose.slides/ishape/blackwhitemode/) property specifies how an individual shape is rendered when a presentation is viewed or processed in black-and-white mode. It does not enable black-and-white display by itself, and it does not change the shape's fill, line, or other formatting in normal color mode.
Use a value from the [BlackWhiteMode](https://reference.aspose.com/slides/net/aspose.slides/blackwhitemode/) enumeration to select the desired behavior. For example, `Automatic` lets the rendering application choose the conversion, `Gray` and `LightGray` use gray coloring, `BlackWhite` uses only black and white, `Black` and `White` force a single color, `Color` preserves normal coloring, and `Hidden` omits the shape in black-and-white mode. `NotDefined` means that no shape-level mode is assigned.
This example creates an orange rectangle and sets [IShape.BlackWhiteMode](https://reference.aspose.com/slides/net/aspose.slides/ishape/blackwhitemode/) to gray. The saved shape retains its orange fill for normal color display and requests gray coloring from applications that honor black-and-white display settings:
```csharp
using System.Drawing;
using Aspose.Slides;
using Aspose.Slides.Export;
using var presentation = new Presentation();
var slide = presentation.Slides[0];
var shape = slide.Shapes.AddAutoShape(ShapeType.Rectangle, 50, 50, 200, 100);
shape.FillFormat.FillType = FillType.Solid;
shape.FillFormat.SolidFillColor.Color = Color.Orange;
shape.BlackWhiteMode = BlackWhiteMode.Gray;
presentation.Save("shape_black_white_mode.pptx", SaveFormat.Pptx);
```
In normal color mode, the rectangle retains its orange fill. In a black-and-white display workflow, it uses gray coloring because its mode is set to `Gray`. This lets you preserve a full-color slide while defining a distinct appearance for printing, previewing, or other workflows that honor the presentation's black-and-white display settings.
## **Reset Formatting**
Use [ISlide.Reset](https://reference.aspose.com/slides/net/aspose.slides/islide/reset/) to restore the position, size, and formatting of slide placeholders from their corresponding layout placeholders. This example requires an existing presentation with layout-linked placeholders and resets every slide before saving. Shapes without corresponding layout placeholders are not reset.
```csharp
using Aspose.Slides;
using Aspose.Slides.Export;
using var presentation = new Presentation("sample.pptx");
foreach (var slide in presentation.Slides)
{
slide.Reset();
}
presentation.Save("reset_formatting.pptx", SaveFormat.Pptx);
```
## **FAQ**
**Does shape formatting affect the final presentation file size?**
Colors, line styles, and effect settings generally add little data compared with embedded images and media. Picture fills can increase the file size because their images are stored in the presentation.
**How can I detect shapes on a slide that share identical formatting so I can group them?**
Compare each shape’s key formatting properties—fill, line, and effect settings. If all corresponding values match, treat their styles as identical and logically group those shapes, which simplifies later style management.
**Can I save a set of custom shape styles to a separate file for reuse in other presentations?**
Yes. Store sample shapes with the desired styles in a template slide deck or a .POTX template file. When creating a new presentation, open the template, clone the styled shapes you need, and reapply their formatting wherever required.
## Related features
- [Set shape fills](https://docs.aspose.com/slides/features/shape-fills/)
- [Format shape outlines](https://docs.aspose.com/slides/features/shape-outlines/)
## Related articles
- [Manage Presentation Backgrounds in .NET](https://docs.aspose.com/slides/net/presentation-background/)
# Manage Presentation Shapes in .NET
> Learn how to identify, adjust, clone, remove, hide, reorder, export, align, and flip presentation shapes with Aspose.Slides for .NET.
Source: https://docs.aspose.com/slides/net/shape-manipulations/
Updated: 2026-09-25
## **Overview**
Aspose.Slides for .NET represents the shapes on a slide as an ordered [IShapeCollection](https://reference.aspose.com/slides/net/aspose.slides/ishapecollection/). The collection is both the place where you find and modify shapes and the source of their stacking order: index `0` is the backmost shape, while the last index is the frontmost shape.
This article follows that model. It first explains how to identify a shape reliably and modify preset shape adjustment points, then shows how to clone, remove, hide, and reorder shapes. The final sections cover layout-level formatting, SVG export, alignment, and flip settings. Each example is independent, so you can use only the operations your workflow requires.
## **Identify and Find Shapes**
Collection indexes are convenient while processing a known file, but they are not stable identifiers. Adding, removing, or reordering a shape can change its index. Choose an identifier according to how the presentation is authored and maintained:
- [Name](https://reference.aspose.com/slides/net/aspose.slides/ishape/name/) is useful for developer-controlled templates and is easy to inspect in PowerPoint's Selection Pane. Names can be edited and are not guaranteed to be unique, so establish a naming convention if code depends on them.
- [AlternativeText](https://reference.aspose.com/slides/net/aspose.slides/ishape/alternativetext/) is useful when an accessibility description or an author-supplied tag already identifies the shape. It is visible to users, may be localized or rewritten for accessibility, and is not guaranteed to be unique. Do not silently repurpose meaningful accessibility text as a database key.
- [OfficeInteropShapeId](https://reference.aspose.com/slides/net/aspose.slides/ishape/officeinteropshapeid/) is a read-only identifier that is unique within a slide and corresponds to the shape ID used by PowerPoint interop. Use it when integrating with PowerPoint or when you need an unambiguous reference during the lifetime of a shape. A cloned or recreated shape is a different shape and receives its own ID.
The related [UniqueId](https://reference.aspose.com/slides/net/aspose.slides/ishape/uniqueid/) property has presentation scope, but it is intended for add-ins and can be reassigned. It should not be treated as a permanent external key. If long-term identity is essential, keep the mapping in application data and validate that the expected shape still exists.
For a practical example of reading and updating both the alternative text title and description, see [Manage Alternative Text Titles and Descriptions](https://docs.aspose.com/slides/net/presentation-accessibility/). Use alternative text to explain the visual's meaning to readers, and keep it separate from shape names used by code to find shapes.
The following example searches by `Name` with an ordinal comparison and reports the slide-scoped interop ID. When the template does not contain the expected shape, the code reports that result instead of continuing with the wrong object.
```csharp
using System;
using Aspose.Slides;
using var presentation = new Presentation("input.pptx");
var slide = presentation.Slides[0];
IShape? targetShape = null;
foreach (var shape in slide.Shapes)
{
if (string.Equals(shape.Name, "RevenueChart", StringComparison.Ordinal))
{
targetShape = shape;
break;
}
}
if (targetShape is null)
{
Console.WriteLine("The shape 'RevenueChart' was not found on slide 1.");
}
else
{
Console.WriteLine($"Found {targetShape.Name}; interop ID: {targetShape.OfficeInteropShapeId}");
}
```
When an operation is specific to a shape type, check the interface before using type-specific members. This example updates text and alternative text only if the named object is an [IAutoShape](https://reference.aspose.com/slides/net/aspose.slides/iautoshape/).
```csharp
using System;
using Aspose.Slides;
using Aspose.Slides.Export;
using var presentation = new Presentation("input.pptx");
var slide = presentation.Slides[0];
IShape? candidate = null;
foreach (var shape in slide.Shapes)
{
if (string.Equals(shape.Name, "StatusLabel", StringComparison.Ordinal))
{
candidate = shape;
break;
}
}
if (candidate is IAutoShape autoShape)
{
autoShape.TextFrame.Text = "Approved";
autoShape.AlternativeText = "Approval status: approved";
presentation.Save("identified-shape.pptx", SaveFormat.Pptx);
}
else
{
Console.WriteLine("'StatusLabel' is missing or is not an AutoShape.");
}
```
## **Identify and Modify Preset Shape Adjustments**
Preset geometry shapes can expose adjustment points that control features such as corner size, arrow proportions, or arc angles. Access them through the read-only [IGeometryShape.Adjustments](https://reference.aspose.com/slides/net/aspose.slides/igeometryshape/adjustments/) collection. The collection itself is supplied by the shape, but each [IAdjustValue](https://reference.aspose.com/slides/net/aspose.slides/iadjustvalue/) contains a value that can be changed.
Do not rely only on a fixed collection index. Iterate through the adjustments and inspect the read-only [Type](https://reference.aspose.com/slides/net/aspose.slides/adjustvalue/type/) property, whose [ShapeAdjustmentType](https://reference.aspose.com/slides/net/aspose.slides/shapeadjustmenttype/) value describes what the adjustment controls. The read-only [Name](https://reference.aspose.com/slides/net/aspose.slides/adjustvalue/name/) property provides additional identification information and is especially useful when a preset contains more than one adjustment with the same semantic type.
Use the value property that matches the adjustment's meaning:
| Adjustment type | Purpose | Value to change |
|---|---|---|
| `CornerSize` | Size of rounded corners | [RawValue](https://reference.aspose.com/slides/net/aspose.slides/adjustvalue/rawvalue/) |
| `ArrowTailThickness` | Thickness of an arrow tail | `RawValue` |
| `ArrowheadLength` | Length of an arrowhead | `RawValue` |
| `ArrowheadWidth` | Width of an arrowhead | `RawValue` |
| `StartAngle` | Start angle of a pie or arc | [AngleValue](https://reference.aspose.com/slides/net/aspose.slides/adjustvalue/anglevalue/) |
| `EndAngle` | End angle of a pie or arc | `AngleValue` |
`Type` and `Name` cannot be assigned. `RawValue` is a read/write integer in the preset's native geometry units, while `AngleValue` is a read/write angle in degrees. The number, order, meaning, and valid range of adjustments depend on the preset [ShapeType](https://reference.aspose.com/slides/net/aspose.slides/igeometryshape/shapetype/). A value that is valid for one preset may be invalid or have a different effect for another.
When `Type` is `ShapeAdjustmentType.Custom`, the API does not recognize a standard semantic meaning. Inspect `Name`, the preset type, and the existing value, and leave the adjustment unchanged unless the expected meaning and range are known. Even for recognized types, check whether the same type occurs more than once before selecting a value. The [Connector](https://docs.aspose.com/slides/net/connector/) article shows this situation with connector bend adjustments.
The following complete example creates default and modified versions of three preset shapes. It iterates through every adjustment, reports its `Name` and `Type`, changes size-related values through `RawValue`, changes angles through `AngleValue`, and saves the result. The left column retains the default geometry; the right column shows the adjusted rounded rectangle, four-way arrow, and pie.
```csharp
using System;
using Aspose.Slides;
using Aspose.Slides.Export;
using var presentation = new Presentation();
var slide = presentation.Slides[0];
// Adds headers for the default and adjusted shape columns.
var defaultColumnLabel = slide.Shapes.AddAutoShape(ShapeType.Rectangle, 40, 20, 250, 30);
defaultColumnLabel.TextFrame.Text = "Default preset geometry";
var adjustedColumnLabel = slide.Shapes.AddAutoShape(ShapeType.Rectangle, 390, 20, 250, 30);
adjustedColumnLabel.TextFrame.Text = "Modified adjustment values";
slide.Shapes.AddAutoShape(ShapeType.RoundCornerRectangle, 80, 70, 160, 70);
var modifiedRoundedRectangle = slide.Shapes.AddAutoShape(ShapeType.RoundCornerRectangle, 430, 70, 160, 70);
modifiedRoundedRectangle.Name = "ModifiedRoundedRectangle";
slide.Shapes.AddAutoShape(ShapeType.QuadArrow, 80, 180, 160, 110);
var modifiedArrow = slide.Shapes.AddAutoShape(ShapeType.QuadArrow, 430, 180, 160, 110);
modifiedArrow.Name = "ModifiedQuadArrow";
slide.Shapes.AddAutoShape(ShapeType.Pie, 95, 330, 130, 130);
var modifiedPie = slide.Shapes.AddAutoShape(ShapeType.Pie, 445, 330, 130, 130);
modifiedPie.Name = "ModifiedPie";
var shapesToAdjust = new IGeometryShape[]
{
modifiedRoundedRectangle,
modifiedArrow,
modifiedPie
};
foreach (var shape in shapesToAdjust)
{
for (var adjustmentIndex = 0; adjustmentIndex < shape.Adjustments.Count; adjustmentIndex++)
{
var adjustment = shape.Adjustments[adjustmentIndex];
Console.WriteLine($"{shape.Name} / {adjustment.Name}: {adjustment.Type}");
switch (adjustment.Type)
{
case ShapeAdjustmentType.CornerSize:
adjustment.RawValue = 5000;
break;
case ShapeAdjustmentType.ArrowTailThickness:
adjustment.RawValue = 25000;
break;
case ShapeAdjustmentType.ArrowheadLength:
adjustment.RawValue = 30000;
break;
case ShapeAdjustmentType.ArrowheadWidth:
adjustment.RawValue = 40000;
break;
case ShapeAdjustmentType.StartAngle:
adjustment.AngleValue = 30;
break;
case ShapeAdjustmentType.EndAngle:
adjustment.AngleValue = 300;
break;
case ShapeAdjustmentType.Custom:
Console.WriteLine($"Custom adjustment '{adjustment.Name}' was not changed.");
break;
}
}
}
presentation.Save("preset-shape-adjustments.pptx", SaveFormat.Pptx);
```
Checking the semantic type before changing a value makes the code explicit about its intent and avoids assuming that a particular collection index has the same meaning across different preset shapes.
## **Modify the Shape Collection**
The add, clone, remove, and reorder methods operate on the collection immediately. If an operation changes the number or order of shapes, do not continue to rely on indexes captured before that operation.
### **Clone a Shape**
[AddClone](https://reference.aspose.com/slides/net/aspose.slides/ishapecollection/addclone/) creates an independent copy and appends it to the target collection. [InsertClone](https://reference.aspose.com/slides/net/aspose.slides/ishapecollection/insertclone/) also creates a copy but places it at a specified z-order index. The overloads that accept coordinates move the clone without changing its size; overloads with width and height can resize it as well.
The example creates a destination slide, clones a labeled rectangle to the front, and inserts a second clone at the back. Changes to either clone do not modify the source shape.
```csharp
using System;
using Aspose.Slides;
using Aspose.Slides.Export;
using var presentation = new Presentation();
var sourceSlide = presentation.Slides[0];
var sourceShape = sourceSlide.Shapes.AddAutoShape(ShapeType.Rectangle, 40, 40, 180, 60);
sourceShape.Name = "SourceLabel";
sourceShape.TextFrame.Text = "Source";
var blankLayout = presentation.Masters[0].LayoutSlides.GetByType(SlideLayoutType.Blank);
var destinationSlide = presentation.Slides.AddEmptySlide(blankLayout);
var frontCloneShape = destinationSlide.Shapes.AddClone(sourceShape, 80, 80);
frontCloneShape.Name = "FrontClone";
if (frontCloneShape is IAutoShape frontClone)
{
frontClone.TextFrame.Text = "Front clone";
}
else
{
Console.WriteLine("The front clone is not an AutoShape; its text was not changed.");
}
var backCloneShape = destinationSlide.Shapes.InsertClone(0, sourceShape, 80, 180);
backCloneShape.Name = "BackClone";
if (backCloneShape is IAutoShape backClone)
{
backClone.TextFrame.Text = "Back clone";
}
else
{
Console.WriteLine("The back clone is not an AutoShape; its text was not changed.");
}
presentation.Save("cloned-shapes.pptx", SaveFormat.Pptx);
```
Cloning copies the shape's content and formatting, including its name and alternative text. Assign new logical identifiers to the clone when those values must be unique. Resources used by complex shapes are handled by the presentation, but a clone remains a new collection item with a new shape identity.
### **Remove Shapes**
[Remove](https://reference.aspose.com/slides/net/aspose.slides/ishapecollection/remove/) deletes a specific shape object from its collection. When removing multiple matches during indexed iteration, traverse from the end so that each remaining index stays valid.
This example removes every shape with a designated name. It reads `slide.Shapes[i]`, not a fixed collection item, and it does not cast the shape unnecessarily.
```csharp
using System;
using Aspose.Slides;
using Aspose.Slides.Export;
using var presentation = new Presentation();
var slide = presentation.Slides[0];
var keepShape = slide.Shapes.AddAutoShape(ShapeType.Rectangle, 40, 40, 140, 60);
keepShape.Name = "Keep";
var firstTemporaryShape = slide.Shapes.AddAutoShape(ShapeType.Ellipse, 220, 40, 80, 80);
firstTemporaryShape.Name = "Temporary";
var secondTemporaryShape = slide.Shapes.AddAutoShape(ShapeType.Triangle, 340, 40, 100, 80);
secondTemporaryShape.Name = "Temporary";
for (var i = slide.Shapes.Count - 1; i >= 0; i--)
{
var shape = slide.Shapes[i];
if (string.Equals(shape.Name, "Temporary", StringComparison.Ordinal))
{
slide.Shapes.Remove(shape);
}
}
presentation.Save("removed-shapes.pptx", SaveFormat.Pptx);
```
After removal, the shape count and the indexes of later shapes change. References to unaffected shapes remain more reliable than saved indexes. Also consider connectors, animations, and other presentation features that may refer to the removed object; removing a visible shape can change more than the slide's appearance.
### **Hide a Shape**
Setting [Hidden](https://reference.aspose.com/slides/net/aspose.slides/ishape/hidden/) to `true` keeps the shape in the collection but prevents it from appearing in the normal slide show. Its index, formatting, and content remain available to code, so hiding is appropriate for optional elements that may be restored later.
```csharp
using System;
using Aspose.Slides;
using Aspose.Slides.Export;
using var presentation = new Presentation();
var slide = presentation.Slides[0];
var visibleShape = slide.Shapes.AddAutoShape(ShapeType.Rectangle, 40, 40, 160, 60);
visibleShape.Name = "VisibleLabel";
var optionalShape = slide.Shapes.AddAutoShape(ShapeType.Moon, 240, 40, 100, 100);
optionalShape.Name = "OptionalDecoration";
foreach (var shape in slide.Shapes)
{
if (string.Equals(shape.Name, "OptionalDecoration", StringComparison.Ordinal))
{
shape.Hidden = true;
}
}
presentation.Save("hidden-shape.pptx", SaveFormat.Pptx);
```
Hiding is not deletion or security. The object can still be discovered and unhidden by a user or by code, and it remains part of the presentation file.
### **Change the Z-Order**
Overlapping shapes are painted in collection order. [Reorder](https://reference.aspose.com/slides/net/aspose.slides/ishapecollection/reorder/) moves an existing shape to a target index without cloning it. Index `0` is the back; `Count - 1` is the front.
```csharp
using System.Drawing;
using Aspose.Slides;
using Aspose.Slides.Export;
using var presentation = new Presentation();
var slide = presentation.Slides[0];
var blueRectangle = slide.Shapes.AddAutoShape(ShapeType.Rectangle, 100, 100, 220, 120);
blueRectangle.Name = "BlueRectangle";
blueRectangle.FillFormat.FillType = FillType.Solid;
blueRectangle.FillFormat.SolidFillColor.Color = Color.SteelBlue;
var orangeEllipse = slide.Shapes.AddAutoShape(ShapeType.Ellipse, 180, 140, 220, 120);
orangeEllipse.Name = "OrangeEllipse";
orangeEllipse.FillFormat.FillType = FillType.Solid;
orangeEllipse.FillFormat.SolidFillColor.Color = Color.Orange;
slide.Shapes.Reorder(slide.Shapes.Count - 1, blueRectangle);
presentation.Save("reordered-shapes.pptx", SaveFormat.Pptx);
```
The rectangle is created first and initially sits behind the ellipse. Moving it to the final index puts it in front. Finalize z-order after adding or cloning all related shapes, because those operations append or insert new collection items and can alter the intended stack.
## **Inspect Shapes on Layout Slides**
Normal slides, layout slides, and master slides have separate shape collections. A shape in a layout collection is not the same object as a similarly positioned shape on a normal slide. Inspect layout shapes when you need to understand or change formatting supplied by a layout.
The following example reads each layout shape's [FillFormat](https://reference.aspose.com/slides/net/aspose.slides/ishape/fillformat/) and [LineFormat](https://reference.aspose.com/slides/net/aspose.slides/ishape/lineformat/) without assuming that every shape is an `AutoShape`.
```csharp
using System;
using Aspose.Slides;
using var presentation = new Presentation("input.pptx");
foreach (var layoutSlide in presentation.LayoutSlides)
{
foreach (var shape in layoutSlide.Shapes)
{
var fillType = shape.FillFormat.FillType;
var lineWidth = shape.LineFormat.Width;
Console.WriteLine($"{layoutSlide.Name} / {shape.Name}: fill={fillType}, line width={lineWidth}");
}
}
```
Editing a layout can affect multiple slides that use it. Before changing a layout shape, determine whether a normal slide inherits the object or contains a local override, and test every slide that uses that layout.
## **Export a Shape to SVG**
[WriteAsSvg](https://reference.aspose.com/slides/net/aspose.slides/ishape/writeassvg/) writes one shape's rendered content to a stream. The result contains the shape, not the entire slide background or neighboring shapes.
```csharp
using System;
using System.IO;
using Aspose.Slides;
using var presentation = new Presentation("input.pptx");
var slide = presentation.Slides[0];
if (slide.Shapes.Count == 0)
{
Console.WriteLine("Slide 1 does not contain a shape to export.");
}
else
{
var shape = slide.Shapes[0];
using var svgStream = File.Create("shape.svg");
shape.WriteAsSvg(svgStream);
}
```
Keep the presentation open while rendering. The output depends on the shape's formatting and on resources such as fonts and images. If you need the whole composition, export the slide rather than an individual shape. The caller owns the stream and must dispose it.
## **Align Shapes**
The [SlideUtil.AlignShapes](https://reference.aspose.com/slides/net/aspose.slides.util/slideutil/alignshapes/) overloads align either all shapes or selected collection indexes. [ShapesAlignmentType](https://reference.aspose.com/slides/net/aspose.slides/shapesalignmenttype/) specifies the edge, center line, or distribution mode. Set `alignToSlide` to `true` to use the slide edges; set it to `false` to align the selected shapes relative to one another.
This example aligns three shapes to the top edge of the slide. The returned shape references are converted to their current indexes immediately before alignment.
```csharp
using Aspose.Slides;
using Aspose.Slides.Export;
using Aspose.Slides.Util;
using var presentation = new Presentation();
var slide = presentation.Slides[0];
var firstShape = slide.Shapes.AddAutoShape(ShapeType.Rectangle, 60, 80, 120, 50);
var secondShape = slide.Shapes.AddAutoShape(ShapeType.Ellipse, 240, 160, 120, 50);
var thirdShape = slide.Shapes.AddAutoShape(ShapeType.Triangle, 420, 240, 120, 50);
firstShape.Name = "FirstAlignedShape";
secondShape.Name = "SecondAlignedShape";
thirdShape.Name = "ThirdAlignedShape";
var shapeIndexes = new[]
{
slide.Shapes.IndexOf(firstShape),
slide.Shapes.IndexOf(secondShape),
slide.Shapes.IndexOf(thirdShape)
};
SlideUtil.AlignShapes(ShapesAlignmentType.AlignTop, true, slide, shapeIndexes);
presentation.Save("aligned-shapes.pptx", SaveFormat.Pptx);
```
Alignment changes positions, not z-order. Relative alignment normally needs at least two shapes, while horizontal or vertical distribution needs enough shapes to define spacing. Recompute indexes if you modify the collection before calling the method.
## **Flip a Shape**
The [ShapeFrame](https://reference.aspose.com/slides/net/aspose.slides/shapeframe/) class stores position, size, horizontal and vertical flip settings, and rotation. Its `FlipH` and `FlipV` values use [NullableBool](https://reference.aspose.com/slides/net/aspose.slides/nullablebool/): `True` enables the flip, `False` disables it, and `NotDefined` preserves the unspecified/default state.
The input presentation below contains one unflipped shape.

The example preserves every other frame value and replaces only the two flip settings. This is important because assigning a new [Frame](https://reference.aspose.com/slides/net/aspose.slides/ishape/frame/) replaces the complete frame.
```csharp
using System;
using Aspose.Slides;
using Aspose.Slides.Export;
using var presentation = new Presentation("sample.pptx");
var shape = presentation.Slides[0].Shapes[0];
var frame = shape.Frame;
Console.WriteLine($"Horizontal flip before change: {frame.FlipH}");
Console.WriteLine($"Vertical flip before change: {frame.FlipV}");
shape.Frame = new ShapeFrame(
frame.X, frame.Y, frame.Width, frame.Height,
NullableBool.True, NullableBool.True, frame.Rotation);
presentation.Save("flipped-shape.pptx", SaveFormat.Pptx);
```
The saved shape is mirrored horizontally and vertically while keeping its position, size, and rotation.

## **FAQ**
**Should I use a collection index as a shape identifier?**
Only for short-lived processing when the collection will not change before the index is used. Prefer a validated `Name` or `AlternativeText` convention for authored templates, or `OfficeInteropShapeId` for slide-scoped interop work.
**Does hiding a shape remove it from the z-order?**
No. A hidden shape remains in the collection at the same index. It can be found, reordered, edited, or made visible again.
**Why did a cloned shape appear in front of another shape?**
`AddClone` appends the clone to the end of the collection, which is the front of the z-order. Use `InsertClone` to choose the initial index or `Reorder` after all shapes have been added.
**Can I use a fixed index to identify a preset shape adjustment?**
Only after validating the exact preset and collection layout. Prefer iterating through `IGeometryShape.Adjustments` and checking `IAdjustValue.Type`; use `IAdjustValue.Name` as additional information when the same semantic type appears more than once.
## Related features
- [Change shape stacking order](https://docs.aspose.com/slides/features/shape-order/)
# Shape Types in Aspose.Slides for .NET
> Learn every shape type in Aspose.Slides for .NET, with clear examples to create, format, and edit shapes in PPT and PPTX presentations.
Source: https://docs.aspose.com/slides/net/shape-types/
Updated: 2025-11-13
---
lastmod: 2025-11-13T18:56:36+04:00
title: Shape Types in Aspose.Slides for .NET
linktitle: Shape Types
type: docs
weight: 10
url: /net/shape-types/
keywords:
- shape
- connector
- ellipse
- group
- line
- rectangle
- PowerPoint
- presentation
- .NET
- C#
- Aspose.Slides
description: "Learn every shape type in Aspose.Slides for .NET, with clear examples to create, format, and edit shapes in PPT and PPTX presentations."
---
## Related features
- [Add preset shapes](https://docs.aspose.com/slides/features/autoshapes/)
## Related articles
- [Connector](https://docs.aspose.com/slides/net/examples/elements/connector/)
# Apply or Change Slide Layouts in .NET
> Apply, create, and modify slide layouts in Aspose.Slides for .NET, add placeholders, remove unused layouts, and control footer visibility.
Source: https://docs.aspose.com/slides/net/slide-layout/
Updated: 2026-09-28
## **Overview**
A slide layout defines the positions and formatting of placeholders such as titles, text, pictures, charts, and tables. Applying a layout gives slides a consistent structure while allowing each slide to contain its own content.
The most common layouts include:
- **Title Slide**: Contains title and subtitle placeholders.
- **Title and Content**: Contains a title placeholder and a general-purpose content placeholder.
- **Blank**: Contains no content placeholders and is useful when every shape will be positioned manually.
## **Understand Layout Inheritance**
A presentation has three related levels:
1. A [master slide](https://reference.aspose.com/slides/net/aspose.slides/imasterslide/) defines the theme, shared formatting, backgrounds, and common objects.
1. A [layout slide](https://reference.aspose.com/slides/net/aspose.slides/ilayoutslide/) belongs to a master and defines a particular arrangement of placeholders.
1. A [normal slide](https://reference.aspose.com/slides/net/aspose.slides/islide/) uses one layout and stores the content entered for that slide.
A normal slide inherits theme and formatting from its layout, and the layout inherits from its master. A value set directly on a normal slide overrides the inherited value at that level. When a normal slide is created, its placeholder shapes are generated from the selected layout, while the content entered into those placeholders belongs to the normal slide.
Add required placeholders to a layout before creating slides from it. Adding another placeholder to a layout later does not automatically add a corresponding placeholder shape to existing normal slides.
This relationship has two important consequences:
- Changing inherited formatting or existing placeholder geometry on a layout can update every slide that depends on it. Before editing a layout that is already in use, inspect its dependent slides and review the resulting presentation.
- A layout that is still used by a slide cannot be removed. Reassign its dependent slides to another layout first, or remove only unused layouts.
For more information about the top level of this hierarchy, see [Slide Master](https://docs.aspose.com/slides/net/slide-master/).
To hide inherited logos or decorative master shapes on one slide or through a shared layout, see [Control the Visibility of Master Graphics](https://docs.aspose.com/slides/net/slide-master/). The example compares two slides using the same master.
## **Select and Apply a Slide Layout**
Use a layout type when the presentation follows standard PowerPoint layout definitions. Layout names are user-editable and can be localized, so name-based selection is less reliable unless you control the source template.
The following example looks for **Title and Content** on the first master. If that layout is unavailable, it deliberately falls back to **Blank**. The second null check is necessary because a presentation can contain only custom layouts. The selected layout is then applied to the first normal slide through the [ISlide.LayoutSlide](https://reference.aspose.com/slides/net/aspose.slides/islide/layoutslide/) property.
```csharp
using System;
using Aspose.Slides;
using Aspose.Slides.Export;
using var presentation = new Presentation("input.pptx");
var layoutSlides = presentation.Masters[0].LayoutSlides;
var targetLayout = layoutSlides.GetByType(SlideLayoutType.TitleAndObject) ?? layoutSlides.GetByType(SlideLayoutType.Blank);
if (targetLayout == null)
{
throw new InvalidOperationException("The first master does not contain a suitable layout slide.");
}
presentation.Slides[0].LayoutSlide = targetLayout;
presentation.Save("output-with-new-layout.pptx", SaveFormat.Pptx);
```
Changing a slide's layout does not remove ordinary shapes added directly to the slide. However, placeholder positions, inherited formatting, and the correspondence between existing placeholders and the new layout can change, so inspect the output when switching between substantially different layouts.
## **Add a Layout Slide**
Selection and creation are separate operations. The previous example selects an existing layout; it does not create one. To create a layout, call the [IMasterLayoutSlideCollection.Add](https://reference.aspose.com/slides/net/aspose.slides/masterlayoutslidecollection/add/) method on the target master's layout collection.
The following example always adds a new **Title and Content** layout named `Report Title and Content`, then adds a normal slide based on it. Layout names must be unique within the collection.
```csharp
using Aspose.Slides;
using Aspose.Slides.Export;
using var presentation = new Presentation("input.pptx");
var masterSlide = presentation.Masters[0];
var reportLayout = masterSlide.LayoutSlides.Add(SlideLayoutType.TitleAndObject, "Report Title and Content");
presentation.Slides.AddEmptySlide(reportLayout);
presentation.Save("output-with-report-layout.pptx", SaveFormat.Pptx);
```
Add a layout only when the template genuinely needs another reusable structure. If a suitable layout already exists, select and reuse it instead of creating a duplicate.
## **Add Placeholders to a Layout Slide**
The [ILayoutSlide.PlaceholderManager](https://reference.aspose.com/slides/net/aspose.slides/ilayoutslide/placeholdermanager/) property provides an [ILayoutPlaceholderManager](https://reference.aspose.com/slides/net/aspose.slides/ilayoutplaceholdermanager/) for adding placeholder shapes to a layout.
| PowerPoint Placeholder | `ILayoutPlaceholderManager` Method |
| ----------------------------------- | ---------------------------------- |
|  | [`AddContentPlaceholder(float x, float y, float width, float height)`](https://reference.aspose.com/slides/net/aspose.slides/layoutplaceholdermanager/addcontentplaceholder/) |
|  | [`AddVerticalContentPlaceholder(float x, float y, float width, float height)`](https://reference.aspose.com/slides/net/aspose.slides/layoutplaceholdermanager/addverticalcontentplaceholder/) |
|  | [`AddTextPlaceholder(float x, float y, float width, float height)`](https://reference.aspose.com/slides/net/aspose.slides/layoutplaceholdermanager/addtextplaceholder/) |
|  | [`AddVerticalTextPlaceholder(float x, float y, float width, float height)`](https://reference.aspose.com/slides/net/aspose.slides/layoutplaceholdermanager/addverticaltextplaceholder/) |
|  | [`AddPicturePlaceholder(float x, float y, float width, float height)`](https://reference.aspose.com/slides/net/aspose.slides/layoutplaceholdermanager/addpictureplaceholder/) |
|  | [`AddChartPlaceholder(float x, float y, float width, float height)`](https://reference.aspose.com/slides/net/aspose.slides/layoutplaceholdermanager/addchartplaceholder/) |
|  | [`AddTablePlaceholder(float x, float y, float width, float height)`](https://reference.aspose.com/slides/net/aspose.slides/layoutplaceholdermanager/addtableplaceholder/) |
|  | [`AddSmartArtPlaceholder(float x, float y, float width, float height)`](https://reference.aspose.com/slides/net/aspose.slides/layoutplaceholdermanager/addsmartartplaceholder/) |
|  | [`AddMediaPlaceholder(float x, float y, float width, float height)`](https://reference.aspose.com/slides/net/aspose.slides/layoutplaceholdermanager/addmediaplaceholder/) |
|  | [`AddOnlineImagePlaceholder(float x, float y, float width, float height)`](https://reference.aspose.com/slides/net/aspose.slides/layoutplaceholdermanager/addonlineimageplaceholder/) |
The following example verifies that the **Blank** layout exists, adds four placeholders to it, and then creates a normal slide that uses the modified layout. The order is intentional: the placeholders are added before the normal slide is created, so Aspose.Slides can generate the corresponding placeholder shapes on that slide.
```csharp
using System;
using Aspose.Slides;
using Aspose.Slides.Export;
using var presentation = new Presentation();
var blankLayout = presentation.LayoutSlides.GetByType(SlideLayoutType.Blank);
if (blankLayout == null)
{
throw new InvalidOperationException("The presentation does not contain a Blank layout slide.");
}
var placeholderManager = blankLayout.PlaceholderManager;
placeholderManager.AddContentPlaceholder(20, 20, 310, 270);
placeholderManager.AddVerticalTextPlaceholder(350, 20, 350, 270);
placeholderManager.AddChartPlaceholder(20, 310, 310, 180);
placeholderManager.AddTablePlaceholder(350, 310, 350, 180);
presentation.Slides.AddEmptySlide(blankLayout);
presentation.Save("output-with-placeholders.pptx", SaveFormat.Pptx);
```
The result:
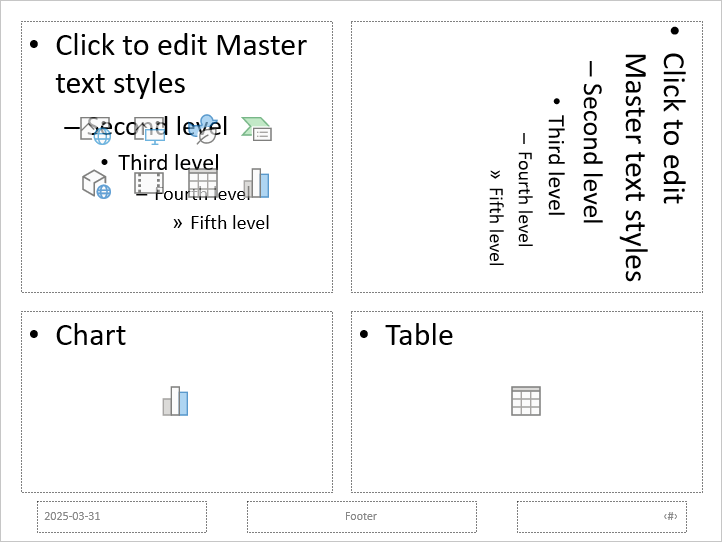
Changing inherited formatting or the geometry of existing layout placeholders can affect dependent slides. A newly added layout placeholder is not backfilled into existing normal slides. Test layout changes on a copy of the presentation and inspect every dependent slide.
## **Remove Unused Layout Slides**
Use the [Compress.RemoveUnusedLayoutSlides](https://reference.aspose.com/slides/net/aspose.slides.lowcode/compress/removeunusedlayoutslides/) method to remove layouts that no normal slide references. The method leaves layouts that are still in use intact.
```csharp
using Aspose.Slides;
using Aspose.Slides.Export;
using Aspose.Slides.LowCode;
using var presentation = new Presentation("input.pptx");
Compress.RemoveUnusedLayoutSlides(presentation);
presentation.Save("output-without-unused-layouts.pptx", SaveFormat.Pptx);
```
To remove one specific layout, first use its [HasDependingSlides](https://reference.aspose.com/slides/net/aspose.slides/ilayoutslide/hasdependingslides/) property or [GetDependingSlides](https://reference.aspose.com/slides/net/aspose.slides/ilayoutslide/getdependingslides/) method. Reassign any dependent slides before calling [ILayoutSlide.Remove](https://reference.aspose.com/slides/net/aspose.slides/ilayoutslide/remove/). Attempting to remove a used layout raises a [PptxEditException](https://reference.aspose.com/slides/net/aspose.slides/pptxeditexception/).
## **Control Footer Visibility on a Layout Slide**
A layout has its own footer, slide-number, and date-time placeholders. Use the [ILayoutSlide.HeaderFooterManager](https://reference.aspose.com/slides/net/aspose.slides/ilayoutslide/headerfootermanager/) property to control those placeholders for one layout. This is useful when, for example, content layouts should show footers but title layouts should not.
The following example selects a layout safely and makes its footer elements visible:
```csharp
using System;
using Aspose.Slides;
using Aspose.Slides.Export;
using var presentation = new Presentation("input.pptx");
var layoutSlide = presentation.LayoutSlides.GetByType(SlideLayoutType.TitleAndObject) ?? presentation.LayoutSlides.GetByType(SlideLayoutType.Blank);
if (layoutSlide == null)
{
throw new InvalidOperationException("The presentation does not contain a suitable layout slide.");
}
var headerFooterManager = layoutSlide.HeaderFooterManager;
headerFooterManager.SetFooterVisibility(true);
headerFooterManager.SetSlideNumberVisibility(true);
headerFooterManager.SetDateTimeVisibility(true);
headerFooterManager.SetFooterText("Footer text");
headerFooterManager.SetDateTimeText("Date and time text");
presentation.Save("output-with-layout-footers.pptx", SaveFormat.Pptx);
```
## **Control Footer Visibility on a Master and Its Child Layouts**
To apply consistent footer settings across a master hierarchy, use the [IMasterSlide.HeaderFooterManager](https://reference.aspose.com/slides/net/aspose.slides/imasterslide/headerfootermanager/) property. The propagation methods of [IMasterSlideHeaderFooterManager](https://reference.aspose.com/slides/net/aspose.slides/imasterslideheaderfootermanager/) operate on the master and its dependent layout slides and normal slides; they do not target just one normal slide.
```csharp
using Aspose.Slides;
using Aspose.Slides.Export;
using var presentation = new Presentation("input.pptx");
var headerFooterManager = presentation.Masters[0].HeaderFooterManager;
headerFooterManager.SetFooterAndChildFootersVisibility(true);
headerFooterManager.SetSlideNumberAndChildSlideNumbersVisibility(true);
headerFooterManager.SetDateTimeAndChildDateTimesVisibility(true);
headerFooterManager.SetFooterAndChildFootersText("Footer text");
headerFooterManager.SetDateTimeAndChildDateTimesText("Date and time text");
presentation.Save("output-with-master-footers.pptx", SaveFormat.Pptx);
```
## **FAQ**
**What Is the Difference Between a Master Slide and a Layout Slide?**
A master slide defines the presentation's theme and shared formatting. A layout slide belongs to a master and defines one reusable arrangement of placeholders. Normal slides use those layouts and store slide-specific content.
**Can I Copy a Layout Slide from One Presentation to Another?**
Yes. Add a copy to the destination collection with the [AddClone](https://reference.aspose.com/slides/net/aspose.slides/globallayoutslidecollection/addclone/) method. When copying between presentations, also verify fonts, themes, images, and other resources used by the source layout.
**What Happens When I Modify a Layout That Is Already in Use?**
Dependent slides inherit the layout changes unless they override the affected formatting or objects locally. Placeholder geometry and inherited styling can therefore change on many slides at once. Use [GetDependingSlides](https://reference.aspose.com/slides/net/aspose.slides/ilayoutslide/getdependingslides/) to identify the affected slides before editing the layout.
**What Happens If I Remove a Layout That Is Still in Use?**
Aspose.Slides throws a [PptxEditException](https://reference.aspose.com/slides/net/aspose.slides/pptxeditexception/). Reassign the dependent slides first, or use [RemoveUnusedLayoutSlides](https://reference.aspose.com/slides/net/aspose.slides.lowcode/compress/removeunusedlayoutslides/) to remove only unreferenced layouts.
## Related features
- [Work with slide layouts](https://docs.aspose.com/slides/features/slide-layouts/)
## Related articles
- [Manage Presentation Headers and Footers in .NET](https://docs.aspose.com/slides/net/presentation-header-and-footer/)
- [Layout Slide](https://docs.aspose.com/slides/net/examples/elements/layout-slide/)
- [Manage Presentation Slide Masters in .NET](https://docs.aspose.com/slides/net/slide-master/)
# Manage Presentation Slide Masters in .NET
> Manage slide masters in Aspose.Slides for .NET: access, edit, clone, compare, and remove master slides in PowerPoint and OpenDocument presentations.
Source: https://docs.aspose.com/slides/net/slide-master/
Updated: 2026-09-28
## **Overview**
A **slide master** defines shared design settings for a group of slides. It can contain common shapes, logos, backgrounds, text styles, theme settings, and footer settings. In PowerPoint, editing a slide master is the usual way to keep a presentation consistent without repeating the same formatting on every slide.
Aspose.Slides for .NET supports the same model. A presentation can contain one or more master slides, and each master slide can contain several layout slides. Normal slides do not usually refer to a master slide directly. Instead, a normal slide uses a layout slide, and that layout slide belongs to a master slide.
The hierarchy is:
1. **Slide master** - defines the shared design and theme.
1. **Layout slide** - defines a specific arrangement of placeholders and layout-level formatting.
1. **Normal slide** - contains the actual presentation content and uses one layout slide.

In Aspose.Slides, a slide master is represented by the [IMasterSlide](https://reference.aspose.com/slides/net/aspose.slides/imasterslide/) interface. All master slides in a presentation are available through the [Presentation.Masters](https://reference.aspose.com/slides/net/aspose.slides/presentation/masters/) collection, which implements [IMasterSlideCollection](https://reference.aspose.com/slides/net/aspose.slides/imasterslidecollection/).
When the same property is defined at more than one level, the more specific level wins. For example, if a master slide and a layout slide both define a background, slides based on that layout use the layout background. For more information about layout slides, see [Apply or Change Slide Layouts](https://docs.aspose.com/slides/net/slide-layout/).
## **Access Slide Masters**
In PowerPoint, you can open the Slide Master view from **View** > **Slide Master**.

In Aspose.Slides, use the `Masters` collection to access master slides:
```csharp
using Aspose.Slides;
using var presentation = new Presentation("presentation.pptx");
var firstMasterSlide = presentation.Masters[0];
var masterSlideCount = presentation.Masters.Count;
var firstMasterLayoutSlideCount = firstMasterSlide.LayoutSlides.Count;
Console.WriteLine("Master slides: " + masterSlideCount);
Console.WriteLine("Layouts in the first master: " + firstMasterLayoutSlideCount);
```
You can also get the master slide used by a normal slide through its layout:
```csharp
using Aspose.Slides;
using var presentation = new Presentation("presentation.pptx");
var slide = presentation.Slides[0];
var layoutSlide = slide.LayoutSlide;
var masterSlide = layoutSlide.MasterSlide;
var masterSlideName = masterSlide.Name;
Console.WriteLine(masterSlideName);
```
## **What a Slide Master Contains**
A master slide is a slide-like object. It implements [IBaseSlide](https://reference.aspose.com/slides/net/aspose.slides/ibaseslide/), so it exposes many of the same slide properties used by normal and layout slides. Master-specific members are listed on the [IMasterSlide](https://reference.aspose.com/slides/net/aspose.slides/imasterslide/) API page.
Commonly used master slide members include:
| Member | Purpose |
| --- | --- |
| `Background` | Sets the master-level slide background. |
| `Shapes` | Stores shapes placed on the master, such as logos, picture frames, and shared text. |
| `LayoutSlides` | Stores the layout slides that belong to the master. |
| `ThemeManager` | Provides access to the master theme APIs. |
| `HeaderFooterManager` | Controls headers, footers, dates, and slide numbers for the master and its child layouts. |
| `GetDependingSlides` | Returns normal slides that depend on the master through their layouts. |
## **Add an Image to a Slide Master**
When you add an image to a master slide, it appears on slides that use layouts from that master. This is useful for logos, watermarks, decorative bands, and other repeated visual elements.
The following example adds a logo to the first master slide:
```csharp
using Aspose.Slides;
using Aspose.Slides.Export;
using var presentation = new Presentation("presentation.pptx");
var masterSlide = presentation.Masters[0];
var logoBytes = File.ReadAllBytes("logo.png");
var logoImage = presentation.Images.AddImage(logoBytes);
masterSlide.Shapes.AddPictureFrame(
ShapeType.Rectangle,
x: 20,
y: 20,
width: 80,
height: 80,
image: logoImage);
presentation.Save("presentation-with-logo.pptx", SaveFormat.Pptx);
```
For more information about picture frames, see [Picture Frame](https://docs.aspose.com/slides/net/picture-frame/).
## **Control the Visibility of Master Graphics**
Use [IBaseSlide.ShowMasterShapes](https://reference.aspose.com/slides/net/aspose.slides/ibaseslide/showmastershapes/) to hide inherited master graphics, such as logos or decorative shapes, without deleting them from the master. Set [Slide.ShowMasterShapes](https://reference.aspose.com/slides/net/aspose.slides/slide/showmastershapes/) to `false` on the slide that should omit those graphics and keep it `true` on slides that should display them.
The following self-contained example creates a blue decorative band on a master and two slides that use the same blank layout. The band is visible on the first slide and hidden on the second. No input presentation or image is required.
```csharp
using System.Drawing;
using Aspose.Slides;
using Aspose.Slides.Export;
using var presentation = new Presentation();
var masterSlide = presentation.Masters[0];
var layoutSlide = masterSlide.LayoutSlides.GetByType(SlideLayoutType.Blank);
layoutSlide.ShowMasterShapes = true;
var slideHeight = presentation.SlideSize.Size.Height;
var band = masterSlide.Shapes.AddAutoShape(ShapeType.Rectangle, 0, 0, 60, slideHeight);
band.FillFormat.FillType = FillType.Solid;
band.FillFormat.SolidFillColor.Color = Color.SteelBlue;
band.LineFormat.FillFormat.FillType = FillType.NoFill;
var visibleSlide = presentation.Slides[0];
visibleSlide.LayoutSlide = layoutSlide;
visibleSlide.Shapes.Clear();
var hiddenSlide = presentation.Slides.AddEmptySlide(layoutSlide);
visibleSlide.ShowMasterShapes = true;
hiddenSlide.ShowMasterShapes = false;
presentation.Save("master-graphics.pptx", SaveFormat.Pptx);
```
The example uses the **Blank** layout supplied with a new presentation and removes the initial slide's own placeholders.
### **Choose the Scope of the Setting**
A normal slide uses its master through [ISlide.LayoutSlide](https://reference.aspose.com/slides/net/aspose.slides/islide/layoutslide/) and [ILayoutSlide.MasterSlide](https://reference.aspose.com/slides/net/aspose.slides/ilayoutslide/masterslide/). Setting the property on an individual slide affects only that slide. Setting [LayoutSlide.ShowMasterShapes](https://reference.aspose.com/slides/net/aspose.slides/layoutslide/showmastershapes/) to `false` hides master graphics for slides that use that shared layout, even if their own setting is `true`. To hide graphics on just one slide, change the slide property and leave the shared layout unchanged.
The setting is not supported as a visibility control on the master slide itself. On a master it always returns `false`, and assigning `true` raises `NotSupportedException`. Apply it to a normal slide or a layout instead.
### **Distinguish Graphics from the Background**
| Operation | Effect |
| --- | --- |
| Hide master graphics | Controls the visibility of inherited master shapes without deleting them or changing the slide's own shapes. |
| Change the slide background fill | Changes the background color, gradient, or image. Master graphics are separate shapes and can remain visible over that background. See [Presentation Background](https://docs.aspose.com/slides/net/presentation-background/). |
| Delete a shape from the master | Removes the shared source shape, so it is no longer available to any slide using that master. |
## **Work with Placeholders**
Placeholders are normally defined on layout slides. The master slide provides the shared style and theme that those layouts inherit, while each layout decides which placeholders are available and where they are placed.
In PowerPoint, placeholder commands are available in Slide Master view.

To add new placeholders with Aspose.Slides, work with the layout slide that belongs to the master:
```csharp
using Aspose.Slides;
using Aspose.Slides.Export;
using var presentation = new Presentation("presentation.pptx");
var masterSlide = presentation.Masters[0];
var blankLayoutSlide =
masterSlide.LayoutSlides.GetByType(SlideLayoutType.Blank) ??
masterSlide.LayoutSlides.Add(SlideLayoutType.Blank, "Blank");
blankLayoutSlide.PlaceholderManager.AddTextPlaceholder(
x: 60,
y: 120,
width: 600,
height: 80);
presentation.Slides.AddEmptySlide(blankLayoutSlide);
presentation.Save("presentation-with-placeholder.pptx", SaveFormat.Pptx);
```
You can also format placeholder shapes that already exist on a master slide. The following example finds the title placeholder and applies a linear gradient fill:
```csharp
using System.Drawing;
using Aspose.Slides;
using Aspose.Slides.Export;
using var presentation = new Presentation("presentation.pptx");
var masterSlide = presentation.Masters[0];
var titlePlaceholder = FindPlaceholder(masterSlide, PlaceholderType.Title);
if (titlePlaceholder != null)
{
var redGradientColor = Color.FromArgb(255, 0, 0);
var purpleGradientColor = Color.FromArgb(128, 0, 128);
titlePlaceholder.FillFormat.FillType = FillType.Gradient;
titlePlaceholder.FillFormat.GradientFormat.GradientShape = GradientShape.Linear;
titlePlaceholder.FillFormat.GradientFormat.GradientStops.Add(0, redGradientColor);
titlePlaceholder.FillFormat.GradientFormat.GradientStops.Add(255, purpleGradientColor);
}
presentation.Save("presentation-title-style.pptx", SaveFormat.Pptx);
static IAutoShape? FindPlaceholder(IMasterSlide masterSlide, PlaceholderType placeholderType)
{
foreach (var shape in masterSlide.Shapes)
{
if (shape is IAutoShape { Placeholder: not null } autoShape &&
autoShape.Placeholder.Type == placeholderType)
{
return autoShape;
}
}
return null;
}
```

For more placeholder and text formatting options, see [Set Prompt Text in Placeholder](https://docs.aspose.com/slides/net/manage-placeholder/) and [Text Formatting](https://docs.aspose.com/slides/net/text-formatting/).
## **Change a Slide Master Background**
A master background is inherited by layouts and slides that do not override it. The following example sets a solid background color for the first master slide:
```csharp
using System.Drawing;
using Aspose.Slides;
using Aspose.Slides.Export;
using var presentation = new Presentation("presentation.pptx");
var masterSlide = presentation.Masters[0];
masterSlide.Background.Type = BackgroundType.OwnBackground;
masterSlide.Background.FillFormat.FillType = FillType.Solid;
masterSlide.Background.FillFormat.SolidFillColor.Color = Color.ForestGreen;
presentation.Save("presentation-master-background.pptx", SaveFormat.Pptx);
```
For related topics, see [Presentation Background](https://docs.aspose.com/slides/net/presentation-background/) and [Presentation Theme](https://docs.aspose.com/slides/net/presentation-theme/).
## **Clone a Slide Master to Another Presentation**
Use [IMasterSlideCollection.AddClone](https://reference.aspose.com/slides/net/aspose.slides/imasterslidecollection/addclone/) to copy a master slide into another presentation. The copied master can then be used by layouts and slides in the destination presentation.
```csharp
using Aspose.Slides;
using Aspose.Slides.Export;
using var sourcePresentation = new Presentation("source.pptx");
using var destinationPresentation = new Presentation("destination.pptx");
var sourceMasterSlide = sourcePresentation.Masters[0];
var clonedMasterSlide = destinationPresentation.Masters.AddClone(sourceMasterSlide);
destinationPresentation.Save("destination-with-master.pptx", SaveFormat.Pptx);
```
If you need to clone normal slides together with their master, see [Clone Slides](https://docs.aspose.com/slides/net/clone-slides/).
## **Add Multiple Slide Masters**
A presentation can contain multiple master slides. This is useful when different sections require different branding, page structure, or theme settings.

The following example clones the default master, gives the clone a different background, creates a layout under that cloned master, and adds a new slide based on that layout:
```csharp
using System.Drawing;
using Aspose.Slides;
using Aspose.Slides.Export;
using var presentation = new Presentation("presentation.pptx");
var defaultMasterSlide = presentation.Masters[0];
var sectionMasterSlide = presentation.Masters.AddClone(defaultMasterSlide);
sectionMasterSlide.Background.Type = BackgroundType.OwnBackground;
sectionMasterSlide.Background.FillFormat.FillType = FillType.Solid;
sectionMasterSlide.Background.FillFormat.SolidFillColor.Color = Color.LightSteelBlue;
var sourceBlankLayout =
defaultMasterSlide.LayoutSlides.GetByType(SlideLayoutType.Blank) ??
defaultMasterSlide.LayoutSlides[0];
var sectionBlankLayout = sectionMasterSlide.LayoutSlides.AddClone(sourceBlankLayout);
presentation.Slides.AddEmptySlide(sectionBlankLayout);
presentation.Save("presentation-with-multiple-masters.pptx", SaveFormat.Pptx);
```
## **Compare Slide Masters**
Master slides can be compared with the `Equals` method inherited from [IBaseSlide](https://reference.aspose.com/slides/net/aspose.slides/ibaseslide/). The comparison checks structure and static content, such as shapes, text, formatting, animations, and other slide settings. It does not compare unique identifiers, such as slide IDs, or dynamic placeholder values, such as the current date.
```csharp
using Aspose.Slides;
using var firstPresentation = new Presentation("first.pptx");
using var secondPresentation = new Presentation("second.pptx");
var firstPresentationMasterCount = firstPresentation.Masters.Count;
var secondPresentationMasterCount = secondPresentation.Masters.Count;
for (var firstMasterIndex = 0; firstMasterIndex < firstPresentationMasterCount; firstMasterIndex++)
{
for (var secondMasterIndex = 0; secondMasterIndex < secondPresentationMasterCount; secondMasterIndex++)
{
var firstMasterSlide = firstPresentation.Masters[firstMasterIndex];
var secondMasterSlide = secondPresentation.Masters[secondMasterIndex];
var areMasterSlidesEqual = firstMasterSlide.Equals(secondMasterSlide);
if (areMasterSlidesEqual)
{
Console.WriteLine(
"first.pptx master #{0} equals second.pptx master #{1}",
firstMasterIndex,
secondMasterIndex);
}
}
}
```
For more information, see [Compare Presentation Slides](https://docs.aspose.com/slides/net/compare-slides/).
## **Set Slide Master View as the Default View**
Use the `LastView` property on [ViewProperties](https://reference.aspose.com/slides/net/aspose.slides/viewproperties/) to control the view that PowerPoint opens first. The following example opens the presentation in Slide Master view:
```csharp
using Aspose.Slides;
using Aspose.Slides.Export;
using var presentation = new Presentation("presentation.pptx");
presentation.ViewProperties.LastView = ViewType.SlideMasterView;
presentation.Save("presentation-master-view.pptx", SaveFormat.Pptx);
```
For more view settings, see [Save Presentation](https://docs.aspose.com/slides/net/save-presentation/).
## **Remove Unused Master Slides**
Presentations sometimes contain master slides that are no longer used by any normal slides. Removing unused masters can reduce file size and simplify template maintenance.
Use [MasterSlideCollection.RemoveUnused](https://reference.aspose.com/slides/net/aspose.slides/masterslidecollection/removeunused/) to remove unused masters from the `Masters` collection:
```csharp
using Aspose.Slides;
using Aspose.Slides.Export;
using var presentation = new Presentation("presentation.pptx");
presentation.Masters.RemoveUnused(ignorePreserveField: true);
presentation.Save("presentation-clean.pptx", SaveFormat.Pptx);
```
You can also use the low-code [Compress.RemoveUnusedMasterSlides](https://reference.aspose.com/slides/net/aspose.slides.lowcode/compress/removeunusedmasterslides/) method:
```csharp
using Aspose.Slides;
using Aspose.Slides.Export;
using var presentation = new Presentation("presentation.pptx");
Aspose.Slides.LowCode.Compress.RemoveUnusedMasterSlides(presentation);
presentation.Save("presentation-clean.pptx", SaveFormat.Pptx);
```
## **FAQ**
**What is the difference between a slide master and a layout slide?**
A slide master defines shared design settings such as theme, background, common shapes, and text styles. A layout slide belongs to a master slide and defines a specific arrangement of placeholders. A normal slide uses a layout slide, so it inherits from both the layout and the master.
**Can one presentation contain several slide masters?**
Yes. A presentation can contain several slide masters. Use multiple masters when different sections need different visual systems or branding.
**Should I add placeholders to a master slide or a layout slide?**
In most cases, add placeholders to layout slides. Put shared visual elements and shared formatting on the master slide, then put content placeholders on the layouts that normal slides will use.
**Can I delete a master slide that is still used?**
No. A master slide that has dependent slides cannot be safely removed directly. First move those slides to layouts under another master, or use an unused-master cleanup method that removes only masters that are not in use.
## Related features
- [Remove unused masters, layouts and media](https://docs.aspose.com/slides/features/remove-unused-content/)
- [Work with slide masters](https://docs.aspose.com/slides/features/slide-masters/)
## Related articles
- [Master Slide](https://docs.aspose.com/slides/net/examples/elements/master-slide/)
- [Layout Slide](https://docs.aspose.com/slides/net/examples/elements/layout-slide/)
- [Apply or Change Slide Layouts in .NET](https://docs.aspose.com/slides/net/slide-layout/)
# Manage Slide Sections in Presentations in .NET
> Manage slide sections with Aspose.Slides for .NET: create, rename, reorder, retrieve, and process section slides in PPTX presentations.
Source: https://docs.aspose.com/slides/net/slide-section/
Updated: 2026-08-25
## **Introduction**
Sections organize consecutive slides into named groups without changing the slide content. With Aspose.Slides for .NET, you can create, reorder, rename, inspect, and remove sections through the [Presentation.Sections](https://reference.aspose.com/slides/net/aspose.slides/presentation/sections/) property.
Sections are especially useful when:
- a large presentation needs to be divided into logical topics or chapters;
- different groups of slides are assigned to different collaborators;
- slides need to be processed, moved, or merged as groups.
Choose concise section names that describe the purpose of the grouped slides. Because sections are part of the presentation structure, use the section APIs to determine membership instead of deriving it from slide positions.
## **Create and Manage Sections**
Use [ISectionCollection.AddSection](https://reference.aspose.com/slides/net/aspose.slides/sectioncollection/addsection/) to create a section by specifying its name and starting slide. Aspose.Slides determines which slides belong to the section from the presentation's current section structure.
The same [ISectionCollection](https://reference.aspose.com/slides/net/aspose.slides/isectioncollection/) also lets you:
- move a section together with its slides by using [ISectionCollection.ReorderSectionWithSlides](https://reference.aspose.com/slides/net/aspose.slides/sectioncollection/reordersectionwithslides/);
- remove only the section definition with [ISectionCollection.RemoveSection](https://reference.aspose.com/slides/net/aspose.slides/sectioncollection/removesection/), which retains its slides;
- remove a section and its slides with [ISectionCollection.RemoveSectionWithSlides](https://reference.aspose.com/slides/net/aspose.slides/sectioncollection/removesectionwithslides/);
- add an empty section at the end with [ISectionCollection.AppendEmptySection](https://reference.aspose.com/slides/net/aspose.slides/sectioncollection/appendemptysection/).
The following example creates two sections, moves one of them, removes it together with its slides, and appends an empty section:
```csharp
using Aspose.Slides;
using var presentation = new Presentation();
var titleSlide = presentation.Slides[0];
presentation.Slides.AddEmptySlide(presentation.LayoutSlides[0]);
var resultsSlide = presentation.Slides.AddEmptySlide(presentation.LayoutSlides[0]);
presentation.Slides.AddEmptySlide(presentation.LayoutSlides[0]);
presentation.Sections.AddSection("Introduction", titleSlide);
var resultsSection = presentation.Sections.AddSection("Results", resultsSlide);
presentation.Sections.ReorderSectionWithSlides(resultsSection, 0);
presentation.Sections.RemoveSectionWithSlides(resultsSection);
presentation.Sections.AppendEmptySection("Appendix");
```
After these operations, the presentation contains the `Introduction` section with its slides and an empty `Appendix` section. The `Results` section and its slides have been removed.
## **Rename Sections**
To rename a section, set its [ISection.Name](https://reference.aspose.com/slides/net/aspose.slides/isection/name/) property. The section's slides and position remain unchanged.
The following example creates a section and changes its name:
```csharp
using Aspose.Slides;
using var presentation = new Presentation();
var slide = presentation.Slides[0];
var section = presentation.Sections.AddSection("Overview", slide);
section.Name = "Introduction";
```
## **Retrieve Slides from Sections**
The [Presentation.Sections](https://reference.aspose.com/slides/net/aspose.slides/presentation/sections/) property returns an [ISectionCollection](https://reference.aspose.com/slides/net/aspose.slides/isectioncollection/) that you can enumerate. For each [ISection](https://reference.aspose.com/slides/net/aspose.slides/isection/), call [ISection.GetSlidesListOfSection](https://reference.aspose.com/slides/net/aspose.slides/isection/getslideslistofsection/) to obtain the slides that currently belong to it. The method returns an [ISectionSlideCollection](https://reference.aspose.com/slides/net/aspose.slides/isectionslidecollection/), which provides a count, indexed access, and enumeration.
The following example creates two populated sections and one empty section, then prints each section's [name](https://reference.aspose.com/slides/net/aspose.slides/isection/name/), [identifier](https://reference.aspose.com/slides/net/aspose.slides/isection/sectionid/), [starting slide](https://reference.aspose.com/slides/net/aspose.slides/isection/startedfromslide/), slide count, and slide numbers. It uses the collection indexer to read the first slide and `foreach` to process every slide. For the empty section, the returned collection has a count of zero, the indexer is not accessed, and enumeration performs no iterations.
```csharp
using System;
using Aspose.Slides;
using var presentation = new Presentation();
var firstSlide = presentation.Slides[0];
presentation.Slides.AddEmptySlide(presentation.LayoutSlides[0]);
var thirdSlide = presentation.Slides.AddEmptySlide(presentation.LayoutSlides[0]);
presentation.Sections.AddSection("Introduction", firstSlide);
presentation.Sections.AddSection("Details", thirdSlide);
presentation.Sections.AppendEmptySection("Appendix");
foreach (var section in presentation.Sections)
{
var sectionSlides = section.GetSlidesListOfSection();
var startingSlide = section.StartedFromSlide == null ? "none" : section.StartedFromSlide.SlideNumber.ToString();
Console.WriteLine($"Section: {section.Name}");
Console.WriteLine($"ID: {section.SectionId}");
Console.WriteLine($"Starting slide: {startingSlide}");
Console.WriteLine($"Slide count: {sectionSlides.Count}");
if (sectionSlides.Count > 0)
{
Console.WriteLine($"First slide via indexer: {sectionSlides[0].SlideNumber}");
}
Console.Write("Slide numbers:");
foreach (var slide in sectionSlides)
{
Console.Write($" {slide.SlideNumber}");
}
Console.WriteLine();
}
```
Section membership is determined by the presentation's section structure. Do not calculate a section's range manually from [ISection.StartedFromSlide](https://reference.aspose.com/slides/net/aspose.slides/isection/startedfromslide/), slide indexes, and the next section's starting slide.
Structural edits can change both the slides returned for a section and their slide numbers. This includes reordering slides, cloning a slide into a section, moving a section together with its slides, removing slides, and removing sections. The next example calls [ISection.GetSlidesListOfSection](https://reference.aspose.com/slides/net/aspose.slides/isection/getslideslistofsection/) after every such change instead of retaining assumptions about the section's former boundaries.
```csharp
using System;
using Aspose.Slides;
using var presentation = new Presentation();
var firstSlide = presentation.Slides[0];
presentation.Slides.AddEmptySlide(presentation.LayoutSlides[0]);
var thirdSlide = presentation.Slides.AddEmptySlide(presentation.LayoutSlides[0]);
presentation.Slides.AddEmptySlide(presentation.LayoutSlides[0]);
var firstSection = presentation.Sections.AddSection("First", firstSlide);
var secondSection = presentation.Sections.AddSection("Second", thirdSlide);
static void PrintSectionSlides(string label, ISection section)
{
var sectionSlides = section.GetSlidesListOfSection();
Console.Write($"{label} ({sectionSlides.Count} slides):");
foreach (var slide in sectionSlides)
{
Console.Write($" {slide.SlideNumber}");
}
Console.WriteLine();
}
PrintSectionSlides("Initially", firstSection);
var slidesBeforeClone = firstSection.GetSlidesListOfSection();
presentation.Slides.AddClone(slidesBeforeClone[0], firstSection);
PrintSectionSlides("After cloning into the section", firstSection);
var slidesBeforeReorder = firstSection.GetSlidesListOfSection();
var firstSectionPosition = slidesBeforeReorder[0].SlideNumber - 1;
presentation.Slides.Reorder(firstSectionPosition, slidesBeforeReorder[slidesBeforeReorder.Count - 1]);
PrintSectionSlides("After reordering slides", firstSection);
presentation.Sections.ReorderSectionWithSlides(firstSection, 1);
PrintSectionSlides("After moving the section", firstSection);
var slidesBeforeRemoval = firstSection.GetSlidesListOfSection();
presentation.Slides.Remove(slidesBeforeRemoval[0]);
PrintSectionSlides("After removing a slide", firstSection);
presentation.Sections.RemoveSectionWithSlides(secondSection);
foreach (var section in presentation.Sections)
{
PrintSectionSlides("Remaining section", section);
}
```
Call [ISection.GetSlidesListOfSection](https://reference.aspose.com/slides/net/aspose.slides/isection/getslideslistofsection/) again whenever slides or sections are reordered, cloned, moved, or removed. This keeps subsequent processing aligned with the current presentation structure.
The PPT (PowerPoint 97–2003) format does not preserve section metadata. Use this workflow with a format that supports sections, such as PPTX; converting to PPT removes the section structure needed for later enumeration.
## **FAQ**
**Are sections preserved when saving to the PPT (PowerPoint 97–2003) format?**
No. The PPT format does not support section metadata, so section grouping is lost when saving to .ppt.
**Can an entire section be "hidden"?**
No. A section has no visibility state. To hide its contents, set the [ISlide.Hidden](https://reference.aspose.com/slides/net/aspose.slides/islide/hidden/) property for each slide in the section.
**How can I find the section that contains a slide?**
Enumerate [Presentation.Sections](https://reference.aspose.com/slides/net/aspose.slides/presentation/sections/), call [ISection.GetSlidesListOfSection](https://reference.aspose.com/slides/net/aspose.slides/isection/getslideslistofsection/) for each section, and compare the returned slides with the target slide. For a non-empty section, [ISection.StartedFromSlide](https://reference.aspose.com/slides/net/aspose.slides/isection/startedfromslide/) returns its first slide; for an empty section, it returns `null`.
## Related features
- [Organize slides into sections](https://docs.aspose.com/slides/features/slide-sections/)
## Related articles
- [Section](https://docs.aspose.com/slides/net/examples/elements/section/)
# Change the Presentation Slide Size in .NET
> Learn how to quickly resize slides in PPT, PPTX and ODP files with .NET and Aspose.Slides, optimize presentations for any screen without losing quality.
Source: https://docs.aspose.com/slides/net/slide-size/
Updated: 2026-11-08
## **Introduction**
Aspose.Slides for .NET provides comprehensive tools to adjust the slide size and aspect ratio in PowerPoint presentations, critical for both printing and on-screen display.
Popular Slide Sizes and Ratios:
- **Standard (4:3 Aspect Ratio)**: Ideal for older screens and devices.
- **Widescreen (16:9 Aspect Ratio)**: Recommended for modern projectors and displays.
Ensure consistency throughout your presentation as a single slide size and aspect ratio apply to all slides. For optimal results, set your slide dimensions at the beginning of your presentation creation process to avoid complications.
By default, presentations created with Aspose.Slides use the standard 4:3 aspect ratio.
Notes and handout pages have separate dimensions from regular slides. See [Notes Page Size](https://docs.aspose.com/slides/net/notes-size/) to change their size and orientation.
## **How to Change the Slide Size in a Presentation**
This example demonstrates changing a presentation's slide size with Aspose.Slides in C#:
```csharp
using Aspose.Slides;
using Aspose.Slides.Export;
using (Presentation pres = new Presentation("presentation-4x3.pptx"))
{
pres.SlideSize.SetSize(SlideSizeType.OnScreen16x9, SlideSizeScaleType.DoNotScale);
pres.Save("presentation-16x9.pptx", SaveFormat.Pptx);
}
```
## **Specify Custom Slide Sizes**
Tailoring the slide size to your specific needs, such as for unique paper layouts or screen specifications, can be beneficial. Here's how to set a custom slide size with Aspose.Slides for .NET:
```csharp
using Aspose.Slides;
using Aspose.Slides.Export;
using (Presentation pres = new Presentation("presentation.pptx"))
{
pres.SlideSize.SetSize(780, 540, SlideSizeScaleType.DoNotScale); // A4 paper size
pres.Save("presentation-a4.pptx", SaveFormat.Pptx);
}
```
## **Handle Slide Content After Resizing**
Post-resizing, slide contents may distort. You can control how Aspose.Slides manages this resizing:
- **`DoNotScale`**: Keep objects at original sizes to avoid scaling.
- **`EnsureFit`**: Scale objects to fit smaller slides, preventing content loss.
- **`Maximize`**: Enlarge objects to suit larger slides for aesthetic consistency.
Example of using `Maximize` setting for slide size adjustment:
```csharp
using Aspose.Slides;
using (Presentation pres = new Presentation("presentation.pptx"))
{
pres.SlideSize.SetSize(SlideSizeType.Ledger, SlideSizeScaleType.Maximize);
}
```
[](https://docs.aspose.com/slides/net/slide-size/visual-slide-size-1dbb49bb41cc.svg)
*One .NET fixture resized to the same 600 × 300-point canvas in each mode. The figure uses one display scale throughout. Dashed marks show where shape frames extend beyond the canvas.*
## **FAQ**
### Can I set a custom slide size using units other than inches (for example, points or millimeters)?
Yes. Aspose.Slides uses points internally, where 1 point equals 1/72 of an inch. You can convert any unit (such as millimeters or centimeters) to points and use the converted values to define slide width and height.
### Will a very large custom slide size affect performance and memory usage during rendering?
Yes. Larger slide dimensions (in points) combined with higher rendering scale lead to increased memory consumption and longer processing times. Aim for a practical slide size and adjust rendering scale only as needed to achieve the desired output quality.
### Can I define one non-standard slide size and then merge slides from presentations that have different sizes?
You can’t [merge presentations](https://docs.aspose.com/slides/net/merge-presentation/) while they have different slide sizes — first, resize one presentation to match the other. When changing the slide size, you can choose how existing content is handled via the [SlideSizeScaleType](https://reference.aspose.com/slides/net/aspose.slides/slidesizescaletype/) option. After aligning sizes, you can merge slides while preserving formatting.
### Can I generate thumbnails for individual shapes or specific regions of a slide, and will they respect the new slide size?
Yes. Aspose.Slides can render thumbnails for [entire slides](https://reference.aspose.com/slides/net/aspose.slides/slide/getimage/) as well as for [selected shapes](https://reference.aspose.com/slides/net/aspose.slides/shape/getimage/). The resulting images reflect the current slide size and aspect ratio, ensuring consistent framing and geometry.
## Related features
- [Set slide size and orientation](https://docs.aspose.com/slides/features/slide-size/)
# Slide Text Extraction: PPT, PPTX, ODP Essentials
> Turn slides into data: extract text from PPT, PPTX, and ODP for search, automation, and accessibility, with format insights—usable in .NET and cloud platforms.
Source: https://docs.aspose.com/slides/net/slide-text-extraction-ppt-pptx-odp-essentials/
Updated: 2025-11-14
## **Introduction**
Extracting text from presentation files is critical for **automating business processes**, **data analytics**, and **streamlining document workflows**. In today’s digital landscape, many organizations need **rapid access** to information contained in slides. Whether for **search indexing**, **content analysis**, **accessibility**, or **localization**, reliable text extraction ensures that valuable slide content can be reused, processed, and analyzed across various systems.
## **Practical Applications of Text Extraction**
- **Automating Document Workflows**: Seamlessly integrate PPTX and ODP files into corporate document management systems (DMS) like SharePoint, Alfresco, or 1C:Document Management.
- **Search Indexing**: Create high-speed search systems by indexing extracted text, enabling quick retrieval of pertinent data from large presentation archives.
- **Content Analysis**: Automatically identify key phrases, topics, and trends to aid marketing and analytics teams in forecasting and strategic decision-making.
- **Accessibility and Localization**: Generate subtitles, translate slides into multiple languages, or integrate content with screen-reading software for improved access.
- **Text Positioning and Visual Analysis**: Beyond text itself, analyzing layout and positioning helps ensure proper slide structure, formatting, and alignment with corporate guidelines.
This article explores several popular presentation file formats and how each affects the text extraction process.
## **Overview of Presentation Formats**
### **PPT (Legacy PowerPoint Format)**
Originally used by Microsoft PowerPoint until 2007, **PPT** was prevalent in **MS Office 97–2003**. As a **binary format**, PPT is more difficult to process without specialized tools than modern XML-based formats.
**Main Difficulties in Text Extraction**
- Proprietary binary structure makes **data access** challenging without the official Microsoft API or specialized libraries.
- **Text may appear** in multiple locations (slides, notes, comments), requiring a comprehensive approach to extraction.
- **Encoding and font conflicts** can arise when dealing with custom characters.
### **PPTX (Open XML Specification)**
Introduced in **PowerPoint 2007**, **PPTX** is built on **Office Open XML**, an XML-based standard that simplifies text extraction.
**File Structure Basics**
- PPTX files are **ZIP archives** containing multiple **XML documents**.
- Slides, notes sections, and metadata each reside in separate **XML files**.
**Extracting Text from Structured XML**
PPTX allows more efficient text extraction due to its clear XML organization:
- **Text resides in `ppt/slides/slideX.xml`** within `` tags.
- **Notes and comments** are found in `ppt/notesSlides/`.
- **Retaining formatting** may require parsing additional XML attributes.
### **ODP (OpenDocument Presentation)**
Based on the **OpenDocument Format (ODF)**, **ODP** is commonly used in open-source office suites such as **LibreOffice Impress**.
**Differences from PPTX**
- Relies on **OpenDocument XML**, not Open XML.
- Structurally similar but **uses different tags and a distinct hierarchy**.
- Text is often stored in **content.xml** within `` elements.
## **Conclusion**
A solid grasp of presentation file structures is paramount for successful text extraction. Although **PPTX and ODP** offer XML-based transparency, older **PPT** files demand additional steps due to their binary nature. Specialized tools and libraries designed for each format help automate and optimize the extraction process, ensuring that extracted data can power a broad array of use cases—from robust indexing to comprehensive accessibility solutions.
## Related articles
- [How to Extract Text from PPT, PPTX, and ODP with Aspose.Slides](https://docs.aspose.com/slides/net/extracting-text-on-cloud-platforms-using-aspose-slides/)
- [Extracting Text from PPT, PPTX, ODP](https://docs.aspose.com/slides/net/extracting-text-from-ppt-pptx-odp-on-cloud-platforms/)
- [How to Extract Text from PPT, PPTX, and ODP Files Using Open XML SDK in .NET](https://docs.aspose.com/slides/net/extracting-text-on-cloud-platforms-using-open-xml-sdk/)
# Manage Slide Transitions in Presentations in .NET
> Apply slide transitions, configure automatic slide advancement, and customize Morph and other transition effects with Aspose.Slides for .NET.
Source: https://docs.aspose.com/slides/net/slide-transition/
Updated: 2026-11-17
## **Overview**
Slide transitions control how slides appear during a slide show. With Aspose.Slides for .NET, you can choose a transition effect for each slide, configure advancement by mouse click or timer, and adjust options specific to an effect. This article uses C# examples to apply transitions, set exact transition durations, manage slide timing, and create a Morph transition between two slides. The examples also show how to save the settings to a PPTX file.
## **Add Slide Transition**
To apply a transition, load a presentation with the [Presentation](https://reference.aspose.com/slides/net/aspose.slides/presentation/) class and access the slide's [SlideShowTransition](https://reference.aspose.com/slides/net/aspose.slides/ibaseslide/slideshowtransition/) property. Set its [Type](https://reference.aspose.com/slides/net/aspose.slides/islideshowtransition/type/) to a value from the [TransitionType](https://reference.aspose.com/slides/net/aspose.slides.slideshow/transitiontype/) enumeration, then save the presentation.
The following example applies a Circle transition to the first slide and a Comb transition to the second. Use an `input.pptx` file with at least two slides.
```csharp
using System;
using Aspose.Slides;
using Aspose.Slides.Export;
using Aspose.Slides.SlideShow;
using var presentation = new Presentation("input.pptx");
if (presentation.Slides.Count >= 2)
{
presentation.Slides[0].SlideShowTransition.Type = TransitionType.Circle;
presentation.Slides[1].SlideShowTransition.Type = TransitionType.Comb;
presentation.Save("slide-transitions.pptx", SaveFormat.Pptx);
}
else
{
Console.WriteLine("The input presentation must contain at least two slides.");
}
```
## **Wheel Transition**
The [Spokes](https://reference.aspose.com/slides/net/aspose.slides.slideshow/iwheeltransition/spokes/) property of [IWheelTransition](https://reference.aspose.com/slides/net/aspose.slides.slideshow/iwheeltransition/) controls the number of radial sectors that reveal the destination slide. Set the slide's transition [Type](https://reference.aspose.com/slides/net/aspose.slides/islideshowtransition/type/) to Wheel from [TransitionType](https://reference.aspose.com/slides/net/aspose.slides.slideshow/transitiontype/) before accessing [Value](https://reference.aspose.com/slides/net/aspose.slides/islideshowtransition/value/) as [IWheelTransition](https://reference.aspose.com/slides/net/aspose.slides.slideshow/iwheeltransition/).
This example creates two identical pairs of slides: a black slide followed by a slide with a gold rectangle. The destination slides use spoke counts of 1 and 8, with the same [Speed](https://reference.aspose.com/slides/net/aspose.slides.slideshow/slideshowtransition/speed/) and an explicit [Duration](https://reference.aspose.com/slides/net/aspose.slides.slideshow/slideshowtransition/duration/) of 8,000 milliseconds to make the difference easy to observe.
```csharp
using System.Drawing;
using Aspose.Slides;
using Aspose.Slides.Export;
using Aspose.Slides.SlideShow;
using var presentation = new Presentation();
var slideWidth = presentation.SlideSize.Size.Width;
var slideHeight = presentation.SlideSize.Size.Height;
var blackSlide = presentation.Slides[0];
blackSlide.Shapes.Clear();
blackSlide.Background.Type = BackgroundType.OwnBackground;
blackSlide.Background.FillFormat.FillType = FillType.Solid;
blackSlide.Background.FillFormat.SolidFillColor.Color = Color.Black;
var destinationSlide = presentation.Slides.AddClone(blackSlide);
var rectangle = destinationSlide.Shapes.AddAutoShape(ShapeType.Rectangle, 0, 0, slideWidth, slideHeight);
rectangle.FillFormat.FillType = FillType.Solid;
rectangle.FillFormat.SolidFillColor.Color = Color.Gold;
rectangle.TextFrame.Text = "Wheel transition";
presentation.Slides.AddClone(blackSlide);
presentation.Slides.AddClone(destinationSlide);
var spokeCounts = new uint[] { 1, 8 };
for (var i = 0; i < spokeCounts.Length; i++)
{
var transition = presentation.Slides[i * 2 + 1].SlideShowTransition;
transition.Type = TransitionType.Wheel;
var wheelTransition = (IWheelTransition)transition.Value;
wheelTransition.Spokes = spokeCounts[i];
transition.Speed = TransitionSpeed.Slow;
transition.Duration = 8000;
}
presentation.Save("wheel-transitions.pptx", SaveFormat.Pptx);
```
Open the output presentation in PowerPoint and run the slide show. Advance from slide 1 to slide 2, then from slide 3 to slide 4. In PowerPoint playback, the verified spoke count of 1 reveals the slide with one clockwise sweep; the verified count of 8 reveals it through eight radial sectors simultaneously. The destination content and transition timing are identical, so the difference is the number of reveal sectors.
## **Add Advanced Slide Transition**
You can configure how long a slide remains on screen and whether a mouse click advances the slide show. The following properties control this behavior:
- [AdvanceOnClick](https://reference.aspose.com/slides/net/aspose.slides/islideshowtransition/advanceonclick/) allows the viewer to advance by clicking the mouse.
- [AdvanceAfter](https://reference.aspose.com/slides/net/aspose.slides/islideshowtransition/advanceafter/) enables automatic advancement.
- [AdvanceAfterTime](https://reference.aspose.com/slides/net/aspose.slides/islideshowtransition/advanceaftertime/) specifies the delay before automatic advancement, in milliseconds.
Enable both click and timed advancement to let the viewer move on with a click or wait for the timer. To use only the timer, set [AdvanceOnClick](https://reference.aspose.com/slides/net/aspose.slides/islideshowtransition/advanceonclick/) to `false`. The delay controls when the slide show advances; it does not set the duration of the visual transition effect.
This example assigns different effects to the first three slides and enables automatic advancement after 3, 5, and 7 seconds, respectively. Mouse clicks can also advance these slides. Use an `input.pptx` file with at least three slides.
```csharp
using System;
using Aspose.Slides;
using Aspose.Slides.Export;
using Aspose.Slides.SlideShow;
using var presentation = new Presentation("input.pptx");
if (presentation.Slides.Count >= 3)
{
var firstTransition = presentation.Slides[0].SlideShowTransition;
firstTransition.Type = TransitionType.Circle;
firstTransition.AdvanceOnClick = true;
firstTransition.AdvanceAfter = true;
firstTransition.AdvanceAfterTime = 3000;
var secondTransition = presentation.Slides[1].SlideShowTransition;
secondTransition.Type = TransitionType.Comb;
secondTransition.AdvanceOnClick = true;
secondTransition.AdvanceAfter = true;
secondTransition.AdvanceAfterTime = 5000;
var thirdTransition = presentation.Slides[2].SlideShowTransition;
thirdTransition.Type = TransitionType.Zoom;
thirdTransition.AdvanceOnClick = true;
thirdTransition.AdvanceAfter = true;
thirdTransition.AdvanceAfterTime = 7000;
presentation.Save("advanced-transitions.pptx", SaveFormat.Pptx);
}
else
{
Console.WriteLine("The input presentation must contain at least three slides.");
}
```
To check whether timed advancement is enabled, read [AdvanceAfter](https://reference.aspose.com/slides/net/aspose.slides/islideshowtransition/advanceafter/). A stored delay alone does not indicate that the timer is active.
The next example opens the file saved above, reports each enabled timer, and disables automatic advancement for slides with a delay greater than two seconds. It enables mouse clicks for those slides and saves the updated settings.
```csharp
using System;
using Aspose.Slides;
using Aspose.Slides.Export;
using var presentation = new Presentation("advanced-transitions.pptx");
foreach (var slide in presentation.Slides)
{
var transition = slide.SlideShowTransition;
if (transition.AdvanceAfter)
{
Console.WriteLine($"Slide {slide.SlideNumber}: advance after {transition.AdvanceAfterTime} ms.");
if (transition.AdvanceAfterTime > 2000)
{
transition.AdvanceAfter = false;
transition.AdvanceOnClick = true;
}
}
}
presentation.Save("adjusted-transitions.pptx", SaveFormat.Pptx);
```
## **Control Transition Timing Precisely**
Use [Duration](https://reference.aspose.com/slides/net/aspose.slides.slideshow/slideshowtransition/duration/) to specify the exact length of a transition effect in milliseconds. The slide's [SlideShowTransition](https://reference.aspose.com/slides/net/aspose.slides/ibaseslide/slideshowtransition/) property exposes these settings through [ISlideShowTransition](https://reference.aspose.com/slides/net/aspose.slides/islideshowtransition/):
| Property | Purpose |
| --- | --- |
| [Duration](https://reference.aspose.com/slides/net/aspose.slides.slideshow/slideshowtransition/duration/) | Sets the duration of the transition effect itself, in milliseconds. |
| [AdvanceAfterTime](https://reference.aspose.com/slides/net/aspose.slides.slideshow/slideshowtransition/advanceaftertime/) | Sets the delay before the slide advances automatically, in milliseconds. Enable [AdvanceAfter](https://reference.aspose.com/slides/net/aspose.slides/islideshowtransition/advanceafter/) to activate this timer. |
| [Speed](https://reference.aspose.com/slides/net/aspose.slides.slideshow/slideshowtransition/speed/) | Selects a predefined speed category from [TransitionSpeed](https://reference.aspose.com/slides/net/aspose.slides.slideshow/transitionspeed/): Slow, Medium, or Fast. It is used when an exact duration is not specified. |
[Duration](https://reference.aspose.com/slides/net/aspose.slides.slideshow/slideshowtransition/duration/) controls only the transition effect; it does not determine how long the slide remains visible. Configure the automatic advancement delay separately. When no explicit duration is set, Aspose.Slides determines the effect duration from the transition type and [Speed](https://reference.aspose.com/slides/net/aspose.slides.slideshow/slideshowtransition/speed/) value.
### **Apply the Same Duration to Every Slide**
For consistent pacing, apply the same effect and exact duration to every slide. This example loads `input.pptx`, selects Fade from [TransitionType](https://reference.aspose.com/slides/net/aspose.slides.slideshow/transitiontype/), and gives each transition a duration of 750 milliseconds. It separately enables automatic advancement after 5,000 milliseconds and disables advancement by mouse click, then saves the result as PPTX.
```csharp
using Aspose.Slides;
using Aspose.Slides.Export;
using Aspose.Slides.SlideShow;
using var presentation = new Presentation("input.pptx");
foreach (var slide in presentation.Slides)
{
var transition = slide.SlideShowTransition;
transition.Type = TransitionType.Fade;
transition.Duration = 750;
// Configure automatic advancement independently of the effect duration.
transition.AdvanceAfter = true;
transition.AdvanceAfterTime = 5000;
transition.AdvanceOnClick = false;
}
presentation.Save("precise-transitions.pptx", SaveFormat.Pptx);
```
### **Set Different Durations for Individual Slides**
Different slides can use different effect durations. For example, use a brief transition for a title slide and a longer transition for a section introduction. This example sets 500 milliseconds for the first slide and 1,200 milliseconds for the second. Use an `input.pptx` file with at least two slides.
```csharp
using System;
using Aspose.Slides;
using Aspose.Slides.Export;
using Aspose.Slides.SlideShow;
using var presentation = new Presentation("input.pptx");
if (presentation.Slides.Count >= 2)
{
var firstTransition = presentation.Slides[0].SlideShowTransition;
firstTransition.Type = TransitionType.Fade;
firstTransition.Duration = 500;
var secondTransition = presentation.Slides[1].SlideShowTransition;
secondTransition.Type = TransitionType.Push;
secondTransition.Duration = 1200;
presentation.Save("individual-transition-durations.pptx", SaveFormat.Pptx);
}
else
{
Console.WriteLine("The input presentation must contain at least two slides.");
}
```
### **Coordinate Transitions with Animated Output**
When preparing an [animated GIF](https://docs.aspose.com/slides/net/convert-powerpoint-to-animated-gif/), [HTML5 presentation](https://docs.aspose.com/slides/net/export-to-html5/), or [video](https://docs.aspose.com/slides/net/convert-powerpoint-to-video/), set exact transition durations before export to match the intended pacing. For example, use a 600-millisecond fade between scenes, and adjust each slide's advancement delay separately to allow time for its narration or content.
For GIF and video, coordinate the output frame rate with the effect duration: 600 milliseconds corresponds to 18 frames at 30 frames per second. In HTML5, enable animated transitions in the export settings. Check the chosen export format's supported effects and timing options, and preview the output to confirm synchronization.
### **Read an Existing Transition Duration**
Read [Duration](https://reference.aspose.com/slides/net/aspose.slides.slideshow/slideshowtransition/duration/) before modifying the transition to determine whether an explicit value is stored. A value of `-1` means no explicit duration is set; a nonnegative value specifies the stored duration in milliseconds. The unset value is not the calculated playback duration: Aspose.Slides uses the transition type and [Speed](https://reference.aspose.com/slides/net/aspose.slides.slideshow/slideshowtransition/speed/) to determine that duration. Setting a transition type can initialize a duration, so inspect the original settings first.
```csharp
using System;
using Aspose.Slides;
using var presentation = new Presentation("input.pptx");
foreach (var slide in presentation.Slides)
{
var transition = slide.SlideShowTransition;
var duration = transition.Duration;
if (duration >= 0)
{
Console.WriteLine($"Slide {slide.SlideNumber}: stored transition duration is {duration} ms.");
}
else
{
Console.WriteLine($"Slide {slide.SlideNumber}: no explicit duration; timing depends on {transition.Type} and {transition.Speed}.");
}
}
```
## **Morph Transition**
The Morph transition animates changes between objects on consecutive slides. To create a simple Morph effect, clone a slide, move or resize an object on the clone, and apply the Morph transition to the second slide. This gives the transition corresponding objects to animate between their original and modified states.
The following example creates a slide with a text rectangle, clones the slide, and changes the rectangle's position and size on the clone. It then selects Morph from the [TransitionType](https://reference.aspose.com/slides/net/aspose.slides.slideshow/transitiontype/) enumeration for the second slide. Open the saved file in a presentation viewer that supports Morph to see the effect during a slide show.
```csharp
using Aspose.Slides;
using Aspose.Slides.Export;
using Aspose.Slides.SlideShow;
using var presentation = new Presentation();
var firstSlide = presentation.Slides[0];
var rectangle = firstSlide.Shapes.AddAutoShape(ShapeType.Rectangle, 100, 100, 400, 100);
rectangle.TextFrame.Text = "Morph transition";
var secondSlide = presentation.Slides.AddClone(firstSlide);
var movedRectangle = secondSlide.Shapes[0];
movedRectangle.X += 100;
movedRectangle.Y += 50;
movedRectangle.Width -= 200;
movedRectangle.Height -= 10;
secondSlide.SlideShowTransition.Type = TransitionType.Morph;
presentation.Save("morph-transition.pptx", SaveFormat.Pptx);
```
## **Morph Transition Types**
The [TransitionMorphType](https://reference.aspose.com/slides/net/aspose.slides.slideshow/transitionmorphtype/) enumeration controls how Morph matches and animates content:
- [ByObject](https://reference.aspose.com/slides/net/aspose.slides.slideshow/transitionmorphtype/) treats each shape as a whole object.
- [ByWord](https://reference.aspose.com/slides/net/aspose.slides.slideshow/transitionmorphtype/) animates text by matching words where possible.
- [ByChar](https://reference.aspose.com/slides/net/aspose.slides.slideshow/transitionmorphtype/) animates text by matching characters where possible.
Set the transition [Type](https://reference.aspose.com/slides/net/aspose.slides/islideshowtransition/type/) to Morph before accessing its [Value](https://reference.aspose.com/slides/net/aspose.slides/islideshowtransition/value/). The value then provides the [IMorphTransition](https://reference.aspose.com/slides/net/aspose.slides.slideshow/imorphtransition/) interface, whose [MorphType](https://reference.aspose.com/slides/net/aspose.slides.slideshow/imorphtransition/morphtype/) property selects the matching mode.
This example opens the presentation created in the previous section and configures the second slide to use word-based Morph animation.
```csharp
using System;
using Aspose.Slides;
using Aspose.Slides.Export;
using Aspose.Slides.SlideShow;
using var presentation = new Presentation("morph-transition.pptx");
if (presentation.Slides.Count >= 2)
{
var transition = presentation.Slides[1].SlideShowTransition;
transition.Type = TransitionType.Morph;
if (transition.Value is IMorphTransition morphTransition)
{
morphTransition.MorphType = TransitionMorphType.ByWord;
presentation.Save("morph-by-word.pptx", SaveFormat.Pptx);
}
else
{
Console.WriteLine("Morph transition options are unavailable.");
}
}
else
{
Console.WriteLine("The input presentation must contain at least two slides.");
}
```
[](https://docs.aspose.com/slides/net/slide-transition/visual-slide-transition-76bdbee41cb7.svg)
*Morph can match whole shapes, words or characters where possible. These boxes identify matching units rather than observed motion. The example selects ByWord on the second slide.*
## **Set Transition Effects**
Some transitions expose additional options, such as direction or whether the effect starts from a black screen. The available options depend on the selected transition [Type](https://reference.aspose.com/slides/net/aspose.slides/islideshowtransition/type/). Set the type first, then use the appropriate interface from its [Value](https://reference.aspose.com/slides/net/aspose.slides/islideshowtransition/value/).
The following example applies a Cut transition to the first slide of `input.pptx`. It sets [FromBlack](https://reference.aspose.com/slides/net/aspose.slides.slideshow/ioptionalblacktransition/fromblack/) through [IOptionalBlackTransition](https://reference.aspose.com/slides/net/aspose.slides.slideshow/ioptionalblacktransition/) so that the transition starts from a black screen.
```csharp
using System;
using Aspose.Slides;
using Aspose.Slides.Export;
using Aspose.Slides.SlideShow;
using var presentation = new Presentation("input.pptx");
var transition = presentation.Slides[0].SlideShowTransition;
transition.Type = TransitionType.Cut;
if (transition.Value is IOptionalBlackTransition cutTransition)
{
cutTransition.FromBlack = true;
presentation.Save("cut-from-black.pptx", SaveFormat.Pptx);
}
else
{
Console.WriteLine("Cut transition options are unavailable.");
}
```
## **FAQ**
**Can I control the playback speed of a slide transition?**
Yes. Prefer [Duration](https://reference.aspose.com/slides/net/aspose.slides.slideshow/slideshowtransition/duration/) when you need an exact effect duration in milliseconds. Use [Speed](https://reference.aspose.com/slides/net/aspose.slides.slideshow/slideshowtransition/speed/) when a predefined [TransitionSpeed](https://reference.aspose.com/slides/net/aspose.slides.slideshow/transitionspeed/) category—Slow, Medium, or Fast—is sufficient and no explicit duration is set. These settings control the transition effect independently of the automatic advancement delay.
**Can I attach audio to a transition and make it loop?**
Yes. Assign embedded audio to [Sound](https://reference.aspose.com/slides/net/aspose.slides/islideshowtransition/sound/), set [SoundMode](https://reference.aspose.com/slides/net/aspose.slides/islideshowtransition/soundmode/) to StartSound from the [TransitionSoundMode](https://reference.aspose.com/slides/net/aspose.slides.slideshow/transitionsoundmode/) enumeration, and enable [SoundLoop](https://reference.aspose.com/slides/net/aspose.slides/islideshowtransition/soundloop/). The audio loops until the next sound event in the slide show.
**What's the fastest way to apply the same transition to every slide?**
Loop through the presentation's [Slides](https://reference.aspose.com/slides/net/aspose.slides/presentation/slides/) collection and set each slide's transition [Type](https://reference.aspose.com/slides/net/aspose.slides/islideshowtransition/type/) to the same value. Set any timing and effect options in the same loop to keep the behavior consistent across slides.
**How can I check which transition is currently set on a slide?**
Read the [Type](https://reference.aspose.com/slides/net/aspose.slides/islideshowtransition/type/) property from the slide's [SlideShowTransition](https://reference.aspose.com/slides/net/aspose.slides/ibaseslide/slideshowtransition/). It returns a value from the [TransitionType](https://reference.aspose.com/slides/net/aspose.slides.slideshow/transitiontype/) enumeration; None means that no transition effect is applied.
## Related features
- [Work with Morph](https://docs.aspose.com/slides/features/morph/)
- [Set slide transitions and timing](https://docs.aspose.com/slides/features/slide-transitions/)
- [Set transition effects, direction and sound](https://docs.aspose.com/slides/features/transition-options/)
## Related articles
- [Slide Transitions](https://docs.aspose.com/slides/net/slide-transitions/)
- [Slide Transition](https://docs.aspose.com/slides/net/examples/elements/slide-transition/)
# Slide Transitions
>
Source: https://docs.aspose.com/slides/net/slide-transitions/
Updated: 2026-08-13
To make it easier to understand, we have demonstrated the use of Aspose.Slides for .NET to manage simple slide transitions. Developers can not only apply different slide transition effects on the slides, but also customize the behavior of these transition effects.To create a simple slide transition effect, follow the steps below:
- Create an instance of Presentation class
- Apply a Slide Transition Type on the slide from one of the transition effects offered by Aspose.Slides for .NET through **TransitionType** enum
- Write the modified presentation file.
## **Example**
``` csharp
using Aspose.Slides;
using Aspose.Slides.Export;
using Aspose.Slides.SlideShow;
string FilePath = @"..\..\..\Sample Files\";
string FileName = FilePath + "Managing Slides Transitions.pptx";
//Instantiate Presentation class that represents a presentation file
using (Presentation pres = new Presentation(FileName))
{
//Apply circle type transition on slide 1
pres.Slides[0].SlideShowTransition.Type = TransitionType.Circle;
//Apply comb type transition on slide 2
pres.Slides[1].SlideShowTransition.Type = TransitionType.Comb;
//Apply zoom type transition on slide 3
pres.Slides[2].SlideShowTransition.Type = TransitionType.Zoom;
//Write the presentation to disk
pres.Save(FileName, SaveFormat.Pptx);
}
```
## **Download Sample Code**
- [Github](https://github.com/aspose-slides/Aspose.Slides-for-.NET/releases/tag/MissingFeaturesAsposeSlidesForOpenXMLv1.1)
## **Download Running Example**
- [Github](https://github.com/aspose-slides/Aspose.Slides-for-.NET/tree/master/Plugins/OpenXML/Missing%20Features/Managing%20Slides%20Transitions)
For more details, visit [Managing Slides Transitions](https://docs.aspose.com/slides/net/slide-transition/).
## Related articles
- [Manage Slide Transitions in Presentations in .NET](https://docs.aspose.com/slides/net/slide-transition/)
- [Export Media files to HTML file](https://docs.aspose.com/slides/net/export-media-files-to-html-file/)
- [Slide Transition](https://docs.aspose.com/slides/net/examples/elements/slide-transition/)
# Aspose.Slides for .NET 6 Cross-Platform (ZIP Package)
> Use Aspose.Slides for .NET 6 to build cross-platform C# apps on Windows, Linux, and macOS that create, edit, and convert PowerPoint PPT, PPTX and ODP files.
Source: https://docs.aspose.com/slides/net/slides-for-net-6-cross-platform-zip-package/
Updated: 2026-08-13
## **Overview**
This article explains how to use Aspose.Slides for .NET 6 Cross-Platform from a ZIP package. It describes how to download the package, unpack the files from the `net6.0/crossplatform` folder, add a reference to `Aspose.Slides.dll`, and configure the project file so that the required dependent libraries are copied to the application output directory.
The article also describes the contents of the cross-platform package, including the main Aspose.Slides .NET assembly and platform-specific graphics subsystem libraries for Windows, Linux, and macOS.
Aspose.Slides for .NET 6 Cross-Platform is also available from [NuGet](https://www.nuget.org/packages/Aspose.Slides.NET6.CrossPlatform).
## **Using the Cross-Platform Aspose.Slides from a ZIP Package**
1. Download the ZIP package of the latest Aspose.Slides from the [Release Page](https://releases.aspose.com/slides/net/).
2. Unpack the files from *Aspose.Slides.zip\Aspose.Slides\net6.0\crossplatform* and place them in the folder that will be used for dependencies in your project.
3. Add a reference to Aspose.Slides.dll.

In our example (below), the libraries are located in the project folder along this path: *ConsoleApp\libs\Aspose.Slides\net6.0\crossplatform\...*

4. Place the remaining files (that Aspose.Slides depend on) in the output directory by adding instructions to the csproj project file this way:
```xml
PreserveNewest
aspose.slides.drawing.capi_vc14x64.dll
PreserveNewest
aspose.slides.drawing.capi_vc14x86.dll
PreserveNewest
Aspose.Slides.xml
PreserveNewest
libaspose.slides.drawing.capi_appleclang_x86_64.dylib
PreserveNewest
libaspose.slides.drawing.capi_appleclang_arm64.dylib
PreserveNewest
libaspose.slides.drawing.capi_x86_64_libstdcpp_libc2.23.so
```
5. Pay attention to `TargetPath`.
By default, `` copies files while preserving their relative path, but we need the dependent libraries to go to the same folder where the output is generated (Aspose.Slides.dll location).
## **Notes**
### **Proprietary Graphics Subsystem**
Aspose.Slides cross-platform is a collection of libraries:
| Aspose.Slides.dll | Main .NET Assembly Responsible for All Aspose.Slides Logic |
| ---------------------------------------------------------- | -------------------------------------------------------------------------- |
| aspose.slides.drawing.capi_vc14x64.dll | Dependency: graphics subsystem implementation for Win x64 |
| aspose.slides.drawing.capi_vc14x86.dll | Dependency: graphics subsystem implementation for Win x64 |
| libaspose.slides.drawing.capi_x86_64_libstdcpp_libc2.23.so | Dependency: graphics subsystem implementation for Linux (x86/x64) |
| libaspose.slides.drawing.capi_appleclang_x86_64.dylib | Dependency: graphics subsystem implementation for macOS AMD64 (x86-64/x64) |
| libaspose.slides.drawing.capi_appleclang_arm64.dylib | Dependency: graphics subsystem implementation for macOS ARM64 (AArch64) |
Aspose.Slides.dll uses the library that the system it is running on requires. The libraries are usually located in the same location as Aspose.Slides.dll in any file system.
### **ZIP Package Structure**
The ZIP package contains the following folder structure:
Aspose.Slides
├─── net6.0
│ ├─── crossplatform
│ └─── default
├─── net20
├─── net462
└─── netstandard2.0
* Each folder contains assemblies for their corresponding .NET version. There are two versions for net6.0: default and crossplatform. The latter contains the cross-platform Aspose.Slides.dll and all its dependencies. The unpacked contents of this folder can be used as a dependency addition in a project for cross-platform development and other Aspose.Slides use instances.
## **See Also**
- [System Requirements](https://docs.aspose.com/slides/net/system-requirements/)
## Related features
- [Run Slides on Linux](https://docs.aspose.com/slides/features/linux/)
- [Run Slides on ARM64](https://docs.aspose.com/slides/features/arm64/)
## Related articles
- [System Requirements](https://docs.aspose.com/slides/net/system-requirements/)
- [.NET 6 Support](https://docs.aspose.com/slides/net/net6/)
# Slides on Cloud Platforms
> See how Aspose.Slides runs on major cloud platforms, with deployment tips, scaling guidance, and best practices for processing PowerPoint and OpenDocument.
Source: https://docs.aspose.com/slides/net/slides-on-cloud-platforms/
Updated: 2025-11-14
---
lastmod: 2025-11-14T18:26:19+04:00
title: Slides on Cloud Platforms
type: docs
weight: 40
url: /net/slides-on-cloud-platforms/
keywords:
- cloud platforms
- cloud integration
- PowerPoint automation
- text extraction
- Google integration
- PowerPoint
- OpenDocument
- presentation
- .NET
- C#
- Aspose.Slides
description: "See how Aspose.Slides runs on major cloud platforms, with deployment tips, scaling guidance, and best practices for processing PowerPoint and OpenDocument."
---
## Related articles
- [Extracting Text from PPT, PPTX, ODP](https://docs.aspose.com/slides/net/extracting-text-from-ppt-pptx-odp-on-cloud-platforms/)
- [Integrating Aspose.Slides with Google Slides](https://docs.aspose.com/slides/net/integrating-aspose-slides-with-google-slides/)
# Manage Superscript and Subscript in Presentations in .NET
> Master superscript and subscript in Aspose.Slides for .NET and elevate your presentations with professional text formatting for maximum impact.
Source: https://docs.aspose.com/slides/net/superscript-and-subscript/
Updated: 2026-08-05
## **Overview**
Aspose.Slides for .NET provides features for integrating superscript and subscript text into your PowerPoint (PPT, PPTX) and OpenDocument (ODP) presentations. Whether you need to highlight chemical formulas, mathematical equations, or annotate content with footnotes, these specialized formatting options help maintain clarity and precision. In this article, you'll learn how to seamlessly apply superscript and subscript styles and ensure professional results in every slide.
## **Add Superscript and Subscript Text**
You can add superscript and subscript text inside any paragraph in a presentation. To achieve this with Aspose.Slides, you must use the `Escapement` property of the [PortionFormat](https://reference.aspose.com/slides/net/aspose.slides/portionformat/) class.
This property allows you to set superscript or subscript text, with values ranging from -100% (subscript) to 100% (superscript).
Implementation steps:
1. Create an instance of the [Presentation](https://reference.aspose.com/slides/net/aspose.slides/presentation/) class.
1. Get a reference to a slide using its index.
1. Add an [IAutoShape](https://reference.aspose.com/slides/net/aspose.slides/iautoshape/) of type `Rectangle` to the slide.
1. Access the [ITextFrame](https://reference.aspose.com/slides/net/aspose.slides/itextframe/) associated with the [IAutoShape](https://reference.aspose.com/slides/net/aspose.slides/iautoshape/).
1. Clear existing paragraphs.
1. Create a new [Paragraph](https://reference.aspose.com/slides/net/aspose.slides/paragraph/) for superscript text and add it to the paragraph collection of the [ITextFrame](https://reference.aspose.com/slides/net/aspose.slides/itextframe/).
1. Create a new text portion object.
1. Set the `Escapement` property for the text portion between 0 to 100 to apply superscript (0 means no superscript).
1. Set some text for the [Portion](https://reference.aspose.com/slides/net/aspose.slides/portion/) and add it to the paragraph's portion collection.
1. Create another [Paragraph](https://reference.aspose.com/slides/net/aspose.slides/paragraph/) for subscript text and add it to the paragraph collection.
1. Create a new text portion object.
1. Set the `Escapement` property for the text portion between 0 to -100 to apply subscript (0 means no subscript).
1. Set some text for the [Portion](https://reference.aspose.com/slides/net/aspose.slides/portion/) and add it to the paragraph's portion collection.
1. Save the presentation as a PPTX file.
The following C# code implements these steps:
```c#
using Aspose.Slides;
using Aspose.Slides.Export;
using (Presentation presentation = new Presentation())
{
// Get the first slide.
ISlide slide = presentation.Slides[0];
// Create a text box.
IAutoShape shape = slide.Shapes.AddAutoShape(ShapeType.Rectangle, 100, 100, 200, 100);
ITextFrame textFrame = shape.TextFrame;
textFrame.Paragraphs.Clear();
// Create a paragraph for superscript text.
IParagraph superPar = new Paragraph();
// Create a text portion with regular text.
IPortion portion1 = new Portion();
portion1.Text = "MyProduct";
superPar.Portions.Add(portion1);
// Create a text portion with superscript text.
IPortion superPortion = new Portion();
superPortion.PortionFormat.Escapement = 30;
superPortion.Text = "TM";
superPar.Portions.Add(superPortion);
// Create a paragraph for subscript text.
IParagraph paragraph2 = new Paragraph();
// Create a text portion with regular text.
IPortion portion2 = new Portion();
portion2.Text = "a";
paragraph2.Portions.Add(portion2);
// Create a text portion with subscript text.
IPortion subPortion = new Portion();
subPortion.PortionFormat.Escapement = -25;
subPortion.Text = "i";
paragraph2.Portions.Add(subPortion);
// Add the paragraphs to the text box.
textFrame.Paragraphs.Add(superPar);
textFrame.Paragraphs.Add(paragraph2);
presentation.Save("output.pptx", SaveFormat.Pptx);
}
```
The result:

## **FAQ**
### Will superscript and subscript be preserved when exporting to PDF or other formats?
Yes, Aspose.Slides for .NET properly retains superscript and subscript formatting when exporting presentations to PDF, PPT/PPTX, images, and other supported formats. The specialized formatting remains intact in all output files.
### Can superscript and subscript be combined with other formatting styles such as bold or italics?
Yes, Aspose.Slides allows you to mix various text styles within a single portion of text. You can enable bold, italics, underline, and simultaneously apply superscript or subscript by configuring the corresponding properties in [PortionFormat](https://reference.aspose.com/slides/net/aspose.slides/portionformat/).
### Do superscript and subscript formatting work for text inside tables, charts, or SmartArt?
Yes, Aspose.Slides for .NET supports formatting within most objects, including tables and chart elements. When working with SmartArt, you need to access the appropriate elements (such as [SmartArtNode](https://reference.aspose.com/slides/net/aspose.slides.smartart/smartartnode/)) and their text containers, and then configure the [PortionFormat](https://reference.aspose.com/slides/net/aspose.slides/portionformat/) properties in a similar manner.
## Related articles
- [Manage Presentation Text in .NET](https://docs.aspose.com/slides/net/manage-text/)
# Support For Interruptable Library
> Make long-running tasks cancelable with Aspose.Slides for .NET. Interrupt rendering and conversions for PowerPoint and OpenDocument safely, with examples.
Source: https://docs.aspose.com/slides/net/support-for-interruptable-library/
Updated: 2026-08-05
## **Overview**
Aspose.Slides for .NET provides an interruptible processing mechanism for long-running presentation tasks, such as deserialization, serialization, and rendering. This mechanism is based on the `InterruptionToken` and `InterruptionTokenSource` classes.
An `InterruptionToken` can be assigned to `LoadOptions` and passed to the `Presentation` constructor. When `InterruptionTokenSource.Interrupt()` is called, the associated long-running task is interrupted. The article also shows how to use this mechanism together with the standard .NET `CancellationToken` by monitoring cancellation requests and calling `Interrupt()` when cancellation is requested.
## **Interruptable Library**
In [Aspose.Slides 18.4](https://releases.aspose.com/slides/net/release-notes/2018/aspose-slides-for-net-18-4-release-notes/), we introduced the [InterruptionToken](https://reference.aspose.com/slides/net/aspose.slides/interruptiontoken/) and [InterruptionTokenSource](https://reference.aspose.com/slides/net/aspose.slides/interruptiontokensource/) classes. They allow you to interrupt long-running tasks such as deserialization, serialization, and rendering.
- [InterruptionTokenSource](https://reference.aspose.com/slides/net/aspose.slides/interruptiontokensource/) is the source of the token(s) passed to [ILoadOptions.InterruptionToken](https://reference.aspose.com/slides/net/aspose.slides/iloadoptions/interruptiontoken/).
- When [ILoadOptions.InterruptionToken](https://reference.aspose.com/slides/net/aspose.slides/iloadoptions/interruptiontoken/) is set and the [LoadOptions](https://reference.aspose.com/slides/net/aspose.slides/loadoptions/) instance is passed to the [Presentation](https://reference.aspose.com/slides/net/aspose.slides/presentation/) constructor, invoking [InterruptionTokenSource.Interrupt()](https://reference.aspose.com/slides/net/aspose.slides/interruptiontokensource/interrupt/) interrupts any long-running task associated with that [Presentation](https://reference.aspose.com/slides/net/aspose.slides/presentation/).
The following code snippet demonstrates interrupting a running task:
```c#
using System.Threading;
using Aspose.Slides;
using Aspose.Slides.Export;
public static void Run()
{
Action action = (IInterruptionToken token) =>
{
LoadOptions options = new LoadOptions { InterruptionToken = token };
using (Presentation presentation = new Presentation("sample.pptx", options))
{
presentation.Save("sample.ppt", SaveFormat.Ppt);
}
};
InterruptionTokenSource tokenSource = new InterruptionTokenSource();
Run(action, tokenSource.Token); // run the action in a separate thread
Thread.Sleep(10000); // timeout
tokenSource.Interrupt(); // stop the conversion
}
private static void Run(Action action, IInterruptionToken token)
{
Task.Run(() => { action(token); });
}
```
## **.NET CancellationToken and Interruptable Library**
When you need to use a [CancellationToken](https://docs.microsoft.com/en-us/dotnet/api/system.threading.cancellationtoken) alongside the Aspose.Slides Interruptible library, wrap the [Presentation](https://reference.aspose.com/slides/net/aspose.slides/presentation/) processing and interrupt the [InterruptionToken](https://reference.aspose.com/slides/net/aspose.slides/interruptiontoken/) when [CancellationToken.IsCancellationRequested](https://learn.microsoft.com/en-us/dotnet/api/system.threading.cancellationtoken.iscancellationrequested) is `true`.
This C# code demonstrates the operation:
```cs
using System.Threading;
using Aspose.Slides;
using Aspose.Slides.Export;
public static void Main()
{
CancellationTokenSource tokenSource = new CancellationTokenSource(TimeSpan.FromSeconds(20));
ProcessPresentation("sample.pptx", "sample.pdf", tokenSource.Token);
}
static void ProcessPresentation(string path, string outPath, CancellationToken cancellationToken)
{
Action action = (IInterruptionToken token) =>
{
LoadOptions options = new LoadOptions {InterruptionToken = token};
using (Presentation presentation = new Presentation(path, options))
{
presentation.Save(outPath, SaveFormat.Pdf);
}
};
InterruptionTokenSource tokenSource = new InterruptionTokenSource();
Task task = Run(action, tokenSource.Token); // run the action in a separate thread
while (!task.Wait(500)) // wait and monitor whether cancellationToken.IsCancellationRequested is set
{
if (cancellationToken.IsCancellationRequested)
{
Console.WriteLine("Presentation processing was canceled");
tokenSource.Interrupt(); // interrupt Presentation processing
}
}
}
private static Task Run(Action action, IInterruptionToken token)
{
return Task.Run(() =>
{
action(token);
});
}
```
## **FAQ**
### What is the purpose of the Aspose.Slides interrupt library?
It provides a mechanism to interrupt long-running operations—such as loading, saving, or rendering presentations—before they complete. This is useful when processing time must be limited or the task is no longer needed.
### What is the difference between [InterruptionToken](https://reference.aspose.com/slides/net/aspose.slides/interruptiontoken/) and [InterruptionTokenSource](https://reference.aspose.com/slides/net/aspose.slides/iinterruptiontokensource/)?
- `InterruptionToken` is passed to the Aspose.Slides API and checked during long-running operations.
- `InterruptionTokenSource` is used in your code to create tokens and trigger interruptions by calling `Interrupt()`.
### Can I use .NET [CancellationToken](https://learn.microsoft.com/en-us/dotnet/api/system.threading.cancellationtoken) with the interrupt library?
Yes. You can monitor the [CancellationToken](https://learn.microsoft.com/en-us/dotnet/api/system.threading.cancellationtoken) in your application logic and call [InterruptionTokenSource.Interrupt()](https://reference.aspose.com/slides/net/aspose.slides/iinterruptiontokensource/interrupt/) when cancellation is requested. This enables Aspose.Slides to integrate with standard .NET cancellation workflows.
### What tasks can be interrupted?
Any Aspose.Slides task that accepts an [InterruptionToken](https://reference.aspose.com/slides/net/aspose.slides/interruptiontoken/)—such as loading a presentation with `Presentation(path, loadOptions)` or saving with `Presentation.Save(...)`—can be interrupted.
### Does interruption happen immediately?
No. Interruption is cooperative: the operation periodically checks the token and stops as soon as it detects that [Interrupt()](https://reference.aspose.com/slides/net/aspose.slides/iinterruptiontokensource/interrupt/) has been called.
### What happens if I call [Interrupt()](https://reference.aspose.com/slides/net/aspose.slides/iinterruptiontokensource/interrupt/) after a task has already completed?
Nothing—the call has no effect if the corresponding task has already completed.
### Can I reuse the same [InterruptionTokenSource](https://reference.aspose.com/slides/net/aspose.slides/iinterruptiontokensource/) for multiple tasks?
Yes—but after you call [Interrupt()](https://reference.aspose.com/slides/net/aspose.slides/iinterruptiontokensource/interrupt/) on that source, all tasks using its tokens will be interrupted. Use separate token sources to manage tasks independently.
## Related features
- [Interrupt presentation processing](https://docs.aspose.com/slides/features/cancel-processing/)
# Supported File Formats
> See which file formats Aspose.Slides for .NET can load, import, save, and render, and which API reads or writes each one.
Source: https://docs.aspose.com/slides/net/supported-file-formats/
Updated: 2026-09-28
## **Overview**
Aspose.Slides for .NET opens and saves PowerPoint and OpenDocument presentations. It also imports PDF and HTML content into slides, saves presentations to document, web, and image formats, and renders individual slides and shapes as images. This article lists each supported format and names the API that reads or writes it.
Both NuGet packages, Aspose.Slides.NET and Aspose.Slides.NET6.CrossPlatform, support the same formats; see [Installation](https://docs.aspose.com/slides/net/installation/) to choose between them. For an overview of editing features, see [Features Overview](https://docs.aspose.com/slides/net/features-overview/).
## **Supported Microsoft PowerPoint Versions**
- Microsoft PowerPoint 97
- Microsoft PowerPoint 2000
- Microsoft PowerPoint XP
- Microsoft PowerPoint 2003
- Microsoft PowerPoint 2007
- Microsoft PowerPoint 2010
- Microsoft PowerPoint 2013
- Microsoft PowerPoint 2016
- Microsoft PowerPoint 2019
- Microsoft PowerPoint for Mac
- PowerPoint for Microsoft 365 (formerly Office 365)
Presentations saved by PowerPoint 95 and earlier versions cannot be opened. [PresentationFactory.GetPresentationInfo](https://reference.aspose.com/slides/net/aspose.slides/presentationfactory/getpresentationinfo/) recognizes a PowerPoint 95 file and reports `LoadFormat.Ppt95`, but the [Presentation](https://reference.aspose.com/slides/net/aspose.slides/presentation/presentation/) constructor throws [PptUnsupportedFormatException](https://reference.aspose.com/slides/net/aspose.slides/pptunsupportedformatexception/) for it.
## **Supported File Formats**
The table uses four operations:
- **Load**: the [Presentation](https://reference.aspose.com/slides/net/aspose.slides/presentation/presentation/) constructor opens the file as an editable presentation.
- **Import**: a [SlideCollection](https://reference.aspose.com/slides/net/aspose.slides/slidecollection/) method creates slides from the file's content and adds them to an existing presentation. The Presentation constructor does not load these files as presentations.
- **Save**: [Presentation.Save](https://reference.aspose.com/slides/net/aspose.slides/presentation/save/) writes the presentation to a file or stream. Every format except XAML is selected with a [SaveFormat](https://reference.aspose.com/slides/net/aspose.slides.export/saveformat/) value.
- **Render**: a rendering method draws a slide or a shape as an image. Formats that are only rendered are not SaveFormat values.
|**Format**|**Description**|**Load / Import**|**Save / Render**|**API**|
| :- | :- | :- | :- | :- |
|[PPT](https://docs.fileformat.com/presentation/ppt/)|PowerPoint 97-2003 Presentation|Load|Save|`LoadFormat.Ppt`, `SaveFormat.Ppt`|
|[POT](https://docs.fileformat.com/presentation/pot/)|PowerPoint 97-2003 Template|Load|Save|`LoadFormat.Pot`, `SaveFormat.Pot`|
|[PPS](https://docs.fileformat.com/presentation/pps/)|PowerPoint 97-2003 Slide Show|Load|Save|`LoadFormat.Pps`, `SaveFormat.Pps`|
|[PPTX](https://docs.fileformat.com/presentation/pptx/)|PowerPoint Presentation|Load|Save|`LoadFormat.Pptx`, `SaveFormat.Pptx`|
|[POTX](https://docs.fileformat.com/presentation/potx/)|PowerPoint Template|Load|Save|`LoadFormat.Potx`, `SaveFormat.Potx`|
|[PPSX](https://docs.fileformat.com/presentation/ppsx/)|PowerPoint Slide Show|Load|Save|`LoadFormat.Ppsx`, `SaveFormat.Ppsx`|
|[PPTM](https://docs.fileformat.com/presentation/pptm/)|PowerPoint Macro-Enabled Presentation|Load|Save|`LoadFormat.Pptm`, `SaveFormat.Pptm`|
|[POTM](https://docs.fileformat.com/presentation/potm/)|PowerPoint Macro-Enabled Template|Load|Save|`LoadFormat.Potm`, `SaveFormat.Potm`|
|[PPSM](https://docs.fileformat.com/presentation/ppsm/)|PowerPoint Macro-Enabled Slide Show|Load|Save|`LoadFormat.Ppsm`, `SaveFormat.Ppsm`|
|[ODP](https://docs.fileformat.com/presentation/odp/)|OpenDocument Presentation|Load|Save|`LoadFormat.Odp`, `SaveFormat.Odp`|
|FODP|Flat XML OpenDocument Presentation|Load|Save|`LoadFormat.Fodp`, `SaveFormat.Fodp`|
|[OTP](https://docs.fileformat.com/presentation/otp/)|OpenDocument Presentation Template|Load|Save|`LoadFormat.Otp`, `SaveFormat.Otp`|
|[XML](https://docs.fileformat.com/web/xml/)|PowerPoint XML Presentation|Load|Save|`SaveFormat.Xml`; loaded files report `SourceFormat.Xml` (there is no `LoadFormat` value)|
|[PDF](https://docs.fileformat.com/pdf/)|Portable Document Format|Import|Save|`SlideCollection.AddFromPdf`; `SaveFormat.Pdf`|
|[HTML](https://docs.fileformat.com/web/html/)|Hypertext Markup Language|Import|Save|`SlideCollection.AddFromHtml`, `SlideCollection.InsertFromHtml`; `SaveFormat.Html`, `SaveFormat.Html5`|
|[XPS](https://docs.fileformat.com/page-description-language/xps/)|XML Paper Specification|—|Save|`SaveFormat.Xps`|
|[TIFF](https://docs.fileformat.com/image/tiff/)|Tagged Image File Format|—|Save, Render|`SaveFormat.Tiff`; `ImageFormat.Tiff` (one slide)|
|[GIF](https://docs.fileformat.com/image/gif/)|Graphics Interchange Format|—|Save, Render|`SaveFormat.Gif` (animated, all slides); `ImageFormat.Gif` (one slide)|
|[SWF](https://docs.fileformat.com/page-description-language/swf/)|Small Web Format (Flash)|—|Save|`SaveFormat.Swf`|
|[MD](https://docs.fileformat.com/word-processing/md/)|Markdown|—|Save|`SaveFormat.Md`|
|[XAML](https://docs.fileformat.com/web/xaml/)|Extensible Application Markup Language|—|Save|`Presentation.Save(IXamlOptions)`, one XAML file per slide; not a `SaveFormat` value|
|[PNG](https://docs.fileformat.com/image/png/)|Portable Network Graphics|—|Render|`ImageFormat.Png`|
|[JPEG](https://docs.fileformat.com/image/jpeg/)|JPEG Image|—|Render|`ImageFormat.Jpeg`|
|[BMP](https://docs.fileformat.com/image/bmp/)|Bitmap Image|—|Render|`ImageFormat.Bmp`|
|[EMF](https://docs.fileformat.com/image/emf/)|Enhanced Metafile|—|Render|`Slide.WriteAsEmf`|
|[SVG](https://docs.fileformat.com/page-description-language/svg/)|Scalable Vector Graphics|—|Render|`Slide.WriteAsSvg`, `Shape.WriteAsSvg`|
## **Load and Import**
- **Load:** Pass a file path or a stream to the [Presentation](https://reference.aspose.com/slides/net/aspose.slides/presentation/presentation/) constructor. The format is detected from the content; [LoadOptions](https://reference.aspose.com/slides/net/aspose.slides/loadoptions/) supplies settings such as a password. To check a file before opening it, call [PresentationFactory.GetPresentationInfo](https://reference.aspose.com/slides/net/aspose.slides/presentationfactory/getpresentationinfo/), which reports a [LoadFormat](https://reference.aspose.com/slides/net/aspose.slides/loadformat/) value. It reports `LoadFormat.Unknown` for PowerPoint XML, but the constructor opens such a file, and [Presentation.SourceFormat](https://reference.aspose.com/slides/net/aspose.slides/presentation/sourceformat/) then returns `SourceFormat.Xml`. See [Open Presentations](https://docs.aspose.com/slides/net/open-presentation/) and [Determine the Original Presentation Format](https://docs.aspose.com/slides/net/detect-presentation-source-format/).
- **Import:** [SlideCollection.AddFromPdf](https://reference.aspose.com/slides/net/aspose.slides/slidecollection/addfrompdf/) adds one slide per PDF page to the end of a presentation. [SlideCollection.AddFromHtml](https://reference.aspose.com/slides/net/aspose.slides/slidecollection/addfromhtml/) adds slides created from HTML, and [SlideCollection.InsertFromHtml](https://reference.aspose.com/slides/net/aspose.slides/slidecollection/insertfromhtml/) inserts them at a given position. The Presentation constructor does not import: it throws [PptUnsupportedFormatException](https://reference.aspose.com/slides/net/aspose.slides/pptunsupportedformatexception/) for a PDF file and does not convert HTML markup into slide content. See [Import Presentations from PDF or HTML](https://docs.aspose.com/slides/net/import-presentation/).
## **Save and Render**
- **Save:** [Presentation.Save](https://reference.aspose.com/slides/net/aspose.slides/presentation/save/) writes the presentation in the format of a [SaveFormat](https://reference.aspose.com/slides/net/aspose.slides.export/saveformat/) value. Overloads that also take an options object control the output, for example [PdfOptions](https://reference.aspose.com/slides/net/aspose.slides.export/pdfoptions/), [HtmlOptions](https://reference.aspose.com/slides/net/aspose.slides.export/htmloptions/), [Html5Options](https://reference.aspose.com/slides/net/aspose.slides.export/html5options/), [TiffOptions](https://reference.aspose.com/slides/net/aspose.slides.export/tiffoptions/), and [GifOptions](https://reference.aspose.com/slides/net/aspose.slides.export/gifoptions/). Overloads that take an array of slide positions, starting from 1, write only those slides; they accept PDF, XPS, TIFF, HTML, HTML5, SWF, GIF, and Markdown, but not the presentation formats or PowerPoint XML. XAML has its own overload that takes [IXamlOptions](https://reference.aspose.com/slides/net/aspose.slides.export.xaml/ixamloptions/). See [Save Presentations](https://docs.aspose.com/slides/net/save-presentation/), [Convert Presentations](https://docs.aspose.com/slides/net/convert-presentation/), and [Export Presentations to XAML](https://docs.aspose.com/slides/net/export-to-xaml/).
- **Render:** [Slide.GetImage](https://reference.aspose.com/slides/net/aspose.slides/slide/getimage/) and [Shape.GetImage](https://reference.aspose.com/slides/net/aspose.slides/shape/getimage/) return an [IImage](https://reference.aspose.com/slides/net/aspose.slides/iimage/), and [IImage.Save](https://reference.aspose.com/slides/net/aspose.slides/iimage/save/) writes it as PNG, JPEG, BMP, GIF, or TIFF, selected with an [ImageFormat](https://reference.aspose.com/slides/net/aspose.slides/imageformat/) value. [Presentation.GetImages](https://reference.aspose.com/slides/net/aspose.slides/presentation/getimages/) renders all slides or selected slides at once. [Slide.WriteAsSvg](https://reference.aspose.com/slides/net/aspose.slides/slide/writeassvg/) and [Shape.WriteAsSvg](https://reference.aspose.com/slides/net/aspose.slides/shape/writeassvg/) write SVG, and [Slide.WriteAsEmf](https://reference.aspose.com/slides/net/aspose.slides/slide/writeasemf/) writes EMF. See [Convert Presentation Slides to Images](https://docs.aspose.com/slides/net/convert-slide/) and [Render a Slide as an SVG Image](https://docs.aspose.com/slides/net/render-a-slide-as-an-svg-image/).
ImageFormat also has `Emf`, `Wmf`, `Icon`, `Exif`, and `MemoryBmp` values, but IImage.Save does not produce those formats: the file it writes contains PNG data. To get an EMF image of a slide, use Slide.WriteAsEmf.
## **FAQ**
**Can I convert a PPT presentation to PPTX or ODP?**
Yes. Open the PPT file with the Presentation constructor and save it with `SaveFormat.Pptx` or `SaveFormat.Odp`. See [Convert PPT to PPTX](https://docs.aspose.com/slides/net/convert-ppt-to-pptx/).
**Can I open a PDF or HTML file as a presentation?**
No. Create or open a presentation, import the PDF pages or HTML content into it with the slide collection methods described above, and then save it in any supported format.
**Can I load an exported PNG or SVG image as an editable presentation?**
No. Image output records how a slide looks, not its text, shapes, or charts. Keep the source presentation if you need to edit it later.
**Can I save PDF/A or PDF/UA documents?**
Yes. Set [PdfOptions.Compliance](https://reference.aspose.com/slides/net/aspose.slides.export/pdfoptions/compliance/) to a [PdfCompliance](https://reference.aspose.com/slides/net/aspose.slides.export/pdfcompliance/) value: PDF/A-1a, PDF/A-1b, PDF/A-2a, PDF/A-2b, PDF/A-2u, PDF/A-3a, PDF/A-3b, or PDF/UA.
**Can I check whether a file is password-protected before opening it?**
Yes. [PresentationFactory.GetPresentationInfo](https://reference.aspose.com/slides/net/aspose.slides/presentationfactory/getpresentationinfo/) inspects a file without creating a Presentation object, and its [IsPasswordProtected](https://reference.aspose.com/slides/net/aspose.slides/ipresentationinfo/ispasswordprotected/) property reports whether a password is needed. See [Password-Protect Presentations](https://docs.aspose.com/slides/net/password-protected-presentation/).
**Do the two NuGet packages support different formats?**
No. Aspose.Slides.NET and Aspose.Slides.NET6.CrossPlatform have the same LoadFormat and SaveFormat values and the same import and rendering methods. They differ in the platforms they run on and in what those platforms need; see [Installation](https://docs.aspose.com/slides/net/installation/).
## Related articles
- [Convert Presentations to Multiple Formats in .NET](https://docs.aspose.com/slides/net/convert-presentation/)
# System Requirements
> Check what Aspose.Slides for .NET needs before you install it: the frameworks each NuGet package targets, the supported operating systems and processors, and the libraries and fonts that Linux requires.
Source: https://docs.aspose.com/slides/net/system-requirements/
Updated: 2026-09-28
## **Introduction**
Aspose.Slides for .NET is a standalone library: it does not need Microsoft PowerPoint or Microsoft Office. It is published as two NuGet packages, [Aspose.Slides.NET](https://www.nuget.org/packages/Aspose.Slides.NET/) and [Aspose.Slides.NET6.CrossPlatform](https://www.nuget.org/packages/Aspose.Slides.NET6.CrossPlatform/). Both provide the same Aspose.Slides namespaces and classes; they differ in the frameworks they target and in how they draw slides, which decides where they run and what they need.
This article lists the .NET versions and platforms each package supports and the system libraries and fonts that Linux needs, and ends with a short program that checks your setup. To add a package to a project, see [Installation](https://docs.aspose.com/slides/net/installation/).
## **Supported .NET Versions**
Each package contains one build of Aspose.Slides per target framework, and NuGet selects the build that matches your project's target framework.
| Package | Target frameworks in the package | Your project can target |
|---|---|---|
| Aspose.Slides.NET | `net462`, `net6.0`, `netstandard2.0` | .NET Framework 4.6.2 or later; .NET 6 or later, including .NET 8, .NET 9, and .NET 10 |
| Aspose.Slides.NET6.CrossPlatform | `net6.0` | .NET 6 or later, including .NET 8, .NET 9, and .NET 10 |
The `netstandard2.0` build lets a .NET Standard 2.0 class library reference Aspose.Slides.NET. An application that uses such a library runs the build that matches the application's own target framework: a .NET 8 application, for example, runs the `net6.0` build.
## **Supported Operating Systems and Processors**
**Aspose.Slides.NET** contains only processor-independent (AnyCPU) managed code, so it runs on the processor architecture of the .NET runtime that loads it. It draws slides through Microsoft's System.Drawing.Common library, which Microsoft supports [only on Windows](https://learn.microsoft.com/en-us/dotnet/core/compatibility/core-libraries/6.0/system-drawing-common-windows-only). On Linux, Aspose.Slides.NET therefore needs the `libgdiplus` library and a startup switch, described in [Linux](https://docs.aspose.com/slides/net/system-requirements/#linux). It runs on Linux distributions that provide `libgdiplus`, such as Debian, Ubuntu, and Alpine Linux.
**Aspose.Slides.NET6.CrossPlatform** draws slides with its own graphics engine. The engine is a native library that the package contains in one build per platform, so the package runs only on these platforms:
| Operating system | Processors | Notes |
|---|---|---|
| Windows | x86, x64 | Windows on ARM64 is not supported. |
| Linux | x64, ARM64 | Requires glibc 2.23 or later on x64 and glibc 2.39 or later on ARM64. |
| macOS | x64 (Intel), ARM64 (Apple silicon) | |
Aspose.Slides.NET6.CrossPlatform does not run on Alpine Linux or other distributions built on musl instead of glibc, or on distributions with an older glibc, such as CentOS 7. Use Aspose.Slides.NET on those systems.
On Windows, the native library of Aspose.Slides.NET6.CrossPlatform uses the Microsoft Visual C++ runtime (*MSVCP140.dll* and *VCRUNTIME140.dll*, plus *VCRUNTIME140_1.dll* on x64). If these files are missing on the target machine, install the [Microsoft Visual C++ Redistributable](https://learn.microsoft.com/en-us/cpp/windows/latest-supported-vc-redist?view=msvc-170).
## **Linux**
Both packages need additional system libraries on Linux. Without them, the first example in [Create Presentations](https://docs.aspose.com/slides/net/create-presentation/) fails with an exception instead of saving the file. The commands below are for Debian and Ubuntu; on these distributions, each library also brings in the DejaVu fonts (`fonts-dejavu-core`), so text renders without further font packages.
### **Aspose.Slides.NET6.CrossPlatform**
The package's Linux library requires the `fontconfig` library:
```bash
sudo apt-get update && sudo apt-get install -y libfontconfig1
```
Without it, creating a [Presentation](https://reference.aspose.com/slides/net/aspose.slides/presentation/) fails with a `TypeInitializationException` whose inner `DllNotFoundException` reports that `libfontconfig.so.1` cannot be opened.
Minimal base images may not include `fontconfig` either. The AWS Lambda base image for .NET 8, for example, contains neither `fontconfig` nor any fonts. In a container image built on it, run `dnf install -y fontconfig`, which also installs the Noto Sans fonts.
### **Aspose.Slides.NET**
The package requires two things on Linux:
1. The `libgdiplus` library:
```bash
sudo apt-get update && sudo apt-get install -y libgdiplus
```
1. The `System.Drawing.EnableUnixSupport` switch, enabled at the start of your application before any Aspose.Slides call. In a *Program.cs* with top-level statements, put it after the `using` directives:
```c#
System.AppContext.SetSwitch("System.Drawing.EnableUnixSupport", true);
```
Without `libgdiplus`, saving a presentation fails with a `TypeInitializationException` whose inner `DllNotFoundException` reports that `libgdiplus` cannot be loaded. Without the switch, the inner exception is `PlatformNotSupportedException: System.Drawing.Common is not supported on non-Windows platforms`.
The switch works only with System.Drawing.Common 6, the version that Aspose.Slides.NET depends on. Microsoft removed it in System.Drawing.Common 7. If your project references System.Drawing.Common 7 or later, directly or through another package, Aspose.Slides.NET fails on Linux with `PlatformNotSupportedException` even with `libgdiplus` installed and the switch enabled. In that case, use Aspose.Slides.NET6.CrossPlatform.
### **Alpine Linux**
On Alpine Linux, use Aspose.Slides.NET with the switch described above. Alpine images usually contain no fonts, and `libgdiplus` alone does not install any, so install `libgdiplus` together with at least one font package. Without fonts, saving a presentation fails with this error:
```text
System.ArgumentException: Font '?' cannot be found.
```
**Option 1: DejaVu fonts**
The recommended option is the `ttf-dejavu` package:
```dockerfile
RUN apk add --no-cache \
libgdiplus \
ttf-dejavu
```
On current Alpine releases, `ttf-dejavu` installs the `font-dejavu` package, which also installs `fontconfig` and the font tools it depends on.
**Option 2: Microsoft core fonts**
If your presentations use Microsoft fonts such as Arial, Times New Roman, Courier New, or Verdana, install the Microsoft core fonts instead. The `update-ms-fonts` step downloads the fonts while the image is built, so the build needs internet access:
```dockerfile
RUN apk add --no-cache \
libgdiplus \
fontconfig \
msttcorefonts-installer \
&& update-ms-fonts \
&& fc-cache -fv
```
### **Globalization Support**
Both packages need .NET globalization support, which .NET on Linux provides through the ICU libraries. In [globalization-invariant mode](https://learn.microsoft.com/en-us/dotnet/core/runtime-config/globalization), creating a [Presentation](https://reference.aspose.com/slides/net/aspose.slides/presentation/) fails with `CultureNotFoundException: Only the invariant culture is supported in globalization-invariant mode`.
Some container images turn this mode on. The .NET runtime images for Alpine Linux (`runtime-deps`, `runtime`, and `aspnet`), for example, set `DOTNET_SYSTEM_GLOBALIZATION_INVARIANT=true` and do not include ICU. In an image built on them, install ICU and turn the mode off:
```dockerfile
ENV DOTNET_SYSTEM_GLOBALIZATION_INVARIANT=false
RUN apk --no-cache add icu-libs
```
Also make sure that your project file does not set the `InvariantGlobalization` property to `true`.
## **Check Your Setup**
To check that a package and its requirements are in place, run a program that saves a presentation and renders a slide to an image. Saving and rendering use the graphics library and the fonts, which are what the Linux requirements above provide.
Create a console application and add the package as described in [Installation](https://docs.aspose.com/slides/net/installation/), replace the contents of *Program.cs* with the code below, and run `dotnet run`. If you use Aspose.Slides.NET on Linux, add the `System.Drawing.EnableUnixSupport` switch statement shown in [Linux](https://docs.aspose.com/slides/net/system-requirements/#linux) after the `using` directives. The program uses top-level statements and `using` declarations, which need C# 9 or later. Projects that target .NET 6 or later use a newer C# version by default; in a project that targets .NET Framework, add `latest ` to a `PropertyGroup` in the project file.
```c#
using Aspose.Slides;
using Aspose.Slides.Export;
using var presentation = new Presentation();
var slide = presentation.Slides[0];
var shape = slide.Shapes.AddAutoShape(ShapeType.Rectangle, 50, 50, 400, 100);
shape.TextFrame.Text = "Hello, Aspose.Slides!";
presentation.Save("hello.pptx", SaveFormat.Pptx);
using var image = slide.GetImage(1f, 1f);
image.Save("hello.png", ImageFormat.Png);
```
The program adds a rectangle with text to the first slide and saves the presentation as *hello.pptx* with the [Save](https://reference.aspose.com/slides/net/aspose.slides/presentation/save/) method. It then renders the slide with [GetImage](https://reference.aspose.com/slides/net/aspose.slides/slide/getimage/) and saves the result as *hello.png* with [IImage.Save](https://reference.aspose.com/slides/net/aspose.slides/iimage/save/) in the [ImageFormat.Png](https://reference.aspose.com/slides/net/aspose.slides/imageformat/) format. The scale factors of 1 render one pixel per point, so the default 720 × 540 point slide becomes a 720 × 540 pixel image, with the text visible inside the rectangle. Without a license, both files also carry an evaluation watermark; see [Licensing](https://docs.aspose.com/slides/net/licensing/). If a requirement is missing, the program stops with one of the exceptions described in [Linux](https://docs.aspose.com/slides/net/system-requirements/#linux).
## **Development Tools**
You can build applications that use Aspose.Slides with any tool that supports your project's target framework: the .NET SDK and its `dotnet` command-line interface on Windows, Linux, and macOS, or Visual Studio on Windows. [Installation](https://docs.aspose.com/slides/net/installation/) describes both.
## **FAQ**
**Do I need Microsoft PowerPoint installed for conversions and rendering?**
No, PowerPoint is not required. Aspose.Slides is a standalone engine for [creating](https://docs.aspose.com/slides/net/create-presentation/), modifying, [converting](https://docs.aspose.com/slides/net/convert-presentation/), and [rendering](https://docs.aspose.com/slides/net/convert-powerpoint-to-png/) presentations.
**Which package should I use?**
Use Aspose.Slides.NET on Windows and Aspose.Slides.NET6.CrossPlatform on Linux and macOS. On Alpine Linux, on Linux systems whose glibc is older than the versions listed above, and in projects that target .NET Framework, use Aspose.Slides.NET. Add only one of the two packages to a project.
**Which fonts are needed for correct rendering?**
The fonts used in the presentation, or suitable substitutes, must be available in the operating system. On Linux and macOS, install the font packages your presentations need to get consistent rendering. On Alpine Linux, install at least one font package in addition to `libgdiplus`, as described in [Alpine Linux](https://docs.aspose.com/slides/net/system-requirements/#alpine-linux).
**Why does a custom font render as a fallback or missing text on Linux?**
If the font file has inconsistent or corrupted name-table entries, the Linux font-matching stack (FreeType/fontconfig) may select an invalid record, causing the font to be unresolved. Using a font version with corrected name-table records or installing a consistent replacement resolves the issue.
## Related features
- [Choose a .NET runtime](https://docs.aspose.com/slides/features/dotnet-runtimes/)
- [Run Slides on macOS](https://docs.aspose.com/slides/features/macos/)
## Related articles
- [Aspose.Slides for .NET 6 Cross-Platform (ZIP Package)](https://docs.aspose.com/slides/net/slides-for-net-6-cross-platform-zip-package/)
- [How to Run Aspose.Slides in Docker](https://docs.aspose.com/slides/net/how-to-run-aspose-slides-in-docker/)
- [Installation](https://docs.aspose.com/slides/net/installation/)
# Technical Articles
> Technical articles for Aspose.Slides for .NET: OLE, chart, HTML export, threading, and more—best practices for the PPT, PPTX and ODP formats.
Source: https://docs.aspose.com/slides/net/technical-articles/
Updated: 2025-11-14
---
lastmod: 2025-11-14T18:26:19+04:00
title: Technical Articles
type: docs
weight: 270
url: /net/technical-articles/
keywords:
- technical article
- OLE object
- worksheet resizing
- embed Excel cnart
- chart resizing
- prevent editing
- shape lock
- extract image
- slide backgroud
- export presentation
- externally linked image
- warning callback
- font substitution
- resize shape
- interruptable library
- background task
- multithreading
- API limitations
- integrate Excel data
- PowerPoint
- OpenDocument
- presentation
- .NET
- C#
- Aspose.Slides
description: "Technical articles for Aspose.Slides for .NET: OLE, chart, HTML export, threading, and more—best practices for the PPT, PPTX and ODP formats."
---
# Manage Text Fields in PowerPoint Presentations in .NET
> Create, inspect, modify, and remove text fields in PowerPoint presentations with Aspose.Slides for .NET. Preserve formatting and verify saved PPTX and PPT files.
Source: https://docs.aspose.com/slides/net/text-fields/
Updated: 2026-09-21
## **Overview**
A text paragraph consists of portions. An ordinary [IPortion](https://reference.aspose.com/slides/net/aspose.slides/iportion/) contains literal text; a field portion also has an [IField](https://reference.aspose.com/slides/net/aspose.slides/ifield/) whose type identifies an automatically updated value, such as a slide number or date. Two portions can display the same characters while only one contains a field.
Use [IPortion.Field](https://reference.aspose.com/slides/net/aspose.slides/iportion/field/) to distinguish them: it is `null` for ordinary text. [IPortion.AddField](https://reference.aspose.com/slides/net/aspose.slides/iportion/addfield/) converts an existing portion into a field. Keep a label and its dynamic value in separate portions so that converting the value does not also replace the label.
This guide covers fields inside text, their formatting, and saving them in PPTX and PPT. For text frames and paragraphs, see [Manage Text](https://docs.aspose.com/slides/net/manage-text/).
## **Create a Slide Number Field**
The following complete example creates a text box containing a literal `Slide ` label followed by an automatically updated number. It sets the number's size, weight, and color before adding the field, then reopens the saved presentation and checks the field type, text, and formatting. No input file is required.
```cs
using System;
using System.Drawing;
using Aspose.Slides;
using Aspose.Slides.Export;
using var presentation = new Presentation();
var slide = presentation.Slides[0];
var shape = slide.Shapes.AddAutoShape(ShapeType.Rectangle, 40, 40, 240, 50);
shape.AddTextFrame("Slide ");
var paragraph = shape.TextFrame.Paragraphs[0];
var numberPortion = new Portion();
numberPortion.PortionFormat.FontHeight = 24;
numberPortion.PortionFormat.FontBold = NullableBool.True;
numberPortion.PortionFormat.FillFormat.FillType = FillType.Solid;
numberPortion.PortionFormat.FillFormat.SolidFillColor.Color = Color.DarkBlue;
paragraph.Portions.Add(numberPortion);
numberPortion.AddField(FieldType.SlideNumber);
presentation.Save("slide_number.pptx", SaveFormat.Pptx);
using var reopened = new Presentation("slide_number.pptx");
var savedShape = (IAutoShape)reopened.Slides[0].Shapes[0];
var savedNumber = savedShape.TextFrame.Paragraphs[0].Portions[1];
var hasNumberField = savedNumber.Field?.Type.InternalString == FieldType.SlideNumber.InternalString;
var format = savedNumber.PortionFormat;
var formattingPreserved = format.FontHeight == 24 && format.FontBold == NullableBool.True;
formattingPreserved &= format.FillFormat.SolidFillColor.Color.ToArgb() == Color.DarkBlue.ToArgb();
Console.WriteLine($"Text: {savedShape.TextFrame.Text}");
Console.WriteLine($"Slide number field: {hasNumberField}");
Console.WriteLine($"Formatting preserved: {formattingPreserved}");
```
The new presentation starts with slide number 1, so the text is `Slide 1`, and both checks print `True`. The number remains a field after reopening; it is not a literal `1`. The casts and indices in the verification refer to the shape and portions created by this example.
## **Choose a Field Type**
[FieldType](https://reference.aspose.com/slides/net/aspose.slides/fieldtype/) implements [IFieldType](https://reference.aspose.com/slides/net/aspose.slides/ifieldtype/) and provides the following predefined values. Pass the appropriate value to [AddField](https://reference.aspose.com/slides/net/aspose.slides/iportion/addfield/).
| Value | Purpose |
|---|---|
| [SlideNumber](https://reference.aspose.com/slides/net/aspose.slides/fieldtype/slidenumber/) | The current slide number. |
| [DateTime](https://reference.aspose.com/slides/net/aspose.slides/fieldtype/datetime/) | Date/time in the rendering application's default format. |
| [DateTime1](https://reference.aspose.com/slides/net/aspose.slides/fieldtype/datetime1/)–[DateTime9](https://reference.aspose.com/slides/net/aspose.slides/fieldtype/datetime9/) | Predefined date or combined date/time formats. |
| [DateTime10](https://reference.aspose.com/slides/net/aspose.slides/fieldtype/datetime10/)–[DateTime13](https://reference.aspose.com/slides/net/aspose.slides/fieldtype/datetime13/) | Predefined time formats, with options for seconds and a 12-hour clock. |
| [Header](https://reference.aspose.com/slides/net/aspose.slides/fieldtype/header/) | A header field; see the placeholder and format limitations below. |
| [Footer](https://reference.aspose.com/slides/net/aspose.slides/fieldtype/footer/) | A footer field. |
For example, [DateTime3](https://reference.aspose.com/slides/net/aspose.slides/fieldtype/datetime3/) represents a day, full month name, and year in English. These are predefined field formats, not arbitrary .NET date-format strings. The portion's [LanguageId](https://reference.aspose.com/slides/net/aspose.slides/ibaseportionformat/languageid/) and the application processing the presentation can affect the displayed result.
## **Create a Field from an Internal String**
The string overload of [AddField](https://reference.aspose.com/slides/net/aspose.slides/iportion/addfield/) accepts an internal field identifier. Use it when preserving an identifier supplied by another application that has no predefined value. You can also construct a [FieldType](https://reference.aspose.com/slides/net/aspose.slides/fieldtype/fieldtype/) from the identifier. [IFieldType.InternalString](https://reference.aspose.com/slides/net/aspose.slides/ifieldtype/internalstring/) exposes that identifier for inspection.
This example stores an application-specific `custom-report-id` field with the fallback text `Report-042`. The identifier does not register a calculation: Aspose.Slides does not generate report IDs for an unknown type. The application that understands this identifier must supply its meaning and update its value.
```cs
using System;
using Aspose.Slides;
using Aspose.Slides.Export;
using var presentation = new Presentation();
var shape = presentation.Slides[0].Shapes.AddAutoShape(ShapeType.Rectangle, 40, 40, 300, 50);
shape.AddTextFrame("Report-042");
var portion = shape.TextFrame.Paragraphs[0].Portions[0];
portion.AddField("custom-report-id");
presentation.Save("custom_field.pptx", SaveFormat.Pptx);
using var reopened = new Presentation("custom_field.pptx");
var savedShape = (IAutoShape)reopened.Slides[0].Shapes[0];
var savedPortion = savedShape.TextFrame.Paragraphs[0].Portions[0];
Console.WriteLine($"Type: {savedPortion.Field?.Type.InternalString}");
Console.WriteLine($"Text: {savedPortion.Text}");
```
After this PPTX round trip, the type is `custom-report-id` and the text is `Report-042`. Passing a string such as `yyyy-MM-dd` would name a field type; it would not configure a custom date format. For a fixed date in an arbitrary format, use ordinary text.
## **Inspect, Modify, and Remove Date/Time Fields**
Read and change an existing field through [IField.Type](https://reference.aspose.com/slides/net/aspose.slides/ifield/type/). Check that the field exists before accessing its type. To stop automatic updates, call [IPortion.RemoveField](https://reference.aspose.com/slides/net/aspose.slides/iportion/removefield/). This keeps the portion and its current text while removing the field association. If you need a specific fixed value, assign that text after removing the field.
For the API setting associated with date/time field processing, see [Presentation.CurrentDateTime](https://reference.aspose.com/slides/net/aspose.slides/presentation/currentdatetime/). The example below uses an explicit approval date when converting a field to ordinary text.
Download [sample.pptx](https://docs.aspose.com/slides/net/text-fields/sample.pptx) and place it in the working directory. It contains two named text shapes, `UpdatedAt` and `ApprovedDate`, each with a date/time field, plus ordinary text labels. The following example walks top-level text shapes on regular slides. It changes date/time fields to a long-date format and makes them italic, while preserving their other formatting. Only fields in `ApprovedDate` become fixed text.
The sample recognizes the built-in internal identifiers `datetime` and `datetime1` through `datetime13`. Groups, tables, notes, layouts, and masters require traversal of their own text containers and are outside this example's scope.
```cs
using System;
using System.Globalization;
using Aspose.Slides;
using Aspose.Slides.Export;
using var presentation = new Presentation("sample.pptx");
var approvalDate = new DateTime(2030, 4, 5);
var culture = CultureInfo.GetCultureInfo("en-US");
foreach (var slide in presentation.Slides)
{
foreach (var shape in slide.Shapes)
{
if (shape is not IAutoShape textShape || textShape.TextFrame == null)
continue;
foreach (var paragraph in textShape.TextFrame.Paragraphs)
{
foreach (var portion in paragraph.Portions)
{
var field = portion.Field;
if (field == null)
continue;
var typeName = field.Type.InternalString;
var isDateTime = typeName == "datetime";
if (typeName.StartsWith("datetime", StringComparison.Ordinal))
{
var hasFormatNumber = int.TryParse(typeName.Substring(8), out var formatNumber);
isDateTime |= hasFormatNumber && formatNumber >= 1 && formatNumber <= 13;
}
if (!isDateTime)
continue;
field.Type = FieldType.DateTime3;
portion.PortionFormat.LanguageId = "en-US";
portion.PortionFormat.FontItalic = NullableBool.True;
if (textShape.Name == "ApprovedDate")
{
portion.RemoveField();
portion.Text = approvalDate.ToString("dd MMMM yyyy", culture);
}
}
}
}
}
presentation.Save("updated_dates.pptx", SaveFormat.Pptx);
using var reopened = new Presentation("updated_dates.pptx");
foreach (var shape in reopened.Slides[0].Shapes)
{
if (shape is not IAutoShape textShape || textShape.TextFrame == null)
continue;
if (textShape.Name != "UpdatedAt" && textShape.Name != "ApprovedDate")
continue;
var portion = textShape.TextFrame.Paragraphs[0].Portions[0];
var typeName = portion.Field?.Type.InternalString ?? "ordinary text";
Console.WriteLine($"{textShape.Name}: {typeName}; {portion.Text}");
Console.WriteLine($"Italic: {portion.PortionFormat.FontItalic}");
}
```
After reopening, `UpdatedAt` has type `datetime3` and remains dynamic. `ApprovedDate` has no field and contains `05 April 2030`. Both date portions are italic, and their original font size, bold setting, and color remain intact. The ordinary text labels are unchanged. The verification reads the first portion of the two known shapes in the supplied sample.
## **Preserve Text Formatting**
Work with the existing portion when adding a field, changing its type, or removing it. These operations retain that portion's formatting. Use [IPortion.PortionFormat](https://reference.aspose.com/slides/net/aspose.slides/iportion/portionformat/) to change only the required properties, as the examples do for color or italics.
Avoid rebuilding an entire text frame just to update one field: doing so can lose the original portion boundaries and their individual formatting. Also distinguish explicitly set formatting from formatting inherited from the paragraph, layout, or theme. See [Text Formatting](https://docs.aspose.com/slides/net/text-formatting/) for broader formatting options.
## **Fields and Header/Footer Placeholders**
A field is part of a text portion. A placeholder is a shape with a presentation role, such as a footer or slide number. Adding a field to an ordinary text box does not turn that shape into a placeholder.
The header/footer managers control placeholder text and visibility on slides, layouts, and masters, including propagation to dependent slides. A number field in a custom text box can therefore be useful even when you are not using the slide-number placeholder. Conversely, changing placeholder visibility does not remove a field from an unrelated text box.
The predefined header and footer types do not create the corresponding placeholders or supply their content. In particular, a regular PowerPoint slide has no header placeholder; headers belong to notes pages and handouts. Do not assume that a header or footer field in an arbitrary shape will automatically obtain the text configured through a placeholder manager. For that workflow, see [Presentation Headers and Footers](https://docs.aspose.com/slides/net/presentation-header-and-footer/).
## **PPTX and PPT Limitations**
Check both the field type and its resulting text after saving and reopening. Preserving an identifier does not prove that an application can calculate or display its value.
| Format | Field behavior and limitations |
|---|---|
| PPTX | Stores internal field identifiers alongside field text. In round-trip checks, the predefined types and the custom identifier used above survived saving and reopening. The unknown custom type retained its fallback text; it did not acquire automatic calculation logic. Another application may treat unsupported identifiers differently. |
| PPT | Uses legacy field representations and has more limited compatibility. In round-trip checks, slide-number and predefined date/time fields survived saving and reopening. A custom field in an ordinary slide text box reopened with its identifier but with `*` as its text; a header field in the same context also produced `*`. Do not rely on custom fields or unsupported field contexts retaining their visible text. |
For portable, fixed output, convert unsupported fields to ordinary text and explicitly assign the value you want before saving. This preserves the chosen text but intentionally stops automatic updates. Test the target application as well when its own field recalculation is part of your workflow.
## **FAQ**
**How can I tell whether a displayed number or date is a field?**
Inspect [IPortion.Field](https://reference.aspose.com/slides/net/aspose.slides/iportion/field/). A non-null value identifies a field; the displayed text alone cannot tell you.
**Does removing a field remove its text or formatting?**
No. [RemoveField](https://reference.aspose.com/slides/net/aspose.slides/iportion/removefield/) converts the existing portion to ordinary text. Assign an explicit value afterward if you need a particular frozen date or fallback value.
**Can an internal string define a new date format or formula?**
No. It identifies a field type. An unknown identifier does not provide an evaluator or a .NET date-format pattern. Use a supported predefined type or format a value yourself as ordinary text.
**Why check a presentation again after saving it?**
Field identifiers, calculated text, and formatting are separate things to verify. Format conversion can change the visible result even when the field identifier is still present.
# Format Presentation Text in .NET
> Format and style text in PowerPoint and OpenDocument presentations using Aspose.Slides for .NET. Customize fonts, colors, alignment, and more.
Source: https://docs.aspose.com/slides/net/text-formatting/
Updated: 2026-11-05
## **Overview**
This article shows how to format text in PowerPoint and OpenDocument presentations using Aspose.Slides for .NET. It covers background colors, transparency, character spacing, font properties, rotation, paragraph spacing, autofit behavior, text anchoring, tab stops, and language settings.
Unless stated otherwise, the examples use [sample.pptx](https://docs.aspose.com/slides/net/text-formatting/sample.pptx). The first shape on its first slide is a text box, and its first paragraph contains the text shown below. Both slide and shape indices are zero-based. Examples that select bold portions use effective formatting, including inherited bold formatting:

To find and highlight literal text or regular-expression matches, see [Search and Replace Text](https://docs.aspose.com/slides/net/search-and-replace-text/).
## **Set Text Background Color**
Use [IParagraphFormat.DefaultPortionFormat](https://reference.aspose.com/slides/net/aspose.slides/iparagraphformat/defaultportionformat/) to set the default highlight color for a paragraph, or use [IBasePortionFormat.HighlightColor](https://reference.aspose.com/slides/net/aspose.slides/ibaseportionformat/highlightcolor/) for individual text portions.
The following example sets a light gray highlight as the default for the first paragraph. Explicit highlight colors on individual portions take precedence over this default:
```cs
using System.Drawing;
using Aspose.Slides;
using Aspose.Slides.Export;
using var presentation = new Presentation("sample.pptx");
var slide = presentation.Slides[0];
var autoShape = (IAutoShape)slide.Shapes[0];
var paragraph = autoShape.TextFrame.Paragraphs[0];
// Set the highlight color for the entire paragraph.
paragraph.ParagraphFormat.DefaultPortionFormat.HighlightColor.Color = Color.LightGray;
presentation.Save("gray_paragraph.pptx", SaveFormat.Pptx);
```
The result:

The code example below demonstrates how to set the background color for **text portions with a bold font**:
```cs
using System.Drawing;
using Aspose.Slides;
using Aspose.Slides.Export;
using var presentation = new Presentation("sample.pptx");
var slide = presentation.Slides[0];
var autoShape = (IAutoShape)slide.Shapes[0];
var paragraph = autoShape.TextFrame.Paragraphs[0];
foreach (var portion in paragraph.Portions)
{
if (portion.PortionFormat.GetEffective().FontBold)
{
// Set the highlight color for the text portion.
portion.PortionFormat.HighlightColor.Color = Color.LightGray;
}
}
presentation.Save("gray_text_portions.pptx", SaveFormat.Pptx);
```
The result:

## **Align Text Paragraphs**
Use [IParagraphFormat.Alignment](https://reference.aspose.com/slides/net/aspose.slides/iparagraphformat/alignment/) to set paragraph alignment within a text frame. The value can be centered, left-aligned, right-aligned, justified, and so on.
The following code example shows how to align the paragraph to the **center**:
```cs
using Aspose.Slides;
using Aspose.Slides.Export;
using var presentation = new Presentation("sample.pptx");
var slide = presentation.Slides[0];
var autoShape = (IAutoShape)slide.Shapes[0];
var paragraph = autoShape.TextFrame.Paragraphs[0];
// Set the alignment of the paragraph to center.
paragraph.ParagraphFormat.Alignment = TextAlignment.Center;
presentation.Save("aligned_paragraph.pptx", SaveFormat.Pptx);
```
The result:

## **Align Fonts Within a Line**
Use [IParagraphFormat.FontAlignment](https://reference.aspose.com/slides/net/aspose.slides/iparagraphformat/fontalignment/) to vertically align text portions of different font sizes within a line. This setting applies to the entire paragraph and controls alignment within each of its lines.
The following self-contained example creates four labeled text boxes on one slide. Each paragraph contains the same text at 18, 36, and 54 points, with a different font alignment. It uses Arial, disables autofit and wrapping, and keeps the text frames large enough for a single line.
```cs
using System.Drawing;
using Aspose.Slides;
using Aspose.Slides.Export;
using var presentation = new Presentation();
var slide = presentation.Slides[0];
var alignments = new[] { FontAlignment.Baseline, FontAlignment.Top, FontAlignment.Center, FontAlignment.Bottom };
var fontSizes = new[] { 18f, 36f, 54f };
for (var i = 0; i < alignments.Length; i++)
{
var shape = slide.Shapes.AddAutoShape(ShapeType.Rectangle, 30, 20 + i * 130, 660, 120);
shape.FillFormat.FillType = FillType.NoFill;
shape.LineFormat.FillFormat.FillType = FillType.NoFill;
var textFrame = shape.TextFrame;
textFrame.TextFrameFormat.AnchoringType = TextAnchorType.Top;
textFrame.TextFrameFormat.AutofitType = TextAutofitType.None;
textFrame.TextFrameFormat.WrapText = NullableBool.False;
var label = textFrame.Paragraphs[0];
label.Text = alignments[i].ToString();
label.ParagraphFormat.Alignment = TextAlignment.Left;
label.ParagraphFormat.DefaultPortionFormat.FontHeight = 14;
label.ParagraphFormat.DefaultPortionFormat.LatinFont = new FontData("Arial");
label.ParagraphFormat.DefaultPortionFormat.FillFormat.FillType = FillType.Solid;
label.ParagraphFormat.DefaultPortionFormat.FillFormat.SolidFillColor.Color = Color.Gray;
var paragraph = new Paragraph();
paragraph.ParagraphFormat.FontAlignment = alignments[i];
paragraph.ParagraphFormat.Alignment = TextAlignment.Left;
paragraph.ParagraphFormat.DefaultPortionFormat.LatinFont = new FontData("Arial");
paragraph.ParagraphFormat.DefaultPortionFormat.FillFormat.FillType = FillType.Solid;
paragraph.ParagraphFormat.DefaultPortionFormat.FillFormat.SolidFillColor.Color = Color.Black;
foreach (var fontSize in fontSizes)
{
var portion = new Portion("Ag ");
portion.PortionFormat.FontHeight = fontSize;
paragraph.Portions.Add(portion);
}
textFrame.Paragraphs.Add(paragraph);
}
presentation.Save("font_alignment.pptx", SaveFormat.Pptx);
```
The result:
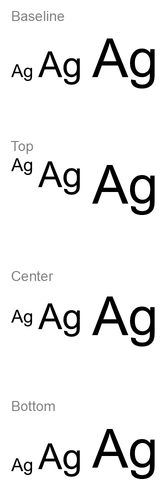
Font alignment uses font metrics, so the visible edges of individual letters do not necessarily line up exactly. The example includes both an uppercase letter and a descender to help show the difference between baseline and bottom alignment. Font availability and substitution, the characters used, and the difference in font sizes affect the result. Frame dimensions, margins, line spacing, wrapping, and autofit also affect layout; use the same fonts and layout settings when comparing modes.
This setting differs from [IParagraphFormat.Alignment](https://reference.aspose.com/slides/net/aspose.slides/iparagraphformat/alignment/), which controls horizontal paragraph alignment, and [ITextFrameFormat.AnchoringType](https://reference.aspose.com/slides/net/aspose.slides/itextframeformat/anchoringtype/), which positions the text block vertically within its shape. Superscript and subscript formatting through [IBasePortionFormat.Escapement](https://reference.aspose.com/slides/net/aspose.slides/ibaseportionformat/escapement/) shifts individual portions relative to the baseline instead of setting font alignment for the paragraph's lines.
## **Set Transparency for Text**
Text transparency is controlled through the alpha component of the color assigned to [IBasePortionFormat.FillFormat](https://reference.aspose.com/slides/net/aspose.slides/ibaseportionformat/fillformat/). In the examples below, `alpha = 50` is an ARGB alpha-channel value on the 0–255 scale, not a transparency percentage.
The code example below shows how to apply transparency to the **entire paragraph**:
```cs
using System.Drawing;
using Aspose.Slides;
using Aspose.Slides.Export;
var alpha = 50;
using var presentation = new Presentation("sample.pptx");
var slide = presentation.Slides[0];
var autoShape = (IAutoShape)slide.Shapes[0];
var paragraph = autoShape.TextFrame.Paragraphs[0];
// Set a semitransparent black fill for the text.
paragraph.ParagraphFormat.DefaultPortionFormat.FillFormat.FillType = FillType.Solid;
paragraph.ParagraphFormat.DefaultPortionFormat.FillFormat.SolidFillColor.Color = Color.FromArgb(alpha, Color.Black);
presentation.Save("transparent_paragraph.pptx", SaveFormat.Pptx);
```
The result:

The following code example shows how to apply transparency to **text portions with a bold font**:
```cs
using System.Drawing;
using Aspose.Slides;
using Aspose.Slides.Export;
var alpha = 50;
using var presentation = new Presentation("sample.pptx");
var slide = presentation.Slides[0];
var autoShape = (IAutoShape)slide.Shapes[0];
var paragraph = autoShape.TextFrame.Paragraphs[0];
foreach (var portion in paragraph.Portions)
{
if (portion.PortionFormat.GetEffective().FontBold)
{
// Set the transparency of the text portion.
portion.PortionFormat.FillFormat.FillType = FillType.Solid;
portion.PortionFormat.FillFormat.SolidFillColor.Color = Color.FromArgb(alpha, Color.Black);
}
}
presentation.Save("transparent_text_portions.pptx", SaveFormat.Pptx);
```
The result:

## **Set Character Spacing for Text**
Use [IBasePortionFormat.Spacing](https://reference.aspose.com/slides/net/aspose.slides/ibaseportionformat/spacing/) to expand or condense spacing between characters in a text box. The examples add 3 points of spacing; negative values condense the text.
The following C# code shows how to expand the character spacing in the **entire paragraph**:
```cs
using Aspose.Slides;
using Aspose.Slides.Export;
using var presentation = new Presentation("sample.pptx");
var slide = presentation.Slides[0];
var autoShape = (IAutoShape)slide.Shapes[0];
var paragraph = autoShape.TextFrame.Paragraphs[0];
// Note: Use negative values to compress the character spacing.
paragraph.ParagraphFormat.DefaultPortionFormat.Spacing = 3; // Expand character spacing.
presentation.Save("character_spacing_in_paragraph.pptx", SaveFormat.Pptx);
```
The result:

The code example below shows how to expand the character spacing in **text portions with a bold font**:
```cs
using Aspose.Slides;
using Aspose.Slides.Export;
using var presentation = new Presentation("sample.pptx");
var slide = presentation.Slides[0];
var autoShape = (IAutoShape)slide.Shapes[0];
var paragraph = autoShape.TextFrame.Paragraphs[0];
foreach (var portion in paragraph.Portions)
{
if (portion.PortionFormat.GetEffective().FontBold)
{
// Note: Use negative values to compress the character spacing.
portion.PortionFormat.Spacing = 3; // Expand character spacing.
}
}
presentation.Save("character_spacing_in_text_portions.pptx", SaveFormat.Pptx);
```
The result:

### **Disable Kerning for Specific Fonts**
In some cases, text rendered by Aspose.Slides may look slightly tighter than the same text displayed in PowerPoint. This can happen because PowerPoint may ignore kerning data for certain fonts, even when the font contains valid kerning information and kerning is enabled in PowerPoint settings.
To make the rendered output closer to PowerPoint in such cases, you can disable kerning for text portions that use the affected font. Set [IBasePortionFormat.KerningMinimalSize](https://reference.aspose.com/slides/net/aspose.slides/ibaseportionformat/kerningminimalsize/) to a value larger than the actual font size. This example requires "presentation.pptx" with a text box as the first shape on the first slide. It checks effective font names, including inherited fonts, and sets a 100-point threshold for portions that use Roboto. This disables kerning for matching portions with a font size below 100 points:
```cs
using Aspose.Slides;
using Aspose.Slides.Export;
using var presentation = new Presentation("presentation.pptx");
var slide = presentation.Slides[0];
var autoShape = (IAutoShape)slide.Shapes[0];
var targetFont = "Roboto";
foreach (var paragraph in autoShape.TextFrame.Paragraphs)
{
foreach (var portion in paragraph.Portions)
{
var textFormat = portion.PortionFormat.GetEffective();
var usesTargetFont = textFormat.LatinFont?.FontName == targetFont ||
textFormat.EastAsianFont?.FontName == targetFont ||
textFormat.ComplexScriptFont?.FontName == targetFont;
if (usesTargetFont)
{
portion.PortionFormat.KerningMinimalSize = 100;
}
}
}
presentation.Save("output.pptx", SaveFormat.Pptx);
```
For matching text below the threshold, this setting prevents kerning and can help align Aspose.Slides rendering with PowerPoint’s visual output for fonts affected by this PowerPoint-specific behavior.
## **Manage Text Font Properties**
Font properties can be set at the paragraph level through [IParagraphFormat.DefaultPortionFormat](https://reference.aspose.com/slides/net/aspose.slides/iparagraphformat/defaultportionformat/) or on individual portions through [IPortionFormat](https://reference.aspose.com/slides/net/aspose.slides/iportionformat/).
The following example sets the first paragraph’s default font to 12-point Times New Roman with bold, italic, and dotted underline formatting. Explicit formatting on individual portions takes precedence over these defaults.
```cs
using Aspose.Slides;
using Aspose.Slides.Export;
using var presentation = new Presentation("sample.pptx");
var slide = presentation.Slides[0];
var autoShape = (IAutoShape)slide.Shapes[0];
var paragraph = autoShape.TextFrame.Paragraphs[0];
// Set the font properties for the paragraph.
var portionFormat = paragraph.ParagraphFormat.DefaultPortionFormat;
portionFormat.FontHeight = 12;
portionFormat.FontBold = NullableBool.True;
portionFormat.FontItalic = NullableBool.True;
portionFormat.FontUnderline = TextUnderlineType.Dotted;
portionFormat.LatinFont = new FontData("Times New Roman");
presentation.Save("font_properties_for_paragraph.pptx", SaveFormat.Pptx);
```
The result:

The following example applies 13-point Times New Roman, italic formatting, and a dotted underline to portions whose effective formatting is bold:
```cs
using Aspose.Slides;
using Aspose.Slides.Export;
using var presentation = new Presentation("sample.pptx");
var slide = presentation.Slides[0];
var autoShape = (IAutoShape)slide.Shapes[0];
var paragraph = autoShape.TextFrame.Paragraphs[0];
foreach (var portion in paragraph.Portions)
{
if (portion.PortionFormat.GetEffective().FontBold)
{
// Set the font properties for the text portion.
portion.PortionFormat.FontHeight = 13;
portion.PortionFormat.FontItalic = NullableBool.True;
portion.PortionFormat.FontUnderline = TextUnderlineType.Dotted;
portion.PortionFormat.LatinFont = new FontData("Times New Roman");
}
}
presentation.Save("font_properties_for_text_portions.pptx", SaveFormat.Pptx);
```
The result:

## **Control Text Height Normalization**
Use [IBasePortionFormat.NormaliseHeight](https://reference.aspose.com/slides/net/aspose.slides/ibaseportionformat/normaliseheight/) when reproducing template typography or investigating differences in character height. In PowerPoint, enabling normalization stretches or compresses individual characters vertically to give them a uniform visible height within the text portion. It does not guarantee equal text heights across different fonts.
Set the property to [NullableBool.True or False](https://reference.aspose.com/slides/net/aspose.slides/nullablebool/) to explicitly enable or disable normalization. `NullableBool.NotDefined` leaves the local setting unset so that the portion inherits its value, for example, from the paragraph's [DefaultPortionFormat](https://reference.aspose.com/slides/net/aspose.slides/iparagraphformat/defaultportionformat/). It does not mean `False`. Use [IPortionFormat.GetEffective](https://reference.aspose.com/slides/net/aspose.slides/iportionformat/geteffective/) and read [IBasePortionFormatEffectiveData.NormaliseHeight](https://reference.aspose.com/slides/net/aspose.slides/ibaseportionformateffectivedata/normaliseheight/) to obtain the resolved Boolean value.
The following self-contained example requires **Arial** to be installed. It creates two text blocks containing the same uppercase letters, lowercase letters, descenders, and accented characters at 54 points. Both paragraphs enable normalization by default. The top portion explicitly disables it; the bottom portion inherits it. The frame sizes, margins, and paragraph spacing are identical, with wrapping and autofit disabled to keep the comparison consistent. The example prints `False: False` and `NotDefined: True`, then saves "text_height_normalization.pptx".
```cs
using System;
using System.Drawing;
using Aspose.Slides;
using Aspose.Slides.Export;
using var presentation = new Presentation();
var slide = presentation.Slides[0];
var settings = new[] { NullableBool.False, NullableBool.NotDefined };
for (var i = 0; i < settings.Length; i++)
{
var shape = slide.Shapes.AddAutoShape(ShapeType.Rectangle, 30, 60 + i * 200, 660, 150);
shape.FillFormat.FillType = FillType.NoFill;
shape.LineFormat.FillFormat.FillType = FillType.NoFill;
var textFrame = shape.TextFrame;
textFrame.Text = "Hxgjpq ÅÉ 0123";
textFrame.TextFrameFormat.AutofitType = TextAutofitType.None;
textFrame.TextFrameFormat.WrapText = NullableBool.False;
textFrame.TextFrameFormat.AnchoringType = TextAnchorType.Top;
textFrame.TextFrameFormat.MarginTop = 0;
textFrame.TextFrameFormat.MarginLeft = 0;
var paragraph = textFrame.Paragraphs[0];
paragraph.ParagraphFormat.Alignment = TextAlignment.Left;
paragraph.ParagraphFormat.SpaceBefore = 0;
paragraph.ParagraphFormat.SpaceAfter = 0;
paragraph.ParagraphFormat.SpaceWithin = 100;
paragraph.ParagraphFormat.DefaultPortionFormat.NormaliseHeight = NullableBool.True;
var portion = paragraph.Portions[0];
portion.PortionFormat.LatinFont = new FontData("Arial");
portion.PortionFormat.FontHeight = 54;
portion.PortionFormat.FillFormat.FillType = FillType.Solid;
portion.PortionFormat.FillFormat.SolidFillColor.Color = Color.Black;
portion.PortionFormat.NormaliseHeight = settings[i];
Console.WriteLine($"{settings[i]}: {portion.PortionFormat.GetEffective().NormaliseHeight}");
}
presentation.Save("text_height_normalization.pptx", SaveFormat.Pptx);
```
The comparison below was exported from the saved presentation. The top row has normalization disabled (`False`); the bottom row inherits the enabled setting (`NotDefined` → `True`). Keep Arial installed to reproduce this appearance.

Normalization changes character height without changing the assigned [FontHeight](https://reference.aspose.com/slides/net/aspose.slides/ibaseportionformat/fontheight/) value, which specifies the font size in points. Paragraph [SpaceWithin](https://reference.aspose.com/slides/net/aspose.slides/iparagraphformat/spacewithin/) controls line spacing, while text-frame [AutofitType](https://reference.aspose.com/slides/net/aspose.slides/itextframeformat/autofittype/) controls how text or its container adjusts to fit. These settings serve different purposes and can affect the overall layout independently. For more on paragraph formatting and inheritance, see [Manage Paragraph](https://docs.aspose.com/slides/net/manage-paragraph/).
## **Apply and Remove Strikethrough**
Use [IBasePortionFormat.StrikethroughType](https://reference.aspose.com/slides/net/aspose.slides/ibaseportionformat/strikethroughtype/) on a text portion to display corrections, cancelled terms, or previous prices without deleting the original text. Set it to [TextStrikethroughType.Single or Double](https://reference.aspose.com/slides/net/aspose.slides/textstrikethroughtype/) for one or two lines through the text.
To remove strikethrough, assign `TextStrikethroughType.None`. This explicitly disables the effect, even if the surrounding formatting specifies strikethrough. By contrast, `TextStrikethroughType.NotDefined` leaves the local setting undefined, allowing the portion to inherit formatting, for example, from the paragraph. It does not guarantee that strikethrough is removed. Use [IPortionFormat.GetEffective](https://reference.aspose.com/slides/net/aspose.slides/iportionformat/geteffective/) to read the resulting formatting, including inherited values.
The following self-contained example creates three price comparisons. Each paragraph has separate portions for the label, previous price, and current price, so only the previous price is affected. The first row applies and then removes strikethrough; the other rows retain single and double strikethrough. Changing this property preserves the text and its other formatting, including the bold previous price.
```cs
using System.Drawing;
using Aspose.Slides;
using Aspose.Slides.Export;
using var presentation = new Presentation();
var slide = presentation.Slides[0];
var shape = slide.Shapes.AddAutoShape(ShapeType.Rectangle, 50, 50, 620, 220);
shape.FillFormat.FillType = FillType.NoFill;
shape.LineFormat.FillFormat.FillType = FillType.NoFill;
shape.TextFrame.Paragraphs.Clear();
var labels = new[] { "None: ", "Single: ", "Double: " };
foreach (var label in labels)
{
var paragraph = new Paragraph();
paragraph.ParagraphFormat.Alignment = TextAlignment.Left;
paragraph.ParagraphFormat.SpaceAfter = 20;
var format = paragraph.ParagraphFormat.DefaultPortionFormat;
format.FontHeight = 28;
format.LatinFont = new FontData("Arial");
format.FillFormat.FillType = FillType.Solid;
format.FillFormat.SolidFillColor.Color = Color.Black;
paragraph.Portions.Add(new Portion(label));
var previousPrice = new Portion("$100");
previousPrice.PortionFormat.FontBold = NullableBool.True;
paragraph.Portions.Add(previousPrice);
paragraph.Portions.Add(new Portion(" → $80"));
shape.TextFrame.Paragraphs.Add(paragraph);
}
var paragraphs = shape.TextFrame.Paragraphs;
// Apply strikethrough, then explicitly remove it from the first previous price.
paragraphs[0].Portions[1].PortionFormat.StrikethroughType = TextStrikethroughType.Single;
paragraphs[0].Portions[1].PortionFormat.StrikethroughType = TextStrikethroughType.None;
paragraphs[1].Portions[1].PortionFormat.StrikethroughType = TextStrikethroughType.Single;
paragraphs[2].Portions[1].PortionFormat.StrikethroughType = TextStrikethroughType.Double;
presentation.Save("strikethrough.pptx", SaveFormat.Pptx);
```
The result, from top to bottom: no strikethrough, single strikethrough, and double strikethrough.

## **Set Text Rotation**
Use [ITextFrameFormat.TextVerticalType](https://reference.aspose.com/slides/net/aspose.slides/itextframeformat/textverticaltype/) to set a predefined text orientation within a shape.
The following code example sets the text orientation in the shape to [TextVerticalType.Vertical270](https://reference.aspose.com/slides/net/aspose.slides/textverticaltype/), which rotates the text **90 degrees counterclockwise**:
```cs
using Aspose.Slides;
using Aspose.Slides.Export;
using var presentation = new Presentation("sample.pptx");
var slide = presentation.Slides[0];
var autoShape = (IAutoShape)slide.Shapes[0];
autoShape.TextFrame.TextFrameFormat.TextVerticalType = TextVerticalType.Vertical270;
presentation.Save("text_rotation.pptx", SaveFormat.Pptx);
```
The result:

## **Set Custom Rotation for Text Frames**
Use [ITextFrameFormat.RotationAngle](https://reference.aspose.com/slides/net/aspose.slides/itextframeformat/rotationangle/) to set a custom rotation angle for an [ITextFrame](https://reference.aspose.com/slides/net/aspose.slides/itextframe/).
The code example below rotates the text frame by 3 degrees clockwise within the shape:
```cs
using Aspose.Slides;
using Aspose.Slides.Export;
using var presentation = new Presentation("sample.pptx");
var slide = presentation.Slides[0];
var autoShape = (IAutoShape)slide.Shapes[0];
autoShape.TextFrame.TextFrameFormat.RotationAngle = 3;
presentation.Save("custom_text_rotation.pptx", SaveFormat.Pptx);
```
The result:

## **Set Line Spacing of Paragraphs**
Aspose.Slides provides [IParagraphFormat.SpaceAfter](https://reference.aspose.com/slides/net/aspose.slides/iparagraphformat/spaceafter/), [IParagraphFormat.SpaceBefore](https://reference.aspose.com/slides/net/aspose.slides/iparagraphformat/spacebefore/), and [IParagraphFormat.SpaceWithin](https://reference.aspose.com/slides/net/aspose.slides/iparagraphformat/spacewithin/) to control paragraph spacing. These properties are used as follows:
* Use a positive value to specify line spacing as a percentage of the line height.
* Use a negative value to specify line spacing in points.
The following example sets spacing within the first paragraph to 200% of the line height (double spacing):
```cs
using Aspose.Slides;
using Aspose.Slides.Export;
using var presentation = new Presentation("sample.pptx");
var slide = presentation.Slides[0];
var autoShape = (IAutoShape)slide.Shapes[0];
var paragraph = autoShape.TextFrame.Paragraphs[0];
paragraph.ParagraphFormat.SpaceWithin = 200;
presentation.Save("line_spacing.pptx", SaveFormat.Pptx);
```
The result:
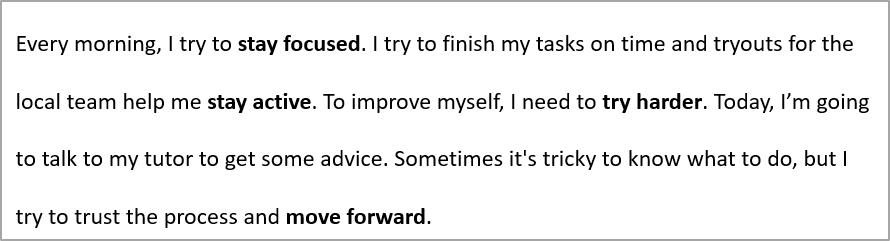
## **Control Line Breaking**
Paragraph line-breaking rules are useful in narrow text blocks and presentations that mix Latin and East Asian text. The following properties belong to [IParagraphFormat](https://reference.aspose.com/slides/net/aspose.slides/iparagraphformat/), so they apply to an entire paragraph:
- [LatinLineBreak](https://reference.aspose.com/slides/net/aspose.slides/iparagraphformat/latinlinebreak/) controls Latin line-breaking rules. In mixed text, changing it can also change where adjacent East Asian text and punctuation wrap.
- [EastAsianLineBreak](https://reference.aspose.com/slides/net/aspose.slides/iparagraphformat/eastasianlinebreak/) controls East Asian line-breaking rules, including restrictions on characters at the beginning and end of a line.
These rules do not replace [ITextFrameFormat.WrapText](https://reference.aspose.com/slides/net/aspose.slides/itextframeformat/wraptext/), which enables automatic wrapping within a text frame. They influence the layout when wrapping occurs; they do not insert line-break characters. An explicit line break forces a new line within the paragraph independently of the available width.
The following self-contained example creates a narrow text block containing Chinese and Latin text. It sets both line-breaking properties explicitly and saves "line_breaking.pptx". To experiment with either rule, change that property's value while keeping the other settings fixed. The example uses 24-point Arial and SimSun with a 160-point frame width and zero horizontal text-frame margins. [ITextFrameFormat.AutofitType](https://reference.aspose.com/slides/net/aspose.slides/itextframeformat/autofittype/) is set to [TextAutofitType.None](https://reference.aspose.com/slides/net/aspose.slides/textautofittype/) so that text size and frame dimensions remain fixed.
```cs
using System.Drawing;
using Aspose.Slides;
using Aspose.Slides.Export;
using var presentation = new Presentation();
var slide = presentation.Slides[0];
var shape = slide.Shapes.AddAutoShape(ShapeType.Rectangle, 50, 50, 160, 300);
shape.FillFormat.FillType = FillType.NoFill;
var textFrame = shape.TextFrame;
textFrame.TextFrameFormat.WrapText = NullableBool.True;
textFrame.TextFrameFormat.AutofitType = TextAutofitType.None;
textFrame.TextFrameFormat.MarginLeft = 0;
textFrame.TextFrameFormat.MarginRight = 0;
var paragraph = textFrame.Paragraphs[0];
paragraph.Text = "中文排版测试,PowerPoint 中文演示。";
var format = paragraph.ParagraphFormat;
format.Alignment = TextAlignment.Left;
format.DefaultPortionFormat.FontHeight = 24;
format.DefaultPortionFormat.LatinFont = new FontData("Arial");
format.DefaultPortionFormat.EastAsianFont = new FontData("SimSun");
format.DefaultPortionFormat.FillFormat.FillType = FillType.Solid;
format.DefaultPortionFormat.FillFormat.SolidFillColor.Color = Color.Black;
format.LatinLineBreak = NullableBool.False;
format.EastAsianLineBreak = NullableBool.True;
presentation.Save("line_breaking.pptx", SaveFormat.Pptx);
```
## **Control Hanging Punctuation**
[IParagraphFormat.HangingPunctuation](https://reference.aspose.com/slides/net/aspose.slides/iparagraphformat/hangingpunctuation/) allows eligible punctuation to extend beyond the text line's right edge instead of occupying the next line. It applies to the entire paragraph and is different from a hanging indent.
The following self-contained example enables hanging punctuation in a 100-point-wide text frame and saves "hanging_punctuation.pptx". With 24-point Arial and zero horizontal text-frame margins, the final period stays after "sentence" and extends beyond the right text edge. Set the property to [NullableBool.False](https://reference.aspose.com/slides/net/aspose.slides/nullablebool/) to compare: with these settings, the period occupies a separate line. Wrapping is enabled and autofit is disabled to keep the available width fixed.
```cs
using System.Drawing;
using Aspose.Slides;
using Aspose.Slides.Export;
using var presentation = new Presentation();
var slide = presentation.Slides[0];
var shape = slide.Shapes.AddAutoShape(ShapeType.Rectangle, 50, 50, 100, 200);
shape.FillFormat.FillType = FillType.NoFill;
var textFrame = shape.TextFrame;
textFrame.TextFrameFormat.WrapText = NullableBool.True;
textFrame.TextFrameFormat.AutofitType = TextAutofitType.None;
textFrame.TextFrameFormat.MarginLeft = 0;
textFrame.TextFrameFormat.MarginRight = 0;
var paragraph = textFrame.Paragraphs[0];
paragraph.Text = "Simple text, next sentence.";
var format = paragraph.ParagraphFormat;
format.Alignment = TextAlignment.Left;
format.DefaultPortionFormat.FontHeight = 24;
format.DefaultPortionFormat.LatinFont = new FontData("Arial");
format.DefaultPortionFormat.FillFormat.FillType = FillType.Solid;
format.DefaultPortionFormat.FillFormat.SolidFillColor.Color = Color.Black;
format.HangingPunctuation = NullableBool.True;
presentation.Save("hanging_punctuation.pptx", SaveFormat.Pptx);
```
Not every punctuation mark can hang. The [font and layout conditions described above](https://docs.aspose.com/slides/net/text-formatting/#control-line-breaking) also apply to this comparison: changing the font, available width, margins, or autofit settings can remove the visible difference.
## **Set Autofit Type for Text Frames**
[ITextFrameFormat.AutofitType](https://reference.aspose.com/slides/net/aspose.slides/itextframeformat/autofittype/) determines how text behaves when it exceeds the boundaries of its container. Use it to control whether the text shrinks, overflows, or resizes the shape automatically. The following example configures the shape to resize to fit its text and saves the result to "autofit_type.pptx".
```cs
using Aspose.Slides;
using Aspose.Slides.Export;
using var presentation = new Presentation("sample.pptx");
var slide = presentation.Slides[0];
var autoShape = (IAutoShape)slide.Shapes[0];
autoShape.TextFrame.TextFrameFormat.AutofitType = TextAutofitType.Shape;
presentation.Save("autofit_type.pptx", SaveFormat.Pptx);
```
To count lines after automatic wrapping and see how text or shape width changes the result, see [Count Rendered Lines](https://docs.aspose.com/slides/net/manage-paragraph/). Line count alone does not indicate whether text overflows its container.
## **Set Anchor of Text Frames**
[ITextFrameFormat.AnchoringType](https://reference.aspose.com/slides/net/aspose.slides/itextframeformat/anchoringtype/) defines how text is positioned vertically inside a shape, for example, at the top, middle, or bottom. The following example anchors the text to the bottom of the first shape and saves the result to "text_anchor.pptx".
```cs
using Aspose.Slides;
using Aspose.Slides.Export;
using var presentation = new Presentation("sample.pptx");
var slide = presentation.Slides[0];
var autoShape = (IAutoShape)slide.Shapes[0];
autoShape.TextFrame.TextFrameFormat.AnchoringType = TextAnchorType.Bottom;
presentation.Save("text_anchor.pptx", SaveFormat.Pptx);
```
## **Set Text Tabulation**
Use [IParagraphFormat.DefaultTabSize](https://reference.aspose.com/slides/net/aspose.slides/iparagraphformat/defaulttabsize/) and [IParagraphFormat.Tabs](https://reference.aspose.com/slides/net/aspose.slides/iparagraphformat/tabs/) to configure tab stops in a paragraph. The following example sets the default tab interval to 100 points and adds a left-aligned tab stop at 30 points. These settings affect text containing tab characters.
```cs
using Aspose.Slides;
using Aspose.Slides.Export;
using var presentation = new Presentation("sample.pptx");
var slide = presentation.Slides[0];
var autoShape = (IAutoShape)slide.Shapes[0];
var paragraph = autoShape.TextFrame.Paragraphs[0];
paragraph.ParagraphFormat.DefaultTabSize = 100;
paragraph.ParagraphFormat.Tabs.Add(30, TabAlignment.Left);
presentation.Save("paragraph_tabs.pptx", SaveFormat.Pptx);
```
The result:
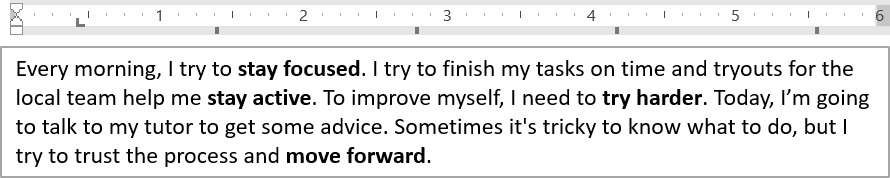
## **Set Proofing Language**
Aspose.Slides provides [IBasePortionFormat.LanguageId](https://reference.aspose.com/slides/net/aspose.slides/ibaseportionformat/languageid/), which allows you to set the proofing language for a text portion. The proofing language determines the language used for spelling and grammar checks in PowerPoint.
The following example requires "presentation.pptx" with a text box as the first shape on the first slide and at least one paragraph. It replaces the first paragraph’s contents with "1。", sets SimSun as its font, and assigns the Simplified Chinese proofing language (`zh-CN`). It saves the result to "proofing_language.pptx":
```cs
using Aspose.Slides;
using Aspose.Slides.Export;
using var presentation = new Presentation("presentation.pptx");
var slide = presentation.Slides[0];
var autoShape = (IAutoShape)slide.Shapes[0];
var paragraph = autoShape.TextFrame.Paragraphs[0];
paragraph.Portions.Clear();
var font = new FontData("SimSun");
var textPortion = new Portion();
textPortion.PortionFormat.ComplexScriptFont = font;
textPortion.PortionFormat.EastAsianFont = font;
textPortion.PortionFormat.LatinFont = font;
// Set the proofing language to Simplified Chinese.
textPortion.PortionFormat.LanguageId = "zh-CN";
textPortion.Text = "1。";
paragraph.Portions.Add(textPortion);
presentation.Save("proofing_language.pptx", SaveFormat.Pptx);
```
## **Set Default Language**
Use [LoadOptions.DefaultTextLanguage](https://reference.aspose.com/slides/net/aspose.slides/loadoptions/defaulttextlanguage/) to define the default language for text created while loading or creating a presentation. The following example creates a presentation with US English as the default text language, adds a text box, and prints `en-US` for its first text portion.
```cs
using System;
using Aspose.Slides;
var loadOptions = new LoadOptions();
loadOptions.DefaultTextLanguage = "en-US";
using var presentation = new Presentation(loadOptions);
var slide = presentation.Slides[0];
// Add a new rectangle shape with text.
var shape = slide.Shapes.AddAutoShape(ShapeType.Rectangle, 20, 20, 150, 50);
shape.TextFrame.Text = "Sample text";
// Check the first portion language.
var portion = shape.TextFrame.Paragraphs[0].Portions[0];
Console.WriteLine(portion.PortionFormat.LanguageId);
```
## **Set Default Text Style**
To apply default text formatting at the presentation level, use [IPresentation.DefaultTextStyle](https://reference.aspose.com/slides/net/aspose.slides/ipresentation/defaulttextstyle/).
The following example sets a 14-point bold font as the default for top-level paragraphs in a new presentation and saves it to "default_text_style.pptx". Text can inherit these defaults unless more specific formatting overrides them.
```cs
using Aspose.Slides;
using Aspose.Slides.Export;
using var presentation = new Presentation();
// Get the top level paragraph format.
var paragraphFormat = presentation.DefaultTextStyle.GetLevel(0);
if (paragraphFormat != null)
{
paragraphFormat.DefaultPortionFormat.FontHeight = 14;
paragraphFormat.DefaultPortionFormat.FontBold = NullableBool.True;
}
presentation.Save("default_text_style.pptx", SaveFormat.Pptx);
```
## **Extract Text with the All-Caps Effect**
In PowerPoint, applying the **All Caps** font effect makes text appear in uppercase on the slide even when it was originally typed in lowercase. When you retrieve such a text portion with Aspose.Slides, the library returns the text exactly as it was entered. To match the displayed text, check [TextCapType](https://reference.aspose.com/slides/net/aspose.slides/textcaptype/) and convert the returned string to uppercase when the value is `All`.
This example requires "sample2.pptx" with a text box as the first shape on the first slide. Its first paragraph’s first portion contains "Hello, Aspose!" with the All Caps effect applied, as shown below.

The code example below shows how to extract the text with the **All Caps** effect applied:
```cs
using System;
using Aspose.Slides;
using var presentation = new Presentation("sample2.pptx");
var slide = presentation.Slides[0];
var autoShape = (IAutoShape)slide.Shapes[0];
var textPortion = autoShape.TextFrame.Paragraphs[0].Portions[0];
Console.WriteLine($"Original text: {textPortion.Text}");
var textFormat = textPortion.PortionFormat.GetEffective();
if (textFormat.TextCapType == TextCapType.All)
{
var text = textPortion.Text.ToUpper();
Console.WriteLine($"All-Caps effect: {text}");
}
```
Output:
```text
Original text: Hello, Aspose!
All-Caps effect: HELLO, ASPOSE!
```
## **FAQ**
**How do I modify text in a table on a slide?**
To modify text in a table on a slide, use [ITable](https://reference.aspose.com/slides/net/aspose.slides/itable/). Iterate through the cells and update each cell through [ICell.TextFrame](https://reference.aspose.com/slides/net/aspose.slides/icell/textframe/) and paragraph formatting through [IParagraph.ParagraphFormat](https://reference.aspose.com/slides/net/aspose.slides/iparagraph/paragraphformat/).
**How do I apply a gradient color to text on a PowerPoint slide?**
To apply a gradient color to text, use [IBasePortionFormat.FillFormat](https://reference.aspose.com/slides/net/aspose.slides/ibaseportionformat/fillformat/). Set [IFillFormat.FillType](https://reference.aspose.com/slides/net/aspose.slides/ifillformat/filltype/) to [FillType.Gradient](https://reference.aspose.com/slides/net/aspose.slides/filltype/) and configure the gradient stops, direction, and transparency.
Related feature: [Format text within slides](https://docs.aspose.com/slides/features/text-formatting/).
## Related features
- [Work with right-to-left text](https://docs.aspose.com/slides/features/right-to-left-text/)
- [Work with Chinese, Japanese and Korean text](https://docs.aspose.com/slides/features/cjk-text/)
# Add Trend Lines to Presentation Charts in .NET
> Quickly add and customize trend lines in PowerPoint charts with Aspose.Slides for .NET — a practical guide to engage your audience.
Source: https://docs.aspose.com/slides/net/trend-line/
Updated: 2026-10-16
## **Overview**
This article explains how to add trend lines to presentation charts by using Aspose.Slides. It shows how to create a chart, add trend lines to chart series, and work with several trend line types, including exponential, linear, logarithmic, moving average, polynomial, and power.
It also describes how to add a custom line to a chart by inserting a line shape, and includes a short FAQ about forward and backward trend line projection values and whether trend lines are preserved during export to PDF or SVG and when rendering charts as images.
## **Add a Trend Line**
Use [ITrendlineCollection.Add](https://reference.aspose.com/slides/net/aspose.slides.charts/itrendlinecollection/add/) to add a trend line to a chart series, selecting its type with [TrendlineType](https://reference.aspose.com/slides/net/aspose.slides.charts/trendlinetype/). The example creates a clustered column chart with default data and adds two trend lines to each of its three series.
The exponential trend line hides its equation and R-squared value through [DisplayEquation](https://reference.aspose.com/slides/net/aspose.slides.charts/itrendline/displayequation/) and [DisplayRSquaredValue](https://reference.aspose.com/slides/net/aspose.slides.charts/itrendline/displayrsquaredvalue/), while the linear trend line is red. The logarithmic trend line uses [AddTextFrameForOverriding](https://reference.aspose.com/slides/net/aspose.slides.charts/trendline/addtextframeforoverriding/) for a custom label. The moving average uses a [Period](https://reference.aspose.com/slides/net/aspose.slides.charts/itrendline/period/) of three data points and a custom [TrendlineName](https://reference.aspose.com/slides/net/aspose.slides.charts/itrendline/trendlinename/).
The polynomial trend line has an [Order](https://reference.aspose.com/slides/net/aspose.slides.charts/itrendline/order/) of three and extends one category forward through [Forward](https://reference.aspose.com/slides/net/aspose.slides.charts/itrendline/forward/). The power trend line extends one category backward through [Backward](https://reference.aspose.com/slides/net/aspose.slides.charts/itrendline/backward/).
```csharp
using System.Drawing;
using Aspose.Slides;
using Aspose.Slides.Charts;
using Aspose.Slides.Export;
using var presentation = new Presentation();
var slide = presentation.Slides[0];
var chart = slide.Shapes.AddChart(ChartType.ClusteredColumn, 20, 20, 500, 400);
var firstSeries = chart.ChartData.Series[0];
var exponentialTrendline = firstSeries.TrendLines.Add(TrendlineType.Exponential);
exponentialTrendline.DisplayEquation = false;
exponentialTrendline.DisplayRSquaredValue = false;
var linearTrendline = firstSeries.TrendLines.Add(TrendlineType.Linear);
linearTrendline.Format.Line.FillFormat.FillType = FillType.Solid;
linearTrendline.Format.Line.FillFormat.SolidFillColor.Color = Color.Red;
var secondSeries = chart.ChartData.Series[1];
var logarithmicTrendline = secondSeries.TrendLines.Add(TrendlineType.Logarithmic);
logarithmicTrendline.AddTextFrameForOverriding("New log trend line");
var movingAverageTrendline = secondSeries.TrendLines.Add(TrendlineType.MovingAverage);
movingAverageTrendline.Period = 3;
movingAverageTrendline.TrendlineName = "New TrendLine Name";
var thirdSeries = chart.ChartData.Series[2];
var polynomialTrendline = thirdSeries.TrendLines.Add(TrendlineType.Polynomial);
polynomialTrendline.Forward = 1;
polynomialTrendline.Order = 3;
var powerTrendline = thirdSeries.TrendLines.Add(TrendlineType.Power);
powerTrendline.Backward = 1;
presentation.Save("ChartTrendLines.pptx", SaveFormat.Pptx);
```
## **Set a Trend Line Intercept**
Use [Intercept](https://reference.aspose.com/slides/net/aspose.slides.charts/trendline/intercept/) to fix a trend line's Y value at X = 0. This setting is supported for linear, exponential, and polynomial trend lines.
For example, a production cost model may need to start at known fixed costs of 100, even when measurements at nonzero production volumes suggest a different baseline. For a linear trend line, fixing the intercept constrains the equation `y = ax + b` to `b = 100`; the slope is fitted to the data under that constraint. It does not simply move an already fitted line. Axis crossing settings control where the chart axes meet, not the coefficients of the fitted trend line.
The following example creates a scatter (XY) chart with production volumes from 1 to 4 and costs of 170, 200, 230, and 260. It saves the chart with the default automatic intercept, sets the intercept to 100, and saves a second PPTX. The two files differ only in the intercept setting. The trend line displays its equation and extends back to X = 0.
```csharp
using Aspose.Slides;
using Aspose.Slides.Charts;
using Aspose.Slides.Export;
using var presentation = new Presentation();
var slide = presentation.Slides[0];
var chart = slide.Shapes.AddChart(ChartType.ScatterWithMarkers, 20, 20, 480, 210);
chart.HasLegend = false;
chart.ChartData.Series.Clear();
chart.ChartData.Categories.Clear();
var workbook = chart.ChartData.ChartDataWorkbook;
workbook.Clear(0);
var nameCell = workbook.GetCell(0, 0, 1, "Production cost");
var series = chart.ChartData.Series.Add(nameCell, ChartType.ScatterWithMarkers);
double[] costs = { 170, 200, 230, 260 };
for (var i = 0; i < costs.Length; i++)
{
var xCell = workbook.GetCell(0, i + 1, 0, i + 1);
var yCell = workbook.GetCell(0, i + 1, 1, costs[i]);
series.DataPoints.AddDataPointForScatterSeries(xCell, yCell);
}
var trendline = series.TrendLines.Add(TrendlineType.Linear);
trendline.DisplayEquation = true;
trendline.Backward = 1;
presentation.Save("AutomaticIntercept.pptx", SaveFormat.Pptx);
trendline.Intercept = 100;
presentation.Save("FixedIntercept.pptx", SaveFormat.Pptx);
```
With automatic calculation, these data produce `y = 30x + 140`. Setting the intercept to 100 instead produces approximately `y = 43.33x + 100`: the fitted value at zero matches the known baseline, while the line no longer passes through every data point.
| Automatic intercept | Fixed intercept of 100 |
| --- | --- |
| 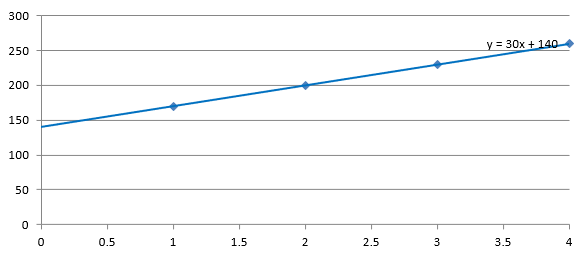 |  |
Both images use the same data and axis scales. The trend lines are extended back to X = 0 to show their intercepts.
By default, the property contains `double.NaN`, which represents an unspecified intercept rather than zero. The intercept is then calculated automatically from the data.
## **Add a Custom Line**
A custom line is a shape drawn over the chart rather than a trend line calculated from series data. This example uses [IShapeCollection.AddAutoShape](https://reference.aspose.com/slides/net/aspose.slides/ishapecollection/addautoshape/) to add a horizontal line to the slide over the chart. The line's position is specified in slide coordinates, measured in points, so it starts at the chart's left edge and sits halfway down the chart. Its width matches the chart's width. The [LineFormat](https://reference.aspose.com/slides/net/aspose.slides/ishape/lineformat/) gives the line a solid red color.
```csharp
using System.Drawing;
using Aspose.Slides;
using Aspose.Slides.Charts;
using Aspose.Slides.Export;
using var presentation = new Presentation();
var slide = presentation.Slides[0];
var chart = slide.Shapes.AddChart(ChartType.ClusteredColumn, 100, 100, 500, 400);
var line = slide.Shapes.AddAutoShape(ShapeType.Line, chart.X, chart.Y + chart.Height / 2, chart.Width, 0);
line.LineFormat.FillFormat.FillType = FillType.Solid;
line.LineFormat.FillFormat.SolidFillColor.Color = Color.Red;
presentation.Save("AddCustomLines.pptx", SaveFormat.Pptx);
```
## **FAQ**
**What do 'forward' and 'backward' mean for a trend line?**
They are the lengths of the trend line projected forward/backward: for scatter (XY) charts — in axis units; for non-scatter charts — in number of categories. Only non-negative values are allowed.
**Will the trend line be preserved when exporting the presentation to PDF or SVG, or when rendering a slide to an image?**
Yes. Aspose.Slides converts presentations to [PDF](https://docs.aspose.com/slides/net/convert-powerpoint-to-pdf/) or [SVG](https://docs.aspose.com/slides/net/render-a-slide-as-an-svg-image/) and renders charts to images; trend lines, as part of the chart, are preserved during these operations. A method is also available to [export an image of the chart](https://docs.aspose.com/slides/net/create-shape-thumbnails/) itself.
## Related features
- [Add chart trendlines](https://docs.aspose.com/slides/features/chart-trendlines/)
# Update OLE Objects Automatically Using a PowerPoint Add-In
> Discover how to auto-update OLE charts and objects in PowerPoint with an add-in and Aspose.Slides for .NET, featuring practical code and optimization tips.
Source: https://docs.aspose.com/slides/net/updating-ole-objects-automatically-using-ms-powerpoint-add-in/
Updated: 2026-08-05
## **Introduction**
One of the most frequent questions asked by Aspose.Slides for .NET customers is how to create or modify editable charts (or other OLE objects) so that they update automatically when the presentation is opened. Unfortunately, PowerPoint doesn’t support automatic macros in the same way Excel and Word do. The only macros available are `Auto_Open` and `Auto_Close`, and these only run automatically from an add-in. This short technical tip shows how to achieve that.
## **Update OLE Objects Automatically**
First, several freeware add-ins are available that add the Auto_Open macro feature to PowerPoint, for example [AutoEvents Add-in](http://skp.mvps.org/autoevents.htm) and [Event Generator](https://www.officeoneonline.com/eventgen/eventgen.html).
After installing one of these add-ins, simply add the `Auto_Open()` macro (or `OnPresentationOpen()` if you’re using Event Generator) to your template presentation as shown below:
```vbnet
Sub Auto_Open()
Dim oSlide As Slide
Dim oShape As Shape
Dim oObject As Object
' Loop through each slide in the presentation.
For Each oSlide In ActivePresentation.Slides
' Loop through all the shapes on the current slide.
For Each oShape In oSlide.Shapes
' Check whether the shape is an OLE object.
If oShape.Type = msoEmbeddedOLEObject Then
' Found an OLE object. Obtain its object reference and then update it.
Set oObject = oShape.OLEFormat.Object
oObject.Application.Update
' Now, quit out of the OLE server program.
' This frees memory, and prevents any problems.
' Also, set oObject to Nothing to release the object.
oObject.Application.Quit
Set oObject = Nothing
End If
Next oShape
Next oSlide
End Sub
```
Any changes made to OLE objects with Aspose.Slides for .NET will be automatically updated when PowerPoint opens the presentation. If you have many OLE objects and don’t want to update them all, simply add a custom tag to the shapes you need to process and check for it in the macro.
# Using Aspose.Slides on Azure
> Use Aspose.Slides on Azure App Service, Functions, and containers to generate, edit, and convert PPT, PPTX and ODP in scalable cloud .NET apps.
Source: https://docs.aspose.com/slides/net/using-aspose-slides-on-azure/
Updated: 2026-08-05
## **Introduction**
Aspose.Slides is a powerful library for managing PowerPoint presentations programmatically. When deployed on Microsoft Azure, it offers scalability, reliability, and seamless integration with various cloud services. This article explores the benefits of using Aspose.Slides on Azure, discusses integration possibilities, and provides guidance on setting up the environment.
## **Benefits**
Using Aspose.Slides on Azure provides several advantages, including:
- **Scalability**: Azure's infrastructure allows you to scale your applications dynamically.
- *Real-World Note:* For instance, you can automatically scale out multiple Azure Function instances when converting large batches of PowerPoint files to PDFs. By leveraging Azure’s dynamic scale, you can handle spikes in file uploads without manual intervention.
- **Reliability**: Microsoft ensures high availability and fault tolerance across its data centers.
- *Real-World Note:* In practical scenarios, if one region faces downtime or high latency, Azure’s failover capabilities ensure your PPT conversions continue in another region, maintaining uninterrupted service.
- **Security**: Azure provides built-in security features to protect your applications and data.
- *Real-World Note:* A typical approach is to store sensitive presentations in a secure Blob container, then integrate role-based access control (RBAC) so only authorized Azure Functions can access them for processing.
- **Seamless Integration**: Azure services like Azure Functions, Blob Storage, and App Services enhance Aspose.Slides’ capabilities.
- *Real-World Note & Code Example:* You might chain together a Logic App that triggers an Azure Function any time a PowerPoint file lands in Blob Storage. Below is a sample snippet showing how to handle concurrency by processing each uploaded file in parallel:
```cs
using Aspose.Slides;
using Aspose.Slides.Export;
[FunctionName("BulkConvertPptToPdf")]
public static async Task RunAsync(
[BlobTrigger("incoming-presentations/{name}", Connection = "AzureWebJobsStorage")] Stream inputFile,
string name,
[Blob("output-pdfs/{name}.pdf", FileAccess.Write, Connection = "AzureWebJobsStorage")] Stream outputFile,
ILogger log)
{
log.LogInformation($"Converting {name} to PDF in parallel...");
// Example concurrency handling:
// This could be part of a larger batch orchestrator that splits files or processes them in parallel.
using (var presentation = new Presentation(inputFile))
{
presentation.Save(outputFile, SaveFormat.Pdf);
}
log.LogInformation("Conversion completed successfully.");
}
```
- In a real-world pipeline, you can configure multiple triggers and parallel executions, ensuring that each presentation file is processed quickly—even when hundreds of uploads occur simultaneously.
## **Integration with Services**
Aspose.Slides can be integrated with various Azure services to optimize workflow automation and document processing. Some common integrations include:
- **Azure Blob Storage**: Store and retrieve presentation files efficiently.
*Real-World Note:* For nightly bulk conversions, you might upload dozens—or hundreds—of PPT files into a Blob container. Each file can then be processed automatically in a serverless pipeline.
- **Azure Functions**: Automate presentation generation and processing using serverless computing.
*Real-World Note:* For example, an Azure Function can trigger whenever a new PowerPoint file is detected in Blob Storage, instantly converting it to PDF or images without requiring a dedicated VM.
- **Azure App Services**: Deploy web applications that generate and manipulate presentations on the fly.
*Real-World Note:* Host a .NET web app that lets users upload PPT files, edit slide content, and then download a converted PDF—scaling automatically as traffic grows.
- **Azure Logic Apps**: Create automated workflows that handle PowerPoint files.
*Real-World Note:* You can chain actions (like sending email notifications or updating a database) after a successful conversion, making it easy to build end-to-end processes with little custom code.
## **Setting Up the Environment**
To start using Aspose.Slides on Azure, you need to set up the appropriate cloud services. While choosing between Azure offerings, consider the following:
- **Azure Functions** for serverless processing of presentations.
- **Azure Virtual Machines** for hosting applications requiring high customization.
- **Azure Kubernetes Service (AKS)** for containerized deployment of Aspose.Slides-based applications.
- **Azure App Services** for running web applications with built-in scaling features.
## **Common Use Cases**
Aspose.Slides on Azure enables various real-world applications, including:
- **Automated Report Generation**: Create PowerPoint reports dynamically from databases.
- **Online Presentation Editing**: Provide users with an interactive web-based tool for modifying slides.
- **Batch Processing**: Convert large numbers of presentations to different formats using Azure Functions.
- **Presentation Security**: Apply password protection and digital signatures to PowerPoint files.
## **Example: Automating PPT to PDF Conversions Using Azure Functions**
Below is an example of an Azure Function that processes a PowerPoint file stored in Azure Blob Storage and converts it to PDF using Aspose.Slides:
```cs
using System.Xml.Linq;
using Aspose.Slides;
using Aspose.Slides.Export;
using Microsoft.Azure.WebJobs;
using Microsoft.Extensions.Logging;
public static class ConvertPptToPdf
{
[FunctionName("ConvertPptToPdf")]
public static void Run(
[BlobTrigger("presentations/{name}", Connection = "AzureWebJobsStorage")] Stream inputBlob, string name,
[Blob("pdfs/{name}.pdf", FileAccess.Write, Connection = "AzureWebJobsStorage")] Stream outputBlob, ILogger log)
{
try
{
log.LogInformation($"Processing file: {name}");
using (var presentation = new Presentation(inputBlob))
{
presentation.Save(outputBlob, SaveFormat.Pdf);
}
log.LogInformation("Conversion successful.");
}
catch (Exception ex)
{
log.LogError($"Error processing file: {ex.Message}");
}
}
}
```
This function triggers when a PowerPoint file is uploaded to Azure Blob Storage and automatically converts it to a PDF, storing the output in another Blob container.
By leveraging Aspose.Slides on Azure, developers can build robust, scalable, and automated solutions for PowerPoint document processing.
## Related features
- [Use the Slides library in Azure Functions](https://docs.aspose.com/slides/features/azure-functions/)
# Manage Video Frames in Presentations in .NET
> Learn to programmatically add and extract video frames in PowerPoint and OpenDocument slides using Aspose.Slides for .NET. Fast how-to guide.
Source: https://docs.aspose.com/slides/net/video-frame/
Updated: 2026-11-07
## **Introduction**
Videos can help explain ideas and engage an audience. Aspose.Slides for .NET lets you add video frames to slides, adjust playback settings, manage captions, and extract embedded video data.
PowerPoint supports local videos and links to online videos, such as YouTube videos.
To represent video data and video frames, Aspose.Slides provides the [IVideo](https://reference.aspose.com/slides/net/aspose.slides/ivideo/) interface, [IVideoFrame](https://reference.aspose.com/slides/net/aspose.slides/ivideoframe/) interface, and other relevant types.
## **Create an Embedded Video Frame**
If the video file you want to add to your slide is stored locally, you can create a video frame to embed the video in your presentation.
This example embeds a local video on the first slide of an existing presentation and saves the result. Frame coordinates and dimensions are in points. The stream stays open until saving finishes because [LoadingStreamBehavior.KeepLocked](https://reference.aspose.com/slides/net/aspose.slides/loadingstreambehavior/) keeps it locked while the presentation uses it.
```csharp
using System.IO;
using Aspose.Slides;
using Aspose.Slides.Export;
using var presentation = new Presentation("presentation.pptx");
var slide = presentation.Slides[0];
using var videoStream = File.OpenRead("video.mp4");
var video = presentation.Videos.AddVideo(videoStream, LoadingStreamBehavior.KeepLocked);
slide.Shapes.AddVideoFrame(10, 10, 150, 250, video);
presentation.Save("embedded_video.pptx", SaveFormat.Pptx);
```
You can also pass a local video path directly to [AddVideoFrame](https://reference.aspose.com/slides/net/aspose.slides/ishapecollection/addvideoframe/). This example embeds the video on the first slide of a new presentation. The video must remain accessible until the presentation is saved.
```csharp
using Aspose.Slides;
using Aspose.Slides.Export;
using var presentation = new Presentation();
var slide = presentation.Slides[0];
slide.Shapes.AddVideoFrame(50, 150, 300, 150, "video.avi");
presentation.Save("video_from_path.pptx", SaveFormat.Pptx);
```
## **Set Video Volume Precisely**
In Aspose.Slides for .NET 26.11 or later, [IVideoFrame.VolumeValue](https://reference.aspose.com/slides/net/aspose.slides/ivideoframe/volumevalue/) sets a floating-point percentage from 0 to 100. Use it when the [Volume](https://reference.aspose.com/slides/net/aspose.slides/ivideoframe/volume/) presets are too coarse. For example, `75.5f` requests 75.5% volume.
This example requires [Aspose.Slides for .NET](https://docs.aspose.com/slides/net/installation/) 26.11 or later and a local `video.mp4`. It embeds the video, explicitly initializes playback, saves the presentation, and reads the stored percentage back.
```csharp
using System;
using System.IO;
using System.Linq;
using Aspose.Slides;
using Aspose.Slides.Export;
var volume = 75.5f;
if (float.IsNaN(volume) || float.IsInfinity(volume) || volume < 0 || volume > 100)
{
Console.WriteLine("Use a finite volume from 0 to 100.");
return;
}
using (var presentation = new Presentation())
{
var videoBytes = File.ReadAllBytes("video.mp4");
var video = presentation.Videos.AddVideo(videoBytes);
var frame = presentation.Slides[0].Shapes.AddVideoFrame(50, 50, 320, 180, video);
frame.PlayMode = VideoPlayModePreset.Auto;
frame.VolumeValue = volume;
presentation.Save("video-volume.pptx", SaveFormat.Pptx);
}
using var saved = new Presentation("video-volume.pptx");
var savedFrame = saved.Slides[0].Shapes.OfType().First();
Console.WriteLine(savedFrame.VolumeValue);
```
Validate input yourself; do not rely on the setter to reject values outside the documented range. The Low, Medium and Loud presets correspond to 20, 50 and 80 in 26.11. Setting a preset can replace an earlier percentage, so assign the percentage last when you need an exact value. Use [AudioVolumeMode.Mute](https://reference.aspose.com/slides/net/aspose.slides/audiovolumemode/) for the explicit mute setting; a numeric zero and the preset enum are not interchangeable states.
Explicitly set [PlayMode](https://reference.aspose.com/slides/net/aspose.slides/ivideoframe/playmode/) when configuring a linked video too, and keep its media file available to the viewer. Saving and reopening verifies the stored setting; actual playback and loudness depend on the presentation player and its audio settings.
## **Create a Video Frame with Video from a Web Source**
Microsoft [PowerPoint](https://support.microsoft.com/en-us/powerpoint/training/insert-a-video-from-youtube-or-another-site) supports online videos in presentations. You can create a video frame that links to an online video, such as a YouTube video.
This example adds a YouTube video link and thumbnail to the first slide. Replace the video identifier to use another video. The [PlayMode](https://reference.aspose.com/slides/net/aspose.slides/ivideoframe/playmode/) setting requests automatic playback. Downloading the thumbnail and playing the video require internet access. The presentation viewer must also support online video playback.
```csharp
using System.Net.Http;
using Aspose.Slides;
using Aspose.Slides.Export;
using var presentation = new Presentation();
var slide = presentation.Slides[0];
using var httpClient = new HttpClient();
var videoId = "aqz-KE-bpKQ";
var videoUrl = $"https://www.youtube.com/embed/{videoId}";
var videoFrame = slide.Shapes.AddVideoFrame(10, 10, 427, 240, videoUrl);
videoFrame.PlayMode = VideoPlayModePreset.Auto;
var thumbnailUrl = $"https://img.youtube.com/vi/{videoId}/hqdefault.jpg";
var thumbnailData = httpClient.GetByteArrayAsync(thumbnailUrl).GetAwaiter().GetResult();
var thumbnail = presentation.Images.AddImage(thumbnailData);
videoFrame.PictureFormat.Picture.Image = thumbnail;
presentation.Save("online_video.pptx", SaveFormat.Pptx);
```
## **Play a Video in Full-Screen Mode**
In a training presentation, you can play a software demonstration in full-screen mode so the audience can see the details. Set [FullScreenMode](https://reference.aspose.com/slides/net/aspose.slides/videoframe/fullscreenmode/) to `true` to enable this behavior during playback.
This example opens a presentation, finds the first [IVideoFrame](https://reference.aspose.com/slides/net/aspose.slides/ivideoframe/) on the first slide, and enables full-screen playback. The input presentation must contain at least one slide with an existing video frame on the first slide.
```csharp
using Aspose.Slides;
using Aspose.Slides.Export;
using var presentation = new Presentation("training.pptx");
var slide = presentation.Slides[0];
foreach (var shape in slide.Shapes)
{
if (shape is IVideoFrame videoFrame)
{
videoFrame.FullScreenMode = true;
break;
}
}
presentation.Save("full_screen_video.pptx", SaveFormat.Pptx);
```
Full-screen playback controls how the video is displayed. Independently, [PlayMode](https://reference.aspose.com/slides/net/aspose.slides/videoframe/playmode/) controls whether it starts automatically or on click, and [PlayLoopMode](https://reference.aspose.com/slides/net/aspose.slides/videoframe/playloopmode/) controls whether it repeats. To choose the start behavior, set the playback mode to [VideoPlayModePreset.Auto or VideoPlayModePreset.OnClick](https://reference.aspose.com/slides/net/aspose.slides/videoplaymodepreset/). The example preserves the existing start and loop settings.
## **Rewind a Video After Playback**
In a training presentation, returning a demonstration video to its beginning makes it ready for the presenter to play again. Set [RewindVideo](https://reference.aspose.com/slides/net/aspose.slides/videoframe/rewindvideo/) to `true` to return the video to the beginning after playback finishes.
This example opens a presentation, finds the first [IVideoFrame](https://reference.aspose.com/slides/net/aspose.slides/ivideoframe/) on the first slide, and enables rewinding. It disables looping so playback can finish and sets playback to start on click. The input presentation must contain at least one slide with an existing video frame on the first slide.
```csharp
using Aspose.Slides;
using Aspose.Slides.Export;
using var presentation = new Presentation("training.pptx");
var slide = presentation.Slides[0];
foreach (var shape in slide.Shapes)
{
if (shape is IVideoFrame videoFrame)
{
videoFrame.RewindVideo = true;
videoFrame.PlayLoopMode = false;
videoFrame.PlayMode = VideoPlayModePreset.OnClick;
break;
}
}
presentation.Save("rewind_video.pptx", SaveFormat.Pptx);
```
Rewinding returns the video to its beginning without starting it again. In contrast, enabling [PlayLoopMode](https://reference.aspose.com/slides/net/aspose.slides/videoframe/playloopmode/) repeats playback automatically. Keep looping disabled when you want the video to finish and remain ready to replay. [PlayMode](https://reference.aspose.com/slides/net/aspose.slides/videoframe/playmode/) independently controls automatic or on-click startup; this example uses [VideoPlayModePreset.OnClick](https://reference.aspose.com/slides/net/aspose.slides/videoplaymodepreset/) so the presenter controls when playback starts. Set the playback mode after the loop setting, as shown in the example. Rewinding works independently of [FullScreenMode](https://reference.aspose.com/slides/net/aspose.slides/videoframe/fullscreenmode/).
## **Trim a Video Frame**
Use [IVideoFrame.TrimFromStart](https://reference.aspose.com/slides/net/aspose.slides/ivideoframe/trimfromstart/) and [IVideoFrame.TrimFromEnd](https://reference.aspose.com/slides/net/aspose.slides/ivideoframe/trimfromend/) to skip part of the beginning or end of a video during playback. Both values are in milliseconds. Trimming changes playback settings without modifying the embedded video data.
**Set Trim Settings**
This example embeds a local video and skips the first 2.5 seconds and the last second during playback. Use a video longer than 3.5 seconds so a playable segment remains.
```csharp
using System.IO;
using Aspose.Slides;
using Aspose.Slides.Export;
using var presentation = new Presentation();
var slide = presentation.Slides[0];
var videoData = File.ReadAllBytes("video.mp4");
var video = presentation.Videos.AddVideo(videoData);
var videoFrame = slide.Shapes.AddVideoFrame(50, 50, 640, 360, video);
videoFrame.TrimFromStart = 2500f;
videoFrame.TrimFromEnd = 1000f;
presentation.Save("video_with_trim.pptx", SaveFormat.Pptx);
```
**Read Trim Settings**
This example prints the trim values of the first video frame on the first slide in milliseconds. The presentation must contain at least one slide. If that slide has no video frame, nothing is printed. The preceding example produces values of 2500 and 1000.
```csharp
using System;
using Aspose.Slides;
using var presentation = new Presentation("video_with_trim.pptx");
var slide = presentation.Slides[0];
foreach (var shape in slide.Shapes)
{
if (shape is IVideoFrame videoFrame)
{
Console.WriteLine($"Trim from start: {videoFrame.TrimFromStart} ms");
Console.WriteLine($"Trim from end: {videoFrame.TrimFromEnd} ms");
break;
}
}
```
## **Manage Video Captions**
Aspose.Slides allows you to manage closed captions for video frames in PowerPoint presentations. Captions are stored in WebVTT format and are exposed through the [IVideoFrame.CaptionTracks](https://reference.aspose.com/slides/net/aspose.slides/ivideoframe/captiontracks/) property.
**Add Captions to a Video Frame**
This example embeds a local video and adds a WebVTT caption track labeled English. The caption timestamps should match the video. The saved presentation includes both the video and its captions.
```csharp
using System.IO;
using Aspose.Slides;
using Aspose.Slides.Export;
using var presentation = new Presentation();
var slide = presentation.Slides[0];
var videoData = File.ReadAllBytes("video.mp4");
var video = presentation.Videos.AddVideo(videoData);
var videoFrame = slide.Shapes.AddVideoFrame(0, 0, 100, 100, video);
videoFrame.CaptionTracks.Add("English", "track.vtt");
presentation.Save("video_with_captions.pptx", SaveFormat.Pptx);
```
The [ICaptionsCollection](https://reference.aspose.com/slides/net/aspose.slides/icaptionscollection/) interface also provides an overload that lets you add captions from a stream.
**Extract Captions from a Video Frame**
This example saves all caption tracks from video frames on the first slide as separate WebVTT files. Sequential numbers keep the output files distinct. The console reports the number of extracted tracks. The presentation must contain at least one slide.
```csharp
using System;
using System.IO;
using Aspose.Slides;
using var presentation = new Presentation("video_with_captions.pptx");
var slide = presentation.Slides[0];
var trackCount = 0;
foreach (var shape in slide.Shapes)
{
if (shape is IVideoFrame videoFrame)
{
foreach (var captionTrack in videoFrame.CaptionTracks)
{
trackCount++;
var outputPath = $"captions_{trackCount}.vtt";
File.WriteAllBytes(outputPath, captionTrack.BinaryData);
}
}
}
Console.WriteLine($"Caption tracks extracted: {trackCount}");
```
Each [ICaptions](https://reference.aspose.com/slides/net/aspose.slides/icaptions/) object exposes the caption identifier, label, binary data, and caption text as a UTF-8 string.
**Remove Captions from a Video Frame**
This example removes all captions from the video frame at the first shape position on the first slide and saves the result. It assumes that the slide and shape exist and that the shape is a video frame.
```csharp
using System;
using Aspose.Slides;
using Aspose.Slides.Export;
using var presentation = new Presentation("video_with_captions.pptx");
var slide = presentation.Slides[0];
var videoFrame = (IVideoFrame) slide.Shapes[0];
videoFrame.CaptionTracks.Clear();
presentation.Save("video_without_captions.pptx", SaveFormat.Pptx);
```
If you need to remove only one caption track, use the [Remove](https://reference.aspose.com/slides/net/aspose.slides/captionscollection/remove/) or [RemoveAt](https://reference.aspose.com/slides/net/aspose.slides/captionscollection/removeat/) methods instead of [Clear](https://reference.aspose.com/slides/net/aspose.slides/captionscollection/clear/).
## **Extract Video from a Slide**
Besides adding videos to slides, Aspose.Slides allows you to extract videos embedded in presentations.
This example extracts embedded videos from every slide into separate, numbered binary files. Linked videos are skipped because they have no embedded data. The console prints each video’s MIME type and the total count. Output uses the generic `.bin` extension; change it to match the reported media type when needed.
```csharp
using System;
using System.IO;
using Aspose.Slides;
using var presentation = new Presentation("presentation_with_videos.pptx");
var videoCount = 0;
foreach (var slide in presentation.Slides)
{
foreach (var shape in slide.Shapes)
{
if (shape is IVideoFrame videoFrame)
{
var video = videoFrame.EmbeddedVideo;
if (video == null)
{
Console.WriteLine("Skipped a linked video: no embedded data is available.");
continue;
}
videoCount++;
var outputPath = $"extracted_video_{videoCount}.bin";
File.WriteAllBytes(outputPath, video.BinaryData);
Console.WriteLine($"Video {videoCount}: {video.ContentType}");
}
}
}
Console.WriteLine($"Embedded videos extracted: {videoCount}");
```
## **FAQ**
**Which video playback parameters can be changed for a video frame?**
You can control the [playback mode](https://reference.aspose.com/slides/net/aspose.slides/videoframe/playmode/) (auto or on click) and [looping](https://reference.aspose.com/slides/net/aspose.slides/videoframe/playloopmode/). These options are available via the [VideoFrame](https://reference.aspose.com/slides/net/aspose.slides/videoframe/) object's properties.
**Does adding a video affect the PPTX file size?**
Yes. When you embed a local video, the binary data is included in the document, so the presentation size grows in proportion to the file size. When you link to an online video and add a thumbnail, the presentation stores the link and preview image rather than the video data, so the size increase is usually smaller.
**Can I replace the video in an existing video frame without changing its position and size?**
Yes. You can swap the [video content](https://reference.aspose.com/slides/net/aspose.slides/videoframe/embeddedvideo/) within the frame while preserving the shape's geometry; this is a common scenario for updating media in an existing layout.
**Can the content type (MIME) of an embedded video be determined?**
Yes. An embedded video has a [content type](https://reference.aspose.com/slides/net/aspose.slides/video/contenttype/) that you can read and use, for example when saving it to disk.
## Related features
- [Embed videos in slides](https://docs.aspose.com/slides/features/embedded-video/)
- [Link to external videos](https://docs.aspose.com/slides/features/linked-video/)
## Related articles
- [Manage Audio Frames in Presentations in .NET](https://docs.aspose.com/slides/net/audio-frame/)
- [Video](https://docs.aspose.com/slides/net/examples/elements/video/)
# Add Watermarks to Presentations in .NET
> Manage text and image watermarks in PowerPoint and OpenDocument presentations in .NET to indicate a draft, confidential information, copyright, and more.
Source: https://docs.aspose.com/slides/net/watermark/
Updated: 2026-08-13
## **Introduction**
**A watermark** in a presentation is a text or image stamp used on a slide or throughout all presentation slides. Usually, a watermark is used to indicate that the presentation is a draft (e.g., a "Draft" watermark), that it contains confidential information (e.g., a "Confidential" watermark), to specify which company it belongs to (e.g., a "Company Name" watermark), to identify the presentation author, etc. A watermark helps to prevent copyright violations by indicating that the presentation should not be copied. Watermarks are used in both PowerPoint and OpenDocument presentation formats. In Aspose.Slides, you can add a watermark to PowerPoint PPT, PPTX, and OpenDocument ODP file formats.
In [**Aspose.Slides**](https://products.aspose.com/slides/net/), there are various ways you can create watermarks in PowerPoint or OpenDocument documents and modify their design and behavior. The common aspect is that to add text watermarks, you should use the [ITextFrame](https://reference.aspose.com/slides/net/aspose.slides/itextframe/) interface, and to add image watermarks, use the [PictureFrame](https://reference.aspose.com/slides/net/aspose.slides/pictureframe/) class or fill a watermark shape with an image. `PictureFrame` implements the [IShape](https://reference.aspose.com/slides/net/aspose.slides/ishape) interface, allowing you to use all the flexible settings of the shape object. Since `ITextFrame` is not a shape and its settings are limited, it is wrapped into an [IShape](https://reference.aspose.com/slides/net/aspose.slides/ishape) object.
There are two ways a watermark can be applied: to a single slide or to all presentation slides. The Slide Master is used to apply a watermark to all presentation slides — the watermark is added to the Slide Master, fully designed there, and applied to all slides without affecting the permission to modify the watermark on individual slides.
A watermark is usually considered to be unavailable for editing by other users. To prevent the watermark (or rather the watermark's parent shape) from being edited, Aspose.Slides provides shape locking functionality. A specific shape can be locked on a normal slide or on a Slide Master. When the watermark shape is locked on the Slide Master, it will be locked on all presentation slides.
You can set a name for the watermark so that in the future, if you want to delete it, you can find it in the slide's shapes by name.
You can design the watermark in any way; however, there are usually common features in watermarks, such as center alignment, rotation, front position, etc. We will consider how to use these in the examples below.
## **Text Watermark**
### **Add a Text Watermark to a Slide**
To add a text watermark in PPT, PPTX, or ODP, you can first add a shape to the slide, then add a text frame to this shape. The text frame is represented by the [ITextFrame](https://reference.aspose.com/slides/net/aspose.slides/itextframe) interface. This type is not inherited from [IShape](https://reference.aspose.com/slides/net/aspose.slides/ishape/), which has a wide set of properties for positioning the watermark in a flexible way. Therefore, the [ITextFrame](https://reference.aspose.com/slides/net/aspose.slides/itextframe) object is wrapped in an [IAutoShape](https://reference.aspose.com/slides/net/aspose.slides/iautoshape/) object. To add watermark text to the shape, use the [AddTextFrame](https://reference.aspose.com/slides/net/aspose.slides/iautoshape/methods/addtextframe) method as shown below.
```cs
using Aspose.Slides;
string watermarkText = "CONFIDENTIAL";
using Presentation presentation = new Presentation();
ISlide slide = presentation.Slides[0];
// Add the watermark to the slide.
IAutoShape watermarkShape = slide.Shapes.AddAutoShape(ShapeType.Rectangle, 100, 100, 400, 40);
ITextFrame watermarkFrame = watermarkShape.AddTextFrame(watermarkText);
```
- [How to Use the TextFrame Class?](https://docs.aspose.com/slides/net/text-formatting/)
### **Add a Text Watermark to a Presentation**
If you want to add a text watermark to the entire presentation (i.e., all slides at once), add it to the [MasterSlide](https://reference.aspose.com/slides/net/aspose.slides/masterslide/). The rest of the logic is the same as when adding a watermark to a single slide — create an [IAutoShape](https://reference.aspose.com/slides/net/aspose.slides/iautoshape/) object and then add the watermark to it using the [AddTextFrame](https://reference.aspose.com/slides/net/aspose.slides/iautoshape/methods/addtextframe) method.
```cs
using Aspose.Slides;
string watermarkText = "CONFIDENTIAL";
using Presentation presentation = new Presentation();
IMasterSlide masterSlide = presentation.Masters[0];
// Add the watermark to the master slide.
IAutoShape watermarkShape = masterSlide.Shapes.AddAutoShape(ShapeType.Rectangle, 100, 100, 400, 40);
ITextFrame watermarkFrame = watermarkShape.AddTextFrame(watermarkText);
```
- [How to Use the Slide Master?](https://docs.aspose.com/slides/net/slide-master/)
### **Set Watermark Shape Transparency**
By default, the rectangle shape is styled with fill and line colors. This means that when the watermark is added, it may appear with a solid background or border that can potentially distract from the slide's content. To ensure that the watermark remains subtle and does not interfere with the presentation's visual design, you can make the shape completely transparent.
The following lines of code make the shape transparent by removing both its fill and border colors:
```cs
using Aspose.Slides;
using Presentation presentation = new Presentation();
ISlide slide = presentation.Slides[0];
IAutoShape watermarkShape = slide.Shapes.AddAutoShape(ShapeType.Rectangle, 100, 100, 400, 40);
watermarkShape.FillFormat.FillType = FillType.NoFill;
watermarkShape.LineFormat.FillFormat.FillType = FillType.NoFill;
```
### **Set the Font for a Text Watermark**
Before applying the text watermark to your slide, it's important to customize its appearance so that it harmonizes with the overall design. You can change the font type and size to ensure that the watermark is both legible and aesthetically pleasing. Customizing the font can also help in reinforcing brand identity or simply matching the presentation style.
The code snippet below demonstrates how to adjust the watermark's font settings by selecting a specific Latin font and setting an appropriate font height:
```cs
using Aspose.Slides;
using Presentation presentation = new Presentation();
ISlide slide = presentation.Slides[0];
IAutoShape watermarkShape = slide.Shapes.AddAutoShape(ShapeType.Rectangle, 100, 100, 400, 40);
ITextFrame watermarkFrame = watermarkShape.AddTextFrame("CONFIDENTIAL");
IPortionFormat textFormat = watermarkFrame.Paragraphs[0].ParagraphFormat.DefaultPortionFormat;
textFormat.LatinFont = new FontData("Arial");
textFormat.FontHeight = 50;
```
### **Set the Watermark Text Color**
Before applying your watermark, it's essential to ensure that the text color is set appropriately so that it blends well with your slide content without overwhelming it. Adjusting the color transparency (alpha) along with the red, green, and blue components allows you to create a subtle, semi-transparent watermark that is visible yet unobtrusive. This approach helps maintain focus on your main presentation while still protecting your content.
To set the color of the watermark text, use the following code:
```cs
using System.Drawing;
using Aspose.Slides;
using Presentation presentation = new Presentation();
ISlide slide = presentation.Slides[0];
IAutoShape watermarkShape = slide.Shapes.AddAutoShape(ShapeType.Rectangle, 100, 100, 400, 40);
ITextFrame watermarkFrame = watermarkShape.AddTextFrame("CONFIDENTIAL");
int alpha = 150, red = 200, green = 200, blue = 200;
IFillFormat fillFormat = watermarkFrame.Paragraphs[0].ParagraphFormat.DefaultPortionFormat.FillFormat;
fillFormat.FillType = FillType.Solid;
fillFormat.SolidFillColor.Color = Color.FromArgb(alpha, red, green, blue);
```
### **Center a Text Watermark**
Properly centering your text watermark can significantly enhance the overall aesthetics of your presentation by ensuring that the watermark is symmetrically positioned, regardless of the slide dimensions. This approach not only gives your slides a professional look but also ensures that the watermark does not interfere with the main content of the slide.
The code snippet below demonstrates how to calculate the center position of a slide and place the text watermark accordingly:
```cs
using System.Drawing;
using Aspose.Slides;
string watermarkText = "CONFIDENTIAL";
using Presentation presentation = new Presentation();
ISlide slide = presentation.Slides[0];
SizeF slideSize = presentation.SlideSize.Size;
float watermarkWidth = 400;
float watermarkHeight = 40;
float watermarkX = (slideSize.Width - watermarkWidth) / 2;
float watermarkY = (slideSize.Height - watermarkHeight) / 2;
IAutoShape watermarkShape = slide.Shapes.AddAutoShape(
ShapeType.Rectangle, watermarkX, watermarkY, watermarkWidth, watermarkHeight);
ITextFrame watermarkFrame = watermarkShape.AddTextFrame(watermarkText);
```
The image below shows the final result.
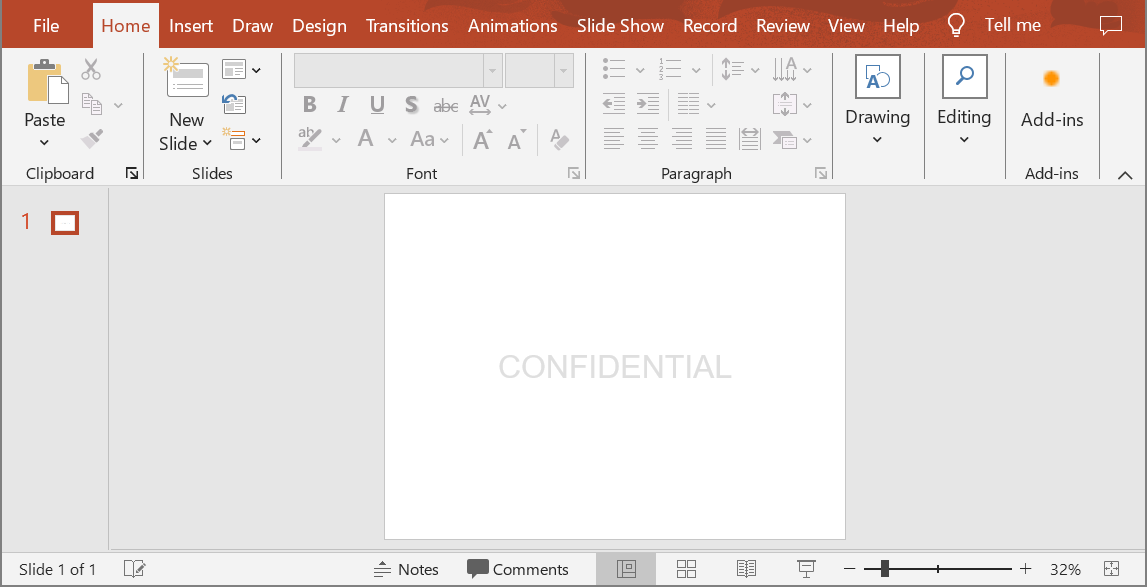
## **Image Watermark**
### **Add an Image Watermark to a Presentation**
In many cases, an image watermark can provide a unique branding element or a more visually appealing alternative to a text watermark. Before adding the watermark, make sure that the image file is readily available (e.g., PNG for transparency). The following example demonstrates how to load an image from your file system, add it to the presentation, and then apply it as a watermark using the shape's fill properties.
```cs
using Aspose.Slides;
using Presentation presentation = new Presentation();
ISlide slide = presentation.Slides[0];
IAutoShape watermarkShape = slide.Shapes.AddAutoShape(ShapeType.Rectangle, 100, 100, 400, 40);
using FileStream imageStream = File.OpenRead("watermark.png");
IPPImage image = presentation.Images.AddImage(imageStream);
watermarkShape.FillFormat.FillType = FillType.Picture;
watermarkShape.FillFormat.PictureFillFormat.Picture.Image = image;
watermarkShape.FillFormat.PictureFillFormat.PictureFillMode = PictureFillMode.Stretch;
```
## **Lock a Watermark from Editing**
If it is necessary to prevent a watermark from being edited, use the [IAutoShape.ShapeLock](https://reference.aspose.com/slides/net/aspose.slides/iautoshape/properties/shapelock) property on the shape. With this property, you can protect the shape from being selected, resized, repositioned, grouped with other elements, lock its text from editing, and much more:
```cs
using Aspose.Slides;
using Presentation presentation = new Presentation();
ISlide slide = presentation.Slides[0];
IAutoShape watermarkShape = slide.Shapes.AddAutoShape(ShapeType.Rectangle, 100, 100, 400, 40);
// Lock the watermark shape from modifying.
watermarkShape.ShapeLock.SelectLocked = true;
watermarkShape.ShapeLock.SizeLocked = true;
watermarkShape.ShapeLock.TextLocked = true;
watermarkShape.ShapeLock.PositionLocked = true;
watermarkShape.ShapeLock.GroupingLocked = true;
```
## **Bring a Watermark to Front**
In Aspose.Slides, the Z-order of shapes can be set via the [IShapeCollection.Reorder](https://reference.aspose.com/slides/net/aspose.slides/ishapecollection/reorder/#reorder) method. To do this, you need to call this method from the presentation slides list and pass the shape reference and its order number into the method. This way, it is possible to bring a shape to the front or send it to the back of the slide. This feature is especially useful if you need to place a watermark in front of the presentation:
```cs
using Aspose.Slides;
using Presentation presentation = new Presentation();
ISlide slide = presentation.Slides[0];
IAutoShape watermarkShape = slide.Shapes.AddAutoShape(ShapeType.Rectangle, 100, 100, 400, 40);
int shapeCount = slide.Shapes.Count;
slide.Shapes.Reorder(shapeCount - 1, watermarkShape);
```
## **Set Watermark Rotation**
Adjusting the rotation of your watermark can significantly enhance the visual impact and subtlety of your presentation. A diagonal watermark, for example, can be less intrusive while still providing robust protection against unauthorized use. The following example calculates the appropriate angle based on the slide's dimensions so that the watermark is positioned diagonally across the slide. This dynamic calculation ensures the watermark remains effective regardless of varying slide sizes.
```cs
using System.Drawing;
using Aspose.Slides;
using Presentation presentation = new Presentation();
ISlide slide = presentation.Slides[0];
IAutoShape watermarkShape = slide.Shapes.AddAutoShape(ShapeType.Rectangle, 100, 100, 400, 40);
SizeF slideSize = presentation.SlideSize.Size;
double diagonalAngle = Math.Atan((slideSize.Height / slideSize.Width)) * 180 / Math.PI;
watermarkShape.Rotation = (float)diagonalAngle;
```
## **Set a Name for a Watermark**
Aspose.Slides allows you to set the name of a shape. By using the shape name, you can access it in the future to modify or delete it. To set the name of the watermark shape, assign it to the [IAutoShape.Name](https://reference.aspose.com/slides/net/aspose.slides/ishape/properties/name) property:
```cs
using Aspose.Slides;
using Presentation presentation = new Presentation();
ISlide slide = presentation.Slides[0];
IAutoShape watermarkShape = slide.Shapes.AddAutoShape(ShapeType.Rectangle, 100, 100, 400, 40);
watermarkShape.Name = "watermark";
```
## **Remove a Watermark**
To remove the watermark shape, use the [IAutoShape.Name](https://reference.aspose.com/slides/net/aspose.slides/ishape/properties/name) property to find it in the slide shapes. Then, pass the watermark shape into the [IShapeCollection.Remove](https://reference.aspose.com/slides/net/aspose.slides/ishapecollection/remove/) method:
```cs
using Aspose.Slides;
using Presentation presentation = new Presentation();
ISlide slide = presentation.Slides[0];
List slideShapes = slide.Shapes.ToList();
foreach (IShape shape in slideShapes)
{
if (string.Compare(shape.Name, "watermark", StringComparison.Ordinal) == 0)
{
slide.Shapes.Remove(shape);
}
}
```
## **A Live Example**
You may want to check out the **Aspose.Slides free** [Add Watermark](https://products.aspose.app/slides/watermark) and [Remove Watermark](https://products.aspose.app/slides/watermark/remove-watermark) online tools.
## **FAQ**
### What is a watermark and why should I use it?
A watermark is a text or image overlay applied to slides that helps protect intellectual property, enhance brand recognition, or prevent unauthorized use of presentations.
### Can I add a watermark to all slides in a presentation?
Yes, Aspose.Slides allows you to programmatically add a watermark to every slide in a presentation. You can iterate through all the slides and apply the watermark settings individually.
### How can I adjust the transparency of the watermark?
You can adjust the transparency of the watermark by modifying the fill settings ([FillFormat](https://reference.aspose.com/slides/net/aspose.slides/shape/fillformat/)) of the shape. This ensures that the watermark is subtle and does not distract from the slide content.
### What image formats are supported for watermarks?
Aspose.Slides supports various image formats such as PNG, JPEG, GIF, BMP, SVG, and more.
### Can I customize the font and style of a text watermark?
Yes, you can choose any font, size, and style to match the design of your presentation and maintain brand consistency.
### How do I change the position or orientation of a watermark?
You can adjust the position and orientation of the watermark programmatically by modifying the shape's coordinates, size, and rotation properties.
## Related features
- [Add watermarks with text and images](https://docs.aspose.com/slides/features/watermarks/)
# New HTML Export System - Aspose.Slides.WebExtensions
> Export presentations to HTML with templates, CSS and JS—no SVG. Learn single or multi-page output, resource control, and customization for PPT, PPTX and ODP.
Source: https://docs.aspose.com/slides/net/web-extensions/
Updated: 2026-08-05
## **Introduction**
* In old Aspose.Slides API builds, when you export PowerPoint to HTML, the resulting HTML got represented as an SVG markup combined with HTML. Each slide got exported as an SVG container.
* In new Aspose.Slides versions, when you use the WebExtensions system for exporting PowerPoint presentations to HTML, you get to customize the HTML export settings to deliver the best results.
Using the new WebExtensions system, you can export an entire presentation into HTML with a set of CSS classes and JavaScript animations (without SVG). The new export system also provides an unlimited number of options and methods that define the export process.
The new WebExtensions system is used to generate HTML from presentations in these cases and events:
* when using custom CSS styles or animations; overriding the markup for certain types of shapes.
* when overriding the document structure, e.g., using custom navigation between pages.
* when saving .html, .css, .js files into folders with customized hierarchy, including specific file types in different folders. For example, exporting slides to a folder based on the section name.
* when saving CSS and JS files into separate folders by default and then adding them to an HTML file. Images and embedded fonts are also saved into separate files. However, they can be embedded in an HTML file (in base64 format). You can save some parts of the resources to the files and embed other resources into HTML as base64.
Your can go through PowerPoint to HTML examples in the [Aspose.Slides.WebExtensions project](https://github.com/aspose-slides/Aspose.Slides.WebExtensions/) on GitHub. This project contains 2 parts: **Examples\SinglePageApp** and **Examples\MultiPageApp**. The other examples used in this article can also be found in the GitHub repo.
### **Templates**
To further extend the capabilities of HTML export, we recommend you use the ASP.NET Razor template system. The [Presentation](https://reference.aspose.com/slides/net/aspose.slides/presentation) class instance can be used alongside a set of templates to get an HTML document as the export result.
**Demonstration**
In this example, we will export text from a presentation to HTML. First, let's create the template:
``` html
@foreach (Slide slide in Model.Object.Slides)
{
foreach (Shape shape in slide.Shapes)
{
if(shape is AutoShape)
{
ITextFrame textFrame = ((AutoShape)shape).TextFrame;
@textFrame.Text
}
}
}
|  Aspose.Slides for .NET is a class library for creating, reading, editing and converting PowerPoint and OpenDocument presentations in .NET applications, without Microsoft PowerPoint or Office Automation.
It loads and saves PPT, PPTX, PPS, POT and ODP, including macro-enabled and template variants, and exports to PDF, XPS, HTML, SVG, TIFF, Markdown and images.