在 .Net6 中运行 Aspose.Cells
概述
对于 .NET6(或更高版本)平台,与之前的平台(.netcore31 或更早版本)相比,一个重要的区别是关于图形库。 在这份官方微软文档中,它解释了对于 .NET6 或更高版本,图形库“System.Drawing.Common”将仅在 Windows 上受支持,并就替换图形库提出建议。
对于Apose.Cells产品,我们已经进行了评估并已完成了图形库的迁移。在非Windows系统中,我们使用SkiaSharp代替System.Drawing.Common,这是在微软官方文档中建议的。请注意,这个重要的更改将在Aspose.Cells 22.10.1或更高版本的.Net6中生效。
对于.netcore31或之前版本,为了兼容性和稳定性,我们目前仍然使用"System.Drawing.Common"图形库。.netcore31或之前版本的依赖项如下:
- System.Drawing.Common, 4.7.0.
- System.Security.Cryptography.Pkcs, 5.0.1.
- System.Text.Encoding.CodePages, 4.7.0.
在Windows上运行Aspose.Cells for .Net6
首先,您可以使用VS2022创建一个.net6应用程序,然后您可以选择以下安装选项:
通过NuGet安装
-
从 NuGet 搜索 Aspose.Cells: Aspose.Cells for .NET NuGet软件包. 您还可以通过VS2022的NuGet包管理器安装Aspose.Cells。
-
“SkiaSharp"或"System.Drawing.Common"将自动安装为Aspose.Cells 22.10.1或以后的依赖项,这取决于您项目中的"目标OS"配置。
- 将项目的"目标OS"设置为"Windows”,您将在.Net6项目的Windows系统中使用"System.Drawing.Common"作为依赖项。在此配置中,绘图的结果更接近.netcore31或之前版本。
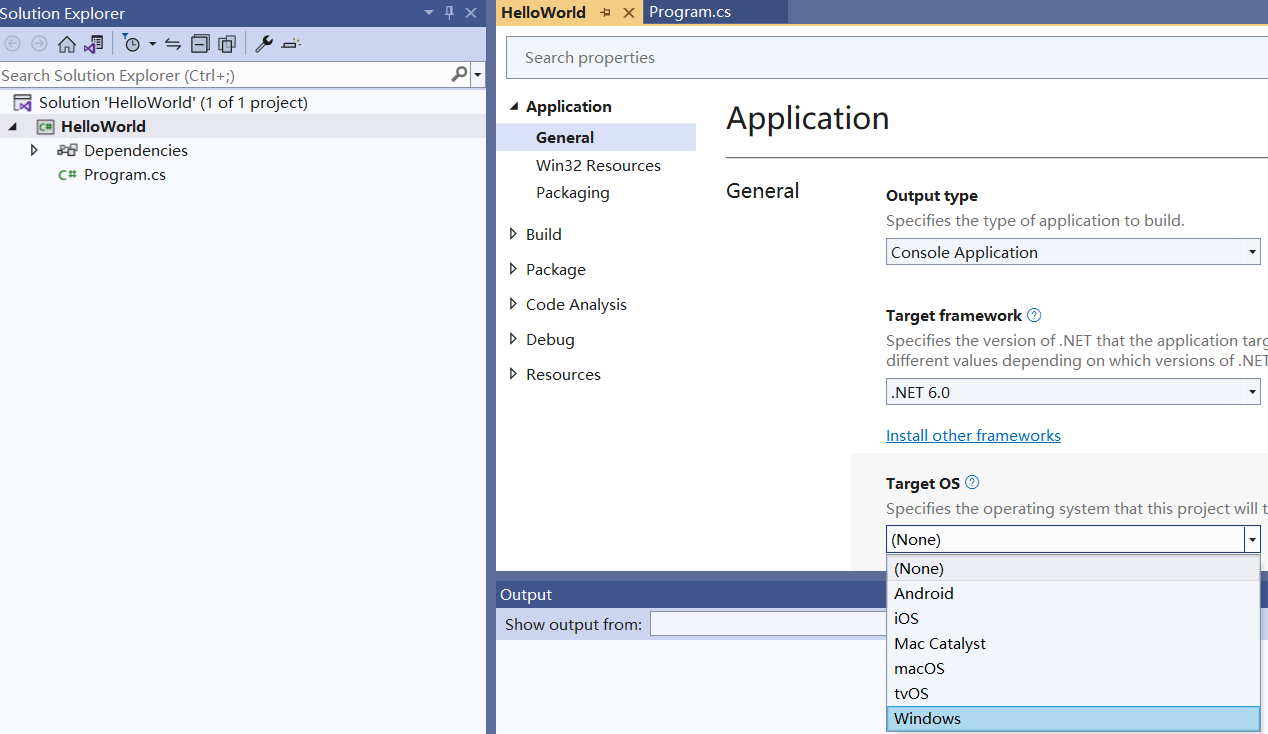
- 将项目的"目标OS"设置为"None"或其他选项,您将在.Net6项目的Windows系统中使用"SkiaSharp"作为依赖项。请注意,使用"SkiaSharp"作为依赖项的版本不支持打印到打印机功能。
通过msi或DLL安装
-
打开安装目录或DLL目录,然后选择以下步骤3或4:
-
找到"net6.0-windows"子目录,在其中添加Aspose.Cells.dll到您的.net6应用程序。手动将以下NuGet包添加到您的.net6项目:
- System.Drawing.Common, 4.7.0.
- System.Security.Cryptography.Pkcs, 6.0.3.
- System.Text.Encoding.CodePages, 4.7.0.
通过这种方式,在您的Windows系统上的.Net6项目中将使用"System.Drawing.Common"作为依赖项。在此配置中,绘图的结果更接近.netcore31或之前版本。
- 找到"net6.0"子目录,在其中添加Aspose.Cells.dll到您的.net6应用程序。手动将以下NuGet包添加到您的.net6项目:
- SkiaSharp, 2.88.6.
- System.Security.Cryptography.Pkcs, 6.0.3.
- System.Text.Encoding.CodePages, 4.7.0.
通过这种方式,在您的Windows系统上的.Net6项目中将使用"SkiaSharp"作为依赖项。请注意,使用"SkiaSharp"作为依赖项的版本不支持打印到打印机功能。
在Linux上运行Aspose.Cells for .Net6
参考在Windows上的安装方法,您只能在Linux系统上选择SkiaSharp作为图形库依赖项。
您需要执行以下附加操作以确保在Linux下正确使用SkiaSharp:
- 在您的Linux系统中运行以下命令:
apt-get update && apt-get install -y libfontconfig1
或者
apk update && apk add fontconfig
-
将NuGet软件包"SkiaSharp.NativeAssets.Linux 2.88.6"添加到您的.net6项目中。
-
或者您可以选择将NuGet软件包"SkiaSharp.NativeAssets.Linux.NoDependencies 2.88.6"添加到您的.net6项目中,而不是上面的两个步骤。
Ubuntu的Dockerfile示例
-
将NuGet软件包"SkiaSharp.NativeAssets.Linux 2.88.6"添加到您的.net6项目中。
-
使用以下Dockerfile:
# Ubuntu 20.04
FROM mcr.microsoft.com/dotnet/runtime:6.0-focal AS base
WORKDIR /app

# add "libfontconfig1" package if using "SkiaSharp.NativeAssets.Linux" in your project
# Or you need to use "SkiaSharp.NativeAssets.Linux.NoDependencies" in your project
RUN apt-get update && apt-get install -y libfontconfig1

# Copy fonts from local to docker
# For example, put a "fonts" folder in your project folder, and put the font files in it,
# then, use the following line:
COPY fonts/ /usr/share/fonts

FROM mcr.microsoft.com/dotnet/sdk:6.0-focal AS build
WORKDIR /src
COPY ["Ubuntu_Docker.csproj", "."]
RUN dotnet restore "./Ubuntu_Docker.csproj"
COPY . .
WORKDIR "/src/."
RUN dotnet build "Ubuntu_Docker.csproj" -c Release -o /app/build

FROM build AS publish
RUN dotnet publish "Ubuntu_Docker.csproj" -c Release -o /app/publish

FROM base AS final
WORKDIR /app
COPY --from=publish /app/publish .
ENTRYPOINT ["dotnet", "Ubuntu_Docker.dll"]
Alpine的Dockerfile示例
-
将NuGet软件包"SkiaSharp.NativeAssets.Linux 2.88.6"添加到您的.net6项目中。
-
使用以下Dockerfile:
#Alpine 3.16
FROM mcr.microsoft.com/dotnet/runtime:6.0-alpine3.16 AS base
WORKDIR /app

# add "fontconfig" package if using "SkiaSharp.NativeAssets.Linux" in your project
# Or you need to use "SkiaSharp.NativeAssets.Linux.NoDependencies" in your project
RUN apk update && apk add fontconfig

# Copy fonts from local to docker
# For example, put a "fonts" folder in your project folder, and put the font files in it,
# then, use the following line:
COPY fonts/ /usr/share/fonts

FROM mcr.microsoft.com/dotnet/sdk:6.0-alpine3.16 AS build
WORKDIR /src
COPY ["Alpine_Docker.csproj", "."]
RUN dotnet restore "./Alpine_Docker.csproj"
COPY . .
WORKDIR "/src/."
RUN dotnet build "Alpine_Docker.csproj" -c Release -o /app/build

FROM build AS publish
RUN dotnet publish "Alpine_Docker.csproj" -c Release -o /app/publish

FROM base AS final
WORKDIR /app
COPY --from=publish /app/publish .
ENTRYPOINT ["dotnet", "Alpine_Docker.dll"]