如何在Docker中运行Aspose.Cells
微服务结合容器化使得很容易结合技术。Docker允许您轻松地将Aspose.Cells功能集成到您的应用程序中,无论您的开发堆栈中使用什么技术。
如果您的目标是微服务,或者如果您的堆栈中的主要技术不是.NET、C++或Java,但您需要Aspose.Cells的功能,或者如果您的堆栈中已经在使用Docker,那么您可能有兴趣在Docker容器中利用Aspose.Cells。
先决条件
-
您的系统必须安装Docker。有关如何在Windows或Mac上安装Docker的信息,请参考"另请参阅"部分中的链接。
-
还要注意,下面的示例中使用的是Visual Studio 2019和.NET Core 3.1 SDK。
Hello World 应用程序
在此示例中,您将创建一个简单的Hello World控制台应用程序,它可以生成“Hello World!”文档,并将其保存为所有支持的保存格式。然后,该应用程序可以在Docker中构建和运行。
创建控制台应用程序
要创建Hello World程序,请按照以下步骤进行:
- 安装Docker后,请确保其使用Linux容器(默认)。如果需要,可以从Docker Desktop菜单中选择“切换至Linux容器”选项。
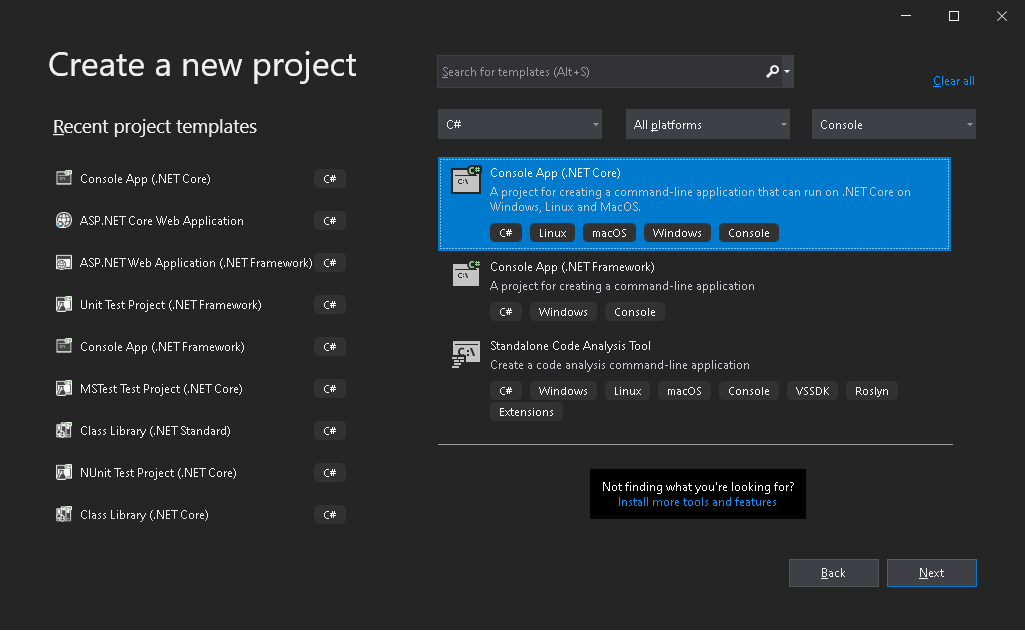
- In Visual Studio, create a .NET Core console application.
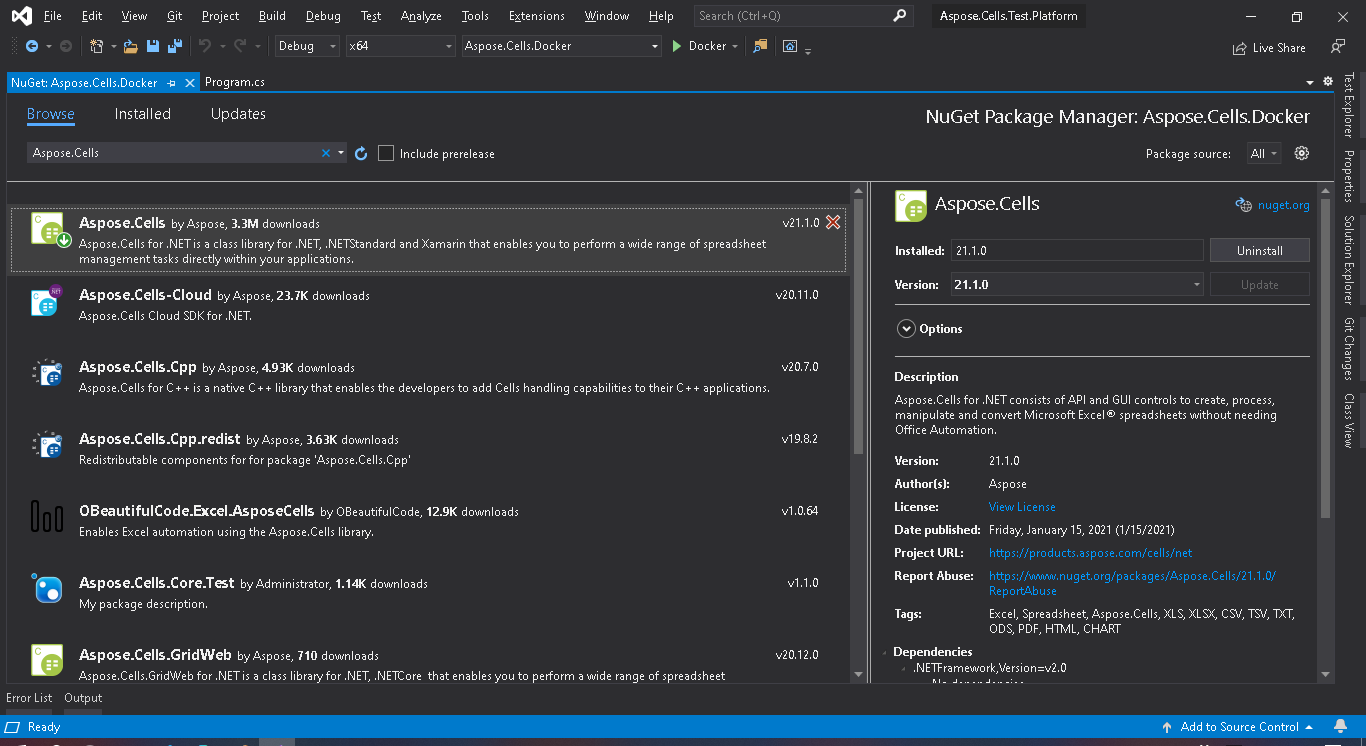
- Install the latest Aspose.Cells version from NuGet. System.Drawing.Common and System.Text.Encoding.CodePages will be installed as a dependency of Aspose.Cells.
- 由于该应用程序将在Linux上运行,因此必须安装相应的本机Linux资产。从dotnet core sdk 3.1基础映像开始,并安装libgdiplus libc6-dev。
- When all required dependencies are added, write a simple program that creates a “Hello World!” workbook and saves it in all supported save formats:
.NET
using System;
namespace Aspose.Cells.Docker
{
    class Program
    {
        static void Main(string[] args)
        {
            Workbook workbook = new Workbook();
            workbook.Worksheets[0].Cells[0, 0].PutValue("Hello from Aspose.Cells!!!");
            foreach (SaveFormat sf in Enum.GetValues(typeof(SaveFormat)))
            {
                if (sf != SaveFormat.Unknown)
                {
                    try
                    {
                        // The folder specified will be mounted as a volume when run the application in Docker image.
                        var fileName = string.Format("out{0}", FileFormatUtil.SaveFormatToExtension(sf));
                        workbook.Save(fileName, sf);
                        Console.WriteLine("Saving {0}\t\t[OK]", sf);
                    }
                    catch
                    {
                        Console.WriteLine("Saving {0}\t\t[FAILED]", sf);
                    }
                }
            }
        }
    }
}
请注意,“TestOut”文件夹被指定为保存输出文档的输出文件夹。在Docker中运行应用程序时,将会将主机机器上的一个文件夹挂载到容器中的此文件夹。这将使您能够轻松查看由Aspose.Cells在Docker容器中生成的输出。
配置Dockerfile
下一步是创建和配置Dockerfile。
- 创建Dockerfile并将其放置在应用程序的解决方案文件旁边。将此文件名保持为没有扩展名的形式(默认)。
- 在Dockerfile中指定:
FROM mcr.microsoft.com/dotnet/core/sdk:3.1-buster
COPY fonts/* /usr/share/fonts/
WORKDIR /app
COPY . ./
RUN apt-get update && \
    apt-get install -y --allow-unauthenticated libgdiplus libc6-dev
RUN dotnet publish "Aspose.Cells.Docker.csproj" -c Release -o /app/publish
ENTRYPOINT ["dotnet", "publish/Aspose.Cells.Docker.dll"]
以上是一个简单的Dockerfile,包含以下指令:
- 要使用的SDK映像。这里使用的是.NET Core SDK 3.1映像。构建时Docker将下载它。SDK的版本被指定为标签。
- 安装字体,因为SDK映像中只包含很少的字体。该命令会将字体文件从本地复制到Docker映像中。请确保您拥有一个包含所有所需安装字体的本地“fonts”目录。在本示例中,“fonts”目录被放在与Dockerfile相同的目录中。
- 工作目录,在下一行中指定。
- 将所有内容复制到容器中,发布应用程序,并指定入口点的命令。
- 在容器中运行安装libgdiplus的命令。这是System.Drawing.Common所需要的。
在Docker中构建和运行应用程序
现在应用程序可以在Docker中构建和运行了。打开您喜欢的命令提示符,将目录切换到包含应用程序的文件夹(解决方案文件和Dockerfile所放置的文件夹),然后运行以下命令:
docker build -t actest .第一次执行此命令时可能需要更长时间,因为Docker需要下载所需的镜像。一旦上一个命令完成,运行以下命令:
docker run --mount type=bind,source=C:\Temp,target=/TestOut --rm actest from Docker支持Aspose.Cells的图像
- Aspose.Cells for .NET Standard 不支持在 Linux 上的 EMF 和 TIFF.
更多示例
1. 在Windows Server 2019上运行应用程序
- Dockerfile
FROM microsoft/dotnet-framework:4.7.2-sdk-windowsservercore-ltsc2019
WORKDIR /app
COPY . ./
RUN dotnet publish "Aspose.Cells.Docker.csproj" -c Release -o /app/publish
ENTRYPOINT ["dotnet", "publish/Aspose.Cells.Docker.dll"]- 构建Docker镜像
docker build -t actest .- 运行Docker镜像
docker run --mount type=bind,source=C:\Temp,target=c:\TestOut --rm actest from Docker2. 在Linux中运行应用程序
- 编写一个简单的程序,设置字体文件夹,创建一个“Hello World!”工作簿并保存它。
namespace Aspose.Cells.Docker.Fonts
{
    using System;
    using System.IO;

    class Program
    {
        static void Main(string[] args)
        {
            try
            {
                // Set font folders on linux.
                string[] fonts = { "/Fonts" };
                FontConfigs.SetFontFolders(fonts, true);
                // build workbook
                Workbook workbook = new Workbook();
                MemoryStream memoryStream = new MemoryStream();
                workbook.Worksheets[0].Cells[0, 0].PutValue("Hello from Aspose.Cells!!!");
                Style style = workbook.CreateStyle();
                style.Font.Name = "Arial";
                style.Font.Size = 16;
                workbook.Worksheets[0].Cells[0, 0].SetStyle(style);
                workbook.Save("/TestOut/TestFontsOut.xlsx");
            }
            catch (Exception e)
            {
                Console.WriteLine("Saving outfonts.xlsx\t\t[FAILED],{0}", e.Message);
            }

        }
    }
}
- Dockerfile
FROM mcr.microsoft.com/dotnet/core/sdk:3.1-buster
WORKDIR /app
COPY . ./
RUN apt-get update && \
    apt-get install -y --allow-unauthenticated libgdiplus libc6-dev
WORKDIR /app
COPY . ./
RUN dotnet publish "Aspose.Cells.Docker.Fonts.csproj" -c Release -o /app/publish
ENTRYPOINT ["dotnet", "publish/Aspose.Cells.Docker.Fonts.dll"]- 构建Docker镜像
docker build -t actest .- 运行Docker镜像
docker run --mount type=bind,source=C:\Windows\Fonts,target=/Fonts --mount type=bind,source=C:\Temp,target=/TestOut --rm actest from Docker