ใช้DocumentBuilderเพื่อแก้ไขเอกสาร

การระบุการจัดรูปแบบ

การจัดรูปแบบแบบอักษร

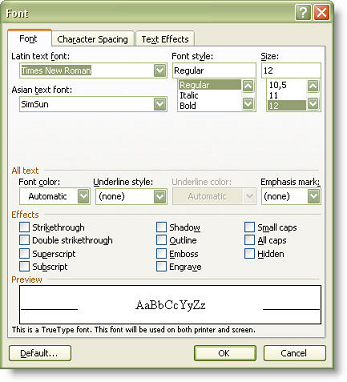
การจัดรูปแบบแบบอักษรปัจจุบันจะแสดงโดยออบเจกต์Fontที่ส่งคืนโดยคุณสมบัติDocumentBuilder.Font คลาสFontประกอบด้วยคุณสมบัติแบบอักษรที่หลากหลายที่เป็นไปได้ในMicrosoft Word.

font-formatting-aspose-words-java
ตัวอย่างรหัสต่อไปนี้แสดงวิธีการตั้งค่าการจัดรูปแบบแบบอักษร.
// For complete examples and data files, please go to https://github.com/aspose-words/Aspose.Words-for-Java
Document doc = new Document();
DocumentBuilder builder = new DocumentBuilder(doc);
// Set font formatting properties
Font font = builder.getFont();
font.setBold(true);
font.setColor(Color.BLUE);
font.setItalic(true);
font.setName("Arial");
font.setSize(24);
font.setSpacing(5);
font.setUnderline(Underline.DOUBLE);
builder.write("I'm a very nice formatted string.");

การจัดรูปแบบเซลล์

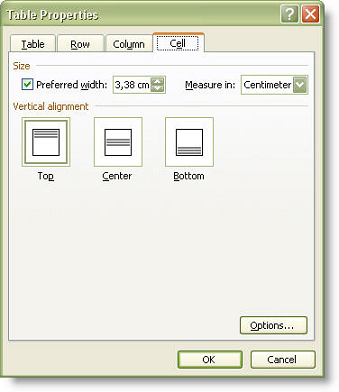
การจัดรูปแบบเซลล์ถูกนำมาใช้ในระหว่างการสร้างตาราง ออบเจกต์CellFormatที่ส่งคืนโดยคุณสมบัติDocumentBuilder.CellFormat CellFormatห่อหุ้มคุณสมบัติของเซลล์ตารางต่างๆเช่นความกว้างหรือแนวตั้ง.

cell-formatting-aspose-words-java
ตัวอย่างรหัสต่อไปนี้แสดงวิธีการสร้างตารางที่ประกอบด้วยเซลล์รูปแบบเดียว.
// For complete examples and data files, please go to https://github.com/aspose-words/Aspose.Words-for-Java
// The path to the documents directory.
String dataDir = Utils.getDataDir(DocumentBuilderSetTableCellFormatting.class);
// Open the document.
Document doc = new Document();
DocumentBuilder builder = new DocumentBuilder(doc);
builder.insertCell();
CellFormat cellFormat = builder.getCellFormat();
cellFormat.setWidth(250);
cellFormat.setLeftPadding(30);
cellFormat.setRightPadding(30);
cellFormat.setBottomPadding(30);
cellFormat.setTopPadding(30);
builder.writeln("I'm a wonderful formatted cell.");
builder.endRow();
builder.endTable();
doc.save(dataDir + "output.doc");

การจัดรูปแบบแถว

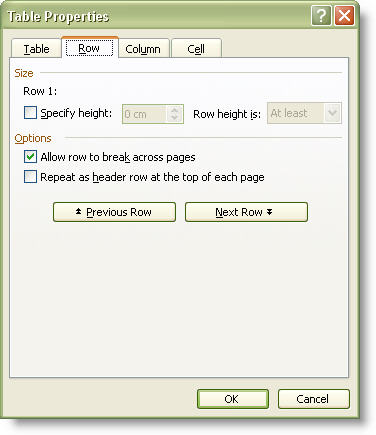
การจัดรูปแบบแถวปัจจุบันจะถูกกำหนดโดยRowFormatวัตถุที่ถูกส่งคืนโดยคุณสมบัติDocumentBuilder.RowFormat วัตถุห่อหุ้มข้อมูลเกี่ยวกับการจัดรูปแบบแถวตารางทั้งหมด.

row-formatting-aspose-words-java
ตัวอย่างเป็นlow codeแสดงวิธีการสร้างตารางที่มีเซลล์เดียวและใช้การจัดรูปแบบแถว.
// For complete examples and data files, please go to https://github.com/aspose-words/Aspose.Words-for-Java
// The path to the documents directory.
String dataDir = Utils.getDataDir(DocumentBuilderSetTableRowFormatting.class);
// Open the document.
Document doc = new Document();
DocumentBuilder builder = new DocumentBuilder(doc);
Table table = builder.startTable();
builder.insertCell();
RowFormat rowFormat = builder.getRowFormat();
rowFormat.setHeight(100);
rowFormat.setHeightRule(HeightRule.EXACTLY);
table.setBottomPadding(30);
table.setTopPadding(30);
table.setLeftPadding(30);
table.setRightPadding(30);
builder.writeln("I'm a wonderful formatted row.");
builder.endRow();
builder.endTable();
doc.save(dataDir + "output.doc");

การจัดรูปแบบรายการ

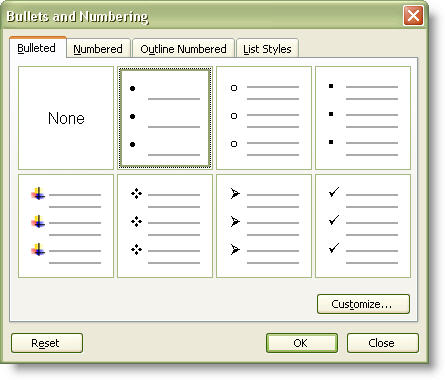
Aspose.Wordsช่วยให้การสร้างง่ายของรายการโดยการใช้การจัดรูปแบบรายการ DocumentBuilderให้คุณDocumentBuilder.ListFormatที่ส่งกลับวัตถุListFormat วัตถุนี้มีหลายวิธีในการเริ่มต้นและสิ้นสุดรายการและการเพิ่ม/ลดการเยื้อง.

list-fformatting-aspose-words-java
มีสองประเภททั่วไปของรายการในMicrosoft Word:สัญลักษณ์แสดงหัวข้อย่อยและหมายเลข.
  • ในการเริ่มต้นรายการที่มีสัญลักษณ์แสดงหัวข้อย่อยให้โทรListFormat.applyBulletDefault.
  • ในการเริ่มรายการหมายเลขให้โทรListFormat.applyNumberDefault.

นย่อหน้าปัจจุบันและย่อหน้าต่อไปทั้งหมดที่สร้างขึ้นโดยใช้DocumentBuilderจนกระทั่งListFormat.removeNumbersถูกเรียกว่าเพื่อหยุดกา.

ในคำเอกสารรายการอาจประกอบด้วยถึงเก้าระดับ การจัดรูปแบบรายการสำหรับแต่ละระดับระบุสิ่งที่กระสุนหรือหมายเลขที่ใช้เยื้องซ้ายช่องว่.

  • หากต้องการเพิ่มระดับรายการของย่อหน้าปัจจุบันโดยหนึ่งระดับให้โทรListFormat.listIndent.
  • เมื่อต้องการลดระดับรายการของย่อหน้าปัจจุบันโดยหนึ่งระดับให้โทรListFormat.listOutdent.

เมธอดเปลี่ยนระดับรายการและใช้คุณสมบัติการจัดรูปแบบของระดับใหม่.

ตัวอย่างรหัสต่อไปนี้แสดงวิธีการสร้างรายการหลายระดับ.

// For complete examples and data files, please go to https://github.com/aspose-words/Aspose.Words-for-Java
// The path to the documents directory.
String dataDir = Utils.getDataDir(DocumentBuilderSetMultilevelListFormatting.class);
// Open the document.
Document doc = new Document();
DocumentBuilder builder = new DocumentBuilder(doc);
builder.getListFormat().applyNumberDefault();
builder.writeln("Item 1");
builder.writeln("Item 2");
builder.getListFormat().listIndent();
builder.writeln("Item 2.1");
builder.writeln("Item 2.2");
builder.getListFormat().listIndent();
builder.writeln("Item 2.1.1");
builder.writeln("Item 2.2.2");
builder.getListFormat().listOutdent();
builder.writeln("Item 3");
builder.getListFormat().removeNumbers();
doc.save(dataDir + "output.doc");

การตั้งค่าหน้าเว็บและการจัดรูปแบบส่วน

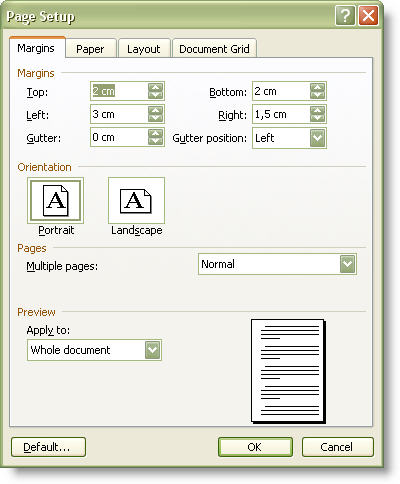
ตั้งค่าหน้าเว็บและส่วนคุณสมบัติถูกห่อหุ้มในPageSetupวัตถุที่ถูกส่งคืนโดยคุณสมบัติDocumentBuilder.PageSetup วัตถุประกอบด้วยแอตทริบิวต์การตั้งค่าหน้าเว็บทั้งหมดของส่วน(ขอบซ้ายขอบล่างขนาดกระด.

section-formatting-aspose-words-java
ตัวอย่างโค้ดต่อไปนี้แสดงวิธีการตั้งค่าคุณสมบัติเช่นขนาดหน้าและการวางแนวสำหรับส่วน.
// For complete examples and data files, please go to https://github.com/aspose-words/Aspose.Words-for-Java
// The path to the documents directory.
String dataDir = Utils.getDataDir(DocumentBuilderSetPageSetupAndSectionFormatting.class);
// Open the document.
Document doc = new Document();
DocumentBuilder builder = new DocumentBuilder(doc);
builder.getPageSetup().setOrientation(Orientation.LANDSCAPE);
builder.getPageSetup().setLeftMargin(50);
builder.getPageSetup().setPaperSize(PaperSize.PAPER_10_X_14);
doc.save(dataDir + "output.doc");

การใช้สไตล์

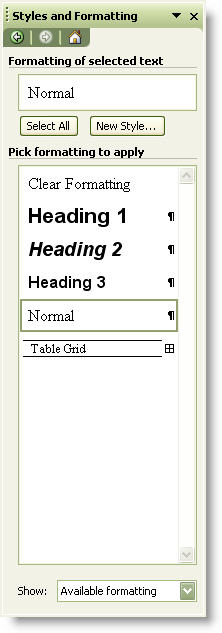
ออบเจกต์การจัดรูปแบบบางอย่างเช่นแบบอักษรหรือParagraphFormatรูปแบบการสนับสนุน สไตล์ที่ผู้ใช้กำหนดในตัวเดียวจะแสดงโดยออบเจกต์Styleที่มีคุณสมบัติลักษณะที่สอดคล้องกันเช่น.

นอกจากนี้ออบเจกต์StyleมีคุณสมบัติStyle.getStyleIdentifierที่ส่งคืนตัวระบุสไตล์อิสระโลแคลที่แสดงโดยค่าการแจงนับStyle.StyleIdentifier ประเด็นคือชื่อของลักษณะในตัวในMicrosoft Wordเป็นภาษาท้องถิ่นสำหรับภาษาที่แตกต่างกัน ใช้ตัวระบุลักษณะคุณสามารถค้นหาลักษณะที่ถูกต้องโดยไม่คำนึงถึงภาษาของเอกสาร ค่าการแจงนับสอดคล้องกับรูปแบบในตัวMicrosoft Wordเช่นปกติ,Heading 1,Heading 2เป็นต้น รูปแบบที่ผู้ใช้กำหนดทั้งหมดจะถูกกำหนดStyleIdentifier.User value.

apply-style-aspose-words-java
ตัวอย่างรหัสต่อไปนี้แสดงวิธีการใช้ลักษณะย่อหน้า.
// For complete examples and data files, please go to https://github.com/aspose-words/Aspose.Words-for-Java
// Open the document.
Document doc = new Document();
// Set paragraph style
DocumentBuilder builder = new DocumentBuilder(doc);
builder.getParagraphFormat().setStyleIdentifier(StyleIdentifier.TITLE);
builder.write("Hello");
doc.save(dataDir + "ApplyParagraphStyle_out.doc");

เส้นขอบและการแรเงา

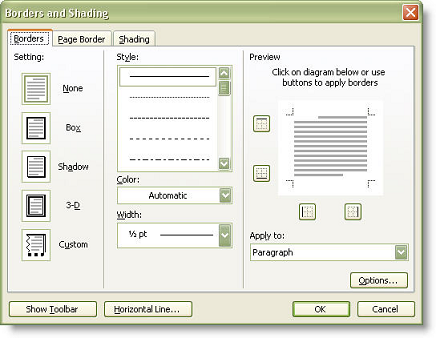
เส้นขอบจะแสดงด้วยBorderCollection นี่คือคอลเลกชันของวัตถุเส้นขอบที่เข้าถึงโดยดัชนีหรือตามชนิดของเส้นขอบ ประเภทเส้นขอบจะแสดงโดยการแจงนับBorderType ค่าบางอย่างของการนับมีผลบังคับใช้กับหลายหรือเพียงองค์ประกอบเอกสารหนึ่ง ตัวอย่างเช่นBorderType.Bottomใช้ได้กับย่อหน้าหรือเซลล์ตารางในขณะที่BorderType.DiagonalDownระบุขอบเส้นทแยงมุมในเซลล์ตาราง.

ทั้งคอลเลกชันชายแดนและแต่ละชายแดนแยกต่างหากมีคุณลักษณะที่คล้ายกันเช่นสีลักษณะเส้ คุณสมบัติของชื่อเดียวกัน คุณสามารถบรรลุประเภทเส้นขอบที่แตกต่างกันโดยการรวมค่าคุณสมบัติ นอกจากนี้วัตถุทั้งBorderCollectionและBorderช่วยให้คุณสามารถรีเซ็ตค่าเหล่านี้เป็นค่าเริ่มต้นโดยการเรียกวิธีการBorder.clearFormatting โปรดทราบว่าเมื่อรีเซ็ตคุณสมบัติเส้นขอบเป็นค่าเริ่มต้นเส้นขอบจะมองไม่เห็น.

set-borders-shading-aspose-words-java
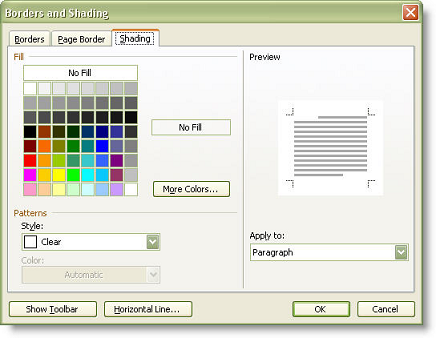
คลาสShadingประกอบด้วยแอตทริบิวต์การแรเงาสำหรับอิลิเมนต์เอกสาร คุณสามารถตั้งค่าพื้นผิวการแรเงาที่ต้องการและสีที่ใช้กับพื้นหลังและเบื้องหน้าขององค์ป.

รงแรเงาถูกตั้งค่าด้วย TextureIndex ค่าการนับที่ช่วยให้การประยุกต์ใช้รูปแบบต่างๆไปยังวัตถุShading ตัวอย่างเช่นเมื่อต้องการตั้งค่าสีพื้นหลังสำหรับองค์ประกอบเอกสารให้ใช้ TextureIndex.TextureSolid ค่าและตั้งค่าสีแรเงาเบื้องหน้าตามความเหมาะสม.

borders-and-shading-aspose-words-java
ตัวอย่างด้านล่างแสดงวิธีการใช้เส้นขอบและการแรเงากับย่อหน้า.
// For complete examples and data files, please go to https://github.com/aspose-words/Aspose.Words-for-Java
// Open the document.
Document doc = new Document();
DocumentBuilder builder = new DocumentBuilder(doc);
// Set paragraph borders
BorderCollection borders = builder.getParagraphFormat().getBorders();
borders.setDistanceFromText(20);
borders.getByBorderType(BorderType.LEFT).setLineStyle(LineStyle.DOUBLE);
borders.getByBorderType(BorderType.RIGHT).setLineStyle(LineStyle.DOUBLE);
borders.getByBorderType(BorderType.TOP).setLineStyle(LineStyle.DOUBLE);
borders.getByBorderType(BorderType.BOTTOM).setLineStyle(LineStyle.DOUBLE);
// Set paragraph shading
Shading shading = builder.getParagraphFormat().getShading();
shading.setTexture(TextureIndex.TEXTURE_DIAGONAL_CROSS);
shading.setBackgroundPatternColor(Color.YELLOW);
shading.setForegroundPatternColor(Color.GREEN);
builder.write("I'm a formatted paragraph with double border and nice shading.");
doc.save(dataDir + "ApplyBordersAndShading_out.doc");

สแนปไปยังตาราง

Aspose.WordsมีสองคุณสมบัติParagraphFormat.SnapToGridและFont.SnapToGridที่จะได้รับและการตั้งค่าคุณสมบัติย่อหน้าสแน็ปในตาราง

// For complete examples and data files, please go to https://github.com/aspose-words/Aspose.Words-for-Java
Document doc = new Document(dataDir + "Input.docx");
Paragraph par = doc.getFirstSection().getBody().getFirstParagraph();
par.getParagraphFormat().setSnapToGrid(true);
par.getRuns().get(0).getFont().setSnapToGrid(true);
dataDir = dataDir + "SetSnapToGrid_out.doc";
doc.save(dataDir);

การย้ายเคอร์เซอร์

การตรวจหาตำแหน่งเคอร์เซอร์ปัจจุบัน

คุณสามารถขอรับตำแหน่งเคอร์เซอร์ของผู้สร้างในปัจจุบันได้ตลอดเวลา คุณสมบัติDocumentBuilder.getCurrentNodeจะส่งคืนโหนดที่เลือกอยู่ในตัวสร้างนี้ในปัจจุบัน โหนดเป็นลูกโดยตรงของย่อหน้า การแทรกการดำเนินการใดๆที่คุณดำเนินการโดยใช้DocumentBuilderจะแทรกก่อนDocumentBuilder.CurrentNode เมื่อย่อหน้าปัจจุบันว่างเปล่าหรือวางเคอร์เซอร์ไว้ก่อนสิ้นย่อหน้าDocumentBuilder.CurrentNodeจะเป็นโมฆะ.

นอกจากนี้คุณสามารถใช้คุณสมบัติDocumentBuilder.getCurrentParagraphซึ่งได้รับย่อหน้าที่ถูกเลือกในDocumentBuilderนี้ ตัวอย่างเป็นlow codeแสดงวิธีเข้าถึงโหนดปัจจุบันในตัวสร้างเอกสาร.

// For complete examples and data files, please go to https://github.com/aspose-words/Aspose.Words-for-Java
// The path to the documents directory.
String dataDir = Utils.getDataDir(DocumentBuilderCursorPosition.class);
// Open the document.
Document doc = new Document();
DocumentBuilder builder = new DocumentBuilder(doc);
Node node = builder.getCurrentNode();
Paragraph curParagraph = builder.getCurrentParagraph();
doc.save(dataDir + "output.doc");

ย้ายไปยังโหนดใดๆ(ย่อหน้าและบุตรหลานของพวกเขา)

ถ้าคุณมีโหนดวัตถุเอกสารซึ่งเป็นย่อหน้าหรือลูกโดยตรงของย่อหน้าคุณสามารถชี้เคอร์เซอร์ ใช้วิธีการDocumentBuilder.moveToเพื่อดำเนินการนี้. ตัวอย่างรหัสต่อไปนี้แสดงวิธีการย้ายตำแหน่งเคอร์เซอร์ไปยังโหนดที่ระบุ.

// For complete examples and data files, please go to https://github.com/aspose-words/Aspose.Words-for-Java
Document doc = new Document();
DocumentBuilder builder = new DocumentBuilder(doc);
// Start a bookmark and add content to it using a DocumentBuilder.
builder.startBookmark("MyBookmark");
builder.writeln("Bookmark contents.");
builder.endBookmark("MyBookmark");
// The node that the DocumentBuilder is currently at is past the boundaries of the bookmark.
Assert.assertEquals(doc.getRange().getBookmarks().get(0).getBookmarkEnd(), builder.getCurrentParagraph().getFirstChild());
// If we wish to revise the content of our bookmark with the DocumentBuilder, we can move back to it like this.
builder.moveToBookmark("MyBookmark");
// Now we're located between the bookmark's BookmarkStart and BookmarkEnd nodes, so any text the builder adds will be within it.
Assert.assertEquals(doc.getRange().getBookmarks().get(0).getBookmarkStart(), builder.getCurrentParagraph().getFirstChild());
// We can move the builder to an individual node,
// which in this case will be the first node of the first paragraph, like this.
builder.moveTo(doc.getFirstSection().getBody().getFirstParagraph().getChildNodes(NodeType.ANY, false).get(0));
Assert.assertEquals(NodeType.BOOKMARK_START, builder.getCurrentNode().getNodeType());
Assert.assertTrue(builder.isAtStartOfParagraph());
// A shorter way of moving the very start/end of a document is with these methods.
builder.moveToDocumentEnd();
Assert.assertTrue(builder.isAtEndOfParagraph());
builder.moveToDocumentStart();
Assert.assertTrue(builder.isAtStartOfParagraph());

การย้ายไปยังเอกสารเริ่มต้น/สิ้นสุด

หากคุณต้องการย้ายไปยังจุดเริ่มต้นของเอกสารโทรDocumentBuilder.moveToDocumentStart ถ้าคุณต้องการที่จะย้ายไปยังส่วนท้ายของเอกสาร,โทรDocumentBuilder.moveToDocumentEnd.

// For complete examples and data files, please go to https://github.com/aspose-words/Aspose.Words-for-Java
String dataDir = Utils.getDataDir(DocumentBuilderMoveToDocumentStartEnd.class);
Document doc = new Document(dataDir + "Document.docx");
DocumentBuilder builder = new DocumentBuilder(doc);
// Move the cursor position to the beginning of your document.
builder.moveToDocumentStart();
builder.writeln("This is the beginning of the document.");
// Move the cursor position to the end of your document.
builder.moveToDocumentEnd();
builder.writeln("This is the end of the document.");

การย้ายไปยังส่วน

หากคุณกำลังทำงานกับเอกสารที่มีหลายส่วนคุณสามารถย้ายไปยังส่วนที่ต้องการโดยใช้DocumentBuilder.moveToSection เมธอดนี้จะเลื่อนเคอร์เซอร์ไปที่จุดเริ่มต้นของส่วนที่ระบุและยอมรับดัชนีของส่วนที่ต้องการ เมื่อดัชนีส่วนมากกว่าหรือเท่ากับ 0 จะระบุดัชนีจากจุดเริ่มต้นของเอกสารด้วย 0 เป็นส่วนแรก เมื่อดัชนีส่วนน้อยกว่า 0 จะระบุดัชนีจากส่วนท้ายของเอกสารด้วย -1 เป็นส่วนสุดท้าย ตัวอย่างเป็นlow codeแสดงวิธีการย้ายตำแหน่งเคอร์เซอร์ไปยังส่วนที่ระบุ คุณสามารถดาวน์โหลดไฟล์แม่แบบของตัวอย่างนี้ได้จาก ที่นี่.

// The path to the documents directory.
String dataDir = Utils.getDataDir(DocumentBuilderMoveToSection.class);
// Open the document.
Document doc = new Document(dataDir + "Rendering.docx");
DocumentBuilder builder = new DocumentBuilder(doc);
builder.moveToSection(2);
builder.write("\nThis is third Section\n");
doc.save(dataDir + "output.doc");

การย้ายไปยังส่วนหัว/ส่วนท้าย

เมื่อคุณต้องการวางข้อมูลบางอย่างลงในส่วนหัวหรือส่วนท้าย,คุณควรย้ายไปที่นั่นก่อนโดยใช้DocumentBuilder.moveToHeaderFooter.เมธอดยอมรับค่าการแจงนับHeaderFooterTypeที่ระบุชนิดของส่วนหัวหรือส่วนท้ายที่ควรย้ายเคอร์เซอร์.

หากคุณต้องการสร้างส่วนหัวและท้ายกระดาษที่แตกต่างกันสำหรับหน้าแรกคุณต้องตั้งค่าคุณสมบัติPageSetup.getDifferentFirstPageHeaderFooterเป็นtrue หากคุณต้องการสร้างส่วนหัวและท้ายกระดาษที่แตกต่างกันสำหรับหน้าคู่และหน้าคี่คุณต้องตั้งPageSetup.getOddAndEvenPagesHeaderFooterถึงtrue.

หากคุณต้องการกลับไปที่เรื่องราวหลักให้ใช้DocumentBuilder.moveToSectionเพื่อย้ายออกจากส่วนหัวหรือส่วนท้าย ตัวอย่างด้านล่างจะสร้างส่วนหัวและท้ายกระดาษในเอกสารโดยใช้DocumentBuilder.

// For complete examples and data files, please go to https://github.com/aspose-words/Aspose.Words-for-Java
String dataDir = Utils.getDataDir(DocumentBuilderHeadersAndFooters.class);
Document doc = new Document();
DocumentBuilder builder = new DocumentBuilder(doc);
// Specify that we want headers and footers different for first, even and odd pages.
builder.getPageSetup().setDifferentFirstPageHeaderFooter(true);
builder.getPageSetup().setOddAndEvenPagesHeaderFooter(true);
// Create the headers.
builder.moveToHeaderFooter(HeaderFooterType.HEADER_FIRST);
builder.write("Header for the first page");
builder.moveToHeaderFooter(HeaderFooterType.HEADER_EVEN);
builder.write("Header for even pages");
builder.moveToHeaderFooter(HeaderFooterType.HEADER_PRIMARY);
builder.write("Header for all other pages");
// Create two pages in the document.
builder.moveToSection(0);
builder.writeln("Page1");
builder.insertBreak(BreakType.PAGE_BREAK);
builder.writeln("Page2");
doc.save(dataDir + "DocumentBuilder.HeadersAndFooters.docx");

การย้ายไปยังย่อหน้า

ใช้DocumentBuilder.moveToParagraphเพื่อย้ายเคอร์เซอร์ไปยังย่อหน้าที่ต้องการในส่วนปัจจุบัน คุณควรส่งพารามิเตอร์สองตัวไปยังวิธีนี้:paragraphIndex(ดัชนีของย่อหน้าที่จะย้ายไป)และcharacterIndex(ดัชนีของอักขระภาย.

การนำทางจะดำเนินการภายในเรื่องปัจจุบันของส่วนปัจจุบัน อร์เซอร์ไปยังส่วนหัวหลักของส่วนแรกแล้วparagraphIndexจะระบุดัชนีของย่อหน้าภายในส่วนหัวของส่วนนั้น.

เมื่อparagraphIndexมากกว่าหรือเท่ากับ 0 จะระบุดัชนีจากจุดเริ่มต้นของส่วนที่มี 0 เป็นย่อหน้าแรก เมื่อparagraphIndexน้อยกว่า 0 จะระบุดัชนีจากส่วนท้ายของส่วนที่มี -1 เป็นย่อหน้าสุดท้าย ขณะนี้ดัชนีอักขระสามารถระบุเป็น 0 เพื่อย้ายไปยังจุดเริ่มต้นของย่อหน้าหรือ -1 เพื่อย้ายไปยัง ตัวอย่างรหัสต่อไปนี้แสดงวิธีการย้ายตำแหน่งเคอร์เซอร์ไปยังย่อหน้าที่ คุณสามารถดาวน์โหลดไฟล์แม่แบบของตัวอย่างนี้ได้จาก ที่นี่.

// The path to the documents directory.
String dataDir = Utils.getDataDir(DocumentBuilderMoveToParagraph.class);
// Open the document.
Document doc = new Document(dataDir + "Rendering.docx");
DocumentBuilder builder = new DocumentBuilder(doc);
builder.moveToParagraph(2, 0);
builder.writeln("This is the 3rd paragraph.");
doc.save(dataDir + "output.doc");

การย้ายไปยังเซลล์ตาราง

ใช้DocumentBuilder.moveToCellหากคุณต้องการเลื่อนเคอร์เซอร์ไปยังเซลล์ตารางในส่วนปัจจุบัน วิธีนี้ยอมรับสี่พารามิเตอร์:

  • tableIndex-ดัชนีของตารางที่จะย้ายไป.
  • rowIndex-ดัชนีของแถวในตาราง.
  • columnIndex-ดัชนีของคอลัมน์ในตาราง.
  • characterIndex-ดัชนีของอักขระภายในเซลล์.

การนำทางจะดำเนินการภายในเรื่องปัจจุบันของส่วนปัจจุบัน.

สำหรับพารามิเตอร์ดัชนีเมื่อดัชนีมากกว่าหรือเท่ากับ 0 จะระบุดัชนีตั้งแต่ต้นด้วย 0 เป็นองค์ป เมื่อดัชนีน้อยกว่า 0 จะระบุดัชนีจากจุดสิ้นสุดด้วย -1 เป็นองค์ประกอบสุดท้าย.

นอกจากนี้โปรดทราบว่าcharacterIndexขณะนี้สามารถระบุได้เพียง 0 เพื่อย้ายไปยังจุดเริ่มต้นของเซลล์หรือ -1 เพื่อย้ายไปยังจุดสิ้นสุดของเซลล์ ตัวอย่างรหัสต่อไปนี้แสดงวิธีการย้ายตำแหน่งเคอร์เซอร์ไปยังเซลล์ตารางที่ระบุ คุณสามารถดาวน์โหลดไฟล์แม่แบบของตัวอย่างนี้ได้จาก ที่นี่.

// For complete examples and data files, please go to https://github.com/aspose-words/Aspose.Words-for-Java
String dataDir = Utils.getDataDir(DocumentBuilderMoveToTableCell.class);
Document doc = new Document(dataDir + "Tables.docx");
DocumentBuilder builder = new DocumentBuilder(doc);
// Move the builder to row 3, cell 4 of the first table.
builder.moveToCell(0, 2, 3, 0);
builder.write("\nCell contents added by DocumentBuilder");
Table table = (Table)doc.getChild(NodeType.TABLE, 0, true);
Assert.assertEquals(table.getRows().get(2).getCells().get(3), builder.getCurrentNode().getParentNode().getParentNode());
Assert.assertEquals("Cell contents added by DocumentBuilderCell 3 contents\u0007", table.getRows().get(2).getCells().get(3).getText().trim());

การย้ายไปยังบุ๊กมาร์ก

ที่คั่นหน้าจะใช้บ่อยเพื่อทำเครื่องหมายสถานที่เฉพาะในเอกสารที่จะแทรกองค์ประกอบใหม่ เมื่อต้องการย้ายไปยังบุ๊กมาร์กใช้DocumentBuilder.moveToBookmark วิธีการนี้มีสองเกินพิกัด ที่ง่ายที่สุดยอมรับอะไรแต่ชื่อของบุ๊คมาร์คที่เคอร์เซอร์จะถูกย้าย ตัวอย่างรหัสต่อไปนี้แสดงวิธีการย้ายตำแหน่งเคอร์เซอร์ไปยังบุ๊กมาร์ก.

// For complete examples and data files, please go to https://github.com/aspose-words/Aspose.Words-for-Java
Document doc = new Document();
DocumentBuilder builder = new DocumentBuilder(doc);
// Start a bookmark and add content to it using a DocumentBuilder.
builder.startBookmark("MyBookmark");
builder.writeln("Bookmark contents.");
builder.endBookmark("MyBookmark");
// If we wish to revise the content of our bookmark with the DocumentBuilder, we can move back to it like this.
builder.moveToBookmark("MyBookmark");
// Now we're located between the bookmark's BookmarkStart and BookmarkEnd nodes, so any text the builder adds will be within it.
Assert.assertEquals(doc.getRange().getBookmarks().get(0).getBookmarkStart(), builder.getCurrentParagraph().getFirstChild());
// We can move the builder to an individual node,
// which in this case will be the first node of the first paragraph, like this.
builder.moveTo(doc.getFirstSection().getBody().getFirstParagraph().getChildNodes(NodeType.ANY, false).get(0));
Assert.assertEquals(NodeType.BOOKMARK_START, builder.getCurrentNode().getNodeType());

การโอเวอร์โหลดนี้จะเลื่อนเคอร์เซอร์ไปยังตำแหน่งหลังจากที่เริ่มต้นของบุ๊กมาร์กที่มีชื่อ เกินพิกัดอีกDocumentBuilder.moveToBookmarkเลื่อนเคอร์เซอร์ไปยังบุ๊กมาร์กที่มีความแม่นยำมากขึ้น มันยอมรับสองพารามิเตอร์บูลีน:

  • isStartกำหนดว่าจะย้ายเคอร์เซอร์ไปยังจุดเริ่มต้นหรือจุดสิ้นสุดของบุ๊กมาร์ก.
  • isAfterกำหนดว่าจะย้ายเคอร์เซอร์ไปหลังตำแหน่งเริ่มต้นหรือจุดสิ้นสุดของบุ๊กมาร์กหรือเลื่อนเคอร์เซอร์ไปก่อนตำแหน่งเริ่มต้นหรือจุดสิ้นสุดของบุ๊กมาร์ก.

ตัวอย่างรหัสต่อไปนี้แสดงวิธีการย้ายตำแหน่งเคอร์เซอร์ไปหลังจากจบบุ๊กมาร์ก.

// For complete examples and data files, please go to https://github.com/aspose-words/Aspose.Words-for-Java
// The path to the documents directory.
String dataDir = Utils.getDataDir(DocumentBuilderMoveToBookmarkEnd.class);
// Open the document.
Document doc = new Document(dataDir + "DocumentBuilder.doc");
DocumentBuilder builder = new DocumentBuilder(doc);
builder.moveToBookmark("CoolBookmark", false, true);
builder.writeln("This is a very cool bookmark.");
doc.save(dataDir + "output.doc");

การแทรกข้อความใหม่ในลักษณะนี้ไม่ได้แทนที่ข้อความที่มีอยู่ของบุ๊กมาร์ก โปรดทราบว่าบุ๊กมาร์กบางอย่างในเอกสารถูกกำหนดให้กับเขตข้อมูลแบบฟอร์ม ย้ายไปยังบุ๊คมาร์คดังกล่าวและการแทรกข้อความที่มีแทรกข้อความลงในรหัสฟิลด์แบบฟอร์ม แม้ว่านี้จะไม่ทำให้ฟิลด์ฟอร์มเป็นโมฆะข้อความที่แทรกจะไม่สามารถมองเห็นได้เนื่องจาก.

ย้ายไปยังช่องMerge

บางครั้งคุณอาจต้องดำเนินการ"คู่มือ"Mail Mergeโดยใช้DocumentBuilderหรือกรอกข้อมูลผสานในลักษณะพิเศษภายในMail Mergeตัวจัดการเหตุการณ์ นั่นคือเมื่อDocumentBuilder.moveToMergeFieldอาจมีประโยชน์ เมธอดยอมรับชื่อของฟิลด์ผสาน ย้ายเคอร์เซอร์ไปยังตำแหน่งที่เกินกว่าเขตข้อมูลผสานที่ระบุและเอาเขตข้อมูลผสาน ตัวอย่างรหัสต่อไปนี้แสดงวิธีการย้ายเคอร์เซอร์ไปยังตำแหน่งที่เกินกว่าเขตข้อมูลผสานที่.

// For complete examples and data files, please go to https://github.com/aspose-words/Aspose.Words-for-Java
Document doc = new Document();
DocumentBuilder builder = new DocumentBuilder(doc);
// Insert a field using the DocumentBuilder and add a run of text after it.
Field field = builder.insertField("MERGEFIELD field");
builder.write(" Text after the field.");
// The builder's cursor is currently at end of the document.
Assert.assertNull(builder.getCurrentNode());
// We can move the builder to a field like this, placing the cursor at immediately after the field.
builder.moveToField(field, true);
// Note that the cursor is at a place past the FieldEnd node of the field, meaning that we are not actually inside the field.
// If we wish to move the DocumentBuilder to inside a field,
// we will need to move it to a field's FieldStart or FieldSeparator node using the DocumentBuilder.MoveTo() method.
Assert.assertEquals(field.getEnd(), builder.getCurrentNode().getPreviousSibling());
builder.write(" Text immediately after the field.");

วิธีการแปลงระหว่างหน่วยวัด

คุณสมบัติของวัตถุส่วนใหญ่ที่ให้ไว้ในAspose.WordsAPIที่แสดงถึงการวัด(ความกว้าง/ความสูงขอบและระยะทางต่างๆ)acceptค่าในจุด(1 นิ้วเท่ากับ 72 จุด) บางครั้งนี้ไม่สะดวกจึงมีชั้นเรียนConvertUtilที่ให้ฟังก์ชั่นผู้ช่วยในการแปลงระหว่างหน่วยวัดต่างๆ จะช่วยให้การแปลงนิ้วเป็นจุด,จุดนิ้วพิกเซลไปยังจุดและจุดที่จะพิกเซล เมื่อพิกเซลถูกแปลงเป็นจุดและในทางกลับกันก็สามารถทำได้ที่ความละเอียด 96 จุดต่อนิ้ว(จุด.

ConvertUtil

ตัวอย่างโค้ดต่อไปนี้แสดงวิธีการระบุคุณสมบัติของหน้าเป็นนิ้ว.

// For complete examples and data files, please go to https://github.com/aspose-words/Aspose.Words-for-Java
// The path to the documents directory.
String dataDir = Utils.getDataDir(ConvertBetweenMeasurementUnits.class);
// Open the document.
Document doc = new Document();
DocumentBuilder builder = new DocumentBuilder(doc);
PageSetup pageSetup = builder.getPageSetup();
pageSetup.setTopMargin(ConvertUtil.inchToPoint(1.0));
pageSetup.setBottomMargin(ConvertUtil.inchToPoint(1.0));
pageSetup.setLeftMargin(ConvertUtil.inchToPoint(1.5));
pageSetup.setRightMargin(ConvertUtil.inchToPoint(1.5));
pageSetup.setHeaderDistance(ConvertUtil.inchToPoint(0.2));
pageSetup.setFooterDistance(ConvertUtil.inchToPoint(0.2));
doc.save(dataDir + "output.doc");