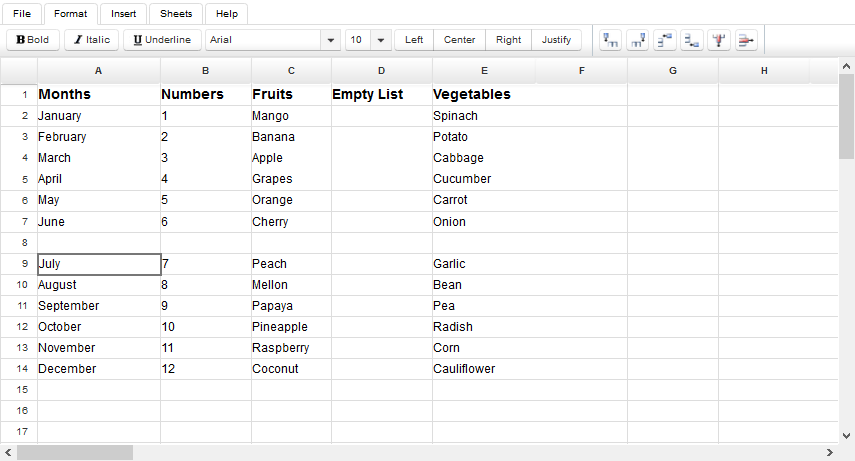
スプレッドシートエディター 行と列の操作
目次
- 行を追加
- WorksheetView.addRowAbove
- WorksheetView.addRowBelow
- 列を追加
- WorksheetView.addColumnBefore
- WorksheetView.addColumnAfter
- 行を削除
- WorksheetView.deleteRow
- 列の削除
- WorksheetView.deleteColumn
- 列幅と行の高さ
- WorksheetView.setCurrentRowHeight
- WorksheetView.setCurrentColumnWidth
- セルを挿入します
- WorksheetView.addCellShiftRight
- WorksheetView.addCellShiftDown
行を追加
新しい行を追加するには:
- 行を追加したいセルをクリックします。
- フォーマットタブ に切り替えます。
- 選択したセルの上に行を追加するには、行を上に追加をクリックします。
- 選択したセルの下に行を追加するには、行を下に追加をクリックします。
エディターは選択した場所に新しい行を追加します。

動作仕様
「行を上に追加」および「行を下に追加」はJSFバックエンドビーンWorksheetViewによって処理されます。それぞれのメソッドのソースコードは以下の通りです。
WorksheetView.addRowAbove
     public void addRowAbove() {

        try {

            getAsposeWorksheet().getCells().insertRows(currentRowId, 1, true);

        } catch (com.aspose.cells.CellsException cx) {

            msg.sendMessage("Could not add row", cx.getMessage());

            return;

        }

        purge();

        reloadRowHeight(currentRowId);

    }
WorksheetView.addRowBelow
     public void addRowBelow() {

        if (getCurrentRowId() < 0) {

            msg.sendMessage("No cell selected", null);

            return;

        }

        int newRowId = currentRowId + 1;

        try {

            getAsposeWorksheet().getCells().insertRows(newRowId, 1, true);

        } catch (com.aspose.cells.CellsException cx) {

            msg.sendMessage("Could not add row", cx.getMessage());

            return;

        }

        purge();

        reloadRowHeight(newRowId);

    }
列を追加
新しい列を追加するには:
- 列を追加したいセルをクリックします。
- フォーマットタブ に切り替えます。
- 選択したセルの前に列を追加するには列を前に追加をクリックします。
- 選択したセルの後に列を追加するには列を後に追加をクリックします。
エディタは選択した場所に新しい列を追加します。

動作仕様
「列を前に追加」および「列を後に追加」はJSFバックエンドビーンWorksheetViewによって処理されます。それぞれのメソッドのソースコードは以下の通りです。
WorksheetView.addColumnBefore
     public void addColumnBefore() {

        try {

            getAsposeWorksheet().getCells().insertColumns(getCurrentColumnId(), 1, true);

        } catch (com.aspose.cells.CellsException cx) {

            msg.sendMessage("Could not add column", cx.getMessage());

            return;

        }

        reloadColumnWidth(currentColumnId);

        purge();

    }
WorksheetView.addColumnAfter
     public void addColumnAfter() {

        int newColumnId = currentColumnId + 1;

        try {

            getAsposeWorksheet().getCells().insertColumns(newColumnId, 1, true);

        } catch (com.aspose.cells.CellsException cx) {

            msg.sendMessage("Could not add column", cx.getMessage());

            return;

        }

        reloadColumnWidth(newColumnId);

        purge();

    }
行を削除
行を削除するには:
- 削除したい行のセルをクリックします。
- フォーマットタブ に切り替えます。
- 行を削除 ボタンをクリックします。
エディタは選択したセルを含む行を削除します。

動作仕様
「行を削除」ボタンはJSFバックエンドビーンWorksheetViewによってWorksheetView.deleteRowメソッドを使用して処理されます。
WorksheetView.deleteRow
     public void deleteRow() {

        try {

            getAsposeWorksheet().getCells().deleteRows(currentRowId, 1, true);

        } catch (com.aspose.cells.CellsException cx) {

            msg.sendMessage("Could not delete row", cx.getMessage());

            return;

        }

        cells.getRows(workbook.getCurrent()).remove(currentRowId);

        getRowHeight().remove(currentRowId);

        purge();

    }
列の削除
列を削除するには:
- 削除したい列のセルをクリックします。
- フォーマットタブ に切り替えます。
- 列を削除 ボタンをクリックします。
エディタは選択したセルを含む列を削除します。

動作仕様
「列を削除」ボタンはJSFバックエンドビーンWorksheetViewによってWorksheetView.deleteColumnメソッドを使用して処理されます。
WorksheetView.deleteColumn
     public void deleteColumn() {

        try {

            getAsposeWorksheet().getCells().deleteColumns(currentColumnId, 1, true);

        } catch (com.aspose.cells.CellsException cx) {

            msg.sendMessage("Could not delete column", cx.getMessage());

            return;

        }

        cells.getColumns(workbook.getCurrent()).remove(currentColumnId);

        getRowHeight().remove(currentColumnId);

        purge();

    }
列幅と行の高さ
列の幅を変更するには:
- 列内の任意のセルをクリックします。
- フォーマットタブ に切り替えます。
- 列幅 ボタンをクリックして列幅ダイアログを開きます。 ダイアログボックスに新しい値を入力します。
- Close をクリックします。
エディタは列の幅を変更します。
行の高さを変更する方法は?
行の高さを変更するには:
- 行内の任意のセルをクリックします。
- フォーマットタブ に切り替えます。
- 行の高さ ボタンをクリックして 行の高さ ダイアログを開きます。 ダイアログボックスに新しい値を入力します。
- Close をクリックします。
エディタは行の高さを変更します。
動作仕様
ユーザーが幅と高さの値を送信すると、これらの値はJSFバックエンドビーン WorksheetView の setCurrentRowHeight および setCurrentColumnWidth メソッドによってサーバーサイドで処理されます。
WorksheetView.setCurrentRowHeight
     public void setCurrentRowHeight(int height) {

        if (!isLoaded()) {

            return;

        }

        getAsposeWorksheet().getCells().setRowHeightPixel(currentRowId, height);

        reloadRowHeight(currentRowId);

        RequestContext.getCurrentInstance().update("sheet");

    }
WorksheetView.setCurrentColumnWidth
     public void setCurrentColumnWidth(int width) {

        if (!isLoaded()) {

            return;

        }

        getAsposeWorksheet().getCells().setColumnWidthPixel(currentColumnId, width);

        reloadColumnWidth(currentColumnId);

        RequestContext.getCurrentInstance().update("sheet");

    }
セルを挿入します
新しいセルを追加するには:
- 新しいセルが欲しい位置をクリックします。
- 挿入タブ に切り替えます。
- セル ボタンをクリックします。
- セルを右にシフト または セルを下にシフト ボタンを選択します。
エディタは選択した場所に新しいセルを追加します。隣接するセルは、新しいセルのスペースを作るために水平または垂直に自動的にシフトされます。
動作仕様
セルを右にシフト および セルを下にシフト は、JSFバックエンドビーン WorksheetView によって処理されます。該当メソッドのソースコードは以下のとおりです:
WorksheetView.addCellShiftRight
     public void addCellShiftRight() {

        if (!isLoaded()) {

            return;

        }

        com.aspose.cells.CellArea a = new com.aspose.cells.CellArea();

        a.StartColumn = a.EndColumn = currentColumnId;

        a.StartRow = a.EndRow = currentRowId;

        getAsposeWorksheet().getCells().insertRange(a, com.aspose.cells.ShiftType.RIGHT);

        purge();

    }
WorksheetView.addCellShiftDown
     public void addCellShiftDown() {

        if (!isLoaded()) {

            return;

        }

        com.aspose.cells.CellArea a = new com.aspose.cells.CellArea();

        a.StartColumn = a.EndColumn = currentColumnId;

        a.StartRow = a.EndRow = currentRowId;

        getAsposeWorksheet().getCells().insertRange(a, com.aspose.cells.ShiftType.DOWN);

        purge();

    }