Tablo Düzenleyici Satırlar ve Sütunlarla Çalışma
İçindekiler
- Bir Satır Ekle
- WorksheetView.addRowAbove
- WorksheetView.addRowBelow
- Sütun Ekle
- WorksheetView.addColumnBefore
- WorksheetView.addColumnAfter
- Satır Sil
- WorksheetView.deleteRow
- Bir Sütunu Sil
- WorksheetView.deleteColumn
- Sütun Genişliği ve Satır Yüksekliği
- WorksheetView.setCurrentRowHeight
- WorksheetView.setCurrentColumnWidth
- Bir Hücre Ekle
- WorksheetView.addCellShiftRight
- WorksheetView.addCellShiftDown
Bir Satır Ekle
Yeni bir satır eklemek için:
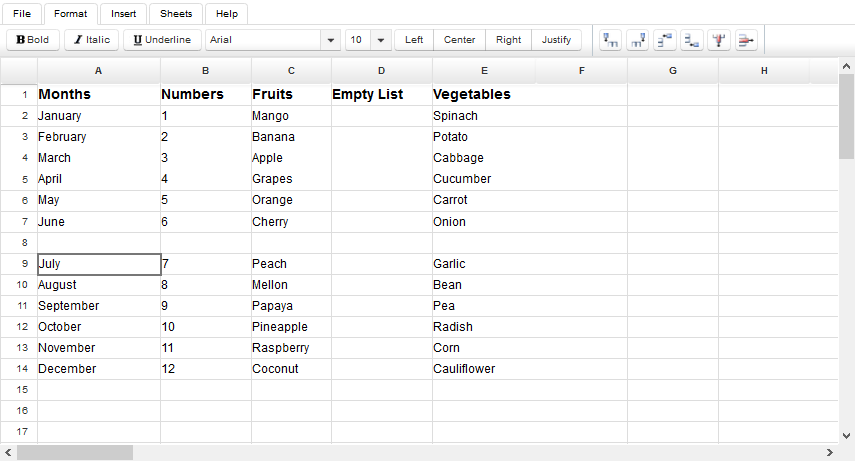
- Bir satır eklemek istediğiniz hücreye tıklayın.
- Biçim sekmesine geçin.
- Seçili hücrenin üstüne bir satır eklemek için Üstte Satır Ekle‘ye tıklayın.
- Seçili hücrenin altına bir satır eklemek için Alttan Satır Ekle‘ye tıklayın.
Düzenleyici seçili konuma yeni bir satır ekleyecek.
Nasıl çalışır?
Üstte Satır Ekle ve Alttan Satır Ekle, JSF arka uç fasulyesi WorksheetView tarafından ele alınır. İlgili yöntemlerin kaynak kodları aşağıdaki gibidir:
WorksheetView.addRowAbove
     public void addRowAbove() {

        try {

            getAsposeWorksheet().getCells().insertRows(currentRowId, 1, true);

        } catch (com.aspose.cells.CellsException cx) {

            msg.sendMessage("Could not add row", cx.getMessage());

            return;

        }

        purge();

        reloadRowHeight(currentRowId);

    }
WorksheetView.addRowBelow
     public void addRowBelow() {

        if (getCurrentRowId() < 0) {

            msg.sendMessage("No cell selected", null);

            return;

        }

        int newRowId = currentRowId + 1;

        try {

            getAsposeWorksheet().getCells().insertRows(newRowId, 1, true);

        } catch (com.aspose.cells.CellsException cx) {

            msg.sendMessage("Could not add row", cx.getMessage());

            return;

        }

        purge();

        reloadRowHeight(newRowId);

    }
Sütun Ekle
Yeni bir sütun eklemek için:
- Bir sütun eklemek istediğiniz hücreye tıklayın.
- Biçim sekmesine geçin.
- Seçili hücrenin yanına bir sütun eklemek için Öncesine Sütun Ekle‘ye tıklayın.
- Seçili hücrenin sonrasına bir sütun eklemek için Sonrasına Sütun Ekle‘ye tıklayın.
Düzenleyici seçili konuma yeni bir sütun ekleyecek.
Nasıl çalışır?
Öncesine Sütun Ekle ve Sonrasına Sütun Ekle, JSF arka uç fasulyesi WorksheetView tarafından ele alınır. İlgili yöntemlerin kaynak kodları aşağıdaki gibidir:
WorksheetView.addColumnBefore
     public void addColumnBefore() {

        try {

            getAsposeWorksheet().getCells().insertColumns(getCurrentColumnId(), 1, true);

        } catch (com.aspose.cells.CellsException cx) {

            msg.sendMessage("Could not add column", cx.getMessage());

            return;

        }

        reloadColumnWidth(currentColumnId);

        purge();

    }
WorksheetView.addColumnAfter
     public void addColumnAfter() {

        int newColumnId = currentColumnId + 1;

        try {

            getAsposeWorksheet().getCells().insertColumns(newColumnId, 1, true);

        } catch (com.aspose.cells.CellsException cx) {

            msg.sendMessage("Could not add column", cx.getMessage());

            return;

        }

        reloadColumnWidth(newColumnId);

        purge();

    }
Satır Sil
Bir satırı silmek için:
- Sileceğiniz satırdaki bir hücreye tıklayın.
- Biçim sekmesine geçin.
- Satırı Sil düğmesine tıklayın.
Düzenleyici seçili hücreyi içeren satırı silecektir.
Nasıl çalışır?
Satırı Sil düğmesi, WorksheetView.deleteRow yöntemini kullanarak JSF backend bean WorksheetView tarafından işlenir:
WorksheetView.deleteRow
     public void deleteRow() {

        try {

            getAsposeWorksheet().getCells().deleteRows(currentRowId, 1, true);

        } catch (com.aspose.cells.CellsException cx) {

            msg.sendMessage("Could not delete row", cx.getMessage());

            return;

        }

        cells.getRows(workbook.getCurrent()).remove(currentRowId);

        getRowHeight().remove(currentRowId);

        purge();

    }
Bir Sütunu Sil
Bir sütunu silmek için:
- Sileceğiniz sütundaki bir hücreye tıklayın.
- Biçim sekmesine geçin.
- Sütunu Sil düğmesine tıklayın.
Düzenleyici seçili hücreyi içeren sütunu silecektir.
Nasıl çalışır?
Sütunu Sil düğmesi, WorksheetView.deleteColumn yöntemini kullanarak JSF backend bean WorksheetView tarafından işlenir:
WorksheetView.deleteColumn
     public void deleteColumn() {

        try {

            getAsposeWorksheet().getCells().deleteColumns(currentColumnId, 1, true);

        } catch (com.aspose.cells.CellsException cx) {

            msg.sendMessage("Could not delete column", cx.getMessage());

            return;

        }

        cells.getColumns(workbook.getCurrent()).remove(currentColumnId);

        getRowHeight().remove(currentColumnId);

        purge();

    }
Sütun Genişliği ve Satır Yüksekliği
Bir sütunun genişliğini değiştirmek için:
- Sütun içinde herhangi bir hücreye tıklayın.
- Biçim sekmesine geçin.
- Sütun Genişliği düğmesine tıklayarak Sütun Genişliği iletişim kutusunu açın.
- İletişim kutusuna yeni bir değer girin.
- Kapat‘a tıklayın.
Düzenleyici sütunun genişliğini değiştirecektir.
Satır yüksekliği nasıl değiştirilir?
Bir satırın yüksekliğini değiştirmek için:
- Satır içinde herhangi bir hücreye tıklayın.
- Biçim sekmesine geçin.
- Satır Yüksekliği düğmesine tıklayarak Satır Yüksekliği iletişim kutusunu açın.
- İletişim kutusuna yeni bir değer girin.
- Kapat‘a tıklayın.
Düzenleyici satırın yüksekliğini değiştirecektir.
Nasıl çalışır?
Kullanıcı genişlik ve yükseklik değerlerini gönderdiğinde, bu değerler JSF backend bean WorksheetView‘in setCurrentRowHeight ve setCurrentColumnWidth metodları tarafından sunucu tarafında işlenir.
WorksheetView.setCurrentRowHeight
     public void setCurrentRowHeight(int height) {

        if (!isLoaded()) {

            return;

        }

        getAsposeWorksheet().getCells().setRowHeightPixel(currentRowId, height);

        reloadRowHeight(currentRowId);

        RequestContext.getCurrentInstance().update("sheet");

    }
WorksheetView.setCurrentColumnWidth
     public void setCurrentColumnWidth(int width) {

        if (!isLoaded()) {

            return;

        }

        getAsposeWorksheet().getCells().setColumnWidthPixel(currentColumnId, width);

        reloadColumnWidth(currentColumnId);

        RequestContext.getCurrentInstance().update("sheet");

    }
Bir Hücre Ekle
Yeni bir hücre eklemek için:
- Yeni eklemek istediğiniz hücreye tıklayın.
- Ekleme sekmesine geçin.
- Hücre düğmesine tıklayın.
- Sağa Kaydır veya Aşağı Kaydır düğmesini seçin.
Düzenleyici seçilen konumda yeni bir hücre ekleyecektir. Yeni bir hücre için yatay veya dikey olarak bitişik hücreler otomatik olarak kaydırılır.
Nasıl çalışır?
Sağa Kaydır ve Aşağı Kaydır olayları JSF backend bean WorksheetView tarafından işlenir. İlgili metodların kaynak kodları aşağıdaki gibidir:
WorksheetView.addCellShiftRight
     public void addCellShiftRight() {

        if (!isLoaded()) {

            return;

        }

        com.aspose.cells.CellArea a = new com.aspose.cells.CellArea();

        a.StartColumn = a.EndColumn = currentColumnId;

        a.StartRow = a.EndRow = currentRowId;

        getAsposeWorksheet().getCells().insertRange(a, com.aspose.cells.ShiftType.RIGHT);

        purge();

    }
WorksheetView.addCellShiftDown
     public void addCellShiftDown() {

        if (!isLoaded()) {

            return;

        }

        com.aspose.cells.CellArea a = new com.aspose.cells.CellArea();

        a.StartColumn = a.EndColumn = currentColumnId;

        a.StartRow = a.EndRow = currentRowId;

        getAsposeWorksheet().getCells().insertRange(a, com.aspose.cells.ShiftType.DOWN);

        purge();

    }