Working with Shapes in PS file | Python
Add Shapes to PS Document
Add Rectangle to PS
In order to insert a rectangle into PsDocument using Aspose.Page for Python via .NET library take the following steps:
- Create an output stream for the resulting PS file.
- Create a PsSaveOptions object with the default options.
- Create a 1-paged PsDocument with an already created output stream and save options.
- Create a rectangle aspose.pydrawing.GraphicsPath from the rectangle.
- Set a paint to the current graphics state of PsDocument.
- Fill the rectangle.
- Close the page.
- Save the document.
To stroke (outline) a rectangle the first 4 and the last 2 steps will be the same, but the 5-th and 6-th one will be:
- Set the stroke to the current graphics state of the PsDocument.
- Stroke (outline) the rectangle.
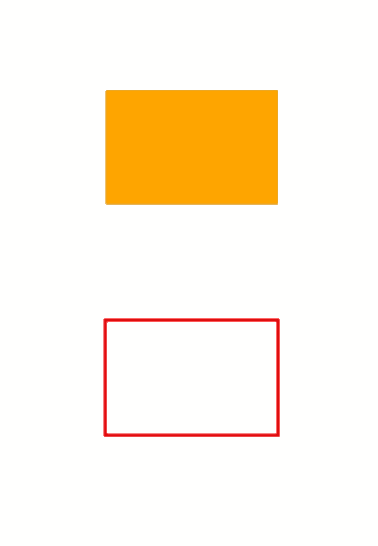
 1from aspose.page import *
 2from aspose.page.eps import *
 3from aspose.page.eps.device import *
 4import aspose.pydrawing
 5from util import Util
 6###############################################
 7###### Class and Method declaration here ######
 8###############################################
 9
10# The path to the documents directory.
11data_dir = Util.get_data_dir_working_with_shapes()
12
13# Create an output stream for the PostScript document
14with open(data_dir + "AddRectangle_outPS.ps", "wb") as out_ps_stream:
15    # Create save options with A4 size
16    options = PsSaveOptions()
17
18    # Create a new 1-paged PS Document
19    document = PsDocument(out_ps_stream, options, False)
20
21    # Create a graphics path from the first rectangle
22    path = aspose.pydrawing.drawing2d.GraphicsPath()
23    path.add_rectangle(aspose.pydrawing.RectangleF(250, 100, 150, 100))
24    # Set the paint
25    document.set_paint(aspose.pydrawing.SolidBrush(aspose.pydrawing.Color.orange))
26    # Fill the rectangle
27    document.fill(path)
28
29    # Create a graphics path from the second rectangle
30    path = aspose.pydrawing.drawing2d.GraphicsPath()
31    path.add_rectangle(aspose.pydrawing.RectangleF(250, 300, 150, 100))
32    # Set stroke
33    document.set_stroke(GraphicsFactory.create_pen_by_brush_and_width(aspose.pydrawing.SolidBrush(aspose.pydrawing.Color.red), 3))
34    # Stroke (outline) the rectangle
35    document.draw(path)
36
37    # Close the current page
38    document.close_page()
39
40    # Save the document
41 document.save()The result of running this code is

Add Ellipse to PS
To add an ellipse to PsDocument also 8 steps are required to be taken:
- Create an output stream for the resulting PS file.
- Create a PsSaveOptions object with the default options.
- Create a 1-paged PsDocument with an already created output stream and save options.
- Create an ellipse aspose.pydrawing.drawing2d.GraphicsPath from the rectangle.
- Set the paint to the current graphics state of PsDocument.
- Fill the ellipse path.
- Close the page.
- Save the document.
To stroke (outline) an ellipse the first 4 and the last 2 steps will be the same but the 5-th and 6-th one will be:
- Set stroke to the current graphics state of PsDocument.
- Stroke (outline) the ellipse.
 1from aspose.page import *
 2from aspose.page.eps import *
 3from aspose.page.eps.device import *
 4import aspose.pydrawing
 5from util import Util
 6###############################################
 7###### Class and Method declaration here ######
 8###############################################
 9
10# The path to the documents directory.
11data_dir = Util.get_data_dir_working_with_shapes()
12
13# Create an output stream for PostScript document
14with open(data_dir + "AddEllipse_outPS.ps", "wb") as out_ps_stream:
15    # Create save options with the A4 size
16    options = PsSaveOptions()
17
18    # Create a new 1-paged PS Document
19    document = PsDocument(out_ps_stream, options, False)
20
21    # Create a graphics path from the first ellipse
22    path = aspose.pydrawing.drawing2d.GraphicsPath()
23    path.add_ellipse(aspose.pydrawing.RectangleF(250, 100, 150, 100))
24    # Set the paint
25    document.set_paint(aspose.pydrawing.SolidBrush(aspose.pydrawing.Color.orange))
26    # Fill the ellipse
27    document.fill(path)
28
29    # Create a graphics path from the second ellipse
30    path = aspose.pydrawing.drawing2d.GraphicsPath()
31    path.add_ellipse(aspose.pydrawing.RectangleF(250, 300, 150, 100))
32    # Set the stroke
33    document.set_stroke(GraphicsFactory.create_pen_by_brush_and_width(aspose.pydrawing.SolidBrush(aspose.pydrawing.Color.red), 3))
34    # Stroke (outline) the ellipse
35    document.draw(path)
36
37    # Close the current page
38    document.close_page()
39
40    # Save the document
41    document.save()
The result of running this code is

As we can see, any shape, both closed and unclosed, can be filled or drawn by PsDocument. It can also be clipped, but it will be described in a different article.
You can download examples and data files from GitHub.