在 Python 中向 PDF 添加表格
在现有 PDF 文档中添加表格是数据展示、结构化内容和报告的常见需求。Aspose.PDF for Python via .NET 提供了一个实用的 API,用于在现有 PDF 中插入和格式化表格。
本指南提供了表格创建、列大小设置、边框、行和单元格以及保存修改后文档的分步示例。它还涵盖了高级选项,如单元格边框、外边距、内边距以及用于动态表格大小的 AutoFit 设置。
当您需要在已有 PDF 中添加新表格并在 Python 中控制其布局行为时,请使用此页面。
创建基本表格
创建表格
本示例演示如何在 PDF 文档中创建带有边框和多行的表格。
- 创建一个新的 PDF 文档。
- 在文档中添加一个空白页。
- 初始化表格。
- 设置整体表格边框。
- 设置单个单元格的边框。
- 添加行和单元格。
- 将表格插入页面中。
- 将 PDF 保存到指定路径。
import aspose.pdf as ap
from aspose.pdf import Color, HorizontalAlignment
from os import path
import sys

def create_table(outfile: str) -> None:
    # Create new PDF document
    document = ap.Document()
    page = document.pages.add()
    # Initializes a new instance of the Table
    table = ap.Table()
    # Set the table border color as LightGray
    table.border = ap.BorderInfo(ap.BorderSide.ALL, 5, ap.Color.light_gray)
    # Set the border for table cells
    table.default_cell_border = ap.BorderInfo(ap.BorderSide.ALL, 5, ap.Color.light_gray)
    # Create a loop to add 10 rows
    for row_count in range(10):
        # Add row to table
        row = table.rows.add()
        # Add table cells
        row.cells.add("Column (" + str(row_count) + ", 1)")
        row.cells.add("Column (" + str(row_count) + ", 2)")
        row.cells.add("Column (" + str(row_count) + ", 3)")
    # Add table object to first page of input document
    page.paragraphs.add(table)

    # Save updated document containing table object
    document.save(outfile)
将图像添加到表格单元格
此代码片段展示了如何在 PDF 文档的 Table 单元格中插入图像。
- 创建一个新的 PDF 文档。
- 初始化表格。
- 以点为单位设置列宽。
- 已将文本片段添加到第一个单元格。
- 一个 ‘ap.Image()’ 实例被添加到第二个单元格。
- 将图像文件的路径设置为 ‘img.file’。
- ‘img.fix_width’ 和 ‘img.fix_height’ 控制单元格内图像的大小。
- 将表格插入 PDF 页面。
- 保存 PDF。
import aspose.pdf as ap
from aspose.pdf import Color, HorizontalAlignment
from os import path
import sys

def add_image(image: str, outfile: str) -> None:
    # Instantiate Document object
    document = ap.Document()
    page = document.pages.add()
    # Instantiate a table object
    table = ap.Table()
    # Set width for table cells
    table.column_widths = "200 100"

    # Create row object and add it to table instance
    row = table.rows.add()
    # Create cell object and add it to row instance
    cell = row.cells.add()
    # Add textfragment to paragraphs collection of cell object
    cell.paragraphs.add(ap.text.TextFragment(image))
    # Create an image instance
    img = ap.Image()
    # Set image type as SVG
    # Path for source file
    img.file = image
    # Set width for image instance
    img.fix_width = 50
    # Set height for image instance
    img.fix_height = 50
    # Add another cell to row object
    cell = row.cells.add()
    # Add SVG image to paragraphs collection of recently added cell instance
    cell.paragraphs.add(img)

    # Add table to paragraphs collection of page object
    page.paragraphs.add(table)
    # Save PDF file
    document.save(outfile)
您可以将 SVG 图像添加到 PDF 文档的表格单元格中:
import aspose.pdf as ap
from aspose.pdf import Color, HorizontalAlignment
from os import path
import sys

def add_svg_image(images: list[str], outfile: str) -> None:
    # Instantiate Document object
    document = ap.Document()
    page = document.pages.add()
    # Instantiate a table object
    table = ap.Table()
    # Set width for table cells
    table.column_widths = "200 100"
    for image in images:
        # Create row object and add it to table instance
        row = table.rows.add()
        # Create cell object and add it to row instance
        cell = row.cells.add()
        # Add textfragment to paragraphs collection of cell object
        cell.paragraphs.add(ap.text.TextFragment(image))
        # Create an image instance
        img = ap.Image()
        # Set image type as SVG
        img.file_type = ap.ImageFileType.SVG
        # Path for source file
        img.file = image
        # Set width for image instance
        img.fix_width = 50
        # Set height for image instance
        img.fix_height = 50
        # Add another cell to row object
        cell = row.cells.add()
        # Add SVG image to paragraphs collection of recently added cell instance
        cell.paragraphs.add(img)

    # Add table to paragraphs collection of page object
    page.paragraphs.add(table)
    # Save PDF file
    document.save(outfile)
表格中的列跨度和行跨度
此示例展示了如何垂直和水平合并表格单元格以创建复杂的表格布局。
- 设置整体表格边框。
- 设置默认单元格边框。
- 将两个单元格水平合并为一个。
- 将单元格垂直合并跨越两行。
- 第5行通过跳过合并的列来处理跨行(rowspan)。
- 将表格插入页面中。
- 保存 PDF。
import aspose.pdf as ap
from aspose.pdf import Color, HorizontalAlignment
from os import path
import sys

def add_rowspan_or_colspan(outfile: str) -> None:
    # Create new PDF document
    document = ap.Document()
    page = document.pages.add()

    # Initializes a new instance of the Table
    table = ap.Table()
    # Set the table border color as LightGray
    table.border = ap.BorderInfo(ap.BorderSide.ALL, 0.5, ap.Color.black)
    # Set the border for table cells
    table.default_cell_border = ap.BorderInfo(ap.BorderSide.ALL, 0.5, ap.Color.black)
    # Add 1st row to table
    row1 = table.rows.add()
    for cell_count in range(1, 5):
        # Add table cells
        row1.cells.add("Test 1" + str(cell_count))

    # Add 2nd row to table
    row2 = table.rows.add()
    row2.cells.add("Test 2 1")
    cell = row2.cells.add("Test 2 2")
    cell.col_span = 2
    row2.cells.add("Test 2 4")

    # Add 3rd row to table
    row3 = table.rows.add()
    row3.cells.add("Test 3 1")
    row3.cells.add("Test 3 2")
    row3.cells.add("Test 3 3")
    row3.cells.add("Test 3 4")

    # Add 4th row to table
    row4 = table.rows.add()
    row4.cells.add("Test 4 1")
    cell = row4.cells.add("Test 4 2")
    cell.row_span = 2
    row4.cells.add("Test 4 3")
    row4.cells.add("Test 4 4")

    # Add 5th row to table
    row5 = table.rows.add()
    row5.cells.add("Test 5 1")
    row5.cells.add("Test 5 3")
    row5.cells.add("Test 5 4")

    # Add table object to first page of input document
    page.paragraphs.add(table)
    # Save updated document containing table object
    document.save(outfile)

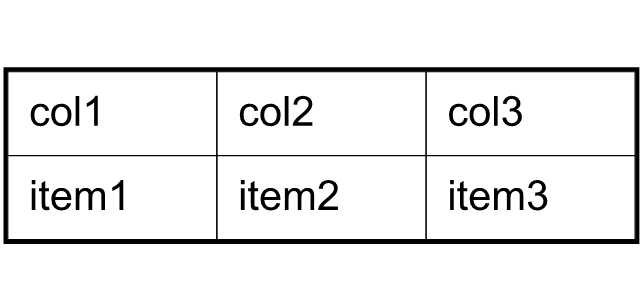
为表格和单元格应用边框
此示例演示如何设置单元格内边距、表格边距,并控制表格单元格中文本的自动换行。
- 设置列的宽度。
- 定义表格和单元格边框。
- 设置单元格内部填充以实现一致的间距。
- 默认情况下将填充应用于所有单元格。
- 添加文本并控制换行。
- 添加行和单元格。
- 保存 PDF。
import aspose.pdf as ap
from aspose.pdf import Color, HorizontalAlignment
from os import path
import sys

def add_borders(outfile: str) -> None:
    # Create new PDF document
    document = ap.Document()
    page = document.pages.add()
    # Instantiate a table object
    tab1 = ap.Table()
    # Add the table in paragraphs collection of the desired section
    page.paragraphs.add(tab1)
    # Set with column widths of the table
    tab1.column_widths = "50 50 50"
    # Set default cell border using BorderInfo object
    tab1.default_cell_border = ap.BorderInfo(ap.BorderSide.ALL, 0.1)
    # Set table border using another customized BorderInfo object
    tab1.border = ap.BorderInfo(ap.BorderSide.ALL, 1)
    # Create MarginInfo object and set its left, bottom, right and top margins
    margin = ap.MarginInfo()
    margin.top = 5
    margin.left = 5
    margin.right = 5
    margin.bottom = 5
    # Set the default cell padding to the MarginInfo object
    tab1.default_cell_padding = margin
    # Create rows in the table and then cells in the rows
    row1 = tab1.rows.add()
    row1.cells.add("col1")
    row1.cells.add("col2")
    row1.cells.add()
    text = ap.text.TextFragment("col3 with large text string")
    row1.cells[2].paragraphs.add(text)
    row1.cells[2].is_word_wrapped = False
    row2 = tab1.rows.add()
    row2.cells.add("item1")
    row2.cells.add("item2")
    row2.cells.add("item3")
    # Save updated document containing table object
    document.save(outfile)
表格布局和尺寸
自动调整列和行
此代码片段展示了如何自动调整表格列宽以适应页面。 请注意,在参数 table.column_widths = “50 50 50” 中,它的单位是点。但您也可以指定厘米(cm)、英寸或 %。
- 设置初始列宽。
- 自动调整列以适应页面宽度。
- 定义单元格和表格边框。
- ’table.default_cell_padding’ 使用 ‘MarginInfo()’ 来在单元格内部实现一致的间距。
- 使用 ’table.rows.add()’ 添加行,使用 ‘row.cells.add()’ 添加单元格。
- 保存 PDF。
import aspose.pdf as ap
from aspose.pdf import Color, HorizontalAlignment
from os import path
import sys

def auto_fit(outfile: str) -> None:
    # Create new PDF document
    document = ap.Document()
    page = document.pages.add()
    # Instantiate a table object
    table = ap.Table()

    page.paragraphs.add(table)

    table.column_widths = "50 50 50"
    table.column_adjustment = ap.ColumnAdjustment.AUTO_FIT_TO_WINDOW

    table.default_cell_border = ap.BorderInfo(ap.BorderSide.ALL, 0.1)

    table.border = ap.BorderInfo(ap.BorderSide.ALL, 1)

    margin = ap.MarginInfo()
    margin.top = 5
    margin.left = 5
    margin.right = 5
    margin.bottom = 5

    table.default_cell_padding = margin

    row1 = table.rows.add()
    row1.cells.add("col1")
    row1.cells.add("col2")
    row1.cells.add("col3")
    row2 = table.rows.add()
    row2.cells.add("item1")
    row2.cells.add("item2")
    row2.cells.add("item3")

    document.save(outfile)
创建具有合并单元格和重复列的复杂 PDF 表格
使用 Python 和 Aspose.PDF 在 PDF 中构建高级表格。它包括合并的标题单元格、彩色背景、重复列,以及大型结构化数据集。该表格被配置为处理垂直换行和用于报告样式文档的复杂布局。
import aspose.pdf as ap
from aspose.pdf import Color, HorizontalAlignment
from os import path
import sys

def add_table_hide_borders(outfile: str) -> None:
    # Create PDF document
    document = ap.Document()
    page = document.pages.add()

    # Instantiate a table object that will be nested inside outerTable that will break inside the same page
    table = ap.Table()
    table.broken = ap.TableBroken.VERTICAL
    table.default_cell_border = ap.BorderInfo(ap.BorderSide.ALL)
    table.repeating_columns_count = 2
    page.paragraphs.add(table)

    # Add header Row
    row = table.rows.add()
    cell = row.cells.add("header 1")
    cell.col_span = 2
    cell.background_color = ap.Color.light_gray
    row.cells.add("header 3")

    cell2 = row.cells.add("header 4")
    cell2.col_span = 2
    cell2.background_color = ap.Color.light_blue
    row.cells.add("header 6")

    cell3 = row.cells.add("header 7")
    cell3.col_span = 2
    cell3.background_color = ap.Color.light_green
    cell4 = row.cells.add("header 9")

    cell4.col_span = 3
    cell4.background_color = ap.Color.light_coral
    row.cells.add("header 12")
    row.cells.add("header 13")
    row.cells.add("header 14")
    row.cells.add("header 15")
    row.cells.add("header 16")
    row.cells.add("header 17")

    row_counter = 0
    while row_counter < 3:
        # Create rows in the table and then cells in the rows
        row1 = table.rows.add()
        row1.cells.add("col " + str(row_counter) + ", 1")
        row1.cells.add("col " + str(row_counter) + ", 2")
        row1.cells.add("col " + str(row_counter) + ", 3")
        row1.cells.add("col " + str(row_counter) + ", 4")
        row1.cells.add("col " + str(row_counter) + ", 5")
        row1.cells.add("col " + str(row_counter) + ", 6")
        row1.cells.add("col " + str(row_counter) + ", 7")
        row1.cells.add("col " + str(row_counter) + ", 8")
        row1.cells.add("col " + str(row_counter) + ", 9")
        row1.cells.add("col " + str(row_counter) + ", 10")
        row1.cells.add("col " + str(row_counter) + ", 11")
        row1.cells.add("col " + str(row_counter) + ", 12")
        row1.cells.add("col " + str(row_counter) + ", 13")
        row1.cells.add("col " + str(row_counter) + ", 14")
        row1.cells.add("col " + str(row_counter) + ", 15")
        row1.cells.add("col " + str(row_counter) + ", 16")
        row1.cells.add("col " + str(row_counter) + ", 17")
        row_counter += 1

    document.save(outfile)

表格角落样式
Aspose.PDF for Python via .NET 展示了如何为表格应用圆角并自定义边框半径。
- 创建一个新的表实例。
- 为所有侧面初始化边框。
- 设置圆角半径。
- 应用圆角样式。
- 添加行和单元格。
- 使用 ‘page.paragraphs.add(table)’ 将表格插入 PDF 页面。
- 保存 PDF 文档。
import aspose.pdf as ap
from aspose.pdf import Color, HorizontalAlignment
from os import path
import sys

def create_table_with_round_corner(outfile: str) -> None:
    # Create new PDF document
    document = ap.Document()
    page = document.pages.add()

    # Create a table
    table = ap.Table()

    # Create a blank BorderInfo object
    b_info = ap.BorderInfo(ap.BorderSide.ALL)

    # Set the border a rounded border where radius of round is 15
    b_info.rounded_border_radius = 15

    # Set the table corner style as Round
    table.corner_style = ap.BorderCornerStyle.ROUND

    # Set the table border information
    table.border = b_info

    # Create a loop to add 10 rows
    for row_count in range(0, 10):
        # Add row to table
        row = table.rows.add()
        # Add table cells
        row.cells.add("Column (" + str(row_count) + ", 1)")
        row.cells.add("Column (" + str(row_count) + ", 2)")
        row.cells.add("Column (" + str(row_count) + ", 3)")

    # Add table object to first page of input document
    page.paragraphs.add(table)
    # Save updated document containing table object
    document.save(outfile)
向表格添加内容
在单元格中使用 HtmlFragment
此示例展示了如何将 HTML 格式的内容插入表格单元格。
- 定义表格和单元格边框。
- 添加 HTML 内容。
- 添加行。循环在每个单元格中添加包含 HTML 格式内容的多行。
- 使用 ‘page.paragraphs.add(table)’ 将表格插入 PDF 页面。
- 保存 PDF 文档。
import aspose.pdf as ap
from aspose.pdf import Color, HorizontalAlignment
from os import path
import sys

def add_html_fragments(outfile: str) -> None:
    # Instantiate Document object
    document = ap.Document()
    page = document.pages.add()
    # Instantiate a table object
    table = ap.Table()

    # Set the table border color as LightGray
    table.border = ap.BorderInfo(ap.BorderSide.ALL, 0.5, ap.Color.light_gray)
    # Set the border for table cells
    table.default_cell_border = ap.BorderInfo(
        ap.BorderSide.ALL, 0.5, ap.Color.light_gray
    )
    # Create a loop to add 10 rows
    row_count = 1
    while row_count < 10:
        # Add row to table
        row = table.rows.add()
        # Add table cells
        cell = row.cells.add()
        cell.paragraphs.add(
            ap.HtmlFragment(f"Column <strong>({row_count}, 1)</strong>")
        )

        cell = row.cells.add()
        cell.paragraphs.add(
            ap.HtmlFragment(f"Column <span style='color:red'>({row_count}, 2)</span>")
        )

        cell = row.cells.add()
        cell.paragraphs.add(
            ap.HtmlFragment(
                f"Column <span style='text-decoration: underline'>({row_count}, 3)</span>"
            )
        )
        row_count += 1

    # Add table object to first page of input document
    page.paragraphs.add(table)
    # Save updated document containing table object
    document.save(outfile)
在单元格中使用 LaTeX 片段
本示例演示如何将 LaTeX 格式的内容插入表格单元格,以用于数学或样式化的表达式。
- 定义表格和单元格边框。
- 添加 LaTeX 内容。
- 添加行。循环在每个单元格中添加多行包含 LaTeX 格式内容的行。
- 使用 ‘page.paragraphs.add(table)’ 将表格插入 PDF 页面。
- 保存 PDF 文档。
import aspose.pdf as ap
from aspose.pdf import Color, HorizontalAlignment
from os import path
import sys

def add_latex_fragments(outfile: str) -> None:
    # Instantiate Document object
    document = ap.Document()
    page = document.pages.add()
    # Instantiate a table object
    table = ap.Table()

    # Set the table border color as LightGray
    table.border = ap.BorderInfo(ap.BorderSide.ALL, 0.5, ap.Color.light_gray)
    # Set the border for table cells
    table.default_cell_border = ap.BorderInfo(
        ap.BorderSide.ALL, 0.5, ap.Color.light_gray
    )
    # Create a loop to add 10 rows
    row_count = 1
    while row_count < 10:
        # Add row to table
        row = table.rows.add()
        # Add table cells
        cell = row.cells.add()
        cell.paragraphs.add(ap.LatexFragment(f"Column $\\mathbf{{({row_count}, 1)}}$"))

        cell = row.cells.add()
        cell.paragraphs.add(
            ap.LatexFragment(f"Column $\\textcolor{{red}}{{({row_count}, 2)}}$")
        )

        cell = row.cells.add()
        cell.paragraphs.add(
            ap.LatexFragment(f"Column $\\underline{{({row_count}, 3)}}$")
        )
        row_count += 1

    # Add table object to first page of input document
    page.paragraphs.add(table)
    # Save updated document containing table object
    document.save(outfile)
高级表格功能
在 PDF 表格中插入自动换页
使用 Python 和 Aspose.PDF 在 PDF 中创建大表格,并在达到特定行数后自动分页。它构建多行表格,应用边框,并强制选定的行在新页面开始,以获得更好的布局控制。
import aspose.pdf as ap
from aspose.pdf import Color, HorizontalAlignment
from os import path
import sys

def insert_page_break(outfile: str) -> None:
    # Create PDF document
    document = ap.Document()

    # Add page
    page = document.pages.add()

    # Create table instance
    table = ap.Table()

    # Set border style for table
    table.border = ap.BorderInfo(ap.BorderSide.ALL, ap.Color.red)

    # Set default border style for table with border color as Red
    table.default_cell_border = ap.BorderInfo(ap.BorderSide.ALL, ap.Color.red)

    # Specify table columns width
    table.column_widths = "100 100"

    # Create a loop to add 200 rows for table
    for counter in range(201):
        row = ap.Row()
        table.rows.add(row)

        cell1 = ap.Cell()
        cell1.paragraphs.add(ap.text.TextFragment(f"Cell {counter}, 0"))
        row.cells.add(cell1)

        cell2 = ap.Cell()
        cell2.paragraphs.add(ap.text.TextFragment(f"Cell {counter}, 1"))
        row.cells.add(cell2)

        # When 10 rows are added, render new row in new page
        if counter % 10 == 0 and counter != 0:
            row.is_in_new_page = True

    # Add table to paragraphs collection of PDF file
    page.paragraphs.add(table)

    # Save PDF document
    document.save(outfile)
在多个页面上重复标题行
此示例展示了如何创建跨多页的表格,同时在每页上保持标题行可见。
- 初始化表格。
- 重复标题行,包括字体、大小和颜色。
- 设置列宽并为表格应用边框。
- 添加标题行。
- 添加许多数据行以强制表格跨越多页。
- 使用 ‘page.paragraphs.add(table)’ 将表格插入 PDF 页面。
- 保存 PDF 文档。
import aspose.pdf as ap
from aspose.pdf import Color, HorizontalAlignment
from os import path
import sys

def add_repeating_rows(outfile: str) -> None:
    # Create PDF document
    document = ap.Document()
    page = document.pages.add()

    # Instantiate a table object
    table = ap.Table()

    # Set the table to break across pages
    table.broken = ap.TableBroken.VERTICAL

    # Set number of repeating header rows
    table.repeating_rows_count = 2

    text_state = ap.text.TextState()
    text_state.font_size = 12
    text_state.font = ap.text.FontRepository.find_font("TimesNewRoman")
    text_state.foreground_color = ap.Color.red
    table.repeating_rows_style = text_state

    # Set column widths
    table.column_widths = "100 100 100"

    # Set borders
    table.default_cell_border = ap.BorderInfo(ap.BorderSide.ALL, 0.5, ap.Color.black)
    table.border = ap.BorderInfo(ap.BorderSide.ALL, 1, ap.Color.black)

    # Add header rows that will repeat on each page
    header_row1 = table.rows.add()
    header_row1.cells.add("Header 1-1")
    header_row1.cells.add("Header 1-2")
    header_row1.cells.add("Header 1-3")

    # Set background color for header rows
    for cell in header_row1.cells:
        cell.background_color = ap.Color.light_gray

    header_row2 = table.rows.add()
    header_row2.cells.add("Header 2-1")
    header_row2.cells.add("Header 2-2")
    header_row2.cells.add("Header 2-3")

    for cell in header_row2.cells:
        cell.background_color = ap.Color.light_blue

    # Add many data rows to force table across multiple pages
    for i in range(1, 101):
        row = table.rows.add()
        row.cells.add(f"Data {i}-1")
        row.cells.add(f"Data {i}-2")
        row.cells.add(f"Data {i}-3")

    # Add table to page
    page.paragraphs.add(table)

    # Save document
    document.save(outfile)
重复列
函数 ‘add_repeating_columns’ 创建一个带有重复列的表格的 PDF 文档。它设置了带边框的表格,添加标题,填充数据行,并将生成的 PDF 文件保存到指定位置。设置此属性将导致表格按列方式在下一页断开,并在下一页的起始处重复给定的列数。
- 初始化一个新的 PDF 文档。
- 添加一个具有自定义尺寸的页面。
- 设置表格边框样式。
- 初始化表格。
- 在 PDF 页面上添加表格。
- 添加标题行。
- 添加数据行。
- 保存 PDF 文档。
import aspose.pdf as ap
from aspose.pdf import Color, HorizontalAlignment
from os import path
import sys

def add_repeating_columns(outfile: str) -> None:
    # Create PDF document
    document = ap.Document()

    # Add page
    page = document.pages.add()
    page.set_page_size(ap.PageSize.a5.height, ap.PageSize.a5.width)

    # Define border
    border = ap.BorderInfo(ap.BorderSide.ALL, 0.5, ap.Color.light_gray)

    # Create table
    table = ap.Table()
    table.broken = ap.TableBroken.VERTICAL_IN_SAME_PAGE
    table.column_adjustment = ap.ColumnAdjustment.AUTO_FIT_TO_CONTENT
    table.repeating_columns_count = 5
    table.border = border
    table.default_cell_border = border

    # Add table to page
    page.paragraphs.add(table)

    # Add header row
    row = table.rows.add()
    for i in range(1, 6):
        cell = row.cells.add(f"header {i}")
        cell.background_color = ap.Color.light_gray

    for i in range(6, 18):
        row.cells.add(f"header {i}")

    # Add data rows
    for row_counter in range(1, 6):
        row = table.rows.add()
        for i in range(1, 6):
            cell = row.cells.add(f"cell {row_counter},{i}")
            cell.background_color = ap.Color.light_gray
        for i in range(6, 18):
            row.cells.add(f"cell {row_counter},{i}")

    # Save PDF document
    document.save(outfile)
创建一个带有旋转文本单元格的 PDF 表格
使用 Python 和 Aspose.PDF 在 PDF 中创建表格,并在每个单元格内将文本旋转不同角度。这对于垂直标题、创意布局、紧凑表格以及自定义报告格式非常有用。
import aspose.pdf as ap
from aspose.pdf import Color, HorizontalAlignment
from os import path
import sys

def rotated_text_table(outfile: str) -> None:
    # Create PDF document
    document = ap.Document()

    # Add page
    page = document.pages.add()

    # Initializes a new instance of the Table
    table = ap.Table()
    table.border = ap.BorderInfo(ap.BorderSide.ALL, 0.5, Color.black)
    table.default_cell_border = ap.BorderInfo(ap.BorderSide.ALL, 0.5, Color.black)

    # Add 1st row to table
    row1 = table.rows.add()
    row1.min_row_height = 200

    for cell_count in range(4):
        # Add table cells
        cell = row1.cells.add()

        tf = ap.text.TextFragment(f"Cell 1 {cell_count - 1}")
        tf.text_state.rotation = 90 * cell_count
        tf.horizontal_alignment = HorizontalAlignment.CENTER

        cell.paragraphs.add(tf)

    # Add table object to first page of input document
    page.paragraphs.add(table)

    # Save result
    document.save(outfile)