
Android でのプレゼンテーションにシェイプ効果を適用する
はじめに
PowerPoint のエフェクトはシェイプを目立たせるために使用できますが、fills やアウトラインとは異なります。PowerPoint のエフェクトを使用すると、シェイプにリアルな反射を作成したり、シェイプの光彩を広げたりすることができます。
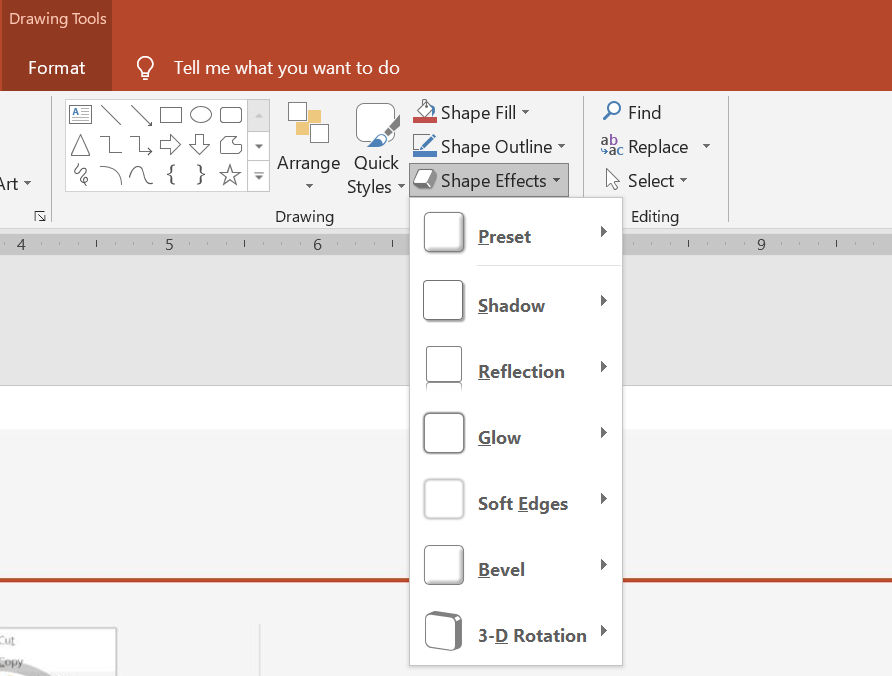
PowerPoint にはシェイプに適用できる 6 つのエフェクトが用意されています。シェイプに 1 つまたは複数のエフェクトを適用できます。
効果の組み合わせによっては見栄えが異なります。そのため、PowerPoint では Preset の下にオプションが用意されています。Preset オプションは、見た目が良いと分かっている 2 つ以上のエフェクトの組み合わせです。プリセットを選択すれば、さまざまなエフェクトをテストしたり組み合わせて最適な組み合わせを探す手間が省けます。
Aspose.Slides は、PowerPoint プレゼンテーション内のシェイプに同じエフェクトを適用できるよう、EffectFormat クラスのプロパティとメソッドを提供します。
影効果の適用
Aspose.Slides for Android via Java は、シェイプに対して外側と内側の影をサポートします。影の色、方向、距離、ぼかし半径をカスタマイズして、プレゼンテーションのデザインに合わせることができます。
外側の影を適用
外側の影を使用すると、カードやパネルがスライドの背景から際立ちます。影がシェイプのエッジを超えて広がり、シェイプがスライド上に持ち上げられたように見えます。色、方向、距離、ぼかし半径を調整して、テンプレートの照明やスタイリングに合わせてください。
この Java コードは、矩形に outer shadow effect を適用する方法を示しています。
import com.aspose.slides.*;
import android.graphics.Color;

Presentation presentation = new Presentation();
try {
    ISlide slide = presentation.getSlides().get_Item(0);

    IShape shape = slide.getShapes().addAutoShape(ShapeType.RoundCornerRectangle, 20, 20, 200, 100);
    shape.getEffectFormat().enableOuterShadowEffect();
    shape.getEffectFormat().getOuterShadowEffect().getShadowColor().setColor(Color.rgb(169, 169, 169));
    shape.getEffectFormat().getOuterShadowEffect().setDistance(10);
    shape.getEffectFormat().getOuterShadowEffect().setDirection(45);

    presentation.save("shadow_effect.pptx", SaveFormat.Pptx);
} finally {
    presentation.dispose();
}

内側の影を適用
テンプレートのビジュアルスタイルを再現する際は、内側の影を使用してカードやパネルにくぼんだ外観を付与します。外側の影はシェイプの外側に広がり持ち上がったように見せますが、内側の影はエッジの内側を陰影付けします。
enableInnerShadowEffect を呼び出し、続いて getInnerShadowEffect で取得した影を設定します。ぼかし半径の値が大きいほど、エッジは柔らかくなります。
この Java の例は、淡い青色のカードに濃い灰色の内側の影を付け、PPTX ファイルとして保存します。影の方向は 225 度、距離は 7 ポイント、ぼかし半径は 6 ポイントです。
import com.aspose.slides.*;
import android.graphics.Color;

Presentation presentation = new Presentation();
try {
    ISlide slide = presentation.getSlides().get_Item(0);

    IAutoShape shape = slide.getShapes().addAutoShape(ShapeType.Rectangle, 20, 20, 200, 100);
    shape.getFillFormat().setFillType(FillType.Solid);
    shape.getFillFormat().getSolidFillColor().setColor(Color.rgb(173, 216, 230));
    shape.getLineFormat().getFillFormat().setFillType(FillType.NoFill);

    shape.getEffectFormat().enableInnerShadowEffect();
    IInnerShadow shadow = shape.getEffectFormat().getInnerShadowEffect();
    shadow.getShadowColor().setColor(Color.rgb(105, 105, 105));
    shadow.setDirection(225);
    shadow.setDistance(7);
    shadow.setBlurRadius(6);

    presentation.save("inner_shadow_effect.pptx", SaveFormat.Pptx);
} finally {
    presentation.dispose();
}

内側の影を削除するには、シェイプのエフェクト フォーマットで disableInnerShadowEffect を呼び出します。
反射効果の適用
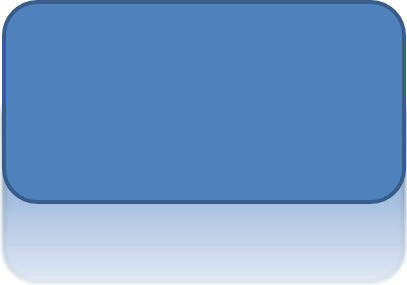
Aspose.Slides for Android via Java で反射効果を適用するには、シェイプに鏡面のような反射を追加し、距離、透明度、サイズなどのパラメータを調整します。この効果は、シェイプに洗練された外観を与え、プレゼンテーションの美観を高めます。シンプルなコードで簡単に実装でき、複数の要素に対して素早く適用して一貫したデザインを実現できます。
この Java コードは、シェイプに reflection effect を適用する方法を示しています。
import com.aspose.slides.*;

Presentation presentation = new Presentation();
try {
    ISlide slide = presentation.getSlides().get_Item(0);

    IShape shape = slide.getShapes().addAutoShape(ShapeType.RoundCornerRectangle, 20, 20, 200, 100);
    shape.getEffectFormat().enableReflectionEffect();
    shape.getEffectFormat().getReflectionEffect().setRectangleAlign(RectangleAlignment.Bottom);
    shape.getEffectFormat().getReflectionEffect().setDirection(90);
    shape.getEffectFormat().getReflectionEffect().setDistance(40);
    shape.getEffectFormat().getReflectionEffect().setBlurRadius(2);

    presentation.save("reflection_effect.pptx", SaveFormat.Pptx);
} finally {
    presentation.dispose();
}
光彩効果の適用
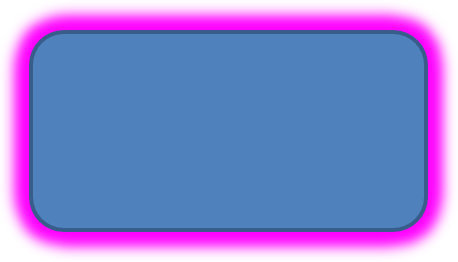
Aspose.Slides for Android via Java でシェイプに光彩効果を適用すると、シェイプの周囲に柔らかな光輪を追加できます。色やサイズなどのプロパティを調整して、シェイプを際立たせ、プレゼンテーションに魅力的で目を引くビジュアル要素を加えることができます。コードは最小限で済み、スライド全体の見栄えを簡単に向上させられます。
この Java コードは、シェイプに glow effect を適用する方法を示しています。
import com.aspose.slides.*;
import android.graphics.Color;

Presentation presentation = new Presentation();
try {
    ISlide slide = presentation.getSlides().get_Item(0);

    IShape shape = slide.getShapes().addAutoShape(ShapeType.RoundCornerRectangle, 20, 20, 200, 100);
    shape.getEffectFormat().enableGlowEffect();
    shape.getEffectFormat().getGlowEffect().getColor().setColor(Color.MAGENTA);
    shape.getEffectFormat().getGlowEffect().setRadius(15);

    presentation.save("glow_effect.pptx", SaveFormat.Pptx);
} finally {
    presentation.dispose();
}
ソフトエッジ効果の適用
Aspose.Slides for Android via Java でソフトエッジ効果を適用すると、シェイプのエッジ周辺に滑らかでぼやけたトランジションを作成できます。この効果は、より控えめで洗練された外観を加え、柔らかい印象が必要なデザインに最適です。半径などのパラメータを簡単に調整して、プレゼンテーション内のさまざまなシェイプに望みの効果を付与できます。
この Java コードは、シェイプに soft edges effect を適用する方法を示しています。
import com.aspose.slides.*;

Presentation presentation = new Presentation();
try {
    ISlide slide = presentation.getSlides().get_Item(0);

    IShape shape = slide.getShapes().addAutoShape(ShapeType.RoundCornerRectangle, 20, 20, 200, 150);
    shape.getEffectFormat().enableSoftEdgeEffect();
    shape.getEffectFormat().getSoftEdgeEffect().setRadius(8);

    presentation.save("soft_edges_effect.pptx", SaveFormat.Pptx);
} finally {
    presentation.dispose();
}

FAQ
同じシェイプに複数のエフェクトを適用できますか?
はい、影、反射、光彩などの異なるエフェクトを単一のシェイプに組み合わせて、よりダイナミックな外観を作り出すことができます。
どのシェイプにエフェクトを適用できますか?
オートシェイプ、チャート、テーブル、画像、SmartArt オブジェクト、OLE オブジェクトなど、さまざまなシェイプにエフェクトを適用できます。
グループ化されたシェイプにエフェクトを適用できますか?
はい、グループ化されたシェイプ全体にエフェクトを適用できます。エフェクトはグループ全体に適用されます。