Pythonでプレゼンテーションテキストをフォーマット
概要
この記事では、Aspose.Slides for Python via .NET を使用して PowerPoint および OpenDocument プレゼンテーションのテキスト書式設定方法を示します。ハイライト、背景色、透明度、文字間隔、フォントプロパティ、回転、段落間隔、オートフィット動作、テキストのアンカリング、タブストップ、言語設定などを扱います。
以下の例では、最初のスライドに単一のテキスト ボックスがあり、次のテキストが入力された「sample.pptx」というファイルを使用します。

テキストのハイライト
テキスト フレーム内で特定のサンプルに一致するテキストをハイライトする必要がある場合は、TextFrame.highlight_text メソッドを使用します。このメソッドは一致したテキスト フラグメントにハイライト色を適用し、TextSearchOptions と組み合わせて検索方法を制御できます。たとえば、完全一致の単語のみを対象にすることができます。
以下のコード例は、文字列 “try” のすべての出現箇所をハイライトし、その後、単語 “to” のみをハイライトします。
import aspose.pydrawing as draw
import aspose.slides as slides

with slides.Presentation("sample.pptx") as presentation:
    # 最初のスライドから最初のシェイプを取得します。
    shape = presentation.slides[0].shapes[0]

    # シェイプ内の単語 "try" をハイライトします。
    shape.text_frame.highlight_text("try", draw.Color.light_blue)

    search_options = slides.TextSearchOptions()
    search_options.whole_words_only = True

    # シェイプ内の単語 "to" をハイライトします。
    shape.text_frame.highlight_text("to", draw.Color.violet, search_options, None)

    presentation.save("highlighted_text.pptx", slides.export.SaveFormat.PPTX)
結果:

正規表現を使用したテキストのハイライト
テキスト フレーム内で正規表現に一致するテキストをハイライトするには、TextFrame.highlight_regex メソッドを使用します。Python では、この API は TextFrame 上で提供されています。
以下のコード例は、7 文字以上 を含むすべての単語をハイライトします。
import aspose.pydrawing as draw
import aspose.slides as slides

with slides.Presentation("sample.pptx") as presentation:
    shape = presentation.slides[0].shapes[0]

    regex = r"\b[^\s]{7,}\b"

    # 7 文字以上の単語をすべてハイライトします。
    shape.text_frame.highlight_regex(regex, draw.Color.yellow, None)

    presentation.save("highlighted_text_using_regex.pptx", slides.export.SaveFormat.PPTX)
結果:

テキストの背景色の設定
段落全体のデフォルトハイライト色を設定するには ParagraphFormat.default_portion_format を使用し、個々のテキスト部分に対しては PortionFormat.highlight_color を使用します。
次のコード例は、段落全体 の背景色を設定する方法を示します。
import aspose.pydrawing as draw
import aspose.slides as slides

with slides.Presentation("sample.pptx") as presentation:
    auto_shape = presentation.slides[0].shapes[0]
    paragraph = auto_shape.text_frame.paragraphs[0]

    # 段落全体のハイライト色を設定します。
    paragraph.paragraph_format.default_portion_format.highlight_color.color = draw.Color.light_gray

    presentation.save("gray_paragraph.pptx", slides.export.SaveFormat.PPTX)
結果:

以下のコード例は、太字フォントを使用したテキスト部分 の背景色を設定する方法を示します。
import aspose.pydrawing as draw
import aspose.slides as slides

with slides.Presentation("sample.pptx") as presentation:
    auto_shape = presentation.slides[0].shapes[0]
    paragraph = auto_shape.text_frame.paragraphs[0]

    for portion in paragraph.portions:
        if portion.portion_format.get_effective().font_bold:
            # テキスト部分のハイライト色を設定します。
            portion.portion_format.highlight_color.color = draw.Color.light_gray

    presentation.save("gray_text_portions.pptx", slides.export.SaveFormat.PPTX)
結果:

テキスト段落の配置
ParagraphFormat.alignment を使用して、テキスト フレーム内の段落配置を設定します。値には中央揃え、左揃え、右揃え、両端揃えなどがあります。
次のコード例は、段落を 中央 に揃える方法を示します。
import aspose.slides as slides

with slides.Presentation("sample.pptx") as presentation:
    auto_shape = presentation.slides[0].shapes[0]
    paragraph = auto_shape.text_frame.paragraphs[0]

    # 段落の配置を中央に設定します。
    paragraph.paragraph_format.alignment = slides.TextAlignment.CENTER

    presentation.save("aligned_paragraph.pptx", slides.export.SaveFormat.PPTX)
結果:

テキストの透明度の設定
テキストの透明度は、PortionFormat.fill_format に割り当てられた色のアルファ成分で制御されます。以下の例では、alpha = 50 は 0〜255 のスケールの ARGB アルファ チャネル値であり、透明度のパーセンテージではありません。
以下のコード例は、段落全体 に透明度を適用する方法を示します。
import aspose.pydrawing as draw
import aspose.slides as slides

alpha = 50

with slides.Presentation("sample.pptx") as presentation:
    auto_shape = presentation.slides[0].shapes[0]
    paragraph = auto_shape.text_frame.paragraphs[0]

    # テキストの塗りつぶし色を透明色に設定します。
    paragraph.paragraph_format.default_portion_format.fill_format.fill_type = slides.FillType.SOLID
    paragraph.paragraph_format.default_portion_format.fill_format.solid_fill_color.color = draw.Color.from_argb(alpha, draw.Color.black)

    presentation.save("transparent_paragraph.pptx", slides.export.SaveFormat.PPTX)
結果:
![]()
以下のコード例は、太字フォントを使用したテキスト部分 に透明度を適用する方法を示します。
import aspose.pydrawing as draw
import aspose.slides as slides

alpha = 50

with slides.Presentation("sample.pptx") as presentation:
    auto_shape = presentation.slides[0].shapes[0]
    paragraph = auto_shape.text_frame.paragraphs[0]

    for portion in paragraph.portions:
        if portion.portion_format.get_effective().font_bold:
            # テキスト部分の透明度を設定します。
            portion.portion_format.fill_format.fill_type = slides.FillType.SOLID
            portion.portion_format.fill_format.solid_fill_color.color = draw.Color.from_argb(alpha, draw.Color.black)

    presentation.save("transparent_text_portions.pptx", slides.export.SaveFormat.PPTX)
結果:

テキストの文字間隔の設定
BasePortionFormat.spacing を使用して、テキスト ボックス内の文字間の間隔を拡大または縮小できます。
次の Python コードは、段落全体 の文字間隔を拡大する方法を示します。
import aspose.slides as slides

with slides.Presentation("sample.pptx") as presentation:
    auto_shape = presentation.slides[0].shapes[0]
    paragraph = auto_shape.text_frame.paragraphs[0]

    # 注意: 文字間隔を縮めるには負の値を使用します。
    paragraph.paragraph_format.default_portion_format.spacing = 3  # 文字間隔を拡大します。

    presentation.save("character_spacing_in_paragraph.pptx", slides.export.SaveFormat.PPTX)
結果:

以下のコード例は、太字フォントを使用したテキスト部分 の文字間隔を拡大する方法を示します。
import aspose.slides as slides

with slides.Presentation("sample.pptx") as presentation:
    auto_shape = presentation.slides[0].shapes[0]
    paragraph = auto_shape.text_frame.paragraphs[0]

    for portion in paragraph.portions:
        if portion.portion_format.get_effective().font_bold:
            # 注意: 文字間隔を縮めるには負の値を使用します。
            portion.portion_format.spacing = 3  # 文字間隔を拡大します。

    presentation.save("character_spacing_in_text_portions.pptx", slides.export.SaveFormat.PPTX)
結果:

特定フォントのカーニング無効化
場合によっては、Aspose.Slides でレンダリングされたテキストが PowerPoint の同じテキストよりもやや詰まって見えることがあります。これは、PowerPoint が特定のフォントに対してカーニング データを無視するためで、フォントに有効なカーニング情報が含まれていても、PowerPoint の設定でカーニングが有効になっている場合があります。
このような場合にレンダリング結果を PowerPoint に近づけるには、該当フォントを使用するテキスト部分のカーニングを無効にできます。PortionFormat.kerning_minimal_size を実際のフォントサイズよりはるかに大きな値に設定します。
import aspose.slides as slides

with slides.Presentation("presentation.pptx") as presentation:
    auto_shape = presentation.slides[0].shapes[0]
    target_font = "Roboto"

    for paragraph in auto_shape.text_frame.paragraphs:
        for portion in paragraph.portions:
            latin_font = portion.portion_format.latin_font
            east_asian_font = portion.portion_format.east_asian_font
            complex_script_font = portion.portion_format.complex_script_font

            if ((latin_font is not None and latin_font.font_name == target_font) or
                    (east_asian_font is not None and east_asian_font.font_name == target_font) or
                    (complex_script_font is not None and complex_script_font.font_name == target_font)):
                portion.portion_format.kerning_minimal_size = 100

    presentation.save("output.pptx", slides.export.SaveFormat.PPTX)
テキストフォントプロパティの管理
フォント プロパティは、ParagraphFormat.default_portion_format を使用して段落レベルで設定でき、個々の部分については PortionFormat で設定できます。
次のコードは、段落全体のフォントとテキスト スタイルを設定します。フォントサイズ、太字、斜体、点線の下線、そして Times New Roman フォントを段落内のすべての部分に適用します。
import aspose.slides as slides

with slides.Presentation("sample.pptx") as presentation:
    auto_shape = presentation.slides[0].shapes[0]
    paragraph = auto_shape.text_frame.paragraphs[0]

    # 段落のフォントプロパティを設定します。
    paragraph.paragraph_format.default_portion_format.font_height = 12
    paragraph.paragraph_format.default_portion_format.font_bold = slides.NullableBool.TRUE
    paragraph.paragraph_format.default_portion_format.font_italic = slides.NullableBool.TRUE
    paragraph.paragraph_format.default_portion_format.font_underline = slides.TextUnderlineType.DOTTED
    paragraph.paragraph_format.default_portion_format.latin_font = slides.FontData("Times New Roman")

    presentation.save("font_properties_for_paragraph.pptx", slides.export.SaveFormat.PPTX)
結果:

以下のコード例は、太字フォントを使用したテキスト部分 に同様のプロパティを適用します。
import aspose.slides as slides

with slides.Presentation("sample.pptx") as presentation:
    auto_shape = presentation.slides[0].shapes[0]
    paragraph = auto_shape.text_frame.paragraphs[0]

    for portion in paragraph.portions:
        if portion.portion_format.get_effective().font_bold:
            # テキスト部分のフォントプロパティを設定します。
            portion.portion_format.font_height = 13
            portion.portion_format.font_italic = slides.NullableBool.TRUE
            portion.portion_format.font_underline = slides.TextUnderlineType.DOTTED
            portion.portion_format.latin_font = slides.FontData("Times New Roman")

    presentation.save("font_properties_for_text_portions.pptx", slides.export.SaveFormat.PPTX)
結果:

テキスト回転の設定
TextFrameFormat.text_vertical_type を使用して、シェイプ内のテキスト向きを事前定義されたものに設定します。
次のコード例は、シェイプ内のテキスト向きを VERTICAL270 に設定し、テキストを 反時計回りに 90 度 回転させます。
import aspose.slides as slides

with slides.Presentation("sample.pptx") as presentation:
    auto_shape = presentation.slides[0].shapes[0]

    auto_shape.text_frame.text_frame_format.text_vertical_type = slides.TextVerticalType.VERTICAL270

    presentation.save("text_rotation.pptx", slides.export.SaveFormat.PPTX)
結果:

テキストフレームのカスタム回転設定
TextFrameFormat.rotation_angle を使用して、TextFrame のカスタム回転角度を設定します。
以下のコード例は、シェイプ内でテキスト フレームを時計回りに 3 度回転させます。
import aspose.slides as slides

with slides.Presentation("sample.pptx") as presentation:
    auto_shape = presentation.slides[0].shapes[0]

    auto_shape.text_frame.text_frame_format.rotation_angle = 3

    presentation.save("custom_text_rotation.pptx", slides.export.SaveFormat.PPTX)
結果:

段落の行間設定
Aspose.Slides は、段落間隔を制御するために ParagraphFormat.space_after、ParagraphFormat.space_before、および ParagraphFormat.space_within を提供します。これらのプロパティは次のように使用します。
- 正の値を使用して、行間を行の高さのパーセンテージで指定します。
- 負の値を使用して、行間をポイント単位で指定します。
次のコード例は、段落内の行間を指定する方法を示します。
import aspose.slides as slides

with slides.Presentation("sample.pptx") as presentation:
    auto_shape = presentation.slides[0].shapes[0]
    paragraph = auto_shape.text_frame.paragraphs[0]

    paragraph.paragraph_format.space_within = 200

    presentation.save("line_spacing.pptx", slides.export.SaveFormat.PPTX)
結果:

テキストフレームのオートフィット タイプの設定
TextFrameFormat.autofit_type は、テキストがコンテナの境界を超えたときの動作を決定します。テキストを縮小、はみ出し、またはシェイプを自動的にリサイズするかを制御するために使用します。
import aspose.slides as slides

with slides.Presentation("sample.pptx") as presentation:
    auto_shape = presentation.slides[0].shapes[0]

    auto_shape.text_frame.text_frame_format.autofit_type = slides.TextAutofitType.SHAPE

    presentation.save("autofit_type.pptx", slides.export.SaveFormat.PPTX)
テキストフレームのアンカー設定
TextFrameFormat.anchoring_type は、シェイプ内でテキストが垂直方向にどの位置に配置されるか(例:上部、中央、下部)を定義します。
import aspose.slides as slides

with slides.Presentation("sample.pptx") as presentation:
    auto_shape = presentation.slides[0].shapes[0]

    auto_shape.text_frame.text_frame_format.anchoring_type = slides.TextAnchorType.BOTTOM

    presentation.save("text_anchor.pptx", slides.export.SaveFormat.PPTX)
テキストのタブ設定
ParagraphFormat.default_tab_size と ParagraphFormat.tabs を使用して、段落のタブストップを構成します。
import aspose.slides as slides

with slides.Presentation("sample.pptx") as presentation:
    auto_shape = presentation.slides[0].shapes[0]
    paragraph = auto_shape.text_frame.paragraphs[0]

    paragraph.paragraph_format.default_tab_size = 100
    paragraph.paragraph_format.tabs.add(30, slides.TabAlignment.LEFT)

    presentation.save("paragraph_tabs.pptx", slides.export.SaveFormat.PPTX)
結果:

校正言語の設定
Aspose.Slides は、テキスト部分の校正言語を設定できる PortionFormat.language_id を提供します。校正言語は、PowerPoint のスペルチェックおよび文法チェックに使用される言語を決定します。
以下のコード例は、テキスト部分の校正言語を設定する方法を示します。
import aspose.slides as slides

with slides.Presentation("presentation.pptx") as presentation:
    auto_shape = presentation.slides[0].shapes[0]

    paragraph = auto_shape.text_frame.paragraphs[0]
    paragraph.portions.clear()

    font = slides.FontData("SimSun")

    text_portion = slides.Portion()
    text_portion.portion_format.complex_script_font = font
    text_portion.portion_format.east_asian_font = font
    text_portion.portion_format.latin_font = font

    # 校正言語の ID を設定します。
    text_portion.portion_format.language_id = "zh-CN"

    text_portion.text = "1."
    paragraph.portions.add(text_portion)

    presentation.save("proofing_language.pptx", slides.export.SaveFormat.PPTX)
デフォルト言語の設定
LoadOptions.default_text_language を使用して、プレゼンテーションの読み込みまたは作成時に作成されるテキストのデフォルト言語を定義します。
import aspose.slides as slides

load_options = slides.LoadOptions()
load_options.default_text_language = "en-US"

with slides.Presentation(load_options) as presentation:
    slide = presentation.slides[0]

    # テキスト付きの新しい長方形シェイプを追加します。
    shape = slide.shapes.add_auto_shape(slides.ShapeType.RECTANGLE, 20, 20, 150, 50)
    shape.text_frame.text = "Sample text"

    # 最初のテキスト部分の言語を確認します。
    portion = shape.text_frame.paragraphs[0].portions[0]
    print(portion.portion_format.language_id)
デフォルトテキスト スタイルの設定
プレゼンテーション レベルでデフォルトのテキスト書式設定を適用するには、Presentation.default_text_style を使用します。
以下のコード例は、新しいプレゼンテーションのすべてのスライドに対して、デフォルトで 14 pt の太字フォントを設定する方法を示します。
import aspose.slides as slides

with slides.Presentation() as presentation:
    # 上位レベルの段落書式を取得します。
    paragraph_format = presentation.default_text_style.get_level(0)

    if paragraph_format is not None:
        paragraph_format.default_portion_format.font_height = 14
        paragraph_format.default_portion_format.font_bold = slides.NullableBool.TRUE

    presentation.save("default_text_style.pptx", slides.export.SaveFormat.PPTX)
全大文字効果でテキストを抽出
PowerPoint では、All Caps フォント効果を適用すると、元が小文字で入力されていてもスライド上で大文字として表示されます。Aspose.Slides でそのようなテキスト部分を取得すると、ライブラリは入力されたままのテキストを返します。表示されたテキストと一致させるには、TextCapType を確認し、値が ALL の場合は返された文字列を大文字に変換します。
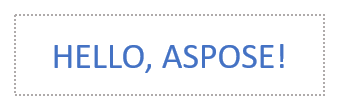
例として、sample2.pptx ファイルの最初のスライドに次のテキスト ボックスがあるとします。
以下のコード例は、All Caps 効果が適用されたテキストを抽出する方法を示します。
import aspose.slides as slides

with slides.Presentation("sample2.pptx") as presentation:
    auto_shape = presentation.slides[0].shapes[0]
    text_portion = auto_shape.text_frame.paragraphs[0].portions[0]

    print("Original text:", text_portion.text)

    text_format = text_portion.portion_format.get_effective()
    if text_format.text_cap_type == slides.TextCapType.ALL:
        text = text_portion.text.upper()
        print("All-Caps effect:", text)
出力:
Original text: Hello, Aspose!
All-Caps effect: HELLO, ASPOSE!
FAQ
スライド上の表のテキストを変更する方法は?
スライド上の表のテキストを変更するには、Table を使用します。セルを反復処理し、各セルを Cell.text_frame を介して更新し、段落書式は Paragraph.paragraph_format で設定します。
PowerPoint スライドのテキストにグラデーションカラーを適用する方法は?
テキストにグラデーションカラーを適用するには、PortionFormat.fill_format を使用します。FillFormat.fill_type を FillType.GRADIENT に設定し、グラデーション ストップ、方向、透明度を構成します。