
PowerPoint-vormen opmaken in PHP
Inleiding
In PowerPoint kun je vormen aan dia’s toevoegen. Aangezien vormen uit lijnen bestaan, kun je ze opmaken door de omtrek aan te passen of effecten toe te passen. Bovendien kun je vormen opmaken door instellingen op te geven die bepalen hoe de binnenkant wordt gevuld.
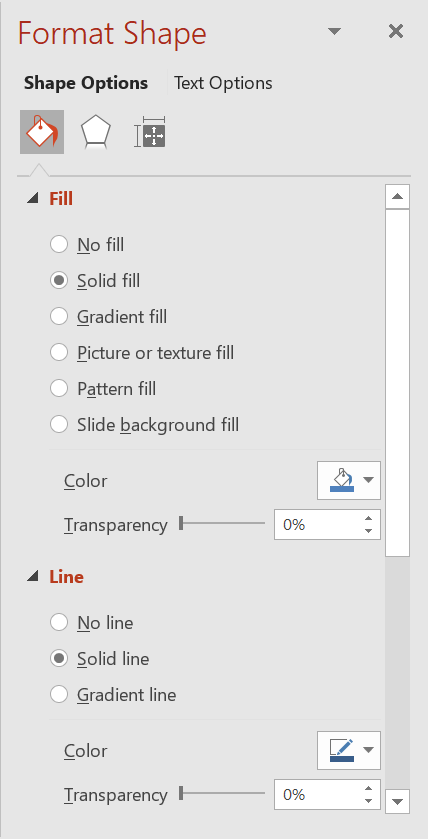
Aspose.Slides for PHP via Java biedt klassen en methoden waarmee je vormen kunt opmaken met dezelfde opties die beschikbaar zijn in PowerPoint.
Lijnen opmaken
Met Aspose.Slides kun je een aangepaste lijnstijl voor een vorm opgeven. De volgende stappen beschrijven de procedure:
- Maak een instantie van de Presentation klasse.
- Haal een referentie naar een dia op basis van de index.
- Voeg een AutoShape toe aan de dia.
- Stel de lijnstijl van de vorm in.
- Stel de lijndikte in.
- Stel de streepstijl van de lijn in.
- Stel de lijnkleur van de vorm in.
- Sla de aangepaste presentatie op als een PPTX‑bestand.
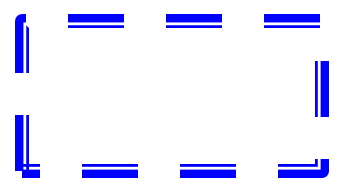
De volgende PHP‑code laat zien hoe je een rechthoekige AutoShape opmaakt:
// Instantieer de Presentation-klasse die een presentatiebestand vertegenwoordigt.
$presentation = new Presentation();
try {
    // Haal de eerste dia op.
    $slide = $presentation->getSlides()->get_Item(0);

    // Voeg een auto shape van het type Rectangle toe.
    $shape = $slide->getShapes()->addAutoShape(ShapeType::Rectangle, 50, 150, 150, 75);

    // Stel de vulkleur in voor de rechthoekvorm.
    $shape->getFillFormat()->setFillType(FillType::NoFill);

    // Pas opmaak toe op de lijnen van de rechthoek.
    $shape->getLineFormat()->setStyle(LineStyle::ThickThin);
    $shape->getLineFormat()->setWidth(7);
    $shape->getLineFormat()->setDashStyle(LineDashStyle::Dash);

    // Stel de kleur in voor de lijn van de rechthoek.
    $shape->getLineFormat()->getFillFormat()->setFillType(FillType::Solid);
    $shape->getLineFormat()->getFillFormat()->getSolidFillColor()->setColor(java("java.awt.Color")->BLUE);

    // Sla het PPTX-bestand op op schijf.
    $presentation->save("formatted_lines.pptx", SaveFormat::Pptx);
} finally {
    $presentation->dispose();
}
Het resultaat:
Schets‑effecten toepassen op vormlijnen
Een schets‑effect laat een vormlijn eruitzien alsof deze met de hand is getekend. Gebruik Shape.getLineFormat om de lijninstellingen te benaderen, LineFormat.getSketchFormat om de schetsinstellingen te benaderen, en SketchFormat.setSketchType om een waarde uit de LineSketchType‑enumeratie te selecteren.
De volgende PHP‑code toont hoe je een LineSketchType.Curved‑effect toepast, de expliciet toegewezen waarde uitleest, en het effect verwijdert met LineSketchType.None:
$presentation = new Presentation();
try {
    $slide = $presentation->getSlides()->get_Item(0);
    $shape = $slide->getShapes()->addAutoShape(ShapeType::Rectangle, 50, 50, 200, 100);

    // Toegang tot de lijnopmaak van de vorm en het schetsformaat.
    $sketchFormat = $shape->getLineFormat()->getSketchFormat();

    // Pas een schetseffect toe.
    $sketchFormat->setSketchType(LineSketchType::Curved);

    // Lees het schetseffect dat direct aan de vorm is toegewezen.
    $explicitSketchType = $sketchFormat->getSketchType();
    echo "Explicit sketch type: " . $explicitSketchType . PHP_EOL;

    // Verwijder het schetseffect.
    $sketchFormat->setSketchType(LineSketchType::None);
} finally {
    $presentation->dispose();
}
De waarde die wordt geretourneerd door SketchFormat.getSketchType vertegenwoordigt de instelling die rechtstreeks aan de vorm is toegewezen. Als de lijnopmaak kan worden geërfd van een thema, masterdia of lay‑outdia, gebruik dan LineFormat.getEffective, benader de getSketchFormat‑methode van het geretourneerde object en lees de getSketchType‑waarde. De effectieve waarde weerspiegelt de opmaak die daadwerkelijk wordt toegepast na het oplossen van de erfenis:
$presentation = new Presentation("presentation.pptx");
try {
    $shape = $presentation->getSlides()->get_Item(0)->getShapes()->get_Item(0);
    $lineFormat = $shape->getLineFormat();

    $explicitSketchType = $lineFormat->getSketchFormat()->getSketchType();
    $effectiveLineFormat = $lineFormat->getEffective();
    $effectiveSketchType = $effectiveLineFormat->getSketchFormat()->getSketchType();

    echo "Explicit sketch type: " . $explicitSketchType . PHP_EOL;
    echo "Effective sketch type: " . $effectiveSketchType . PHP_EOL;
} finally {
    $presentation->dispose();
}
Join‑stijlen opmaken
Dit zijn de drie opties voor het type join:
- Rond
- Schuin
- Afgeschuind
Standaard, wanneer PowerPoint twee lijnen onder een hoek (bijvoorbeeld op een hoek van een vorm) verbindt, wordt de Rond‑instelling gebruikt. Als je echter een vorm met scherpe hoeken tekent, kun je de Schuin‑optie verkiezen.
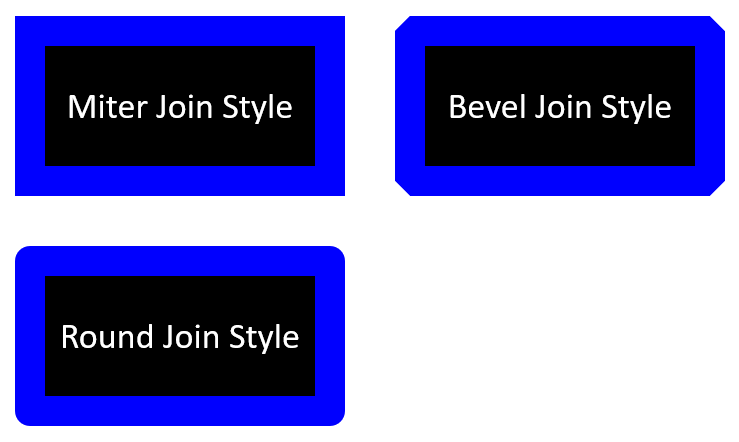
De volgende PHP‑code laat zien hoe drie rechthoeken (zoals afgebeeld in de afbeelding hierboven) werden gemaakt met de Miter, Bevel en Round join‑type‑instellingen:
// Instantieer de Presentation-klasse die een presentatiebestand vertegenwoordigt.
$presentation = new Presentation();
try {
    // Haal de eerste dia op.
    $slide = $presentation->getSlides()->get_Item(0);

    // Voeg drie auto shapes van het type Rectangle toe.
    $shape1 = $slide->getShapes()->addAutoShape(ShapeType::Rectangle, 20, 20, 150, 75);
    $shape2 = $slide->getShapes()->addAutoShape(ShapeType::Rectangle, 210, 20, 150, 75);
    $shape3 = $slide->getShapes()->addAutoShape(ShapeType::Rectangle, 20, 135, 150, 75);

    // Stel de vulkleur in voor elke rechthoekvorm.
    $shape1->getFillFormat()->setFillType(FillType::Solid);
    $shape1->getFillFormat()->getSolidFillColor()->setColor(java("java.awt.Color")->BLACK);
    $shape2->getFillFormat()->setFillType(FillType::Solid);
    $shape2->getFillFormat()->getSolidFillColor()->setColor(java("java.awt.Color")->BLACK);
    $shape3->getFillFormat()->setFillType(FillType::Solid);
    $shape3->getFillFormat()->getSolidFillColor()->setColor(java("java.awt.Color")->BLACK);

    // Stel de lijndikte in.
    $shape1->getLineFormat()->setWidth(15);
    $shape2->getLineFormat()->setWidth(15);
    $shape3->getLineFormat()->setWidth(15);

    // Stel de kleur in voor de lijn van elke rechthoek.
    $shape1->getLineFormat()->getFillFormat()->setFillType(FillType::Solid);
    $shape1->getLineFormat()->getFillFormat()->getSolidFillColor()->setColor(java("java.awt.Color")->BLUE);
    $shape2->getLineFormat()->getFillFormat()->setFillType(FillType::Solid);
    $shape2->getLineFormat()->getFillFormat()->getSolidFillColor()->setColor(java("java.awt.Color")->BLUE);
    $shape3->getLineFormat()->getFillFormat()->setFillType(FillType::Solid);
    $shape3->getLineFormat()->getFillFormat()->getSolidFillColor()->setColor(java("java.awt.Color")->BLUE);

    // Stel de join‑stijl in.
    $shape1->getLineFormat()->setJoinStyle(LineJoinStyle::Miter);
    $shape2->getLineFormat()->setJoinStyle(LineJoinStyle::Bevel);
    $shape3->getLineFormat()->setJoinStyle(LineJoinStyle::Round);

    // Voeg tekst toe aan elke rechthoek.
    $shape1->getTextFrame()->setText("Miter Join Style");
    $shape2->getTextFrame()->setText("Bevel Join Style");
    $shape3->getTextFrame()->setText("Round Join Style");

    // Sla het PPTX‑bestand op op schijf.
    $presentation->save("join_styles.pptx", SaveFormat::Pptx);
} finally {
    $presentation->dispose();
}
Gradiëntvulling
In PowerPoint is Gradiëntvulling een opmaakoptie waarmee je een continue kleurverloop op een vorm kunt toepassen. Je kunt bijvoorbeeld twee of meer kleuren gebruiken zodat de ene geleidelijk in de andere overloopt.
Zo pas je een gradiëntvulling toe op een vorm met Aspose.Slides:
- Maak een instantie van de Presentation klasse.
- Haal een referentie naar een dia op basis van de index.
- Voeg een AutoShape toe aan de dia.
- Stel de FillType van de vorm in op
Gradient. - Voeg je twee gewenste kleuren met gedefinieerde posities toe via de
add‑methoden van de gradiënt‑stop‑collectie die wordt blootgesteld door de GradientFormat klasse. - Sla de aangepaste presentatie op als een PPTX‑bestand.
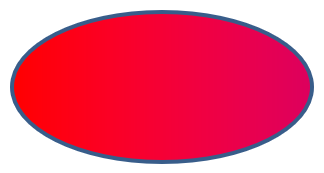
De volgende PHP‑code laat zien hoe je een ellipse een gradiëntvulling geeft:
// Instantieer de Presentation-klasse die een presentatiebestand vertegenwoordigt.
$presentation = new Presentation();
try {
    // Haal de eerste dia op.
    $slide = $presentation->getSlides()->get_Item(0);

    // Voeg een auto shape van het type Ellipse toe.
    $shape = $slide->getShapes()->addAutoShape(ShapeType::Ellipse, 50, 50, 150, 75);

    // Pas gradiëntopmaak toe op de ellipse.
    $shape->getFillFormat()->setFillType(FillType::Gradient);
    $shape->getFillFormat()->getGradientFormat()->setGradientShape(GradientShape::Linear);

    // Stel de richting van de gradiënt in.
    $shape->getFillFormat()->getGradientFormat()->setGradientDirection(GradientDirection::FromCorner2);

    // Voeg twee gradiëntstops toe.
    $shape->getFillFormat()->getGradientFormat()->getGradientStops()->addPresetColor(1.0, PresetColor::Purple);
    $shape->getFillFormat()->getGradientFormat()->getGradientStops()->addPresetColor(0, PresetColor::Red);

    // Sla het PPTX-bestand op op schijf.
    $presentation->save("gradient_fill.pptx", SaveFormat::Pptx);
} finally {
    $presentation->dispose();
}
Het resultaat:
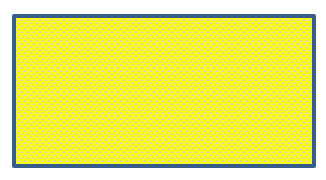
Patroonvulling
In PowerPoint is Patroonvulling een opmaakoptie waarmee je een tweekleurig ontwerp—zoals stippen, strepen, kruislijnen of raster—op een vorm kunt toepassen. Je kunt aangepaste kleuren kiezen voor de voor‑ en achtergrond van het patroon.
Aspose.Slides biedt meer dan 45 vooraf gedefinieerde patroonstijlen die je op vormen kunt toepassen om de visuele aantrekkingskracht van je presentaties te vergroten. Zelfs nadat je een vooraf gedefinieerd patroon hebt gekozen, kun je de exacte kleuren die het moet gebruiken nog steeds specificeren.
Zo pas je een patroonvulling toe op een vorm met Aspose.Slides:
- Maak een instantie van de Presentation klasse.
- Haal een referentie naar een dia op basis van de index.
- Voeg een AutoShape toe aan de dia.
- Stel de FillType van de vorm in op
Pattern. - Kies een patroonstijl uit de vooraf gedefinieerde opties.
- Stel de Background Color van het patroon in.
- Stel de Foreground Color van het patroon in.
- Sla de aangepaste presentatie op als een PPTX‑bestand.
De volgende PHP‑code laat zien hoe je een rechthoek een patroonvulling geeft:
// Instantieer de Presentation-klasse die een presentatiebestand vertegenwoordigt.
$presentation = new Presentation();
try {
    // Haal de eerste dia op.
    $slide = $presentation->getSlides()->get_Item(0);

    // Voeg een auto shape van het type Rectangle toe.
    $shape = $slide->getShapes()->addAutoShape(ShapeType::Rectangle, 50, 50, 150, 75);

    // Stel het vultype in op Pattern.
    $shape->getFillFormat()->setFillType(FillType::Pattern);

    // Stel de patroonstijl in.
    $shape->getFillFormat()->getPatternFormat()->setPatternStyle(PatternStyle::Trellis);

    // Stel de achtergrond- en voorgrondkleuren van het patroon in.
    $shape->getFillFormat()->getPatternFormat()->getBackColor()->setColor(java("java.awt.Color")->LIGHT_GRAY);
    $shape->getFillFormat()->getPatternFormat()->getForeColor()->setColor(java("java.awt.Color")->YELLOW);

    // Sla het PPTX-bestand op op schijf.
    $presentation->save("pattern_fill.pptx", SaveFormat::Pptx);
} finally {
    $presentation->dispose();
}
Het resultaat:
Afbeeldingsvulling
In PowerPoint is Afbeeldingsvulling een opmaakoptie waarmee je een afbeelding in een vorm kunt invoegen—effectief de afbeelding als achtergrond van de vorm gebruiken.
Zo gebruik je Aspose.Slides om een afbeeldingvulling op een vorm toe te passen:
- Maak een instantie van de Presentation klasse.
- Haal een referentie naar een dia op basis van de index.
- Voeg een AutoShape toe aan de dia.
- Stel de FillType van de vorm in op
Picture. - Stel de afbeeldingvullingsmodus in op
Tile(of een andere gewenste modus). - Maak een PPImage object aan van de afbeelding die je wilt gebruiken.
- Geef de afbeelding door aan de
SlidesPicture.setImage‑methode. - Sla de aangepaste presentatie op als een PPTX‑bestand.
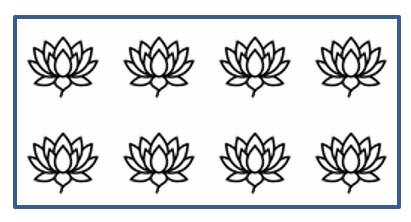
Stel dat we een bestand “lotus.png” hebben met de volgende afbeelding:

De volgende PHP‑code laat zien hoe je een vorm vult met de afbeelding:
// Instantieer de Presentation-klasse die een presentatiebestand vertegenwoordigt.
$presentation = new Presentation();
try {
    // Haal de eerste dia op.
    $slide = $presentation->getSlides()->get_Item(0);

    // Voeg een auto shape van het type Rectangle toe.
    $shape = $slide->getShapes()->addAutoShape(ShapeType::Rectangle, 50, 50, 255, 130);

    // Stel het vultype in op Picture.
    $shape->getFillFormat()->setFillType(FillType::Picture);

    // Stel de picture fill-modus in.
    $shape->getFillFormat()->getPictureFillFormat()->setPictureFillMode(PictureFillMode::Tile);

    // Laad een afbeelding en voeg deze toe aan de presentatieresources.
    $image = Images::fromFile("lotus.png");
    $picture = $presentation->getImages()->addImage($image);
    $image->dispose();

    // Stel de afbeelding in.
    $shape->getFillFormat()->getPictureFillFormat()->getPicture()->setImage($picture);

    // Sla het PPTX-bestand op op schijf.
    $presentation->save("picture_fill.pptx", SaveFormat::Pptx);
} finally {
    $presentation->dispose();
}
Het resultaat:
Afbeelding tegelen als textuur
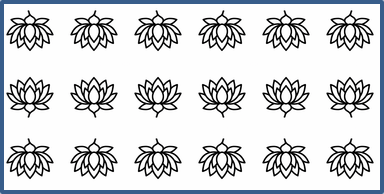
Als je een getegelde afbeelding als tekstuur wilt instellen en het tegelgedrag wilt aanpassen, kun je de volgende methoden van de PictureFillFormat klasse gebruiken:
- setPictureFillMode: Stelt de picture fill‑modus in —
TileofStretch. - setTileAlignment: Bepaalt de uitlijning van de tegels binnen de vorm.
- setTileFlip: Bepaalt of de tegel horizontaal, verticaal of beide kanten wordt gespiegeld.
- setTileOffsetX: Stelt de horizontale offset van de tegel (in points) ten opzichte van de oorsprong van de vorm in.
- setTileOffsetY: Stelt de verticale offset van de tegel (in points) ten opzichte van de oorsprong van de vorm in.
- setTileScaleX: Definieert de horizontale schaal van de tegel als percentage.
- setTileScaleY: Definieert de verticale schaal van de tegel als percentage.
De volgende code‑voorbeeld laat zien hoe je een rechthoekige vorm toevoegt met een getegelde afbeeldingvulling en de tegelopties configureert:
// Instantieer de Presentation-klasse die een presentatiebestand vertegenwoordigt.
$presentation = new Presentation();
try {
    // Haal de eerste dia op.
    $firstSlide = $presentation->getSlides()->get_Item(0);

    // Voeg een rechthoekige auto shape toe.
    $shape = $firstSlide->getShapes()->addAutoShape(ShapeType::Rectangle, 50, 50, 190, 95);

    // Stel het vultype van de vorm in op Picture.
    $shape->getFillFormat()->setFillType(FillType::Picture);

    // Laad de afbeelding en voeg deze toe aan de presentatieresources.
    $sourceImage = Images::fromFile("lotus.png");
    $presentationImage = $presentation->getImages()->addImage($sourceImage);
    $sourceImage->dispose();

    // Wijs de afbeelding toe aan de vorm.
    $pictureFillFormat = $shape->getFillFormat()->getPictureFillFormat();
    $pictureFillFormat->getPicture()->setImage($presentationImage);

    // Configureer de picture fill-modus en tegel‑eigenschappen.
    $pictureFillFormat->setPictureFillMode(PictureFillMode::Tile);
    $pictureFillFormat->setTileOffsetX(-32);
    $pictureFillFormat->setTileOffsetY(-32);
    $pictureFillFormat->setTileScaleX(50);
    $pictureFillFormat->setTileScaleY(50);
    $pictureFillFormat->setTileAlignment(RectangleAlignment::BottomRight);
    $pictureFillFormat->setTileFlip(TileFlip::FlipBoth);

    // Sla het PPTX‑bestand op op schijf.
    $presentation->save("tile.pptx", SaveFormat::Pptx);
} finally {
    $presentation->dispose();
}
Het resultaat:
Effenkleurvulling
In PowerPoint is Effenkleurvulling een opmaakoptie die een vorm vult met één enkele, uniforme kleur. Deze egale achtergrondkleur wordt toegepast zonder gradaties, texturen of patronen.
Om een effenkleurvulling toe te passen op een vorm met Aspose.Slides, volg je deze stappen:
- Maak een instantie van de Presentation klasse.
- Haal een referentie naar een dia op basis van de index.
- Voeg een AutoShape toe aan de dia.
- Stel de FillType van de vorm in op
Solid. - Wijs je voorkeursvulkleur toe aan de vorm.
- Sla de aangepaste presentatie op als een PPTX‑bestand.
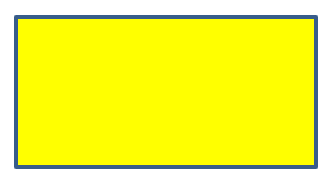
De volgende PHP‑code laat zien hoe je een rechthoek in een PowerPoint‑dia een effenkleurvulling geeft:
// Instantieer de Presentation-klasse die een presentatiebestand vertegenwoordigt.
$presentation = new Presentation();
try {
    // Haal de eerste dia op.
    $slide = $presentation->getSlides()->get_Item(0);

    // Voeg een auto shape van het type Rectangle toe.
    $shape = $slide->getShapes()->addAutoShape(ShapeType::Rectangle, 50, 50, 150, 75);

    // Stel het vultype in op Solid.
    $shape->getFillFormat()->setFillType(FillType::Solid);

    // Stel de vulkleur in.
    $shape->getFillFormat()->getSolidFillColor()->setColor(java("java.awt.Color")->YELLOW);

    // Sla het PPTX-bestand op op schijf.
    $presentation->save("solid_color_fill.pptx", SaveFormat::Pptx);
} finally {
    $presentation->dispose();
}
Het resultaat:
Transparantie instellen
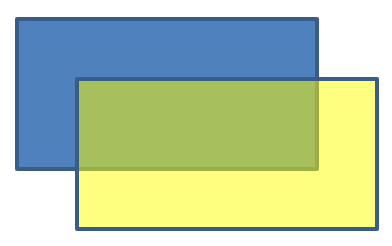
In PowerPoint kun je bij het toepassen van een effen kleur, gradiënt, afbeelding of textuurvulling op vormen ook een transparantieniveau instellen om de dekking van de vulling te controleren. Een hogere transparantiewaarde maakt de vorm transparanter, waardoor de achtergrond of onderliggende objecten gedeeltelijk zichtbaar worden.
Aspose.Slides maakt het mogelijk de transparantiewaarde in te stellen door de alfa‑waarde van de gebruikte kleur voor de vulling aan te passen. Zo doe je dat:
- Maak een instantie van de Presentation klasse.
- Haal een referentie naar een dia op basis van de index.
- Voeg een AutoShape toe aan de dia.
- Stel de FillType in op
Solid. - Gebruik
Colorom een kleur met transparantie te definiëren (dealpha‑component regelt de transparantie). - Sla de presentatie op.
De volgende PHP‑code laat zien hoe je een transparante vulkleur toepast op een rechthoek:
// Instantieer de Presentation-klasse die een presentatiebestand vertegenwoordigt.
$presentation = new Presentation();
try {
    // Haal de eerste dia op.
    $slide = $presentation->getSlides()->get_Item(0);

    // Voeg een effen rechthoekige auto shape toe.
    $solidShape = $slide->getShapes()->addAutoShape(ShapeType::Rectangle, 50, 50, 150, 75);

    // Voeg een transparante rechthoekige auto shape toe boven de effen vorm.
    $transparentShape = $slide->getShapes()->addAutoShape(ShapeType::Rectangle, 80, 80, 150, 75);
    $transparentShape->getFillFormat()->setFillType(FillType::Solid);
    $transparentShape->getFillFormat()->getSolidFillColor()->setColor(new java("java.awt.Color", 255, 255, 0, 204));

    // Sla het PPTX-bestand op op schijf.
    $presentation->save("shape_transparency.pptx", SaveFormat::Pptx);
} finally {
    $presentation->dispose();
}
Het resultaat:
Vormen roteren
Aspose.Slides maakt het mogelijk om vormen in PowerPoint‑presentaties te roteren. Dit kan handig zijn bij het positioneren van visuele elementen met specifieke uitlijning‑ of ontwerpeisen.
Om een vorm op een dia te roteren, volg je deze stappen:
- Maak een instantie van de Presentation klasse.
- Haal een referentie naar een dia op basis van de index.
- Voeg een AutoShape toe aan de dia.
- Stel de rotatie‑eigenschap van de vorm in op de gewenste hoek.
- Sla de presentatie op.
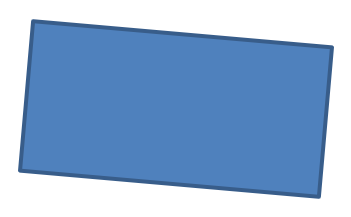
De volgende PHP‑code laat zien hoe je een vorm 5 graden draait:
// Instantieer de Presentation-klasse die een presentatiebestand vertegenwoordigt.
$presentation = new Presentation();
try {
    // Haal de eerste dia op.
    $slide = $presentation->getSlides()->get_Item(0);

    // Voeg een auto shape van het type Rectangle toe.
    $shape = $slide->getShapes()->addAutoShape(ShapeType::Rectangle, 50, 50, 150, 75);

    // Roteer de vorm met 5 graden.
    $shape->setRotation(5);

    // Sla het PPTX-bestand op op schijf.
    $presentation->save("shape_rotation.pptx", SaveFormat::Pptx);
} finally {
    $presentation->dispose();
}
Het resultaat:
3D‑schuineffecten toevoegen
Aspose.Slides stelt je in staat 3D‑schuineffecten toe te passen op vormen door de eigenschappen van hun ThreeDFormat te configureren.
Om 3D‑schuineffecten aan een vorm toe te voegen, volg je deze stappen:
- Instantieer de Presentation klasse.
- Haal een referentie naar een dia op basis van de index.
- Voeg een AutoShape toe aan de dia.
- Configureer de ThreeDFormat van de vorm om de schuine‑instellingen te definiëren.
- Sla de presentatie op.
De volgende PHP‑code toont hoe je 3D‑schuineffecten op een vorm toepast:
// Maak een instantie van de Presentation-klasse.
$presentation = new Presentation();
try {
    $slide = $presentation->getSlides()->get_Item(0);

    // Voeg een vorm toe aan de dia.
    $shape = $slide->getShapes()->addAutoShape(ShapeType::Ellipse, 50, 50, 100, 100);
    $shape->getFillFormat()->setFillType(FillType::Solid);
    $shape->getFillFormat()->getSolidFillColor()->setColor(java("java.awt.Color")->GREEN);
    $shape->getLineFormat()->getFillFormat()->setFillType(FillType::Solid);
    $shape->getLineFormat()->getFillFormat()->getSolidFillColor()->setColor(java("java.awt.Color")->ORANGE);
    $shape->getLineFormat()->setWidth(2.0);

    // Stel de ThreeDFormat‑eigenschappen van de vorm in.
    $shape->getThreeDFormat()->setDepth(4);
    $shape->getThreeDFormat()->getBevelTop()->setBevelType(BevelPresetType::Circle);
    $shape->getThreeDFormat()->getBevelTop()->setHeight(6);
    $shape->getThreeDFormat()->getBevelTop()->setWidth(6);
    $shape->getThreeDFormat()->getCamera()->setCameraType(CameraPresetType::OrthographicFront);
    $shape->getThreeDFormat()->getLightRig()->setLightType(LightRigPresetType::ThreePt);
    $shape->getThreeDFormat()->getLightRig()->setDirection(LightingDirection::Top);

    // Sla de presentatie op als een PPTX‑bestand.
    $presentation->save("3D_bevel_effect.pptx", SaveFormat::Pptx);
} finally {
    $presentation->dispose();
}
Het resultaat:

3D‑rotatie‑effecten toevoegen
Aspose.Slides maakt het mogelijk 3D‑rotatie‑effecten toe te passen op vormen door hun ThreeDFormat eigenschappen te configureren.
Om 3D‑rotatie op een vorm toe te passen:
- Maak een instantie van de Presentation klasse.
- Haal een referentie naar een dia op basis van de index.
- Voeg een AutoShape toe aan de dia.
- Gebruik setCameraType en setLightType om de 3D‑rotatie te definiëren.
- Sla de presentatie op.
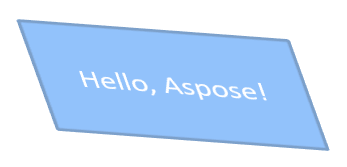
De volgende PHP‑code laat zien hoe je 3D‑rotatie‑effecten op een vorm toepast:
// Maak een instantie van de Presentation-klasse.
$presentation = new Presentation();
try {
    $slide = $presentation->getSlides()->get_Item(0);

    $autoShape = $slide->getShapes()->addAutoShape(ShapeType::Rectangle, 50, 50, 150, 75);
    $autoShape->getTextFrame()->setText("Hello, Aspose!");

    $autoShape->getThreeDFormat()->setDepth(6);
    $autoShape->getThreeDFormat()->getCamera()->setRotation(40, 35, 20);
    $autoShape->getThreeDFormat()->getCamera()->setCameraType(CameraPresetType::IsometricLeftUp);
    $autoShape->getThreeDFormat()->getLightRig()->setLightType(LightRigPresetType::Balanced);

    // Sla de presentatie op als een PPTX‑bestand.
    $presentation->save("3D_rotation_effect.pptx", SaveFormat::Pptx);
} finally {
    $presentation->dispose();
}
Het resultaat:
Zwart‑wit weergave voor vormen beheren
De methode Shape::setBlackWhiteMode geeft aan hoe een individuele vorm wordt gerenderd wanneer een presentatie wordt bekeken of verwerkt in zwart‑wit‑modus. De methode activeert niet zelf een zwart‑wit‑weergave en verandert de vul‑, lijn‑ of andere opmaak niet in de normale kleurenmodus.
Gebruik een waarde uit de klasse BlackWhiteMode om het gewenste gedrag te selecteren. Bijvoorbeeld, Automatic laat de render‑applicatie de conversie kiezen, Gray en LightGray gebruiken grijstinten, BlackWhite gebruikt alleen zwart en wit, Black en White dwingen één kleur, Color behoudt normale kleuring, en Hidden laat de vorm weg in zwart‑wit‑modus. NotDefined betekent dat er geen vorm‑specifieke modus is toegewezen.
De volgende PHP‑code maakt een gekleurde vorm en zorgt ervoor dat deze grijs wordt weergegeven in de zwart‑wit‑weergavemodus:
use aspose\slides\BlackWhiteMode;
use aspose\slides\FillType;
use aspose\slides\Presentation;
use aspose\slides\SaveFormat;
use aspose\slides\ShapeType;

$presentation = new Presentation();
try {
    $slide = $presentation->getSlides()->get_Item(0);

    $shape = $slide->getShapes()->addAutoShape(ShapeType::Rectangle, 50, 50, 200, 100);
    $shape->getFillFormat()->setFillType(FillType::Solid);
    $orange = new Java("java.awt.Color", 255, 165, 0);
    $shape->getFillFormat()->getSolidFillColor()->setColor($orange);

    // Behoud de oranje vulling in kleurmodus, maar geef de vorm weer met een grijze kleur in zwart-wit-modus.
    $shape->setBlackWhiteMode(BlackWhiteMode::Gray);

    $presentation->save("shape_black_white_mode.pptx", SaveFormat::Pptx);
} finally {
    $presentation->dispose();
}
In de normale kleurenmodus behoudt de rechthoek zijn oranje vulkleur. In een zwart‑wit‑workflow gebruikt hij grijze kleuring omdat de modus is ingesteld op Gray. Hierdoor kun je een volledige‑kleur dia behouden terwijl je een aparte weergave definieert voor afdrukken, preview of andere workflows die de zwart‑wit‑instellingen van de presentatie respecteren.
Opmaak resetten
De volgende Java‑code toont hoe je de opmaak van een dia reset en de positie, grootte en opmaak van alle vormen met place‑holders op de LayoutSlide terugzet naar hun standaardinstellingen:
$presentation = new Presentation("sample.pptx");
try {
    for ($i = 0; $i < java_values($presentation->getSlides()->size()); $i++) {
        $slide = $presentation->getSlides()->get_Item($i);
        // Reset elke vorm op de dia die een placeholder op de lay-out heeft.
        $slide->reset();
    }
    $presentation->save("reset_formatting.pptx", SaveFormat::Pptx);
} finally {
    $presentation->dispose();
}
FAQ
Heeft het opmaken van vormen invloed op de uiteindelijke bestandsgrootte van de presentatie?
Alleen minimaal. Ingesloten afbeeldingen en media nemen het grootste deel van de bestandsruimte in beslag, terwijl vormparameters zoals kleuren, effecten en gradaties als metadata worden opgeslagen en praktisch geen extra grootte toevoegen.
Hoe kan ik vormen op een dia detecteren die identieke opmaak delen zodat ik ze kan groeperen?
Vergelijk de belangrijkste opmaak‑eigenschappen van elke vorm—vullings‑, lijn‑ en effectinstellingen. Als alle overeenkomstige waarden kloppen, beschouw je de stijlen als identiek en groepeer je die vormen logisch, wat later het beheer van stijlen vereenvoudigt.
Kan ik een set aangepaste vormstijlen opslaan in een apart bestand voor hergebruik in andere presentaties?
Ja. Sla voorbeeldvormen met de gewenste stijlen op in een template‑dia of een .POTX‑templatebestand. Wanneer je een nieuwe presentatie maakt, open je de template, kloon je de gestylede vormen die je nodig hebt, en pas je hun opmaak opnieuw toe waar nodig.