
จัดการการซูมของงานนำเสนอบน Android
บทนำ
Zoom ใน PowerPoint ช่วยให้คุณกระโดดไปยังสไลด์ ส่วน หรือส่วนย่อยของงานนำเสนอและกลับมาได้อย่างรวดเร็ว เมื่อคุณกำลังนำเสนอ ความสามารถในการนำทางอย่างรวดเร็วนี้อาจเป็นประโยชน์อย่างมาก
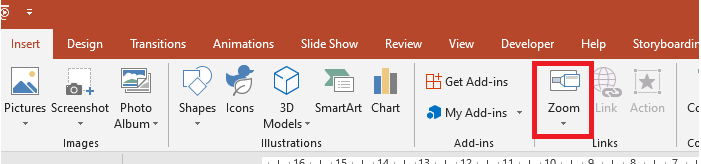
- เพื่อสรุปงานนำเสนอทั้งหมดในสไลด์เดียว ใช้ Summary Zoom
- หากต้องการแสดงสไลด์ที่เลือกเท่านั้น ใช้ Slide Zoom
- หากต้องการแสดงส่วนเดียวเท่านั้น ใช้ Section Zoom
Slide Zoom
Slide Zoom สามารถทำให้งานนำเสนอของคุณมีความไดนามิกมากขึ้น โดยให้คุณนำทางระหว่างสไลด์ได้อย่างอิสระในลำดับที่ต้องการโดยไม่ขัดจังหวะการนำเสนอ Slide Zoom เหมาะสำหรับการนำเสนอสั้นที่ไม่มีหลายส่วน แต่คุณยังสามารถใช้ในสถานการณ์การนำเสนออื่น ๆ ได้
Slide Zoom ช่วยให้คุณเจาะลึกข้อมูลหลายชิ้นโดยรู้สึกเหมือนอยู่บนผืนผ้าใบเดียว
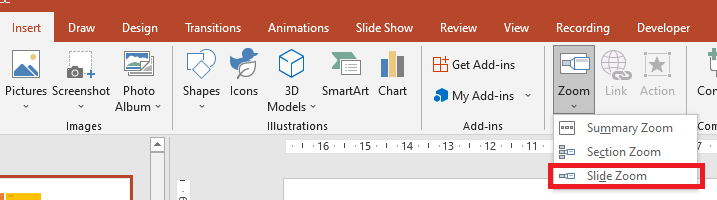
สำหรับออบเจกต์ Slide Zoom, Aspose.Slides มี enumeration ZoomImageType, interface IZoomFrame และบางเมธอดภายใต้ interface IShapeCollection
สร้าง Zoom Frame
คุณสามารถเพิ่ม Zoom Frame ในสไลด์ได้ดังนี้:
- สร้างอินสแตนซ์ของคลาส Presentation
- สร้างสไลด์ใหม่ที่คุณต้องการเชื่อมโยงกับ Zoom Frame
- เพิ่มข้อความระบุตัวตนและพื้นหลังให้กับสไลด์ที่สร้าง
- เพิ่ม Zoom Frame (ที่อ้างอิงสไลด์ที่สร้าง) ไปยังสไลด์แรก
- บันทึกงานนำเสนอที่แก้ไขเป็นไฟล์ PPTX
โค้ด Java ตัวอย่างต่อไปนี้แสดงวิธีสร้าง Zoom Frame บนสไลด์:
Presentation pres = new Presentation();
try {
    //เพิ่มสไลด์ใหม่ในงานนำเสนอ
    ISlide slide2 = pres.getSlides().addEmptySlide(pres.getSlides().get_Item(0).getLayoutSlide());
    ISlide slide3 = pres.getSlides().addEmptySlide(pres.getSlides().get_Item(0).getLayoutSlide());

    //สร้างพื้นหลังสำหรับสไลด์ที่สอง
    slide2.getBackground().setType(BackgroundType.OwnBackground);
    slide2.getBackground().getFillFormat().setFillType(FillType.Solid);
    slide2.getBackground().getFillFormat().getSolidFillColor().setColor(Color.cyan);

    //สร้างกล่องข้อความสำหรับสไลด์ที่สอง
    IAutoShape autoshape = slide2.getShapes().addAutoShape(ShapeType.Rectangle, 100, 200, 500, 200);
    autoshape.getTextFrame().setText("Second Slide");

    //สร้างพื้นหลังสำหรับสไลด์ที่สาม
    slide3.getBackground().setType(BackgroundType.OwnBackground);
    slide3.getBackground().getFillFormat().setFillType(FillType.Solid);
    slide3.getBackground().getFillFormat().getSolidFillColor().setColor(Color.darkGray);

    //สร้างกล่องข้อความสำหรับสไลด์ที่สาม
    autoshape = slide3.getShapes().addAutoShape(ShapeType.Rectangle, 100, 200, 500, 200);
    autoshape.getTextFrame().setText("Trird Slide");

    //เพิ่มวัตถุ ZoomFrame
    pres.getSlides().get_Item(0).getShapes().addZoomFrame(20, 20, 250, 200, slide2);
    pres.getSlides().get_Item(0).getShapes().addZoomFrame(200, 250, 250, 200, slide3);

    //บันทึกงานนำเสนอ
    pres.save("presentation.pptx", SaveFormat.Pptx);
} finally {
    if (pres != null) pres.dispose();
}
สร้าง Zoom Frame ด้วยรูปภาพกำหนดเอง
ด้วย Aspose.Slides for Android via Java คุณสามารถสร้าง Zoom Frame พร้อมภาพตัวอย่างสไลด์ที่แตกต่างกันได้ดังนี้:
- สร้างอินสแตนซ์ของคลาส Presentation
- สร้างสไลด์ใหม่ที่คุณต้องการเชื่อมโยงกับ Zoom Frame
- เพิ่มข้อความระบุตัวตนและพื้นหลังให้กับสไลด์
- สร้างออบเจกต์ IPPImage โดยเพิ่มรูปภาพไปยังคอลเลกชัน Images ของออบเจกต์ Presentation ที่จะใช้เติมกรอบ
- เพิ่ม Zoom Frame (ที่อ้างอิงสไลด์ที่สร้าง) ไปยังสไลด์แรก
- บันทึกงานนำเสนอที่แก้ไขเป็นไฟล์ PPTX
โค้ด Java ตัวอย่างต่อไปนี้แสดงวิธีสร้าง Zoom Frame ด้วยรูปภาพที่แตกต่าง:
Presentation pres = new Presentation();
try {
    //เพิ่มสไลด์ใหม่ในงานนำเสนอ
    ISlide slide = pres.getSlides().addEmptySlide(pres.getSlides().get_Item(0).getLayoutSlide());

    //สร้างพื้นหลังสำหรับสไลด์ที่สอง
    slide.getBackground().setType(BackgroundType.OwnBackground);
    slide.getBackground().getFillFormat().setFillType(FillType.Solid);
    slide.getBackground().getFillFormat().getSolidFillColor().setColor(Color.cyan);

    //สร้างกล่องข้อความสำหรับสไลด์ที่สาม
    IAutoShape autoshape = slide.getShapes().addAutoShape(ShapeType.Rectangle, 100, 200, 500, 200);
    autoshape.getTextFrame().setText("Second Slide");

    //สร้างภาพใหม่สำหรับอ็อบเจกต์ซูม
    IPPImage picture;
        IImage image = Images.fromFile("image.png");
        try {
            picture = pres.getImages().addImage(image);
        } finally {
            if (image != null) image.dispose();
        }
    //เพิ่มอ็อบเจกต์ ZoomFrame
    pres.getSlides().get_Item(0).getShapes().addZoomFrame(20, 20, 300, 200, slide, picture);

    //บันทึกงานนำเสนอ
    pres.save("presentation.pptx", SaveFormat.Pptx);
} catch(IOException e) {
} finally {
    if (pres != null) pres.dispose();
}
จัดรูปแบบ Zoom Frame
ในส่วนก่อนหน้า เราแสดงวิธีสร้าง Zoom Frame อย่างง่าย เพื่อสร้าง Zoom Frame ที่ซับซ้อนขึ้น คุณต้องปรับเปลี่ยนการจัดรูปแบบของกรอบที่ง่าย ๆ มีตัวเลือกการจัดรูปแบบหลายอย่างที่คุณสามารถใช้กับ Zoom Frame
คุณสามารถควบคุมการจัดรูปแบบของ Zoom Frame บนสไลด์ได้ดังนี้:
- สร้างอินสแตนซ์ของคลาส Presentation
- สร้างสไลด์ใหม่ที่คุณต้องการเชื่อมโยงกับ Zoom Frame
- เพิ่มข้อความระบุตัวตนและพื้นหลังให้กับสไลด์ที่สร้าง
- เพิ่ม Zoom Frame (ที่อ้างอิงสไลด์ที่สร้าง) ไปยังสไลด์แรก
- สร้างออบเจกต์ IPPImage โดยเพิ่มรูปภาพไปยังคอลเลกชัน Images ของออบเจกต์ Presentation
- ตั้งค่ารูปภาพกำหนดเองสำหรับออบเจกต์ Zoom Frame ตัวแรก
- เปลี่ยนรูปแบบเส้นของออบเจกต์ Zoom Frame ตัวที่สอง
- ลบพื้นหลังจากภาพของออบเจกต์ Zoom Frame ตัวที่สอง
- บันทึกงานนำเสนอที่แก้ไขเป็นไฟล์ PPTX
โค้ด Java ตัวอย่างต่อไปนี้แสดงวิธีเปลี่ยนการจัดรูปแบบของ Zoom Frame บนสไลด์:
Presentation pres = new Presentation();
try {
    //เพิ่มสไลด์ใหม่ในงานนำเสนอ
    ISlide slide2 = pres.getSlides().addEmptySlide(pres.getSlides().get_Item(0).getLayoutSlide());
    ISlide slide3 = pres.getSlides().addEmptySlide(pres.getSlides().get_Item(0).getLayoutSlide());

    //สร้างพื้นหลังสำหรับสไลด์ที่สอง
    slide2.getBackground().setType(BackgroundType.OwnBackground);
    slide2.getBackground().getFillFormat().setFillType(FillType.Solid);
    slide2.getBackground().getFillFormat().getSolidFillColor().setColor(Color.cyan);

    //สร้างกล่องข้อความสำหรับสไลด์ที่สอง
    IAutoShape autoshape = slide2.getShapes().addAutoShape(ShapeType.Rectangle, 100, 200, 500, 200);
    autoshape.getTextFrame().setText("Second Slide");

    //สร้างพื้นหลังสำหรับสไลด์ที่สาม
    slide3.getBackground().setType(BackgroundType.OwnBackground);
    slide3.getBackground().getFillFormat().setFillType(FillType.Solid);
    slide3.getBackground().getFillFormat().getSolidFillColor().setColor(Color.darkGray);

    //สร้างกล่องข้อความสำหรับสไลด์ที่สาม
    autoshape = slide3.getShapes().addAutoShape(ShapeType.Rectangle, 100, 200, 500, 200);
    autoshape.getTextFrame().setText("Trird Slide");

    //เพิ่มอ็อบเจกต์ ZoomFrame
    IZoomFrame zoomFrame1 = pres.getSlides().get_Item(0).getShapes().addZoomFrame(20, 20, 250, 200, slide2);
    IZoomFrame zoomFrame2 = pres.getSlides().get_Item(0).getShapes().addZoomFrame(200, 250, 250, 200, slide3);

    //สร้างภาพใหม่สำหรับอ็อบเจกต์ซูม
    IPPImage picture;
        IImage image = Images.fromFile("image.png");
        try {
            picture = pres.getImages().addImage(image);
        } finally {
            if (image != null) image.dispose();
        }
    //ตั้งค่าภาพกำหนดเองสำหรับอ็อบเจกต์ zoomFrame1
    zoomFrame1.setImage(picture);

    //ตั้งค่ารูปแบบกรอบซูมสำหรับอ็อบเจกต์ zoomFrame2
    zoomFrame2.getLineFormat().setWidth(5);
    zoomFrame2.getLineFormat().getFillFormat().setFillType(FillType.Solid);
    zoomFrame2.getLineFormat().getFillFormat().getSolidFillColor().setColor(Color.pink);
    zoomFrame2.getLineFormat().setDashStyle(LineDashStyle.DashDot);

    //การตั้งค่าสำหรับไม่แสดงพื้นหลังสำหรับอ็อบเจกต์ zoomFrame2
    zoomFrame2.setShowBackground(false);

    //บันทึกงานนำเสนอ
    pres.save("presentation.pptx", SaveFormat.Pptx);
} catch(IOException e) {
} finally {
    if (pres != null) pres.dispose();
}
Section Zoom
Section Zoom คือการเชื่อมโยงไปยังส่วนหนึ่งของงานนำเสนอ คุณสามารถใช้ Section Zoom เพื่อกลับไปยังส่วนที่ต้องการเน้นย้ำ หรือใช้เพื่อแสดงให้เห็นว่าชิ้นส่วนต่าง ๆ ของงานนำเสนอเชื่อมต่อกันอย่างไร
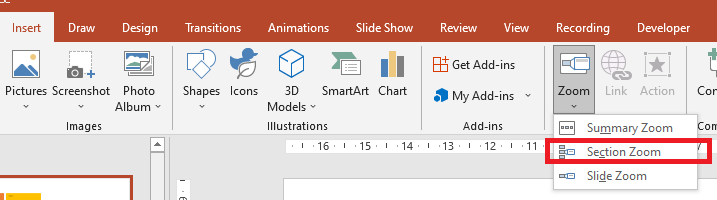
สำหรับออบเจกต์ Section Zoom, Aspose.Slides มี interface ISectionZoomFrame และเมธอดบางอย่างภายใต้ interface IShapeCollection
สร้าง Section Zoom Frame
คุณสามารถเพิ่ม Section Zoom Frame ลงในสไลด์ได้ดังนี้:
- สร้างอินสแตนซ์ของคลาส Presentation
- สร้างสไลด์ใหม่
- เพิ่มพื้นหลังระบุตัวตนให้กับสไลด์ที่สร้าง
- สร้างส่วนใหม่ที่คุณต้องการเชื่อมโยงกับ Zoom Frame
- เพิ่ม Section Zoom Frame (ที่อ้างอิงส่วนที่สร้าง) ไปยังสไลด์แรก
- บันทึกงานนำเสนอที่แก้ไขเป็นไฟล์ PPTX
โค้ด Java ตัวอย่างต่อไปนี้แสดงวิธีสร้าง Zoom Frame บนสไลด์:
Presentation pres = new Presentation();
try {
    //เพิ่มสไลด์ใหม่ในงานนำเสนอ
    ISlide slide = pres.getSlides().addEmptySlide(pres.getSlides().get_Item(0).getLayoutSlide());
    slide.getBackground().getFillFormat().setFillType(FillType.Solid);
    slide.getBackground().getFillFormat().getSolidFillColor().setColor(Color.yellow);
    slide.getBackground().setType(BackgroundType.OwnBackground);

    // เพิ่มส่วนใหม่ในงานนำเสนอ
    pres.getSections().addSection("Section 1", slide);

    // เพิ่มอ็อบเจกต์ SectionZoomFrame
    ISectionZoomFrame sectionZoomFrame = pres.getSlides().get_Item(0).getShapes().addSectionZoomFrame(20, 20, 300, 200, pres.getSections().get_Item(1));

    // บันทึกงานนำเสนอ
    pres.save("presentation.pptx", SaveFormat.Pptx);
} finally {
    if (pres != null) pres.dispose();
}
สร้าง Section Zoom Frame ด้วยรูปภาพกำหนดเอง
ด้วย Aspose.Slides for Android via Java คุณสามารถสร้าง Section Zoom Frame พร้อมภาพตัวอย่างสไลด์ที่แตกต่างกันได้ดังนี้:
- สร้างอินสแตนซ์ของคลาส Presentation
- สร้างสไลด์ใหม่
- เพิ่มพื้นหลังระบุตัวตนให้กับสไลด์ที่สร้าง
- สร้างส่วนใหม่ที่คุณต้องการเชื่อมโยงกับ Zoom Frame
- สร้างออบเจกต์ IPPImage โดยเพิ่มรูปภาพไปยังคอลเลกชัน Images ของออบเจกต์ Presentation
- เพิ่ม Section Zoom Frame (ที่อ้างอิงส่วนที่สร้าง) ไปยังสไลด์แรก
- บันทึกงานนำเสนอที่แก้ไขเป็นไฟล์ PPTX
โค้ด Java ตัวอย่างต่อไปนี้แสดงวิธีสร้าง Zoom Frame ด้วยรูปภาพที่แตกต่าง:
Presentation pres = new Presentation();
try {
    //เพิ่มสไลด์ใหม่ในงานนำเสนอ
    ISlide slide = pres.getSlides().addEmptySlide(pres.getSlides().get_Item(0).getLayoutSlide());
    slide.getBackground().getFillFormat().setFillType(FillType.Solid);
    slide.getBackground().getFillFormat().getSolidFillColor().setColor(Color.yellow);
    slide.getBackground().setType(BackgroundType.OwnBackground);

    // เพิ่มส่วนใหม่ในงานนำเสนอ
    pres.getSections().addSection("Section 1", slide);

    // สร้างภาพใหม่สำหรับอ็อบเจกต์ซูม
    IPPImage picture;
    IImage image = Images.fromFile("image.png");
    try {
        picture = pres.getImages().addImage(image);
    } finally {
        if (image != null) image.dispose();
    }

    // เพิ่มอ็อบเจกต์ SectionZoomFrame
    ISectionZoomFrame sectionZoomFrame = pres.getSlides().get_Item(0).getShapes().addSectionZoomFrame(20, 20, 300, 200, pres.getSections().get_Item(1), picture);

    // บันทึกงานนำเสนอ
    pres.save("presentation.pptx", SaveFormat.Pptx);
} catch(IOException e) {
} finally {
    if (pres != null) pres.dispose();
}
จัดรูปแบบ Section Zoom Frame
เพื่อสร้าง Section Zoom Frame ที่ซับซ้อนขึ้น คุณต้องปรับเปลี่ยนการจัดรูปแบบของกรอบที่ง่าย ๆ มีตัวเลือกการจัดรูปแบบหลายอย่างที่คุณสามารถใช้กับ Section Zoom Frame
คุณสามารถควบคุมการจัดรูปแบบของ Section Zoom Frame บนสไลด์ได้ดังนี้:
- สร้างอินสแตนซ์ของคลาส Presentation
- สร้างสไลด์ใหม่
- เพิ่มพื้นหลังระบุตัวตนให้กับสไลด์ที่สร้าง
- สร้างส่วนใหม่ที่คุณต้องการเชื่อมโยงกับ Zoom Frame
- เพิ่ม Section Zoom Frame (ที่อ้างอิงส่วนที่สร้าง) ไปยังสไลด์แรก
- เปลี่ยนขนาดและตำแหน่งของออบเจกต์ Section Zoom ที่สร้าง
- สร้างออบเจกต์ IPPImage โดยเพิ่มรูปภาพไปยังคอลเลกชัน Images ของออบเจกต์ Presentation
- ตั้งค่ารูปภาพกำหนดเองสำหรับออบเจกต์ Section Zoom ที่สร้าง
- ตั้งค่าความสามารถ กลับไปสไลด์เดิมจากส่วนที่เชื่อมโยง
- ลบพื้นหลังจากภาพของออบเจกต์ Section Zoom
- เปลี่ยนรูปแบบเส้นของออบเจกต์ Zoom Frame ตัวที่สอง
- เปลี่ยนระยะเวลาในการเปลี่ยนฉาก
- บันทึกงานนำเสนอที่แก้ไขเป็นไฟล์ PPTX
โค้ด Java ตัวอย่างต่อไปนี้แสดงวิธีเปลี่ยนการจัดรูปแบบของ Section Zoom Frame:
Presentation pres = new Presentation();
try {
    //เพิ่มสไลด์ใหม่ในงานนำเสนอ
    ISlide slide = pres.getSlides().addEmptySlide(pres.getSlides().get_Item(0).getLayoutSlide());
    slide.getBackground().getFillFormat().setFillType(FillType.Solid);
    slide.getBackground().getFillFormat().getSolidFillColor().setColor(Color.yellow);
    slide.getBackground().setType(BackgroundType.OwnBackground);

    //เพิ่มส่วนใหม่ในงานนำเสนอ
    pres.getSections().addSection("Section 1", slide);

    //เพิ่มอ็อบเจกต์ SectionZoomFrame
    ISectionZoomFrame sectionZoomFrame = pres.getSlides().get_Item(0).getShapes().addSectionZoomFrame(20, 20, 300, 200, pres.getSections().get_Item(1));

    //การจัดรูปแบบสำหรับ SectionZoomFrame
    sectionZoomFrame.setX(100);
    sectionZoomFrame.setY(300);
    sectionZoomFrame.setWidth(100);
    sectionZoomFrame.setHeight(75);

    IPPImage picture;
    IImage image = Images.fromFile("image.png");
    try {
         picture = pres.getImages().addImage(image);
     } finally {
        if (image != null) image.dispose();
     }
    sectionZoomFrame.setImage(picture);

    sectionZoomFrame.setReturnToParent(true);
    sectionZoomFrame.setShowBackground(false);

    sectionZoomFrame.getLineFormat().getFillFormat().setFillType(FillType.Solid);
    sectionZoomFrame.getLineFormat().getFillFormat().getSolidFillColor().setColor(Color.gray);
    sectionZoomFrame.getLineFormat().setDashStyle(LineDashStyle.DashDot);
    sectionZoomFrame.getLineFormat().setWidth(2.5f);

    sectionZoomFrame.setTransitionDuration(1.5f);

    //บันทึกงานนำเสนอ
    pres.save("presentation.pptx", SaveFormat.Pptx);
} catch(IOException e) {
} finally {
    if (pres != null) pres.dispose();
}
Summary Zoom
Summary Zoom คล้ายกับหน้าลงจอดที่แสดงส่วนต่าง ๆ ของงานนำเสนอทั้งหมดพร้อมกัน เมื่อคุณกำลังนำเสนอ คุณสามารถใช้ Zoom เพื่อย้ายจากตำแหน่งหนึ่งไปยังอีกตำแหน่งหนึ่งในลำดับใดก็ได้ตามต้องการ คุณสามารถสร้างสรรค์ ข้ามหน้า หรือย้อนกลับไปดูส่วนต่าง ๆ ของสไลด์โชว์โดยไม่ขัดจังหวะการนำเสนอ
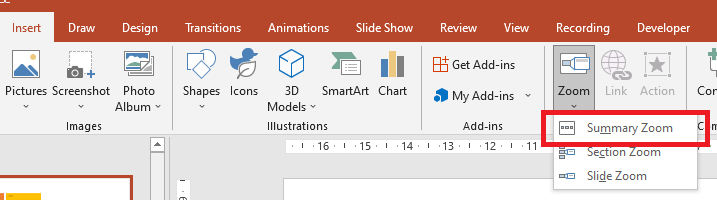
สำหรับออบเจกต์ Summary Zoom, Aspose.Slides มี interface ISummaryZoomFrame, ISummaryZoomSection, ISummaryZoomSectionCollection และเมธอดบางอย่างภายใต้ interface IShapeCollection
สร้าง Summary Zoom
คุณสามารถเพิ่ม Summary Zoom Frame ลงในสไลด์ได้ดังนี้:
- สร้างอินสแตนซ์ของคลาส Presentation
- สร้างสไลด์ใหม่พร้อมพื้นหลังระบุตัวตนและส่วนใหม่สำหรับสไลด์ที่สร้าง
- เพิ่ม Summary Zoom Frame ไปยังสไลด์แรก
- บันทึกงานนำเสนอที่แก้ไขเป็นไฟล์ PPTX
โค้ด Java ตัวอย่างต่อไปนี้แสดงวิธีสร้าง Summary Zoom Frame บนสไลด์:
Presentation pres = new Presentation();
try {
    //เพิ่มสไลด์ใหม่ในงานนำเสนอ
    ISlide slide = pres.getSlides().addEmptySlide(pres.getSlides().get_Item(0).getLayoutSlide());
    slide.getBackground().getFillFormat().setFillType(FillType.Solid);
    slide.getBackground().getFillFormat().getSolidFillColor().setColor(Color.gray);
    slide.getBackground().setType(BackgroundType.OwnBackground);

    //เพิ่มส่วนใหม่ในงานนำเสนอ
    pres.getSections().addSection("Section 1", slide);

    //เพิ่มสไลด์ใหม่ในงานนำเสนอ
    slide = pres.getSlides().addEmptySlide(pres.getSlides().get_Item(0).getLayoutSlide());
    slide.getBackground().getFillFormat().setFillType(FillType.Solid);
    slide.getBackground().getFillFormat().getSolidFillColor().setColor(Color.cyan);
    slide.getBackground().setType(BackgroundType.OwnBackground);

    //เพิ่มส่วนใหม่ในงานนำเสนอ
    pres.getSections().addSection("Section 2", slide);

    //เพิ่มสไลด์ใหม่ในงานนำเสนอ
    slide = pres.getSlides().addEmptySlide(pres.getSlides().get_Item(0).getLayoutSlide());
    slide.getBackground().getFillFormat().setFillType(FillType.Solid);
    slide.getBackground().getFillFormat().getSolidFillColor().setColor(Color.magenta);
    slide.getBackground().setType(BackgroundType.OwnBackground);

    //เพิ่มส่วนใหม่ในงานนำเสนอ
    pres.getSections().addSection("Section 3", slide);

    //เพิ่มสไลด์ใหม่ในงานนำเสนอ
    slide = pres.getSlides().addEmptySlide(pres.getSlides().get_Item(0).getLayoutSlide());
    slide.getBackground().getFillFormat().setFillType(FillType.Solid);
    slide.getBackground().getFillFormat().getSolidFillColor().setColor(Color.green);
    slide.getBackground().setType(BackgroundType.OwnBackground);

    //เพิ่มส่วนใหม่ในงานนำเสนอ
    pres.getSections().addSection("Section 4", slide);

    //เพิ่มอ็อบเจกต์ SummaryZoomFrame
    ISummaryZoomFrame summaryZoomFrame = pres.getSlides().get_Item(0).getShapes().addSummaryZoomFrame(150, 50, 300, 200);

    //บันทึกงานนำเสนอ
    pres.save("presentation.pptx", SaveFormat.Pptx);
} finally {
    if (pres != null) pres.dispose();
}
เพิ่มและลบ Summary Zoom Section
ทุกส่วนใน Summary Zoom Frame แสดงโดยออบเจกต์ ISummaryZoomSection ซึ่งเก็บอยู่ในออบเจกต์ ISummaryZoomSectionCollection คุณสามารถเพิ่มหรือลบออบเจกต์ Summary Zoom Section ผ่าน interface ISummaryZoomSectionCollection ได้ดังนี้:
- สร้างอินสแตนซ์ของคลาส Presentation
- สร้างสไลด์ใหม่พร้อมพื้นหลังระบุตัวตนและส่วนใหม่สำหรับสไลด์ที่สร้าง
- เพิ่ม Summary Zoom Frame เข้าไปในสไลด์แรก
- เพิ่มสไลด์และส่วนใหม่ลงในงานนำเสนอ
- เพิ่มส่วนที่สร้างลงใน Summary Zoom Frame
- ลบส่วนแรกออกจาก Summary Zoom Frame
- บันทึกงานนำเสนอที่แก้ไขเป็นไฟล์ PPTX
โค้ด Java ตัวอย่างต่อไปนี้แสดงวิธีเพิ่มและลบส่วนใน Summary Zoom Frame:
Presentation pres = new Presentation();
try {
    //เพิ่มสไลด์ใหม่ในงานนำเสนอ
    ISlide slide = pres.getSlides().addEmptySlide(pres.getSlides().get_Item(0).getLayoutSlide());
    slide.getBackground().getFillFormat().setFillType(FillType.Solid);
    slide.getBackground().getFillFormat().getSolidFillColor().setColor(Color.gray);
    slide.getBackground().setType(BackgroundType.OwnBackground);

    //เพิ่มส่วนใหม่ในงานนำเสนอ
    pres.getSections().addSection("Section 1", slide);

    //เพิ่มสไลด์ใหม่ในงานนำเสนอ
    slide = pres.getSlides().addEmptySlide(pres.getSlides().get_Item(0).getLayoutSlide());
    slide.getBackground().getFillFormat().setFillType(FillType.Solid);
    slide.getBackground().getFillFormat().getSolidFillColor().setColor(Color.cyan);
    slide.getBackground().setType(BackgroundType.OwnBackground);

    //เพิ่มส่วนใหม่ในงานนำเสนอ
    pres.getSections().addSection("Section 2", slide);

    //เพิ่มอ็อบเจกต์ SummaryZoomFrame
    ISummaryZoomFrame summaryZoomFrame = pres.getSlides().get_Item(0).getShapes().addSummaryZoomFrame(150, 50, 300, 200);

    //เพิ่มสไลด์ใหม่ในงานนำเสนอ
    slide = pres.getSlides().addEmptySlide(pres.getSlides().get_Item(0).getLayoutSlide());
    slide.getBackground().getFillFormat().setFillType(FillType.Solid);
    slide.getBackground().getFillFormat().getSolidFillColor().setColor(Color.magenta);
    slide.getBackground().setType(BackgroundType.OwnBackground);

    //เพิ่มส่วนใหม่ในงานนำเสนอ
    ISection section3 = pres.getSections().addSection("Section 3", slide);

    //เพิ่มส่วนลงใน Summary Zoom
    summaryZoomFrame.getSummaryZoomCollection().addSummaryZoomSection(section3);

    //ลบส่วนออกจาก Summary Zoom
    summaryZoomFrame.getSummaryZoomCollection().removeSummaryZoomSection(pres.getSections().get_Item(1));

    //บันทึกงานนำเสนอ
    pres.save("presentation.pptx", SaveFormat.Pptx);
} finally {
    if (pres != null) pres.dispose();
}
จัดรูปแบบ Summary Zoom Section
เพื่อสร้าง Summary Zoom Section ที่ซับซ้อนขึ้น คุณต้องปรับเปลี่ยนการจัดรูปแบบของกรอบที่ง่าย มีตัวเลือกการจัดรูปแบบหลายอย่างที่คุณสามารถใช้กับ Summary Zoom Section
คุณสามารถควบคุมการจัดรูปแบบของ Summary Zoom Section ใน Summary Zoom Frame ได้ดังนี้:
- สร้างอินสแตนซ์ของคลาส Presentation
- สร้างสไลด์ใหม่พร้อมพื้นหลังระบุตัวตนและส่วนใหม่สำหรับสไลด์ที่สร้าง
- เพิ่ม Summary Zoom Frame ไปยังสไลด์แรก
- รับออบเจกต์ Summary Zoom Section ตัวแรกจาก
ISummaryZoomSectionCollection - สร้างออบเจกต์ IPPImage โดยเพิ่มรูปภาพไปยังคอลเลกชัน Images ของออบเจกต์ Presentation
- ตั้งค่ารูปภาพกำหนดเองสำหรับออบเจกต์ Section Zoom ที่สร้าง
- ตั้งค่าความสามารถ กลับไปสไลด์เดิมจากส่วนที่เชื่อมโยง
- เปลี่ยนรูปแบบเส้นของออบเจกต์ Zoom Frame ตัวที่สอง
- เปลี่ยนระยะเวลาในการเปลี่ยนฉาก
- บันทึกงานนำเสนอที่แก้ไขเป็นไฟล์ PPTX
โค้ด Java ตัวอย่างต่อไปนี้แสดงวิธีเปลี่ยนการจัดรูปแบบของ Summary Zoom Section:
Presentation pres = new Presentation();
try {
    //เพิ่มสไลด์ใหม่ในงานนำเสนอ
    ISlide slide = pres.getSlides().addEmptySlide(pres.getSlides().get_Item(0).getLayoutSlide());
    slide.getBackground().getFillFormat().setFillType(FillType.Solid);
    slide.getBackground().getFillFormat().getSolidFillColor().setColor(Color.gray);
    slide.getBackground().setType(BackgroundType.OwnBackground);

    // เพิ่มส่วนใหม่ในงานนำเสนอ
    pres.getSections().addSection("Section 1", slide);

    //เพิ่มสไลด์ใหม่ในงานนำเสนอ
    slide = pres.getSlides().addEmptySlide(pres.getSlides().get_Item(0).getLayoutSlide());
    slide.getBackground().getFillFormat().setFillType(FillType.Solid);
    slide.getBackground().getFillFormat().getSolidFillColor().setColor(Color.cyan);
    slide.getBackground().setType(BackgroundType.OwnBackground);

    // เพิ่มส่วนใหม่ในงานนำเสนอ
    pres.getSections().addSection("Section 2", slide);

    // เพิ่มอ็อบเจกต์ SummaryZoomFrame
    ISummaryZoomFrame summaryZoomFrame = pres.getSlides().get_Item(0).getShapes().addSummaryZoomFrame(150, 50, 300, 200);

    // รับอ็อบเจกต์ SummaryZoomSection ตัวแรก
    ISummaryZoomSection summarySection = summaryZoomFrame.getSummaryZoomCollection().get_Item(0);

    // การจัดรูปแบบสำหรับอ็อบเจกต์ SummaryZoomSection
    IPPImage picture;
    IImage image = Images.fromFile("image.png");
    try {
    picture = pres.getImages().addImage(picture);
    } finally {
          if (image != null) image.dispose();
    }
    summarySection.setImage(picture);

    summarySection.setReturnToParent(false);

    summarySection.getLineFormat().getFillFormat().setFillType(FillType.Solid);
    summarySection.getLineFormat().getFillFormat().getSolidFillColor().setColor(Color.black);
    summarySection.getLineFormat().setDashStyle(LineDashStyle.DashDot);
    summarySection.getLineFormat().setWidth(1.5f);

    summarySection.setTransitionDuration(1.5f);

    // บันทึกงานนำเสนอ
    pres.save("presentation.pptx", SaveFormat.Pptx);
} catch(IOException e) {
} finally {
    if (pres != null) pres.dispose();
}
FAQ
ฉันสามารถควบคุมการกลับไปยังสไลด์ “แม่” หลังจากแสดงเป้าหมายได้หรือไม่?
ได้. Zoom frame หรือ section มีพฤติกรรม return‑to‑parent ที่เมื่อเปิดใช้งานจะส่งผู้ชมกลับไปยังสไลด์ต้นฉบับหลังจากเยี่ยมชมเนื้อหาเป้าหมาย
ฉันสามารถปรับ “ความเร็ว” หรือระยะเวลาในการเปลี่ยนฉากของ Zoom ได้หรือไม่?
ได้. Zoom รองรับการตั้งค่าระยะเวลาในการเปลี่ยนฉากเพื่อให้คุณควบคุมระยะเวลาการกระโดดของอนิเมชัน
มีข้อจำกัดจำนวนออบเจกต์ Zoom ที่งานนำเสนอสามารถบรรจุได้หรือไม่?
ไม่มีขีดจำกัด API อย่างเป็นทางการที่ระบุไว้ ขีดจำกัดเชิงปฏิบัติขึ้นอยู่กับความซับซ้อนโดยรวมของงานนำเสนอและประสิทธิภาพของผู้ชม คุณสามารถเพิ่ม Zoom Frame ได้หลายตัว แต่ควรคำนึงถึงขนาดไฟล์และเวลาการเรนเดอร์