
จัดการการซูมของการนำเสนอใน C++
บทนำ
Zoom ใน PowerPoint ช่วยให้คุณกระโดดไปและกลับจากสไลด์, ส่วน, และส่วนย่อยที่เฉพาะของการนำเสนอ เมื่อคุณกำลังนำเสนอ ความสามารถในการนำทางอย่างรวดเร็วผ่านเนื้อหาอาจเป็นประโยชน์มาก

- เพื่อสรุปการนำเสนอทั้งหมดในสไลด์เดียว ให้ใช้ Summary Zoom.
- เพื่อแสดงสไลด์ที่เลือกเท่านั้น ให้ใช้ Slide Zoom.
- เพื่อแสดงส่วนเดียวเท่านั้น ให้ใช้ Section Zoom.
Zoom สไลด์
Zoom สไลด์สามารถทำให้การนำเสนอของคุณมีความไดนามิกมากขึ้น โดยช่วยให้คุณนำทางอย่างอิสระระหว่างสไลด์ในลำดับใดก็ได้โดยไม่ขัดจังหวะการนำเสนอ Zoom สไลด์เหมาะสำหรับการนำเสนอสั้น ๆ Without many sections, แต่คุณยังสามารถใช้ในสถานการณ์การนำเสนอที่หลากหลายได้
Zoom สไลด์ช่วยให้คุณเจาะลึกข้อมูลหลายส่วนในขณะที่รู้สึกเหมือนอยู่บนผืนผ้าใบเดียว
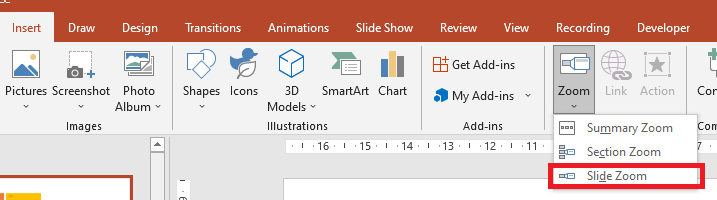
สำหรับวัตถุ Zoom สไลด์ Aspose.Slides มี enumeration ZoomImageType, interface IZoomFrame, และบางเมธอดภายใต้ interface IShapeCollection
สร้างกรอบ Zoom
คุณสามารถเพิ่มกรอบ Zoom บนสไลด์ได้ดังนี้:
- Create an instance of the Presentation class.
- Create new slides to which you intend to link the zoom frames.
- Add an identification text and background to the created slides.
- Add zoom frames (containing the references to created slides) to the first slide.
- Write the modified presentation as a PPTX file.
โค้ด C++ นี้แสดงวิธีสร้างกรอบ Zoom บนสไลด์:
void SetSlideBackground(SharedPtr<ISlide> slide, Color color)
{
    slide->get_Background()->get_FillFormat()->set_FillType(FillType::Solid);
    slide->get_Background()->get_FillFormat()->get_SolidFillColor()->set_Color(color);
    slide->get_Background()->set_Type(BackgroundType::OwnBackground);
}
auto pres = System::MakeObject<Presentation>();
auto slide0 = pres->get_Slides()->idx_get(0);

//เพิ่มสไลด์ใหม่ลงในงานนำเสนอ
auto slide2 = pres->get_Slides()->AddEmptySlide(slide0->get_LayoutSlide());
auto slide3 = pres->get_Slides()->AddEmptySlide(slide0->get_LayoutSlide());

//สร้างพื้นหลังสำหรับสไลด์ที่สอง
SetSlideBackground(slide2, Color::get_Cyan());

//สร้างกล่องข้อความสำหรับสไลด์ที่สอง
auto autoshape = slide2->get_Shapes()->AddAutoShape(ShapeType::Rectangle, 100.0f, 200.0f, 500.0f, 200.0f);
autoshape->get_TextFrame()->set_Text(u"Second Slide");

//สร้างพื้นหลังสำหรับสไลด์ที่สาม
SetSlideBackground(slide3, Color::get_DarkKhaki());

//สร้างกล่องข้อความสำหรับสไลด์ที่สาม
autoshape = slide3->get_Shapes()->AddAutoShape(ShapeType::Rectangle, 100.0f, 200.0f, 500.0f, 200.0f);
autoshape->get_TextFrame()->set_Text(u"Trird Slide");

//เพิ่มวัตถุ ZoomFrame
slide0->get_Shapes()->AddZoomFrame(20.0f, 20.0f, 250.0f, 200.0f, slide2);
slide0->get_Shapes()->AddZoomFrame(200.0f, 250.0f, 250.0f, 200.0f, slide3);

//บันทึกงานนำเสนอ
pres->Save(u"presentation.pptx", SaveFormat::Pptx);
สร้างกรอบ Zoom ด้วยรูปภาพที่กำหนดเอง
ด้วย Aspose.Slides for C++ คุณสามารถสร้างกรอบ Zoom พร้อมรูปภาพตัวอย่างสไลด์ที่แตกต่างกันได้ดังนี้:
- Create an instance of the Presentation class.
- Create a new slide to which you intend to link the zoom frame.
- Add an identification text and background to the slide.
- Create an IPPImage object by adding an image to the Images collection associated with the Presentation object that will be used to fill the frame.
- Add zoom frames (containing the reference to created slide) to the first slide.
- Write the modified presentation as a PPTX file.
โค้ด C++ นี้แสดงวิธีสร้างกรอบ Zoom ด้วยรูปภาพที่แตกต่าง:
auto pres = System::MakeObject<Presentation>();
auto slide0 = pres->get_Slides()->idx_get(0);

//เพิ่มสไลด์ใหม่ลงในงานนำเสนอ
auto slide = pres->get_Slides()->AddEmptySlide(slide0->get_LayoutSlide());

// สร้างพื้นหลังสำหรับสไลด์ที่สอง
SetSlideBackground(slide, Color::get_Cyan());

// สร้างกล่องข้อความสำหรับสไลด์ที่สาม
auto autoshape = slide->get_Shapes()->AddAutoShape(ShapeType::Rectangle, 100.0f, 200.0f, 500.0f, 200.0f);
autoshape->get_TextFrame()->set_Text(u"Second Slide");

// สร้างภาพใหม่สำหรับวัตถุซูม
auto image = pres->get_Images()->AddImage(Images::FromFile(u"image.png"));

//เพิ่มวัตถุ ZoomFrame object
slide0->get_Shapes()->AddZoomFrame(20.0f, 20.0f, 300.0f, 200.0f, slide, image);

// บันทึกงานนำเสนอ
pres->Save(u"presentation.pptx", SaveFormat::Pptx);
รูปแบบกรอบ Zoom
ในส่วนก่อนหน้า เราได้แสดงวิธีสร้างกรอบ Zoom อย่างง่าย เพื่อสร้างกรอบ Zoom ที่ซับซ้อนยิ่งขึ้น คุณต้องปรับรูปแบบของกรอบนั้น มีตัวเลือกการจัดรูปแบบหลายอย่างที่คุณสามารถนำไปใช้กับกรอบ Zoom
คุณสามารถควบคุมรูปแบบของกรอบ Zoom บนสไลด์ได้ดังนี้:
- Create an instance of the Presentation class.
- Create new slides to link to which you intend to link the zoom frame.
- Add some identification text and background to the created slides.
- Add zoom frames (containing the references to the created slides) to the first slide.
- Create an IPPImage object by adding an image to the Images collection associated with the Presentation object that will be used to fill the frame.
- Set a custom image for the first zoom frame object.
- Change the line format for the second zoom frame object.
- Remove the background from an image of the second zoom frame object.
- Write the modified presentation as a PPTX file.
โค้ด C++ นี้แสดงวิธีการเปลี่ยนรูปแบบของกรอบ Zoom บนสไลด์:
auto pres = System::MakeObject<Presentation>();
auto slide1 = pres->get_Slides()->idx_get(0);
//เพิ่มสไลด์ใหม่ลงในงานนำเสนอ
auto slide2 = pres->get_Slides()->AddEmptySlide(slide1->get_LayoutSlide());
auto slide3 = pres->get_Slides()->AddEmptySlide(slide1->get_LayoutSlide());

//สร้างพื้นหลังสำหรับสไลด์ที่สอง
SetSlideBackground(slide2, Color::get_Cyan());

//สร้างกล่องข้อความสำหรับสไลด์ที่สอง
auto autoshape = slide2->get_Shapes()->AddAutoShape(ShapeType::Rectangle, 100.0f, 200.0f, 500.0f, 200.0f);
autoshape->get_TextFrame()->set_Text(u"Second Slide");

//สร้างพื้นหลังสำหรับสไลด์ที่สาม
SetSlideBackground(slide3, Color::get_DarkKhaki());

//สร้างกล่องข้อความสำหรับสไลด์ที่สาม
autoshape = slide3->get_Shapes()->AddAutoShape(ShapeType::Rectangle, 100.0f, 200.0f, 500.0f, 200.0f);
autoshape->get_TextFrame()->set_Text(u"Trird Slide");

//เพิ่มวัตถุ ZoomFrame objects
auto zoomFrame1 = slide1->get_Shapes()->AddZoomFrame(20.0f, 20.0f, 250.0f, 200.0f, slide2);
auto zoomFrame2 = slide1->get_Shapes()->AddZoomFrame(200.0f, 250.0f, 250.0f, 200.0f, slide3);

//สร้างภาพใหม่สำหรับวัตถุซูม
auto image = pres->get_Images()->AddImage(Images::FromFile(u"image.png"));
//กำหนดภาพที่กำหนดเองสำหรับวัตถุ zoomFrame1 object
zoomFrame1->set_Image(image);

//กำหนดรูปแบบกรอบซูมสำหรับวัตถุ zoomFrame2 object
zoomFrame2->get_LineFormat()->set_Width(5);
zoomFrame2->get_LineFormat()->get_FillFormat()->set_FillType(FillType::Solid);
zoomFrame2->get_LineFormat()->get_FillFormat()->get_SolidFillColor()->set_Color(Color::get_HotPink());
zoomFrame2->get_LineFormat()->set_DashStyle(LineDashStyle::DashDot);

//ตั้งค่าไม่แสดงพื้นหลังสำหรับวัตถุ zoomFrame2 object
zoomFrame2->set_ShowBackground(false);

//บันทึกงานนำเสนอ
pres->Save(u"presentation.pptx", SaveFormat::Pptx);
Section Zoom
Section Zoom คือการเชื่อมโยงไปยังส่วนหนึ่งของการนำเสนอ คุณสามารถใช้ Section Zoom เพื่อกลับไปยังส่วนที่ต้องการเน้น หรือใช้เพื่อแสดงให้เห็นว่าชิ้นส่วนต่าง ๆ ของการนำเสนอเชื่อมต่อกันอย่างไร
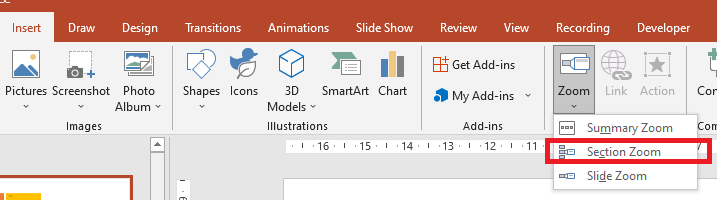
สำหรับวัตถุ Section Zoom Aspose.Slides มี interface ISectionZoomFrame และบางเมธอดภายใต้ interface IShapeCollection
สร้างกรอบ Section Zoom
คุณสามารถเพิ่มกรอบ Section Zoom บนสไลด์ได้ดังนี้:
- Create an instance of the Presentation class.
- Create a new slide.
- Add an identification background to the created slide.
- Create a new section to which you intend to link the zoom frame.
- Add a section zoom frame (containing references to the created section) to the first slide.
- Write the modified presentation as a PPTX file.
โค้ด C++ นี้แสดงวิธีสร้างกรอบ Zoom บนสไลด์:
auto pres = System::MakeObject<Presentation>();
auto slide0 = pres->get_Slides()->idx_get(0);

//เพิ่มสไลด์ใหม่ลงในงานนำเสนอ
auto slide = pres->get_Slides()->AddEmptySlide(slide0->get_LayoutSlide());
SetSlideBackground(slide, Color::get_YellowGreen());

// เพิ่ม Section ใหม่ลงในงานนำเสนอ
pres->get_Sections()->AddSection(u"Section 1", slide);

// เพิ่มวัตถุ SectionZoomFrame object
auto sectionZoomFrame = slide0->get_Shapes()->AddSectionZoomFrame(20.0f, 20.0f, 300.0f, 200.0f, pres->get_Sections()->idx_get(1));

// บันทึกงานนำเสนอ
pres->Save(u"presentation.pptx", SaveFormat::Pptx);
สร้างกรอบ Section Zoom ด้วยรูปภาพที่กำหนดเอง
ใช้ Aspose.Slides for C++ คุณสามารถสร้างกรอบ Section Zoom พร้อมรูปภาพตัวอย่างสไลด์ที่แตกต่างได้ดังนี้:
- Create an instance of the Presentation class.
- Create a new slide.
- Add an identification background to created slide.
- Create a new section to which you intend to link the zoom frame.
- Create an IPPImage object by adding an image to the Images collection associated with the Presentation object that will be used to fill the frame.
- Add a section zoom frame (containing a reference to the created section) to the first slide.
- Write the modified presentation as a PPTX file.
โค้ด C++ นี้แสดงวิธีสร้างกรอบ Zoom ด้วยรูปภาพที่แตกต่าง:
auto pres = System::MakeObject<Presentation>();
auto slide0 = pres->get_Slides()->idx_get(0);

//เพิ่มสไลด์ใหม่ลงในงานนำเสนอ
auto slide = pres->get_Slides()->AddEmptySlide(slide0->get_LayoutSlide());
SetSlideBackground(slide, Color::get_YellowGreen());

// เพิ่ม Section ใหม่ลงในงานนำเสนอ
pres->get_Sections()->AddSection(u"Section 1", slide);

//สร้างภาพใหม่สำหรับวัตถุซูม
auto image = pres->get_Images()->AddImage(Images::FromFile(u"image.png"));

//เพิ่มวัตถุ SectionZoomFrame object
auto sectionZoomFrame = slide0->get_Shapes()->AddSectionZoomFrame(20.0f, 20.0f, 300.0f, 200.0f, pres->get_Sections()->idx_get(1), image);

//บันทึกงานนำเสนอ
pres->Save(u"presentation.pptx", SaveFormat::Pptx);
รูปแบบกรอบ Section Zoom
เพื่อสร้างกรอบ Section Zoom ที่ซับซ้อนขึ้น คุณต้องปรับรูปแบบของกรอบแบบง่าย มีตัวเลือกการจัดรูปแบบหลายอย่างที่คุณสามารถนำไปใช้กับกรอบ Section Zoom
คุณสามารถควบคุมรูปแบบของกรอบ Section Zoom บนสไลด์ได้ดังนี้:
- Create an instance of the Presentation class.
- Create a new slide.
- Add identification background to created slide.
- Create a new section to which you intend to link the zoom frame.
- Add a section zoom frame (containing references to created section) to the first slide.
- Change the size and position for the created section zoom object.
- Create an IPPImage object by adding an image to the Images collection associated with the Presentation object that will be used to fill the frame.
- Set a custom image for the created section zoom frame object.
- Set the return to the original slide from the linked section ability.
- Remove the background from an image of the section zoom frame object.
- Change the line format for the second zoom frame object.
- Change the transition duration.
- Write the modified presentation as a PPTX file.
โค้ด C++ นี้แสดงวิธีเปลี่ยนรูปแบบของกรอบ Section Zoom:
auto pres = System::MakeObject<Presentation>();
auto slide0 = pres->get_Slides()->idx_get(0);

//เพิ่มสไลด์ใหม่ลงในงานนำเสนอ
auto slide = pres->get_Slides()->AddEmptySlide(slide0->get_LayoutSlide());
SetSlideBackground(slide, Color::get_YellowGreen());

// เพิ่ม Section ใหม่ลงในงานนำเสนอ
pres->get_Sections()->AddSection(u"Section 1", slide);

// เพิ่มวัตถุ SectionZoomFrame
auto sectionZoomFrame = slide0->get_Shapes()->AddSectionZoomFrame(20.0f, 20.0f, 300.0f, 200.0f, pres->get_Sections()->idx_get(1));

// การจัดรูปแบบสำหรับ SectionZoomFrame
sectionZoomFrame->set_X(100.0f);
sectionZoomFrame->set_Y(300.0f);
sectionZoomFrame->set_Width(100.0f);
sectionZoomFrame->set_Height(75.0f);

auto image = pres->get_Images()->AddImage(Images::FromFile(u"image.png"));
sectionZoomFrame->set_Image(image);

sectionZoomFrame->set_ReturnToParent(true);
sectionZoomFrame->set_ShowBackground(false);

auto sectionZoomLineFormat = sectionZoomFrame->get_LineFormat();
sectionZoomLineFormat->get_FillFormat()->set_FillType(FillType::Solid);
sectionZoomLineFormat->get_FillFormat()->get_SolidFillColor()->set_Color(Color::get_Brown());
sectionZoomLineFormat->set_DashStyle(LineDashStyle::DashDot);
sectionZoomLineFormat->set_Width(2.5f);

sectionZoomFrame->set_TransitionDuration(1.5f);

//บันทึกงานนำเสนอ
pres->Save(u"presentation.pptx", SaveFormat::Pptx);
Summary Zoom
Summary Zoom คล้ายกับหน้าแลนดิ้งที่แสดงส่วนต่าง ๆ ของการนำเสนอทั้งหมดพร้อมกัน เมื่อคุณนำเสนอ คุณสามารถใช้ Zoom เพื่อย้ายจากตำแหน่งหนึ่งไปยังอีกตำแหน่งหนึ่งในลำดับใดก็ได้ตามต้องการ คุณสามารถทำให้การนำเสนอมีความสร้างสรรค์ เลื่อนหน้าก่อน หรือย้อนกลับไปยังส่วนต่าง ๆ ของสไลด์โชว์โดยไม่ขัดจังหวะการนำเสนอ
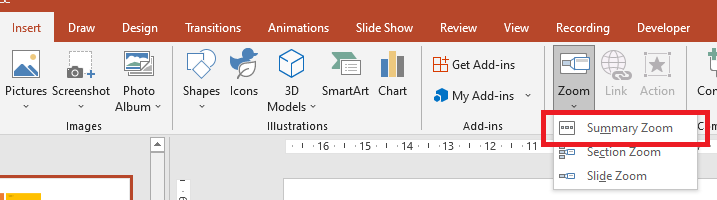
สำหรับวัตถุ Summary Zoom Aspose.Slides มี interface ISummaryZoomFrame, ISummaryZoomSection, และ ISummaryZoomSectionCollection พร้อมบางเมธอดภายใต้ interface IShapeCollection
สร้าง Summary Zoom
คุณสามารถเพิ่มกรอบ Summary Zoom บนสไลด์ได้ดังนี้:
- Create an instance of the Presentation class.
- Create new slides with identification background and new sections for created slides.
- Add the summary zoom frame to the first slide.
- Write the modified presentation as a PPTX file.
โค้ด C++ นี้แสดงวิธีสร้างกรอบ Summary Zoom บนสไลด์:
auto pres = System::MakeObject<Presentation>();
auto slide0 = pres->get_Slides()->idx_get(0);

//เพิ่มสไลด์ใหม่ลงในงานนำเสนอ
auto slide = pres->get_Slides()->AddEmptySlide(slide0->get_LayoutSlide());
SetSlideBackground(slide, Color::get_Brown());

//เพิ่มSectionใหม่ลงในงานนำเสนอ
pres->get_Sections()->AddSection(u"Section 1", slide);

//เพิ่มสไลด์ใหม่ลงในงานนำเสนอ
slide = pres->get_Slides()->AddEmptySlide(slide0->get_LayoutSlide());
SetSlideBackground(slide, Color::get_Aqua());

//เพิ่มSectionใหม่ลงในงานนำเสนอ
pres->get_Sections()->AddSection(u"Section 2", slide);

//เพิ่มสไลด์ใหม่ลงในงานนำเสนอ
slide = pres->get_Slides()->AddEmptySlide(slide0->get_LayoutSlide());
SetSlideBackground(slide, Color::get_Chartreuse());

//เพิ่มSectionใหม่ลงในงานนำเสนอ
pres->get_Sections()->AddSection(u"Section 3", slide);

//เพิ่มสไลด์ใหม่ลงในงานนำเสนอ
slide = pres->get_Slides()->AddEmptySlide(slide0->get_LayoutSlide());
SetSlideBackground(slide, Color::get_DarkGreen());

//เพิ่มSectionใหม่ลงในงานนำเสนอ
pres->get_Sections()->AddSection(u"Section 4", slide);

//เพิ่มวัตถุ SummaryZoomFrame
auto summaryZoomFrame = slide0->get_Shapes()->AddSummaryZoomFrame(150.0f, 50.0f, 300.0f, 200.0f);

//บันทึกงานนำเสนอ
pres->Save(u"presentation.pptx", SaveFormat::Pptx);
เพิ่มและลบ Section ใน Summary Zoom
ทุก Section ในกรอบ Summary Zoom แทนด้วยวัตถุ ISummaryZoomSection ซึ่งถูกเก็บในวัตถุ ISummaryZoomSectionCollection คุณสามารถเพิ่มหรือ ลบ Section ผ่านอินเทอร์เฟซ ISummaryZoomSectionCollection ได้ดังนี้:
- Create an instance of the Presentation class.
- Create new slides with identification background and new sections for created slides.
- Add a summary zoom frame into the first slide.
- Add a new slide and section to the presentation.
- Add the created section to the summary zoom frame.
- Remove the first section from the summary zoom frame.
- Write the modified presentation as a PPTX file.
โค้ด C++ นี้แสดงวิธีเพิ่มและลบ Section ในกรอบ Summary Zoom:
auto pres = System::MakeObject<Presentation>();
auto slide0 = pres->get_Slides()->idx_get(0);

//เพิ่มสไลด์ใหม่ลงในงานนำเสนอ
auto slide = pres->get_Slides()->AddEmptySlide(slide0->get_LayoutSlide());
SetSlideBackground(slide, Color::get_Brown());

//เพิ่ม Section ใหม่ลงในงานนำเสนอ
pres->get_Sections()->AddSection(u"Section 1", slide);

//เพิ่มสไลด์ใหม่ลงในงานนำเสนอ
slide = pres->get_Slides()->AddEmptySlide(slide0->get_LayoutSlide());
SetSlideBackground(slide, Color::get_Aqua());

//เพิ่ม Section ใหม่ลงในงานนำเสนอ
pres->get_Sections()->AddSection(u"Section 2", slide);

//เพิ่มวัตถุ SummaryZoomFrame
auto summaryZoomFrame = slide0->get_Shapes()->AddSummaryZoomFrame(150.0f, 50.0f, 300.0f, 200.0f);

//เพิ่มสไลด์ใหม่ลงในงานนำเสนอ
slide = pres->get_Slides()->AddEmptySlide(slide0->get_LayoutSlide());
SetSlideBackground(slide, Color::get_Chartreuse());

//เพิ่ม Section ใหม่ลงในงานนำเสนอ
auto section3 = pres->get_Sections()->AddSection(u"Section 3", slide);

//เพิ่ม Section ลงใน Summary Zoom
summaryZoomFrame->get_SummaryZoomCollection()->AddSummaryZoomSection(section3);

//ลบ Section จาก Summary Zoom
summaryZoomFrame->get_SummaryZoomCollection()->RemoveSummaryZoomSection(pres->get_Sections()->idx_get(1));

//บันทึกงานนำเสนอ
pres->Save(u"presentation.pptx", SaveFormat::Pptx);
รูปแบบ Section ของ Summary Zoom
เพื่อสร้างวัตถุ Summary Zoom Section ที่ซับซ้อนขึ้น คุณต้องปรับรูปแบบของกรอบแบบง่าย มีตัวเลือกการจัดรูปแบบหลายอย่างที่คุณสามารถนำไปใช้กับวัตถุ Summary Zoom Section
คุณสามารถควบคุมรูปแบบของวัตถุ Summary Zoom Section ภายในกรอบ Summary Zoom ได้ดังนี้:
- Create an instance of the Presentation class.
- Create new slides with identification background and new sections for created slides.
- Add a summary zoom frame to the first slide.
- Get a summary zoom section object for the first object from the
ISummaryZoomSectionCollection. - Create an IPPImage object by adding an image to the images collection associated with the Presentation object that will be used to fill the frame.
- Set a custom image for the created section zoom frame object.
- Set the return to the original slide from the linked section ability.
- Change the line format for the second zoom frame object.
- Change the transition duration.
- Write the modified presentation as a PPTX file.
โค้ด C++ นี้แสดงวิธีเปลี่ยนรูปแบบของวัตถุ Summary Zoom Section:
auto pres = System::MakeObject<Presentation>();
auto slide0 = pres->get_Slides()->idx_get(0);

//เพิ่มสไลด์ใหม่ลงในงานนำเสนอ
auto slide = pres->get_Slides()->AddEmptySlide(slide0->get_LayoutSlide());
SetSlideBackground(slide, Color::get_Brown());

// เพิ่ม Section ใหม่ลงในงานนำเสนอ
pres->get_Sections()->AddSection(u"Section 1", slide);

//เพิ่มสไลด์ใหม่ลงในงานนำเสนอ
slide = pres->get_Slides()->AddEmptySlide(slide0->get_LayoutSlide());
SetSlideBackground(slide, Color::get_Aqua());

// เพิ่ม Section ใหม่ลงในงานนำเสนอ
pres->get_Sections()->AddSection(u"Section 2", slide);

// เพิ่มวัตถุ SummaryZoomFrame
auto summaryZoomFrame = slide0->get_Shapes()->AddSummaryZoomFrame(150.0f, 50.0f, 300.0f, 200.0f);

// ดึงวัตถุ SummaryZoomSection ตัวแรก
auto summarySection = summaryZoomFrame->get_SummaryZoomCollection()->idx_get(0);

// การจัดรูปแบบสำหรับวัตถุ SummaryZoomSection
auto image = pres->get_Images()->AddImage(Images::FromFile(u"image.png"));
summarySection->set_Image(image);

summarySection->set_ReturnToParent(false);

summarySection->get_LineFormat()->get_FillFormat()->set_FillType(FillType::Solid);
summarySection->get_LineFormat()->get_FillFormat()->get_SolidFillColor()->set_Color(Color::get_Black());
summarySection->get_LineFormat()->set_DashStyle(LineDashStyle::DashDot);
summarySection->get_LineFormat()->set_Width(1.5f);

summarySection->set_TransitionDuration(1.5f);

// บันทึกงานนำเสนอ
pres->Save(u"presentation.pptx", SaveFormat::Pptx);
FAQ
ฉันสามารถควบคุมการกลับไปยังสไลด์ ‘แม่’ หลังจากแสดงเป้าหมายได้หรือไม่?
ใช่. Zoom frame หรือ section มีเมธอด set_ReturnToParent ที่ส่งผู้ชมกลับไปยังสไลด์ต้นทางหลังจากเยี่ยมชมเนื้อหาเป้าหมาย
ฉันสามารถปรับ ‘ความเร็ว’ หรือระยะเวลาในการเปลี่ยนแปลงของ Zoom ได้หรือไม่?
ใช่. Zoom รองรับการตั้งค่าระยะเวลาในการเปลี่ยนแปลงเพื่อให้คุณควบคุมเวลาการเคลื่อนที่ของแอนิเมชัน
มีขีดจำกัดจำนวนวัตถุ Zoom ที่การนำเสนอสามารถมีได้หรือไม่?
ไม่มีขีดจำกัดที่ระบุใน API อย่างเป็นทางการ ขีดจำกัดเชิงปฏิบัติขึ้นอยู่กับความซับซ้อนโดยรวมของการนำเสนอและประสิทธิภาพของผู้ชม คุณสามารถเพิ่ม Zoom frame ได้หลาย ๆ ตัว แต่ควรคำนึงถึงขนาดไฟล์และเวลาเรนเดอร์