
在 C++ 中管理簡報縮放
簡介
PowerPoint 中的縮放功能讓您能夠在簡報的特定投影片、章節和區段之間跳轉。當您在演示時,這種快速瀏覽內容的能力可能會非常有用。

- 要在單一投影片上概括整個簡報,請使用Summary Zoom。
- 若只要顯示選取的投影片,請使用Slide Zoom。
- 若只要顯示單一章節,請使用Section Zoom。
Slide Zoom
Slide Zoom 可以讓您的簡報更具動態性,讓您可自由依任意順序在投影片之間切換,而不會中斷簡報的流程。Slide Zoom 非常適合短篇且章節不多的簡報,但在其他簡報情境中也能使用。
Slide Zoom 可協助您在同一畫布上深入多個資訊片段。

對於 Slide Zoom 物件,Aspose.Slides 提供了ZoomImageType 列舉、IZoomFrame 介面,以及在IShapeCollection 介面下的多個方法。
建立縮放框格
您可以這樣在投影片上加入縮放框格:
- 建立一個 Presentation 類別的實例。
- 建立您打算連結到縮放框格的新投影片。
- 為新投影片加入辨識文字與背景。
- 將縮放框格(包含對已建立投影片的參考)加入第一張投影片。
- 將修改後的簡報寫入 PPTX 檔案。
以下 C++ 程式碼示範如何在投影片上建立縮放框格:
void SetSlideBackground(SharedPtr<ISlide> slide, Color color)
{
    slide->get_Background()->get_FillFormat()->set_FillType(FillType::Solid);
    slide->get_Background()->get_FillFormat()->get_SolidFillColor()->set_Color(color);
    slide->get_Background()->set_Type(BackgroundType::OwnBackground);
}
auto pres = System::MakeObject<Presentation>();
auto slide0 = pres->get_Slides()->idx_get(0);

//Adds new slides to the presentation
auto slide2 = pres->get_Slides()->AddEmptySlide(slide0->get_LayoutSlide());
auto slide3 = pres->get_Slides()->AddEmptySlide(slide0->get_LayoutSlide());

// Creates a background for the second slide
SetSlideBackground(slide2, Color::get_Cyan());

// Creates a text box for the second slide
auto autoshape = slide2->get_Shapes()->AddAutoShape(ShapeType::Rectangle, 100.0f, 200.0f, 500.0f, 200.0f);
autoshape->get_TextFrame()->set_Text(u"Second Slide");

// Creates a background for the third slide
SetSlideBackground(slide3, Color::get_DarkKhaki());

// Create a text box for the third slide
autoshape = slide3->get_Shapes()->AddAutoShape(ShapeType::Rectangle, 100.0f, 200.0f, 500.0f, 200.0f);
autoshape->get_TextFrame()->set_Text(u"Trird Slide");

//Adds ZoomFrame objects
slide0->get_Shapes()->AddZoomFrame(20.0f, 20.0f, 250.0f, 200.0f, slide2);
slide0->get_Shapes()->AddZoomFrame(200.0f, 250.0f, 250.0f, 200.0f, slide3);

// Saves the presentation
pres->Save(u"presentation.pptx", SaveFormat::Pptx);
使用自訂圖像建立縮放框格
使用 Aspose.Slides for C++,您可以這樣建立使用不同投影片預覽圖的縮放框格:
- 建立一個 Presentation 類別的實例。
- 建立您打算連結到縮放框格的新投影片。
- 為該投影片加入辨識文字與背景。
- 透過在與 Presentation 物件關聯的 Images 集合中加入圖像,建立一個 IPPImage 物件,以填滿框格。
- 將縮放框格(包含對已建立投影片的參考)加入第一張投影片。
- 將修改後的簡報寫入 PPTX 檔案。
以下 C++ 程式碼示範如何使用不同圖像建立縮放框格:
auto pres = System::MakeObject<Presentation>();
auto slide0 = pres->get_Slides()->idx_get(0);

//新增投影片到簡報
auto slide = pres->get_Slides()->AddEmptySlide(slide0->get_LayoutSlide());

// 建立第二張投影片的背景
SetSlideBackground(slide, Color::get_Cyan());

// 建立第三張投影片的文字方塊
auto autoshape = slide->get_Shapes()->AddAutoShape(ShapeType::Rectangle, 100.0f, 200.0f, 500.0f, 200.0f);
autoshape->get_TextFrame()->set_Text(u"Second Slide");

// 建立縮放物件的新圖像
auto image = pres->get_Images()->AddImage(Images::FromFile(u"image.png"));

//新增ZoomFrame物件
slide0->get_Shapes()->AddZoomFrame(20.0f, 20.0f, 300.0f, 200.0f, slide, image);

// 儲存簡報
pres->Save(u"presentation.pptx", SaveFormat::Pptx);
格式化縮放框格
在前面的章節中,我們示範了如何建立簡單的縮放框格。若要建立較為複雜的縮放框格,您必須變更簡單框格的格式。您可以對縮放框格套用多種格式設定。
您可以這樣在投影片上控制縮放框格的格式:
- 建立一個 Presentation 類別的實例。
- 建立您打算連結到縮放框格的新投影片。
- 為新投影片加入辨識文字與背景。
- 將縮放框格(包含對已建立投影片的參考)加入第一張投影片。
- 透過在與 Presentation 物件關聯的 Images 集合中加入圖像,建立一個 IPPImage 物件,以填滿框格。
- 為第一個縮放框格物件設定自訂圖像。
- 變更第二個縮放框格物件的線條格式。
- 移除第二個縮放框格物件圖像的背景。
- 將修改後的簡報寫入 PPTX 檔案。
以下 C++ 程式碼示範如何在投影片上變更縮放框格的格式:
auto pres = System::MakeObject<Presentation>();
auto slide1 = pres->get_Slides()->idx_get(0);
//新增投影片到簡報
auto slide2 = pres->get_Slides()->AddEmptySlide(slide1->get_LayoutSlide());
auto slide3 = pres->get_Slides()->AddEmptySlide(slide1->get_LayoutSlide());

// 為第二張投影片建立背景
SetSlideBackground(slide2, Color::get_Cyan());

// 為第二張投影片建立文字方塊
auto autoshape = slide2->get_Shapes()->AddAutoShape(ShapeType::Rectangle, 100.0f, 200.0f, 500.0f, 200.0f);
autoshape->get_TextFrame()->set_Text(u"Second Slide");

// 為第三張投影片建立背景
SetSlideBackground(slide3, Color::get_DarkKhaki());

// 為第三張投影片建立文字方塊
autoshape = slide3->get_Shapes()->AddAutoShape(ShapeType::Rectangle, 100.0f, 200.0f, 500.0f, 200.0f);
autoshape->get_TextFrame()->set_Text(u"Trird Slide");

//新增 ZoomFrame 物件
auto zoomFrame1 = slide1->get_Shapes()->AddZoomFrame(20.0f, 20.0f, 250.0f, 200.0f, slide2);
auto zoomFrame2 = slide1->get_Shapes()->AddZoomFrame(200.0f, 250.0f, 250.0f, 200.0f, slide3);

// 為縮放物件建立新圖像
auto image = pres->get_Images()->AddImage(Images::FromFile(u"image.png"));
// 為 zoomFrame1 物件設定自訂圖像
zoomFrame1->set_Image(image);

// 為 zoomFrame2 物件設定縮放框格格式
zoomFrame2->get_LineFormat()->set_Width(5);
zoomFrame2->get_LineFormat()->get_FillFormat()->set_FillType(FillType::Solid);
zoomFrame2->get_LineFormat()->get_FillFormat()->get_SolidFillColor()->set_Color(Color::get_HotPink());
zoomFrame2->get_LineFormat()->set_DashStyle(LineDashStyle::DashDot);

// 設定 zoomFrame2 物件不顯示背景
zoomFrame2->set_ShowBackground(false);

// 儲存簡報
pres->Save(u"presentation.pptx", SaveFormat::Pptx);
Section Zoom
Section Zoom 是指向簡報中某個章節的連結。您可以使用 Section Zoom 返回您想特別強調的章節,或用來突顯簡報中不同部分之間的關聯。

對於 Section Zoom 物件,Aspose.Slides 提供了ISectionZoomFrame 介面,以及在IShapeCollection 介面下的多個方法。
建立章節縮放框格
您可以這樣在投影片上加入章節縮放框格:
- 建立一個 Presentation 類別的實例。
- 建立一張新投影片。
- 為該投影片加入辨識背景。
- 建立您打算連結到縮放框格的新章節。
- 將章節縮放框格(包含對已建立章節的參考)加入第一張投影片。
- 將修改後的簡報寫入 PPTX 檔案。
以下 C++ 程式碼示範如何在投影片上建立章節縮放框格:
auto pres = System::MakeObject<Presentation>();
auto slide0 = pres->get_Slides()->idx_get(0);

//新增投影片到簡報
auto slide = pres->get_Slides()->AddEmptySlide(slide0->get_LayoutSlide());
SetSlideBackground(slide, Color::get_YellowGreen());

// 新增章節到簡報
pres->get_Sections()->AddSection(u"Section 1", slide);

// 新增 SectionZoomFrame 物件
auto sectionZoomFrame = slide0->get_Shapes()->AddSectionZoomFrame(20.0f, 20.0f, 300.0f, 200.0f, pres->get_Sections()->idx_get(1));

// 儲存簡報
pres->Save(u"presentation.pptx", SaveFormat::Pptx);
使用自訂圖像建立章節縮放框格
使用 Aspose.Slides for C++,您可以這樣建立使用不同投影片預覽圖的章節縮放框格:
- 建立一個 Presentation 類別的實例。
- 建立一張新投影片。
- 為該投影片加入辨識背景。
- 建立您打算連結到縮放框格的新章節。
- 透過在與 Presentation 物件關聯的 Images 集合中加入圖像,建立一個 IPPImage 物件,以填滿框格。
- 將章節縮放框格(包含對已建立章節的參考)加入第一張投影片。
- 將修改後的簡報寫入 PPTX 檔案。
以下 C++ 程式碼示範如何使用不同圖像建立章節縮放框格:
auto pres = System::MakeObject<Presentation>();
auto slide0 = pres->get_Slides()->idx_get(0);

//新增投影片到簡報
auto slide = pres->get_Slides()->AddEmptySlide(slide0->get_LayoutSlide());
SetSlideBackground(slide, Color::get_YellowGreen());

// 新增章節到簡報
pres->get_Sections()->AddSection(u"Section 1", slide);

// 為縮放物件建立新圖像
auto image = pres->get_Images()->AddImage(Images::FromFile(u"image.png"));

// 新增 SectionZoomFrame 物件
auto sectionZoomFrame = slide0->get_Shapes()->AddSectionZoomFrame(20.0f, 20.0f, 300.0f, 200.0f, pres->get_Sections()->idx_get(1), image);

// 儲存簡報
pres->Save(u"presentation.pptx", SaveFormat::Pptx);
格式化章節縮放框格
若要建立較為複雜的章節縮放框格,您必須變更簡單框格的格式。您可以對章節縮放框格套用多種格式設定。
您可以這樣在投影片上控制章節縮放框格的格式:
- 建立一個 Presentation 類別的實例。
- 建立一張新投影片。
- 為該投影片加入辨識背景。
- 建立您打算連結到縮放框格的新章節。
- 將章節縮放框格(包含對已建立章節的參考)加入第一張投影片。
- 變更已建立章節縮放物件的大小與位置。
- 透過在與 Presentation 物件關聯的 Images 集合中加入圖像,建立一個 IPPImage 物件,以填滿框格。
- 為已建立的章節縮放框格物件設定自訂圖像。
- 設定從連結的章節返回原始投影片的功能。
- 移除章節縮放框格物件圖像的背景。
- 變更第二個縮放框格物件的線條格式。
- 變更過渡持續時間。
- 將修改後的簡報寫入 PPTX 檔案。
以下 C++ 程式碼示範如何變更章節縮放框格的格式:
auto pres = System::MakeObject<Presentation>();
auto slide0 = pres->get_Slides()->idx_get(0);

//新增投影片到簡報
auto slide = pres->get_Slides()->AddEmptySlide(slide0->get_LayoutSlide());
SetSlideBackground(slide, Color::get_YellowGreen());

// 新增章節到簡報
pres->get_Sections()->AddSection(u"Section 1", slide);

// 新增 SectionZoomFrame 物件
auto sectionZoomFrame = slide0->get_Shapes()->AddSectionZoomFrame(20.0f, 20.0f, 300.0f, 200.0f, pres->get_Sections()->idx_get(1));

// SectionZoomFrame 的格式設定
sectionZoomFrame->set_X(100.0f);
sectionZoomFrame->set_Y(300.0f);
sectionZoomFrame->set_Width(100.0f);
sectionZoomFrame->set_Height(75.0f);

auto image = pres->get_Images()->AddImage(Images::FromFile(u"image.png"));
sectionZoomFrame->set_Image(image);

sectionZoomFrame->set_ReturnToParent(true);
sectionZoomFrame->set_ShowBackground(false);

auto sectionZoomLineFormat = sectionZoomFrame->get_LineFormat();
sectionZoomLineFormat->get_FillFormat()->set_FillType(FillType::Solid);
sectionZoomLineFormat->get_FillFormat()->get_SolidFillColor()->set_Color(Color::get_Brown());
sectionZoomLineFormat->set_DashStyle(LineDashStyle::DashDot);
sectionZoomLineFormat->set_Width(2.5f);

sectionZoomFrame->set_TransitionDuration(1.5f);

// 儲存簡報
pres->Save(u"presentation.pptx", SaveFormat::Pptx);
Summary Zoom
Summary Zoom 如同一個登陸頁面,將簡報的所有片段一次顯示。當您在演示時,可使用縮放在簡報的任意位置之間跳轉,順序不受限制。您可以發揮創意,前進或回顧投影片內容,而不會中斷簡報的流程。
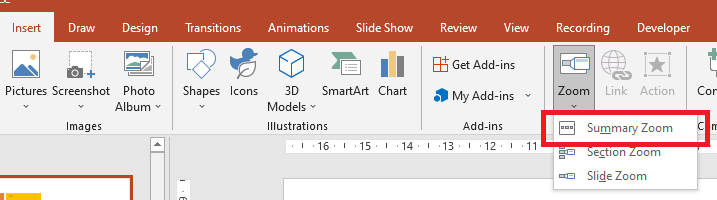
對於 Summary Zoom 物件,Aspose.Slides 提供了ISummaryZoomFrame、ISummaryZoomSection 以及ISummaryZoomSectionCollection 介面,還有在IShapeCollection 介面下的多個方法。
建立 Summary Zoom
您可以這樣在投影片上加入 Summary Zoom 框格:
- 建立一個 Presentation 類別的實例。
- 建立具備辨識背景與新章節的新投影片。
- 將 Summary Zoom 框格加入第一張投影片。
- 將修改後的簡報寫入 PPTX 檔案。
以下 C++ 程式碼示範如何在投影片上建立 Summary Zoom 框格:
auto pres = System::MakeObject<Presentation>();
auto slide0 = pres->get_Slides()->idx_get(0);

// 新增投影片到簡報
auto slide = pres->get_Slides()->AddEmptySlide(slide0->get_LayoutSlide());
SetSlideBackground(slide, Color::get_Brown());

// 新增章節到簡報
pres->get_Sections()->AddSection(u"Section 1", slide);

// 新增投影片到簡報
slide = pres->get_Slides()->AddEmptySlide(slide0->get_LayoutSlide());
SetSlideBackground(slide, Color::get_Aqua());

// 新增章節到簡報
pres->get_Sections()->AddSection(u"Section 2", slide);

// 新增投影片到簡報
slide = pres->get_Slides()->AddEmptySlide(slide0->get_LayoutSlide());
SetSlideBackground(slide, Color::get_Chartreuse());

// 新增章節到簡報
pres->get_Sections()->AddSection(u"Section 3", slide);

// 新增投影片到簡報
slide = pres->get_Slides()->AddEmptySlide(slide0->get_LayoutSlide());
SetSlideBackground(slide, Color::get_DarkGreen());

// 新增章節到簡報
pres->get_Sections()->AddSection(u"Section 4", slide);

// 新增 SummaryZoomFrame 物件
auto summaryZoomFrame = slide0->get_Shapes()->AddSummaryZoomFrame(150.0f, 50.0f, 300.0f, 200.0f);

// 儲存簡報
pres->Save(u"presentation.pptx", SaveFormat::Pptx);
新增與移除 Summary Zoom 章節
Summary Zoom 框格中的所有章節皆由ISummaryZoomSection 物件表示,這些物件儲存在ISummaryZoomSectionCollection 物件中。您可以透過ISummaryZoomSectionCollection 介面這樣新增或移除 Summary Zoom 章節物件:
- 建立一個 Presentation 類別的實例。
- 建立具備辨識背景與新章節的新投影片。
- 將 Summary Zoom 框格加入第一張投影片。
- 為簡報新增一張投影片與章節。
- 將新建立的章節加入 Summary Zoom 框格。
- 從 Summary Zoom 框格中移除第一個章節。
- 將修改後的簡報寫入 PPTX 檔案。
以下 C++ 程式碼示範如何在 Summary Zoom 框格中新增與移除章節:
auto pres = System::MakeObject<Presentation>();
auto slide0 = pres->get_Slides()->idx_get(0);

//新增投影片到簡報
auto slide = pres->get_Slides()->AddEmptySlide(slide0->get_LayoutSlide());
SetSlideBackground(slide, Color::get_Brown());

// 新增章節到簡報
pres->get_Sections()->AddSection(u"Section 1", slide);

//新增投影片到簡報
slide = pres->get_Slides()->AddEmptySlide(slide0->get_LayoutSlide());
SetSlideBackground(slide, Color::get_Aqua());

// 新增章節到簡報
pres->get_Sections()->AddSection(u"Section 2", slide);

// 新增 SummaryZoomFrame 物件
auto summaryZoomFrame = slide0->get_Shapes()->AddSummaryZoomFrame(150.0f, 50.0f, 300.0f, 200.0f);

//新增投影片到簡報
slide = pres->get_Slides()->AddEmptySlide(slide0->get_LayoutSlide());
SetSlideBackground(slide, Color::get_Chartreuse());

// 新增章節到簡報
auto section3 = pres->get_Sections()->AddSection(u"Section 3", slide);

// 將章節加入 Summary Zoom
summaryZoomFrame->get_SummaryZoomCollection()->AddSummaryZoomSection(section3);

// 從 Summary Zoom 中移除章節
summaryZoomFrame->get_SummaryZoomCollection()->RemoveSummaryZoomSection(pres->get_Sections()->idx_get(1));

// 儲存簡報
pres->Save(u"presentation.pptx", SaveFormat::Pptx);
格式化 Summary Zoom 章節
若要建立較為複雜的 Summary Zoom 章節物件,您必須變更簡單框格的格式。您可以對 Summary Zoom 章節物件套用多種格式設定。
您可以這樣在 Summary Zoom 框格中控制章節物件的格式:
- 建立一個 Presentation 類別的實例。
- 建立具備辨識背景與新章節的新投影片。
- 將 Summary Zoom 框格加入第一張投影片。
- 從
ISummaryZoomSectionCollection取得第一個章節物件。 - 透過在與 Presentation 物件關聯的 images 集合中加入圖像,建立一個 IPPImage 物件,以填滿框格。
- 為已建立的章節縮放框格物件設定自訂圖像。
- 設定從連結的章節返回原始投影片的功能。
- 變更第二個縮放框格物件的線條格式。
- 變更過渡持續時間。
- 將修改後的簡報寫入 PPTX 檔案。
以下 C++ 程式碼示範如何變更 Summary Zoom 章節物件的格式:
auto pres = System::MakeObject<Presentation>();
auto slide0 = pres->get_Slides()->idx_get(0);

//新增投影片到簡報
auto slide = pres->get_Slides()->AddEmptySlide(slide0->get_LayoutSlide());
SetSlideBackground(slide, Color::get_Brown());

// 新增章節到簡報
pres->get_Sections()->AddSection(u"Section 1", slide);

//新增投影片到簡報
slide = pres->get_Slides()->AddEmptySlide(slide0->get_LayoutSlide());
SetSlideBackground(slide, Color::get_Aqua());

// 新增章節到簡報
pres->get_Sections()->AddSection(u"Section 2", slide);

// 新增 SummaryZoomFrame 物件
auto summaryZoomFrame = slide0->get_Shapes()->AddSummaryZoomFrame(150.0f, 50.0f, 300.0f, 200.0f);

// 取得第一個 SummaryZoomSection 物件
auto summarySection = summaryZoomFrame->get_SummaryZoomCollection()->idx_get(0);

// SummaryZoomSection 物件的格式設定
auto image = pres->get_Images()->AddImage(Images::FromFile(u"image.png"));
summarySection->set_Image(image);

summarySection->set_ReturnToParent(false);

summarySection->get_LineFormat()->get_FillFormat()->set_FillType(FillType::Solid);
summarySection->get_LineFormat()->get_FillFormat()->get_SolidFillColor()->set_Color(Color::get_Black());
summarySection->get_LineFormat()->set_DashStyle(LineDashStyle::DashDot);
summarySection->get_LineFormat()->set_Width(1.5f);

summarySection->set_TransitionDuration(1.5f);

// 儲存簡報
pres->Save(u"presentation.pptx", SaveFormat::Pptx);
FAQ
我可以控制在顯示目標後返回「父」投影片嗎?
可以。Zoom frame 或 section 具有 set_ReturnToParent 方法,可在觀看者造訪目標內容後返回原始投影片。
我可以調整 Zoom 轉場的「速度」或持續時間嗎?
可以。Zoom 支援設定轉場持續時間,讓您掌控跳躍動畫的長度。
簡報能包含多少個 Zoom 物件有限制嗎?
文件中未列出硬性 API 限制。實際限制取決於簡報整體的複雜度與觀看者的效能。您可以加入許多 Zoom 框格,但需留意檔案大小與渲染時間。