Create Resources and Link with Tasks
While working with MPP files, you might need to create resources and link them to tasks from your project. This article demonstrates how to load MPP files in your .NET applications and assign resources to tasks using both VSTO and Aspose.Tasks for .NET.
Introduction
In project scheduling, associating resources with tasks allows for workload planning, cost estimation, and progress tracking. Resources typically represent people, equipment, or material, and their proper assignment is key for meaningful project analysis.
This article shows how to programmatically:
- Add new resources to a Microsoft Project file.
- Assign those resources to tasks.
The functionality is demonstrated using both legacy VSTO interop and the modern Aspose.Tasks for .NET API.
Create Resources and Link to Tasks using VSTO
To create resources and link them to tasks using Microsoft Office Interop:
- Create a Visual Studio project.
- Add a reference to Microsoft Project 12.0 Object Library from the COM tab.
- Import
Microsoft.Office.Interop.MSProject. - Use the code sample below.
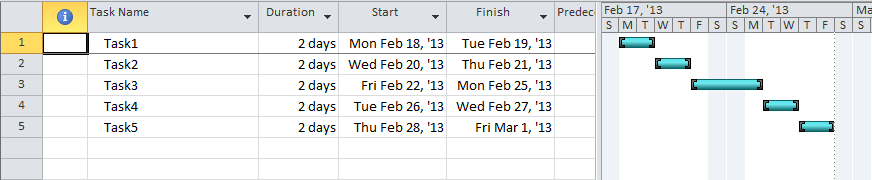
Before and after screenshots show the project structure in Gantt and Resource views.
📎 Input file: Gantt chart view
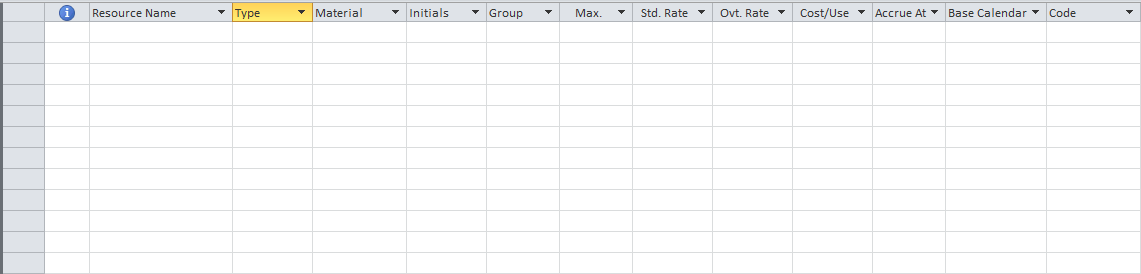
📎 Input file: Resource sheet view
VSTO Code Example
 1Microsoft.Office.Interop.MSProject.Application projectApplication = new Application();
 2object missingValue = System.Reflection.Missing.Value;
 3
 4projectApplication.FileOpenEx(@"SampleProject.mpp",
 5    missingValue, missingValue, missingValue, missingValue,
 6    missingValue, missingValue, missingValue, missingValue,
 7    missingValue, missingValue, PjPoolOpen.pjPoolReadOnly,
 8    missingValue, missingValue, missingValue, missingValue,
 9    missingValue);
10
11Microsoft.Office.Interop.MSProject.Project project = projectApplication.ActiveProject;
12
13int iResourceId = 1;
14
15foreach (Task tsk in project.Tasks)
16{
17    string developer = "Developer0" + iResourceId;
18    project.Resources.Add(developer, iResourceId);
19    tsk.Assignments.Add(tsk.ID, iResourceId, missingValue);
20    iResourceId++;
21}
22
23projectApplication.FileCloseAll(Microsoft.Office.Interop.MSProject.PjSaveType.pjSave);
Output file: Gantt chart view

Output file: Resource sheet view

Notes
- Resources are added sequentially and assigned per task.
- The
Assignments.Addmethod requires task and resource identifiers. - COM interop requires careful lifecycle and reference management.
Create Resources and Link to Tasks using Aspose.Tasks for .NET
To accomplish the same using Aspose.Tasks:
- Create a Visual Studio project.
- Add a reference to Aspose.Tasks via the .NET tab.
- Import the
Aspose.Tasksnamespace. - Use the example code provided below.
 1Project project = new Project("New Project.mpp");
 2
 3// Declare ChildTasksCollector class object
 4ChildTasksCollector collector = new ChildTasksCollector();
 5
 6// Use TaskUtils to get all children tasks in RootTask
 7TaskUtils.Apply(project.RootTask, collector, 0);
 8
 9// Define Resources
10for (int i = 0; i <= 4; i++)
11{
12    // Add resource to project
13    Resource newResource = project.Resources.Add("Developer0" + i);
14    newResource.Set(Rsc.Type, ResourceType.Work);
15
16    // Define assignment
17    ResourceAssignment newResourceAssignment = project.ResourceAssignments.Add((Task)collector.Tasks[i], newResource);
18}
19
20project.Save("CreateResourcesAndLinkToTasks_out.mpp", SaveFileFormat.MPP);Highlights
- Resources are added via the
project.Resources.Addmethod. - Assignments are linked to tasks using
project.ResourceAssignments.Add(task, resource). - The API is concise, fully managed, and compatible with server environments.
Comparison Table
| Feature | VSTO / Interop | Aspose.Tasks for .NET |
|---|---|---|
| Microsoft Project required | ✅ Yes | ❌ No |
| Platform support | 🖥 Windows only | ✅ Cross-platform |
| Deployment-friendly | ❌ Requires Office runtime | ✅ Self-contained .NET |
| API verbosity | ⚠ High | ✅ Minimal and intuitive |
| Assignment method | Assignments.Add(taskID, resourceID) | ResourceAssignments.Add(task, res) |
| Output file format flexibility | Limited | ✅ MPP, XML, PDF, HTML, etc. |
Summary
Creating and assigning resources is a key step in building a realistic and trackable project plan. While VSTO offers native access to Microsoft Project’s object model, it comes with limitations in portability, scalability, and code complexity.
Aspose.Tasks for .NET provides a high-level API that enables efficient resource management in MPP files — all without requiring Microsoft Project to be installed. This makes it the ideal solution for web apps, services, and cross-platform .NET workloads.
For related scenarios, check out: