
Gestionar párrafos de texto de PowerPoint en Android
Descripción general
Aspose.Slides for Android via Java representa el texto como una jerarquía de marcos de texto, párrafos y porciones:
- ITextFrame representa el contenedor de texto en una forma y proporciona acceso a su colección de párrafos.
- IParagraph representa un párrafo en un marco de texto y proporciona acceso a sus porciones y al formato a nivel de párrafo.
- IPortion representa una ejecución de texto dentro de un párrafo. Cada porción puede tener su propio texto y formato a nivel de carácter.
Por lo tanto, un párrafo puede contener texto con diferentes fuentes, colores, tamaños y otros formatos mediante el uso de varias porciones.
Crear y dar formato a los párrafos
Cree párrafos en el marco de texto de una forma y utilice porciones para dar formato a ejecuciones de texto individuales. Esta sección muestra cómo combinar varias porciones dentro de cada párrafo y aplicar colores, tamaños de fuente y estilos diferentes.
Crear párrafos con varias porciones
El siguiente ejemplo de Android vía Java crea tres párrafos, cada uno con tres ejecuciones de texto en la colección devuelta por IParagraph.getPortions. Reutiliza el párrafo predeterminado y su porción vacía, y luego añade los párrafos y porciones restantes. El formato se aplica mediante IPortion.getPortionFormat: la primera porción de cada párrafo es roja, negrita y de 15 puntos; la segunda es azul, cursiva y de 18 puntos. La tercera porción conserva su formato predeterminado:
import com.aspose.slides.*;
import android.graphics.Color;

Presentation presentation = new Presentation();
try {
    ISlide slide = presentation.getSlides().get_Item(0);

    IAutoShape shape = slide.getShapes().addAutoShape(ShapeType.Rectangle, 50, 150, 300, 150);
    ITextFrame textFrame = shape.getTextFrame();

    IParagraph firstParagraph = textFrame.getParagraphs().get_Item(0);
    firstParagraph.getPortions().add(new Portion());
    firstParagraph.getPortions().add(new Portion());

    IParagraph secondParagraph = new Paragraph();
    secondParagraph.getPortions().add(new Portion());
    secondParagraph.getPortions().add(new Portion());
    secondParagraph.getPortions().add(new Portion());
    textFrame.getParagraphs().add(secondParagraph);

    IParagraph thirdParagraph = new Paragraph();
    thirdParagraph.getPortions().add(new Portion());
    thirdParagraph.getPortions().add(new Portion());
    thirdParagraph.getPortions().add(new Portion());
    textFrame.getParagraphs().add(thirdParagraph);

    int paragraphCount = textFrame.getParagraphs().getCount();
    for (int paragraphIndex = 0; paragraphIndex < paragraphCount; paragraphIndex++) {
        IParagraph paragraph = textFrame.getParagraphs().get_Item(paragraphIndex);
        int portionCount = paragraph.getPortions().getCount();
        for (int portionIndex = 0; portionIndex < portionCount; portionIndex++) {
            IPortion portion = paragraph.getPortions().get_Item(portionIndex);
            portion.setText("Portion " + (paragraphIndex + 1) + "." + (portionIndex + 1));

            if (portionIndex == 0) {
                portion.getPortionFormat().getFillFormat().setFillType(FillType.Solid);
                portion.getPortionFormat().getFillFormat().getSolidFillColor().setColor(Color.RED);
                portion.getPortionFormat().setFontBold(NullableBool.True);
                portion.getPortionFormat().setFontHeight(15);
            } else if (portionIndex == 1) {
                portion.getPortionFormat().getFillFormat().setFillType(FillType.Solid);
                portion.getPortionFormat().getFillFormat().getSolidFillColor().setColor(Color.BLUE);
                portion.getPortionFormat().setFontItalic(NullableBool.True);
                portion.getPortionFormat().setFontHeight(18);
            }
        }
    }

    presentation.save("paragraphs_with_portions.pptx", SaveFormat.Pptx);
} finally {
    presentation.dispose();
}
Crear listas con viñetas y numeración
Organice el texto de los párrafos en listas con símbolos, números o imágenes personalizadas. Los ejemplos de esta sección cubren el formato de viñetas, listas multinivel y números de inicio personalizados.
Crear una lista con viñetas o numerada
Las viñetas y la numeración facilitan la lectura de elementos relacionados. En Aspose.Slides, la configuración de la lista se define a través de IBulletFormat.
Este ejemplo de Android vía Java añade una viñeta de símbolo y un elemento numerado al mismo marco de texto. IBulletFormat.setType selecciona el tipo de viñeta, mientras que IBulletFormat.setChar suministra el símbolo y IBulletFormat.setNumberedBulletStyle selecciona el estilo de numeración. Ambos elementos usan viñetas negras con una altura del 100 % y una sangría de párrafo de 25 puntos:
import com.aspose.slides.*;
import android.graphics.Color;

Presentation presentation = new Presentation();
try {
    ISlide slide = presentation.getSlides().get_Item(0);

    IAutoShape shape = slide.getShapes().addAutoShape(ShapeType.Rectangle, 200, 200, 400, 200);
    ITextFrame textFrame = shape.getTextFrame();
    textFrame.getParagraphs().clear();

    Paragraph symbolParagraph = new Paragraph();
    symbolParagraph.setText("Welcome to Aspose.Slides");
    symbolParagraph.getParagraphFormat().getBullet().setType(BulletType.Symbol);
    symbolParagraph.getParagraphFormat().getBullet().setChar((char) 0x2022);
    symbolParagraph.getParagraphFormat().setIndent(25);
    symbolParagraph.getParagraphFormat().getBullet().getColor().setColorType(ColorType.RGB);
    symbolParagraph.getParagraphFormat().getBullet().getColor().setColor(Color.BLACK);
    symbolParagraph.getParagraphFormat().getBullet().setBulletHardColor(NullableBool.True);
    symbolParagraph.getParagraphFormat().getBullet().setHeight(100);
    textFrame.getParagraphs().add(symbolParagraph);

    Paragraph numberedParagraph = new Paragraph();
    numberedParagraph.setText("This is a numbered item");
    numberedParagraph.getParagraphFormat().getBullet().setType(BulletType.Numbered);
    numberedParagraph.getParagraphFormat().getBullet().setNumberedBulletStyle(NumberedBulletStyle.BulletCircleNumWDBlackPlain);
    numberedParagraph.getParagraphFormat().setIndent(25);
    numberedParagraph.getParagraphFormat().getBullet().getColor().setColorType(ColorType.RGB);
    numberedParagraph.getParagraphFormat().getBullet().getColor().setColor(Color.BLACK);
    numberedParagraph.getParagraphFormat().getBullet().setBulletHardColor(NullableBool.True);
    numberedParagraph.getParagraphFormat().getBullet().setHeight(100);
    textFrame.getParagraphs().add(numberedParagraph);

    presentation.save("bulleted_and_numbered_list.pptx", SaveFormat.Pptx);
} finally {
    presentation.dispose();
}
Usar viñetas de imagen
Las viñetas de imagen le permiten usar una imagen personalizada en lugar de un símbolo o número.
Este ejemplo de Android vía Java añade una imagen a la colección de imágenes de la presentación como IPPImage y la usa como viñeta de párrafo. Llama a IBulletFormat.setType para usar una viñeta de imagen y asigna la imagen mediante IBulletFormat.getPicture. IBulletFormat.setHeight se establece en el 100 % para dimensionar la viñeta en relación con el texto del párrafo:
import com.aspose.slides.*;

Presentation presentation = new Presentation();
try {
    ISlide slide = presentation.getSlides().get_Item(0);

    IImage bulletImage = Images.fromFile("bullets.png");
    IPPImage presentationImage;
    try {
        presentationImage = presentation.getImages().addImage(bulletImage);
    } finally {
        bulletImage.dispose();
    }

    IAutoShape shape = slide.getShapes().addAutoShape(ShapeType.Rectangle, 200, 200, 400, 200);
    ITextFrame textFrame = shape.getTextFrame();
    textFrame.getParagraphs().clear();

    Paragraph paragraph = new Paragraph();
    paragraph.setText("Welcome to Aspose.Slides");
    paragraph.getParagraphFormat().getBullet().setType(BulletType.Picture);
    paragraph.getParagraphFormat().getBullet().getPicture().setImage(presentationImage);
    paragraph.getParagraphFormat().getBullet().setHeight(100);
    textFrame.getParagraphs().add(paragraph);

    presentation.save("picture_bullet.pptx", SaveFormat.Pptx);
    presentation.save("picture_bullet.ppt", SaveFormat.Ppt);
} finally {
    presentation.dispose();
}
Crear una lista multinivel
Establezca IParagraphFormat.setDepth para colocar los párrafos en diferentes niveles de una lista. El nivel superior tiene una profundidad de 0.
Este ejemplo de Android vía Java asigna valores de IParagraphFormat.setDepth de 0 a 3 a cuatro párrafos, creando una jerarquía dentro de un mismo marco de texto. Cada párrafo usa una viñeta de símbolo, con IBulletFormat.setChar alternando entre una viñeta redonda y un guion para distinguir los niveles adyacentes:
import com.aspose.slides.*;
import android.graphics.Color;

Presentation presentation = new Presentation();
try {
    ISlide slide = presentation.getSlides().get_Item(0);

    IAutoShape shape = slide.getShapes().addAutoShape(ShapeType.Rectangle, 200, 200, 400, 200);
    ITextFrame textFrame = shape.getTextFrame();
    textFrame.getParagraphs().clear();

    IParagraph firstParagraph = new Paragraph();
    firstParagraph.setText("Content");
    firstParagraph.getParagraphFormat().getBullet().setType(BulletType.Symbol);
    firstParagraph.getParagraphFormat().getBullet().setChar((char) 0x2022);
    firstParagraph.getParagraphFormat().getDefaultPortionFormat().getFillFormat().setFillType(FillType.Solid);
    firstParagraph.getParagraphFormat().getDefaultPortionFormat().getFillFormat().getSolidFillColor().setColor(Color.BLACK);
    firstParagraph.getParagraphFormat().setDepth((short) 0);

    IParagraph secondParagraph = new Paragraph();
    secondParagraph.setText("Second level");
    secondParagraph.getParagraphFormat().getBullet().setType(BulletType.Symbol);
    secondParagraph.getParagraphFormat().getBullet().setChar('-');
    secondParagraph.getParagraphFormat().getDefaultPortionFormat().getFillFormat().setFillType(FillType.Solid);
    secondParagraph.getParagraphFormat().getDefaultPortionFormat().getFillFormat().getSolidFillColor().setColor(Color.BLACK);
    secondParagraph.getParagraphFormat().setDepth((short) 1);

    IParagraph thirdParagraph = new Paragraph();
    thirdParagraph.setText("Third level");
    thirdParagraph.getParagraphFormat().getBullet().setType(BulletType.Symbol);
    thirdParagraph.getParagraphFormat().getBullet().setChar((char) 0x2022);
    thirdParagraph.getParagraphFormat().getDefaultPortionFormat().getFillFormat().setFillType(FillType.Solid);
    thirdParagraph.getParagraphFormat().getDefaultPortionFormat().getFillFormat().getSolidFillColor().setColor(Color.BLACK);
    thirdParagraph.getParagraphFormat().setDepth((short) 2);

    IParagraph fourthParagraph = new Paragraph();
    fourthParagraph.setText("Fourth level");
    fourthParagraph.getParagraphFormat().getBullet().setType(BulletType.Symbol);
    fourthParagraph.getParagraphFormat().getBullet().setChar('-');
    fourthParagraph.getParagraphFormat().getDefaultPortionFormat().getFillFormat().setFillType(FillType.Solid);
    fourthParagraph.getParagraphFormat().getDefaultPortionFormat().getFillFormat().getSolidFillColor().setColor(Color.BLACK);
    fourthParagraph.getParagraphFormat().setDepth((short) 3);

    textFrame.getParagraphs().add(firstParagraph);
    textFrame.getParagraphs().add(secondParagraph);
    textFrame.getParagraphs().add(thirdParagraph);
    textFrame.getParagraphs().add(fourthParagraph);

    presentation.save("multilevel_list.pptx", SaveFormat.Pptx);
} finally {
    presentation.dispose();
}
Iniciar elementos numerados con valores personalizados
Use IBulletFormat.setNumberedBulletStartWith para establecer el número inicial que se muestra en un párrafo numerado.
Este ejemplo de Android vía Java establece IBulletFormat.setType para usar numeración en tres párrafos y asigna valores de IBulletFormat.setNumberedBulletStartWith de 2, 3 y 7. El valor de inicio se configura por separado para cada párrafo, lo que permite que los números mostrados salten valores:
import com.aspose.slides.*;

Presentation presentation = new Presentation();
try {
    ISlide slide = presentation.getSlides().get_Item(0);

    IAutoShape shape = slide.getShapes().addAutoShape(ShapeType.Rectangle, 200, 200, 400, 200);
    ITextFrame textFrame = shape.getTextFrame();
    textFrame.getParagraphs().clear();

    Paragraph firstParagraph = new Paragraph();
    firstParagraph.setText("Start at 2");
    firstParagraph.getParagraphFormat().getBullet().setType(BulletType.Numbered);
    firstParagraph.getParagraphFormat().getBullet().setNumberedBulletStartWith((short) 2);
    textFrame.getParagraphs().add(firstParagraph);

    Paragraph secondParagraph = new Paragraph();
    secondParagraph.setText("Start at 3");
    secondParagraph.getParagraphFormat().getBullet().setType(BulletType.Numbered);
    secondParagraph.getParagraphFormat().getBullet().setNumberedBulletStartWith((short) 3);
    textFrame.getParagraphs().add(secondParagraph);

    Paragraph thirdParagraph = new Paragraph();
    thirdParagraph.setText("Start at 7");
    thirdParagraph.getParagraphFormat().getBullet().setType(BulletType.Numbered);
    thirdParagraph.getParagraphFormat().getBullet().setNumberedBulletStartWith((short) 7);
    textFrame.getParagraphs().add(thirdParagraph);

    presentation.save("custom_numbered_list.pptx", SaveFormat.Pptx);
} finally {
    presentation.dispose();
}
Controlar el diseño del párrafo y sus propiedades finales
Ajuste los márgenes y sangrías del párrafo para controlar la posición de la primera línea y de las líneas envueltas. También puede dar formato al símbolo de fin de párrafo por separado del texto visible.
Establecer una sangría de primera línea
Use el método IParagraphFormat.setIndent para controlar la sangría de la primera línea de un párrafo. Este ajuste solo mueve la primera línea respecto al margen izquierdo del párrafo. Un valor positivo desplaza la primera línea a la derecha, mientras que las líneas restantes permanecen alineadas con el cuerpo del párrafo.
Use IParagraphFormat.setMarginLeft cuando necesite mover el párrafo completo. Use IParagraphFormat.setIndent cuando solo necesite mover la primera línea.
El siguiente ejemplo asigna a tres párrafos el mismo IParagraphFormat.setMarginLeft de 20 puntos y valores de IParagraphFormat.setIndent de 0, 20 y 40 puntos. Las primeras líneas comienzan en desplazamientos progresivamente mayores, mientras que las líneas envueltas conservan el mismo margen izquierdo:
import com.aspose.slides.*;
import android.graphics.Color;

Presentation presentation = new Presentation();
try {
    ISlide slide = presentation.getSlides().get_Item(0);

    IAutoShape shape = slide.getShapes().addAutoShape(ShapeType.Rectangle, 50, 50, 420, 220);
    shape.getFillFormat().setFillType(FillType.NoFill);
    shape.getLineFormat().getFillFormat().setFillType(FillType.Solid);
    shape.getLineFormat().getFillFormat().getSolidFillColor().setColor(Color.GRAY);

    ITextFrame textFrame = shape.getTextFrame();
    textFrame.getTextFrameFormat().setAutofitType(TextAutofitType.Shape);
    textFrame.getParagraphs().clear();

    Paragraph firstParagraph = new Paragraph();
    firstParagraph.setText("No first-line indent. Wrapped lines start at the same position as the first line.");
    firstParagraph.getParagraphFormat().getDefaultPortionFormat().getFillFormat().setFillType(FillType.Solid);
    firstParagraph.getParagraphFormat().getDefaultPortionFormat().getFillFormat().getSolidFillColor().setColor(Color.BLACK);
    firstParagraph.getParagraphFormat().setMarginLeft(20f);
    firstParagraph.getParagraphFormat().setIndent(0f);

    Paragraph secondParagraph = new Paragraph();
    secondParagraph.setText("First-line indent of 20 points. The first line moves to the right, while wrapped lines remain aligned to the paragraph body.");
    secondParagraph.getParagraphFormat().getDefaultPortionFormat().getFillFormat().setFillType(FillType.Solid);
    secondParagraph.getParagraphFormat().getDefaultPortionFormat().getFillFormat().getSolidFillColor().setColor(Color.BLACK);
    secondParagraph.getParagraphFormat().setMarginLeft(20f);
    secondParagraph.getParagraphFormat().setIndent(20f);

    Paragraph thirdParagraph = new Paragraph();
    thirdParagraph.setText("First-line indent of 40 points. This paragraph shows a larger first-line offset to make the effect easier to see.");
    thirdParagraph.getParagraphFormat().getDefaultPortionFormat().getFillFormat().setFillType(FillType.Solid);
    thirdParagraph.getParagraphFormat().getDefaultPortionFormat().getFillFormat().getSolidFillColor().setColor(Color.BLACK);
    thirdParagraph.getParagraphFormat().setMarginLeft(20f);
    thirdParagraph.getParagraphFormat().setIndent(40f);

    textFrame.getParagraphs().add(firstParagraph);
    textFrame.getParagraphs().add(secondParagraph);
    textFrame.getParagraphs().add(thirdParagraph);

    presentation.save("paragraph_indent.pptx", SaveFormat.Pptx);
} finally {
    presentation.dispose();
}
El resultado:

Establecer una sangría colgante
Una sangría colgante es un diseño de párrafo en el que la primera línea comienza a la izquierda de las líneas restantes. En Aspose.Slides, crea este efecto con la propiedad IParagraphFormat.setIndent. Establezca Indent a un valor negativo para mover la primera línea a la izquierda respecto al cuerpo del párrafo.
En la práctica, IParagraphFormat.setMarginLeft define la posición izquierda del cuerpo del párrafo, y IParagraphFormat.setIndent define la posición de la primera línea respecto a ese margen. Para crear una sangría colgante, establezca un valor positivo en MarginLeft y un valor negativo en Indent.
Este formato es útil para bibliografías, referencias, entradas de glosario y otros párrafos donde las líneas envueltas deben alinearse bajo el cuerpo del párrafo y no bajo el primer carácter de la primera línea.
El siguiente ejemplo de Android vía Java combina valores de IParagraphFormat.setMarginLeft de 40 y 60 puntos con valores de IParagraphFormat.setIndent de -20 y -30 puntos. En cada párrafo, la primera línea comienza a la izquierda de las líneas envueltas; el segundo párrafo tiene una sangría colgante más profunda:
import com.aspose.slides.*;
import android.graphics.Color;

Presentation presentation = new Presentation();
try {
    ISlide slide = presentation.getSlides().get_Item(0);

    IAutoShape shape = slide.getShapes().addAutoShape(ShapeType.Rectangle, 50, 50, 420, 220);
    shape.getFillFormat().setFillType(FillType.NoFill);
    shape.getLineFormat().getFillFormat().setFillType(FillType.Solid);
    shape.getLineFormat().getFillFormat().getSolidFillColor().setColor(Color.GRAY);

    ITextFrame textFrame = shape.getTextFrame();
    textFrame.getTextFrameFormat().setAutofitType(TextAutofitType.Shape);
    textFrame.getParagraphs().clear();

    Paragraph firstParagraph = new Paragraph();
    firstParagraph.setText("A hanging indent is created by combining a positive left margin with a negative indent. The first line starts to the left, while wrapped lines align with the paragraph body.");
    firstParagraph.getParagraphFormat().getDefaultPortionFormat().getFillFormat().setFillType(FillType.Solid);
    firstParagraph.getParagraphFormat().getDefaultPortionFormat().getFillFormat().getSolidFillColor().setColor(Color.BLACK);
    firstParagraph.getParagraphFormat().setMarginLeft(40f);
    firstParagraph.getParagraphFormat().setIndent(-20f);

    Paragraph secondParagraph = new Paragraph();
    secondParagraph.setText("This second example uses a deeper hanging indent so the difference between the first line and the wrapped lines is easier to compare.");
    secondParagraph.getParagraphFormat().getDefaultPortionFormat().getFillFormat().setFillType(FillType.Solid);
    secondParagraph.getParagraphFormat().getDefaultPortionFormat().getFillFormat().getSolidFillColor().setColor(Color.BLACK);
    secondParagraph.getParagraphFormat().setMarginLeft(60f);
    secondParagraph.getParagraphFormat().setIndent(-30f);

    textFrame.getParagraphs().add(firstParagraph);
    textFrame.getParagraphs().add(secondParagraph);

    presentation.save("hanging_indent.pptx", SaveFormat.Pptx);
} finally {
    presentation.dispose();
}
El resultado:

Establecer propiedades de ejecución del final del párrafo
El método IParagraph.setEndParagraphPortionFormat controla el formato del símbolo de fin de párrafo. El siguiente ejemplo crea un PortionFormat con IBasePortionFormat.setFontHeight establecido en 48 puntos y IBasePortionFormat.setLatinFont establecido en Times New Roman. Asigna este formato al símbolo de fin del segundo párrafo, dejando sin cambios las porciones de texto visibles:
import com.aspose.slides.*;

Presentation presentation = new Presentation("Test.pptx");
try {
    ISlide slide = presentation.getSlides().get_Item(0);

    IAutoShape shape = slide.getShapes().addAutoShape(ShapeType.Rectangle, 10, 10, 200, 250);
    ITextFrame textFrame = shape.getTextFrame();
    textFrame.getParagraphs().clear();

    Paragraph firstParagraph = new Paragraph();
    firstParagraph.getPortions().add(new Portion("Sample text"));

    Paragraph secondParagraph = new Paragraph();
    secondParagraph.getPortions().add(new Portion("Sample text 2"));

    PortionFormat endParagraphFormat = new PortionFormat();
    endParagraphFormat.setFontHeight(48);
    endParagraphFormat.setLatinFont(new FontData("Times New Roman"));
    secondParagraph.setEndParagraphPortionFormat(endParagraphFormat);

    textFrame.getParagraphs().add(firstParagraph);
    textFrame.getParagraphs().add(secondParagraph);

    presentation.save("end_paragraph_format.pptx", SaveFormat.Pptx);
} finally {
    presentation.dispose();
}
Contar líneas renderizadas
Para reglas de párrafo que afectan al ajuste automático y a la puntuación al final de línea, vea Controlar el salto de línea y Controlar la puntuación colgante.
Use IParagraph.getLinesCount para contar las líneas que ocupa un párrafo después del diseño del texto, incluido el ajuste automático. Esto es útil al comprobar la longitud del texto y el diseño en plantillas de presentaciones.
Un párrafo es un elemento de ITextFrame.getParagraphs, y puede ocupar varias líneas renderizadas. Un salto de línea explícito dentro de un párrafo fuerza una nueva línea sin crear otro párrafo. El ajuste automático crea líneas según el ancho disponible sin insertar saltos de línea explícitos en el texto. Por lo tanto, contar párrafos o caracteres de salto de línea no proporciona el recuento de líneas renderizadas.
El siguiente ejemplo crea una forma de texto, cuenta sus líneas, estrecha la forma y luego sustituye el texto por una cadena más corta. El ejemplo habilita el ajuste con ITextFrameFormat.setWrapText y desactiva el autofit con ITextFrameFormat.setAutofitType para que el ancho de la forma controle el ajuste sin reducir automáticamente el texto ni redimensionar la forma. Cada medición utiliza IParagraph.getLinesCount. Las dimensiones de la forma están en puntos. Finalmente, el ejemplo añade otro párrafo y suma los recuentos de líneas en todo el marco de texto.
import com.aspose.slides.*;

Presentation presentation = new Presentation();
try {
    ISlide slide = presentation.getSlides().get_Item(0);

    IAutoShape shape = slide.getShapes().addAutoShape(ShapeType.Rectangle, 50, 50, 400, 200);
    ITextFrame textFrame = shape.getTextFrame();
    textFrame.getTextFrameFormat().setWrapText(NullableBool.True);
    textFrame.getTextFrameFormat().setAutofitType(TextAutofitType.None);

    IParagraph paragraph = textFrame.getParagraphs().get_Item(0);
    paragraph.getParagraphFormat().getDefaultPortionFormat().setFontHeight(20);
    paragraph.setText("This text demonstrates how automatic wrapping changes the number of rendered lines.");
    System.out.println("Original width: " + paragraph.getLinesCount());

    shape.setWidth(150);
    System.out.println("Narrower shape: " + paragraph.getLinesCount());

    paragraph.setText("Short text.");
    System.out.println("Shorter text: " + paragraph.getLinesCount());

    Paragraph secondParagraph = new Paragraph();
    secondParagraph.setText("Another paragraph.");
    secondParagraph.getParagraphFormat().getDefaultPortionFormat().setFontHeight(20);
    textFrame.getParagraphs().add(secondParagraph);

    int totalLineCount = 0;
    for (IParagraph currentParagraph : textFrame.getParagraphs()) {
        totalLineCount += currentParagraph.getLinesCount();
    }
    System.out.println("Total lines in the text frame: " + totalLineCount);
} finally {
    presentation.dispose();
}
Con este texto y estas dimensiones, estrechar la forma aumenta el recuento de líneas, mientras que sustituir el texto por la cadena corta lo reduce. Los recuentos exactos pueden variar según la disponibilidad y sustitución de fuentes, el tamaño de fuente, márgenes, sangrías, ajuste y configuración de autofit. Use las fuentes y la configuración de diseño previstas para el entorno de destino al comprobar una plantilla.
El número de líneas por sí solo no determina si el texto desborda su contenedor. También influyen la altura disponible, la altura de línea, el interlineado y el comportamiento de autofit; incluso una única línea puede superar el ancho disponible cuando el ajuste está desactivado.
Importar y exportar contenido de párrafos
Utilice HTML para introducir texto en una presentación o para exportar párrafos existentes y usarlos fuera de ella. Esta sección también muestra cómo renderizar párrafos individuales como imágenes, incluidos los párrafos en celdas de tabla.
Importar texto HTML en párrafos
Use ParagraphCollection.addFromHtml para convertir marcado HTML en párrafos y porciones en un marco de texto.
Este ejemplo de Android vía Java lee HTML desde un archivo y pasa el marcado a ParagraphCollection.addFromHtml. Elimina el párrafo predeterminado del marco de texto para que el marco contenga solo el contenido importado. La forma rectangular deja un margen de 10 puntos en cada lado de la diapositiva:
import com.aspose.slides.*;
import java.io.IOException;
import java.nio.charset.StandardCharsets;
import java.nio.file.Files;
import java.nio.file.Paths;

Presentation presentation = new Presentation();
try {
    ISlide slide = presentation.getSlides().get_Item(0);

    float shapeWidth = (float) presentation.getSlideSize().getSize().getWidth() - 20;
    float shapeHeight = (float) presentation.getSlideSize().getSize().getHeight() - 20;
    IAutoShape shape = slide.getShapes().addAutoShape(ShapeType.Rectangle, 10, 10, shapeWidth, shapeHeight);
    shape.getFillFormat().setFillType(FillType.NoFill);
    shape.getTextFrame().getParagraphs().clear();

    try {
        byte[] htmlBytes = Files.readAllBytes(Paths.get("file.html"));
        String html = new String(htmlBytes, StandardCharsets.UTF_8);
        shape.getTextFrame().getParagraphs().addFromHtml(html);
        presentation.save("html_text.pptx", SaveFormat.Pptx);
    } catch (IOException exception) {
        System.out.println("The HTML file could not be read: " + exception.getMessage());
    }
} finally {
    presentation.dispose();
}
Exportar texto de párrafo a HTML
Use ParagraphCollection.exportToHtml para exportar un rango seleccionado de párrafos como HTML. Cuando reutilice el texto de una presentación en un sitio web, puede que desee conservar el énfasis local sin trasladar la fuente, el tamaño o los estilos del cuadro de texto de la presentación. Establezca TextToHtmlConversionOptions.setTextInheritanceLimit para controlar hasta dónde el exportador sigue la herencia de formato.
Descargue la presentación de ejemplo y colóquela en el directorio de trabajo de la aplicación. Su primera diapositiva contiene una forma de texto con el texto “Inherited text; explicit red 18pt”. La entrada usa deliberadamente varios niveles de formato:
- El estilo de texto predeterminado de la presentación suministra Calibri y un tamaño de 28 pt.
- El estilo de texto de primer nivel del marco de texto suministra texto azul e itálica.
- El párrafo establece explícitamente texto en negrita.
- La segunda porción, “explicit red 18pt”, establece explícitamente texto rojo y un tamaño de 18 pt.
El siguiente ejemplo completo exporta los mismos párrafos tres veces. Pasa TextToHtmlConversionOptions al método de exportación y escribe cada resultado como un archivo HTML UTF‑8 separado:
import com.aspose.slides.*;
import java.io.IOException;
import java.nio.charset.StandardCharsets;
import java.nio.file.Files;
import java.nio.file.Paths;

Presentation presentation = new Presentation("text-inheritance.pptx");
try {
    IShape shape = presentation.getSlides().get_Item(0).getShapes().get_Item(0);

    if (shape instanceof IAutoShape) {
        IAutoShape textShape = (IAutoShape) shape;
        ITextFrame textFrame = textShape.getTextFrame();
        if (textFrame != null) {
            IParagraphCollection paragraphs = textFrame.getParagraphs();

            int[] modes = { TextInheritanceLimit.All, TextInheritanceLimit.TextBox, TextInheritanceLimit.ParagraphOnly };
            String[] fileNames = { "All.html", "TextBox.html", "ParagraphOnly.html" };

            for (int i = 0; i < modes.length; i++) {
                TextToHtmlConversionOptions options = new TextToHtmlConversionOptions();
                options.setTextInheritanceLimit(modes[i]);

                String html = paragraphs.exportToHtml(0, paragraphs.getCount(), options);
                byte[] htmlBytes = html.getBytes(StandardCharsets.UTF_8);
                try {
                    Files.write(Paths.get(fileNames[i]), htmlBytes);
                } catch (IOException exception) {
                    System.out.println("The HTML file could not be written: " + exception.getMessage());
                }
            }
        } else {
            System.out.println("The first shape does not contain a text frame.");
        }
    } else {
        System.out.println("The first shape is not a text shape.");
    }
} finally {
    presentation.dispose();
}
El HTML generado contiene el siguiente CSS para la primera porción, “Inherited text; “. La tabla enumera las declaraciones relevantes; otras propiedades generadas se omiten por claridad.
| Salida | CSS relevante para la primera porción | Apariencia |
|---|---|---|
All.html |
font-family:'Calibri'; font-size:28pt; color:#0000ff; font-style:italic; font-weight:bold |
Texto azul, negrita, itálica a 28 pt en Calibri, si esa fuente está disponible. |
TextBox.html |
color:#0000ff; font-style:italic; font-weight:bold |
Texto azul, negrita, itálica; la página o el navegador suministran la familia y el tamaño de fuente. |
ParagraphOnly.html |
font-weight:bold |
Texto en negrita; la página o el navegador suministran la familia, tamaño, color y estilo itálico. |
La segunda porción conserva color:#ff0000, font-size:18pt y font-weight:bold en las tres salidas. También conserva itálica en All y TextBox, pero no en ParagraphOnly. Restringir la herencia, por tanto, no elimina el formato asignado explícitamente a un párrafo o una porción.
Abra los archivos en el mismo navegador para compararlos. En los dos modos restringidos, las propiedades CSS omitidas se resuelven con los estilos de la página de destino o con los valores predeterminados del navegador, por lo que la apariencia resultante depende del entorno donde se utilice el HTML.
Renderizar un párrafo como imagen
IParagraph.getImage renderiza directamente un párrafo individual y devuelve un IImage. Guarde el resultado en un archivo o flujo con IImage.save. No es necesario renderizar la forma contenedora ni recortar un mapa de bits manualmente.
IParagraph.getImage puede devolver null si el párrafo no se encuentra en su colección padre, no tiene límites de renderizado válidos o no se puede renderizar. Compruebe el resultado antes de guardarlo y libere la imagen devuelta tras su uso.
Renderizar un párrafo a escala predeterminada
El ejemplo usa una presentación con una diapositiva cuyo primer elemento es un cuadro de texto que contiene tres párrafos.
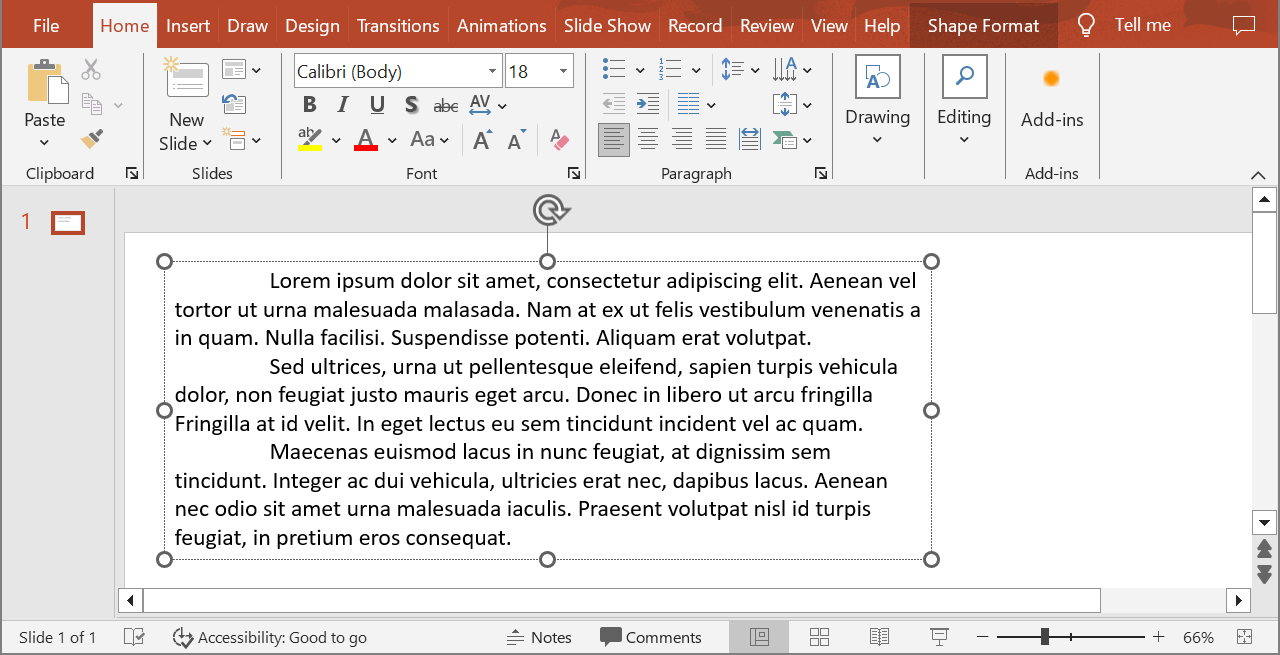
El siguiente ejemplo selecciona el segundo párrafo (índice 1) y llama a IParagraph.getImage sin parámetros de escala. Comprueba que la forma contiene el párrafo requerido y que la renderización devuelve una imagen antes de llamar a IImage.save para guardarla en formato PNG. El bloque finally libera la imagen tras su uso.
import com.aspose.slides.*;

Presentation presentation = new Presentation("sample.pptx");
try {
    IShape shape = presentation.getSlides().get_Item(0).getShapes().get_Item(0);

    if (shape instanceof IAutoShape) {
        IAutoShape textShape = (IAutoShape) shape;
        ITextFrame textFrame = textShape.getTextFrame();
        if (textFrame != null && textFrame.getParagraphs().getCount() > 1) {
            IParagraph paragraph = textFrame.getParagraphs().get_Item(1);
            IImage paragraphImage = paragraph.getImage();

            if (paragraphImage != null) {
                try {
                    paragraphImage.save("paragraph.png", ImageFormat.Png);
                } finally {
                    paragraphImage.dispose();
                }
            } else {
                System.out.println("The paragraph could not be rendered.");
            }
        } else {
            System.out.println("The expected paragraph was not found.");
        }
    } else {
        System.out.println("The first shape is not a text shape.");
    }
} finally {
    presentation.dispose();
}
El resultado:

Renderizar un párrafo en una celda de tabla con escala
Utilice la sobrecarga de IParagraph.getImage que acepta los parámetros float scaleX y float scaleY para establecer los factores de escala horizontal y vertical. El siguiente ejemplo crea una tabla, renderiza el párrafo en su primera celda al doble de su ancho y alto predeterminados, y guarda el resultado como imagen PNG.
import com.aspose.slides.*;

float scaleX = 2f;
float scaleY = 2f;

Presentation presentation = new Presentation();
try {
    ISlide slide = presentation.getSlides().get_Item(0);

    ITable table = slide.getShapes().addTable(50, 50, new double[] { 300 }, new double[] { 80 });
    IParagraph paragraph = table.get_Item(0, 0).getTextFrame().getParagraphs().get_Item(0);
    paragraph.setText("Text in a table cell");

    IImage paragraphImage = paragraph.getImage(scaleX, scaleY);
    if (paragraphImage != null) {
        try {
            paragraphImage.save("table_paragraph.png", ImageFormat.Png);
        } finally {
            paragraphImage.dispose();
        }
    } else {
        System.out.println("The paragraph could not be rendered.");
    }
} finally {
    presentation.dispose();
}
Un factor de escala de 1 mantiene ese eje en su tamaño de píxel predeterminado. Por ejemplo, 2 para ambos factores produce una imagen cuyo ancho y alto son aproximadamente el doble de las dimensiones predeterminadas, lo que genera cuatro veces más píxeles. Factores mayores suelen producir texto más nítido para zoom o salida de alta resolución, pero también aumentan el uso de memoria y el tamaño del archivo. Factores menores que 1 producen imágenes más pequeñas con menos detalle. Use factores iguales para conservar la proporción del párrafo; factores diferentes en horizontal y vertical estiran la salida de forma independiente.
Renderizar una forma completa con IShape.getImage sigue siendo útil cuando la salida debe incluir el relleno, contorno u otro contexto visual de la forma. Para una imagen únicamente del párrafo, use IParagraph.getImage.
Preguntas frecuentes
¿Puedo desactivar completamente el ajuste de línea dentro de un marco de texto?
Sí. Establezca ITextFrameFormat.setWrapText para desactivar el ajuste y que las líneas no se dividan en los bordes del marco de texto.
¿Cómo puedo obtener los límites exactos en la diapositiva de un párrafo concreto?
Use IParagraph.getRect para obtener el rectángulo delimitador del párrafo. IPortion.getRect proporciona los límites de una porción individual.
¿Dónde se controla la alineación del párrafo (izquierda, derecha, centrado o justificado)?
IParagraphFormat.setAlignment es una configuración a nivel de párrafo y se aplica a todo el párrafo independientemente del formato de las porciones individuales.
Para alinear verticalmente porciones con diferentes tamaños de fuente dentro de cada línea, consulte Alinear fuentes dentro de una línea.
¿Puedo establecer el idioma de corrección para una parte de un párrafo?
Sí. Establezca IBasePortionFormat.setLanguageId para porciones individuales, de modo que un párrafo pueda contener texto en varios idiomas.