
Crear y aplicar efectos WordArt en Android
Visión general
Los efectos WordArt le permiten dar estilo al texto con rellenos, contornos, sombras, reflejos, resplandor, transformaciones y formato 3D. Este artículo explica cómo crear y personalizar estos efectos en presentaciones de PowerPoint usando Aspose.Slides for Android via Java, sin necesidad de Microsoft Office instalado.
Crear una plantilla WordArt sencilla y aplicarla al texto
Los siguientes ejemplos crean un estilo WordArt sencillo configurando el texto, la fuente, el relleno de patrón y el contorno.
Cada ejemplo crea una nueva presentación y añade un rectángulo a su primera diapositiva; no se necesita archivo de entrada. El primer ejemplo establece el texto a “Aspose.Slides”. La posición y dimensiones de la forma se miden en puntos:
import com.aspose.slides.*;

Presentation presentation = new Presentation();
try {
    ISlide slide = presentation.getSlides().get_Item(0);

    IAutoShape autoShape = slide.getShapes().addAutoShape(ShapeType.Rectangle, 20, 20, 400, 200);
    ITextFrame textFrame = autoShape.getTextFrame();

    IPortion portion = textFrame.getParagraphs().get_Item(0).getPortions().get_Item(0);
    portion.setText("Aspose.Slides");
} finally {
    presentation.dispose();
}
Establezca la fuente a Arial Black a 36 puntos para que el formato sea más visible:
import com.aspose.slides.*;

Presentation presentation = new Presentation();
try {
    ISlide slide = presentation.getSlides().get_Item(0);

    IAutoShape autoShape = slide.getShapes().addAutoShape(ShapeType.Rectangle, 20, 20, 400, 200);

    IPortion portion = autoShape.getTextFrame().getParagraphs().get_Item(0).getPortions().get_Item(0);
    portion.setText("Aspose.Slides");
    FontData font = new FontData("Arial Black");
    portion.getPortionFormat().setLatinFont(font);
    portion.getPortionFormat().setFontHeight(36);
} finally {
    presentation.dispose();
}
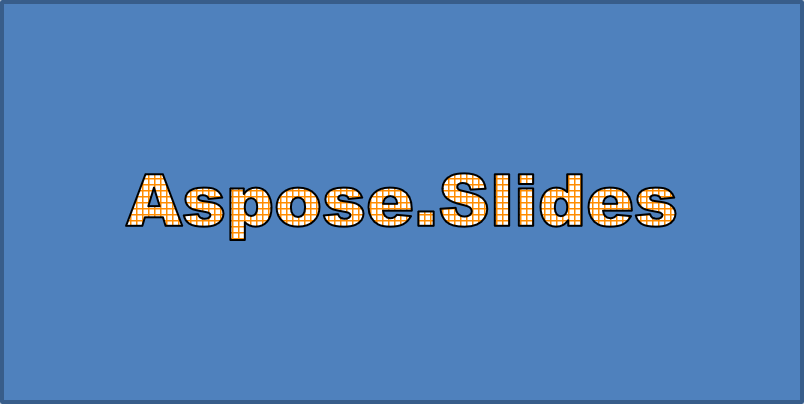
Aplique un patrón SmallGrid con un primer plano naranja oscuro y un fondo blanco, y añada un contorno de texto negro con un grosor de 1 punto:
import com.aspose.slides.*;
import android.graphics.Color;

Presentation presentation = new Presentation();
try {
    ISlide slide = presentation.getSlides().get_Item(0);

    IAutoShape autoShape = slide.getShapes().addAutoShape(ShapeType.Rectangle, 20, 20, 400, 200);

    IPortion portion = autoShape.getTextFrame().getParagraphs().get_Item(0).getPortions().get_Item(0);
    portion.setText("Aspose.Slides");
    FontData font = new FontData("Arial Black");
    portion.getPortionFormat().setLatinFont(font);
    portion.getPortionFormat().setFontHeight(36);

    portion.getPortionFormat().getFillFormat().setFillType(FillType.Pattern);
    int darkOrange = Color.rgb(255, 140, 0);
    portion.getPortionFormat().getFillFormat().getPatternFormat().getForeColor().setColor(darkOrange);
    portion.getPortionFormat().getFillFormat().getPatternFormat().getBackColor().setColor(Color.WHITE);
    portion.getPortionFormat().getFillFormat().getPatternFormat().setPatternStyle(PatternStyle.SmallGrid);

    portion.getPortionFormat().getLineFormat().setWidth(1);
    portion.getPortionFormat().getLineFormat().getFillFormat().setFillType(FillType.Solid);
    portion.getPortionFormat().getLineFormat().getFillFormat().getSolidFillColor().setColor(Color.BLACK);
} finally {
    presentation.dispose();
}
El texto resultante:
Aplicar otros efectos WordArt
Los siguientes ejemplos demuestran cómo aplicar sombras, reflejos, resplandor, transformaciones y efectos 3D al texto.
Aplicar efectos de sombra externa
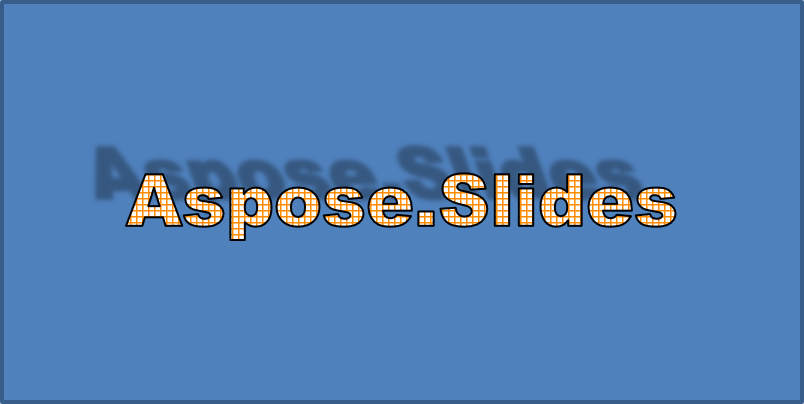
Una sombra externa añade profundidad colocando una sombra detrás del texto. Puede personalizar su color, dirección, distancia, radio de desenfoque, escala y sesgo.
Este ejemplo llama a enableOuterShadowEffect y establece una sombra negra con un radio de desenfoque de 4 puntos, una dirección de 230 grados y una distancia de 30 puntos. Los valores de escala de 100 preservan el tamaño de la sombra, mientras que el sesgo horizontal la inclina 20 grados. La transformación alfa establece su opacidad al 32 %:
import com.aspose.slides.*;
import android.graphics.Color;

Presentation presentation = new Presentation();
try {
    ISlide slide = presentation.getSlides().get_Item(0);

    IAutoShape autoShape = slide.getShapes().addAutoShape(ShapeType.Rectangle, 20, 20, 400, 200);

    IPortion portion = autoShape.getTextFrame().getParagraphs().get_Item(0).getPortions().get_Item(0);
    portion.setText("Aspose.Slides");
    FontData font = new FontData("Arial Black");
    portion.getPortionFormat().setLatinFont(font);
    portion.getPortionFormat().setFontHeight(36);

    portion.getPortionFormat().getEffectFormat().enableOuterShadowEffect();
    portion.getPortionFormat().getEffectFormat().getOuterShadowEffect().getShadowColor().setColor(Color.BLACK);
    portion.getPortionFormat().getEffectFormat().getOuterShadowEffect().setScaleHorizontal(100);
    portion.getPortionFormat().getEffectFormat().getOuterShadowEffect().setScaleVertical(100);
    portion.getPortionFormat().getEffectFormat().getOuterShadowEffect().setBlurRadius(4);
    portion.getPortionFormat().getEffectFormat().getOuterShadowEffect().setDirection(230);
    portion.getPortionFormat().getEffectFormat().getOuterShadowEffect().setDistance(30);
    portion.getPortionFormat().getEffectFormat().getOuterShadowEffect().setSkewHorizontal(20);
    portion.getPortionFormat().getEffectFormat().getOuterShadowEffect().setSkewVertical(0);
    portion.getPortionFormat().getEffectFormat().getOuterShadowEffect().getShadowColor().getColorTransform().add(ColorTransformOperation.SetAlpha, 0.32f);
} finally {
    presentation.dispose();
}
El texto resultante:
Note
- Cuando se usan sombras externas y predefinidas juntas, solo se aplica la sombra externa.
- Si se usan sombras externas e internas simultáneamente, el efecto resultante depende de la versión de PowerPoint. Por ejemplo, en PowerPoint 2013 el efecto se duplica, mientras que en PowerPoint 2007 solo se aplica la sombra externa.
Aplicar efectos de reflexión
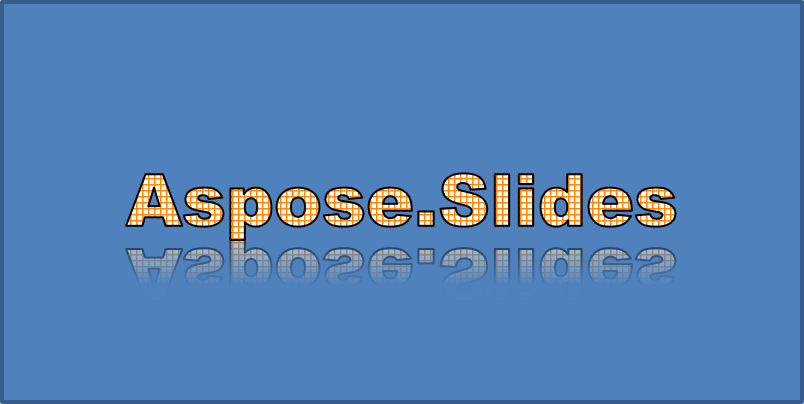
Una reflexión crea una copia espejo del texto. Ajuste su posición, escala, desenfoque y opacidad para controlar su apariencia.
Este ejemplo llama a enableReflectionEffect y voltea la reflexión verticalmente con una escala del -100 %. Utiliza un radio de desenfoque de 0,5 puntos y una distancia de 4,72 puntos. La opacidad disminuye del 60 % al 0,9 % entre las posiciones 0 % y 60 % a lo largo de la reflexión:
import com.aspose.slides.*;

Presentation presentation = new Presentation();
try {
    ISlide slide = presentation.getSlides().get_Item(0);

    IAutoShape autoShape = slide.getShapes().addAutoShape(ShapeType.Rectangle, 20, 20, 400, 200);

    IPortion portion = autoShape.getTextFrame().getParagraphs().get_Item(0).getPortions().get_Item(0);
    portion.setText("Aspose.Slides");
    FontData font = new FontData("Arial Black");
    portion.getPortionFormat().setLatinFont(font);
    portion.getPortionFormat().setFontHeight(36);

    portion.getPortionFormat().getEffectFormat().enableReflectionEffect();
    portion.getPortionFormat().getEffectFormat().getReflectionEffect().setBlurRadius(0.5);
    portion.getPortionFormat().getEffectFormat().getReflectionEffect().setDistance(4.72);
    portion.getPortionFormat().getEffectFormat().getReflectionEffect().setStartPosAlpha(0f);
    portion.getPortionFormat().getEffectFormat().getReflectionEffect().setEndPosAlpha(60f);
    portion.getPortionFormat().getEffectFormat().getReflectionEffect().setDirection(90);
    portion.getPortionFormat().getEffectFormat().getReflectionEffect().setScaleHorizontal(100);
    portion.getPortionFormat().getEffectFormat().getReflectionEffect().setScaleVertical(-100);
    portion.getPortionFormat().getEffectFormat().getReflectionEffect().setStartReflectionOpacity(60f);
    portion.getPortionFormat().getEffectFormat().getReflectionEffect().setEndReflectionOpacity(0.9f);
    portion.getPortionFormat().getEffectFormat().getReflectionEffect().setRectangleAlign(RectangleAlignment.BottomLeft);
} finally {
    presentation.dispose();
}
El texto resultante:
Aplicar efectos de resplandor
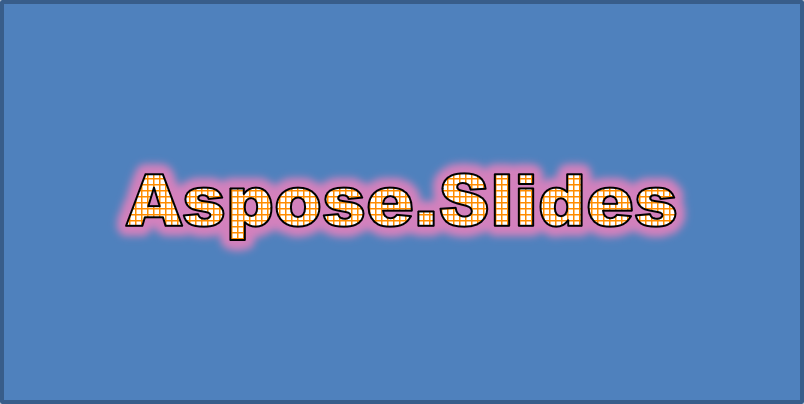
Un resplandor añade un contorno de color suave alrededor del texto. Ajuste su color, opacidad y radio para controlar el efecto.
Este ejemplo llama a enableGlowEffect y aplica un resplandor rojo con un 54 % de opacidad y un radio de 7 puntos:
import com.aspose.slides.*;
import android.graphics.Color;

Presentation presentation = new Presentation();
try {
    ISlide slide = presentation.getSlides().get_Item(0);

    IAutoShape autoShape = slide.getShapes().addAutoShape(ShapeType.Rectangle, 20, 20, 400, 200);

    IPortion portion = autoShape.getTextFrame().getParagraphs().get_Item(0).getPortions().get_Item(0);
    portion.setText("Aspose.Slides");
    FontData font = new FontData("Arial Black");
    portion.getPortionFormat().setLatinFont(font);
    portion.getPortionFormat().setFontHeight(36);

    portion.getPortionFormat().getEffectFormat().enableGlowEffect();
    portion.getPortionFormat().getEffectFormat().getGlowEffect().getColor().setColor(Color.RED);
    portion.getPortionFormat().getEffectFormat().getGlowEffect().getColor().getColorTransform().add(ColorTransformOperation.SetAlpha, 0.54f);
    portion.getPortionFormat().getEffectFormat().getGlowEffect().setRadius(7);
} finally {
    presentation.dispose();
}
El texto resultante:
Aplicar transformaciones WordArt
Las transformaciones WordArt doblan, estiran o deforme un bloque de texto.
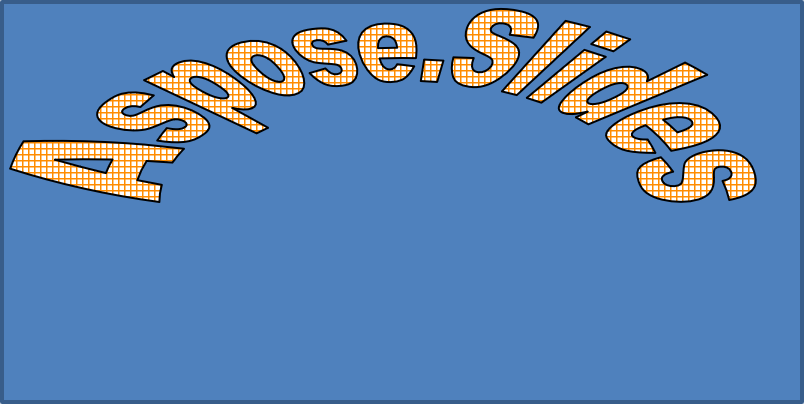
Establezca setTransform a ArchUpPour para curvar todo el marco de texto hacia arriba:
import com.aspose.slides.*;

Presentation presentation = new Presentation();
try {
    ISlide slide = presentation.getSlides().get_Item(0);

    IAutoShape autoShape = slide.getShapes().addAutoShape(ShapeType.Rectangle, 20, 20, 400, 200);

    ITextFrame textFrame = autoShape.getTextFrame();
    textFrame.setText("Aspose.Slides");
    textFrame.getTextFrameFormat().setTransform(TextShapeType.ArchUpPour);
} finally {
    presentation.dispose();
}
El texto resultante:
Note
Aspose.Slides for Android via Java proporciona un conjunto de tipos de transformación predefinidos.Aplicar efectos 3D a formas y texto
Puede aplicar efectos 3D a una forma o a su texto. Los biseles, la extrusión, la iluminación y la cámara controlan la apariencia resultante.
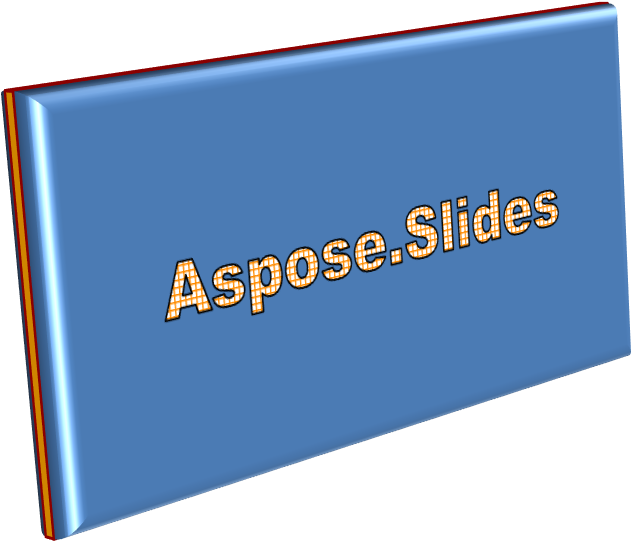
El siguiente ejemplo usa ThreeDFormat para añadir biseles circulares, extrusión naranja y un contorno rojo oscuro al rectángulo. Las dimensiones del bisel, la altura de extrusión, el ancho del contorno y la profundidad se miden en puntos. Un material plástico, iluminación equilibrada girada 40 grados alrededor del eje Z y una cámara en perspectiva definen su apariencia:
import com.aspose.slides.*;
import android.graphics.Color;

Presentation presentation = new Presentation();
try {
    ISlide slide = presentation.getSlides().get_Item(0);

    IAutoShape autoShape = slide.getShapes().addAutoShape(ShapeType.Rectangle, 20, 20, 400, 200);
    autoShape.getTextFrame().setText("Aspose.Slides");

    autoShape.getThreeDFormat().getBevelBottom().setBevelType(BevelPresetType.Circle);
    autoShape.getThreeDFormat().getBevelBottom().setHeight(10.5);
    autoShape.getThreeDFormat().getBevelBottom().setWidth(10.5);

    autoShape.getThreeDFormat().getBevelTop().setBevelType(BevelPresetType.Circle);
    autoShape.getThreeDFormat().getBevelTop().setHeight(12.5);
    autoShape.getThreeDFormat().getBevelTop().setWidth(11);

    int orange = Color.rgb(255, 165, 0);
    autoShape.getThreeDFormat().getExtrusionColor().setColor(orange);
    autoShape.getThreeDFormat().setExtrusionHeight(6);

    int darkRed = Color.rgb(139, 0, 0);
    autoShape.getThreeDFormat().getContourColor().setColor(darkRed);
    autoShape.getThreeDFormat().setContourWidth(1.5);

    autoShape.getThreeDFormat().setDepth(3);

    autoShape.getThreeDFormat().setMaterial(MaterialPresetType.Plastic);

    autoShape.getThreeDFormat().getLightRig().setDirection(LightingDirection.Top);
    autoShape.getThreeDFormat().getLightRig().setLightType(LightRigPresetType.Balanced);
    autoShape.getThreeDFormat().getLightRig().setRotation(0, 0, 40);

    autoShape.getThreeDFormat().getCamera().setCameraType(CameraPresetType.PerspectiveContrastingRightFacing);
} finally {
    presentation.dispose();
}
La forma resultante:
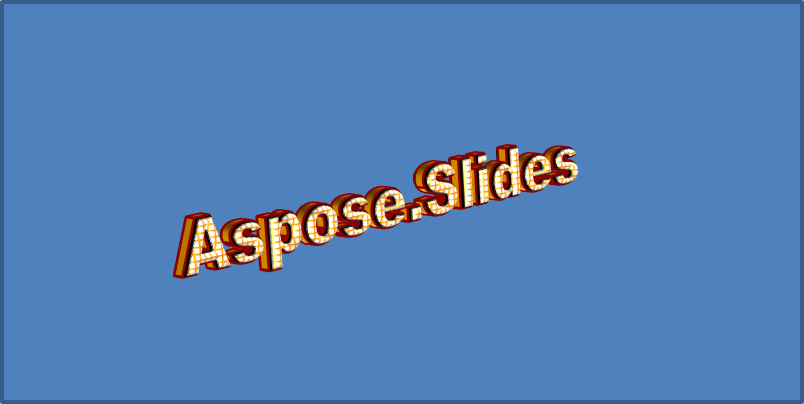
Este ejemplo aplica un formato 3D similar al texto mediante TextFrameFormat.getThreeDFormat. Biseles más pequeños modelan los bordes de las letras, mientras que la extrusión y la iluminación dan profundidad al texto:
import com.aspose.slides.*;
import android.graphics.Color;

Presentation presentation = new Presentation();
try {
    ISlide slide = presentation.getSlides().get_Item(0);

    IAutoShape autoShape = slide.getShapes().addAutoShape(ShapeType.Rectangle, 20, 20, 400, 200);
    ITextFrame textFrame = autoShape.getTextFrame();
    textFrame.setText("Aspose.Slides");

    textFrame.getTextFrameFormat().getThreeDFormat().getBevelBottom().setBevelType(BevelPresetType.Circle);
    textFrame.getTextFrameFormat().getThreeDFormat().getBevelBottom().setHeight(3.5);
    textFrame.getTextFrameFormat().getThreeDFormat().getBevelBottom().setWidth(3.5);

    textFrame.getTextFrameFormat().getThreeDFormat().getBevelTop().setBevelType(BevelPresetType.Circle);
    textFrame.getTextFrameFormat().getThreeDFormat().getBevelTop().setHeight(4);
    textFrame.getTextFrameFormat().getThreeDFormat().getBevelTop().setWidth(4);

    int orange = Color.rgb(255, 165, 0);
    textFrame.getTextFrameFormat().getThreeDFormat().getExtrusionColor().setColor(orange);
    textFrame.getTextFrameFormat().getThreeDFormat().setExtrusionHeight(6);

    int darkRed = Color.rgb(139, 0, 0);
    textFrame.getTextFrameFormat().getThreeDFormat().getContourColor().setColor(darkRed);
    textFrame.getTextFrameFormat().getThreeDFormat().setContourWidth(1.5);

    textFrame.getTextFrameFormat().getThreeDFormat().setDepth(3);

    textFrame.getTextFrameFormat().getThreeDFormat().setMaterial(MaterialPresetType.Plastic);

    textFrame.getTextFrameFormat().getThreeDFormat().getLightRig().setDirection(LightingDirection.Top);
    textFrame.getTextFrameFormat().getThreeDFormat().getLightRig().setLightType(LightRigPresetType.Balanced);
    textFrame.getTextFrameFormat().getThreeDFormat().getLightRig().setRotation(0, 0, 40);

    textFrame.getTextFrameFormat().getThreeDFormat().getCamera().setCameraType(CameraPresetType.PerspectiveContrastingRightFacing);
} finally {
    presentation.dispose();
}
El texto resultante:
Note
La aplicación de efectos 3D al texto o a sus formas —y la interacción entre esos efectos— está regida por reglas específicas. Considere una escena que involucre tanto el texto como la forma que lo contiene. Un efecto 3D incluye la representación 3D del objeto y la escena en la que se sitúa.
- Si se establece una escena tanto para la forma como para el texto, la escena de la forma tiene prioridad y la escena del texto se ignora.
- Si la forma no tiene su propia escena pero sí una representación 3D, se utiliza la escena del texto.
- Si la forma no tiene ningún efecto 3D, se trata como plana y el efecto 3D se aplica solo al texto.
Estos comportamientos se relacionan con los métodos ThreeDFormat.getLightRig y ThreeDFormat.getCamera.
Para mantener el texto plano y legible mientras se conserva el formato 3D de la forma, consulte Keep Text Flat on a 3D Shape para comparar ambas configuraciones y ver un ejemplo Java completo.
Preguntas frecuentes
¿Puedo usar efectos WordArt con diferentes fuentes o scripts (p.ej., árabe, chino)?
Sí, Aspose.Slides for Android via Java admite Unicode y funciona con todas las fuentes y scripts principales. Los efectos WordArt como sombra, relleno y contorno pueden aplicarse sin importar el idioma, aunque la disponibilidad de fuentes y la renderización pueden depender de las fuentes del sistema.
¿Puedo aplicar efectos WordArt a elementos del patrón de diapositivas?
Sí, puede aplicar efectos WordArt a formas en las diapositivas maestras, incluidos marcadores de posición de título, pies de página o texto de fondo. Los cambios realizados en el diseño maestro se reflejarán en todas las diapositivas asociadas.
¿Los efectos WordArt afectan al tamaño del archivo de la presentación?
Ligeramente. Los efectos WordArt como sombras, resplandores y rellenos degradados pueden aumentar ligeramente el tamaño del archivo debido a los metadatos de formato adicionales, pero la diferencia suele ser insignificante.
¿Puedo previsualizar el resultado de los efectos WordArt sin guardar la presentación?
Sí, puede renderizar diapositivas que contengan WordArt a imágenes (p.ej., PNG, JPEG) usando ISlide.getImage, o renderizar formas individuales con IShape.getImage. Esto le permite previsualizar el resultado en memoria o en pantalla antes de guardar o exportar la presentación completa.