
Python으로 프레젠테이션에서 줌 관리
소개
PowerPoint의 줌을 사용하면 프레젠테이션의 특정 슬라이드, 섹션 및 부분으로 이동하거나 돌아올 수 있습니다. 프레젠테이션 중에 이렇게 빠르게 탐색하는 기능이 매우 유용할 수 있습니다.
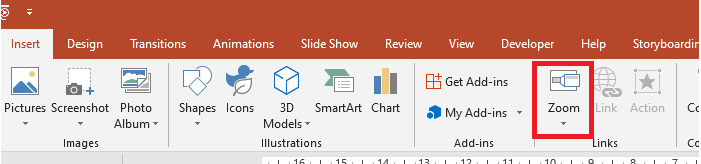
- 프레젠테이션 전체를 한 슬라이드에 요약하려면 Summary Zoom 를 사용하십시오.
- 선택한 슬라이드만 표시하려면 Slide Zoom 을 사용하십시오.
- 단일 섹션만 표시하려면 Section Zoom 을 사용하십시오.
슬라이드 줌
슬라이드 줌은 프레젠테이션을 보다 역동적으로 만들어 원하는 순서대로 슬라이드 사이를 자유롭게 이동할 수 있게 하며, 프레젠테이션 흐름을 방해하지 않습니다. 슬라이드 줌은 섹션이 많지 않은 짧은 프레젠테이션에 적합하지만, 다양한 상황에서도 활용할 수 있습니다.
슬라이드 줌은 하나의 캔버스에 있는 듯한 느낌으로 여러 정보 조각을 자세히 살펴볼 수 있게 합니다.
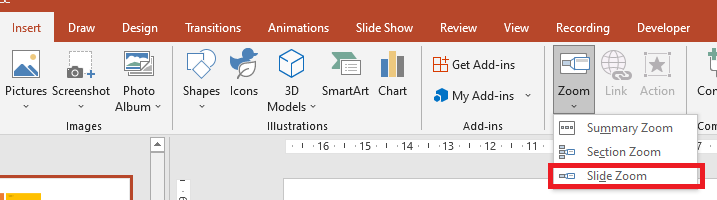
슬라이드 줌 객체의 경우, Aspose.Slides는 ZoomImageType 열거형, ZoomFrame 클래스 및 ShapeCollection 클래스의 몇몇 메서드를 제공합니다.
Zoom 프레임 만들기
슬라이드에 줌 프레임을 추가하려면 다음과 같이 합니다:
- Presentation 클래스의 인스턴스를 생성합니다.
- 링크할 새 슬라이드를 생성합니다.
- 생성된 슬라이드에 식별 텍스트와 배경을 추가합니다.
- 첫 번째 슬라이드에 (생성된 슬라이드에 대한 참조를 포함하는) 줌 프레임을 추가합니다.
- 수정된 프레젠테이션을 PPTX 파일로 저장합니다.
This sample code shows you how to create a zoom frame in a slide:
import aspose.slides as slides
import aspose.pydrawing as draw

with slides.Presentation() as pres:
    # 프레젠테이션에 새 슬라이드 추가
    slide2 = pres.slides.add_empty_slide(pres.slides[0].layout_slide)
    slide3 = pres.slides.add_empty_slide(pres.slides[0].layout_slide)

    # 두 번째 슬라이드에 배경 만들기
    slide2.background.type = slides.BackgroundType.OWN_BACKGROUND
    slide2.background.fill_format.fill_type = slides.FillType.SOLID
    slide2.background.fill_format.solid_fill_color.color = draw.Color.cyan

    # 두 번째 슬라이드에 텍스트 상자 만들기
    autoshape = slide2.shapes.add_auto_shape(slides.ShapeType.RECTANGLE, 100, 200, 500, 200)
    autoshape.text_frame.text = "Second Slide"

    # 세 번째 슬라이드에 배경 만들기
    slide3.background.type = slides.BackgroundType.OWN_BACKGROUND
    slide3.background.fill_format.fill_type = slides.FillType.SOLID
    slide3.background.fill_format.solid_fill_color.color = draw.Color.dark_khaki

    # 세 번째 슬라이드에 텍스트 상자 만들기
    autoshape = slide3.shapes.add_auto_shape(slides.ShapeType.RECTANGLE, 100, 200, 500, 200)
    autoshape.text_frame.text = "Trird Slide"

    # ZoomFrame 객체 추가
    pres.slides[0].shapes.add_zoom_frame(20, 20, 250, 200, slide2)
    pres.slides[0].shapes.add_zoom_frame(200, 250, 250, 200, slide3)

    # 프레젠테이션 저장
    pres.save("presentation-zoom.pptx", slides.export.SaveFormat.PPTX)
Custom 이미지로 Zoom 프레임 만들기
Aspose.Slides for Python via .NET을 사용하면 슬라이드 미리 보기 이미지가 아닌 다른 이미지를 사용하여 줌 프레임을 만들 수 있습니다:
Presentation클래스의 인스턴스를 생성합니다.- 링크할 새 슬라이드를 생성합니다.
- 생성된 슬라이드에 식별 텍스트와 배경을 추가합니다.
- 프레임을 채우는 데 사용할 Presentation 객체와 연결된 Images 컬렉션에 이미지를 추가하여 PPImage 객체를 생성합니다.
- 첫 번째 슬라이드에 (생성된 슬라이드에 대한 참조를 포함하는) 줌 프레임을 추가합니다.
- 수정된 프레젠테이션을 PPTX 파일로 저장합니다.
This python code shows you how to create a zoom frame with a different image:
import aspose.slides as slides
import aspose.pydrawing as draw

with slides.Presentation() as pres:
    # 프레젠테이션에 새 슬라이드 추가
    slide = pres.slides.add_empty_slide(pres.slides[0].layout_slide)

    # 두 번째 슬라이드에 배경 만들기
    slide.background.type = slides.BackgroundType.OWN_BACKGROUND
    slide.background.fill_format.fill_type = slides.FillType.SOLID
    slide.background.fill_format.solid_fill_color.color = draw.Color.cyan

    # 세 번째 슬라이드에 텍스트 상자 만들기
    autoshape = slide.shapes.add_auto_shape(slides.ShapeType.RECTANGLE, 100, 200, 500, 200)
    autoshape.text_frame.text = "Second Slide"

    # 줌 객체를 위한 새 이미지 만들기
    image = pres.images.add_image(slides.Images.from_file("img.jpeg"))

    # ZoomFrame 객체 추가
    pres.slides[0].shapes.add_zoom_frame(20, 20, 300, 200, slide, image)

    # 프레젠테이션 저장
    pres.save("presentation.pptx", slides.export.SaveFormat.PPTX)
Zoom 프레임 서식 지정
위 섹션에서 간단한 줌 프레임을 만드는 방법을 보여드렸습니다. 보다 복잡한 줌 프레임을 만들려면 프레임의 서식을 변경해야 합니다. 줌 프레임에 적용할 수 있는 서식 설정이 여러 가지 있습니다.
슬라이드에서 줌 프레임의 서식을 제어하려면 다음과 같이 합니다:
Presentation클래스의 인스턴스를 생성합니다.- 링크할 새 슬라이드를 생성합니다.
- 생성된 슬라이드에 식별 텍스트와 배경을 추가합니다.
- 첫 번째 슬라이드에 (생성된 슬라이드에 대한 참조를 포함하는) 줌 프레임을 추가합니다.
- 프레임을 채우는 데 사용할 Presentation 객체와 연결된 Images 컬렉션에 이미지를 추가하여 PPImage 객체를 생성합니다.
- 첫 번째 줌 프레임 객체에 사용자 지정 이미지를 설정합니다.
- 두 번째 줌 프레임 객체의 선 서식을 변경합니다.
- 두 번째 줌 프레임 객체 이미지에서 배경을 제거합니다.
- 수정된 프레젠테이션을 PPTX 파일로 저장합니다.
import aspose.slides as slides
import aspose.pydrawing as draw

with slides.Presentation() as pres:
    # 프레젠테이션에 새 슬라이드 추가
    slide2 = pres.slides.add_empty_slide(pres.slides[0].layout_slide)
    slide3 = pres.slides.add_empty_slide(pres.slides[0].layout_slide)

    # 두 번째 슬라이드에 배경 만들기
    slide2.background.type = slides.BackgroundType.OWN_BACKGROUND
    slide2.background.fill_format.fill_type = slides.FillType.SOLID
    slide2.background.fill_format.solid_fill_color.color = draw.Color.cyan

    # 두 번째 슬라이드에 텍스트 상자 만들기
    autoshape = slide2.shapes.add_auto_shape(slides.ShapeType.RECTANGLE, 100, 200, 500, 200)
    autoshape.text_frame.text = "Second Slide"

    # 세 번째 슬라이드에 배경 만들기
    slide3.background.type = slides.BackgroundType.OWN_BACKGROUND
    slide3.background.fill_format.fill_type = slides.FillType.SOLID
    slide3.background.fill_format.solid_fill_color.color = draw.Color.dark_khaki

    # 세 번째 슬라이드에 텍스트 상자 만들기
    autoshape = slide3.shapes.add_auto_shape(slides.ShapeType.RECTANGLE, 100, 200, 500, 200)
    autoshape.text_frame.text = "Trird Slide"

    # ZoomFrame 객체 추가
    zoomFrame1 = pres.slides[0].shapes.add_zoom_frame(20, 20, 250, 200, slide2)
    zoomFrame2 = pres.slides[0].shapes.add_zoom_frame(200, 250, 250, 200, slide3)

    # 줌 객체를 위한 새 이미지 만들기
    image = pres.images.add_image(slides.Images.from_file("img.jpeg"))
    # zoomFrame1 객체에 사용자 지정 이미지 설정
    zoomFrame1.image = image

    # zoomFrame2 객체에 줌 프레임 서식 설정
    zoomFrame2.line_format.width = 5
    zoomFrame2.line_format.fill_format.fill_type = slides.FillType.SOLID
    zoomFrame2.line_format.fill_format.solid_fill_color.color = draw.Color.hot_pink
    zoomFrame2.line_format.dash_style = slides.LineDashStyle.DASH_DOT

    # zoomFrame2 객체에 배경 표시하지 않음
    zoomFrame2.show_background = False

    # 프레젠테이션 저장
    pres.save("presentation-zoom2.pptx", slides.export.SaveFormat.PPTX)
섹션 줌
섹션 줌은 프레젠테이션의 섹션에 연결되는 링크입니다. 강조하고 싶은 섹션으로 다시 이동하거나, 프레젠테이션의 특정 부분이 어떻게 연결되는지 강조하는 데 사용할 수 있습니다.
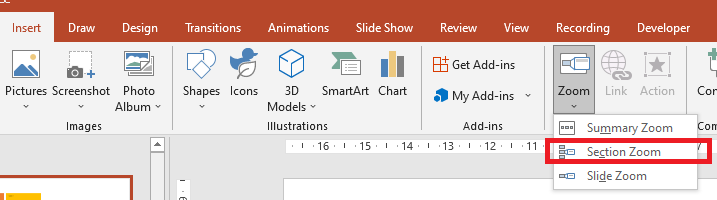
섹션 줌 객체의 경우, Aspose.Slides는 SectionZoomFrame 클래스와 ShapeCollection 클래스의 몇몇 메서드를 제공합니다.
섹션 Zoom 프레임 만들기
슬라이드에 섹션 줌 프레임을 추가하려면 다음과 같이 합니다:
- Presentation 클래스의 인스턴스를 생성합니다.
- 새 슬라이드를 생성합니다.
- 생성된 슬라이드에 식별 배경을 추가합니다.
- 줌 프레임을 연결하려는 새 섹션을 생성합니다.
- 첫 번째 슬라이드에 (생성된 섹션에 대한 참조를 포함하는) 섹션 줌 프레임을 추가합니다.
- 수정된 프레젠테이션을 PPTX 파일로 저장합니다.
import aspose.slides as slides
import aspose.pydrawing as draw

with slides.Presentation() as pres:
    #프레젠테이션에 새 슬라이드 추가
    slide = pres.slides.add_empty_slide(pres.slides[0].layout_slide)

    slide.background.type = slides.BackgroundType.OWN_BACKGROUND
    slide.background.fill_format.fill_type = slides.FillType.SOLID
    slide.background.fill_format.solid_fill_color.color = draw.Color.yellow_green


    # 새 섹션을 프레벤테이션에 추가
    pres.sections.add_section("Section 1", slide)

    # SectionZoomFrame 객체 추가
    sectionZoomFrame = pres.slides[0].shapes.add_section_zoom_frame(20, 20, 300, 200, pres.sections[1])

    # 프레젠테이션 저장
    pres.save("presentation.pptx", slides.export.SaveFormat.PPTX)
Custom 이미지로 섹션 Zoom 프레임 만들기
Aspose.Slides for Python을 사용하면 다른 슬라이드 미리 보기 이미지를 사용하여 섹션 줌 프레임을 만들 수 있습니다:
- Presentation 클래스의 인스턴스를 생성합니다.
- 새 슬라이드를 생성합니다.
- 생성된 슬라이드에 식별 배경을 추가합니다.
- 줌 프레임을 연결하려는 새 섹션을 생성합니다.
- PPImage 객체를 생성하려면 Presentation 객체와 연결된 Images 컬렉션에 이미지를 추가합니다.
- 첫 번째 슬라이드에 (생성된 섹션에 대한 참조를 포함하는) 섹션 줌 프레임을 추가합니다.
- 수정된 프레젠테이션을 PPTX 파일로 저장합니다.
import aspose.slides as slides
import aspose.pydrawing as draw

with slides.Presentation() as pres:
    #프레젠테이션에 새 슬라이드 추가
    slide = pres.slides.add_empty_slide(pres.slides[0].layout_slide)

    slide.background.type = slides.BackgroundType.OWN_BACKGROUND
    slide.background.fill_format.fill_type = slides.FillType.SOLID
    slide.background.fill_format.solid_fill_color.color = draw.Color.yellow_green


    # 프레젠테이션에 새 섹션 추가
    pres.sections.add_section("Section 1", slide)

    # 줌 객체를 위한 새 이미지 생성
    image = pres.images.add_image(slides.Images.from_file("img.jpeg"))

    # SectionZoomFrame 객체 추가
    sectionZoomFrame = pres.slides[0].shapes.add_section_zoom_frame(20, 20, 300, 200, pres.sections[1], image)

    # 프레젠테이션 저장
    pres.save("presentation.pptx", slides.export.SaveFormat.PPTX)
섹션 Zoom 프레임 서식 지정
보다 복잡한 섹션 줌 프레임을 만들려면 간단한 프레임의 서식을 변경해야 합니다. 섹션 줌 프레임에 적용할 수 있는 서식 옵션이 여러 가지 있습니다.
슬라이드에서 섹션 줌 프레임의 서식을 제어하려면 다음과 같이 합니다:
- Presentation 클래스의 인스턴스를 생성합니다.
- 새 슬라이드를 생성합니다.
- 생성된 슬라이드에 식별 배경을 추가합니다.
- 줌 프레임을 연결하려는 새 섹션을 생성합니다.
- 첫 번째 슬라이드에 (생성된 섹션에 대한 참조를 포함하는) 섹션 줌 프레임을 추가합니다.
- 생성된 섹션 줌 객체의 크기와 위치를 변경합니다.
- 프레임을 채우는 데 사용할 Presentation 객체와 연결된 Images 컬렉션에 이미지를 추가하여 PPImage 객체를 생성합니다.
- 생성된 섹션 줌 프레임 객체에 사용자 지정 이미지를 설정합니다.
- 링크된 섹션에서 원본 슬라이드로 돌아가기 기능을 설정합니다.
- 섹션 줌 프레임 객체 이미지에서 배경을 제거합니다.
- 두 번째 줌 프레임 객체의 선 서식을 변경합니다.
- 전환 지속 시간을 변경합니다.
- 수정된 프레젠테이션을 PPTX 파일로 저장합니다.
import aspose.slides as slides
import aspose.pydrawing as draw


with slides.Presentation() as pres:
    #프레젠테이션에 새 슬라이드 추가
    slide = pres.slides.add_empty_slide(pres.slides[0].layout_slide)
    slide.background.fill_format.fill_type = slides.FillType.SOLID
    slide.background.fill_format.solid_fill_color.color = draw.Color.yellow_green
    slide.background.type = slides.BackgroundType.OWN_BACKGROUND

    # 프레젠테이션에 새 섹션 추가
    pres.sections.add_section("Section 1", slide)

    # SectionZoomFrame 객체 추가
    sectionZoomFrame = pres.slides[0].shapes.add_section_zoom_frame(20, 20, 300, 200, pres.sections[1])

    # SectionZoomFrame 서식 지정
    sectionZoomFrame.x = 100
    sectionZoomFrame.y = 300
    sectionZoomFrame.width = 100
    sectionZoomFrame.height = 75

    image = pres.images.add_image(slides.Images.from_file("img.jpeg"))
    sectionZoomFrame.image = image

    sectionZoomFrame.return_to_parent = True
    sectionZoomFrame.show_background = False

    sectionZoomFrame.line_format.fill_format.fill_type = slides.FillType.SOLID
    sectionZoomFrame.line_format.fill_format.solid_fill_color.color = draw.Color.brown
    sectionZoomFrame.line_format.dash_style = slides.LineDashStyle.DASH_DOT
    sectionZoomFrame.line_format.width = 2.5

    sectionZoomFrame.transition_duration = 1.5

    # 프레젠테이션 저장
    pres.save("presentation.pptx", slides.export.SaveFormat.PPTX)
요약 줌
요약 줌은 프레젠테이션의 모든 조각을 한 번에 표시하는 랜딩 페이지와 같습니다. 프레젠테이션 중에 줌을 사용하면 원하는 순서대로 프레젠테이션의 어느 위치든 이동할 수 있습니다. 창의적으로 진행하거나, 앞부분을 건너뛰거나, 슬라이드 쇼의 일부를 다시 살펴볼 수 있어 흐름을 방해하지 않습니다.
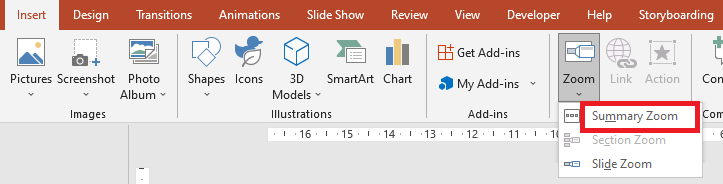
요약 줌 객체의 경우, Aspose.Slides는 SummaryZoomFrame, SummaryZoomSection, SummaryZoomSectionCollection 클래스와 ShapeCollection 클래스의 몇몇 메서드를 제공합니다.
요약 줌 만들기
슬라이드에 요약 줌 프레임을 추가하려면 다음과 같이 합니다:
- Presentation 클래스의 인스턴스를 생성합니다.
- 식별 배경과 새 섹션을 포함한 새 슬라이드를 생성합니다.
- 첫 번째 슬라이드에 요약 줌 프레임을 추가합니다.
- 수정된 프레젠테이션을 PPTX 파일로 저장합니다.
import aspose.slides as slides
import aspose.pydrawing as draw

with slides.Presentation() as pres:
    # 슬라이드 배열 생성
    for slideNumber in range(5):
        #프레젠테이션에 새 슬라이드 추가
        slide = pres.slides.add_empty_slide(pres.slides[0].layout_slide)

        # 슬라이드에 배경 만들기
        slide.background.type = slides.BackgroundType.OWN_BACKGROUND
        slide.background.fill_format.fill_type = slides.FillType.SOLID
        slide.background.fill_format.solid_fill_color.color = draw.Color.dark_khaki

        # 슬라이드에 텍스트 상자 만들기
        autoshape = slide.shapes.add_auto_shape(slides.ShapeType.RECTANGLE, 100, 200, 500, 200)
        autoshape.text_frame.text = "Slide - {num}".format(num = (slideNumber + 2))

    # 첫 번째 슬라이드에 모든 슬라이드용 줌 객체 생성
    for slideNumber in range(1, len(pres.slides)):
        x = (slideNumber - 1) * 100
        y = (slideNumber - 1) * 100
        zoomFrame = pres.slides[0].shapes.add_zoom_frame(x, y, 150, 120, pres.slides[slideNumber])

        # ReturnToParent 속성을 설정하여 첫 번째 슬라이드로 돌아가게 함
        zoomFrame.return_to_parent = True

    # 프레젠테이션 저장
    pres.save("presentation-zoom3.pptx", slides.export.SaveFormat.PPTX)
요약 줌 섹션 추가 및 제거
요약 줌 프레임의 모든 섹션은 SummaryZoomSection 객체로 표현되며, 이는 SummaryZoomSectionCollection 객체에 저장됩니다. 다음과 같이 SummaryZoomSectionCollection 클래스를 통해 요약 줌 섹션 객체를 추가하거나 제거할 수 있습니다:
- Presentation 클래스의 인스턴스를 생성합니다.
- 식별 배경과 새 섹션을 포함한 새 슬라이드를 생성합니다.
- 첫 번째 슬라이드에 요약 줌 프레임을 추가합니다.
- 프레젠테이션에 새 슬라이드와 섹션을 추가합니다.
- 생성된 섹션을 요약 줌 프레임에 추가합니다.
- 요약 줌 프레임에서 첫 번째 섹션을 제거합니다.
- 수정된 프레젠테이션을 PPTX 파일로 저장합니다.
import aspose.slides as slides
import aspose.pydrawing as draw


with slides.Presentation() as pres:
    #프레젠테이션에 새 슬라이드 추가
    slide = pres.slides.add_empty_slide(pres.slides[0].layout_slide)
    slide.background.fill_format.fill_type = slides.FillType.SOLID
    slide.background.fill_format.solid_fill_color.color = draw.Color.yellow_green
    slide.background.type = slides.BackgroundType.OWN_BACKGROUND

    # 프레젠테이션에 새 섹션 추가
    pres.sections.add_section("Section 1", slide)

    #프레젠테이션에 새 슬라이드 추가
    slide = pres.slides.add_empty_slide(pres.slides[0].layout_slide)
    slide.background.fill_format.fill_type = slides.FillType.SOLID
    slide.background.fill_format.solid_fill_color.color = draw.Color.aqua
    slide.background.type = slides.BackgroundType.OWN_BACKGROUND

    # 프레젠테이션에 새 섹션 추가
    pres.sections.add_section("Section 2", slide)

    # SummaryZoomFrame 객체 추가
    summaryZoomFrame = pres.slides[0].shapes.add_summary_zoom_frame(150, 50, 300, 200)

    #프레젠테이션에 새 슬라이드 추가
    slide = pres.slides.add_empty_slide(pres.slides[0].layout_slide)
    slide.background.fill_format.fill_type = slides.FillType.SOLID
    slide.background.fill_format.solid_fill_color.color = draw.Color.chartreuse
    slide.background.type = slides.BackgroundType.OWN_BACKGROUND

    # 프레젠테이션에 새 섹션 추가
    section3 = pres.sections.add_section("Section 3", slide)

    # Summary Zoom에 섹션 추가
    summaryZoomFrame.summary_zoom_collection.add_summary_zoom_section(section3)

    # Summary Zoom에서 섹션 제거
    summaryZoomFrame.summary_zoom_collection.remove_summary_zoom_section(pres.sections[1])

    # 프레젠테이션 저장
    pres.save("presentation.pptx", slides.export.SaveFormat.PPTX)
요약 줌 섹션 서식 지정
보다 복잡한 요약 줌 섹션 객체를 만들려면 간단한 프레임의 서식을 변경해야 합니다. 요약 줌 섹션 객체에 적용할 수 있는 서식 옵션이 여러 가지 있습니다.
요약 줌 프레임에서 요약 줌 섹션 객체의 서식을 제어하려면 다음과 같이 합니다:
- Presentation 클래스의 인스턴스를 생성합니다.
- 식별 배경과 새 섹션을 포함한 새 슬라이드를 생성합니다.
- 첫 번째 슬라이드에 요약 줌 프레임을 추가합니다.
SummaryZoomSectionCollection에서 첫 번째 객체의 요약 줌 섹션 객체를 가져옵니다.- 프레임을 채우는 데 사용할 Presentation 객체와 연결된 images 컬렉션에 이미지를 추가하여
PPImage객체를 생성합니다. - 생성된 섹션 줌 프레임 객체에 사용자 지정 이미지를 설정합니다.
- 링크된 섹션에서 원본 슬라이드로 돌아가기 기능을 설정합니다.
- 두 번째 줌 프레임 객체의 선 서식을 변경합니다.
- 전환 지속 시간을 변경합니다.
- 수정된 프레젠테이션을 PPTX 파일로 저장합니다.
import aspose.slides as slides
import aspose.pydrawing as draw

with slides.Presentation() as pres:
    #프레젠테이션에 새 슬라이드 추가
    slide = pres.slides.add_empty_slide(pres.slides[0].layout_slide)
    slide.background.fill_format.fill_type = slides.FillType.SOLID
    slide.background.fill_format.solid_fill_color.color = draw.Color.brown
    slide.background.type = slides.BackgroundType.OWN_BACKGROUND

    # 프레젠테이션에 새 섹션 추가
    pres.sections.add_section("Section 1", slide)

    #프레젠테이션에 새 슬라이드 추가
    slide = pres.slides.add_empty_slide(pres.slides[0].layout_slide)
    slide.background.fill_format.fill_type = slides.FillType.SOLID
    slide.background.fill_format.solid_fill_color.color = draw.Color.aqua
    slide.background.type = slides.BackgroundType.OWN_BACKGROUND

    # 프레젠테이션에 새 섹션 추가
    pres.sections.add_section("Section 2", slide)

    # SummaryZoomFrame 객체 추가
    summaryZoomFrame = pres.slides[0].shapes.add_summary_zoom_frame(150, 50, 300, 200)

    # 첫 번째 SummaryZoomSection 객체 가져오기
    summarySection = summaryZoomFrame.summary_zoom_collection[0]

    # SummaryZoomSection 객체 서식 지정
    image = pres.images.add_image(slides.Images.from_file("img.jpeg"))
    summarySection.image = image

    summarySection.return_to_parent = False

    summarySection.line_format.fill_format.fill_type = slides.FillType.SOLID
    summarySection.line_format.fill_format.solid_fill_color.color = draw.Color.black
    summarySection.line_format.dash_style = slides.LineDashStyle.DASH_DOT
    summarySection.line_format.width = 1.5

    summarySection.transition_duration = 1.5

    # 프레젠테이션 저장
    pres.save("presentation.pptx", slides.export.SaveFormat.PPTX)
자주 묻는 질문
Can I control returning to the ‘parent’ slide after showing the target?
Yes. The Zoom frame or section has a return_to_parent behavior that, when enabled, sends viewers back to the originating slide after they visit the target content.
Can I adjust the ‘speed’ or duration of the Zoom transition?
Yes. Zoom supports setting a transition_duration so you can control how long the jump animation takes.
Are there limits on how many Zoom objects a presentation can contain?
There is no hard API limit documented. Practical limits depend on overall presentation complexity and the viewer’s performance. You can add many Zoom frames, but consider file size and rendering time.