
Creëer en pas WordArt-effecten toe op Android
Overzicht
WordArt‑effecten stellen u in staat om tekst te stijlen met vullingen, contouren, schaduwen, reflecties, gloed, transformaties en 3D‑opmaak. Dit artikel legt uit hoe u deze effecten maakt en aanpast in PowerPoint‑presentaties met Aspose.Slides for Android via Java, zonder dat Microsoft Office geïnstalleerd is.
Maak een eenvoudige WordArt‑sjabloon en pas het toe op tekst
De volgende voorbeelden bouwen een eenvoudige WordArt‑stijl door de tekst, het lettertype, de patroonvulling en de contour in te stellen.
Elk voorbeeld maakt een nieuwe presentatie en voegt een rechthoek toe aan de eerste dia; er is geen invoer‑bestand nodig. Het eerste voorbeeld stelt de tekst in op “Aspose.Slides”. De positie en afmetingen van de vorm worden gemeten in punten:
import com.aspose.slides.*;

Presentation presentation = new Presentation();
try {
    ISlide slide = presentation.getSlides().get_Item(0);

    IAutoShape autoShape = slide.getShapes().addAutoShape(ShapeType.Rectangle, 20, 20, 400, 200);
    ITextFrame textFrame = autoShape.getTextFrame();

    IPortion portion = textFrame.getParagraphs().get_Item(0).getPortions().get_Item(0);
    portion.setText("Aspose.Slides");
} finally {
    presentation.dispose();
}
Stel het lettertype in op Arial Black met 36 punten om de opmaak beter zichtbaar te maken:
import com.aspose.slides.*;

Presentation presentation = new Presentation();
try {
    ISlide slide = presentation.getSlides().get_Item(0);

    IAutoShape autoShape = slide.getShapes().addAutoShape(ShapeType.Rectangle, 20, 20, 400, 200);

    IPortion portion = autoShape.getTextFrame().getParagraphs().get_Item(0).getPortions().get_Item(0);
    portion.setText("Aspose.Slides");
    FontData font = new FontData("Arial Black");
    portion.getPortionFormat().setLatinFont(font);
    portion.getPortionFormat().setFontHeight(36);
} finally {
    presentation.dispose();
}
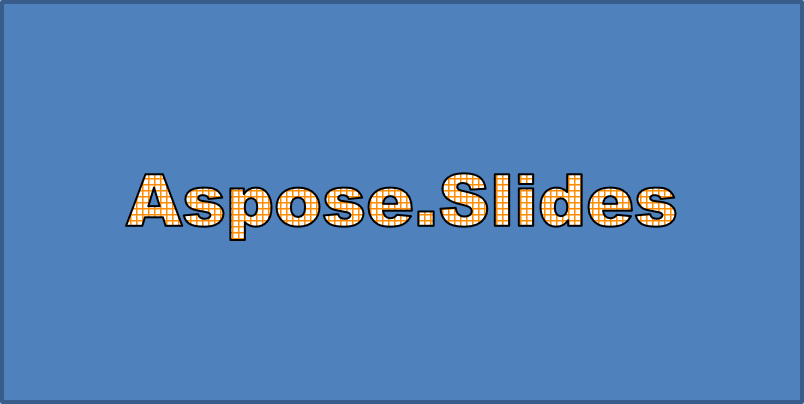
Pas een SmallGrid‑patroon toe met een donkeroranje voorgrond en een witte achtergrond, en voeg vervolgens een zwarte tekstcontour toe met een breedte van 1 punt:
import com.aspose.slides.*;
import android.graphics.Color;

Presentation presentation = new Presentation();
try {
    ISlide slide = presentation.getSlides().get_Item(0);

    IAutoShape autoShape = slide.getShapes().addAutoShape(ShapeType.Rectangle, 20, 20, 400, 200);

    IPortion portion = autoShape.getTextFrame().getParagraphs().get_Item(0).getPortions().get_Item(0);
    portion.setText("Aspose.Slides");
    FontData font = new FontData("Arial Black");
    portion.getPortionFormat().setLatinFont(font);
    portion.getPortionFormat().setFontHeight(36);

    portion.getPortionFormat().getFillFormat().setFillType(FillType.Pattern);
    int darkOrange = Color.rgb(255, 140, 0);
    portion.getPortionFormat().getFillFormat().getPatternFormat().getForeColor().setColor(darkOrange);
    portion.getPortionFormat().getFillFormat().getPatternFormat().getBackColor().setColor(Color.WHITE);
    portion.getPortionFormat().getFillFormat().getPatternFormat().setPatternStyle(PatternStyle.SmallGrid);

    portion.getPortionFormat().getLineFormat().setWidth(1);
    portion.getPortionFormat().getLineFormat().getFillFormat().setFillType(FillType.Solid);
    portion.getPortionFormat().getLineFormat().getFillFormat().getSolidFillColor().setColor(Color.BLACK);
} finally {
    presentation.dispose();
}
De resulterende tekst:
Pas andere WordArt‑effecten toe
De volgende voorbeelden laten zien hoe u schaduwen, reflecties, gloed, transformaties en 3D‑effecten op tekst kunt toepassen.
Pas buitenschaduw‑effecten toe
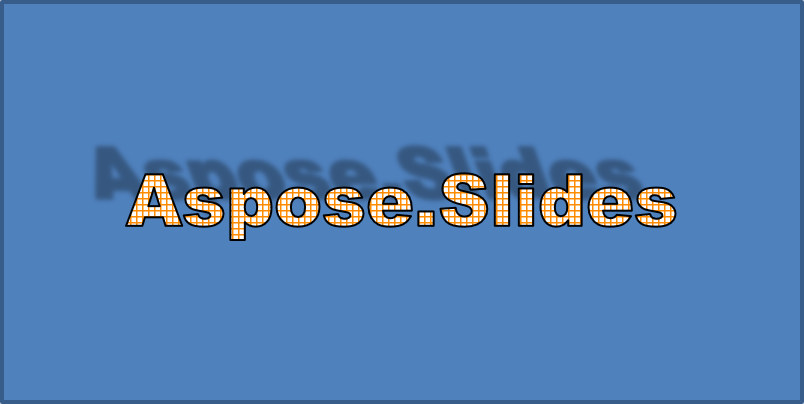
Een buitenschaduw geeft diepte door een schaduw achter de tekst te plaatsen. U kunt de kleur, richting, afstand, vervagingsradius, schaal en scheefstand aanpassen.
Dit voorbeeld roept enableOuterShadowEffect aan en stelt een zwarte schaduw in met een vervagingsradius van 4 punten, een richting van 230 graden en een afstand van 30 punten. Schaalwaarden van 100 behouden de grootte van de schaduw, terwijl een horizontale scheefstand deze 20 graden kantelt. De alfa‑transformatie zet de doorzichtigheid op 32 %:
import com.aspose.slides.*;
import android.graphics.Color;

Presentation presentation = new Presentation();
try {
    ISlide slide = presentation.getSlides().get_Item(0);

    IAutoShape autoShape = slide.getShapes().addAutoShape(ShapeType.Rectangle, 20, 20, 400, 200);

    IPortion portion = autoShape.getTextFrame().getParagraphs().get_Item(0).getPortions().get_Item(0);
    portion.setText("Aspose.Slides");
    FontData font = new FontData("Arial Black");
    portion.getPortionFormat().setLatinFont(font);
    portion.getPortionFormat().setFontHeight(36);

    portion.getPortionFormat().getEffectFormat().enableOuterShadowEffect();
    portion.getPortionFormat().getEffectFormat().getOuterShadowEffect().getShadowColor().setColor(Color.BLACK);
    portion.getPortionFormat().getEffectFormat().getOuterShadowEffect().setScaleHorizontal(100);
    portion.getPortionFormat().getEffectFormat().getOuterShadowEffect().setScaleVertical(100);
    portion.getPortionFormat().getEffectFormat().getOuterShadowEffect().setBlurRadius(4);
    portion.getPortionFormat().getEffectFormat().getOuterShadowEffect().setDirection(230);
    portion.getPortionFormat().getEffectFormat().getOuterShadowEffect().setDistance(30);
    portion.getPortionFormat().getEffectFormat().getOuterShadowEffect().setSkewHorizontal(20);
    portion.getPortionFormat().getEffectFormat().getOuterShadowEffect().setSkewVertical(0);
    portion.getPortionFormat().getEffectFormat().getOuterShadowEffect().getShadowColor().getColorTransform().add(ColorTransformOperation.SetAlpha, 0.32f);
} finally {
    presentation.dispose();
}
De resulterende tekst:
Opmerking
- Wanneer buitenschaduw en vooraf ingestelde schaduwen samen worden gebruikt, wordt alleen de buitenschaduw toegepast.
- Als buitenschaduw en binnenschaduw gelijktijdig worden gebruikt, hangt het resultaat af van de PowerPoint‑versie. In PowerPoint 2013 wordt het effect bijvoorbeeld verdubbeld, terwijl in PowerPoint 2007 alleen de buitenschaduw wordt toegepast.
Pas reflectie‑effecten toe
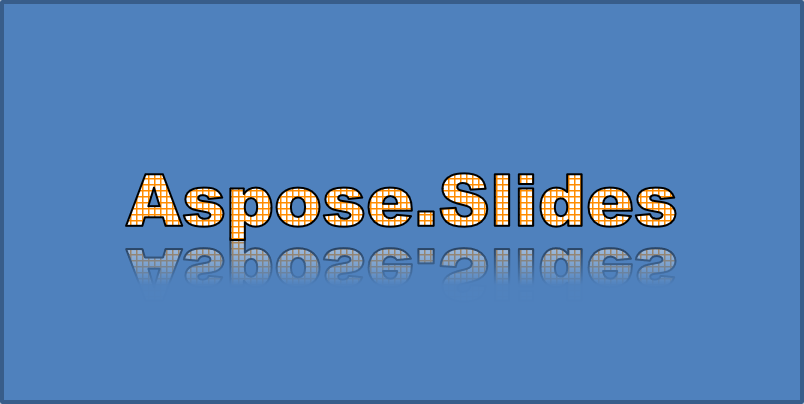
Een reflectie maakt een spiegelende kopie van de tekst. Pas positie, schaal, vervaging en doorzichtigheid aan om het uiterlijk te regelen.
Dit voorbeeld roept enableReflectionEffect aan en draait de reflectie verticaal met een schaal van -100 %. Het gebruikt een vervagingsradius van 0,5 punt en een afstand van 4,72 punten. De doorzichtigheid daalt van 60 % naar 0,9 % tussen posities 0 % en 60 % langs de reflectie:
import com.aspose.slides.*;

Presentation presentation = new Presentation();
try {
    ISlide slide = presentation.getSlides().get_Item(0);

    IAutoShape autoShape = slide.getShapes().addAutoShape(ShapeType.Rectangle, 20, 20, 400, 200);

    IPortion portion = autoShape.getTextFrame().getParagraphs().get_Item(0).getPortions().get_Item(0);
    portion.setText("Aspose.Slides");
    FontData font = new FontData("Arial Black");
    portion.getPortionFormat().setLatinFont(font);
    portion.getPortionFormat().setFontHeight(36);

    portion.getPortionFormat().getEffectFormat().enableReflectionEffect();
    portion.getPortionFormat().getEffectFormat().getReflectionEffect().setBlurRadius(0.5);
    portion.getPortionFormat().getEffectFormat().getReflectionEffect().setDistance(4.72);
    portion.getPortionFormat().getEffectFormat().getReflectionEffect().setStartPosAlpha(0f);
    portion.getPortionFormat().getEffectFormat().getReflectionEffect().setEndPosAlpha(60f);
    portion.getPortionFormat().getEffectFormat().getReflectionEffect().setDirection(90);
    portion.getPortionFormat().getEffectFormat().getReflectionEffect().setScaleHorizontal(100);
    portion.getPortionFormat().getEffectFormat().getReflectionEffect().setScaleVertical(-100);
    portion.getPortionFormat().getEffectFormat().getReflectionEffect().setStartReflectionOpacity(60f);
    portion.getPortionFormat().getEffectFormat().getReflectionEffect().setEndReflectionOpacity(0.9f);
    portion.getPortionFormat().getEffectFormat().getReflectionEffect().setRectangleAlign(RectangleAlignment.BottomLeft);
} finally {
    presentation.dispose();
}
De resulterende tekst:
Pas gloed‑effecten toe
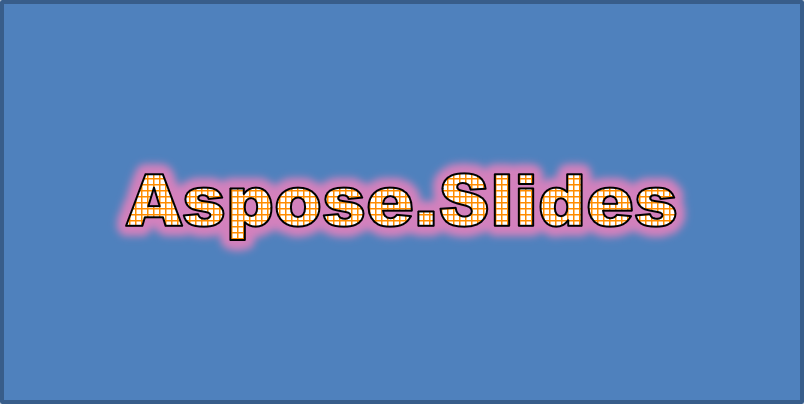
Een gloed voegt een zachte gekleurde omtrek rond de tekst toe. Pas kleur, doorzichtigheid en radius aan om het effect te regelen.
Dit voorbeeld roept enableGlowEffect aan en past een rode gloed toe met 54 % doorzichtigheid en een radius van 7 punten:
import com.aspose.slides.*;
import android.graphics.Color;

Presentation presentation = new Presentation();
try {
    ISlide slide = presentation.getSlides().get_Item(0);

    IAutoShape autoShape = slide.getShapes().addAutoShape(ShapeType.Rectangle, 20, 20, 400, 200);

    IPortion portion = autoShape.getTextFrame().getParagraphs().get_Item(0).getPortions().get_Item(0);
    portion.setText("Aspose.Slides");
    FontData font = new FontData("Arial Black");
    portion.getPortionFormat().setLatinFont(font);
    portion.getPortionFormat().setFontHeight(36);

    portion.getPortionFormat().getEffectFormat().enableGlowEffect();
    portion.getPortionFormat().getEffectFormat().getGlowEffect().getColor().setColor(Color.RED);
    portion.getPortionFormat().getEffectFormat().getGlowEffect().getColor().getColorTransform().add(ColorTransformOperation.SetAlpha, 0.54f);
    portion.getPortionFormat().getEffectFormat().getGlowEffect().setRadius(7);
} finally {
    presentation.dispose();
}
De resulterende tekst:
Pas WordArt‑transformaties toe
WordArt‑transformaties buigen, rekken of vervormen een blok tekst.
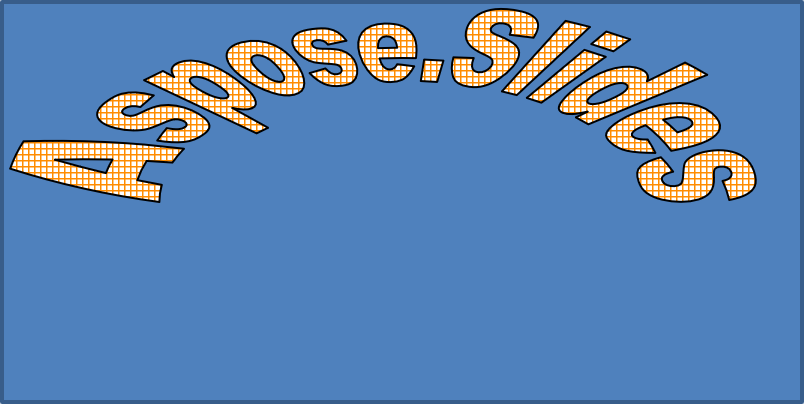
Stel setTransform in op ArchUpPour om het volledige tekstkader naar boven te buigen:
import com.aspose.slides.*;

Presentation presentation = new Presentation();
try {
    ISlide slide = presentation.getSlides().get_Item(0);

    IAutoShape autoShape = slide.getShapes().addAutoShape(ShapeType.Rectangle, 20, 20, 400, 200);

    ITextFrame textFrame = autoShape.getTextFrame();
    textFrame.setText("Aspose.Slides");
    textFrame.getTextFrameFormat().setTransform(TextShapeType.ArchUpPour);
} finally {
    presentation.dispose();
}
De resulterende tekst:
Opmerking
Aspose.Slides for Android via Java biedt een reeks vooraf gedefinieerde transformation types.Pas 3D‑effecten toe op vormen en tekst
U kunt 3D‑effecten toepassen op een vorm of op de tekst ervan. Schuine vlakken, extrusie, verlichting en camera‑instellingen bepalen het uiteindelijke uiterlijk.
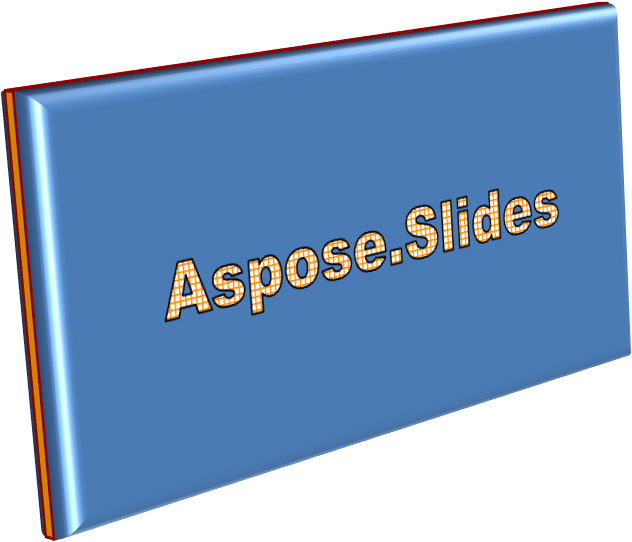
Het volgende voorbeeld gebruikt ThreeDFormat om ronde schuine vlakken, een oranje extrusie en een donkerrode contour aan de rechthoek toe te voegen. Afmetingen van de schuine vlakken, extrusiehoogte, contourbreedte en diepte worden gemeten in punten. Een plastic materiaal, evenwichtige verlichting geroteerd 40 graden rond de Z‑as en een perspective‑camera definiëren het uiterlijk:
import com.aspose.slides.*;
import android.graphics.Color;

Presentation presentation = new Presentation();
try {
    ISlide slide = presentation.getSlides().get_Item(0);

    IAutoShape autoShape = slide.getShapes().addAutoShape(ShapeType.Rectangle, 20, 20, 400, 200);
    autoShape.getTextFrame().setText("Aspose.Slides");

    autoShape.getThreeDFormat().getBevelBottom().setBevelType(BevelPresetType.Circle);
    autoShape.getThreeDFormat().getBevelBottom().setHeight(10.5);
    autoShape.getThreeDFormat().getBevelBottom().setWidth(10.5);

    autoShape.getThreeDFormat().getBevelTop().setBevelType(BevelPresetType.Circle);
    autoShape.getThreeDFormat().getBevelTop().setHeight(12.5);
    autoShape.getThreeDFormat().getBevelTop().setWidth(11);

    int orange = Color.rgb(255, 165, 0);
    autoShape.getThreeDFormat().getExtrusionColor().setColor(orange);
    autoShape.getThreeDFormat().setExtrusionHeight(6);

    int darkRed = Color.rgb(139, 0, 0);
    autoShape.getThreeDFormat().getContourColor().setColor(darkRed);
    autoShape.getThreeDFormat().setContourWidth(1.5);

    autoShape.getThreeDFormat().setDepth(3);

    autoShape.getThreeDFormat().setMaterial(MaterialPresetType.Plastic);

    autoShape.getThreeDFormat().getLightRig().setDirection(LightingDirection.Top);
    autoShape.getThreeDFormat().getLightRig().setLightType(LightRigPresetType.Balanced);
    autoShape.getThreeDFormat().getLightRig().setRotation(0, 0, 40);

    autoShape.getThreeDFormat().getCamera().setCameraType(CameraPresetType.PerspectiveContrastingRightFacing);
} finally {
    presentation.dispose();
}
De resulterende vorm:
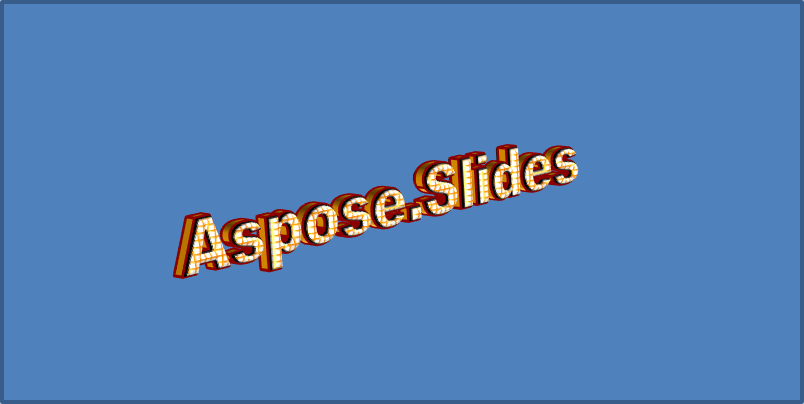
Dit voorbeeld past soortgelijke 3D‑opmaak toe op de tekst via TextFrameFormat.getThreeDFormat. Kleinere schuine vlakken vormen de letterranden, terwijl extrusie en verlichting de tekst diepte geven:
import com.aspose.slides.*;
import android.graphics.Color;

Presentation presentation = new Presentation();
try {
    ISlide slide = presentation.getSlides().get_Item(0);

    IAutoShape autoShape = slide.getShapes().addAutoShape(ShapeType.Rectangle, 20, 20, 400, 200);
    ITextFrame textFrame = autoShape.getTextFrame();
    textFrame.setText("Aspose.Slides");

    textFrame.getTextFrameFormat().getThreeDFormat().getBevelBottom().setBevelType(BevelPresetType.Circle);
    textFrame.getTextFrameFormat().getThreeDFormat().getBevelBottom().setHeight(3.5);
    textFrame.getTextFrameFormat().getThreeDFormat().getBevelBottom().setWidth(3.5);

    textFrame.getTextFrameFormat().getThreeDFormat().getBevelTop().setBevelType(BevelPresetType.Circle);
    textFrame.getTextFrameFormat().getThreeDFormat().getBevelTop().setHeight(4);
    textFrame.getTextFrameFormat().getThreeDFormat().getBevelTop().setWidth(4);

    int orange = Color.rgb(255, 165, 0);
    textFrame.getTextFrameFormat().getThreeDFormat().getExtrusionColor().setColor(orange);
    textFrame.getTextFrameFormat().getThreeDFormat().setExtrusionHeight(6);

    int darkRed = Color.rgb(139, 0, 0);
    textFrame.getTextFrameFormat().getThreeDFormat().getContourColor().setColor(darkRed);
    textFrame.getTextFrameFormat().getThreeDFormat().setContourWidth(1.5);

    textFrame.getTextFrameFormat().getThreeDFormat().setDepth(3);

    textFrame.getTextFrameFormat().getThreeDFormat().setMaterial(MaterialPresetType.Plastic);

    textFrame.getTextFrameFormat().getThreeDFormat().getLightRig().setDirection(LightingDirection.Top);
    textFrame.getTextFrameFormat().getThreeDFormat().getLightRig().setLightType(LightRigPresetType.Balanced);
    textFrame.getTextFrameFormat().getThreeDFormat().getLightRig().setRotation(0, 0, 40);

    textFrame.getTextFrameFormat().getThreeDFormat().getCamera().setCameraType(CameraPresetType.PerspectiveContrastingRightFacing);
} finally {
    presentation.dispose();
}
De resulterende tekst:
Opmerking
Het toepassen van 3D‑effecten op tekst of hun vormen – en de interactie tussen deze effecten – wordt beheerst door specifieke regels. Beschouw een scène met zowel tekst als de vorm die de tekst bevat. Een 3D‑effect omvat de 3D‑representatie van het object en de scène waarin het geplaatst is.
- Als een scène voor zowel de vorm als de tekst is ingesteld, heeft de scène van de vorm prioriteit en wordt de scène van de tekst genegeerd.
- Als de vorm geen eigen scène heeft maar wel een 3D‑representatie, wordt de scène van de tekst gebruikt.
- Als de vorm helemaal geen 3D‑effect heeft, wordt deze als plat beschouwd en wordt het 3D‑effect alleen op de tekst toegepast.
Deze gedragingen hebben betrekking op de methoden ThreeDFormat.getLightRig en ThreeDFormat.getCamera.
Om tekst plat en leesbaar te houden terwijl de 3D‑opmaak van de vorm behouden blijft, zie Keep Text Flat on a 3D Shape voor een vergelijking van beide instellingen en een volledige Java‑voorbeeld.
FAQ
Kan ik WordArt‑effecten gebruiken met verschillende lettertypen of scripts (bijv. Arabisch, Chinees)?
Ja, Aspose.Slides for Android via Java ondersteunt Unicode en werkt met alle belangrijke lettertypen en scripts. WordArt‑effecten zoals schaduw, vulling en contour kunnen worden toegepast ongeacht de taal, hoewel de beschikbaarheid van lettertypen en de weergave kunnen afhangen van de systeem‑lettertypen.
Kan ik WordArt‑effecten toepassen op elementen in de dia‑master?
Ja, u kunt WordArt‑effecten toepassen op vormen op de master‑dia’s, inclusief titel‑placeholder, voetteksten of achtergrondtekst. Wijzigingen in de master‑indeling worden in alle bijbehorende dia’s weergegeven.
Beïnvloeden WordArt‑effecten de bestandsgrootte van de presentatie?
Een beetje. WordArt‑effecten zoals schaduwen, gloed en verloopvullingen kunnen de bestandsgrootte licht verhogen vanwege extra opmaak‑metadata, maar het verschil is meestal verwaarloosbaar.
Kan ik een voorbeeld van WordArt‑effecten zien zonder de presentatie op te slaan?
Ja, u kunt dia’s met WordArt renderen naar afbeeldingen (bijv. PNG, JPEG) met ISlide.getImage of individuele vormen met IShape.getImage. Hiermee kunt u het resultaat in het geheugen of op het scherm bekijken voordat u de volledige presentatie opslaat of exporteert.