
สร้างและใช้เอฟเฟกต์ WordArt บน Android
ภาพรวม
เอฟเฟกต์ WordArt ช่วยให้คุณสามารถจัดรูปแบบข้อความด้วยการเติมสี, ตัวขอบ, เงา, การสะท้อน, แสงเรืองแสง, การแปลงรูป, และการจัดรูปแบบ 3D บทความนี้อธิบายวิธีสร้างและปรับแต่งเอฟเฟกต์เหล่านี้ในงานนำเสนอ PowerPoint โดยใช้ Aspose.Slides for Android via Java โดยไม่ต้องติดตั้ง Microsoft Office.
สร้างเทมเพลต WordArt แบบง่ายและนำไปใช้กับข้อความ
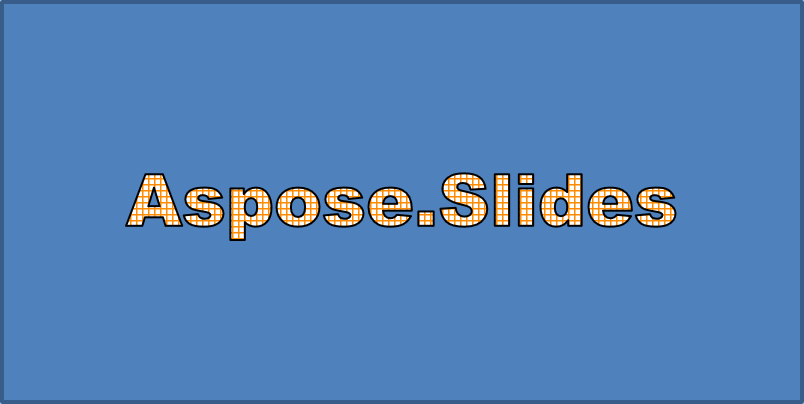
ตัวอย่างต่อไปนี้สร้างสไตล์ WordArt แบบง่ายโดยการกำหนดข้อความ, ฟอนต์, การเติมรูปแบบลาย, และตัวขอบ.
แต่ละตัวอย่างจะสร้างงานนำเสนอใหม่และเพิ่มสี่เหลี่ยมผืนผ้าลงในสไลด์แรก; ไม่จำเป็นต้องมีไฟล์อินพุต ตัวอย่างแรกกำหนดข้อความเป็น “Aspose.Slides” ตำแหน่งและขนาดของรูปร่างถูกวัดเป็นหน่วย points:
import com.aspose.slides.*;

Presentation presentation = new Presentation();
try {
    ISlide slide = presentation.getSlides().get_Item(0);

    IAutoShape autoShape = slide.getShapes().addAutoShape(ShapeType.Rectangle, 20, 20, 400, 200);
    ITextFrame textFrame = autoShape.getTextFrame();

    IPortion portion = textFrame.getParagraphs().get_Item(0).getPortions().get_Item(0);
    portion.setText("Aspose.Slides");
} finally {
    presentation.dispose();
}
ตั้งค่าฟอนต์เป็น Arial Black ที่ 36 points เพื่อทำให้การจัดรูปแบบเด่นชัดยิ่งขึ้น:
import com.aspose.slides.*;

Presentation presentation = new Presentation();
try {
    ISlide slide = presentation.getSlides().get_Item(0);

    IAutoShape autoShape = slide.getShapes().addAutoShape(ShapeType.Rectangle, 20, 20, 400, 200);

    IPortion portion = autoShape.getTextFrame().getParagraphs().get_Item(0).getPortions().get_Item(0);
    portion.setText("Aspose.Slides");
    FontData font = new FontData("Arial Black");
    portion.getPortionFormat().setLatinFont(font);
    portion.getPortionFormat().setFontHeight(36);
} finally {
    presentation.dispose();
}
ใช้รูปแบบ SmallGrid ที่มีสีส้มเข้มเป็นสีพื้นหน้าและสีขาวเป็นพื้นหลัง จากนั้นเพิ่มตัวขอบข้อความสีดำที่ความกว้าง 1 point:
import com.aspose.slides.*;
import android.graphics.Color;

Presentation presentation = new Presentation();
try {
    ISlide slide = presentation.getSlides().get_Item(0);

    IAutoShape autoShape = slide.getShapes().addAutoShape(ShapeType.Rectangle, 20, 20, 400, 200);

    IPortion portion = autoShape.getTextFrame().getParagraphs().get_Item(0).getPortions().get_Item(0);
    portion.setText("Aspose.Slides");
    FontData font = new FontData("Arial Black");
    portion.getPortionFormat().setLatinFont(font);
    portion.getPortionFormat().setFontHeight(36);

    portion.getPortionFormat().getFillFormat().setFillType(FillType.Pattern);
    int darkOrange = Color.rgb(255, 140, 0);
    portion.getPortionFormat().getFillFormat().getPatternFormat().getForeColor().setColor(darkOrange);
    portion.getPortionFormat().getFillFormat().getPatternFormat().getBackColor().setColor(Color.WHITE);
    portion.getPortionFormat().getFillFormat().getPatternFormat().setPatternStyle(PatternStyle.SmallGrid);

    portion.getPortionFormat().getLineFormat().setWidth(1);
    portion.getPortionFormat().getLineFormat().getFillFormat().setFillType(FillType.Solid);
    portion.getPortionFormat().getLineFormat().getFillFormat().getSolidFillColor().setColor(Color.BLACK);
} finally {
    presentation.dispose();
}
ข้อความที่ได้:
ใช้เอฟเฟกต์ WordArt อื่น ๆ
ตัวอย่างต่อไปนี้แสดงวิธีการใช้เงา, การสะท้อน, แสงเรืองแสง, การแปลงรูป, และเอฟเฟกต์ 3D กับข้อความ.
ใช้เอฟเฟกต์เงานอก
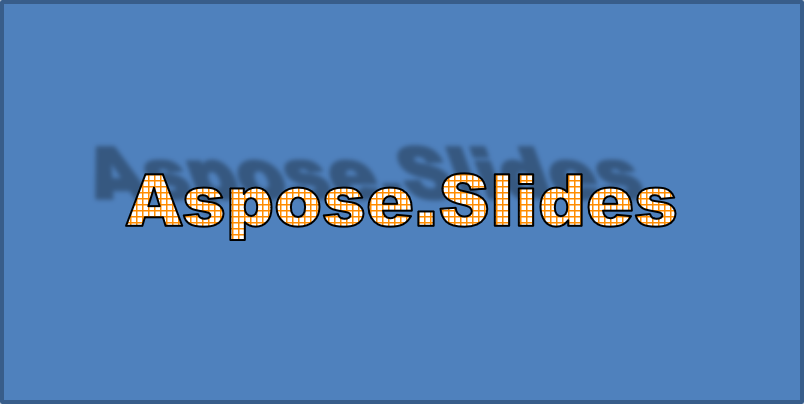
เงานอกเพิ่มความลึกโดยวางเงาไว้ด้านหลังข้อความ คุณสามารถปรับแต่งสี, ทิศทาง, ระยะทาง, รัศมีเบลอ, สเกล, และการบิดของเงาได้.
ตัวอย่างนี้เรียกใช้ enableOuterShadowEffect และตั้งค่าเงาสีดำด้วยรัศมีเบลอ 4 point, ทิศทาง 230 องศา, ระยะทาง 30 point. ค่า Scale 100 จะคงขนาดเงาไว้, ส่วนการบิดแนวนอนทำให้เงาเอียง 20 องศา. การแปลง alpha ตั้งค่าความทึบเป็น 32%:
import com.aspose.slides.*;
import android.graphics.Color;

Presentation presentation = new Presentation();
try {
    ISlide slide = presentation.getSlides().get_Item(0);

    IAutoShape autoShape = slide.getShapes().addAutoShape(ShapeType.Rectangle, 20, 20, 400, 200);

    IPortion portion = autoShape.getTextFrame().getParagraphs().get_Item(0).getPortions().get_Item(0);
    portion.setText("Aspose.Slides");
    FontData font = new FontData("Arial Black");
    portion.getPortionFormat().setLatinFont(font);
    portion.getPortionFormat().setFontHeight(36);

    portion.getPortionFormat().getEffectFormat().enableOuterShadowEffect();
    portion.getPortionFormat().getEffectFormat().getOuterShadowEffect().getShadowColor().setColor(Color.BLACK);
    portion.getPortionFormat().getEffectFormat().getOuterShadowEffect().setScaleHorizontal(100);
    portion.getPortionFormat().getEffectFormat().getOuterShadowEffect().setScaleVertical(100);
    portion.getPortionFormat().getEffectFormat().getOuterShadowEffect().setBlurRadius(4);
    portion.getPortionFormat().getEffectFormat().getOuterShadowEffect().setDirection(230);
    portion.getPortionFormat().getEffectFormat().getOuterShadowEffect().setDistance(30);
    portion.getPortionFormat().getEffectFormat().getOuterShadowEffect().setSkewHorizontal(20);
    portion.getPortionFormat().getEffectFormat().getOuterShadowEffect().setSkewVertical(0);
    portion.getPortionFormat().getEffectFormat().getOuterShadowEffect().getShadowColor().getColorTransform().add(ColorTransformOperation.SetAlpha, 0.32f);
} finally {
    presentation.dispose();
}
ข้อความที่ได้:
Note
- เมื่อใช้เงานอกและเงาที่กำหนดไว้พร้อมกัน จะมีเพียงเงานอกเท่านั้นที่ถูกนำไปใช้.
- หากใช้เงานอกและเงาภายในพร้อมกัน ผลลัพธ์จะขึ้นกับเวอร์ชันของ PowerPoint ตัวอย่างเช่น ใน PowerPoint 2013 เอฟเฟกต์จะเพิ่มเป็นสองเท่า ในขณะที่ใน PowerPoint 2007 จะใช้เพียงเงานอกเท่านั้น.
ใช้เอฟเฟกต์การสะท้อน
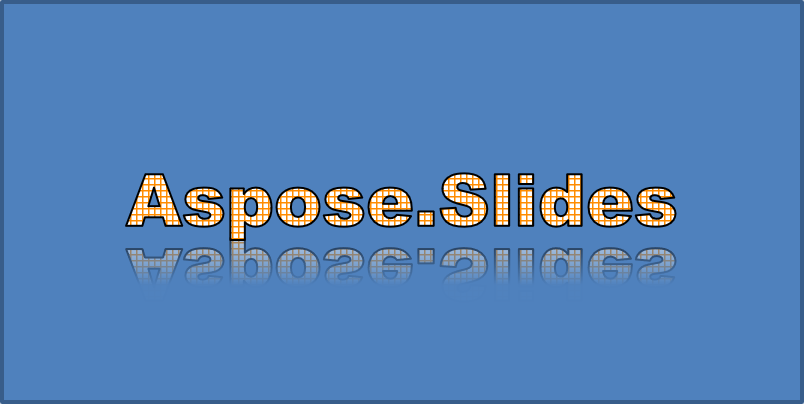
การสะท้อนสร้างสำเนาตรงข้ามของข้อความ ปรับตำแหน่ง, สเกล, การเบลอ, และความทึบเพื่อควบคุมลักษณะของมัน.
ตัวอย่างนี้เรียกใช้ enableReflectionEffect และพลิกการสะท้อนทางแนวตั้งด้วยสเกล -100%. ใช้รัศมีเบลอ 0.5 point และระยะ 4.72 point. ความทึบลดลงจาก 60% ไปยัง 0.9% ระหว่างตำแหน่ง 0% ถึง 60% ตามการสะท้อน:
import com.aspose.slides.*;

Presentation presentation = new Presentation();
try {
    ISlide slide = presentation.getSlides().get_Item(0);

    IAutoShape autoShape = slide.getShapes().addAutoShape(ShapeType.Rectangle, 20, 20, 400, 200);

    IPortion portion = autoShape.getTextFrame().getParagraphs().get_Item(0).getPortions().get_Item(0);
    portion.setText("Aspose.Slides");
    FontData font = new FontData("Arial Black");
    portion.getPortionFormat().setLatinFont(font);
    portion.getPortionFormat().setFontHeight(36);

    portion.getPortionFormat().getEffectFormat().enableReflectionEffect();
    portion.getPortionFormat().getEffectFormat().getReflectionEffect().setBlurRadius(0.5);
    portion.getPortionFormat().getEffectFormat().getReflectionEffect().setDistance(4.72);
    portion.getPortionFormat().getEffectFormat().getReflectionEffect().setStartPosAlpha(0f);
    portion.getPortionFormat().getEffectFormat().getReflectionEffect().setEndPosAlpha(60f);
    portion.getPortionFormat().getEffectFormat().getReflectionEffect().setDirection(90);
    portion.getPortionFormat().getEffectFormat().getReflectionEffect().setScaleHorizontal(100);
    portion.getPortionFormat().getEffectFormat().getReflectionEffect().setScaleVertical(-100);
    portion.getPortionFormat().getEffectFormat().getReflectionEffect().setStartReflectionOpacity(60f);
    portion.getPortionFormat().getEffectFormat().getReflectionEffect().setEndReflectionOpacity(0.9f);
    portion.getPortionFormat().getEffectFormat().getReflectionEffect().setRectangleAlign(RectangleAlignment.BottomLeft);
} finally {
    presentation.dispose();
}
ข้อความที่ได้:
ใช้เอฟเฟกต์แสงเรืองแสง
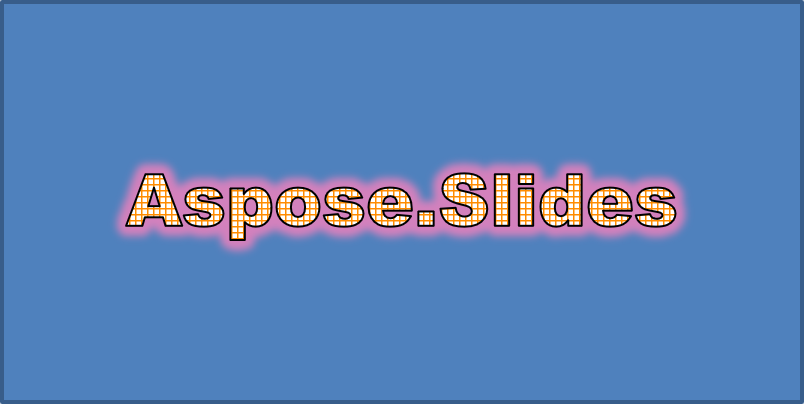
แสงเรืองแสงเพิ่มรอบข้อความด้วยสีอ่อนที่นุ่มนวล ปรับสี, ความทึบ, และรัศมีเพื่อควบคุมเอฟเฟกต์.
ตัวอย่างนี้เรียกใช้ enableGlowEffect และใช้แสงเรืองแสงสีแดงที่ความทึบ 54% และรัศมี 7 points:
import com.aspose.slides.*;
import android.graphics.Color;

Presentation presentation = new Presentation();
try {
    ISlide slide = presentation.getSlides().get_Item(0);

    IAutoShape autoShape = slide.getShapes().addAutoShape(ShapeType.Rectangle, 20, 20, 400, 200);

    IPortion portion = autoShape.getTextFrame().getParagraphs().get_Item(0).getPortions().get_Item(0);
    portion.setText("Aspose.Slides");
    FontData font = new FontData("Arial Black");
    portion.getPortionFormat().setLatinFont(font);
    portion.getPortionFormat().setFontHeight(36);

    portion.getPortionFormat().getEffectFormat().enableGlowEffect();
    portion.getPortionFormat().getEffectFormat().getGlowEffect().getColor().setColor(Color.RED);
    portion.getPortionFormat().getEffectFormat().getGlowEffect().getColor().getColorTransform().add(ColorTransformOperation.SetAlpha, 0.54f);
    portion.getPortionFormat().getEffectFormat().getGlowEffect().setRadius(7);
} finally {
    presentation.dispose();
}
ข้อความที่ได้:
ใช้การแปลง WordArt
การแปลง WordArt ทำให้ข้อความบิด, ยืด, หรือบิดโค้งเป็นบล็อกของข้อความ.
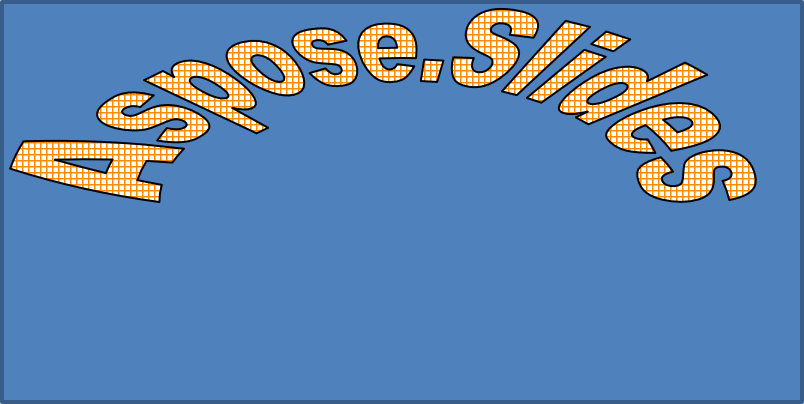
ตั้งค่า setTransform เป็น ArchUpPour เพื่อโค้งกรอบข้อความทั้งหมดขึ้นด้านบน:
import com.aspose.slides.*;

Presentation presentation = new Presentation();
try {
    ISlide slide = presentation.getSlides().get_Item(0);

    IAutoShape autoShape = slide.getShapes().addAutoShape(ShapeType.Rectangle, 20, 20, 400, 200);

    ITextFrame textFrame = autoShape.getTextFrame();
    textFrame.setText("Aspose.Slides");
    textFrame.getTextFrameFormat().setTransform(TextShapeType.ArchUpPour);
} finally {
    presentation.dispose();
}
ข้อความที่ได้:
Note
Aspose.Slides for Android via Java มีชุดของ ประเภทการแปลง ที่กำหนดล่วงหน้า.ใช้เอฟเฟกต์ 3D กับรูปทรงและข้อความ
คุณสามารถใช้เอฟเฟกต์ 3D กับรูปทรงหรือกับข้อความของมันได้ การขอบ, การดันออก, แสง, และการตั้งค่ากล้องควบคุมลักษณะที่ได้.
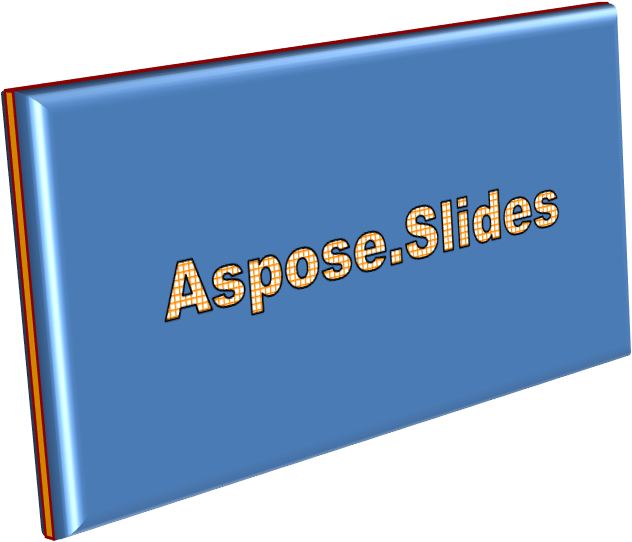
ตัวอย่างต่อไปนี้ใช้ ThreeDFormat เพื่อเพิ่มขอบโค้งวงกลม, การดันสีส้ม, และโค้งสีแดงเข้มให้กับสี่เหลี่ยม ผมิติของขอบ, ความสูงการดัน, ความกว้างโค้ง, และความลึกวัดเป็น points. วัสดุพลาสติก, แสงสมดุลที่หมุน 40 องศารอบแกน Z, และกล้องมุมมองกำหนดลักษณะของมัน:
import com.aspose.slides.*;
import android.graphics.Color;

Presentation presentation = new Presentation();
try {
    ISlide slide = presentation.getSlides().get_Item(0);

    IAutoShape autoShape = slide.getShapes().addAutoShape(ShapeType.Rectangle, 20, 20, 400, 200);
    autoShape.getTextFrame().setText("Aspose.Slides");

    autoShape.getThreeDFormat().getBevelBottom().setBevelType(BevelPresetType.Circle);
    autoShape.getThreeDFormat().getBevelBottom().setHeight(10.5);
    autoShape.getThreeDFormat().getBevelBottom().setWidth(10.5);

    autoShape.getThreeDFormat().getBevelTop().setBevelType(BevelPresetType.Circle);
    autoShape.getThreeDFormat().getBevelTop().setHeight(12.5);
    autoShape.getThreeDFormat().getBevelTop().setWidth(11);

    int orange = Color.rgb(255, 165, 0);
    autoShape.getThreeDFormat().getExtrusionColor().setColor(orange);
    autoShape.getThreeDFormat().setExtrusionHeight(6);

    int darkRed = Color.rgb(139, 0, 0);
    autoShape.getThreeDFormat().getContourColor().setColor(darkRed);
    autoShape.getThreeDFormat().setContourWidth(1.5);

    autoShape.getThreeDFormat().setDepth(3);

    autoShape.getThreeDFormat().setMaterial(MaterialPresetType.Plastic);

    autoShape.getThreeDFormat().getLightRig().setDirection(LightingDirection.Top);
    autoShape.getThreeDFormat().getLightRig().setLightType(LightRigPresetType.Balanced);
    autoShape.getThreeDFormat().getLightRig().setRotation(0, 0, 40);

    autoShape.getThreeDFormat().getCamera().setCameraType(CameraPresetType.PerspectiveContrastingRightFacing);
} finally {
    presentation.dispose();
}
รูปร่างที่ได้:
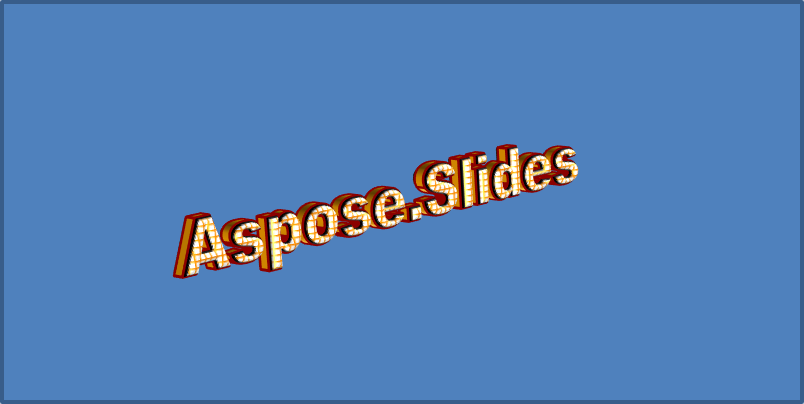
ตัวอย่างนี้ใช้การจัดรูปแบบ 3D คล้ายกันกับข้อความผ่าน TextFrameFormat.getThreeDFormat. ขอบเล็กทำให้ขอบตัวอักษรชัดเจน, ส่วนการดันและแสงให้ความลึกกับข้อความ:
import com.aspose.slides.*;
import android.graphics.Color;

Presentation presentation = new Presentation();
try {
    ISlide slide = presentation.getSlides().get_Item(0);

    IAutoShape autoShape = slide.getShapes().addAutoShape(ShapeType.Rectangle, 20, 20, 400, 200);
    ITextFrame textFrame = autoShape.getTextFrame();
    textFrame.setText("Aspose.Slides");

    textFrame.getTextFrameFormat().getThreeDFormat().getBevelBottom().setBevelType(BevelPresetType.Circle);
    textFrame.getTextFrameFormat().getThreeDFormat().getBevelBottom().setHeight(3.5);
    textFrame.getTextFrameFormat().getThreeDFormat().getBevelBottom().setWidth(3.5);

    textFrame.getTextFrameFormat().getThreeDFormat().getBevelTop().setBevelType(BevelPresetType.Circle);
    textFrame.getTextFrameFormat().getThreeDFormat().getBevelTop().setHeight(4);
    textFrame.getTextFrameFormat().getThreeDFormat().getBevelTop().setWidth(4);

    int orange = Color.rgb(255, 165, 0);
    textFrame.getTextFrameFormat().getThreeDFormat().getExtrusionColor().setColor(orange);
    textFrame.getTextFrameFormat().getThreeDFormat().setExtrusionHeight(6);

    int darkRed = Color.rgb(139, 0, 0);
    textFrame.getTextFrameFormat().getThreeDFormat().getContourColor().setColor(darkRed);
    textFrame.getTextFrameFormat().getThreeDFormat().setContourWidth(1.5);

    textFrame.getTextFrameFormat().getThreeDFormat().setDepth(3);

    textFrame.getTextFrameFormat().getThreeDFormat().setMaterial(MaterialPresetType.Plastic);

    textFrame.getTextFrameFormat().getThreeDFormat().getLightRig().setDirection(LightingDirection.Top);
    textFrame.getTextFrameFormat().getThreeDFormat().getLightRig().setLightType(LightRigPresetType.Balanced);
    textFrame.getTextFrameFormat().getThreeDFormat().getLightRig().setRotation(0, 0, 40);

    textFrame.getTextFrameFormat().getThreeDFormat().getCamera().setCameraType(CameraPresetType.PerspectiveContrastingRightFacing);
} finally {
    presentation.dispose();
}
ข้อความที่ได้:
Note
การใช้เอฟเฟกต์ 3D กับข้อความหรือรูปทรงของมัน—และปฏิสัมพันธ์ระหว่างเอฟเฟกต์เหล่านี้—ถูกกำหนดโดยกฎเฉพาะ พิจารณาฉากที่เกี่ยวข้องกับทั้งข้อความและรูปทรงที่บรรจุข้อความนั้น เอฟเฟกต์ 3D รวมถึงการแสดงผล 3D ของอ็อบเจกต์และฉากที่วางไว้
- หากฉากถูกกำหนดทั้งสำหรับรูปทรงและข้อความ ฉากของรูปทรงจะมีลำดับความสำคัญและฉากของข้อความจะถูกละเลย
- หากรูปทรงไม่มีฉากของตนเองแต่มีการแสดงผล 3D จะใช้ฉากของข้อความ
- หากรูปทรงไม่มีเอฟเฟกต์ 3D ใด ๆ จะถือว่าเป็นแบนและเอฟเฟกต์ 3D จะถูกประยุกต์เพียงกับข้อความเท่านั้น
พฤติกรรมเหล่านี้เกี่ยวข้องกับเมธอด ThreeDFormat.getLightRig และ ThreeDFormat.getCamera .
เพื่อให้ข้อความคงอยู่ในรูปแบบแบนและอ่านง่ายในขณะที่รักษาการจัดรูปแบบ 3D ของรูปทรงไว้ ดูที่ Keep Text Flat on a 3D Shape สำหรับการเปรียบเทียบของการตั้งค่าทั้งสองและตัวอย่าง Java ฉบับเต็ม.
คำถามที่พบบ่อย
ฉันสามารถใช้เอฟเฟกต์ WordArt กับฟอนต์หรือสคริปต์ที่แตกต่างกัน (เช่น อาหรับ, จีน) ได้หรือไม่?
ใช่, Aspose.Slides for Android via Java รองรับ Unicode และทำงานกับฟอนต์และสคริปต์หลักทั้งหมด เอฟเฟกต์ WordArt เช่น เงา, การเติมสี, และตัวขอบสามารถนำไปใช้ได้โดยไม่คำนึงถึงภาษา แม้ว่าความพร้อมใช้งานของฟอนต์และการเรนเดอร์อาจขึ้นกับฟอนต์ระบบ
ฉันสามารถใช้เอฟเฟกต์ WordArt กับองค์ประกอบของสไลด์มาสเตอร์ได้หรือไม่?
ได้, คุณสามารถใช้เอฟเฟกต์ WordArt กับรูปร่างบนสไลด์มาสเตอร์รวมถึงตัวเก็บตำแหน่งหัวเรื่อง, ส่วนท้าย, หรือข้อความพื้นหลัง การเปลี่ยนแปลงบนเลเอาต์มาสเตอร์จะสะท้อนไปยังสไลด์ทั้งหมดที่เชื่อมโยง
เอฟเฟกต์ WordArt มีผลต่อขนาดไฟล์งานนำเสนอหรือไม่?
มีผลเล็กน้อย. เอฟเฟกต์ WordArt เช่น เงา, แสงเรืองแสง, และการเติมสีไล่ระดับอาจเพิ่มขนาดไฟล์เล็กน้อยเนื่องจากเมตาดาต้าการจัดรูปแบบที่เพิ่มขึ้น แต่ความแตกต่างโดยทั่วไปถือว่ารายละเอียดสำคัญไม่มี
ฉันสามารถดูตัวอย่างผลลัพธ์ของเอฟเฟกต์ WordArt โดยไม่ต้องบันทึกงานนำเสนอได้หรือไม่?
ได้, คุณสามารถเรนเดอร์สไลด์ที่มี WordArt เป็นภาพ (เช่น PNG, JPEG) ด้วย ISlide.getImage หรือเรนเดอร์รูปร่างแต่ละอันด้วย IShape.getImage สิ่งนี้ทำให้คุณสามารถดูผลลัพธ์ในหน่วยความจำหรือบนหน้าจอก่อนการบันทึกหรือส่งออกงานนำเสนอเต็มรูปแบบ.