
Node.js で WordArt エフェクトを作成および適用する
概要
WordArt エフェクトを使用すると、塗りつぶし、アウトライン、影、反射、グロー、変形、3D 書式設定でテキストを装飾できます。本記事では、Microsoft Office をインストールせずに、Aspose.Slides for Node.js via Java を使用して PowerPoint プレゼンテーションでこれらのエフェクトを作成およびカスタマイズする方法を説明します。
シンプルな WordArt テンプレートを作成し、テキストに適用する
以下の例では、テキスト、フォント、パターン塗りつぶし、アウトラインを設定してシンプルな WordArt スタイルを構築します。
各例は新しいプレゼンテーションを作成し、最初のスライドに長方形を追加します。入力ファイルは必要ありません。最初の例ではテキストを “Aspose.Slides” に設定します。シェイプの位置とサイズはポイント単位で測定されます:
const aspose = { slides: require("aspose.slides.via.java") };

const presentation = new aspose.slides.Presentation();
try {
    const slide = presentation.getSlides().get_Item(0);

    const autoShape = slide.getShapes().addAutoShape(aspose.slides.ShapeType.Rectangle, 20, 20, 400, 200);
    const textFrame = autoShape.getTextFrame();

    const portion = textFrame.getParagraphs().get_Item(0).getPortions().get_Item(0);
    portion.setText("Aspose.Slides");
} finally {
    presentation.dispose();
}
フォーマットを目立たせるために、フォントを Arial Black の 36 ポイントに設定します:
const aspose = { slides: require("aspose.slides.via.java") };

const presentation = new aspose.slides.Presentation();
try {
    const slide = presentation.getSlides().get_Item(0);

    const autoShape = slide.getShapes().addAutoShape(aspose.slides.ShapeType.Rectangle, 20, 20, 400, 200);

    const portion = autoShape.getTextFrame().getParagraphs().get_Item(0).getPortions().get_Item(0);
    portion.setText("Aspose.Slides");
    const font = new aspose.slides.FontData("Arial Black");
    portion.getPortionFormat().setLatinFont(font);
    portion.getPortionFormat().setFontHeight(36);
} finally {
    presentation.dispose();
}
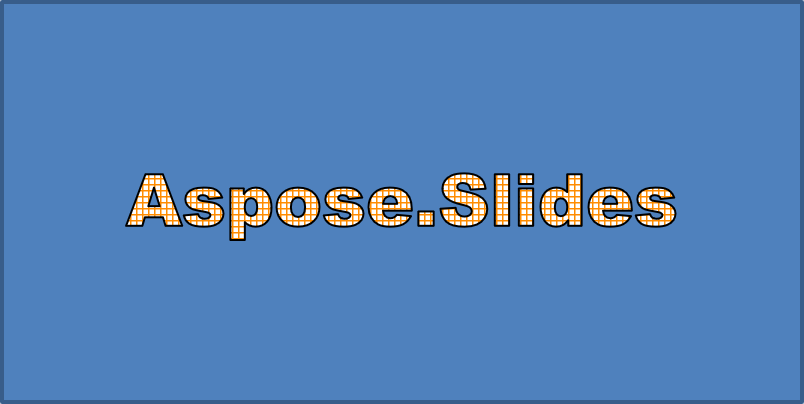
SmallGrid パターンを、暗橙色の前景と白い背景で適用し、幅 1 ポイントの黒いテキストアウトラインを追加します:
const aspose = { slides: require("aspose.slides.via.java") };
const java = require("java");

const presentation = new aspose.slides.Presentation();
try {
    const slide = presentation.getSlides().get_Item(0);

    const autoShape = slide.getShapes().addAutoShape(aspose.slides.ShapeType.Rectangle, 20, 20, 400, 200);

    const portion = autoShape.getTextFrame().getParagraphs().get_Item(0).getPortions().get_Item(0);
    portion.setText("Aspose.Slides");
    const font = new aspose.slides.FontData("Arial Black");
    portion.getPortionFormat().setLatinFont(font);
    portion.getPortionFormat().setFontHeight(36);

    portion.getPortionFormat().getFillFormat().setFillType(java.newByte(aspose.slides.FillType.Pattern));
    const darkOrange = java.newInstanceSync("java.awt.Color", 255, 140, 0);
    portion.getPortionFormat().getFillFormat().getPatternFormat().getForeColor().setColor(darkOrange);
    portion.getPortionFormat().getFillFormat().getPatternFormat().getBackColor().setColor(java.getStaticFieldValue("java.awt.Color", "WHITE"));
    portion.getPortionFormat().getFillFormat().getPatternFormat().setPatternStyle(java.newByte(aspose.slides.PatternStyle.SmallGrid));

    portion.getPortionFormat().getLineFormat().setWidth(1);
    portion.getPortionFormat().getLineFormat().getFillFormat().setFillType(java.newByte(aspose.slides.FillType.Solid));
    portion.getPortionFormat().getLineFormat().getFillFormat().getSolidFillColor().setColor(java.getStaticFieldValue("java.awt.Color", "BLACK"));
} finally {
    presentation.dispose();
}
結果のテキスト:
その他の WordArt エフェクトを適用する
以下の例では、テキストに影、反射、グロー、変形、3D エフェクトを適用する方法を示します。
外側の影エフェクトを適用する
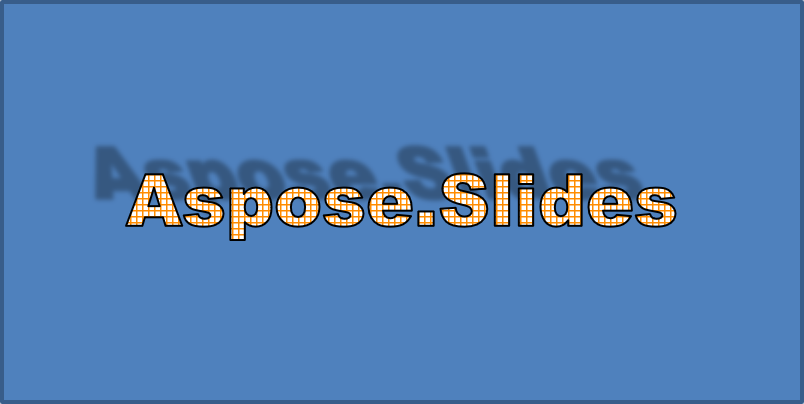
外側の影は、テキストの背後に影を配置して奥行きを追加します。その色、方向、距離、ぼかし半径、スケール、歪みをカスタマイズできます。
この例では enableOuterShadowEffect を呼び出し、ぼかし半径 4 ポイント、方向 230 度、距離 30 ポイントの黒い影を設定します。スケール値 100 は影のサイズを維持し、水平歪みで 20 度傾けます。アルファ変換で不透明度を 32% に設定します:
const aspose = { slides: require("aspose.slides.via.java") };
const java = require("java");

const presentation = new aspose.slides.Presentation();
try {
    const slide = presentation.getSlides().get_Item(0);

    const autoShape = slide.getShapes().addAutoShape(aspose.slides.ShapeType.Rectangle, 20, 20, 400, 200);

    const portion = autoShape.getTextFrame().getParagraphs().get_Item(0).getPortions().get_Item(0);
    portion.setText("Aspose.Slides");
    const font = new aspose.slides.FontData("Arial Black");
    portion.getPortionFormat().setLatinFont(font);
    portion.getPortionFormat().setFontHeight(36);

    portion.getPortionFormat().getEffectFormat().enableOuterShadowEffect();
    portion.getPortionFormat().getEffectFormat().getOuterShadowEffect().getShadowColor().setColor(java.getStaticFieldValue("java.awt.Color", "BLACK"));
    portion.getPortionFormat().getEffectFormat().getOuterShadowEffect().setScaleHorizontal(100);
    portion.getPortionFormat().getEffectFormat().getOuterShadowEffect().setScaleVertical(100);
    portion.getPortionFormat().getEffectFormat().getOuterShadowEffect().setBlurRadius(4);
    portion.getPortionFormat().getEffectFormat().getOuterShadowEffect().setDirection(230);
    portion.getPortionFormat().getEffectFormat().getOuterShadowEffect().setDistance(30);
    portion.getPortionFormat().getEffectFormat().getOuterShadowEffect().setSkewHorizontal(20);
    portion.getPortionFormat().getEffectFormat().getOuterShadowEffect().setSkewVertical(0);
    portion.getPortionFormat().getEffectFormat().getOuterShadowEffect().getShadowColor().getColorTransform().add(aspose.slides.ColorTransformOperation.SetAlpha, java.newFloat(0.32));
} finally {
    presentation.dispose();
}
結果のテキスト:
Note
- 外側の影とプリセットの影を同時に使用すると、外側の影のみが適用されます。
- 外側の影と内側の影を同時に使用した場合、効果は PowerPoint のバージョンに依存します。たとえば、PowerPoint 2013 では効果が2倍になり、PowerPoint 2007 では外側の影のみが適用されます。
反射エフェクトを適用する
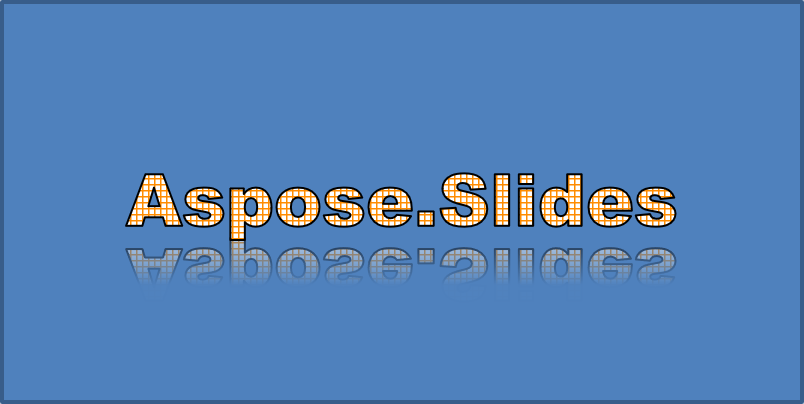
反射はテキストの鏡像コピーを作成します。位置、スケール、ぼかし、透明度を調整して見た目を制御します。
この例では enableReflectionEffect を呼び出し、スケール -100% で反射を垂直に反転させます。ぼかし半径 0.5 ポイント、距離 4.72 ポイントを使用します。透明度は、反射の位置 0% から 60% の間で 60% から 0.9% へと減少します:
const aspose = { slides: require("aspose.slides.via.java") };
const java = require("java");

const presentation = new aspose.slides.Presentation();
try {
    const slide = presentation.getSlides().get_Item(0);

    const autoShape = slide.getShapes().addAutoShape(aspose.slides.ShapeType.Rectangle, 20, 20, 400, 200);

    const portion = autoShape.getTextFrame().getParagraphs().get_Item(0).getPortions().get_Item(0);
    portion.setText("Aspose.Slides");
    const font = new aspose.slides.FontData("Arial Black");
    portion.getPortionFormat().setLatinFont(font);
    portion.getPortionFormat().setFontHeight(36);

    portion.getPortionFormat().getEffectFormat().enableReflectionEffect();
    portion.getPortionFormat().getEffectFormat().getReflectionEffect().setBlurRadius(0.5);
    portion.getPortionFormat().getEffectFormat().getReflectionEffect().setDistance(4.72);
    portion.getPortionFormat().getEffectFormat().getReflectionEffect().setStartPosAlpha(java.newFloat(0));
    portion.getPortionFormat().getEffectFormat().getReflectionEffect().setEndPosAlpha(java.newFloat(60));
    portion.getPortionFormat().getEffectFormat().getReflectionEffect().setDirection(90);
    portion.getPortionFormat().getEffectFormat().getReflectionEffect().setScaleHorizontal(100);
    portion.getPortionFormat().getEffectFormat().getReflectionEffect().setScaleVertical(-100);
    portion.getPortionFormat().getEffectFormat().getReflectionEffect().setStartReflectionOpacity(java.newFloat(60));
    portion.getPortionFormat().getEffectFormat().getReflectionEffect().setEndReflectionOpacity(java.newFloat(0.9));
    portion.getPortionFormat().getEffectFormat().getReflectionEffect().setRectangleAlign(java.newByte(aspose.slides.RectangleAlignment.BottomLeft));
} finally {
    presentation.dispose();
}
結果のテキスト:
グローエフェクトを適用する
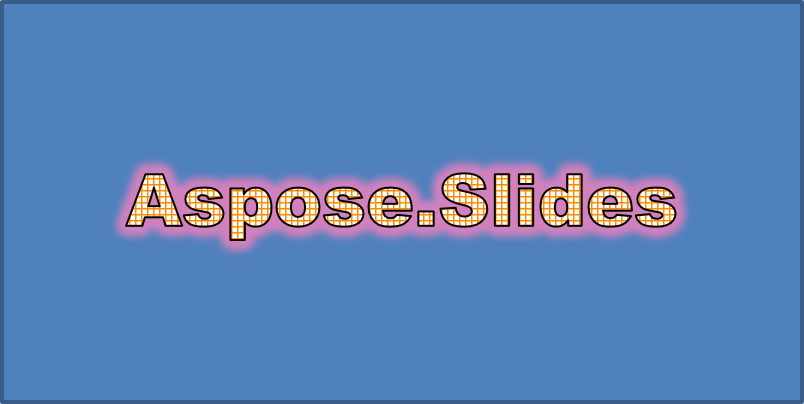
グローはテキストの周囲に柔らかい色のアウトラインを付加します。色、透明度、半径を調整して効果を制御します。
この例では enableGlowEffect を呼び出し、透明度 54%、半径 7 ポイントの赤いグローを適用します:
const aspose = { slides: require("aspose.slides.via.java") };
const java = require("java");

const presentation = new aspose.slides.Presentation();
try {
    const slide = presentation.getSlides().get_Item(0);

    const autoShape = slide.getShapes().addAutoShape(aspose.slides.ShapeType.Rectangle, 20, 20, 400, 200);

    const portion = autoShape.getTextFrame().getParagraphs().get_Item(0).getPortions().get_Item(0);
    portion.setText("Aspose.Slides");
    const font = new aspose.slides.FontData("Arial Black");
    portion.getPortionFormat().setLatinFont(font);
    portion.getPortionFormat().setFontHeight(36);

    portion.getPortionFormat().getEffectFormat().enableGlowEffect();
    portion.getPortionFormat().getEffectFormat().getGlowEffect().getColor().setColor(java.getStaticFieldValue("java.awt.Color", "RED"));
    portion.getPortionFormat().getEffectFormat().getGlowEffect().getColor().getColorTransform().add(aspose.slides.ColorTransformOperation.SetAlpha, java.newFloat(0.54));
    portion.getPortionFormat().getEffectFormat().getGlowEffect().setRadius(7);
} finally {
    presentation.dispose();
}
結果のテキスト:
WordArt 変形を適用する
WordArt の変形は、テキストブロックを曲げ、伸ばし、またはゆがめます。
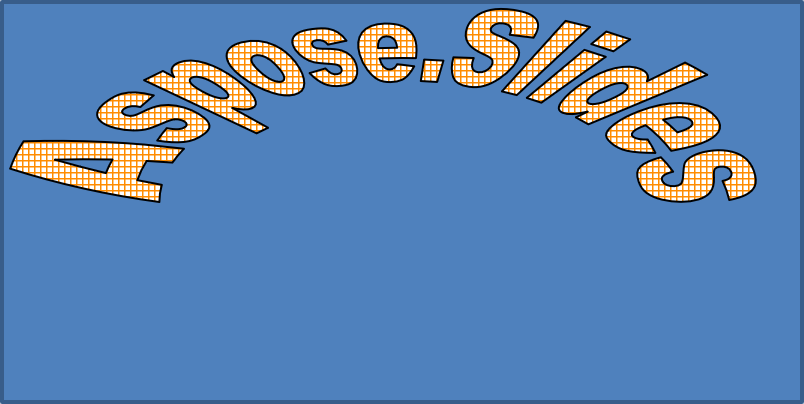
setTransform を ArchUpPour に設定して、テキストフレーム全体を上向きに曲げます:
const aspose = { slides: require("aspose.slides.via.java") };
const java = require("java");

const presentation = new aspose.slides.Presentation();
try {
    const slide = presentation.getSlides().get_Item(0);

    const autoShape = slide.getShapes().addAutoShape(aspose.slides.ShapeType.Rectangle, 20, 20, 400, 200);

    const textFrame = autoShape.getTextFrame();
    textFrame.setText("Aspose.Slides");
    textFrame.getTextFrameFormat().setTransform(java.newByte(aspose.slides.TextShapeType.ArchUpPour));
} finally {
    presentation.dispose();
}
結果のテキスト:
Note
Aspose.Slides for Node.js via Java は、事前定義された transformation types のセットを提供します。シェイプとテキストに 3D エフェクトを適用する
シェイプまたはそのテキストに 3D エフェクトを適用できます。ベベル、押し出し、照明、カメラ設定が最終的な外観を制御します。
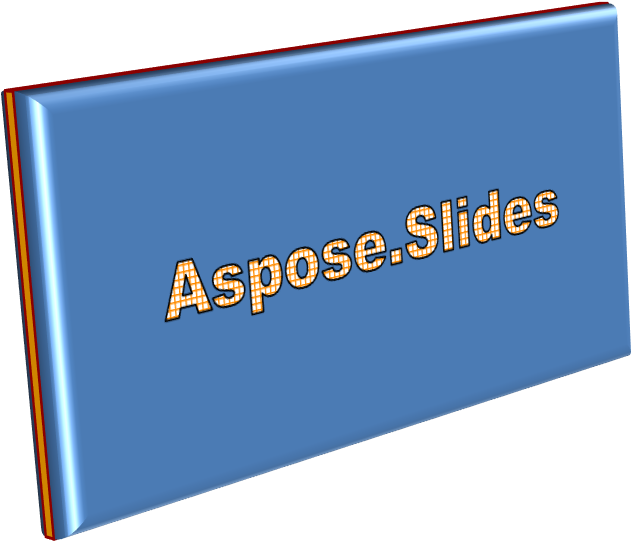
以下の例では ThreeDFormat を使用して、長方形に円形ベベル、オレンジ色の押し出し、暗赤色の輪郭を追加します。ベベルの寸法、押し出し高さ、輪郭幅、奥行きはポイント単位で測定されます。プラスチック素材、Z 軸周りに 40 度回転したバランスの取れた照明、透視カメラが外観を定義します:
const aspose = { slides: require("aspose.slides.via.java") };
const java = require("java");

const presentation = new aspose.slides.Presentation();
try {
    const slide = presentation.getSlides().get_Item(0);

    const autoShape = slide.getShapes().addAutoShape(aspose.slides.ShapeType.Rectangle, 20, 20, 400, 200);
    autoShape.getTextFrame().setText("Aspose.Slides");

    autoShape.getThreeDFormat().getBevelBottom().setBevelType(aspose.slides.BevelPresetType.Circle);
    autoShape.getThreeDFormat().getBevelBottom().setHeight(10.5);
    autoShape.getThreeDFormat().getBevelBottom().setWidth(10.5);

    autoShape.getThreeDFormat().getBevelTop().setBevelType(aspose.slides.BevelPresetType.Circle);
    autoShape.getThreeDFormat().getBevelTop().setHeight(12.5);
    autoShape.getThreeDFormat().getBevelTop().setWidth(11);

    const orange = java.newInstanceSync("java.awt.Color", 255, 165, 0);
    autoShape.getThreeDFormat().getExtrusionColor().setColor(orange);
    autoShape.getThreeDFormat().setExtrusionHeight(6);

    const darkRed = java.newInstanceSync("java.awt.Color", 139, 0, 0);
    autoShape.getThreeDFormat().getContourColor().setColor(darkRed);
    autoShape.getThreeDFormat().setContourWidth(1.5);

    autoShape.getThreeDFormat().setDepth(3);

    autoShape.getThreeDFormat().setMaterial(aspose.slides.MaterialPresetType.Plastic);

    autoShape.getThreeDFormat().getLightRig().setDirection(aspose.slides.LightingDirection.Top);
    autoShape.getThreeDFormat().getLightRig().setLightType(aspose.slides.LightRigPresetType.Balanced);
    autoShape.getThreeDFormat().getLightRig().setRotation(0, 0, 40);

    autoShape.getThreeDFormat().getCamera().setCameraType(aspose.slides.CameraPresetType.PerspectiveContrastingRightFacing);
} finally {
    presentation.dispose();
}
結果のシェイプ:
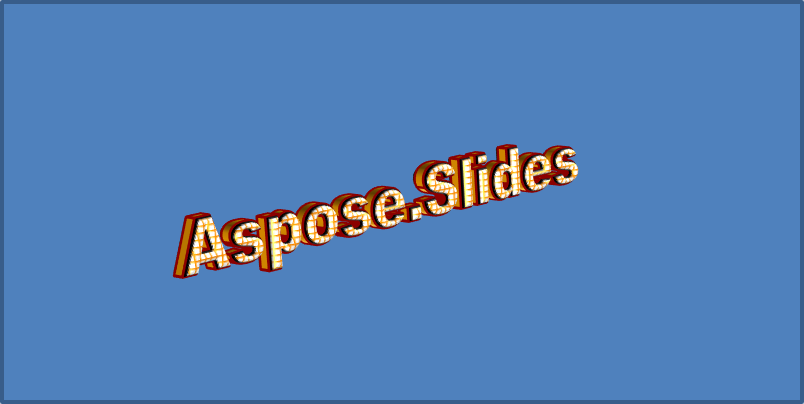
この例では TextFrameFormat.getThreeDFormat を使用してテキストにも同様の 3D 書式設定を適用します。小さなベベルが文字のエッジを形作り、押し出しと照明がテキストに奥行きを与えます:
const aspose = { slides: require("aspose.slides.via.java") };
const java = require("java");

const presentation = new aspose.slides.Presentation();
try {
    const slide = presentation.getSlides().get_Item(0);

    const autoShape = slide.getShapes().addAutoShape(aspose.slides.ShapeType.Rectangle, 20, 20, 400, 200);
    const textFrame = autoShape.getTextFrame();
    textFrame.setText("Aspose.Slides");

    textFrame.getTextFrameFormat().getThreeDFormat().getBevelBottom().setBevelType(aspose.slides.BevelPresetType.Circle);
    textFrame.getTextFrameFormat().getThreeDFormat().getBevelBottom().setHeight(3.5);
    textFrame.getTextFrameFormat().getThreeDFormat().getBevelBottom().setWidth(3.5);

    textFrame.getTextFrameFormat().getThreeDFormat().getBevelTop().setBevelType(aspose.slides.BevelPresetType.Circle);
    textFrame.getTextFrameFormat().getThreeDFormat().getBevelTop().setHeight(4);
    textFrame.getTextFrameFormat().getThreeDFormat().getBevelTop().setWidth(4);

    const orange = java.newInstanceSync("java.awt.Color", 255, 165, 0);
    textFrame.getTextFrameFormat().getThreeDFormat().getExtrusionColor().setColor(orange);
    textFrame.getTextFrameFormat().getThreeDFormat().setExtrusionHeight(6);

    const darkRed = java.newInstanceSync("java.awt.Color", 139, 0, 0);
    textFrame.getTextFrameFormat().getThreeDFormat().getContourColor().setColor(darkRed);
    textFrame.getTextFrameFormat().getThreeDFormat().setContourWidth(1.5);

    textFrame.getTextFrameFormat().getThreeDFormat().setDepth(3);

    textFrame.getTextFrameFormat().getThreeDFormat().setMaterial(aspose.slides.MaterialPresetType.Plastic);

    textFrame.getTextFrameFormat().getThreeDFormat().getLightRig().setDirection(aspose.slides.LightingDirection.Top);
    textFrame.getTextFrameFormat().getThreeDFormat().getLightRig().setLightType(aspose.slides.LightRigPresetType.Balanced);
    textFrame.getTextFrameFormat().getThreeDFormat().getLightRig().setRotation(0, 0, 40);

    textFrame.getTextFrameFormat().getThreeDFormat().getCamera().setCameraType(aspose.slides.CameraPresetType.PerspectiveContrastingRightFacing);
} finally {
    presentation.dispose();
}
結果のテキスト:
Note
テキストまたはシェイプへの 3D エフェクトの適用と、これらのエフェクト間の相互作用は、特定のルールによって管理されます。テキストとそれを含むシェイプの両方が関与するシーンを考えてみましょう。3D エフェクトはオブジェクトの 3D 表現と、配置されるシーンを含みます。
- シェイプとテキストの両方にシーンが設定されている場合、シェイプのシーンが優先され、テキストのシーンは無視されます。
- シェイプに独自のシーンがなく、3D 表現だけがある場合、テキストのシーンが使用されます。
- シェイプに 3D エフェクトが全くない場合、フラットとして扱われ、3D エフェクトはテキストにのみ適用されます。
これらの動作は ThreeDFormat.getLightRig および ThreeDFormat.getCamera メソッドに関連しています。
テキストをフラットかつ読みやすく保ちつつ、シェイプの 3D 書式設定を維持するには、Keep Text Flat on a 3D Shape を参照して、両方の設定の比較と完全な JavaScript サンプルをご覧ください。
FAQ
異なるフォントやスクリプト(例:アラビア語、中国語)で WordArt エフェクトを使用できますか?
はい、Aspose.Slides for Node.js via Java は Unicode をサポートしており、すべての主要なフォントとスクリプトで動作します。影、塗りつぶし、アウトラインなどの WordArt エフェクトは言語に関係なく適用できますが、フォントの可用性やレンダリングはシステムフォントに依存する場合があります。
スライドマスターの要素に WordArt エフェクトを適用できますか?
はい、マスタースライド上のシェイプ(タイトルプレースホルダー、フッター、背景テキストなど)に WordArt エフェクトを適用できます。マスターのレイアウトを変更すると、関連付けられたすべてのスライドに反映されます。
WordArt エフェクトはプレゼンテーションのファイルサイズに影響しますか?
やや影響します。影、グロー、グラデーション塗りつぶしなどの WordArt エフェクトは、追加の書式設定メタデータを伴うためファイルサイズが若干増加することがありますが、差は通常は無視できる程度です。
プレゼンテーションを保存せずに WordArt エフェクトの結果をプレビューできますか?
はい、Slide.getImage を使用して WordArt を含むスライドを画像(例:PNG、JPEG)としてレンダリングしたり、Shape.getImage で個々のシェイプを画像としてレンダリングしたりできます。これにより、プレゼンテーション全体を保存またはエクスポートする前に、メモリ上または画面上で結果をプレビューできます。