
在 Node.js 中建立並套用 WordArt 效果
概述
WordArt 效果讓您可以使用填充、輪廓、陰影、反射、發光、變形和 3D 格式化來設計文字。本文說明如何在未安裝 Microsoft Office 的情況下,使用 Aspose.Slides for Node.js via Java 在 PowerPoint 簡報中建立和自訂這些效果。
建立簡易 WordArt 範本並套用至文字
以下示例透過設定文字、字型、圖樣填充與輪廓來建立簡易的 WordArt 風格。
每個示例都會建立新的簡報,並在第一張投影片上加入一個矩形;不需要輸入檔案。第一個示例將文字設定為「Aspose.Slides」。形狀的位置和尺寸以點為單位測量:
const aspose = { slides: require("aspose.slides.via.java") };

const presentation = new aspose.slides.Presentation();
try {
    const slide = presentation.getSlides().get_Item(0);

    const autoShape = slide.getShapes().addAutoShape(aspose.slides.ShapeType.Rectangle, 20, 20, 400, 200);
    const textFrame = autoShape.getTextFrame();

    const portion = textFrame.getParagraphs().get_Item(0).getPortions().get_Item(0);
    portion.setText("Aspose.Slides");
} finally {
    presentation.dispose();
}
將字型設定為 36 點的 Arial Black,使格式更為顯著:
const aspose = { slides: require("aspose.slides.via.java") };

const presentation = new aspose.slides.Presentation();
try {
    const slide = presentation.getSlides().get_Item(0);

    const autoShape = slide.getShapes().addAutoShape(aspose.slides.ShapeType.Rectangle, 20, 20, 400, 200);

    const portion = autoShape.getTextFrame().getParagraphs().get_Item(0).getPortions().get_Item(0);
    portion.setText("Aspose.Slides");
    const font = new aspose.slides.FontData("Arial Black");
    portion.getPortionFormat().setLatinFont(font);
    portion.getPortionFormat().setFontHeight(36);
} finally {
    presentation.dispose();
}
套用 SmallGrid 圖樣,前景為深橙色、背景為白色,然後加入寬度為 1 點的黑色文字輪廓:
const aspose = { slides: require("aspose.slides.via.java") };
const java = require("java");

const presentation = new aspose.slides.Presentation();
try {
    const slide = presentation.getSlides().get_Item(0);

    const autoShape = slide.getShapes().addAutoShape(aspose.slides.ShapeType.Rectangle, 20, 20, 400, 200);

    const portion = autoShape.getTextFrame().getParagraphs().get_Item(0).getPortions().get_Item(0);
    portion.setText("Aspose.Slides");
    const font = new aspose.slides.FontData("Arial Black");
    portion.getPortionFormat().setLatinFont(font);
    portion.getPortionFormat().setFontHeight(36);

    portion.getPortionFormat().getFillFormat().setFillType(java.newByte(aspose.slides.FillType.Pattern));
    const darkOrange = java.newInstanceSync("java.awt.Color", 255, 140, 0);
    portion.getPortionFormat().getFillFormat().getPatternFormat().getForeColor().setColor(darkOrange);
    portion.getPortionFormat().getFillFormat().getPatternFormat().getBackColor().setColor(java.getStaticFieldValue("java.awt.Color", "WHITE"));
    portion.getPortionFormat().getFillFormat().getPatternFormat().setPatternStyle(java.newByte(aspose.slides.PatternStyle.SmallGrid));

    portion.getPortionFormat().getLineFormat().setWidth(1);
    portion.getPortionFormat().getLineFormat().getFillFormat().setFillType(java.newByte(aspose.slides.FillType.Solid));
    portion.getPortionFormat().getLineFormat().getFillFormat().getSolidFillColor().setColor(java.getStaticFieldValue("java.awt.Color", "BLACK"));
} finally {
    presentation.dispose();
}
產生的文字:

套用其他 WordArt 效果
以下示例示範如何將陰影、反射、發光、變形與 3D 效果套用到文字上。
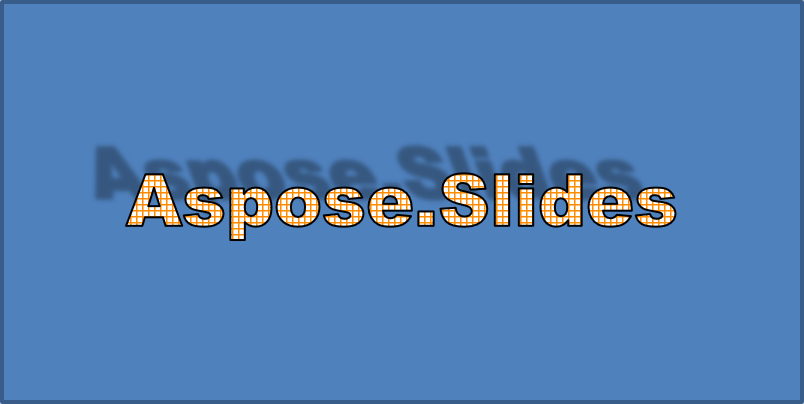
套用外部陰影效果
外部陰影透過在文字後方放置陰影來增添深度。您可以自訂其顏色、方向、距離、模糊半徑、比例與斜切。
此示例呼叫 enableOuterShadowEffect 並設定為黑色陰影,模糊半徑 4 點、方向 230 度、距離 30 點。比例值 100 保持陰影大小,水平斜切將其傾斜 20 度。Alpha 變換將其不透明度設定為 32%:
const aspose = { slides: require("aspose.slides.via.java") };
const java = require("java");

const presentation = new aspose.slides.Presentation();
try {
    const slide = presentation.getSlides().get_Item(0);

    const autoShape = slide.getShapes().addAutoShape(aspose.slides.ShapeType.Rectangle, 20, 20, 400, 200);

    const portion = autoShape.getTextFrame().getParagraphs().get_Item(0).getPortions().get_Item(0);
    portion.setText("Aspose.Slides");
    const font = new aspose.slides.FontData("Arial Black");
    portion.getPortionFormat().setLatinFont(font);
    portion.getPortionFormat().setFontHeight(36);

    portion.getPortionFormat().getEffectFormat().enableOuterShadowEffect();
    portion.getPortionFormat().getEffectFormat().getOuterShadowEffect().getShadowColor().setColor(java.getStaticFieldValue("java.awt.Color", "BLACK"));
    portion.getPortionFormat().getEffectFormat().getOuterShadowEffect().setScaleHorizontal(100);
    portion.getPortionFormat().getEffectFormat().getOuterShadowEffect().setScaleVertical(100);
    portion.getPortionFormat().getEffectFormat().getOuterShadowEffect().setBlurRadius(4);
    portion.getPortionFormat().getEffectFormat().getOuterShadowEffect().setDirection(230);
    portion.getPortionFormat().getEffectFormat().getOuterShadowEffect().setDistance(30);
    portion.getPortionFormat().getEffectFormat().getOuterShadowEffect().setSkewHorizontal(20);
    portion.getPortionFormat().getEffectFormat().getOuterShadowEffect().setSkewVertical(0);
    portion.getPortionFormat().getEffectFormat().getOuterShadowEffect().getShadowColor().getColorTransform().add(aspose.slides.ColorTransformOperation.SetAlpha, java.newFloat(0.32));
} finally {
    presentation.dispose();
}
產生的文字:
Note
- 同時使用外部陰影和預設陰影時,只會套用外部陰影。
- 若同時使用外部陰影與內部陰影,最終效果取決於 PowerPoint 版本。例如,在 PowerPoint 2013 中,效果會加倍;而在 PowerPoint 2007 中,僅套用外部陰影。
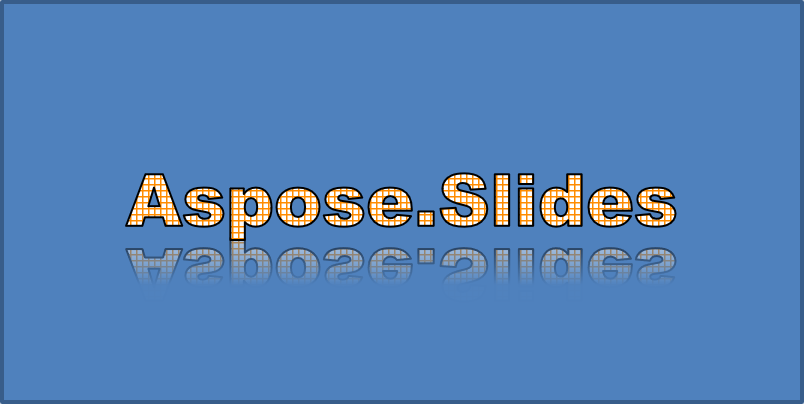
套用反射效果
反射會產生文字的鏡像副本。調整其位置、比例、模糊與不透明度即可控制外觀。
此示例呼叫 enableReflectionEffect 並以 -100% 的比例垂直翻轉反射。使用 0.5 點的模糊半徑和 4.72 點的距離。沿反射的 0% 至 60% 位置,不透明度由 60% 降至 0.9%:
const aspose = { slides: require("aspose.slides.via.java") };
const java = require("java");

const presentation = new aspose.slides.Presentation();
try {
    const slide = presentation.getSlides().get_Item(0);

    const autoShape = slide.getShapes().addAutoShape(aspose.slides.ShapeType.Rectangle, 20, 20, 400, 200);

    const portion = autoShape.getTextFrame().getParagraphs().get_Item(0).getPortions().get_Item(0);
    portion.setText("Aspose.Slides");
    const font = new aspose.slides.FontData("Arial Black");
    portion.getPortionFormat().setLatinFont(font);
    portion.getPortionFormat().setFontHeight(36);

    portion.getPortionFormat().getEffectFormat().enableReflectionEffect();
    portion.getPortionFormat().getEffectFormat().getReflectionEffect().setBlurRadius(0.5);
    portion.getPortionFormat().getEffectFormat().getReflectionEffect().setDistance(4.72);
    portion.getPortionFormat().getEffectFormat().getReflectionEffect().setStartPosAlpha(java.newFloat(0));
    portion.getPortionFormat().getEffectFormat().getReflectionEffect().setEndPosAlpha(java.newFloat(60));
    portion.getPortionFormat().getEffectFormat().getReflectionEffect().setDirection(90);
    portion.getPortionFormat().getEffectFormat().getReflectionEffect().setScaleHorizontal(100);
    portion.getPortionFormat().getEffectFormat().getReflectionEffect().setScaleVertical(-100);
    portion.getPortionFormat().getEffectFormat().getReflectionEffect().setStartReflectionOpacity(java.newFloat(60));
    portion.getPortionFormat().getEffectFormat().getReflectionEffect().setEndReflectionOpacity(java.newFloat(0.9));
    portion.getPortionFormat().getEffectFormat().getReflectionEffect().setRectangleAlign(java.newByte(aspose.slides.RectangleAlignment.BottomLeft));
} finally {
    presentation.dispose();
}
產生的文字:
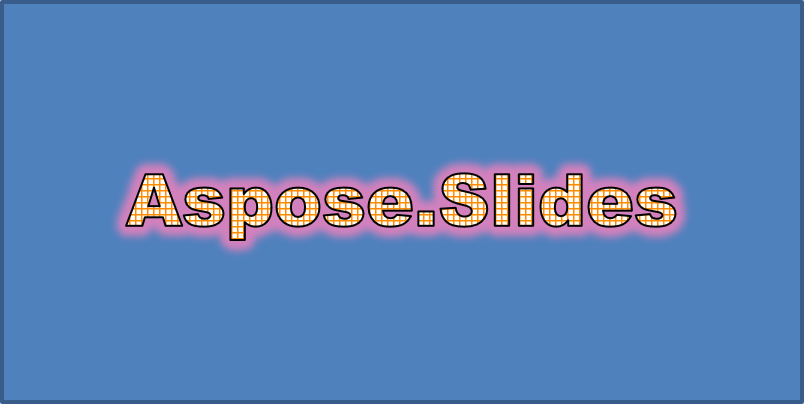
套用發光效果
發光會在文字周圍添加柔和的彩色輪廓。調整其顏色、不透明度與半徑即可控制效果。
此示例呼叫 enableGlowEffect 並套用 54% 不透明度、半徑 7 點的紅色發光:
const aspose = { slides: require("aspose.slides.via.java") };
const java = require("java");

const presentation = new aspose.slides.Presentation();
try {
    const slide = presentation.getSlides().get_Item(0);

    const autoShape = slide.getShapes().addAutoShape(aspose.slides.ShapeType.Rectangle, 20, 20, 400, 200);

    const portion = autoShape.getTextFrame().getParagraphs().get_Item(0).getPortions().get_Item(0);
    portion.setText("Aspose.Slides");
    const font = new aspose.slides.FontData("Arial Black");
    portion.getPortionFormat().setLatinFont(font);
    portion.getPortionFormat().setFontHeight(36);

    portion.getPortionFormat().getEffectFormat().enableGlowEffect();
    portion.getPortionFormat().getEffectFormat().getGlowEffect().getColor().setColor(java.getStaticFieldValue("java.awt.Color", "RED"));
    portion.getPortionFormat().getEffectFormat().getGlowEffect().getColor().getColorTransform().add(aspose.slides.ColorTransformOperation.SetAlpha, java.newFloat(0.54));
    portion.getPortionFormat().getEffectFormat().getGlowEffect().setRadius(7);
} finally {
    presentation.dispose();
}
產生的文字:
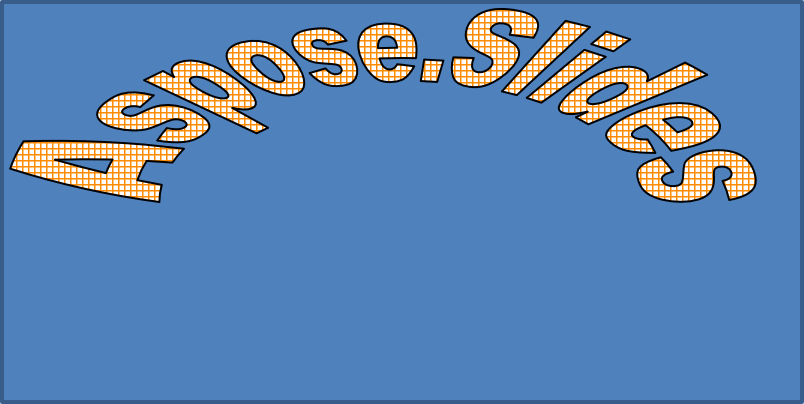
套用 WordArt 變形
WordArt 變形會彎曲、伸展或扭曲文字區塊。
將 setTransform 設為 ArchUpPour 可將整個文字框向上彎曲:
const aspose = { slides: require("aspose.slides.via.java") };
const java = require("java");

const presentation = new aspose.slides.Presentation();
try {
    const slide = presentation.getSlides().get_Item(0);

    const autoShape = slide.getShapes().addAutoShape(aspose.slides.ShapeType.Rectangle, 20, 20, 400, 200);

    const textFrame = autoShape.getTextFrame();
    textFrame.setText("Aspose.Slides");
    textFrame.getTextFrameFormat().setTransform(java.newByte(aspose.slides.TextShapeType.ArchUpPour));
} finally {
    presentation.dispose();
}
產生的文字:
Note
Aspose.Slides for Node.js via Java 提供一組預定義的 transformation types。套用 3D 效果至形狀與文字
您可以將 3D 效果套用於形狀或其文字上。斜角、擠壓、光源與相機設定會影響最終外觀。
以下示例使用 ThreeDFormat 為矩形加入圓形斜角、橙色擠壓以及深紅色輪廓。斜角尺寸、擠壓高度、輪廓寬度與深度皆以點為單位。塑料材質、繞 Z 軸旋轉 40 度的均衡光源,以及透視相機決定其外觀:
const aspose = { slides: require("aspose.slides.via.java") };
const java = require("java");

const presentation = new aspose.slides.Presentation();
try {
    const slide = presentation.getSlides().get_Item(0);

    const autoShape = slide.getShapes().addAutoShape(aspose.slides.ShapeType.Rectangle, 20, 20, 400, 200);
    autoShape.getTextFrame().setText("Aspose.Slides");

    autoShape.getThreeDFormat().getBevelBottom().setBevelType(aspose.slides.BevelPresetType.Circle);
    autoShape.getThreeDFormat().getBevelBottom().setHeight(10.5);
    autoShape.getThreeDFormat().getBevelBottom().setWidth(10.5);

    autoShape.getThreeDFormat().getBevelTop().setBevelType(aspose.slides.BevelPresetType.Circle);
    autoShape.getThreeDFormat().getBevelTop().setHeight(12.5);
    autoShape.getThreeDFormat().getBevelTop().setWidth(11);

    const orange = java.newInstanceSync("java.awt.Color", 255, 165, 0);
    autoShape.getThreeDFormat().getExtrusionColor().setColor(orange);
    autoShape.getThreeDFormat().setExtrusionHeight(6);

    const darkRed = java.newInstanceSync("java.awt.Color", 139, 0, 0);
    autoShape.getThreeDFormat().getContourColor().setColor(darkRed);
    autoShape.getThreeDFormat().setContourWidth(1.5);

    autoShape.getThreeDFormat().setDepth(3);

    autoShape.getThreeDFormat().setMaterial(aspose.slides.MaterialPresetType.Plastic);

    autoShape.getThreeDFormat().getLightRig().setDirection(aspose.slides.LightingDirection.Top);
    autoShape.getThreeDFormat().getLightRig().setLightType(aspose.slides.LightRigPresetType.Balanced);
    autoShape.getThreeDFormat().getLightRig().setRotation(0, 0, 40);

    autoShape.getThreeDFormat().getCamera().setCameraType(aspose.slides.CameraPresetType.PerspectiveContrastingRightFacing);
} finally {
    presentation.dispose();
}
產生的形狀:
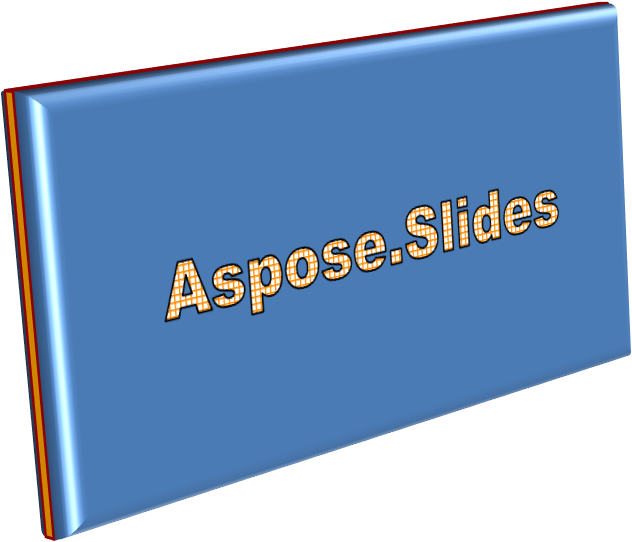
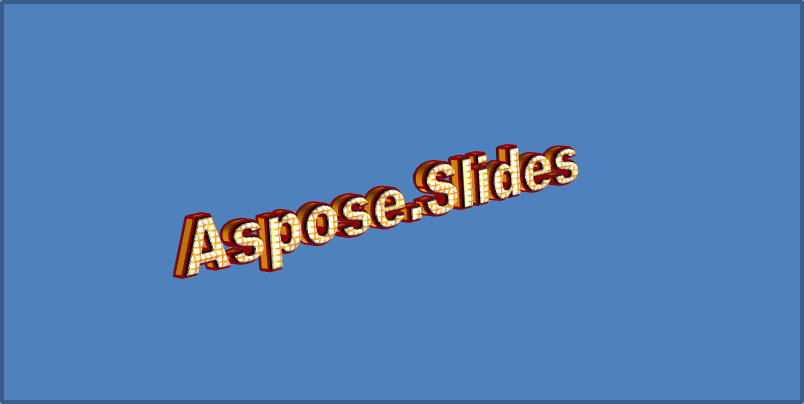
此示例透過 TextFrameFormat.getThreeDFormat 為文字套用類似的 3D 格式。較小的斜角塑造字母邊緣,擠壓與光源則為文字增添深度:
const aspose = { slides: require("aspose.slides.via.java") };
const java = require("java");

const presentation = new aspose.slides.Presentation();
try {
    const slide = presentation.getSlides().get_Item(0);

    const autoShape = slide.getShapes().addAutoShape(aspose.slides.ShapeType.Rectangle, 20, 20, 400, 200);
    const textFrame = autoShape.getTextFrame();
    textFrame.setText("Aspose.Slides");

    textFrame.getTextFrameFormat().getThreeDFormat().getBevelBottom().setBevelType(aspose.slides.BevelPresetType.Circle);
    textFrame.getTextFrameFormat().getThreeDFormat().getBevelBottom().setHeight(3.5);
    textFrame.getTextFrameFormat().getThreeDFormat().getBevelBottom().setWidth(3.5);

    textFrame.getTextFrameFormat().getThreeDFormat().getBevelTop().setBevelType(aspose.slides.BevelPresetType.Circle);
    textFrame.getTextFrameFormat().getThreeDFormat().getBevelTop().setHeight(4);
    textFrame.getTextFrameFormat().getThreeDFormat().getBevelTop().setWidth(4);

    const orange = java.newInstanceSync("java.awt.Color", 255, 165, 0);
    textFrame.getTextFrameFormat().getThreeDFormat().getExtrusionColor().setColor(orange);
    textFrame.getTextFrameFormat().getThreeDFormat().setExtrusionHeight(6);

    const darkRed = java.newInstanceSync("java.awt.Color", 139, 0, 0);
    textFrame.getTextFrameFormat().getThreeDFormat().getContourColor().setColor(darkRed);
    textFrame.getTextFrameFormat().getThreeDFormat().setContourWidth(1.5);

    textFrame.getTextFrameFormat().getThreeDFormat().setDepth(3);

    textFrame.getTextFrameFormat().getThreeDFormat().setMaterial(aspose.slides.MaterialPresetType.Plastic);

    textFrame.getTextFrameFormat().getThreeDFormat().getLightRig().setDirection(aspose.slides.LightingDirection.Top);
    textFrame.getTextFrameFormat().getThreeDFormat().getLightRig().setLightType(aspose.slides.LightRigPresetType.Balanced);
    textFrame.getTextFrameFormat().getThreeDFormat().getLightRig().setRotation(0, 0, 40);

    textFrame.getTextFrameFormat().getThreeDFormat().getCamera().setCameraType(aspose.slides.CameraPresetType.PerspectiveContrastingRightFacing);
} finally {
    presentation.dispose();
}
產生的文字:
Note
將 3D 效果套用於文字或其形狀──以及這些效果之間的相互作用──受特定規則管轄。請考慮同時包含文字與其所在形狀的場景。3D 效果包括物件的 3D 表現以及其所在的場景。
- 若同時為形狀與文字設定了場景,則以形狀的場景為優先,文字的場景會被忽略。
- 若形狀沒有自己的場景但具有 3D 表現,則使用文字的場景。
- 若形狀根本沒有 3D 效果,則視為平面,僅對文字套用 3D 效果。
這些行為與 ThreeDFormat.getLightRig 和 ThreeDFormat.getCamera 方法有關。
若要在保持文字平面且可讀的同時保留其形狀的 3D 格式,請參閱 Keep Text Flat on a 3D Shape 了解兩種設定的比較以及完整的 JavaScript 範例。
常見問題
我可以在不同字型或文字系統(例如阿拉伯文、中文)上使用 WordArt 效果嗎?
是的,Aspose.Slides for Node.js via Java 支援 Unicode,且可與所有主要字型與文字系統一起使用。無論語言為何,都可以套用如陰影、填充與輪廓等 WordArt 效果,不過字型的可用性與渲染可能取決於系統字型。
我可以將 WordArt 效果套用到投影片母片元素嗎?
是的,您可以將 WordArt 效果套用於母片投影片上的形狀,包括標題佔位符、頁腳或背景文字。對母片版面所做的變更會反映在所有相關的投影片上。
WordArt 效果會影響簡報檔案大小嗎?
會略有影響。陰影、發光與漸層填充等 WordArt 效果可能因新增的格式化中繼資料而略微增大檔案大小,但差異通常可忽略不計。
我可以在不儲存簡報的情況下預覽 WordArt 效果的結果嗎?
是的,您可以使用 Slide.getImage 將包含 WordArt 的投影片轉換為影像(例如 PNG、JPEG),或使用 Shape.getImage 轉換單一形狀。這樣即可在記憶體或螢幕上預覽結果,然後再決定是否儲存或匯出完整簡報。