
Tạo và Áp dụng Hiệu ứng WordArt trong Node.js
Tổng quan
Hiệu ứng WordArt cho phép bạn định dạng văn bản với các màu tô, đường viền, bóng, phản chiếu, ánh hào quang, biến đổi và định dạng 3D. Bài viết này giải thích cách tạo và tùy chỉnh các hiệu ứng này trong bản trình chiếu PowerPoint bằng cách sử dụng Aspose.Slides cho Node.js qua Java, mà không cần cài đặt Microsoft Office.
Tạo mẫu WordArt đơn giản và áp dụng vào văn bản
Các ví dụ dưới đây xây dựng một kiểu WordArt đơn giản bằng cách đặt văn bản, phông chữ, mẫu tô và đường viền.
Mỗi ví dụ tạo một bản trình chiếu mới và thêm một hình chữ nhật vào slide đầu tiên; không cần tệp đầu vào. Ví dụ đầu tiên đặt văn bản thành “Aspose.Slides”. Vị trí và kích thước của hình được đo bằng điểm:
const aspose = { slides: require("aspose.slides.via.java") };

const presentation = new aspose.slides.Presentation();
try {
    const slide = presentation.getSlides().get_Item(0);

    const autoShape = slide.getShapes().addAutoShape(aspose.slides.ShapeType.Rectangle, 20, 20, 400, 200);
    const textFrame = autoShape.getTextFrame();

    const portion = textFrame.getParagraphs().get_Item(0).getPortions().get_Item(0);
    portion.setText("Aspose.Slides");
} finally {
    presentation.dispose();
}
Đặt phông chữ thành Arial Black ở kích thước 36 điểm để làm cho định dạng dễ nhận thấy hơn:
const aspose = { slides: require("aspose.slides.via.java") };

const presentation = new aspose.slides.Presentation();
try {
    const slide = presentation.getSlides().get_Item(0);

    const autoShape = slide.getShapes().addAutoShape(aspose.slides.ShapeType.Rectangle, 20, 20, 400, 200);

    const portion = autoShape.getTextFrame().getParagraphs().get_Item(0).getPortions().get_Item(0);
    portion.setText("Aspose.Slides");
    const font = new aspose.slides.FontData("Arial Black");
    portion.getPortionFormat().setLatinFont(font);
    portion.getPortionFormat().setFontHeight(36);
} finally {
    presentation.dispose();
}
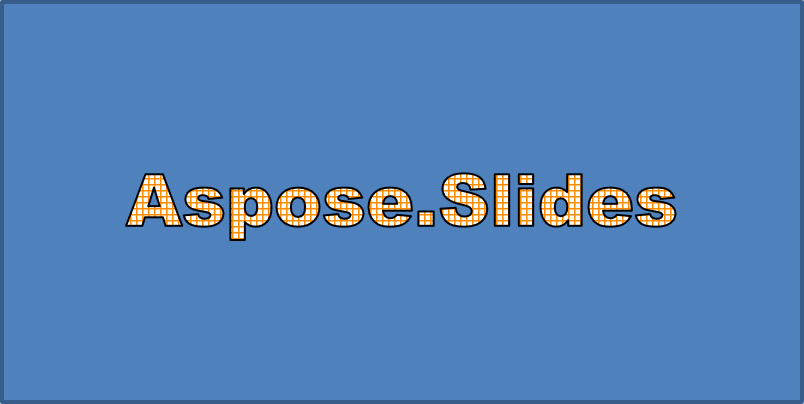
Áp dụng mẫu SmallGrid với màu nền phía trước màu cam đậm và nền trắng, sau đó thêm đường viền văn bản màu đen với độ rộng 1 điểm:
const aspose = { slides: require("aspose.slides.via.java") };
const java = require("java");

const presentation = new aspose.slides.Presentation();
try {
    const slide = presentation.getSlides().get_Item(0);

    const autoShape = slide.getShapes().addAutoShape(aspose.slides.ShapeType.Rectangle, 20, 20, 400, 200);

    const portion = autoShape.getTextFrame().getParagraphs().get_Item(0).getPortions().get_Item(0);
    portion.setText("Aspose.Slides");
    const font = new aspose.slides.FontData("Arial Black");
    portion.getPortionFormat().setLatinFont(font);
    portion.getPortionFormat().setFontHeight(36);

    portion.getPortionFormat().getFillFormat().setFillType(java.newByte(aspose.slides.FillType.Pattern));
    const darkOrange = java.newInstanceSync("java.awt.Color", 255, 140, 0);
    portion.getPortionFormat().getFillFormat().getPatternFormat().getForeColor().setColor(darkOrange);
    portion.getPortionFormat().getFillFormat().getPatternFormat().getBackColor().setColor(java.getStaticFieldValue("java.awt.Color", "WHITE"));
    portion.getPortionFormat().getFillFormat().getPatternFormat().setPatternStyle(java.newByte(aspose.slides.PatternStyle.SmallGrid));

    portion.getPortionFormat().getLineFormat().setWidth(1);
    portion.getPortionFormat().getLineFormat().getFillFormat().setFillType(java.newByte(aspose.slides.FillType.Solid));
    portion.getPortionFormat().getLineFormat().getFillFormat().getSolidFillColor().setColor(java.getStaticFieldValue("java.awt.Color", "BLACK"));
} finally {
    presentation.dispose();
}
Văn bản kết quả:
Áp dụng các hiệu ứng WordArt khác
Các ví dụ sau đây minh họa cách áp dụng bóng, phản chiếu, ánh hào quang, biến đổi và hiệu ứng 3D vào văn bản.
Áp dụng hiệu ứng bóng ngoài
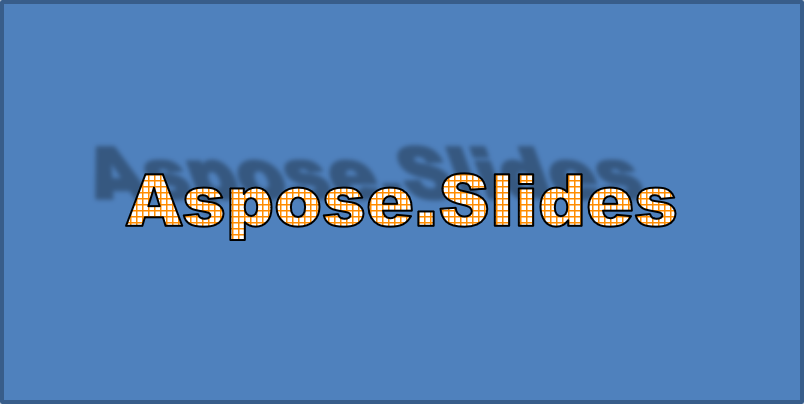
Bóng ngoài tăng độ sâu bằng cách đặt bóng phía sau văn bản. Bạn có thể tùy chỉnh màu, hướng, khoảng cách, bán kính làm mờ, tỉ lệ và độ nghiêng của nó.
Ví dụ này gọi enableOuterShadowEffect và đặt bóng màu đen với bán kính làm mờ 4 điểm, hướng 230 độ và khoảng cách 30 điểm. Giá trị tỉ lệ 100 giữ nguyên kích thước bóng, trong khi độ nghiêng ngang nghiêng bóng 20 độ. Biến đổi alpha đặt độ mờ của bóng ở mức 32%:
const aspose = { slides: require("aspose.slides.via.java") };
const java = require("java");

const presentation = new aspose.slides.Presentation();
try {
    const slide = presentation.getSlides().get_Item(0);

    const autoShape = slide.getShapes().addAutoShape(aspose.slides.ShapeType.Rectangle, 20, 20, 400, 200);

    const portion = autoShape.getTextFrame().getParagraphs().get_Item(0).getPortions().get_Item(0);
    portion.setText("Aspose.Slides");
    const font = new aspose.slides.FontData("Arial Black");
    portion.getPortionFormat().setLatinFont(font);
    portion.getPortionFormat().setFontHeight(36);

    portion.getPortionFormat().getEffectFormat().enableOuterShadowEffect();
    portion.getPortionFormat().getEffectFormat().getOuterShadowEffect().getShadowColor().setColor(java.getStaticFieldValue("java.awt.Color", "BLACK"));
    portion.getPortionFormat().getEffectFormat().getOuterShadowEffect().setScaleHorizontal(100);
    portion.getPortionFormat().getEffectFormat().getOuterShadowEffect().setScaleVertical(100);
    portion.getPortionFormat().getEffectFormat().getOuterShadowEffect().setBlurRadius(4);
    portion.getPortionFormat().getEffectFormat().getOuterShadowEffect().setDirection(230);
    portion.getPortionFormat().getEffectFormat().getOuterShadowEffect().setDistance(30);
    portion.getPortionFormat().getEffectFormat().getOuterShadowEffect().setSkewHorizontal(20);
    portion.getPortionFormat().getEffectFormat().getOuterShadowEffect().setSkewVertical(0);
    portion.getPortionFormat().getEffectFormat().getOuterShadowEffect().getShadowColor().getColorTransform().add(aspose.slides.ColorTransformOperation.SetAlpha, java.newFloat(0.32));
} finally {
    presentation.dispose();
}
Văn bản kết quả:
Note
- Khi bóng ngoài và bóng đặt sẵn được sử dụng cùng nhau, chỉ bóng ngoài được áp dụng.
- Nếu bóng ngoài và bóng trong được sử dụng đồng thời, hiệu ứng cuối cùng phụ thuộc vào phiên bản PowerPoint. Ví dụ, trong PowerPoint 2013, hiệu ứng được nhân đôi, trong khi trong PowerPoint 2007, chỉ bóng ngoài được áp dụng.
Áp dụng hiệu ứng phản chiếu
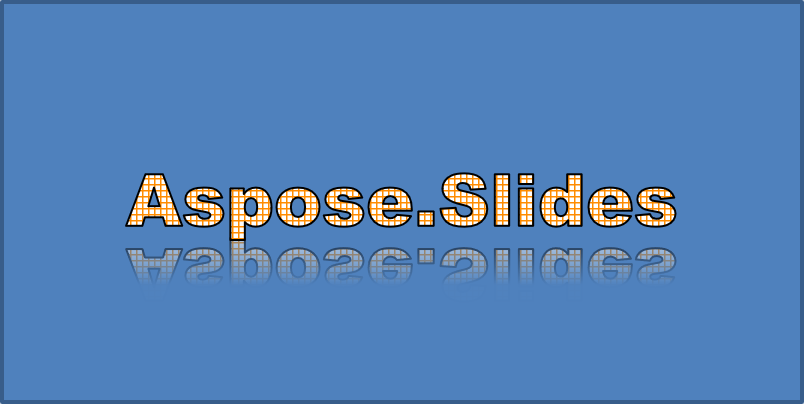
Phản chiếu tạo một bản sao gương của văn bản. Điều chỉnh vị trí, tỉ lệ, độ mờ và độ trong suốt để kiểm soát diện mạo của nó.
Ví dụ này gọi enableReflectionEffect và lật phản chiếu theo chiều dọc với tỉ lệ -100%. Nó sử dụng bán kính làm mờ 0.5 điểm và khoảng cách 4.72 điểm. Độ trong suốt giảm từ 60% xuống 0.9% giữa các vị trí 0% và 60% dọc theo phản chiếu:
const aspose = { slides: require("aspose.slides.via.java") };
const java = require("java");

const presentation = new aspose.slides.Presentation();
try {
    const slide = presentation.getSlides().get_Item(0);

    const autoShape = slide.getShapes().addAutoShape(aspose.slides.ShapeType.Rectangle, 20, 20, 400, 200);

    const portion = autoShape.getTextFrame().getParagraphs().get_Item(0).getPortions().get_Item(0);
    portion.setText("Aspose.Slides");
    const font = new aspose.slides.FontData("Arial Black");
    portion.getPortionFormat().setLatinFont(font);
    portion.getPortionFormat().setFontHeight(36);

    portion.getPortionFormat().getEffectFormat().enableReflectionEffect();
    portion.getPortionFormat().getEffectFormat().getReflectionEffect().setBlurRadius(0.5);
    portion.getPortionFormat().getEffectFormat().getReflectionEffect().setDistance(4.72);
    portion.getPortionFormat().getEffectFormat().getReflectionEffect().setStartPosAlpha(java.newFloat(0));
    portion.getPortionFormat().getEffectFormat().getReflectionEffect().setEndPosAlpha(java.newFloat(60));
    portion.getPortionFormat().getEffectFormat().getReflectionEffect().setDirection(90);
    portion.getPortionFormat().getEffectFormat().getReflectionEffect().setScaleHorizontal(100);
    portion.getPortionFormat().getEffectFormat().getReflectionEffect().setScaleVertical(-100);
    portion.getPortionFormat().getEffectFormat().getReflectionEffect().setStartReflectionOpacity(java.newFloat(60));
    portion.getPortionFormat().getEffectFormat().getReflectionEffect().setEndReflectionOpacity(java.newFloat(0.9));
    portion.getPortionFormat().getEffectFormat().getReflectionEffect().setRectangleAlign(java.newByte(aspose.slides.RectangleAlignment.BottomLeft));
} finally {
    presentation.dispose();
}
Văn bản kết quả:
Áp dụng hiệu ứng ánh hào quang
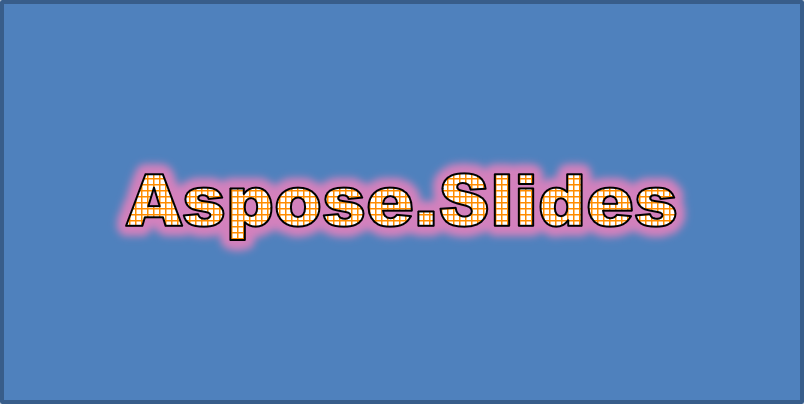
Ánh hào quang thêm một đường viền màu mịn xung quanh văn bản. Điều chỉnh màu, độ trong suốt và bán kính để kiểm soát hiệu ứng.
Ví dụ này gọi enableGlowEffect và áp dụng ánh hào quang màu đỏ với độ trong suốt 54% và bán kính 7 điểm:
const aspose = { slides: require("aspose.slides.via.java") };
const java = require("java");

const presentation = new aspose.slides.Presentation();
try {
    const slide = presentation.getSlides().get_Item(0);

    const autoShape = slide.getShapes().addAutoShape(aspose.slides.ShapeType.Rectangle, 20, 20, 400, 200);

    const portion = autoShape.getTextFrame().getParagraphs().get_Item(0).getPortions().get_Item(0);
    portion.setText("Aspose.Slides");
    const font = new aspose.slides.FontData("Arial Black");
    portion.getPortionFormat().setLatinFont(font);
    portion.getPortionFormat().setFontHeight(36);

    portion.getPortionFormat().getEffectFormat().enableGlowEffect();
    portion.getPortionFormat().getEffectFormat().getGlowEffect().getColor().setColor(java.getStaticFieldValue("java.awt.Color", "RED"));
    portion.getPortionFormat().getEffectFormat().getGlowEffect().getColor().getColorTransform().add(aspose.slides.ColorTransformOperation.SetAlpha, java.newFloat(0.54));
    portion.getPortionFormat().getEffectFormat().getGlowEffect().setRadius(7);
} finally {
    presentation.dispose();
}
Văn bản kết quả:
Áp dụng biến đổi WordArt
Biến đổi WordArt uốn, kéo dài hoặc biến dạng một khối văn bản.
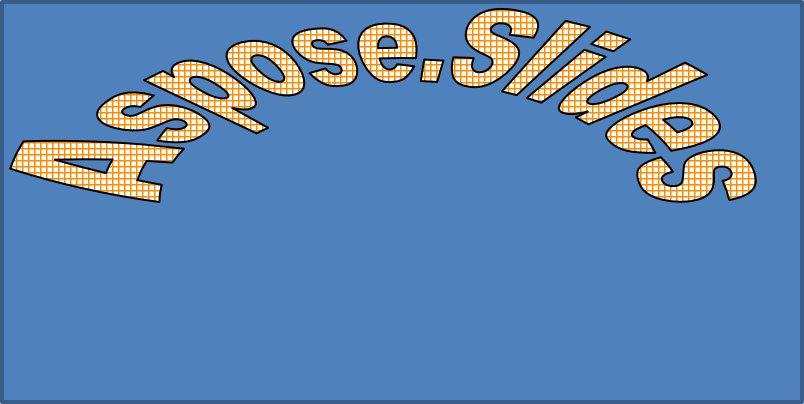
Đặt setTransform thành ArchUpPour để uốn khung văn bản lên phía trên:
const aspose = { slides: require("aspose.slides.via.java") };
const java = require("java");

const presentation = new aspose.slides.Presentation();
try {
    const slide = presentation.getSlides().get_Item(0);

    const autoShape = slide.getShapes().addAutoShape(aspose.slides.ShapeType.Rectangle, 20, 20, 400, 200);

    const textFrame = autoShape.getTextFrame();
    textFrame.setText("Aspose.Slides");
    textFrame.getTextFrameFormat().setTransform(java.newByte(aspose.slides.TextShapeType.ArchUpPour));
} finally {
    presentation.dispose();
}
Văn bản kết quả:
Note
Aspose.Slides cho Node.js qua Java cung cấp một tập hợp các loại biến đổi được định nghĩa trước.Áp dụng hiệu ứng 3D cho hình dạng và văn bản
Bạn có thể áp dụng hiệu ứng 3D cho một hình dạng hoặc cho văn bản của nó. Các góc cạnh, đùn, chiếu sáng và cài đặt máy ảnh kiểm soát diện mạo cuối cùng.
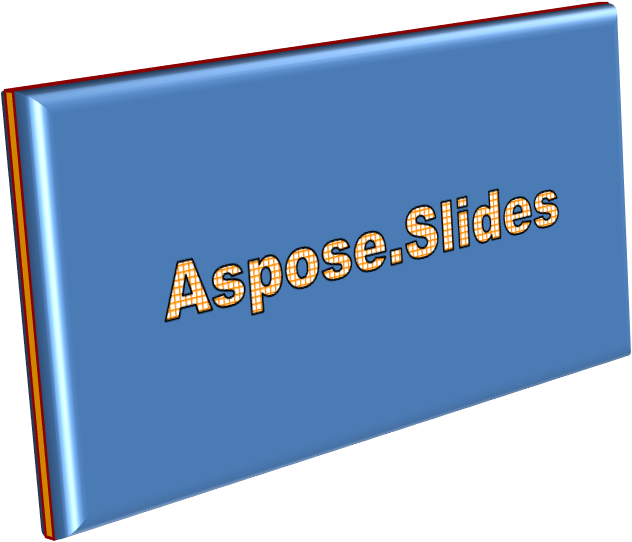
Ví dụ sau sử dụng ThreeDFormat để thêm các góc cạnh tròn, đùn màu cam và viền màu đỏ đậm vào hình chữ nhật. Các kích thước góc cạnh, chiều cao đùn, độ rộng viền và độ sâu được đo bằng điểm. Vật liệu nhựa, ánh sáng cân bằng xoay 40 độ quanh trục Z, và máy ảnh phối cảnh định nghĩa diện mạo của nó:
const aspose = { slides: require("aspose.slides.via.java") };
const java = require("java");

const presentation = new aspose.slides.Presentation();
try {
    const slide = presentation.getSlides().get_Item(0);

    const autoShape = slide.getShapes().addAutoShape(aspose.slides.ShapeType.Rectangle, 20, 20, 400, 200);
    autoShape.getTextFrame().setText("Aspose.Slides");

    autoShape.getThreeDFormat().getBevelBottom().setBevelType(aspose.slides.BevelPresetType.Circle);
    autoShape.getThreeDFormat().getBevelBottom().setHeight(10.5);
    autoShape.getThreeDFormat().getBevelBottom().setWidth(10.5);

    autoShape.getThreeDFormat().getBevelTop().setBevelType(aspose.slides.BevelPresetType.Circle);
    autoShape.getThreeDFormat().getBevelTop().setHeight(12.5);
    autoShape.getThreeDFormat().getBevelTop().setWidth(11);

    const orange = java.newInstanceSync("java.awt.Color", 255, 165, 0);
    autoShape.getThreeDFormat().getExtrusionColor().setColor(orange);
    autoShape.getThreeDFormat().setExtrusionHeight(6);

    const darkRed = java.newInstanceSync("java.awt.Color", 139, 0, 0);
    autoShape.getThreeDFormat().getContourColor().setColor(darkRed);
    autoShape.getThreeDFormat().setContourWidth(1.5);

    autoShape.getThreeDFormat().setDepth(3);

    autoShape.getThreeDFormat().setMaterial(aspose.slides.MaterialPresetType.Plastic);

    autoShape.getThreeDFormat().getLightRig().setDirection(aspose.slides.LightingDirection.Top);
    autoShape.getThreeDFormat().getLightRig().setLightType(aspose.slides.LightRigPresetType.Balanced);
    autoShape.getThreeDFormat().getLightRig().setRotation(0, 0, 40);

    autoShape.getThreeDFormat().getCamera().setCameraType(aspose.slides.CameraPresetType.PerspectiveContrastingRightFacing);
} finally {
    presentation.dispose();
}
Hình dạng kết quả:
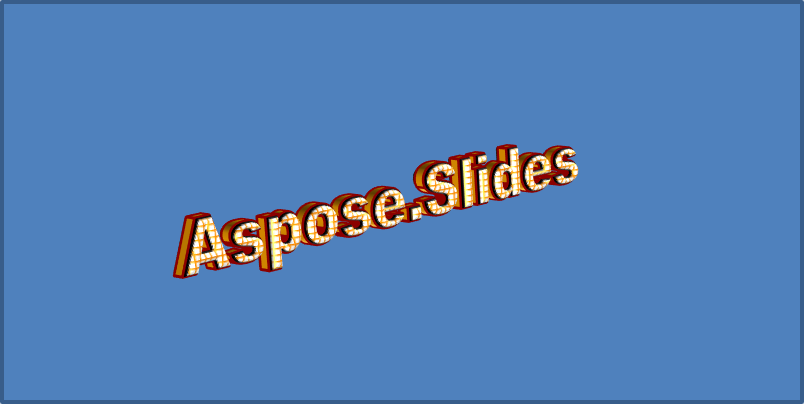
Ví dụ này áp dụng định dạng 3D tương tự cho văn bản thông qua TextFrameFormat.getThreeDFormat. Các góc cạnh nhỏ hơn tạo hình các cạnh chữ, trong khi đùn và chiếu sáng mang lại độ sâu cho văn bản:
const aspose = { slides: require("aspose.slides.via.java") };
const java = require("java");

const presentation = new aspose.slides.Presentation();
try {
    const slide = presentation.getSlides().get_Item(0);

    const autoShape = slide.getShapes().addAutoShape(aspose.slides.ShapeType.Rectangle, 20, 20, 400, 200);
    const textFrame = autoShape.getTextFrame();
    textFrame.setText("Aspose.Slides");

    textFrame.getTextFrameFormat().getThreeDFormat().getBevelBottom().setBevelType(aspose.slides.BevelPresetType.Circle);
    textFrame.getTextFrameFormat().getThreeDFormat().getBevelBottom().setHeight(3.5);
    textFrame.getTextFrameFormat().getThreeDFormat().getBevelBottom().setWidth(3.5);

    textFrame.getTextFrameFormat().getThreeDFormat().getBevelTop().setBevelType(aspose.slides.BevelPresetType.Circle);
    textFrame.getTextFrameFormat().getThreeDFormat().getBevelTop().setHeight(4);
    textFrame.getTextFrameFormat().getThreeDFormat().getBevelTop().setWidth(4);

    const orange = java.newInstanceSync("java.awt.Color", 255, 165, 0);
    textFrame.getTextFrameFormat().getThreeDFormat().getExtrusionColor().setColor(orange);
    textFrame.getTextFrameFormat().getThreeDFormat().setExtrusionHeight(6);

    const darkRed = java.newInstanceSync("java.awt.Color", 139, 0, 0);
    textFrame.getTextFrameFormat().getThreeDFormat().getContourColor().setColor(darkRed);
    textFrame.getTextFrameFormat().getThreeDFormat().setContourWidth(1.5);

    textFrame.getTextFrameFormat().getThreeDFormat().setDepth(3);

    textFrame.getTextFrameFormat().getThreeDFormat().setMaterial(aspose.slides.MaterialPresetType.Plastic);

    textFrame.getTextFrameFormat().getThreeDFormat().getLightRig().setDirection(aspose.slides.LightingDirection.Top);
    textFrame.getTextFrameFormat().getThreeDFormat().getLightRig().setLightType(aspose.slides.LightRigPresetType.Balanced);
    textFrame.getTextFrameFormat().getThreeDFormat().getLightRig().setRotation(0, 0, 40);

    textFrame.getTextFrameFormat().getThreeDFormat().getCamera().setCameraType(aspose.slides.CameraPresetType.PerspectiveContrastingRightFacing);
} finally {
    presentation.dispose();
}
Văn bản kết quả:
Note
Việc áp dụng hiệu ứng 3D cho văn bản hoặc hình dạng của chúng—và sự tương tác giữa các hiệu ứng này—được quy định bởi các quy tắc cụ thể. Xét một cảnh có cả văn bản và hình dạng chứa nó. Một hiệu ứng 3D bao gồm biểu diễn 3D của đối tượng và cảnh mà nó được đặt.
- Nếu một cảnh được đặt cho cả hình dạng và văn bản, cảnh của hình dạng được ưu tiên và cảnh của văn bản bị bỏ qua.
- Nếu hình dạng không có cảnh riêng nhưng có biểu diễn 3D, cảnh của văn bản được sử dụng.
- Nếu hình dạng không có hiệu ứng 3D nào, nó được coi là phẳng và hiệu ứng 3D chỉ được áp dụng cho văn bản.
Các hành vi này liên quan đến các phương thức ThreeDFormat.getLightRig và ThreeDFormat.getCamera.
Để giữ văn bản phẳng và dễ đọc trong khi vẫn duy trì định dạng 3D của hình dạng, xem Giữ Văn bản Phẳng trên Hình 3D để so sánh cả hai cài đặt và một ví dụ JavaScript hoàn chỉnh.
CÂU HỎI THƯỜNG GẶP
Tôi có thể sử dụng hiệu ứng WordArt với các phông chữ hoặc ký tự khác nhau (ví dụ: Ả Rập, Trung Quốc) không?
Đúng vậy, Aspose.Slides cho Node.js qua Java hỗ trợ Unicode và hoạt động với mọi phông chữ và ký tự chính. Các hiệu ứng WordArt như bóng, màu nền và đường viền có thể được áp dụng bất kể ngôn ngữ, mặc dù khả năng có sẵn của phông chữ và việc render có thể phụ thuộc vào phông chữ hệ thống.
Tôi có thể áp dụng hiệu ứng WordArt cho các yếu tố của master slide không?
Đúng, bạn có thể áp dụng hiệu ứng WordArt cho các hình dạng trên master slide, bao gồm trình giữ chỗ tiêu đề, chân trang hoặc văn bản nền. Các thay đổi được thực hiện trên bố cục master sẽ được phản ánh trên tất cả các slide liên quan.
Các hiệu ứng WordArt có ảnh hưởng đến kích thước tệp bản trình chiếu không?
Hơi tăng. Các hiệu ứng WordArt như bóng, hào quang và màu nền gradient có thể làm tăng nhẹ kích thước tệp do metadata định dạng bổ sung, nhưng sự khác biệt thường không đáng kể.
Tôi có thể xem trước kết quả của hiệu ứng WordArt mà không lưu bản trình chiếu không?
Đúng, bạn có thể render các slide chứa WordArt thành hình ảnh (ví dụ: PNG, JPEG) bằng cách sử dụng Slide.getImage, hoặc render các hình dạng riêng lẻ bằng Shape.getImage. Điều này cho phép bạn xem trước kết quả trong bộ nhớ hoặc trên màn hình trước khi lưu hoặc xuất bản trình chiếu đầy đủ.