
Crea e Applica Effetti WordArt in Node.js
Panoramica
Gli effetti WordArt consentono di formattare il testo con riempimenti, contorni, ombre, riflessi, bagliore, trasformazioni e formattazione 3D. Questo articolo spiega come creare e personalizzare questi effetti nelle presentazioni PowerPoint usando Aspose.Slides per Node.js via Java, senza Microsoft Office installato.
Crea un modello WordArt semplice e applicalo al testo
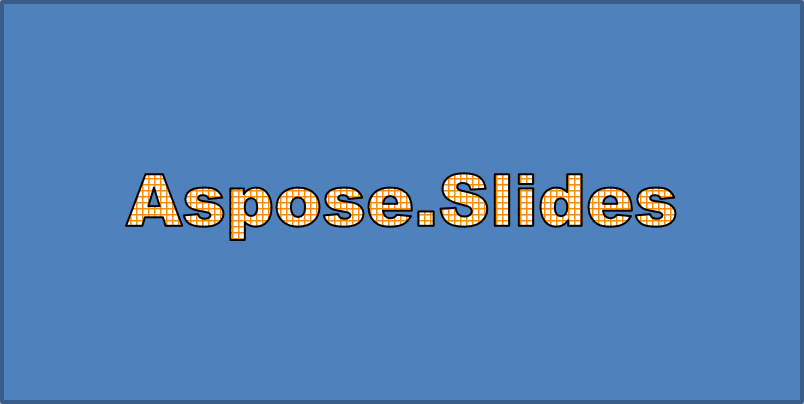
Gli esempi seguenti creano uno stile WordArt semplice impostando il testo, il carattere, il riempimento a motivo e il contorno.
Ogni esempio crea una nuova presentazione e aggiunge un rettangolo alla prima diapositiva; non è richiesto alcun file di input. Il primo esempio imposta il testo a “Aspose.Slides”. La posizione e le dimensioni della forma sono misurate in punti:
const aspose = { slides: require("aspose.slides.via.java") };

const presentation = new aspose.slides.Presentation();
try {
    const slide = presentation.getSlides().get_Item(0);

    const autoShape = slide.getShapes().addAutoShape(aspose.slides.ShapeType.Rectangle, 20, 20, 400, 200);
    const textFrame = autoShape.getTextFrame();

    const portion = textFrame.getParagraphs().get_Item(0).getPortions().get_Item(0);
    portion.setText("Aspose.Slides");
} finally {
    presentation.dispose();
}
Imposta il carattere su Arial Black a 36 punti per rendere la formattazione più evidente:
const aspose = { slides: require("aspose.slides.via.java") };

const presentation = new aspose.slides.Presentation();
try {
    const slide = presentation.getSlides().get_Item(0);

    const autoShape = slide.getShapes().addAutoShape(aspose.slides.ShapeType.Rectangle, 20, 20, 400, 200);

    const portion = autoShape.getTextFrame().getParagraphs().get_Item(0).getPortions().get_Item(0);
    portion.setText("Aspose.Slides");
    const font = new aspose.slides.FontData("Arial Black");
    portion.getPortionFormat().setLatinFont(font);
    portion.getPortionFormat().setFontHeight(36);
} finally {
    presentation.dispose();
}
Applica un motivo SmallGrid con primo piano arancione scuro e sfondo bianco, quindi aggiungi un contorno al testo nero con larghezza di 1 punto:
const aspose = { slides: require("aspose.slides.via.java") };
const java = require("java");

const presentation = new aspose.slides.Presentation();
try {
    const slide = presentation.getSlides().get_Item(0);

    const autoShape = slide.getShapes().addAutoShape(aspose.slides.ShapeType.Rectangle, 20, 20, 400, 200);

    const portion = autoShape.getTextFrame().getParagraphs().get_Item(0).getPortions().get_Item(0);
    portion.setText("Aspose.Slides");
    const font = new aspose.slides.FontData("Arial Black");
    portion.getPortionFormat().setLatinFont(font);
    portion.getPortionFormat().setFontHeight(36);

    portion.getPortionFormat().getFillFormat().setFillType(java.newByte(aspose.slides.FillType.Pattern));
    const darkOrange = java.newInstanceSync("java.awt.Color", 255, 140, 0);
    portion.getPortionFormat().getFillFormat().getPatternFormat().getForeColor().setColor(darkOrange);
    portion.getPortionFormat().getFillFormat().getPatternFormat().getBackColor().setColor(java.getStaticFieldValue("java.awt.Color", "WHITE"));
    portion.getPortionFormat().getFillFormat().getPatternFormat().setPatternStyle(java.newByte(aspose.slides.PatternStyle.SmallGrid));

    portion.getPortionFormat().getLineFormat().setWidth(1);
    portion.getPortionFormat().getLineFormat().getFillFormat().setFillType(java.newByte(aspose.slides.FillType.Solid));
    portion.getPortionFormat().getLineFormat().getFillFormat().getSolidFillColor().setColor(java.getStaticFieldValue("java.awt.Color", "BLACK"));
} finally {
    presentation.dispose();
}
Il testo risultante:
Applica altri effetti WordArt
Gli esempi seguenti dimostrano come applicare ombre, riflessi, bagliore, trasformazioni e effetti 3D al testo.
Applica effetti di ombra esterna
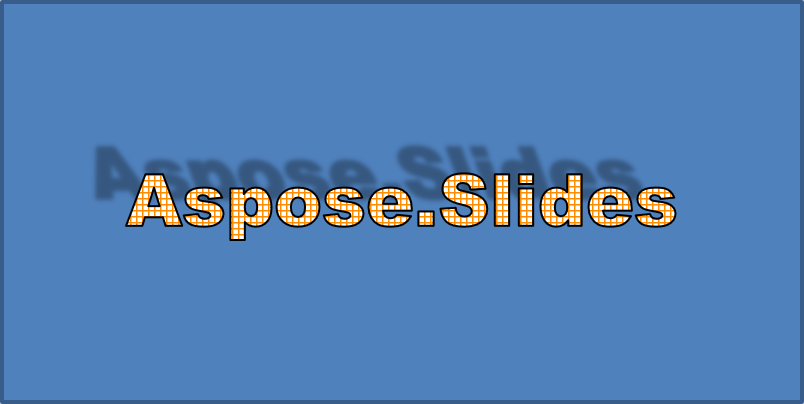
Un’ombra esterna aggiunge profondità posizionando un’ombra dietro il testo. Puoi personalizzare colore, direzione, distanza, raggio di sfocatura, scala e inclinazione.
Questo esempio chiama enableOuterShadowEffect e imposta un’ombra nera con raggio di sfocatura di 4 punti, direzione di 230 gradi e distanza di 30 punti. Valori di scala pari a 100 preservano le dimensioni dell’ombra, mentre l’inclinazione orizzontale la inclina di 20 gradi. La trasformazione alfa imposta la sua opacità al 32%:
const aspose = { slides: require("aspose.slides.via.java") };
const java = require("java");

const presentation = new aspose.slides.Presentation();
try {
    const slide = presentation.getSlides().get_Item(0);

    const autoShape = slide.getShapes().addAutoShape(aspose.slides.ShapeType.Rectangle, 20, 20, 400, 200);

    const portion = autoShape.getTextFrame().getParagraphs().get_Item(0).getPortions().get_Item(0);
    portion.setText("Aspose.Slides");
    const font = new aspose.slides.FontData("Arial Black");
    portion.getPortionFormat().setLatinFont(font);
    portion.getPortionFormat().setFontHeight(36);

    portion.getPortionFormat().getEffectFormat().enableOuterShadowEffect();
    portion.getPortionFormat().getEffectFormat().getOuterShadowEffect().getShadowColor().setColor(java.getStaticFieldValue("java.awt.Color", "BLACK"));
    portion.getPortionFormat().getEffectFormat().getOuterShadowEffect().setScaleHorizontal(100);
    portion.getPortionFormat().getEffectFormat().getOuterShadowEffect().setScaleVertical(100);
    portion.getPortionFormat().getEffectFormat().getOuterShadowEffect().setBlurRadius(4);
    portion.getPortionFormat().getEffectFormat().getOuterShadowEffect().setDirection(230);
    portion.getPortionFormat().getEffectFormat().getOuterShadowEffect().setDistance(30);
    portion.getPortionFormat().getEffectFormat().getOuterShadowEffect().setSkewHorizontal(20);
    portion.getPortionFormat().getEffectFormat().getOuterShadowEffect().setSkewVertical(0);
    portion.getPortionFormat().getEffectFormat().getOuterShadowEffect().getShadowColor().getColorTransform().add(aspose.slides.ColorTransformOperation.SetAlpha, java.newFloat(0.32));
} finally {
    presentation.dispose();
}
Il testo risultante:
Note
- Quando le ombre esterne e predefinite sono usate insieme, viene applicata solo l’ombra esterna.
- Se le ombre esterne e interne sono usate simultaneamente, l’effetto risultante dipende dalla versione di PowerPoint. Ad esempio, in PowerPoint 2013 l’effetto è raddoppiato, mentre in PowerPoint 2007 viene applicata solo l’ombra esterna.
Applica effetti di riflessione
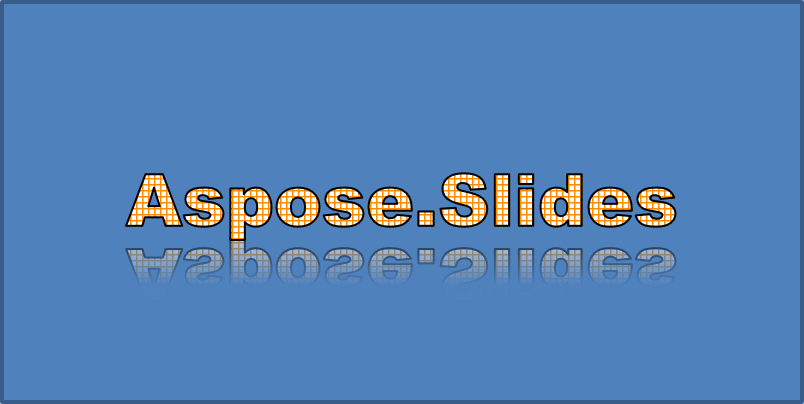
Una riflessione crea una copia speculare del testo. Regola posizione, scala, sfocatura e opacità per controllarne l’aspetto.
Questo esempio chiama enableReflectionEffect e capovolge verticalmente la riflessione con una scala del -100%. Usa un raggio di sfocatura di 0.5 punti e una distanza di 4.72 punti. L’opacità diminuisce dal 60% allo 0.9% tra le posizioni 0% e 60% lungo la riflessione:
const aspose = { slides: require("aspose.slides.via.java") };
const java = require("java");

const presentation = new aspose.slides.Presentation();
try {
    const slide = presentation.getSlides().get_Item(0);

    const autoShape = slide.getShapes().addAutoShape(aspose.slides.ShapeType.Rectangle, 20, 20, 400, 200);

    const portion = autoShape.getTextFrame().getParagraphs().get_Item(0).getPortions().get_Item(0);
    portion.setText("Aspose.Slides");
    const font = new aspose.slides.FontData("Arial Black");
    portion.getPortionFormat().setLatinFont(font);
    portion.getPortionFormat().setFontHeight(36);

    portion.getPortionFormat().getEffectFormat().enableReflectionEffect();
    portion.getPortionFormat().getEffectFormat().getReflectionEffect().setBlurRadius(0.5);
    portion.getPortionFormat().getEffectFormat().getReflectionEffect().setDistance(4.72);
    portion.getPortionFormat().getEffectFormat().getReflectionEffect().setStartPosAlpha(java.newFloat(0));
    portion.getPortionFormat().getEffectFormat().getReflectionEffect().setEndPosAlpha(java.newFloat(60));
    portion.getPortionFormat().getEffectFormat().getReflectionEffect().setDirection(90);
    portion.getPortionFormat().getEffectFormat().getReflectionEffect().setScaleHorizontal(100);
    portion.getPortionFormat().getEffectFormat().getReflectionEffect().setScaleVertical(-100);
    portion.getPortionFormat().getEffectFormat().getReflectionEffect().setStartReflectionOpacity(java.newFloat(60));
    portion.getPortionFormat().getEffectFormat().getReflectionEffect().setEndReflectionOpacity(java.newFloat(0.9));
    portion.getPortionFormat().getEffectFormat().getReflectionEffect().setRectangleAlign(java.newByte(aspose.slides.RectangleAlignment.BottomLeft));
} finally {
    presentation.dispose();
}
Il testo risultante:
Applica effetti di bagliore
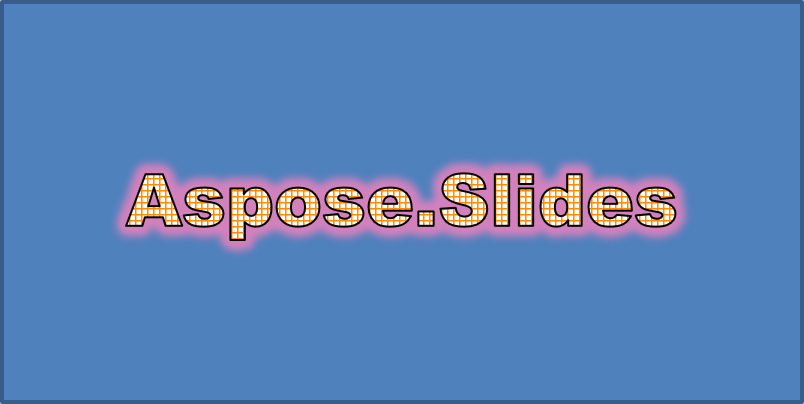
Un bagliore aggiunge un contorno colorato e soffuso attorno al testo. Regola colore, opacità e raggio per controllare l’effetto.
Questo esempio chiama enableGlowEffect e applica un bagliore rosso con opacità del 54% e raggio di 7 punti:
const aspose = { slides: require("aspose.slides.via.java") };
const java = require("java");

const presentation = new aspose.slides.Presentation();
try {
    const slide = presentation.getSlides().get_Item(0);

    const autoShape = slide.getShapes().addAutoShape(aspose.slides.ShapeType.Rectangle, 20, 20, 400, 200);

    const portion = autoShape.getTextFrame().getParagraphs().get_Item(0).getPortions().get_Item(0);
    portion.setText("Aspose.Slides");
    const font = new aspose.slides.FontData("Arial Black");
    portion.getPortionFormat().setLatinFont(font);
    portion.getPortionFormat().setFontHeight(36);

    portion.getPortionFormat().getEffectFormat().enableGlowEffect();
    portion.getPortionFormat().getEffectFormat().getGlowEffect().getColor().setColor(java.getStaticFieldValue("java.awt.Color", "RED"));
    portion.getPortionFormat().getEffectFormat().getGlowEffect().getColor().getColorTransform().add(aspose.slides.ColorTransformOperation.SetAlpha, java.newFloat(0.54));
    portion.getPortionFormat().getEffectFormat().getGlowEffect().setRadius(7);
} finally {
    presentation.dispose();
}
Il testo risultante:
Applica trasformazioni WordArt
Le trasformazioni WordArt piegano, allungano o deformano un blocco di testo.
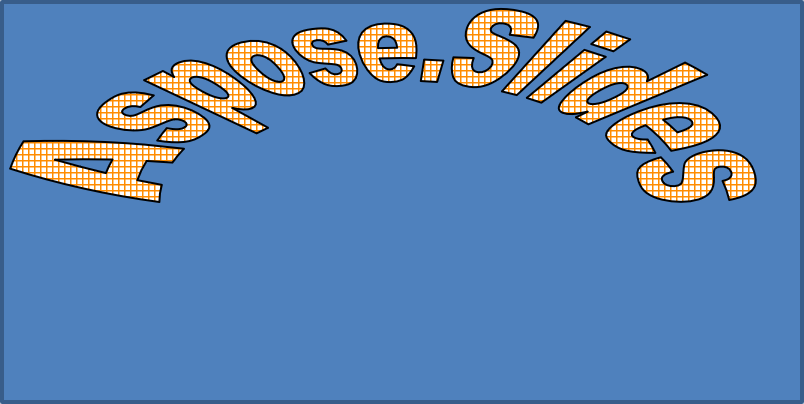
Imposta setTransform su ArchUpPour per curvare verso l’alto l’intero riquadro di testo:
const aspose = { slides: require("aspose.slides.via.java") };
const java = require("java");

const presentation = new aspose.slides.Presentation();
try {
    const slide = presentation.getSlides().get_Item(0);

    const autoShape = slide.getShapes().addAutoShape(aspose.slides.ShapeType.Rectangle, 20, 20, 400, 200);

    const textFrame = autoShape.getTextFrame();
    textFrame.setText("Aspose.Slides");
    textFrame.getTextFrameFormat().setTransform(java.newByte(aspose.slides.TextShapeType.ArchUpPour));
} finally {
    presentation.dispose();
}
Il testo risultante:
Note
Aspose.Slides per Node.js via Java fornisce un insieme di tipi di trasformazione predefiniti.Applica effetti 3D a forme e testo
Puoi applicare effetti 3D a una forma o al suo testo. Smussi, estrusione, illuminazione e impostazioni della fotocamera controllano l’aspetto risultante.
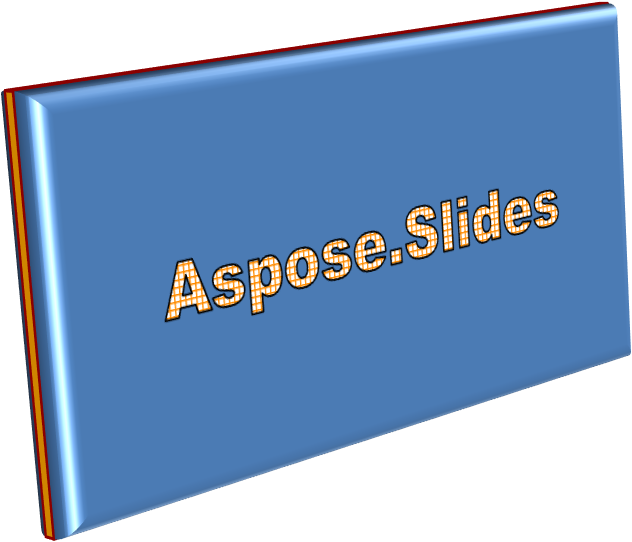
L’esempio seguente utilizza ThreeDFormat per aggiungere smussi circolari, estrusione arancione e un contorno rosso scuro al rettangolo. Le dimensioni degli smussi, l’altezza dell’estrusione, la larghezza e la profondità del contorno sono misurate in punti. Un materiale plastico, illuminazione bilanciata ruotata di 40 gradi attorno all’asse Z, e una fotocamera prospettica ne definiscono l’aspetto:
const aspose = { slides: require("aspose.slides.via.java") };
const java = require("java");

const presentation = new aspose.slides.Presentation();
try {
    const slide = presentation.getSlides().get_Item(0);

    const autoShape = slide.getShapes().addAutoShape(aspose.slides.ShapeType.Rectangle, 20, 20, 400, 200);
    autoShape.getTextFrame().setText("Aspose.Slides");

    autoShape.getThreeDFormat().getBevelBottom().setBevelType(aspose.slides.BevelPresetType.Circle);
    autoShape.getThreeDFormat().getBevelBottom().setHeight(10.5);
    autoShape.getThreeDFormat().getBevelBottom().setWidth(10.5);

    autoShape.getThreeDFormat().getBevelTop().setBevelType(aspose.slides.BevelPresetType.Circle);
    autoShape.getThreeDFormat().getBevelTop().setHeight(12.5);
    autoShape.getThreeDFormat().getBevelTop().setWidth(11);

    const orange = java.newInstanceSync("java.awt.Color", 255, 165, 0);
    autoShape.getThreeDFormat().getExtrusionColor().setColor(orange);
    autoShape.getThreeDFormat().setExtrusionHeight(6);

    const darkRed = java.newInstanceSync("java.awt.Color", 139, 0, 0);
    autoShape.getThreeDFormat().getContourColor().setColor(darkRed);
    autoShape.getThreeDFormat().setContourWidth(1.5);

    autoShape.getThreeDFormat().setDepth(3);

    autoShape.getThreeDFormat().setMaterial(aspose.slides.MaterialPresetType.Plastic);

    autoShape.getThreeDFormat().getLightRig().setDirection(aspose.slides.LightingDirection.Top);
    autoShape.getThreeDFormat().getLightRig().setLightType(aspose.slides.LightRigPresetType.Balanced);
    autoShape.getThreeDFormat().getLightRig().setRotation(0, 0, 40);

    autoShape.getThreeDFormat().getCamera().setCameraType(aspose.slides.CameraPresetType.PerspectiveContrastingRightFacing);
} finally {
    presentation.dispose();
}
La forma risultante:
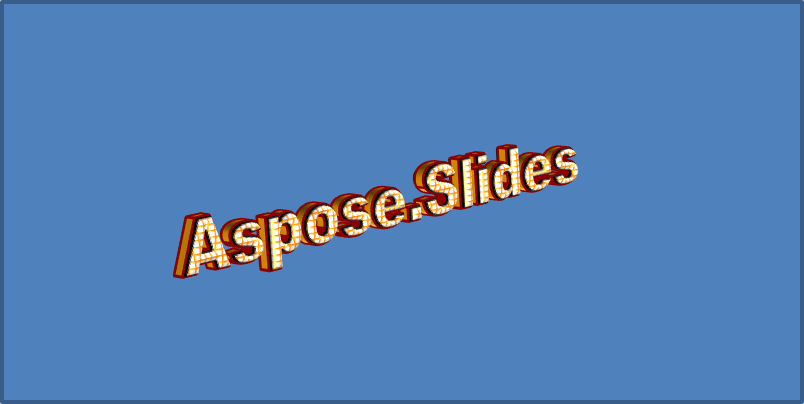
Questo esempio applica una formattazione 3D simile al testo tramite TextFrameFormat.getThreeDFormat. Smussi più piccoli modellano i bordi delle lettere, mentre l’estrusione e l’illuminazione conferiscono profondità al testo:
const aspose = { slides: require("aspose.slides.via.java") };
const java = require("java");

const presentation = new aspose.slides.Presentation();
try {
    const slide = presentation.getSlides().get_Item(0);

    const autoShape = slide.getShapes().addAutoShape(aspose.slides.ShapeType.Rectangle, 20, 20, 400, 200);
    const textFrame = autoShape.getTextFrame();
    textFrame.setText("Aspose.Slides");

    textFrame.getTextFrameFormat().getThreeDFormat().getBevelBottom().setBevelType(aspose.slides.BevelPresetType.Circle);
    textFrame.getTextFrameFormat().getThreeDFormat().getBevelBottom().setHeight(3.5);
    textFrame.getTextFrameFormat().getThreeDFormat().getBevelBottom().setWidth(3.5);

    textFrame.getTextFrameFormat().getThreeDFormat().getBevelTop().setBevelType(aspose.slides.BevelPresetType.Circle);
    textFrame.getTextFrameFormat().getThreeDFormat().getBevelTop().setHeight(4);
    textFrame.getTextFrameFormat().getThreeDFormat().getBevelTop().setWidth(4);

    const orange = java.newInstanceSync("java.awt.Color", 255, 165, 0);
    textFrame.getTextFrameFormat().getThreeDFormat().getExtrusionColor().setColor(orange);
    textFrame.getTextFrameFormat().getThreeDFormat().setExtrusionHeight(6);

    const darkRed = java.newInstanceSync("java.awt.Color", 139, 0, 0);
    textFrame.getTextFrameFormat().getThreeDFormat().getContourColor().setColor(darkRed);
    textFrame.getTextFrameFormat().getThreeDFormat().setContourWidth(1.5);

    textFrame.getTextFrameFormat().getThreeDFormat().setDepth(3);

    textFrame.getTextFrameFormat().getThreeDFormat().setMaterial(aspose.slides.MaterialPresetType.Plastic);

    textFrame.getTextFrameFormat().getThreeDFormat().getLightRig().setDirection(aspose.slides.LightingDirection.Top);
    textFrame.getTextFrameFormat().getThreeDFormat().getLightRig().setLightType(aspose.slides.LightRigPresetType.Balanced);
    textFrame.getTextFrameFormat().getThreeDFormat().getLightRig().setRotation(0, 0, 40);

    textFrame.getTextFrameFormat().getThreeDFormat().getCamera().setCameraType(aspose.slides.CameraPresetType.PerspectiveContrastingRightFacing);
} finally {
    presentation.dispose();
}
Il testo risultante:
Note
L’applicazione degli effetti 3D al testo o alle loro forme — e l’interazione tra questi effetti — è regolata da regole specifiche. Considera una scena che coinvolge sia il testo sia la forma che lo contiene. Un effetto 3D include la rappresentazione 3D dell’oggetto e la scena in cui è inserito.
- Se una scena è impostata sia per la forma sia per il testo, la scena della forma ha la precedenza e la scena del testo viene ignorata.
- Se la forma non ha una propria scena ma ha una rappresentazione 3D, viene utilizzata la scena del testo.
- Se la forma non ha alcun effetto 3D, viene trattata come piatta e l’effetto 3D viene applicato solo al testo.
Questo comportamento è correlato ai metodi ThreeDFormat.getLightRig e ThreeDFormat.getCamera.
Per mantenere il testo piatto e leggibile mantenendo la formattazione 3D della forma, vedi Keep Text Flat on a 3D Shape per un confronto tra le due impostazioni e un esempio JavaScript completo.
Domande frequenti
Posso utilizzare gli effetti WordArt con font o script diversi (ad esempio arabo, cinese)?
Sì, Aspose.Slides per Node.js via Java supporta Unicode e funziona con tutti i principali font e script. Gli effetti WordArt come ombra, riempimento e contorno possono essere applicati indipendentemente dalla lingua, sebbene la disponibilità dei font e il rendering possano dipendere dai font di sistema.
Posso applicare gli effetti WordArt agli elementi del master della diapositiva?
Sì, è possibile applicare gli effetti WordArt alle forme nei master delle diapositive, inclusi i segnaposto del titolo, i piè di pagina o il testo di sfondo. Le modifiche apportate al layout del master verranno propagate a tutte le diapositive associate.
Gli effetti WordArt influenzano la dimensione del file della presentazione?
Leggermente. Gli effetti WordArt come ombre, bagliori e riempimenti a gradiente possono aumentare leggermente la dimensione del file a causa dei metadati di formattazione aggiunti, ma la differenza è solitamente trascurabile.
Posso visualizzare in anteprima il risultato degli effetti WordArt senza salvare la presentazione?
Sì, è possibile renderizzare le diapositive contenenti WordArt in immagini (ad esempio PNG, JPEG) usando Slide.getImage, oppure renderizzare forme singole con Shape.getImage. Questo consente di visualizzare in anteprima il risultato in memoria o sullo schermo prima di salvare o esportare l’intera presentazione.