
.NET에서 WordArt 효과 만들기 및 적용
개요
WordArt 효과를 사용하면 텍스트를 채우기, 외곽선, 그림자, 반사, 글로우, 변환 및 3D 서식으로 스타일링할 수 있습니다. 이 문서에서는 Microsoft Office가 설치되지 않은 상태에서 Aspose.Slides for .NET을 사용하여 PowerPoint 프레젠테이션에서 이러한 효과를 생성하고 사용자 지정하는 방법을 설명합니다.
간단한 WordArt 템플릿 만들기 및 텍스트에 적용
다음 예제에서는 텍스트, 글꼴, 패턴 채우기 및 외곽선을 설정하여 간단한 WordArt 스타일을 만듭니다.
각 예제는 새 프레젠테이션을 만들고 첫 번째 슬라이드에 사각형을 추가합니다; 입력 파일은 필요하지 않습니다. 첫 번째 예제는 텍스트를 “Aspose.Slides"로 설정합니다. 도형의 위치와 크기는 포인트 단위로 측정됩니다:
using Aspose.Slides;

using var presentation = new Presentation();
var slide = presentation.Slides[0];

var autoShape = slide.Shapes.AddAutoShape(ShapeType.Rectangle, 20, 20, 400, 200);
var textFrame = autoShape.TextFrame;

var portion = textFrame.Paragraphs[0].Portions[0];
portion.Text = "Aspose.Slides";
서식을 더 눈에 띄게 하려면 글꼴을 36포인트 Arial Black으로 설정합니다:
using Aspose.Slides;

using var presentation = new Presentation();
var slide = presentation.Slides[0];

var autoShape = slide.Shapes.AddAutoShape(ShapeType.Rectangle, 20, 20, 400, 200);

var portion = autoShape.TextFrame.Paragraphs[0].Portions[0];
portion.Text = "Aspose.Slides";
portion.PortionFormat.LatinFont = new FontData("Arial Black");
portion.PortionFormat.FontHeight = 36;
어두운 주황색 전경과 흰색 배경을 가진 SmallGrid 패턴을 적용한 다음, 너비 1포인트의 검은색 텍스트 외곽선을 추가합니다:
using System.Drawing;
using Aspose.Slides;

using var presentation = new Presentation();
var slide = presentation.Slides[0];

var autoShape = slide.Shapes.AddAutoShape(ShapeType.Rectangle, 20, 20, 400, 200);

var portion = autoShape.TextFrame.Paragraphs[0].Portions[0];
portion.Text = "Aspose.Slides";
portion.PortionFormat.LatinFont = new FontData("Arial Black");
portion.PortionFormat.FontHeight = 36;

portion.PortionFormat.FillFormat.FillType = FillType.Pattern;
portion.PortionFormat.FillFormat.PatternFormat.ForeColor.Color = Color.DarkOrange;
portion.PortionFormat.FillFormat.PatternFormat.BackColor.Color = Color.White;
portion.PortionFormat.FillFormat.PatternFormat.PatternStyle = PatternStyle.SmallGrid;

portion.PortionFormat.LineFormat.Width = 1;
portion.PortionFormat.LineFormat.FillFormat.FillType = FillType.Solid;
portion.PortionFormat.LineFormat.FillFormat.SolidFillColor.Color = Color.Black;
결과 텍스트:

다른 WordArt 효과 적용
다음 예제에서는 텍스트에 그림자, 반사, 글로우, 변환 및 3D 효과를 적용하는 방법을 보여줍니다.
외부 그림자 효과 적용
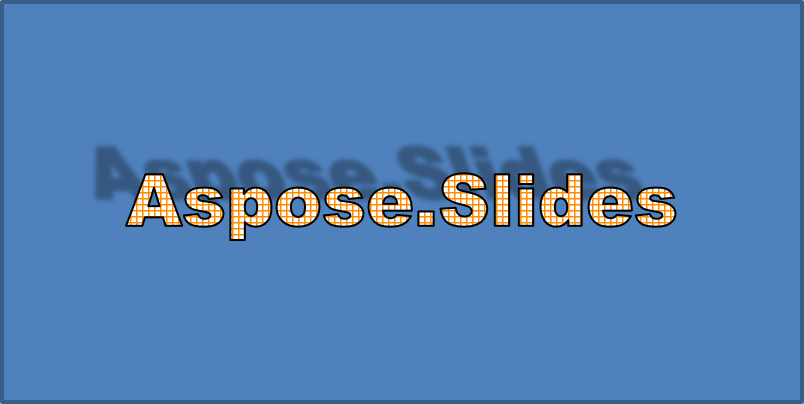
외부 그림자는 텍스트 뒤에 그림자를 배치하여 깊이를 추가합니다. 색상, 방향, 거리, 흐림 반경, 스케일 및 기울기를 사용자 지정할 수 있습니다.
이 예제는 EnableOuterShadowEffect를 호출하고 흐림 반경 4포인트, 방향 230도, 거리 30포인트인 검은색 그림자를 설정합니다. 스케일 값 100은 그림자 크기를 유지하고, 가로 기울기는 20도로 기울입니다. 알파 변환은 불투명도를 32%로 설정합니다:
using System.Drawing;
using Aspose.Slides;

using var presentation = new Presentation();
var slide = presentation.Slides[0];

var autoShape = slide.Shapes.AddAutoShape(ShapeType.Rectangle, 20, 20, 400, 200);

var portion = autoShape.TextFrame.Paragraphs[0].Portions[0];
portion.Text = "Aspose.Slides";
portion.PortionFormat.LatinFont = new FontData("Arial Black");
portion.PortionFormat.FontHeight = 36;

portion.PortionFormat.EffectFormat.EnableOuterShadowEffect();
portion.PortionFormat.EffectFormat.OuterShadowEffect.ShadowColor.Color = Color.Black;
portion.PortionFormat.EffectFormat.OuterShadowEffect.ScaleHorizontal = 100;
portion.PortionFormat.EffectFormat.OuterShadowEffect.ScaleVertical = 100;
portion.PortionFormat.EffectFormat.OuterShadowEffect.BlurRadius = 4;
portion.PortionFormat.EffectFormat.OuterShadowEffect.Direction = 230;
portion.PortionFormat.EffectFormat.OuterShadowEffect.Distance = 30;
portion.PortionFormat.EffectFormat.OuterShadowEffect.SkewHorizontal = 20;
portion.PortionFormat.EffectFormat.OuterShadowEffect.SkewVertical = 0;
portion.PortionFormat.EffectFormat.OuterShadowEffect.ShadowColor.ColorTransform.Add(ColorTransformOperation.SetAlpha, 0.32f);
결과 텍스트:
Note
- 외부 그림자와 사전 설정 그림자를 함께 사용할 경우, 외부 그림자만 적용됩니다.
- 외부 그림자와 내부 그림자를 동시에 사용할 경우, 결과 효과는 PowerPoint 버전에 따라 달라집니다. 예를 들어 PowerPoint 2013에서는 효과가 두 배가 되지만, PowerPoint 2007에서는 외부 그림자만 적용됩니다.
반사 효과 적용
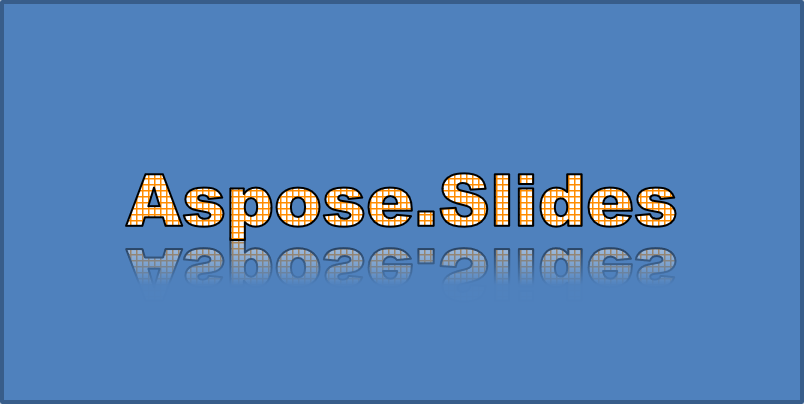
반사는 텍스트의 거울 이미지 복제본을 만듭니다. 위치, 스케일, 흐림 및 불투명도를 조정하여 모양을 제어합니다.
이 예제는 EnableReflectionEffect를 호출하고 스케일 -100%로 반사를 수직으로 뒤집습니다. 흐림 반경 0.5포인트와 거리 4.72포인트를 사용합니다. 불투명도는 반사 위치 0%에서 60% 사이에서 60%에서 0.9%로 감소합니다:
using Aspose.Slides;

using var presentation = new Presentation();
var slide = presentation.Slides[0];

var autoShape = slide.Shapes.AddAutoShape(ShapeType.Rectangle, 20, 20, 400, 200);

var portion = autoShape.TextFrame.Paragraphs[0].Portions[0];
portion.Text = "Aspose.Slides";
portion.PortionFormat.LatinFont = new FontData("Arial Black");
portion.PortionFormat.FontHeight = 36;

portion.PortionFormat.EffectFormat.EnableReflectionEffect();
portion.PortionFormat.EffectFormat.ReflectionEffect.BlurRadius = 0.5;
portion.PortionFormat.EffectFormat.ReflectionEffect.Distance = 4.72;
portion.PortionFormat.EffectFormat.ReflectionEffect.StartPosAlpha = 0f;
portion.PortionFormat.EffectFormat.ReflectionEffect.EndPosAlpha = 60f;
portion.PortionFormat.EffectFormat.ReflectionEffect.Direction = 90;
portion.PortionFormat.EffectFormat.ReflectionEffect.ScaleHorizontal = 100;
portion.PortionFormat.EffectFormat.ReflectionEffect.ScaleVertical = -100;
portion.PortionFormat.EffectFormat.ReflectionEffect.StartReflectionOpacity = 60f;
portion.PortionFormat.EffectFormat.ReflectionEffect.EndReflectionOpacity = 0.9f;
portion.PortionFormat.EffectFormat.ReflectionEffect.RectangleAlign = RectangleAlignment.BottomLeft;
결과 텍스트:
글로우 효과 적용
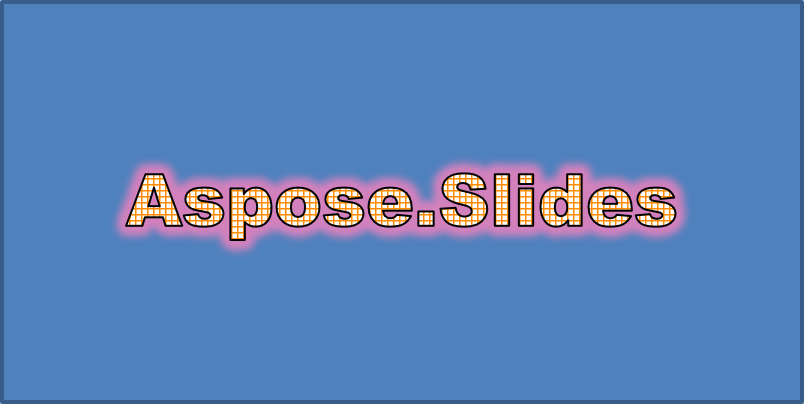
글로우는 텍스트 주위에 부드러운 색상 외곽선을 추가합니다. 색상, 불투명도 및 반경을 조정하여 효과를 제어합니다.
이 예제는 EnableGlowEffect를 호출하고 불투명도 54%와 반경 7포인트인 빨간색 글로우를 적용합니다:
using Aspose.Slides;

using var presentation = new Presentation();
var slide = presentation.Slides[0];

var autoShape = slide.Shapes.AddAutoShape(ShapeType.Rectangle, 20, 20, 400, 200);

var portion = autoShape.TextFrame.Paragraphs[0].Portions[0];
portion.Text = "Aspose.Slides";
portion.PortionFormat.LatinFont = new FontData("Arial Black");
portion.PortionFormat.FontHeight = 36;

portion.PortionFormat.EffectFormat.EnableGlowEffect();
portion.PortionFormat.EffectFormat.GlowEffect.Color.Color = System.Drawing.Color.Red;
portion.PortionFormat.EffectFormat.GlowEffect.Color.ColorTransform.Add(ColorTransformOperation.SetAlpha, 0.54f);
portion.PortionFormat.EffectFormat.GlowEffect.Radius = 7;
결과 텍스트:
WordArt 변환 적용
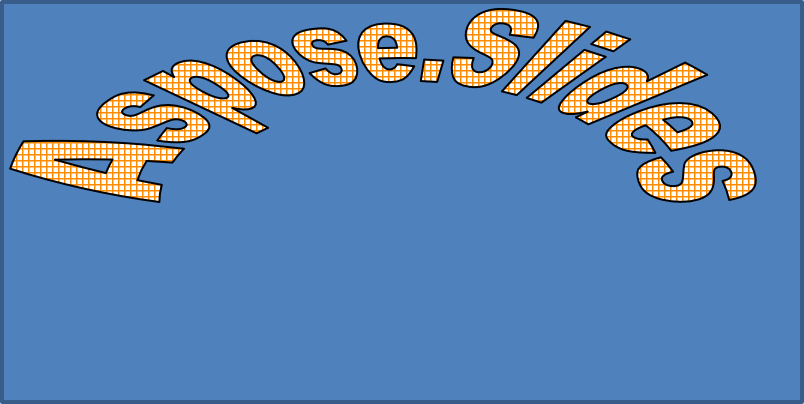
WordArt 변환은 텍스트 블록을 구부리거나 늘리거나 왜곡합니다.
전체 텍스트 프레임을 위로 굽히려면 Transform을 ArchUpPour로 설정합니다:
using Aspose.Slides;

using var presentation = new Presentation();
var slide = presentation.Slides[0];

var autoShape = slide.Shapes.AddAutoShape(ShapeType.Rectangle, 20, 20, 400, 200);

var textFrame = autoShape.TextFrame;
textFrame.Text = "Aspose.Slides";
textFrame.TextFrameFormat.Transform = TextShapeType.ArchUpPour;
결과 텍스트:
Note
Aspose.Slides for .NET은 미리 정의된 transformation types 세트를 제공합니다.도형 및 텍스트에 3D 효과 적용
도형이나 해당 텍스트에 3D 효과를 적용할 수 있습니다. 베벨, 돌출, 조명 및 카메라 설정이 최종 모양을 제어합니다.
다음 예제는 ThreeDFormat을 사용하여 사각형에 원형 베벨, 주황색 돌출 및 짙은 빨간색 윤곽을 추가합니다. 베벨 치수, 돌출 높이, 윤곽선 너비 및 깊이는 포인트 단위로 측정됩니다. 플라스틱 재질, Z축을 기준으로 40도 회전된 균형 조명 및 원근 카메라가 모양을 정의합니다:
using System.Drawing;
using Aspose.Slides;

using var presentation = new Presentation();
var slide = presentation.Slides[0];

var autoShape = slide.Shapes.AddAutoShape(ShapeType.Rectangle, 20, 20, 400, 200);
autoShape.TextFrame.Text = "Aspose.Slides";

autoShape.ThreeDFormat.BevelBottom.BevelType = BevelPresetType.Circle;
autoShape.ThreeDFormat.BevelBottom.Height = 10.5;
autoShape.ThreeDFormat.BevelBottom.Width = 10.5;

autoShape.ThreeDFormat.BevelTop.BevelType = BevelPresetType.Circle;
autoShape.ThreeDFormat.BevelTop.Height = 12.5;
autoShape.ThreeDFormat.BevelTop.Width = 11;

autoShape.ThreeDFormat.ExtrusionColor.Color = Color.Orange;
autoShape.ThreeDFormat.ExtrusionHeight = 6;

autoShape.ThreeDFormat.ContourColor.Color = Color.DarkRed;
autoShape.ThreeDFormat.ContourWidth = 1.5;

autoShape.ThreeDFormat.Depth = 3;

autoShape.ThreeDFormat.Material = MaterialPresetType.Plastic;

autoShape.ThreeDFormat.LightRig.Direction = LightingDirection.Top;
autoShape.ThreeDFormat.LightRig.LightType = LightRigPresetType.Balanced;
autoShape.ThreeDFormat.LightRig.SetRotation(0, 0, 40);

autoShape.ThreeDFormat.Camera.CameraType = CameraPresetType.PerspectiveContrastingRightFacing;
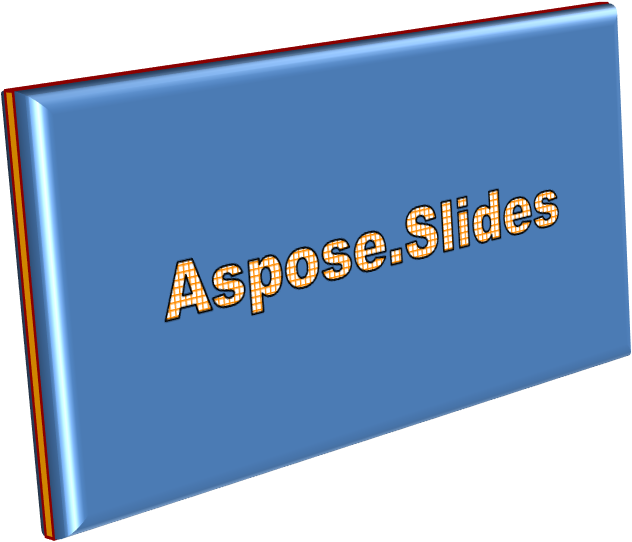
이 예제는 TextFrameFormat.ThreeDFormat을 통해 텍스트에도 유사한 3D 서식을 적용합니다. 작은 베벨이 글자 가장자리를 형성하고, 돌출과 조명이 텍스트에 깊이를 제공합니다:
using System.Drawing;
using Aspose.Slides;

using var presentation = new Presentation();
var slide = presentation.Slides[0];

var autoShape = slide.Shapes.AddAutoShape(ShapeType.Rectangle, 20, 20, 400, 200);
var textFrame = autoShape.TextFrame;
textFrame.Text = "Aspose.Slides";

textFrame.TextFrameFormat.ThreeDFormat.BevelBottom.BevelType = BevelPresetType.Circle;
textFrame.TextFrameFormat.ThreeDFormat.BevelBottom.Height = 3.5;
textFrame.TextFrameFormat.ThreeDFormat.BevelBottom.Width = 3.5;

textFrame.TextFrameFormat.ThreeDFormat.BevelTop.BevelType = BevelPresetType.Circle;
textFrame.TextFrameFormat.ThreeDFormat.BevelTop.Height = 4;
textFrame.TextFrameFormat.ThreeDFormat.BevelTop.Width = 4;

textFrame.TextFrameFormat.ThreeDFormat.ExtrusionColor.Color = Color.Orange;
textFrame.TextFrameFormat.ThreeDFormat.ExtrusionHeight = 6;

textFrame.TextFrameFormat.ThreeDFormat.ContourColor.Color = Color.DarkRed;
textFrame.TextFrameFormat.ThreeDFormat.ContourWidth = 1.5;

textFrame.TextFrameFormat.ThreeDFormat.Depth = 3;

textFrame.TextFrameFormat.ThreeDFormat.Material = MaterialPresetType.Plastic;

textFrame.TextFrameFormat.ThreeDFormat.LightRig.Direction = LightingDirection.Top;
textFrame.TextFrameFormat.ThreeDFormat.LightRig.LightType = LightRigPresetType.Balanced;
textFrame.TextFrameFormat.ThreeDFormat.LightRig.SetRotation(0, 0, 40);

textFrame.TextFrameFormat.ThreeDFormat.Camera.CameraType = CameraPresetType.PerspectiveContrastingRightFacing;
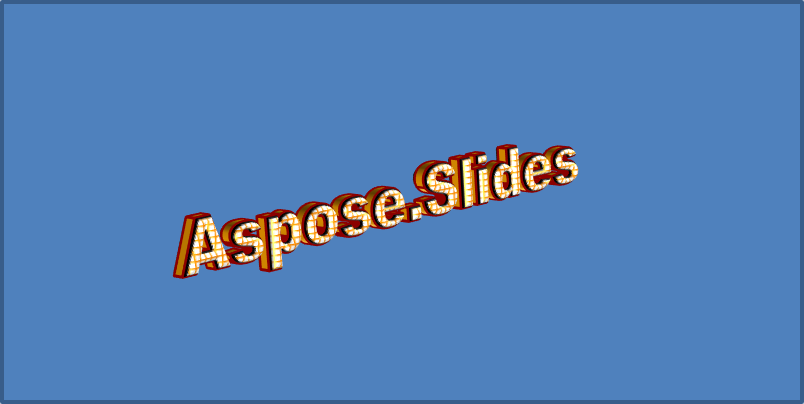
Note
텍스트 또는 해당 도형에 3D 효과를 적용하고 그 효과들 간의 상호 작용은 특정 규칙에 따라 제어됩니다. 텍스트와 이를 포함하는 도형이 모두 포함된 장면을 고려하십시오. 3D 효과는 객체의 3D 표현과 해당 객체가 배치된 장면을 포함합니다.
- 도형과 텍스트 모두에 장면이 설정된 경우, 도형의 장면이 우선하고 텍스트의 장면은 무시됩니다.
- 도형에 자체 장면이 없지만 3D 표현이 있는 경우, 텍스트의 장면이 사용됩니다.
- 도형에 3D 효과가 전혀 없으면 평면으로 취급되며, 3D 효과는 텍스트에만 적용됩니다.
이 동작은 ThreeDFormat.LightRig 및 ThreeDFormat.Camera 속성과 관련됩니다.
텍스트를 평평하고 읽기 쉽게 유지하면서도 도형의 3D 서식을 유지하려면, 두 설정의 비교와 전체 C# 예제가 포함된 Keep Text Flat on a 3D Shape를 참조하십시오.
FAQ
다른 글꼴이나 스크립트(예: 아랍어, 중국어)와 함께 WordArt 효과를 사용할 수 있나요?
예, Aspose.Slides for .NET은 유니코드를 지원하며 모든 주요 글꼴 및 스크립트와 함께 작동합니다. 그림자, 채우기, 외곽선과 같은 WordArt 효과는 언어에 관계없이 적용할 수 있지만, 글꼴 가용성 및 렌더링은 시스템 글꼴에 따라 달라질 수 있습니다.
슬라이드 마스터 요소에 WordArt 효과를 적용할 수 있나요?
예, 마스터 슬라이드의 도형에 WordArt 효과를 적용할 수 있습니다. 여기에는 제목 자리 표시자, 바닥글 또는 배경 텍스트가 포함됩니다. 마스터 레이아웃에 대한 변경 사항은 모든 연관 슬라이드에 반영됩니다.
WordArt 효과가 프레젠테이션 파일 크기에 영향을 미치나요?
약간 그렇습니다. 그림자, 글로우 및 그라데이션 채우기와 같은 WordArt 효과는 추가된 서식 메타데이터 때문에 파일 크기를 약간 증가시킬 수 있지만, 차이는 일반적으로 무시할 정도입니다.
WordArt 효과의 결과를 프레젠테이션을 저장하지 않고 미리 볼 수 있나요?
예, ISlide.GetImage을 사용하여 WordArt가 포함된 슬라이드를 이미지(PNG, JPEG 등)로 렌더링하거나, IShape.GetImage를 사용하여 개별 도형을 렌더링할 수 있습니다. 이를 통해 전체 프레젠테이션을 저장하거나 내보내기 전에 메모리 또는 화면에서 결과를 미리 볼 수 있습니다.