
用 Java 格式化 PowerPoint 圖形
介紹
在 PowerPoint 中,您可以在投影片中添加圖形。由於圖形由線條組成,您可以透過修改或套用效果於其輪廓來格式化它們。此外,您還可以透過指定設定,控制圖形內部的填滿方式來格式化圖形。
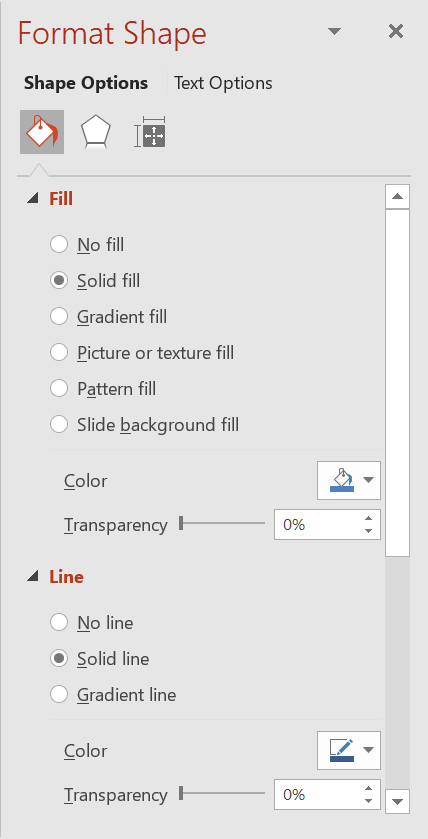
Aspose.Slides for Java 提供了介面和方法,使您能夠使用 PowerPoint 中相同的選項來格式化圖形。
格式化線條
使用 Aspose.Slides,您可以為圖形指定自訂的線條樣式。以下步驟說明了此程序:
- 建立 Presentation 類別的實例。
- 依索引取得投影片的參考。
- 將 IAutoShape 加入投影片。
- 設定圖形的 line style。
- 設定線寬。
- 設定線條的 dash style。
- 設定圖形的線條顏色。
- 將已修改的簡報儲存為 PPTX 檔案。
以下程式碼示範如何格式化矩形 AutoShape:
import com.aspose.slides.*;
import java.awt.Color;

// 建立代表簡報檔案的 Presentation 類別實例。
Presentation presentation = new Presentation();
try {
    // 取得第一張投影片。
    ISlide slide = presentation.getSlides().get_Item(0);

    // 新增一個矩形類型的自動圖形。
    IAutoShape shape = slide.getShapes().addAutoShape(ShapeType.Rectangle, 50, 150, 150, 75);

    // 設定矩形圖形的填滿顏色。
    shape.getFillFormat().setFillType(FillType.NoFill);

    // 套用格式化至矩形的線條。
    shape.getLineFormat().setStyle(LineStyle.ThickThin);
    shape.getLineFormat().setWidth(7);
    shape.getLineFormat().setDashStyle(LineDashStyle.Dash);

    // 設定矩形線條的顏色。
    shape.getLineFormat().getFillFormat().setFillType(FillType.Solid);
    shape.getLineFormat().getFillFormat().getSolidFillColor().setColor(Color.BLUE);

    // 將 PPTX 檔案儲存至磁碟。
    presentation.save("formatted_lines.pptx", SaveFormat.Pptx);
} finally {
    presentation.dispose();
}
結果:

套用手稿效果於圖形線條
手稿效果會讓圖形線條看起來像手繪。使用 IShape.getLineFormat 取得線條設定,使用 ILineFormat.getSketchFormat 取得手稿設定,並使用 ISketchFormat.setSketchType 從 LineSketchType 列舉中選取值。
以下 Java 程式碼示範如何套用 LineSketchType.Curved 效果、讀取明確指派的值,以及使用 LineSketchType.None 移除效果:
Presentation presentation = new Presentation();
try {
    ISlide slide = presentation.getSlides().get_Item(0);
    IAutoShape shape = slide.getShapes().addAutoShape(ShapeType.Rectangle, 50, 50, 200, 100);

    // 存取圖形的線條格式與其手稿格式。
    ISketchFormat sketchFormat = shape.getLineFormat().getSketchFormat();

    // 套用手稿效果。
    sketchFormat.setSketchType(LineSketchType.Curved);

    // 讀取直接指派給圖形的手稿效果。
    int explicitSketchType = sketchFormat.getSketchType();
    System.out.println("Explicit sketch type: " + explicitSketchType);

    // 移除手稿效果。
    sketchFormat.setSketchType(LineSketchType.None);
} finally {
    presentation.dispose();
}
由 ISketchFormat.getSketchType 回傳的值代表直接指派給圖形的設定。如果線條格式可以從佈景主題、母片或版面投影片繼承,請使用 ILineFormat.getEffective,存取 ILineFormatEffectiveData.getSketchFormat,並讀取 ISketchFormatEffectiveData.getSketchType。有效值反映在繼承解析後實際套用的格式:
Presentation presentation = new Presentation("presentation.pptx");
try {
    IShape shape = presentation.getSlides().get_Item(0).getShapes().get_Item(0);
    ILineFormat lineFormat = shape.getLineFormat();

    int explicitSketchType = lineFormat.getSketchFormat().getSketchType();
    ILineFormatEffectiveData effectiveLineFormat = lineFormat.getEffective();
    int effectiveSketchType = effectiveLineFormat.getSketchFormat().getSketchType();

    System.out.println("Explicit sketch type: " + explicitSketchType);
    System.out.println("Effective sketch type: " + effectiveSketchType);
} finally {
    presentation.dispose();
}
格式化接點樣式
以下是三種接點類型選項:
- Round
- Miter
- Bevel
預設情況下,PowerPoint 在以角度(例如圖形的角落)連接兩條線時,使用 Round 設定。然而,如果您繪製的圖形具有銳角,可能會偏好 Miter 選項。
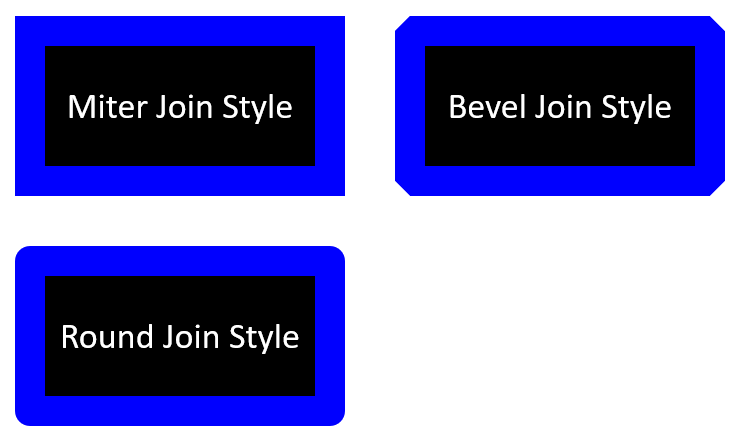
以下 Java 程式碼示範如何使用 Miter、Bevel 與 Round 接點類型設定建立三個矩形(如上圖所示):
import com.aspose.slides.*;
import java.awt.Color;

// 建立代表簡報檔案的 Presentation 類別實例。
Presentation presentation = new Presentation();
try {
    // 取得第一張投影片。
    ISlide slide = presentation.getSlides().get_Item(0);

    // 新增三個矩形類型的自動圖形。
    IAutoShape shape1 = slide.getShapes().addAutoShape(ShapeType.Rectangle, 20, 20, 150, 75);
    IAutoShape shape2 = slide.getShapes().addAutoShape(ShapeType.Rectangle, 210, 20, 150, 75);
    IAutoShape shape3 = slide.getShapes().addAutoShape(ShapeType.Rectangle, 20, 135, 150, 75);

    // 設定每個矩形圖形的填滿顏色。
    shape1.getFillFormat().setFillType(FillType.Solid);
    shape1.getFillFormat().getSolidFillColor().setColor(Color.BLACK);
    shape2.getFillFormat().setFillType(FillType.Solid);
    shape2.getFillFormat().getSolidFillColor().setColor(Color.BLACK);
    shape3.getFillFormat().setFillType(FillType.Solid);
    shape3.getFillFormat().getSolidFillColor().setColor(Color.BLACK);

    // 設定線條寬度。
    shape1.getLineFormat().setWidth(15);
    shape2.getLineFormat().setWidth(15);
    shape3.getLineFormat().setWidth(15);

    // 設定每個矩形線條的顏色。
    shape1.getLineFormat().getFillFormat().setFillType(FillType.Solid);
    shape1.getLineFormat().getFillFormat().getSolidFillColor().setColor(Color.BLUE);
    shape2.getLineFormat().getFillFormat().setFillType(FillType.Solid);
    shape2.getLineFormat().getFillFormat().getSolidFillColor().setColor(Color.BLUE);
    shape3.getLineFormat().getFillFormat().setFillType(FillType.Solid);
    shape3.getLineFormat().getFillFormat().getSolidFillColor().setColor(Color.BLUE);

    // 設定接點樣式。
    shape1.getLineFormat().setJoinStyle(LineJoinStyle.Miter);
    shape2.getLineFormat().setJoinStyle(LineJoinStyle.Bevel);
    shape3.getLineFormat().setJoinStyle(LineJoinStyle.Round);

    // 為每個矩形新增文字。
    shape1.getTextFrame().setText("Miter Join Style");
    shape2.getTextFrame().setText("Bevel Join Style");
    shape3.getTextFrame().setText("Round Join Style");

    // 將 PPTX 檔案儲存至磁碟。
    presentation.save("join_styles.pptx", SaveFormat.Pptx);
} finally {
    presentation.dispose();
}
漸層填滿
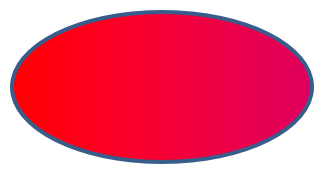
在 PowerPoint 中,漸層填滿是一種格式化選項,可讓您將連續的顏色混合套用於圖形。例如,您可以使用兩種或多種顏色,讓其中一種顏色逐漸淡化為另一種顏色。
以下說明如何使用 Aspose.Slides 為圖形套用漸層填滿:
- 建立 Presentation 類別的實例。
- 依索引取得投影片的參考。
- 將 IAutoShape 加入投影片。
- 將圖形的 FillType 設定為
Gradient。 - 使用由 IGradientFormat 介面公開的漸層停止集合的
add方法,依定義的位置加入您偏好的兩種顏色。 - 將已修改的簡報儲存為 PPTX 檔案。
import com.aspose.slides.*;

// 建立代表簡報檔案的 Presentation 類別實例。
Presentation presentation = new Presentation();
try {
    // 取得第一張投影片。
    ISlide slide = presentation.getSlides().get_Item(0);

    // 新增一個橢圓類型的自動圖形。
    IAutoShape shape = slide.getShapes().addAutoShape(ShapeType.Ellipse, 50, 50, 150, 75);

    // 套用漸層格式至橢圓。
    shape.getFillFormat().setFillType(FillType.Gradient);
    shape.getFillFormat().getGradientFormat().setGradientShape(GradientShape.Linear);

    // 設定漸層的方向。
    shape.getFillFormat().getGradientFormat().setGradientDirection(GradientDirection.FromCorner2);

    // 新增兩個漸層停止點。
    shape.getFillFormat().getGradientFormat().getGradientStops().addPresetColor((float)1.0, PresetColor.Purple);
    shape.getFillFormat().getGradientFormat().getGradientStops().addPresetColor((float)0, PresetColor.Red);

    // 將 PPTX 檔案儲存至磁碟。
    presentation.save("gradient_fill.pptx", SaveFormat.Pptx);
} finally {
    presentation.dispose();
}
結果:
圖案填滿
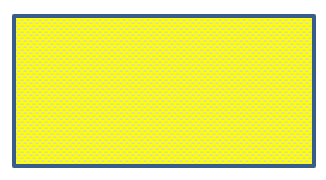
在 PowerPoint 中,圖案填滿是一種格式化選項,讓您可以將兩色設計(如點狀、條紋、交叉陰影或格子)套用於圖形。您可以為圖案的前景色與背景色自行選擇顏色。
Aspose.Slides 提供超過 45 種預定義圖案樣式,您可以將其套用於圖形,以增強簡報的視覺效果。即使在選取預定義圖案後,仍可指定確切的使用顏色。
以下說明如何使用 Aspose.Slides 為圖形套用圖案填滿:
- 建立 Presentation 類別的實例。
- 依索引取得投影片的參考。
- 將 IAutoShape 加入投影片。
- 將圖形的 FillType 設定為
Pattern。 - 從預定義選項中選取圖案樣式。
- 設定圖案的 Background Color。
- 設定圖案的 Foreground Color。
- 將已修改的簡報儲存為 PPTX 檔案。
import com.aspose.slides.*;
import java.awt.Color;

// 建立代表簡報檔案的 Presentation 類別實例。
Presentation presentation = new Presentation();
try {
    // 取得第一張投影片。
    ISlide slide = presentation.getSlides().get_Item(0);

    // 新增一個矩形類型的自動圖形。
    IAutoShape shape = slide.getShapes().addAutoShape(ShapeType.Rectangle, 50, 50, 150, 75);

    // 將填充類型設定為 Pattern。
    shape.getFillFormat().setFillType(FillType.Pattern);

    // 設定圖案樣式。
    shape.getFillFormat().getPatternFormat().setPatternStyle(PatternStyle.Trellis);

    // 設定圖案的背景色與前景色。
    shape.getFillFormat().getPatternFormat().getBackColor().setColor(Color.LIGHT_GRAY);
    shape.getFillFormat().getPatternFormat().getForeColor().setColor(Color.YELLOW);

    // 將 PPTX 檔案儲存至磁碟。
    presentation.save("pattern_fill.pptx", SaveFormat.Pptx);
} finally {
    presentation.dispose();
}
結果:
圖片填滿
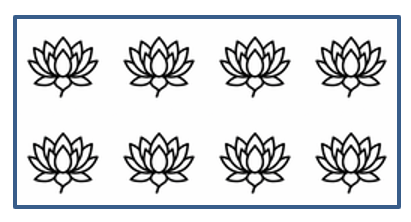
在 PowerPoint 中,圖片填滿是一種格式化選項,允許您在圖形內插入影像,等同於將影像作為圖形的背景。
以下說明如何使用 Aspose.Slides 為圖形套用圖片填滿:
- 建立 Presentation 類別的實例。
- 依索引取得投影片的參考。
- 將 IAutoShape 加入投影片。
- 將圖形的 FillType 設定為
Picture。 - 將圖片填滿模式設定為
Tile(或其他您偏好的模式)。 - 使用欲使用的影像建立一個 IPPImage 物件。
- 將影像傳遞給
ISlidesPicture.setImage方法。 - 將已修改的簡報儲存為 PPTX 檔案。

以下 Java 程式碼示範如何以圖片填滿圖形:
import com.aspose.slides.*;

// 建立代表簡報檔案的 Presentation 類別實例。
Presentation presentation = new Presentation();
try {
    // 取得第一張投影片。
    ISlide slide = presentation.getSlides().get_Item(0);

    // 新增一個矩形類型的自動圖形。
    IAutoShape shape = slide.getShapes().addAutoShape(ShapeType.Rectangle, 50, 50, 255, 130);

    // 將填充類型設定為 Picture。
    shape.getFillFormat().setFillType(FillType.Picture);

    // 設定圖片填充模式。
    shape.getFillFormat().getPictureFillFormat().setPictureFillMode(PictureFillMode.Tile);

    // 載入影像並將其加入簡報資源。
    IImage image = Images.fromFile("lotus.png");
    IPPImage picture = presentation.getImages().addImage(image);
    image.dispose();

    // 設定圖片。
    shape.getFillFormat().getPictureFillFormat().getPicture().setImage(picture);

    // 將 PPTX 檔案儲存至磁碟。
    presentation.save("picture_fill.pptx", SaveFormat.Pptx);
} finally {
    presentation.dispose();
}
結果:
將圖片平鋪為紋理
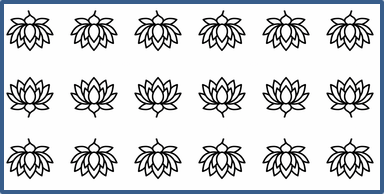
若想將平鋪圖片作為紋理並自訂平鋪行為,可使用 IPictureFillFormat 介面與 PictureFillFormat 類別的下列方法:
- setPictureFillMode:設定圖片填滿模式——
Tile或Stretch。 - setTileAlignment:指定平鋪在圖形內的對齊方式。
- setTileFlip:控制平鋪是否水平、垂直或同時翻轉。
- setTileOffsetX:設定平鋪相對於圖形原點的水平偏移量(以點為單位)。
- setTileOffsetY:設定平鋪相對於圖形原點的垂直偏移量(以點為單位)。
- setTileScaleX:以百分比定義平鋪的水平縮放比例。
- setTileScaleY:以百分比定義平鋪的垂直縮放比例。
以下程式碼示範如何加入一個平鋪圖片填滿的矩形並設定平鋪選項:
import com.aspose.slides.*;

// 建立代表簡報檔案的 Presentation 類別實例。
Presentation presentation = new Presentation();
try {
    // 取得第一張投影片。
    ISlide firstSlide = presentation.getSlides().get_Item(0);

    // 新增一個矩形自動圖形。
    IAutoShape shape = firstSlide.getShapes().addAutoShape(ShapeType.Rectangle, 50, 50, 190, 95);

    // 將圖形的填充類型設定為 Picture。
    shape.getFillFormat().setFillType(FillType.Picture);

    // 載入影像並將其加入簡報資源。
    IImage sourceImage = Images.fromFile("lotus.png");
    IPPImage presentationImage = presentation.getImages().addImage(sourceImage);
    sourceImage.dispose();

    // 指派影像給圖形。
    IPictureFillFormat pictureFillFormat = shape.getFillFormat().getPictureFillFormat();
    pictureFillFormat.getPicture().setImage(presentationImage);

    // 設定圖片填充模式與平鋪屬性。
    pictureFillFormat.setPictureFillMode(PictureFillMode.Tile);
    pictureFillFormat.setTileOffsetX(-32);
    pictureFillFormat.setTileOffsetY(-32);
    pictureFillFormat.setTileScaleX(50);
    pictureFillFormat.setTileScaleY(50);
    pictureFillFormat.setTileAlignment(RectangleAlignment.BottomRight);
    pictureFillFormat.setTileFlip(TileFlip.FlipBoth);

    // 將 PPTX 檔案儲存至磁碟。
    presentation.save("tile.pptx", SaveFormat.Pptx);
} finally {
    presentation.dispose();
}
結果:
純色填滿
在 PowerPoint 中,純色填滿是一種格式化選項,可將圖形填滿單一、均勻的顏色。此純色背景不含任何漸層、紋理或圖案。
以下說明如何使用 Aspose.Slides 為圖形套用純色填滿:
- 建立 Presentation 類別的實例。
- 依索引取得投影片的參考。
- 將 IAutoShape 加入投影片。
- 將圖形的 FillType 設定為
Solid。 - 為圖形指定您偏好的填充顏色。
- 將已修改的簡報儲存為 PPTX 檔案。
import com.aspose.slides.*;
import java.awt.Color;

// 建立代表簡報檔案的 Presentation 類別實例。
Presentation presentation = new Presentation();
try {
    // 取得第一張投影片。
    ISlide slide = presentation.getSlides().get_Item(0);

    // 新增一個矩形類型的自動圖形。
    IAutoShape shape = slide.getShapes().addAutoShape(ShapeType.Rectangle, 50, 50, 150, 75);

    // 設定填充類型為 Solid。
    shape.getFillFormat().setFillType(FillType.Solid);

    // 設定填充顏色。
    shape.getFillFormat().getSolidFillColor().setColor(Color.YELLOW);

    // 將 PPTX 檔案儲存至磁碟。
    presentation.save("solid_color_fill.pptx", SaveFormat.Pptx);
} finally {
    presentation.dispose();
}
結果:

設定透明度
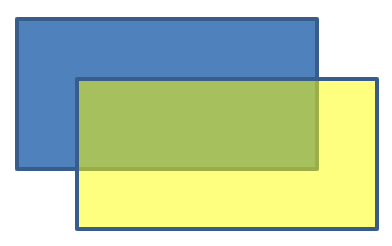
在 PowerPoint 中,當您為圖形套用純色、漸層、圖片或紋理填滿時,也可以設定透明度,以控制填色的透明程度。較高的透明度值會使圖形更為透視,讓背景或底層物件部分可見。
Aspose.Slides 允許您透過調整填色所使用顏色的 alpha 值來設定透明度。操作步驟如下:
- 建立 Presentation 類別的實例。
- 依索引取得投影片的參考。
- 將 IAutoShape 加入投影片。
- 將 FillType 設定為
Solid。 - 使用
Color定義具透明度的顏色(alpha 成分控制透明度)。 - 儲存簡報。
import com.aspose.slides.*;
import java.awt.Color;

// 建立代表簡報檔案的 Presentation 類別實例。
Presentation presentation = new Presentation();
try {
    // 取得第一張投影片。
    ISlide slide = presentation.getSlides().get_Item(0);

    // 新增一個實心矩形自動圖形。
    IAutoShape solidShape = slide.getShapes().addAutoShape(ShapeType.Rectangle, 50, 50, 150, 75);

    // 在實心圖形上方新增一個透明矩形自動圖形。
    IAutoShape transparentShape = slide.getShapes().addAutoShape(ShapeType.Rectangle, 80, 80, 150, 75);
    transparentShape.getFillFormat().setFillType(FillType.Solid);
    transparentShape.getFillFormat().getSolidFillColor().setColor(new Color(255, 255, 0, 204));

    // 將 PPTX 檔案儲存至磁碟。
    presentation.save("shape_transparency.pptx", SaveFormat.Pptx);
} finally {
    presentation.dispose();
}
結果:
旋轉圖形
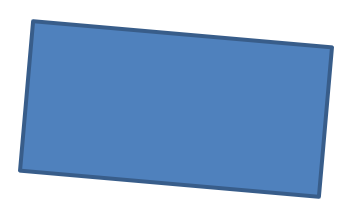
Aspose.Slides 允許您在 PowerPoint 簡報中旋轉圖形。此功能對於需要特定對齊或設計需求的視覺元素定位非常有用。
要旋轉投影片上的圖形,請依以下步驟操作:
- 建立 Presentation 類別的實例。
- 依索引取得投影片的參考。
- 將 IAutoShape 加入投影片。
- 將圖形的旋轉屬性設定為所需的角度。
- 儲存簡報。
import com.aspose.slides.*;

// 建立代表簡報檔案的 Presentation 類別實例。
Presentation presentation = new Presentation();
try {
    // 取得第一張投影片。
    ISlide slide = presentation.getSlides().get_Item(0);

    // 新增一個矩形類型的自動圖形。
    IAutoShape shape = slide.getShapes().addAutoShape(ShapeType.Rectangle, 50, 50, 150, 75);

    // 將圖形旋轉 5 度。
    shape.setRotation(5);

    // 將 PPTX 檔案儲存至磁碟。
    presentation.save("shape_rotation.pptx", SaveFormat.Pptx);
} finally {
    presentation.dispose();
}
結果:
新增 3D 倒角效果
Aspose.Slides 允許您透過設定圖形的 ThreeDFormat 屬性,為圖形套用 3D 倒角效果。
要為圖形新增 3D 倒角效果,請依以下步驟操作:
- 實例化 Presentation 類別。
- 依索引取得投影片的參考。
- 將 IAutoShape 加入投影片。
- 設定圖形的 ThreeDFormat 以定義倒角設定。
- 儲存簡報。
import com.aspose.slides.*;
import java.awt.Color;

// 建立 Presentation 類別的實例。
Presentation presentation = new Presentation();
try {
    ISlide slide = presentation.getSlides().get_Item(0);

    // 在投影片上新增圖形。
    IAutoShape shape = slide.getShapes().addAutoShape(ShapeType.Ellipse, 50, 50, 100, 100);
    shape.getFillFormat().setFillType(FillType.Solid);
    shape.getFillFormat().getSolidFillColor().setColor(Color.GREEN);
    shape.getLineFormat().getFillFormat().setFillType(FillType.Solid);
    shape.getLineFormat().getFillFormat().getSolidFillColor().setColor(Color.ORANGE);
    shape.getLineFormat().setWidth(2.0);

    // 設定圖形的 ThreeDFormat 屬性。
    shape.getThreeDFormat().setDepth(4);
    shape.getThreeDFormat().getBevelTop().setBevelType(BevelPresetType.Circle);
    shape.getThreeDFormat().getBevelTop().setHeight(6);
    shape.getThreeDFormat().getBevelTop().setWidth(6);
    shape.getThreeDFormat().getCamera().setCameraType(CameraPresetType.OrthographicFront);
    shape.getThreeDFormat().getLightRig().setLightType(LightRigPresetType.ThreePt);
    shape.getThreeDFormat().getLightRig().setDirection(LightingDirection.Top);

    // 將簡報儲存為 PPTX 檔案。
    presentation.save("3D_bevel_effect.pptx", SaveFormat.Pptx);
} finally {
    presentation.dispose();
}
結果:

新增 3D 旋轉效果
Aspose.Slides 允許您透過設定圖形的 ThreeDFormat 屬性,為圖形套用 3D 旋轉效果。
要為圖形套用 3D 旋轉:
- 建立 Presentation 類別的實例。
- 依索引取得投影片的參考。
- 將 IAutoShape 加入投影片。
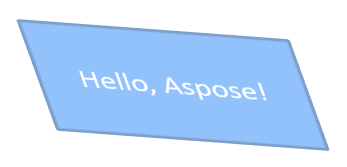
- 使用 setCameraType 與 setLightType 定義 3D 旋轉。
- 儲存簡報。
import com.aspose.slides.*;

// 建立 Presentation 類別的實例。
Presentation presentation = new Presentation();
try {
    ISlide slide = presentation.getSlides().get_Item(0);

    IAutoShape autoShape = slide.getShapes().addAutoShape(ShapeType.Rectangle, 50, 50, 150, 75);
    autoShape.getTextFrame().setText("Hello, Aspose!");

    autoShape.getThreeDFormat().setDepth(6);
    autoShape.getThreeDFormat().getCamera().setRotation(40, 35, 20);
    autoShape.getThreeDFormat().getCamera().setCameraType(CameraPresetType.IsometricLeftUp);
    autoShape.getThreeDFormat().getLightRig().setLightType(LightRigPresetType.Balanced);

    // 將簡報儲存為 PPTX 檔案。
    presentation.save("3D_rotation_effect.pptx", SaveFormat.Pptx);
} finally {
    presentation.dispose();
}
結果:
控制圖形的黑白顯示
IShape.setBlackWhiteMode 方法指定當簡報在黑白模式下檢視或處理時,單一圖形的渲染方式。此方法不會自行啟用黑白顯示,也不會在正常彩色模式下改變圖形的填色、線條或其他格式設定。
請使用 BlackWhiteMode 類別中的值來選取所需行為。例如,Automatic 讓渲染應用程式自行決定轉換方式,Gray 與 LightGray 使用灰色,BlackWhite 只使用黑白,Black 與 White 強制單一顏色,Color 保留正常彩色,Hidden 在黑白模式下省略圖形,NotDefined 代表未為圖形層級指定模式。
以下 Java 程式碼建立一個彩色圖形,並使其在黑白顯示模式下呈現為灰色:
import com.aspose.slides.*;
import java.awt.Color;

Presentation presentation = new Presentation();
try {
    ISlide slide = presentation.getSlides().get_Item(0);

    IAutoShape shape = slide.getShapes().addAutoShape(ShapeType.Rectangle, 50, 50, 200, 100);
    shape.getFillFormat().setFillType(FillType.Solid);
    shape.getFillFormat().getSolidFillColor().setColor(Color.ORANGE);

    // 在彩色模式下保持橙色填充,但在黑白模式下以灰色渲染圖形。
    shape.setBlackWhiteMode(BlackWhiteMode.Gray);

    presentation.save("shape_black_white_mode.pptx", SaveFormat.Pptx);
} finally {
    presentation.dispose();
}
在正常彩色模式下,矩形保留橙色填色;在黑白顯示工作流程中,因模式設定為 Gray,因此使用灰色著色。此功能讓您在保留完整彩色投影片的同時,為列印、預覽或其他尊重黑白顯示設定的工作流程定義不同的外觀。
重設格式
以下 Java 程式碼示範如何重設投影片的格式,並將位於 LayoutSlide 上所有含占位符的圖形的座標、大小與格式還原為預設設定:
import com.aspose.slides.*;

Presentation presentation = new Presentation("sample.pptx");
try {
    for (ISlide slide : presentation.getSlides()) {
        // 重設投影片上具有版面占位符的每個圖形。
        slide.reset();
    }
    presentation.save("reset_formatting.pptx", SaveFormat.Pptx);
} finally {
    presentation.dispose();
}
常見問題
圖形格式化會影響最終簡報檔案大小嗎?
影響極小。嵌入的影像與媒體佔用大部分檔案空間,而顏色、效果與漸層等圖形參數以中繼資料形式儲存,幾乎不會增加額外大小。
我如何偵測投影片中具有相同格式的圖形,以便將它們分組?
比較每個圖形的關鍵格式屬性——填色、線條與效果設定。若所有對應值相符,即可視為樣式相同,將這些圖形邏輯上分組,便於之後的樣式管理。
我可以將一組自訂圖形樣式儲存為單獨的檔案,以便在其他簡報中重複使用嗎?
可以。將具有所需樣式的範例圖形儲存於模板投影片或 .POTX 範本檔案中。建立新簡報時,開啟該範本,複製需要的樣式化圖形,並在需要的地方重新套用其格式。