在 JavaScript 中格式化演示文稿文本
概述
本文介绍如何使用 Aspose.Slides for Node.js via Java 对 PowerPoint 和 OpenDocument 演示文稿中的文本进行格式化。它涵盖了突出显示、背景颜色、透明度、字符间距、字体属性、旋转、段落间距、自动适应行为、文本锚定、制表位和语言设置。
在下面的示例中,我们将使用名为 “sample.pptx” 的文件,该文件在第一张幻灯片上包含一个带有以下文本的单个文本框:

突出显示文本
当您需要在文本框中突出显示匹配特定样本的文本时,请使用 TextFrame.highlightText 方法。该方法会对匹配的文本片段应用突出显示颜色,并且可以与 TextSearchOptions 结合使用,以控制搜索方式,例如仅匹配完整单词。
以下代码示例突出显示所有字符 “try” 的出现位置,然后仅突出显示完整单词 “to”。
const presentation = new aspose.slides.Presentation("sample.pptx");
try {
    const shape = presentation.getSlides().get_Item(0).getShapes().get_Item(0);
    const textFrame = shape.getTextFrame();

    // 在形状中突出显示单词 "try".
    textFrame.highlightText("try", java.getStaticFieldValue("java.awt.Color", "LIGHT_GRAY"));

    const searchOptions = new aspose.slides.TextSearchOptions();
    searchOptions.setWholeWordsOnly(true);

    // 在形状中突出显示单词 "to".
    textFrame.highlightText("to", java.getStaticFieldValue("java.awt.Color", "MAGENTA"), searchOptions, null);

    presentation.save("highlighted_text.pptx", aspose.slides.SaveFormat.Pptx);
} finally {
    presentation.dispose();
}
结果如下:

使用正则表达式突出显示文本
TextFrame.highlightRegex 方法突出显示正则表达式找到的文本匹配项。在 Node.js via Java 中,此 API 在 TextFrame 上公开。
以下代码示例突出显示所有包含 七个或更多字符 的单词:
const Pattern = java.import("java.util.regex.Pattern");
const presentation = new aspose.slides.Presentation("sample.pptx");
try {
    const shape = presentation.getSlides().get_Item(0).getShapes().get_Item(0);
    const regex = Pattern.compile("\\b[^\\s]{7,}\\b");

    // 突出显示所有七个或更多字符的单词.
    shape.getTextFrame().highlightRegex(regex, java.getStaticFieldValue("java.awt.Color", "YELLOW"), null);

    presentation.save("highlighted_text_using_regex.pptx", aspose.slides.SaveFormat.Pptx);
} finally {
    presentation.dispose();
}
结果如下:

设置文本背景颜色
使用 ParagraphFormat.getDefaultPortionFormat 为段落设置默认的突出显示颜色,或使用 PortionFormat.getHighlightColor 为单个文本片段设置颜色。
以下代码示例显示如何为 整个段落 设置背景颜色:
const presentation = new aspose.slides.Presentation("sample.pptx");
try {
    const autoShape = presentation.getSlides().get_Item(0).getShapes().get_Item(0);
    const paragraph = autoShape.getTextFrame().getParagraphs().get_Item(0);

    // 为整个段落设置突出显示颜色.
    paragraph.getParagraphFormat().getDefaultPortionFormat().getHighlightColor().setColor(java.getStaticFieldValue("java.awt.Color", "LIGHT_GRAY"));

    presentation.save("gray_paragraph.pptx", aspose.slides.SaveFormat.Pptx);
} finally {
    presentation.dispose();
}
结果如下:

以下代码示例演示如何为 加粗字体的文本片段 设置背景颜色:
const presentation = new aspose.slides.Presentation("sample.pptx");
try {
    const autoShape = presentation.getSlides().get_Item(0).getShapes().get_Item(0);
    const paragraph = autoShape.getTextFrame().getParagraphs().get_Item(0);
    const portions = paragraph.getPortions();
    const portionCount = portions.getCount();

    for (let portionIndex = 0; portionIndex < portionCount; portionIndex++) {
        const portion = portions.get_Item(portionIndex);
        if (portion.getPortionFormat().getEffective().getFontBold()) {
            // 为文本片段设置突出显示颜色.
            portion.getPortionFormat().getHighlightColor().setColor(java.getStaticFieldValue("java.awt.Color", "LIGHT_GRAY"));
        }
    }

    presentation.save("gray_text_portions.pptx", aspose.slides.SaveFormat.Pptx);
} finally {
    presentation.dispose();
}
结果如下:

对齐文本段落
使用 ParagraphFormat.setAlignment 在文本框内设置段落对齐方式。该值可以是居中、左对齐、右对齐、两端对齐等。
以下代码示例显示如何将段落对齐到 居中:
const presentation = new aspose.slides.Presentation("sample.pptx");
try {
    const autoShape = presentation.getSlides().get_Item(0).getShapes().get_Item(0);
    const paragraph = autoShape.getTextFrame().getParagraphs().get_Item(0);

    // 将段落的对齐方式设置为居中.
    paragraph.getParagraphFormat().setAlignment(aspose.slides.TextAlignment.Center);

    presentation.save("aligned_paragraph.pptx", aspose.slides.SaveFormat.Pptx);
} finally {
    presentation.dispose();
}
结果如下:

设置文本透明度
文本透明度通过分配给 PortionFormat.getFillFormat 的颜色的 alpha 分量来控制。在下面的示例中,alpha = 50 是 0-255 范围的 ARGB 透明通道值,而不是透明度百分比。
以下代码示例显示如何对 整个段落 应用透明度:
const alpha = 50;
const transparentBlack = java.newInstanceSync("java.awt.Color", 0, 0, 0, alpha);
const presentation = new aspose.slides.Presentation("sample.pptx");
try {
    const autoShape = presentation.getSlides().get_Item(0).getShapes().get_Item(0);
    const paragraph = autoShape.getTextFrame().getParagraphs().get_Item(0);
    const fillFormat = paragraph.getParagraphFormat().getDefaultPortionFormat().getFillFormat();

    // 将文本的填充颜色设置为透明颜色.
    fillFormat.setFillType(java.newByte(aspose.slides.FillType.Solid));
    fillFormat.getSolidFillColor().setColor(transparentBlack);

    presentation.save("transparent_paragraph.pptx", aspose.slides.SaveFormat.Pptx);
} finally {
    presentation.dispose();
}
结果如下:
![]()
以下代码示例显示如何对 加粗字体的文本片段 应用透明度:
const alpha = 50;
const transparentBlack = java.newInstanceSync("java.awt.Color", 0, 0, 0, alpha);
const presentation = new aspose.slides.Presentation("sample.pptx");
try {
    const autoShape = presentation.getSlides().get_Item(0).getShapes().get_Item(0);
    const paragraph = autoShape.getTextFrame().getParagraphs().get_Item(0);
    const portions = paragraph.getPortions();
    const portionCount = portions.getCount();

    for (let portionIndex = 0; portionIndex < portionCount; portionIndex++) {
        const portion = portions.get_Item(portionIndex);
        if (portion.getPortionFormat().getEffective().getFontBold()) {
            const fillFormat = portion.getPortionFormat().getFillFormat();

            // 设置文本片段的透明度.
            fillFormat.setFillType(java.newByte(aspose.slides.FillType.Solid));
            fillFormat.getSolidFillColor().setColor(transparentBlack);
        }
    }

    presentation.save("transparent_text_portions.pptx", aspose.slides.SaveFormat.Pptx);
} finally {
    presentation.dispose();
}
结果如下:

设置字符间距
使用 BasePortionFormat.setSpacing 可在文本框内扩大或压缩字符之间的间距。
以下 JavaScript 代码显示如何在 整个段落 中扩大字符间距:
const presentation = new aspose.slides.Presentation("sample.pptx");
try {
    const autoShape = presentation.getSlides().get_Item(0).getShapes().get_Item(0);
    const paragraph = autoShape.getTextFrame().getParagraphs().get_Item(0);

    // 注意:使用负值来压缩字符间距.
    paragraph.getParagraphFormat().getDefaultPortionFormat().setSpacing(3); // 扩展字符间距.

    presentation.save("character_spacing_in_paragraph.pptx", aspose.slides.SaveFormat.Pptx);
} finally {
    presentation.dispose();
}
结果如下:

以下代码示例显示如何在 加粗字体的文本片段 中扩大字符间距:
const presentation = new aspose.slides.Presentation("sample.pptx");
try {
    const autoShape = presentation.getSlides().get_Item(0).getShapes().get_Item(0);
    const paragraph = autoShape.getTextFrame().getParagraphs().get_Item(0);
    const portions = paragraph.getPortions();
    const portionCount = portions.getCount();

    for (let portionIndex = 0; portionIndex < portionCount; portionIndex++) {
        const portion = portions.get_Item(portionIndex);
        if (portion.getPortionFormat().getEffective().getFontBold()) {
            // 注意:使用负值来压缩字符间距.
            portion.getPortionFormat().setSpacing(3); // 扩展字符间距.
        }
    }

    presentation.save("character_spacing_in_text_portions.pptx", aspose.slides.SaveFormat.Pptx);
} finally {
    presentation.dispose();
}
结果如下:

禁用特定字体的字距调整
在某些情况下,Aspose.Slides 渲染的文本可能比 PowerPoint 中显示的同一文本稍微紧凑。这可能是因为 PowerPoint 在某些字体上会忽略字距调整数据,即使该字体包含有效的字距信息并且在 PowerPoint 设置中已启用字距调整。
为使此类情况下的渲染输出更接近 PowerPoint,您可以为使用受影响字体的文本片段禁用字距调整。将 BasePortionFormat.setKerningMinimalSize 设置为显著大于实际字体大小的值:
const presentation = new aspose.slides.Presentation("presentation.pptx");
try {
    const autoShape = presentation.getSlides().get_Item(0).getShapes().get_Item(0);
    const paragraphs = autoShape.getTextFrame().getParagraphs();
    const paragraphCount = paragraphs.getCount();
    const targetFont = "Roboto";

    for (let paragraphIndex = 0; paragraphIndex < paragraphCount; paragraphIndex++) {
        const portions = paragraphs.get_Item(paragraphIndex).getPortions();
        const portionCount = portions.getCount();

        for (let portionIndex = 0; portionIndex < portionCount; portionIndex++) {
            const portion = portions.get_Item(portionIndex);
            const portionFormat = portion.getPortionFormat();
            const latinFont = portionFormat.getLatinFont();
            const eastAsianFont = portionFormat.getEastAsianFont();
            const complexScriptFont = portionFormat.getComplexScriptFont();

            if ((latinFont !== null && latinFont.getFontName() === targetFont) ||
                (eastAsianFont !== null && eastAsianFont.getFontName() === targetFont) ||
                (complexScriptFont !== null && complexScriptFont.getFontName() === targetFont)) {
                portionFormat.setKerningMinimalSize(100);
            }
        }
    }

    presentation.save("output.pptx", aspose.slides.SaveFormat.Pptx);
} finally {
    presentation.dispose();
}
此设置可防止对匹配的文本片段应用字距调整,并有助于在受 PowerPoint 特定行为影响的字体上,使 Aspose.Slides 的渲染效果与 PowerPoint 的视觉输出保持一致。
管理文本字体属性
字体属性可以通过 ParagraphFormat.getDefaultPortionFormat 在段落级别设置,或通过 PortionFormat 单独设置。
以下代码为整个段落设置字体和文本样式:它对段落中的所有片段应用字体大小、加粗、斜体、点状下划线以及 Times New Roman 字体。
const presentation = new aspose.slides.Presentation("sample.pptx");
try {
    const autoShape = presentation.getSlides().get_Item(0).getShapes().get_Item(0);
    const paragraph = autoShape.getTextFrame().getParagraphs().get_Item(0);
    const defaultPortionFormat = paragraph.getParagraphFormat().getDefaultPortionFormat();

    // 设置段落的字体属性.
    defaultPortionFormat.setFontHeight(12);
    defaultPortionFormat.setFontBold(java.newByte(aspose.slides.NullableBool.True));
    defaultPortionFormat.setFontItalic(java.newByte(aspose.slides.NullableBool.True));
    defaultPortionFormat.setFontUnderline(java.newByte(aspose.slides.TextUnderlineType.Dotted));
    defaultPortionFormat.setLatinFont(new aspose.slides.FontData("Times New Roman"));

    presentation.save("font_properties_for_paragraph.pptx", aspose.slides.SaveFormat.Pptx);
} finally {
    presentation.dispose();
}
结果如下:

以下代码示例为 加粗字体的文本片段 应用类似属性:
const presentation = new aspose.slides.Presentation("sample.pptx");
try {
    const autoShape = presentation.getSlides().get_Item(0).getShapes().get_Item(0);
    const paragraph = autoShape.getTextFrame().getParagraphs().get_Item(0);
    const portions = paragraph.getPortions();
    const portionCount = portions.getCount();

    for (let portionIndex = 0; portionIndex < portionCount; portionIndex++) {
        const portion = portions.get_Item(portionIndex);
        if (portion.getPortionFormat().getEffective().getFontBold()) {
            const portionFormat = portion.getPortionFormat();

            // 设置文本片段的字体属性.
            portionFormat.setFontHeight(13);
            portionFormat.setFontItalic(java.newByte(aspose.slides.NullableBool.True));
            portionFormat.setFontUnderline(java.newByte(aspose.slides.TextUnderlineType.Dotted));
            portionFormat.setLatinFont(new aspose.slides.FontData("Times New Roman"));
        }
    }

    presentation.save("font_properties_for_text_portions.pptx", aspose.slides.SaveFormat.Pptx);
} finally {
    presentation.dispose();
}
结果如下:

设置文本旋转
使用 TextFrameFormat.setTextVerticalType 在形状内设置预定义的文本方向。
以下代码示例将形状中的文本方向设置为 Vertical270,这会将文本 逆时针旋转 90 度:
const presentation = new aspose.slides.Presentation("sample.pptx");
try {
    const autoShape = presentation.getSlides().get_Item(0).getShapes().get_Item(0);

    autoShape.getTextFrame().getTextFrameFormat().setTextVerticalType(java.newByte(aspose.slides.TextVerticalType.Vertical270));

    presentation.save("text_rotation.pptx", aspose.slides.SaveFormat.Pptx);
} finally {
    presentation.dispose();
}
结果如下:

为文本框设置自定义旋转
使用 TextFrameFormat.setRotationAngle 为 TextFrame 设置自定义旋转角度。
以下代码示例在形状内将文本框顺时针旋转 3 度:
const presentation = new aspose.slides.Presentation("sample.pptx");
try {
    const autoShape = presentation.getSlides().get_Item(0).getShapes().get_Item(0);

    autoShape.getTextFrame().getTextFrameFormat().setRotationAngle(3);

    presentation.save("custom_text_rotation.pptx", aspose.slides.SaveFormat.Pptx);
} finally {
    presentation.dispose();
}
结果如下:

设置段落的行间距
Aspose.Slides 提供 ParagraphFormat.setSpaceAfter、ParagraphFormat.setSpaceBefore 和 ParagraphFormat.setSpaceWithin 来控制段落间距。使用方式如下:
- 使用正值可将行间距指定为行高的百分比。
- 使用负值可将行间距指定为点数。
以下代码示例显示如何在段落内部指定行间距:
const presentation = new aspose.slides.Presentation("sample.pptx");
try {
    const autoShape = presentation.getSlides().get_Item(0).getShapes().get_Item(0);
    const paragraph = autoShape.getTextFrame().getParagraphs().get_Item(0);

    paragraph.getParagraphFormat().setSpaceWithin(200);

    presentation.save("line_spacing.pptx", aspose.slides.SaveFormat.Pptx);
} finally {
    presentation.dispose();
}
结果如下:

设置文本框的自动适配类型
TextFrameFormat.setAutofitType 确定当文本超出其容器边界时的行为。使用它可以控制文本是缩小、溢出还是自动调整形状大小。
const presentation = new aspose.slides.Presentation("sample.pptx");
try {
    const autoShape = presentation.getSlides().get_Item(0).getShapes().get_Item(0);

    autoShape.getTextFrame().getTextFrameFormat().setAutofitType(java.newByte(aspose.slides.TextAutofitType.Shape));

    presentation.save("autofit_type.pptx", aspose.slides.SaveFormat.Pptx);
} finally {
    presentation.dispose();
}
设置文本框的锚点
TextFrameFormat.setAnchoringType 定义文本在形状内部的垂直位置,例如顶部、居中或底部。
const presentation = new aspose.slides.Presentation("sample.pptx");
try {
    const autoShape = presentation.getSlides().get_Item(0).getShapes().get_Item(0);

    autoShape.getTextFrame().getTextFrameFormat().setAnchoringType(java.newByte(aspose.slides.TextAnchorType.Bottom));

    presentation.save("text_anchor.pptx", aspose.slides.SaveFormat.Pptx);
} finally {
    presentation.dispose();
}
设置文本制表位
使用 ParagraphFormat.setDefaultTabSize 和 ParagraphFormat.getTabs 配置段落中的制表位。
const presentation = new aspose.slides.Presentation("sample.pptx");
try {
    const autoShape = presentation.getSlides().get_Item(0).getShapes().get_Item(0);
    const paragraph = autoShape.getTextFrame().getParagraphs().get_Item(0);

    paragraph.getParagraphFormat().setDefaultTabSize(100);
    paragraph.getParagraphFormat().getTabs().add(30, java.newByte(aspose.slides.TabAlignment.Left));

    presentation.save("paragraph_tabs.pptx", aspose.slides.SaveFormat.Pptx);
} finally {
    presentation.dispose();
}
结果如下:

设置校对语言
Aspose.Slides 提供 PortionFormat.setLanguageId,可为文本片段设置校对语言。校对语言决定 PowerPoint 中拼写和语法检查使用的语言。
以下代码示例显示如何为文本片段设置校对语言:
const presentation = new aspose.slides.Presentation("presentation.pptx");
try {
    const autoShape = presentation.getSlides().get_Item(0).getShapes().get_Item(0);
    const paragraph = autoShape.getTextFrame().getParagraphs().get_Item(0);
    paragraph.getPortions().clear();

    const font = new aspose.slides.FontData("SimSun");
    const textPortion = new aspose.slides.Portion();
    textPortion.getPortionFormat().setComplexScriptFont(font);
    textPortion.getPortionFormat().setEastAsianFont(font);
    textPortion.getPortionFormat().setLatinFont(font);

    // 设置校对语言的 Id.
    textPortion.getPortionFormat().setLanguageId("zh-CN");

    textPortion.setText("1.");
    paragraph.getPortions().add(textPortion);

    presentation.save("proofing_language.pptx", aspose.slides.SaveFormat.Pptx);
} finally {
    presentation.dispose();
}
设置默认语言
使用 LoadOptions.setDefaultTextLanguage 定义在加载或创建演示文稿时创建的文本的默认语言。
const loadOptions = new aspose.slides.LoadOptions();
loadOptions.setDefaultTextLanguage("en-US");

const presentation = new aspose.slides.Presentation(loadOptions);
try {
    const slide = presentation.getSlides().get_Item(0);

    // 添加一个带文本的矩形形状。
    const shape = slide.getShapes().addAutoShape(aspose.slides.ShapeType.Rectangle, 20, 20, 150, 50);
    shape.getTextFrame().setText("Sample text");

    // 检查第一个文本片段的语言。
    const portion = shape.getTextFrame().getParagraphs().get_Item(0).getPortions().get_Item(0);
    console.log(portion.getPortionFormat().getLanguageId());
} finally {
    presentation.dispose();
}
设置默认文本样式
要在演示文稿级别应用默认文本格式,请使用 Presentation.getDefaultTextStyle。
以下代码示例显示如何在新演示文稿中为所有幻灯片的所有文本设置默认的加粗字体,大小为 14 磅。
const presentation = new aspose.slides.Presentation();
try {
    // 获取顶层段落格式.
    const paragraphFormat = presentation.getDefaultTextStyle().getLevel(0);

    if (paragraphFormat !== null) {
        paragraphFormat.getDefaultPortionFormat().setFontHeight(14);
        paragraphFormat.getDefaultPortionFormat().setFontBold(java.newByte(aspose.slides.NullableBool.True));
    }

    presentation.save("default_text_style.pptx", aspose.slides.SaveFormat.Pptx);
} finally {
    presentation.dispose();
}
提取全大写效果的文本
在 PowerPoint 中,应用 All Caps 字体效果会使幻灯片上的文本显示为大写,即使原始输入是小写。使用 Aspose.Slides 检索此类文本片段时,库会返回原始输入的文本。要匹配显示的文本,请检查 TextCapType 并在其值为 All 时将返回的字符串转换为大写。
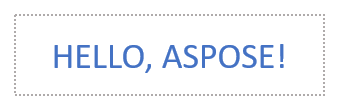
假设我们在 sample2.pptx 文件的第一张幻灯片上有如下文本框。
以下代码示例显示如何提取带有 All Caps 效果的文本:
const presentation = new aspose.slides.Presentation("sample2.pptx");
try {
    const autoShape = presentation.getSlides().get_Item(0).getShapes().get_Item(0);
    const textPortion = autoShape.getTextFrame().getParagraphs().get_Item(0).getPortions().get_Item(0);

    console.log("Original text: " + textPortion.getText());

    const textFormat = textPortion.getPortionFormat().getEffective();
    if (textFormat.getTextCapType() === aspose.slides.TextCapType.All) {
        const text = textPortion.getText().toUpperCase();
        console.log("All-Caps effect: " + text);
    }
} finally {
    presentation.dispose();
}
输出:
Original text: Hello, Aspose!
All-Caps effect: HELLO, ASPOSE!
常见问题
如何在幻灯片上的表格中修改文本?
要在幻灯片上的表格中修改文本,请使用 Table。遍历单元格,并通过 Cell.getTextFrame 更新每个单元格,通过 Paragraph.getParagraphFormat 更新段落格式。
如何在 PowerPoint 幻灯片中的文本上应用渐变颜色?
要为文本应用渐变颜色,请使用 PortionFormat.getFillFormat。将 FillFormat.setFillType 设置为 FillType.Gradient,并配置渐变止点、方向和透明度。