How to Rotate Text of Cell
Rotate Text of Cell in Aspose.Cells
Aspose.Cells is a powerful .NET and Java component that enables developers to work with Excel spreadsheets programmatically. One of the features provided by Aspose.Cells is the ability to rotate cells, allowing you to customize the orientation of text and improve the visual presentation of your data. In this document, we will explore how to rotate cells using Aspose.Cells.
How to Rotate Text of Cell in Excel
To rotate a cell in Excel, you can use the following steps:
- Open Excel and select the cell or range of cells that you want to rotate.
- Right-click on the selected cell(s) and choose “Format Cells” from the context menu. Alternatively, you can go to the “Home” tab in the Excel ribbon, click on the “Format” dropdown in the “Cells” group, and select “Format Cells.”
- In the “Format Cells” dialog box, navigate to the “Alignment” tab.
- Under the “Orientation” section, you will see the options to rotate the text. You can directly input the desired rotation angle in degrees in the “Degrees” box. Positive values rotate the text counterclockwise, and negative values rotate it clockwise.
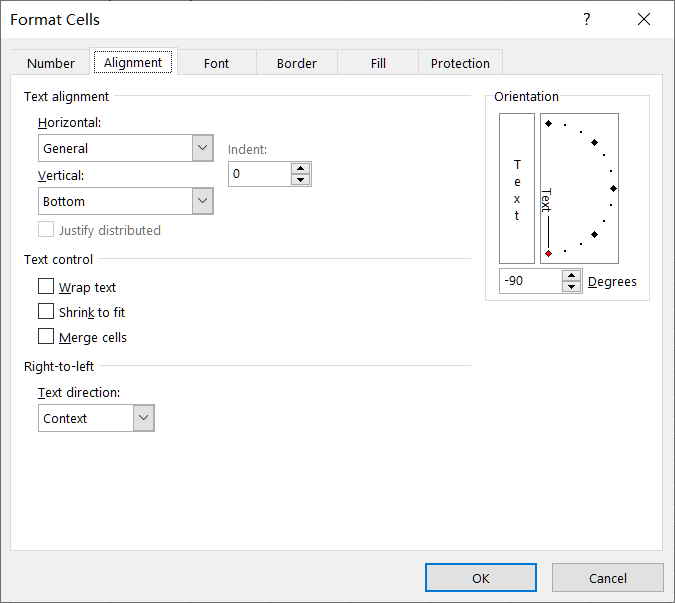
- Once you have selected the desired rotation, click “OK” to apply the changes. The selected cell(s) will now be rotated based on your chosen rotation angle or orientation.
How to Rotate Text of Cell using Aspose.Cells API
Style.RotationAngle property makes it convenient to rotate cells. To rotate cells in Aspose.Cells, you need to follow these steps:
-
Load the Excel Workbook
First, you need to load the Excel workbook using Aspose.Cells. You can use the Workbook class to open an existing Excel file or create a new one. -
Access the Worksheet
Once the workbook is loaded, you need to access the worksheet where you want to rotate the cells. You can either access the worksheet by its index or name. -
Rotate the text of Cell
Now that you have access to the worksheet, you can rotate the cells by modifying the Style object of the desired cells. The Style object allows you to set various formatting options, including rotation. -
Save the Workbook
After rotating the cells, you can save the modified workbook back to a file or stream using the Save method.
C# Sample Code
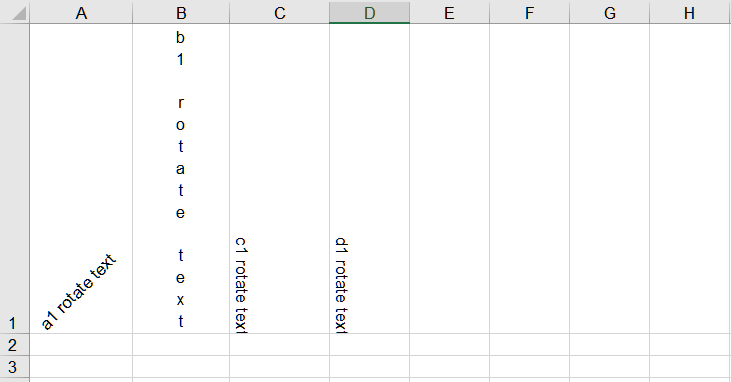
Please see the following code, it creates a workbook object and set different rotation angles for several cells. The screenshot shows the result after the execution of the sample code.